I can’t believe I didn’t think of it sooner. As a person who works from home, I love my tea station. I had so much fun choosing my own perfect tea collection and organizing everything.
In this post, I will share the exact organization items I used and lots of ideas for creating your own drink station at home.
Organization Ideas: 20+ Ways To Keep Your Home Organized, How I Organized My Fridge In One Afternoon, 10 Organizing Tricks I Learned from The Home Edit.
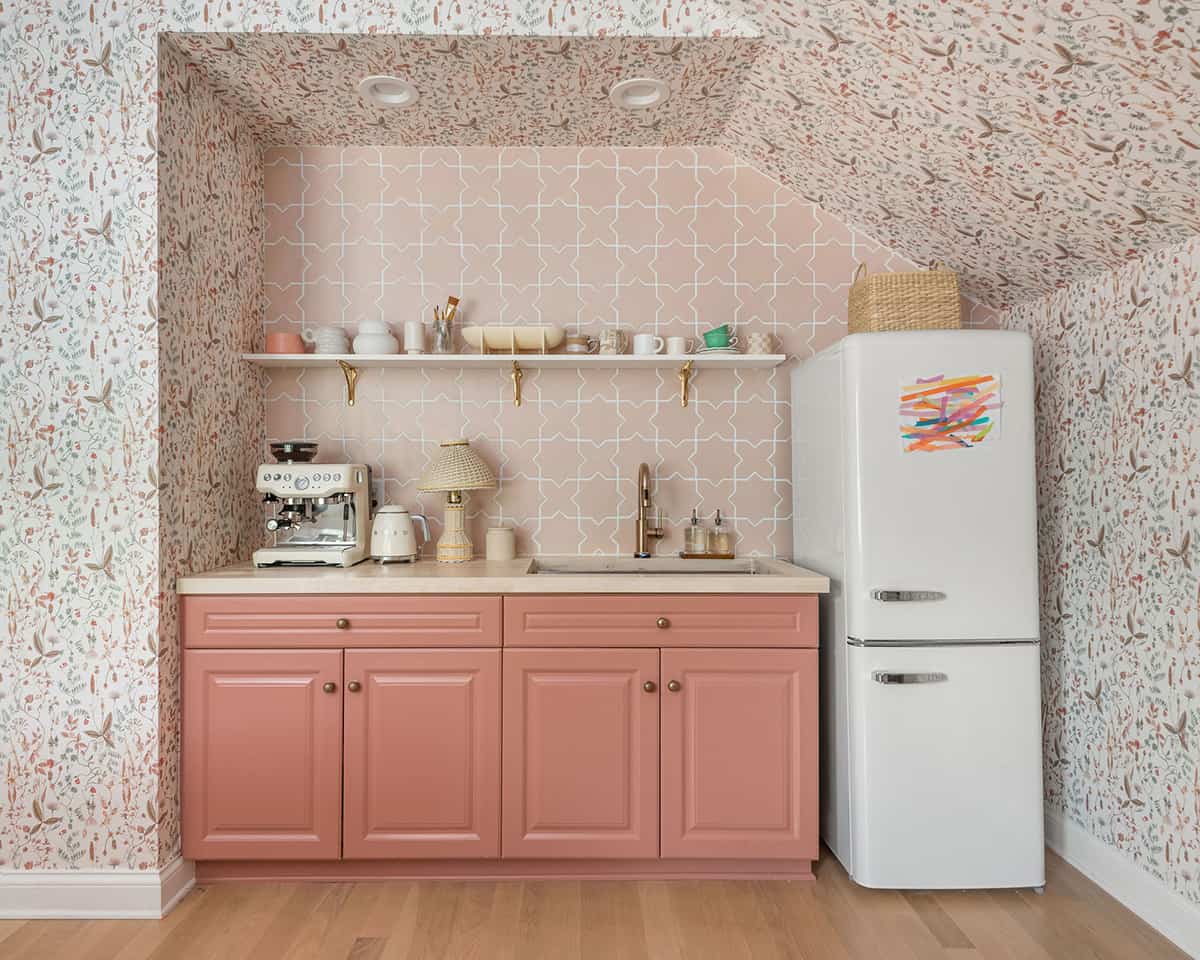

Tea Bag Organizer:
My favorite storage option for tea bags are these bamboo tea organizers. They come in a variety of sizes so you can find the perfect match for your drawer. I used two tea bag organizers and a set of bamboo drawer organizers to fill in the empty space.
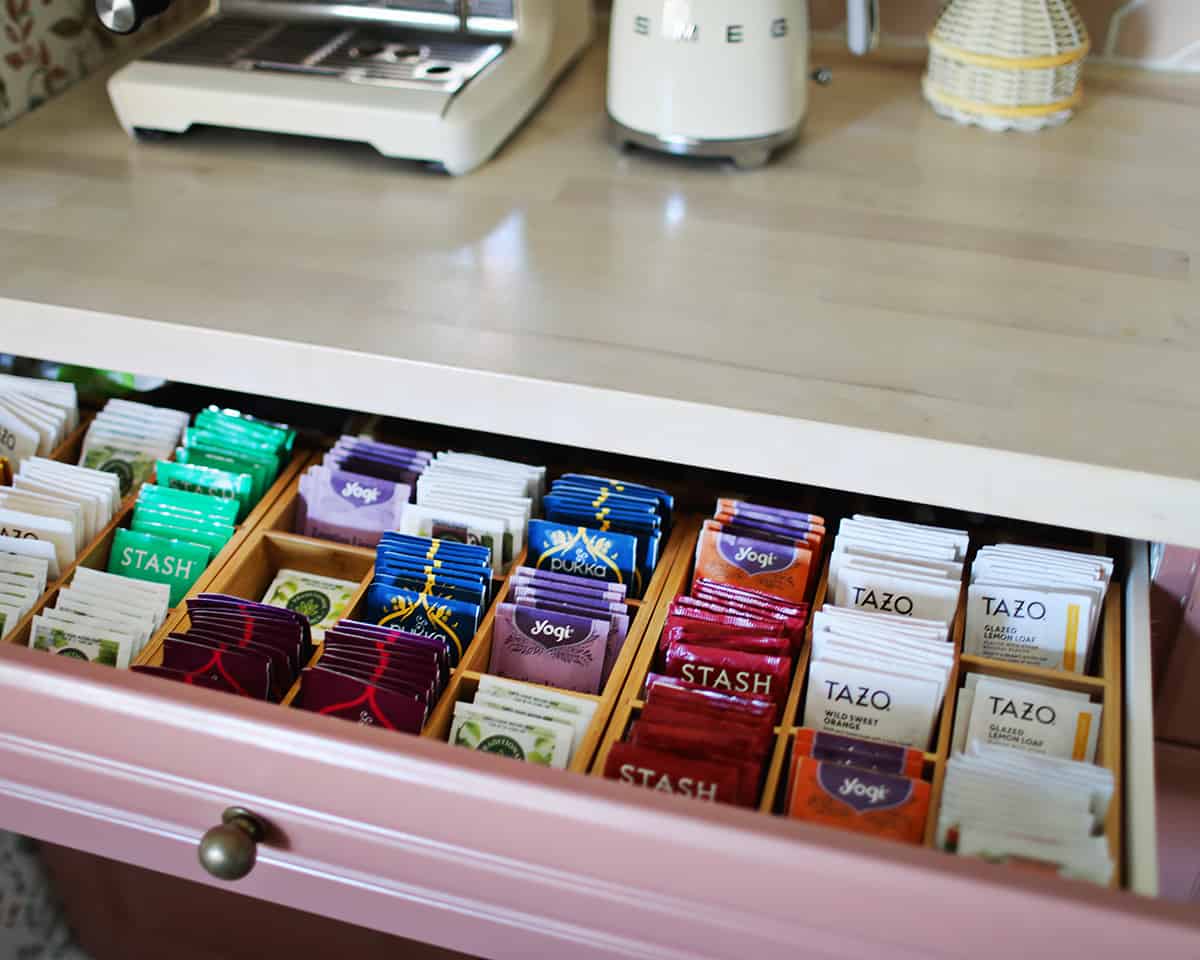
Tea, Coffee, and Sugar Canisters:
Here are a few smart ideas for storing tea, coffee, and sugar in your drink station or home office.
- K-Cup Drawer Organizer
- Countertop Tea Organizer
- Sugar Canister
- Coffee Canister
- Loose Leaf Tea Canister
- Acrylic Tea Organizer
- Bamboo Tea Organizer
- Decorative Glass Jars
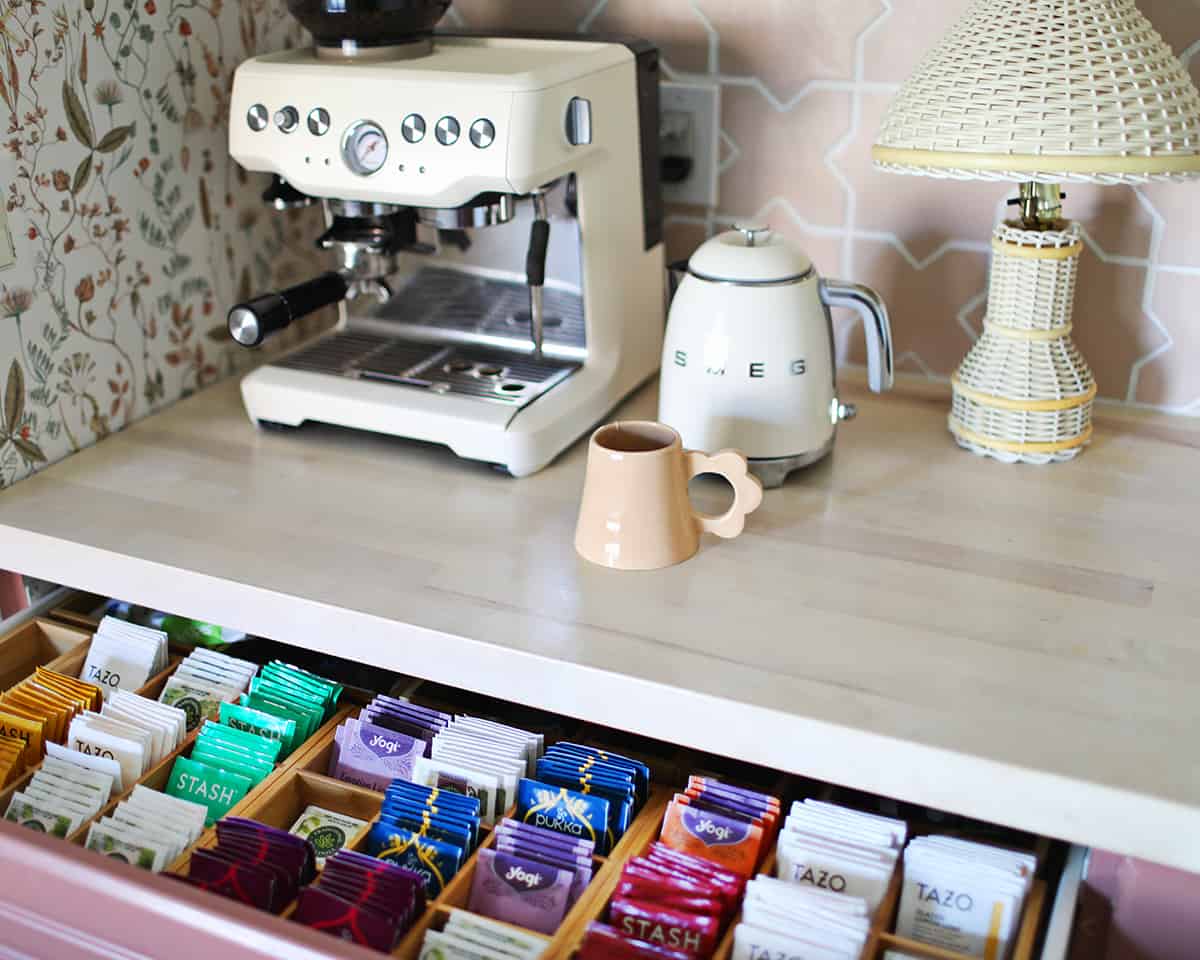
Home Beverage Station Ideas:
In my home office, I keep a variety of hot teas, some canned and bottled beverages in a drink fridge, and frozen coffee in my freezer.
Key items for a tea station:
- Tea bags or loose leaf tea
- Hot water kettle
- Mugs to serve tea
- Sugar
Key items for a coffee station:
- Coffee maker
- Coffee grinder
- Quality coffee
- Cups and glasses for hot and iced coffee
- Cream and sugar
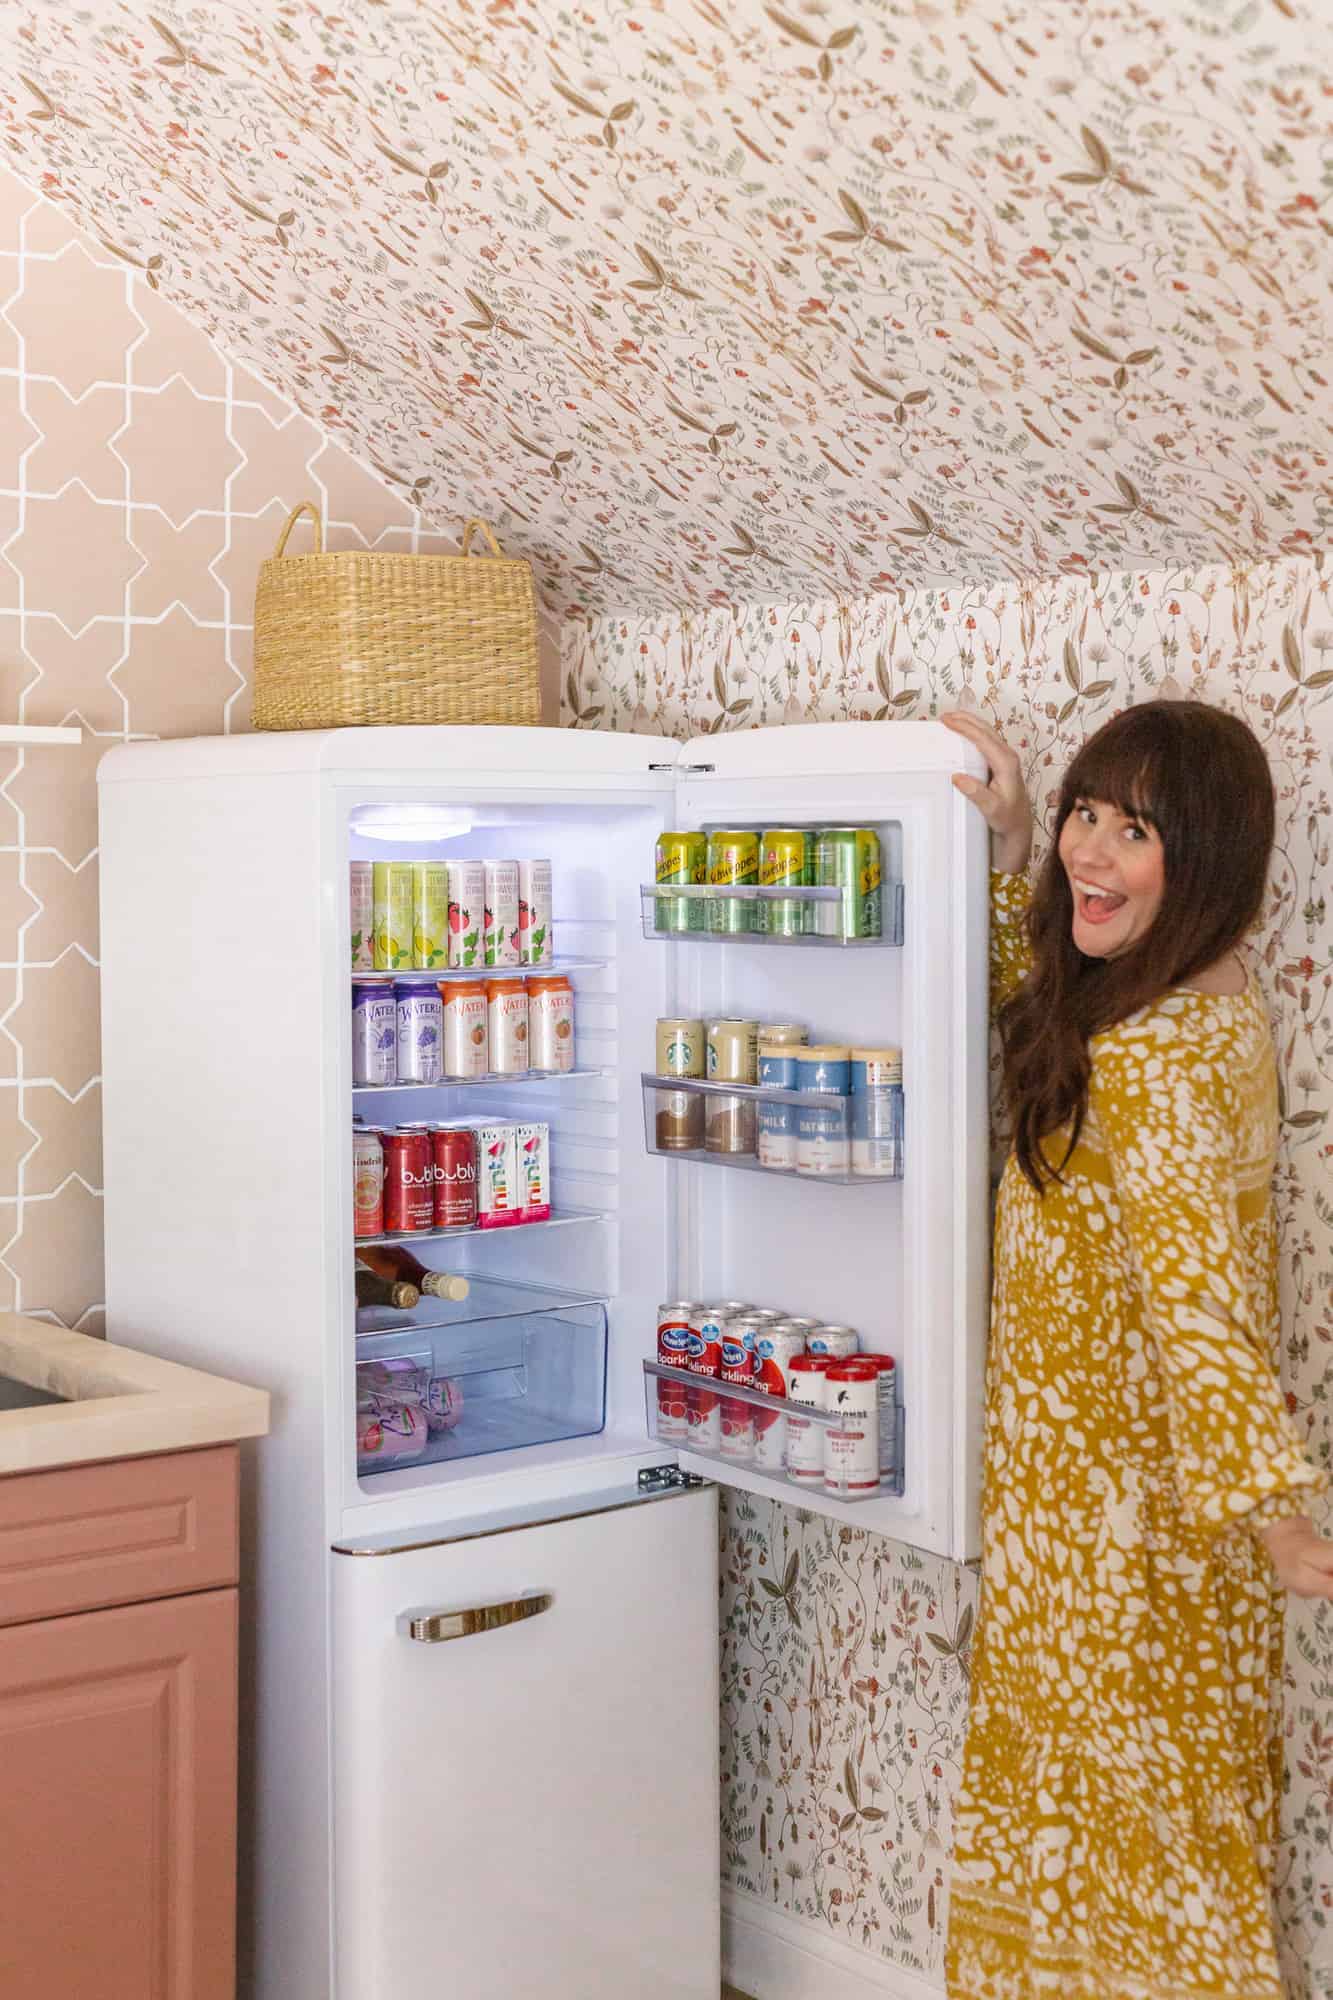
Here’s a full tour of my home office.

Elsie’s Favorite Tea:
My favorite teas in no particular order:
I’d love to hear your favorite teas as well! xx. Elsie
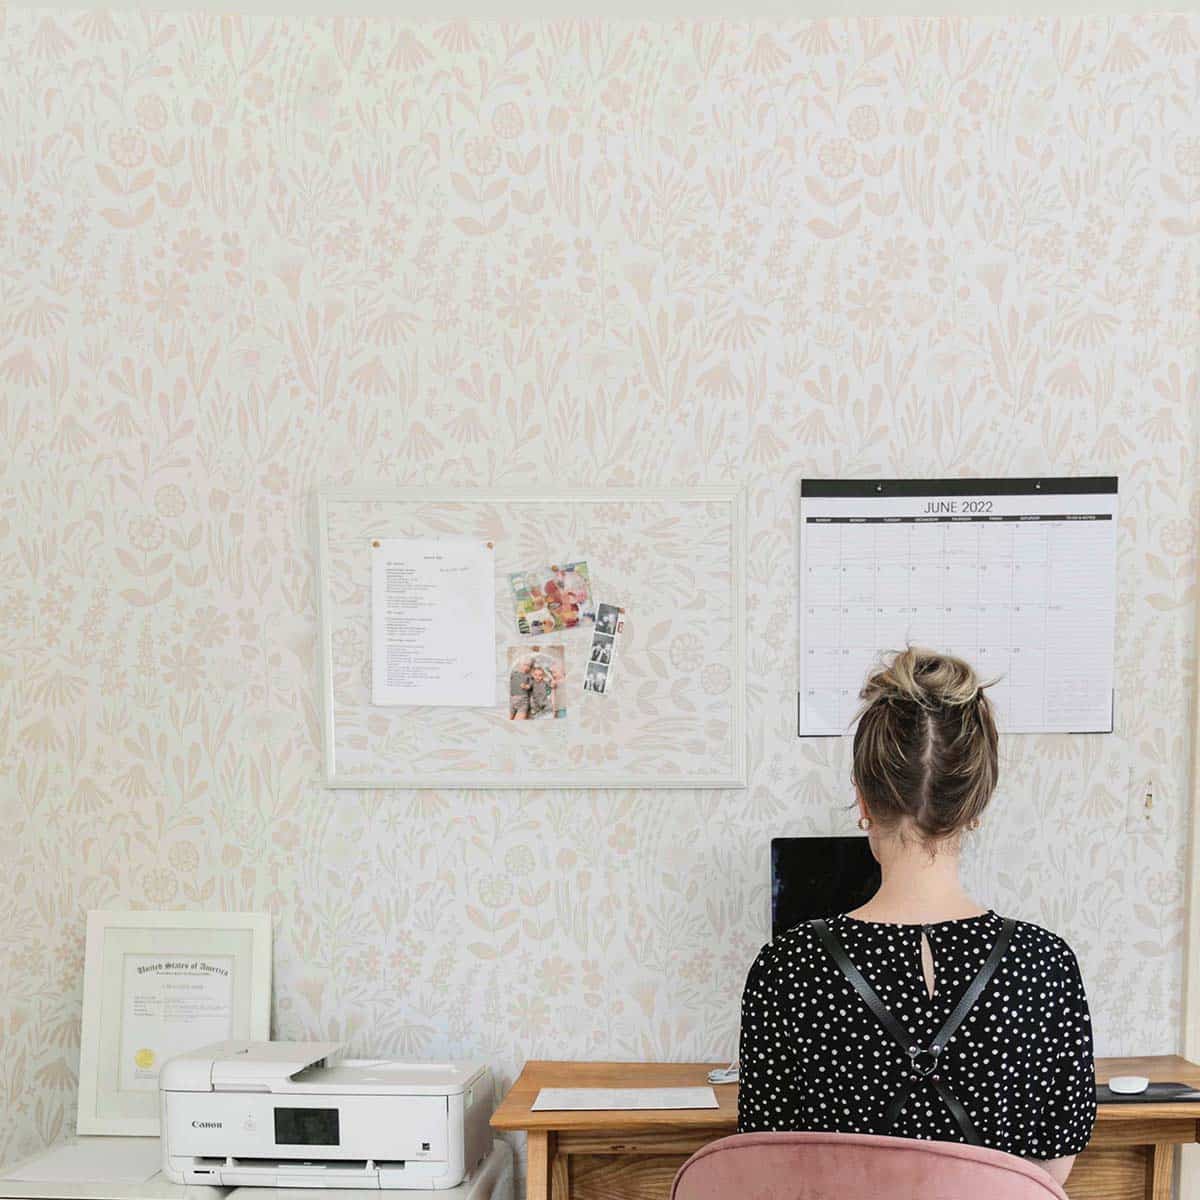
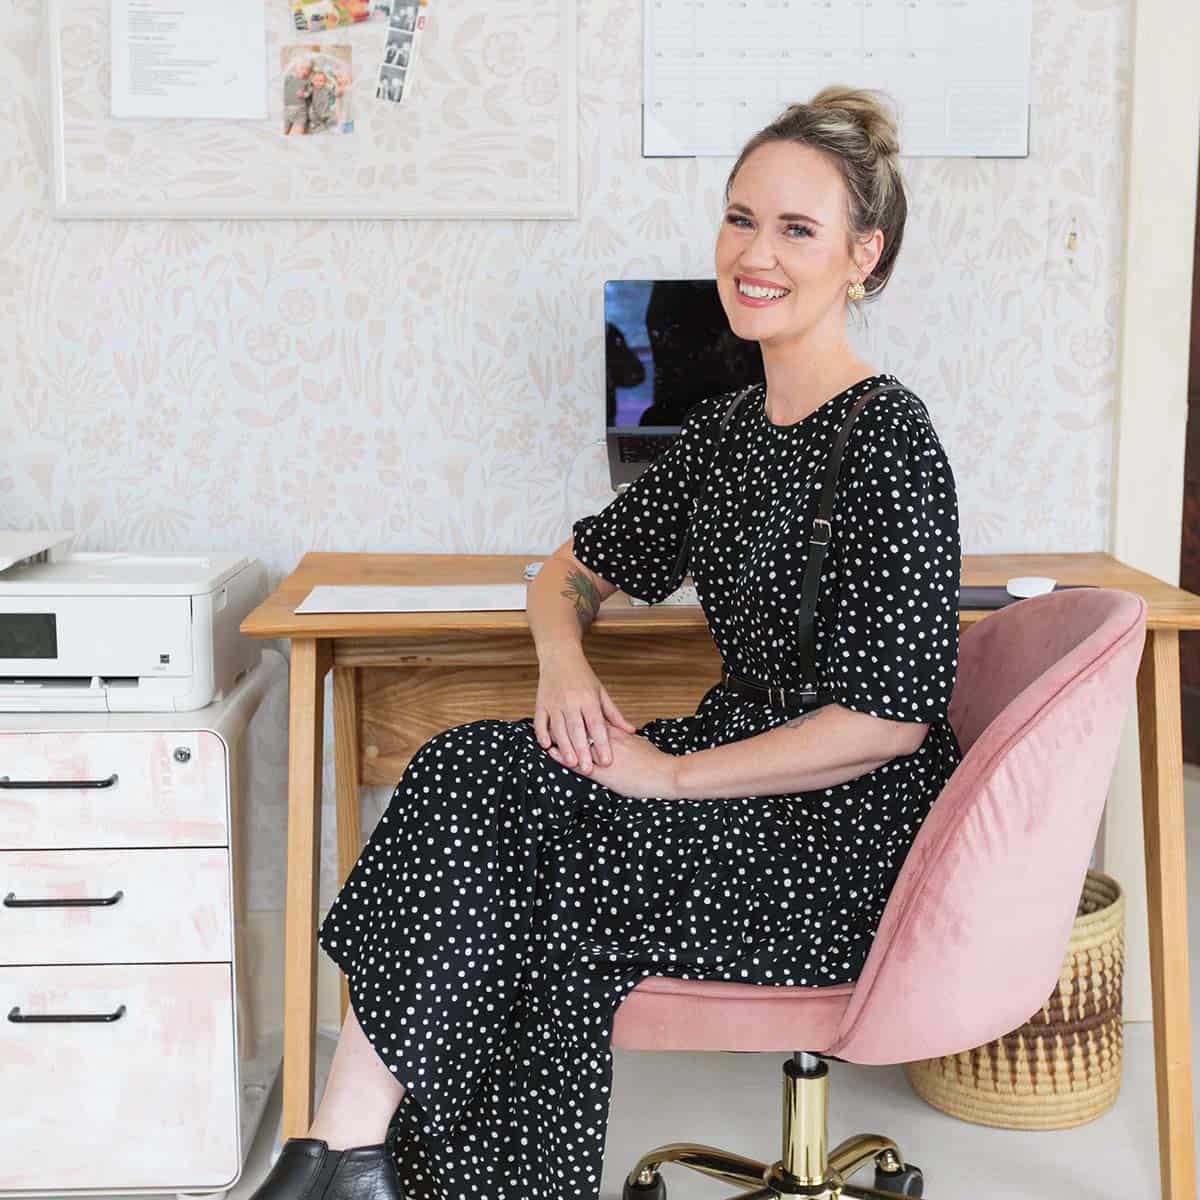
]]>I worked with Spoonflower on this post and got to try out their newly reformulated peel and stick wallpaper. It’s the best peel and stick wallpaper I’ve ever used! The design I went with is Wildflowers by writtenbykristen.
It’s really high quality, and it doesn’t feel like a “disposable” wallpaper by any means, even though you can easily remove it.
I did the accent pieces, but had a professional hang the wallpaper on the wall, and she also told me that she thought this peel and stick was much easier to use than others she has worked with—what a great review!
What’s new/different about Spoonflower peel and stick removable woven wallpaper?
- Thick, high quality wallpaper. This is not a cheap, crappy alternative to traditional wallpaper like some peel and sticks can be.
- The Spoonflower Peel and Stick wallpaper is a high quality paper with a subtle linen texture that is thick and tear resistant. They digitally print the design you select (or create!) in the quantity you need when you order it.
- Although it’s a peel and stick (no glue or paste required/needed), there is some give while you adhere the paper to your project, making it much easier to work with. If you need to line up two panels, this is super helpful.
- No need for messy glues or paste. Peel the backing off of the paper, press the sticky side onto the surface and smooth. Stand back and admire.
- All Spoonflower wallpaper is made in the US and is free from formaldehyde, phthalates, VOCs and PVC, providing a safe product for your home.
Why use peel and stick wallpaper over traditional wallpaper?
- If you think (or know) you will want to remove the paper within a few years or less, it’s a great option. Most often, this is recommended for folks renting their home/apartment and looking for a damage-free option. But, if you are someone who likes to change up your space fairly often, even if you don’t rent, this may be a better choice.
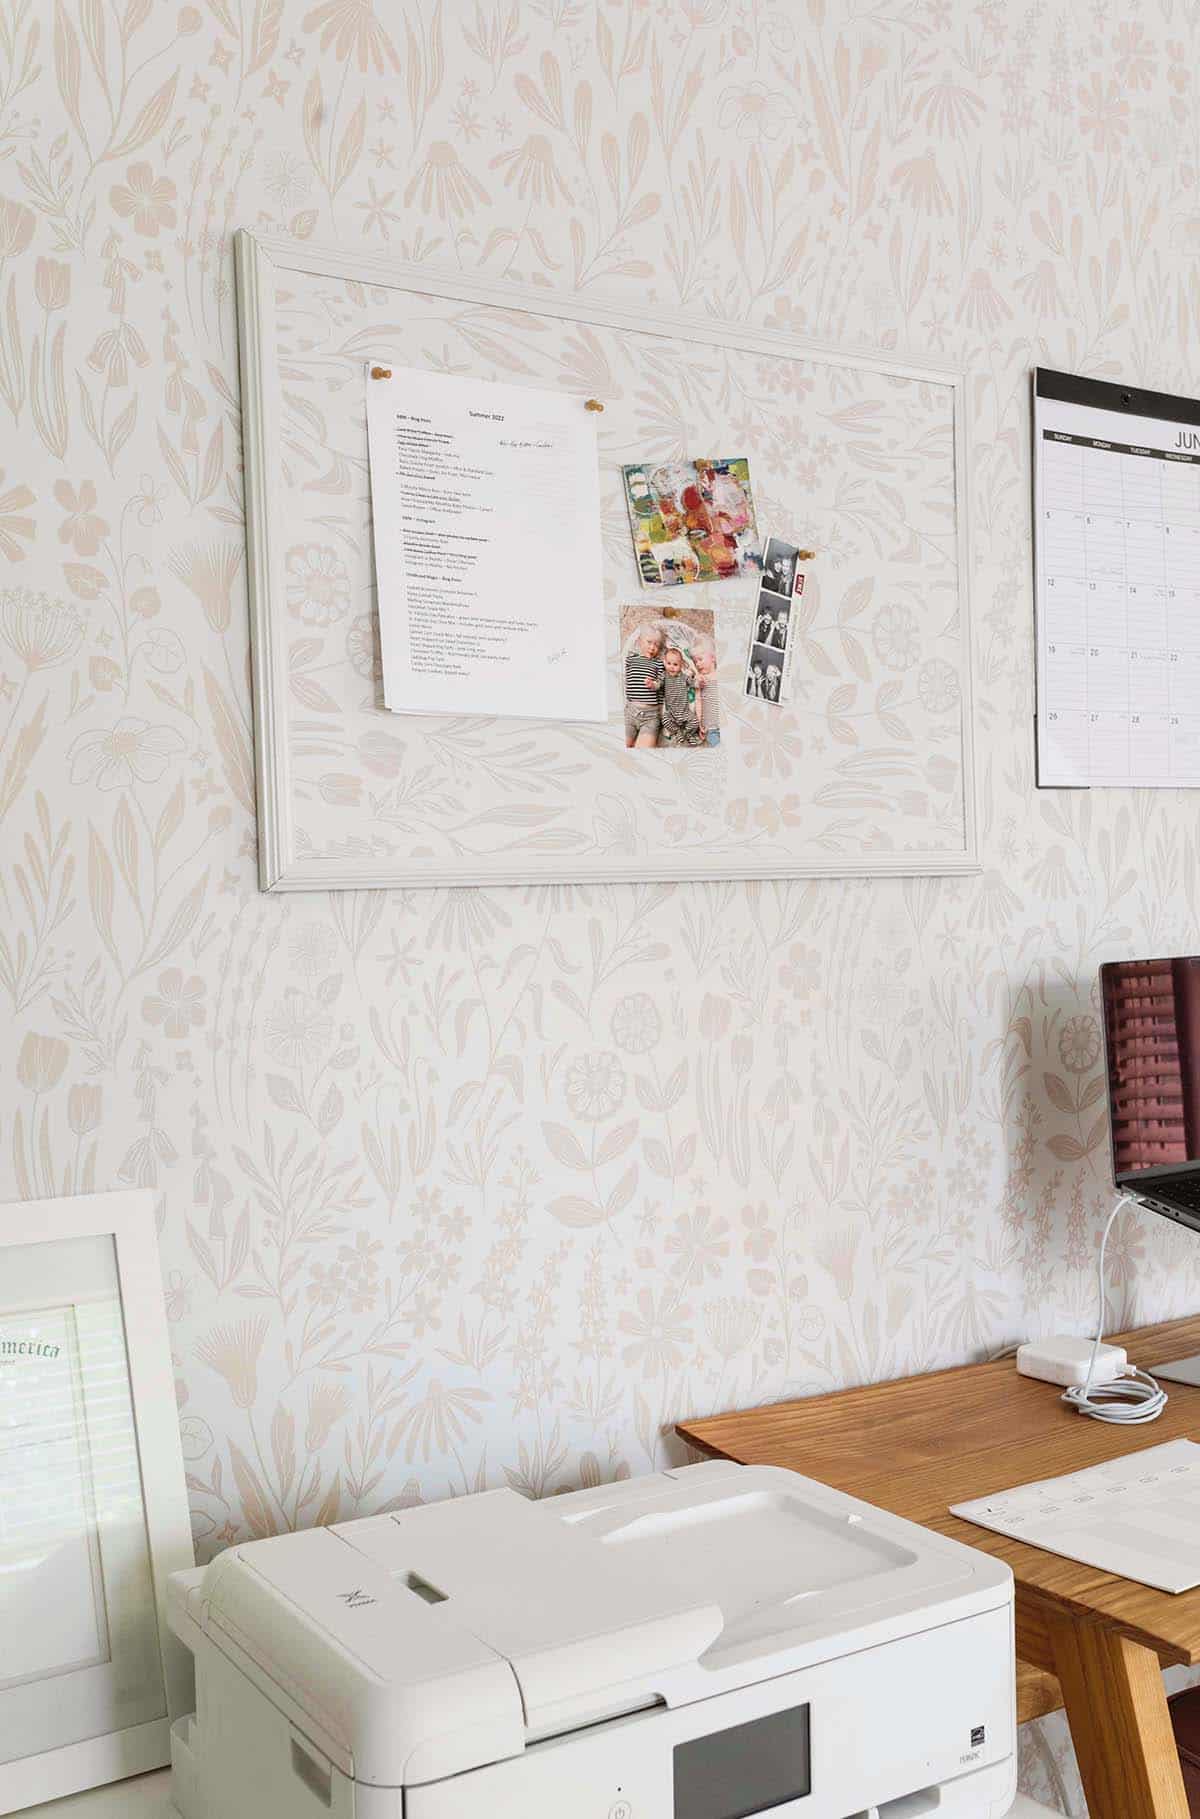
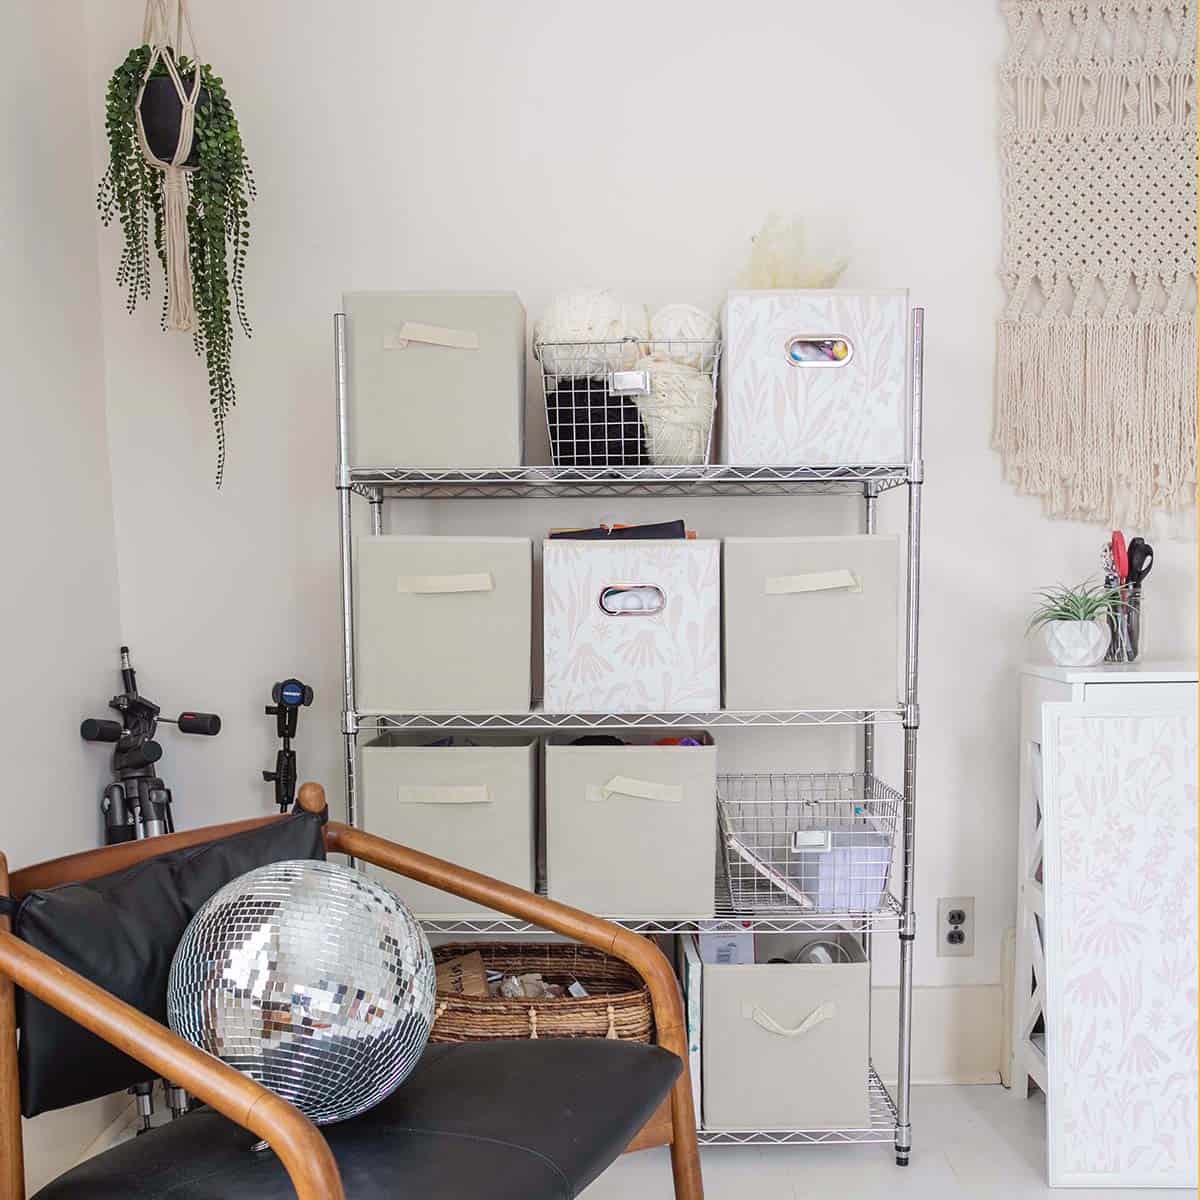
- You can use the paper on small accents or things other than walls. I used the same peel and stick wallpaper on a wall in my office, as well my bulletin board and a few storage bins. Other ideas might include: cabinets or dressers, stairs, interior doors, backs of chairs, or really any smooth non-porous surface that isn’t super high traffic.
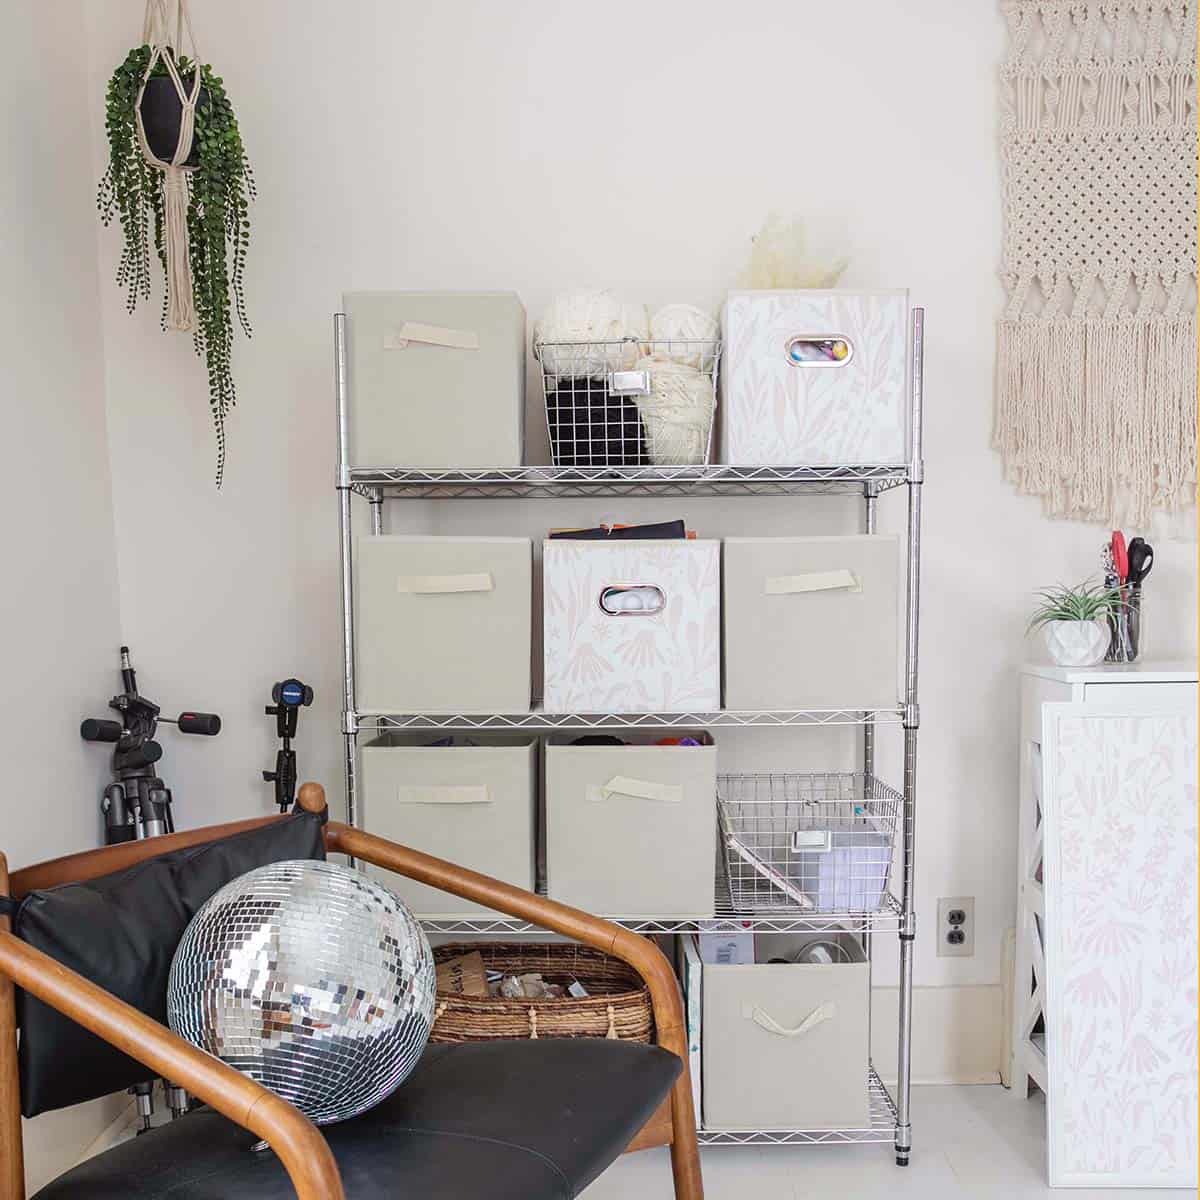
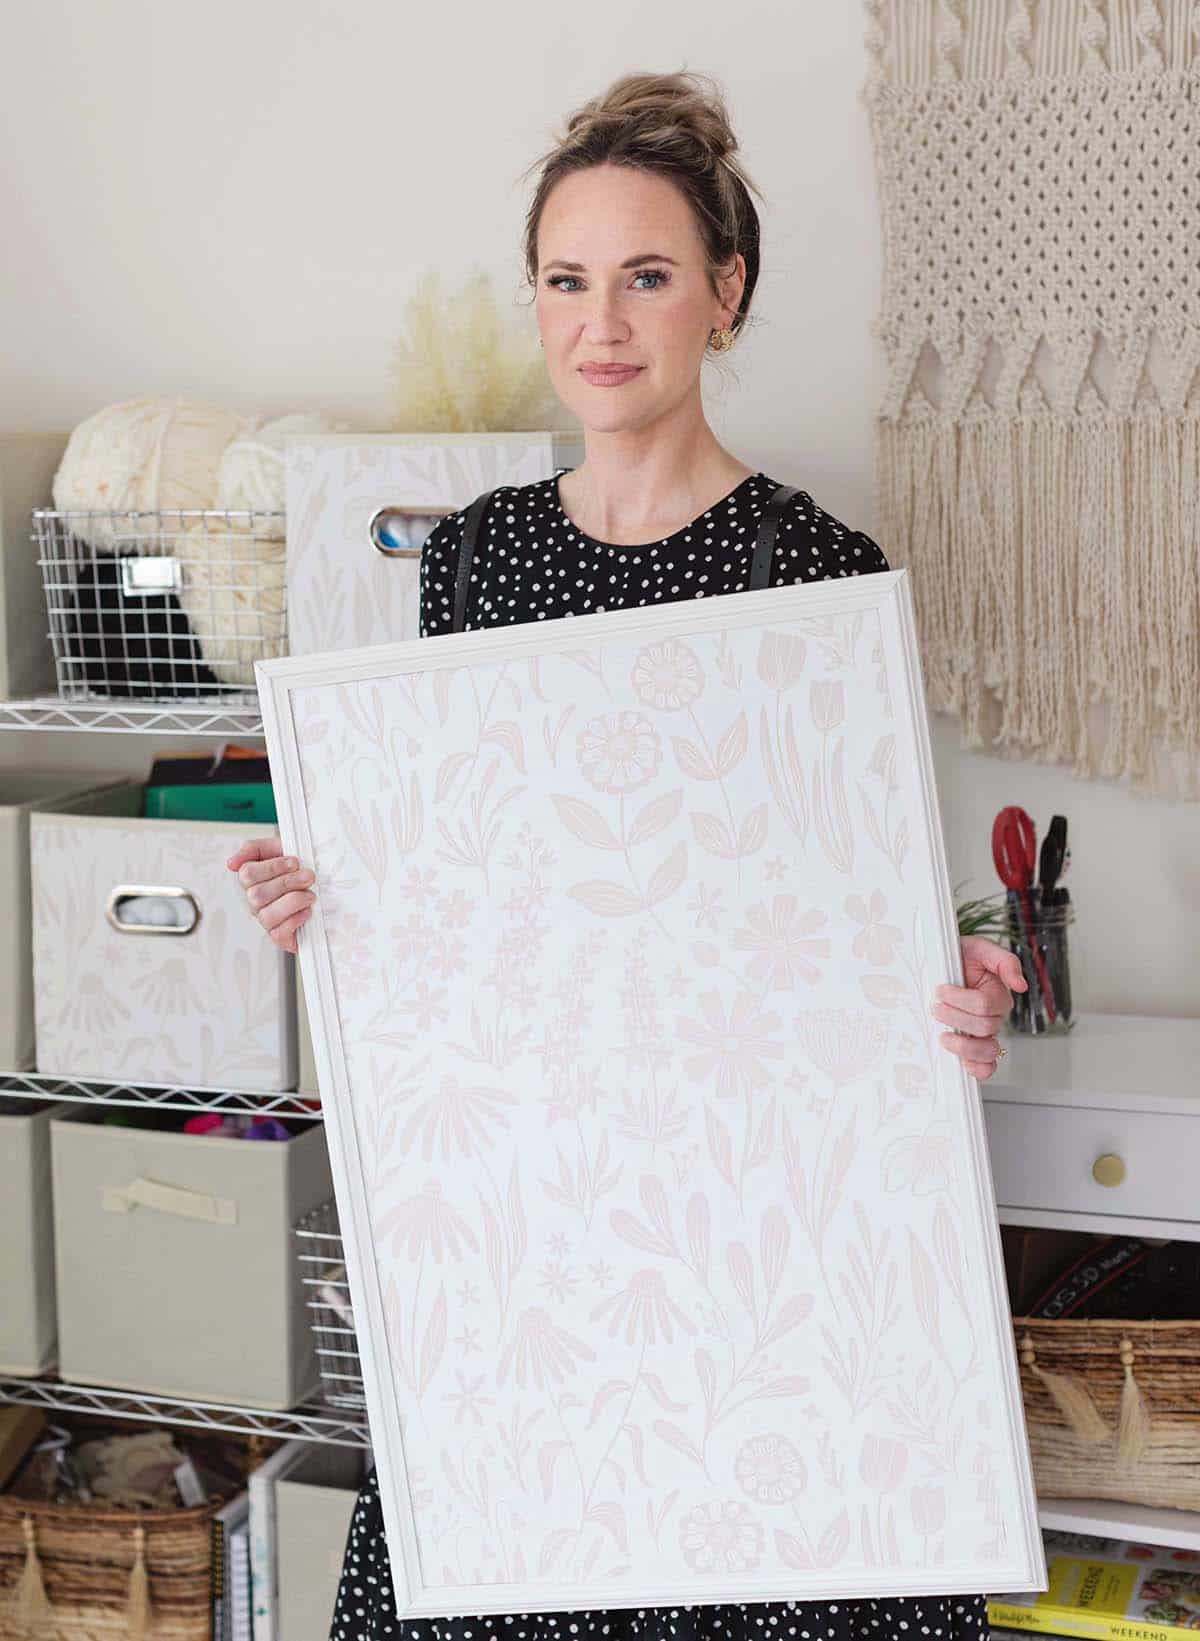
I really liked adding these accent pieces to the room in addition to the office accent wall. It really made the room feel pulled together but not necessarily too matchy.
I also LOVE this wallpaper design! It’s so subtle and goes perfectly with the vibe of our house. That’s one thing I love about shopping from Spoonflower is there are so many independent artists to choose from.
Not only do I get to support their work, but there are lots of different style options and colors to choose from.
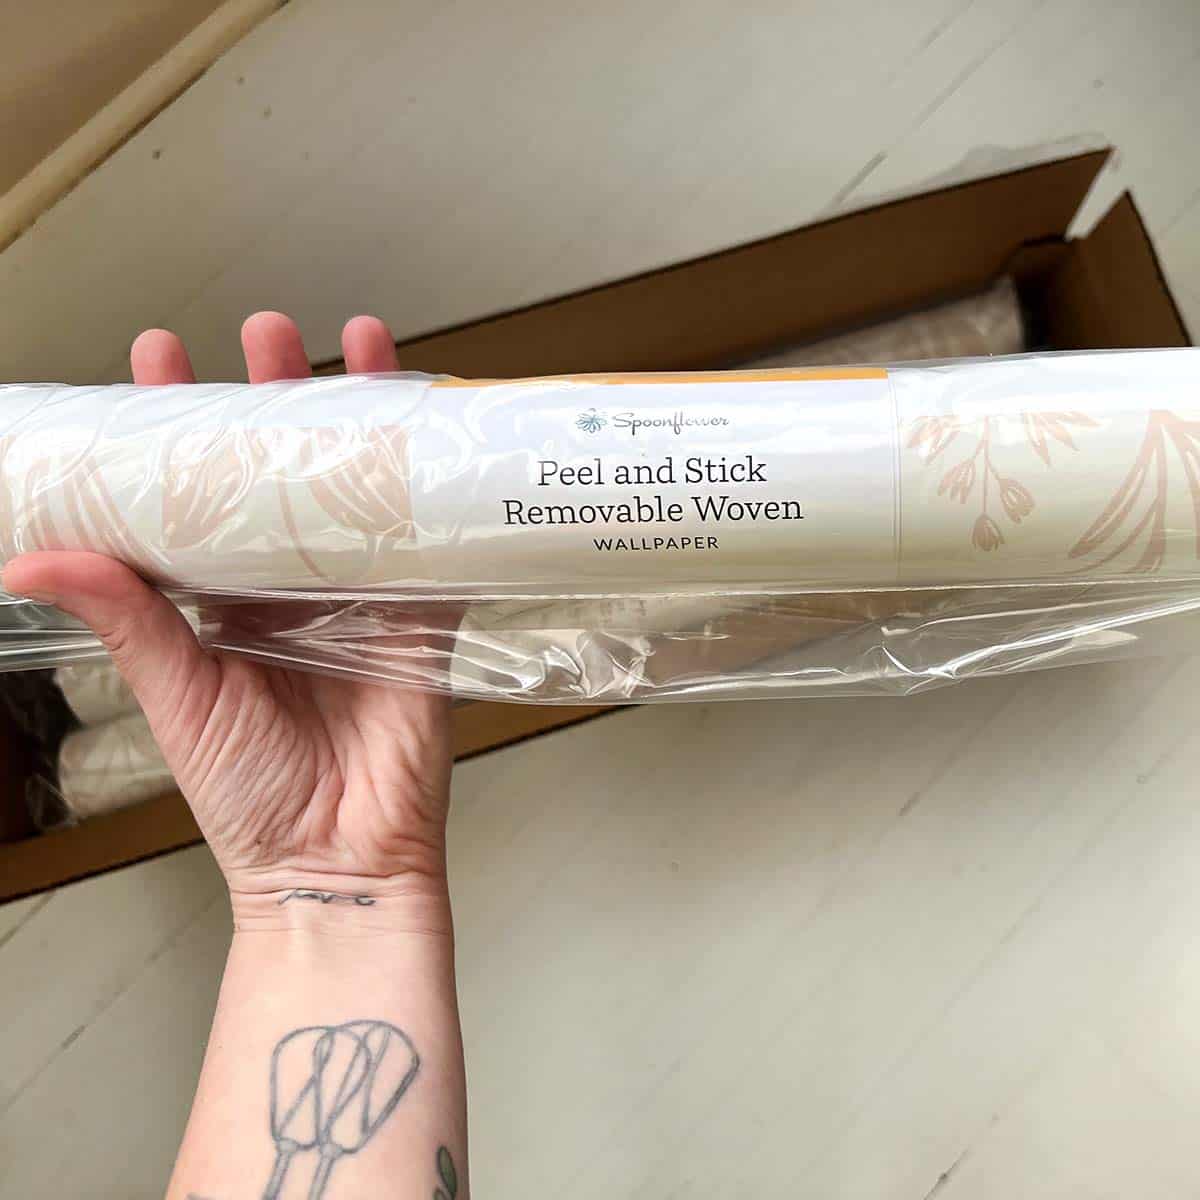
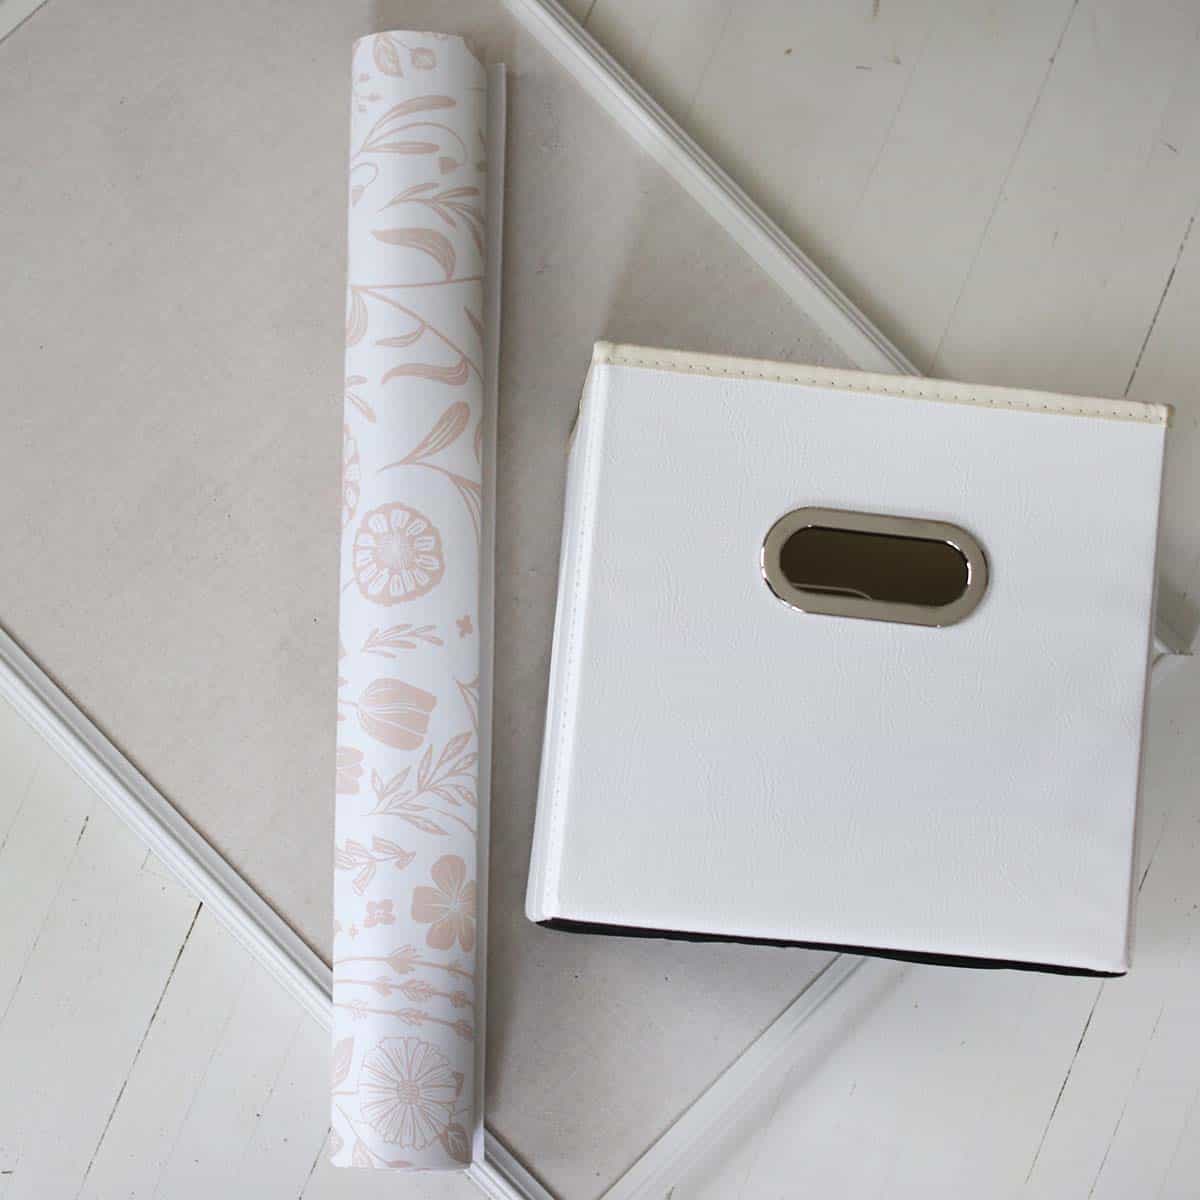
If you are working with accent pieces (things other than walls), I recommend creating a template for the area from scrap paper (like old wrapping paper, or even packing paper you saved to reuse).
Next, cut the peel and stick wallpaper using the template.
Then, if possible, cut a line down the center of just the backing. This way you can add the paper from the center rather than a corner. This may not be possible for any/all accent items.
How long will peel and stick wallpaper last?
Peel and stick wallpaper lasts just as long as traditional wallpaper. This is one of those things I feel like people forget, as we get really focused on how easy it is to remove the paper without damaging your walls.
But as long as your paper doesn’t get damaged by outside forces (like a water leak or something like that), it can last just as long as any traditional wallpaper does.
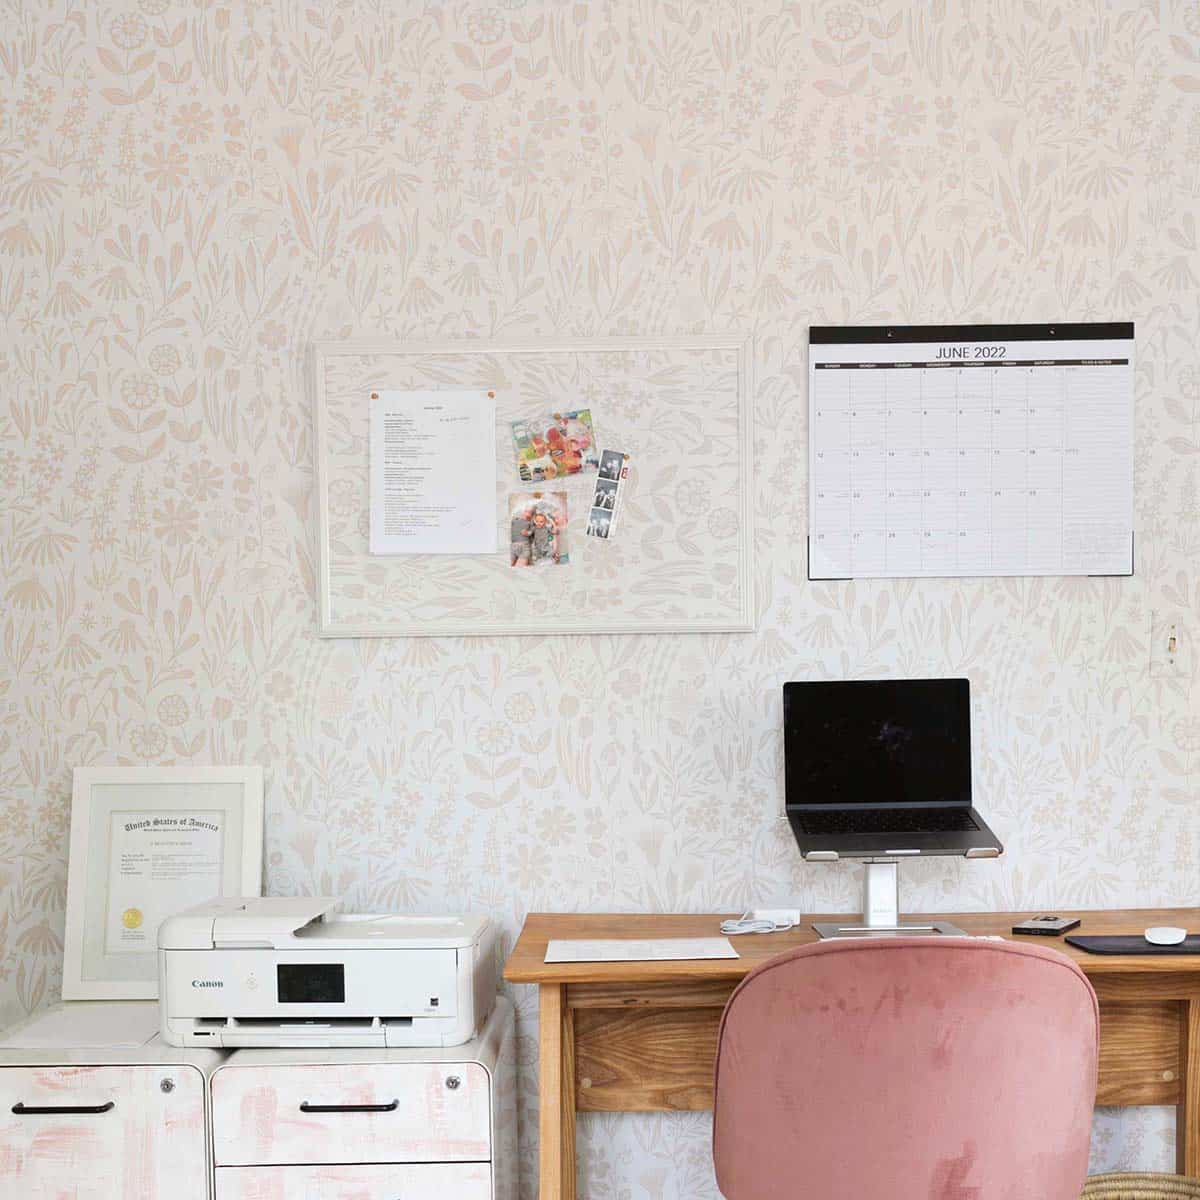
I love my office wallpaper! It adds just a little color, texture, and interest to my space but isn’t so wild that it distracts me while I work. Lol. Thanks for letting me share. -Emma
P.S. Elsie also used Spoonflower peel and stick wallpaper in her daughters’ room (so cute). Here’s the retro pattern she chose!
]]>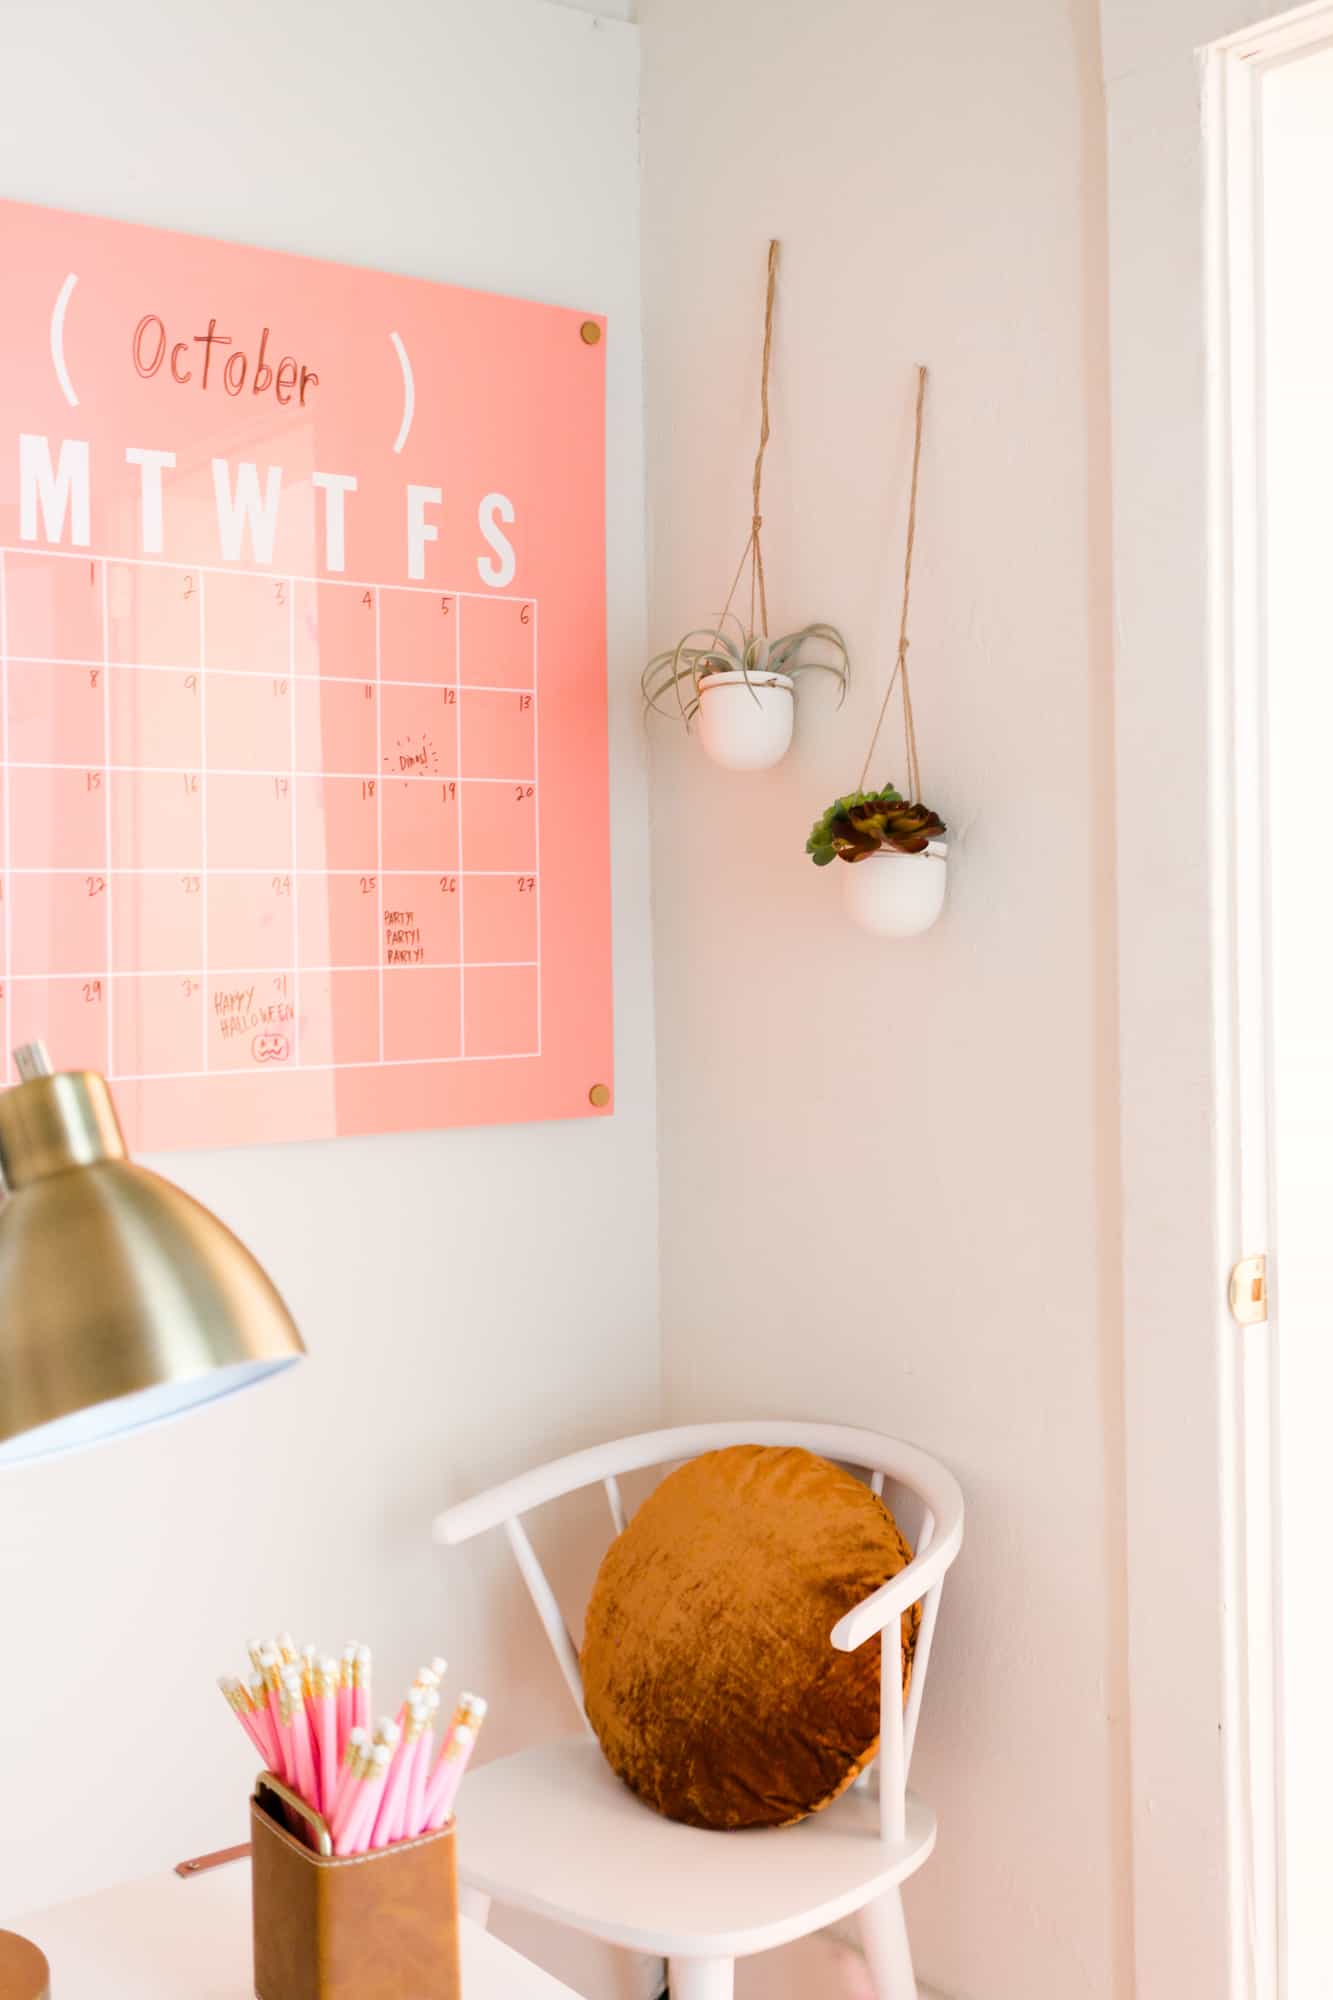 Here at ABM, we love a good project that not only helps organize our lives, but is also pretty to look at, too! We did an office makeover for our friend Allison recently and she asked for an oversized calendar to help keep her busy schedule all in one place. I love the look of acrylic calendars, but this time we wanted to make something that was a pop of color. So we decided to feature a coral pink colored sheet and we are in love with how it turned out!
 Supplies:
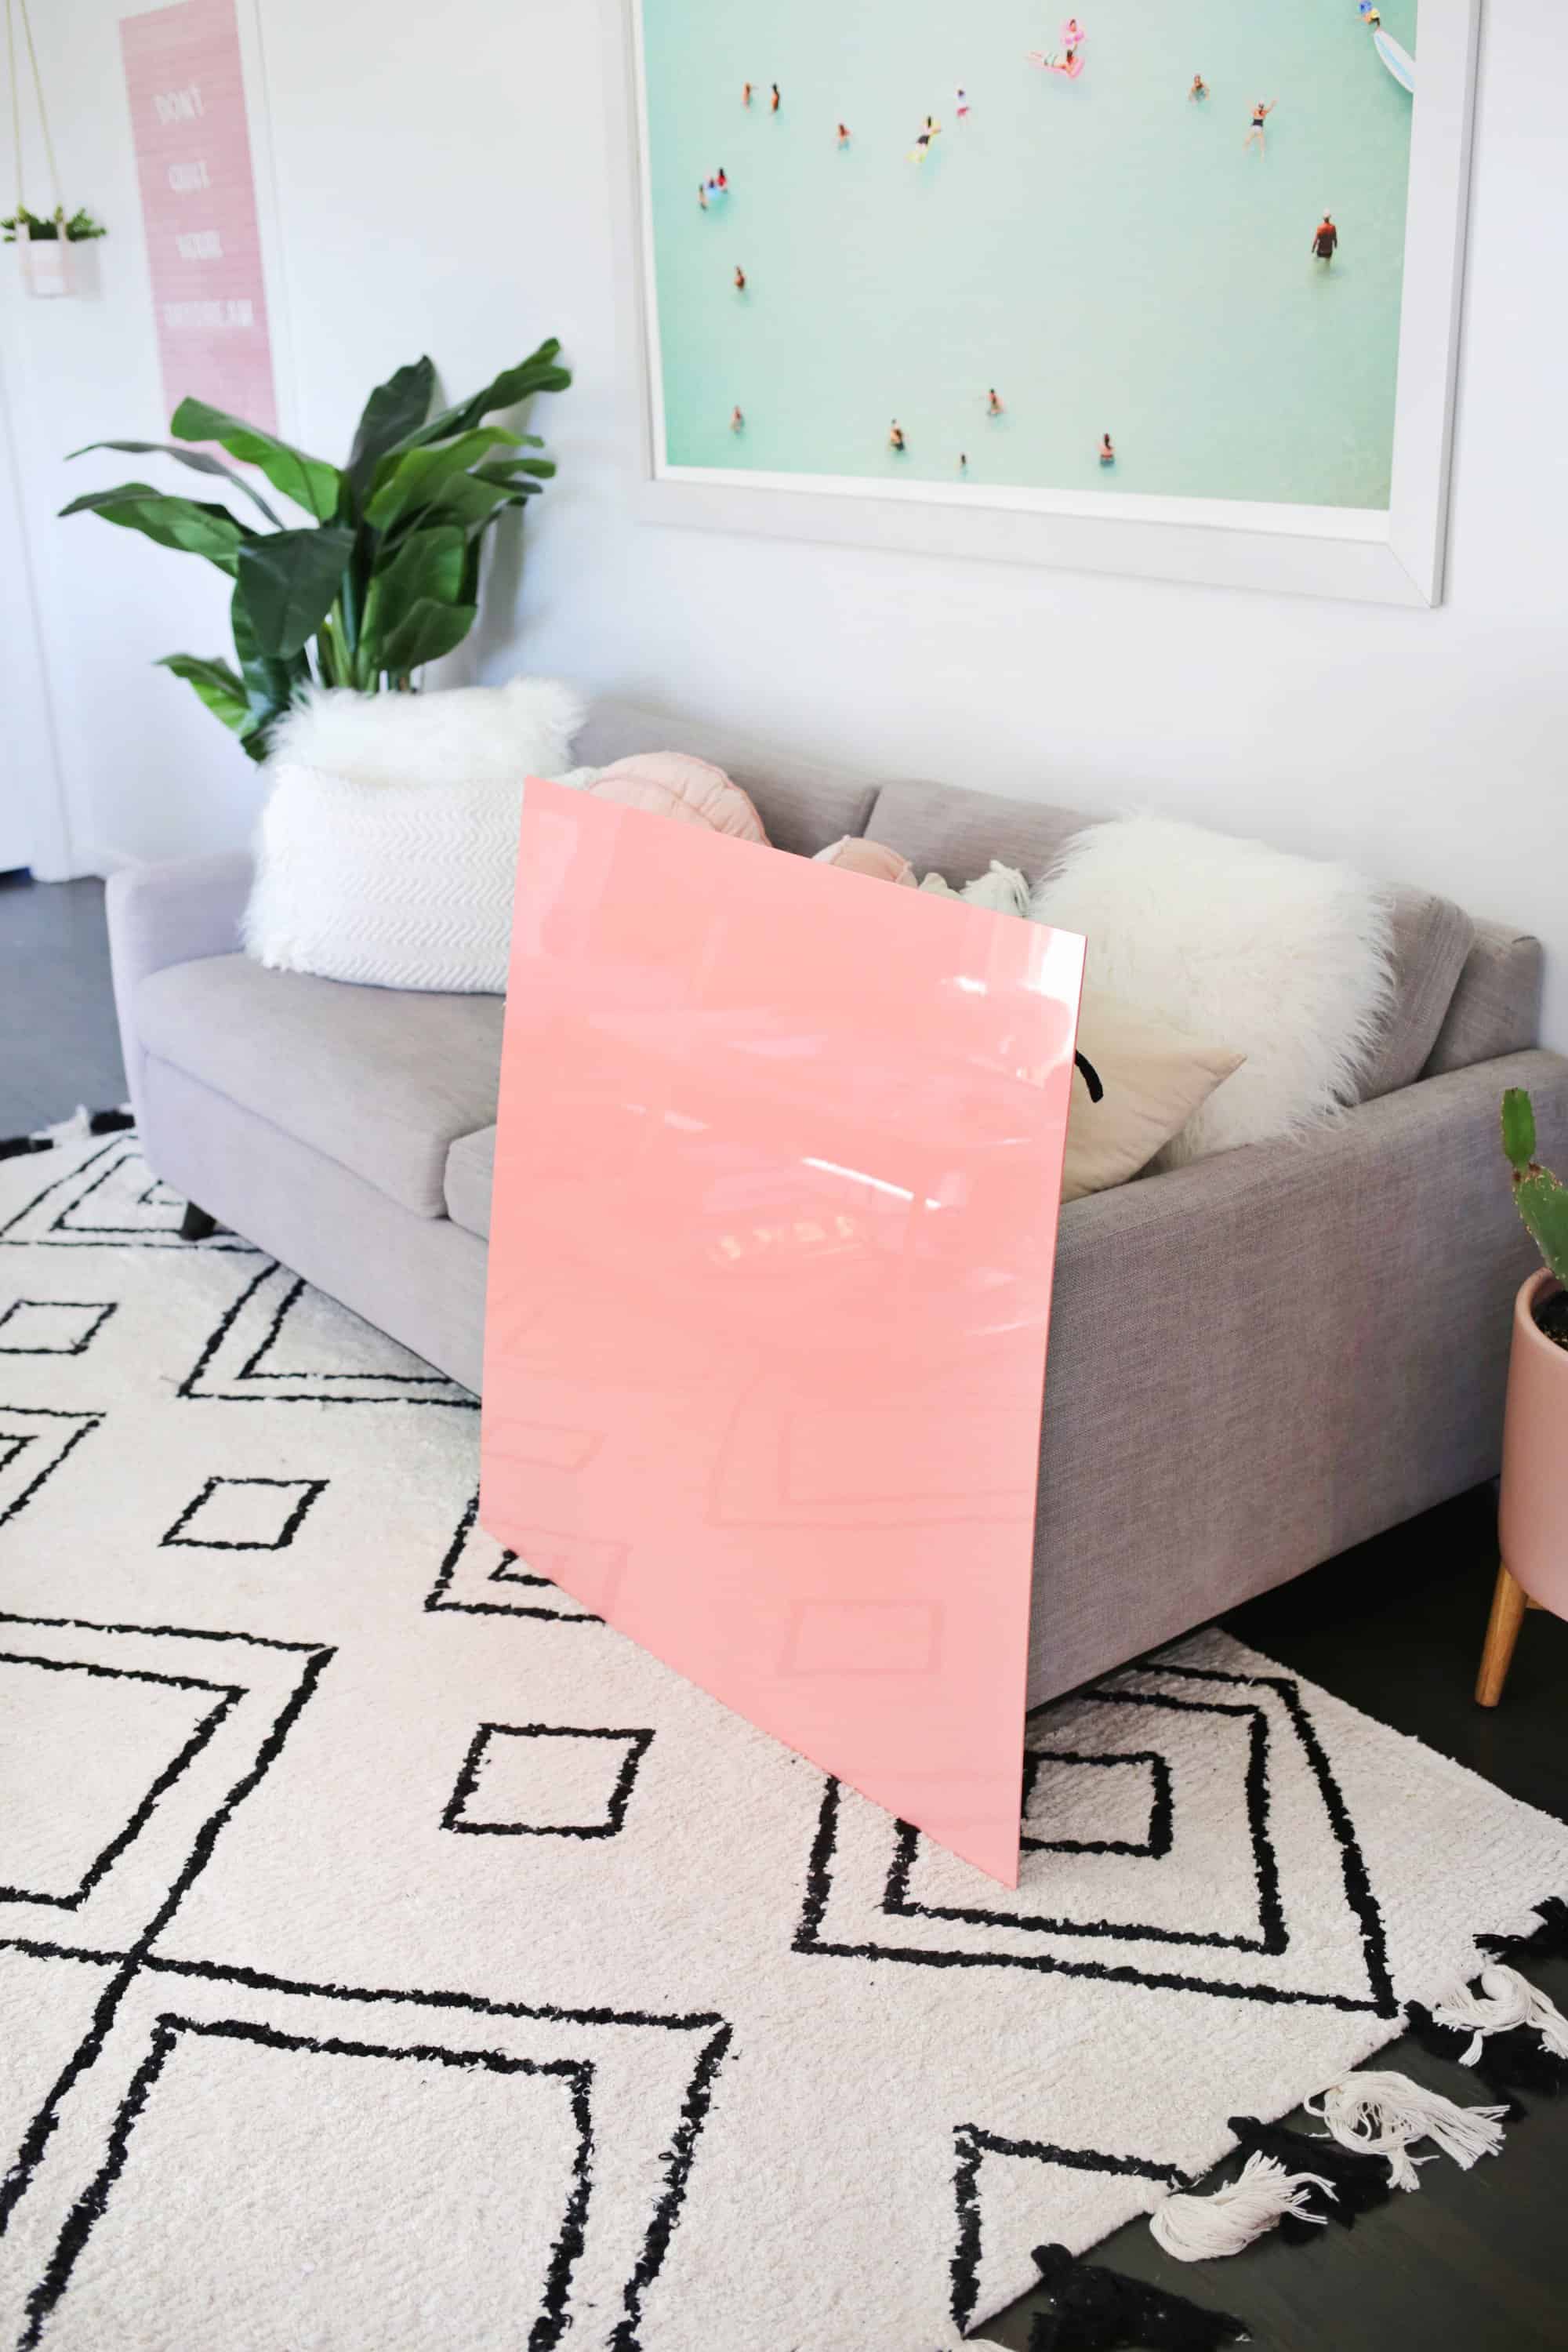
–large acrylic sheet (I ordered a 1/8″ thick 36″x36″ square in the pink color)
–4″ white letter stickers
–1/8″ white vinyl chart tape
–wall mounting hardware and drill
-ruler, X-Acto knife, and painter’s tape for placement guides (a clear acrylic ruler is helpful)

First, cut your day of the week letters out of your sticker sheet, leaving a little bit of paper around each letter shape. This will allow you to place the letters in roughly the space they will go and give you some idea of placement. Cut out two of the parentheses as well and place then in the middle near the top where you want to write your month.
Take your painter’s tape and use a ruler to mark out a rectangle that is 28″ wide and 20″ tall on the inside edge of the tape. The inside edge of the rectangle starts 4″ in from each side and 3″ up from the bottom.
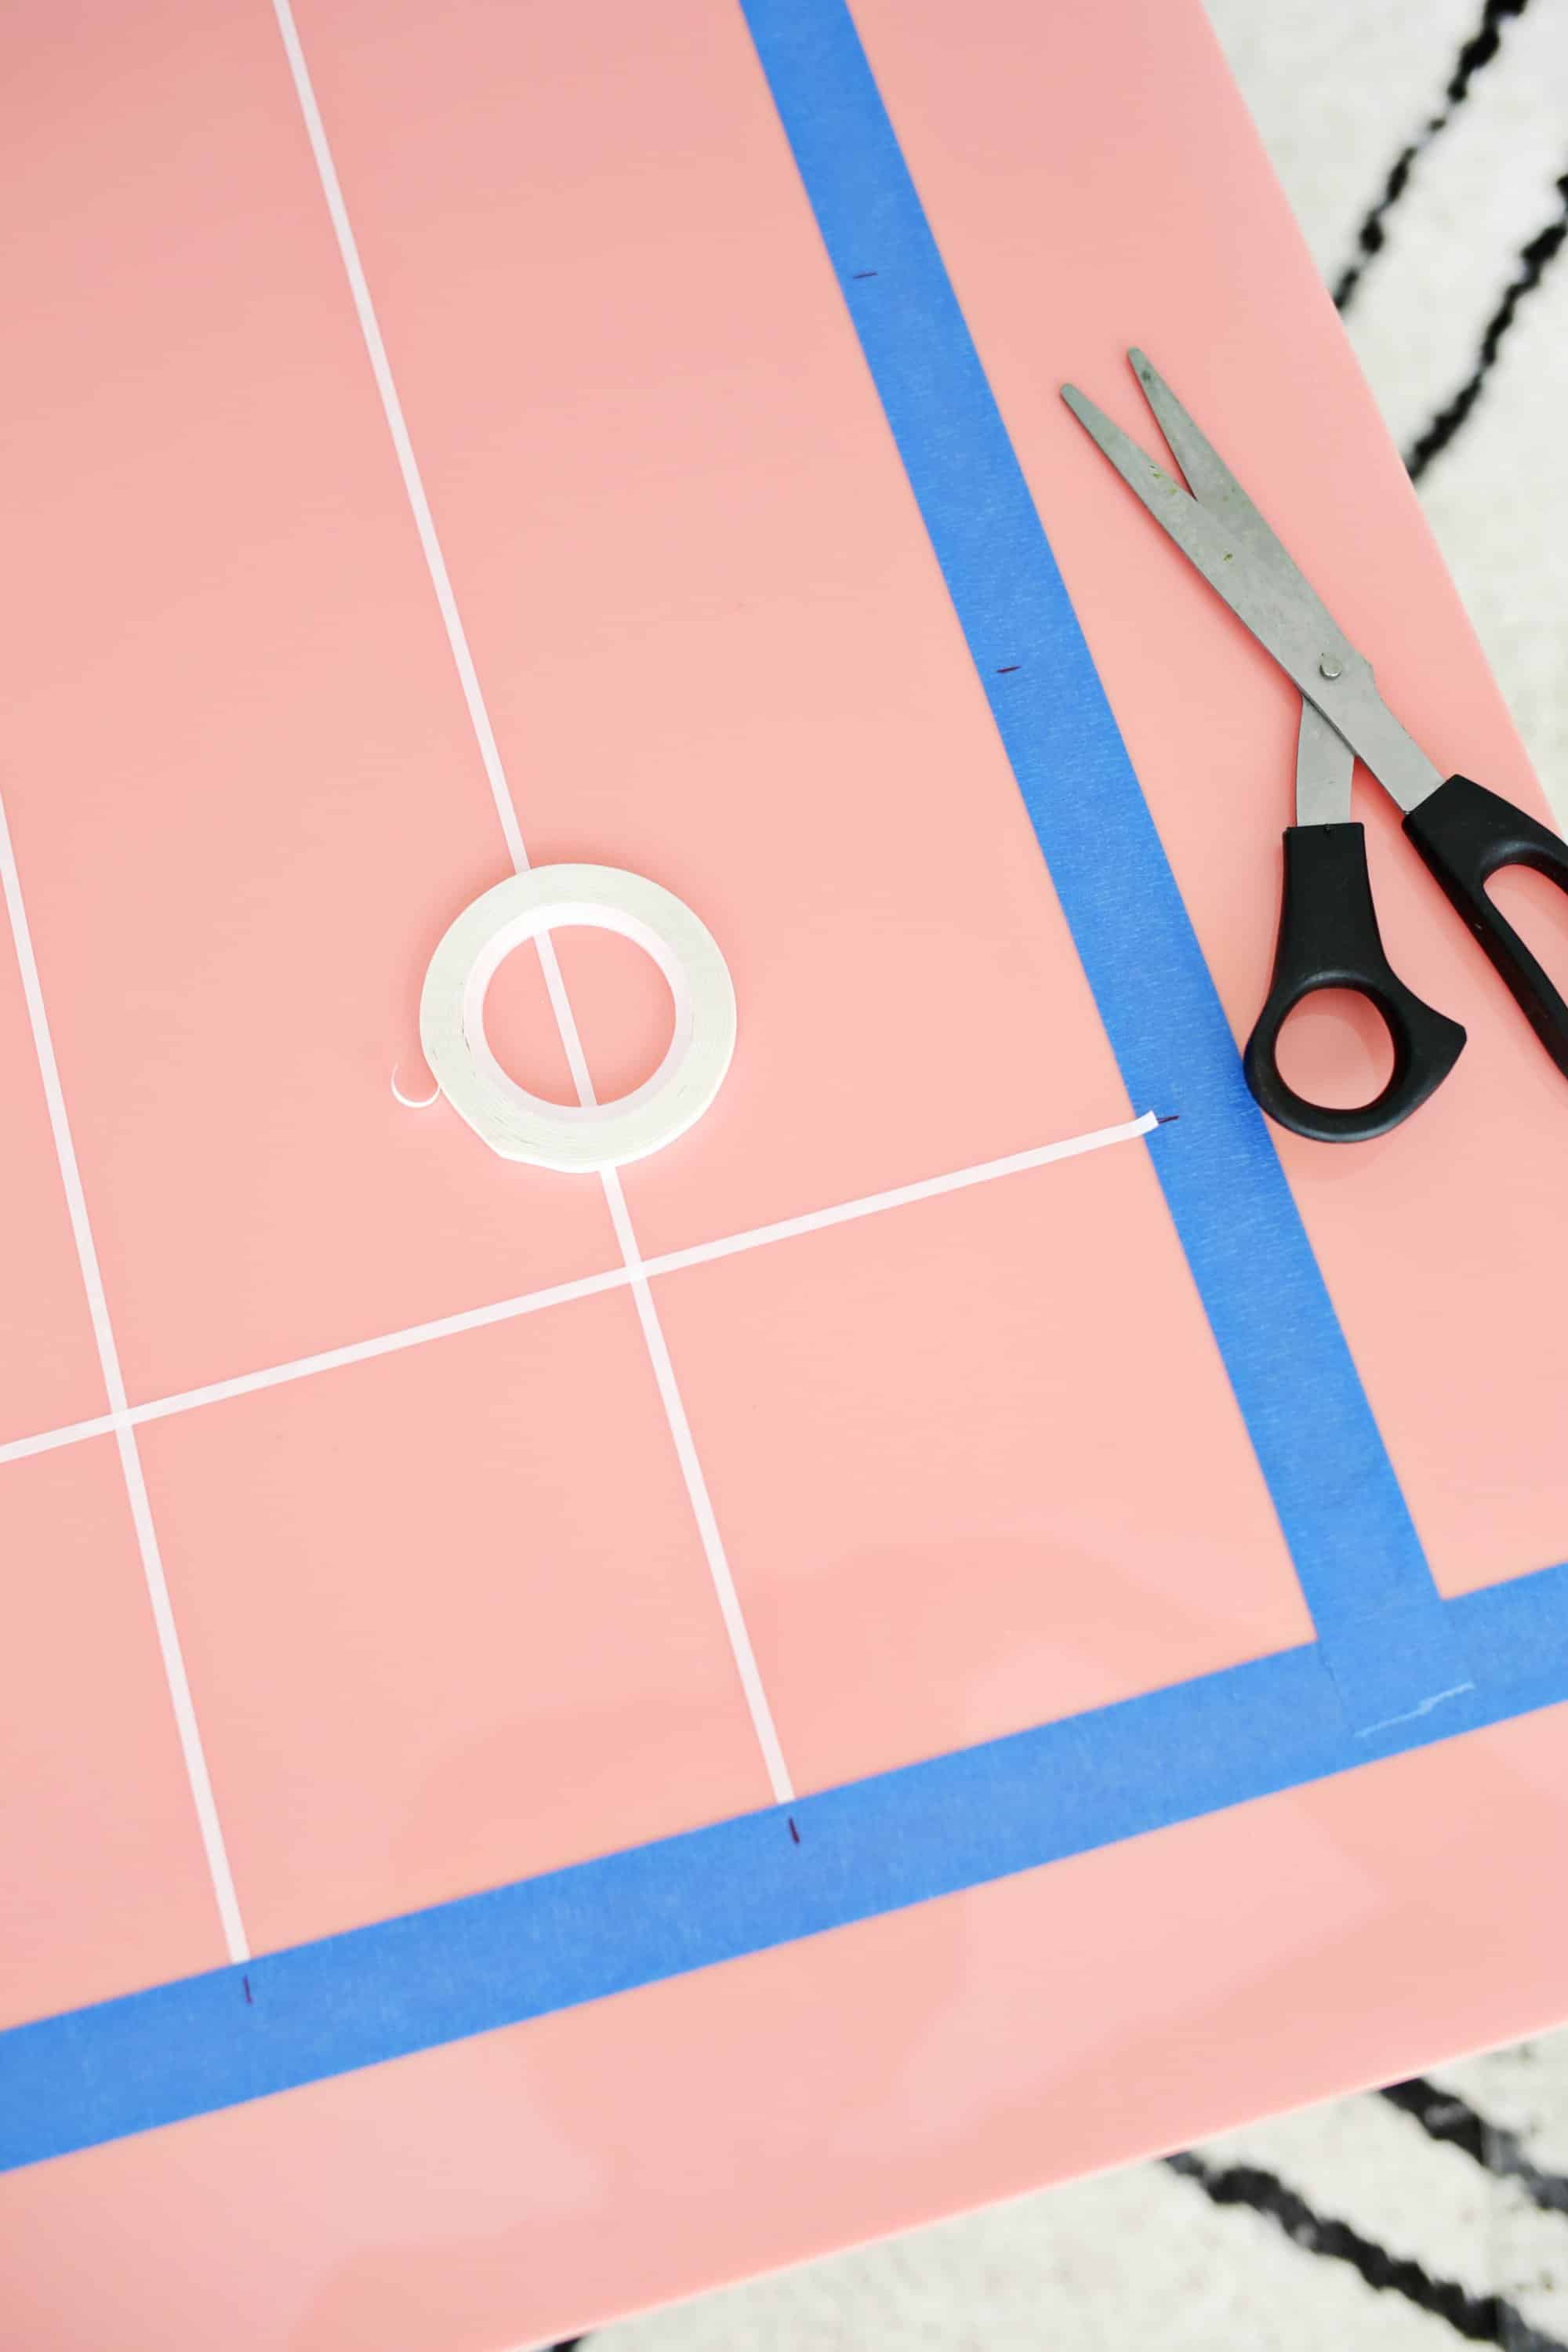
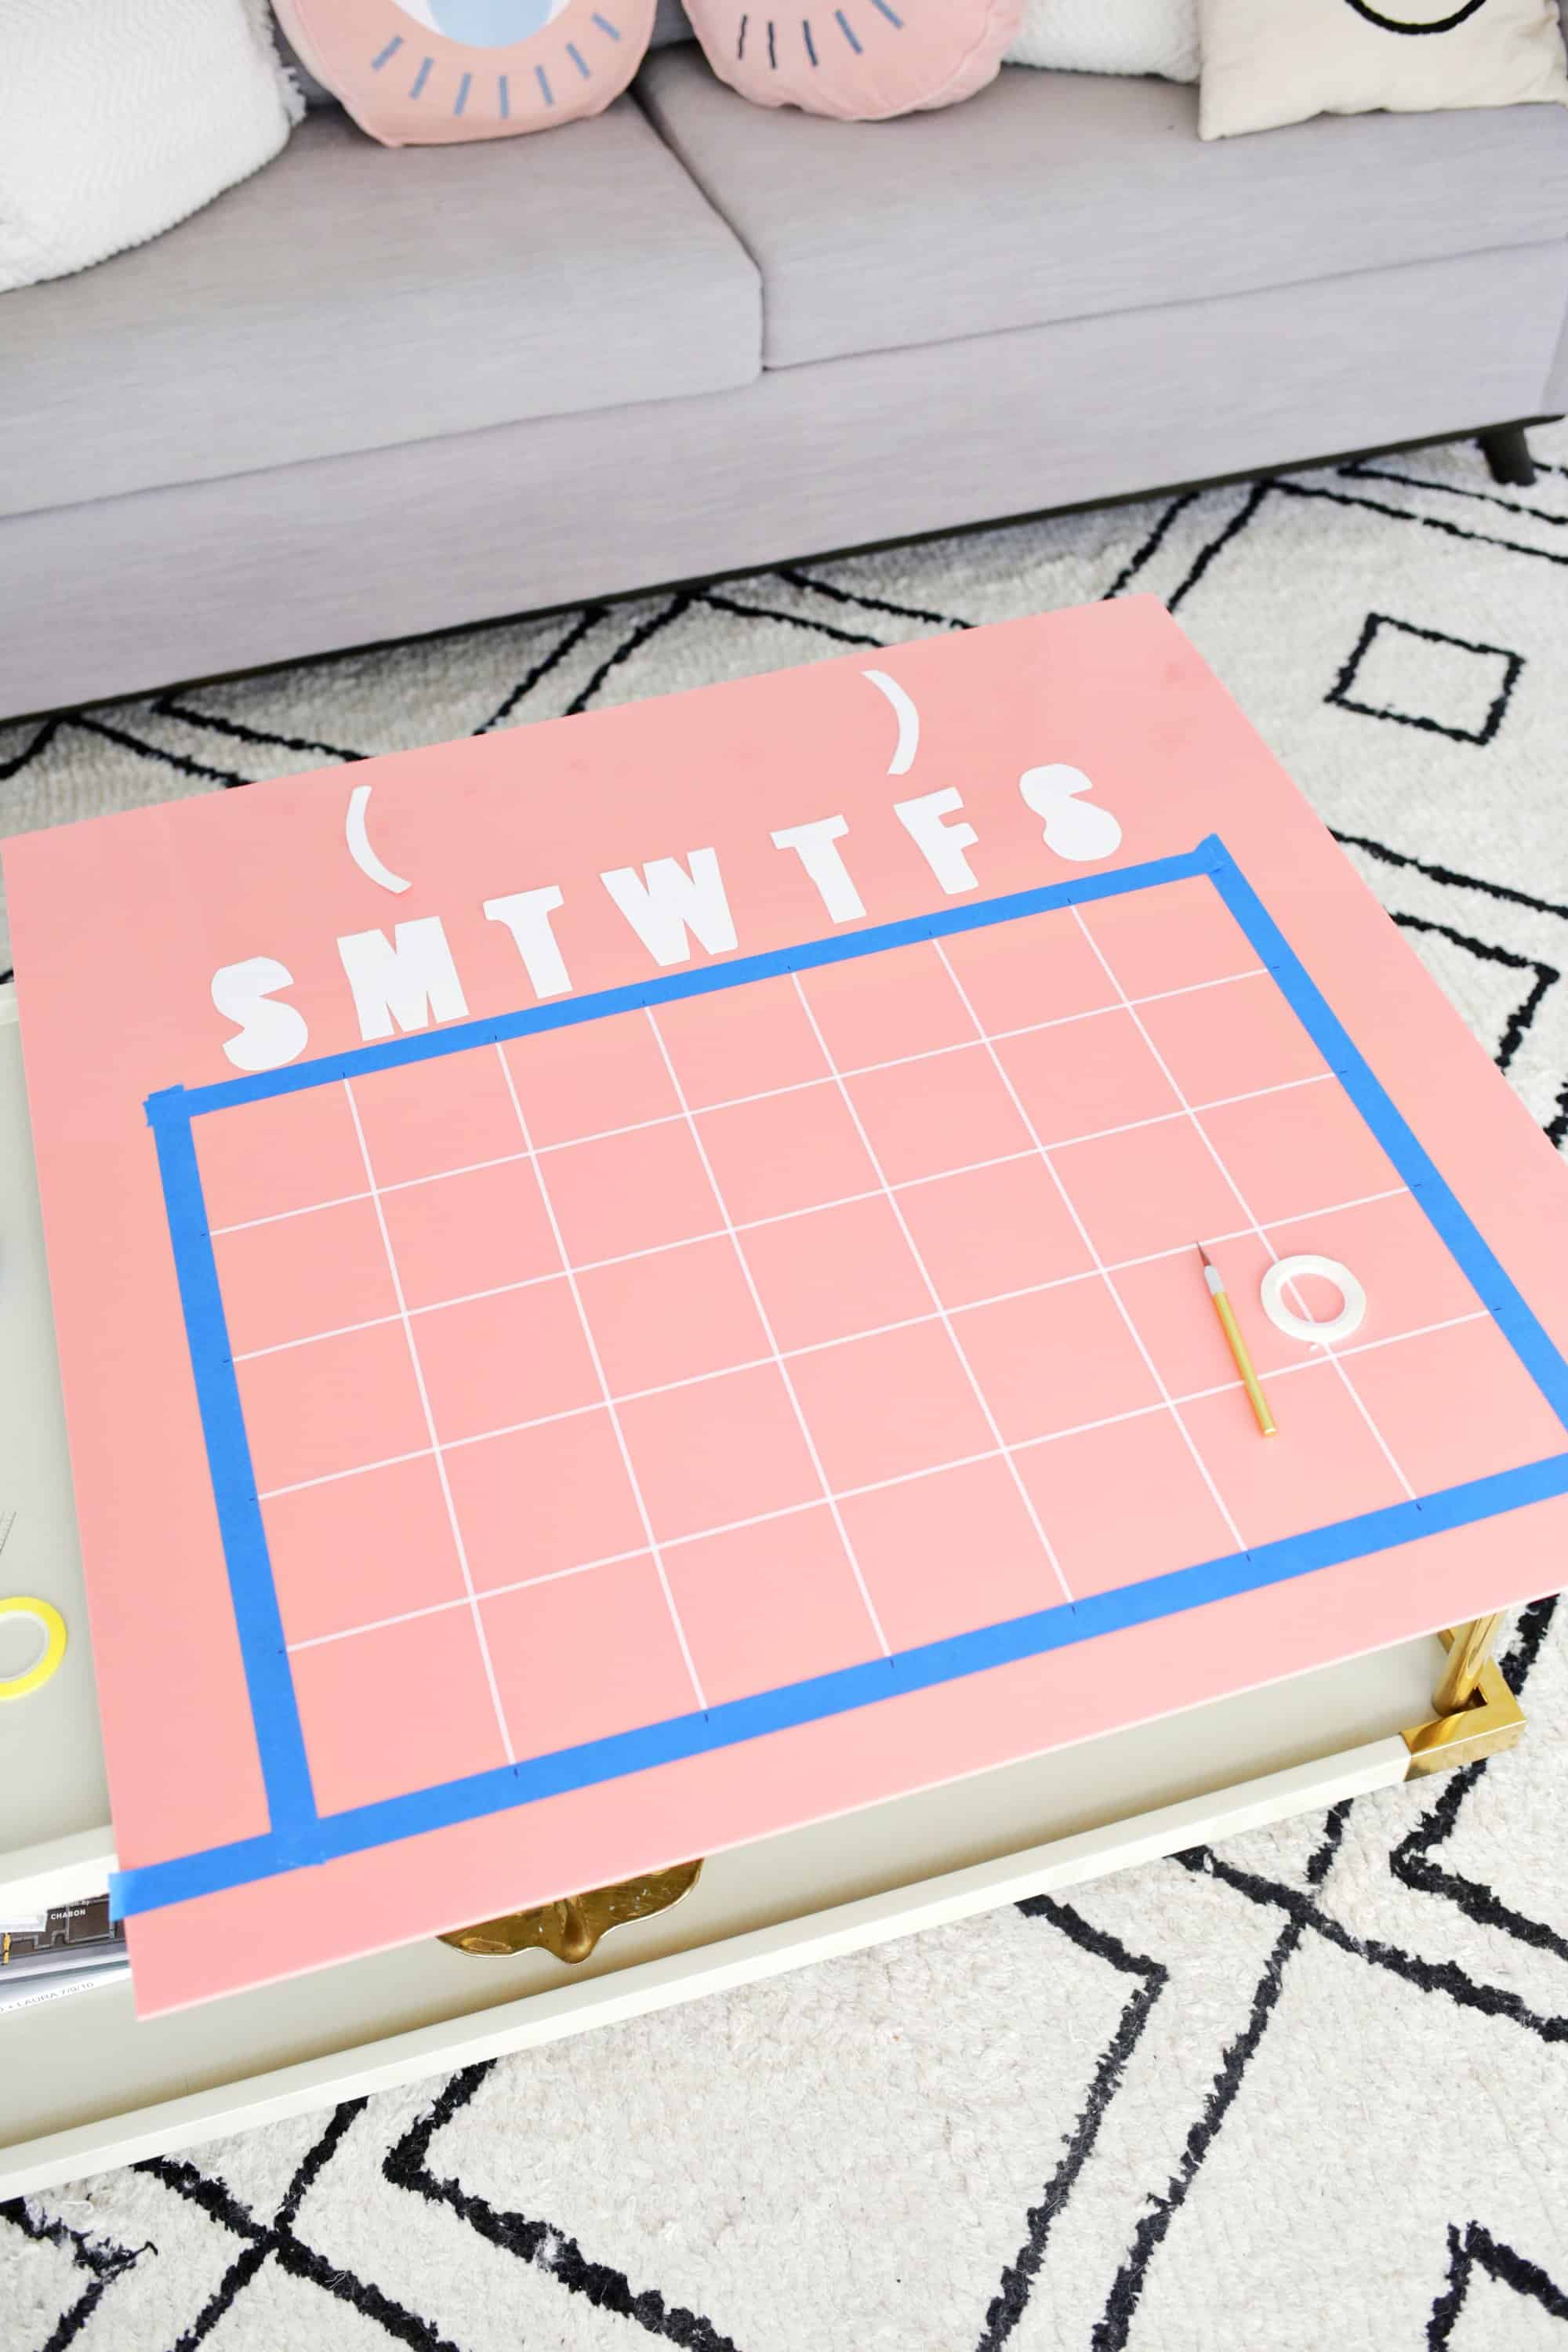 Once your rectangle is taped off, take your ruler and make marks on the tape every 4″ so you have a row of 7 marks across the rectangle, and 5 marks down the rectangle. Use your thin vinyl tape to connect the marks across from each other so you end up with 35 boxes. You can either try and cut your tape with scissors to be as close to the blue painter’s tape as you can, or your can use an X-Acto knife to cut through the tape at the point where the tapes overlap.
  To close up the sides of your grid, mark on the bottom and top pieces of painter’s tape where the side tape should be, pull off the side painter’s tape, and run a piece of tape from the top to the bottom mark to close up the side. Repeat with the other side and then remove the bottom and top tapes and run tape across those lines as well to complete the grid.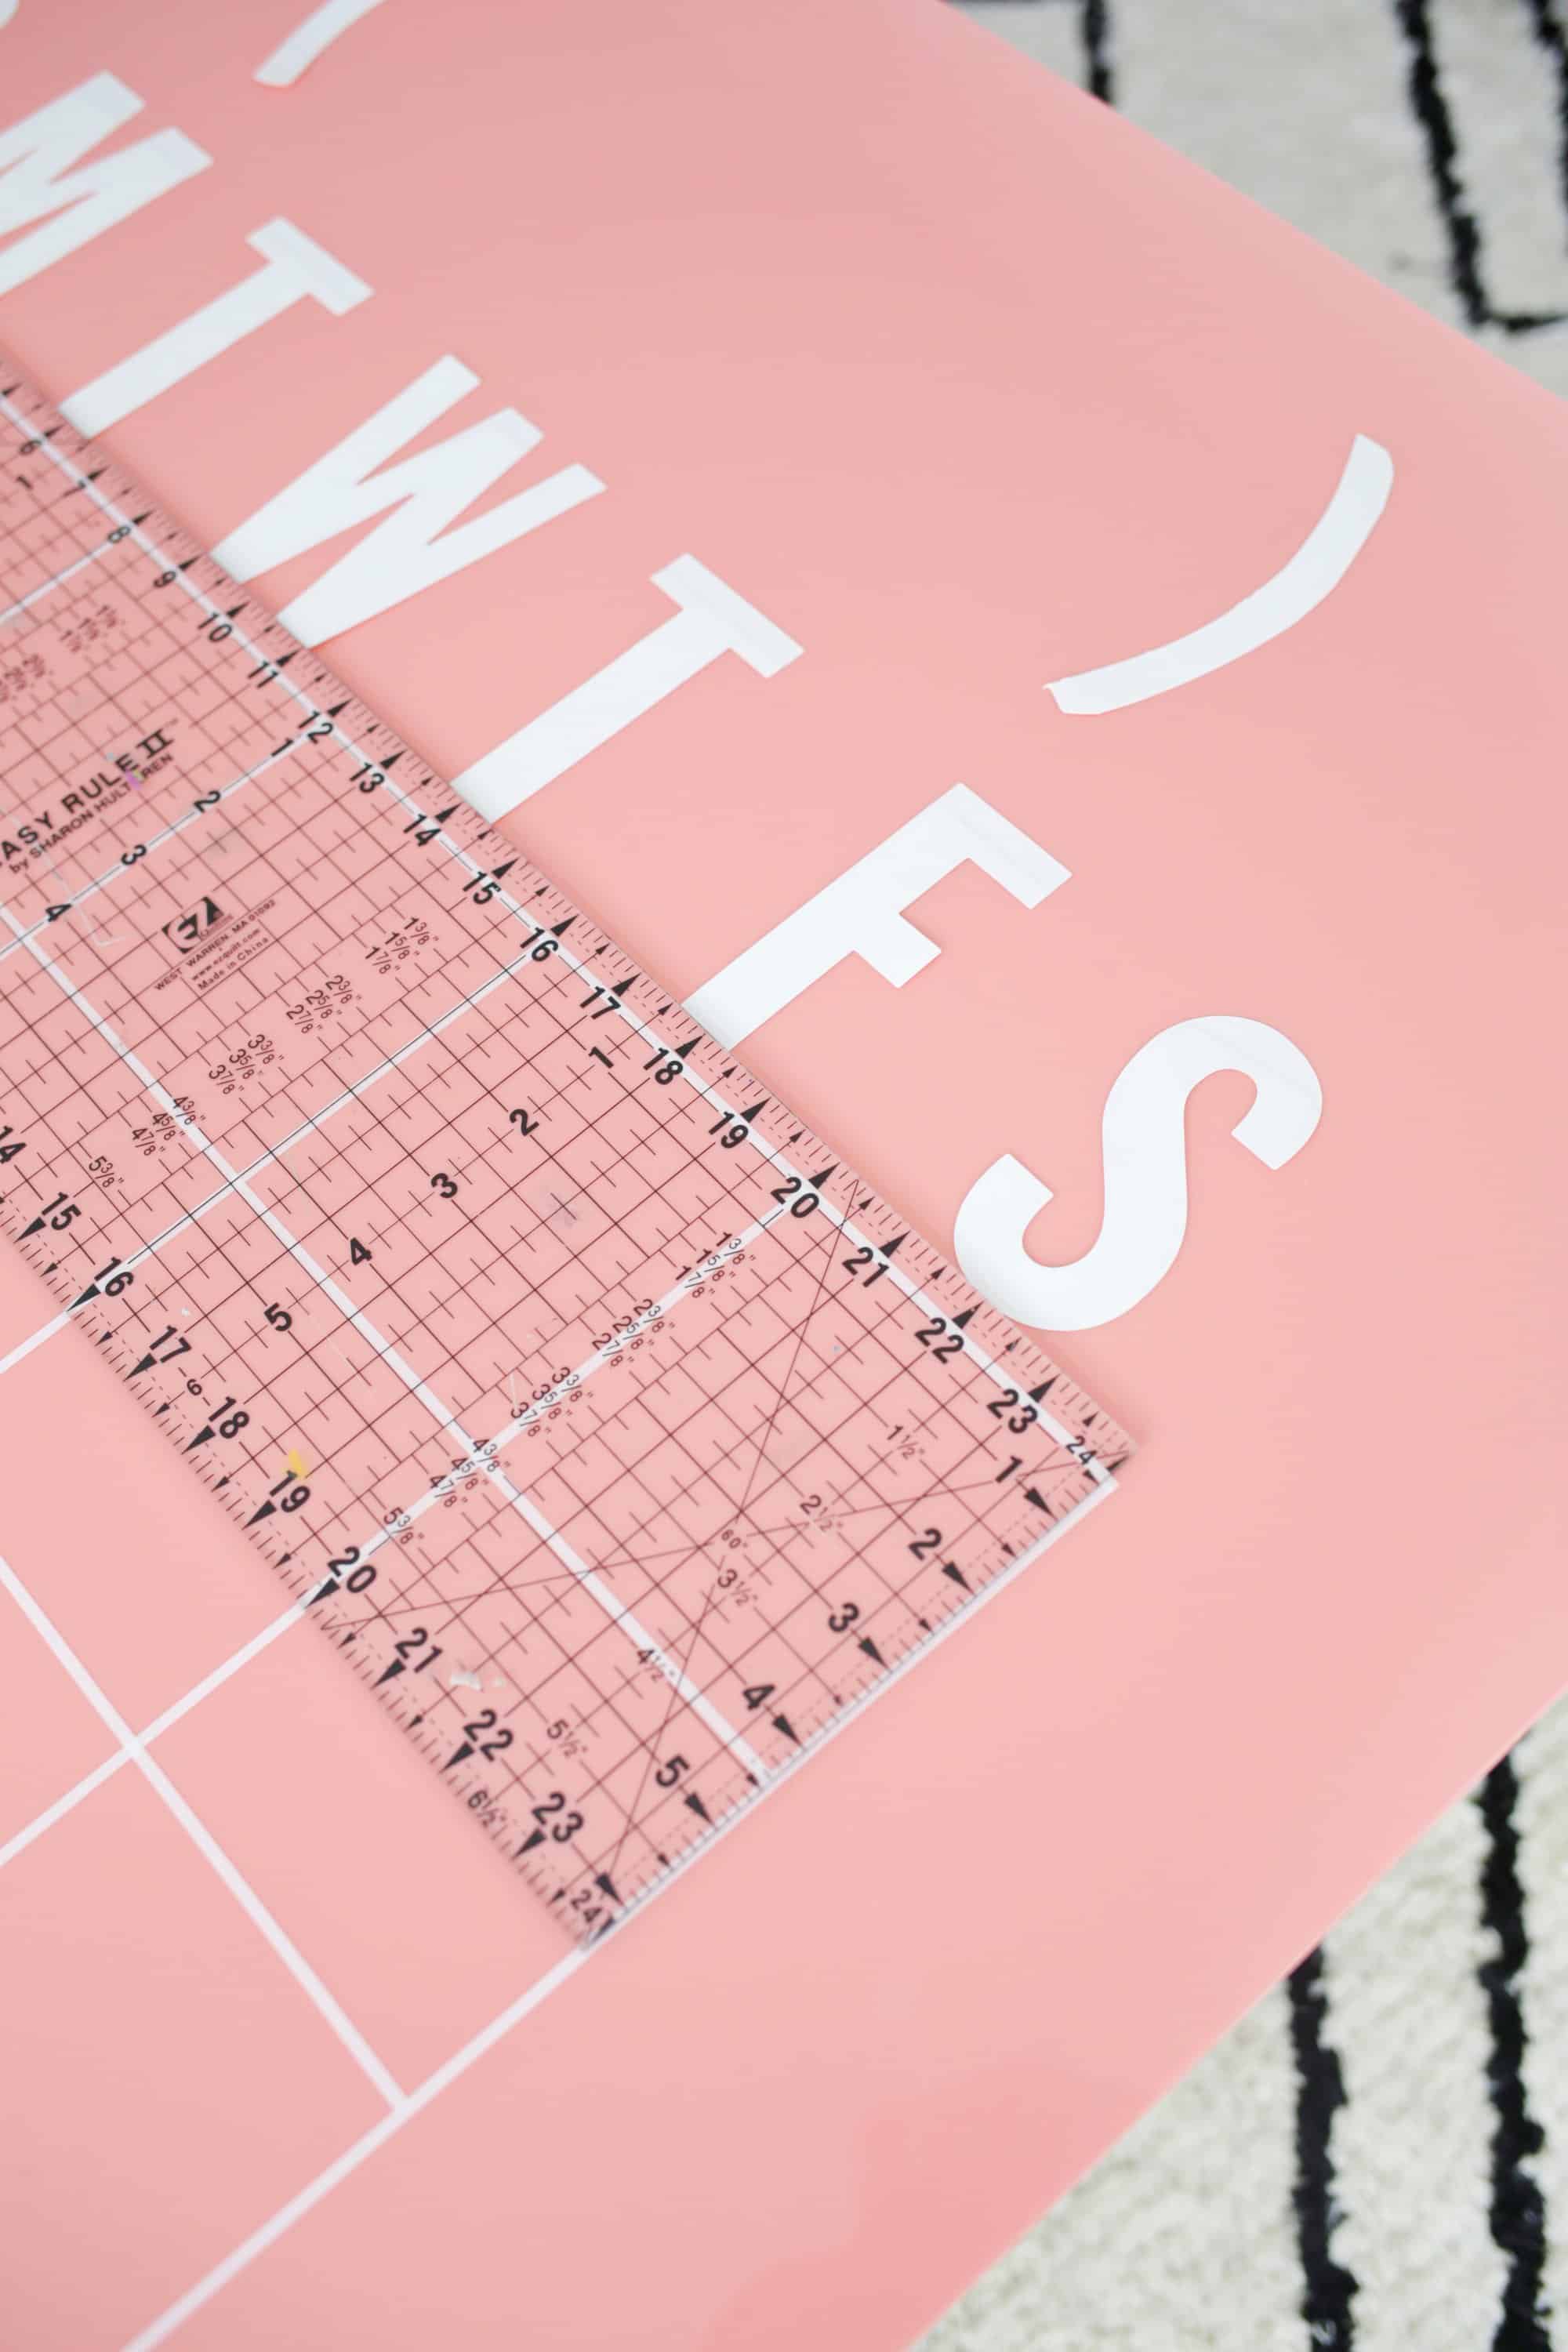
I used acrylic rulers so I could easily see where the middle of each square was (and keep the bottom of all my letters at the same 1/2″ height from the grid line) for placing my letters above the grid.
PRO TIP! For projects like this, I like to peel off the backing of the sticker on just a small section of the letter, place it and adjust as needed, and then push down on the part that doesn’t have the backing to tack it down in place. Then I peel off the rest of the backing (while that one part remains stuck) and then smooth it all out. It’s way easier than taking off all the backing and trying to place it perfectly and smoothly on the first try!
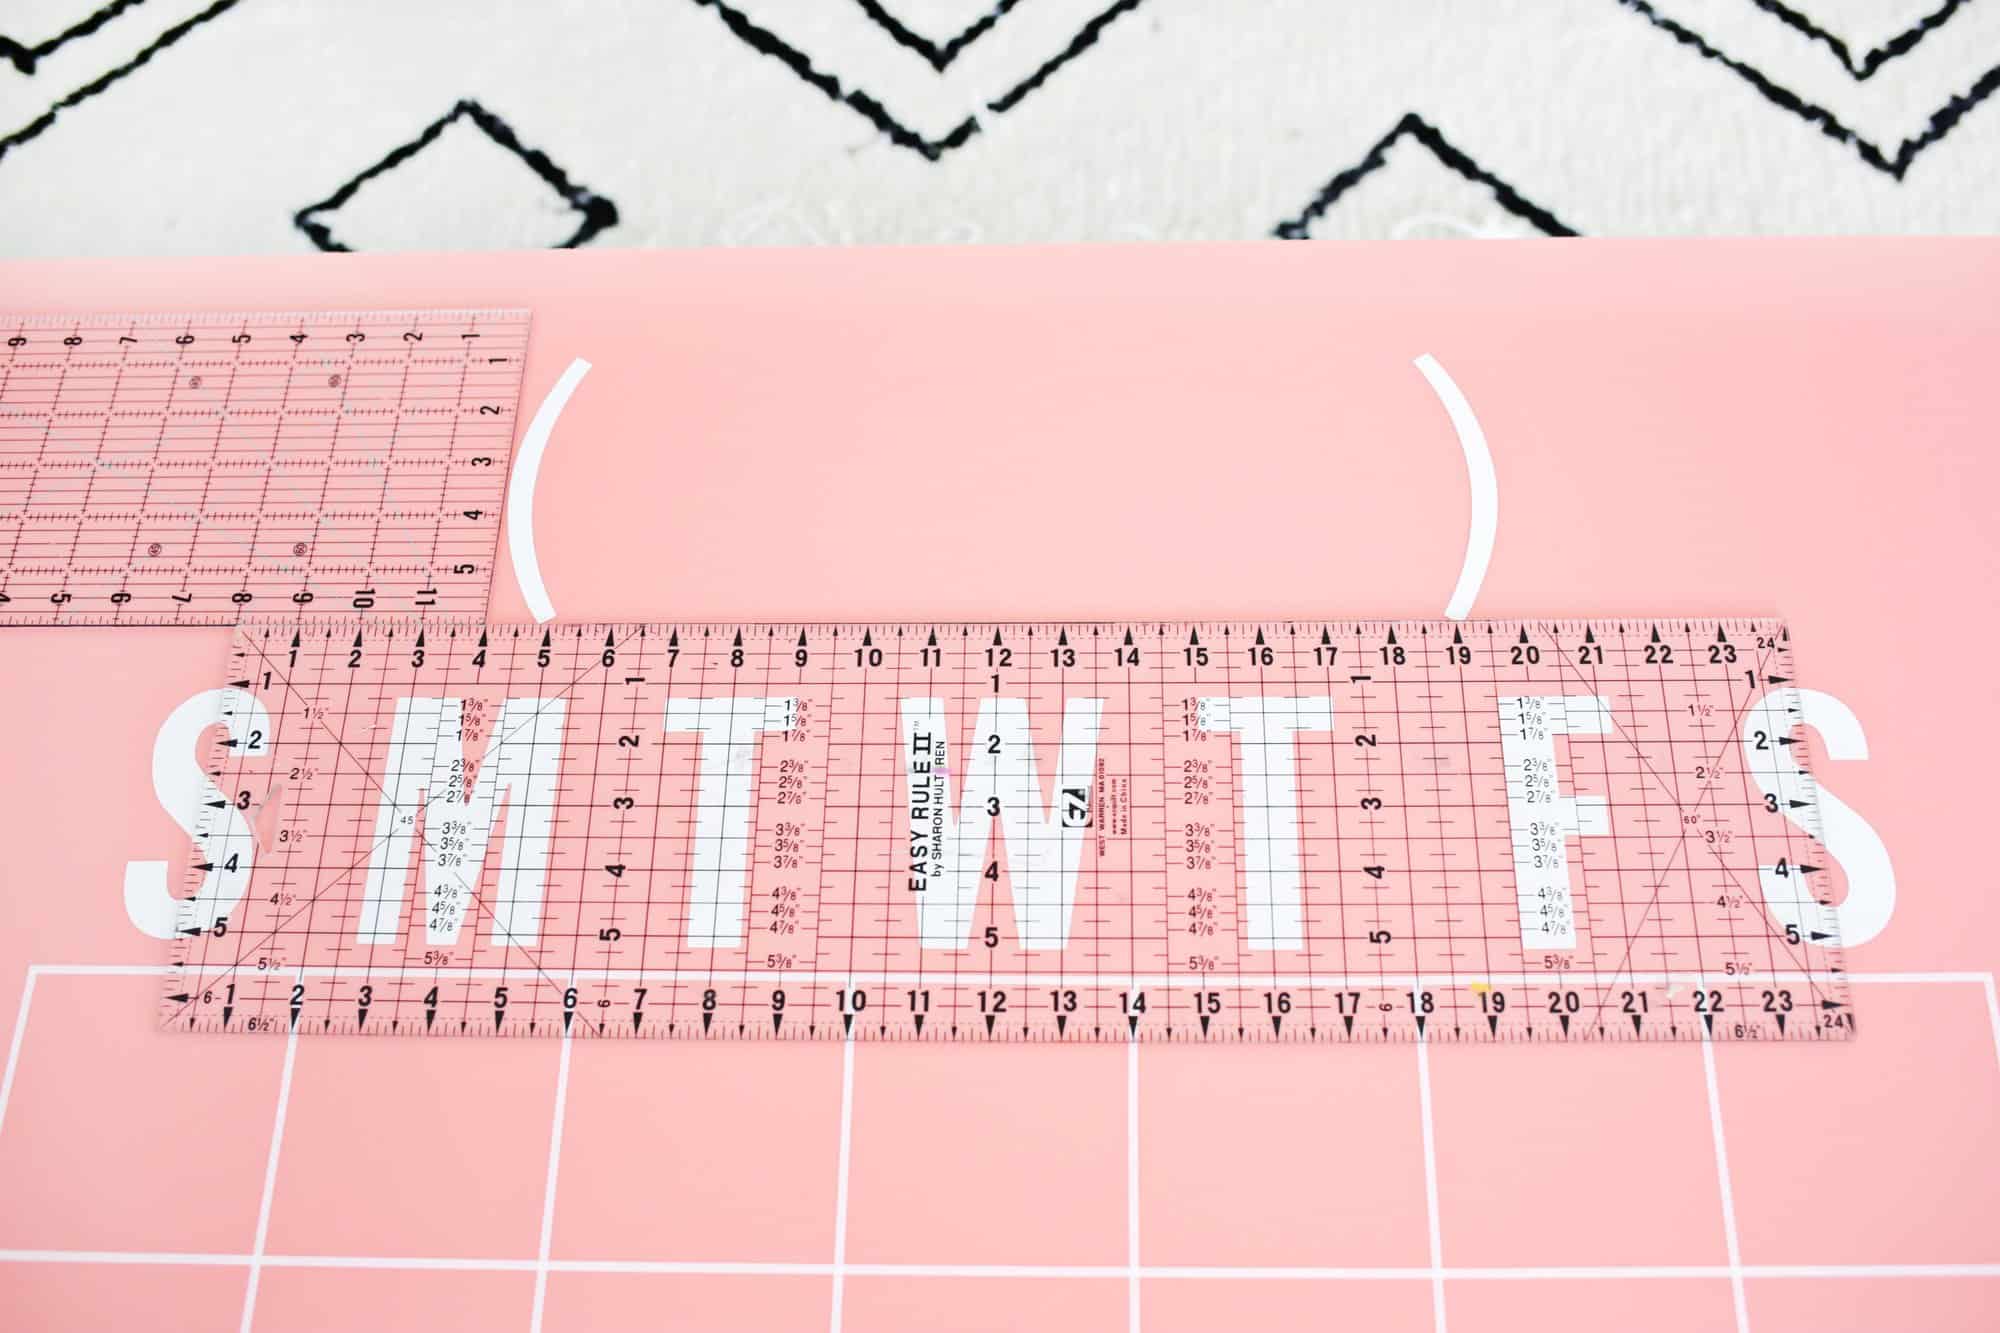 Once all the letters were in place, I centered my parentheses about 1 1/4″ from the top of the letters (and about 14″ apart) and did the same trick with peeling off part of the backing to stick them in place.
Once my month spot was set, the calendar was ready to hang!
 I painted the wall hardware gold and drilled 4 holes to hang the calendar. Some people recommend drilling backwards into acrylic while pushing down with the drill to drill a hole more slowly and avoid any cracking, but I’ve done that and the regular forwards way and haven’t noticed much difference. But try the backwards method if you are worried about it.
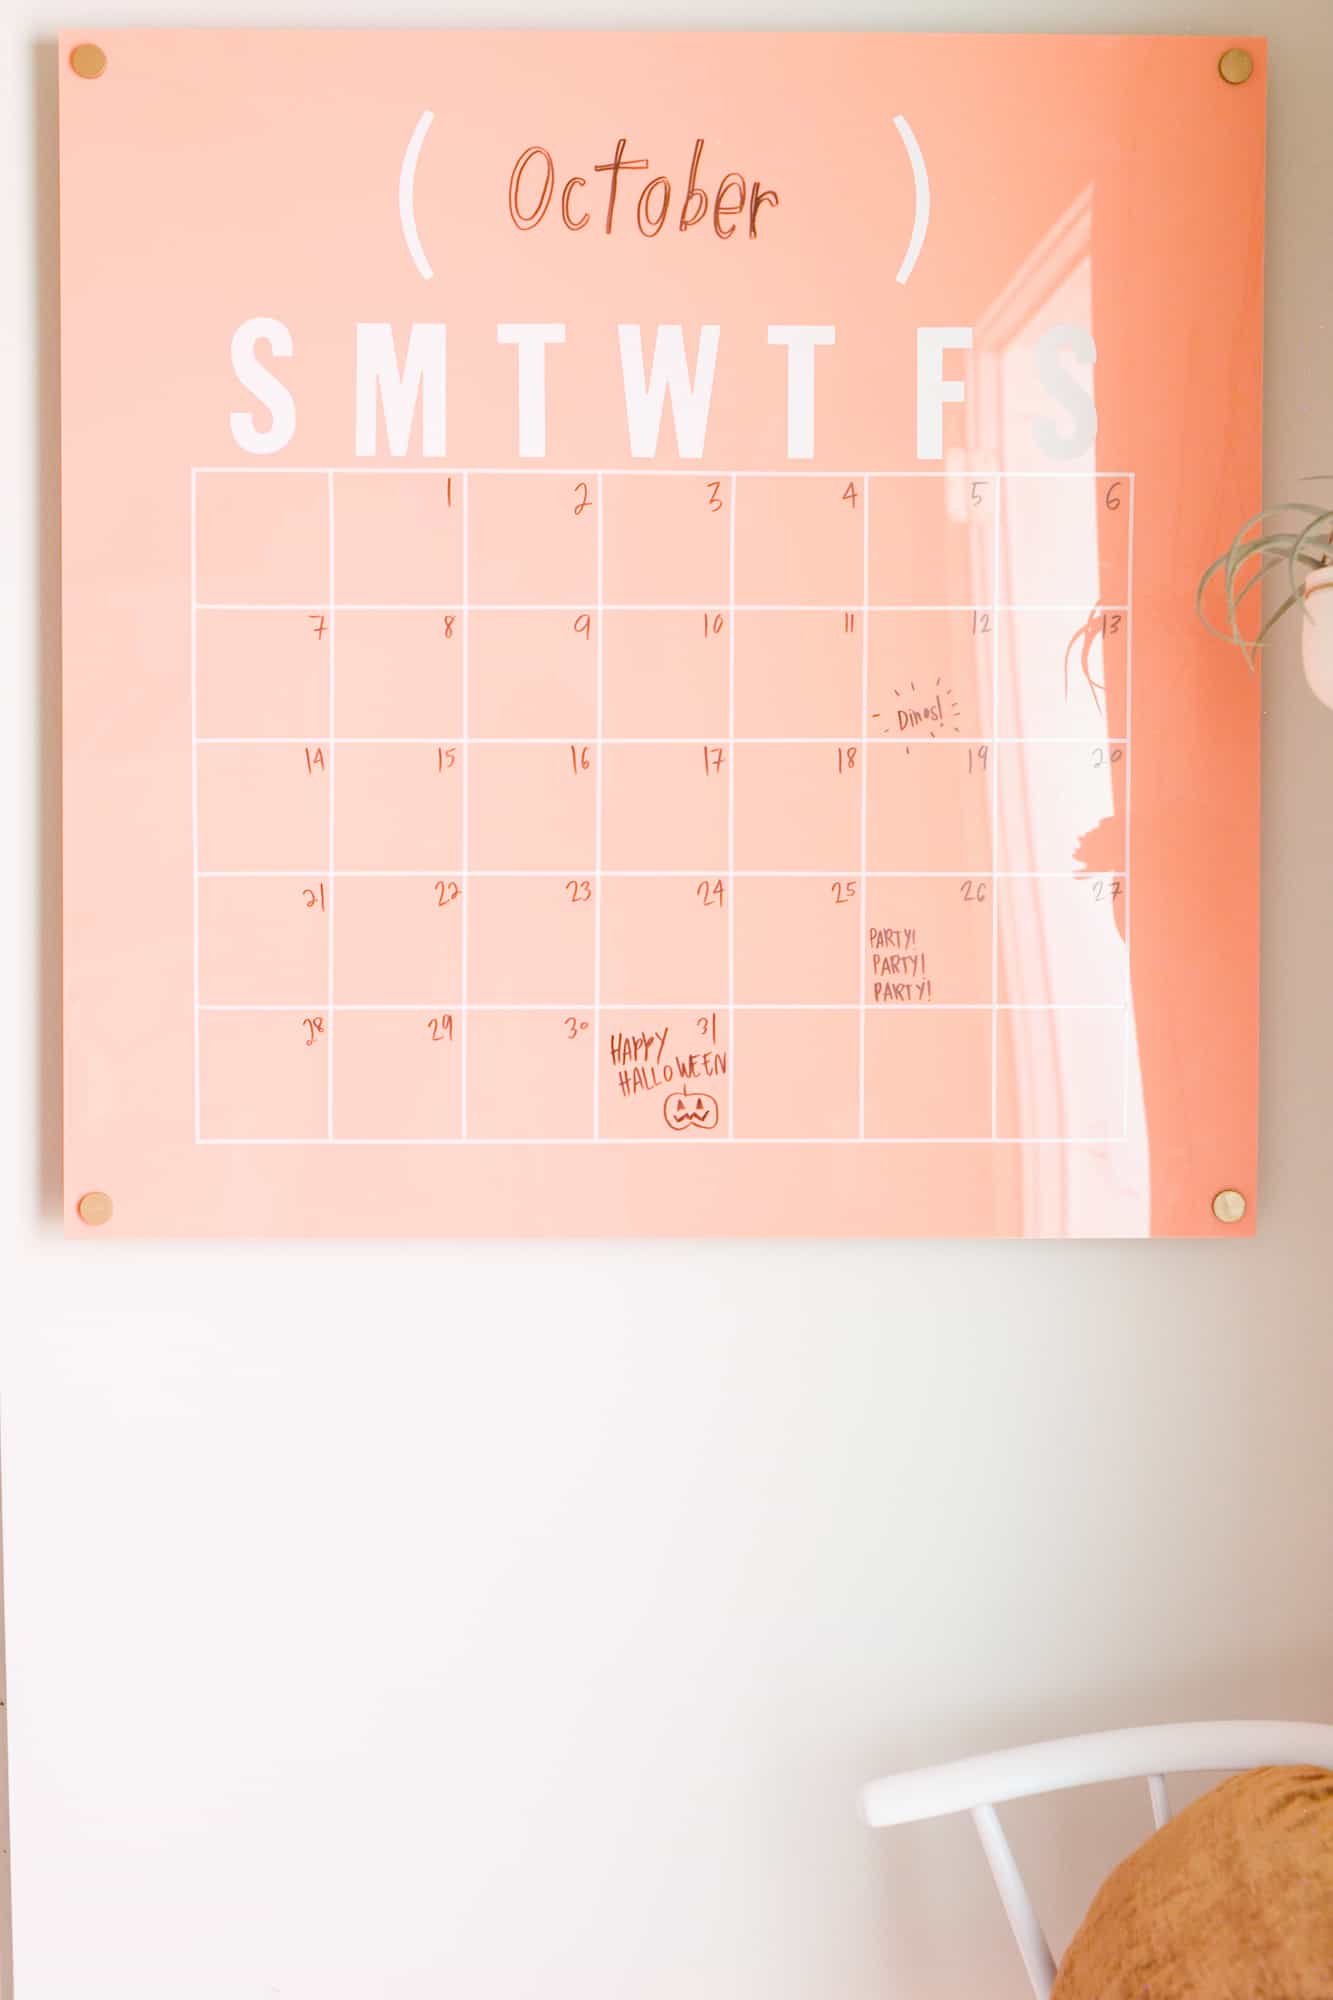
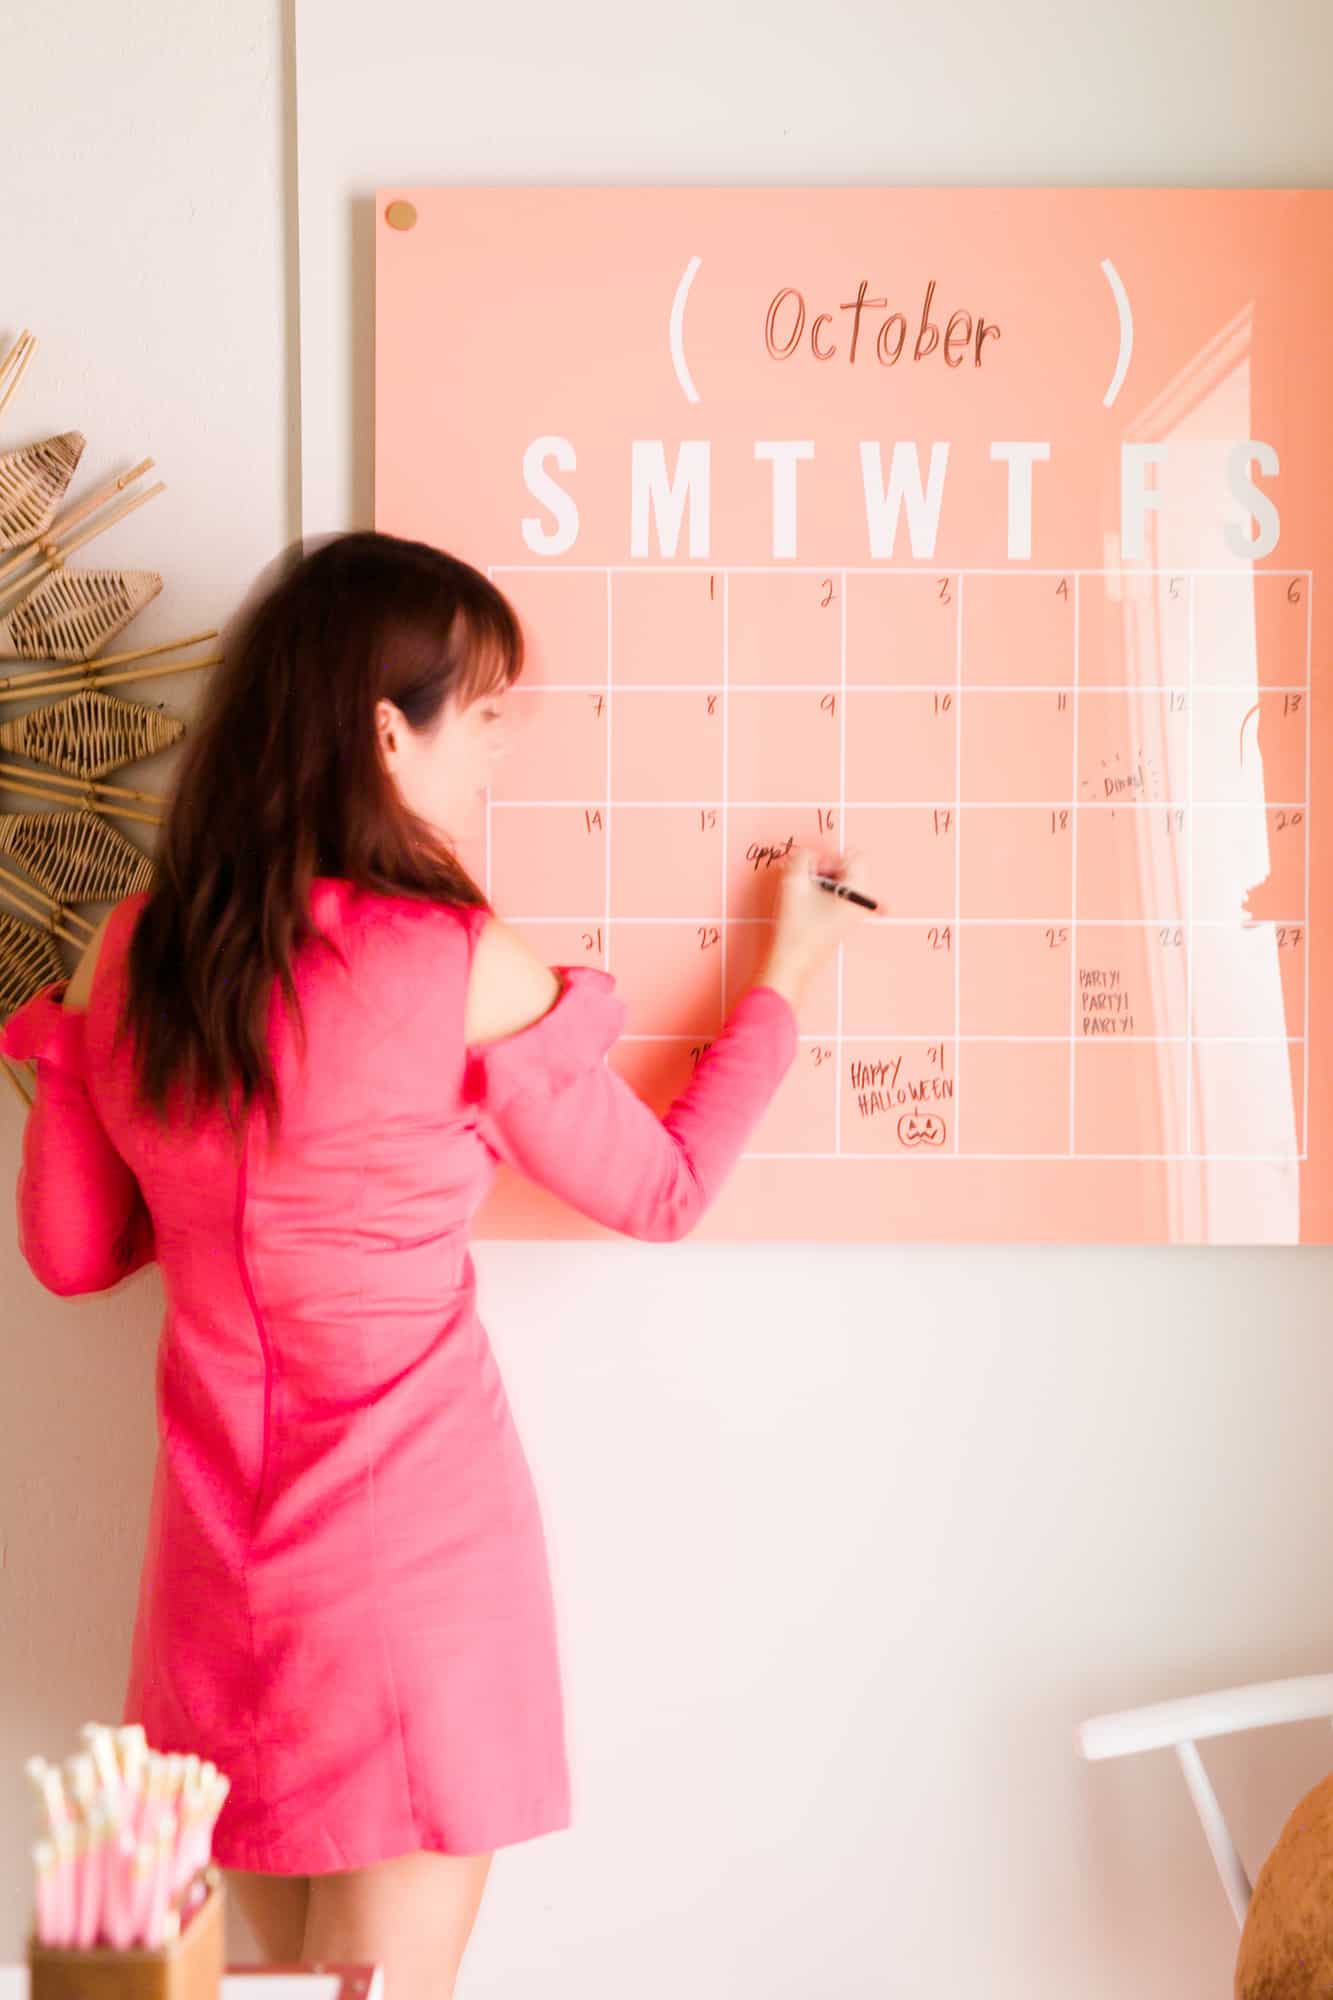
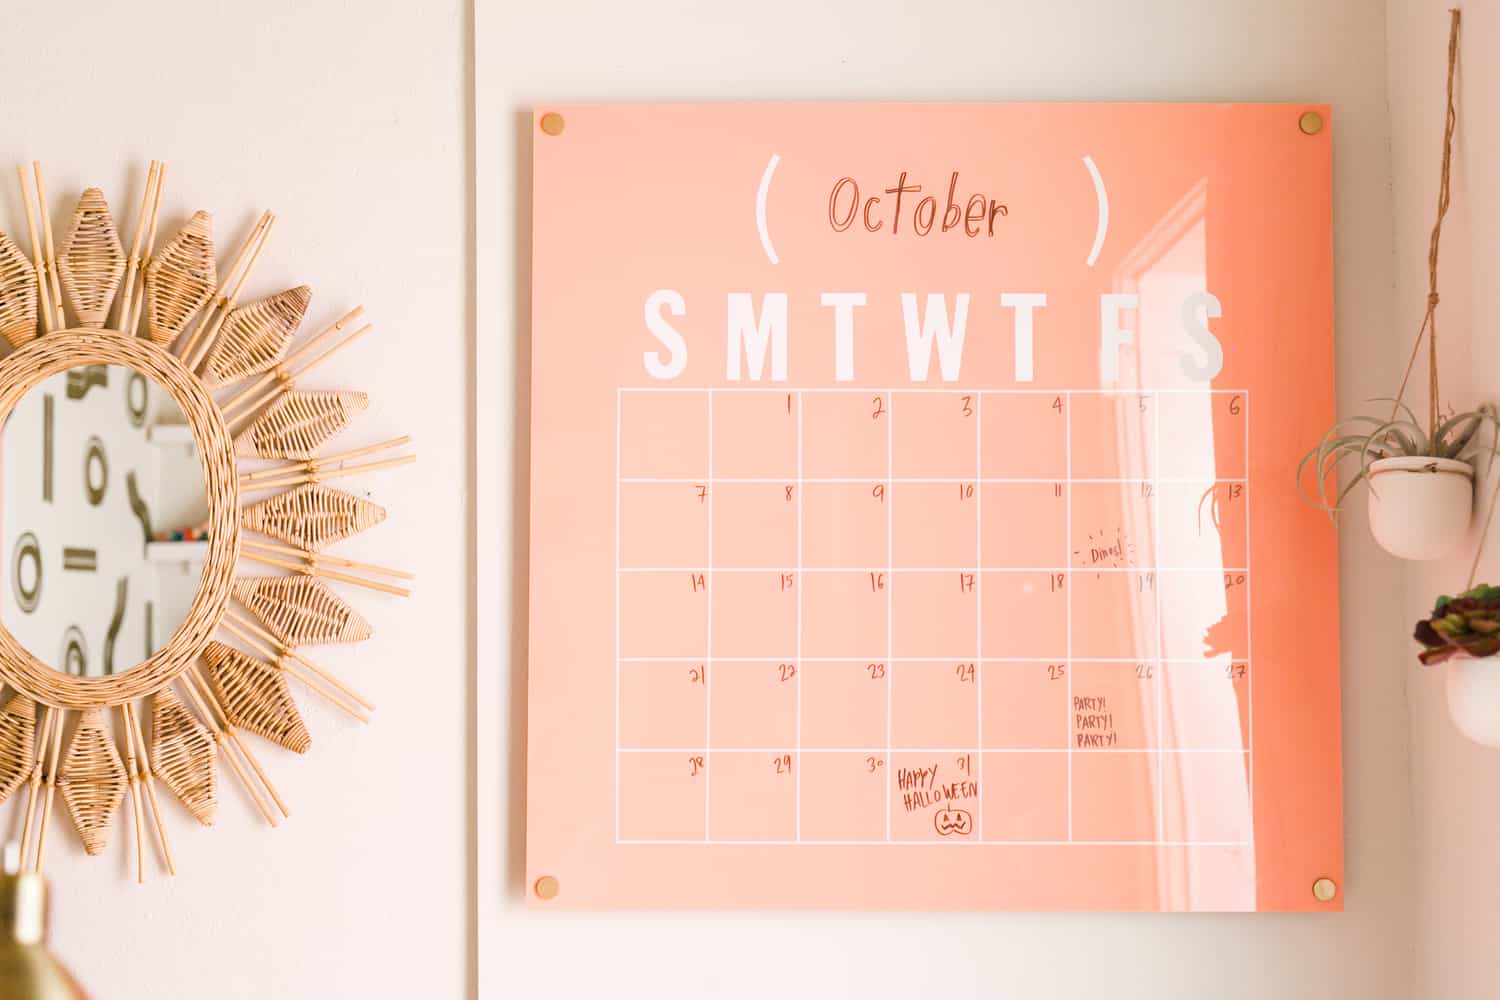 I love the simplicity of the calendar with the clean look of the tape and stickers, but the pop of color from the acrylic really makes it feel special. This looks so good in Allison’s office and now she can have a space to plan out her month and organize all the things a busy boss babe needs to attend to. If you’ve got a need for a chic calendar to organize your month, I hope this can help plan out your life too! xo. Laura
Credits//Author: Laura Gummerman. Photography: Laura Gummerman and Elsie Larson. Photos edited with A Color Story Desktop.
]]> Over the last few months, I have been working on a pretty epic accent wall in my home office space. I’ve been sharing little peeks and progress on our Instagram account, so many have seen this faux living wall coming to life (pun!).
I completed it about a month ago and am finally ready to share the finished project with you.
I’m going to show a little office tour soon but I wanted to also share how I made this DIY faux living wall in case anyone out there wants to add something similar (maybe a bit smaller though? this one is quite large) to their home or office.
I actually think this would be really pretty in a retail space as well. I also think this project is great for any of you aspiring plant ladies out there who tend to kill more plants than you care to admit.
(Raises hand sheepishly.)

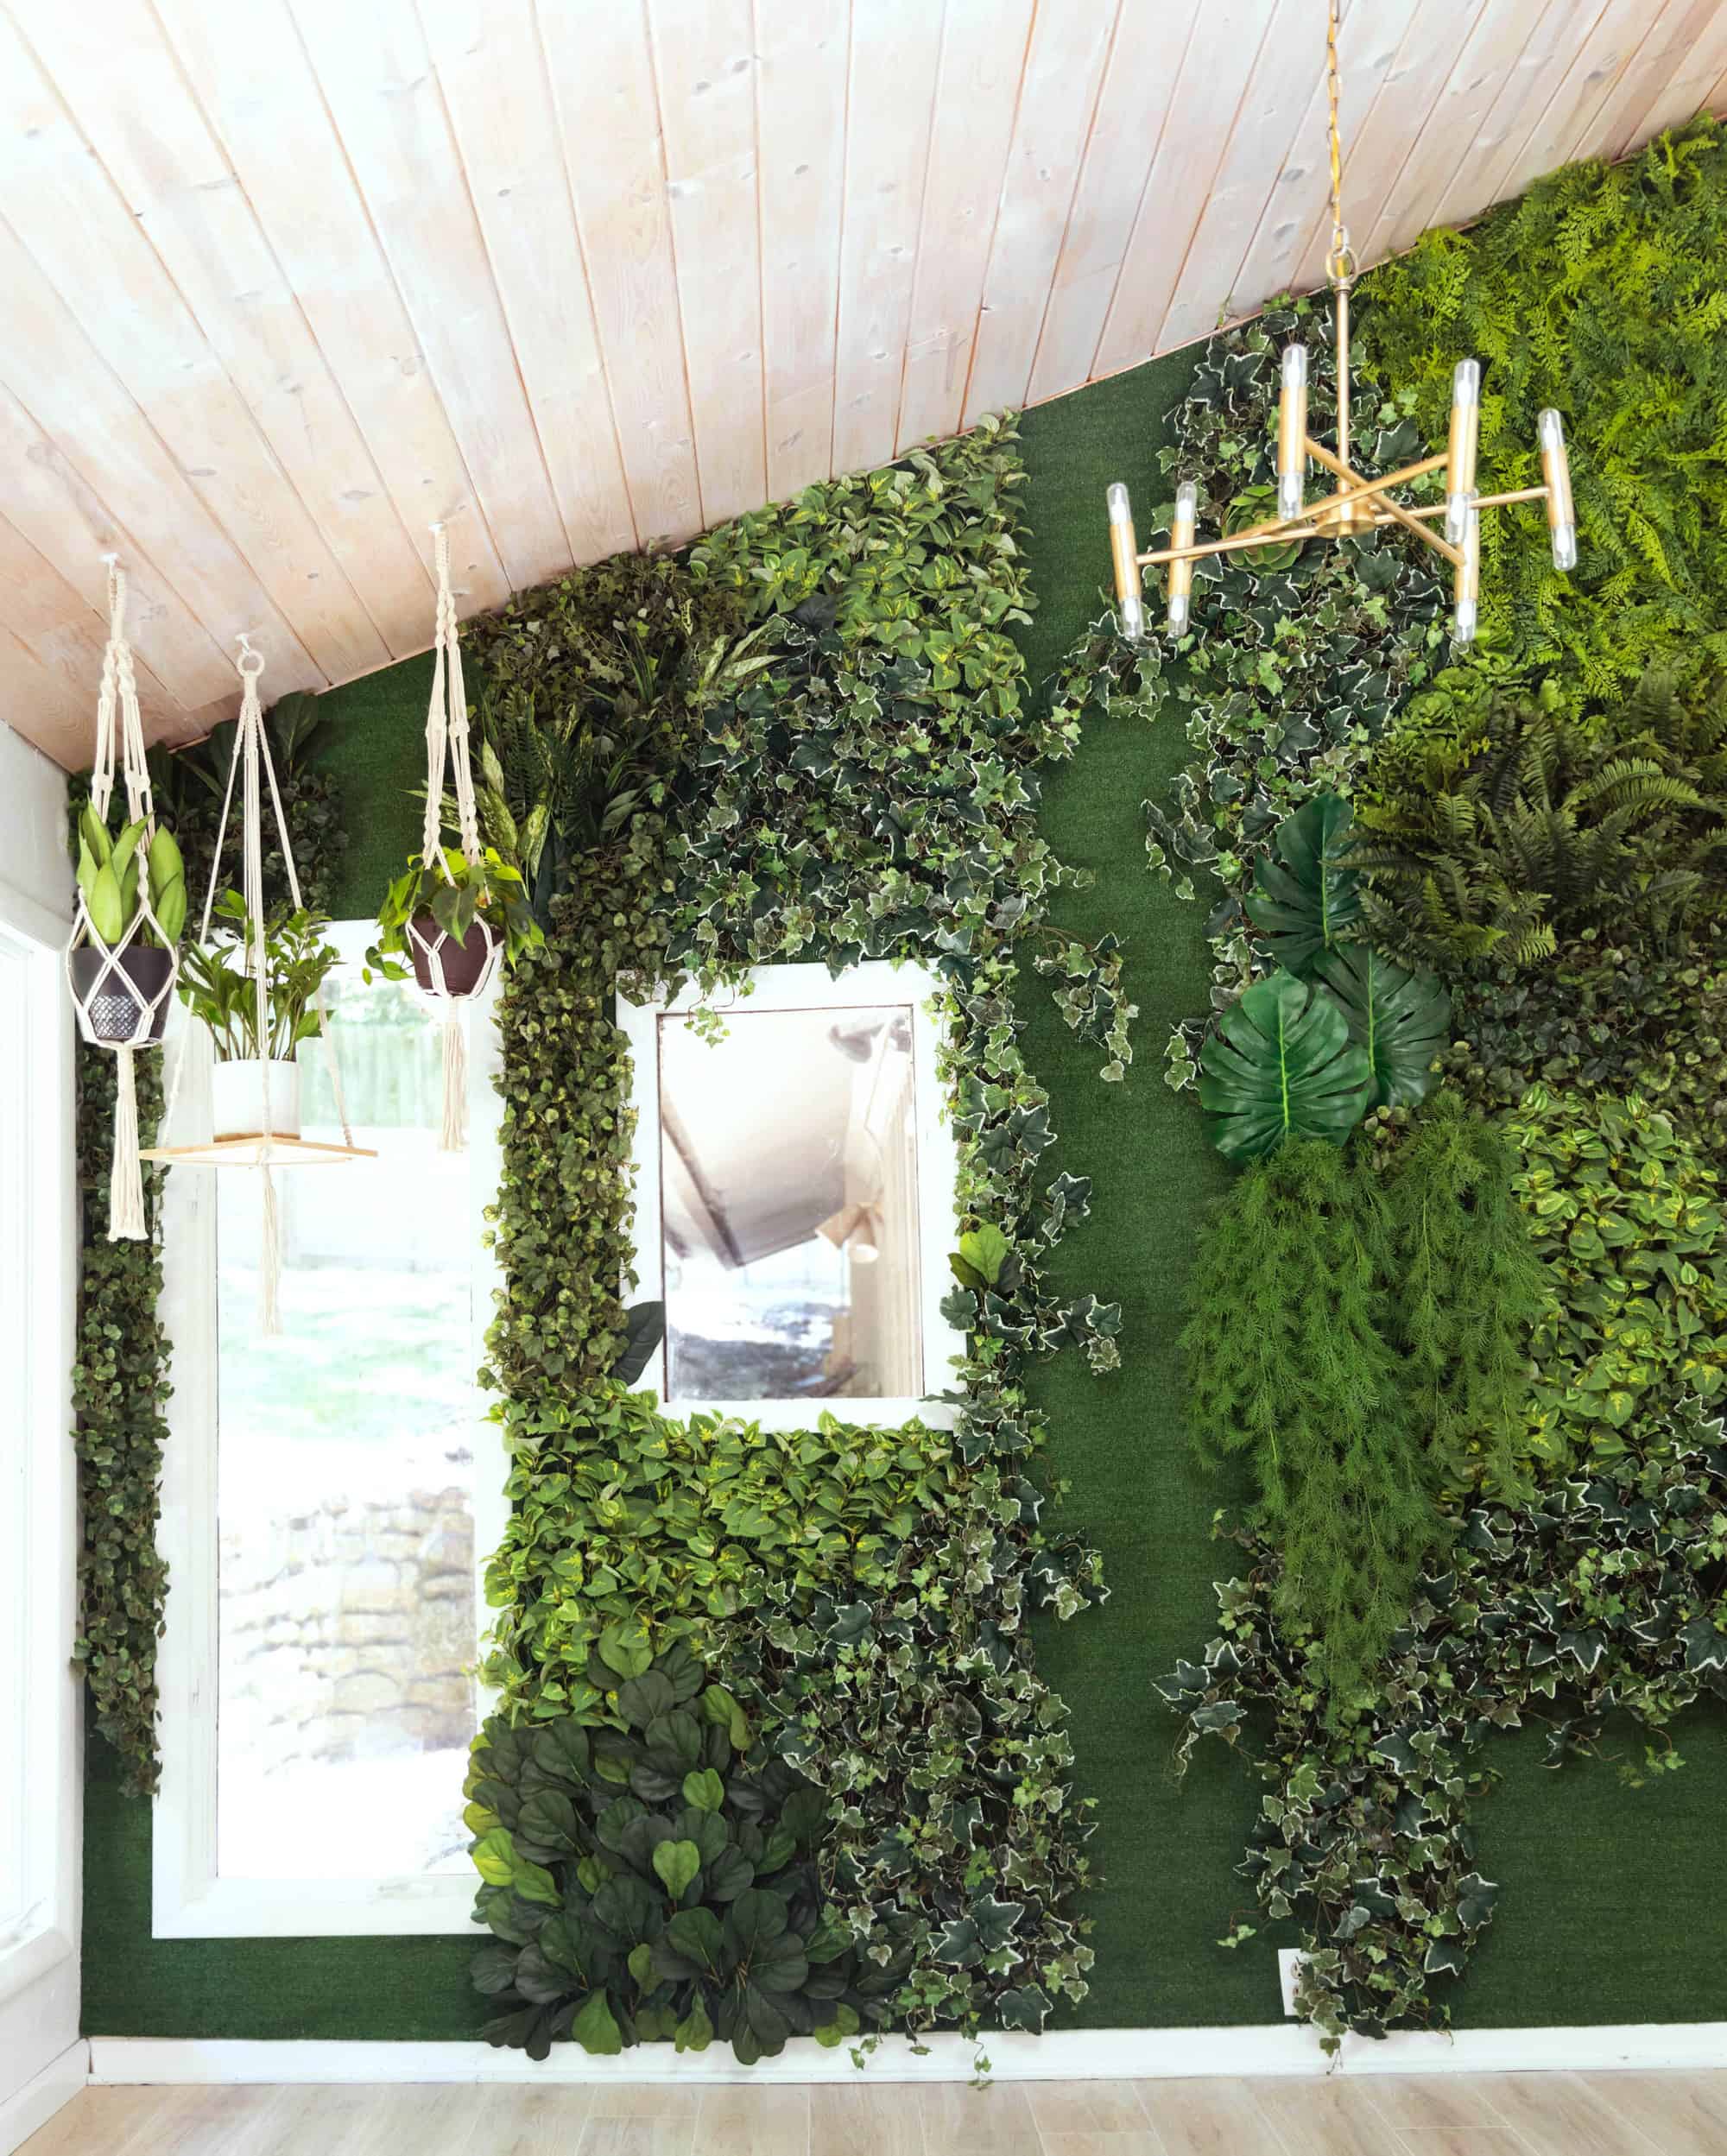 I’m just going to share how I made my wall, but there are definitely some things you may need to modify if you make this in your space.
The two big factors that I think could make a difference is what material your wall is made of (I had drywall in my home, but if you had concrete or brick that would change things) and also how big the wall is that you want to cover. But here’s what I used and did for my DIY faux living wall.
Supplies:
–astroturf
-3/8 x 2 project (pine) board, enough to outline the top and bottom of the wall
-wall anchors or long drywall screws (depending if you have studs in the wall or not)
–hex netting (in the outdoor section, often used for chicken fences)
-power drill
-box cutter
-wire cutter
-staple gun + staples
–faux plants*
-dark green or black pipe cleaners
*The amount of faux plants I would need for this was easily the thing that I had no idea about. It’s not exactly something you can easily measure. I knew the square footage of my wall, of course, but not how much coverage I would get from various faux leaves, vines, and other faux plants.
So what I did was buy a LOT when they were on sale and I made sure the return policy would allow me to return any that I didn’t use. I bought all of my faux plants from Michael’s during a Memorial Day sale and I was able to use another coupon I had received in the mail.
I bought about $800 worth of faux plants, even with the sale and coupons. (I know, crazy!) I ended up returning a little over $300 worth after I had finished this wall.
The other supplies (not including tools) cost $120. So in the end, this entire wall cost around $620 to complete. In case you’re curious my wall is about 90 square feet, although it’s a bit tricky to calculate exactly as it has a substantial slant and two windows.
But hopefully this gives you an idea. I do think you could probably find even better deals on faux plants to decrease the cost. It’s not the cheapest project I’ve ever done, so I did want to warn you.  For me, it was totally worth it though because I LOVE how it turned out!
But if the price tag scares you, I’d consider maybe making a headboard or doing a much smaller wall instead.
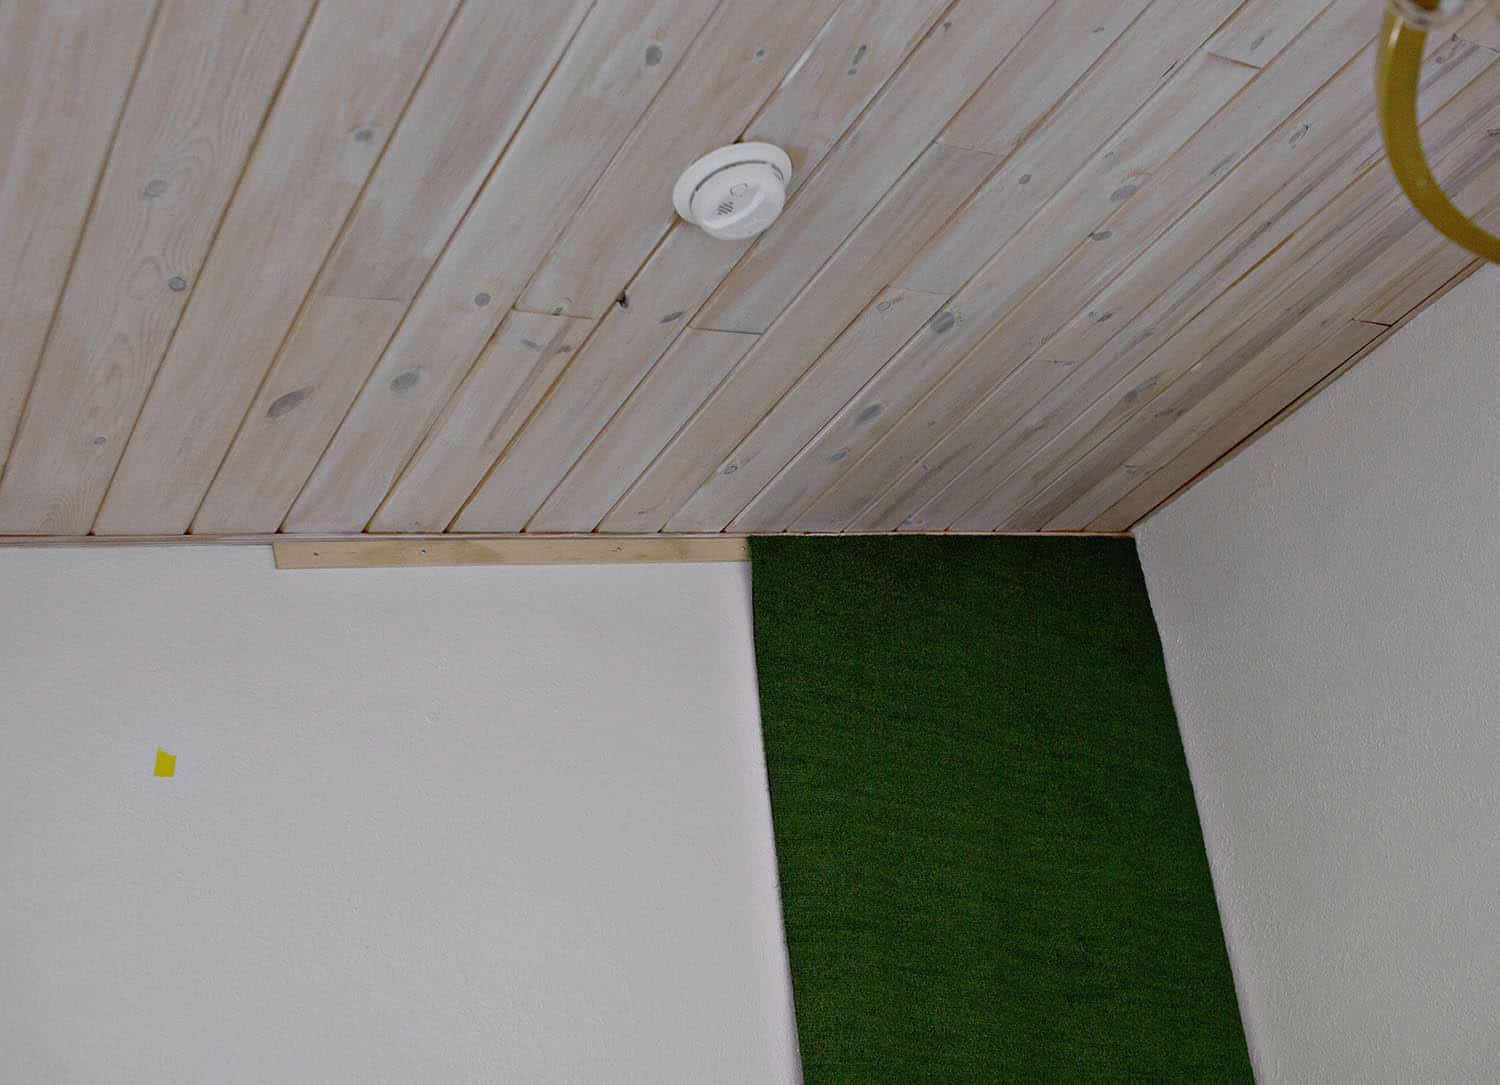 Step One: Line the wall with the project board. Basically the goal here is to create a trim on the top and bottom of your wall that the Astroturf and netting can be hung on.
You could hang it directly into the wall but my thinking was this would add a little more strength and would be easier to remove later (I plan to keep this wall for a long time, but I know myself well enough to know I won’t keep it forever).
Use wall anchors or drywall screws as needed, but do keep in mind that a good amount of weight will be supported by this by the time you hang all the faux plants.
Step Two: Hang the Astroturf. We simply hung up the Astroturf in long pieces and stapled to the wood trim we had installed (using a staple gun).
Then we cut out the windows, one spot for an outlet, and large slits around a wall vent. If your wall doesn’t have any windows, outlets or vents, then you won’t have to mess with that as much.
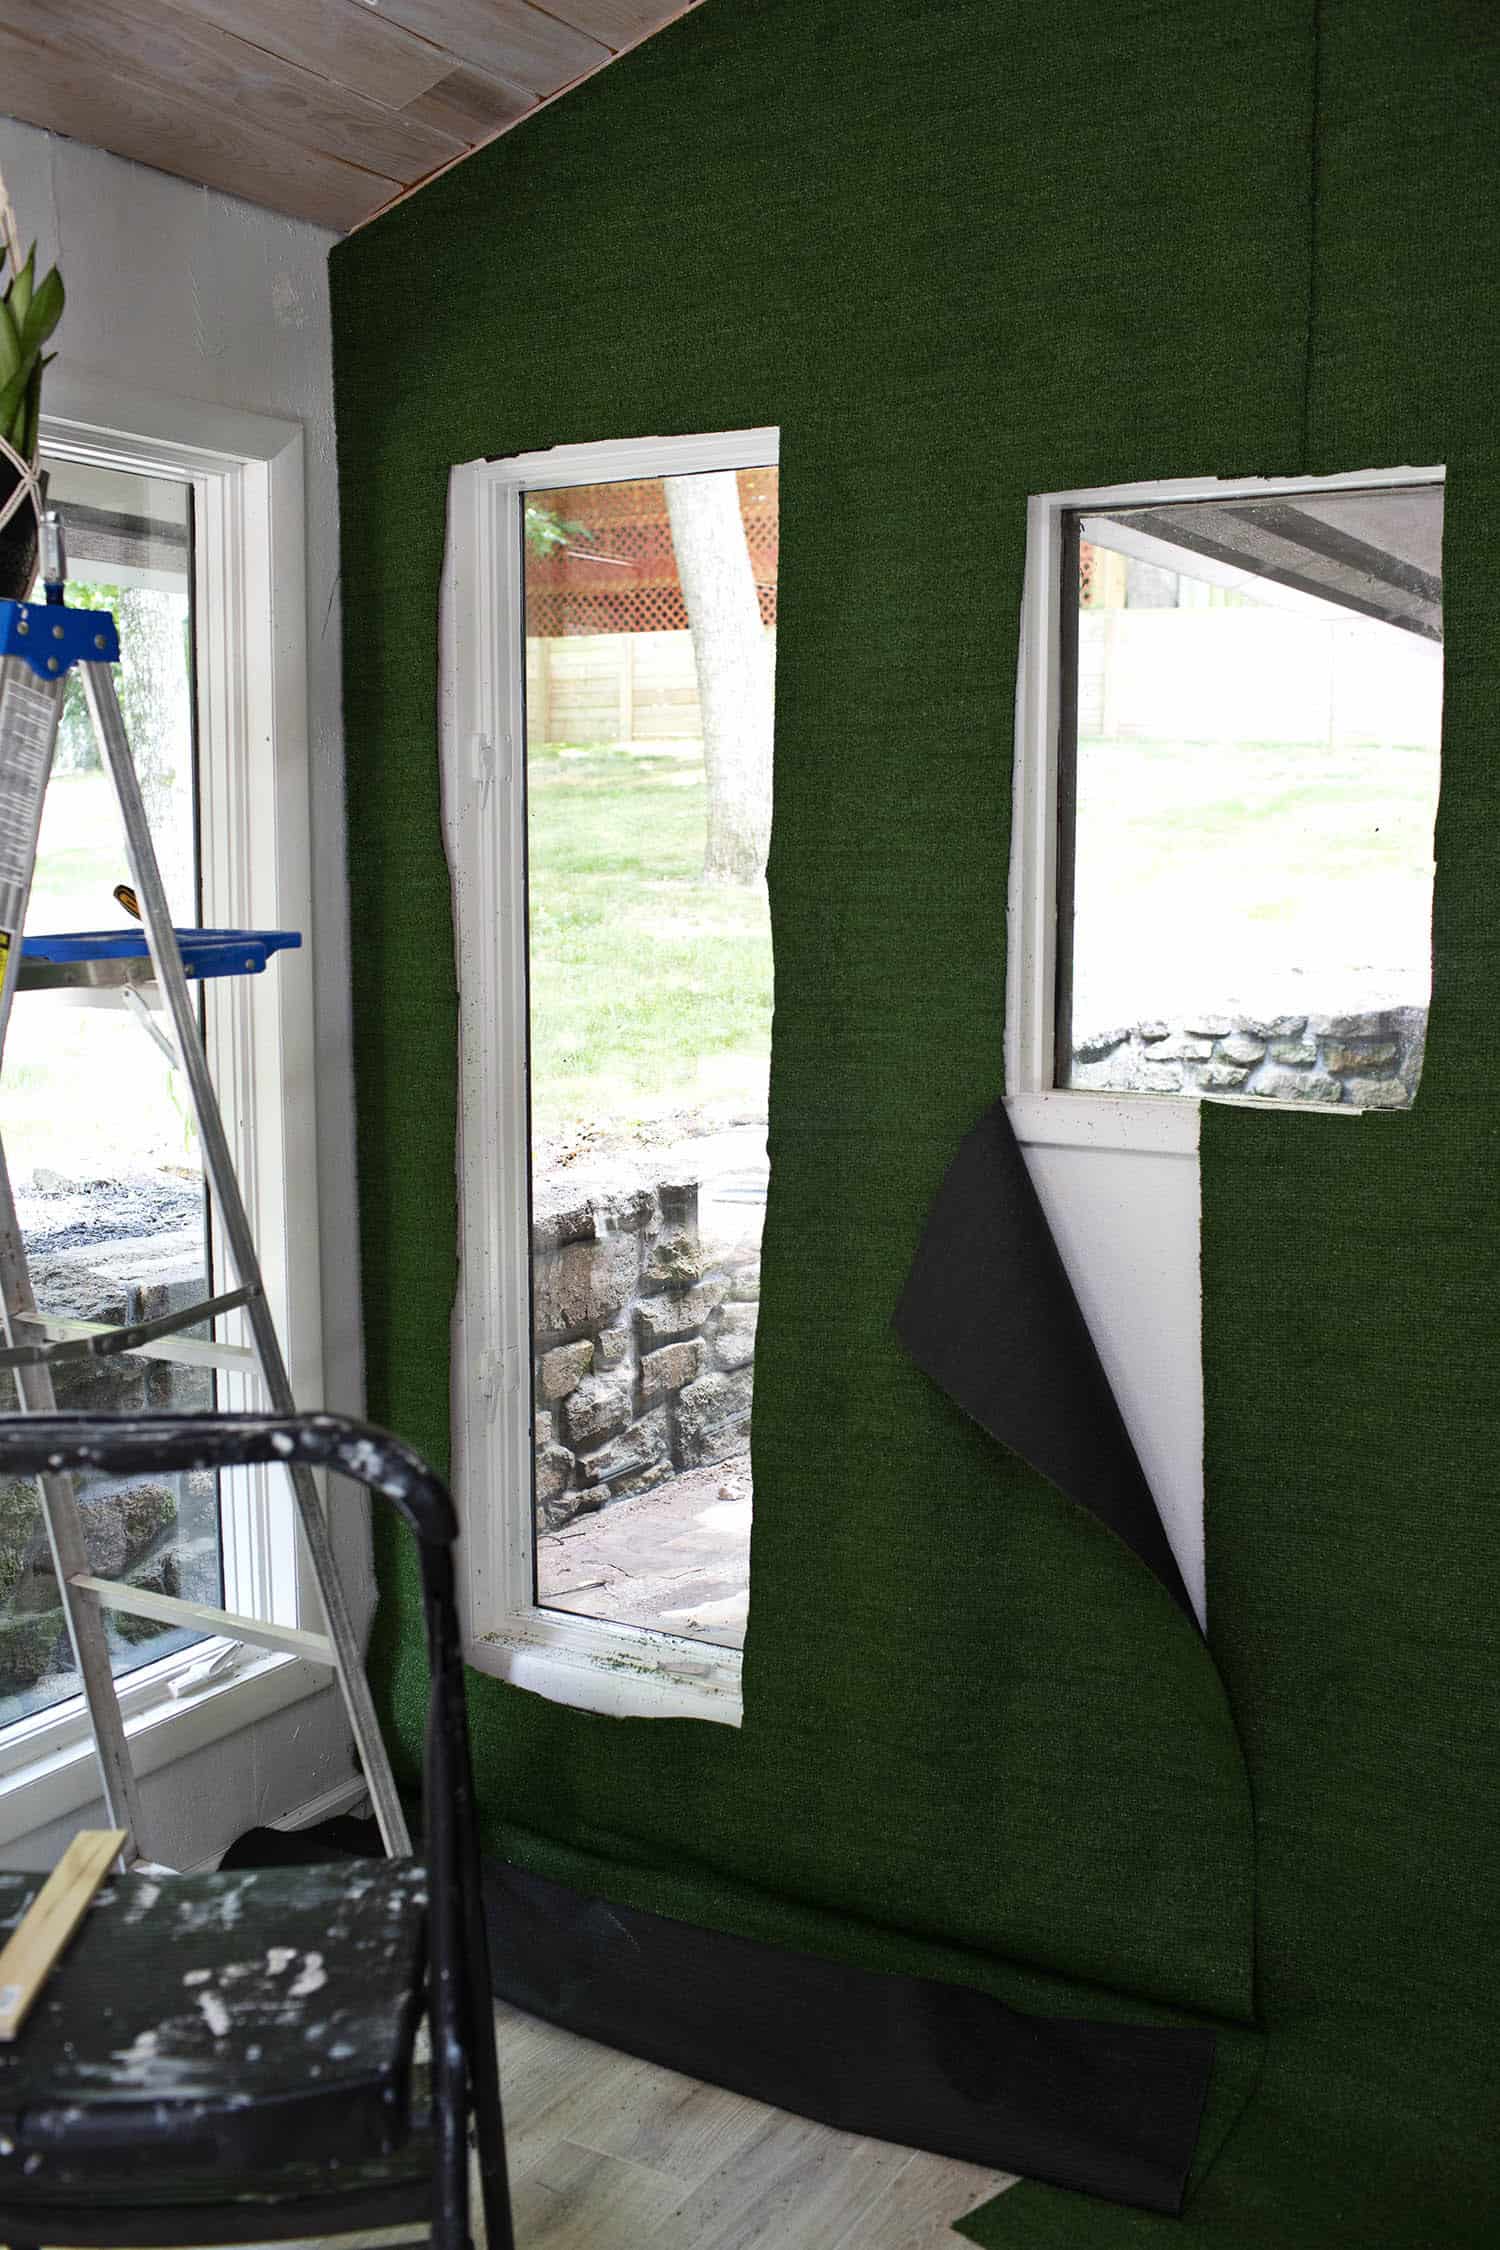
Here you can see how we also waited to staple the bottom edge to the wood trim until after we had cut out the necessary spots.
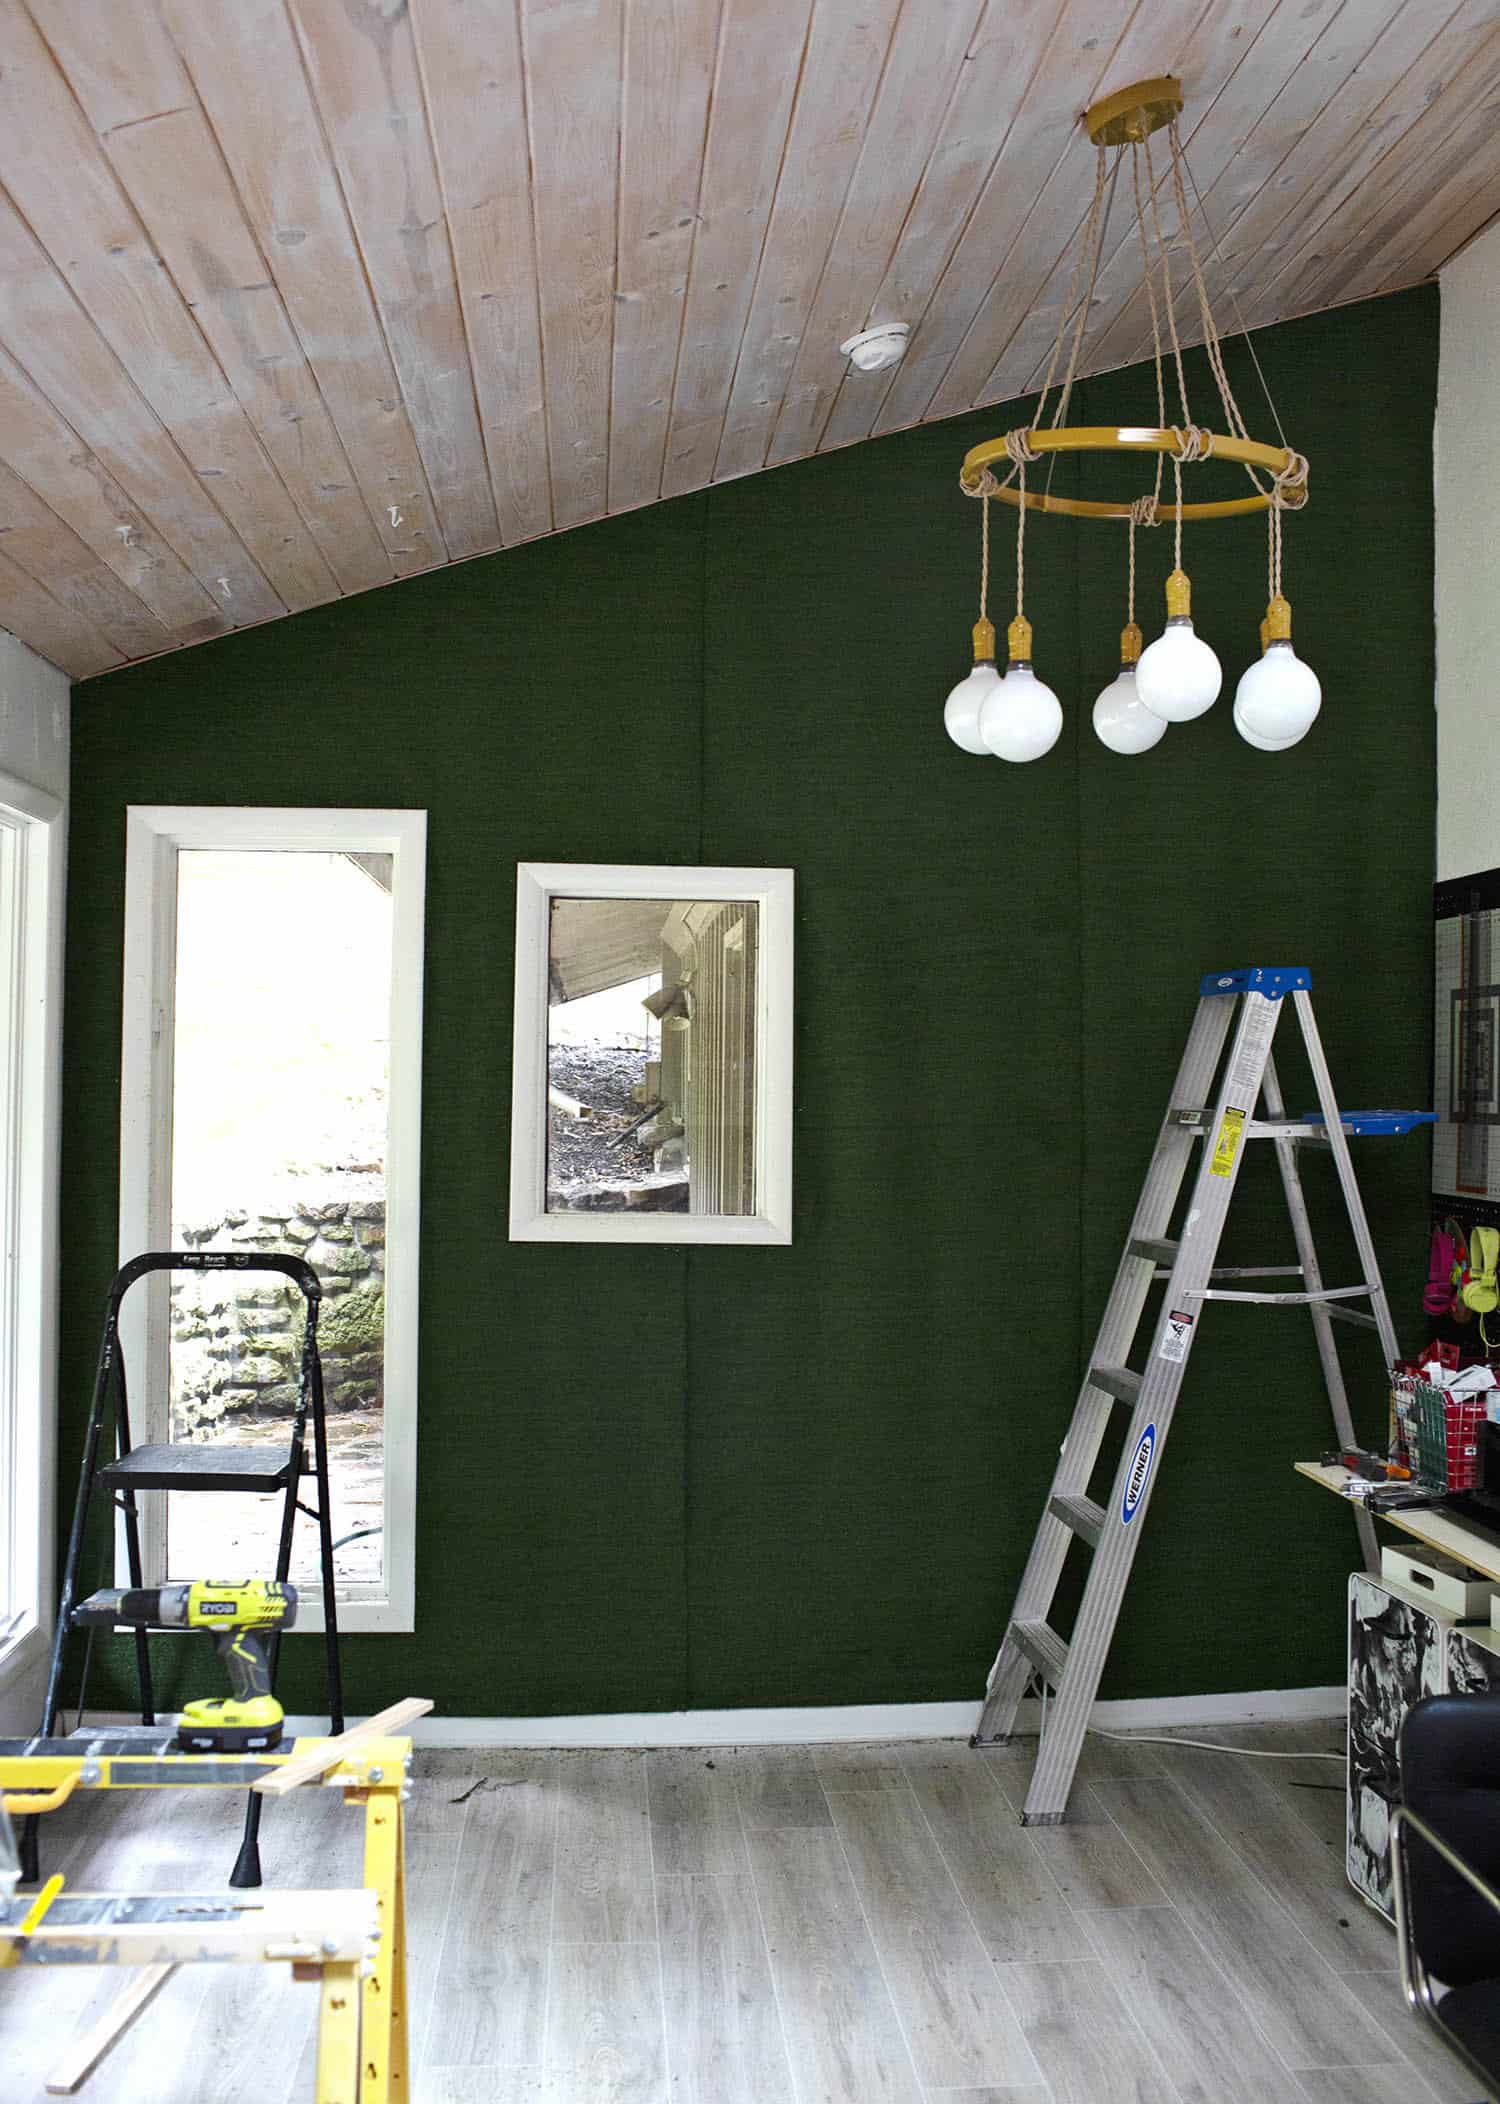 Step Three: Add the netting. This we hung in strips over the Astroturf in the areas I knew I wanted to add plants, like over the seams. We stapled the netting to the top and bottom trim again, just like the turf.
Step Four: Add the faux plants to the netting. Many of the plants you can simply tuck or hook into the netting, but if it’s heavier or just wants to sag or pull away from the wall, cut a small amount of pipe cleaner and use that to tie the plant to the netting.
Take care to make sure your pipe cleaner is hidden, so the overall impression is that it’s a REAL living wall. I also tried using green floral wire for this step but ended up preferring the pipe cleaners because they worked just as well, but were easier to use and softer on my hands.
I have a hunch they will also be easier to remove one day when the time comes.

Hanging all the faux plants was the step that easily took the longest. I probably spent about 10 hours total hanging all the plants. It’s pretty fun though! Like a giant floral (or plant) arranging project. Plus, I was listening to an audiobook the whole time, too.
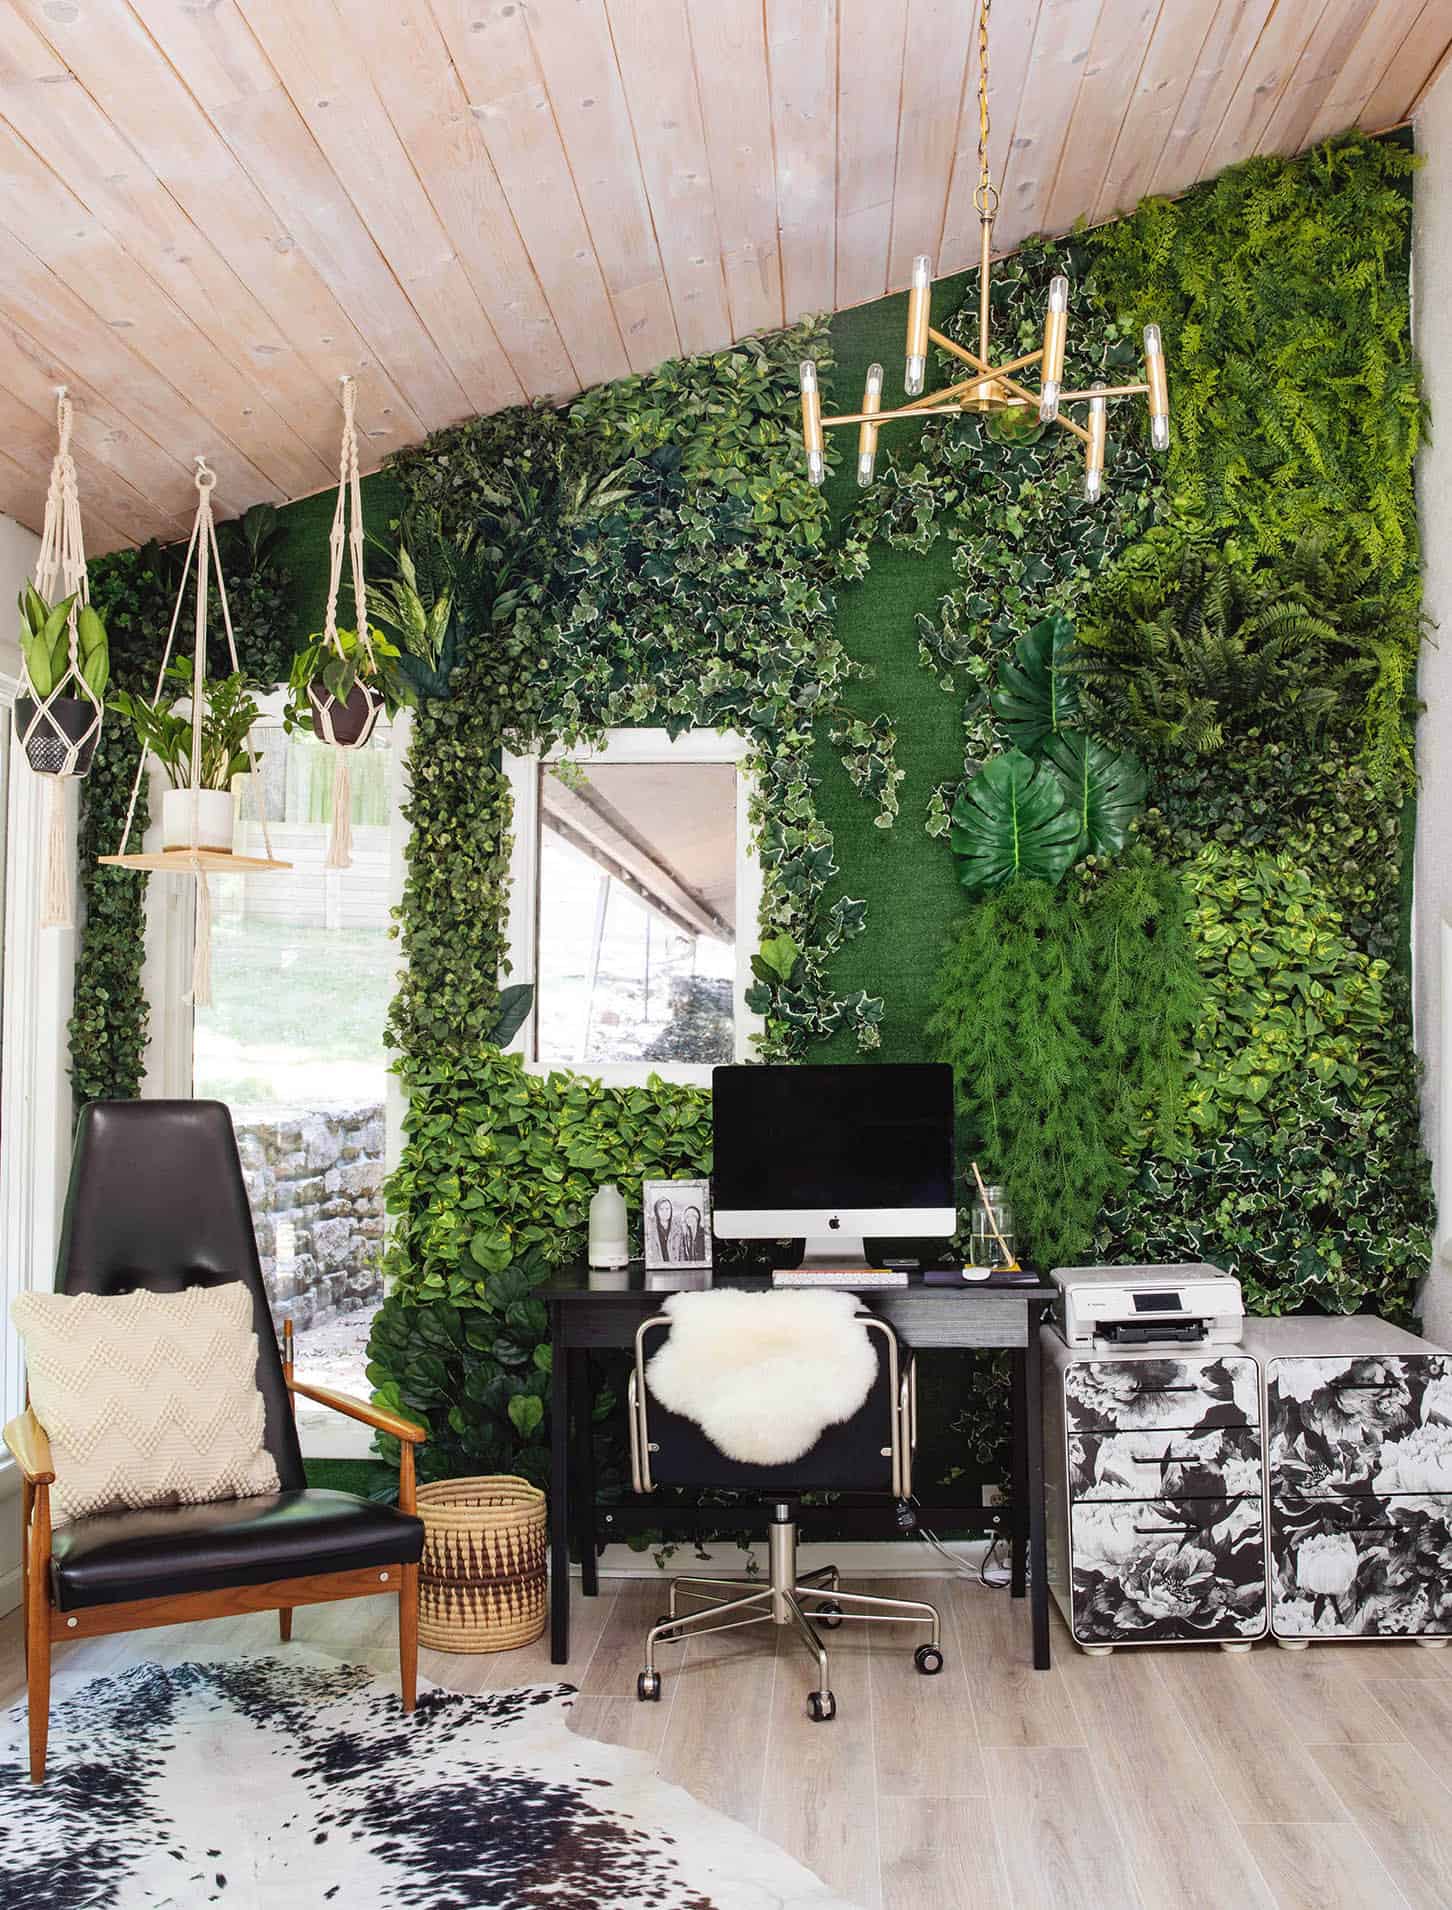 As I mentioned, I’ve only had this DIY faux living wall in my home for about a month now, so I haven’t needed to clean it yet. I did have a lot of people ask how I would clean dust off of it and the real answer is “I don’t know yet” because I haven’t needed to.
I have a few other faux plants in my home that I’ve had for years and none of them are super dusty, so it’s not a major concern to me (we have a lot of dog hair on the floor and rugs, but not much dust to speak of … don’t really know why on the dust, but I do know why on the dog hair. Ha ha).
I had thought about just using a feather duster from time to time or maybe cans of air, like you use to clean a computer. But the cans of air probably aren’t great for the environment, so then I started rethinking that.
Anyway, if you have any cleaning/dusting suggestions, I will gladly take them so I can try them out as needed! Thanks for letting me share. xo. Emma
P.S. Be sure to check out Elsie’s favorite faux plants here.
]]>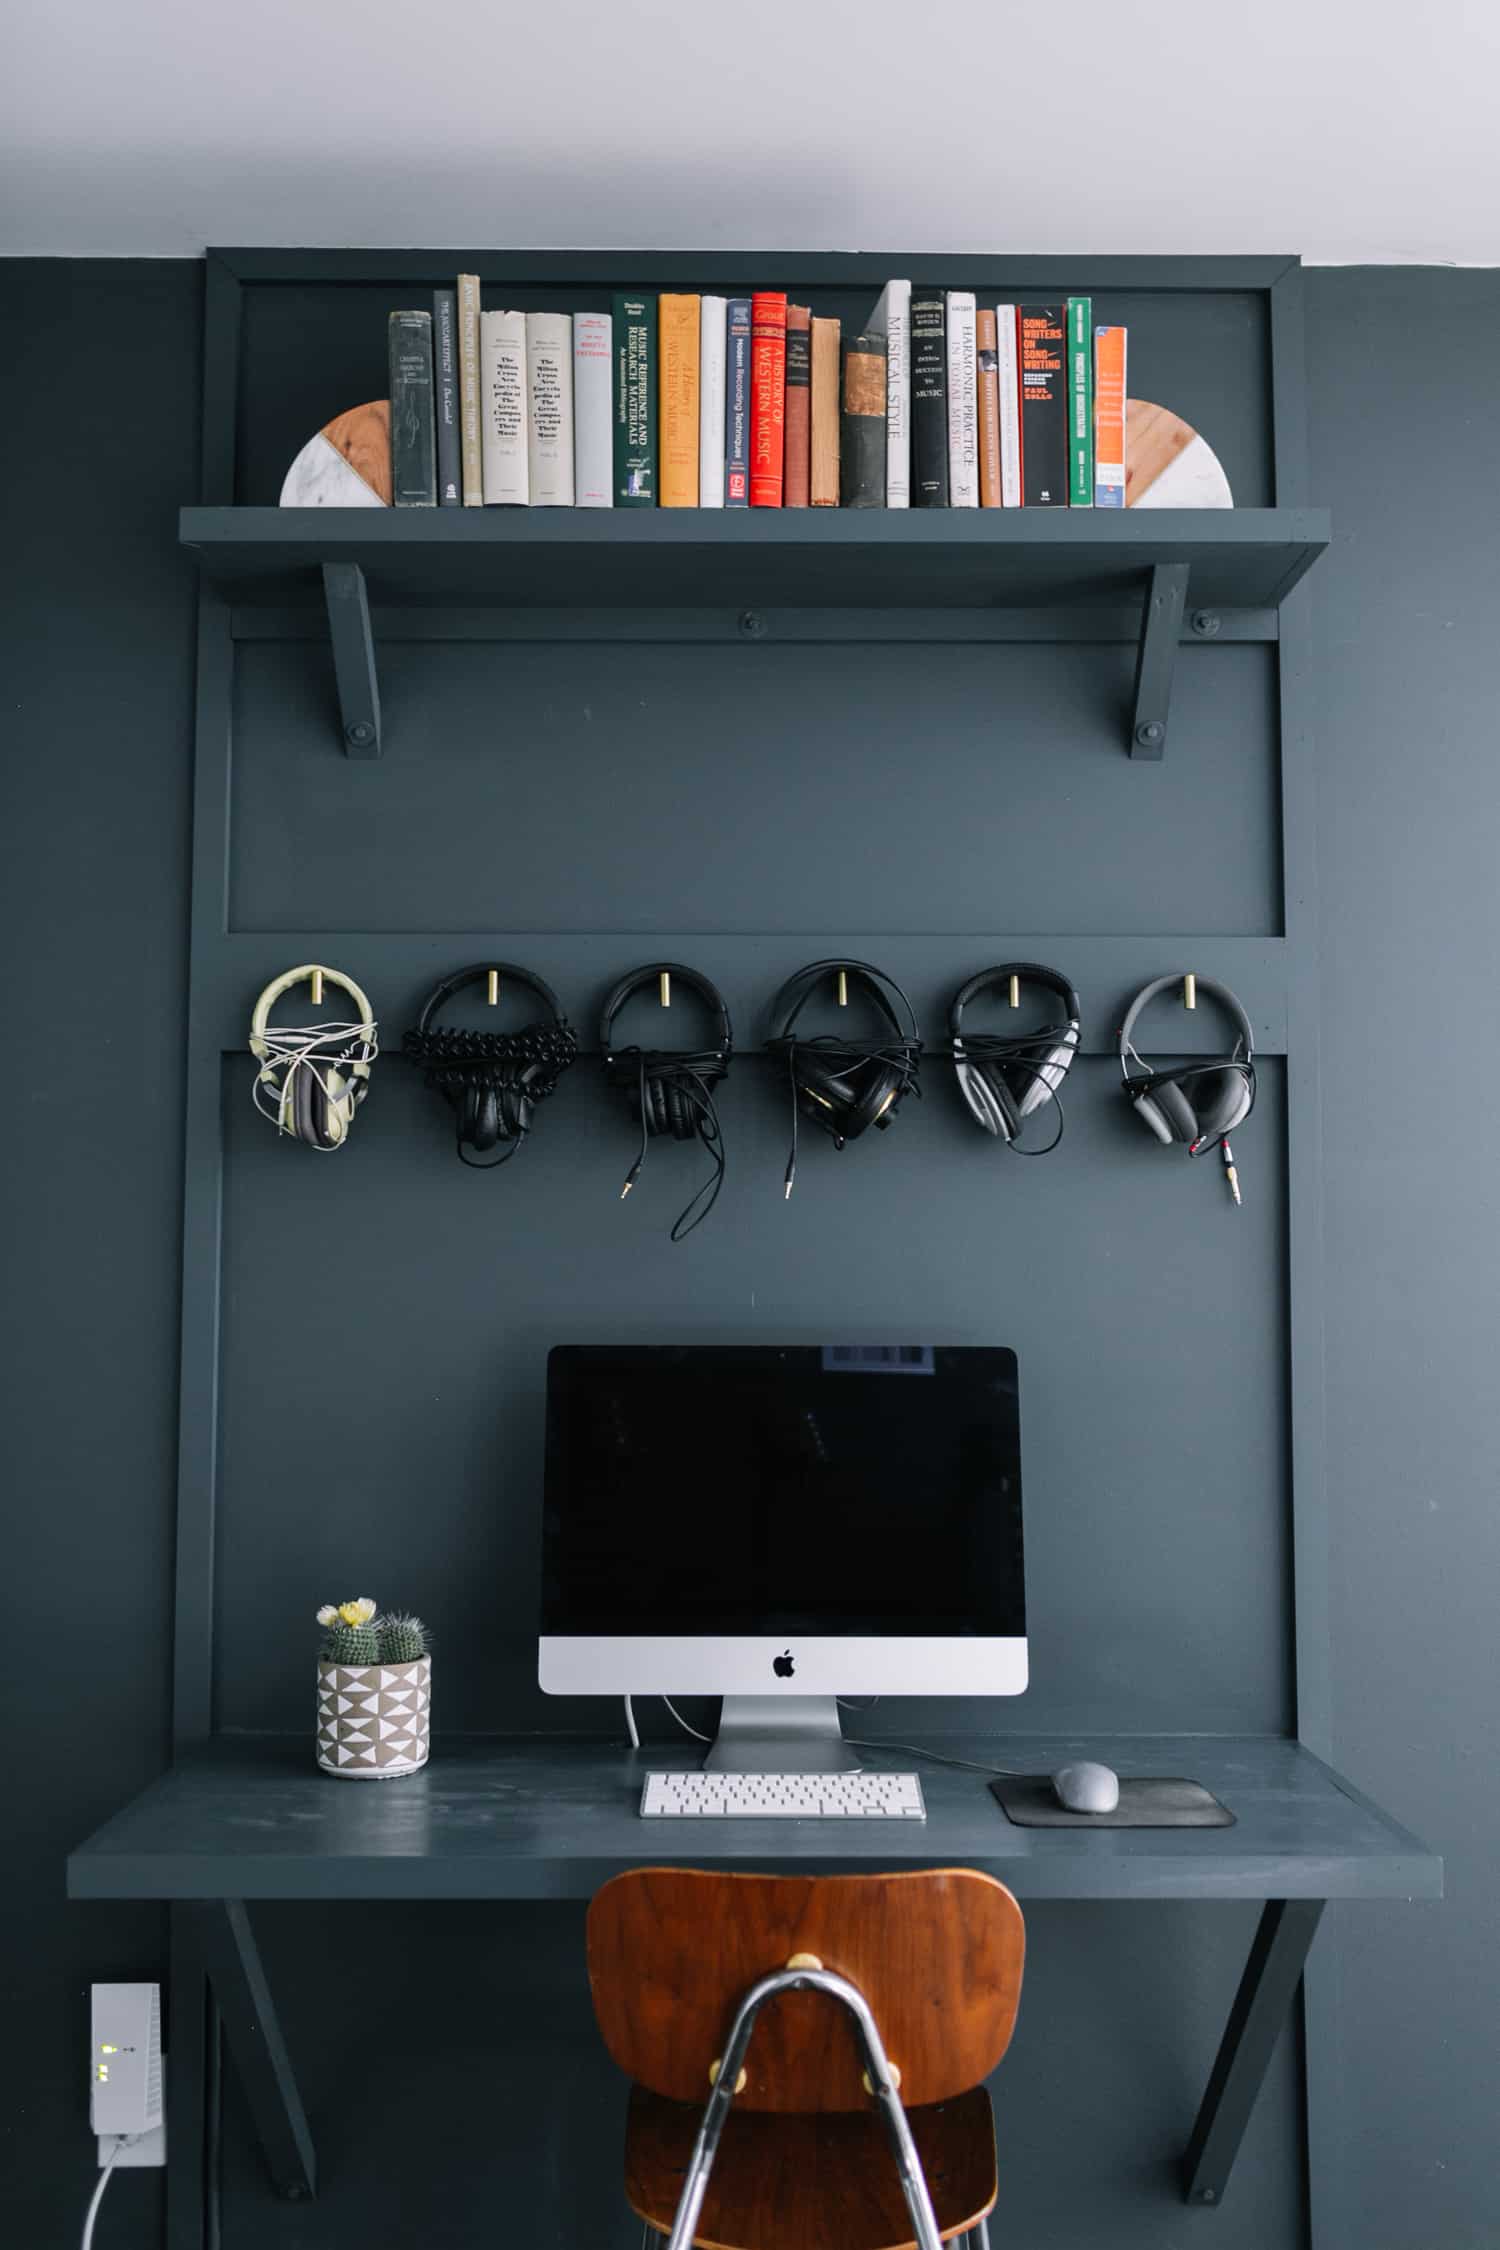 This is one of those projects that was born out of necessity! But I am so glad, because it’s an awesome and very useful project that I am sure many of you will make!!!
So, in the past six months, Jeremy significantly rearranged his studio. He did it for 100% practical, functional reasons, so I couldn’t really be mad at him for messing up my original design (… or could I? lol). Anyway! I recover quickly … so I promised him I would help him to continue tweaking it until it LOOKED nice and functioned.
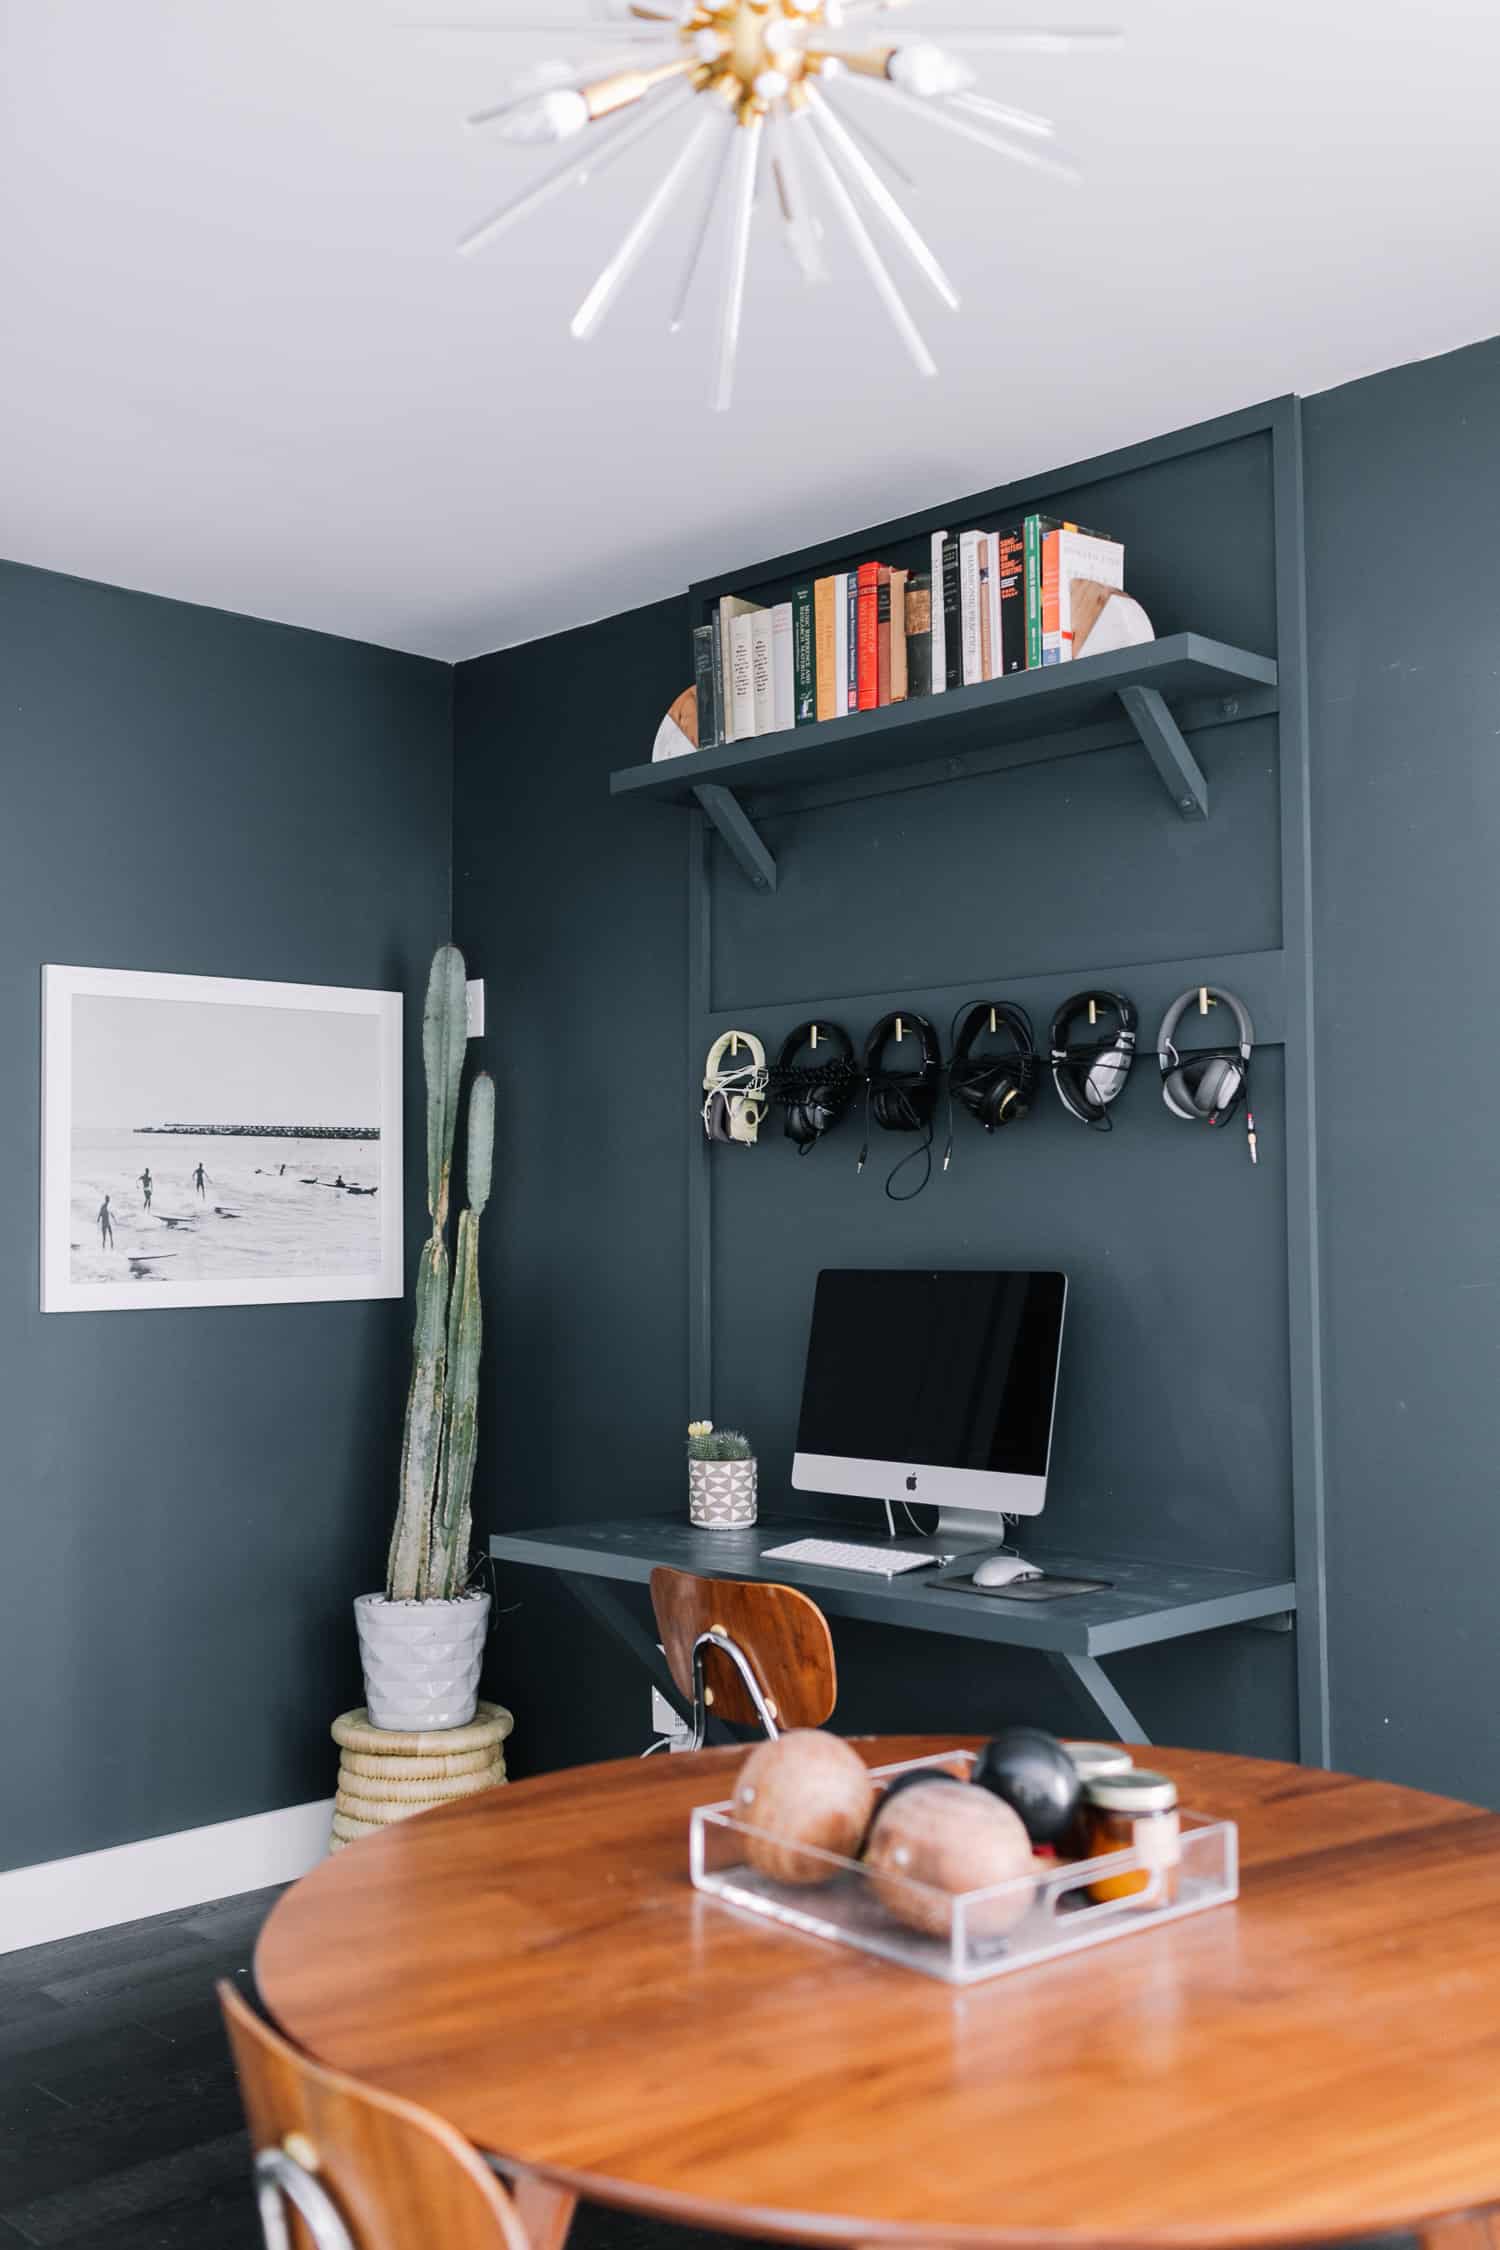
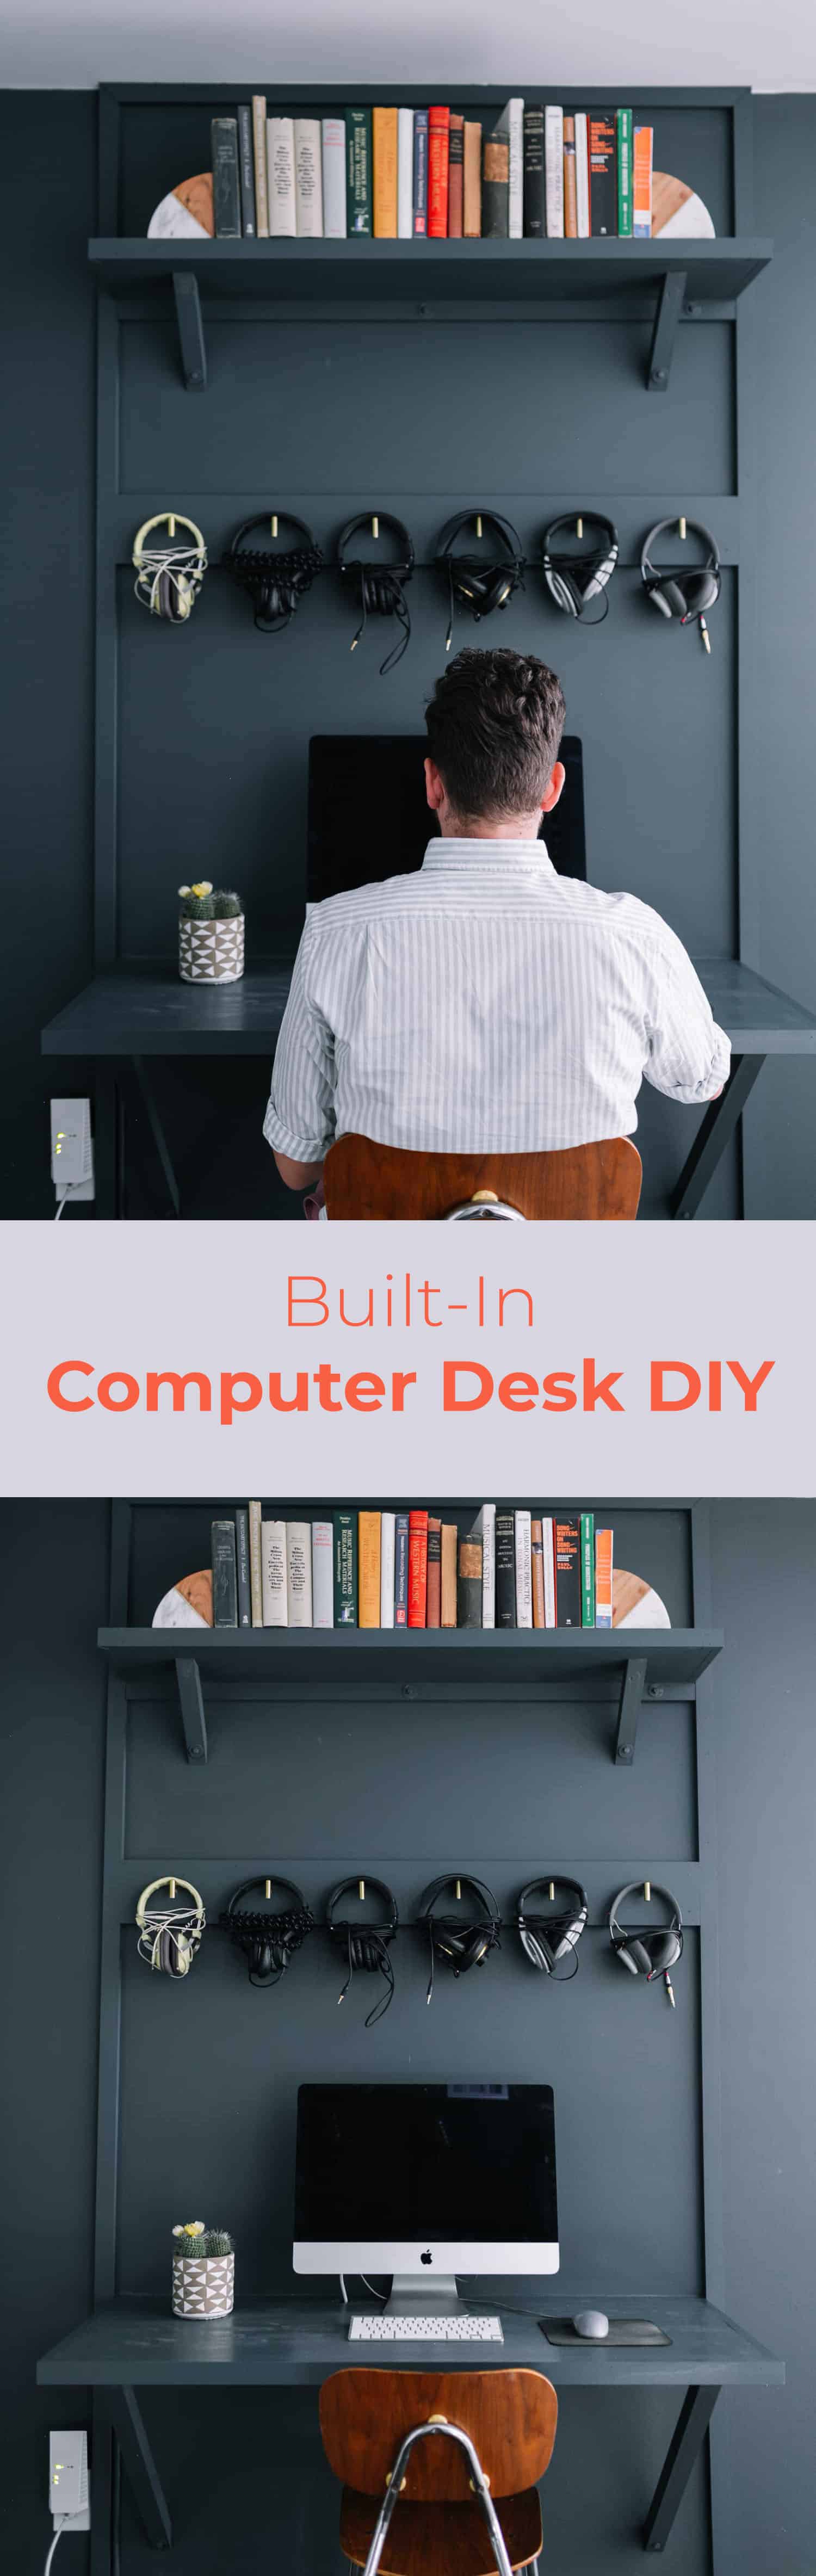
He had been using his desktop Mac on his round table (which was not intended to become a desk) and there wasn’t “visual space” to add another component to this already busy room. So I devised a plan to add a desk TO the wall that was only as big as he needed (so pretty small) and blended seamlessly with the wall, so it didn’t demand too much attention. I am SO pleased with the result.
Here’s one more photo before we jump into Collin’s DIY.
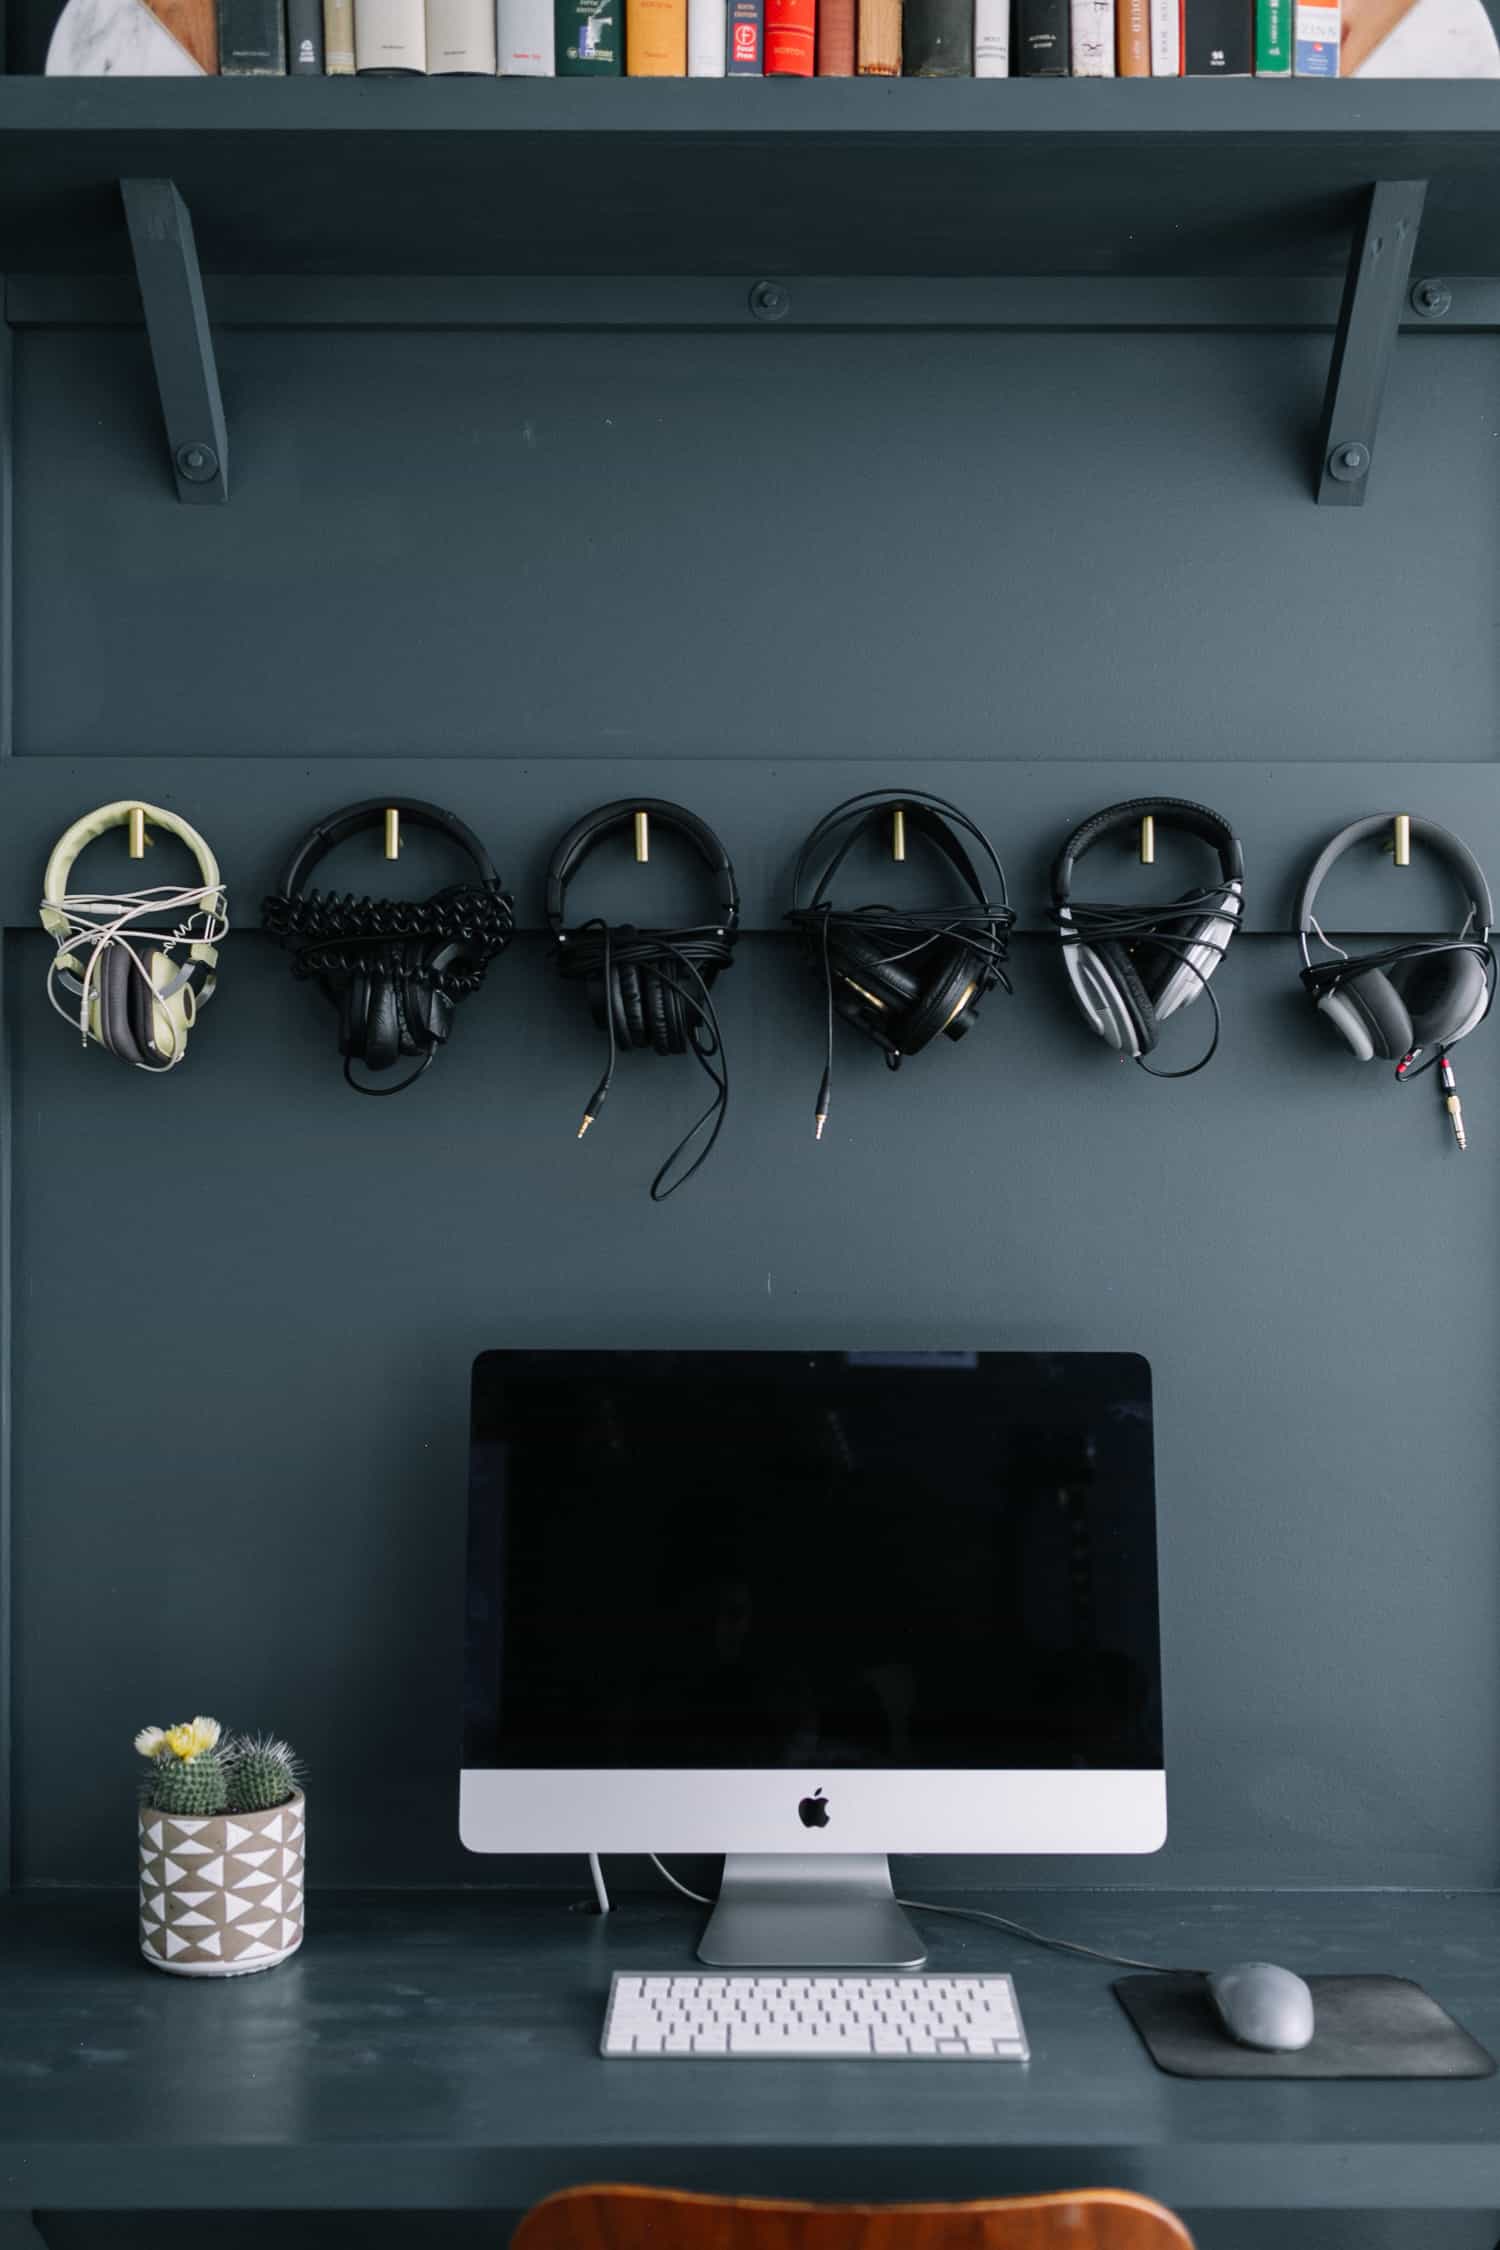
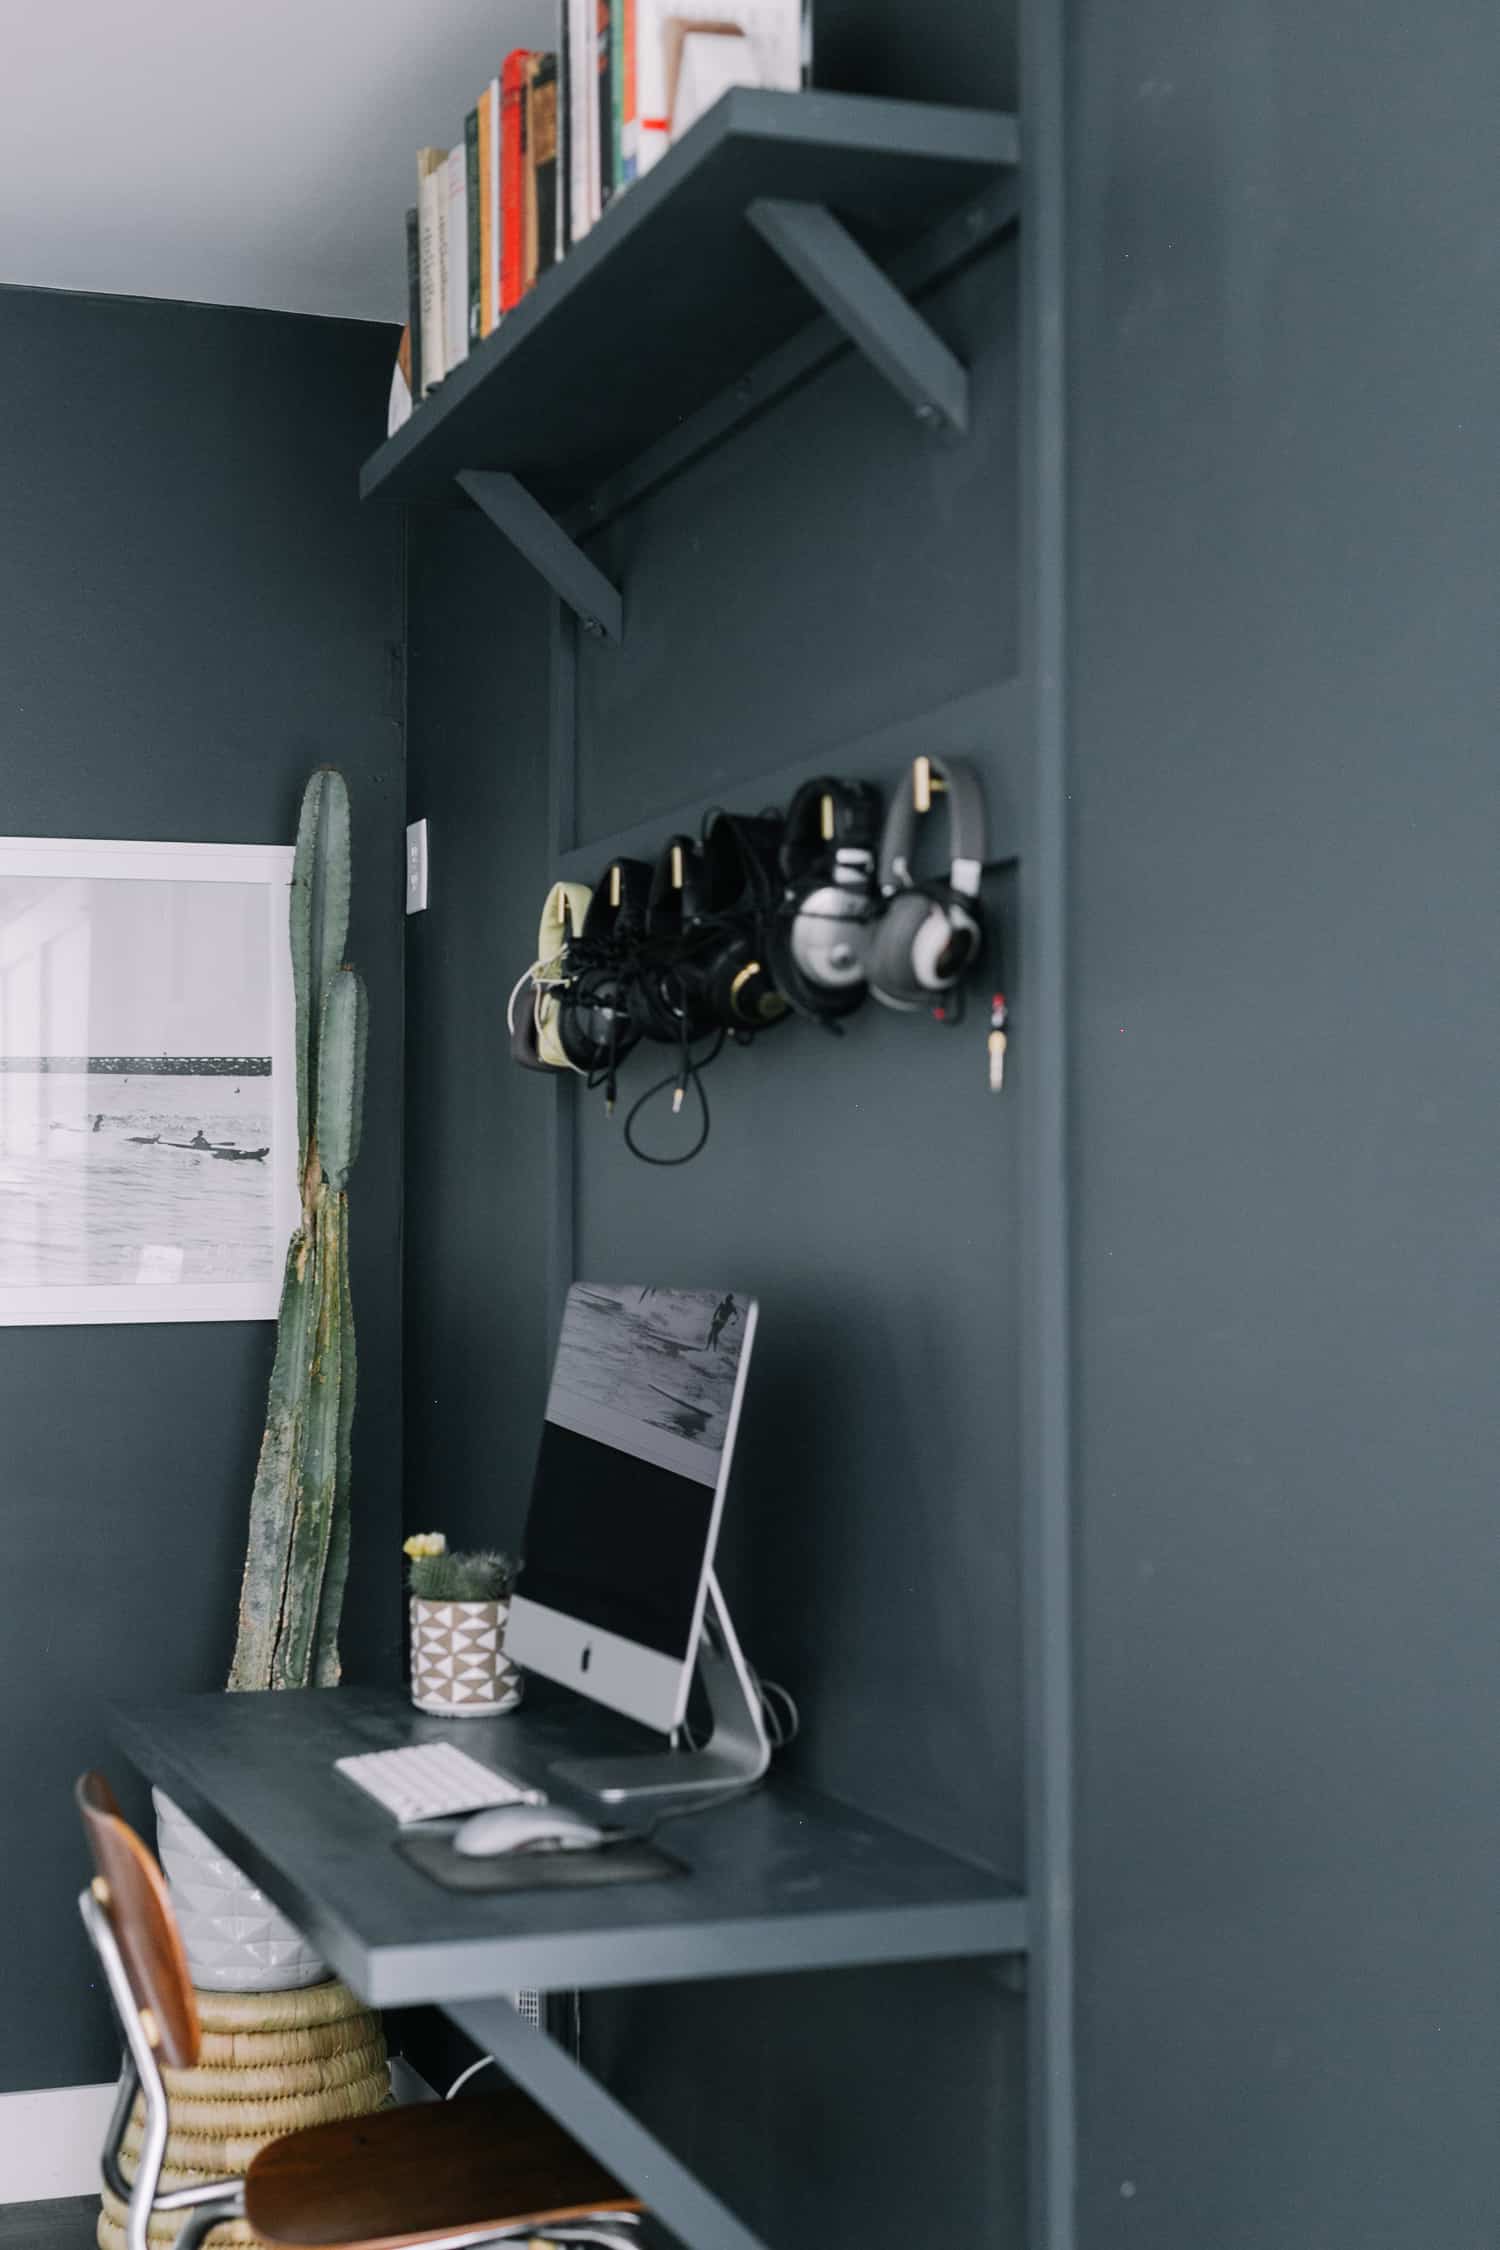
 From this angle, you can really see how this desk adds and functions in Jeremy’s studio. It’s a computer desk and I added the headphone hooks and single bookshelf to make it feel more a part of the studio.
Supplies:
-two 20″ x 4′ x 3/4″ edge glued desk boards
-two 9 1/4″ x 4′ x 3/4″ shelf boards
-one 4′ x 5 1/2″ x 3/4″ hook board
-three 1 1/2″ x 1 1/2″ x 3′ square support boards
-six 1 1/2″ x 3/4″ x 8′ trim boards
-six hooks to hang headphones/cables (we used these handle pulls)
-wood putty
-caulk
-sandpaper
-paint
Tools:
-miter saw
-measuring tape
-nail gun (optional)
-hammer and nails (if not using nail gun)
-drill
-wood screws
–drywall anchors
-1/2″ drill bit
–countersink drill bit
-washers
-wood glue
-level
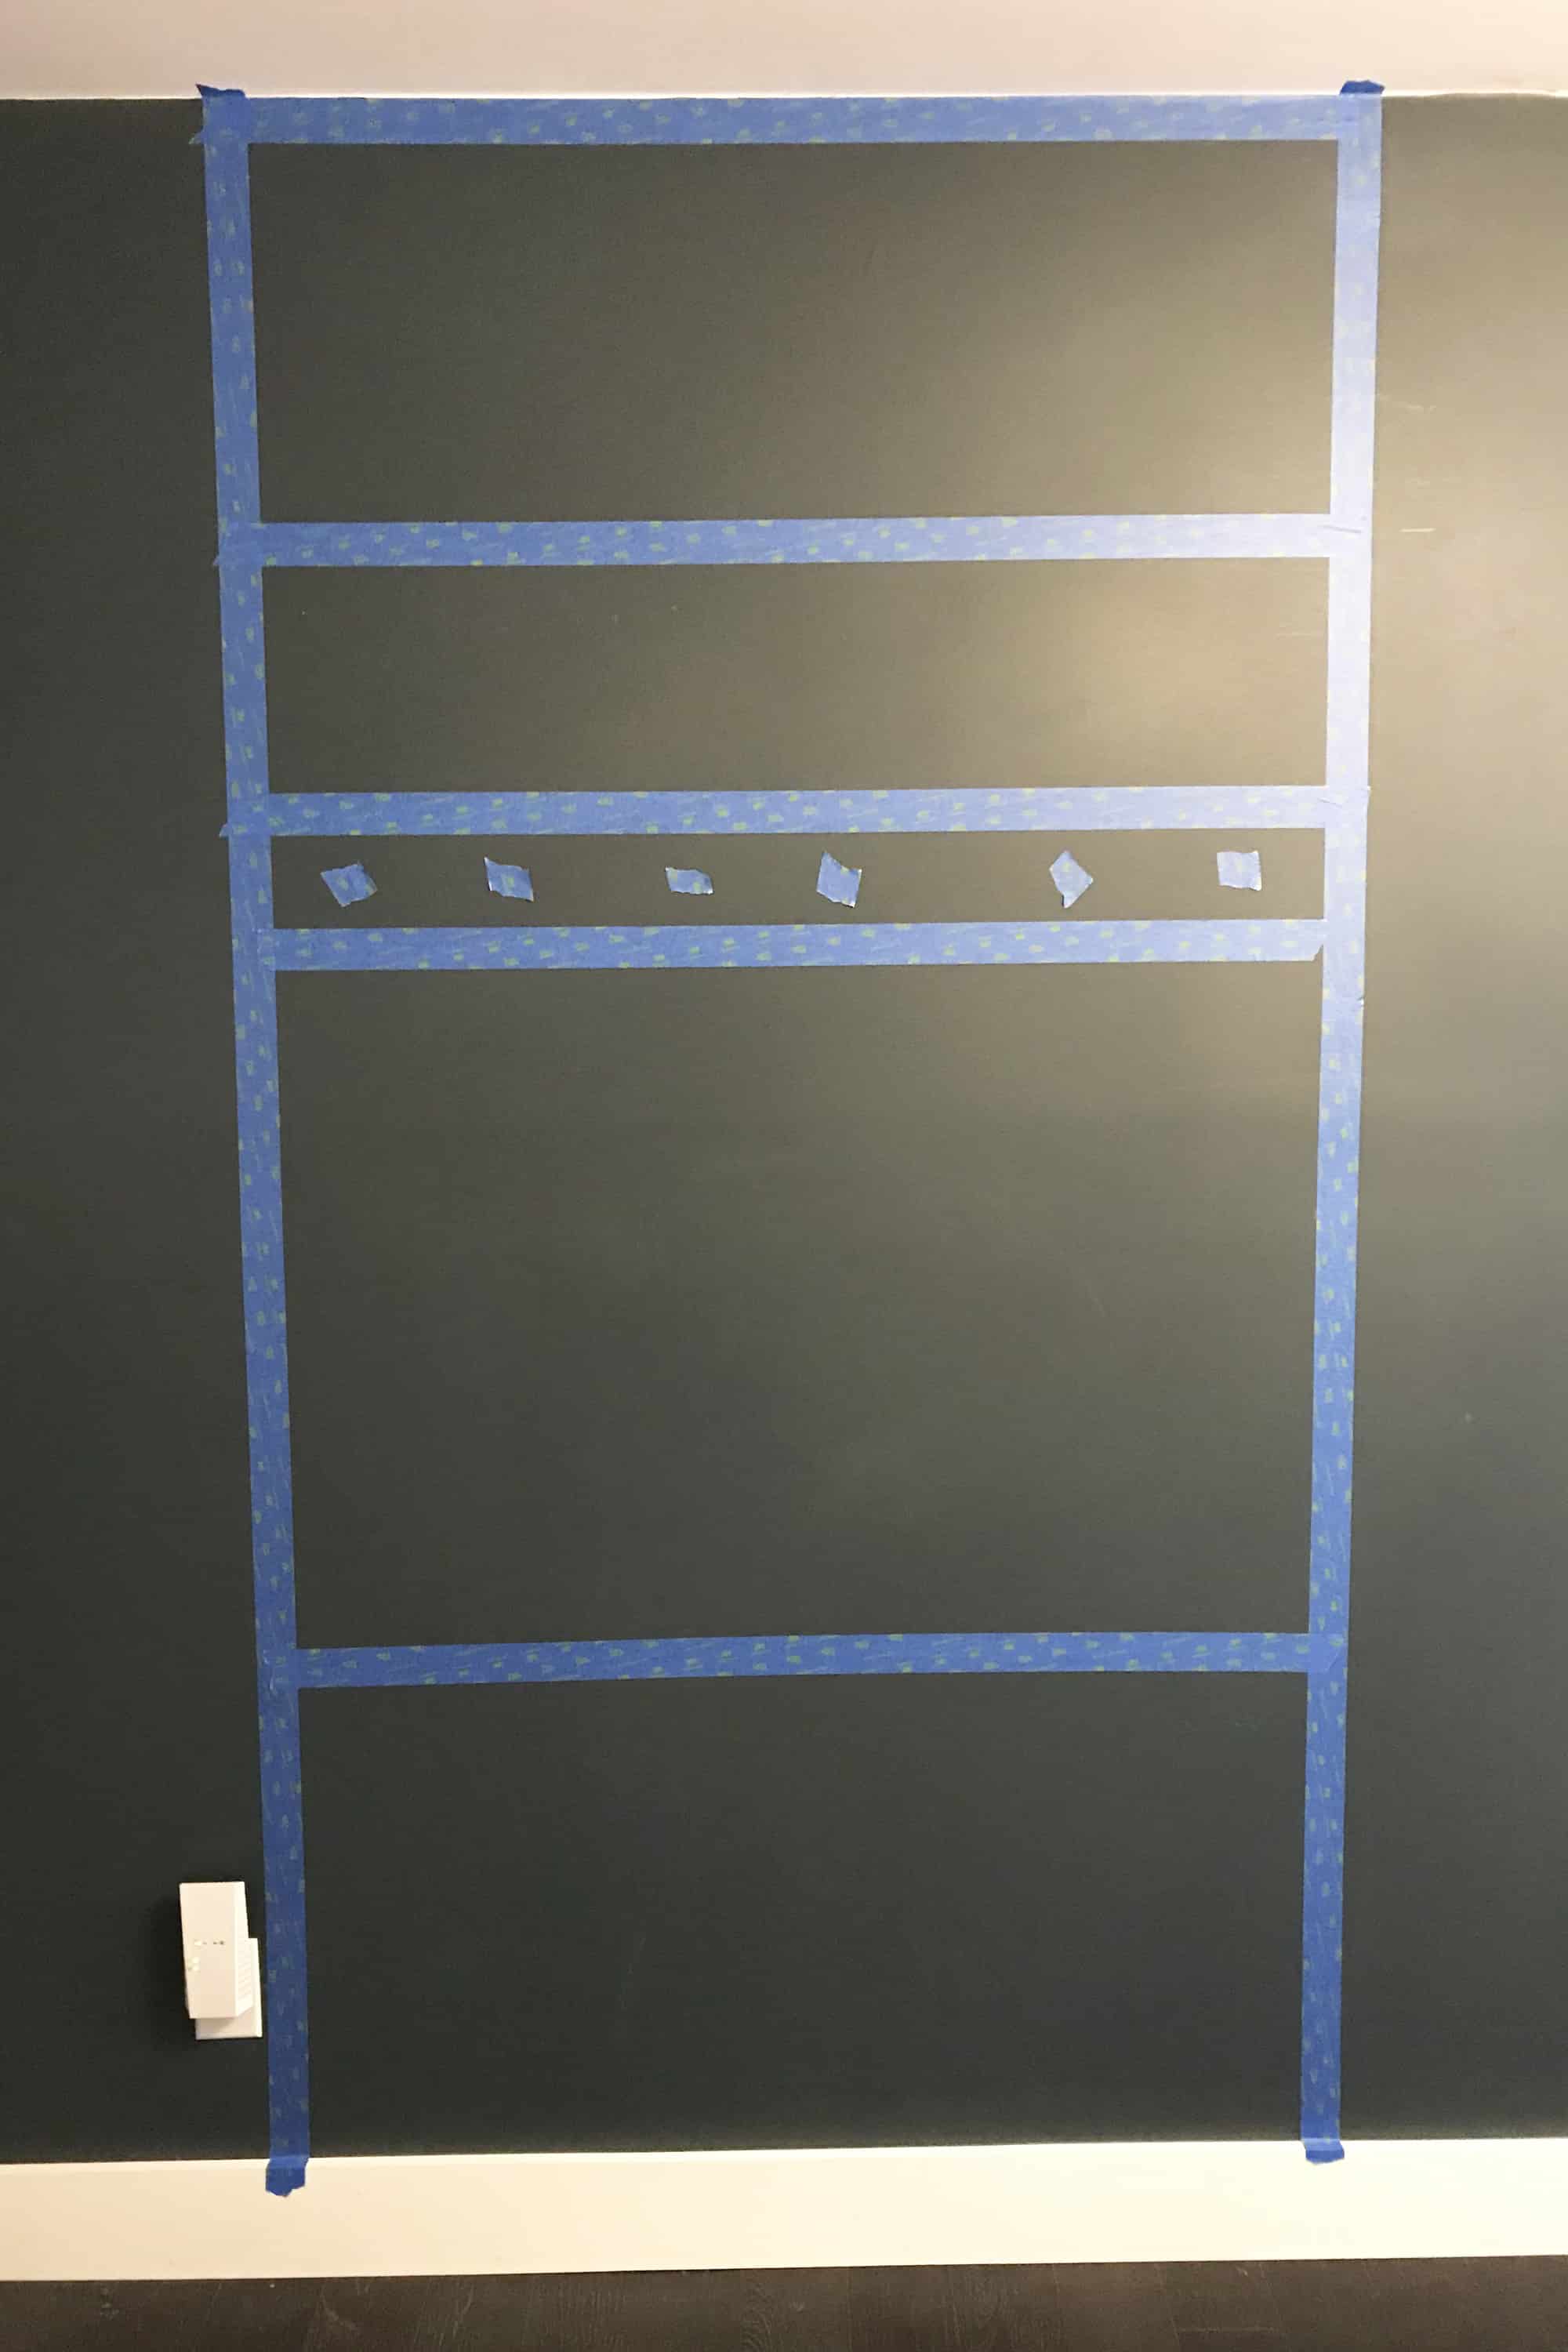 Start by taping off the space on your wall to help you get a good visual for the project, this will also help you decide the height of the desk, shelf, and hook board. The height of your walls will also determine how you space out each piece. We always tape out every shelving project on the wall before making final measurements and purchasing supplies.
The walls in the this space are 8′ which is an average height, so chances are your house has the same! The desk height is 29″ which is also a average height, but you can make it higher or shorter depending on your preference! This project could easily be a standing desk if that’s what you prefer. The hook board and shelf i just eyeballed based on what looked most aesthetically pleasing, and you can make them whatever height works best for your space.
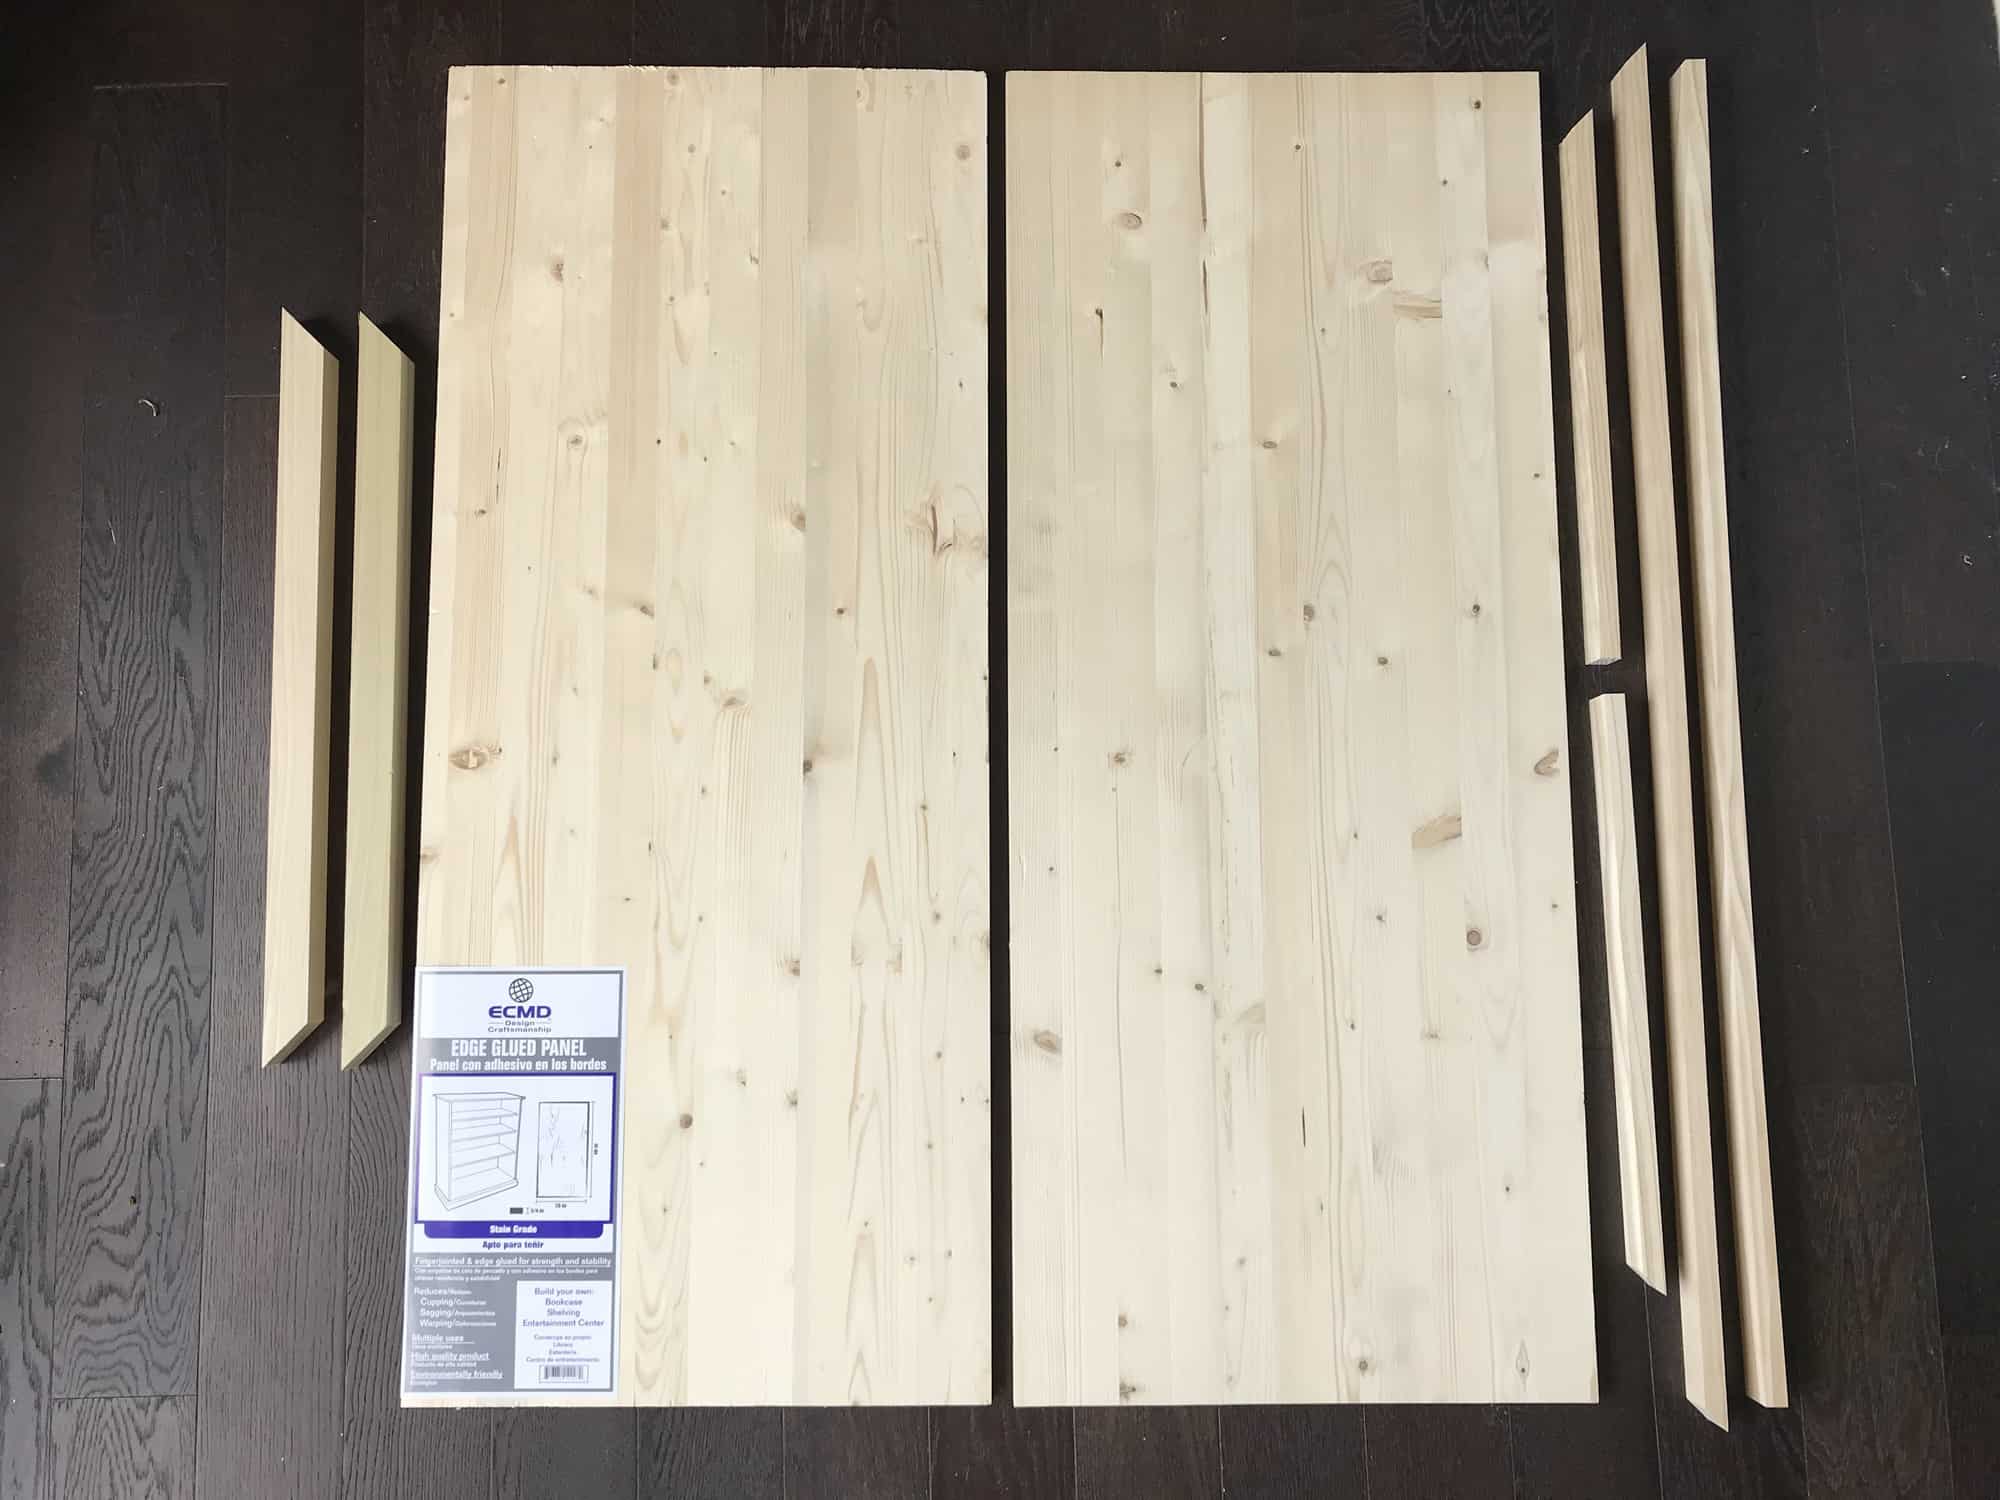 Take your two 2′ x 4′ x 3/4″ edge glued boards and glue them together, one on top of the other and add a few nails with your nail gun for extra stability and also so you don’t have to wait for the glue to dry, the pieces will stay together for the next steps.
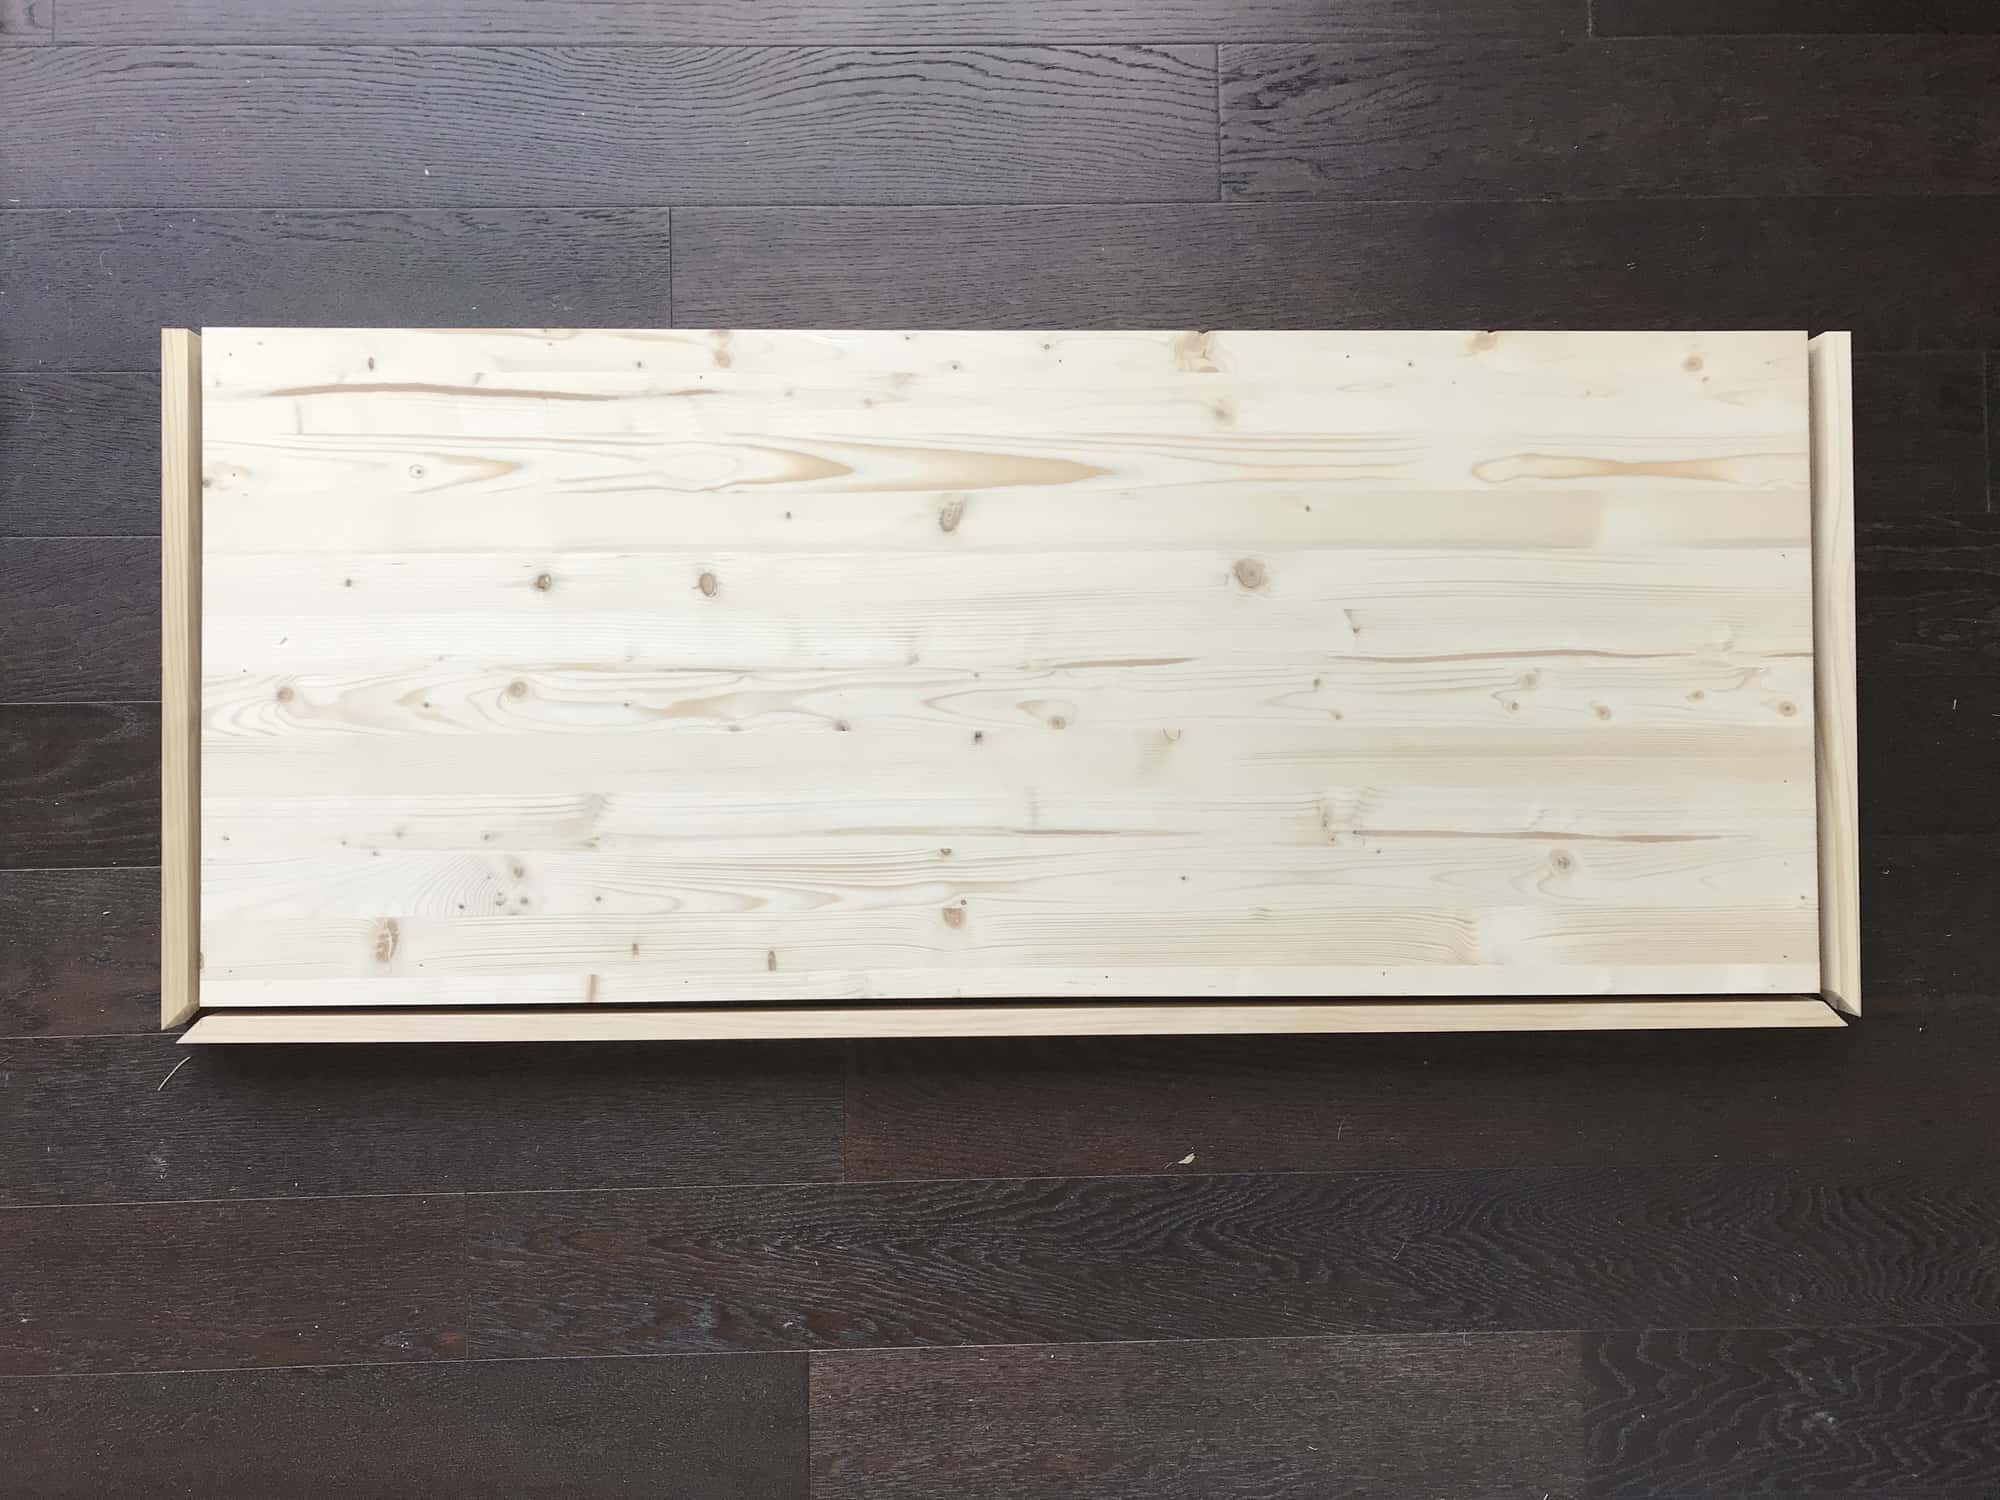 Next, cut your 1 1/2″ x 3/4″ x 8′ trim boards. Since your desk is 20″ deep, your two edge pieces of trim will need to be 20 and 3/4″. This is because we have to account for the overhang that occurs since we are cutting one end of each piece at a 45-degree angle. Similarly because the desk is 48″ in length, the front trim piece will need to be cut at 49 and 1/2″ with each end cut at a 45-degree angle to match up with the end pieces as shown in the picture above. Secure each piece with wood glue and a few nails with your nail gun.
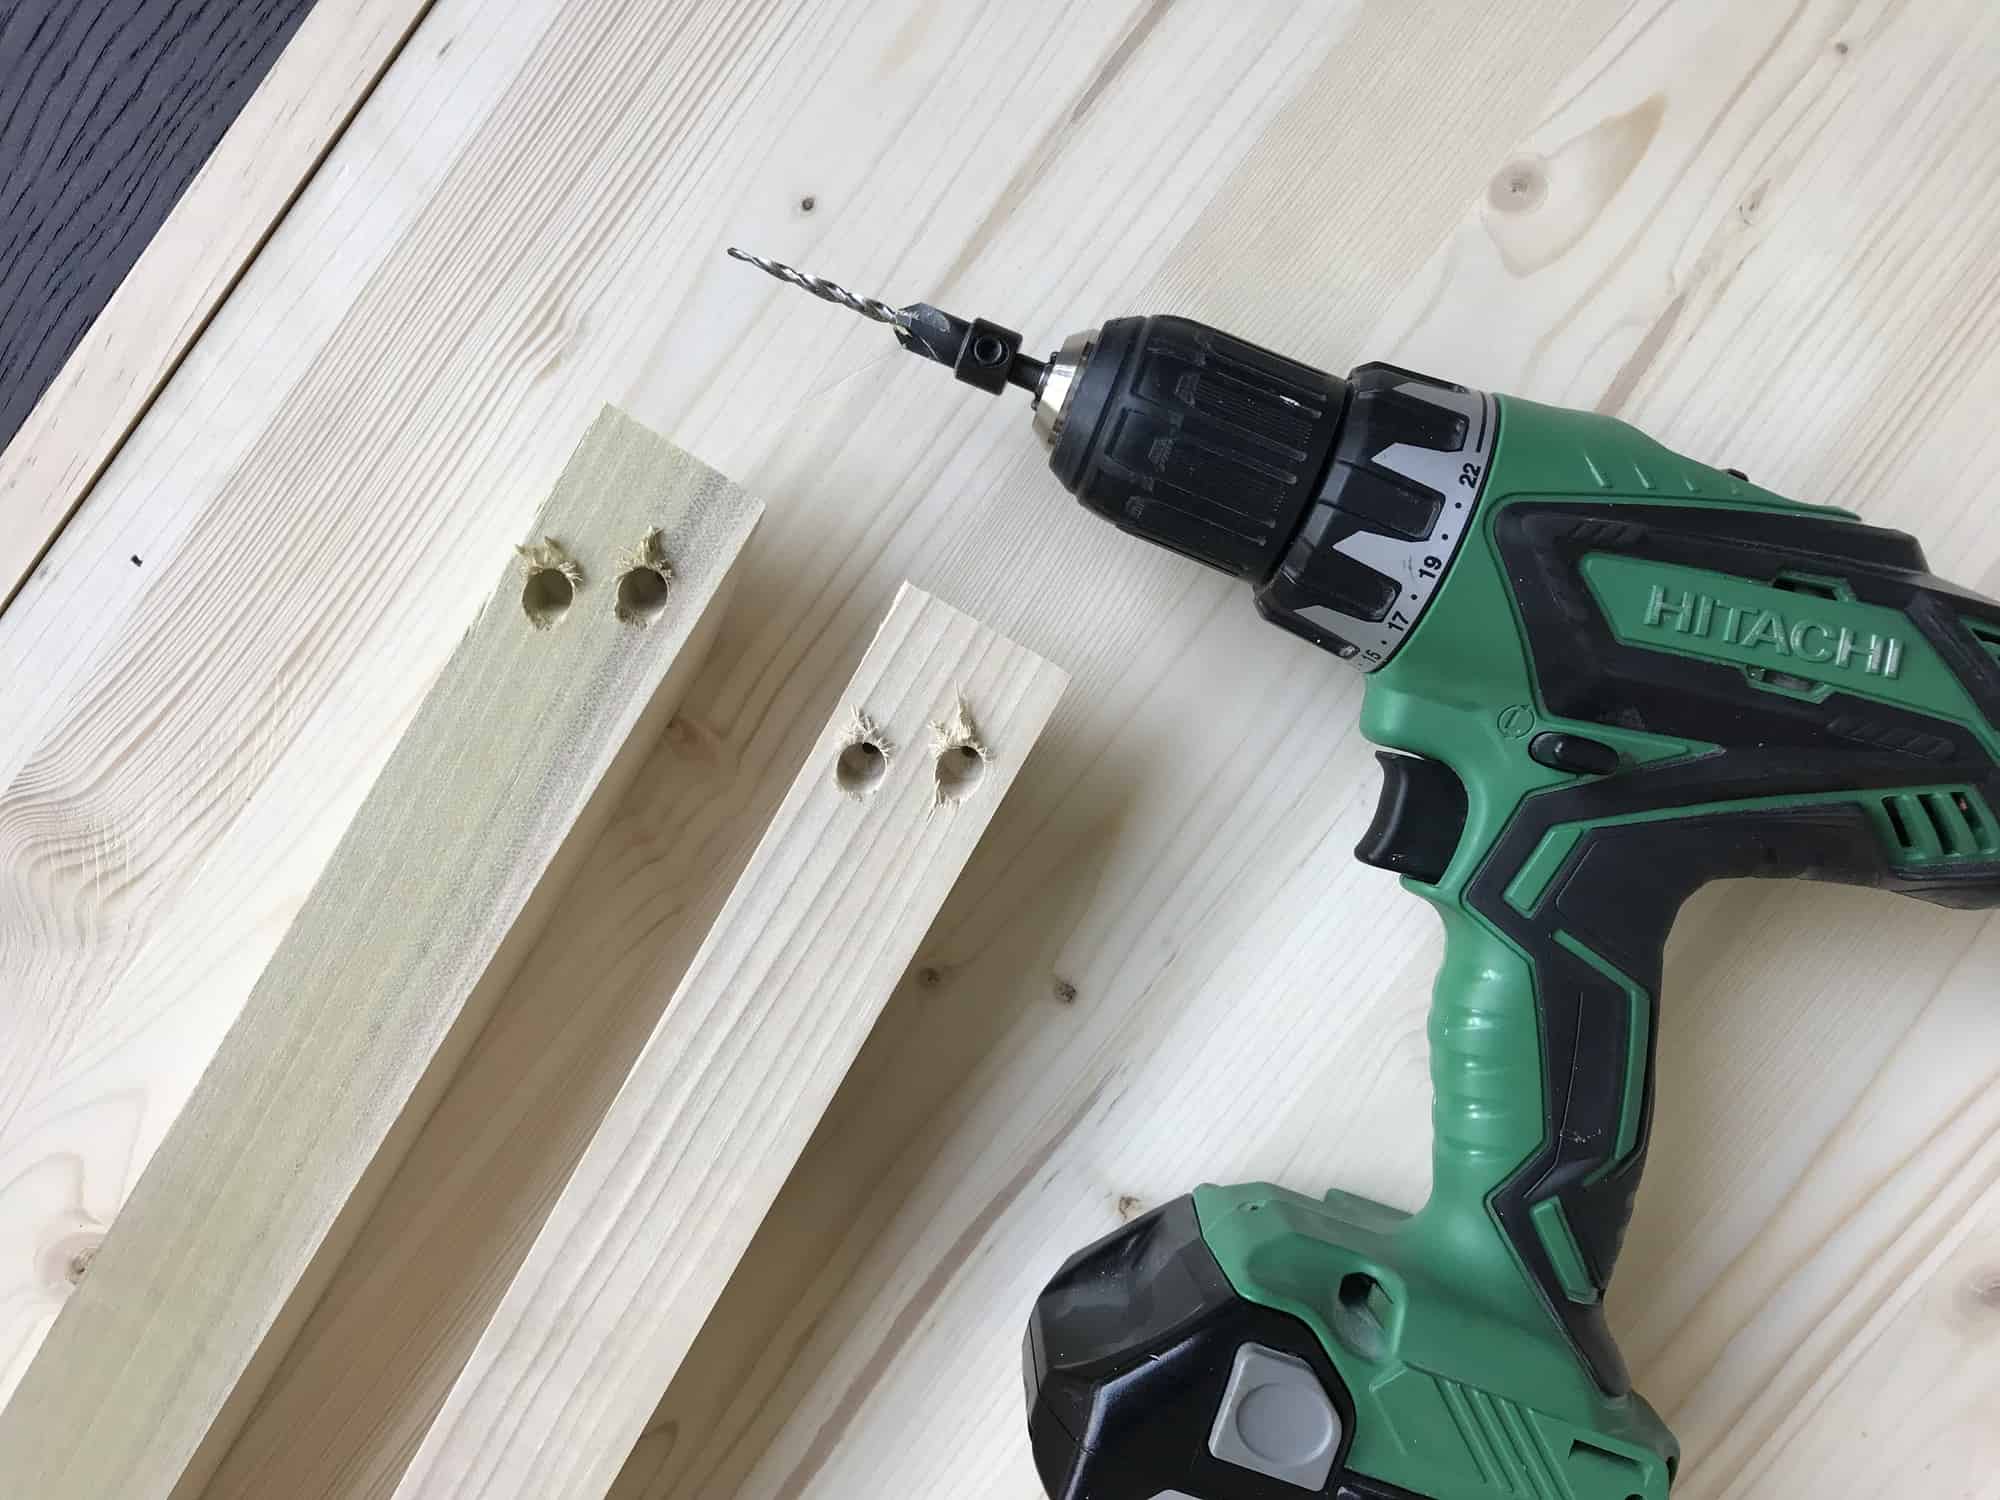 Take your 1 1/2″ x 1 1/2″ x 3′ square support boards and cut them at 18″ with each end cut at 45-degree angles. Next, take your countersink drill bit and drill two holes on one end of each board and on the other ends just one hole. The reason for using the countersink drill bit is to pre-drill the holes for your screws, which you always want to do to avoid splitting the wood, and also so the head of the screw can be hidden with wood putty later.
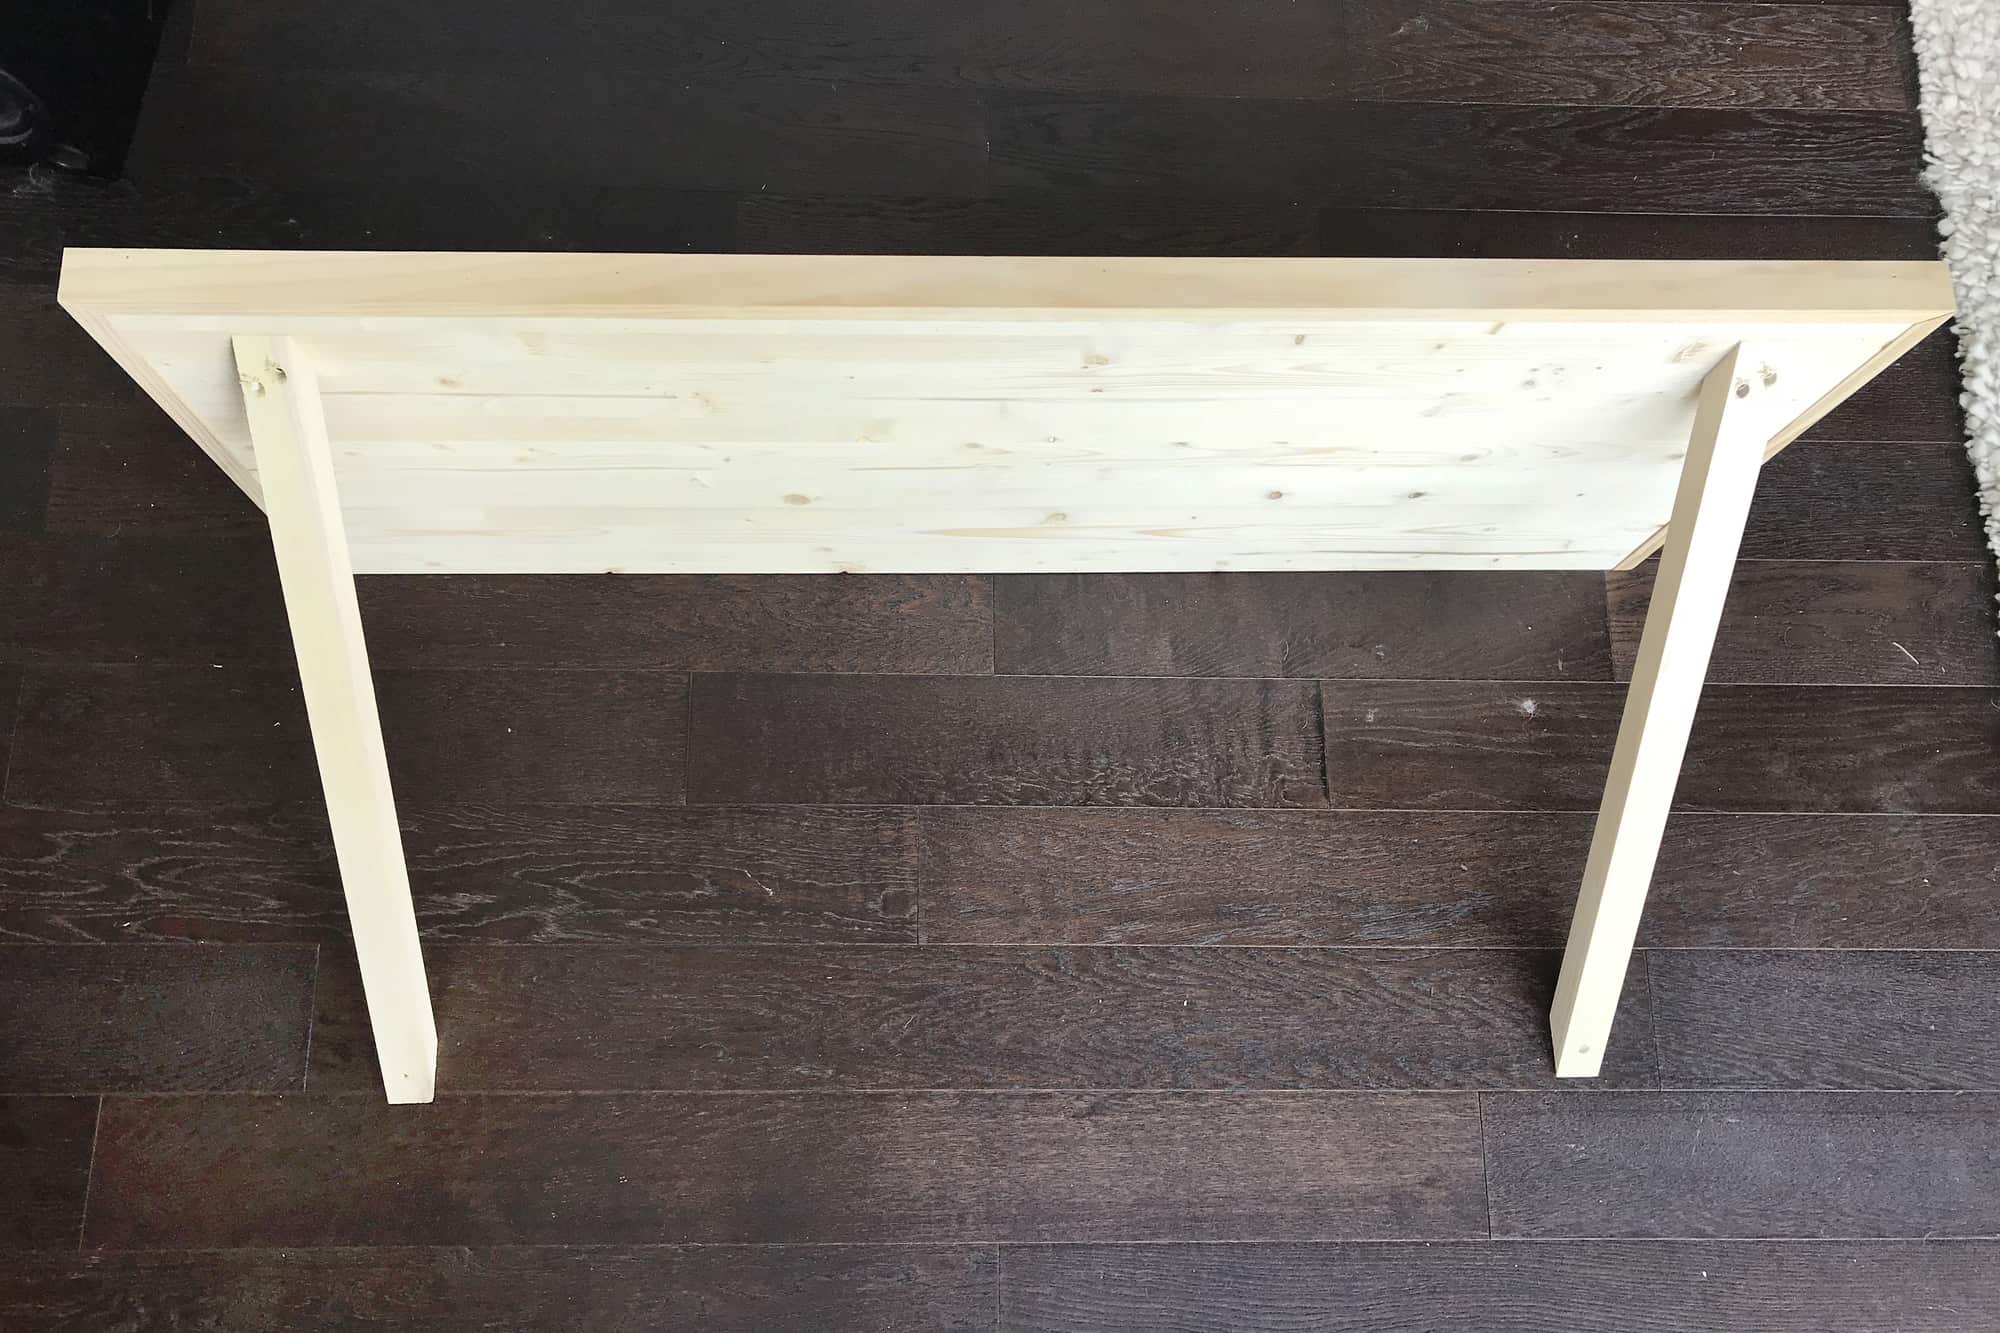 Take your desk and on the bottom side mark where your support boards are going to attach, which is about 3″ from each edge. Lean the desk up against a wall or something similar so it is perfectly upright and secure the support pieces with the appropriate length screws so when it’s done it looks like the picture shown above.
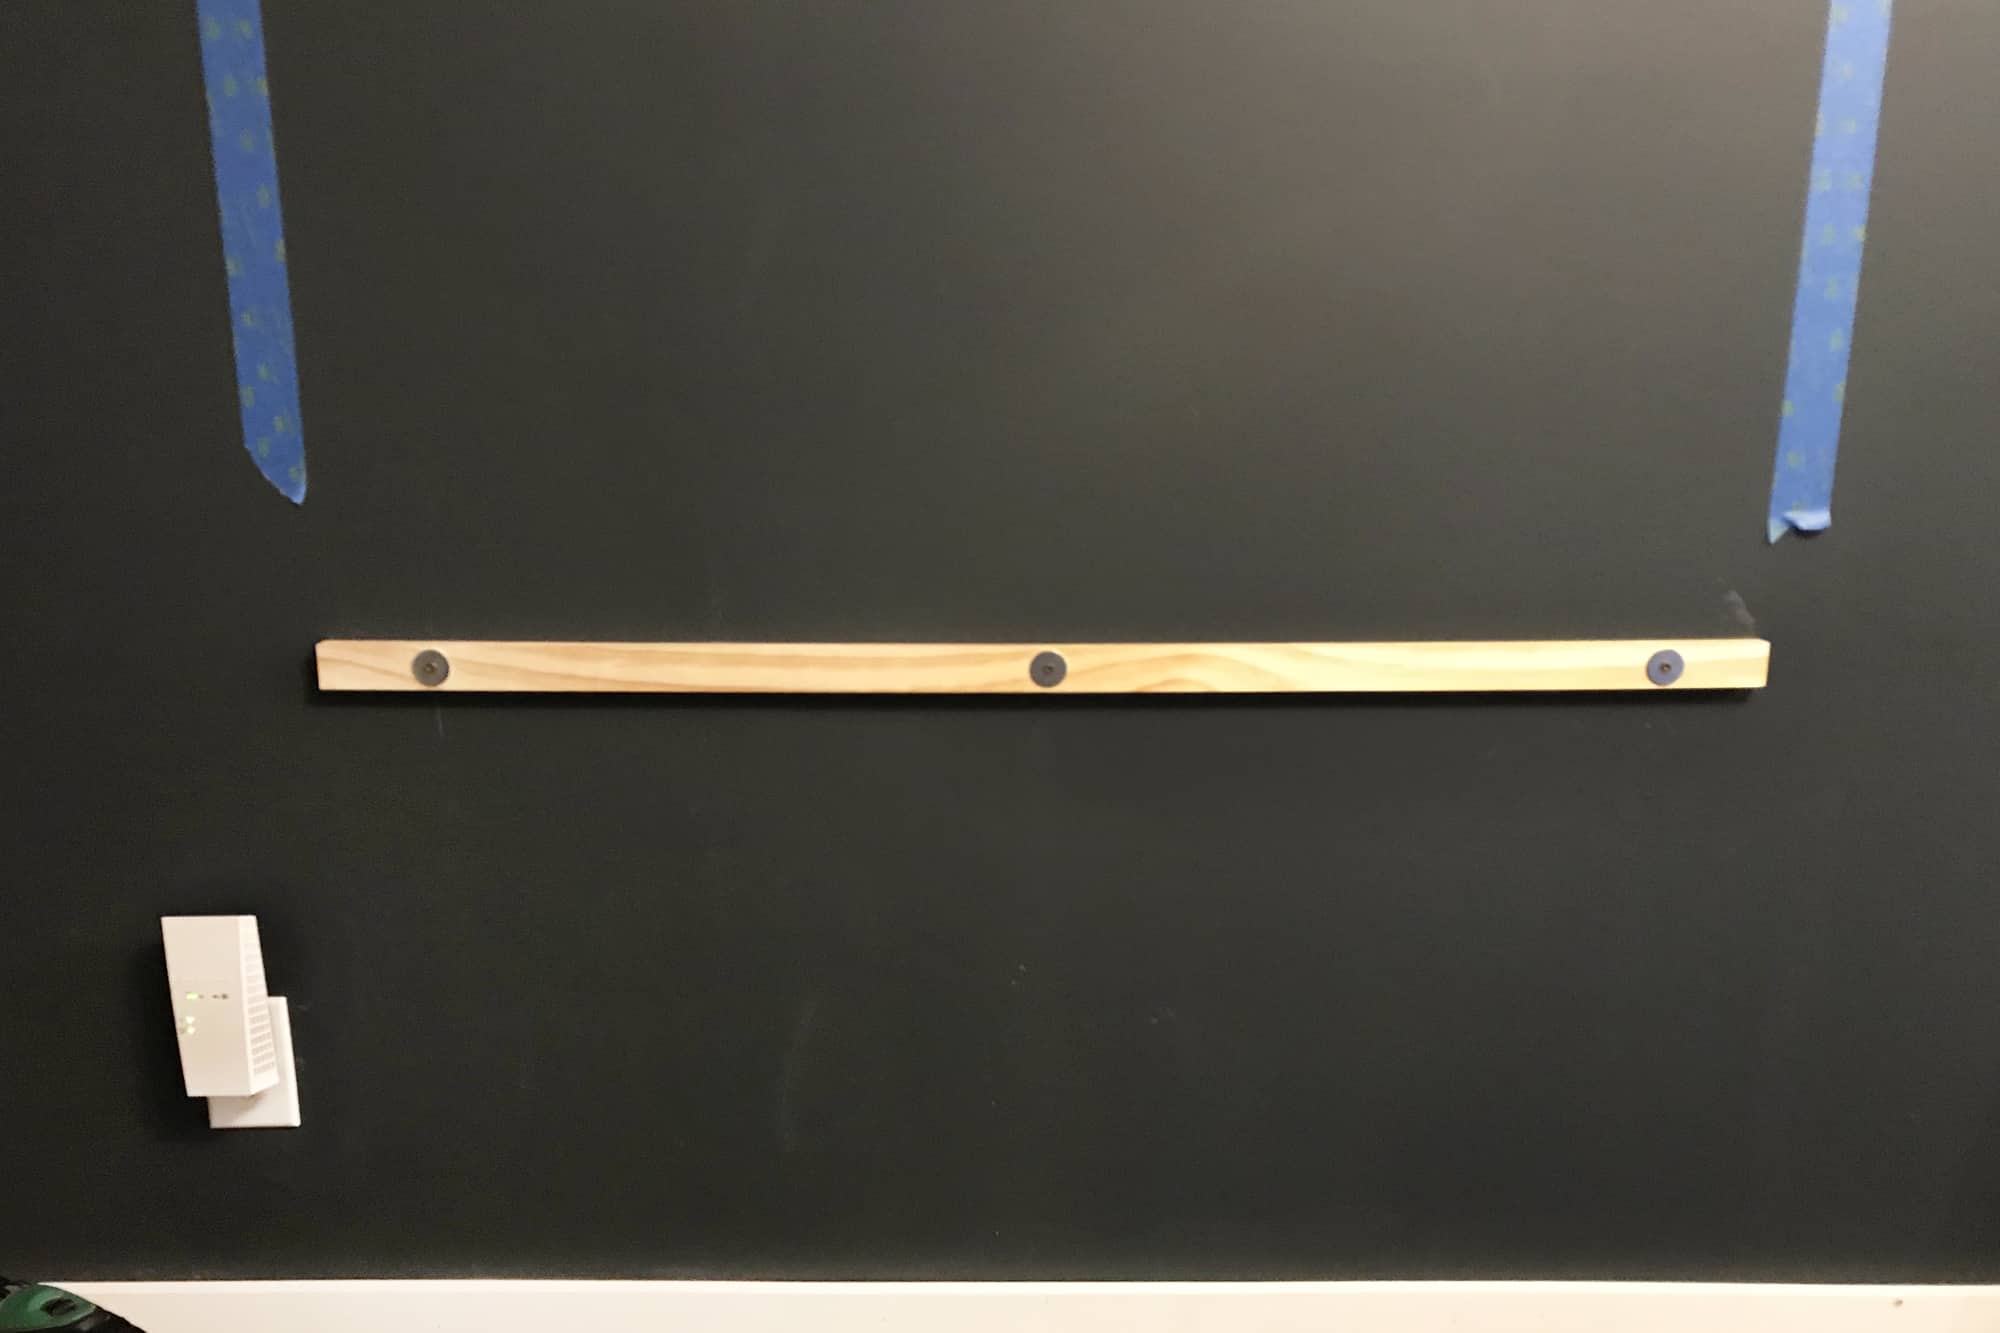 Cut one of your 1 1/2″ x 3/4″ x 8′ trim boards at 20″ and drill 3 holes in it, one in the middle and one on each end. Hold the board up to the wall at 29″ high with a level and mark each hole on the wall with a pen or pencil. Using your 1/2″ drill bit, drill 3 holes where you marked on the wall and insert the drywall anchor in each hole, follow the drywall anchor instructions very carefully to make sure you are using them properly! Once the anchors are in, take the bolts that are supplied with the anchors and put them through the 3 holes in the board while adding a washer for each bolt and fasten the board to the wall.
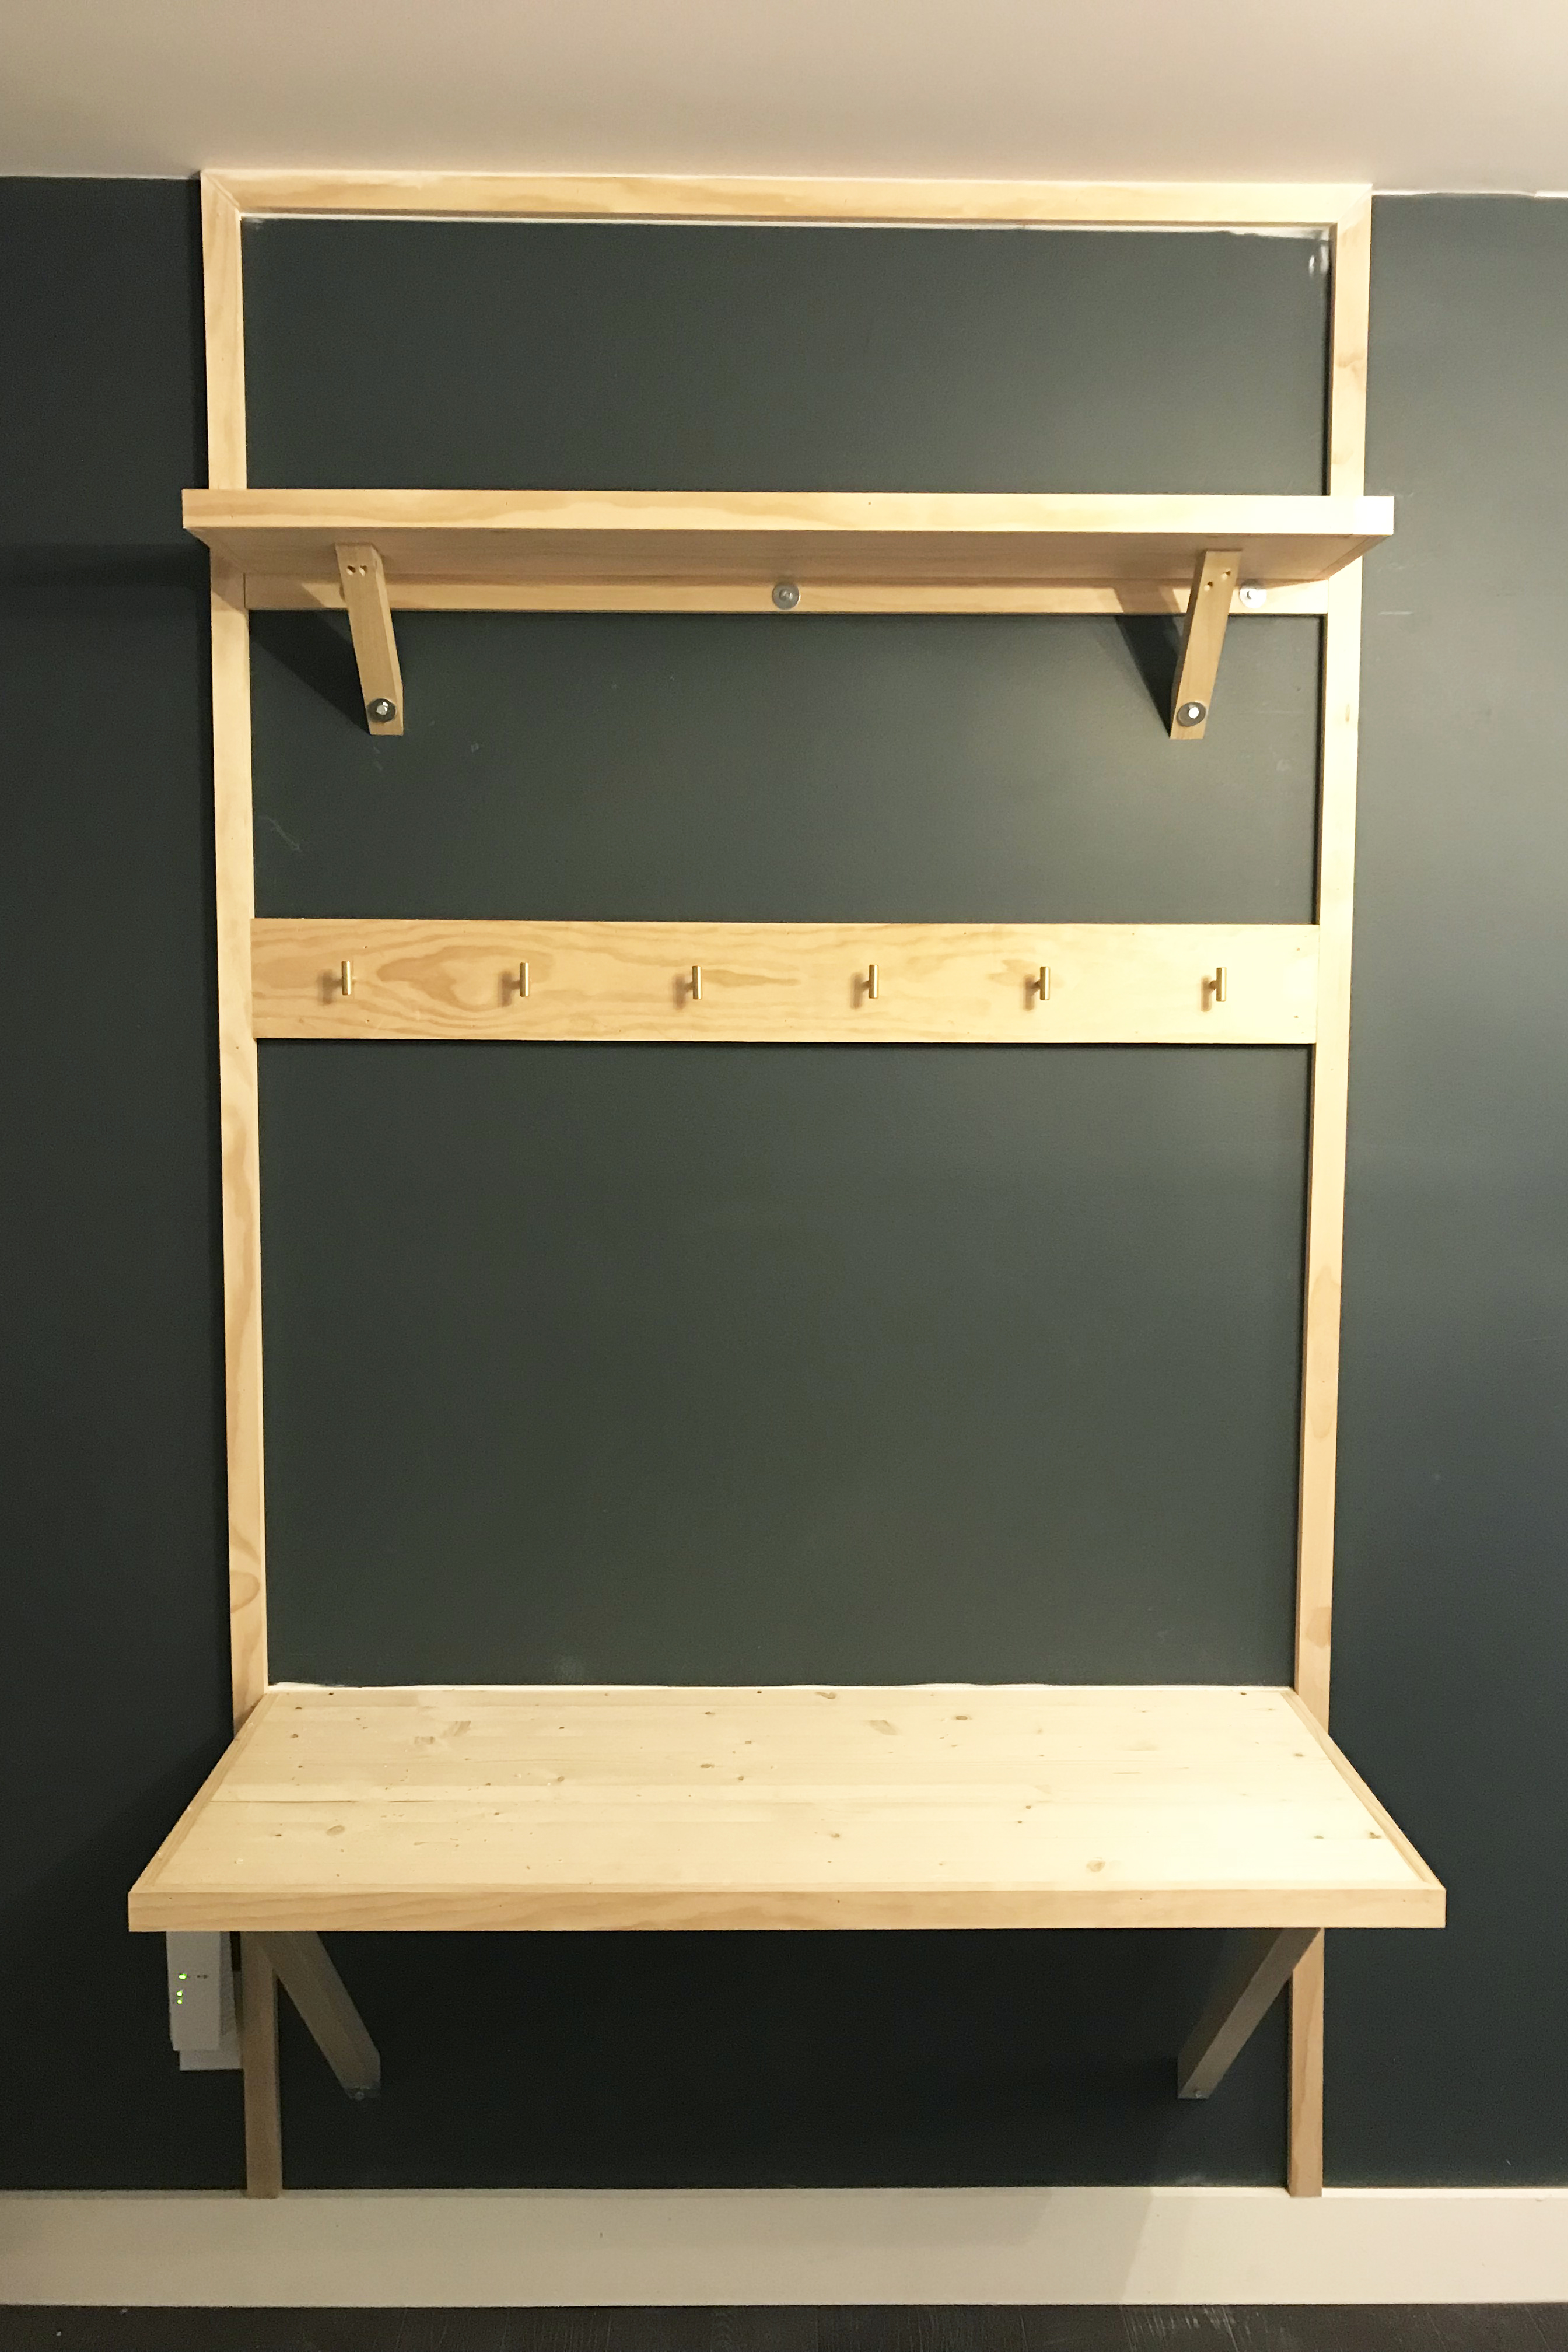 Set the edge of the desk on the board mounted to the wall and place a level on the desk. Once level, stick a pen or pencil through the holes on the bottom end of each of the square support boards (this is a lot easier with two people, one to hold the desk in place and one to mark the holes). Once the holes are marked on the wall, set the desk aside and put two drywall anchors in each spot you marked.
Now place the edge of the desk back on the board on the wall and shoot a few nails into the back of the desk, into the support board mounted to the wall, and then put a bolt and washer through the bottom end of each support boards and into the anchors. Lastly, I would add 3-4 screws into the back end of the top of the desk so that they go through the desk and into the support board. Now the desk should be extremely secure and hold a decent amount of weight! (The computer is pictured here because i was making sure the height of the desk felt right!)
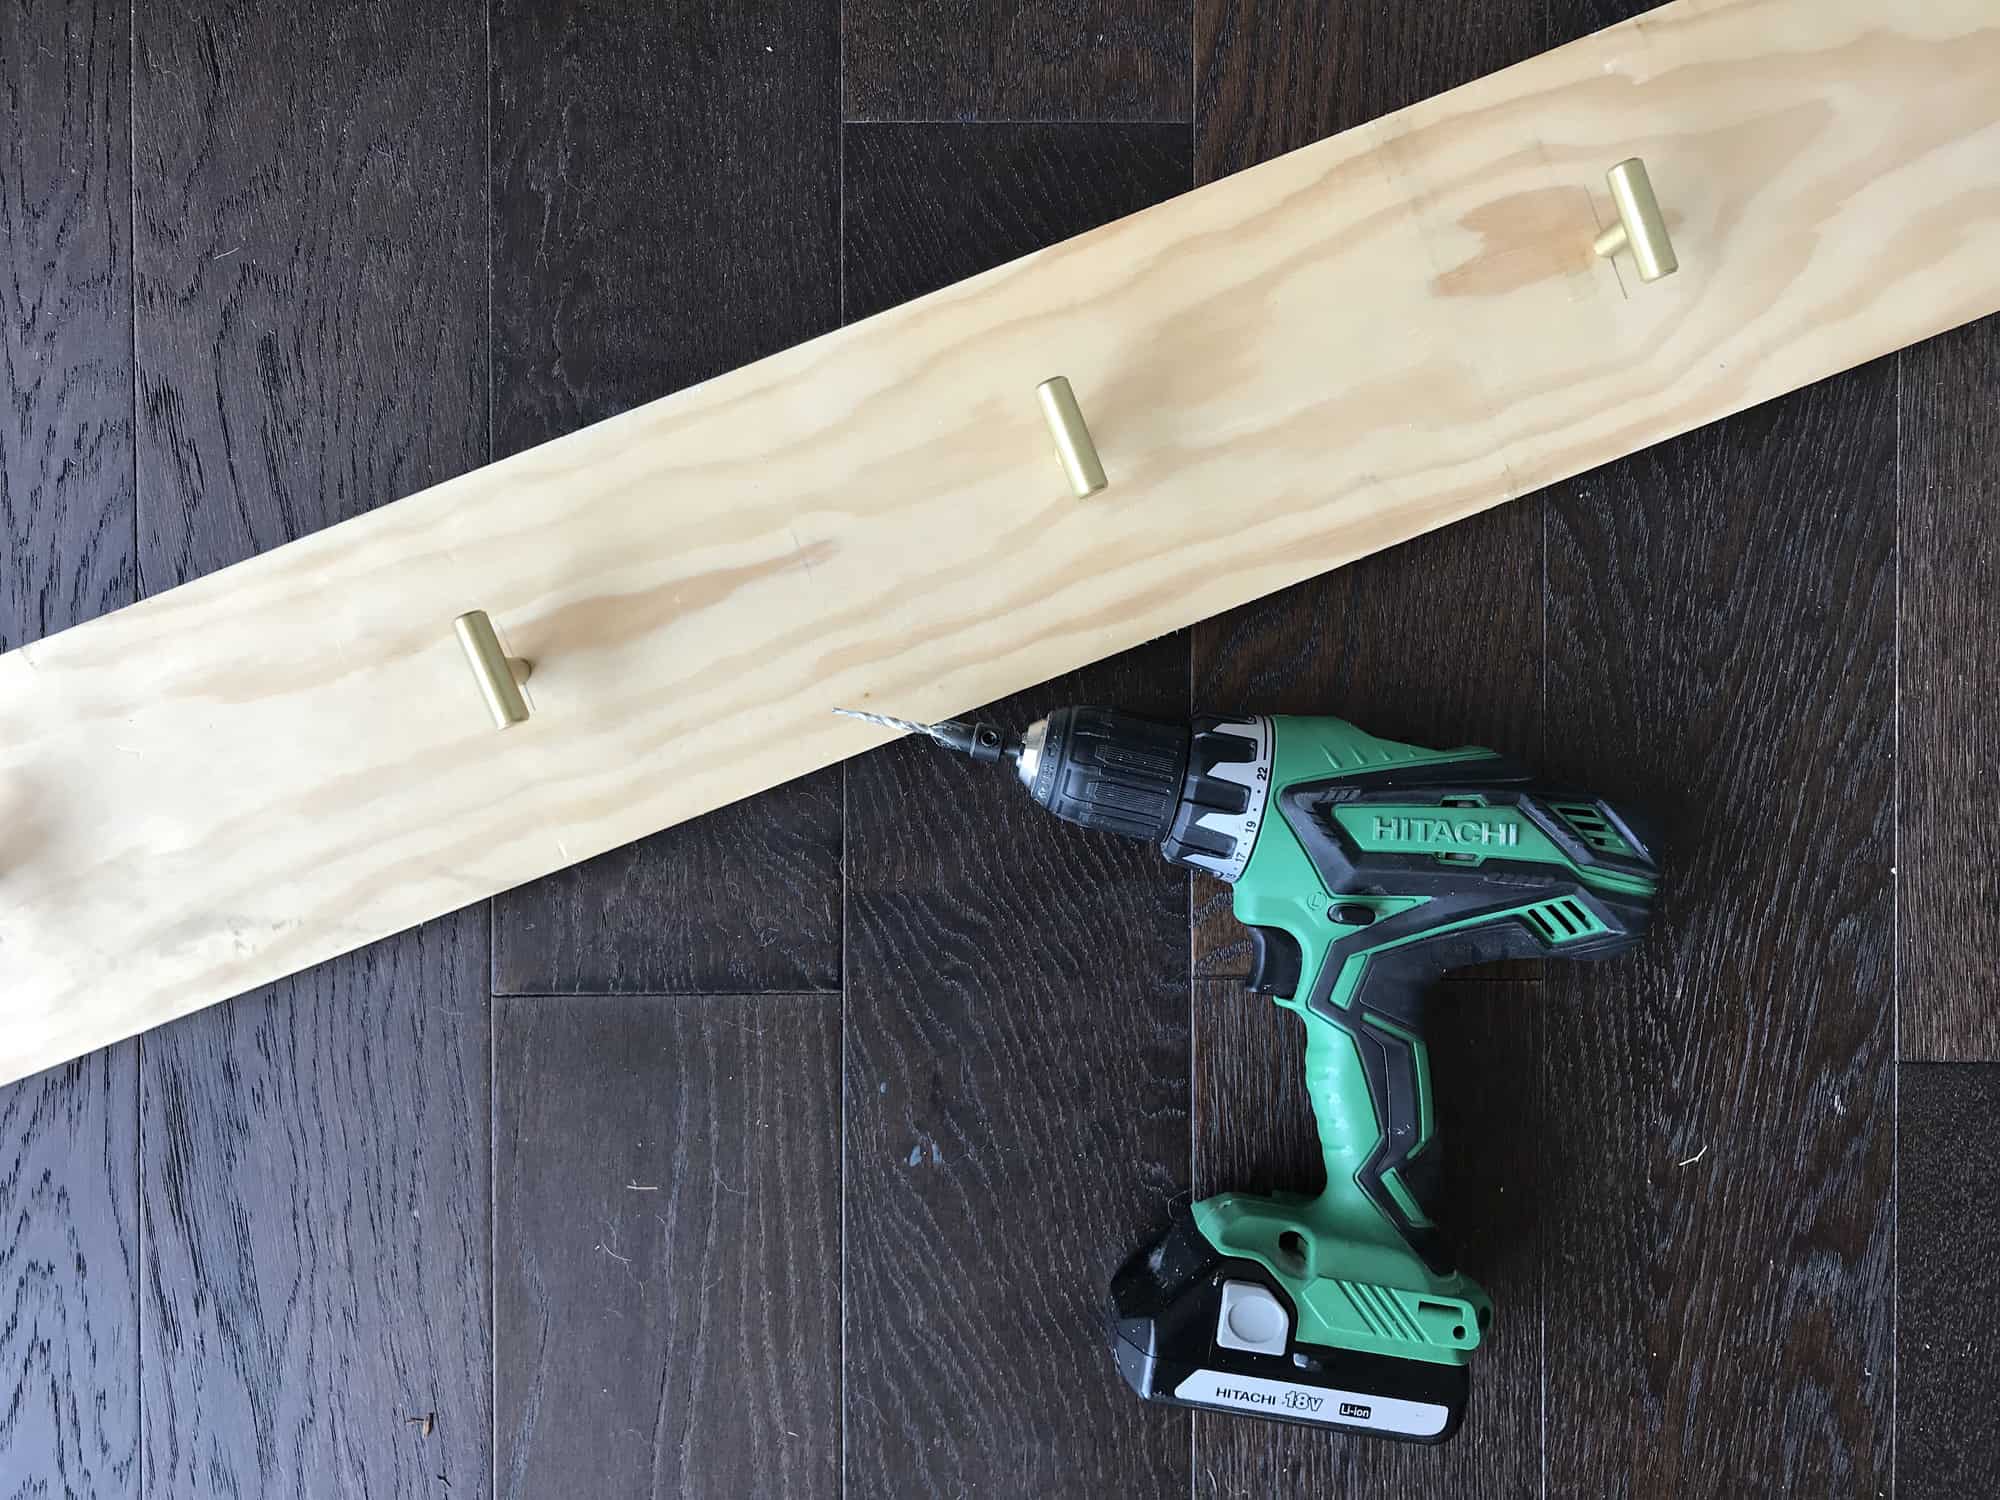 For the hook board, take your 4′ x 5 1/2″ x 3/4″ board and mark with pen or pencil 6 spaces on the back side of the board evenly spaced and pre-drill your holes with the countersink drill bit. Put the screws supplied with the hooks through the back of the board and screw into each hook. Choose how high you want it on the wall and secure it with your nail gun, making sure each edge is perfectly in line with the edges of the desk.
 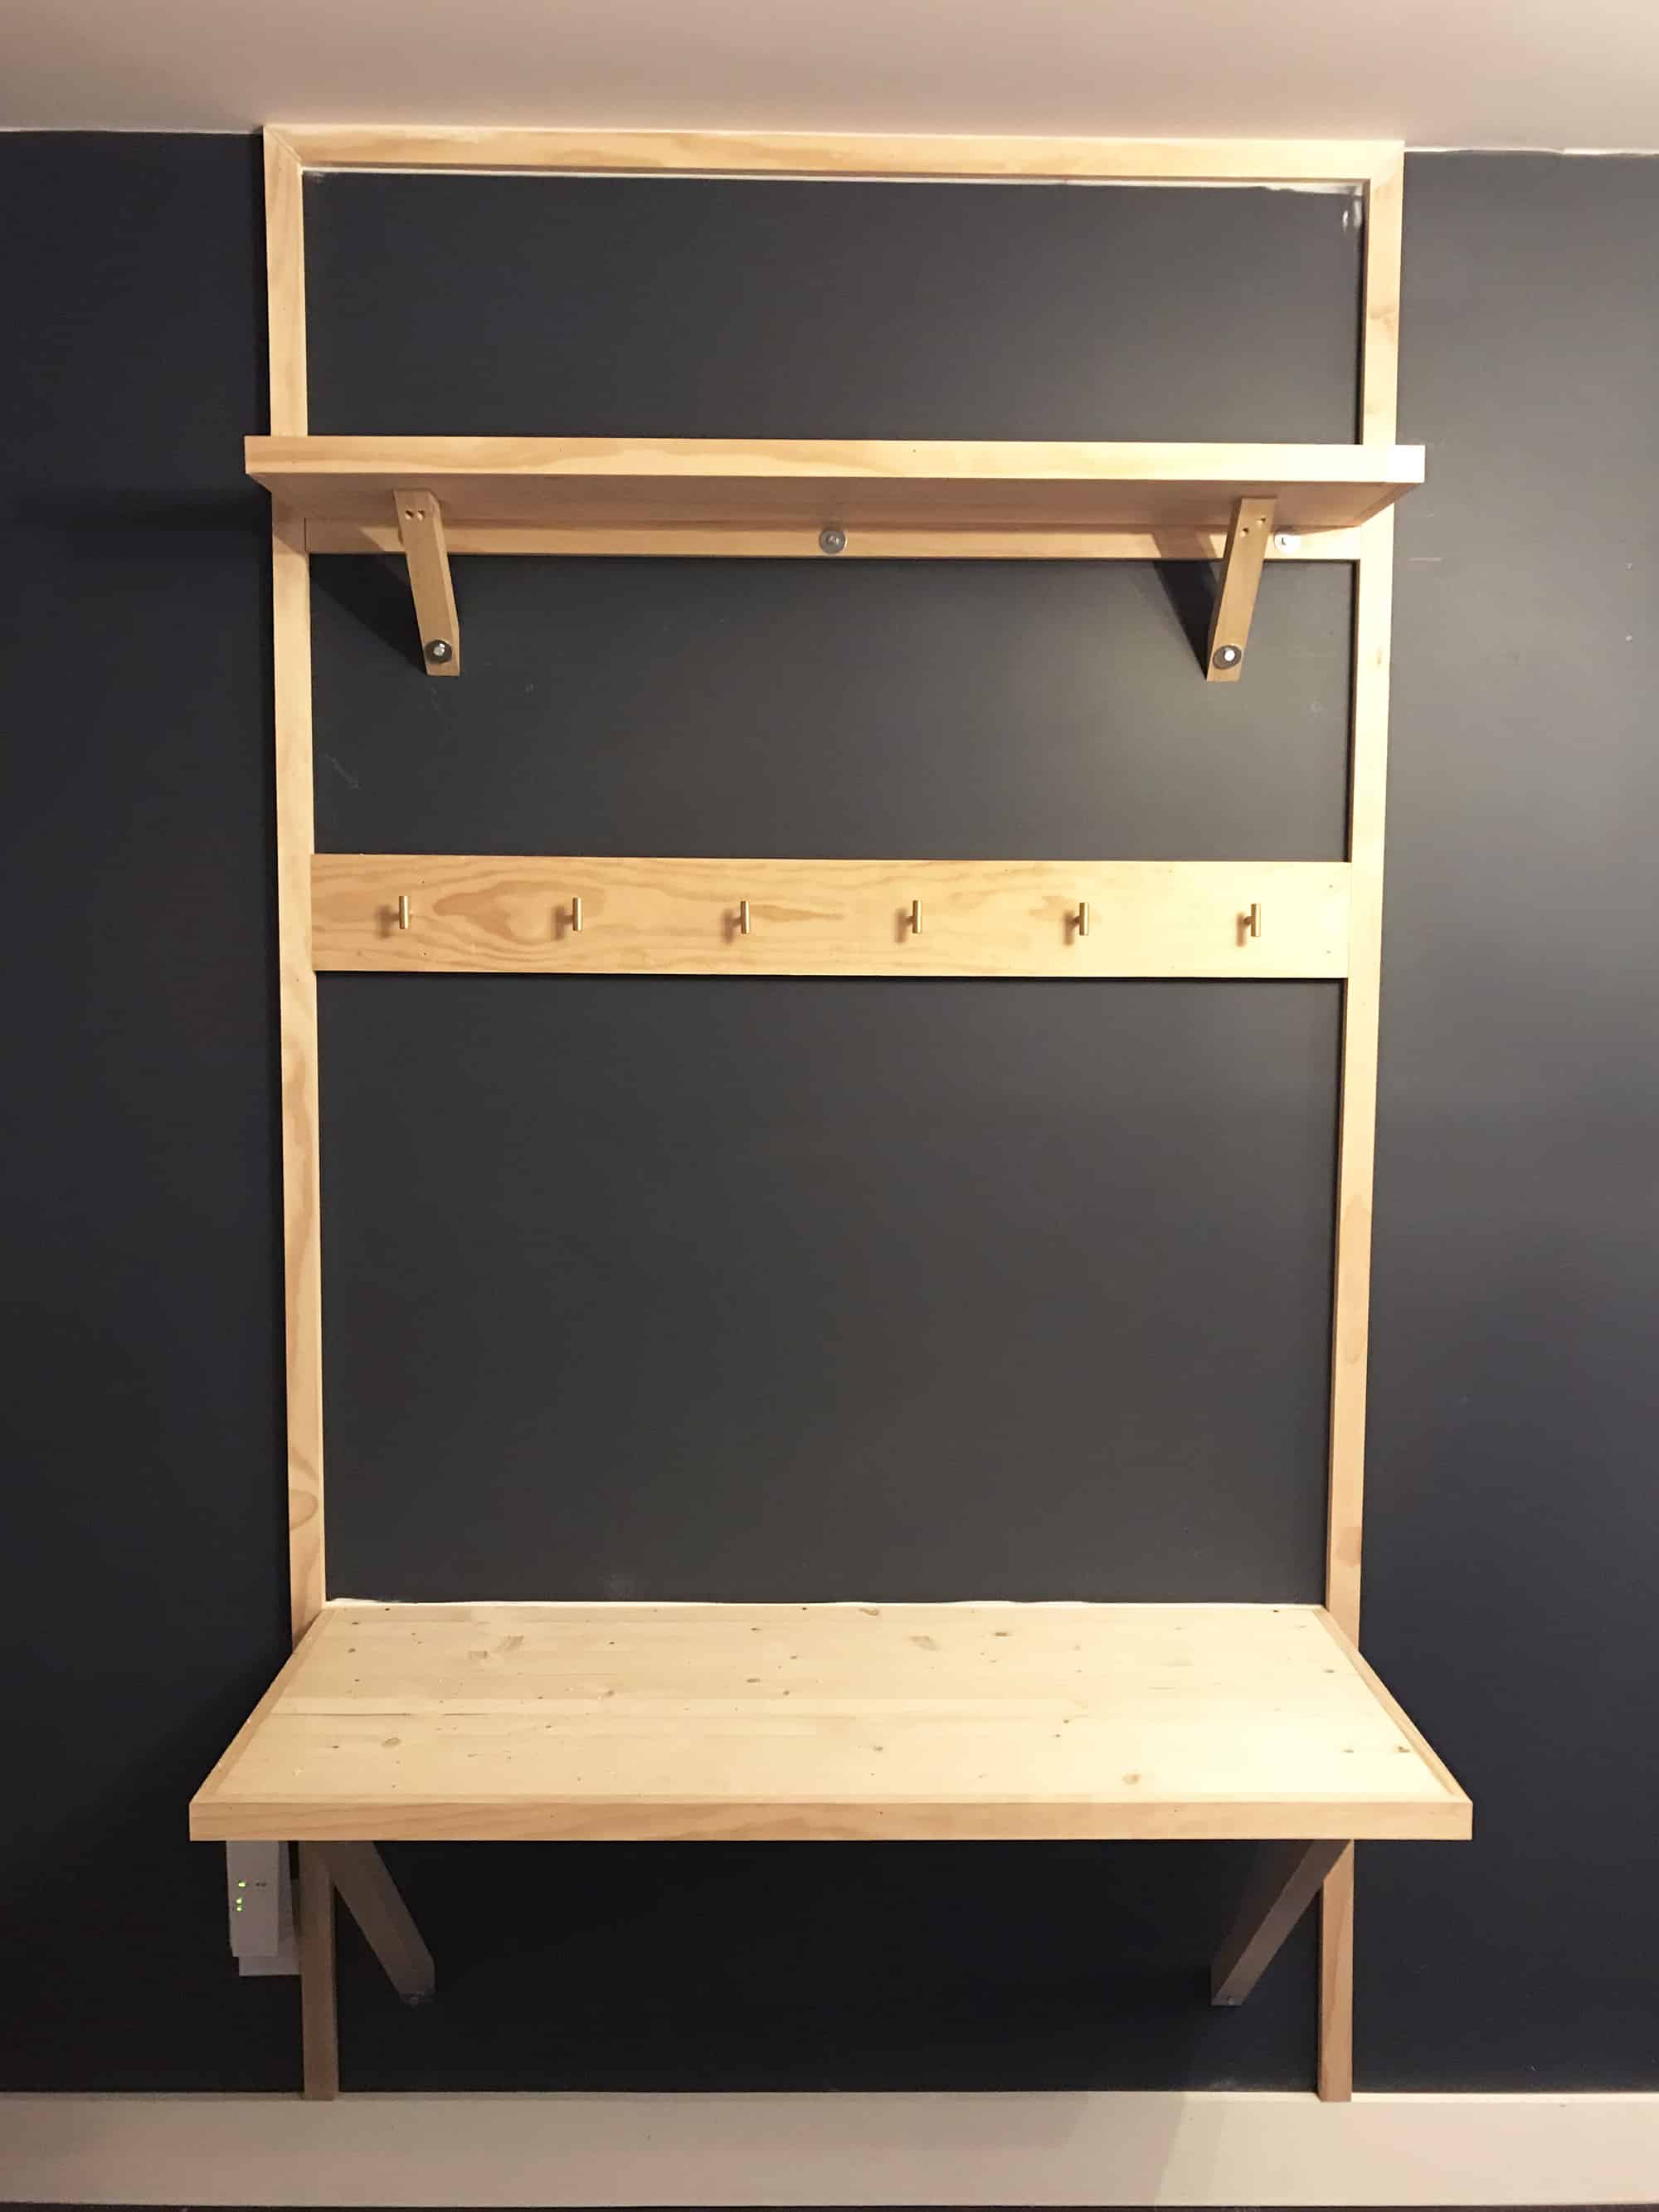 For the shelf, you are going to repeat the process exactly the same as the desk—the only difference being you are going to use the two 9 1/4″ x 4′ x 3/4″ boards for the actual shelf and your two trim pieces on each side of the shelf will be cut at 10″. The front trim piece will be the same as your desk (20 and 3/4″) since they are the same length and your 1 1/2″ x 1 1/2″ x 3′ square support boards will be cut to 7″. When securing the shelf to the wall, make sure it is perfectly in line with both the hook board and the desk. Once your shelf is done, you’re going to trim out the wall around the desk. Measure from the ceiling to the floor (or to the top of your floor trim) and cut two pieces of your 1 1/2″ x 3/4″ x 8 trim boards with one end flat and the other end at a 45-degree angle on each board.
With a level, hold each piece up to the edge of the desk and nail it to the wall with your nail gun. Once the two long side pieces are up, measure the distance in between the two at the top and cut another piece of trim with 45-degree angles on each end. Place the board in between the two side pieces and nail it to the wall. Now that the building portion is done, caulk any cracks that you think need it and wood putty the screw holes in the square support boards. Once dry, give the whole project a light sanding, and you’re ready to paint!
 What do you think?? We’d LOVE to see photos if you use this DIY in your own home. Also, would you guys be interested in seeing the rest of Jeremy’s studio?
xx! Elsie
Credits//Author: Elsie Larson and Collin DuPree. Photography: Amber Ulmer. Photos edited with A Color Story Desktop.
]]>
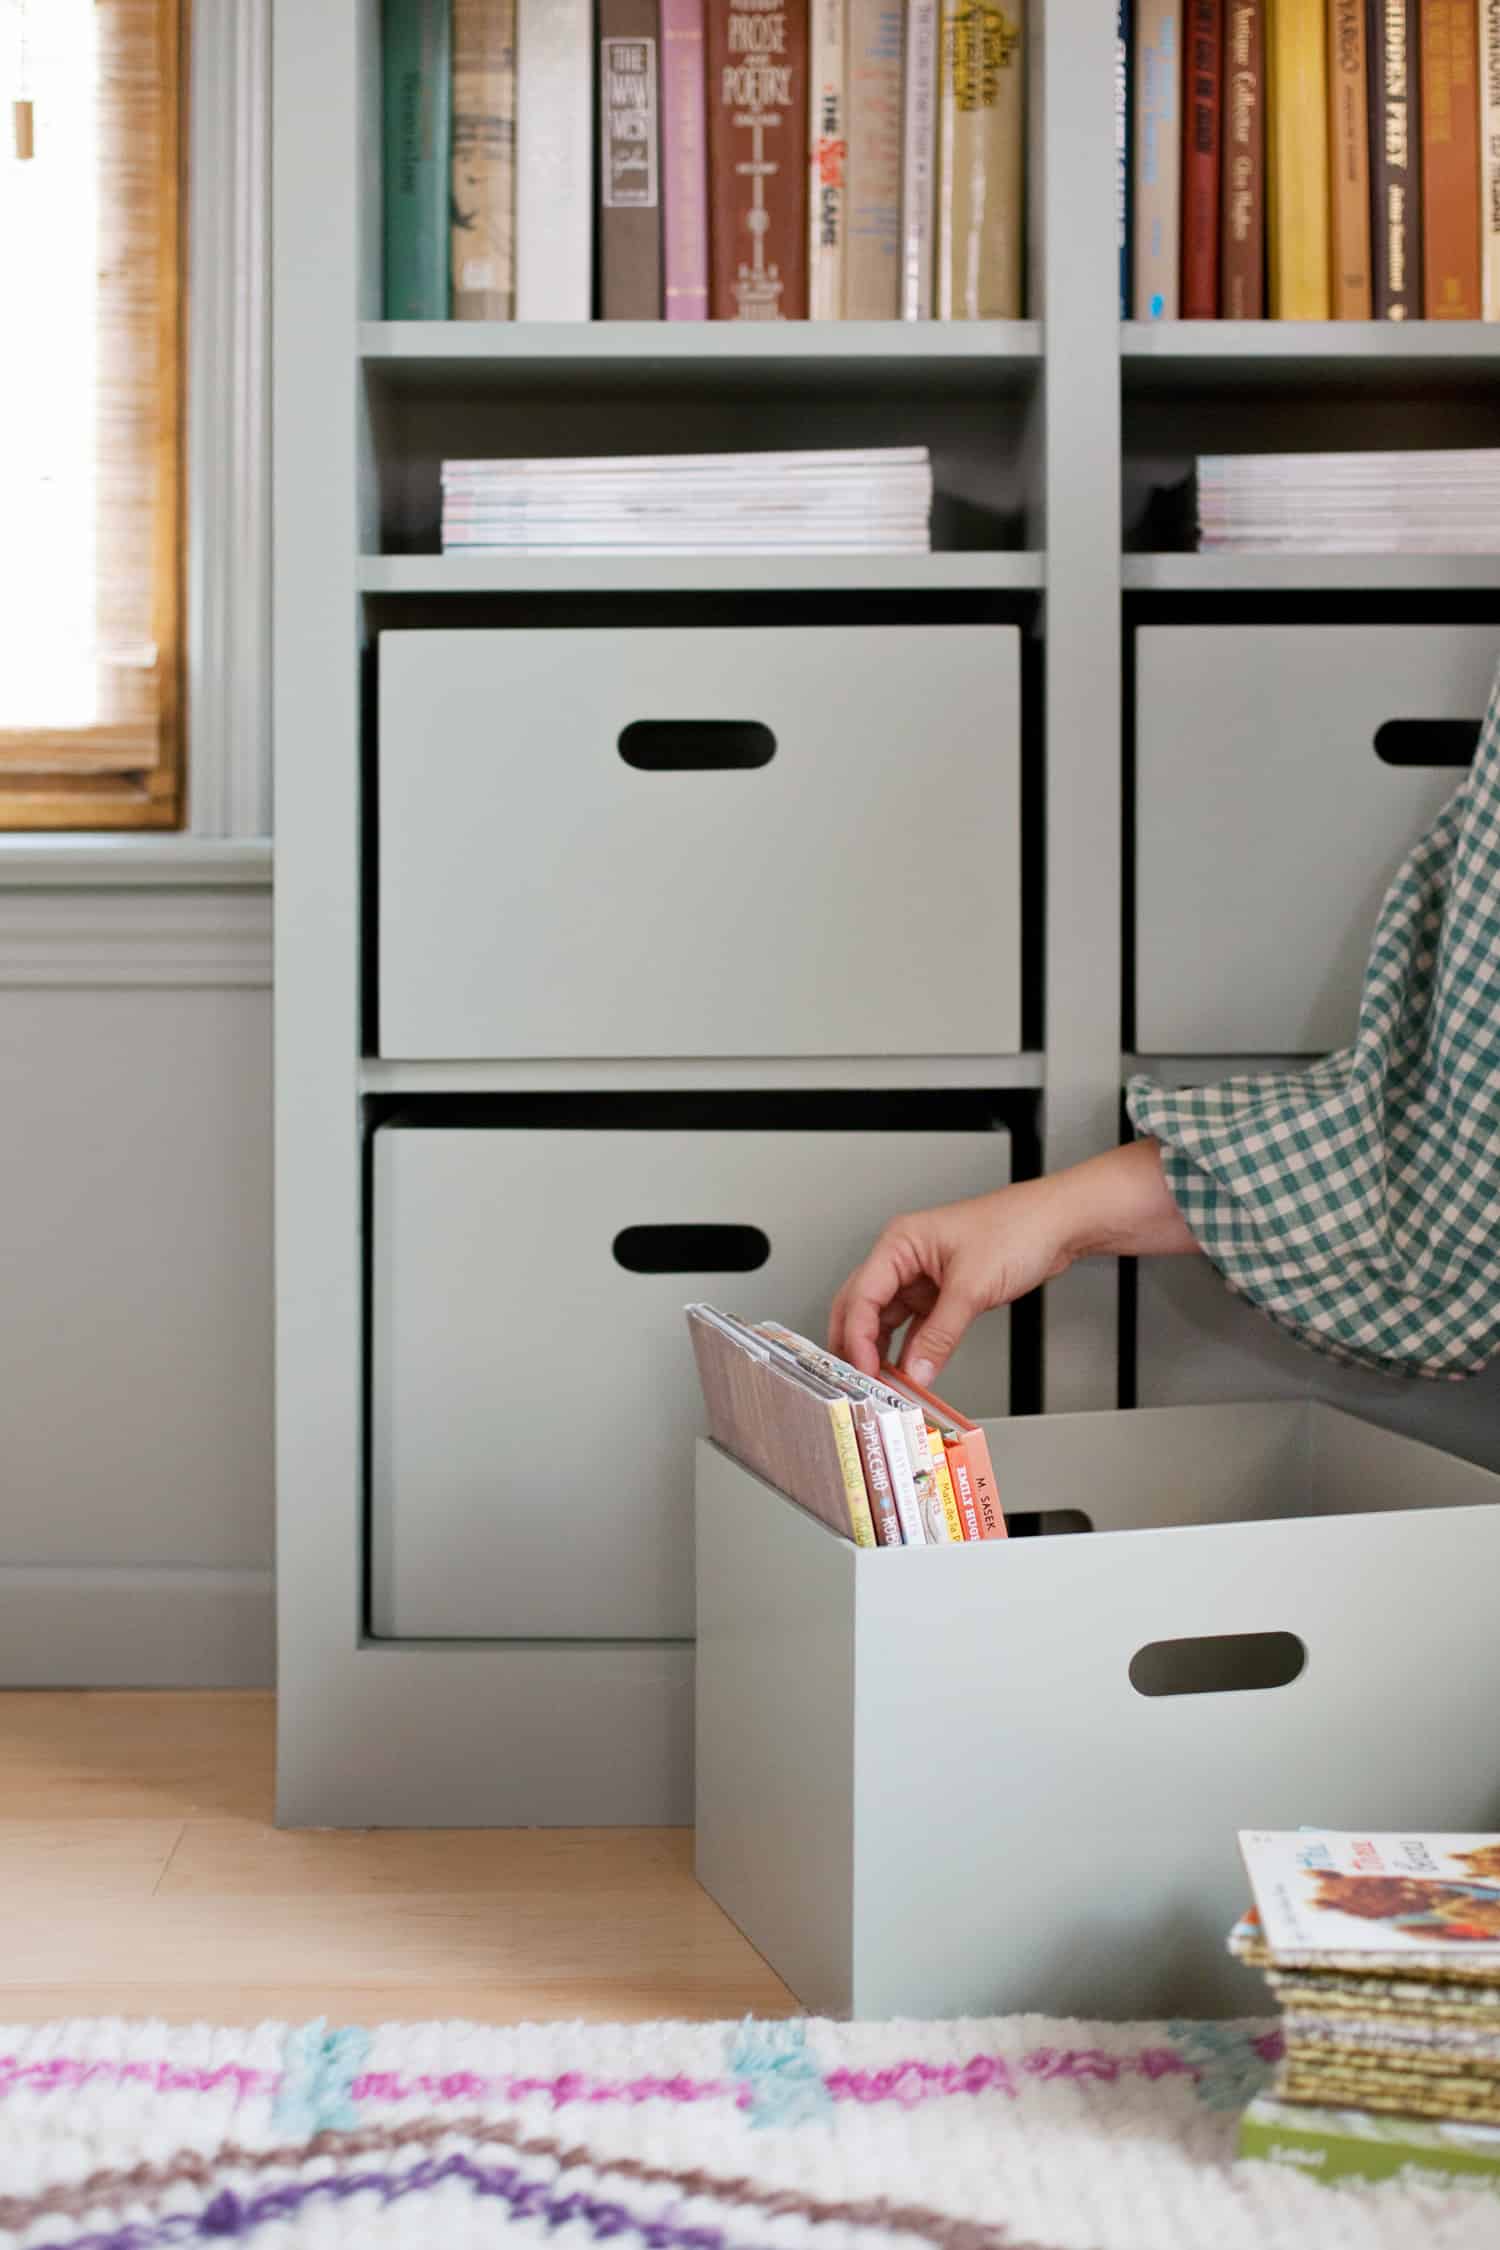 Storage boxes are my favorite decorative tool for bringing calm and organization to the most disordered of shelving scenarios. If you’ve been stumped on how to handle your own cluttered bookcase or open shelving situation, making a set of custom plywood boxes could be a great organizational tool for you. And they look nice too!
When creating my built-in Billy bookcase unit, I wondered if should put cabinet doors on the lower section to hide away less attractive items, such as office supplies and most of our children’s books. In the end, I decided matching boxes would be a nice look. Plus, boxes would offer portability to the items inside.
The problem with this solution was that I couldn’t find any boxes I liked that were the exact size I needed. So I decided to make my own custom plywood storage boxes.
These boxes ended up being relatively easy to make—the perfect project for a beginner woodworker. The supplies are also much less expensive than buying alternative storage bins from the store. Check out how to make your own set of custom plywood storage boxes below!
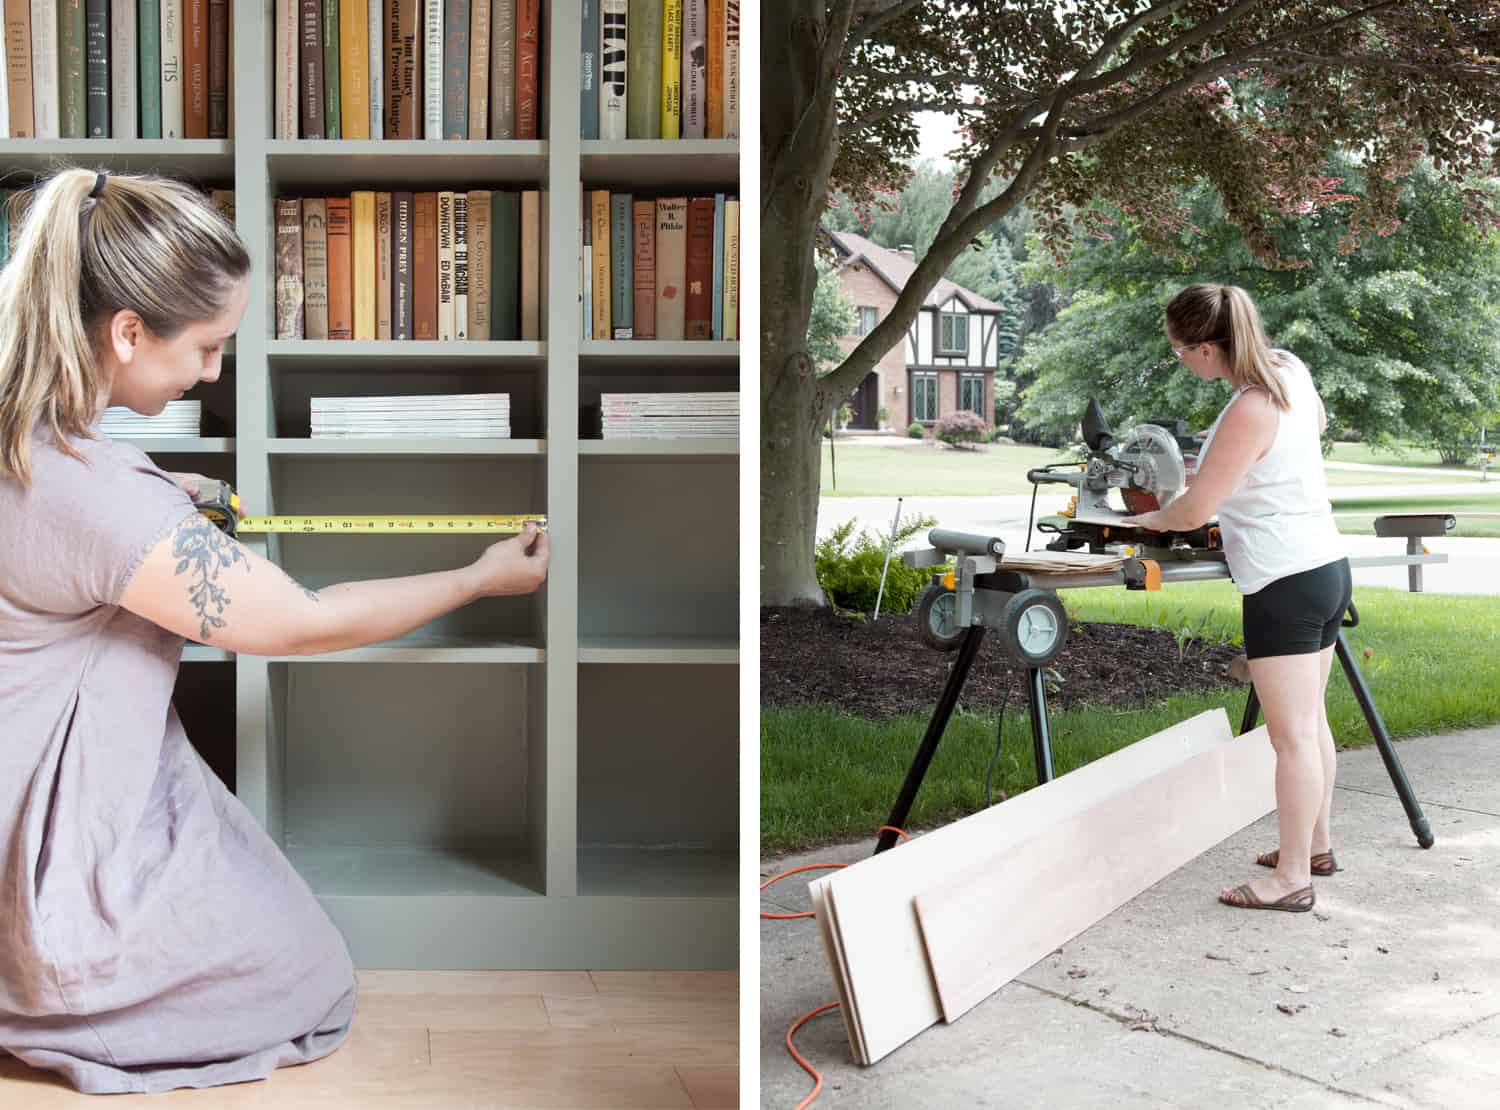 Measure Shelving To Determine Box Size
Because I was using IKEA Billy bookcase units with about 14″ width openings, I was restricted to a box size that would fit inside each little cubby.
I chose to make my boxes 1″ more narrow than the shelving opening to give myself and my children wiggle room when returning each box to its space. I also made the height of the boxes 3/4″ shorter than the opening. I’m happy with how this sizing worked out for me.
Determine Lumber Needed
I recommend using 1/4″ plywood for the sides of your boxes, as it will produce lightweight boxes with adequate stability. Don’t use 1/4″ plywood to make boxes much larger than mine, or the boxes will lose their stability. For the bottoms of the boxes, use a thicker plywood for more stability. (I used 1/2″ plywood for the bottom of my boxes.) Do not use particle board for any part of your boxes, or they will be too heavy to manage.
After deciding on the height, width, and depth of your boxes, determine how much lumber you will need. Plywood is sold in 4’x8′ pieces, so I chose to have 1/4″ plywood sheets cut into strips at the hardware store.
Half of the strips were cut to 13″ wide—the width I needed for the fronts and backs of my boxes. The other half of the strips were cut to 10″—the width I needed for the sides* of the boxes. I cut the strips of plywood to the height I needed using a sliding miter saw.
To make 11 boxes I used two full sheets of 1/4″ plywood plus about 1/2 of a sheet of 1/2″ plywood. (The 1/2″ sheet of plywood was leftover from this fold-away dollhouse project.)
*When determining the width you need for the sides of your boxes, keep in mind that these pieces should be 1/4″ more narrow than your shelf depth. Subtracting 1/4″ allows for the thickness of the front and back panels of the box.
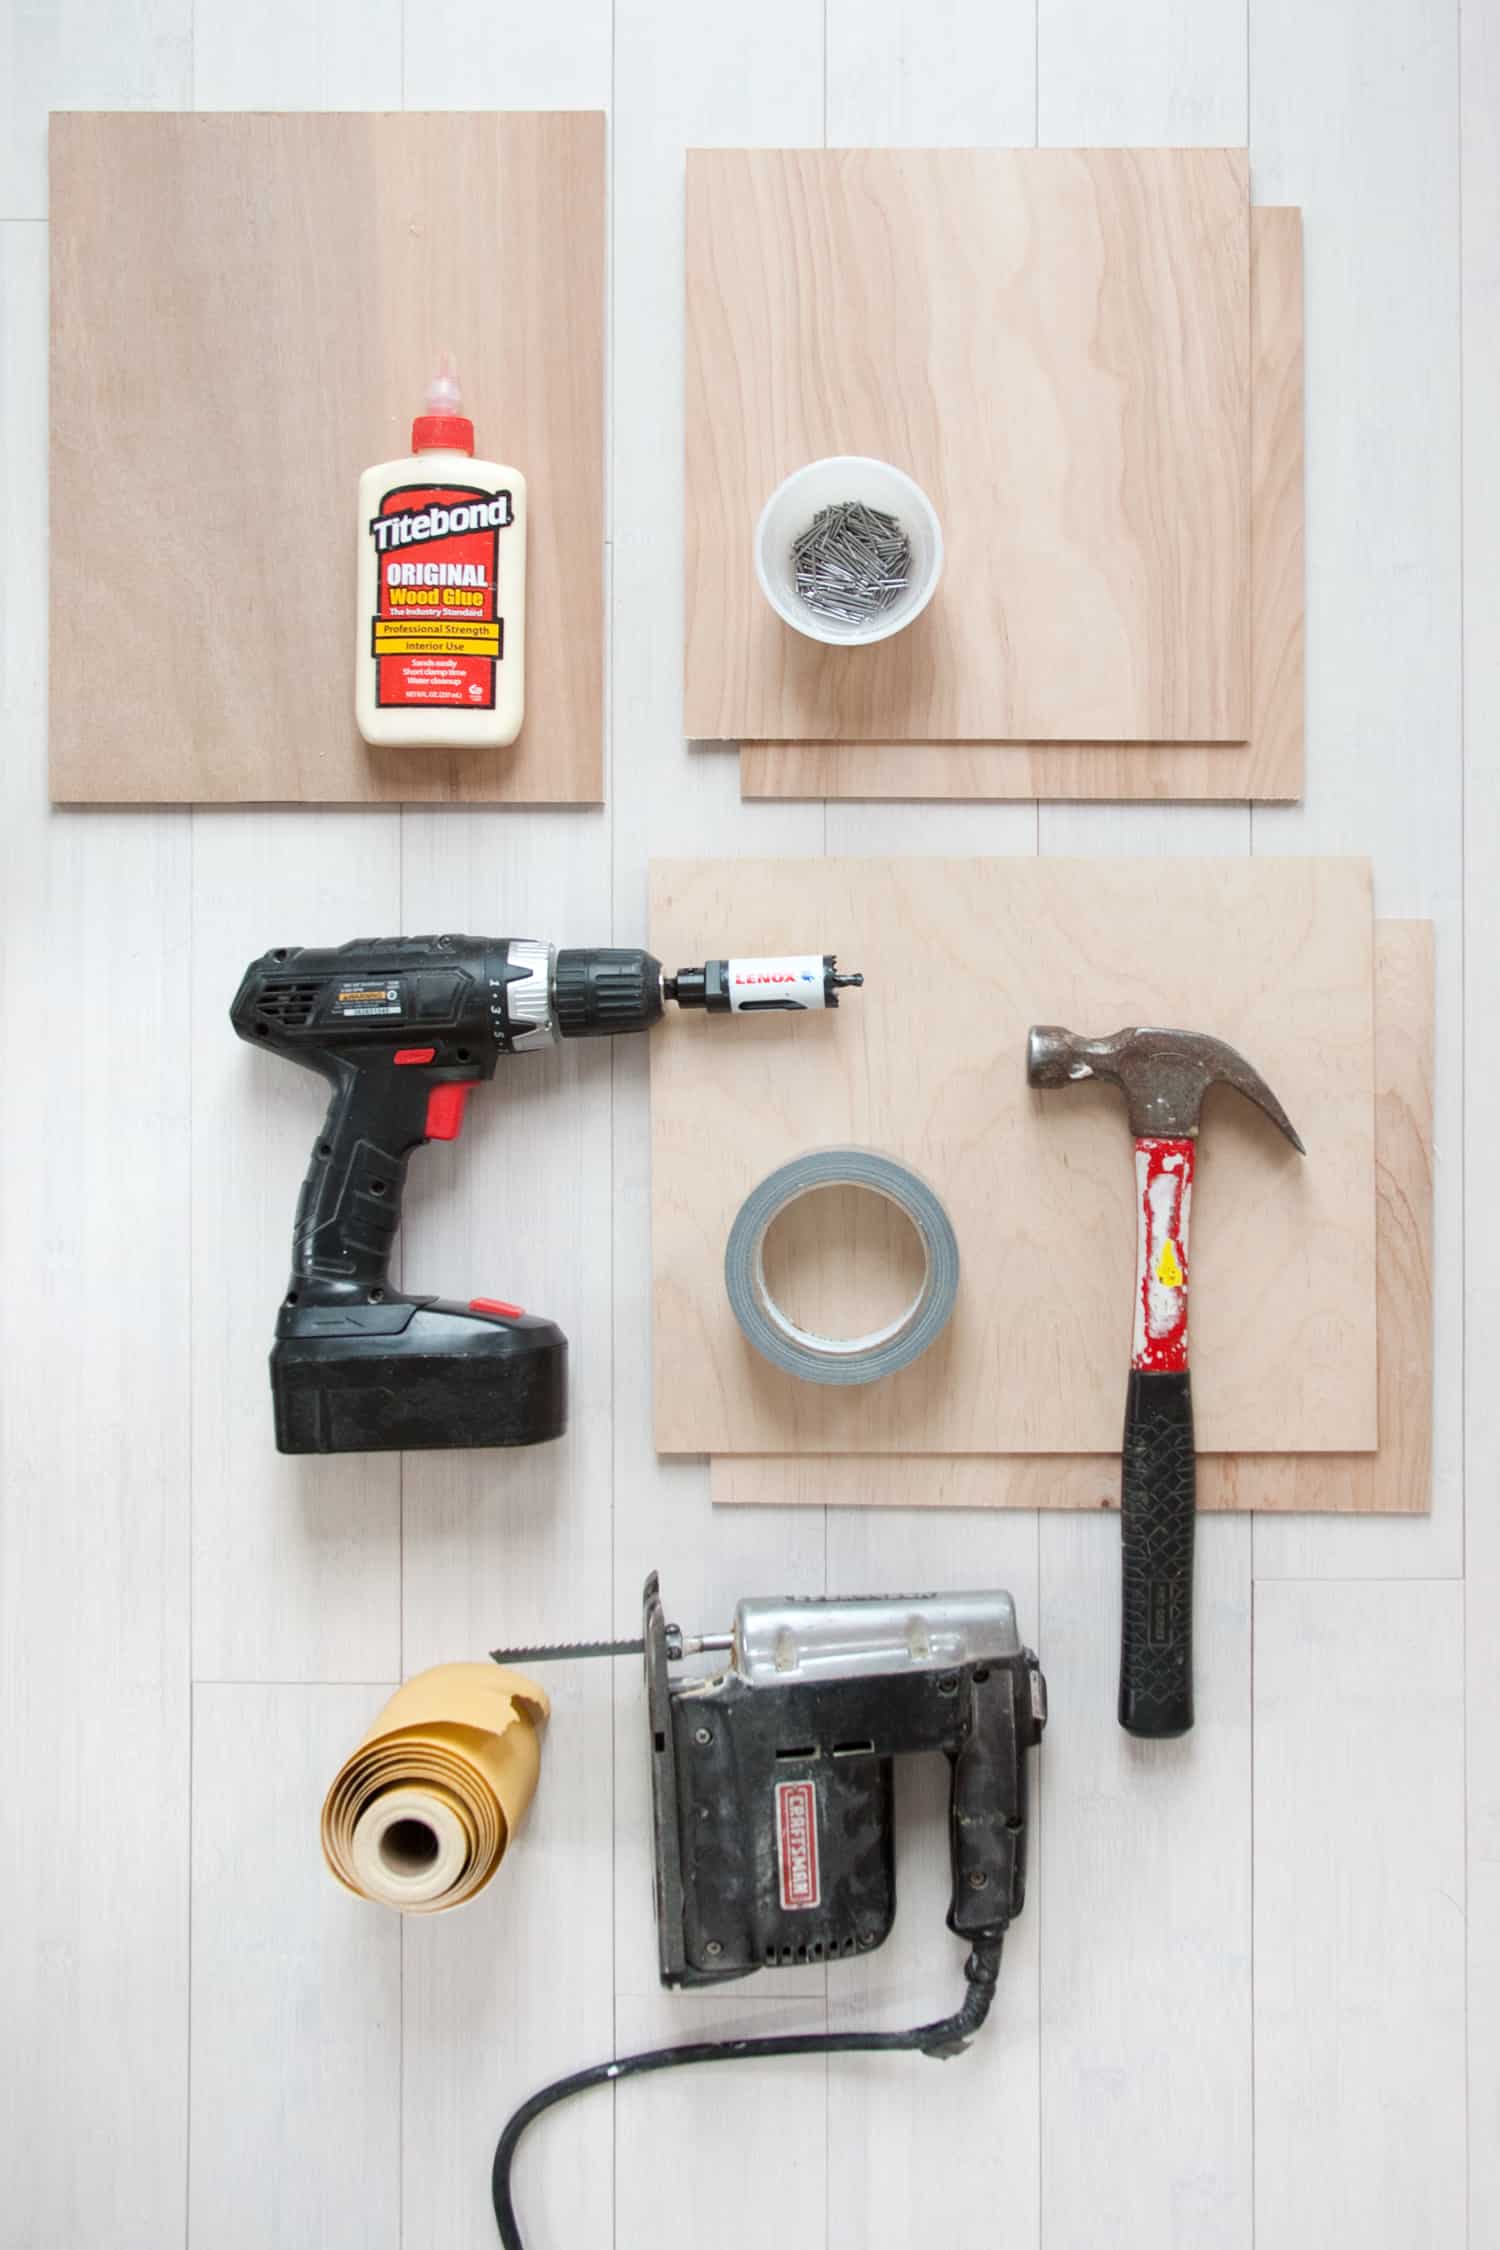 Materials
–1/4″ plywood for the sides of your boxes
–1/2″ plywood for the bottom of your boxes
-Wire brads (I used 1/2″ brads to nail through 1/4″ plywood and 1″ brads to nail through 1/2″ plywood.)
-Sandpaper—80 and 120, and 320 grit (120 is for sanding after box assembly, when a palm sander is handy. I always use adhesive sandpaper when using my palm sander.)
–Wood glue
-Duct tape
Tools
–Jig saw fitted with a fine-cutting blade
-Power drill
–1″ hole saw (drill bit)
-Hammer
–Palm sander (helpful but not necessary)
-Pencil
–Tape measure
How to Build a Simple Plywood Box
Step One: Cut the pieces needed for the sides and bottom of your boxes. See the section above about determining the sizes you need.
Make sure width of the bottom of your box is the same as the width of the left/right sides of your box.
The length of your box bottom should be the same as the width of your front/back sides, minus the thickness of two pieces of 1/4″ plywood. (1/4″ plywood is actually closer to 1/8″ thick, but check your plywood to determine the actual thickness.)
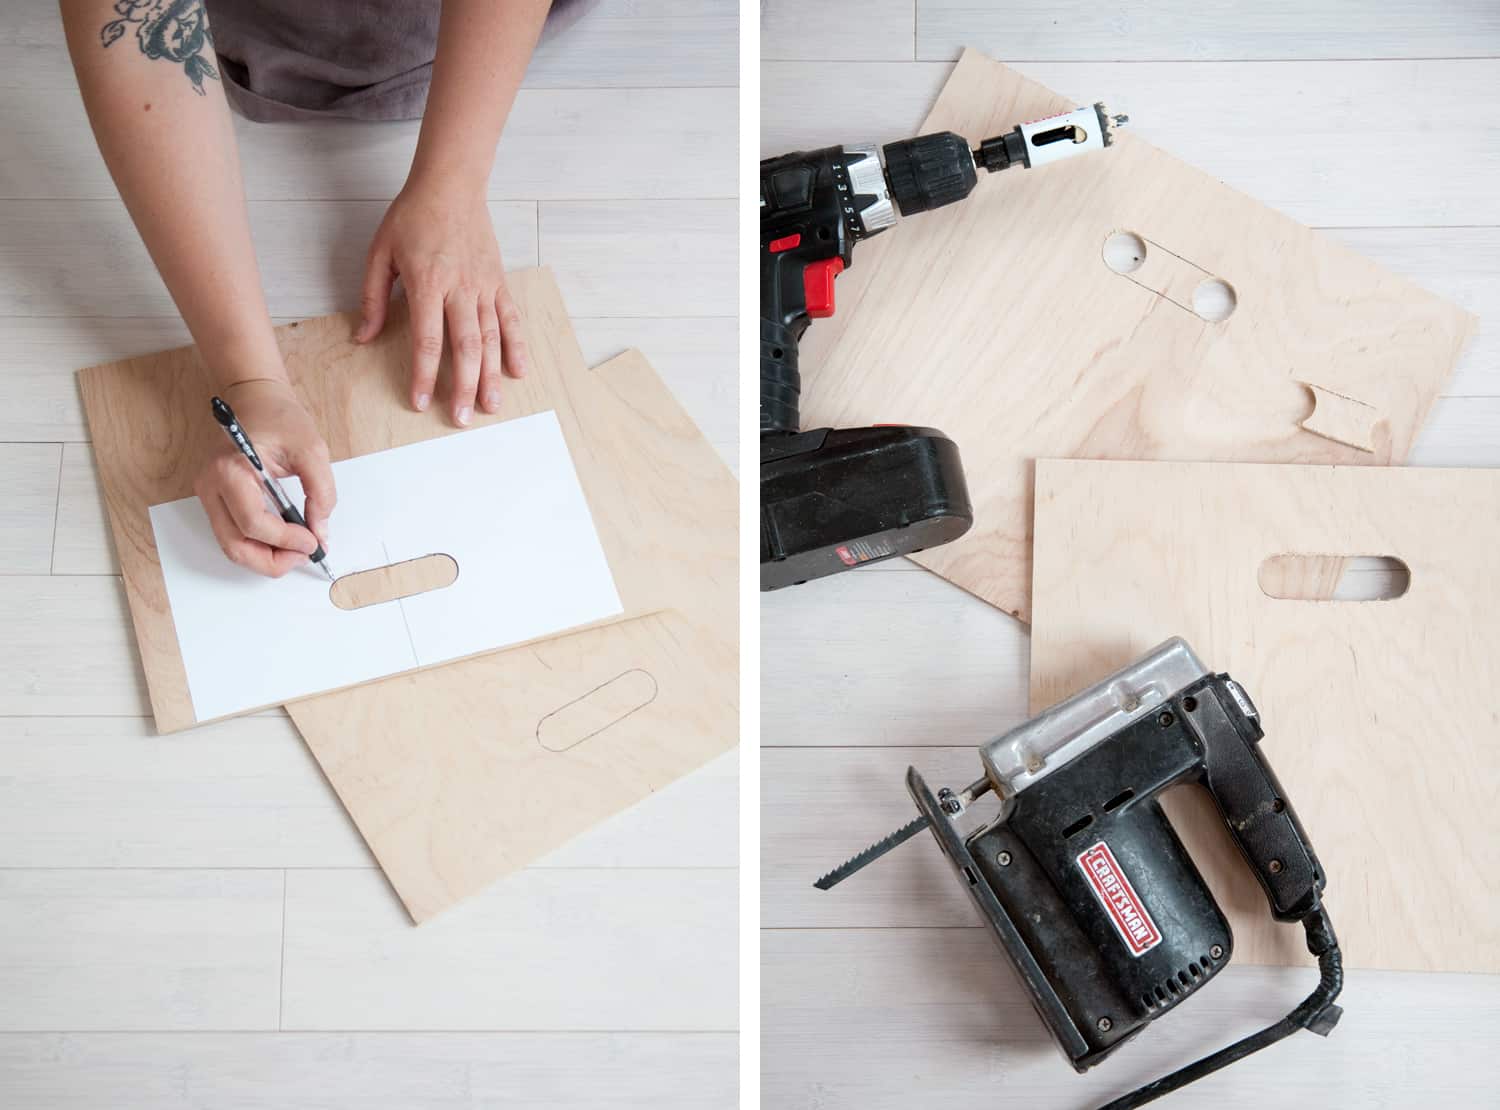 Step Two: Print and cut out this slotted handle template. Center the paper template at the top of your front and back box panels. Trace around the edges of the template where your handle opening will be.
Step Two: Use a 1″ hole saw bit to cut out the rounded edges of the slotted handle opening. Then use a jig saw to connect the holes, creating one opening. I recommend practicing on pieces of scrap wood before cutting into your box panels. Centering your hole saw and controlling the jig saw may take some practice to get it right.
When using the jig saw in this step, always err for a smaller hole rather than a larger hole. You can use sandpaper to make your jig saw cuts better match the hole saw cuts in step three.
Tips for using a hole saw: When cutting holes with a hole saw drill bit, I recommend marking the center part of your hole first, then using a smaller drill bit to drill through that point.
Your hole saw will better be able to find the center point after making a pilot hole. Another tip is to only cut the hole halfway through the thickness of the board then stop. Flip your board over and cut the hole the rest of the way from the opposite side. This will help prevent the wood from splintering.
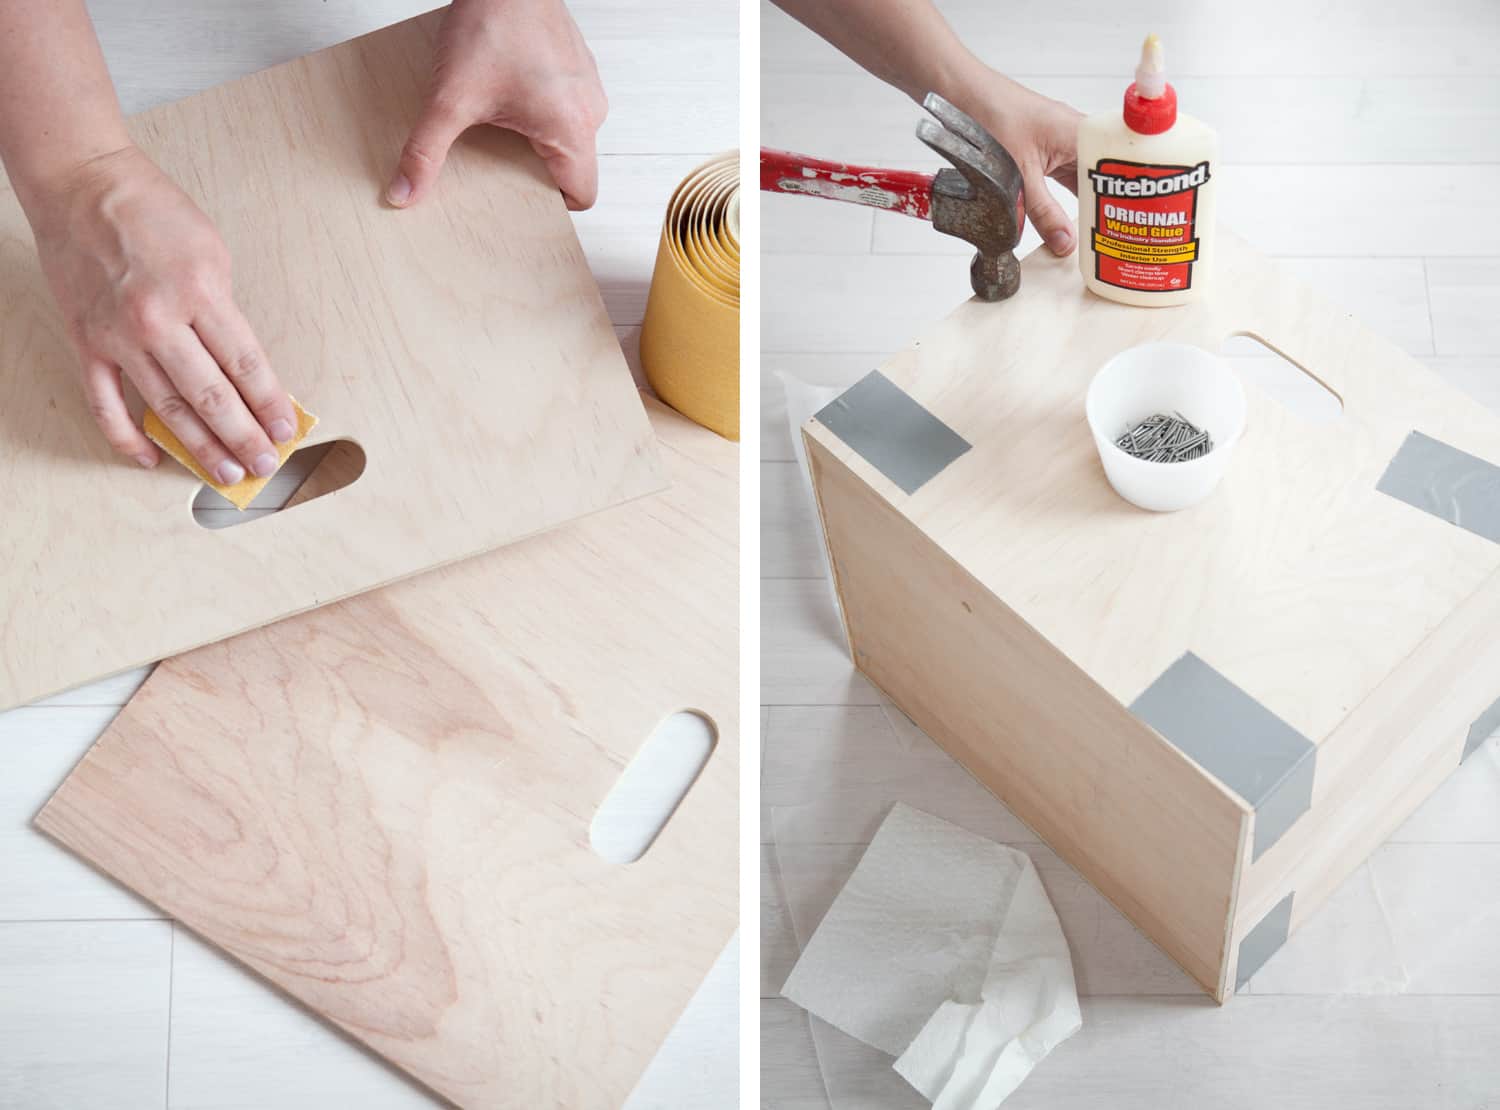 Step Three: Use 80 grit sandpaper to smooth the opening, particularly the points where the jig saw cut meets up with the hole saw cut. It is useful to wrap adhesive sandpaper around a thin scrap of wood to use as a sanding block for this step. Then use sandpaper without a block (only your hands) for the more nuanced sanding of the curves.
Step Four: Assemble the pieces of your box with wood glue* at all the joints, taped together with duct tape until you’ve added nails. The box won’t hold together super well with duct tape, so you’ll need to work gingerly as you begin to hammer in brads through the joints.
The first section I nailed was along the bottom edge of the the left/right panels of the box into the bottom panel of the box. Then I nailed through the bottom edge of the front/back section into the bottom panel of the box. Next, I nailed through either side of the front/back panels where they meet the 1/4″ plywood of the left/right panels.
Tips for nailing together your box panels: Use 1/2″ wire brads when nailing through the sides of the front/back panels into 1/4″ plywood, and use 1″ wire brads when nailing into the bottom panel.
Be very careful when tapping the brads into place, particularly into the 1/4″ plywood, because if they’re not perfectly centered and perpendicular, you’ll end up with nails poking out inside or outside of your box. Haste makes waste, or in this case, haste makes more work for yourself!
*Be sure to remove any seeping wood glue before it dries! It is very difficult to sand away dried wood glue. And if you plan to stain your boxes, dried glue will repel stain and ruin your finish. Some people choose to wipe away wet wood glue with a damp rag (that’s me!), while others may use a chisel or blade to scrape it away as it begins to harden.
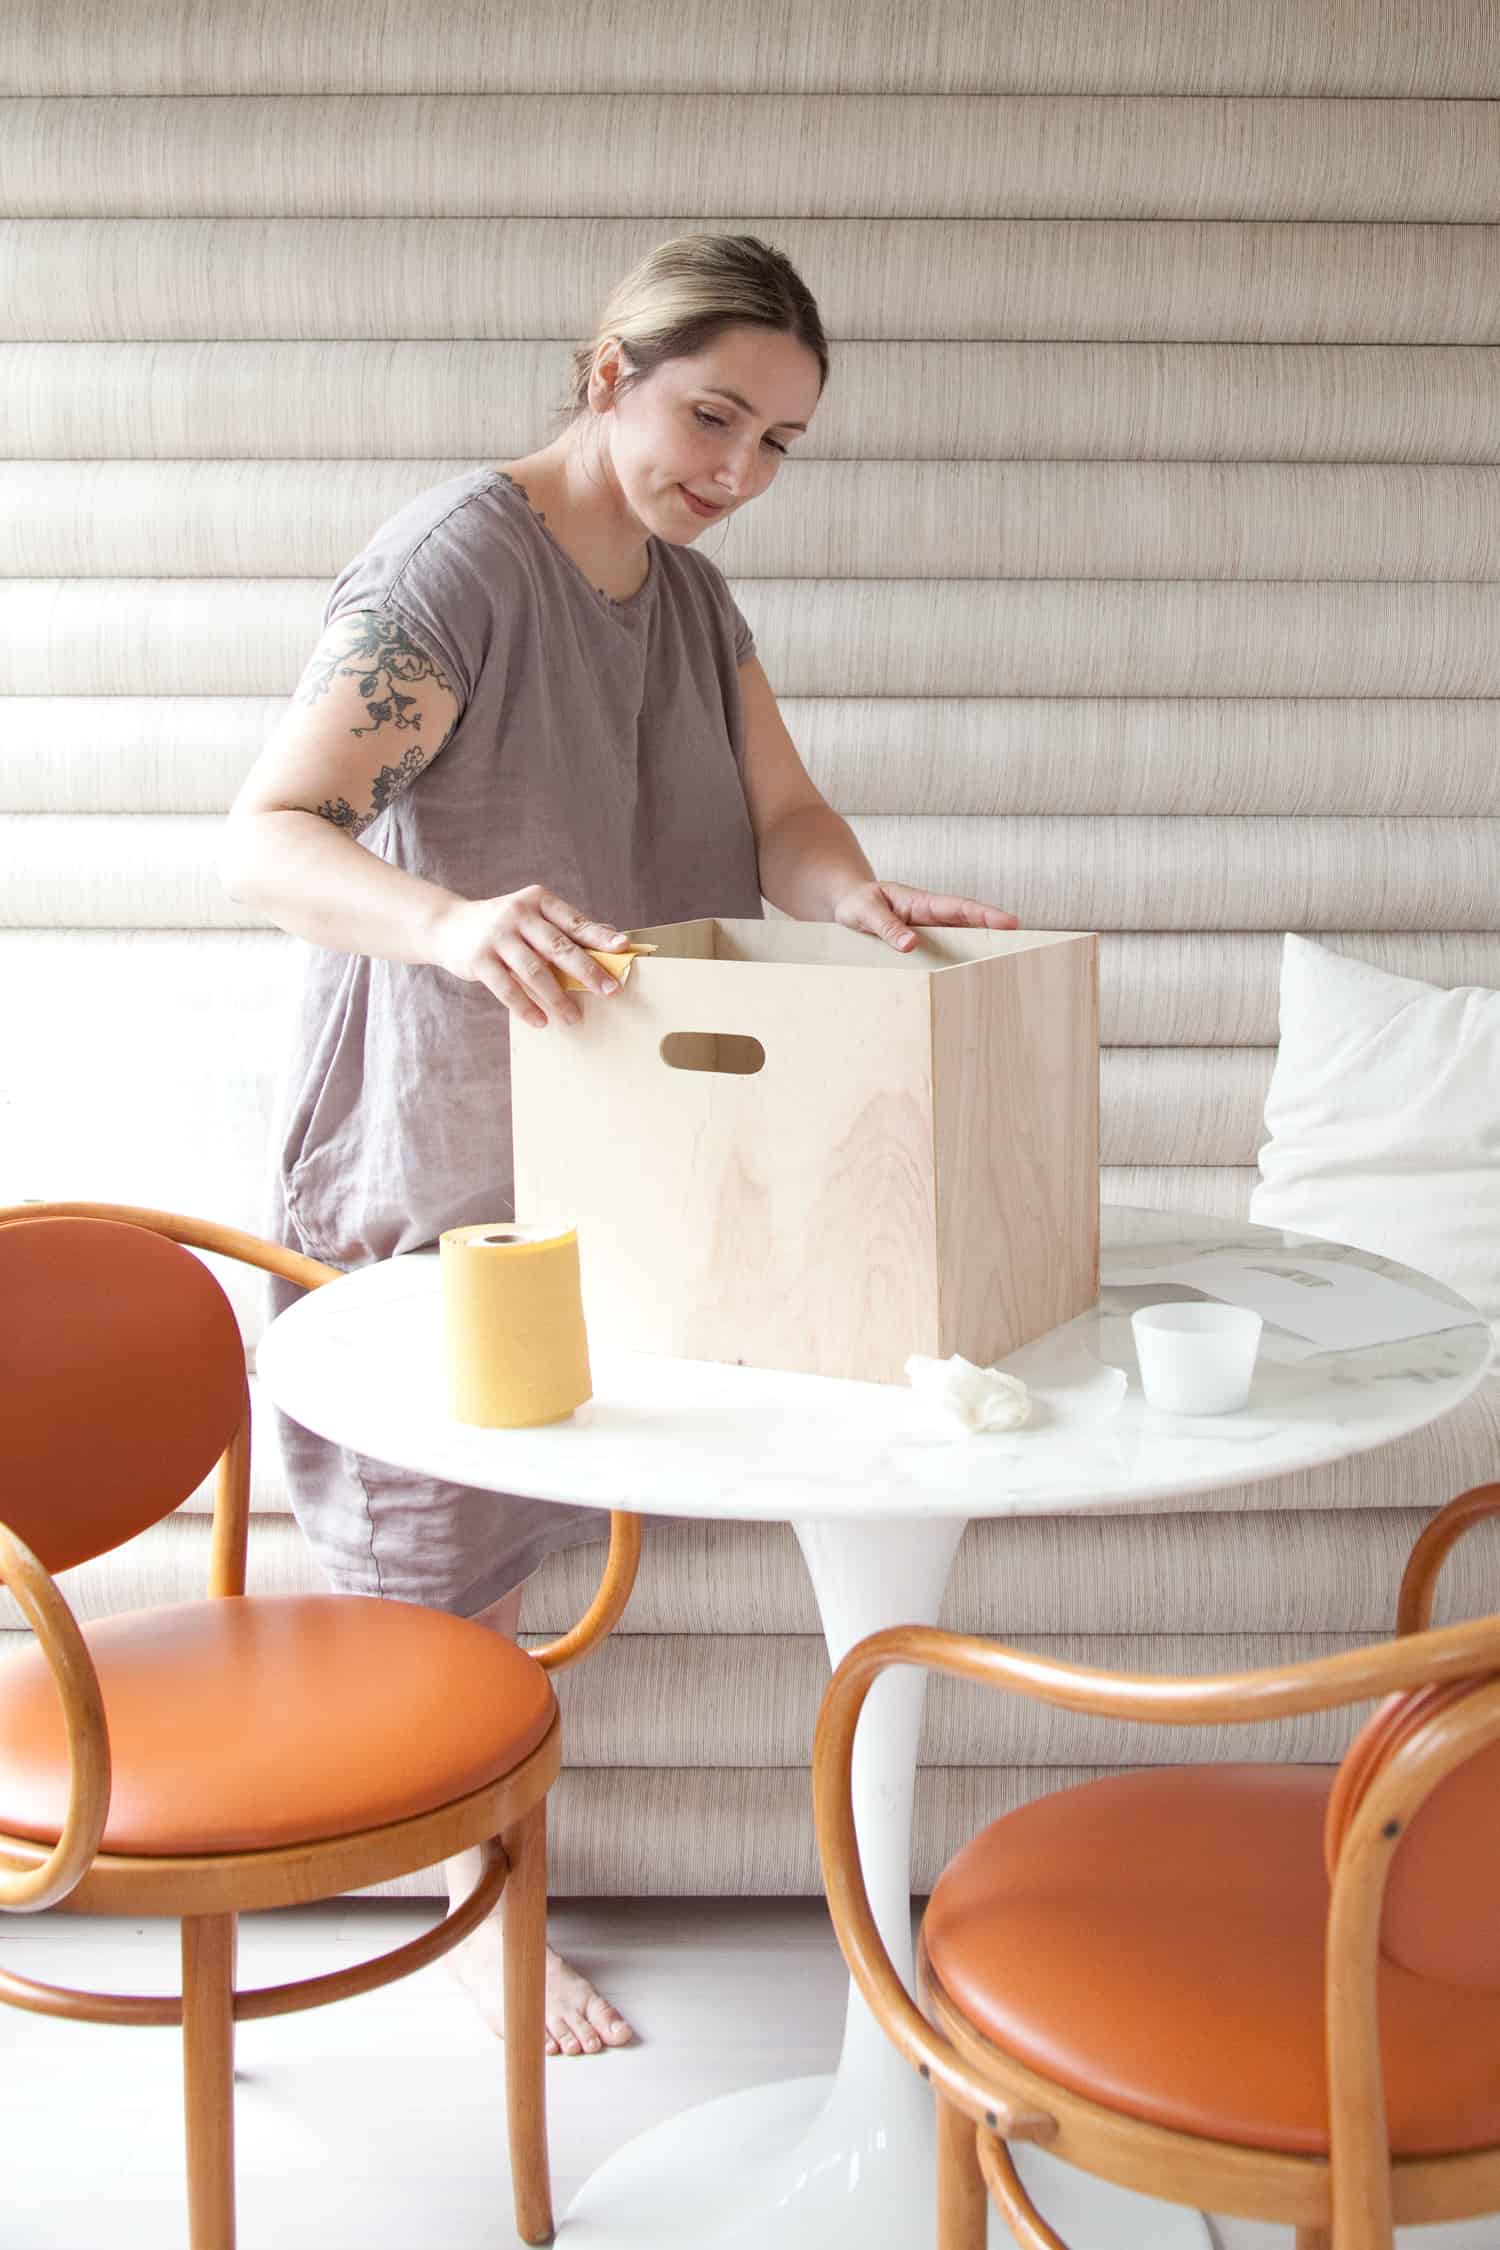 Step Five: Carefully remove the duct tape from the joints after the nails are in place. Peel slowly and toward the edge of your wood panels, not away from the edge, or you may pull apart bits of the plywood in the process.
After at least 30 minutes, your glue will be strong enough to handle sanding the boxes. I used 120 grit sandpaper and my palm sander for this process, and it went relatively quickly. Make sure to get every surface nicely sanded, inside and out.
Thoroughly sanding in this step is super important if you plan to stain rather than paint your boxes. If you don’t completely sand away scratch marks from the 80 grit sandpaper you used in step three, then those scratches will be highlighted after applying stain.
But if you’re just painting the boxes, then a general smoothing down of the surface is good enough.
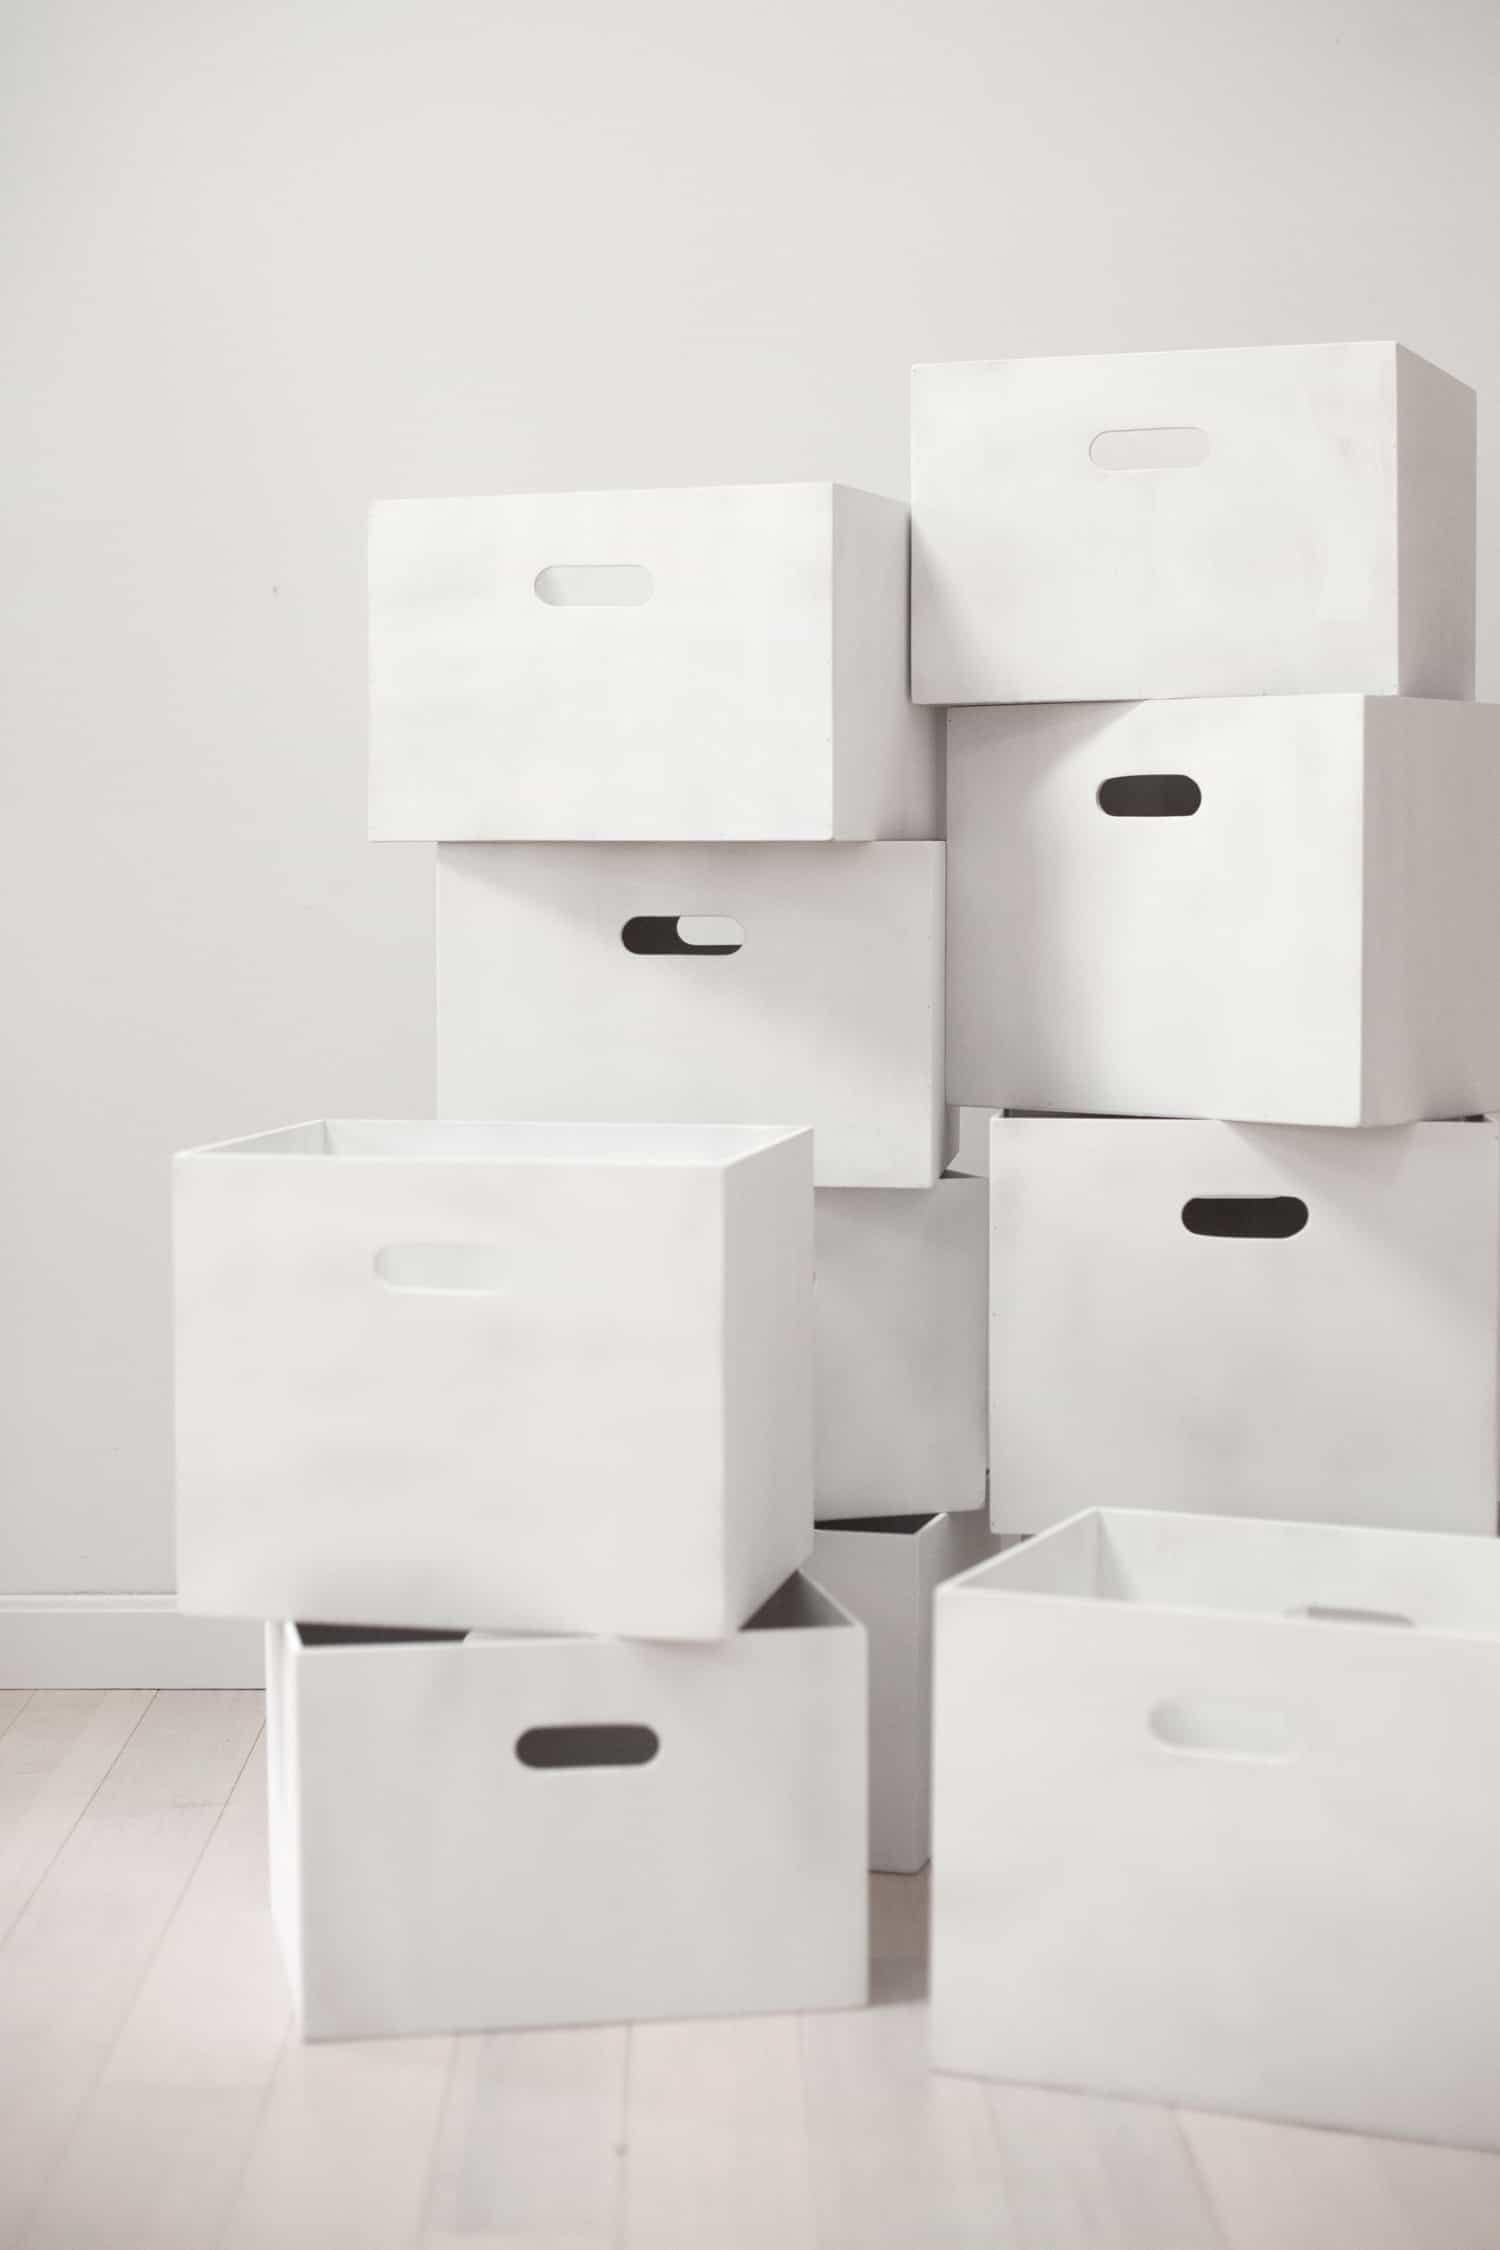 Step Six: Paint or stain your boxes. I’d like to talk briefly about both options, because there really is a right and a wrong way to paint and stain wood.
Priming and Painting the Boxes: When painting your wooden boxes, you should apply a single coat of primer and allow the primer to dry completely. Next, lightly sand down the primer with a high grit sandpaper, such as 320 grit.
This will smooth down all of the roughness that occurs when moisture causes the “hairs” of the wood to stick out. After smoothing down those hairs once, they will be sealed by the primer and will not stick up again in the next steps.
If you really want to take your paint job to the next level, try wet sanding your primer with a wet/dry sandpaper like this. Drip your sandpaper into a bucket of water, sand the primer, and keep dipping as you sand. Wipe down the box with a dry rag after you’ve finished sanding. You’ll notice it is super smooth, and much slicker than it would be with only dry sanding.
After dry or wet sanding your primer, you may have to do some touch-up priming in spots where you sanded away the primer. No need to resand these spots, though, unless they’re substantial areas. Lastly, apply two or three coats of paint and your boxes are finished!
Staining your Boxes: After sanding your boxes with 120 grit sandpaper, I recommend sanding one last time with 180 grit sandpaper before staining. You may choose to apply a wood conditioner to your wood before staining, which will help the wood accept the stain more evenly across its grain. Then apply your stain and allow it to rest for the period of time indicated on the label.
After staining, you will have rough wood that needs sealed and smoothed down again. I usually use polyurethane to seal my stained wood. If you’re using a light stain or no stain at all, you may want to use polycrylic instead, as urethane does yellow slightly over time.
After allowing one coat of the sealer to dry, lightly sand with a super fine sandpaper or 0000 grade steel wool to smooth out any roughness. Then add one or two additional coats of sealer to finish it off.
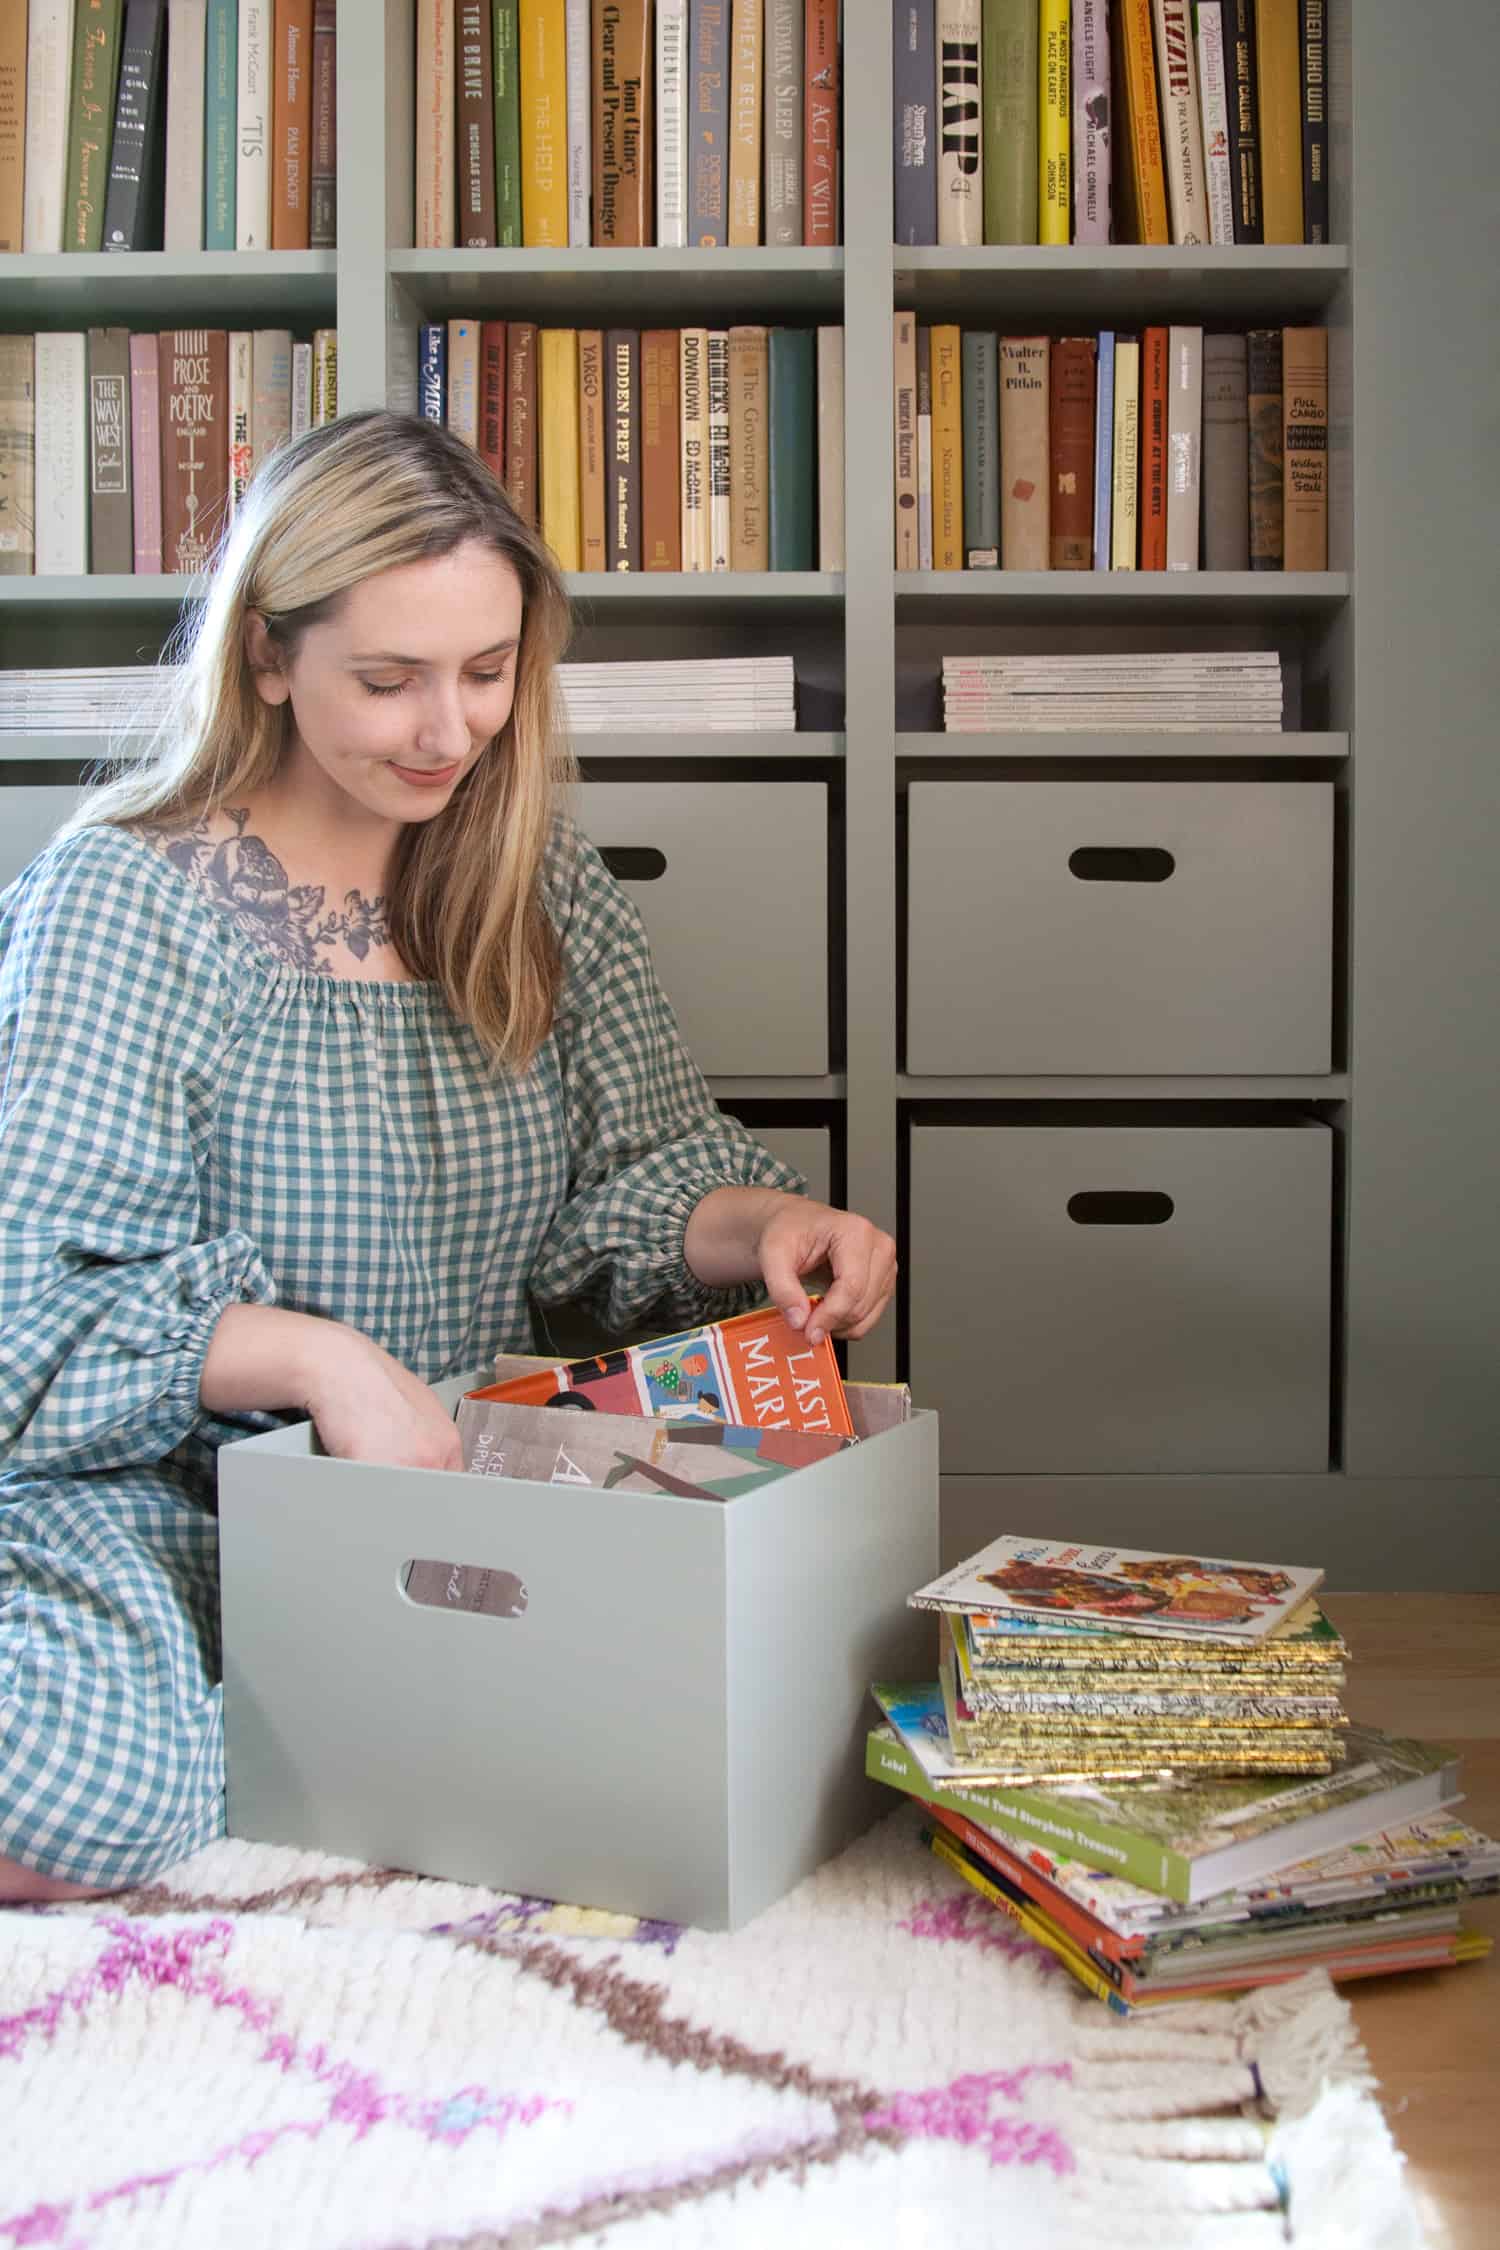 The bottom of my boxes were left unpainted, because I didn’t want paint scraping against shelves as the boxes are slid in and out. I had considered waxing the bottoms of the boxes so they’d slide more easily, but in the end I decided to use felt pads instead.
I cut 1″ wide strips from these felt blankets and put them on either side of the bottoms of the boxes. They slide super easily now.
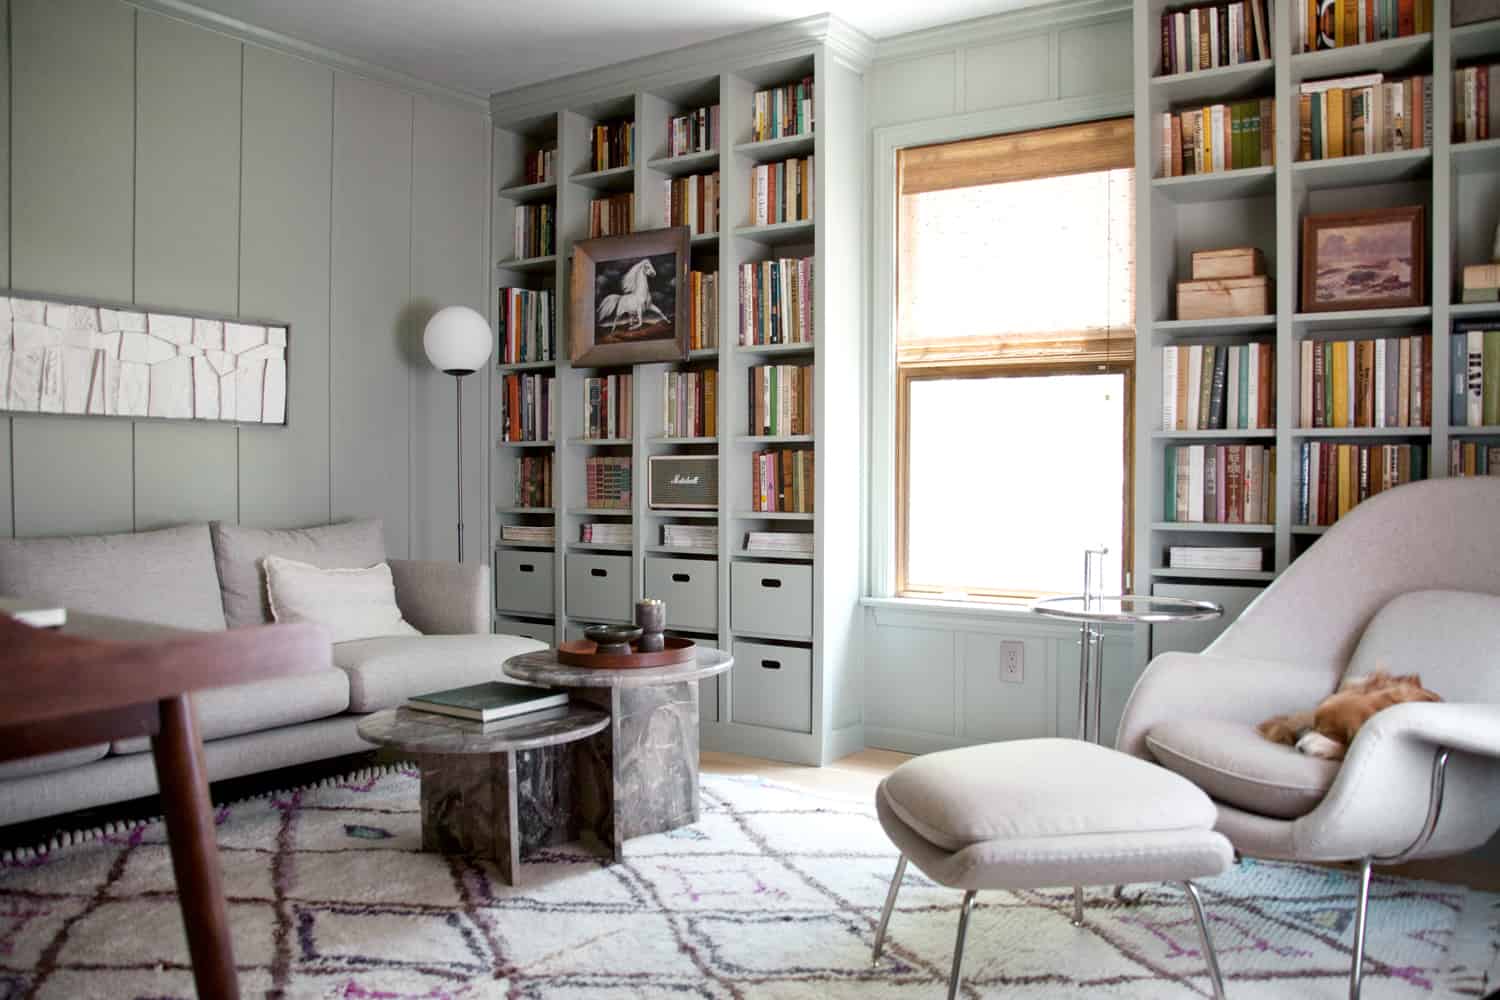 I’m really enjoying the organized look of my bookshelves with the addition of these custom plywood storage boxes! Keeping the kiddos’ books and office supplies tucked neatly away has done wonders for the look of this room. What would you hide away inside your bookshelf boxes? – Mandi
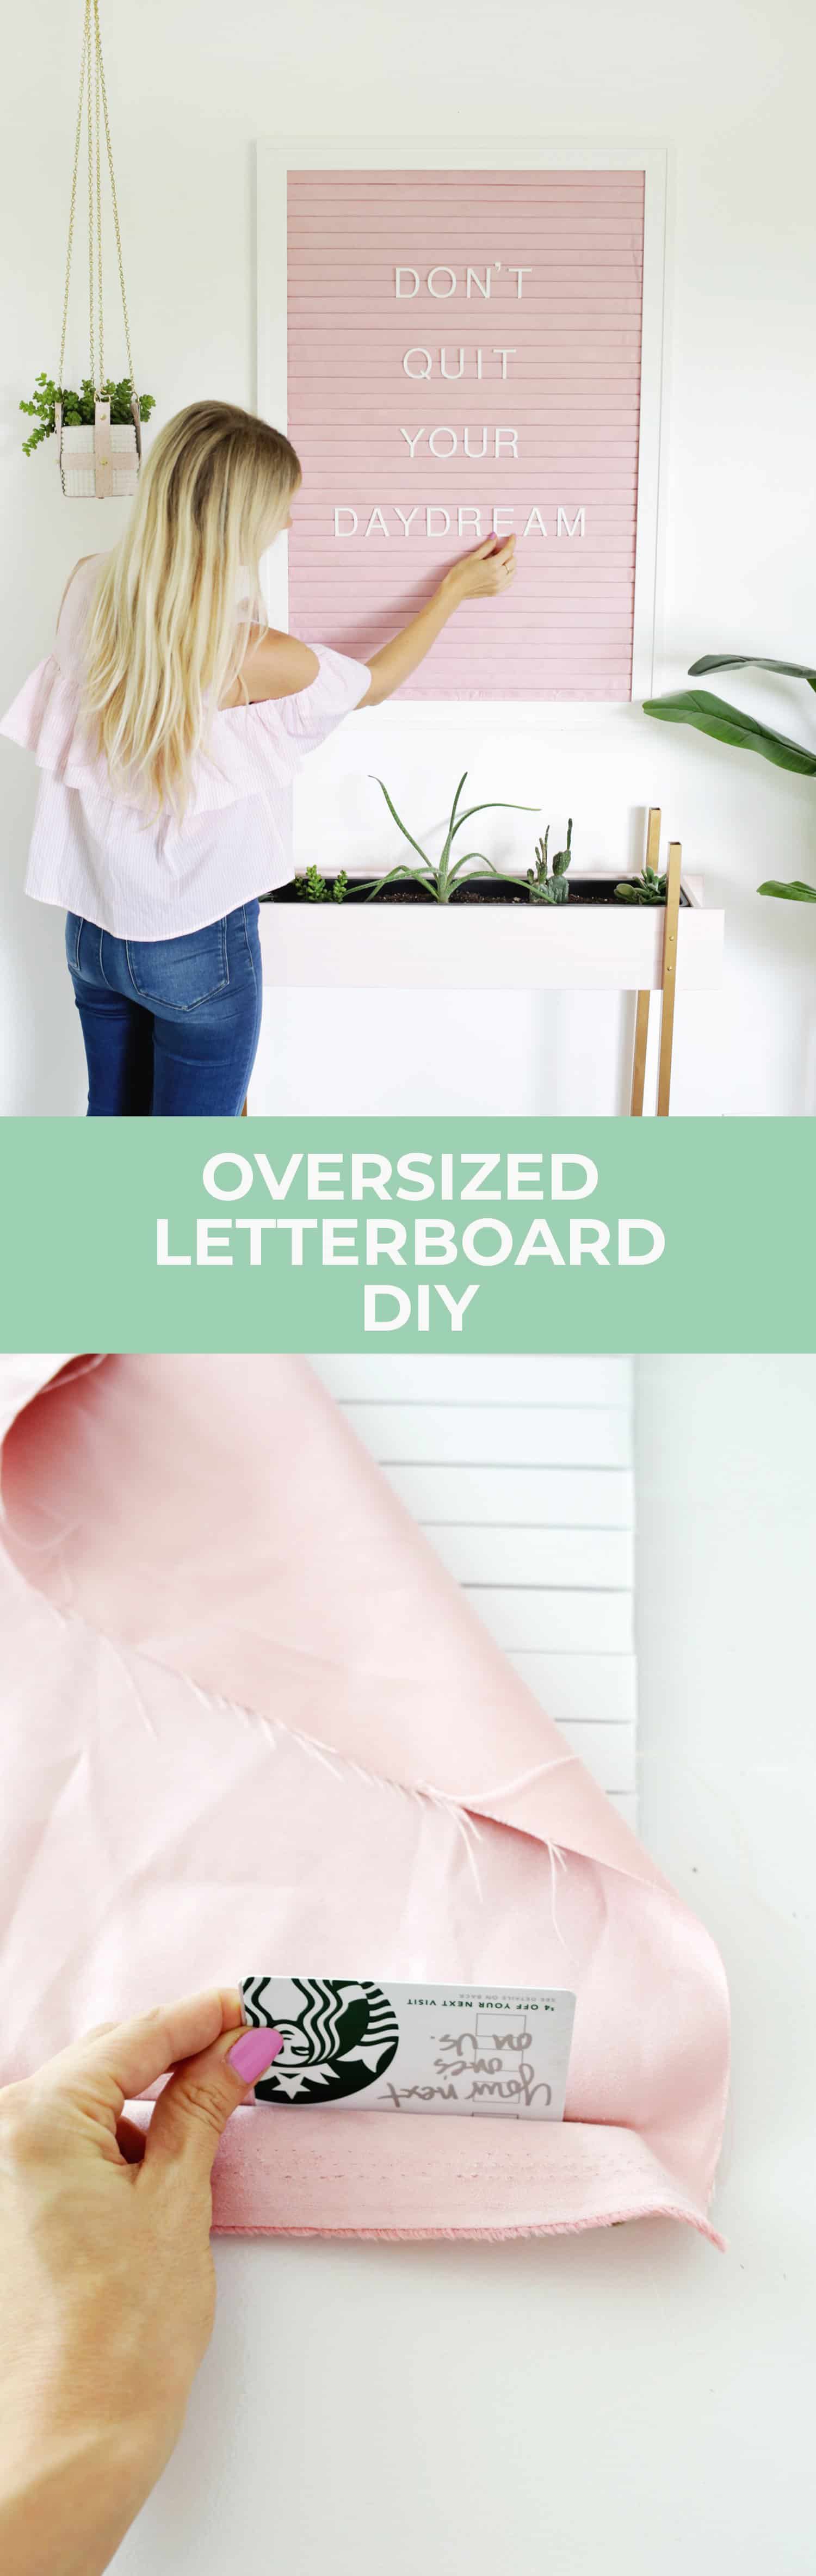
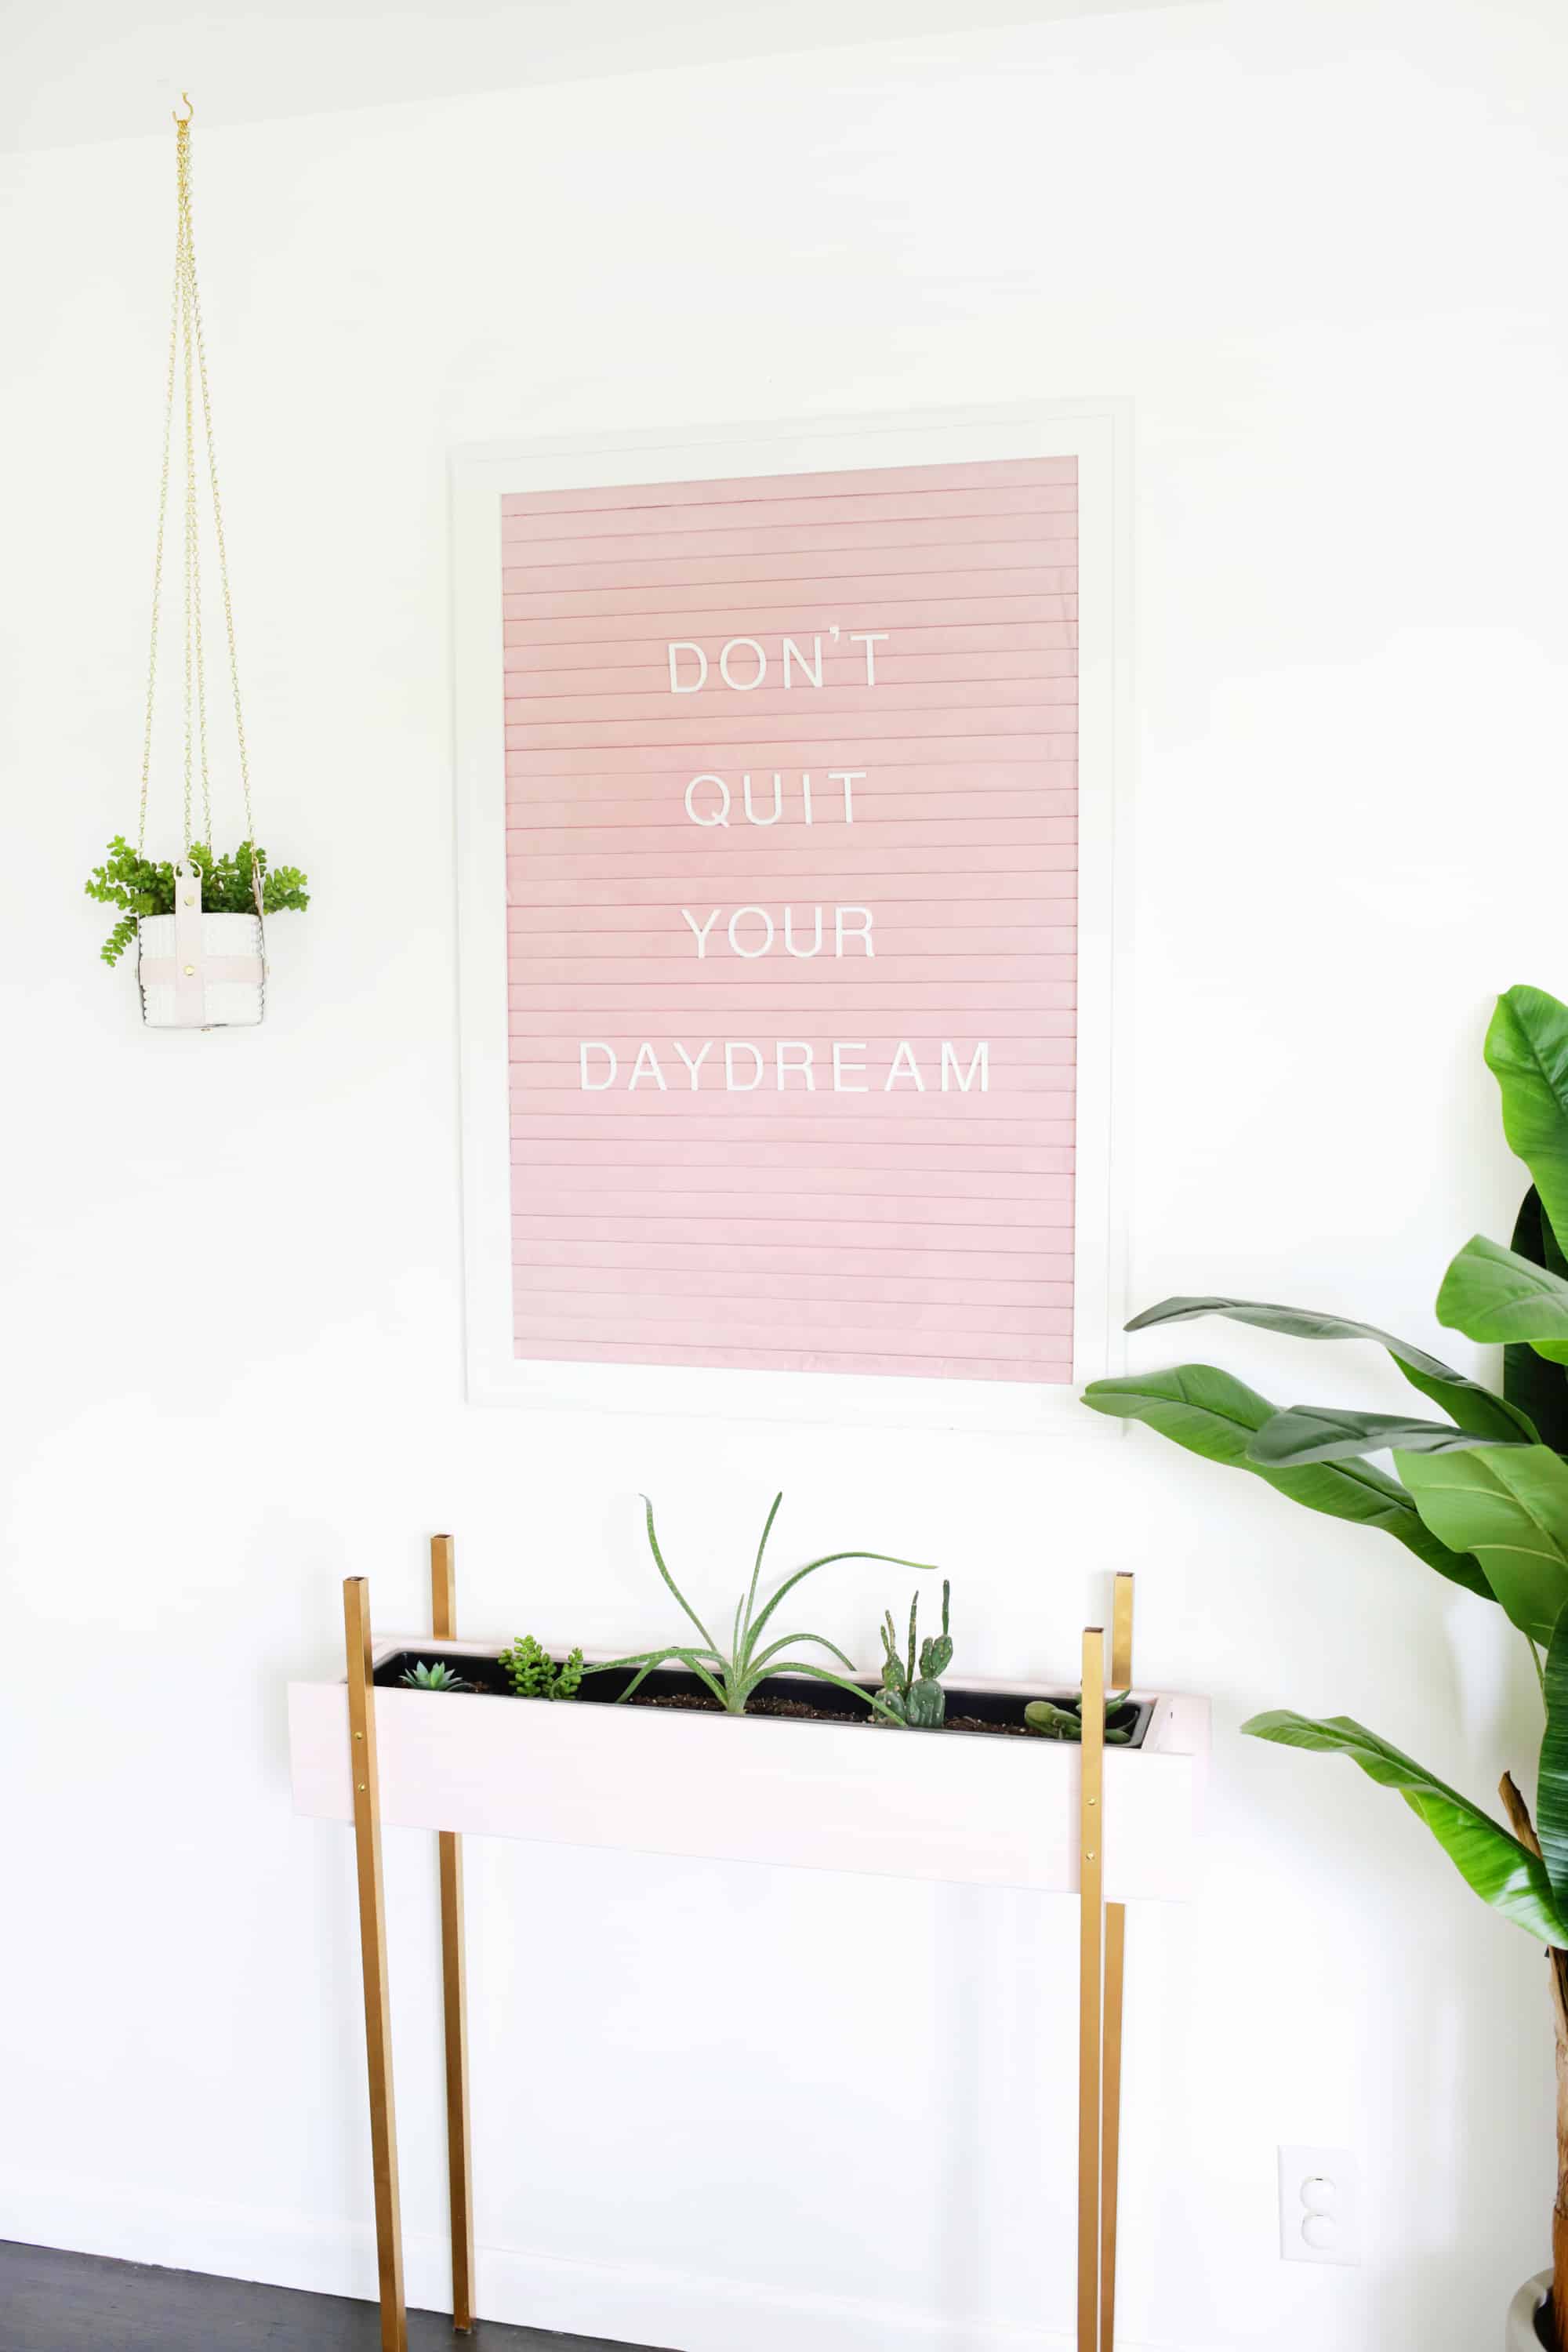 Chances are you already have (or wish you had) a felt letter board of some sort in your home because they are really useful for lots of things: making menus for parties, month-by-month charts for babies, displaying your favorite song lyrics, etc. I tend to always want to make something huge or tiny and I thought that an oversized felt letter board would be three times the size and the amount of fun! I was a little worried that making one that large would be rather time-consuming, but once I figured out the best way to lay it out, it actually went pretty quickly!
 Supplies:
-24″ x 36″ frame
-24″ x 36″ foam core board
-thin felt/faux suede/flannel fabric at least 24″ wide and 52″ long (I used this fabric)
–large letter board letters (usually the 2″ size only have one tab on the back instead of 2 like the smaller letters and that’s what you want)
-X-Acto knife, cutting mat, and metal ruler
-hot glue gun
-gift or credit card
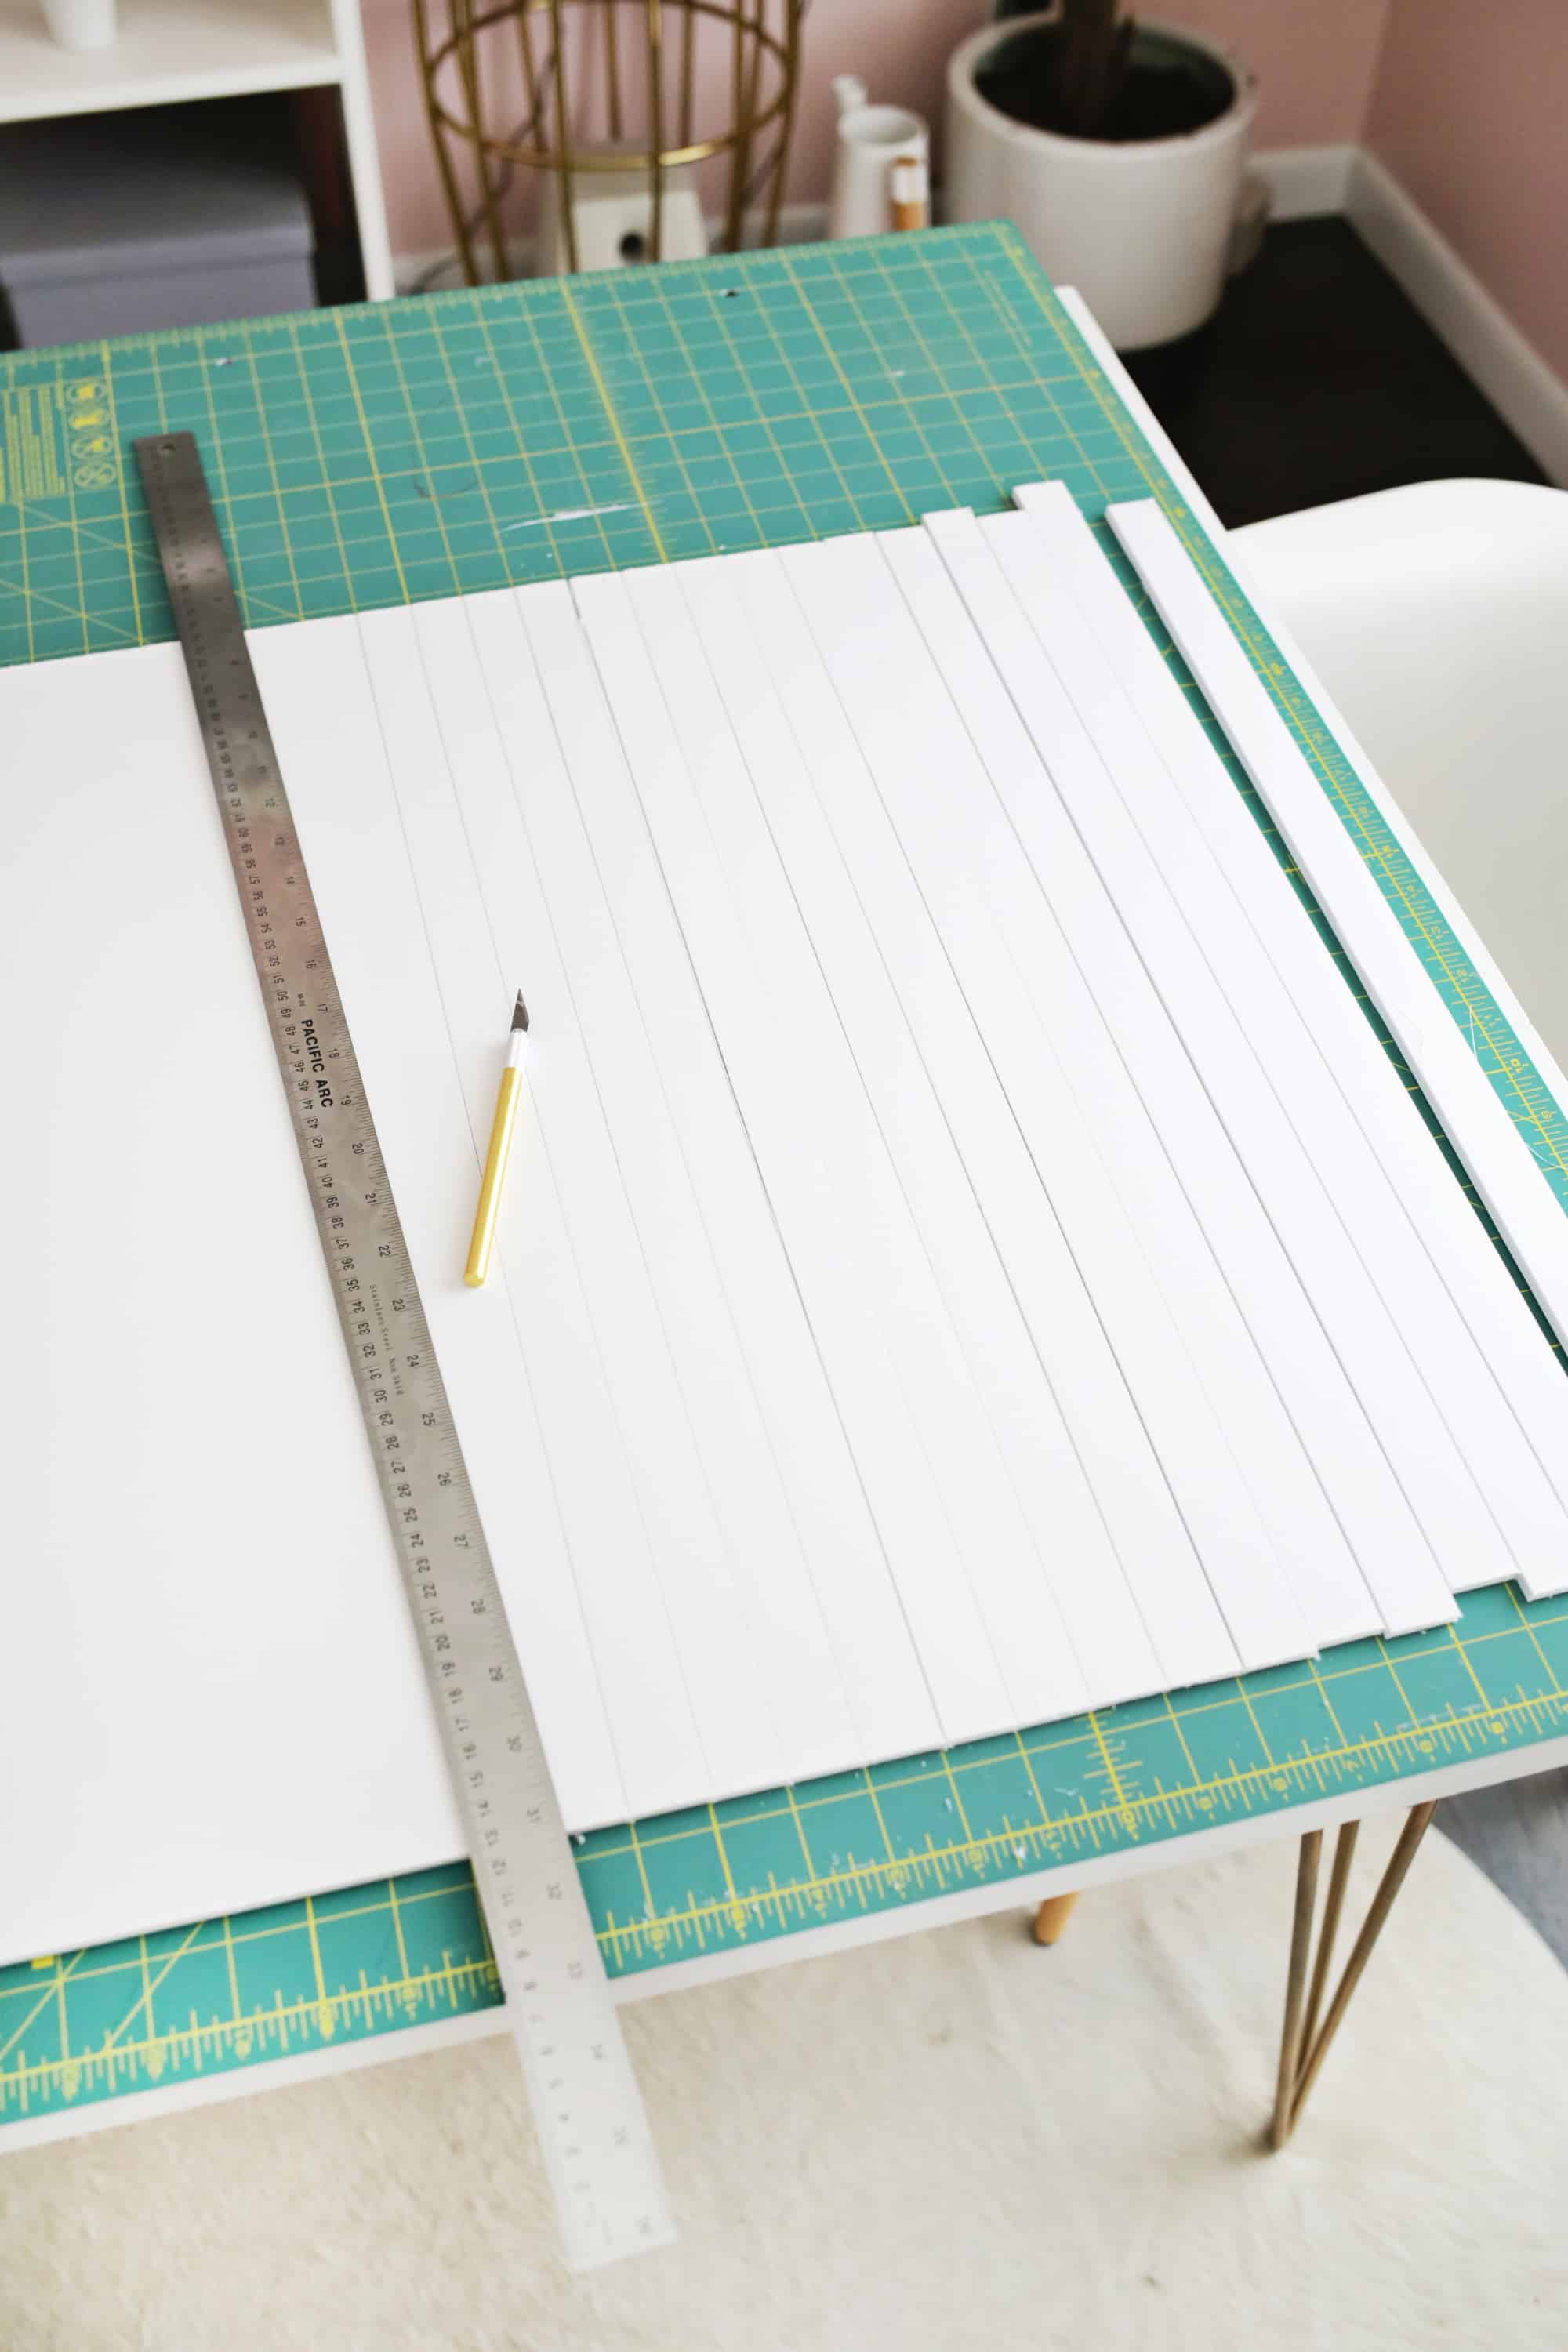
First, you’ll want to take your foam core board and cut your whole board into 1″ x 24″ long strips. You can either make marks down each side at every 1″ interval so you know where you cut or you can lay the board on a large mat with a 1″ grid and just cut at each line for even sections.
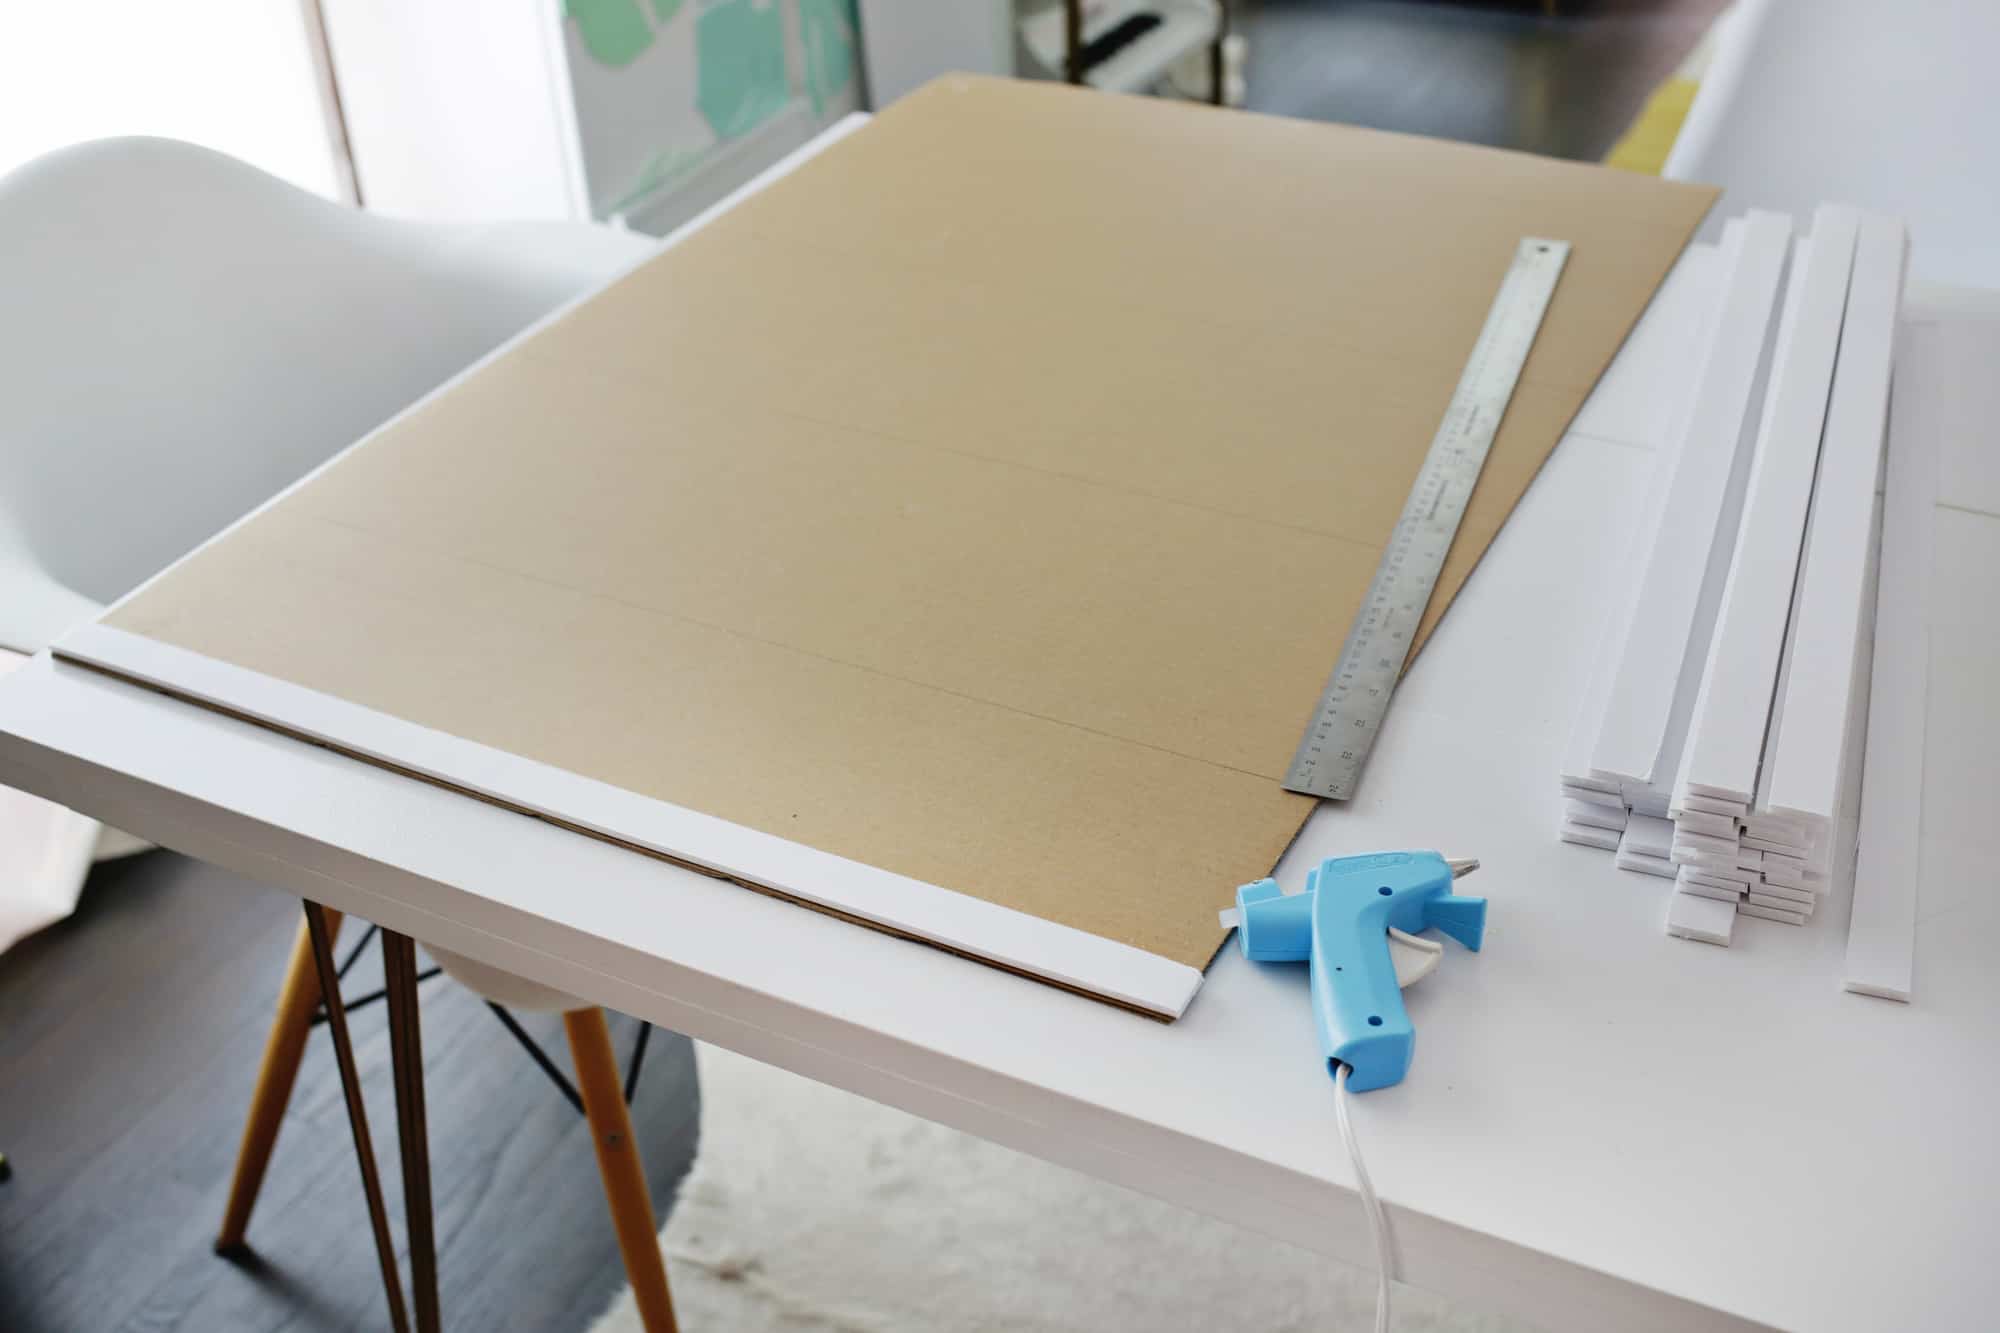 Once all your sections are cut, take your frame apart and glue one foam core strip to the very top of your frame backing with your hot glue gun.
 Leave a 2mm gap and glue the next one right below it. I found that 2mm was best for my thickness of fabric to hold the letter tabs in place, but you may want to experiment with different widths and find the right gap size for your fabric (you should have 1-2 extra strips that you won’t need on your letter board so you can use them to play around and determine the right spacing). If you want to cut a thin piece of foam core to use as a spacer (or a piece of balsa or cardboard would work if you can find or layer to the right thickness), then you can use that in between the foam core strips and remove to use again between the next two for equal spacing throughout.
 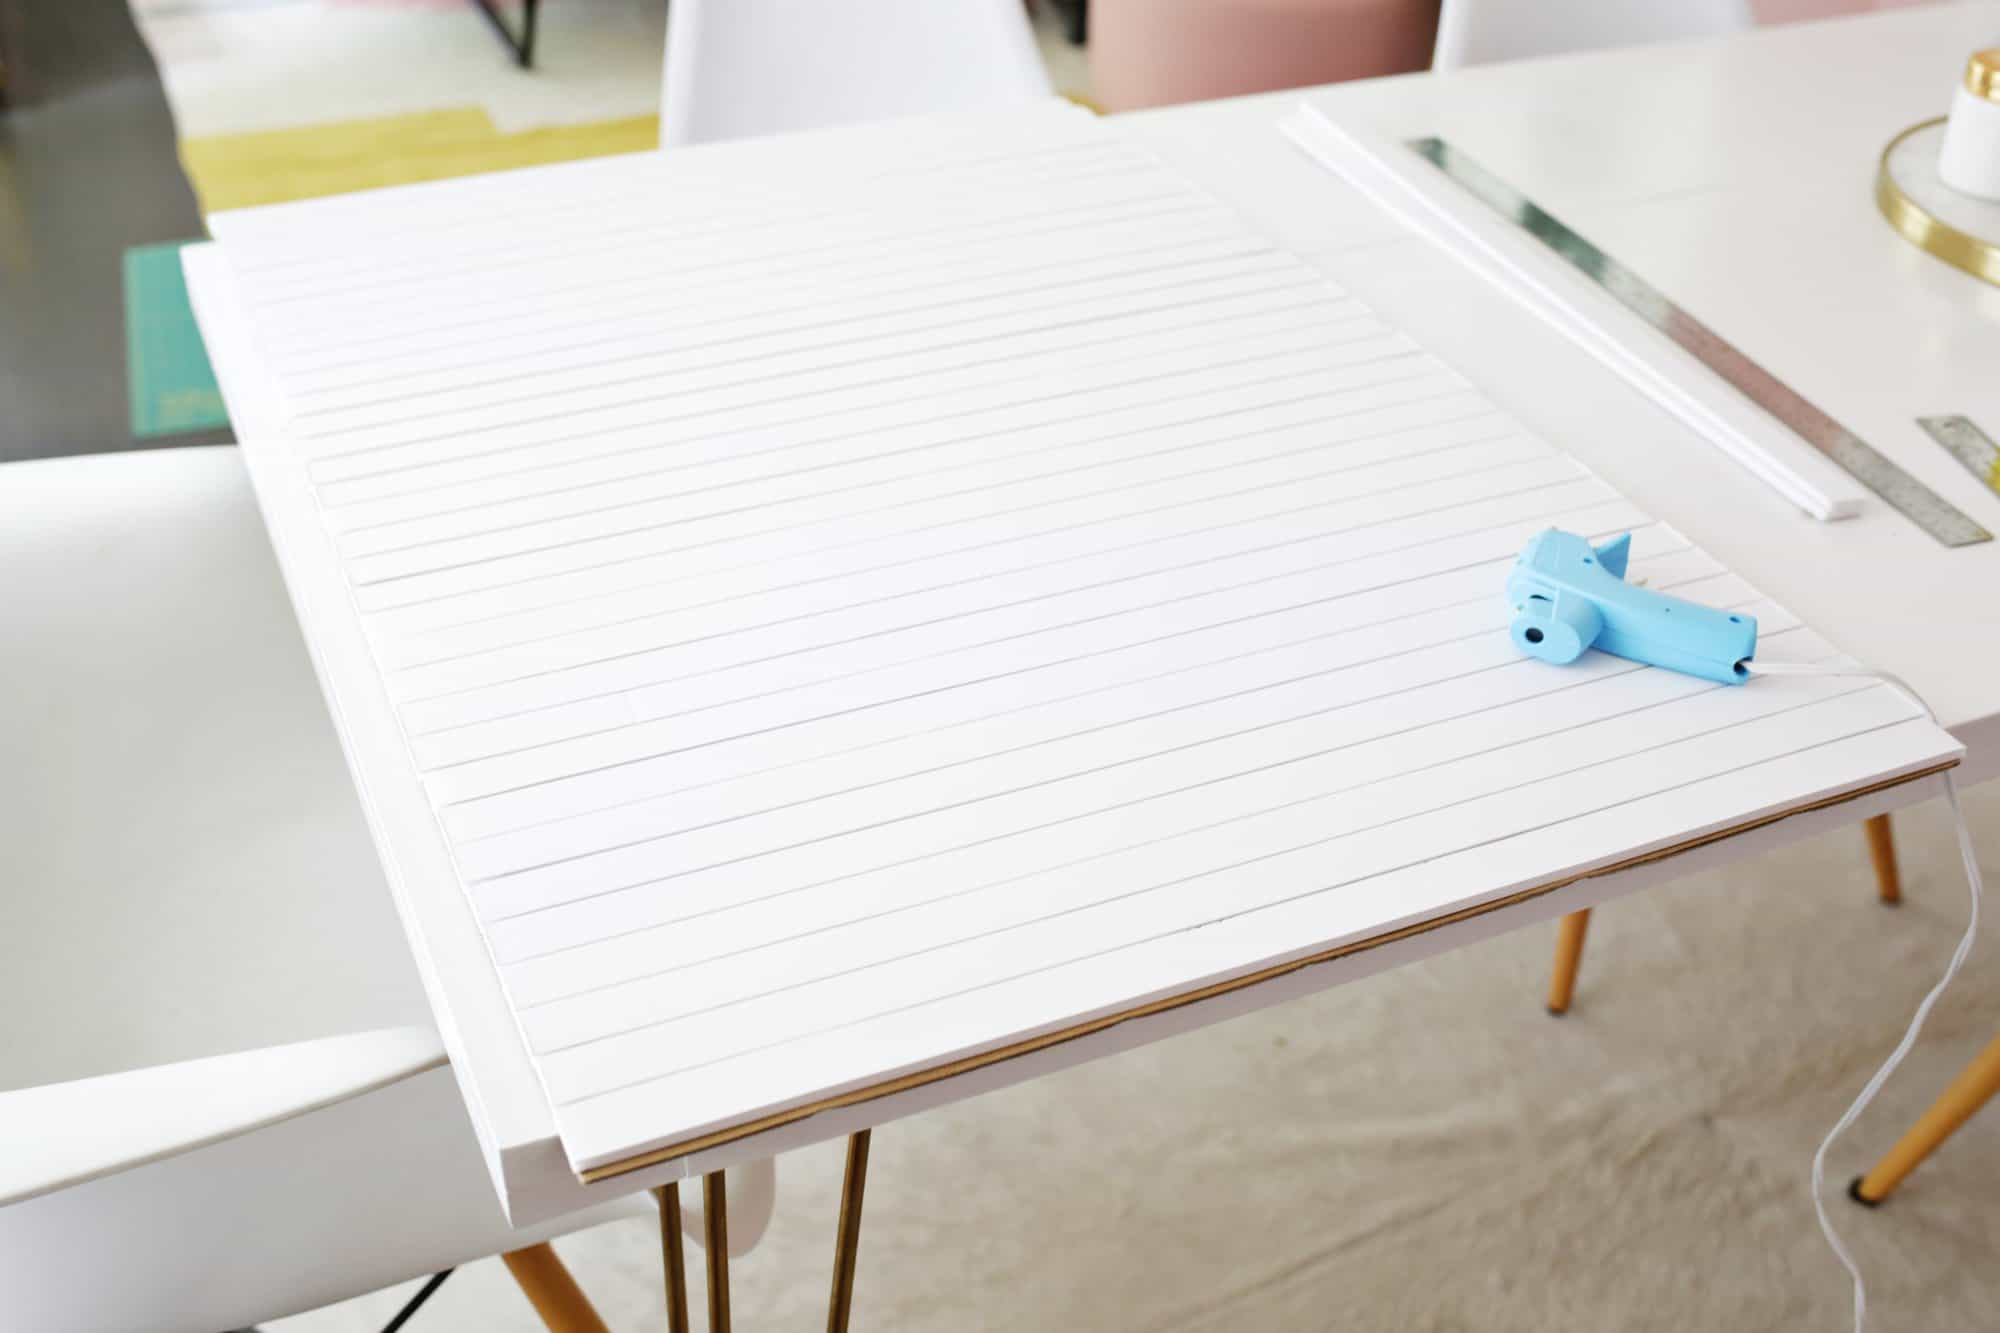 Repeat the spacing and gluing of the foam core strips until you have gone the whole way down the frame backing. Mine ended up fitting pretty perfectly to the bottom, but you can trim the last piece to a different height if needed to fit.
 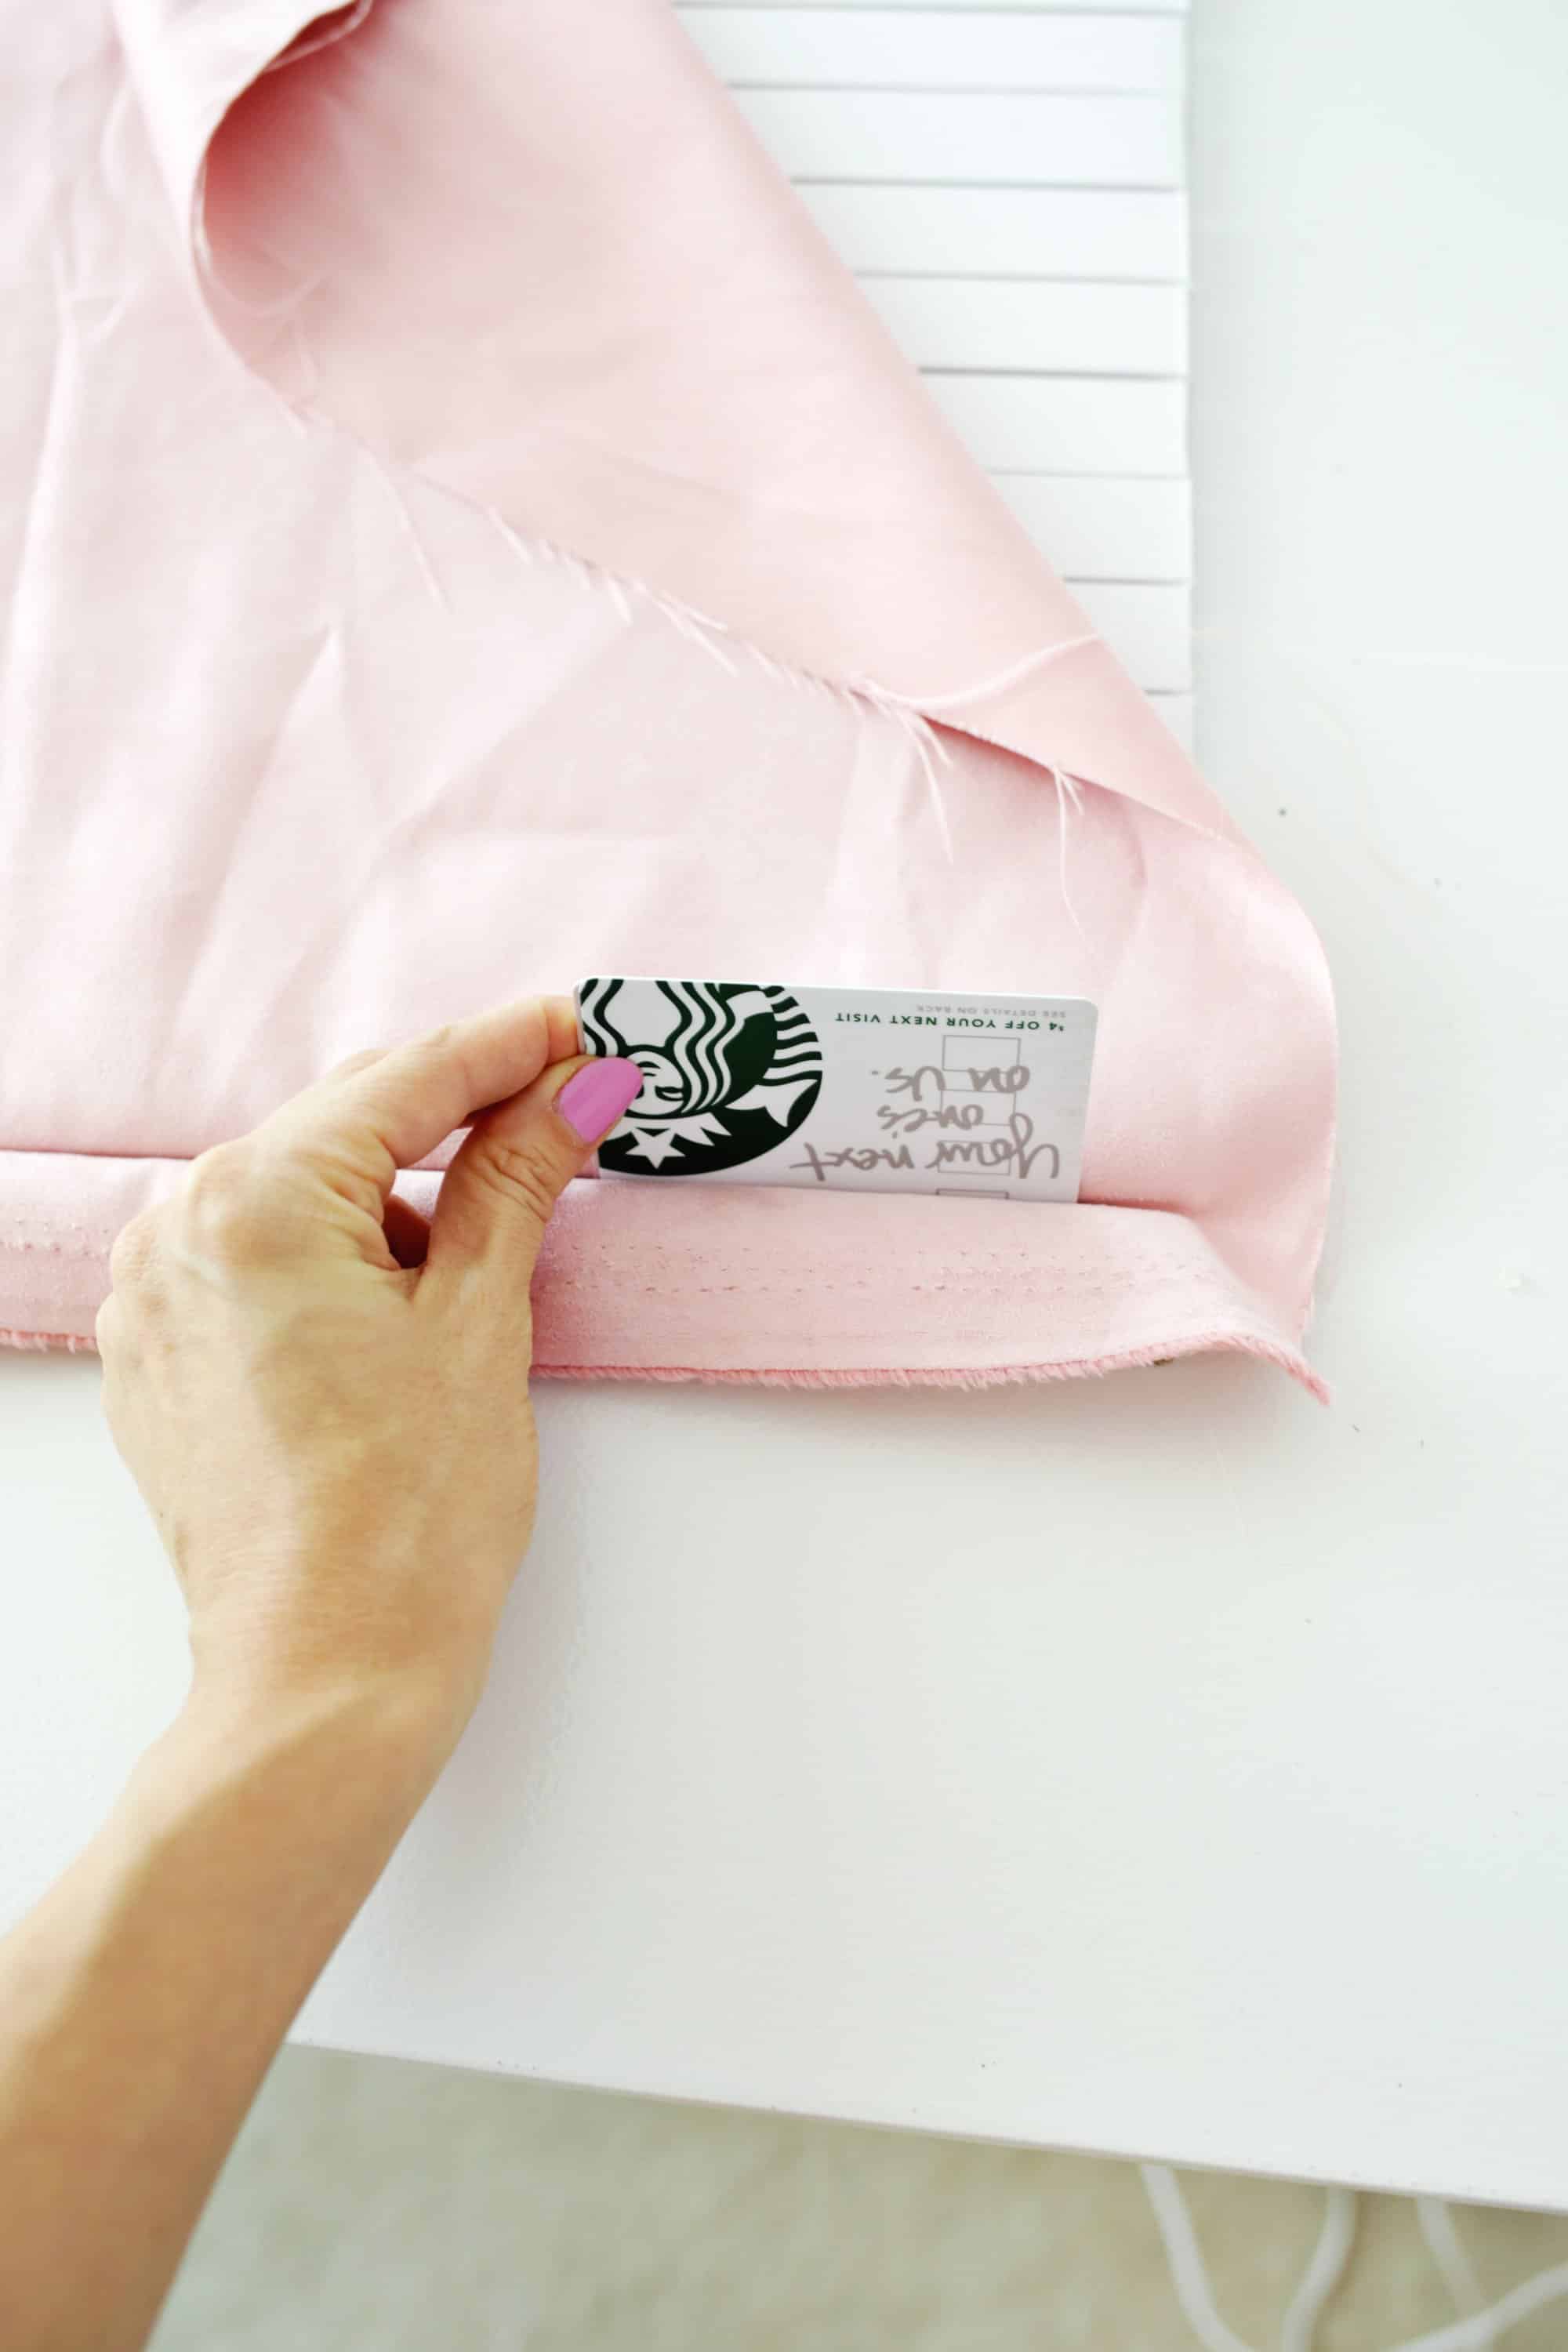 Once you have your foam pieces in, line up your fabric so that it hangs 1″ over the top and use a credit card to push the fabric down into the first crevasse. I would start in the middle and then work your way out to each side. Go down to the next gap and use your card to push the fabric down into that gap as well. Since you don’t want to pull out the fabric you just pushed into the first gap when pushing it into the second gap, you’ll want to keep that first fabric in place with the hand that’s not holding the card as your work your way across the board. You want to try and get the fabric as tight as you can without pulling it out of the line above it, but you can always pull a section out and reinsert it if you need to adjust something.
 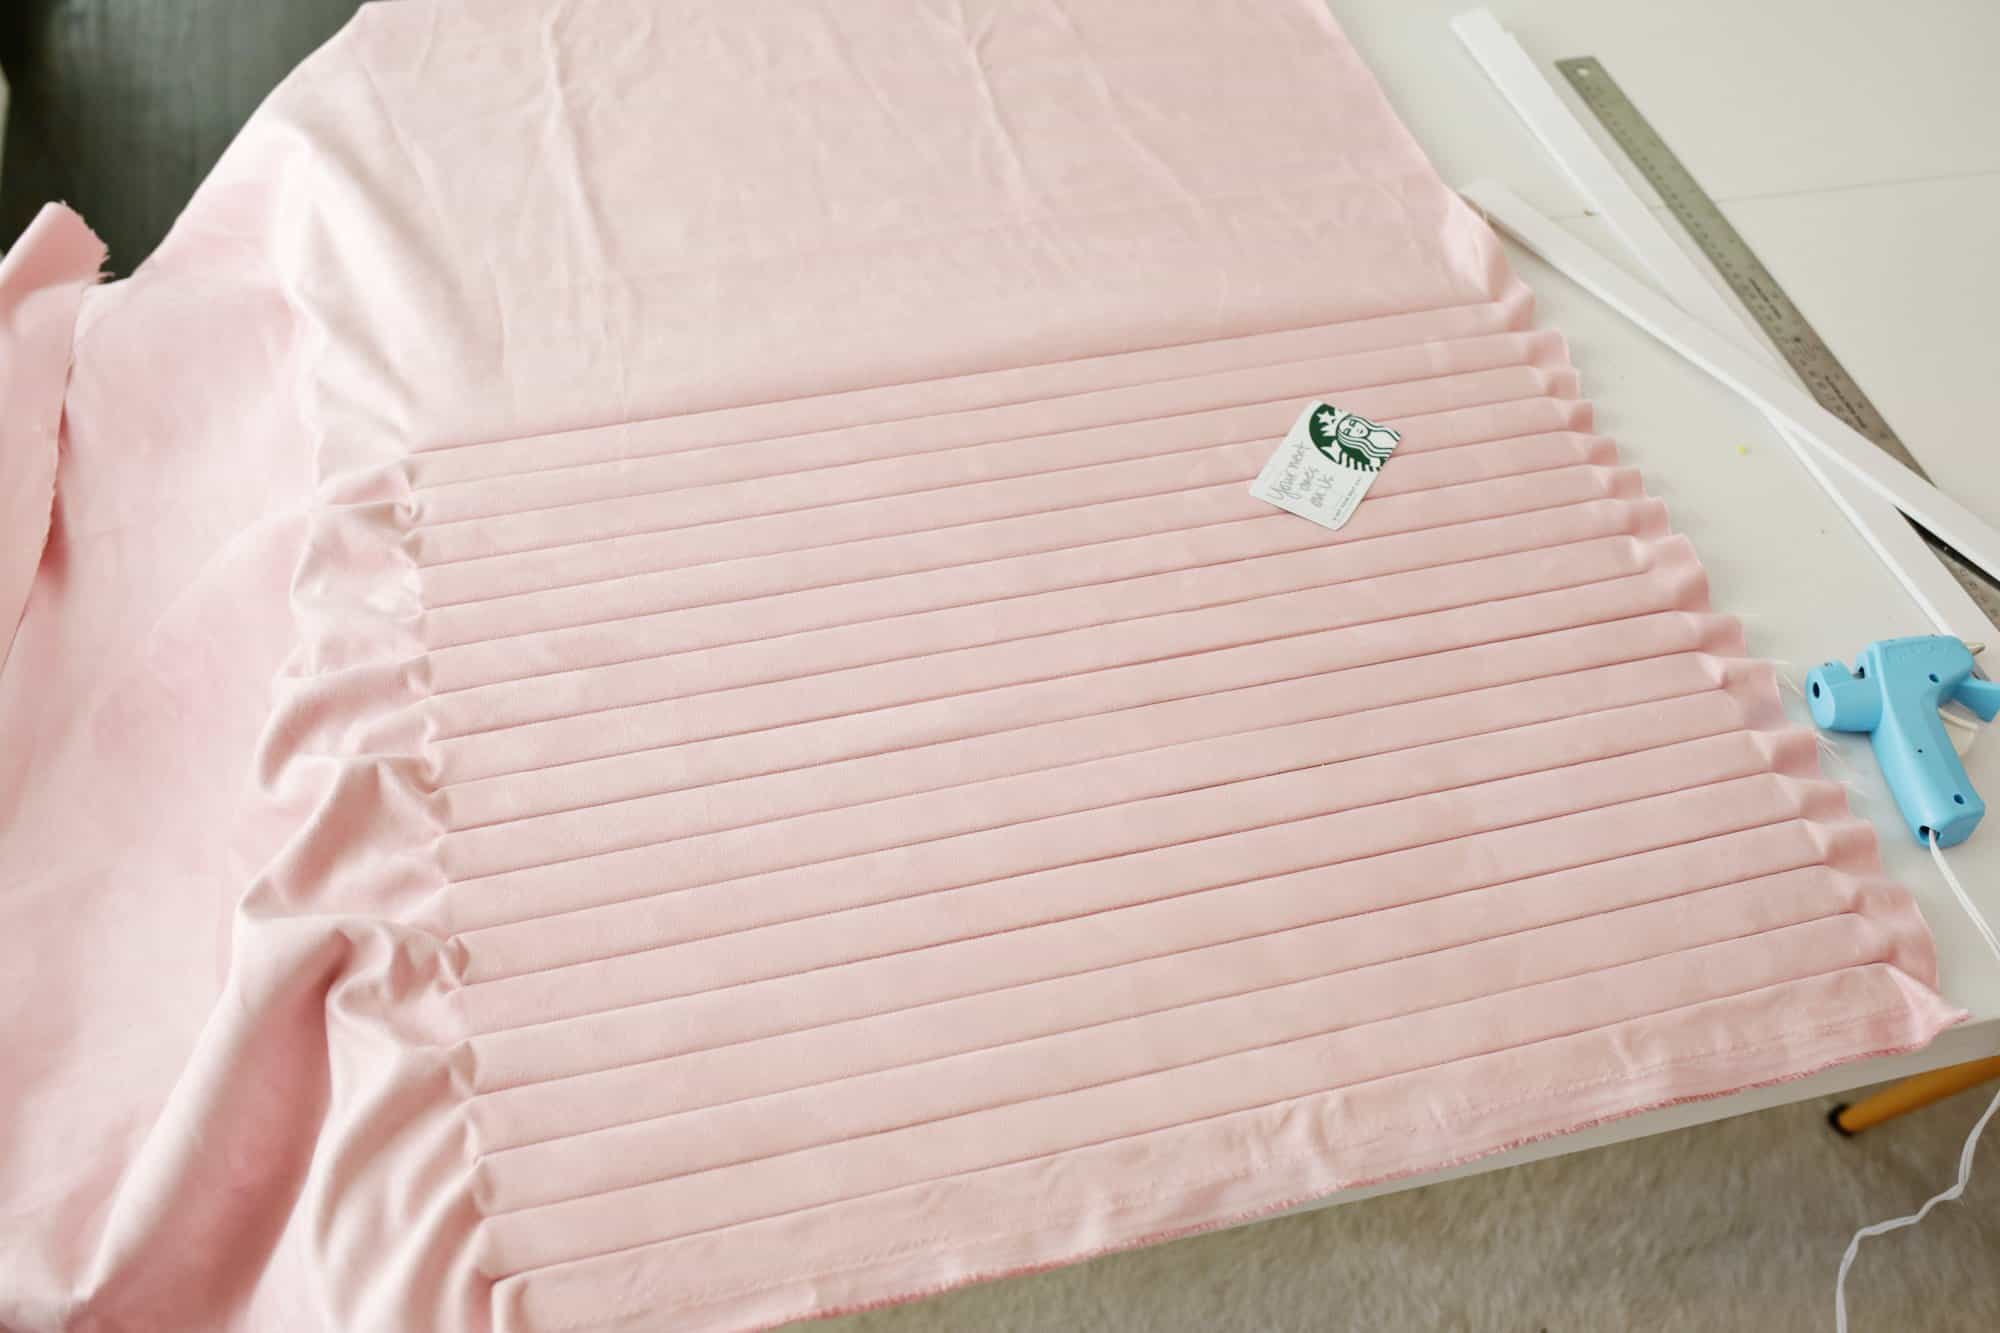 Continue until all your fabric is pushed in the whole way down the board.
 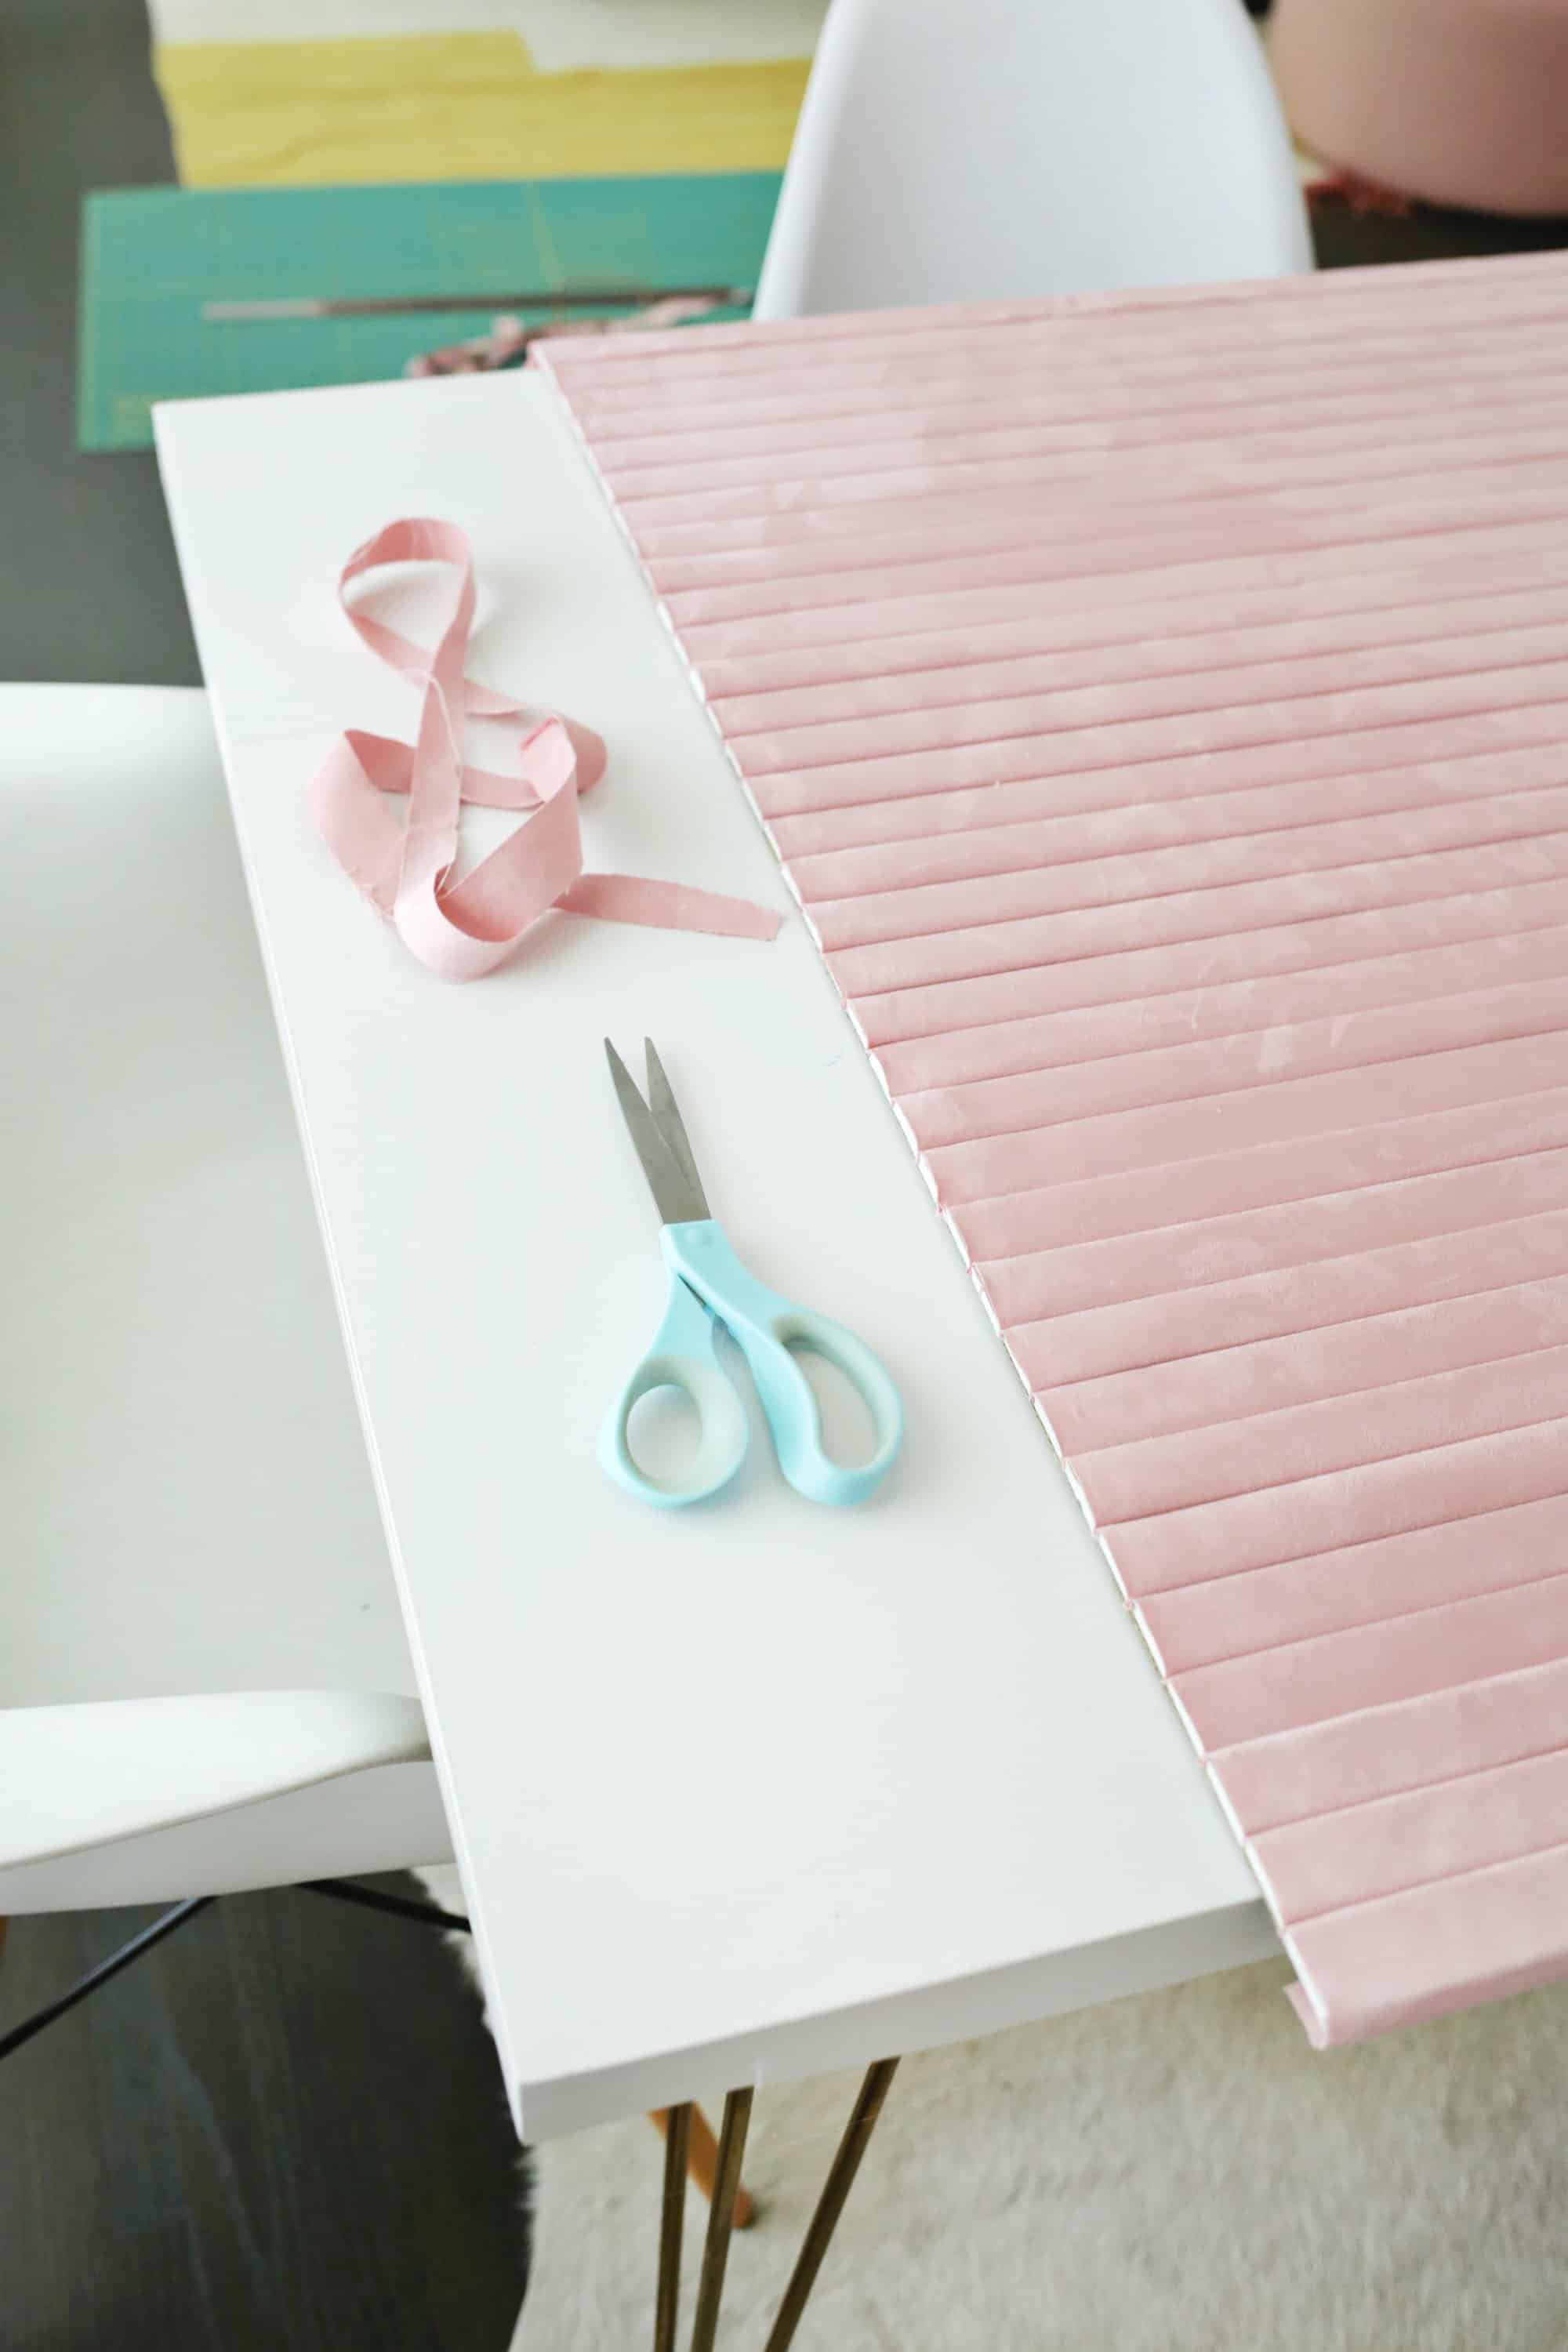 Cut your bottom fabric so that it also hangs 1″ over the edge and trim the excess fabric away from the sides as well. Fold the extra fabric on the top and bottom over the back of the board and use your hot glue gun to glue the flaps in place.
 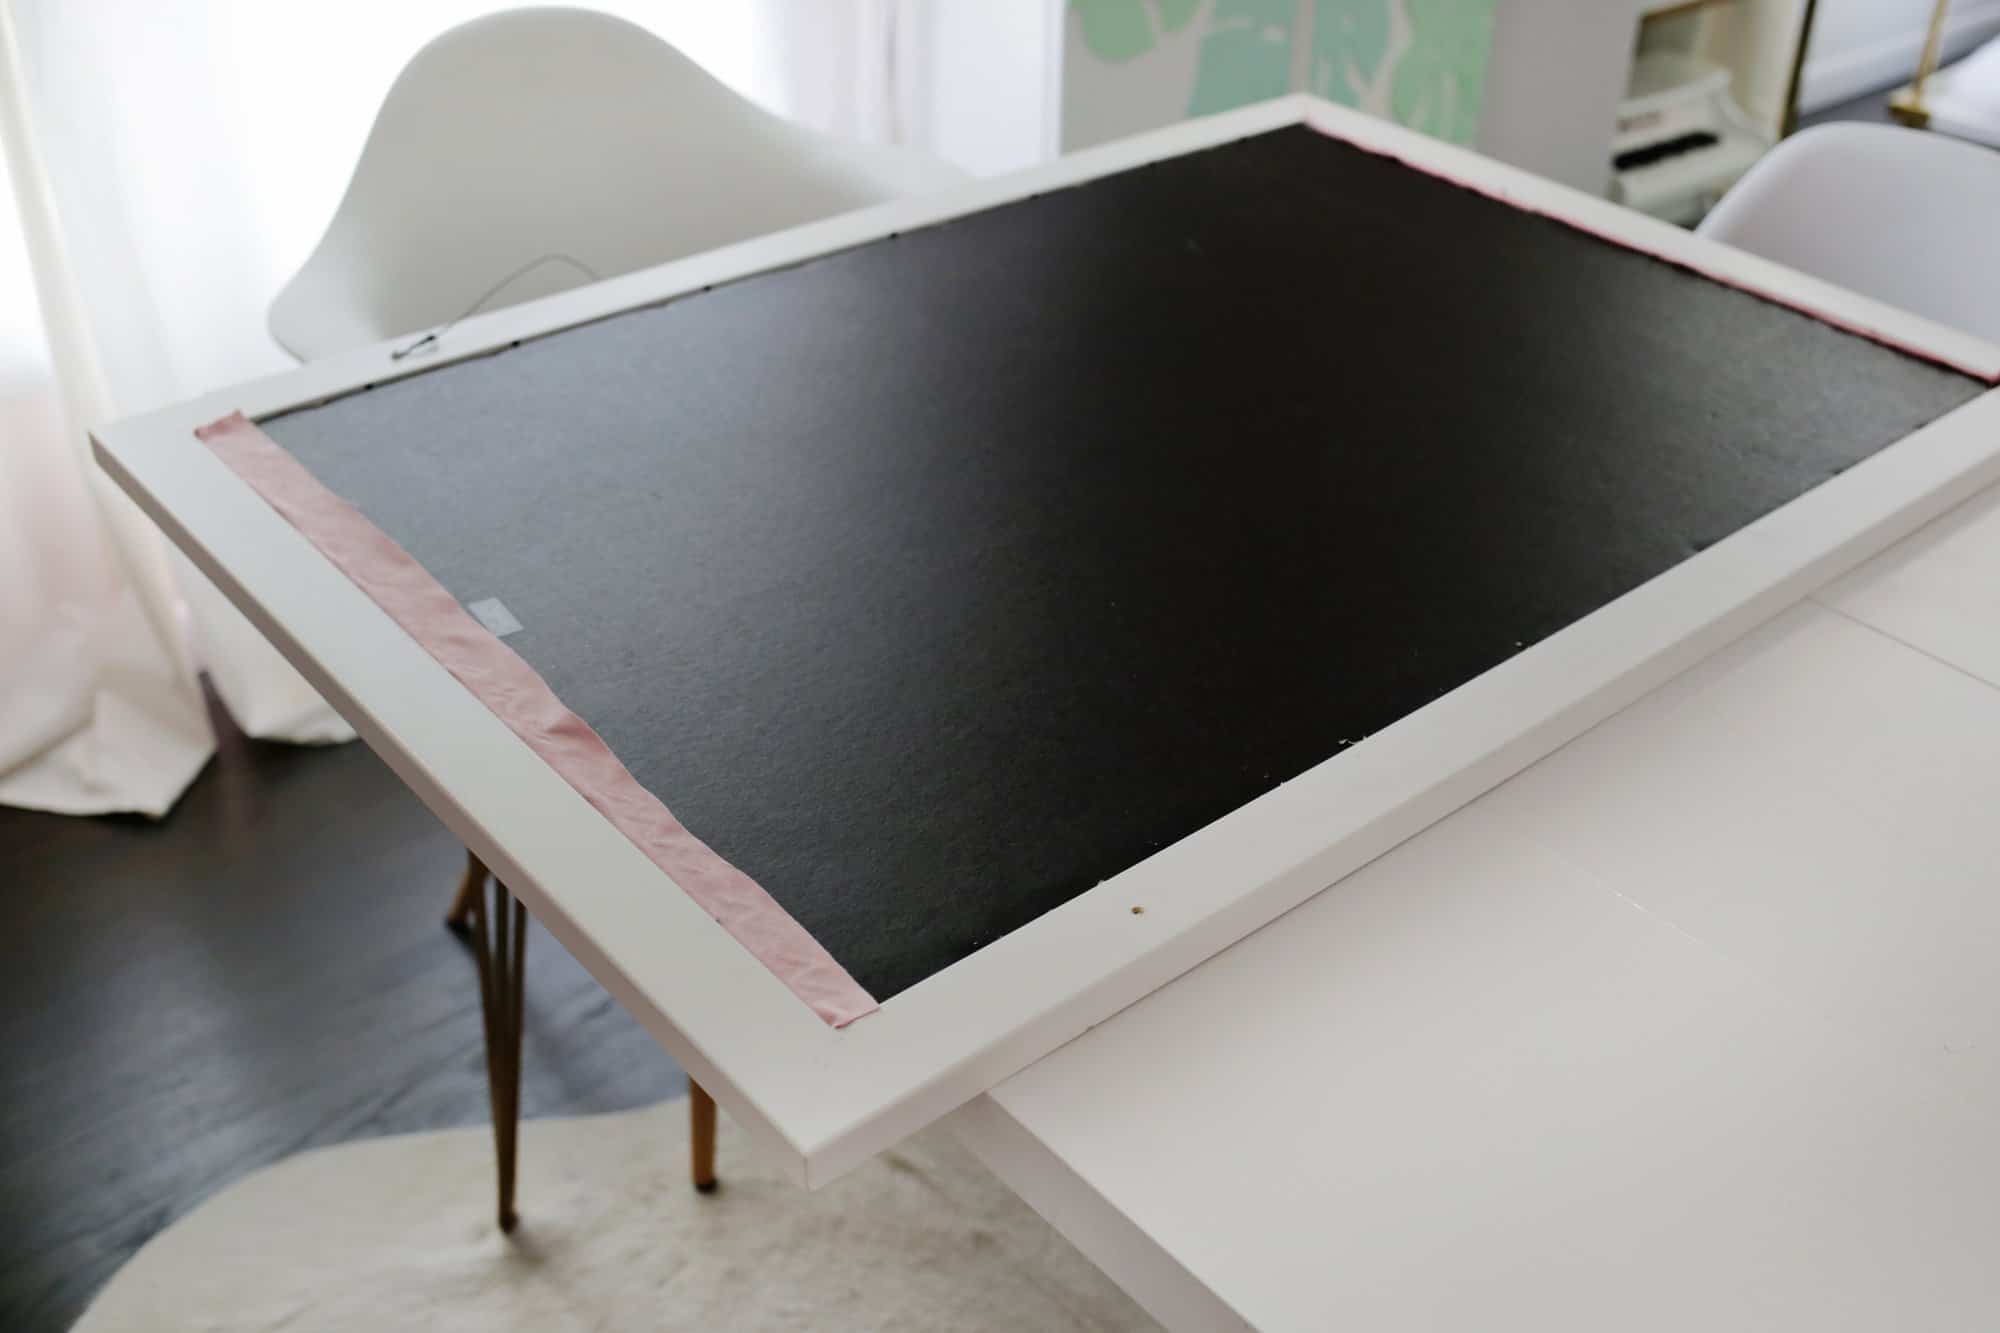 Pop your backing back into the frame (take out the glass if there was glass in the frame) and it should fit snugly on its own without having to secure it into place. You may want to run your credit card through each line one more time once it’s in the frame since all that handling may have pulled the fabric out a bit on a few spots, but after that it’s time to hang and add some letters!
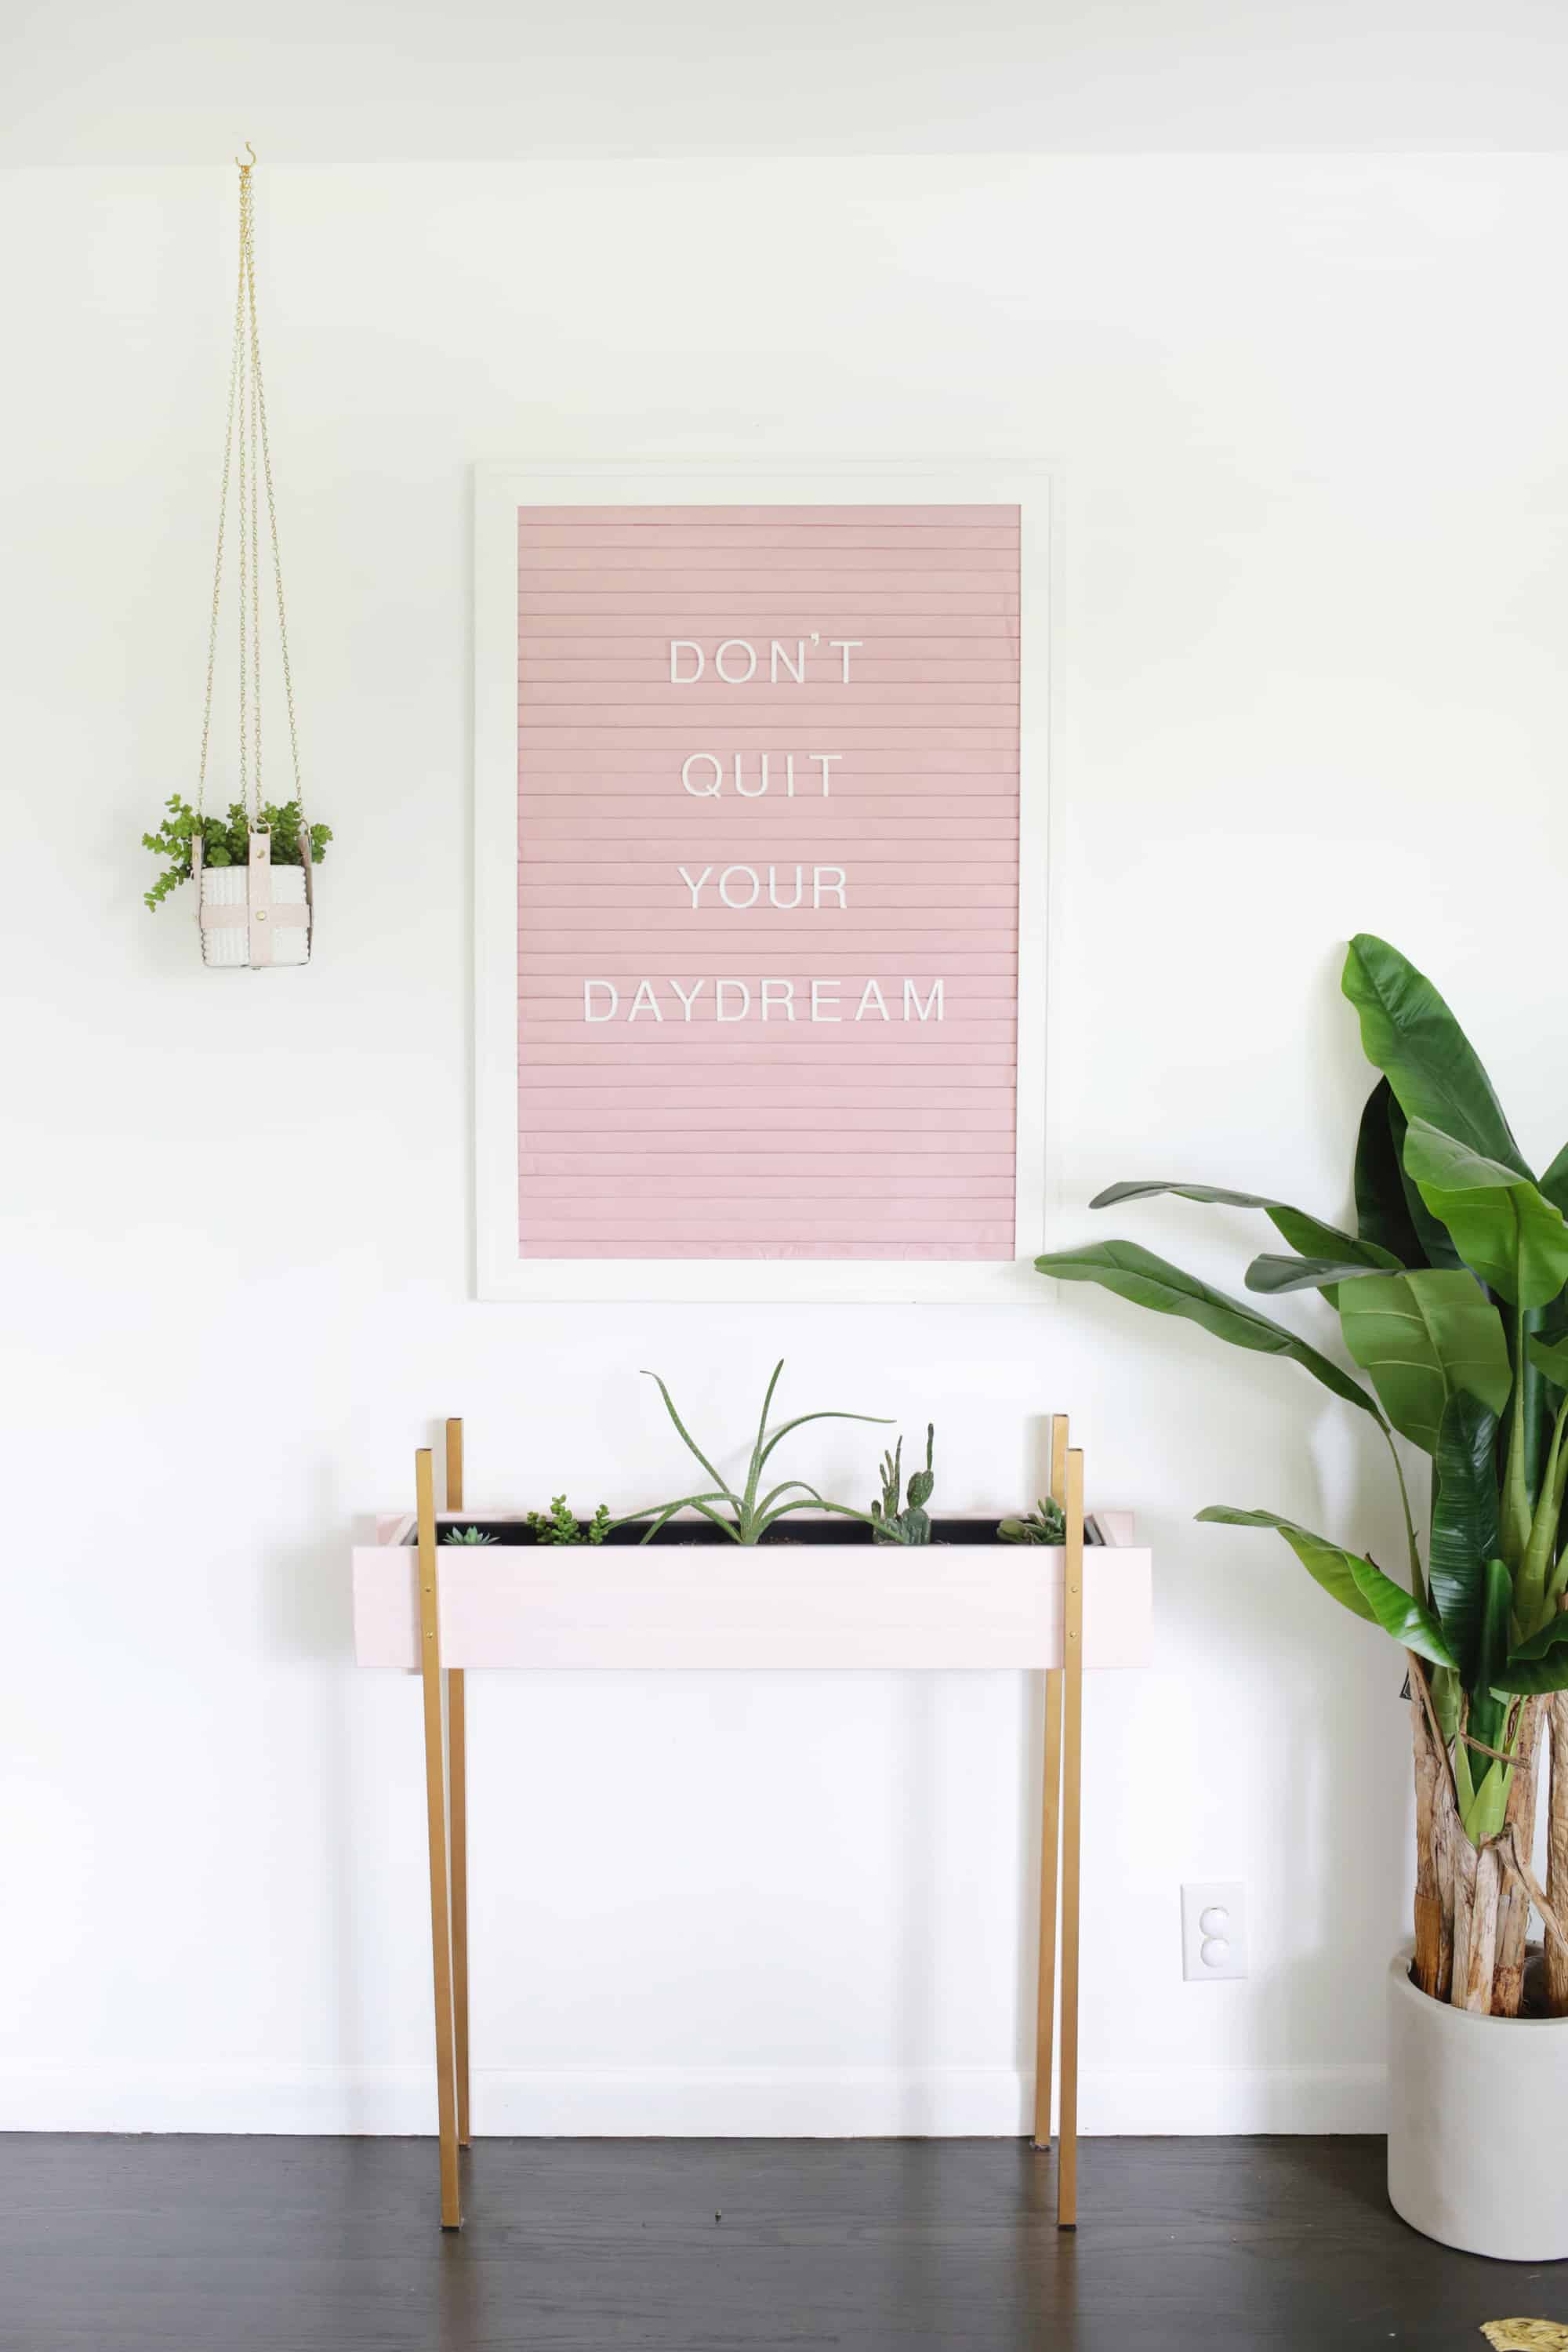
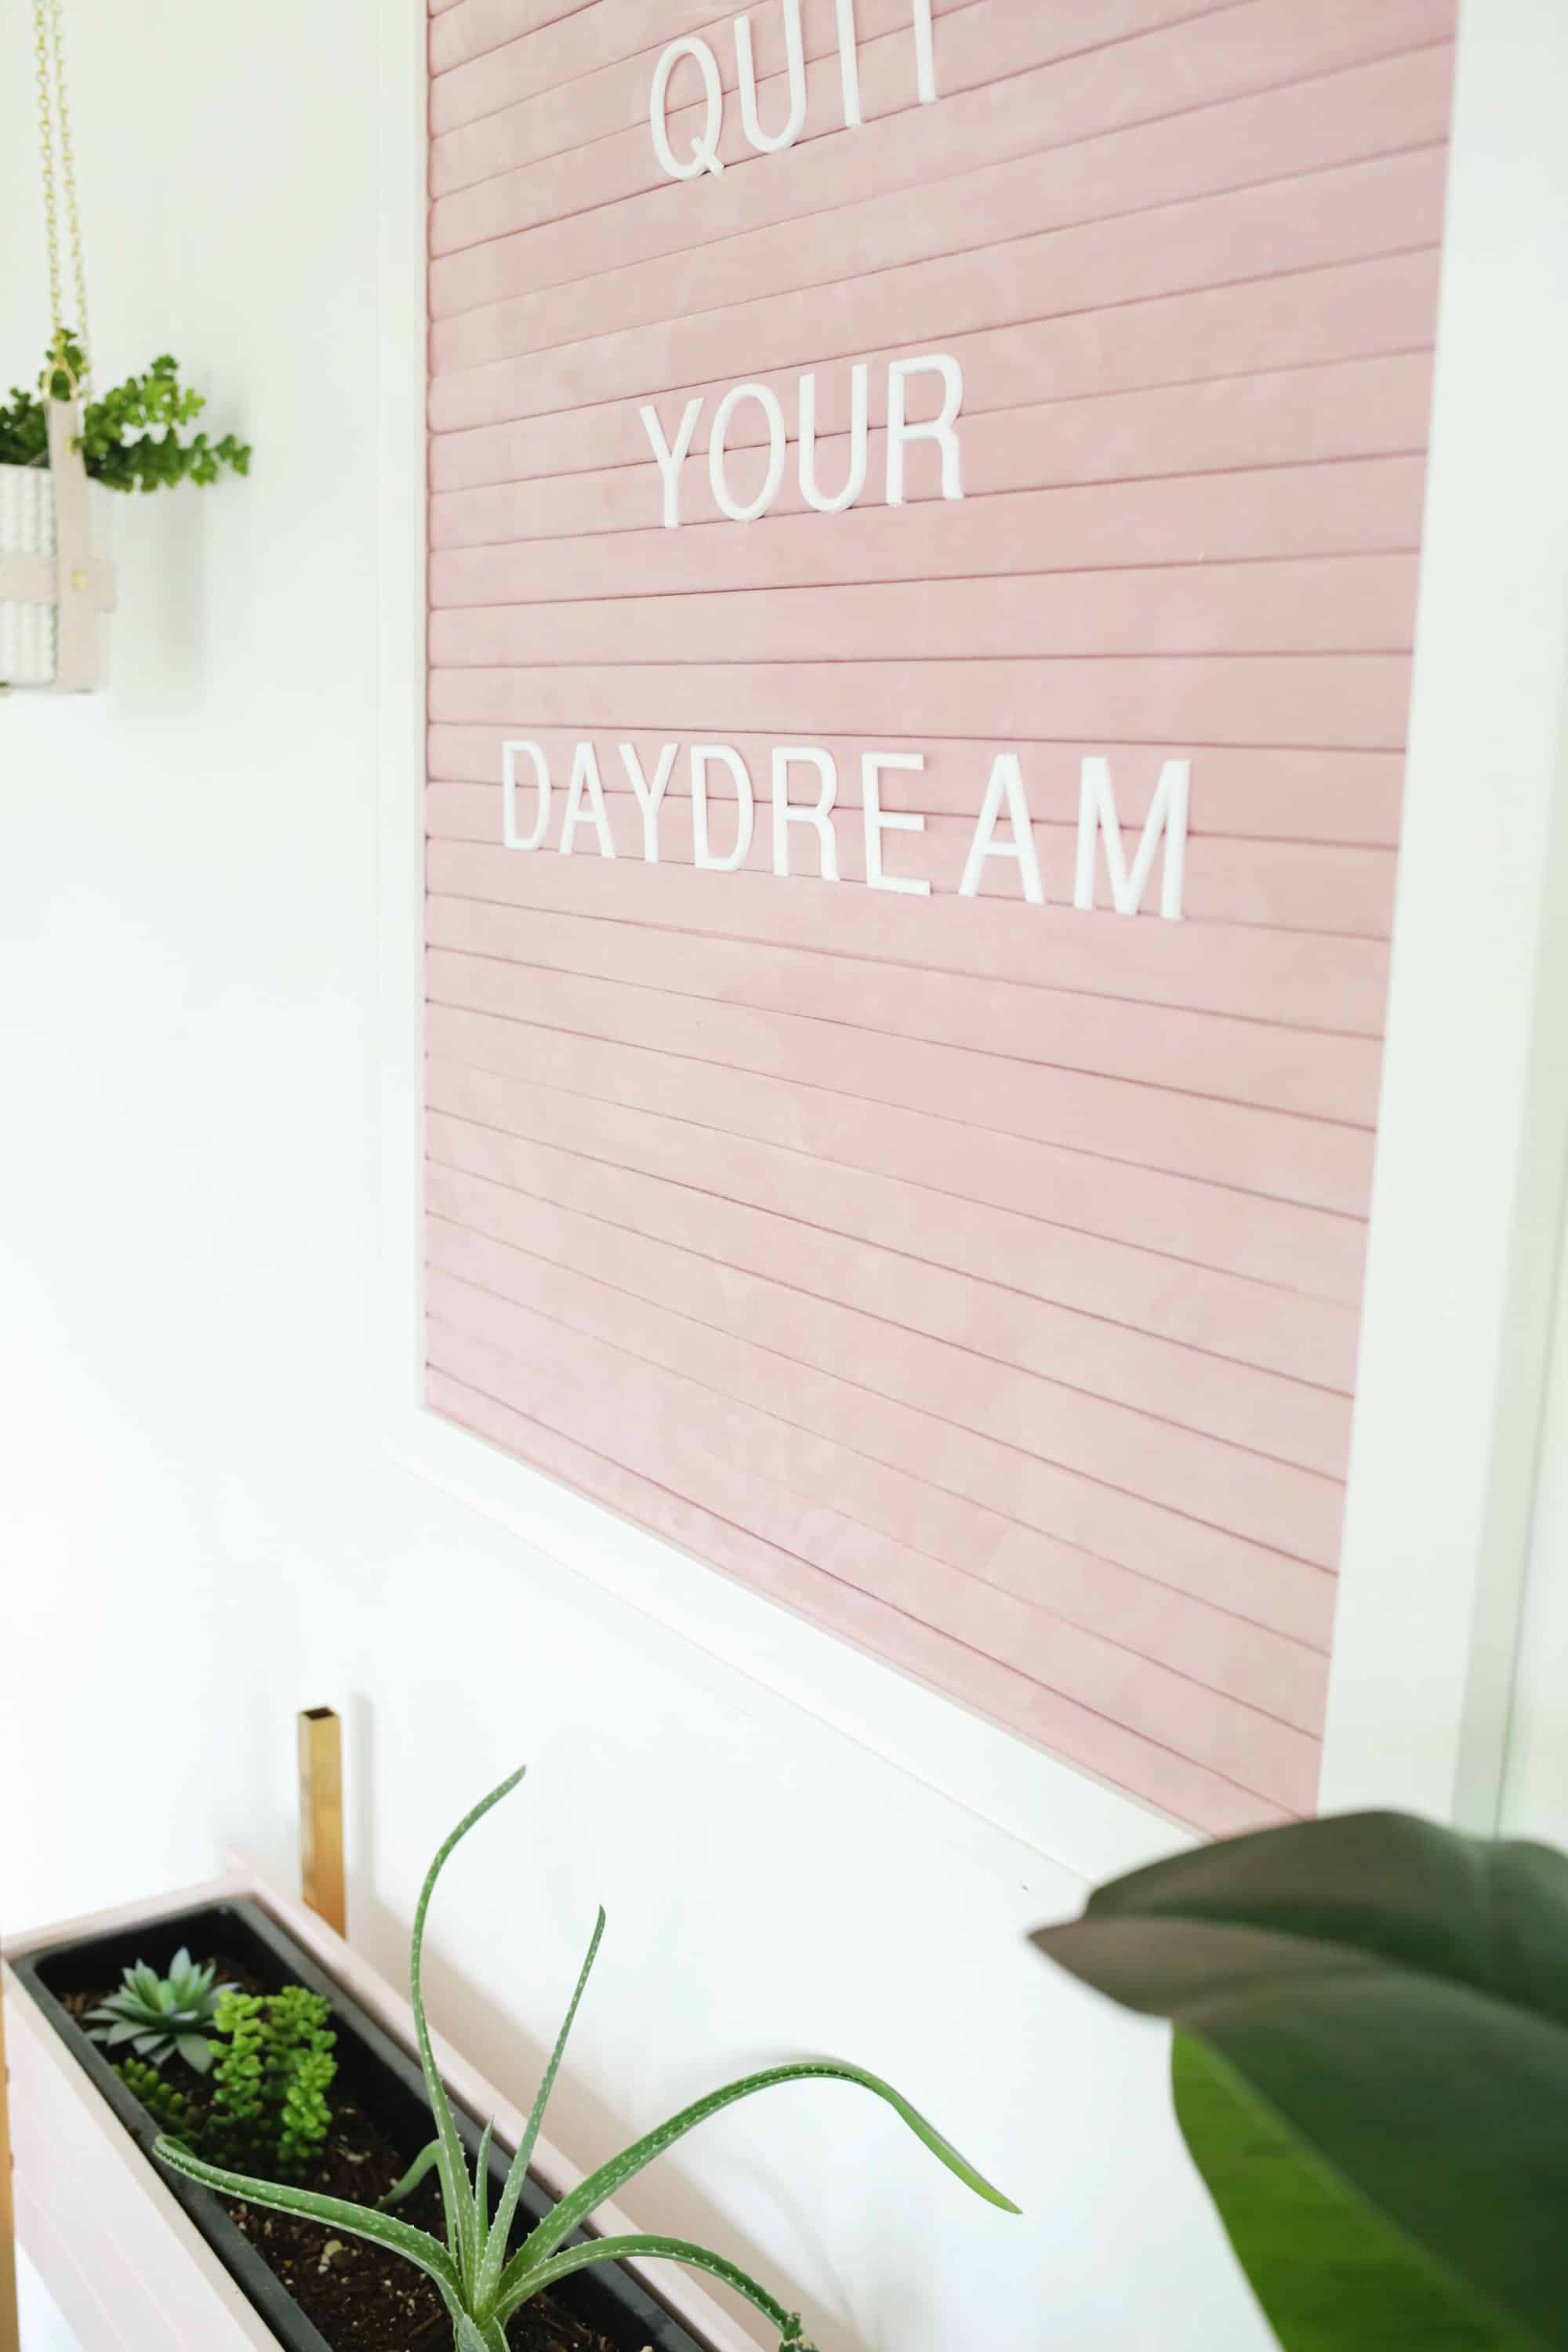
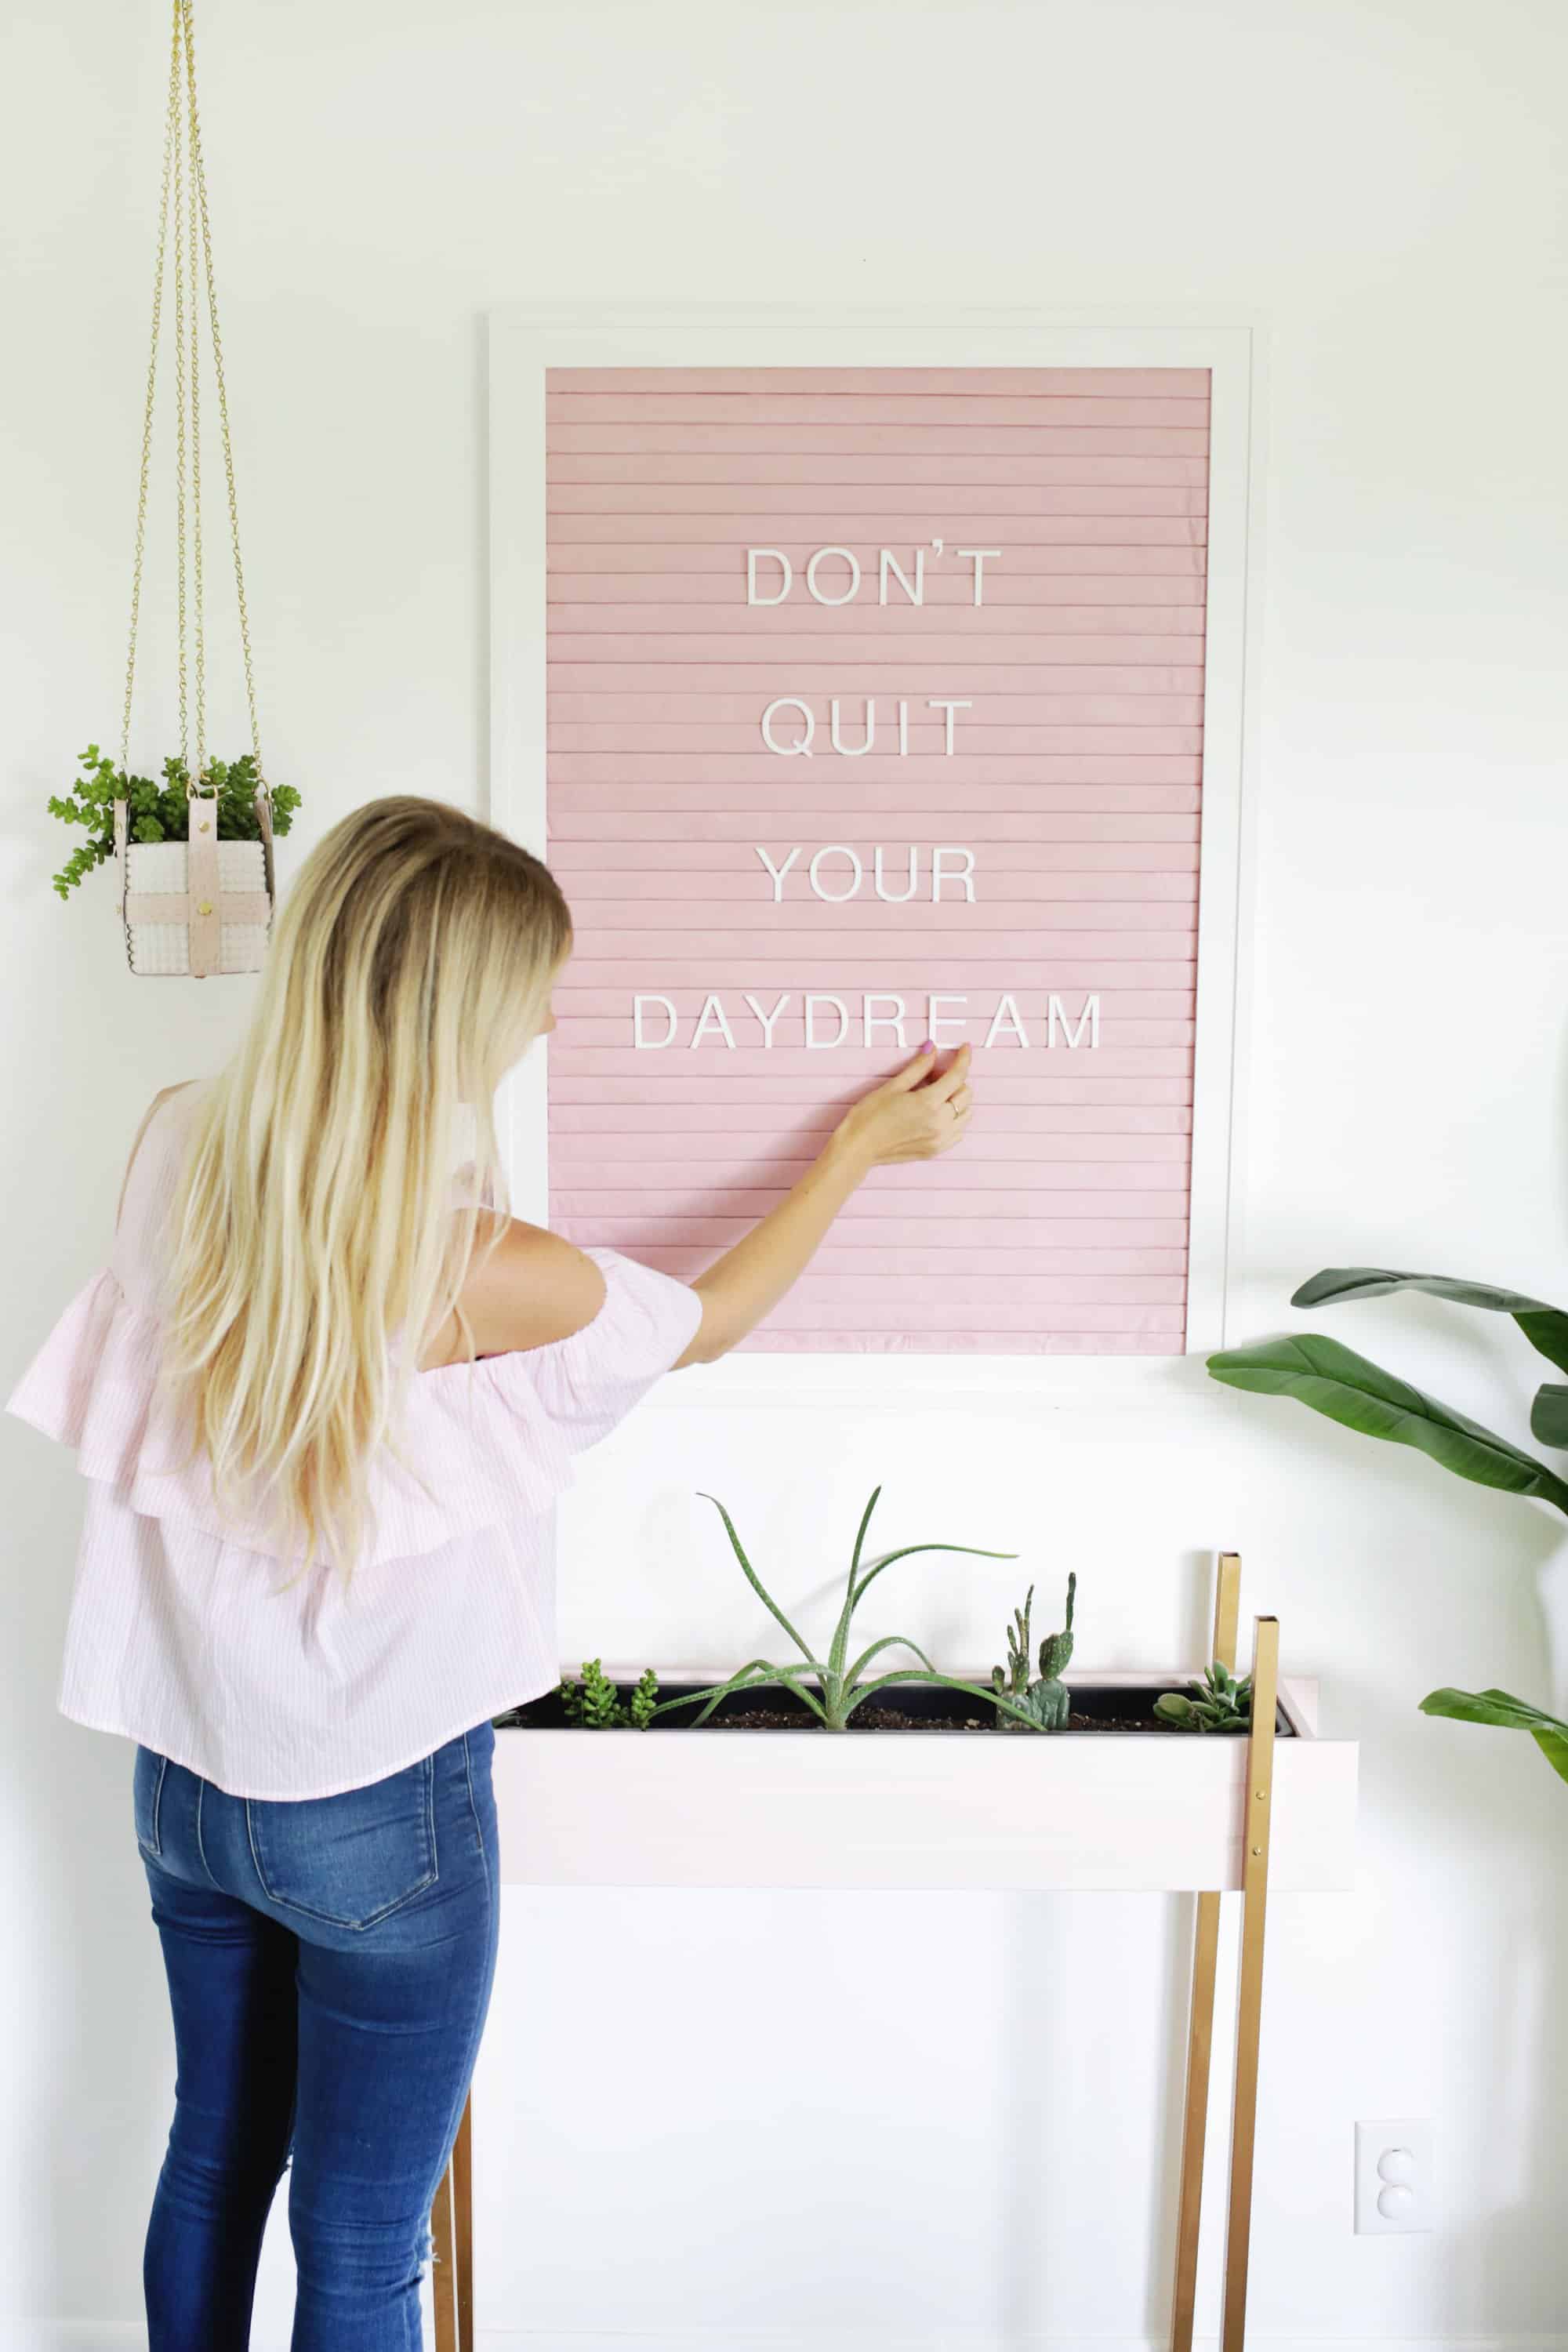 How cool is that?? Items like this are extra fun since you can customize them with whatever song lyrics or movie quotes are special to you (and you can change it up seasonally and for parties, etc.). I have a feeling that this will eventually become a board for Arrested Development quotes and I’m totally fine with that too … xo. Laura
Credits // Author and Photography: Laura Gummerman. Photos edited with A Color Story Desktop.
]]>
 Hi friends! I’m so happy to share this project with you today! I have been working hard on finding homes for our photos throughout our home. In addition to catching up on ALL our photo books, one of my current goals is to fill our home with family memories.
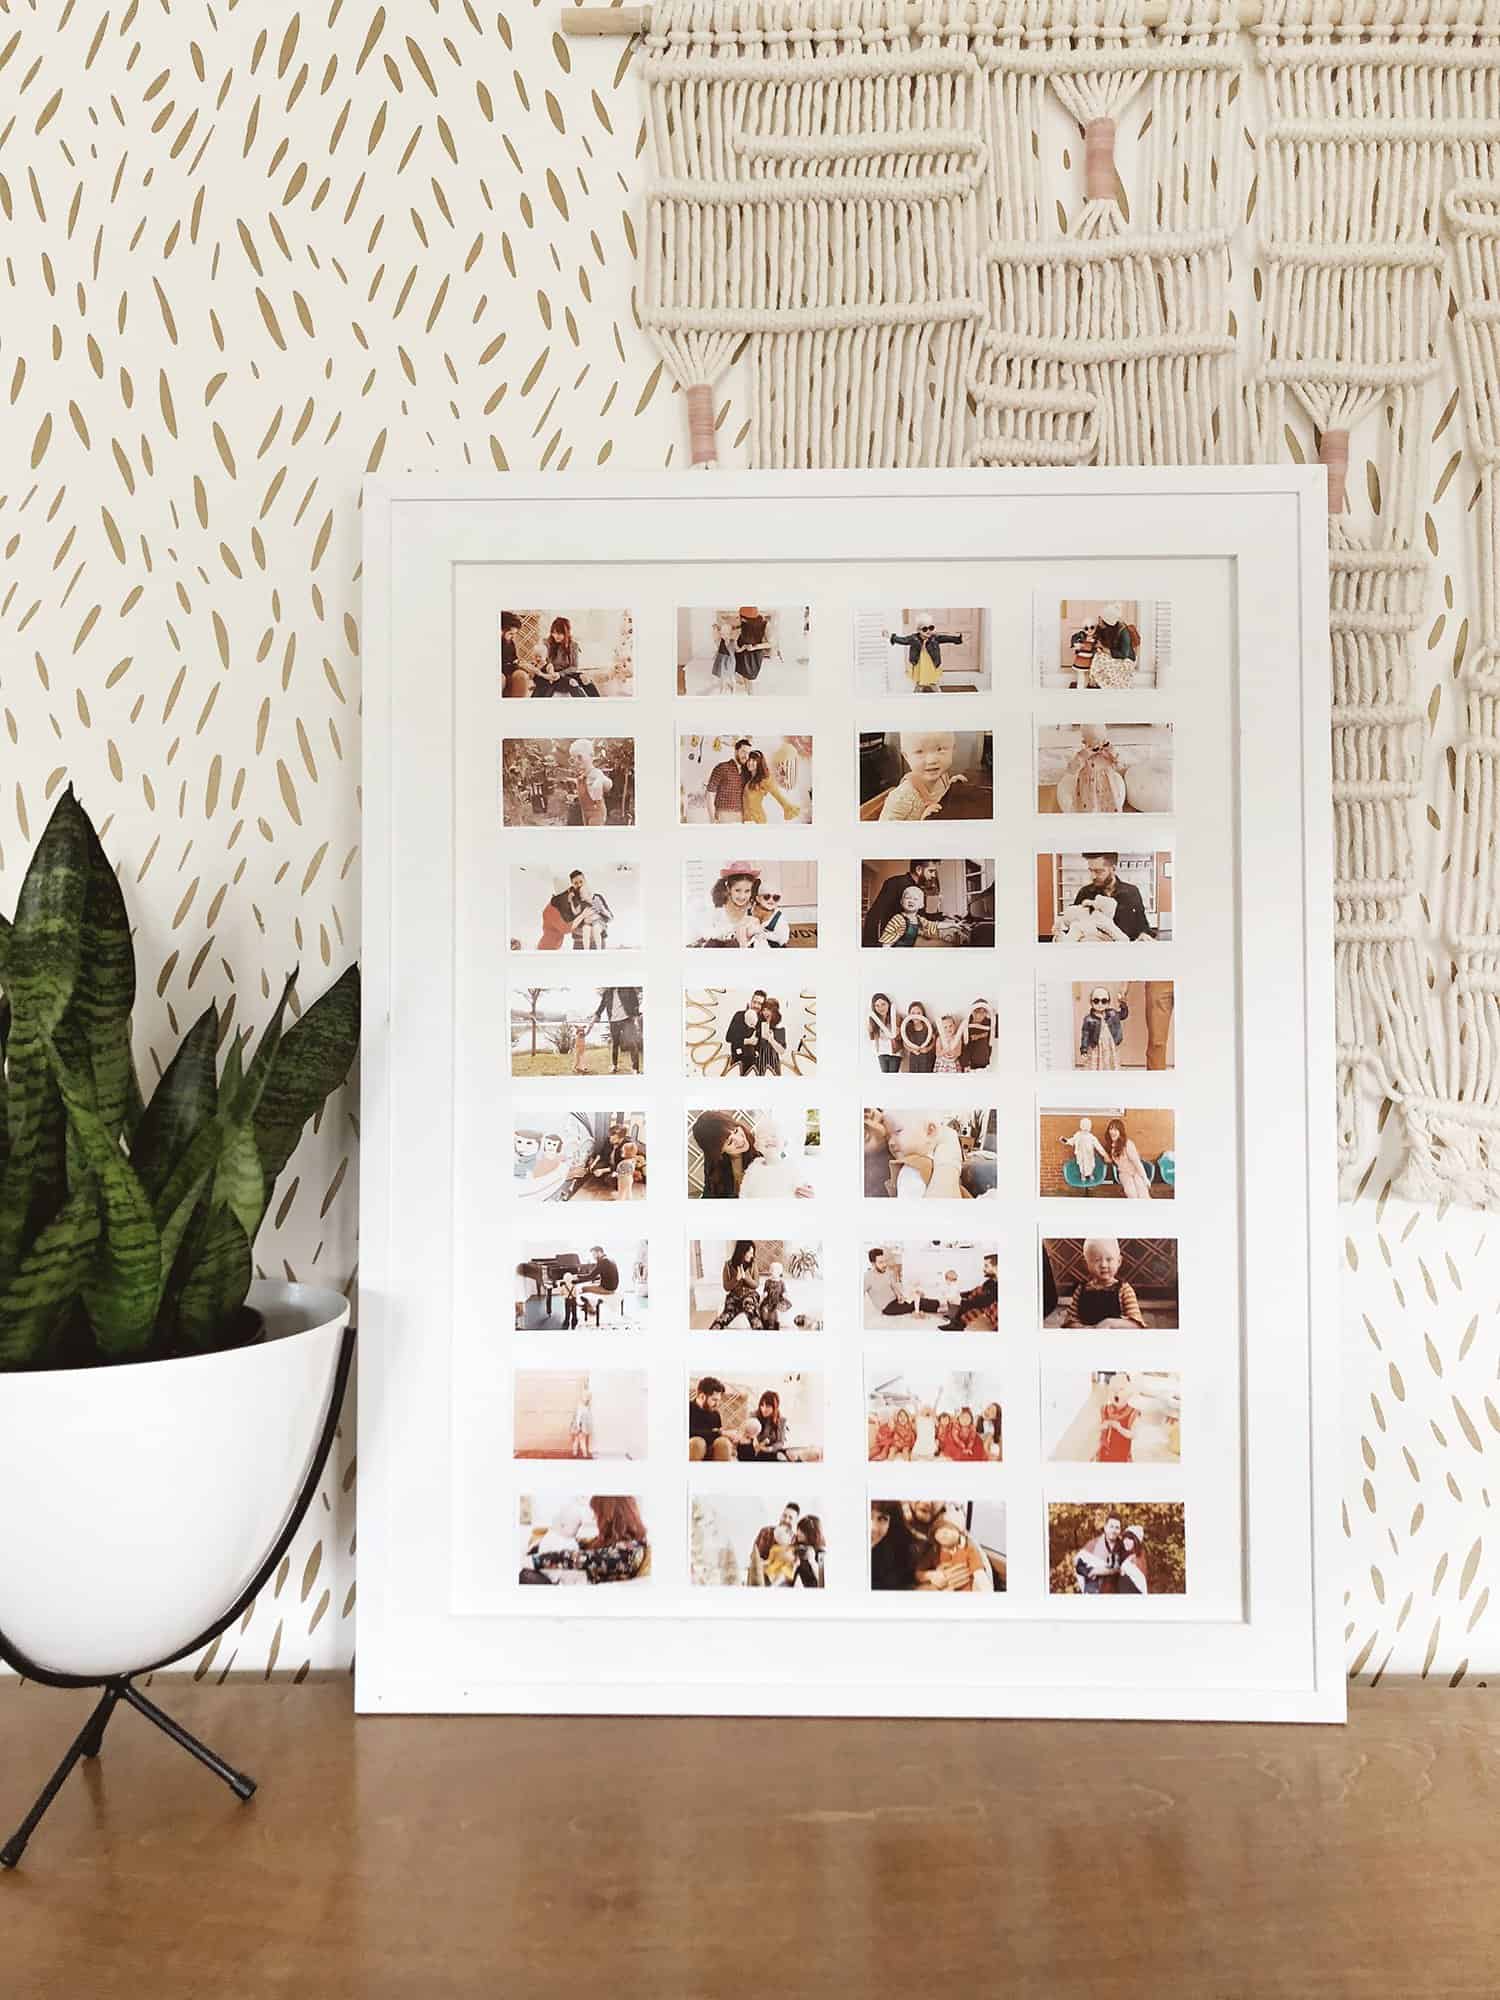
In these digital times, it’s TOO EASY to leave my photos on my phone for years at a time without printing them out. But each time I do print, I get SO happy and motivated! Today, I partnered with our friends at Canon USA to make a big photo display with a 16×20-inch frame and 32 family snapshots from our past two years.
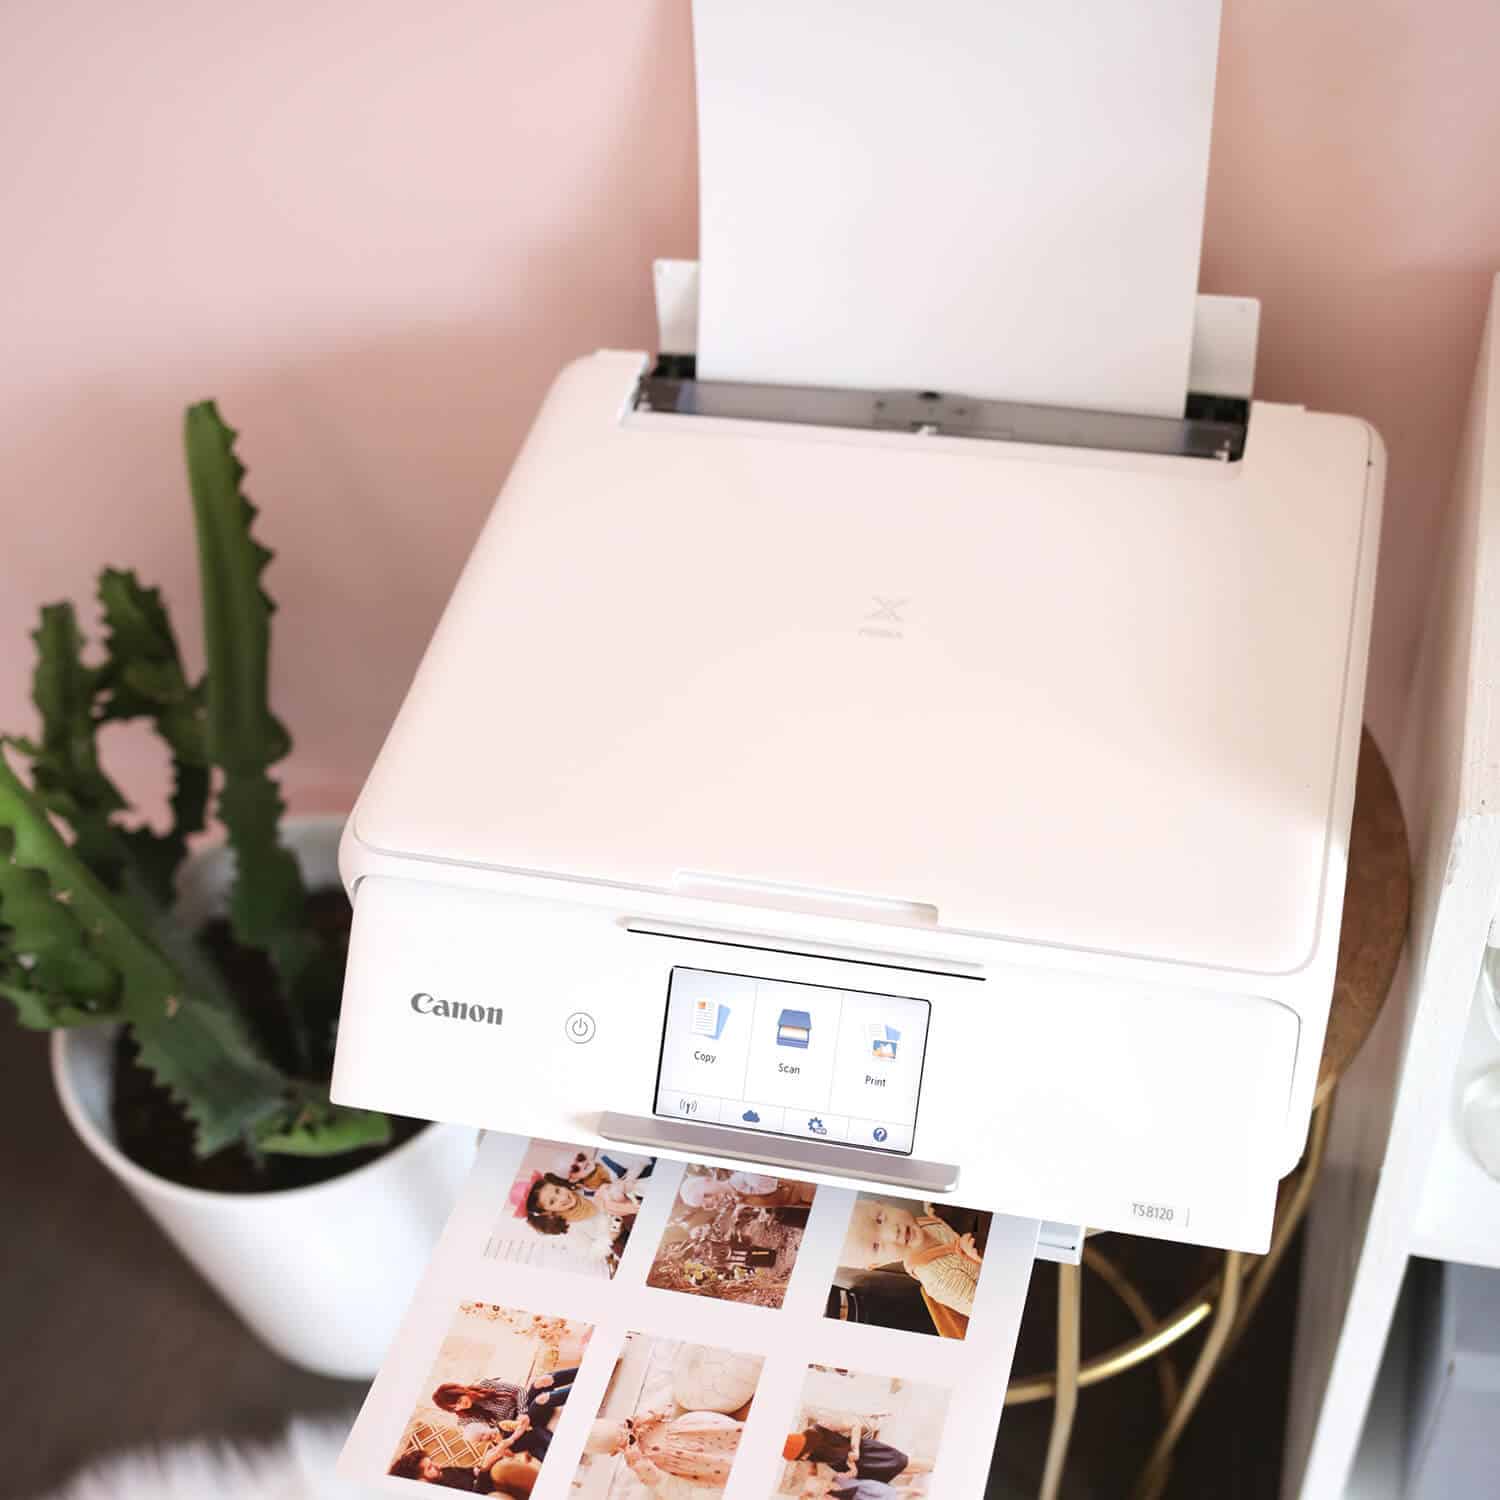 As you all know, I typically don’t use anything but my PIXMA iP8720 (which I adore and cannot recommend enough), but for today’s post I used Laura’s printer while I was waiting for an order of ink to arrive (it’s good to have a neighbor with a full supply of ink, you know what I’m saying?). I’m still loyal to my PIXMA iP8720, but look how pretty Laura’s PIXMA TS8120 printer is. It’s the fashion blogger of all printers! So good looking! And I was super impressed with the printing quality too. The colors really pop, which is important!
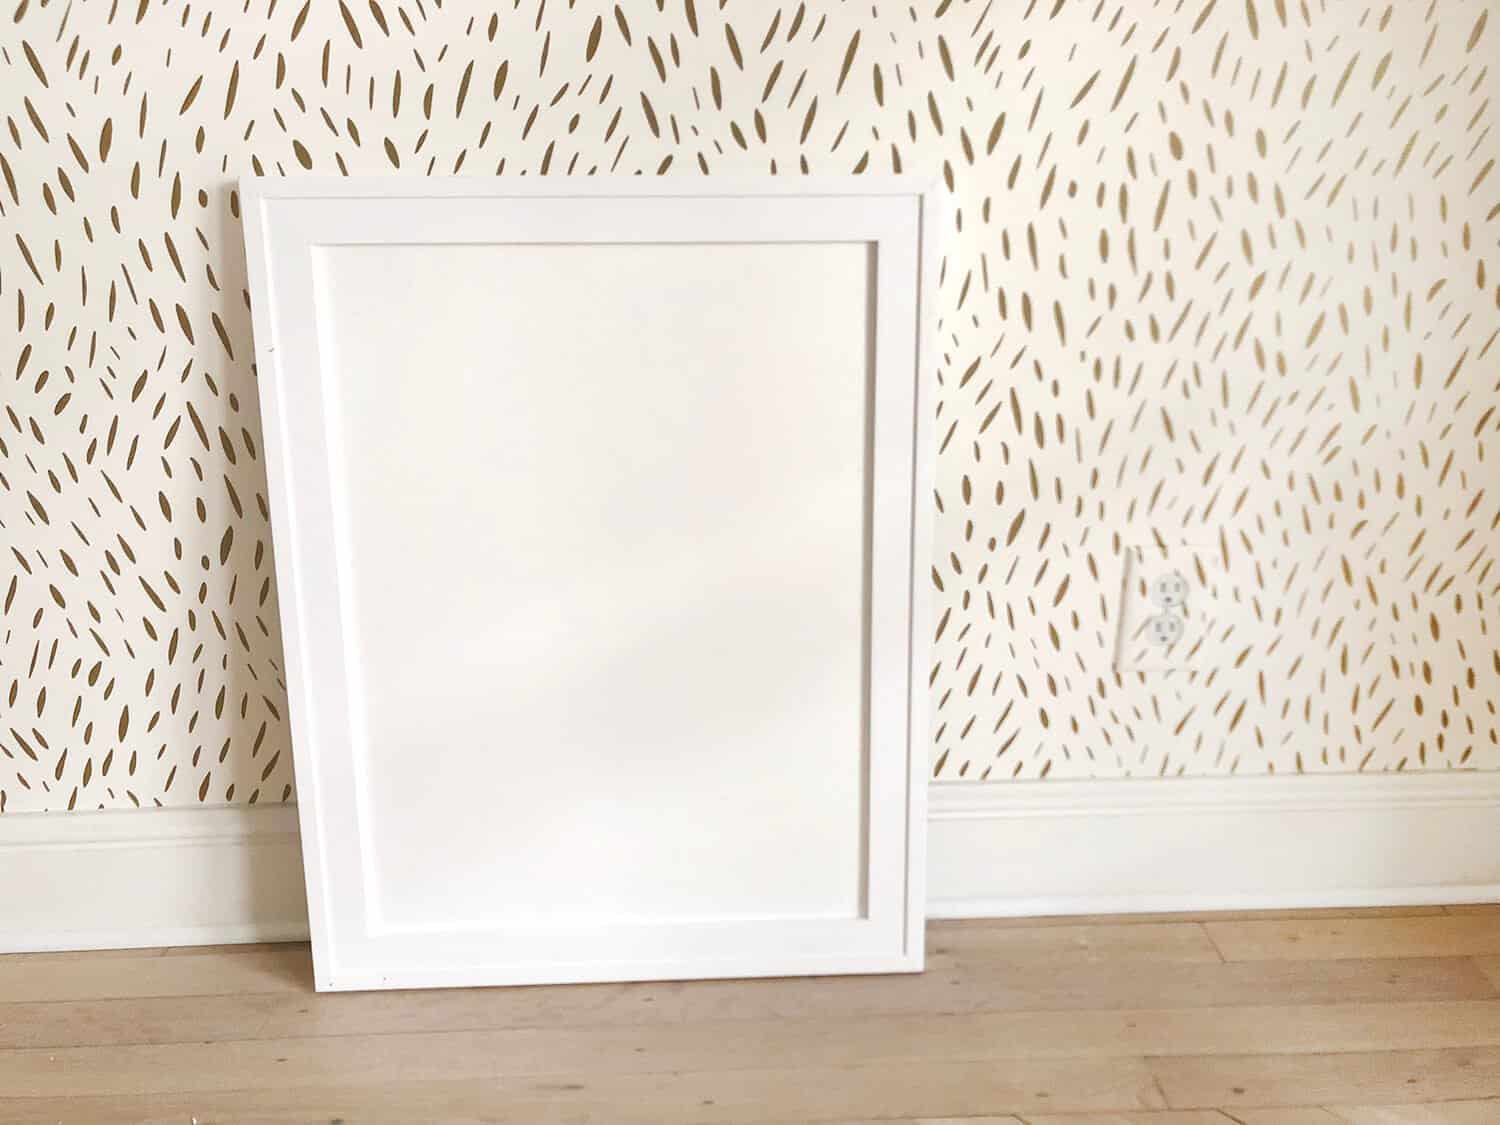 Step 1: Get a 16×20-inch frame and line it with plain white mat board.
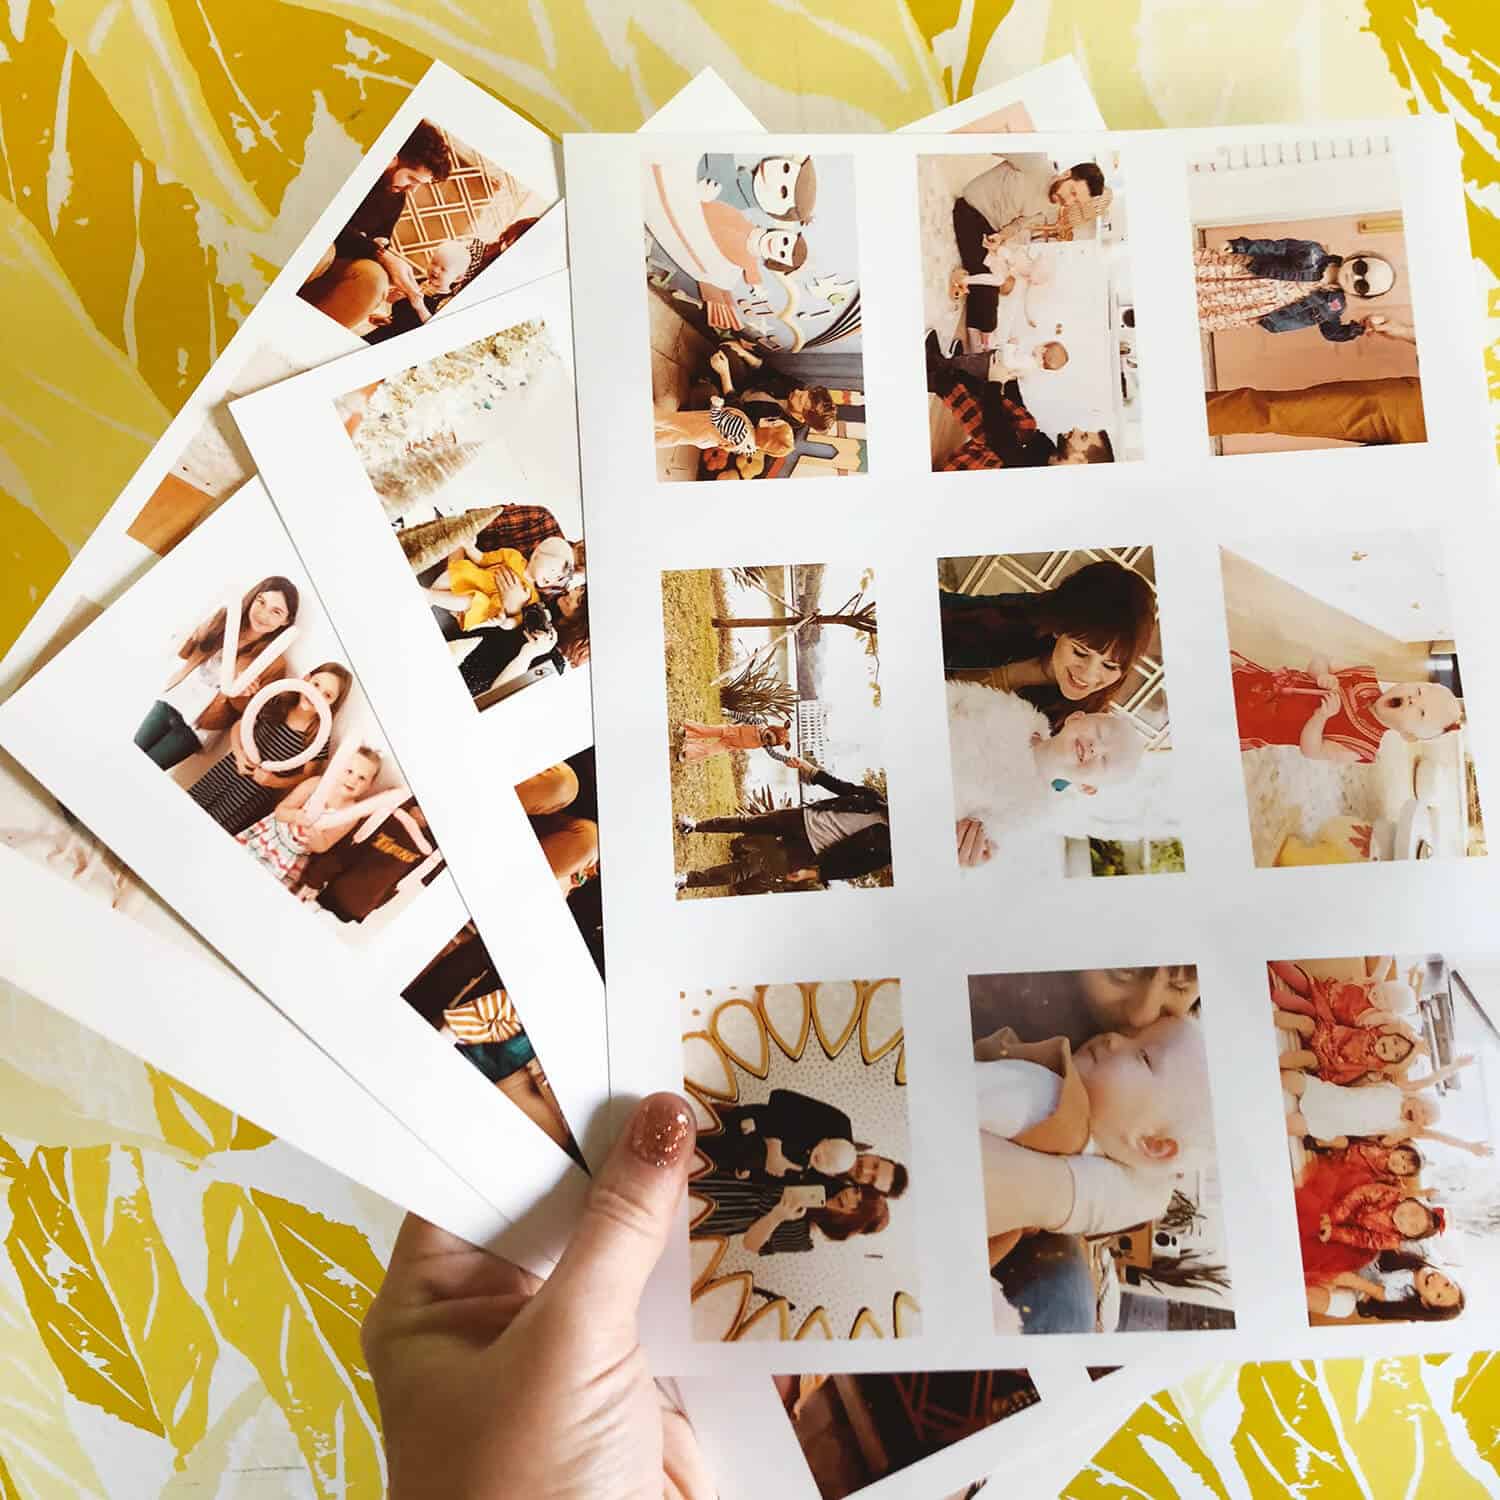 Step 2: Print out 32 of your favorite memories in 2×3 size on nice photo paper. I cut mine out with a small white border remaining on each one.
Choosing the photos was my favorite part, of course!
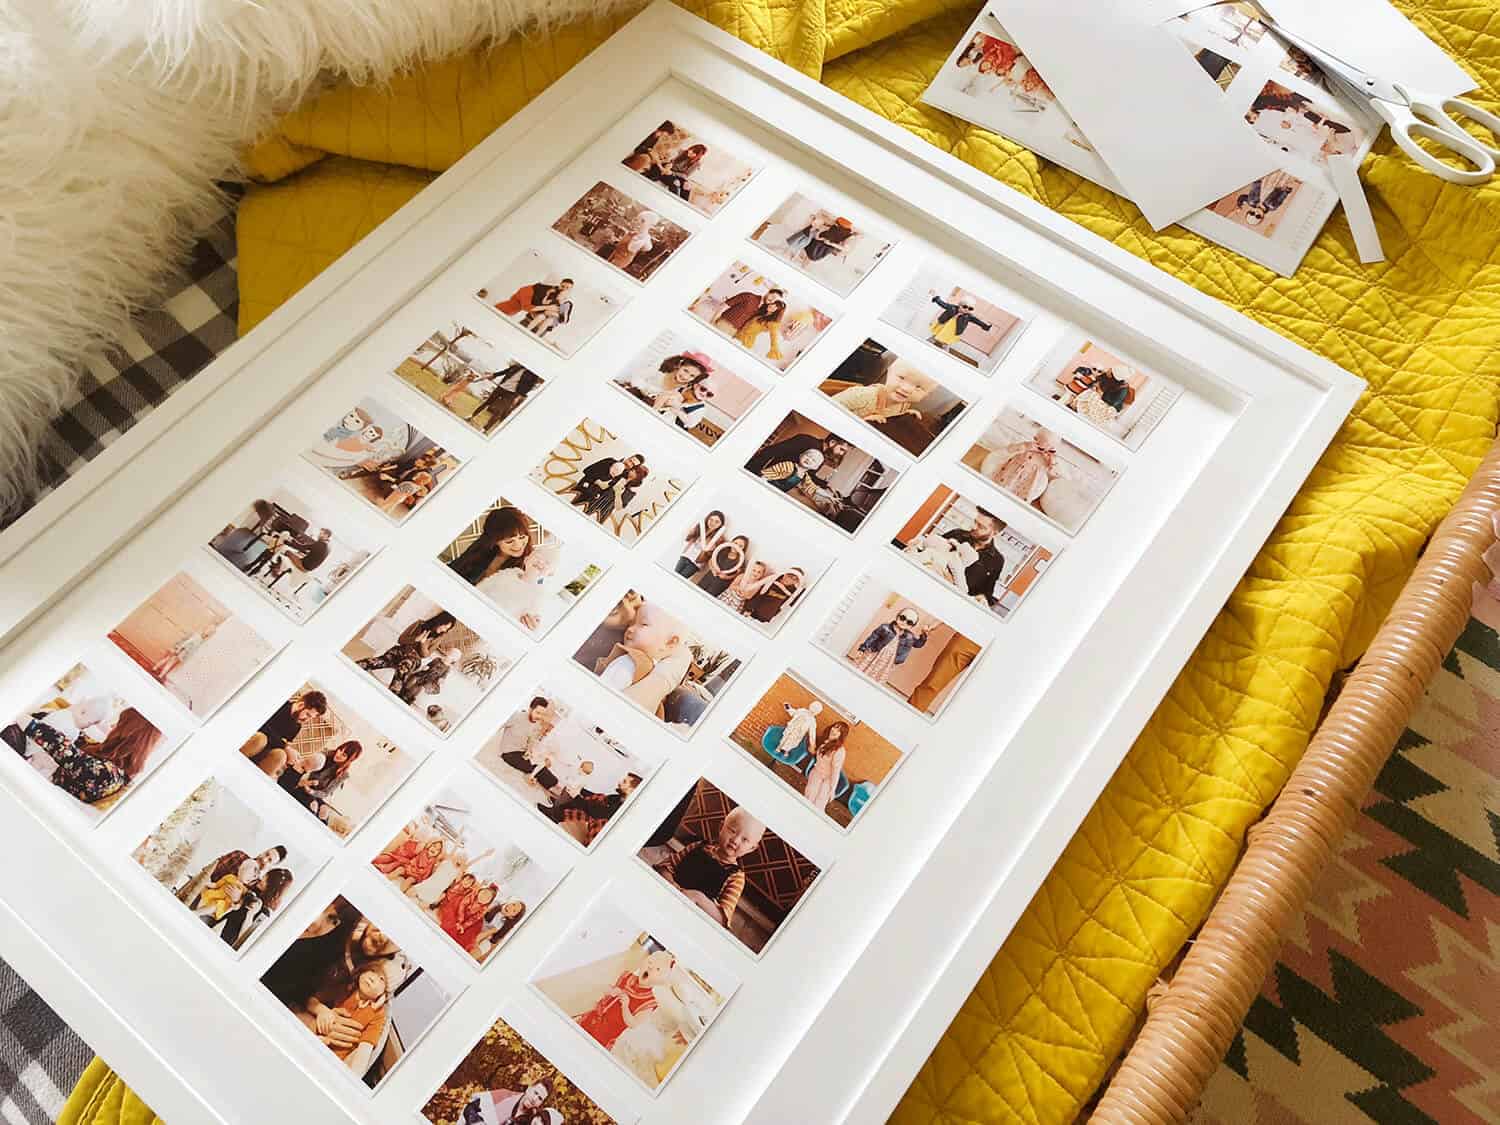 Step 3: Arrange your photos in eight rows of four each. Play with the spacing and composition before you commit to adhesive.
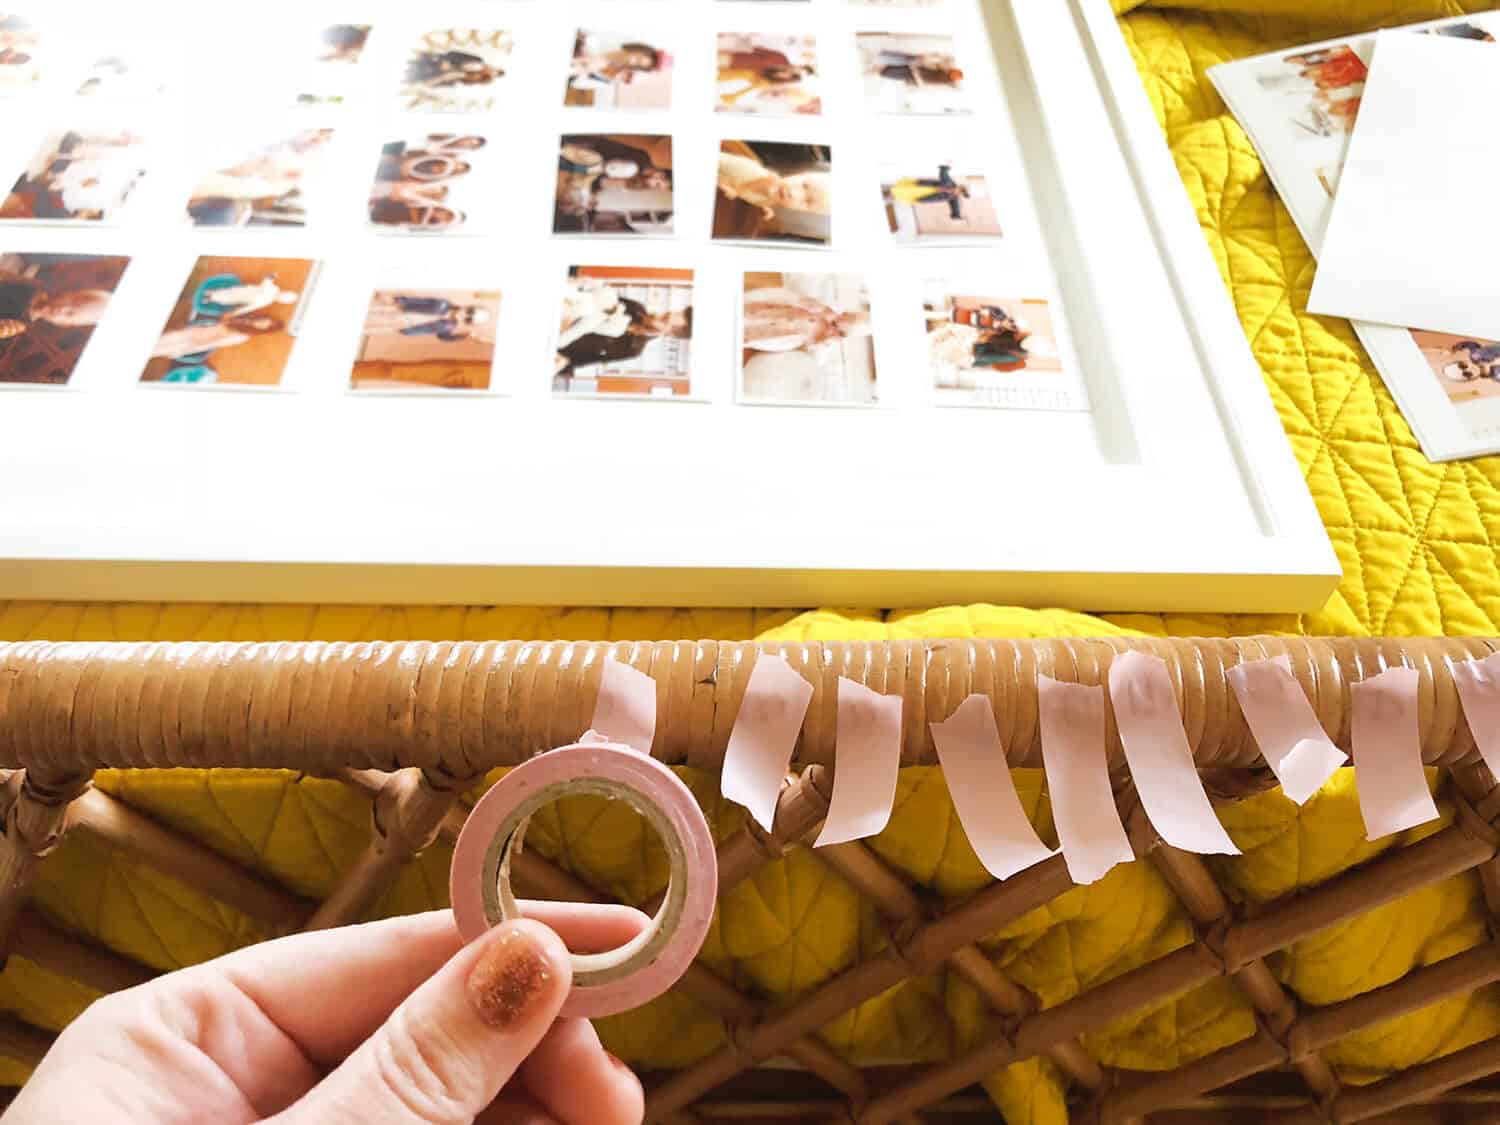 Step 4: Use whatever adhesive you have handy (I used washi) to adhere your photos to the mat board. Be very careful to keep the spacing as even as possible.
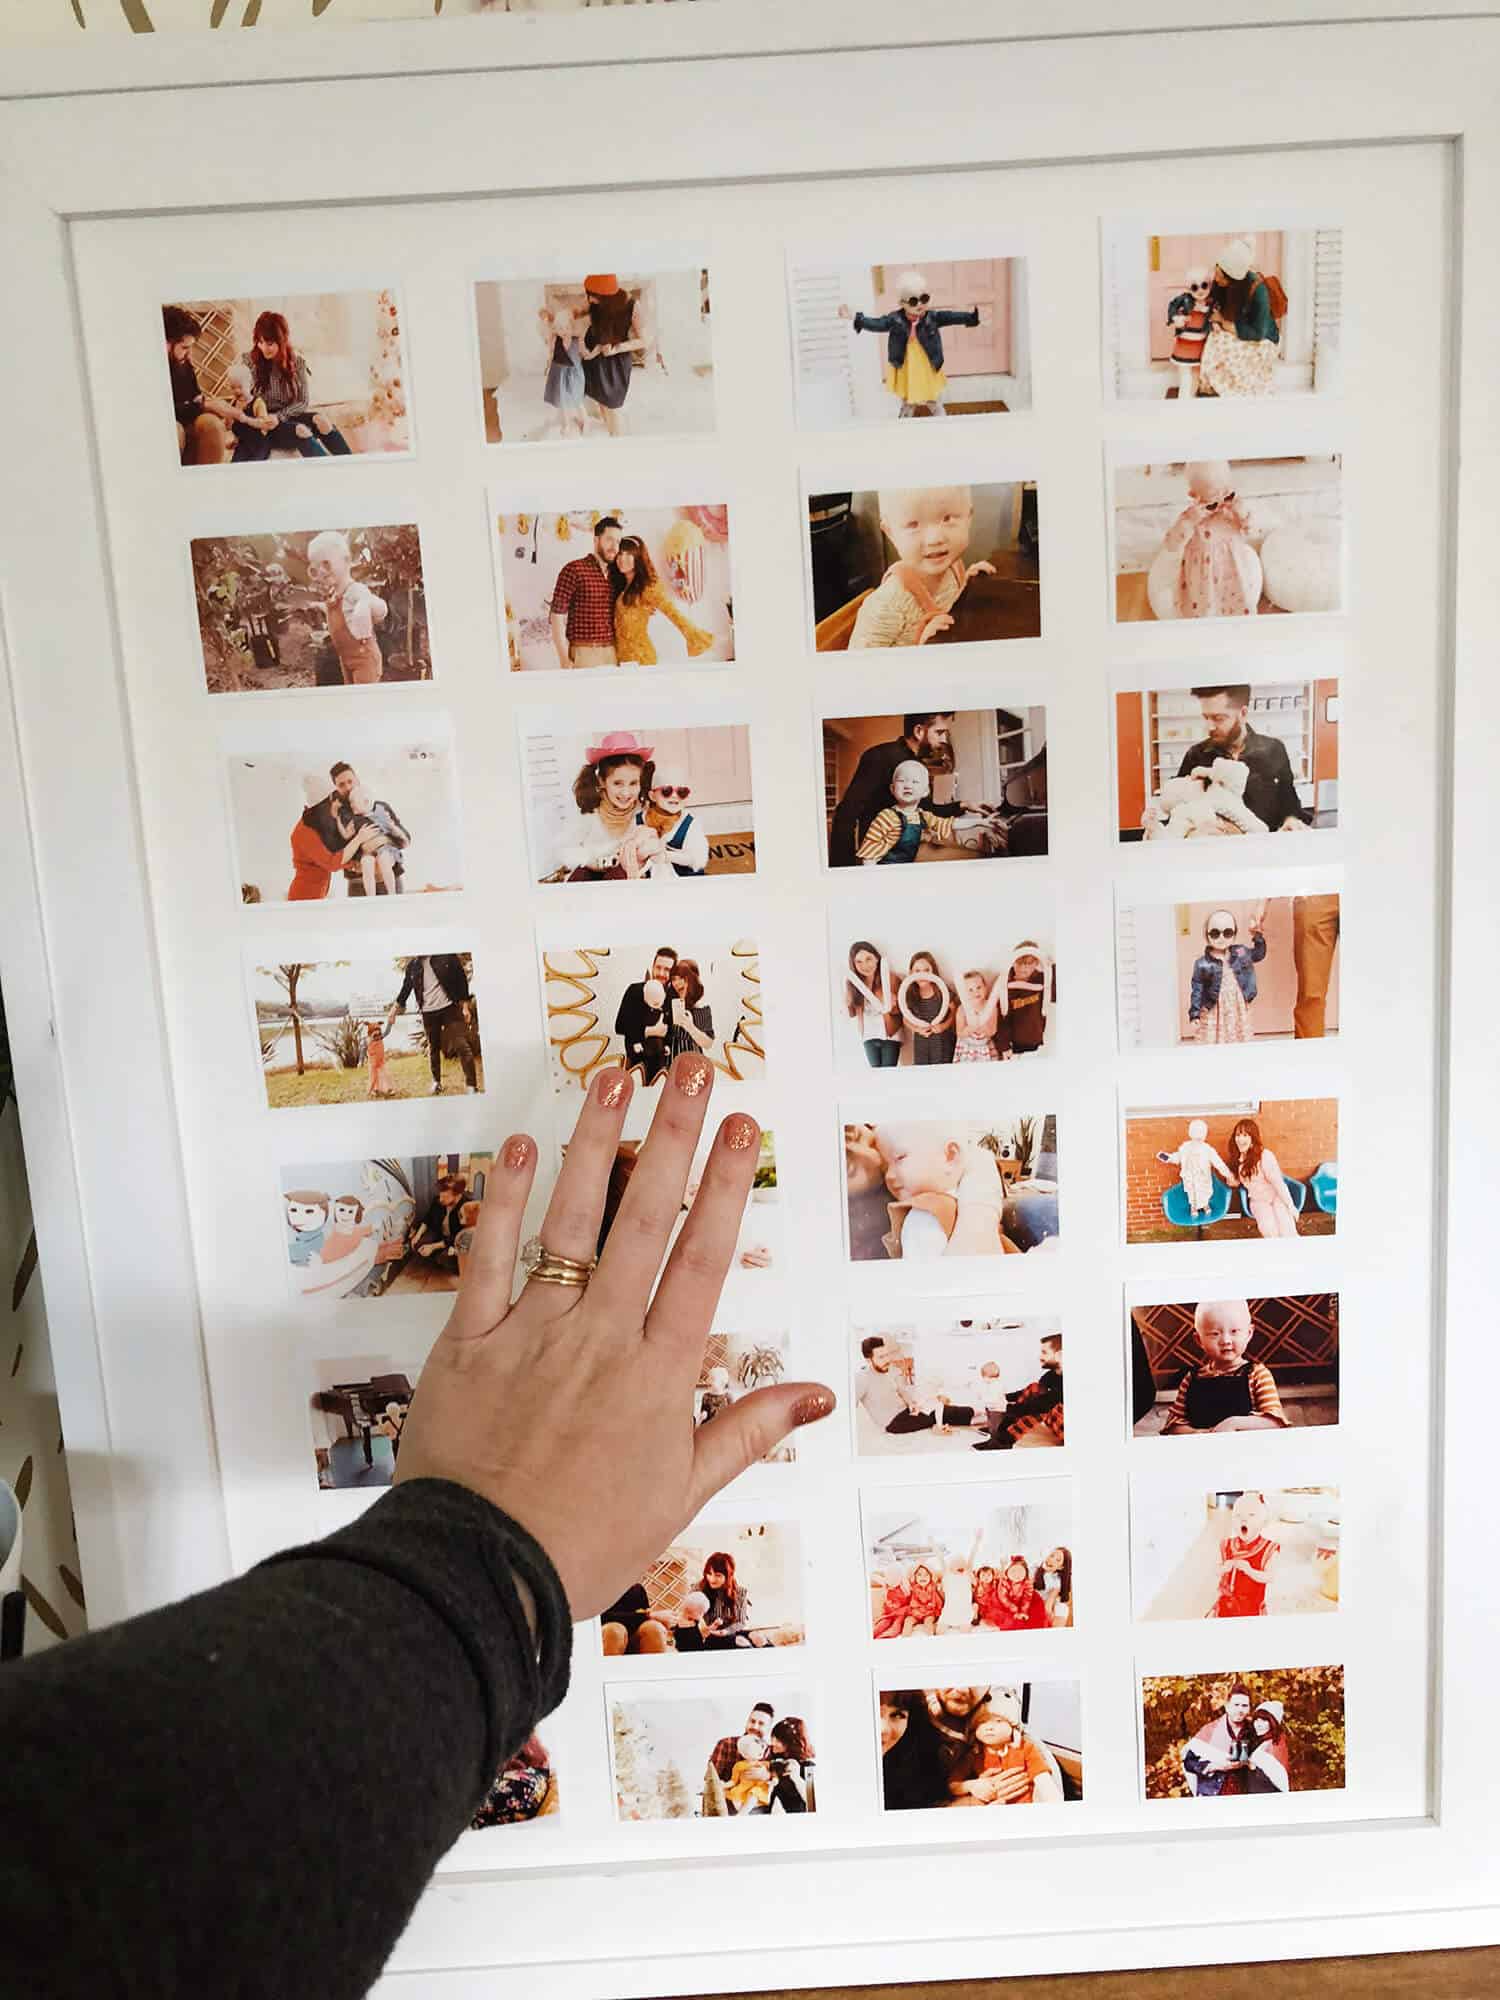 Here’s my hand for scale to see how large this actually is. I think it’s way bigger than it appears in photos. I’m planning to hang it in my office.
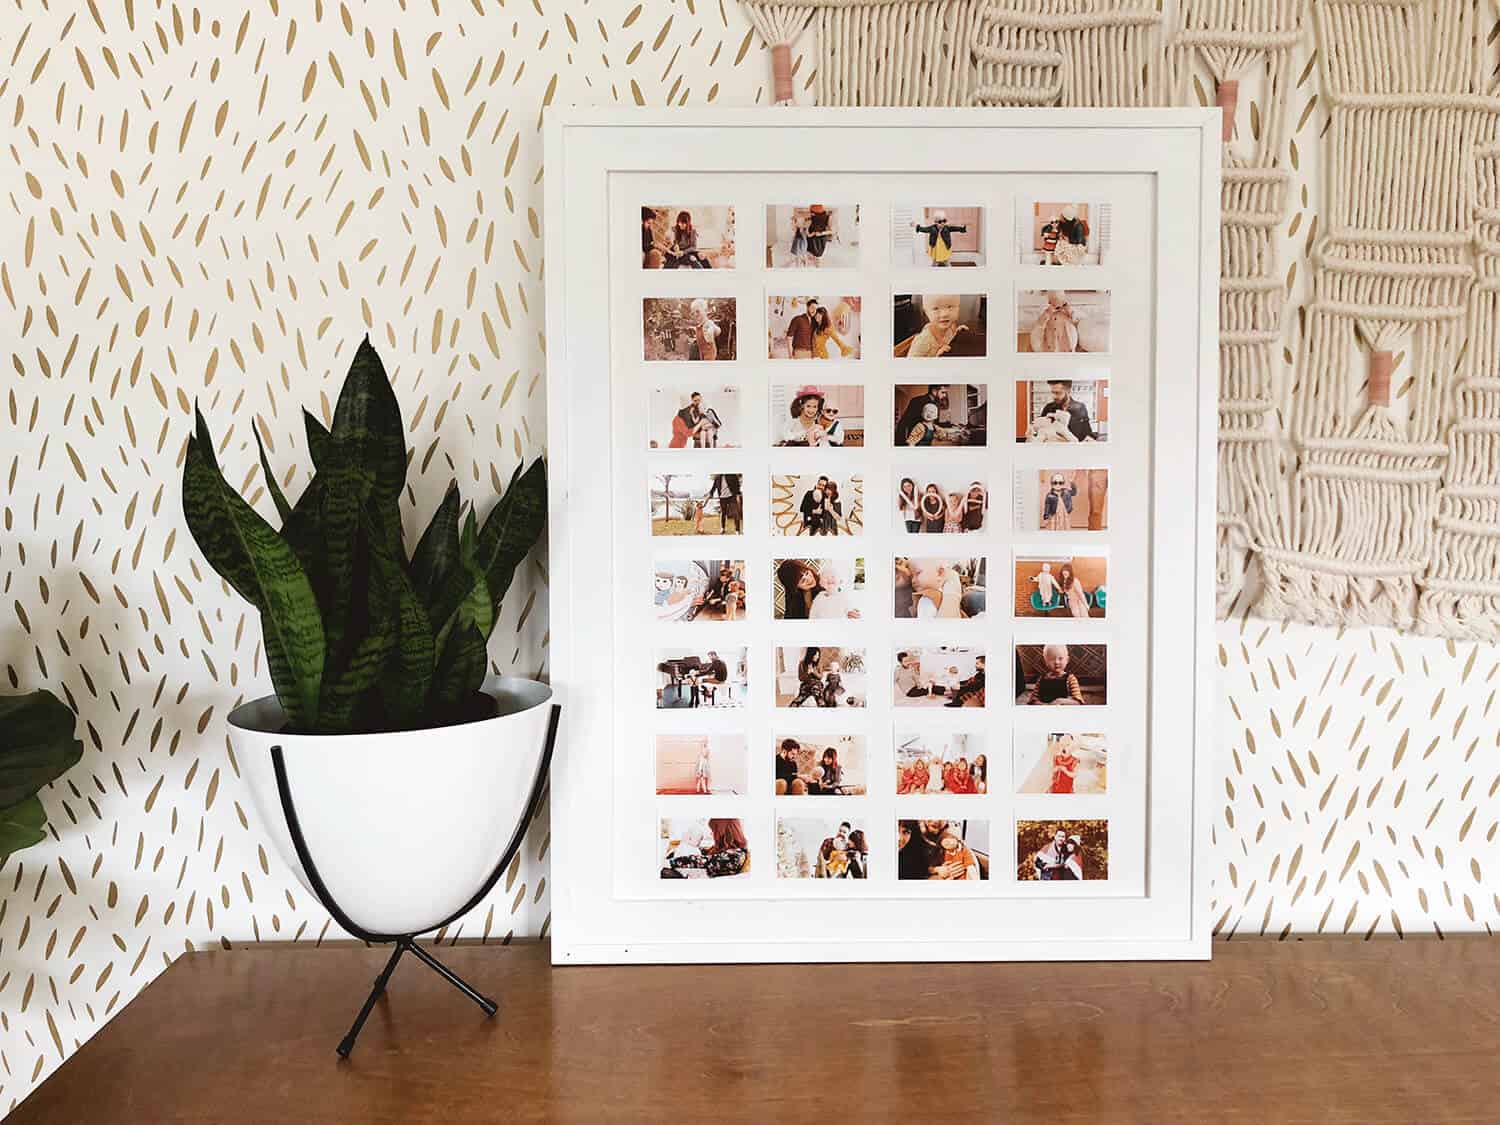 Here’s the finished product! I have probably said this before, but I love the sentimental aspect of seeing a lot of family memories all grouped together. It’s gives me an overwhelming sense of joy and gratitude.
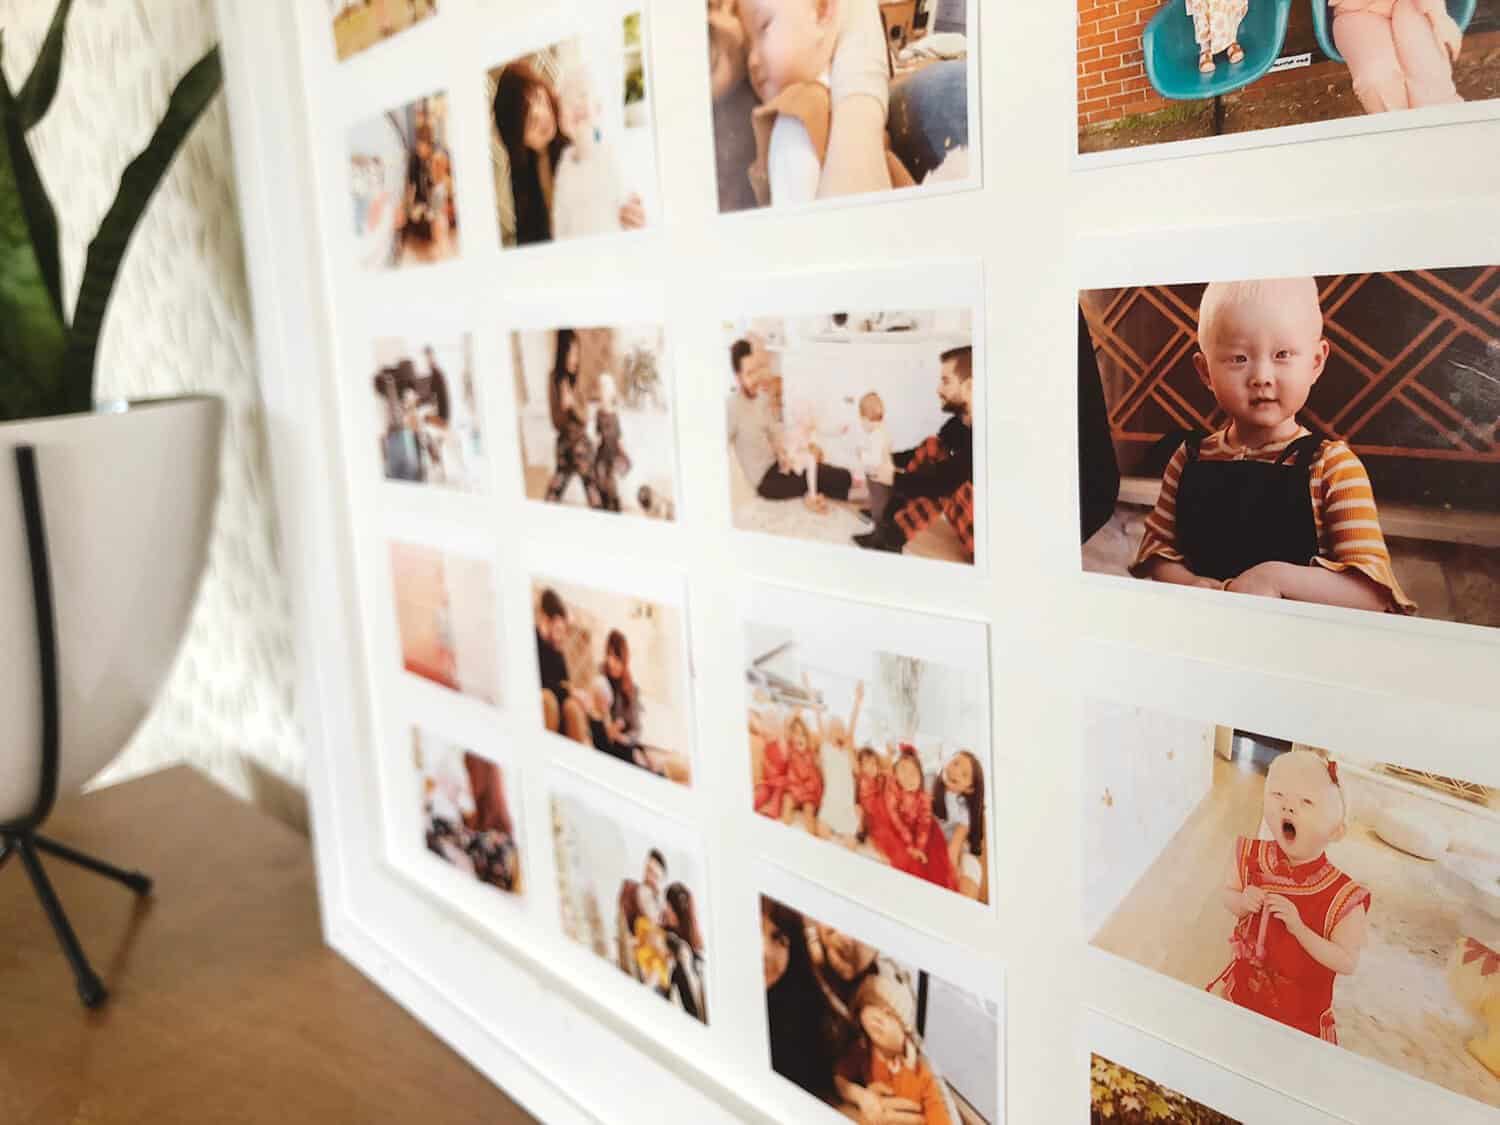 Side view.
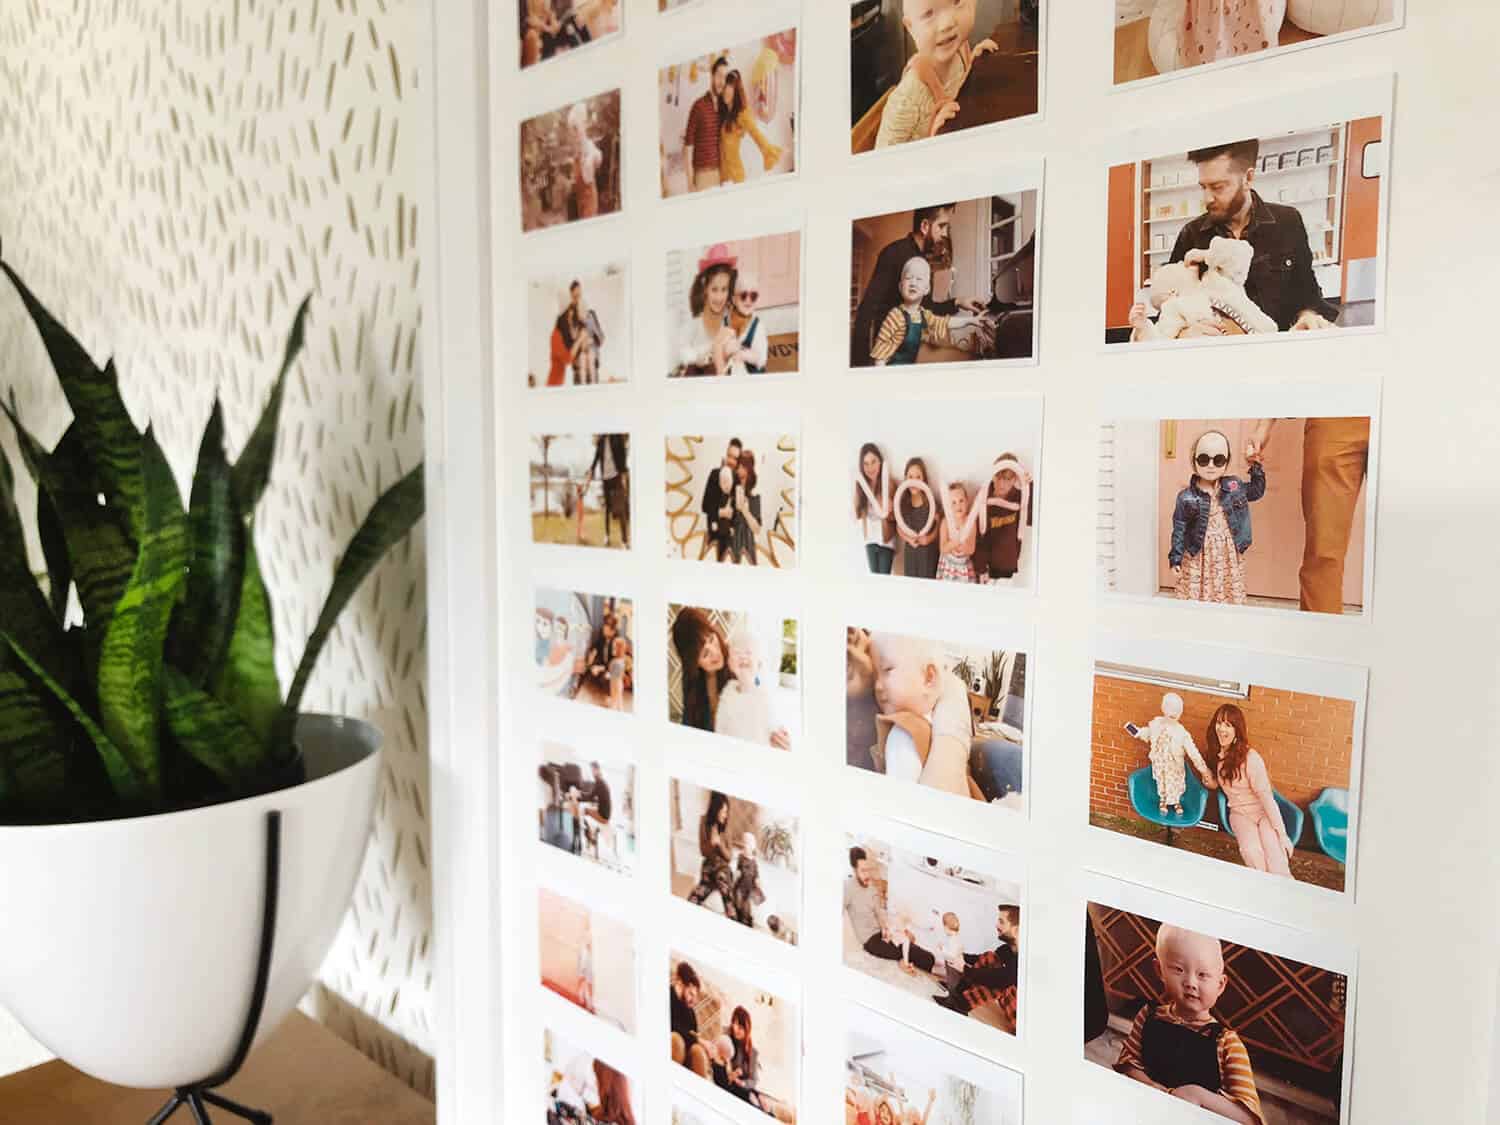 And one last view.
I would LOVE to see it if you guys make a project like this! Tag us on Instagram!
And, as always, I am happy to answer any printer questions you have.
xx. ElsiE
]]>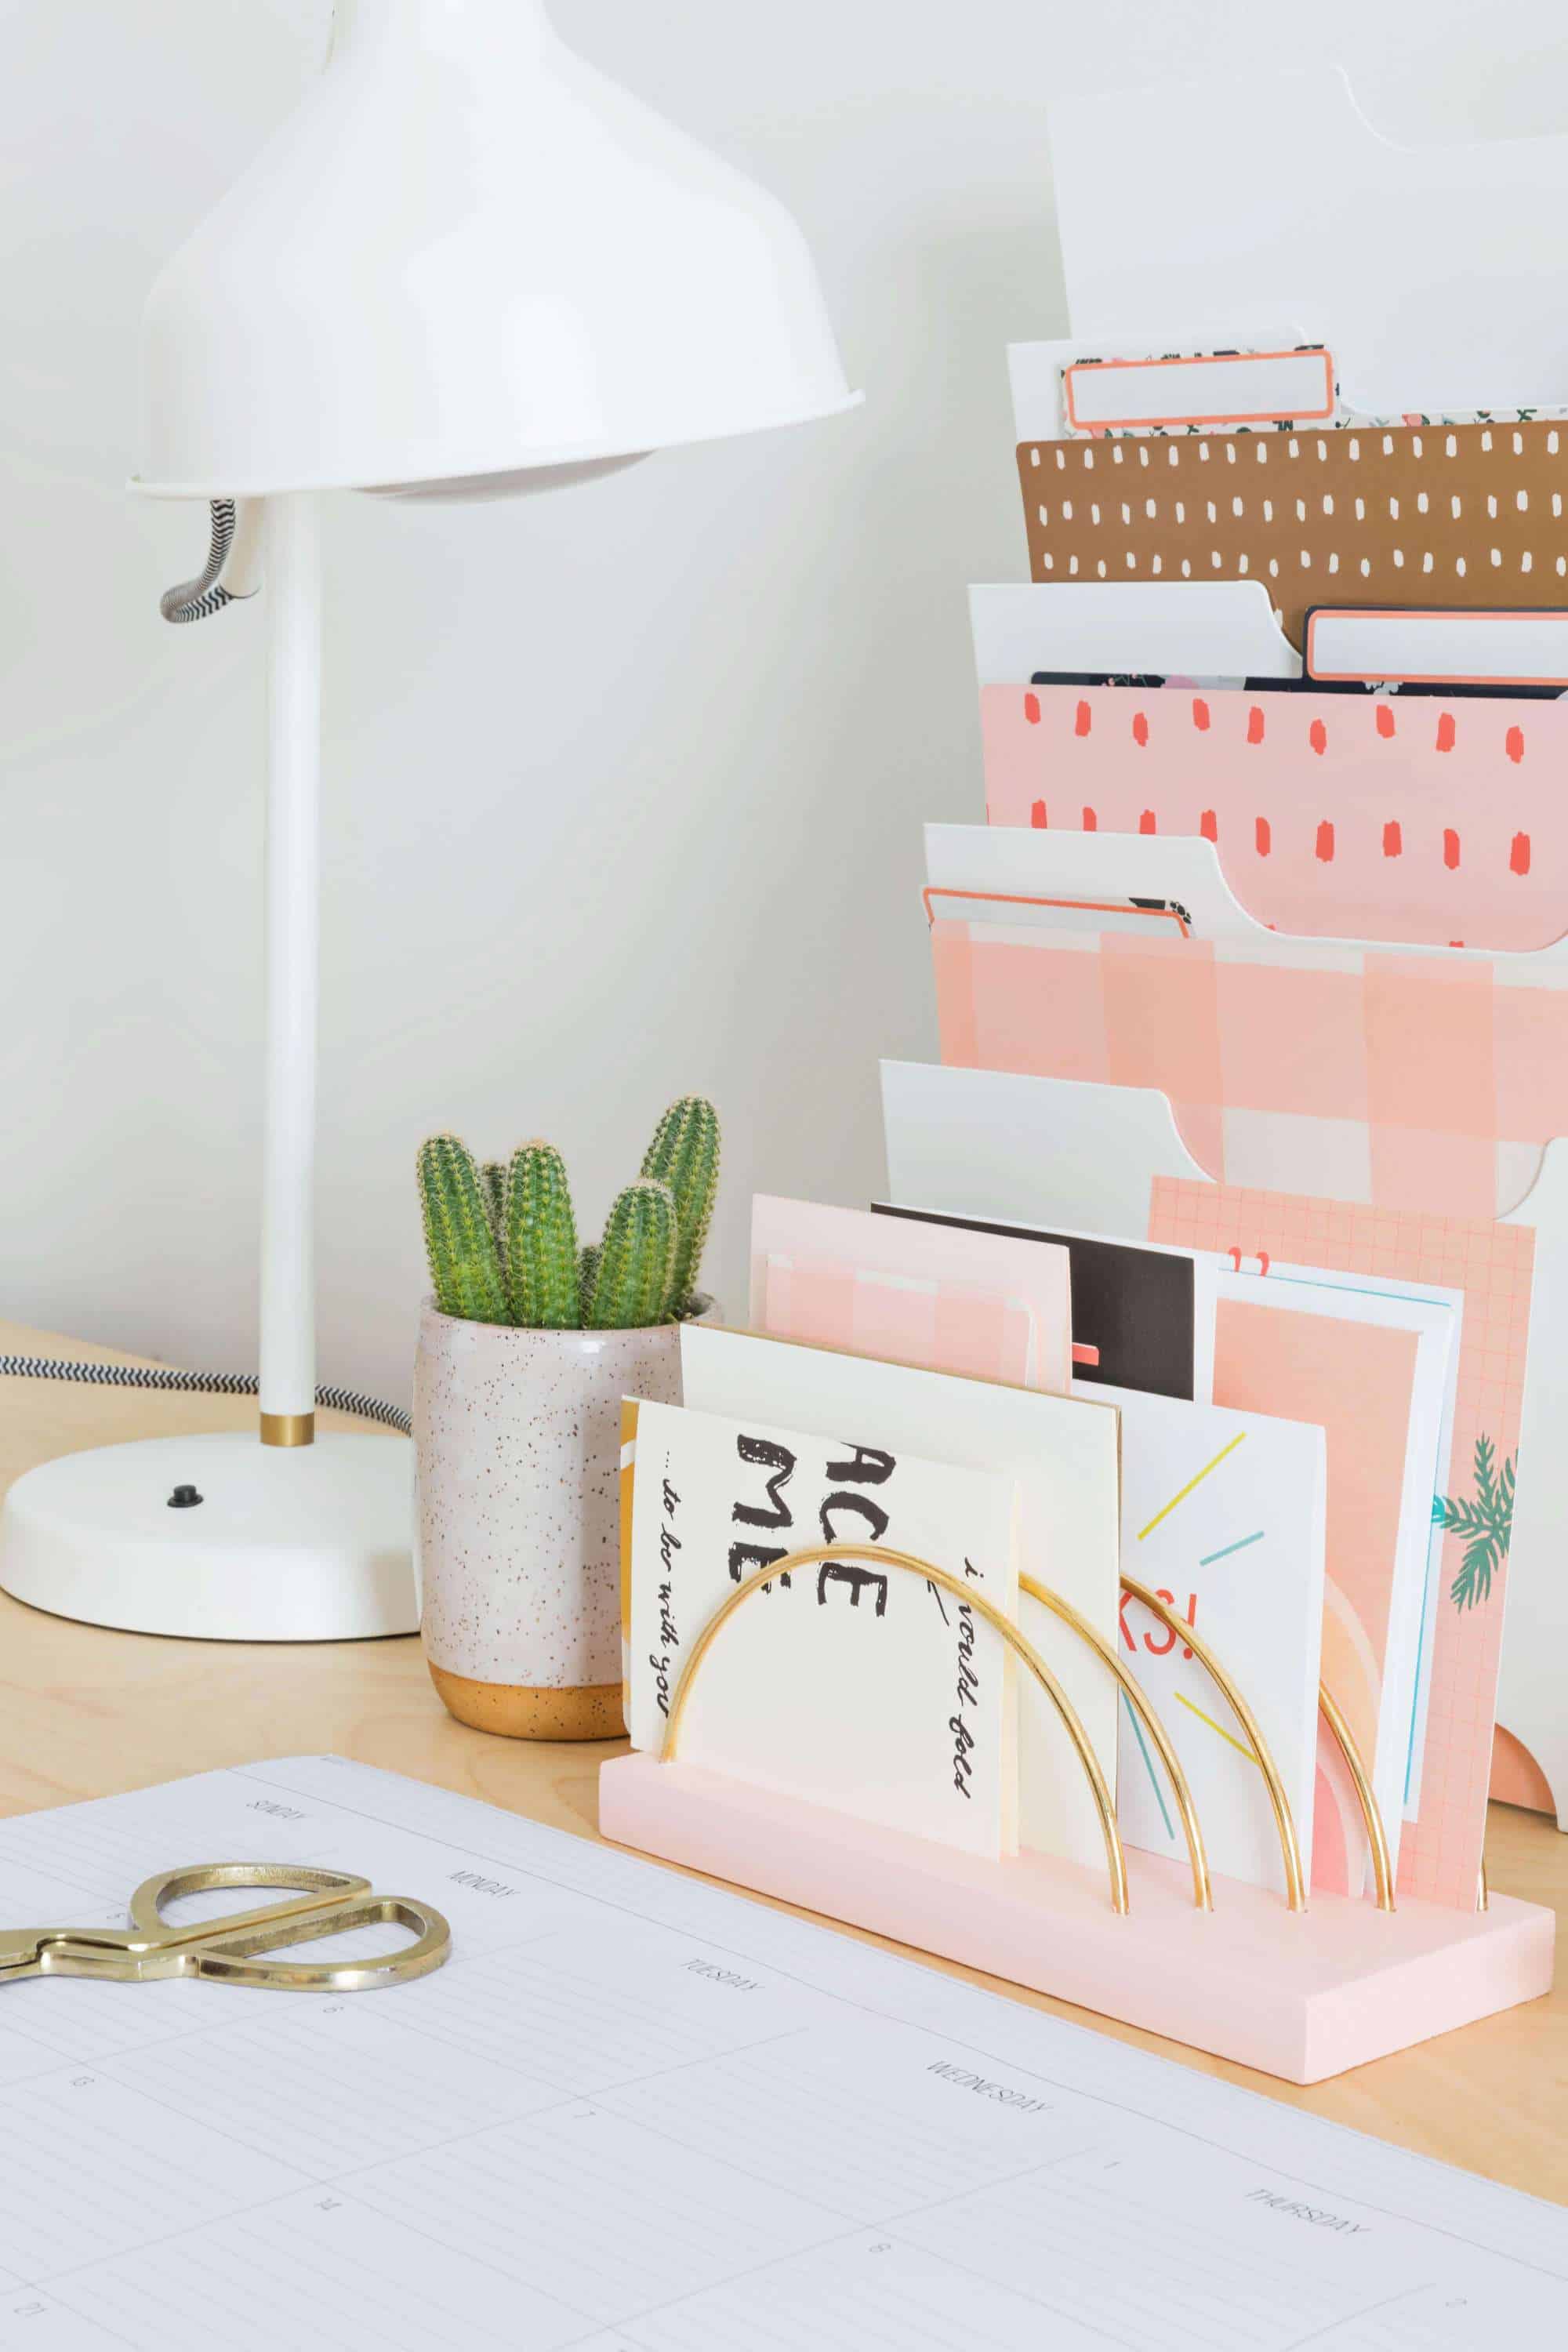 Organization! Who doesn’t need a little more of this in their daily routine to help them feel like they’re killing it at this whole adulting thing?! If you’ve got plenty of notepads on hand, thank you cards to send out, and paper documents that are time sensitive, a chic little letter holder will work some magic. Keeping things upright and within arms’ reach will help clear up valuable desktop square footage and make sure you don’t forget anyone’s birthday this year!
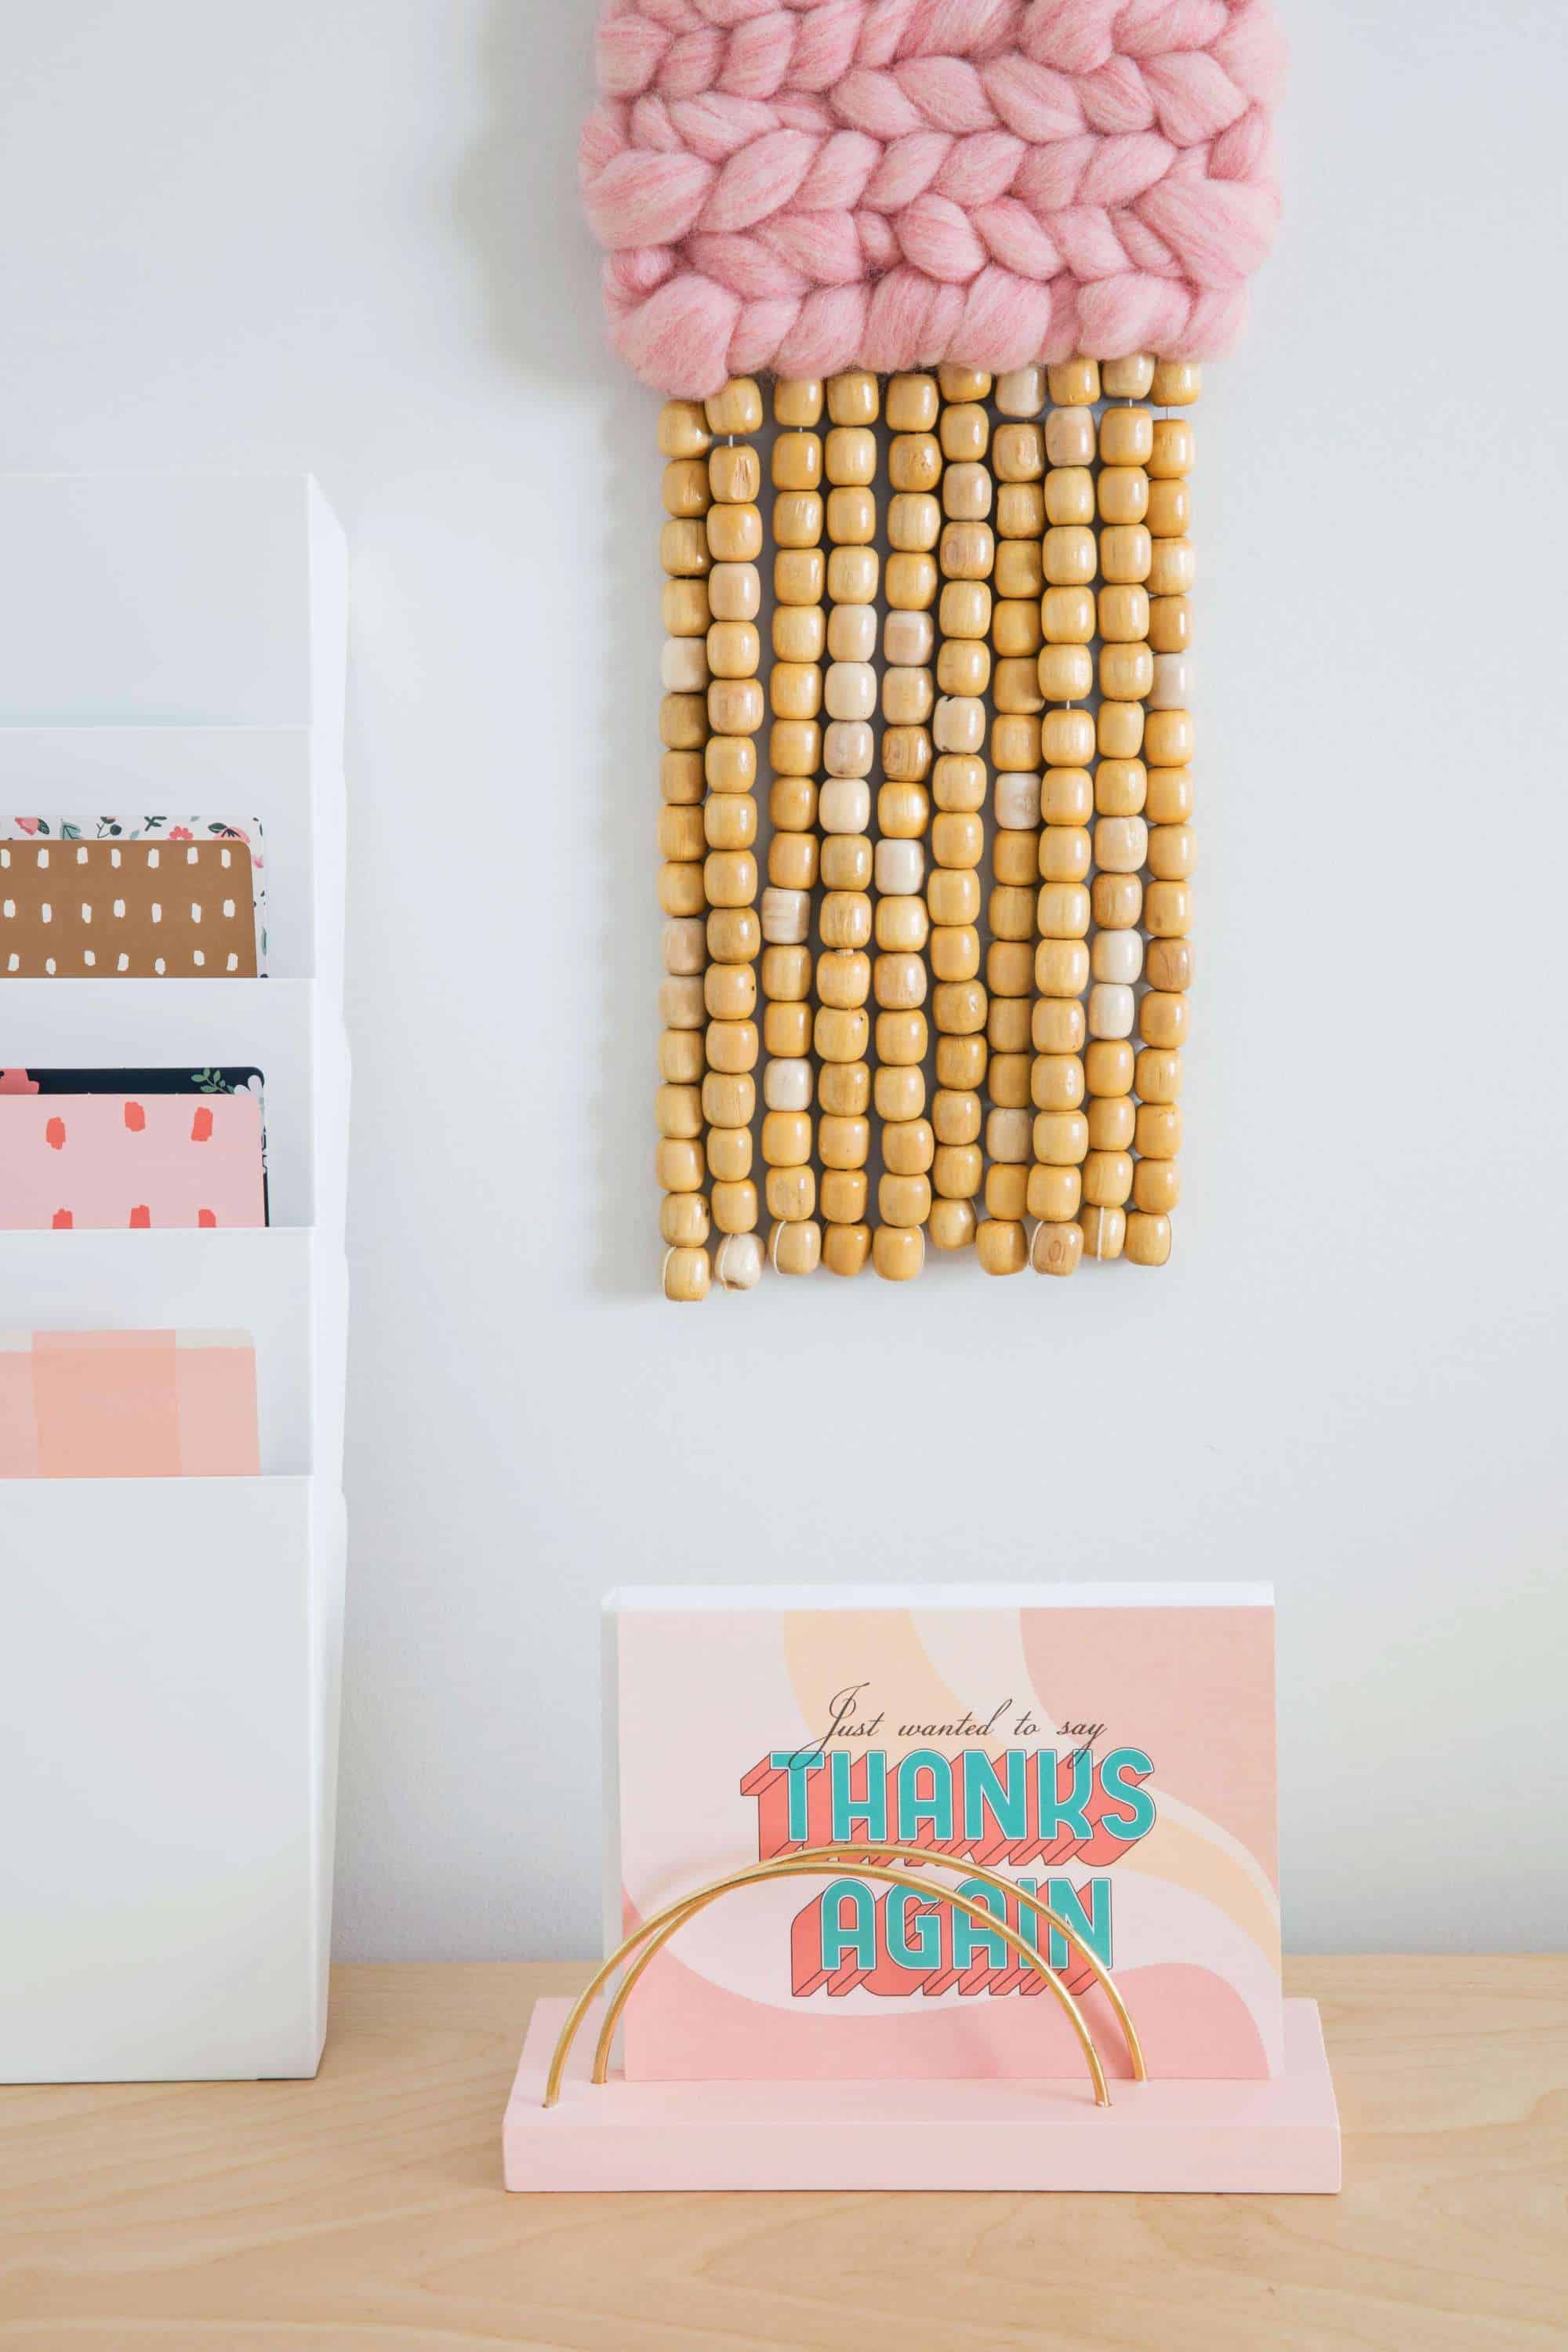
You can alter the width and length of this project according to your spacial needs or what types of paper items are collecting dust or multiplying overnight. Paint your wooden base to fit your aesthetic or leave it natural and seal it with a wax or poly. An organized desk is a happy desk!
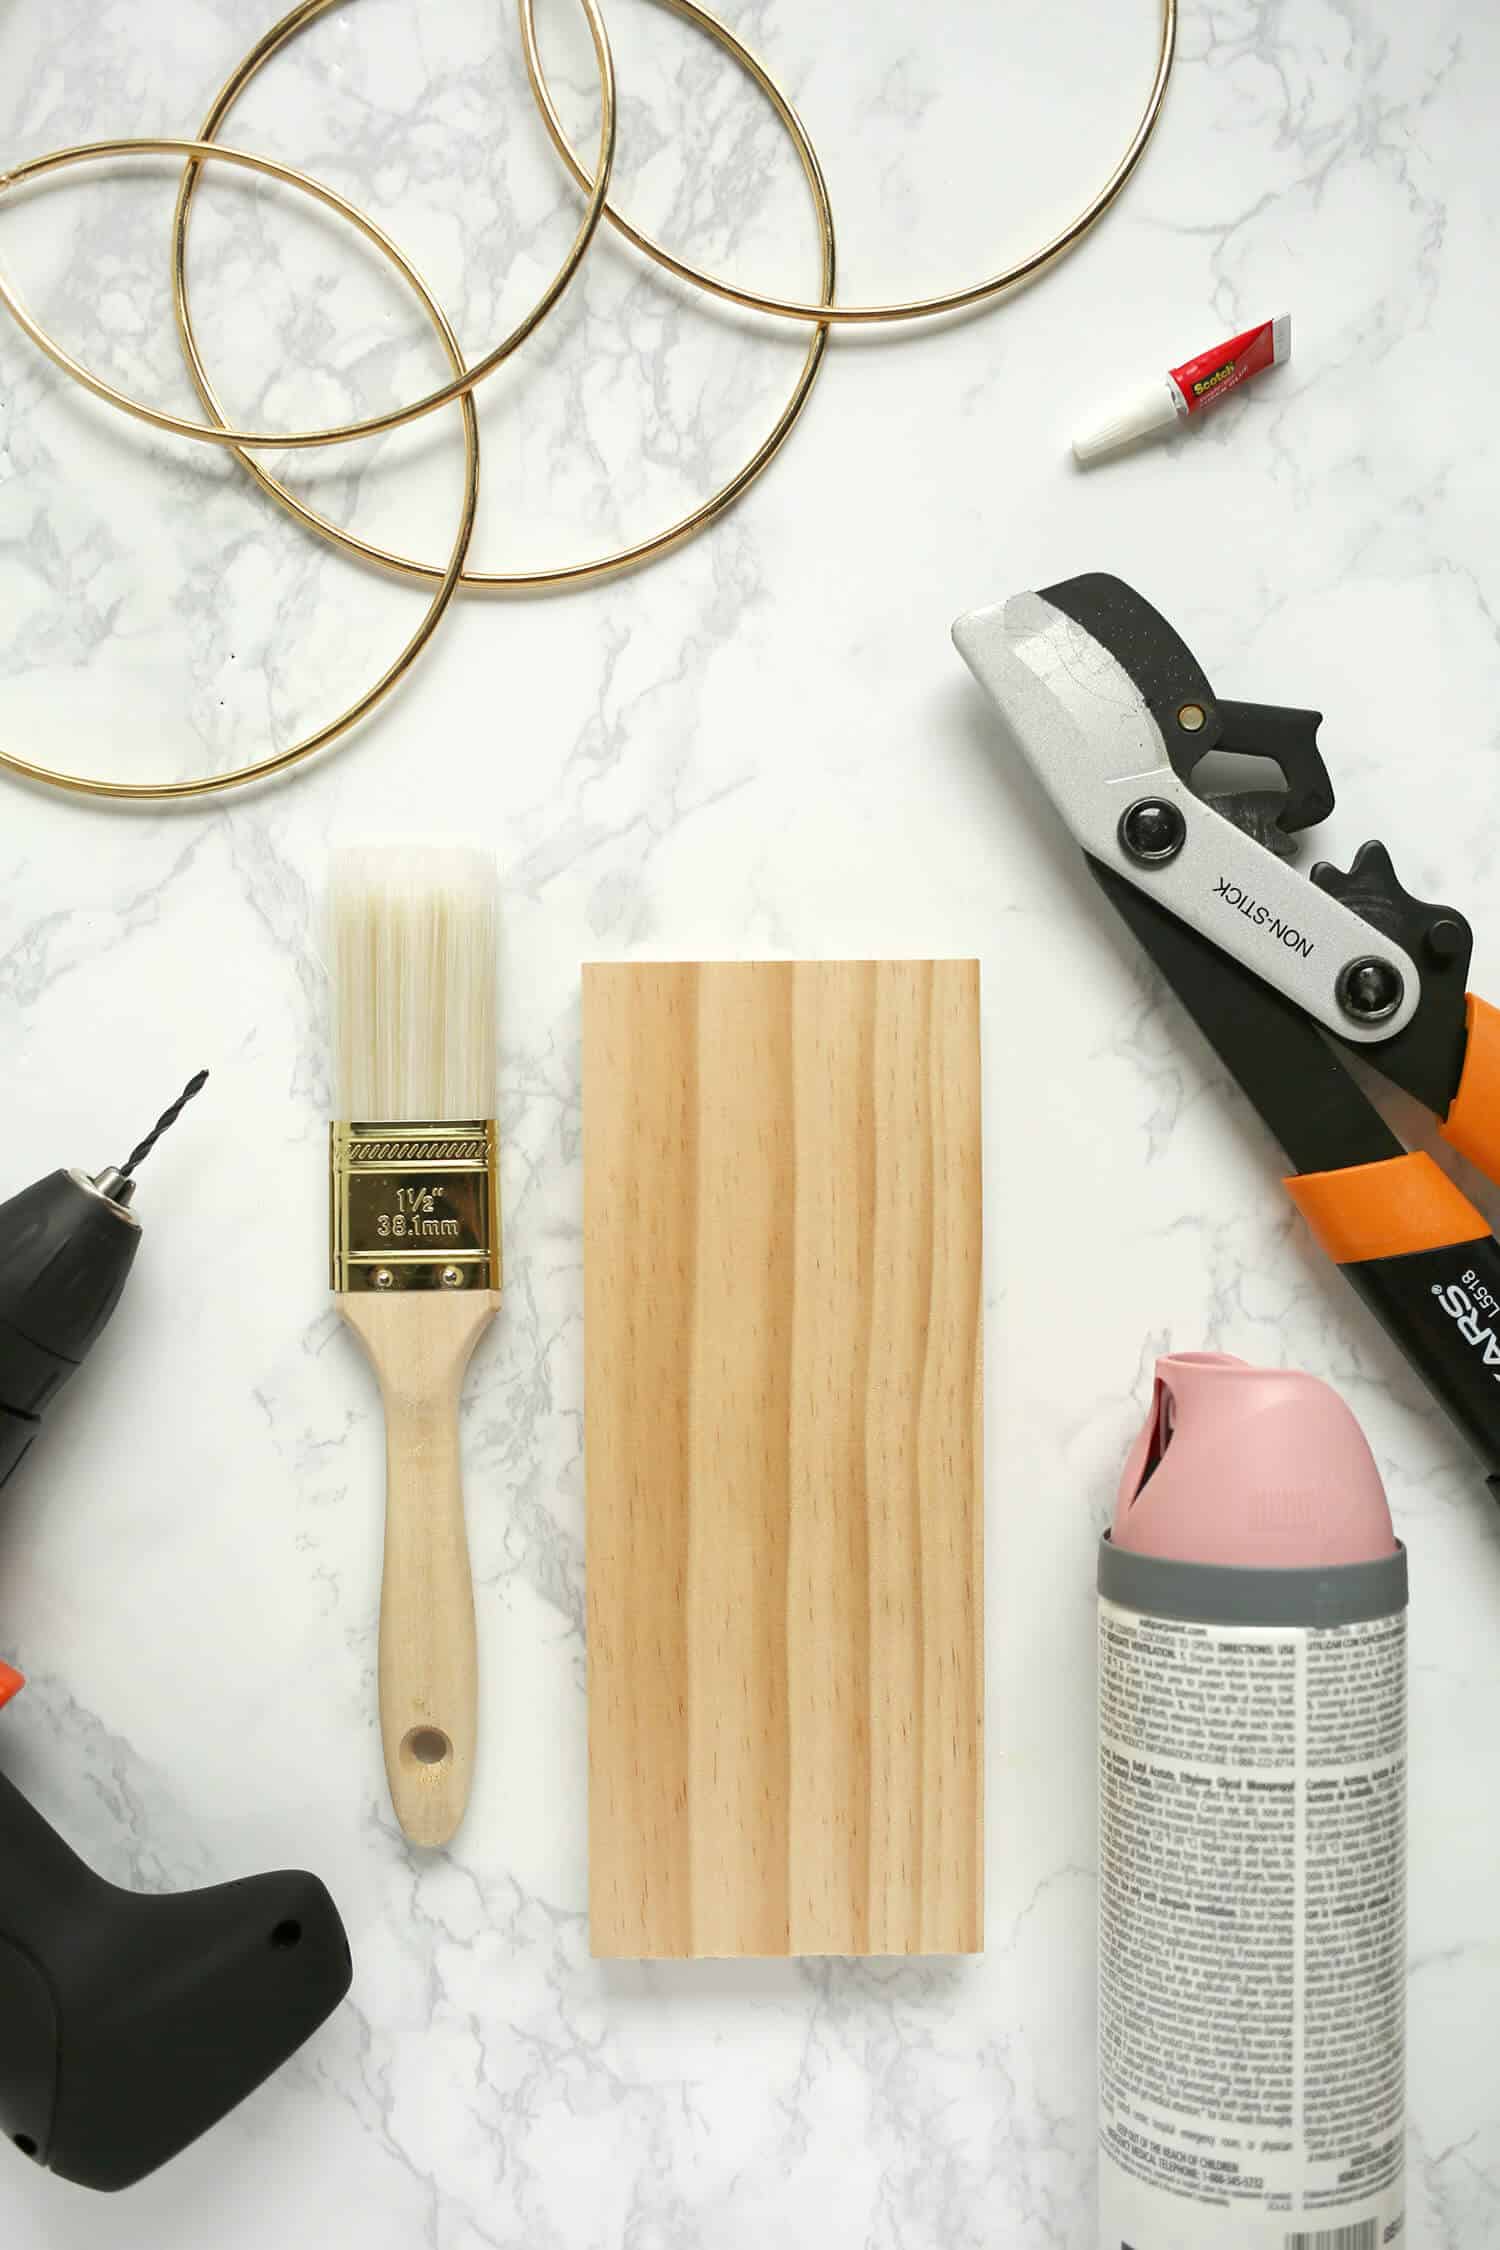 Supplies
-one 4″x10″ cut of pine
-three 8″ brass hoops (or four in case one doesn’t cut well)
-sturdy wire cutters
-super glue
-power drill
-5/64″ drill bit
-spray paint or acrylic paint and brush
-washi tape
-ruler
-pencil
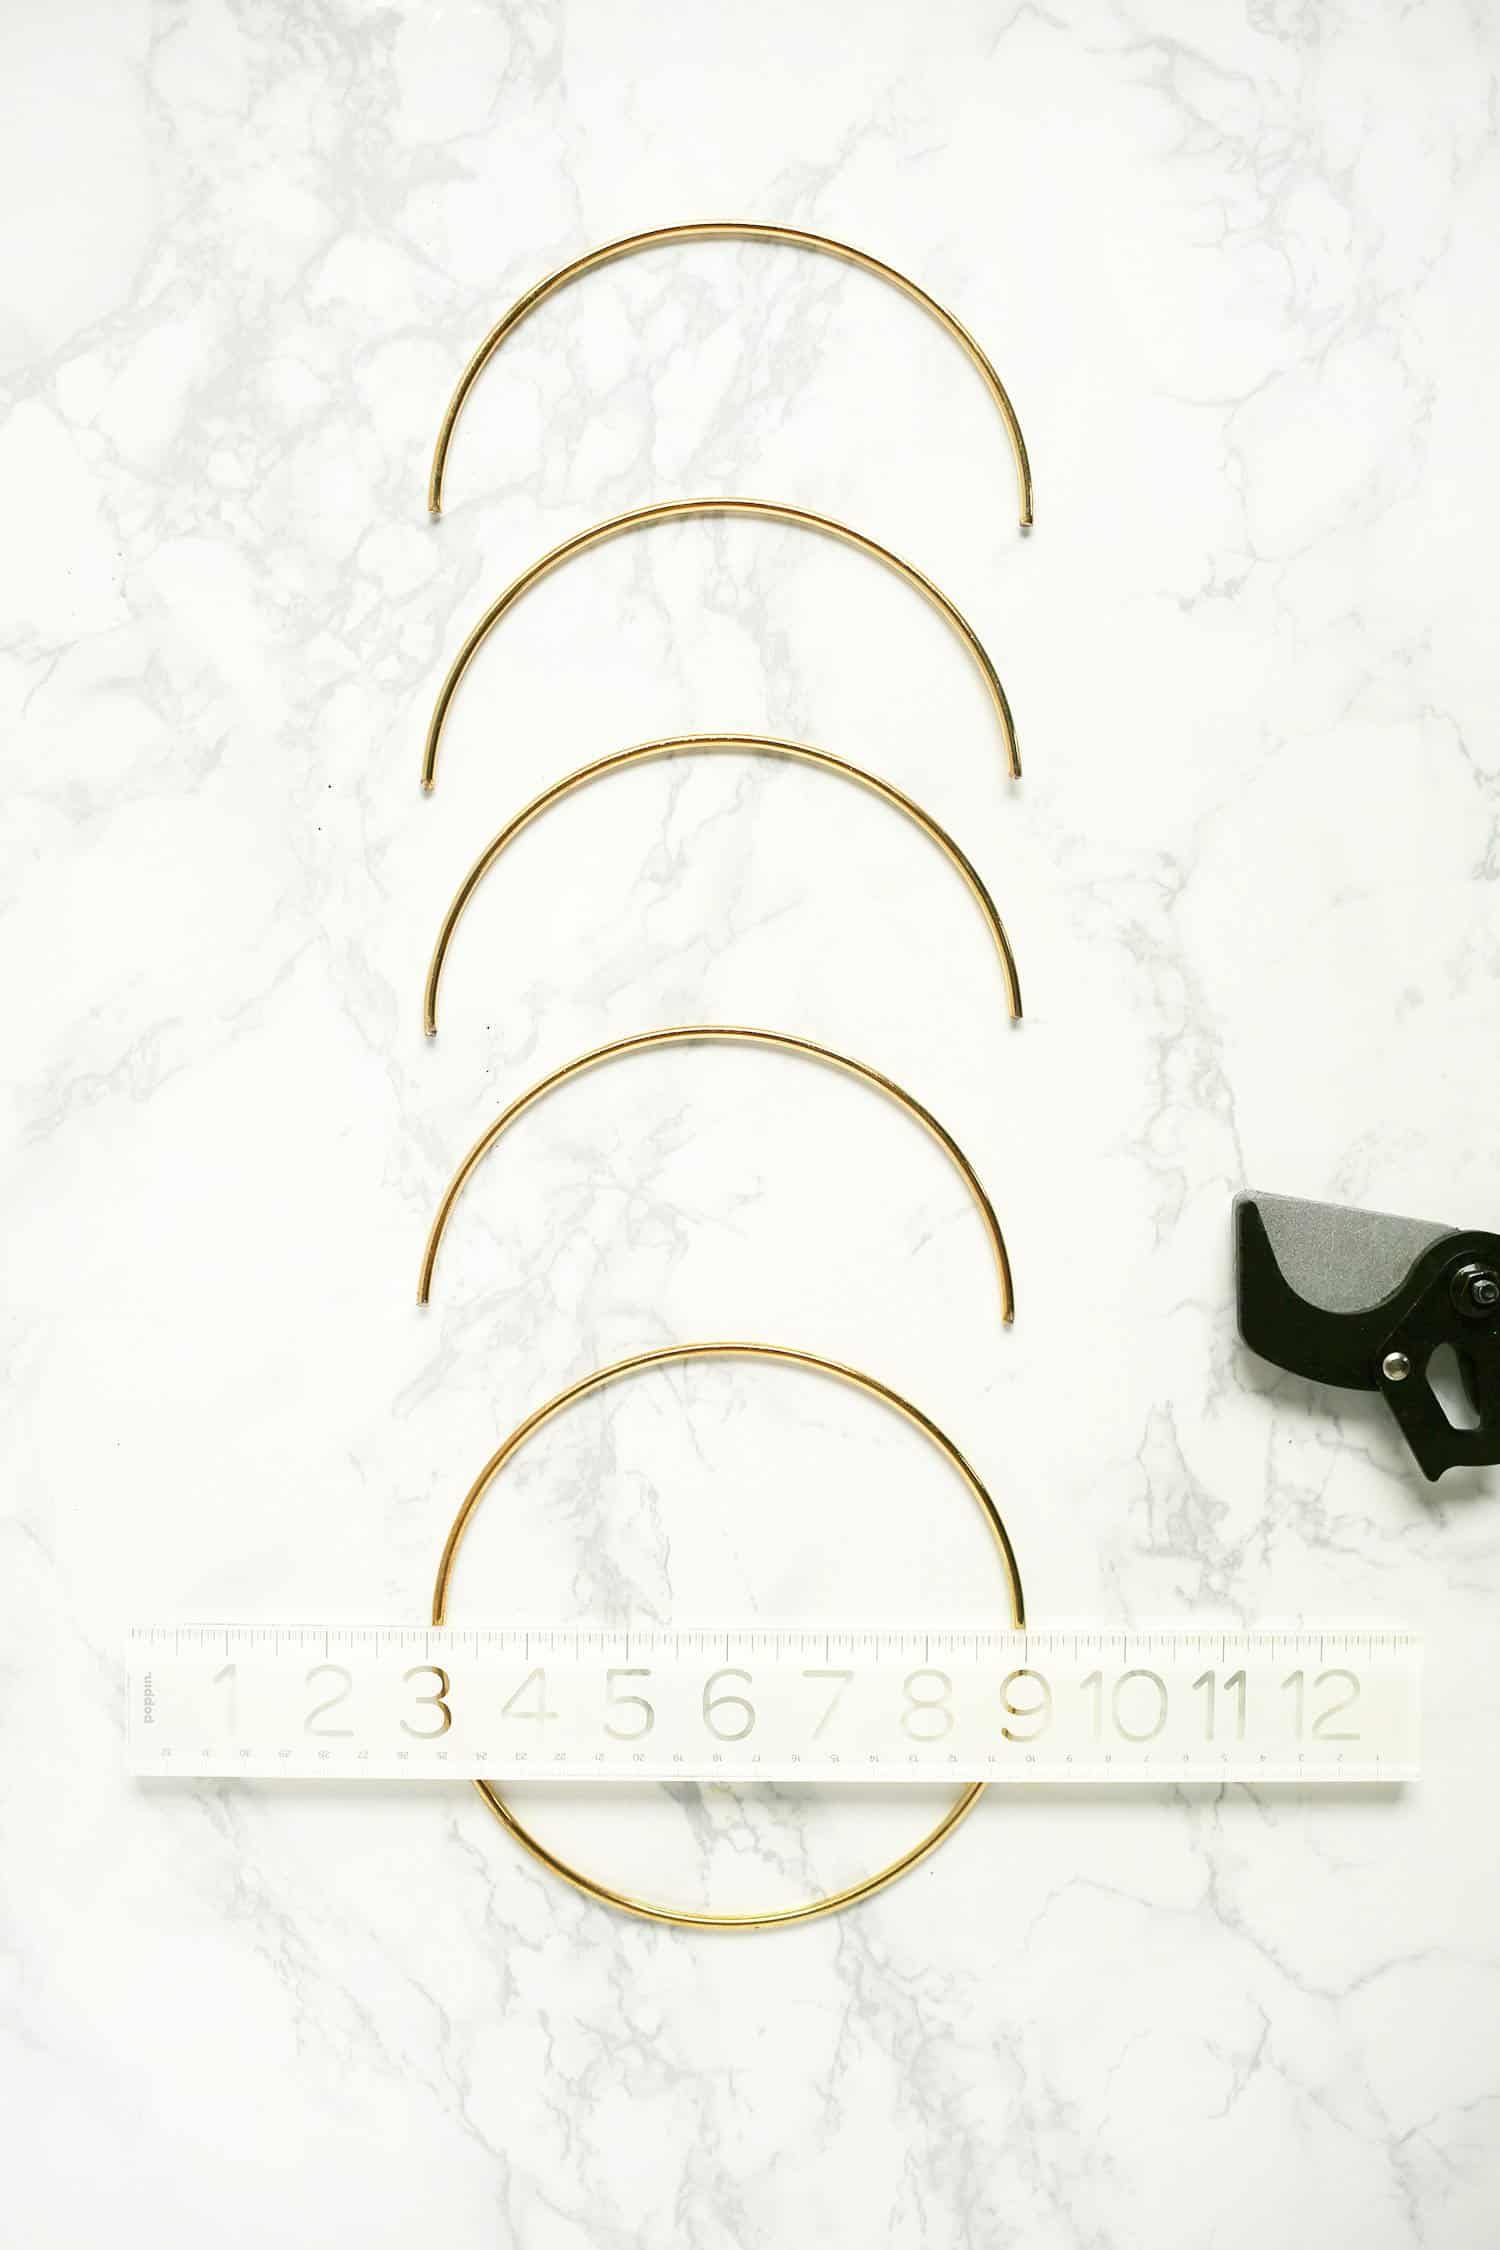 Find the center of your first circle and then use your ruler to mark the halfway point on each brass circle with a piece of washi tape. Cut as precisely on those marks as you can. Repeat until you have the amount of brass circles that you need.
If one of the cuts is off, it will affect the measurements of both halves. How do I know? Let’s just say there was some whispered swearing involved. After you’ve cut three hoops up, you’ll have one extra arch. Find the most consistent five arches out of the six. You can also snip the ends off of the longest ones to ensure they are all as even as possible.
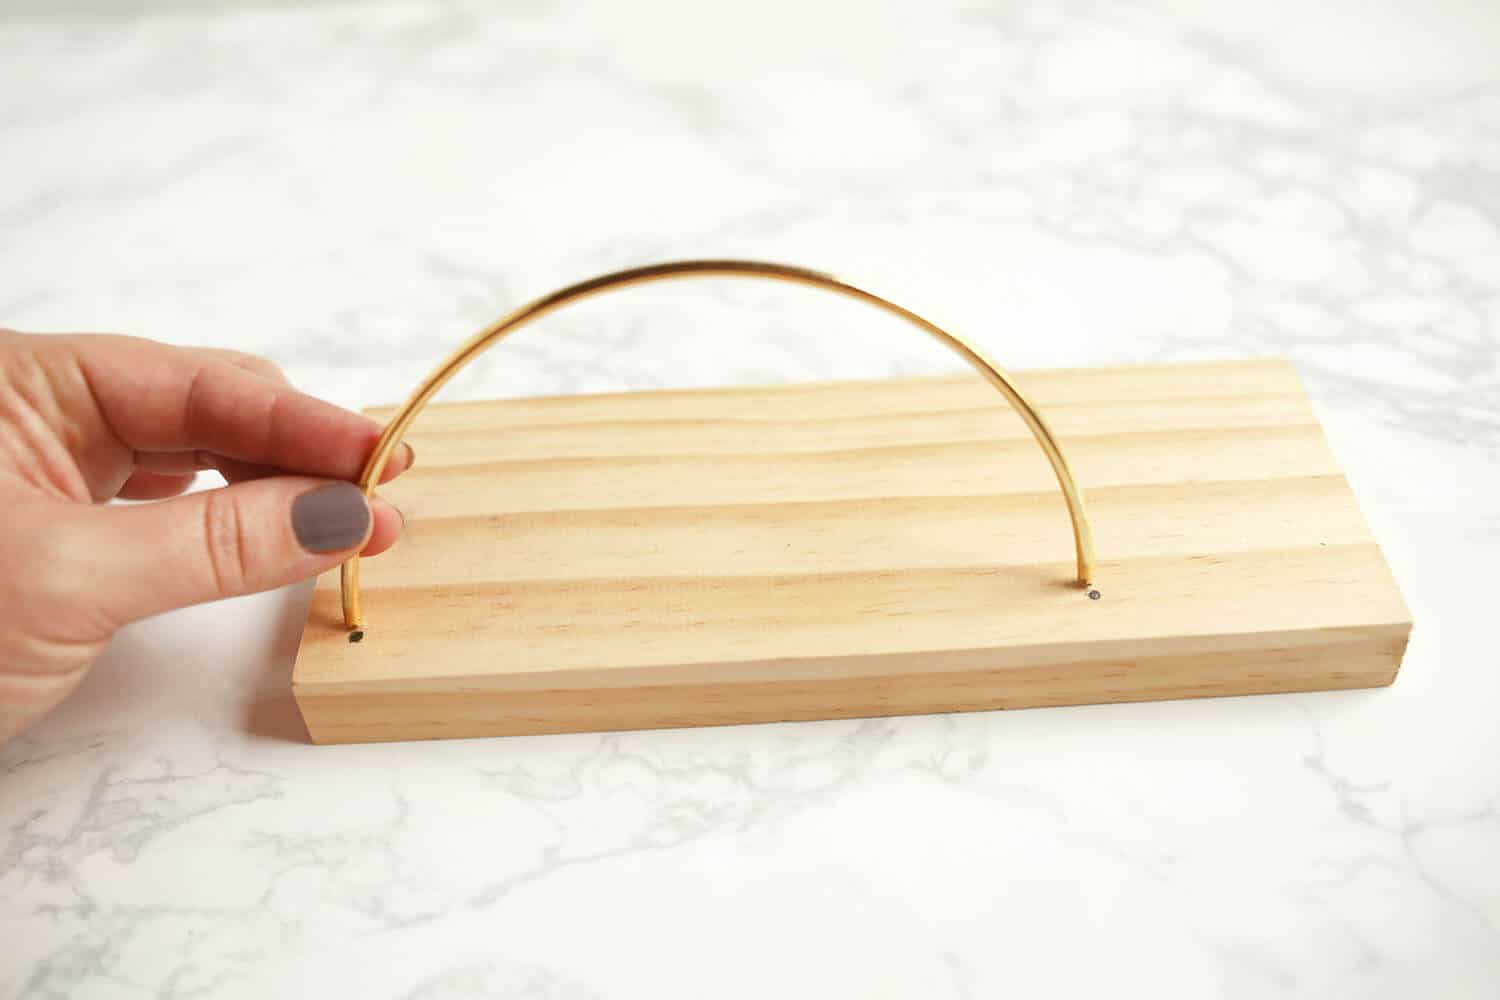 Place one end of your first hoop so that it sets 1/4″ in from the same short end and long end of a corner. Make a mark there and then make another where the other end rests. Be sure it’s also 1/4″ from the edge.
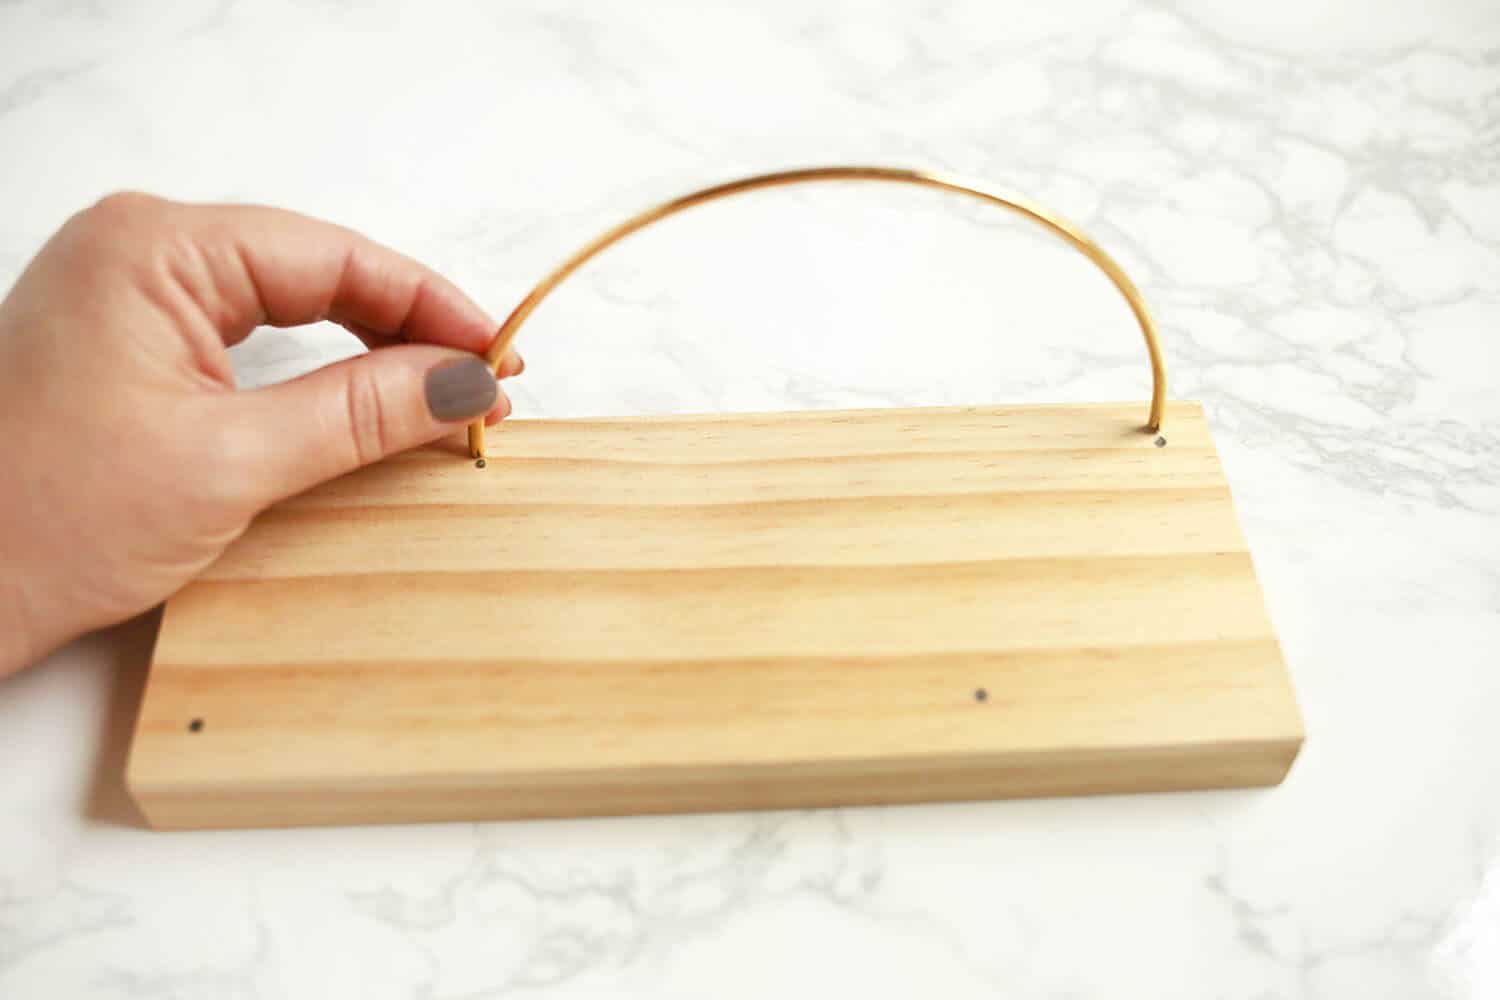 Use the same hoop and place one end 1/4″ in from the short end and the long end of the same corner—the one that is diagonal from your first hole. Make a mark. Then make a mark where the other end rests.
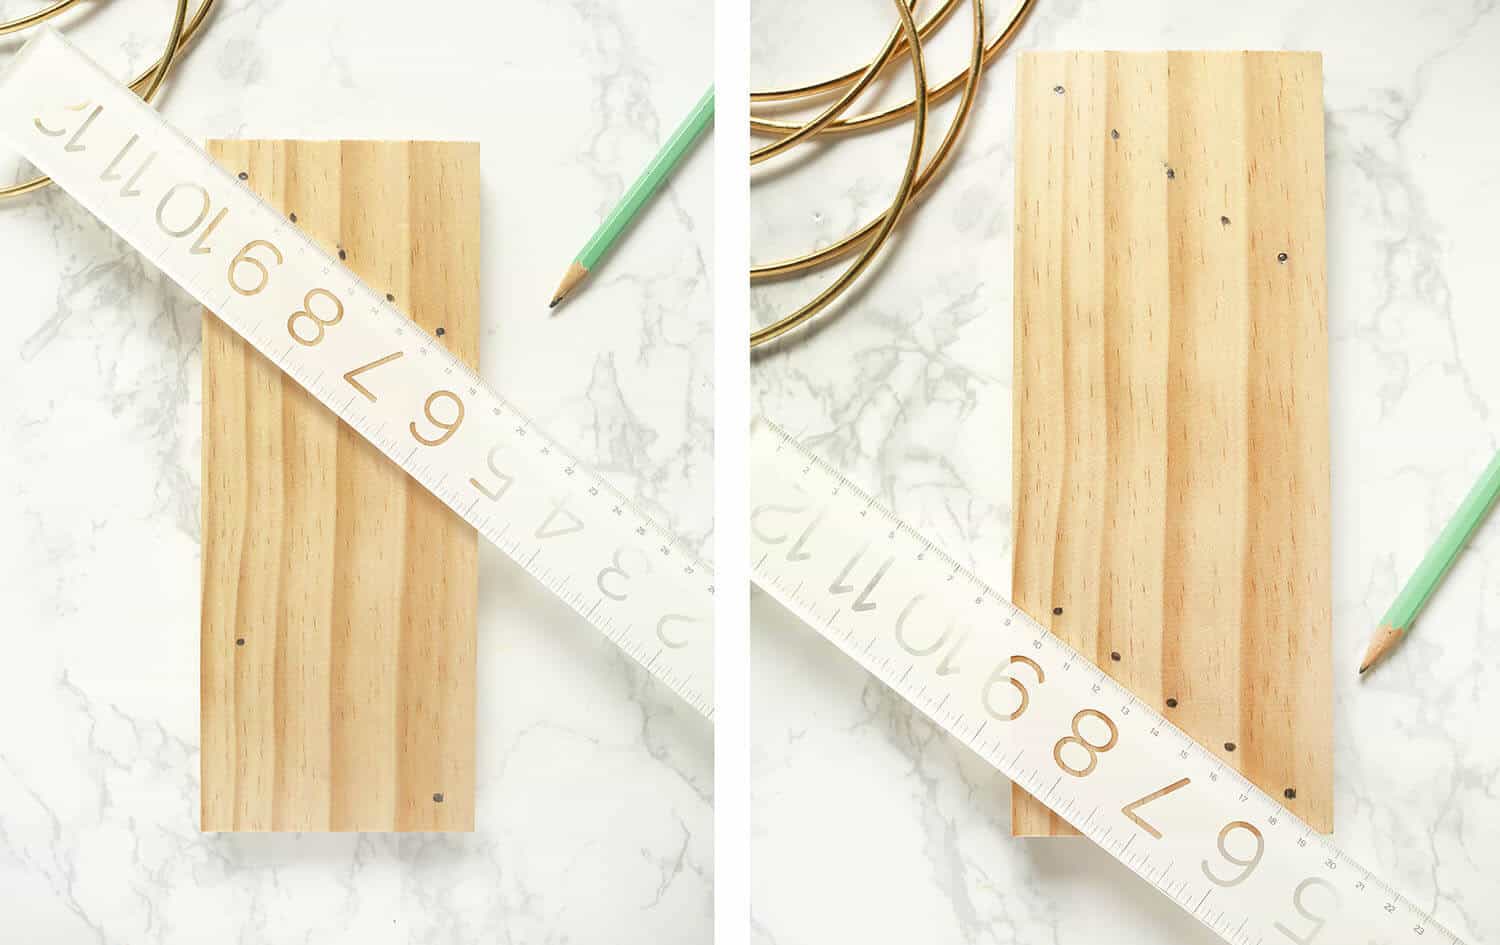 Using your ruler, find the halfway point between the marks as shown above. I resorted to using my cm side to get a more accurate measurement. Then find the center between the middle mark and each end.
Repeat with the other side.
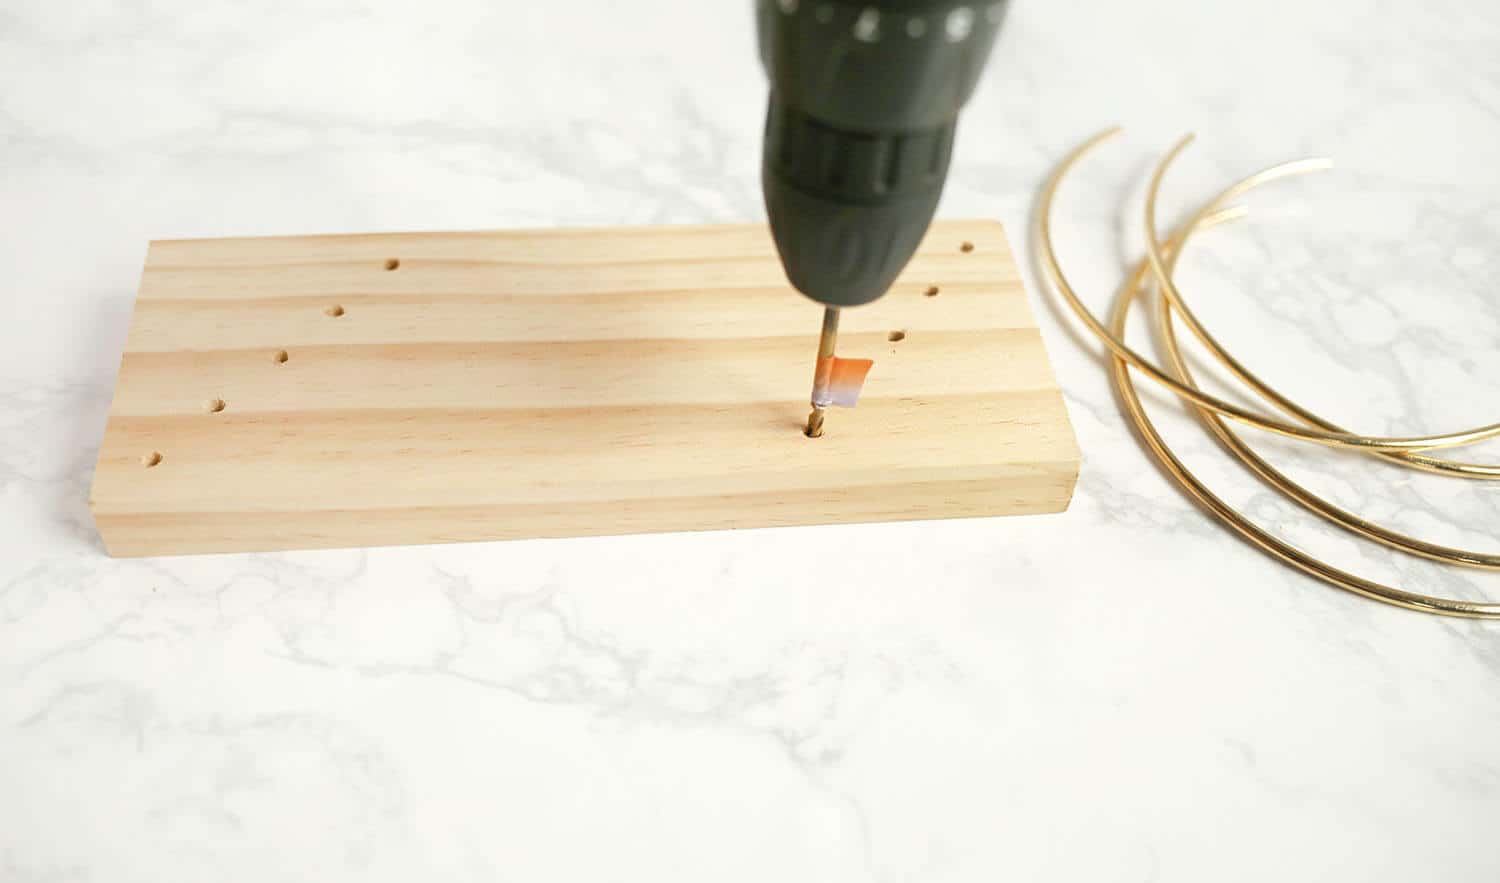 Place your washi tape on your drill bit so that when it hits the wood, you’ll know not to drill any further. You don’t want your hole to go all the way through the wood, just short of a 1/2″ deep. Drill each of your holes and sand off any rough edges.
 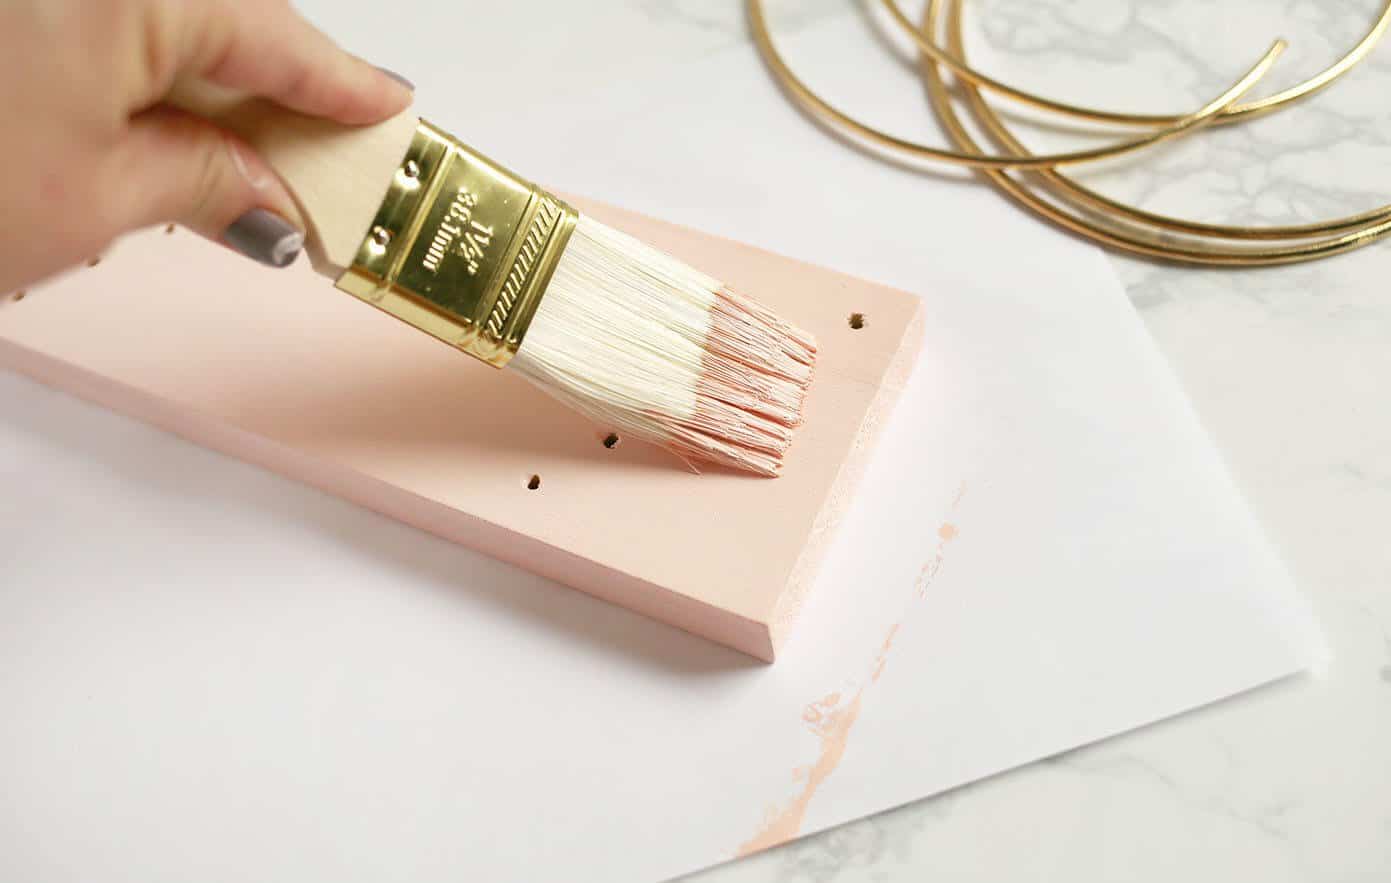 Give your wood two coats of acrylic or spray paint.
 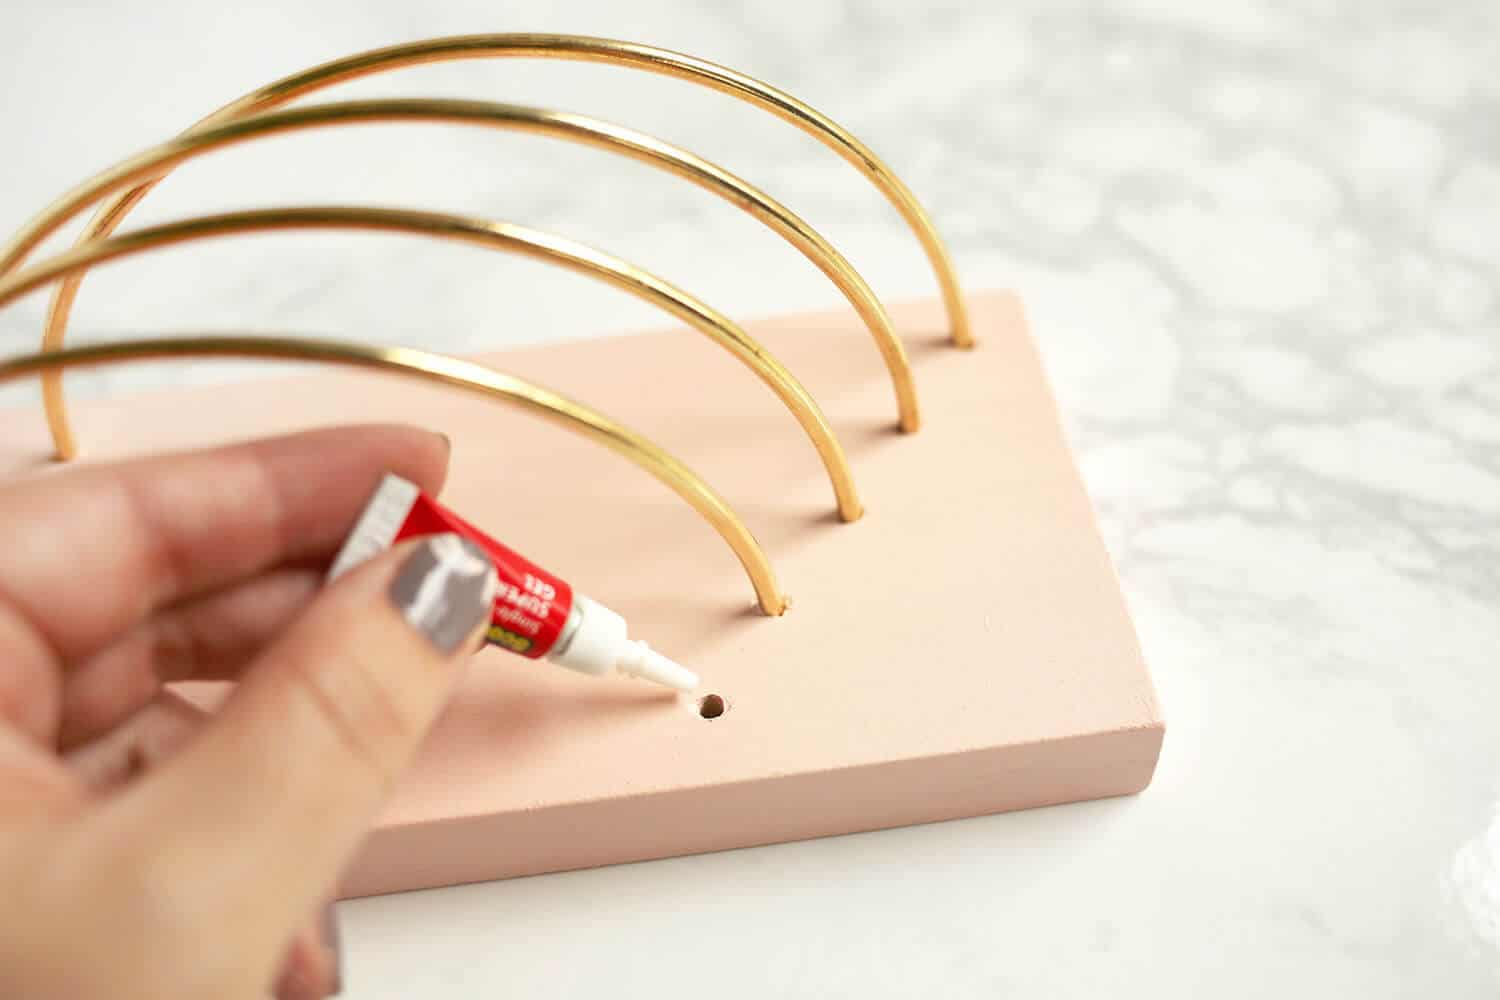 Make sure all of your hoops fit and then remove them before adding a tiny amount of super glue to each hole and replacing them. Let dry according to manufacturer’s instructions.
 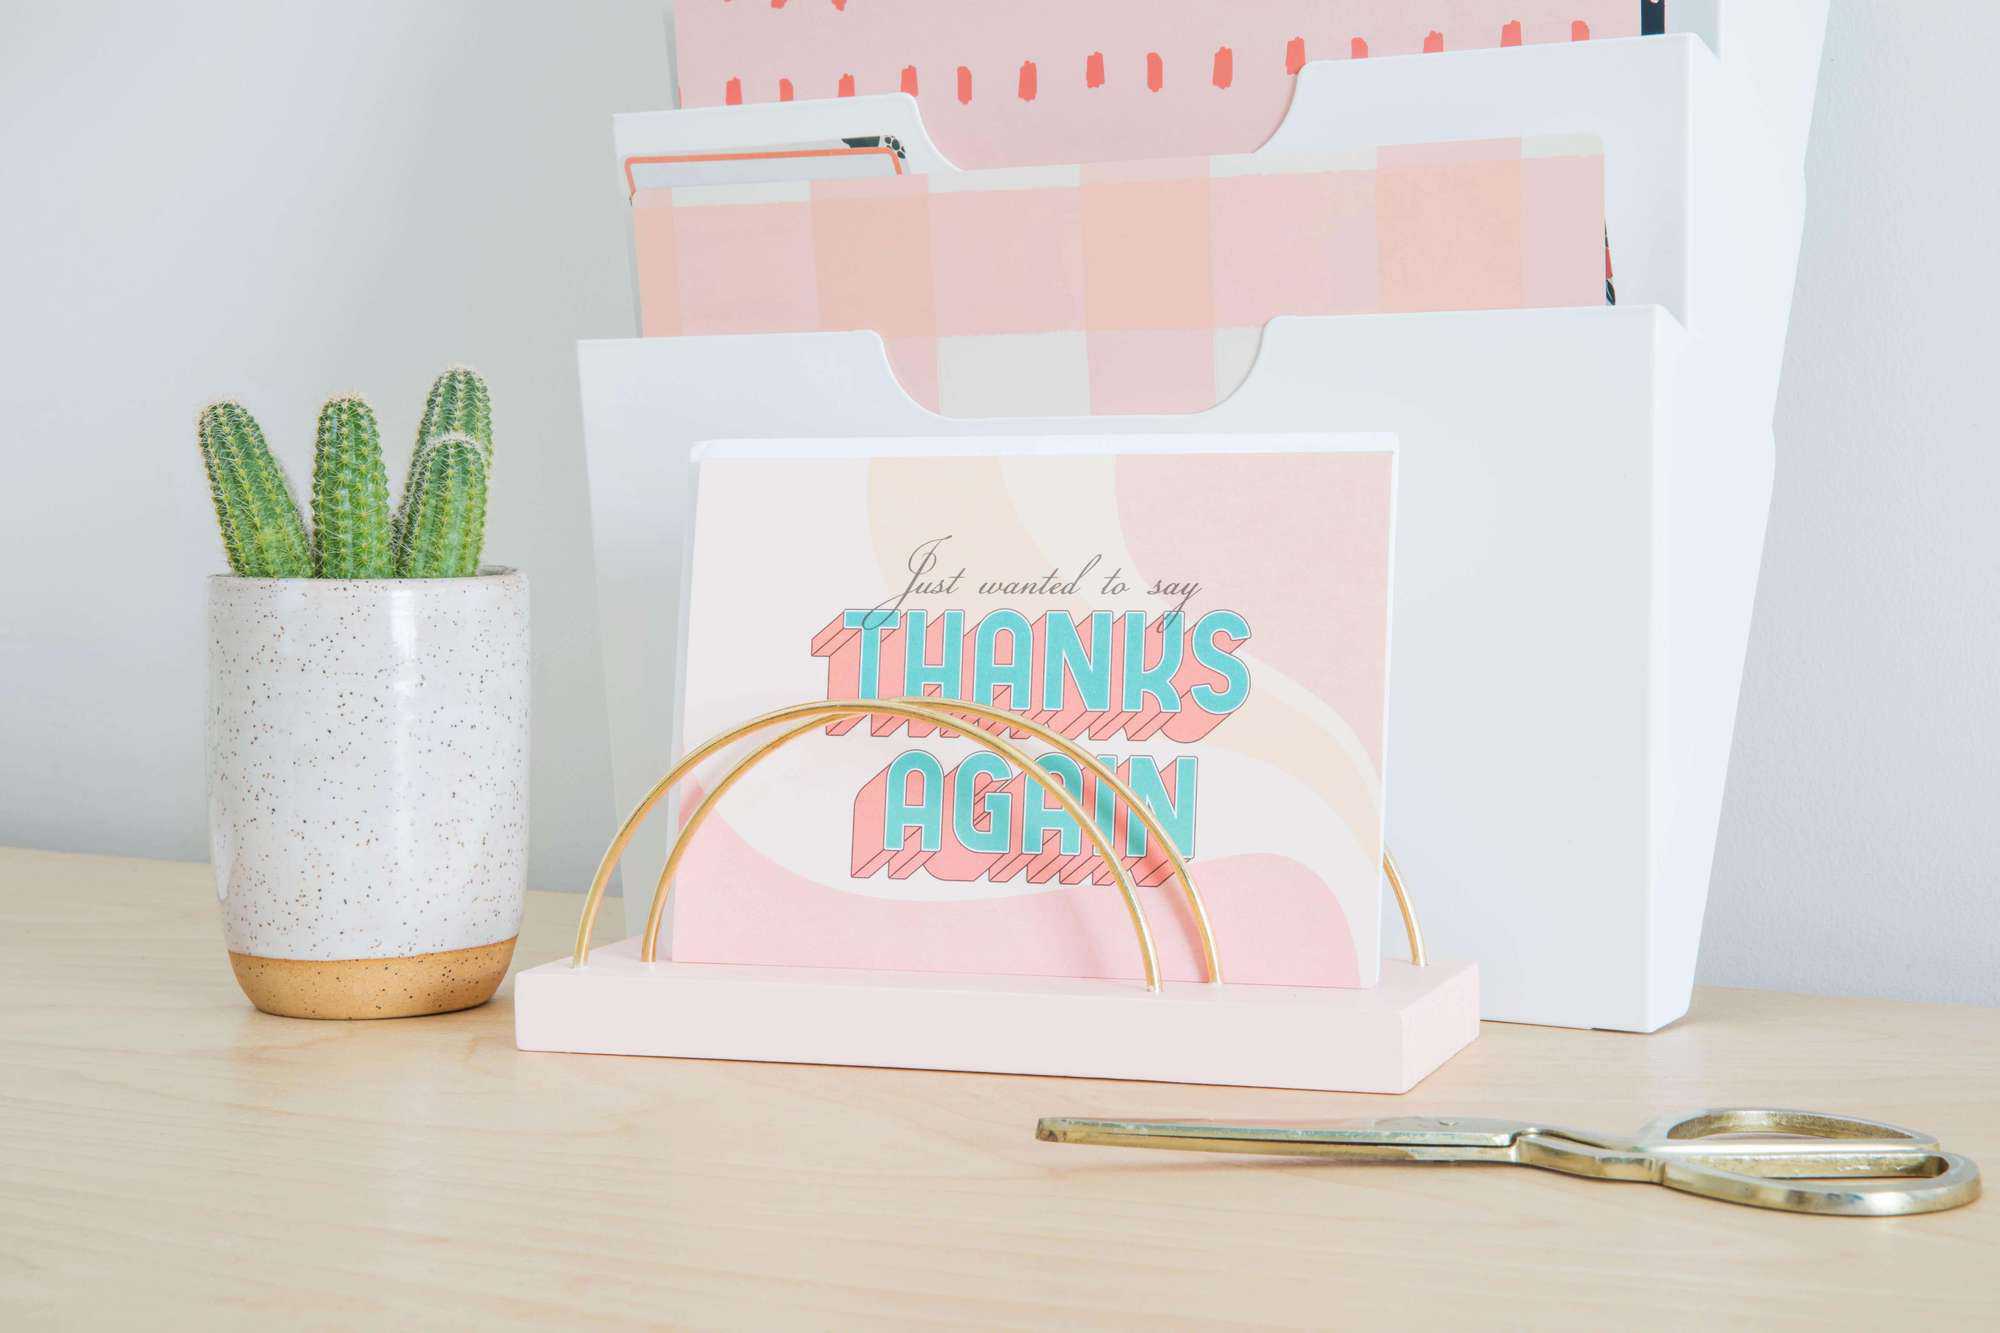 Fill her up with stationary or use her to hold mail that needs attention … like finally RSVPing to your co-worker’s upcoming wedding.
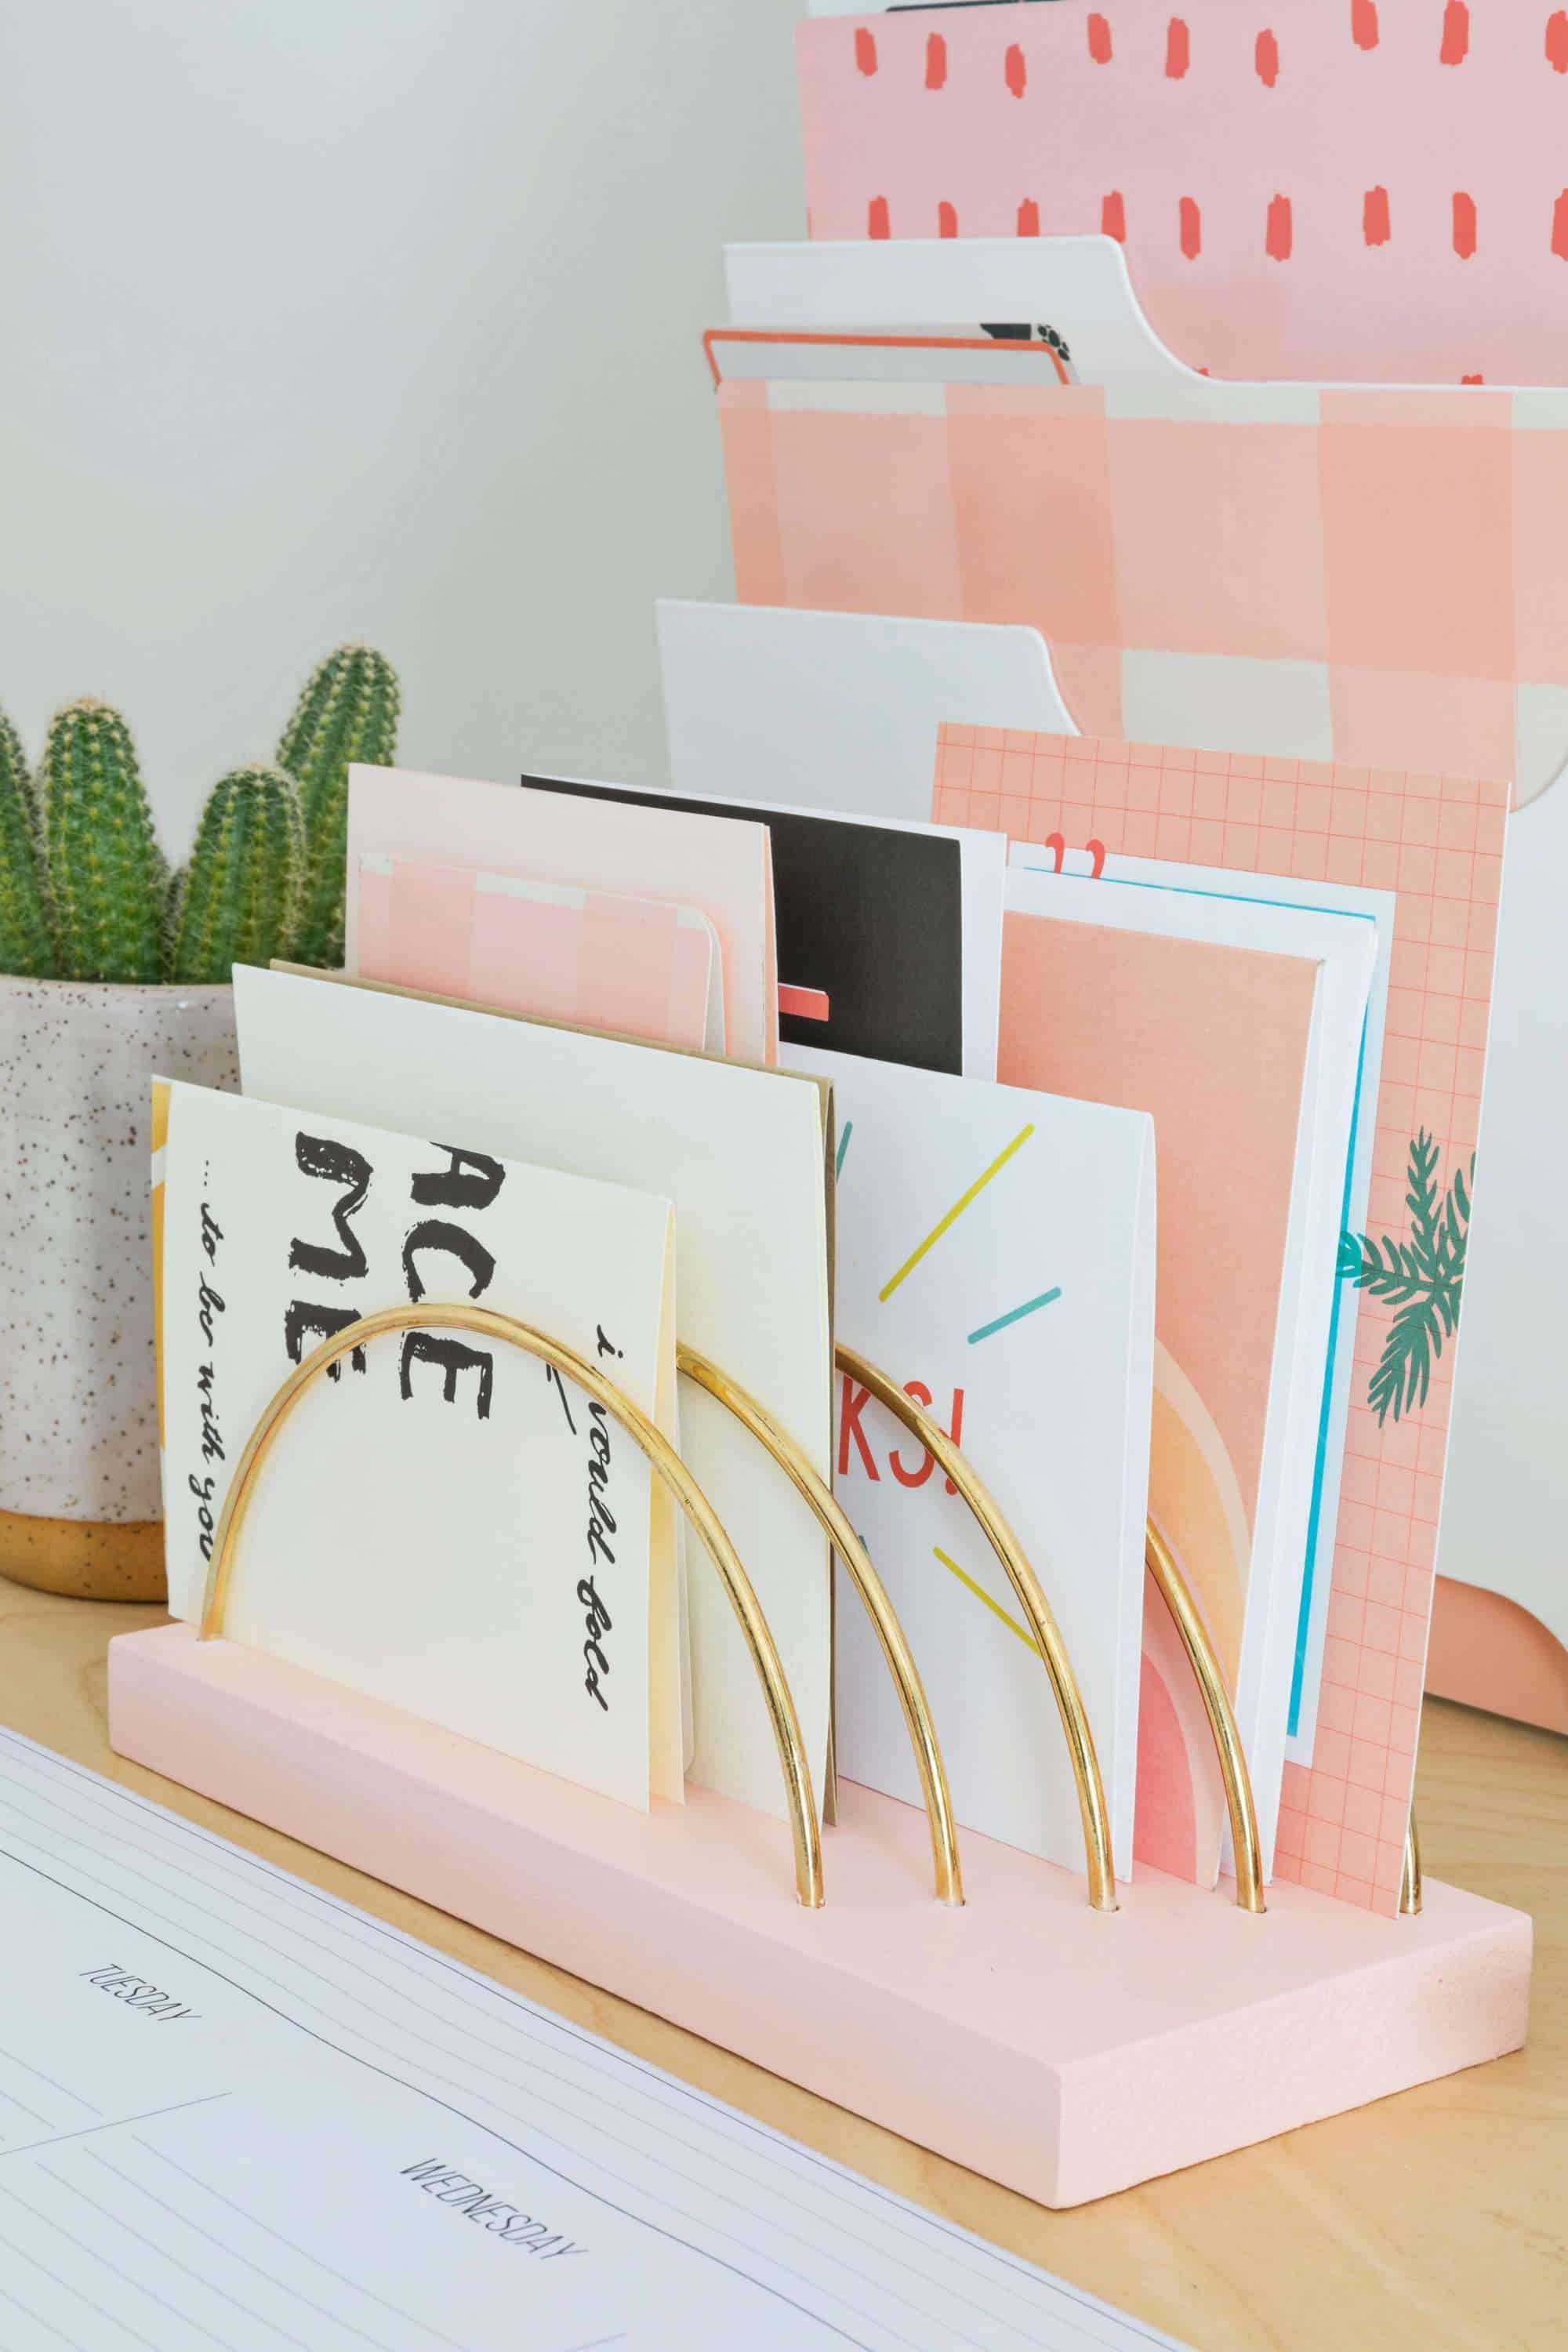
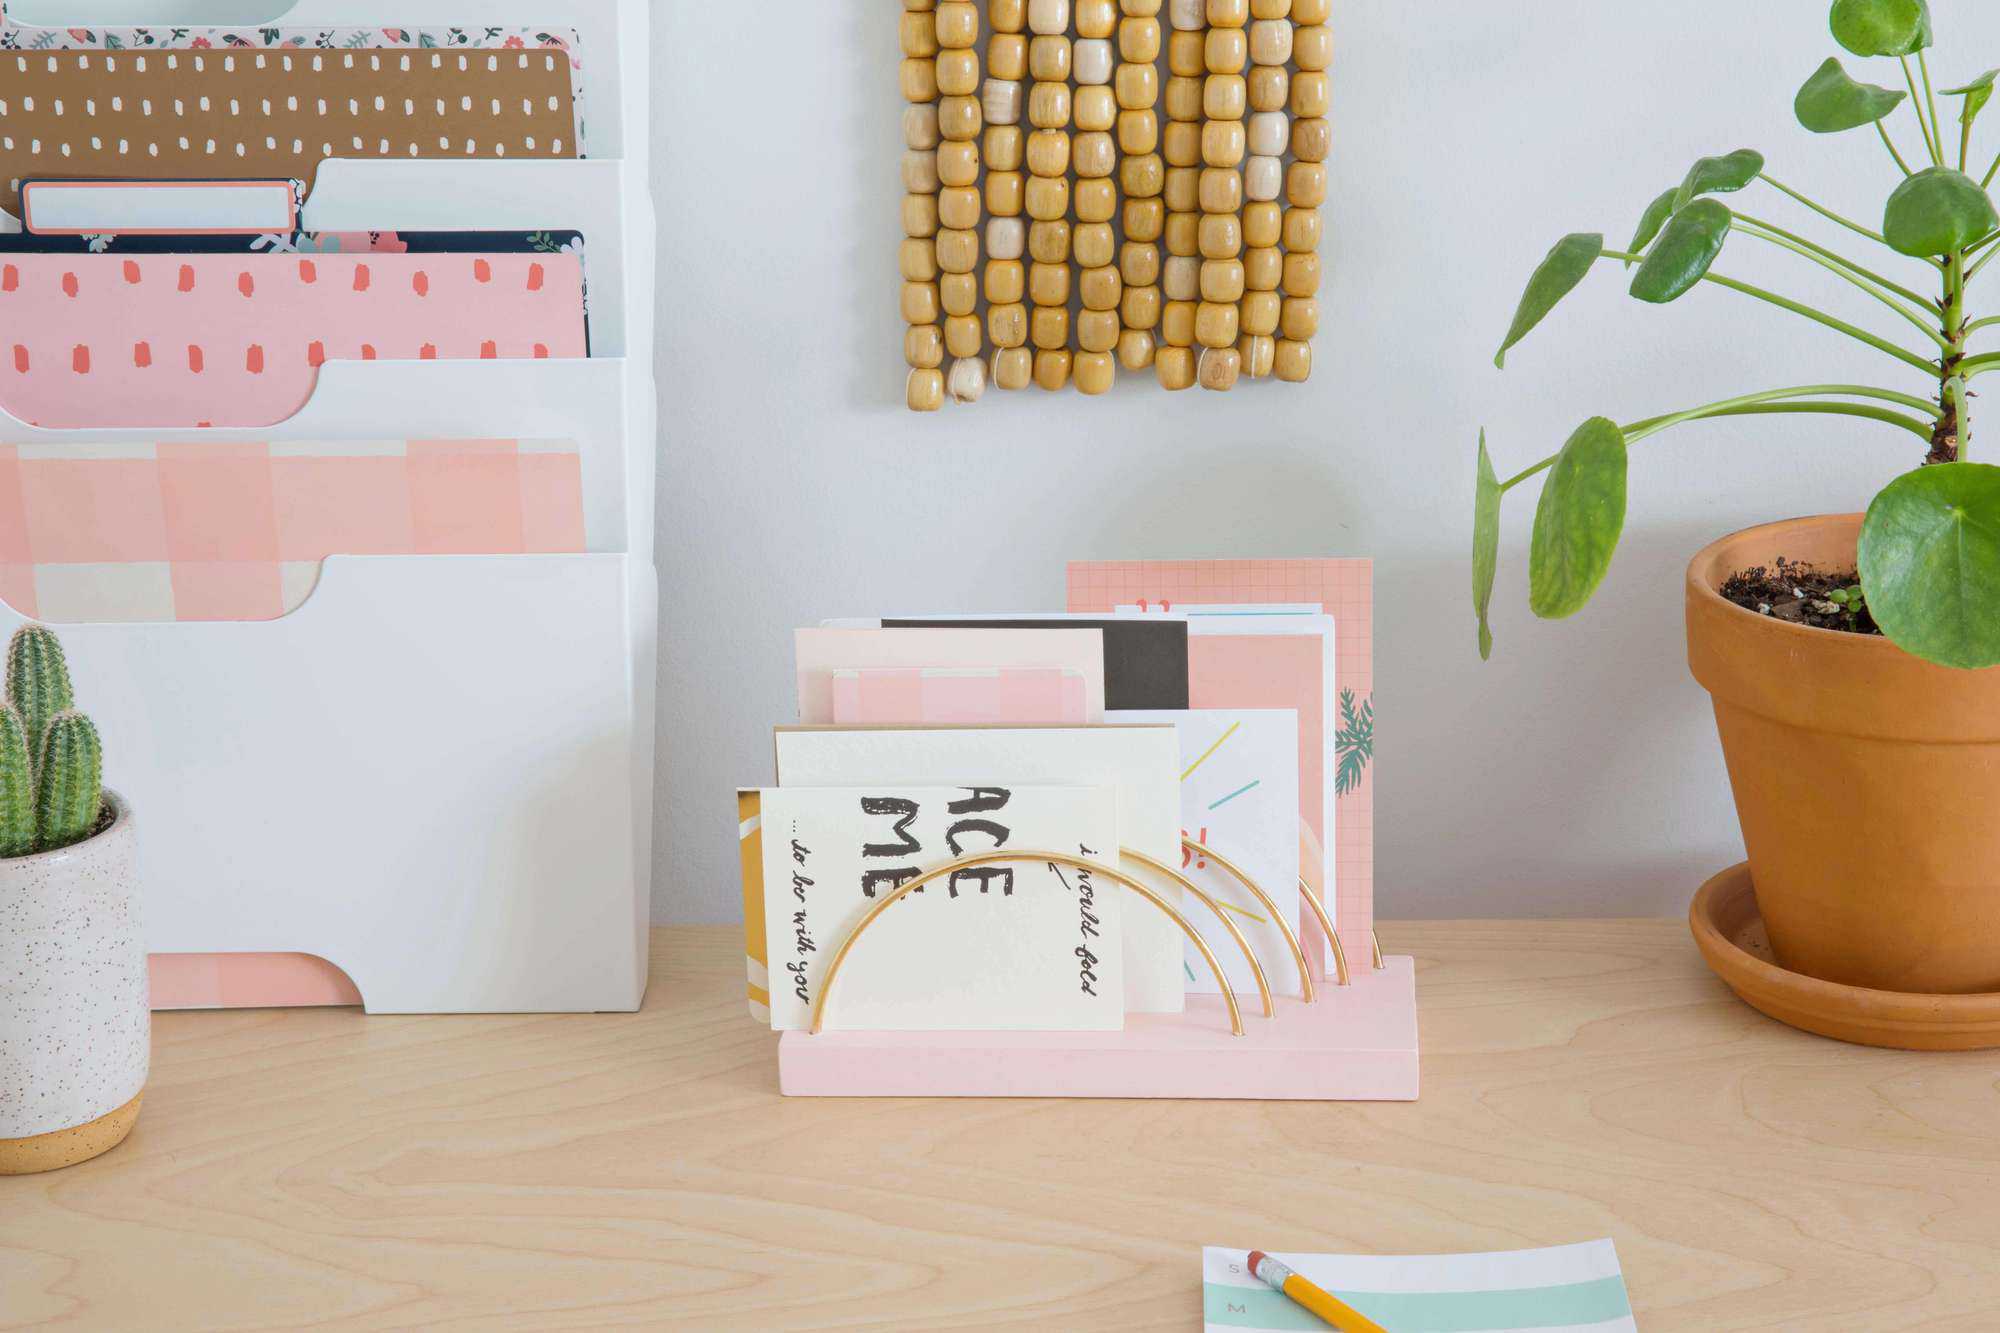 Switch out the hoop size and see what you come up with. Use a heavier block of wood and 14″ hoops to make a chic record stand or pare it way down and cut up seven or eight 4″ hoops, flip them so that they all face one of the short edges, and suddenly you have yourself a fun instant photo display.
This one is definitely going to ensure we don’t run out of birthday cards this year, right? Please say, yes! – Rachel
Credits//Author: Rachel Denbow. Photography: Rachel Denbow and Janae Hardy. Photos edited with ACS for Desktop actions.
]]>This project just goes to show that you can make some epic home decor projects with the right instructions and plenty of creative optimism!
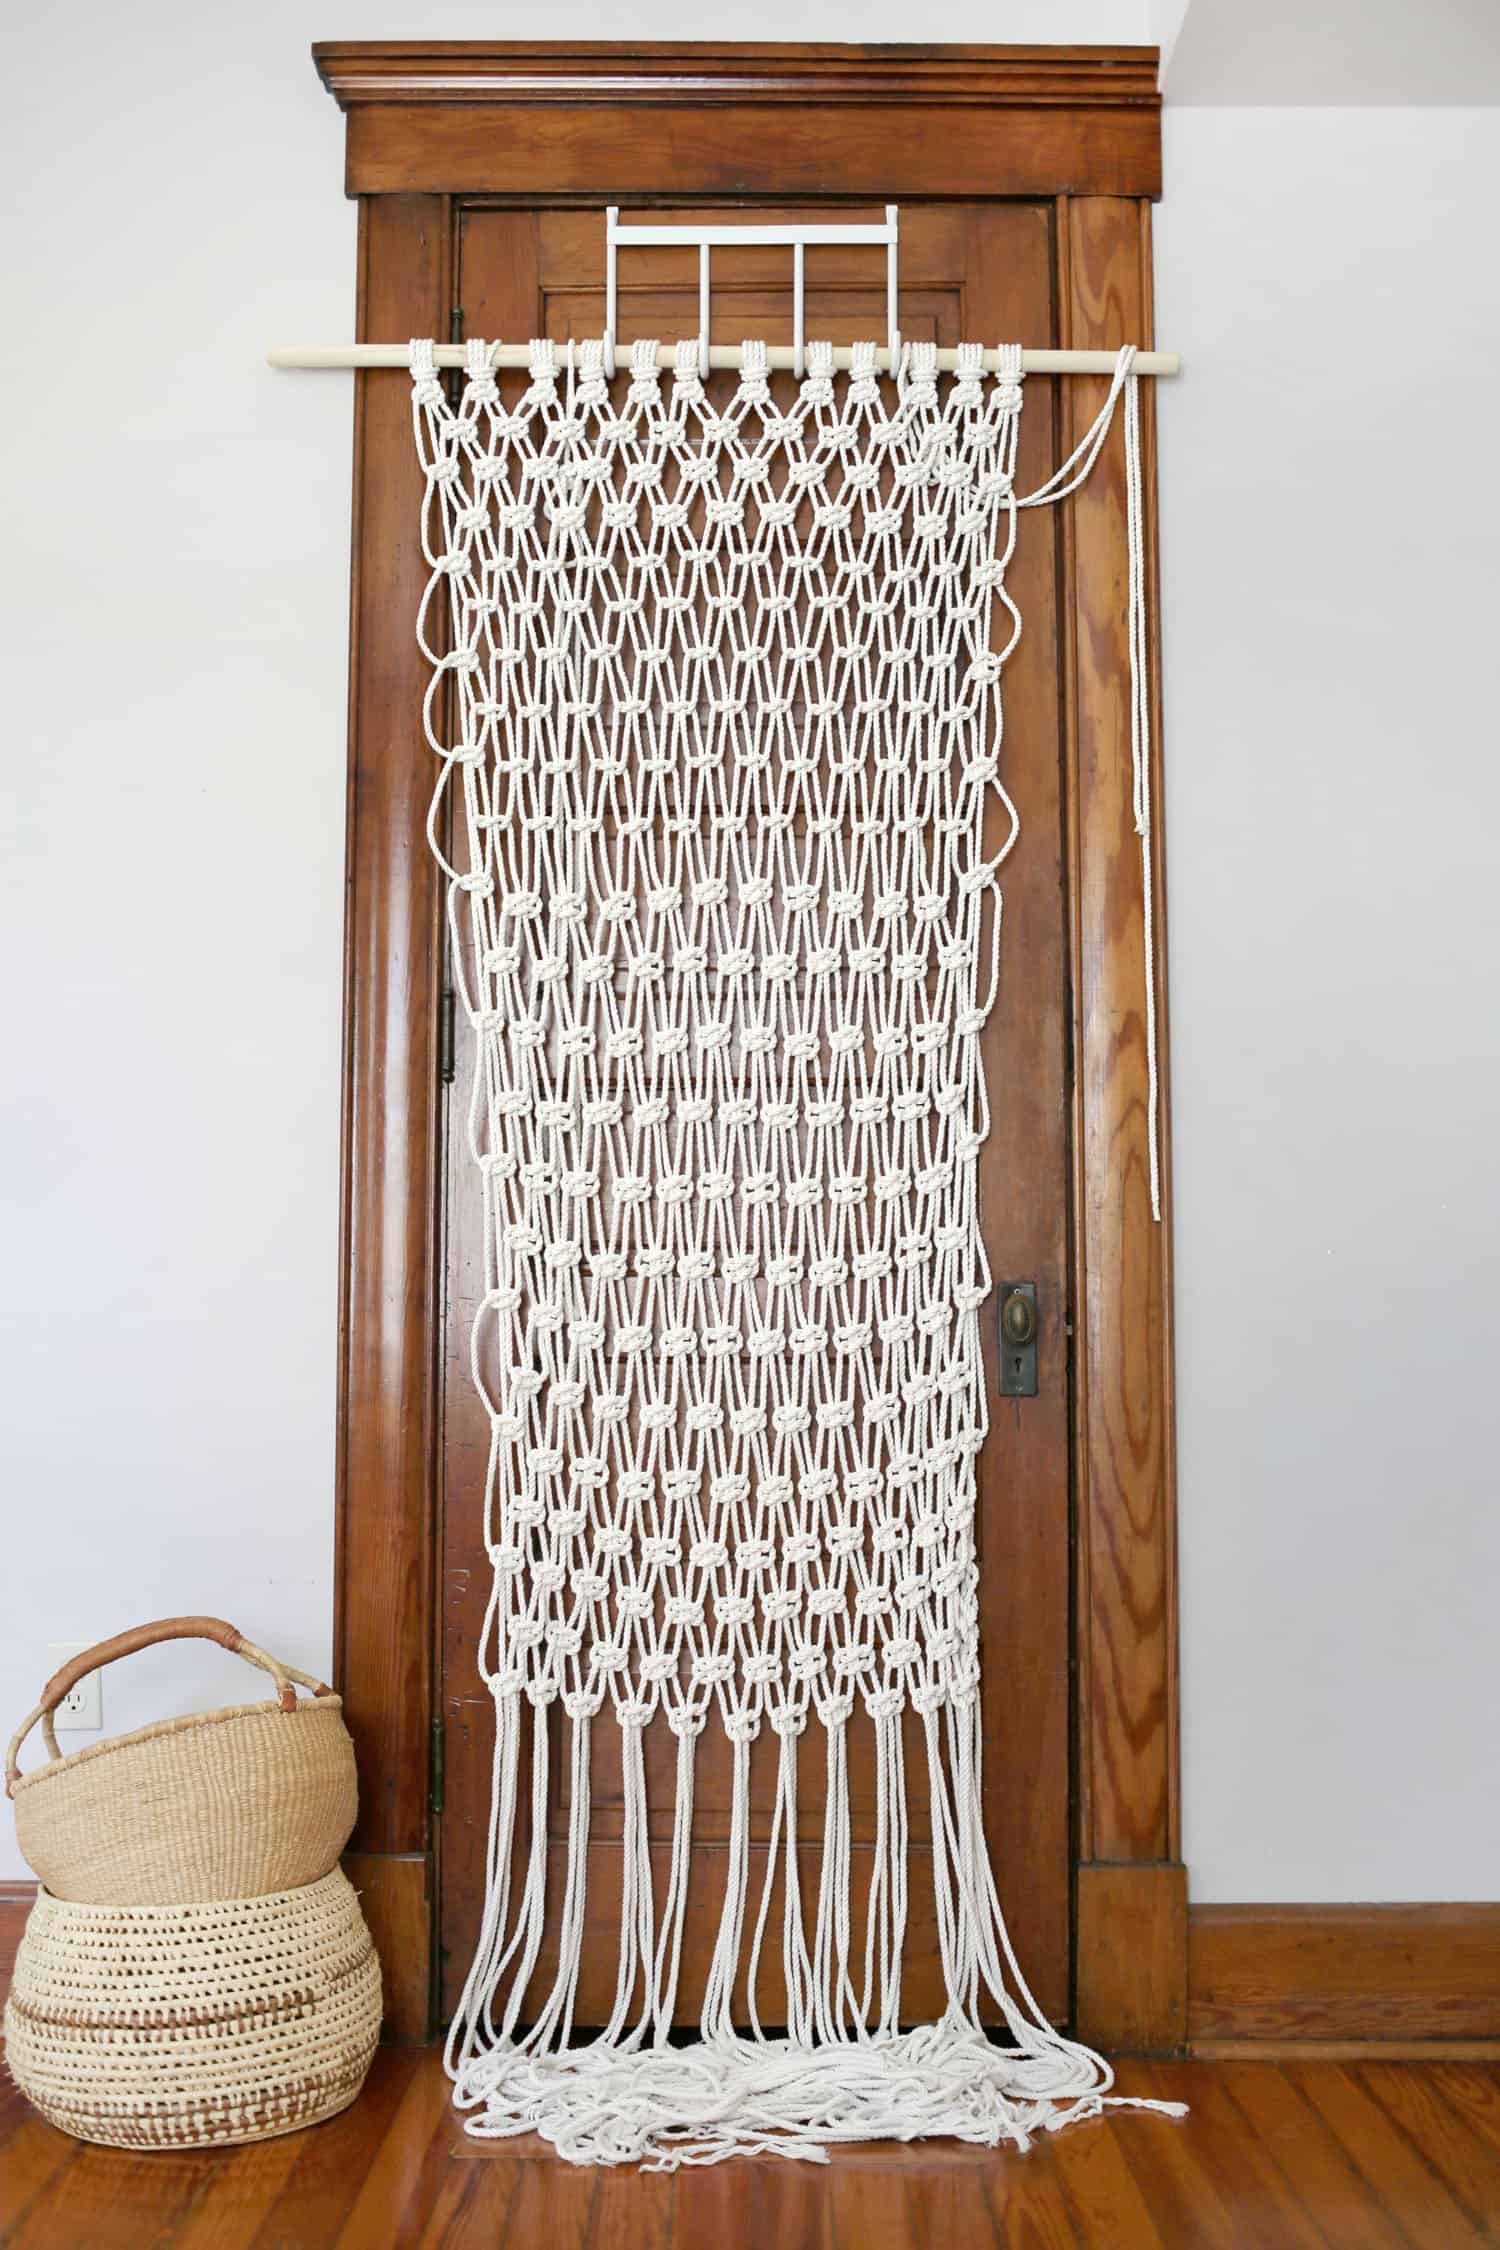
This macrame room divider DIY lends itself easily to creating a relaxed bohemian vibe while also working hard to define a space. Not only does it let plenty of light through, it’s another surface to add some plants.
Related: How To Macrame: A Step By Step Guide For Beginner, Make Your Own Macrame Curtain, How to Make Friendship Bracelets, Simple Macrame Camera Strap Tutorial
 Perfect for the studio apartment, shared office space, or gigantic room in need of definition. All it takes is the right kind of rope, a few simple knots, and the kind of patience these big projects sometimes require. Spoiler alert: It’s always worth it.
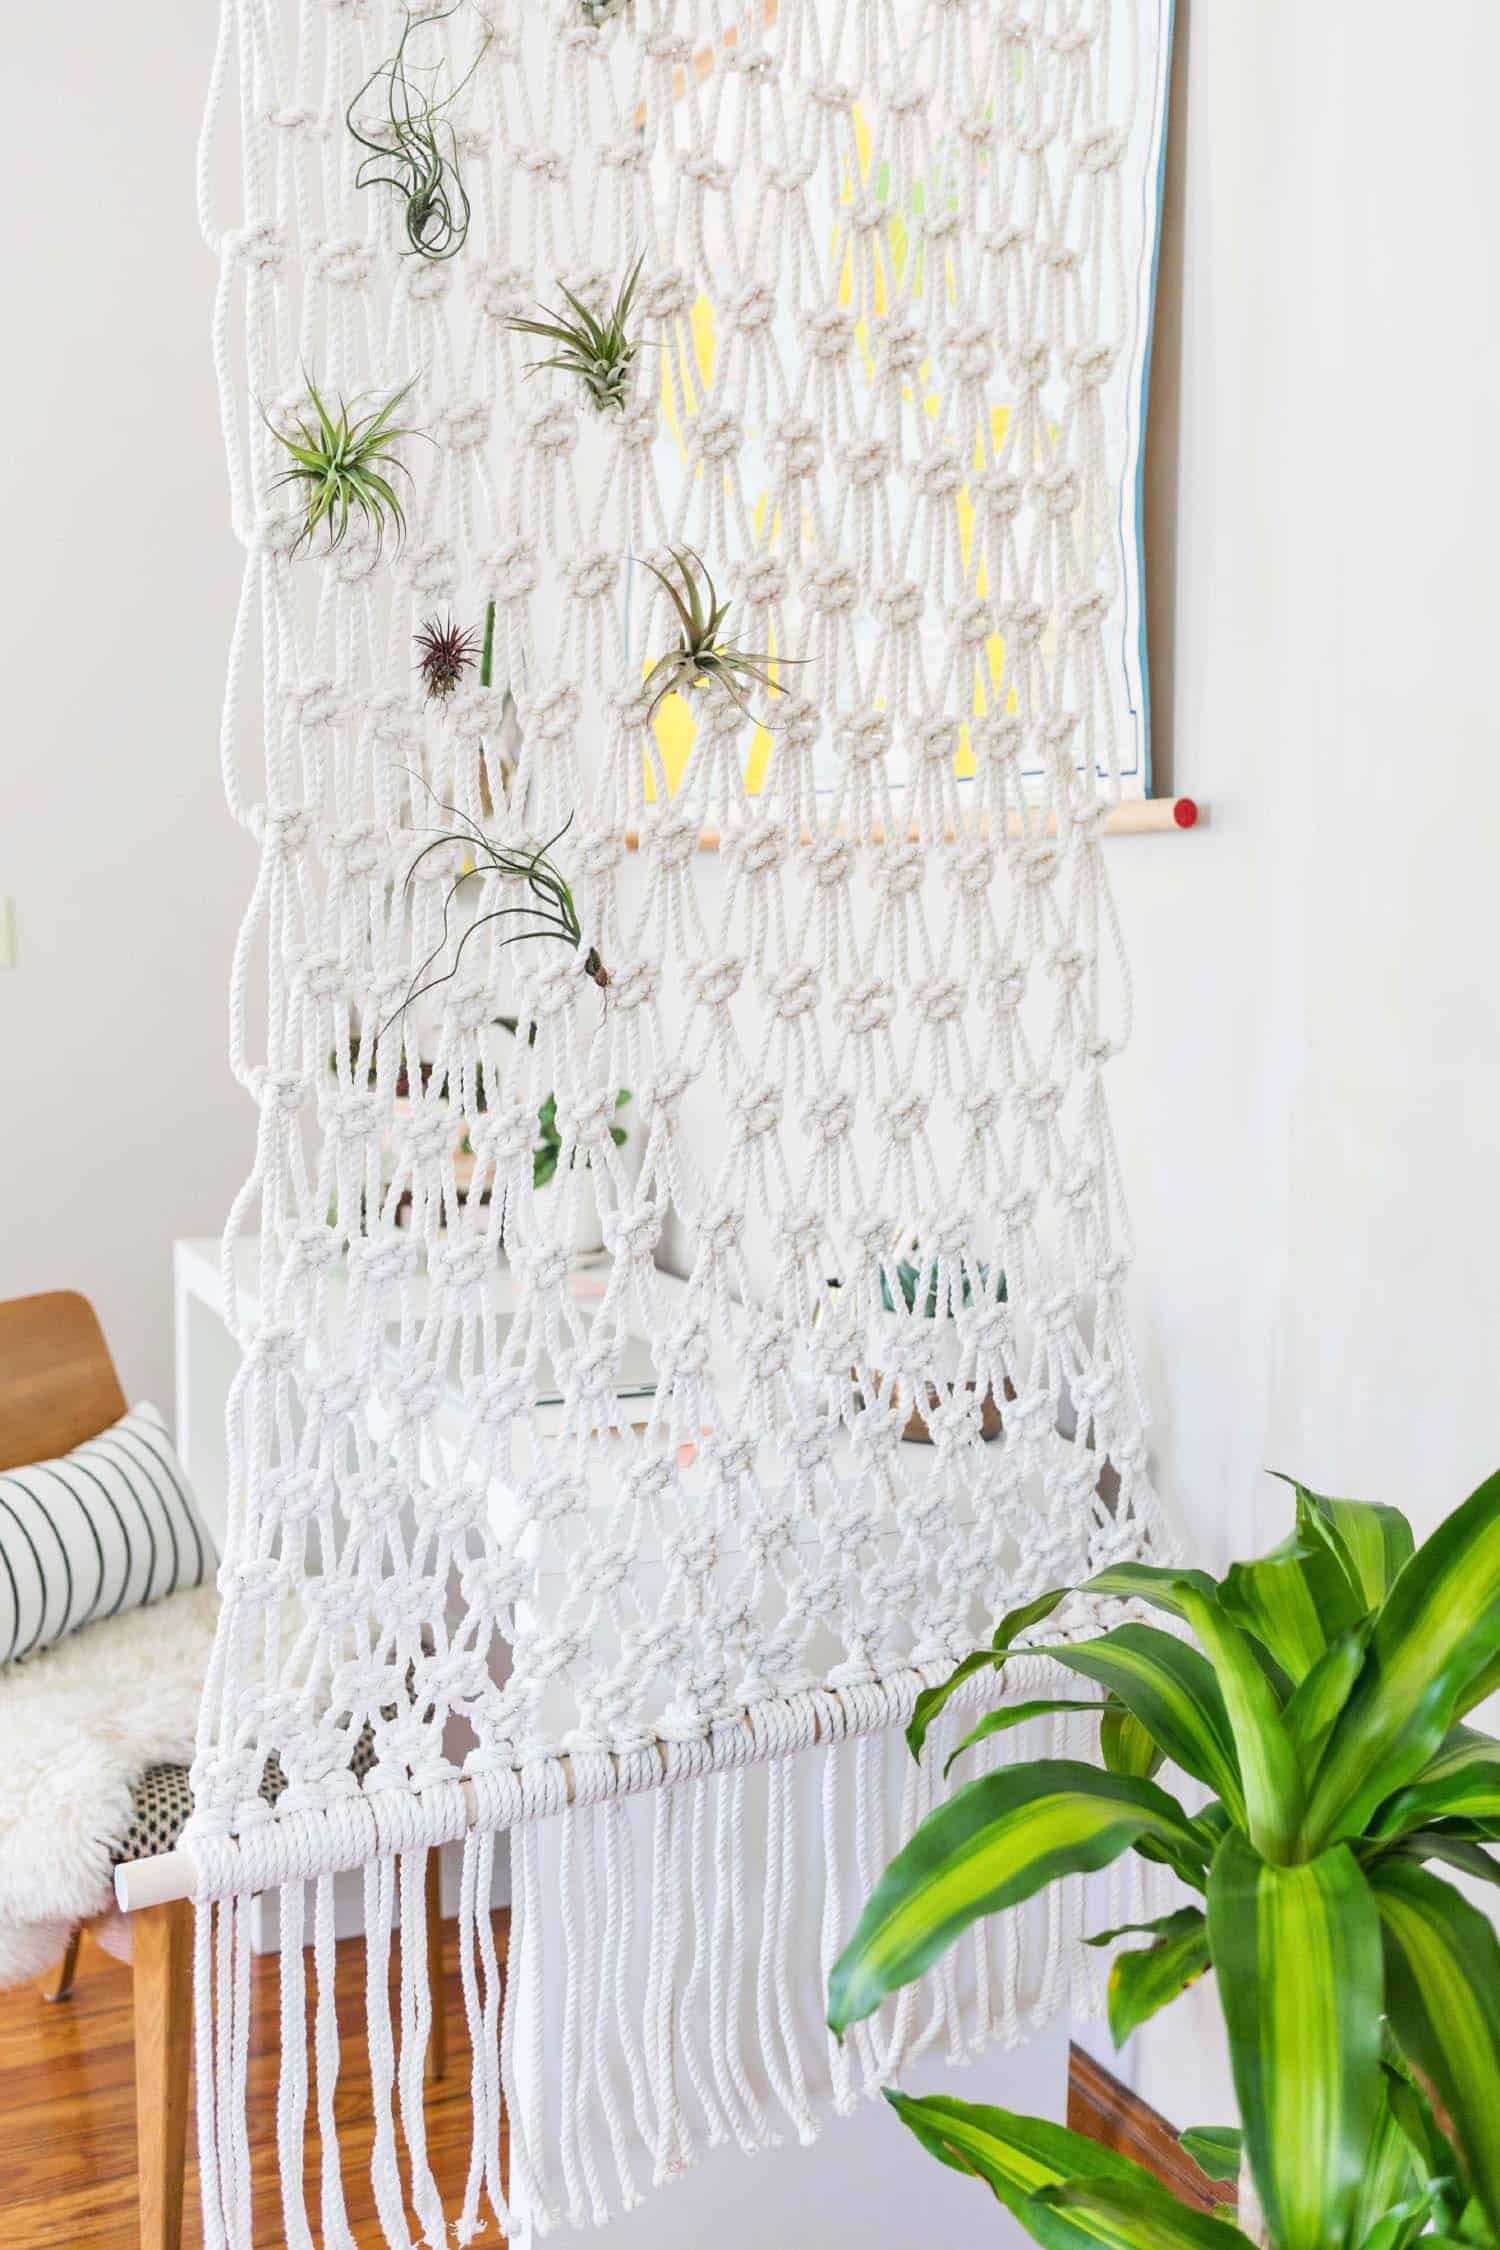
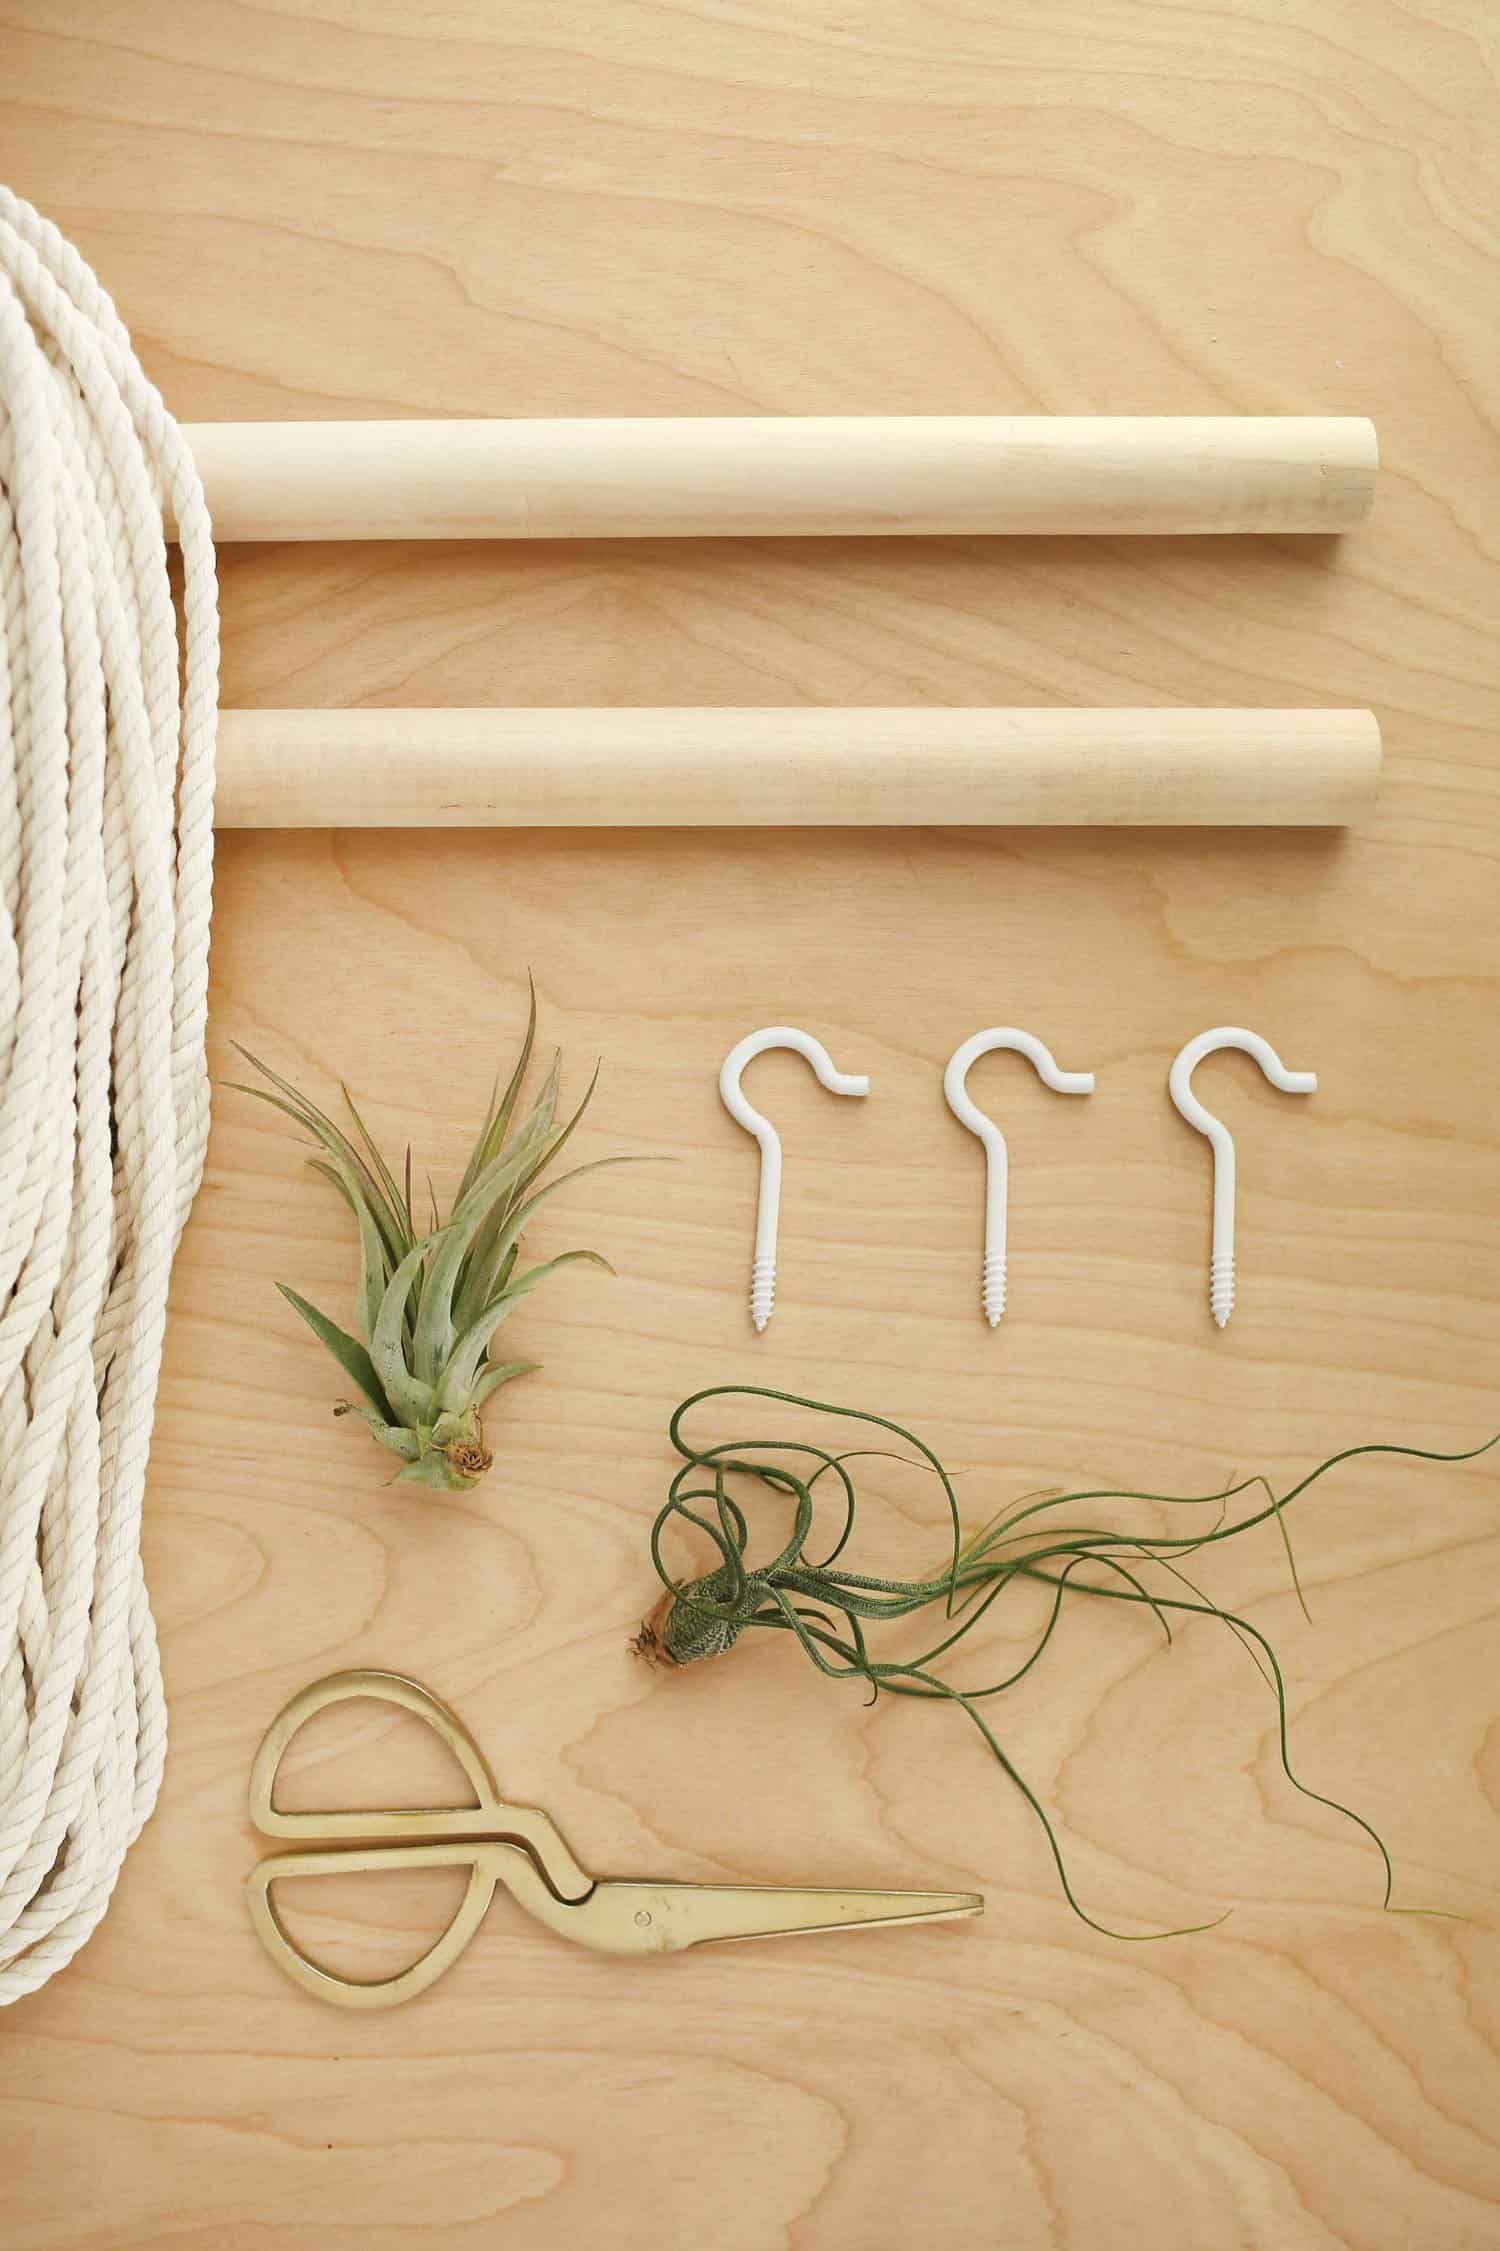 Supplies
-1″ x 36″ wooden dowel
–700 ft of 1/4″ 3 strand cotton rope
-three 3″ hook screws
-scissors
–air plants (optional)
Preparing Your Rope
For this specific project, you’ll want to measure out 24 strands that measure 28′ long each. This will give you a wall hanging that measures roughly 7′ from the top dowel to the bottom dowel and you can add length to it with fringe on the bottom.
If you’re wanting to design a shorter piece, it’s always better to still use more rope than you think you’ll need.
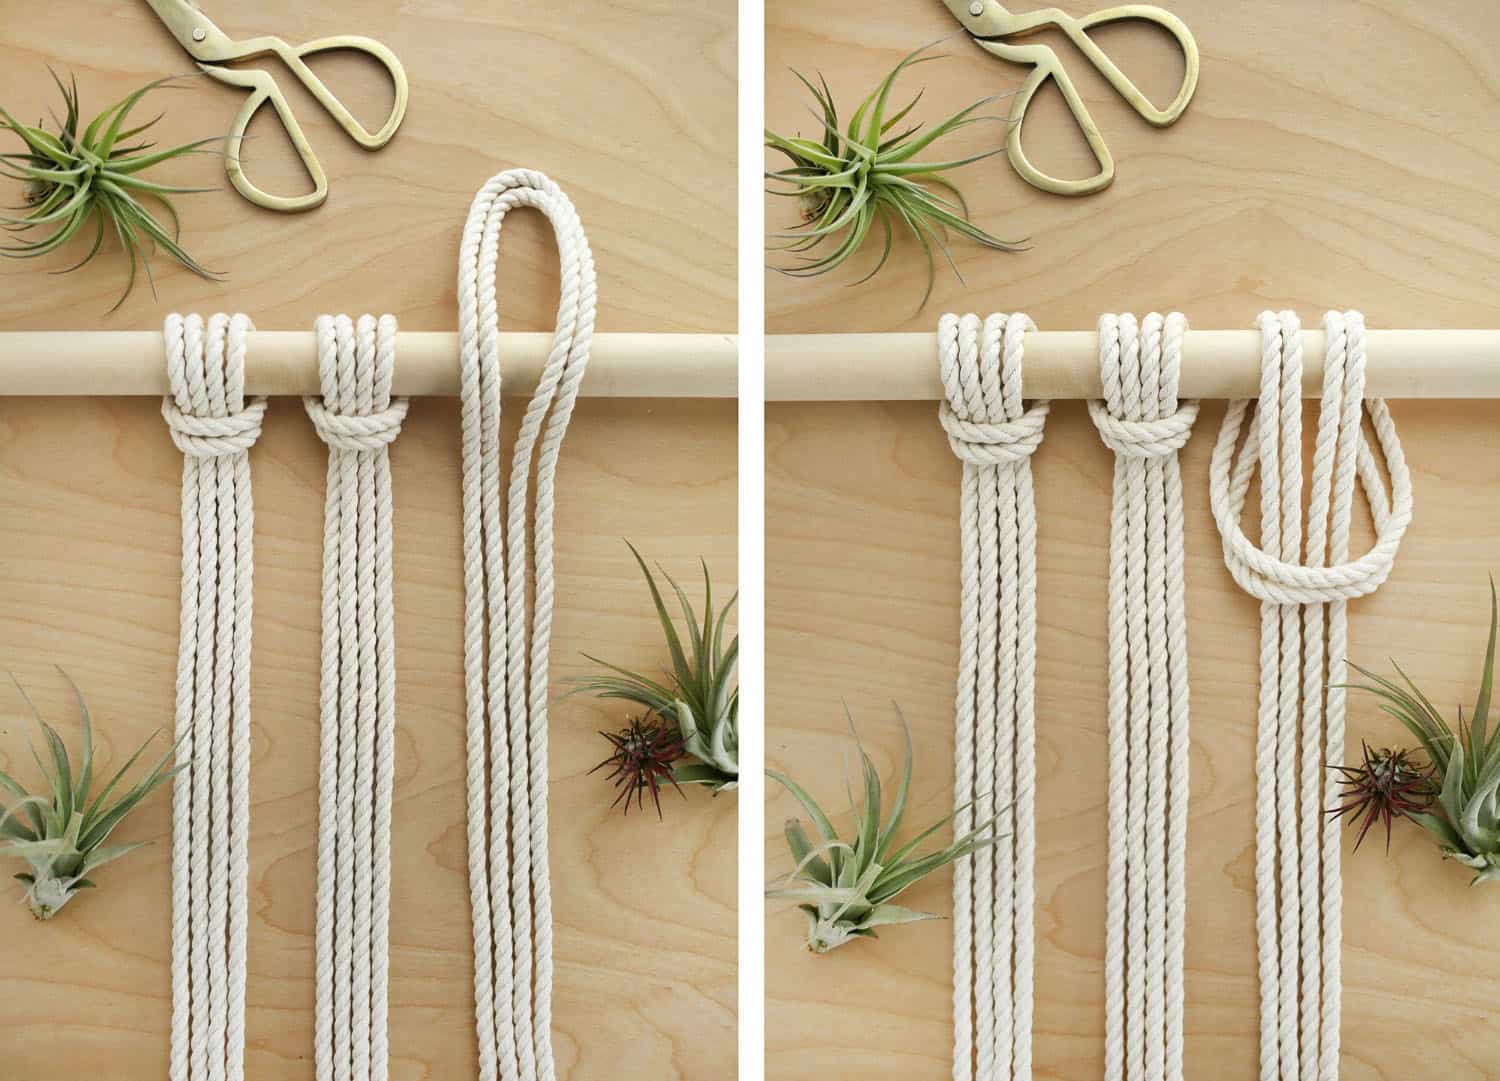 Lark’s Head Knot
Shown are two finished lark’s head knots and then the start of a third. You’ll need two strands of rope per knot for a total of 12 knots. Fold two strands in half and place the center of this pair of rope strands over the top of your first wooden dowel.
Then, wrap them around your dowel and pull the loose ends down through your loop. You’ve probably done this knot before and not even known it. No pun intended.
Continue adding your pairs of rope strands to the dowel until you are finished. Be mindful that you are wrapping over the top of the dowel consistently.
If you forget and wrap one under the dowel instead, it will change the look of your pattern. Make sure all of your finished lark’s head knots are spaced equally apart from each other.
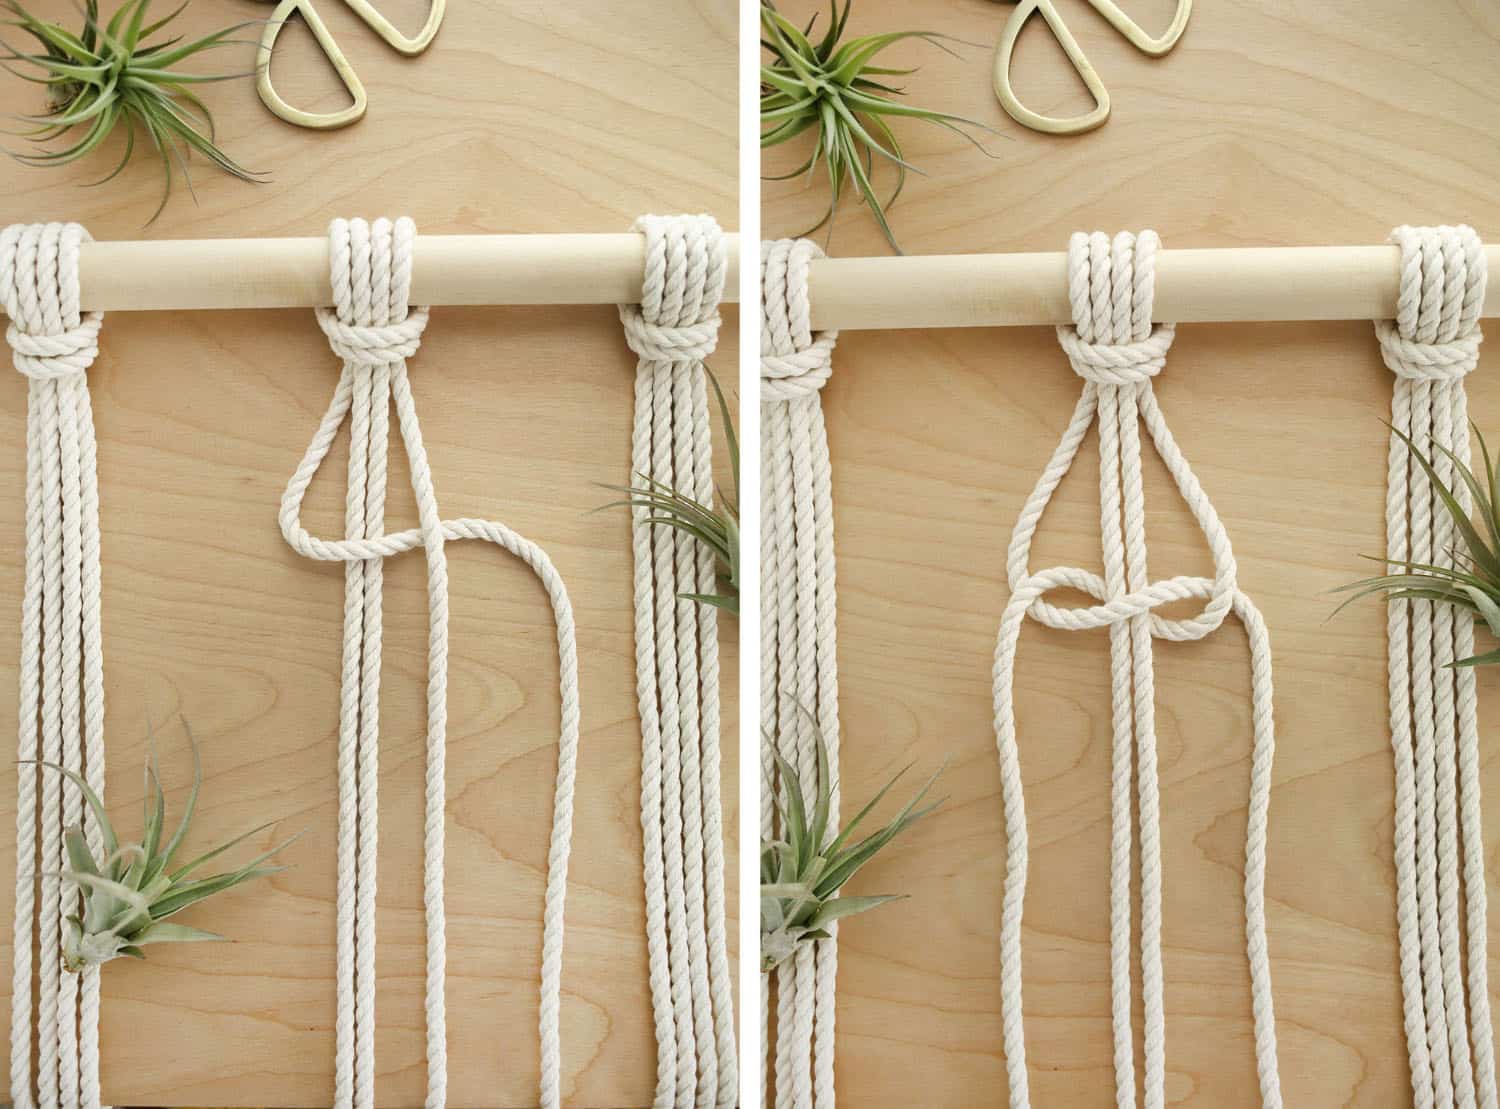 Half Knot
We’ll use a half knot further down in the design to add subtle contrast, but it also makes up the first step of the square knot, so I’m showing it first. A half knot requires four strands of rope.
The two center ropes stay where they are and the two outer ropes pull away just a bit. Then create a bend in the outer left rope and move it towards and then under the outer right rope as shown.
Then bend the outer right rope under the place where the outer left rope crossed it, behind the two center ropes, and back up through the bend from the outer left rope as shown.
We’ll use this knot on its own in a bit, but this is also the first half of the knot you’ll use for the first section of the divider.
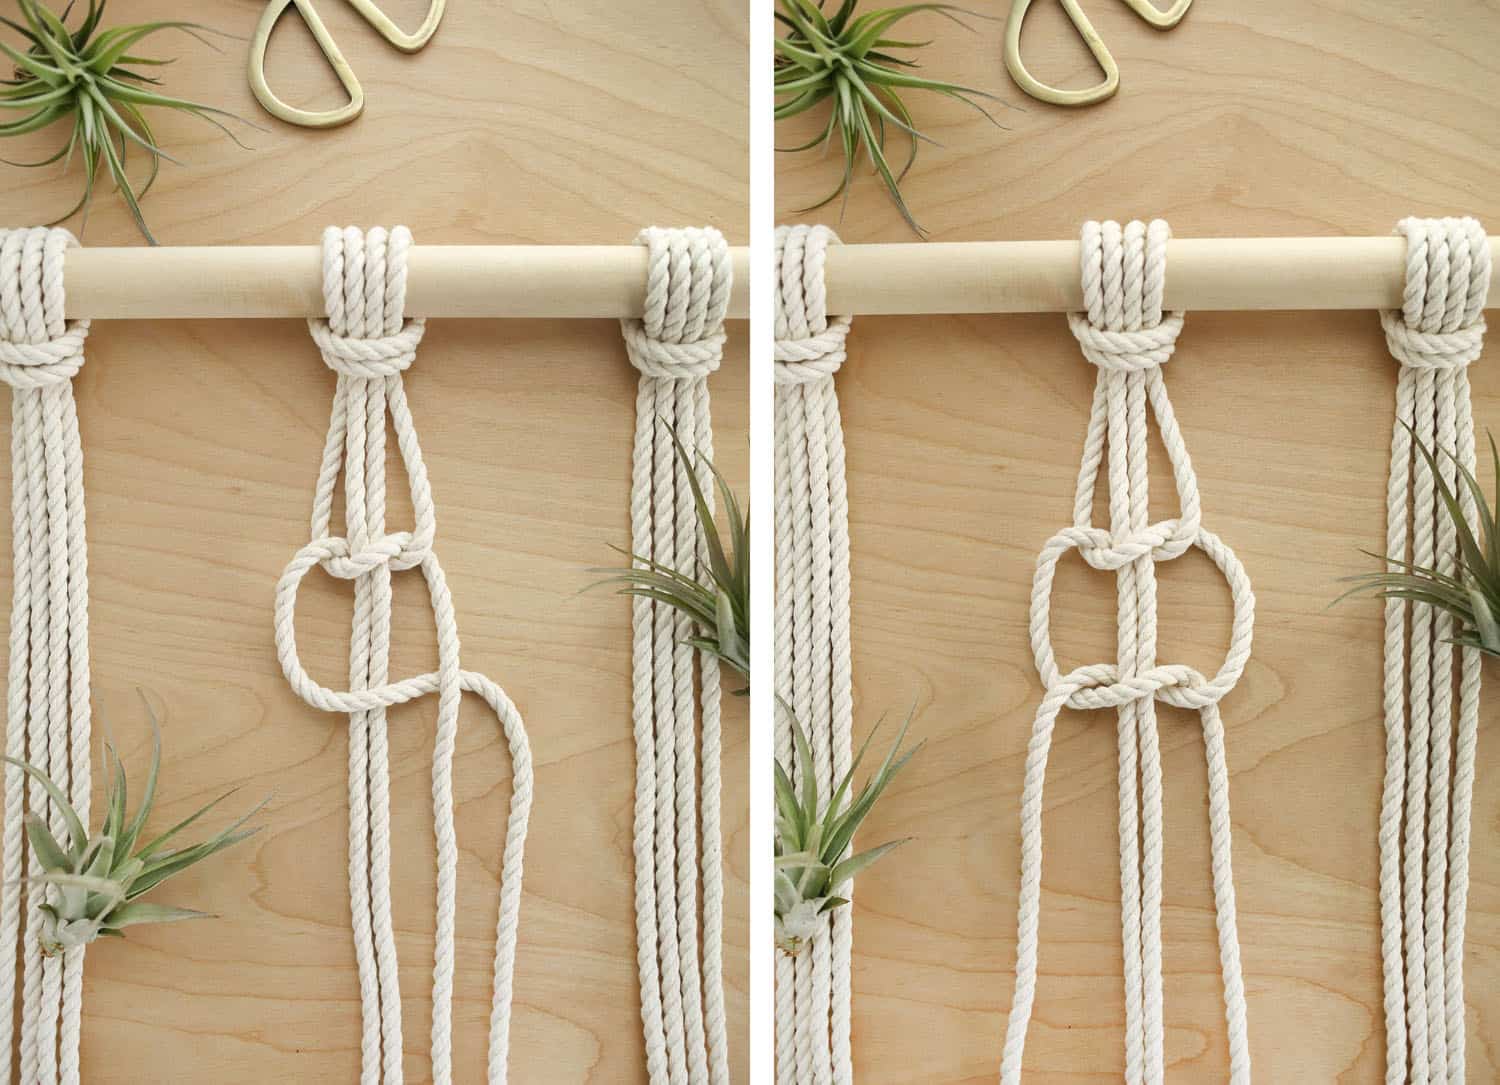 Square Knot
This is comprised of two half knots. Repeat the same pattern you did in the step above, but then pull the outer two rope strands until that second half knot rests snugly against the first half knot.
Now you’ve made a square knot! Repeat this process on each of your pairs of rope strands for your first row of knots.
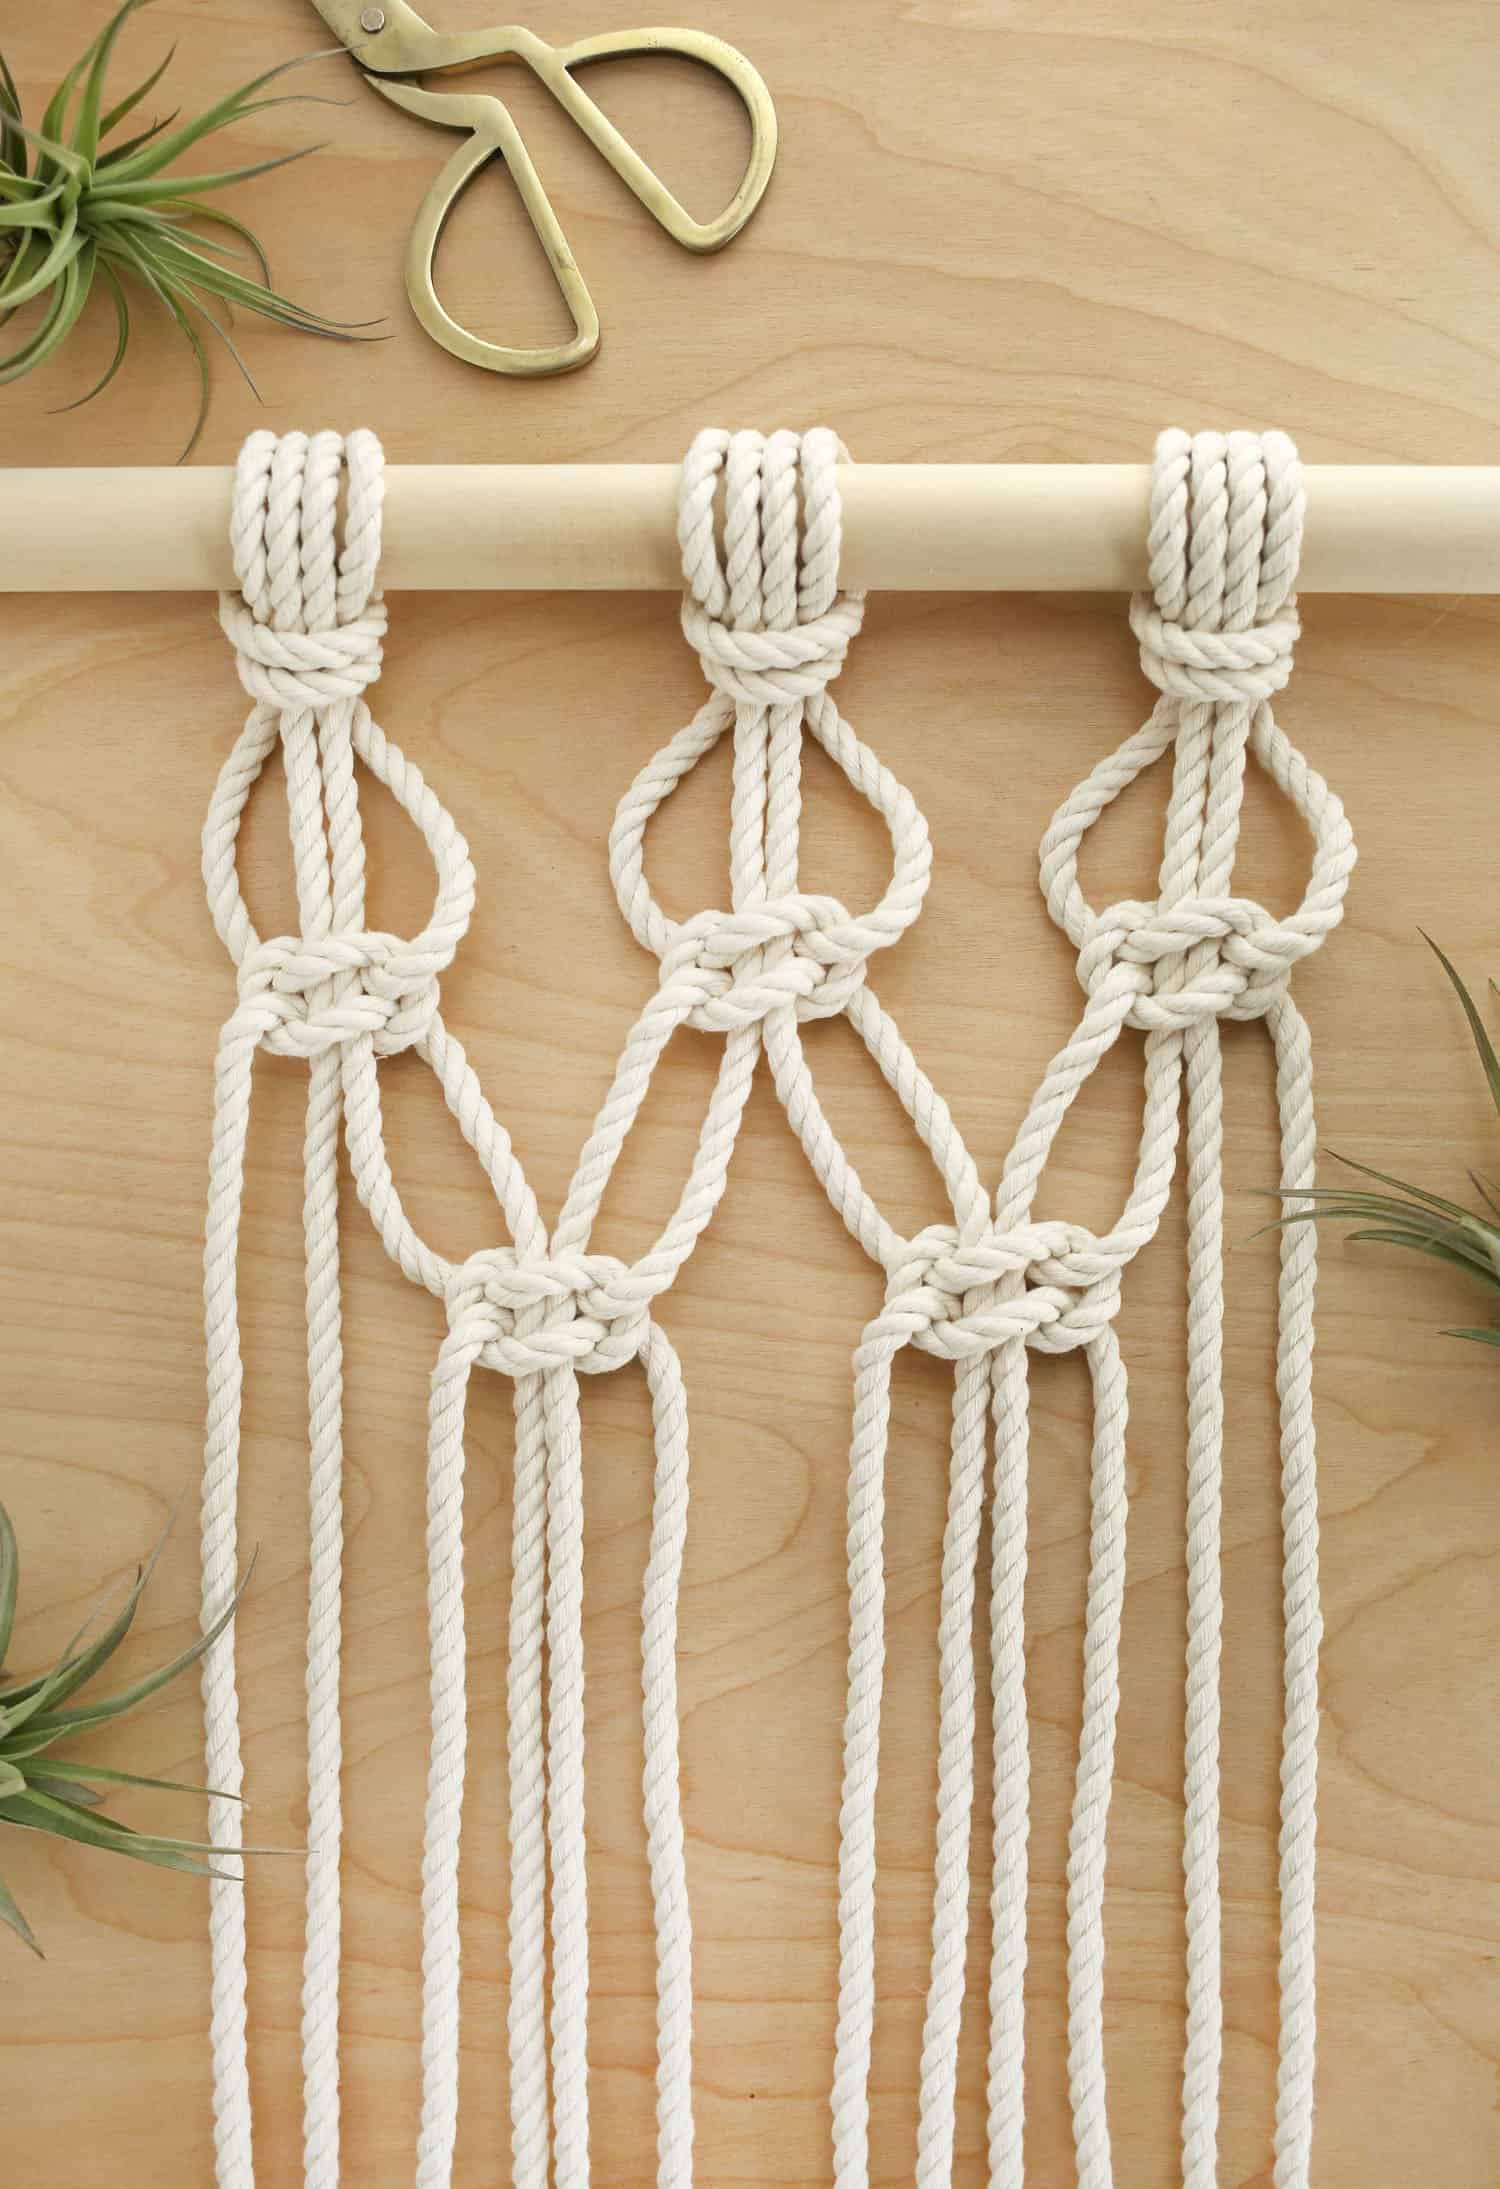 Alternating Square Knot
You can see how the square knots took shape in this photo. You should have 12 square knots in your first row. To create your second row of square knots, you’ll be using two strands from one square knot and two strands from the square knot next to it to create a new square knot that joins them together.
You can start from the center of your piece and work your way out on either side (how I prefer to do it) or you can start from one side and move your way across. As you can see, when you get to the edges of your second row, you’ll have an extra pair of rope strands on each side. That’s next.
When you’re adding in your knots, be mindful of the space between each row. You don’t want to start tying things closer and closer together or you’ll end up with a lopsided wall hanging.
Sometimes it’s helpful to step back about six feet to check on your composition before continuing on. Trust me, you won’t want to later realize it’s crooked enough to be annoying.
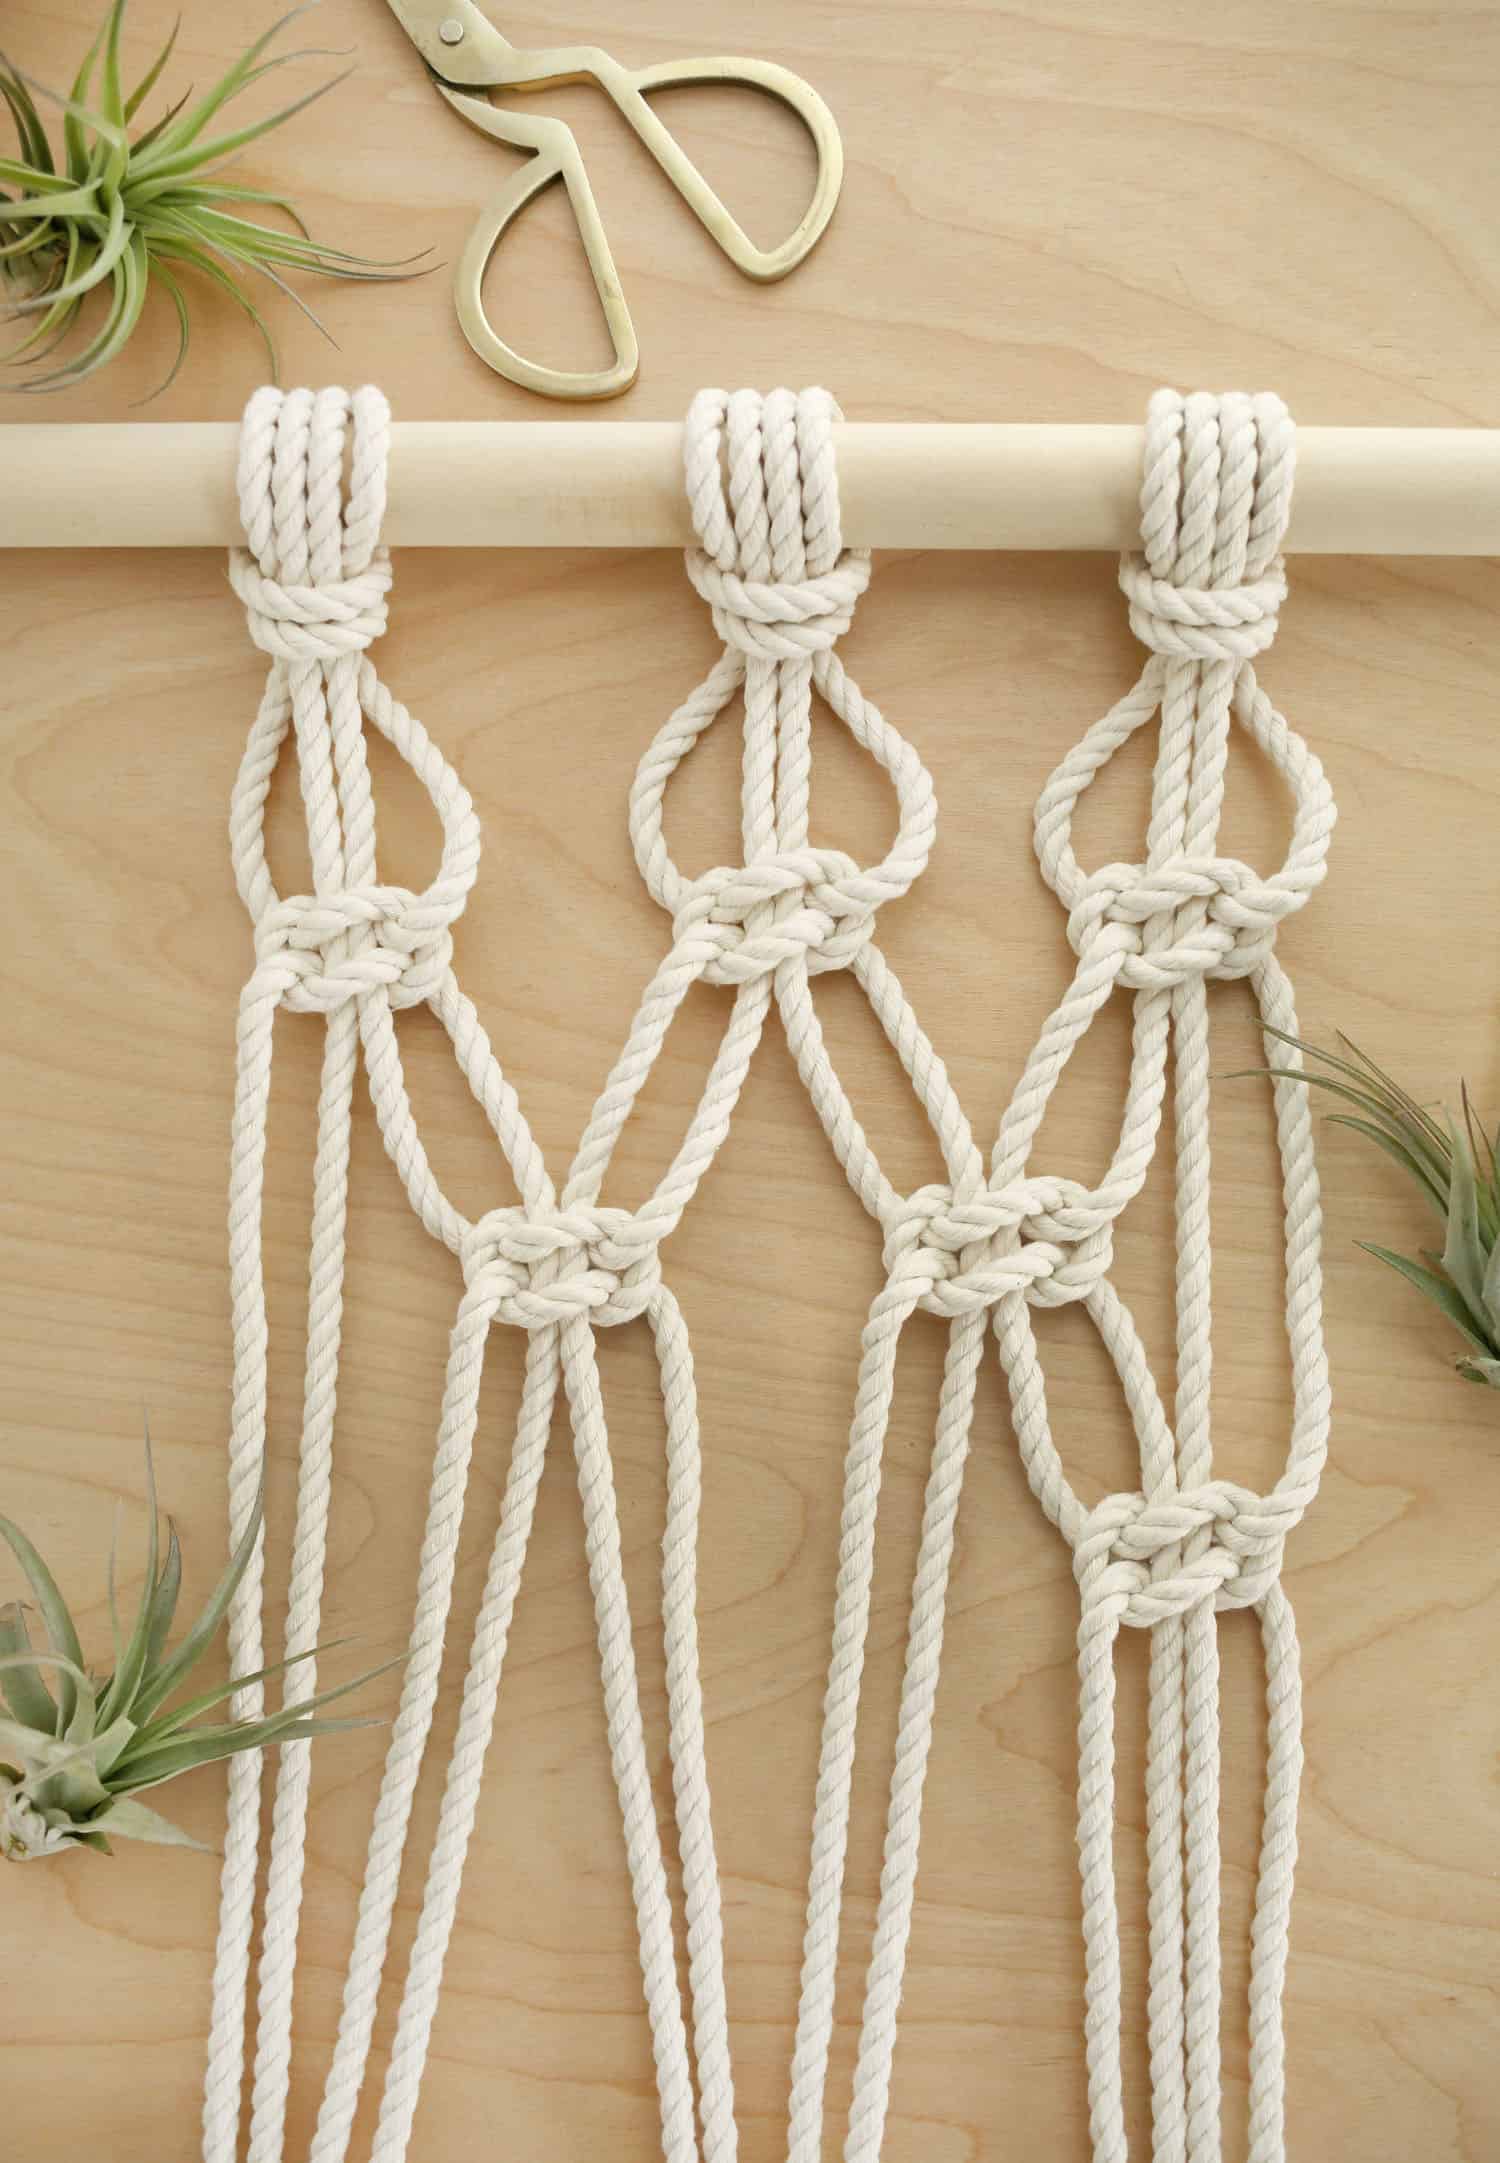 Knots on the Edge
For this design, I’m allowing about 2.5″ of space between all of my knots because I want the room divider to feel light and airy. When I add in my third row of knots, I’ll be back to my original pattern of using all of the strands.
The space that your outer rope creates on the absolute left side of your divider and then the right side of your divider should be a little bit longer than twice as long as that. You want it to have enough slack to create a scallop shape.
My scallops held their shape in some parts of my divider but got heavy in other parts. I’m assuming it’s tricky to get that just right, but do your best.
 For my pattern, I did four alternating rows of square knots and then switched it up and did six alternating rows of half knots. Then I finished up the rest of the divider with 13 alternating rows of square knots again.
This kept things feeling consistent enough to make a statement but also added a bit of a subtle design change to keep it from looking like I’d hung a hammock from the ceiling!
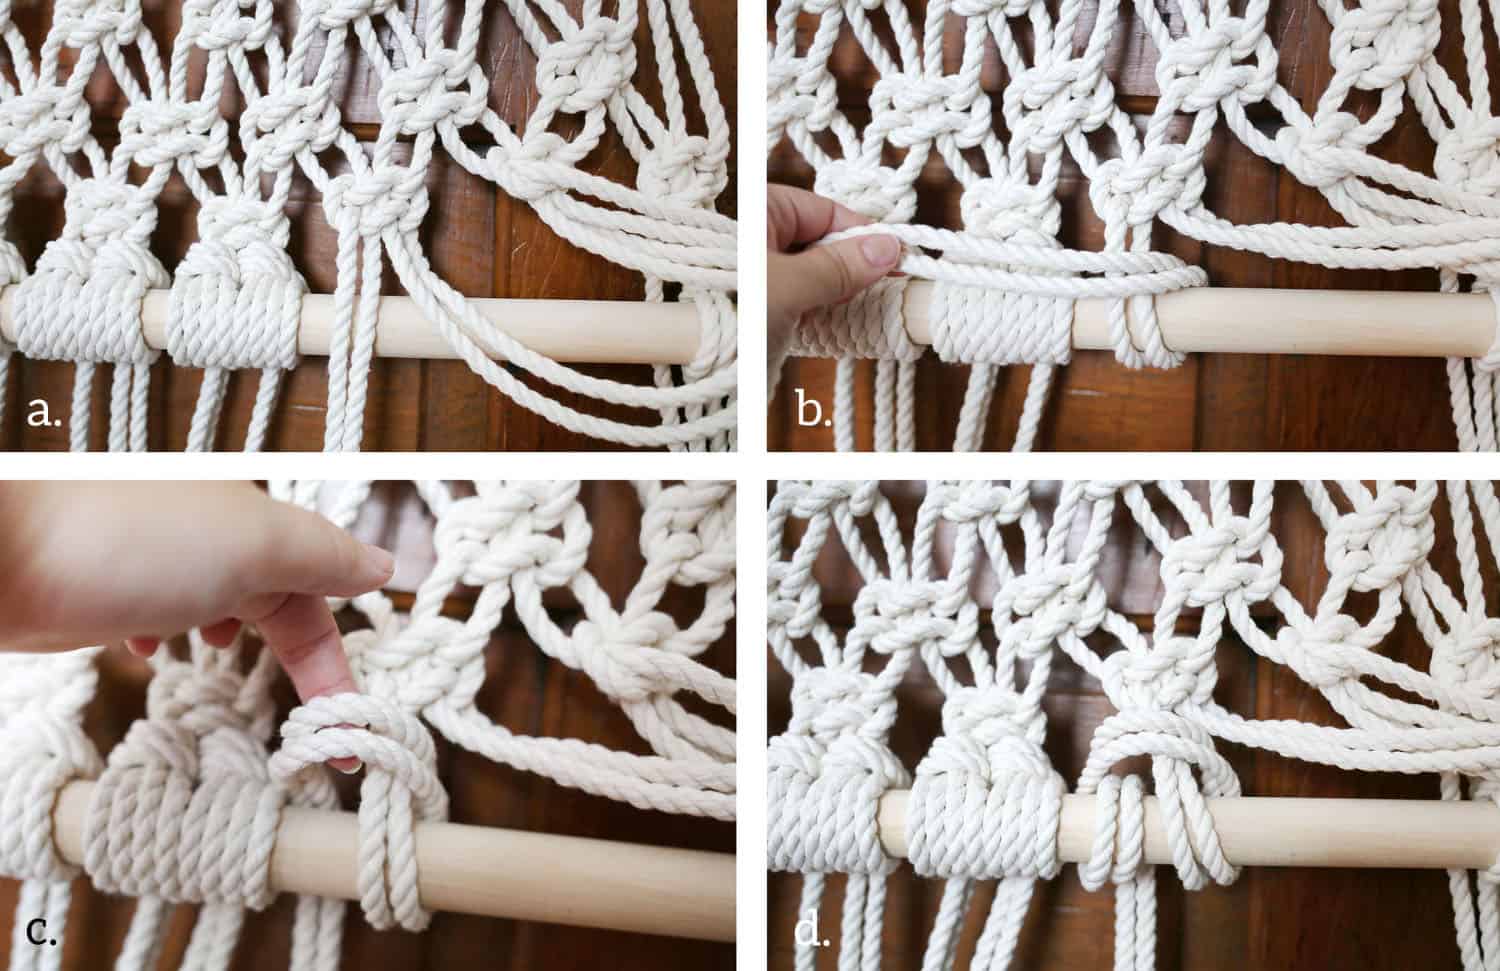 To add the bottom dowel to your room divider, you’re going to create more lark’s head knots. You can’t create them the same way you started, so we’re doing it backwards. I’ve started with a few already attached to show you how it’ll look when it’s done.
A: Separate the four strands underneath one of your square knots and set two aside. B: Wrap the other two strands all the way around the dowel until you wrap inside and over the top of the same two strands. C: Wrap them on the other side of the strands and back behind the dowel. D: Continue around the front of the dowel and tuck under the loop you just made. It will leave a fringe down the back side of the dowel. This is just one of the two lark’s knots you’ll make per square knot.
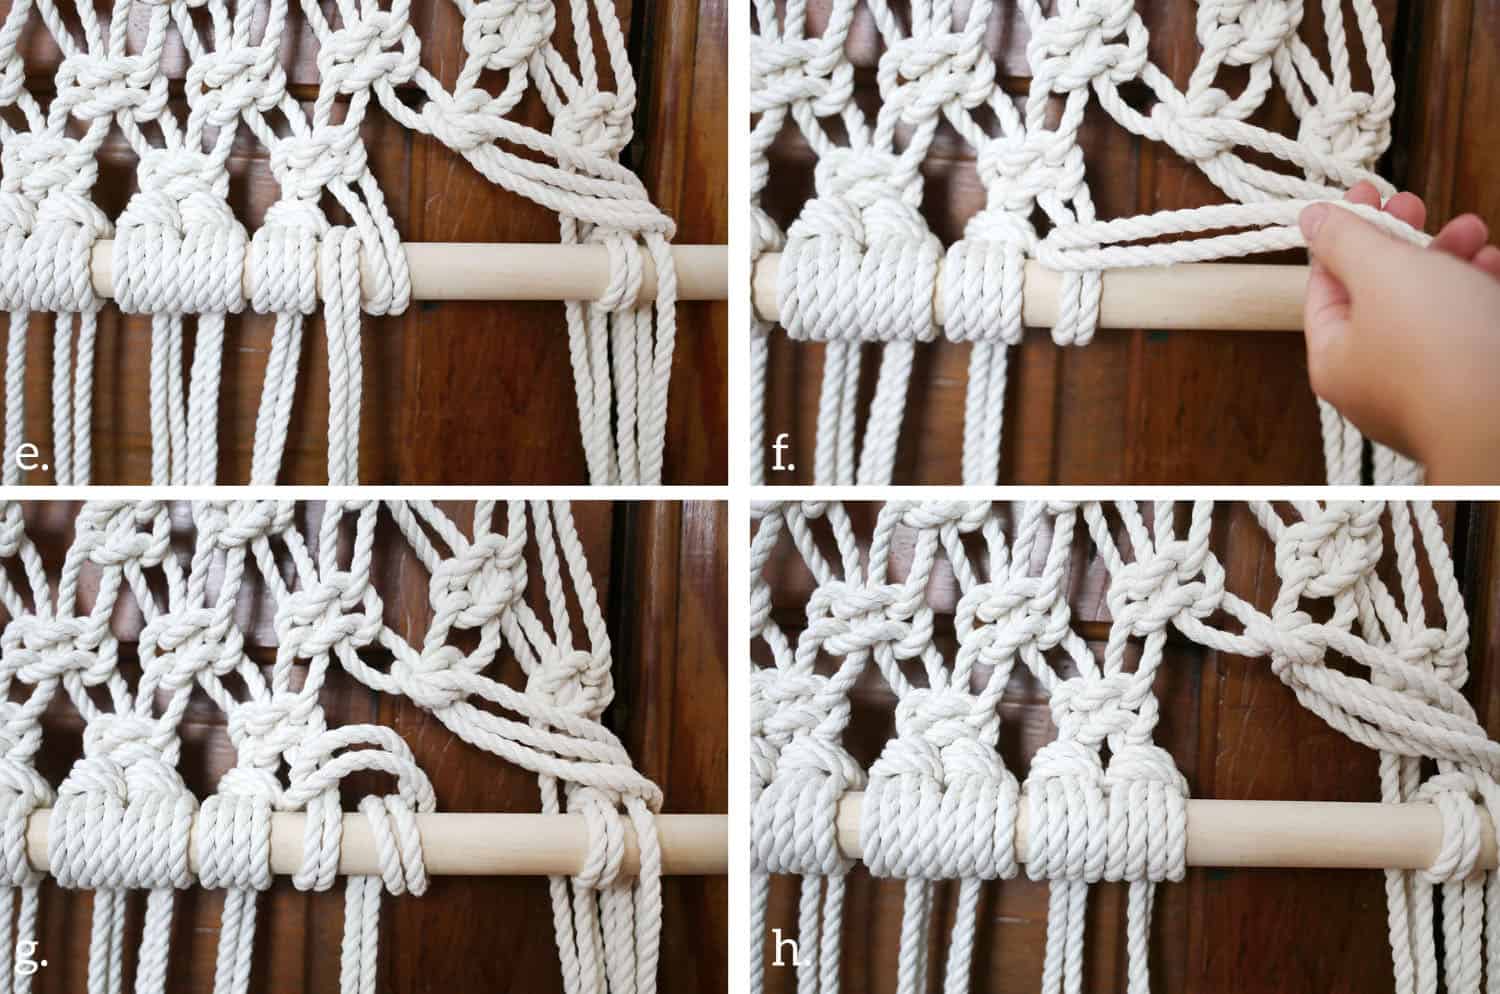 E: Bring the other two strands from that square knot back over and wrap them around the dowel and to the left side. F: Wrap them over the top of themselves. G: Wrap them behind the dowel and all the way back around and under the loop you just created. H: Scoot that knot in close to the first one you made and make sure things are consistently taut. Repeat with each of the other strands in each square knot.
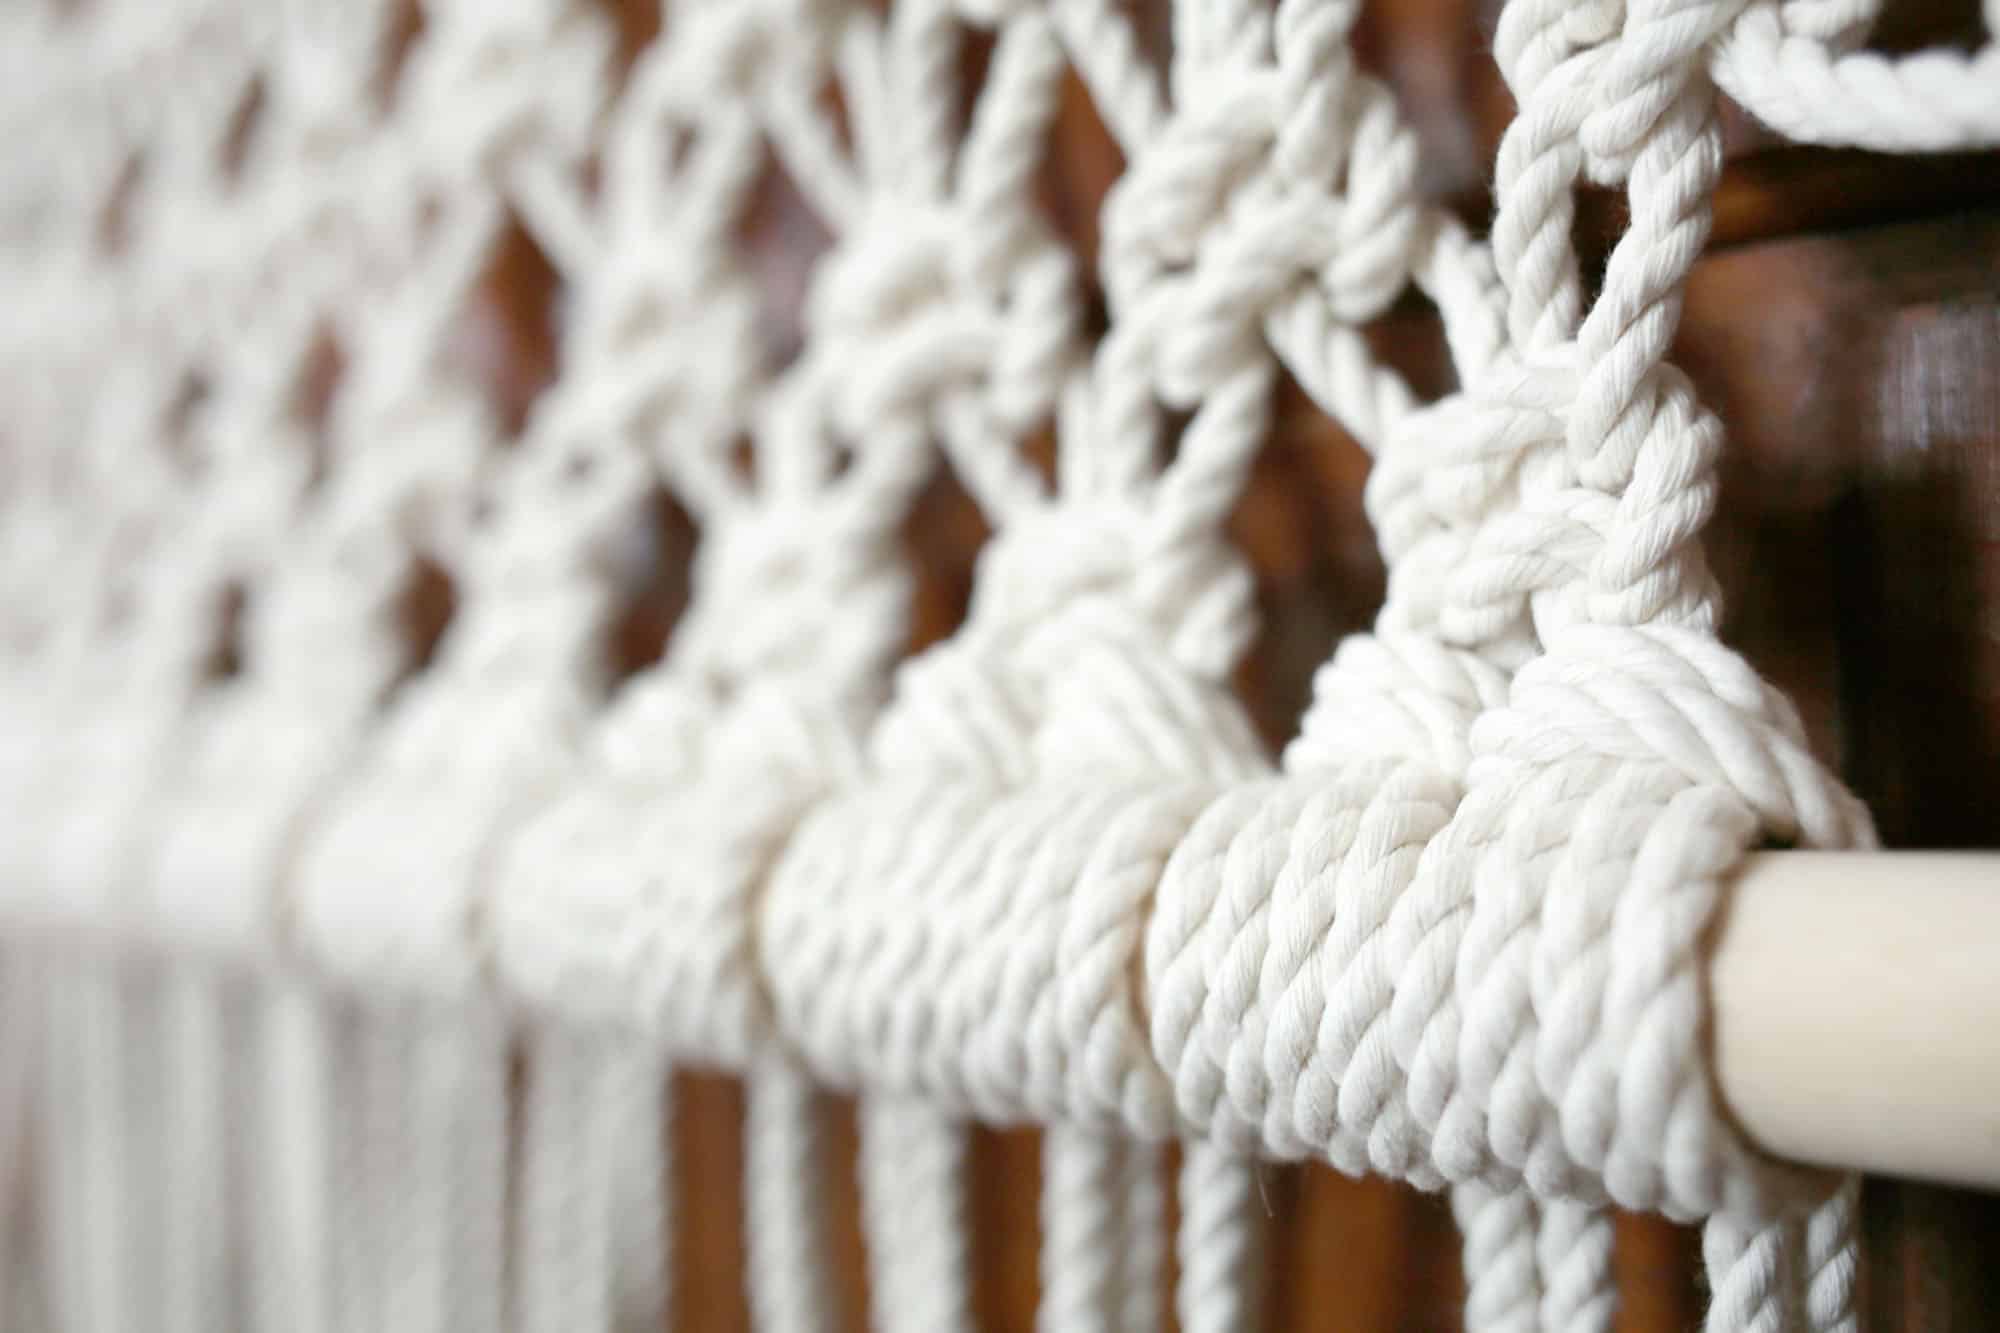
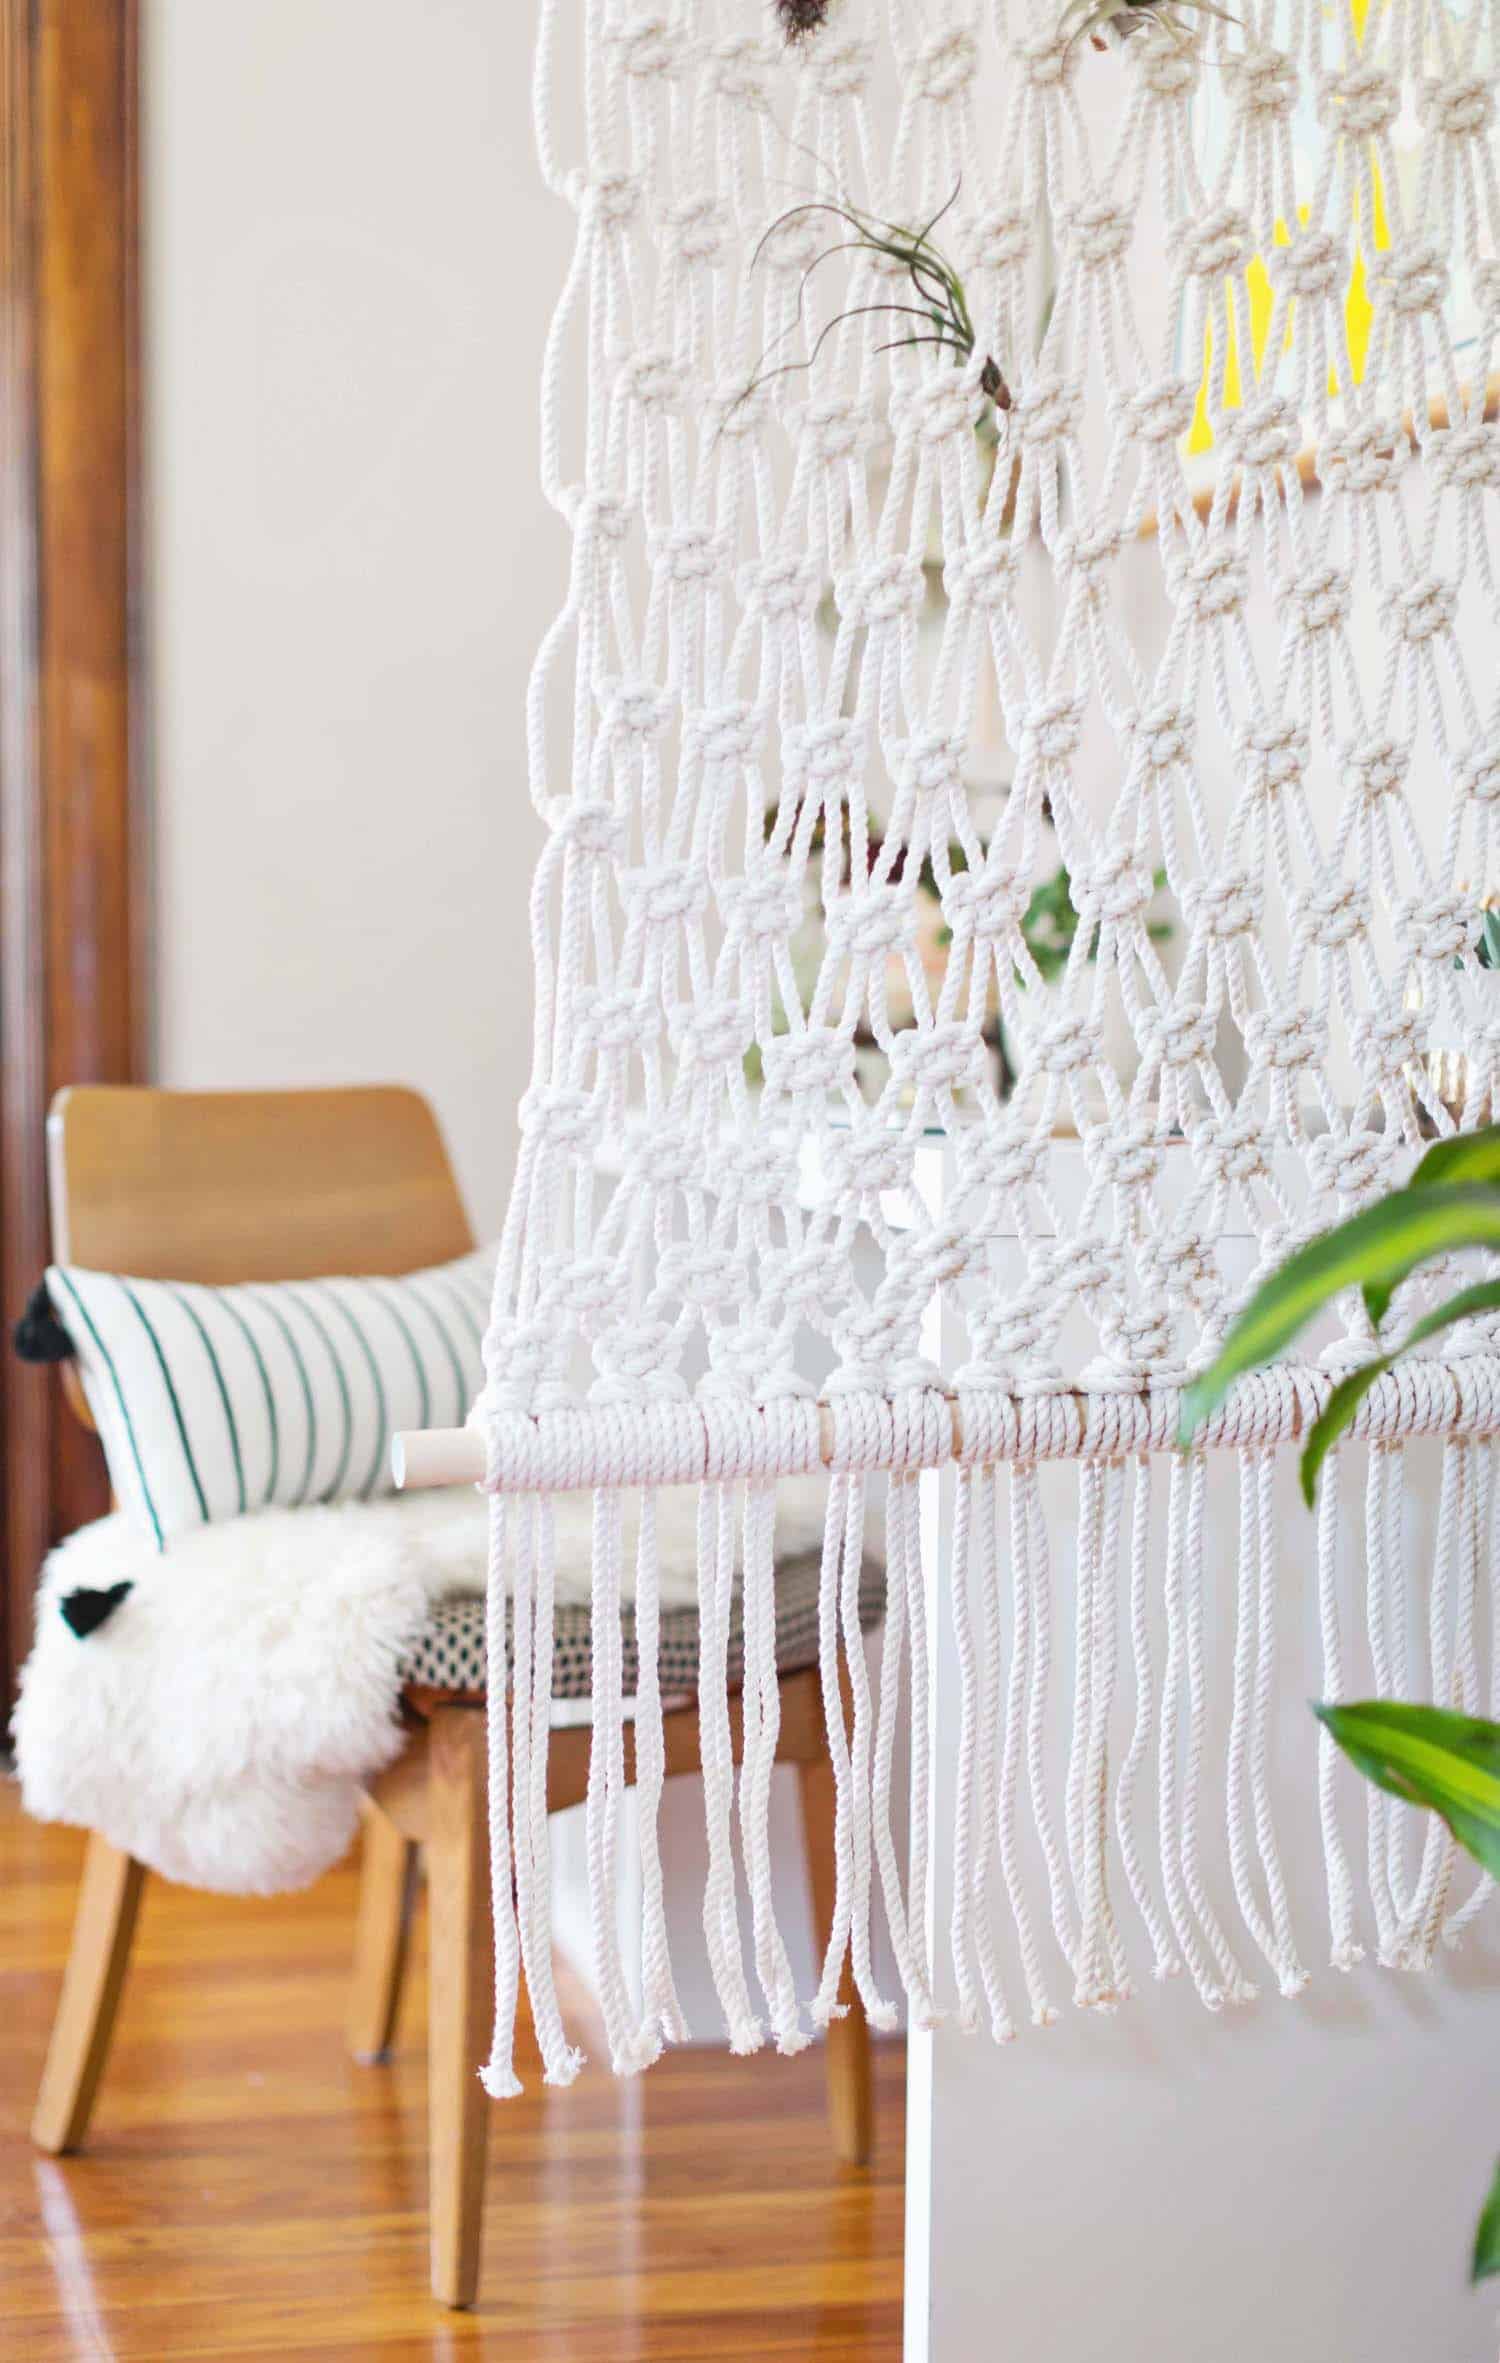 Trim your fringe to the length you need. We have 10-foot ceilings, so even though this room divider is massive, I had to hang it from the screws in my ceiling with another 18″ of rope.
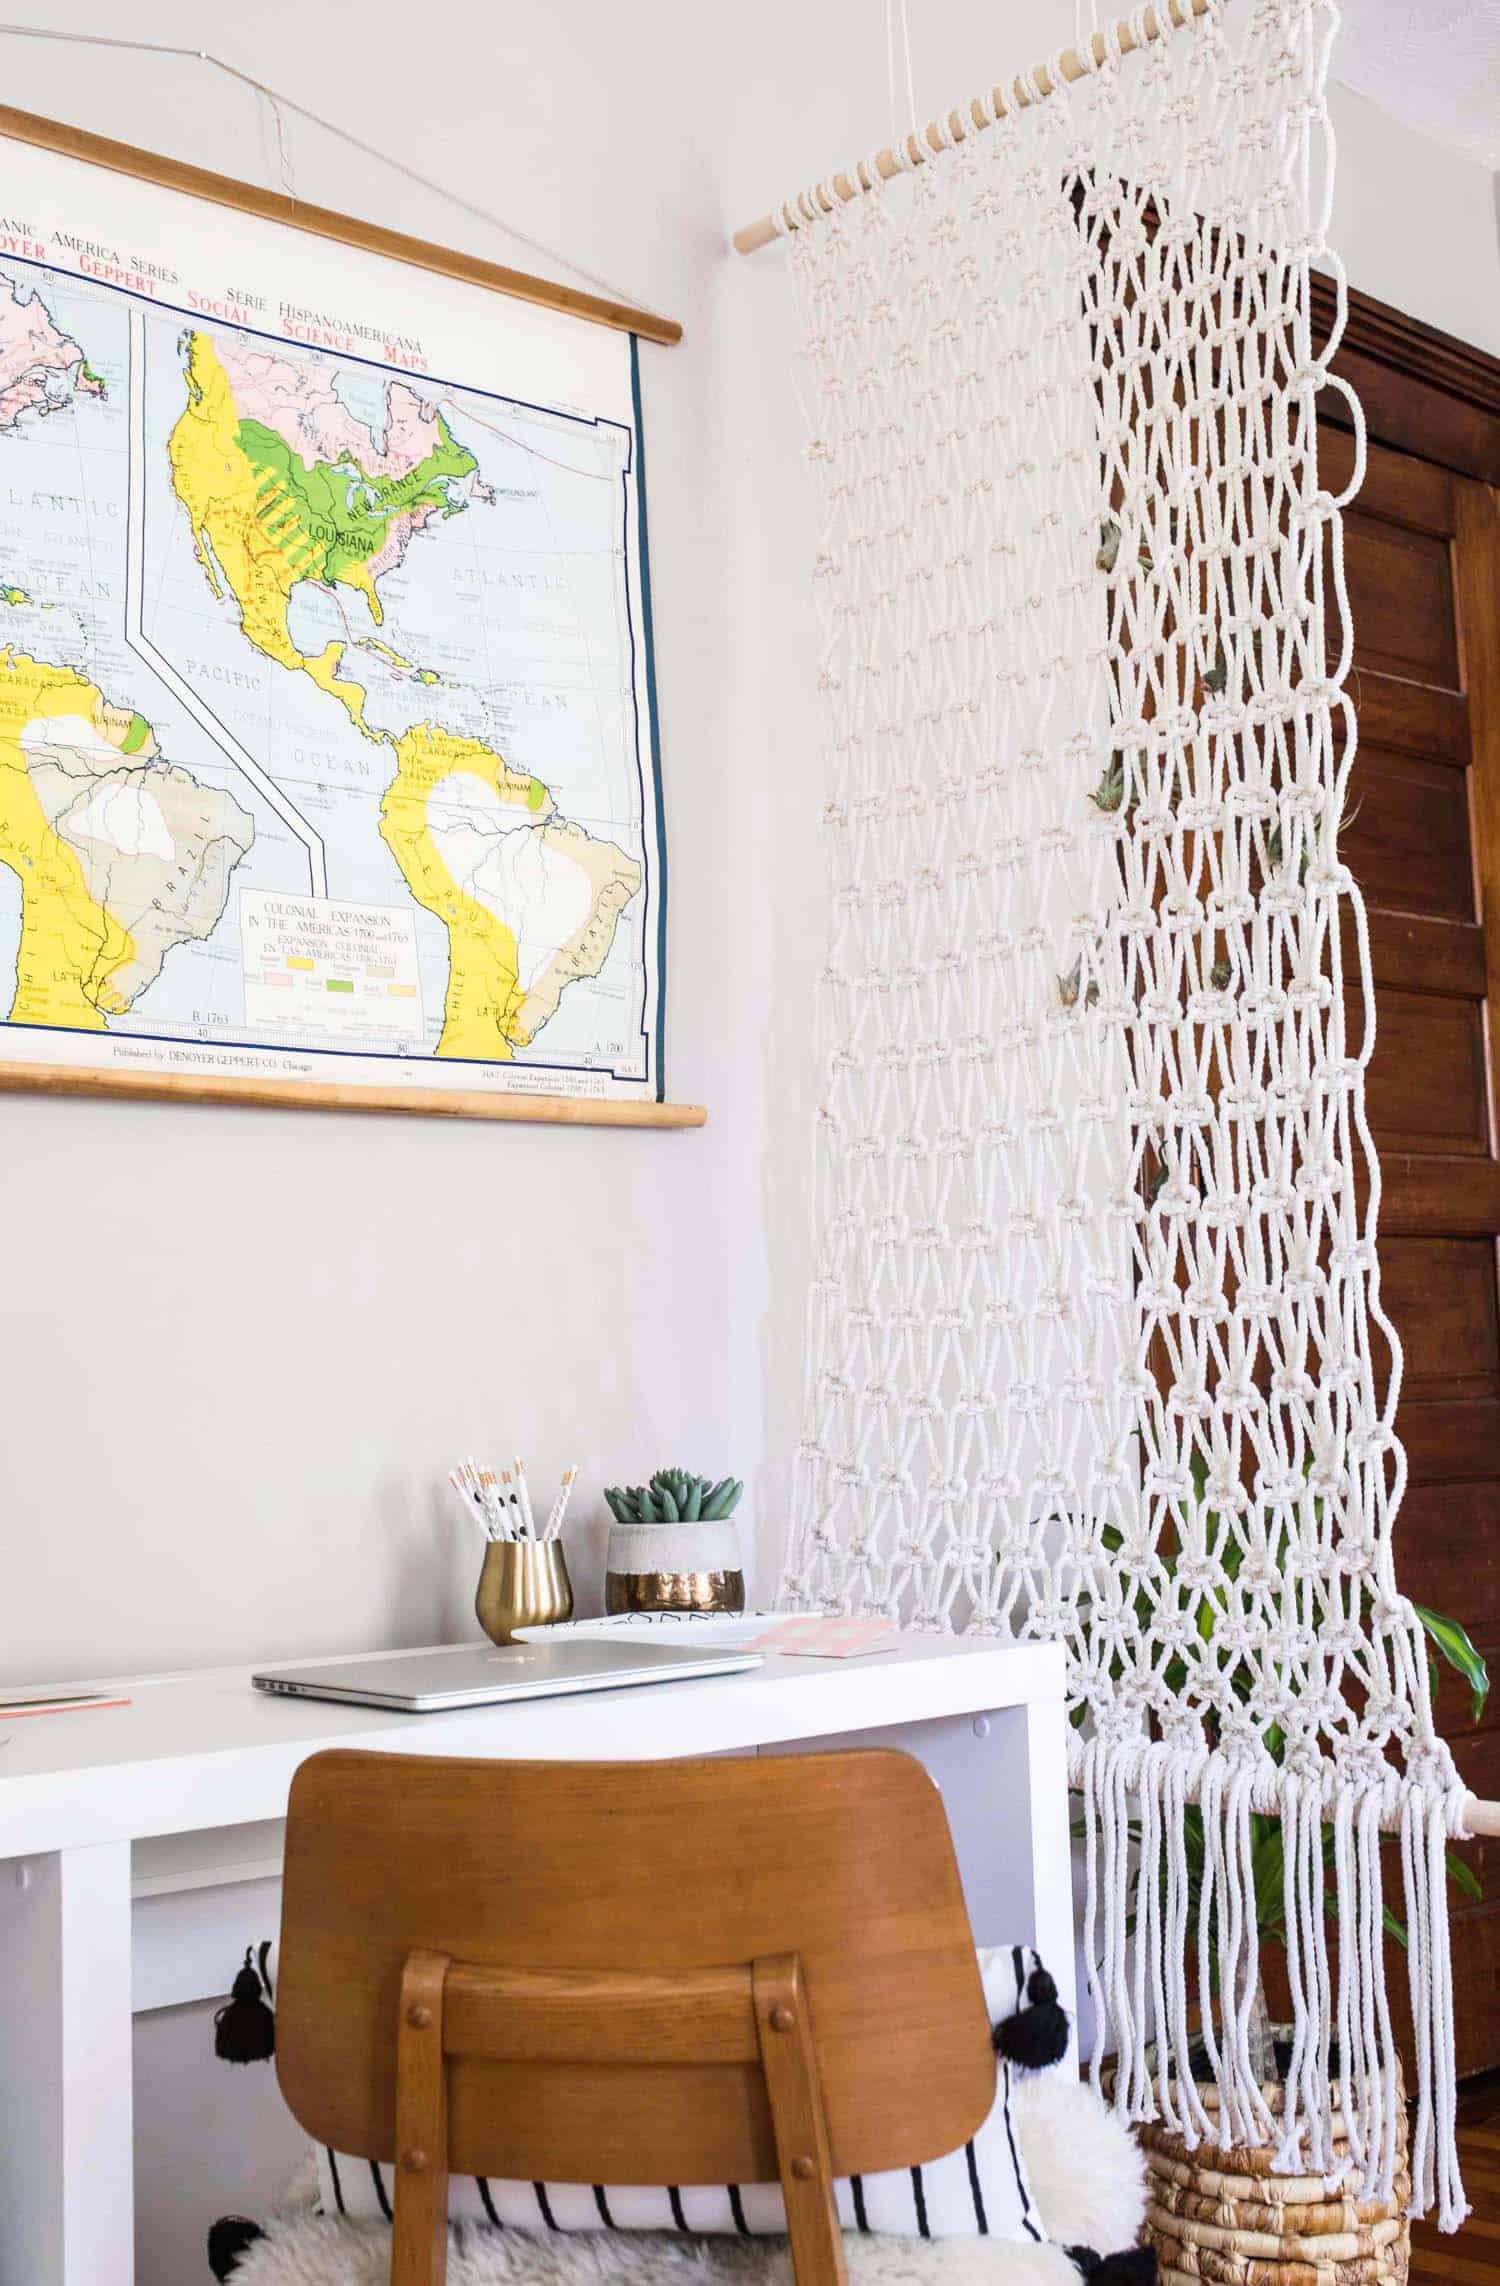
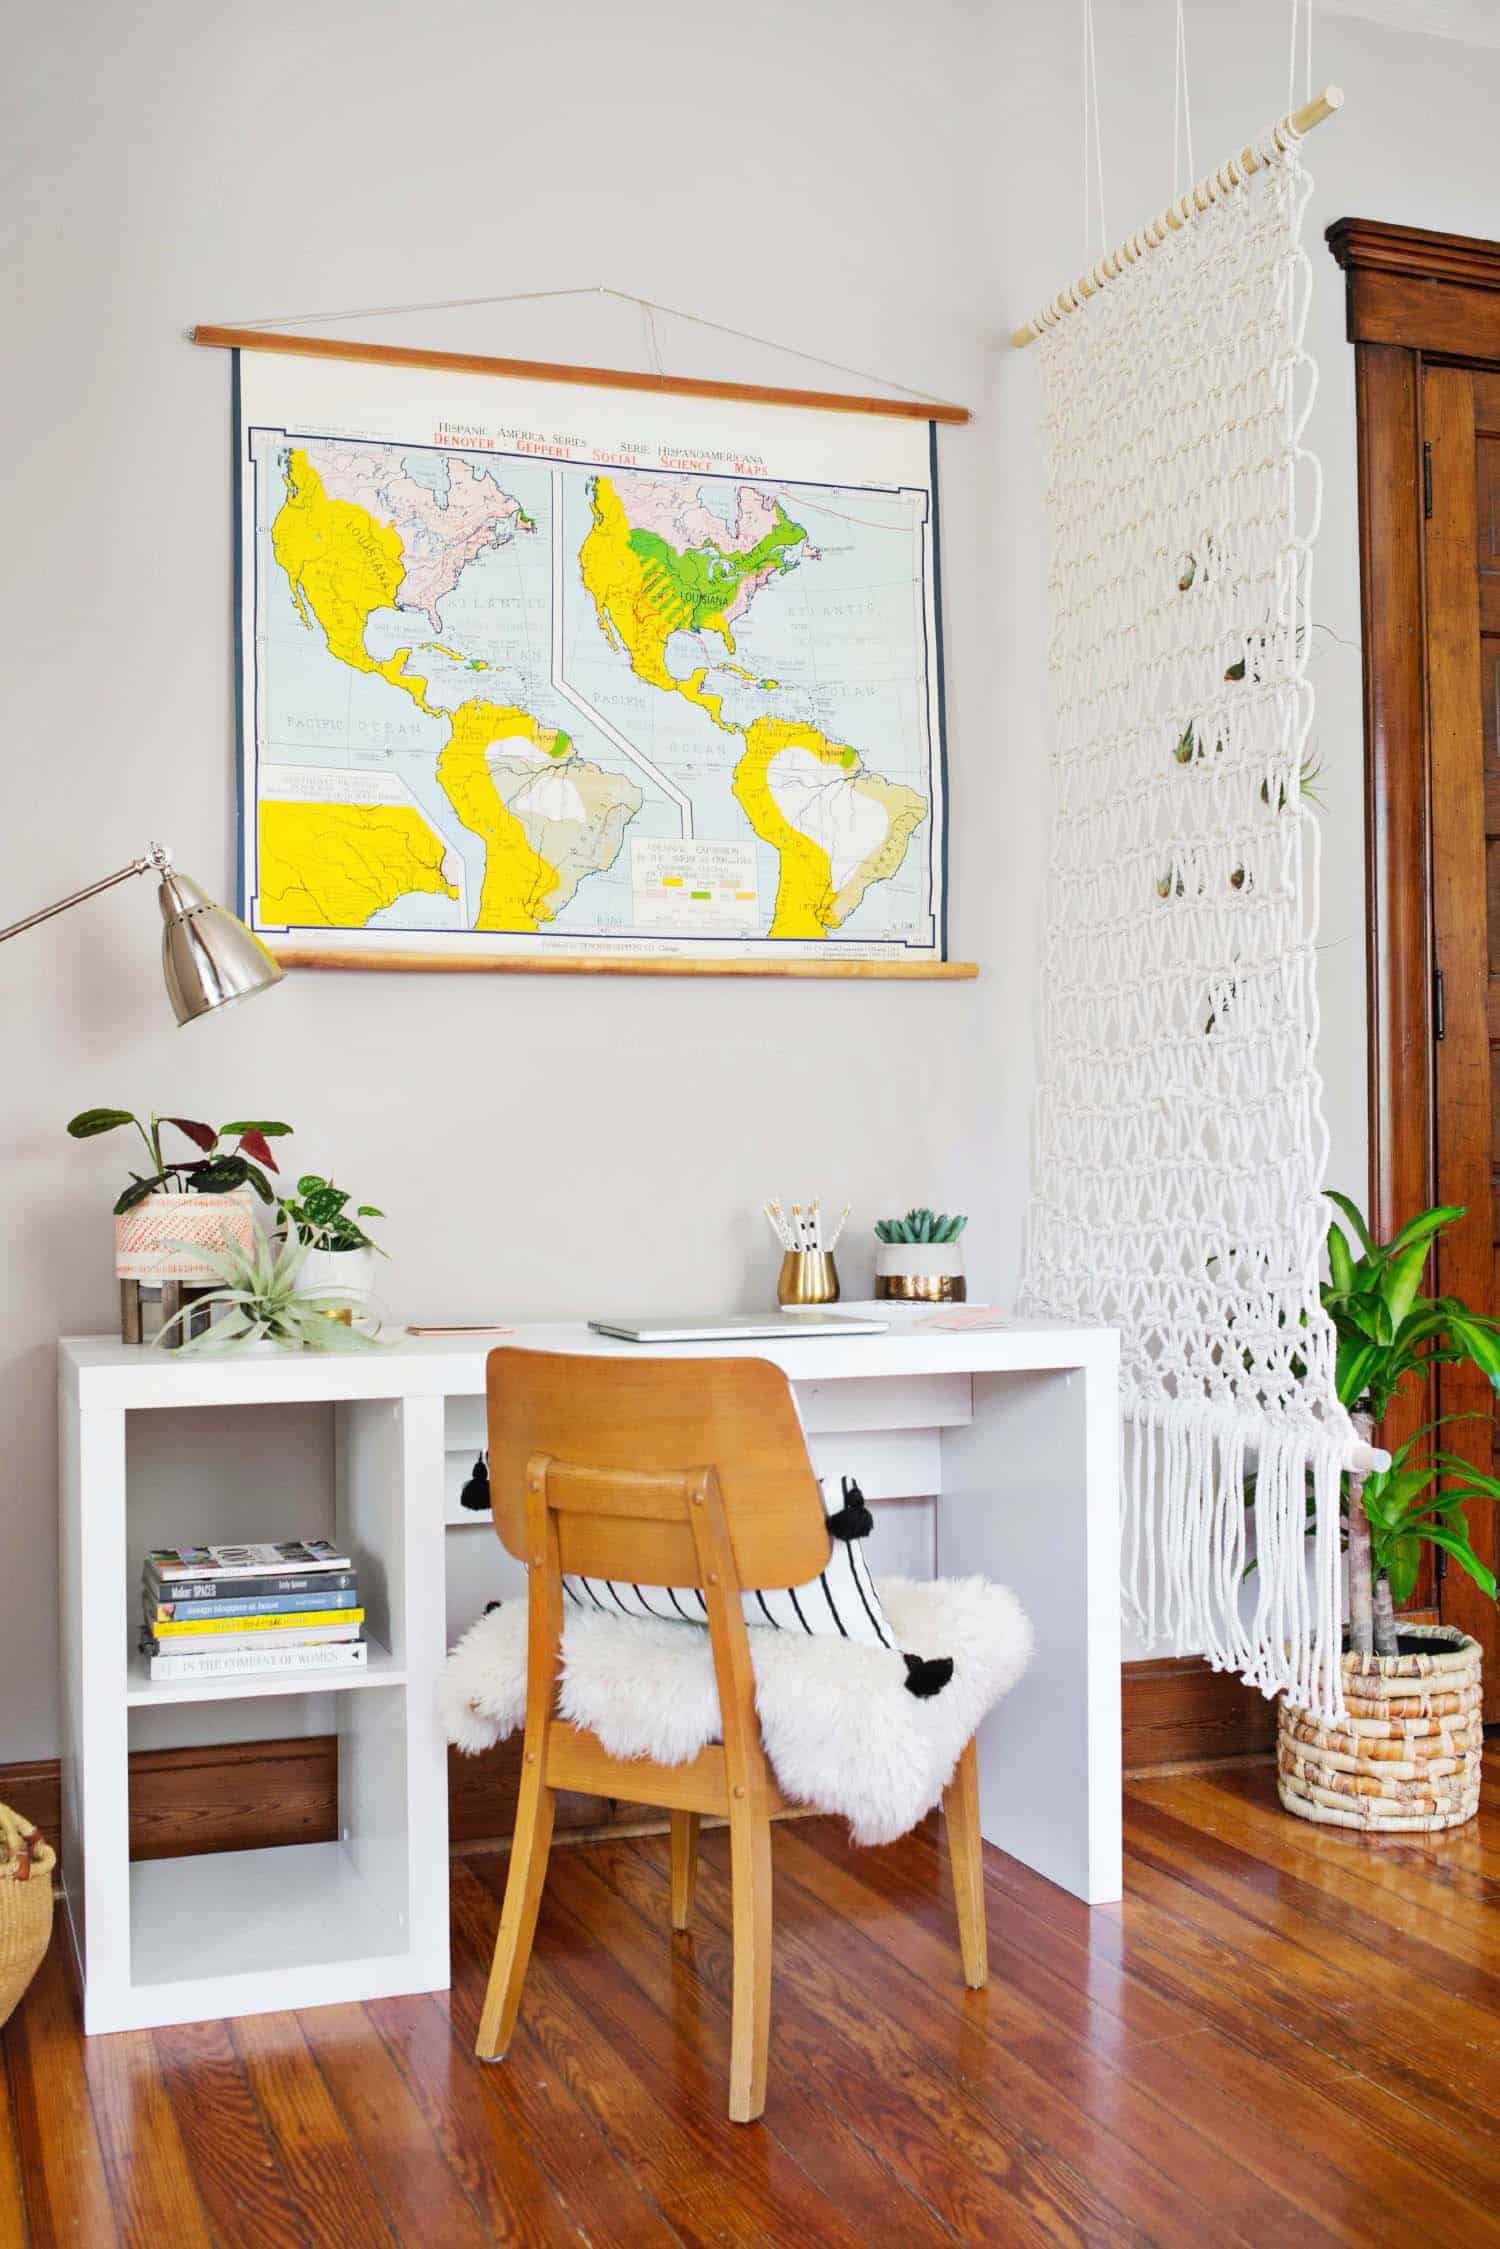 If you don’t need something practical to help divide a room, this would be equally as stunning against a painted wall for plenty of contrast or even used as a simple party backdrop with a floral swag.
Either way, this is a great project for anyone wanting to go big with a simple design and introduce a little hygge just in time for fall.
Wanting to learn macrame for the first time? My friend, Elsie Goodwin, over at Reform Fibers teaches simple techniques through her Instagram feed and sells her unique patterns in her shop. –Rache
]]>