From snowman to Santa, shades of red and reindeers, silver and gold, pretty plaids, festive French tips, and lots of glitter in between, we’ve got tons of ideas to satisfy all manicure tastes. So give yourself the gift of a cute Christmas manicure this holiday season!
Looking for more nail design ideas? Check out:
- 55+ Winter Nail Designs
- Beginner’s Guide to Gel Polish
- Get The Perfect Manicure at Home
- Nail Design Ideas (125+ ideas!)
- 30+ Chrome Nail Designs
- 100+ Summer Nail Designs
- 50+ Spring Nail Designs
- 45+ Easter Nail Ideas
- 45+ Halloween Nails
- Easy Galaxy Nails Tutorial (with Video!)

At home Christmas nails vs. salon nails:
While you can do so many manicure looks at home now with gel manicure kits, it can be a little intimidating to some who are not as steady with their hands or just generally prefer the pampered experience at their local nail salon.
While gel manicures will generally last longer than traditional polish (usually 2-3 weeks for a gel manicure), there are traditional polish brands that boast several weeks of wear from their products and you don’t have the longer gel removal process at home if you choose to take off your own polish.
Some of the trickier techniques like chrome or magnetic polish also might be a little easier in the hands of a professional, but if you have a gel nail kit at home, they are looks that are fun to try and master. You can also stamp your nails so you can get delicate items like snowflakes perfect every time!
Of course, doing a press-on nail is the easiest way to get your perfect spring style at home by yourself, so there’s no shame in finding your favorite look and grabbing your nail glue.

Evergreen Accents
This deep forest green manicure has all the classic looks of French tip nails with a festive twist in a bow accent nail.
Try a French tip stamper to make your manicure easier to do at home!

Candy Cane Lane
This festive design features all over candy canes to keep your nails looking sweet this Christmas. This is also a cute design for short nails!
Just take a dotting tool and alternate dots of red and white in a “J” shape to create the design.

Oh Christmas Tree
These abstract Christmas trees are a fun way to add some holiday cheer to your manicure.

Peppermint Patty
These peppermint red and white nails are Instagram ready and just right to be the star of any holiday party.

Mistletoe Lane
Wear this sweet mistletoe manicure design and you just might get your crush to kiss you this holiday season!
Dab some glitter polish on the end of each nail with a makeup sponge and use a dotting tool for the berries and small brush for the leaves.

Gingerbread Man
How about a set of Christmas nails featuring a gingerbread man that looks good enough to eat?
You can ask your nail artist to paint your cute cookie or use a nail sticker to easily create your own look.

Golden Touch
We love when Christmas nail art ideas bring in some sparkle, so this golden look will help you shine.

Christmas Wreath
These green pearl nails feature a festive Christmas wreath that would make any front door proud.

Pearlized Cranberry
Pearl nails are super trendy and you can mix and match French tips and full color nails in a deep red shade.
You can create your own pearlized look at home by adding a coat of pearl polish, and before setting, dotting the nail with drops of more polish before swirling the dots together with a dotting tool.

Christmas Checkers
This trendy manicure brings in all the fun of the checkered print in a classic festive green shade.
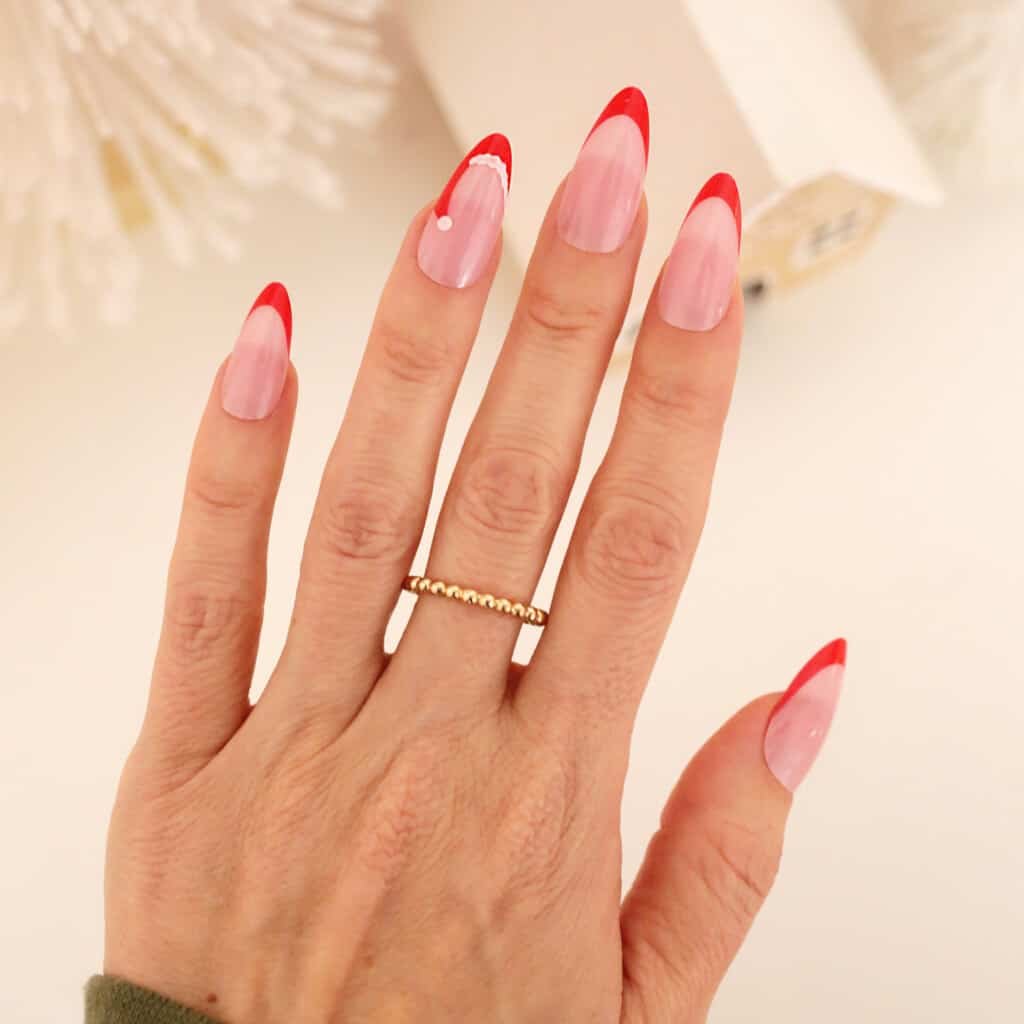
Santa Haute
This adorable Santa hat idea is one of our favorites and looks really pretty with an almond shaped nail.

Snowy Day
These pearlized white nails look like ice crystals on a snowy morning.
You can create your own pearlized look at home by adding a coat of pearl polish, and before setting, dotting the nail with drops of more polish before swirling the dots together with a dotting tool.

Winter Pearls
These half moon pearl accent nails remind us of snowballs and would look pretty with just about any outfit.
Just create a half moon shape with white over a nude shade and then glue nail pearls across the line with rhinestone glue.

Glitter Lined
For a holiday twist on the standard French tip mani, try this doubled lined glitter option to add a little ooh la la.

Candy Cane Lane
These nails are holiday perfection with red French tips and candy cane accent nails.

Classic Christmas Plaid
What’s more classic than a red and green plaid manicure for the holiday season? You can also do just a few accent nails with this look for a toned down version.
You can also DIY this look with plaid nail foils and nail foil glue to get the perfect plaid without having to paint each line individually.

Peppermint Tips
For a twist on a French manicure, this merry manicure adds a peppermint swirl design to your nails’ tips.

Reindeer Love
This sweet little reindeer is ready to join Santa’s sleigh! Try just one as an accent nail or add to every nail for a whole team.
You can also add a reindeer nail sticker to the perfect at-home manicure for a festive DIY look.

Green Waves
This wavy green pattern is modern but keeps you in the Christmas color palette.

Santa Baby
This sweet Santa face will add some jolly to your December days.

Holiday Bows
Add some girly flair with festive vibes to your classic French manicure with this red polish bow design.
To create bows at home easily, try a bow sticker or charm to get the same look.

Golden Tips
Go high style with this wavy gold tip design that are press-ons, so it makes DIY-ing your own nails a snap.

Mad For Plaid
This red and cranberry plaid is what holiday dreams are made of! Add a few snowflake accents and your look is holiday party ready.
You can also DIY this look with plaid nail foils and nail foil glue to get the perfect plaid without having to paint each line individually.

All That Glitters
These glitter ombre nails will bring just the right amount of sparkle to your winter season.
Dab some holographic glitter polish on the end of each nail with a makeup sponge and fade it out 1/3 from the top of the nail.

Here Comes Santa Claus
Find yourself saying yes to Santa this holiday season with these adorable Santa nails!

Ornament Nails
How cute are these tiny 3D ornaments that accent this design?
You can take this idea to your nail tech, or try your hand at mini tree painting with a dome of clear nail art glue for the 3D effect, OR, just use a Christmas ornament nail sticker for an easy DIY dupe.

Wine and Dine
Usher in the festive season with this wine-colored cat eye, which is perfect to add a bit of drama to your Christmas manicure.

Snow Place Like Home
These large snowflakes make a statement on each nail, and on a nude background they are subtle yet sweet.
If snowflakes are too tricky for you to freehand paint yourself, try using a snowflake stamp or snowflake nail stickers for a similar look.

Ho Ho Ho
Feel merry and bright with this Pinterest-pleasing Santa and candy cane design that will match your favorite pair of Christmas pjs.

Beary Christmas
This cutie Christmas bear manicure is ready for winter with just a few sweet nail stickers.

Half Moon Merlot
This half moon design done in a deep merlot color is the perfect red to carry you through the winter season.

Snow Drifts
These white abstract lines remind us of curving snow drifts in winter (and they would be really pretty in white glitter too!).

Frosty Accents
This winter scene is downright storybook on a snowy, starry night and cute through Christmas and beyond.
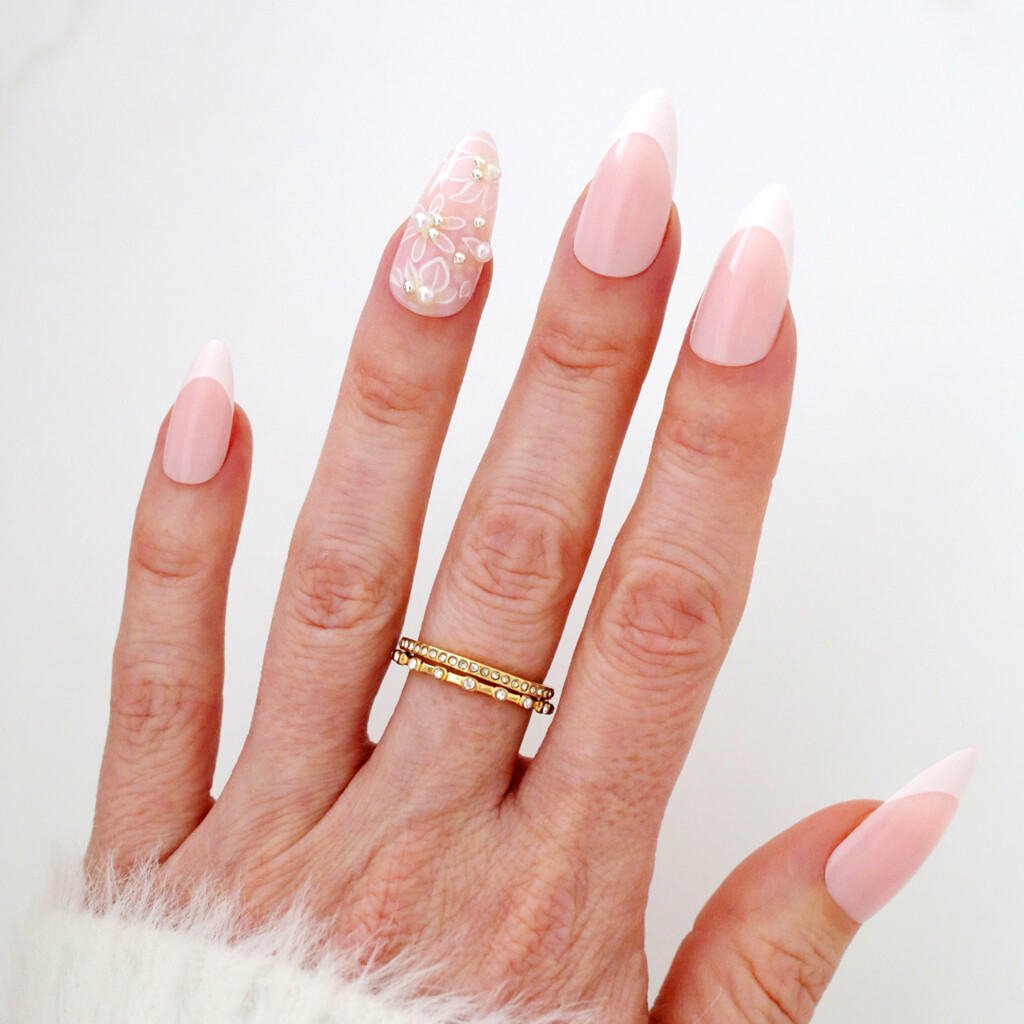
Lace and Pearls
Add the look of lace and pearls to your winter manicure for a fun yet sophisticated look.

Fir Forest
Add a snowy Christmas wonderland to your nails with this winter design.
For an at-home version, you can paint your nails a neutral color with a perfect at-home manicure, add some snow banks at the base of each nail, and then use snowy tree nail stickers to complete the look.

Snow Way
You don’t have to give up pink nails in winter! Keep your favorite shade and add pretty snowflake designs over the top.
If snowflakes are too tricky for you to freehand paint yourself, try using a snowflake stamp or snowflake nail stickers for a similar look.

Oh Christmas Tree
Bring the holiday spirit to your nails with this pretty Christmas tree and sweater nail accent.

White Christmas
These shimmering white cat eye nails are perfect for the snowy winter season.

Snowy Sweater
These half sweater nails are a great way to add in a sweater pattern as an accent to a nude nail.

Chrome Snowflakes
This chrome periwinkle blue looks so pretty under some delicate white snowflakes.
If snowflakes are too tricky for you to freehand paint yourself, try using a snowflake stamp or snowflake nail stickers for a similar look.

Gold Reverse
Add some gold chrome to a reverse French tip design for a touch of shine.
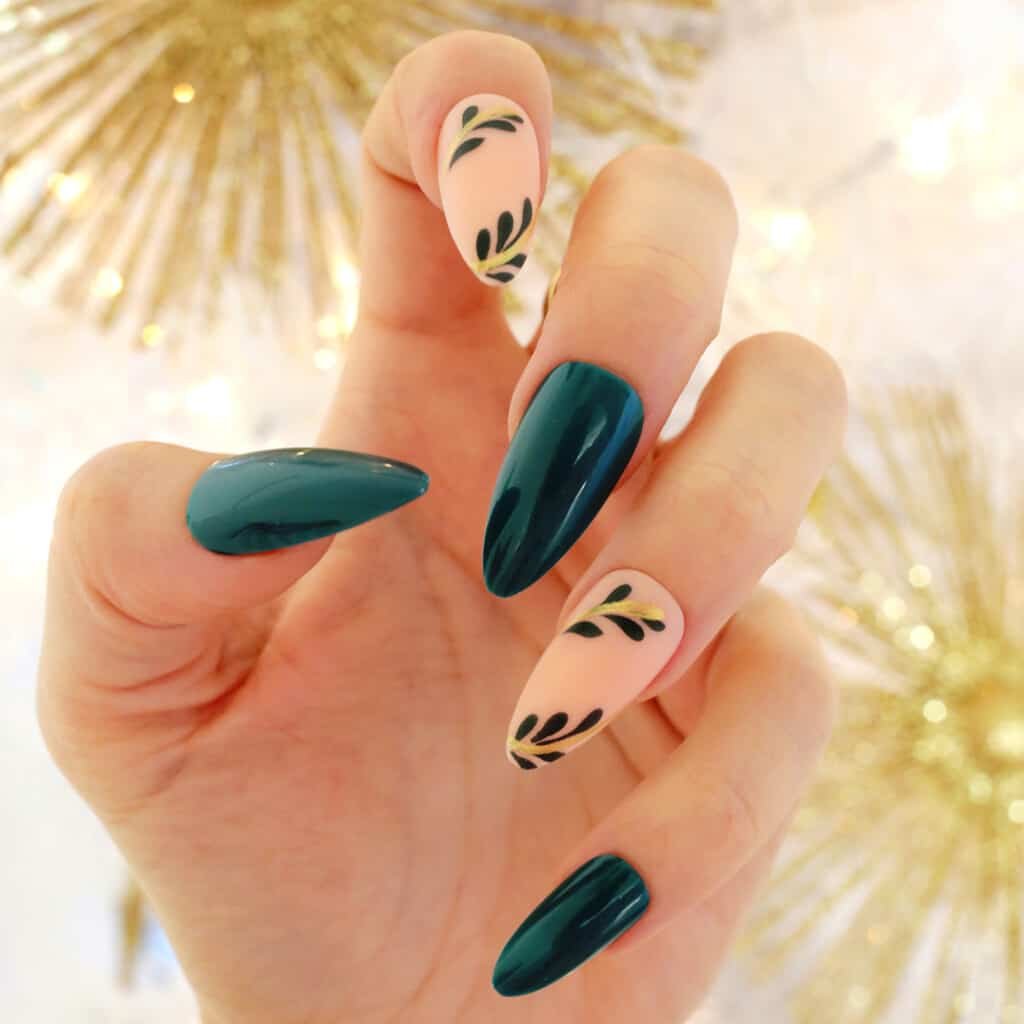
Greensleeves
These forest green nails with greenery decorations are delicate and festive without being too busy.

Silver Tips
Add some silver chrome to your French tip nails with this shiny manicure.

Hot Cocoa Vibes
As if you need an excuse to get hot chocolate, give these hot cocoa nails a try!
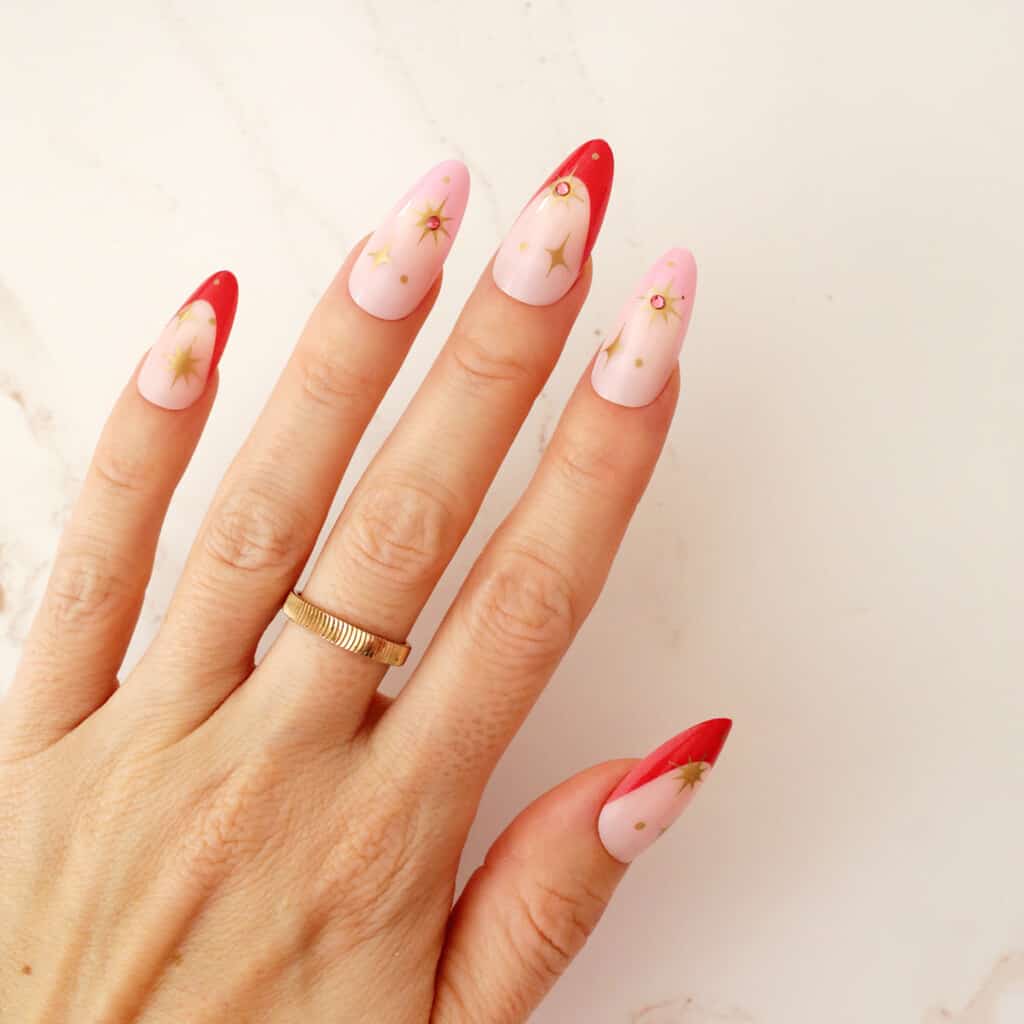
Pink and Red Tips
These fun tips with the gold stars and gems add color and pattern to your holiday mani.
Try a French tip stamper to make your manicure easier to do at home and add some gold star nail stickers to complete.
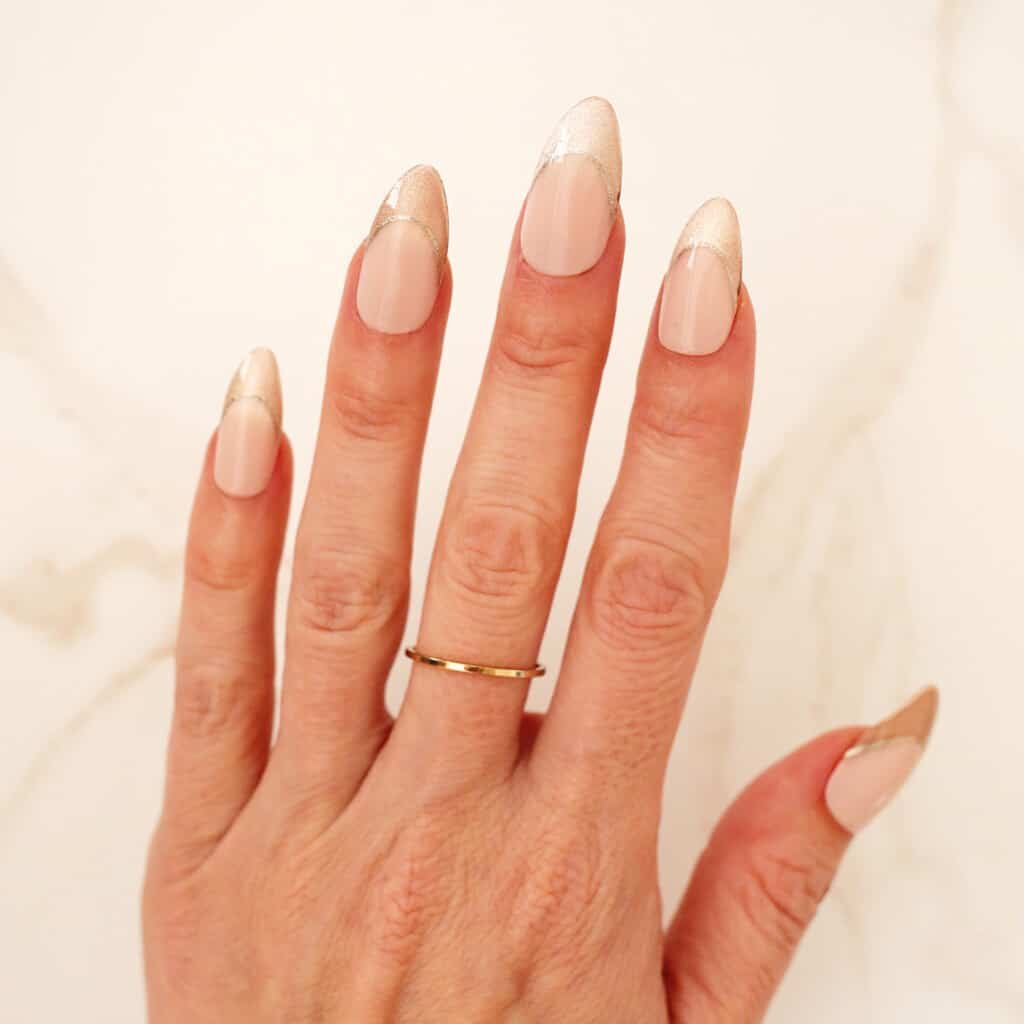
Rose Gold Shimmer
This design with double outlined glitter French tips is perfect for Christmas into New Year’s Eve.
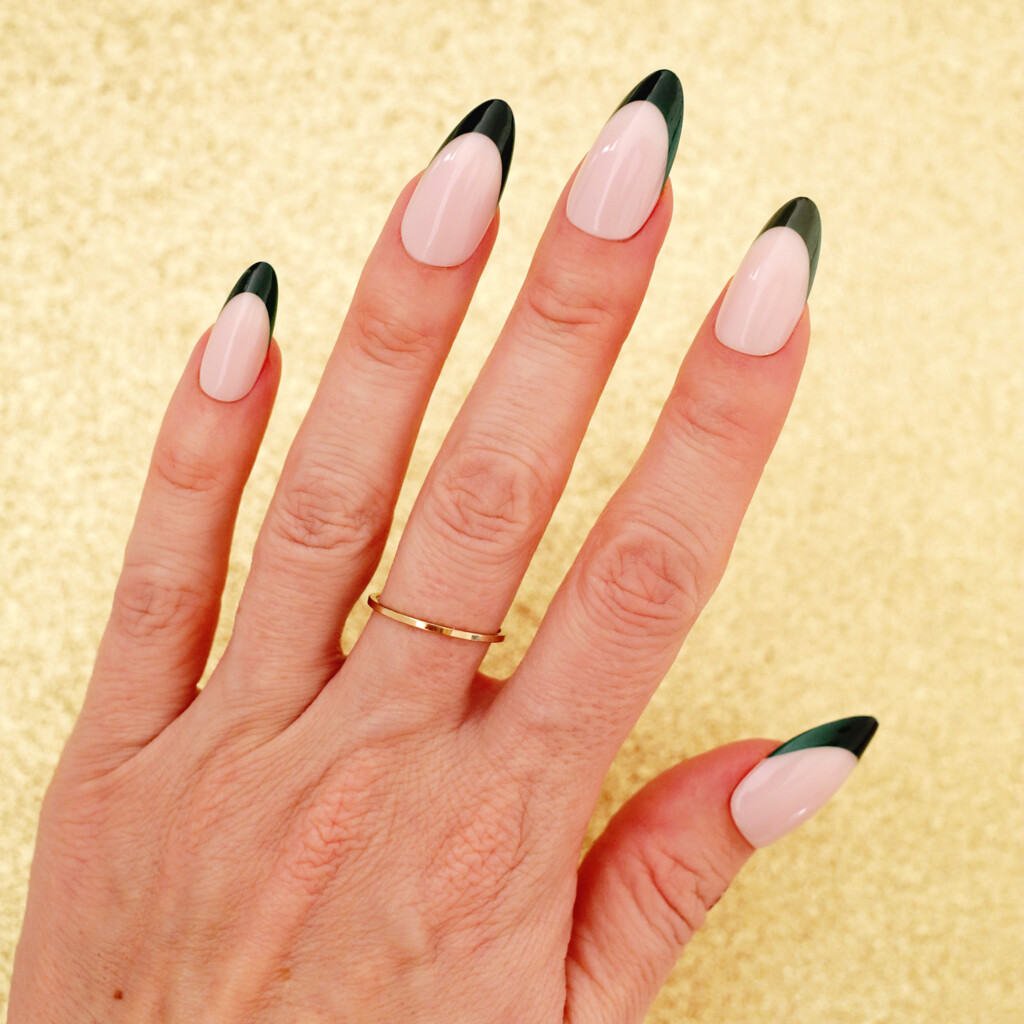
Forest Green French
Pick your favorite shade of green and do a French tip for a colorful take on a classic.
Try a French tip stamper to make this festive manicure easier to do at home.
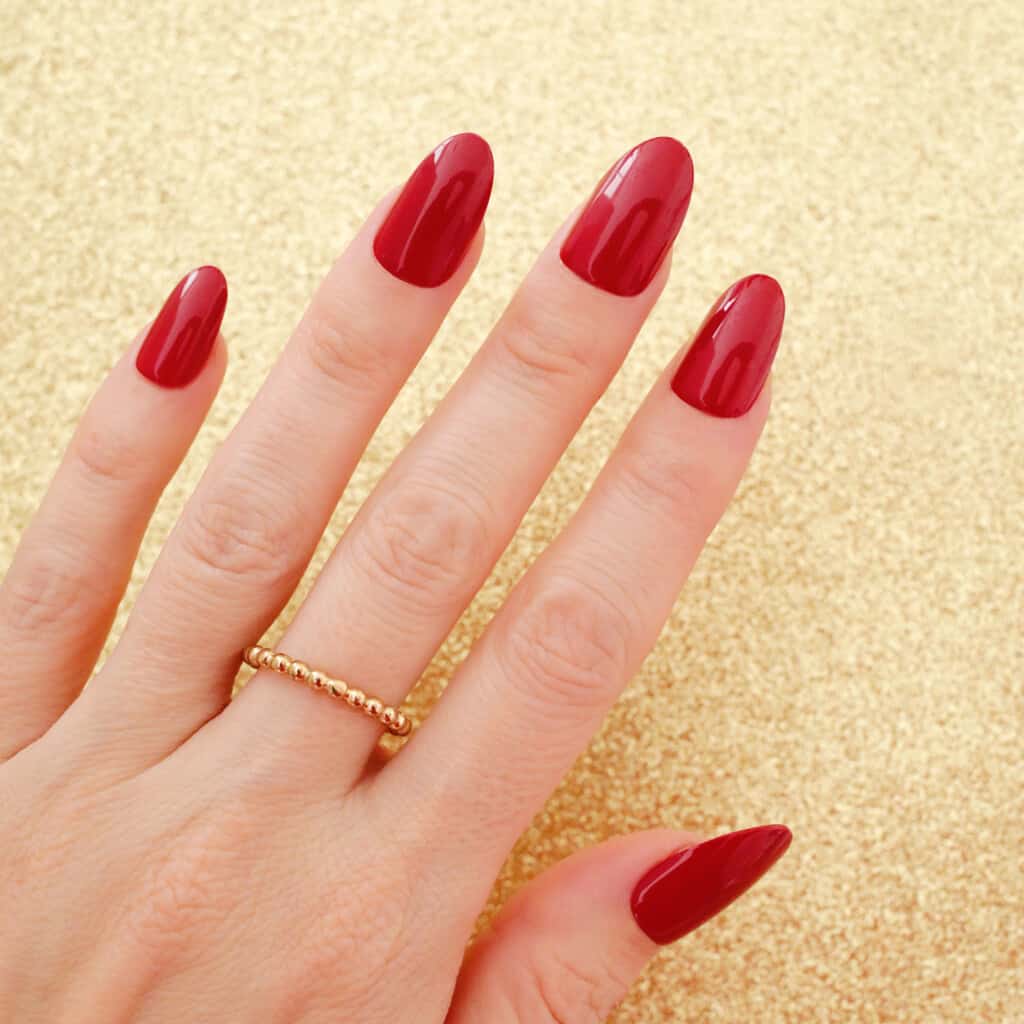
Cranberry Punch
For a monochromatic Christmas look, a classic red manicure with a glossy top coat is a classic for a reason.
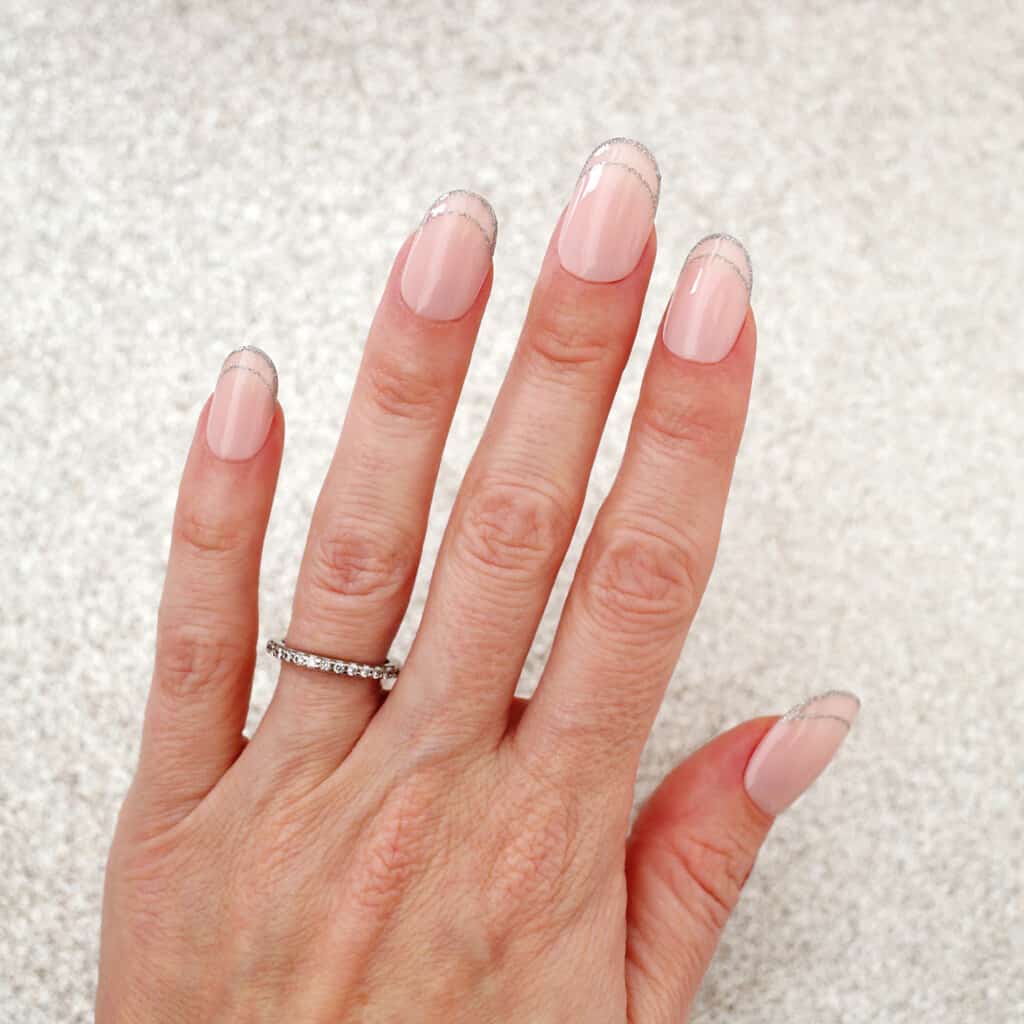
Silver Bells
These silver glitter French tip outlines are just the right touch of sparkle and will match any holiday outfit.
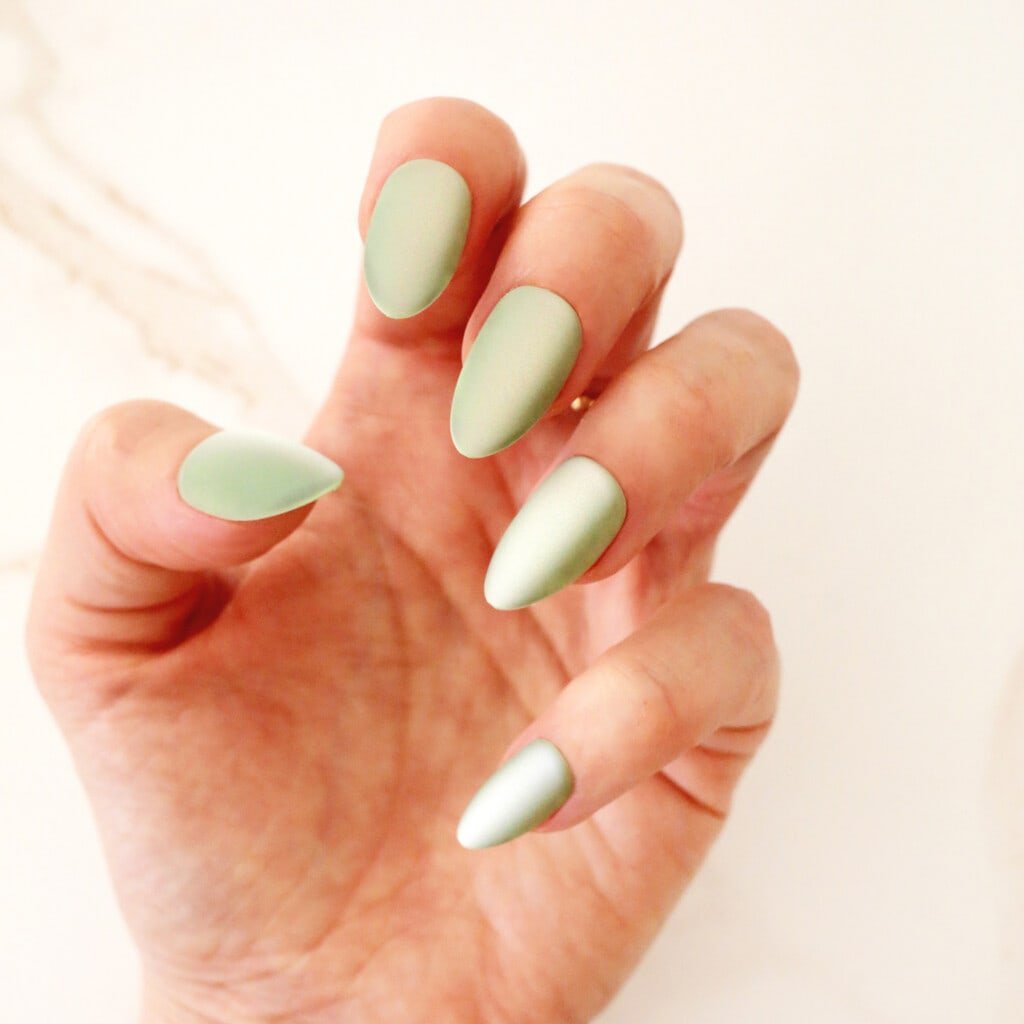
Green Velvet
This minty green cat eye mani gives the look of soft velvet and it’s so pretty!
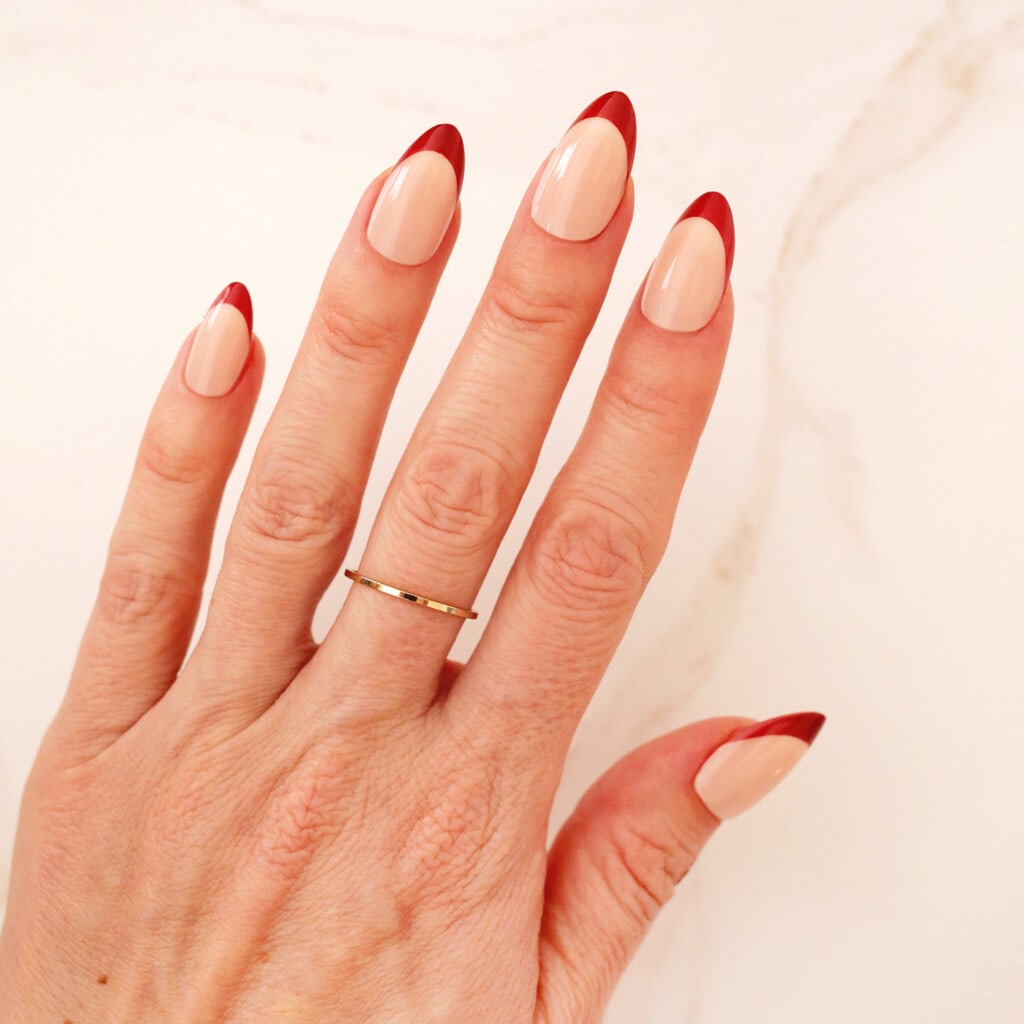
Burgundy-Kissed Tips
For a pop of holiday color, these berry tipped nails are perfect to keep things classy but festive.
Try a French tip stamper to make this crimson manicure easier to do at home!
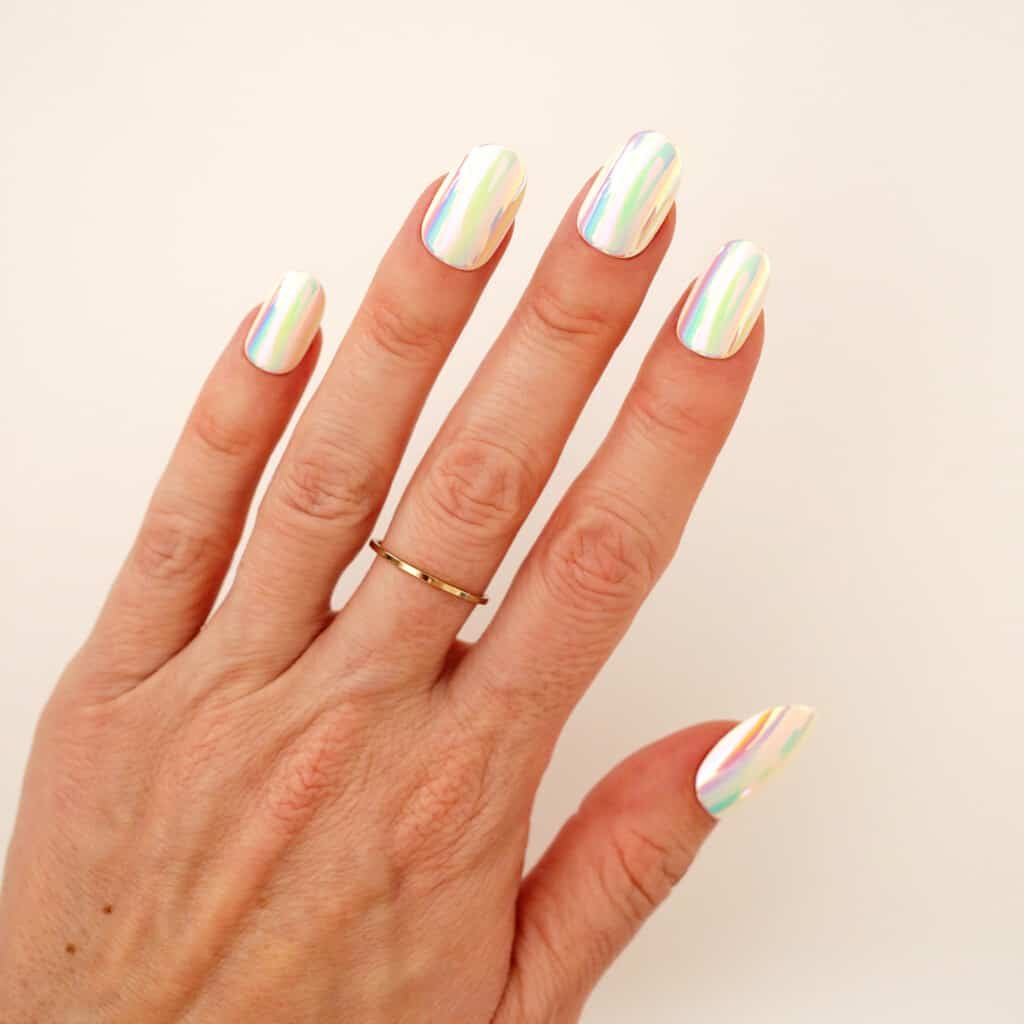
Icy White
These hologram nails remind us of pretty icicles and will still look on trend for New Year’s Eve.
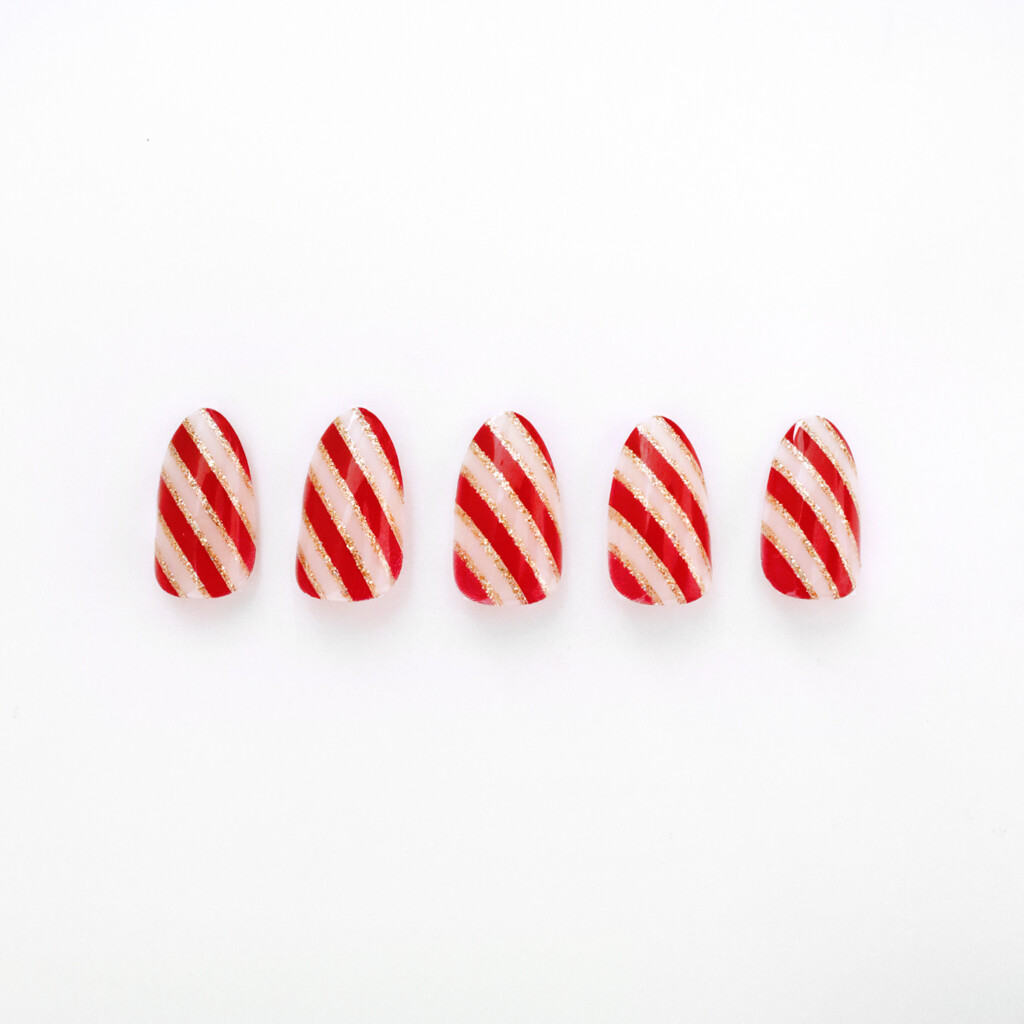
Candy Cane Stripes
Glitter outlined candy cane stripes is the ultimate look for the Christmas nail maximalist.
For a DIY look with no striping brush involved, try a nail polish strip to easily get a similar look.
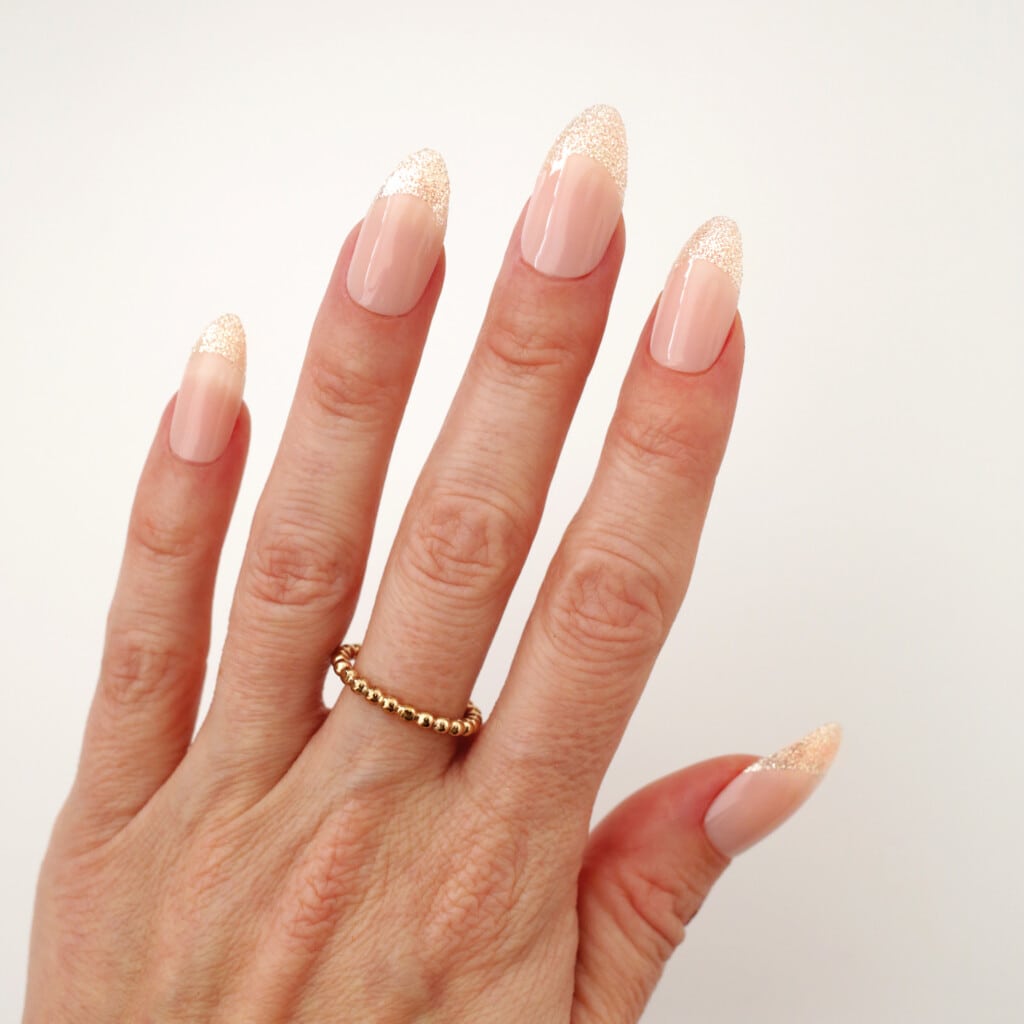
All That Glitters
These soft golden glitter tips are all you want for Christmas if Santa and candy cane nails aren’t your thing.
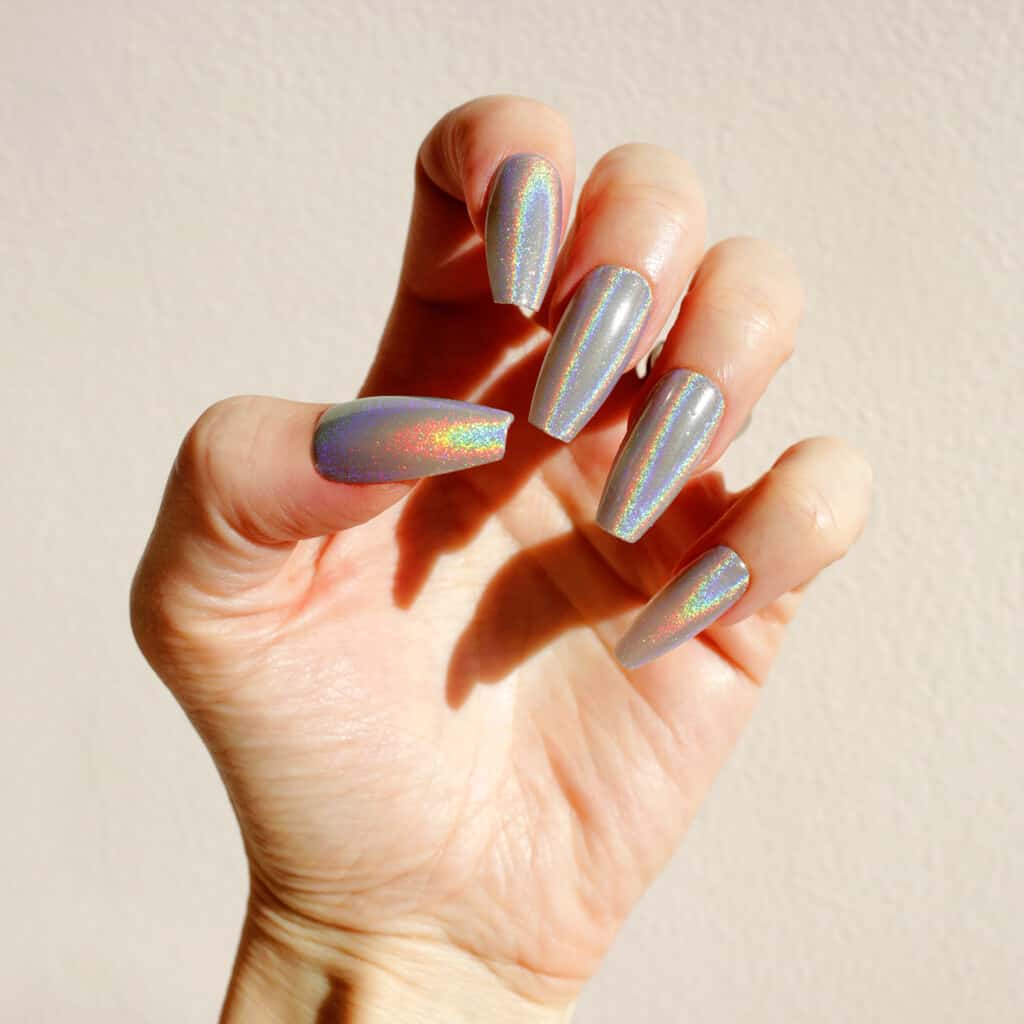
Hologram Holidays
Since the holidays are officially sponsored by all things glittery, these icy hologram nails will look great by the fire as well as by the disco ball for New Year’s Eve.
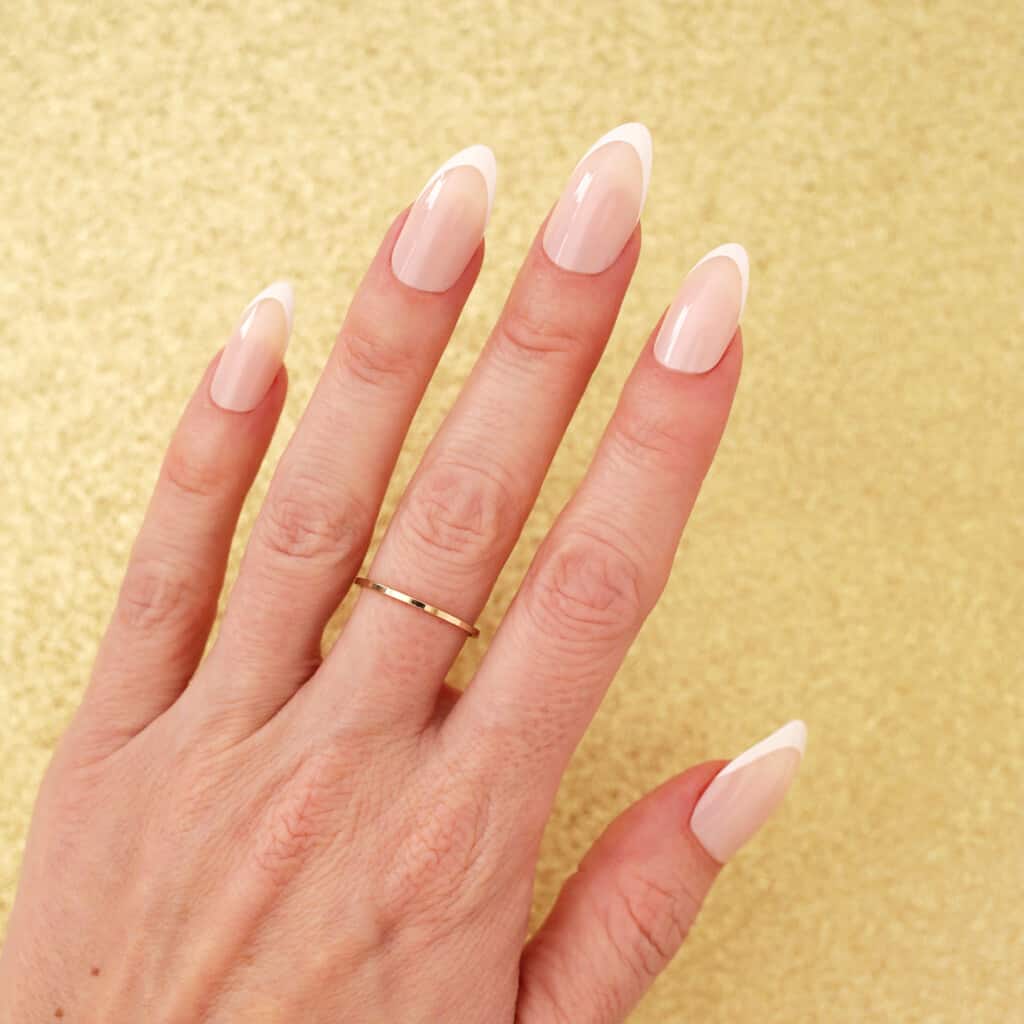
Holiday Classic
While it may not be sparkly or colorful, the classic French tip design is always a good choice if you want to do something elegant for the season.
Try a French tip stamper to make this classic manicure easier to do at home!
Looking for more nail ideas? Check out:
]]>I also had gone years with extensions and it can be a good idea to take off eyelash extensions for a while to give your natural eyelashes a break and allow for regrowth without extensions. This is also a great time to utilize an eyelash growth serum if you want. We’ll talk more about that later in this post.
Related: I got a lash lift and tint and here’s what happened. What happened when I tried Grande Lash MD. What happened when I tried Lashify Lashes.

Supplies
- Lash shampoo
- Glue remover – this brand also has a version for sensitive skin
- Spoolies – also called eyelash brushes or mascara wands
- Micro applicator brushes – or Q-tips can also work well
You will also need water and clean washcloths. Personally, I love using black washcloths like these for anything makeup related because all our other towels and hand towels are white (which I like, because you can bleach them). But makeup can really stain, so black washcloths for washing your face are great.

How to Remove Lash Extensions
Start by washing your eyelids well. You want to be gentle, don’t scrub at your lashes. But when you want to keep your lash extensions the goal is normally to wash your eyelids and around your eye area very carefully so the extensions don’t get wet. This is the opposite—you want to wash your eyelids and eye area well so that the lashes will begin to shed just from the water and lash shampoo.
Once you have washed well, use a spoolie to gently run any remaining water through the lash extensions, aiming to get the base wet. You will likely notice a good amount of eyelash shedding during this process. There is NO need to tug or pull at your lashes. Just comb them out with the spoolie. And pat your face dry if it’s still wet.
Next, use the applicator brushes (or a Q-tip) to apply the glue remover to the base of the extensions. Then use a spoolie to comb through them. Repeat this process as many times as needed to remove all the extensions.
If you feel any of the glue remover getting in your eyes, wash again with the lash shampoo.

What NOT to do
- Do not pull lash extensions off. This will likely pull out your natural lashes too. This is very tempting at the end when you only have a few stubborn extensions left but resist!
- Do not tug at your lashes. Only use the spoolie to remove extensions. They should basically comb off like hair sometimes does when you brush your hair.
- Do not scrub or rub hard at your lashes, even with a washcloth. Gentle is the key word here!
- Do not use eye irritating soaps or other products. The glue remover can be a little irritating, so try not to get it in your eyes and if you accidentally do, rinse it out. It’s not dangerous, it will just hurt.

Frequently Asked Questions
What dissolves eyelash glue?
Eyelash glue removers, usually those containing some type of solvent like acetone or isopropyl alcohol, will work best.
Can I use Vaseline to remove eyelash extensions?
Vaseline can help to soften and loosen lash extension glue but a product with solvent will work best.
Does baby oil remove eyelash extensions?
Baby oil, and other oils like coconut, can help to soften and loosen lash extension glue, but a product with solvent will work best.
Do eyelashes grow back?
Yes. Unless you have some kind of other condition, eyelashes, like other hairs on your body, do grow back within 6-8 weeks typically. This may depend on your genetic makeup, nutrition and a few other factors, but eyelashes typically grow back in most cases.

Caring for your Natural Lashes
- If you have had eyelash extensions for a long time, give your natural lashes some time to breathe and grow without other products like heavy mascaras. It’s hard when you’re used to the look of extensions, but just like giving your nails a break from acrylics, this can be very healthy for them.
- While you have natural lashes, this can be great time to use a growth serum. You can make your own natural rosemary hair growth spray and use a spoolie to apply it to lashes in the evening after you wash your face. Another option is commercial lash serums such as Grande Lash-MD, The Ordinary, Latisse, Babe Lash or RevitaLash.

While I love my lash extensions and plan to get them again, it’s great to know how to take off eyelash extensions at home for when you need to or want to take a break. Thanks for letting me share! If you’ve had success with removing extensions and have more tips you want to share, please leave us a comment below.
]]>Whether you like a more natural nail look with a classic design or you want something organic and abstract or flashy with chrome, gold foil, or glitter accents, we’ve got tons of ideas to keep your natural nail or acrylic mani feeling fresh (Barbie core pink mani anyone??).
Looking for more nail ideas? Check out:
- Get The Perfect Manicure at Home
- Beginner’s Guide to Gel Polish
- 55+ Winter Nail Designs
- 65+ Fall Nail Designs
- 100+ Summer Nail Designs
- 30+ Chrome Nail Designs
- 50+ Spring Nail Designs
- 45+ Easter Nail Ideas
- 45+ Halloween Nails
- 55+ Christmas Nail Designs
- Easy Galaxy Nails Tutorial (with Video!)
At home nails vs. salon nails:
While you can do so many manicure looks at home now with gel manicure kits, it can be a little intimidating to some who are not as steady with their hands or just generally prefer the pampered experience at their local nail salon.
While gel manicures will generally last longer than traditional polish (usually 2-3 weeks for a gel manicure), there are traditional polish brands that boast several weeks of wear from their products and you don’t have the longer gel removal process at home if you choose to take off your own polish.
Some of the trickier techniques like chrome or magnetic polish also might be a little easier in the hands of a professional, but if you have a gel nail kit at home, they are looks that are fun to try and master.
Of course, doing a press-on nail is the easiest way to get your perfect style at home by yourself (or you can find so many nail wraps to use on your natural nails), so there’s no shame in finding your favorite look and grabbing your nail glue.
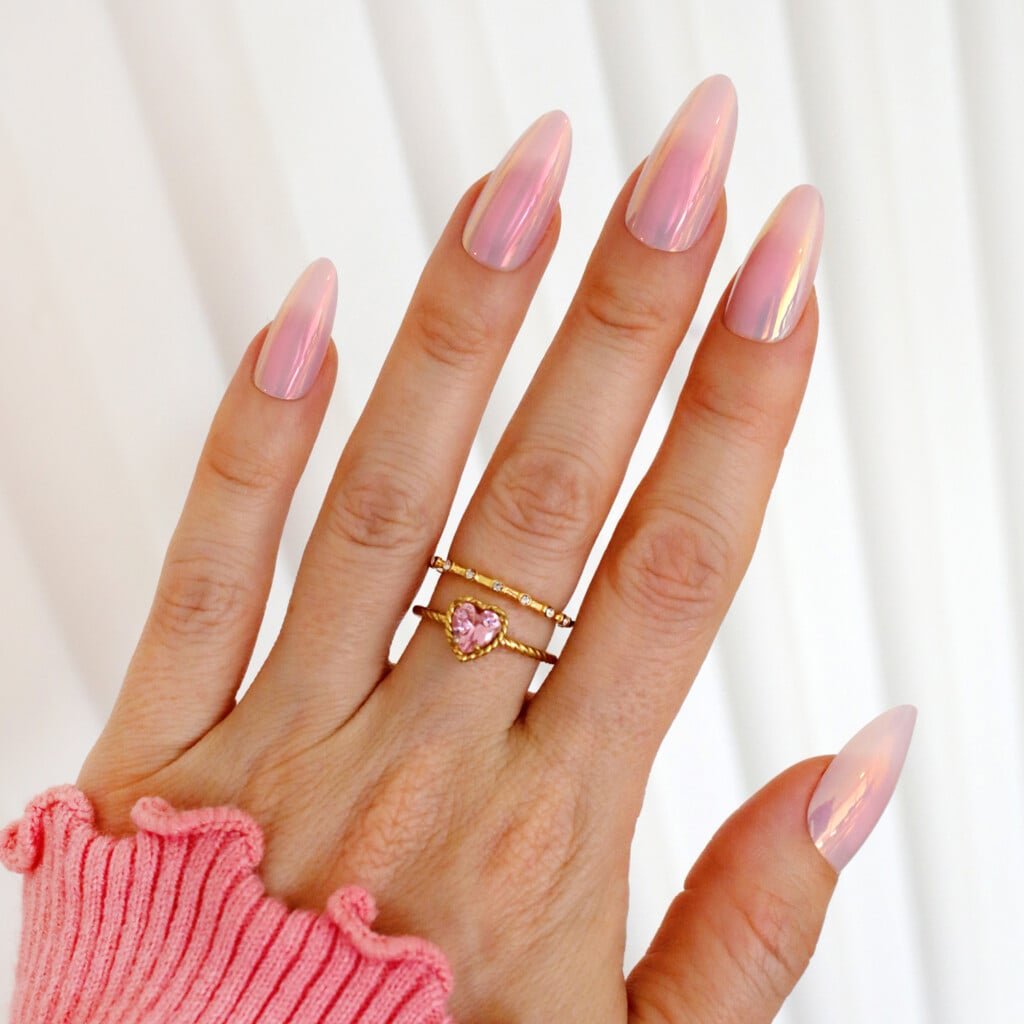
Bubblegum Donut Glaze
These sweet pink chrome nails are a pink-lovers dream!
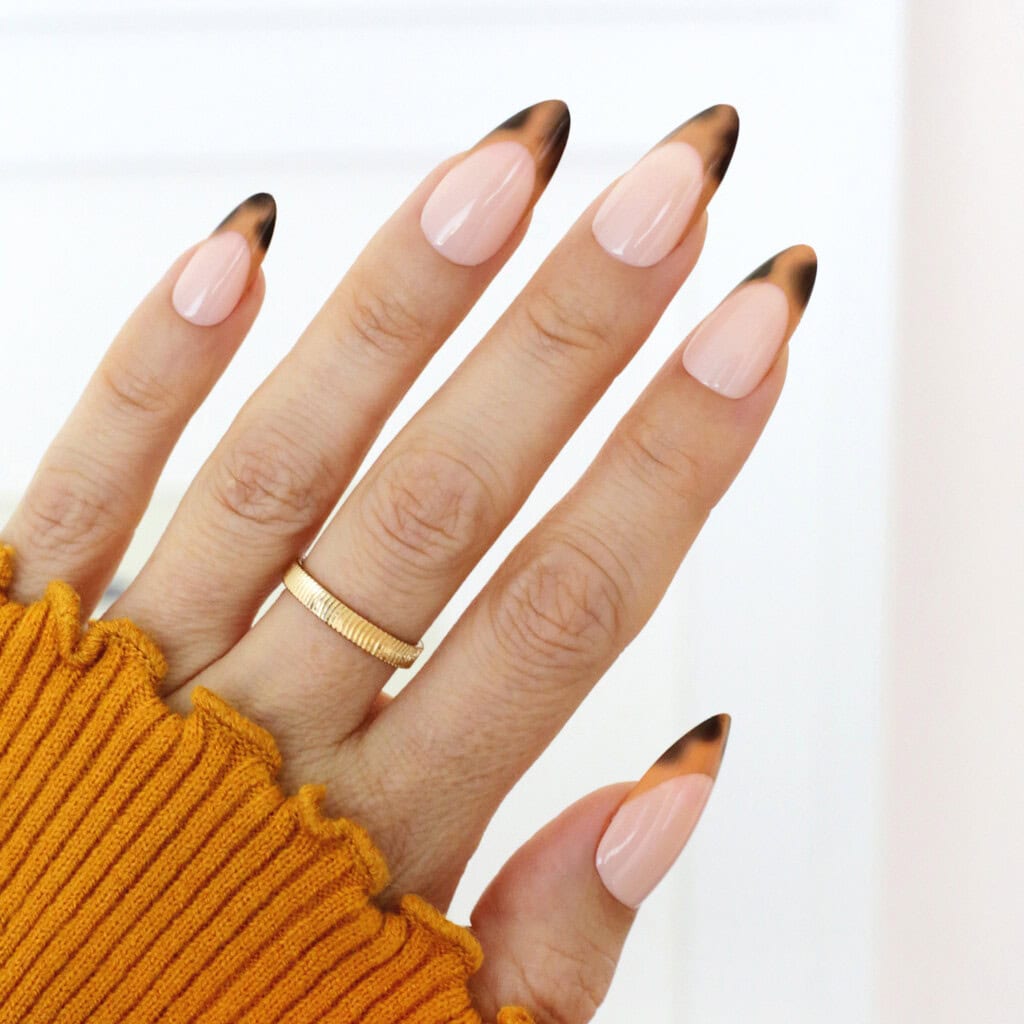
Touch of Leopard
If you want a little bit of animal print without overdoing it, these French tip leopard nails are perfect year round.
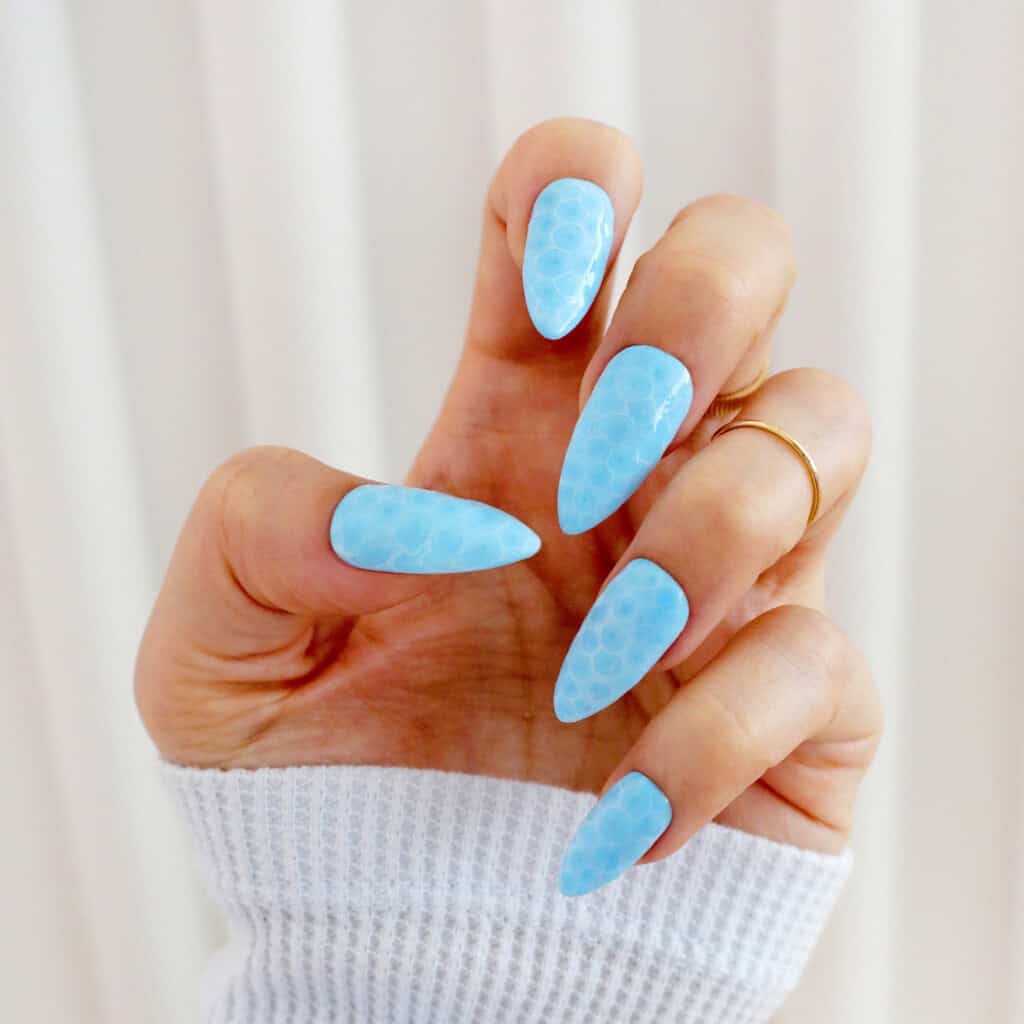
Pool Blue
These pool nails look refreshing enough to jump into on a hot summer day. Just add a translucent white over a blue shade and dot some clear topcoat dots overtop with a dotting tool to create this look.
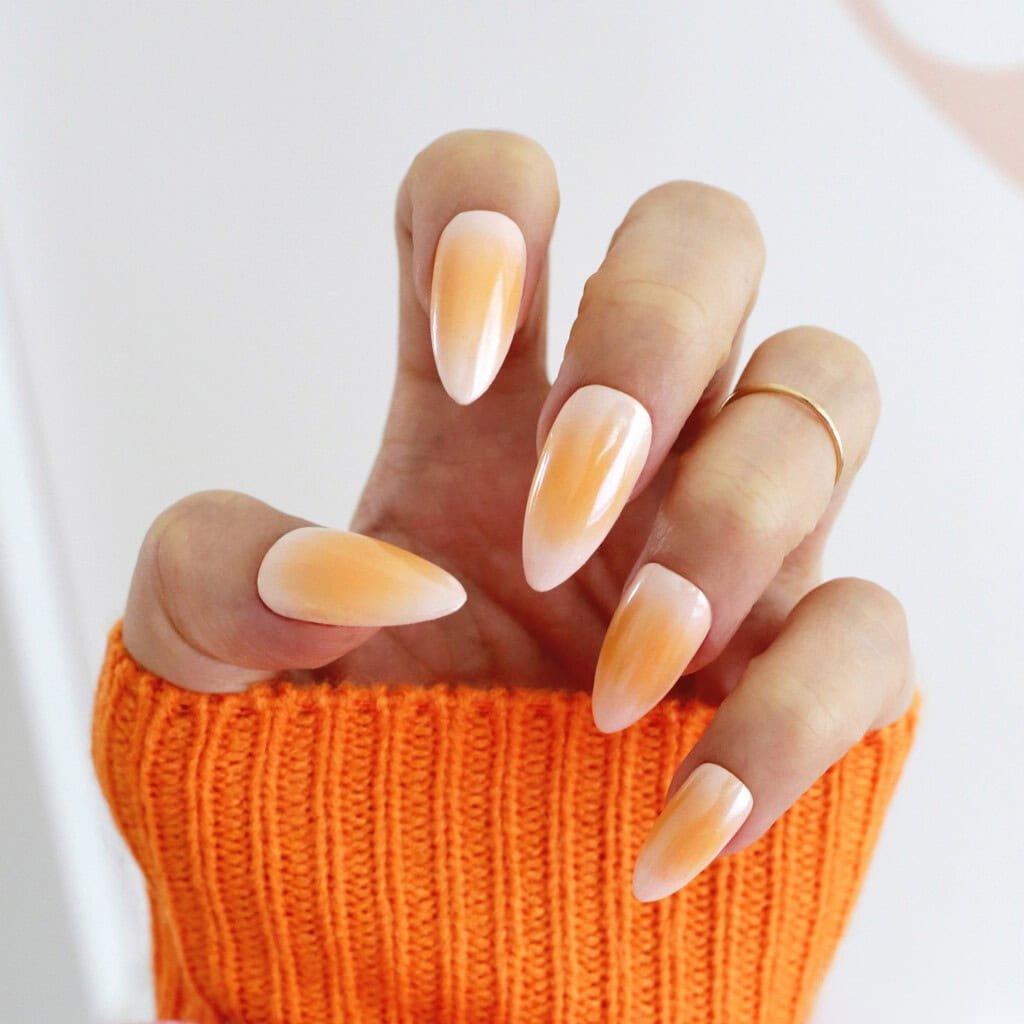
Pumpkin Glow
These pumpkin chrome nails are the perfect amount of trendy color.
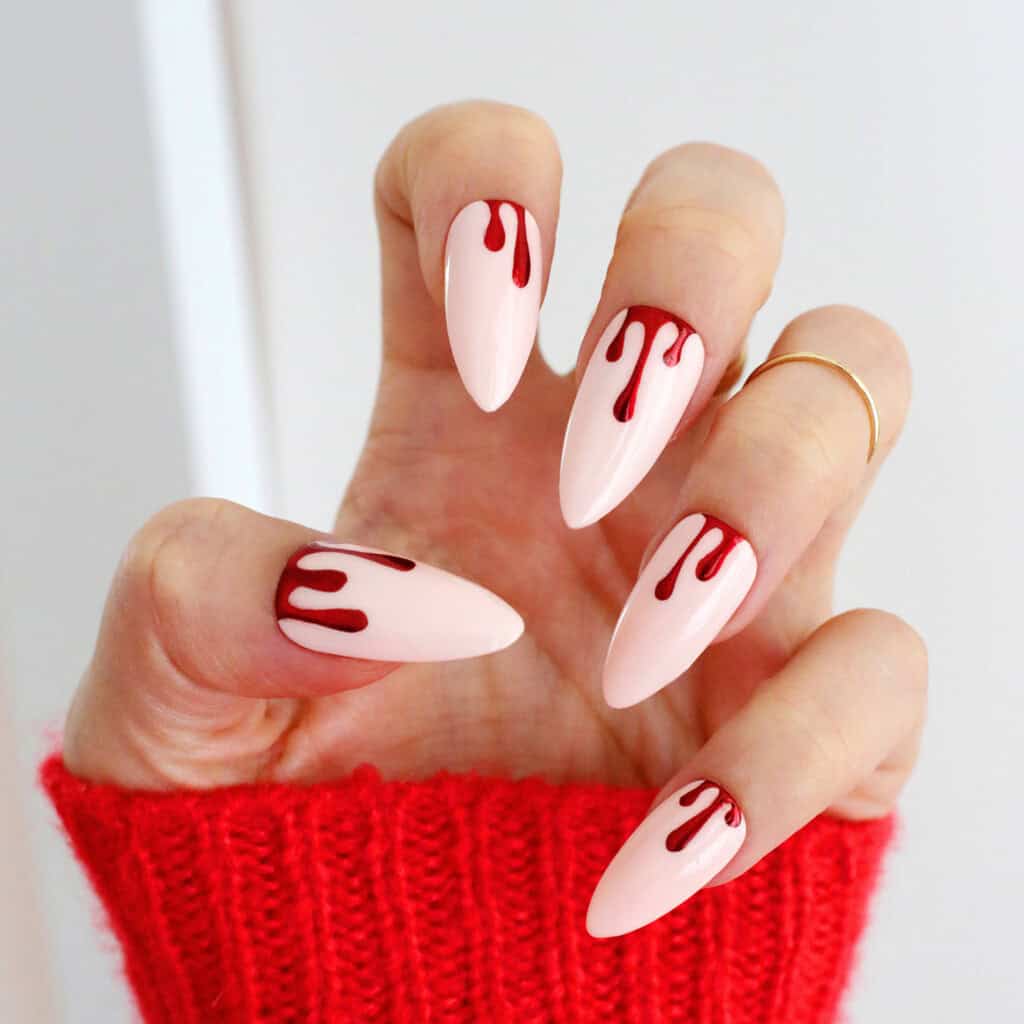
Chrome Blood
For some Halloween fun, add some blood drips to your nails (extra points for chrome red blood).
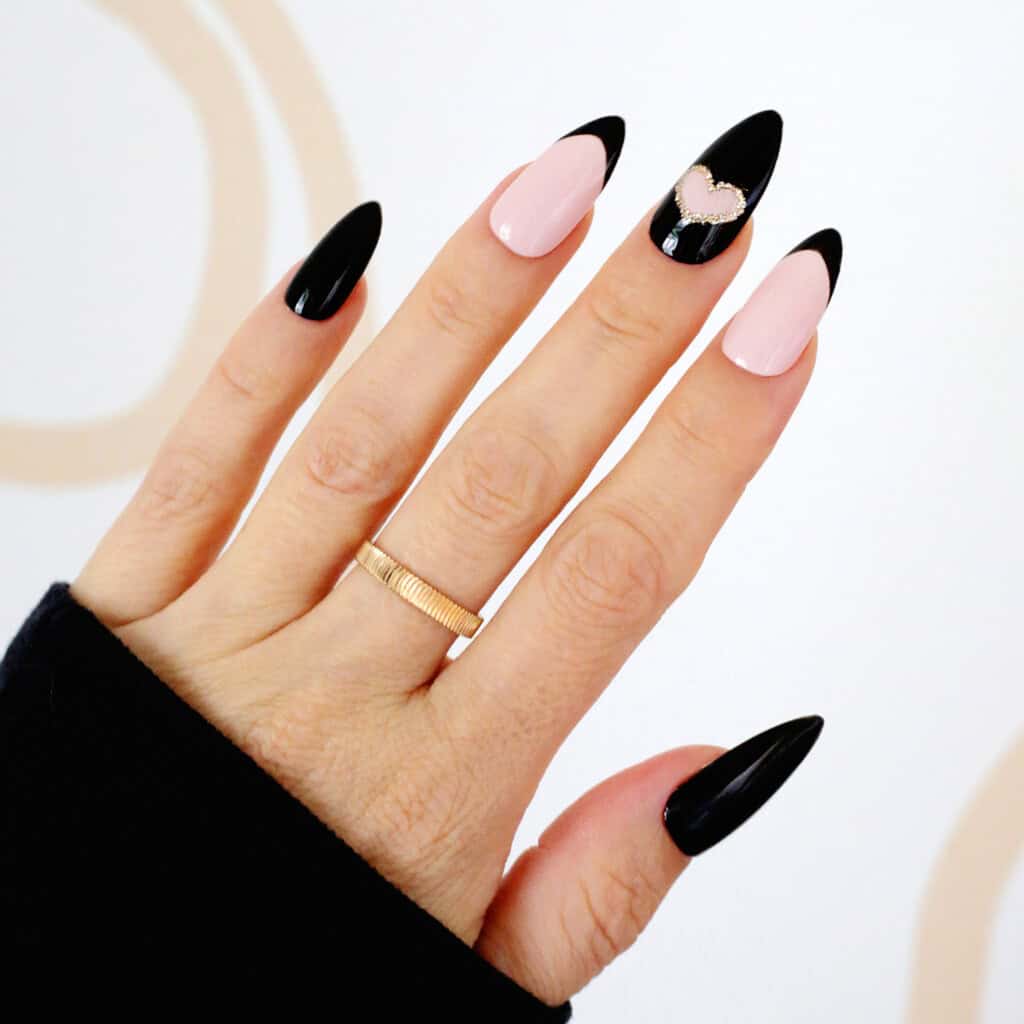
Peek A Boo
These nude and black polish accent nails with a heart cut out are cute for Halloween or any time of the year.
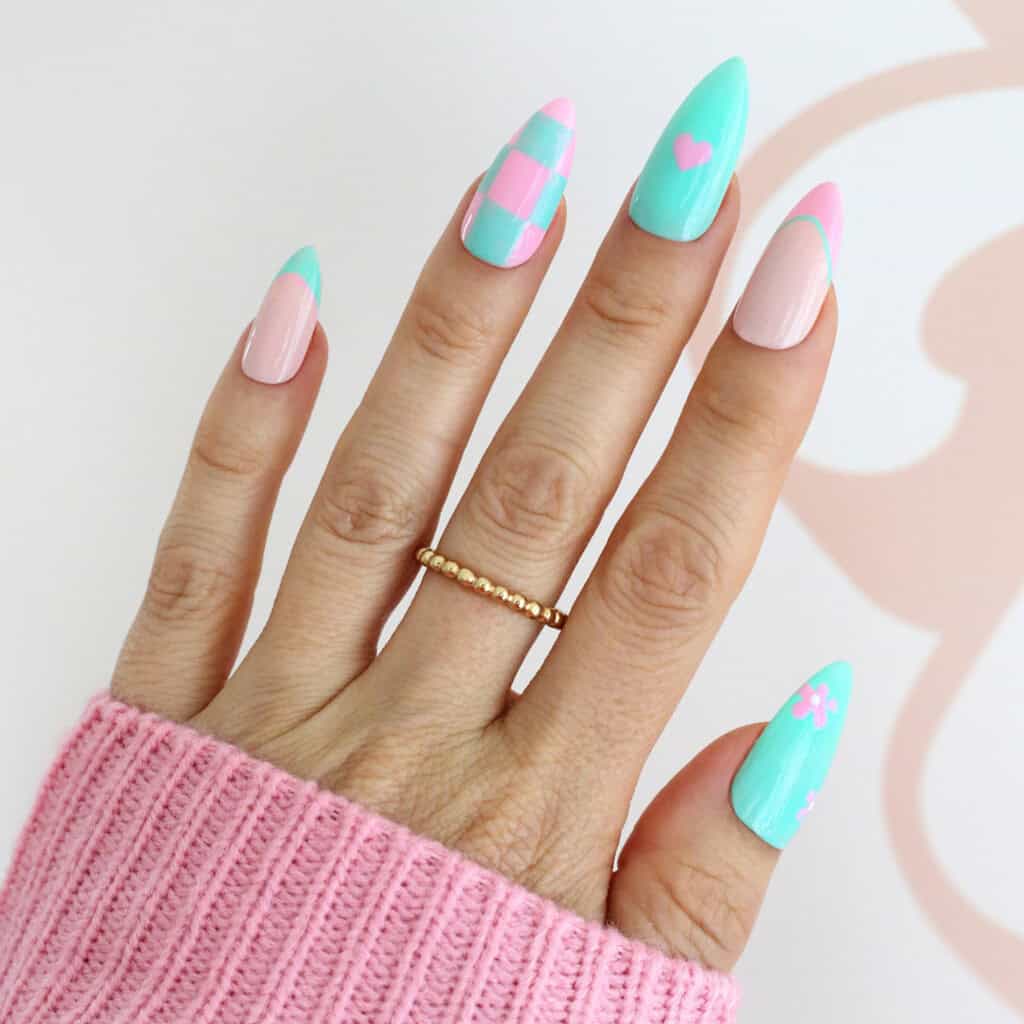
Preppy Pink
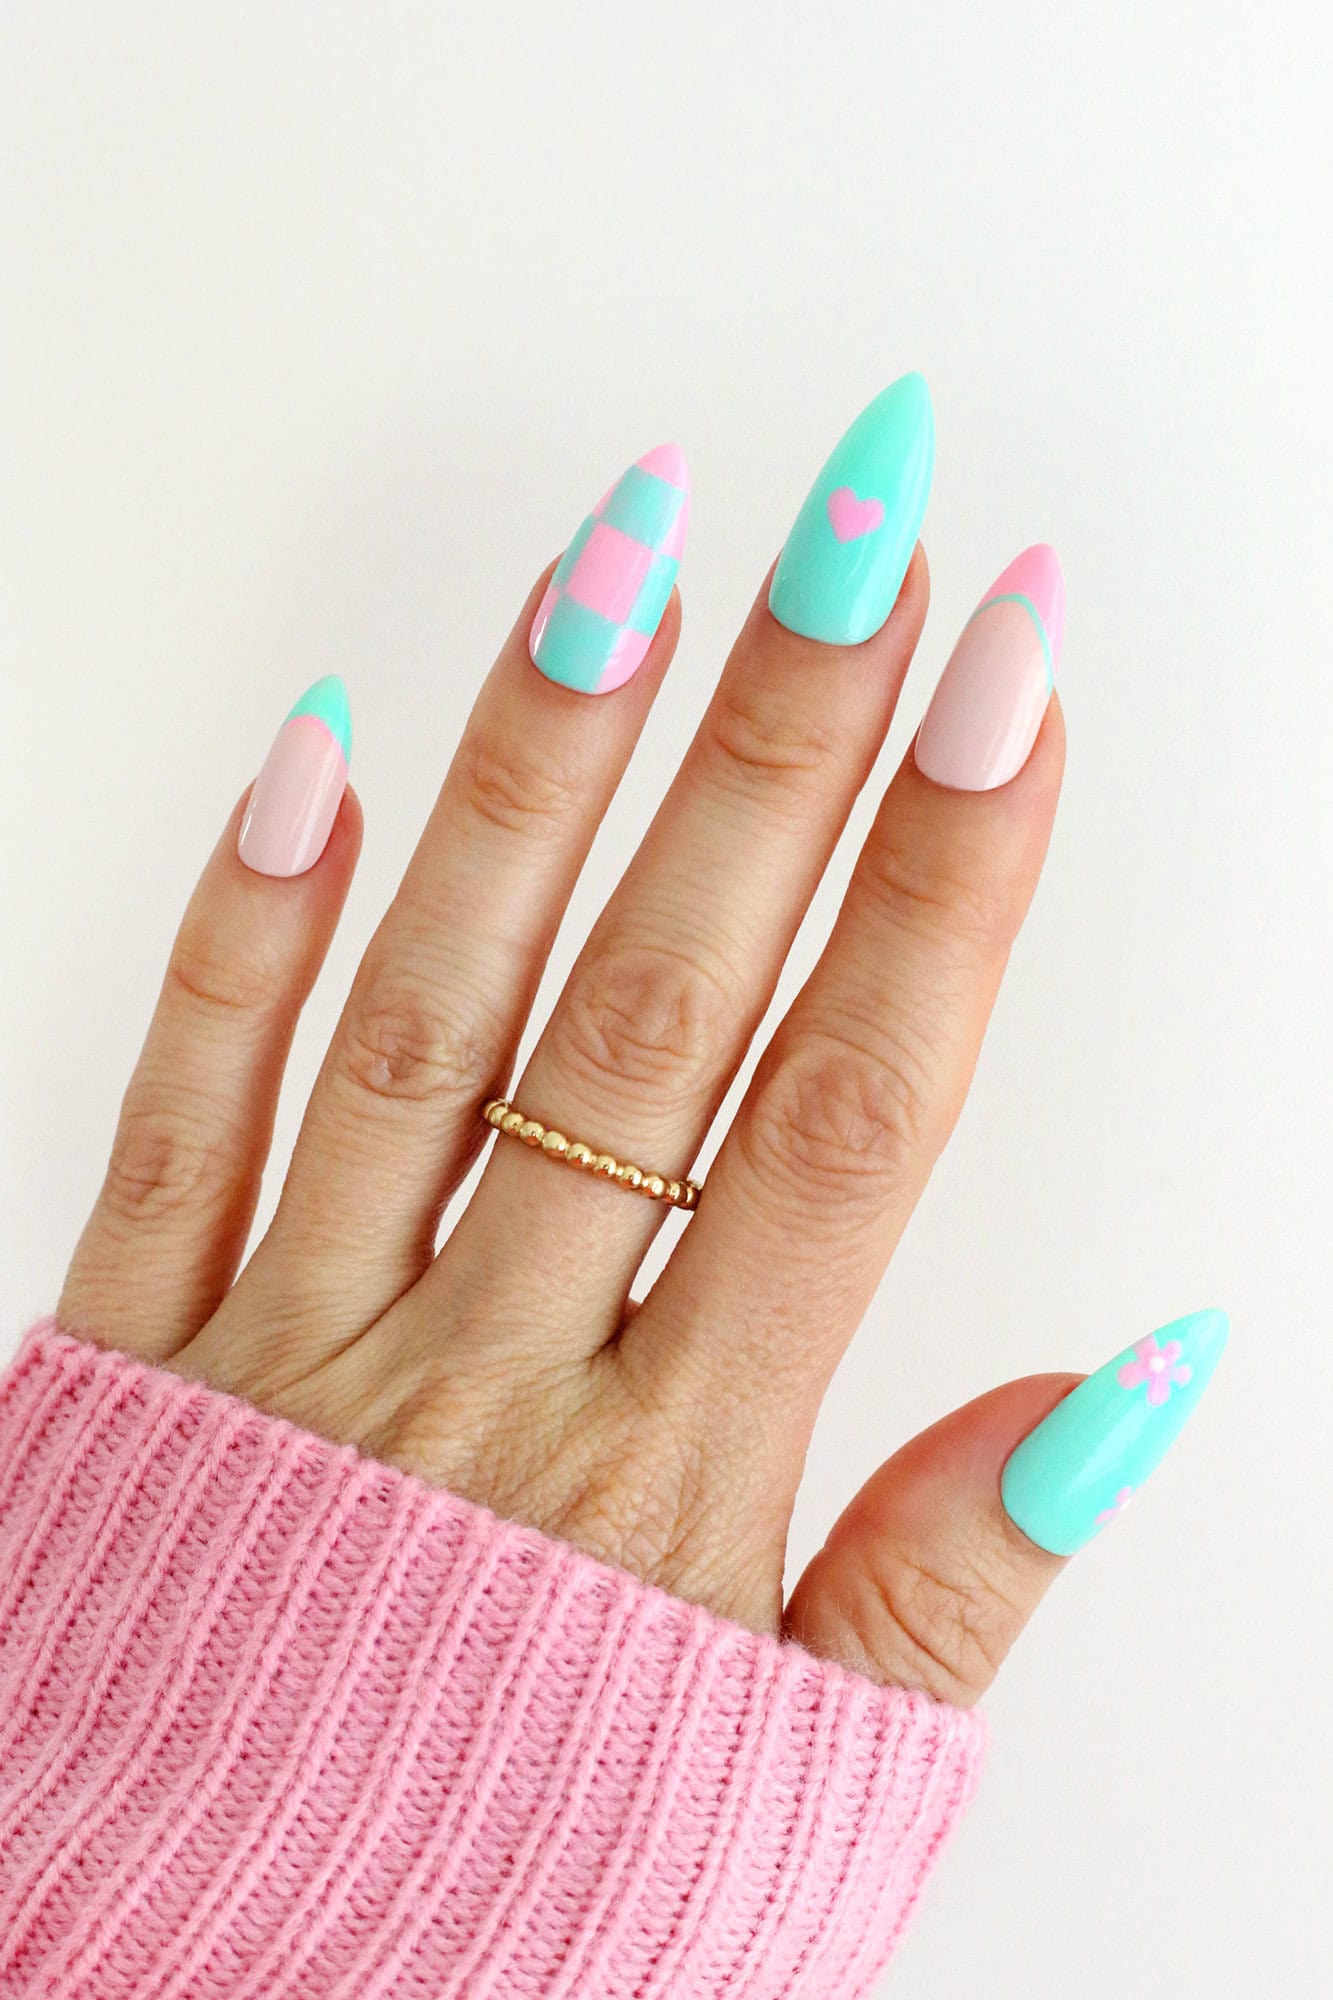
Get on the pink and green train with accent nails of checkered, French tip, and heart and flower designs.
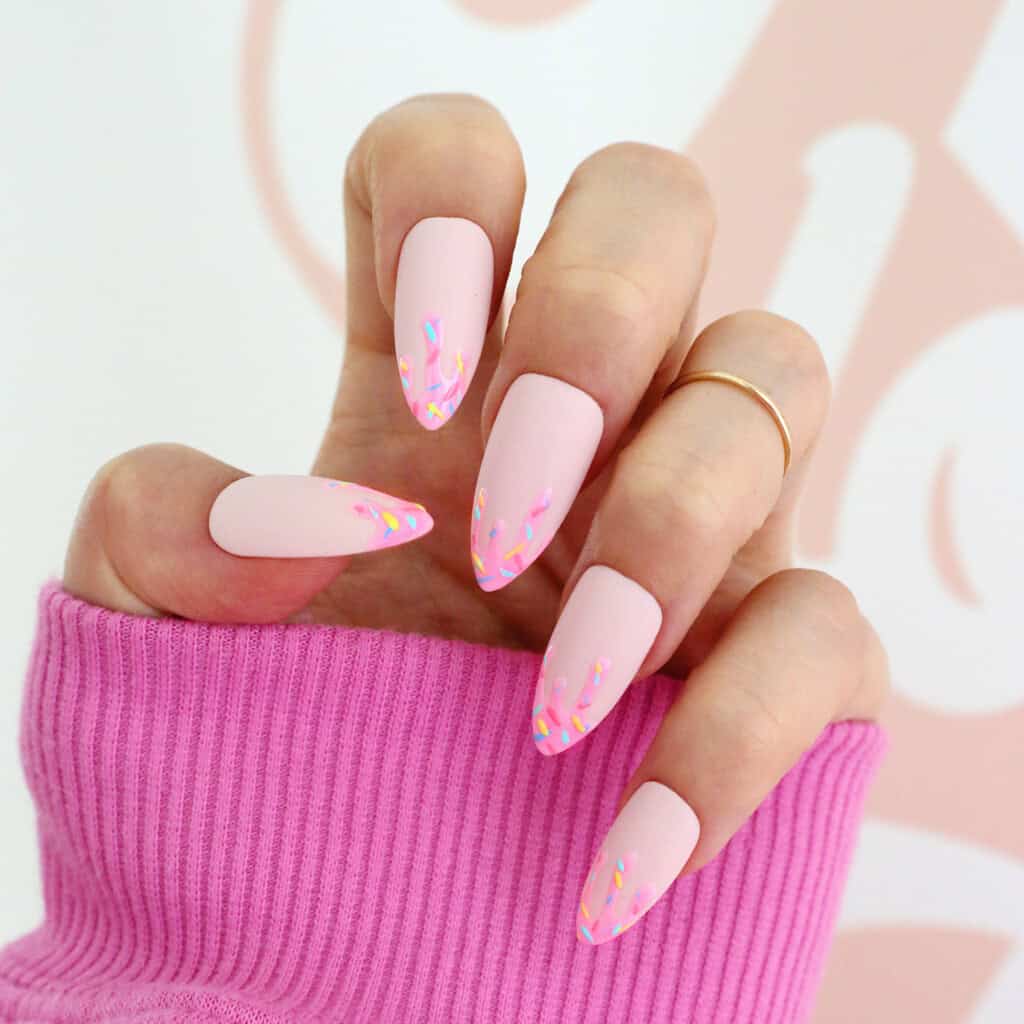
Strawberry Sundae
Add some ice cream drips with sprinkles to your mani to keep you cool during hot summer days.
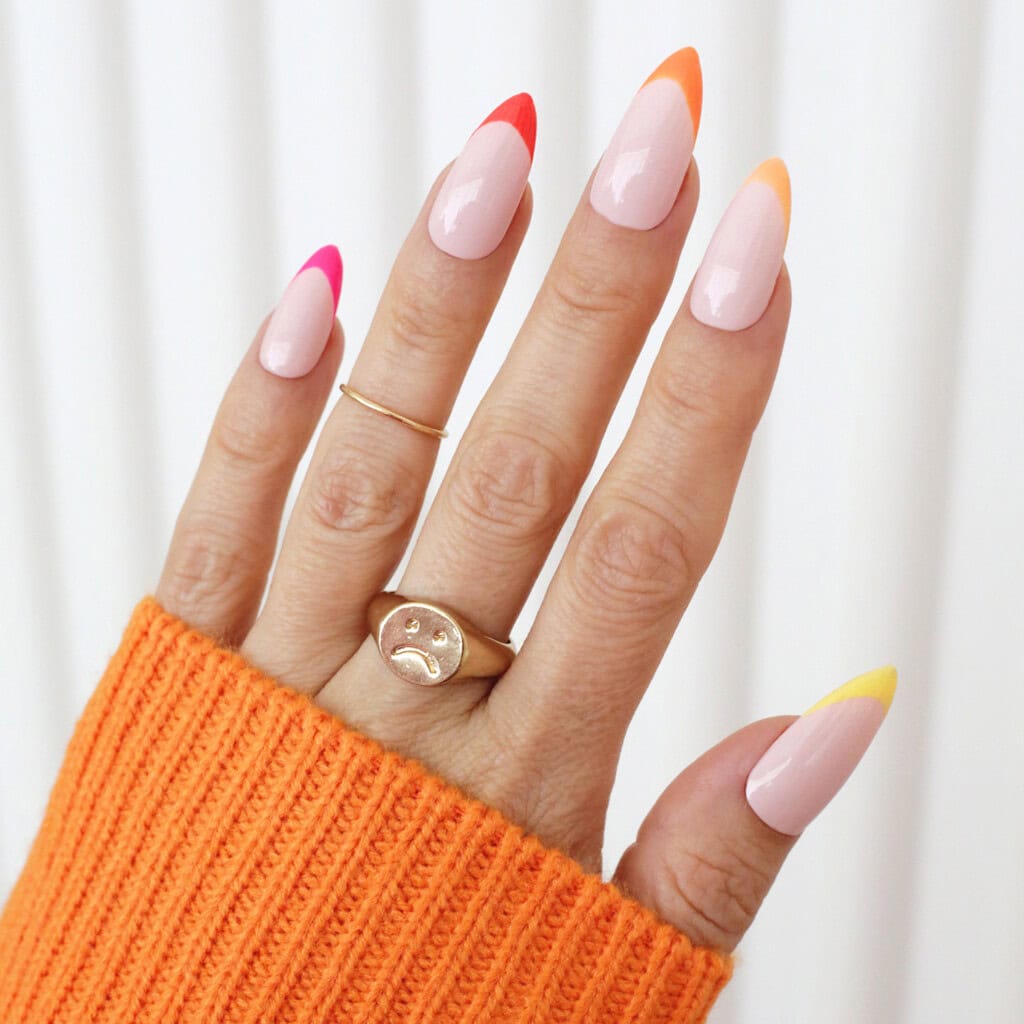
Warm Tips
These gradient French tips are a colorful classic look perfect for summer into fall.
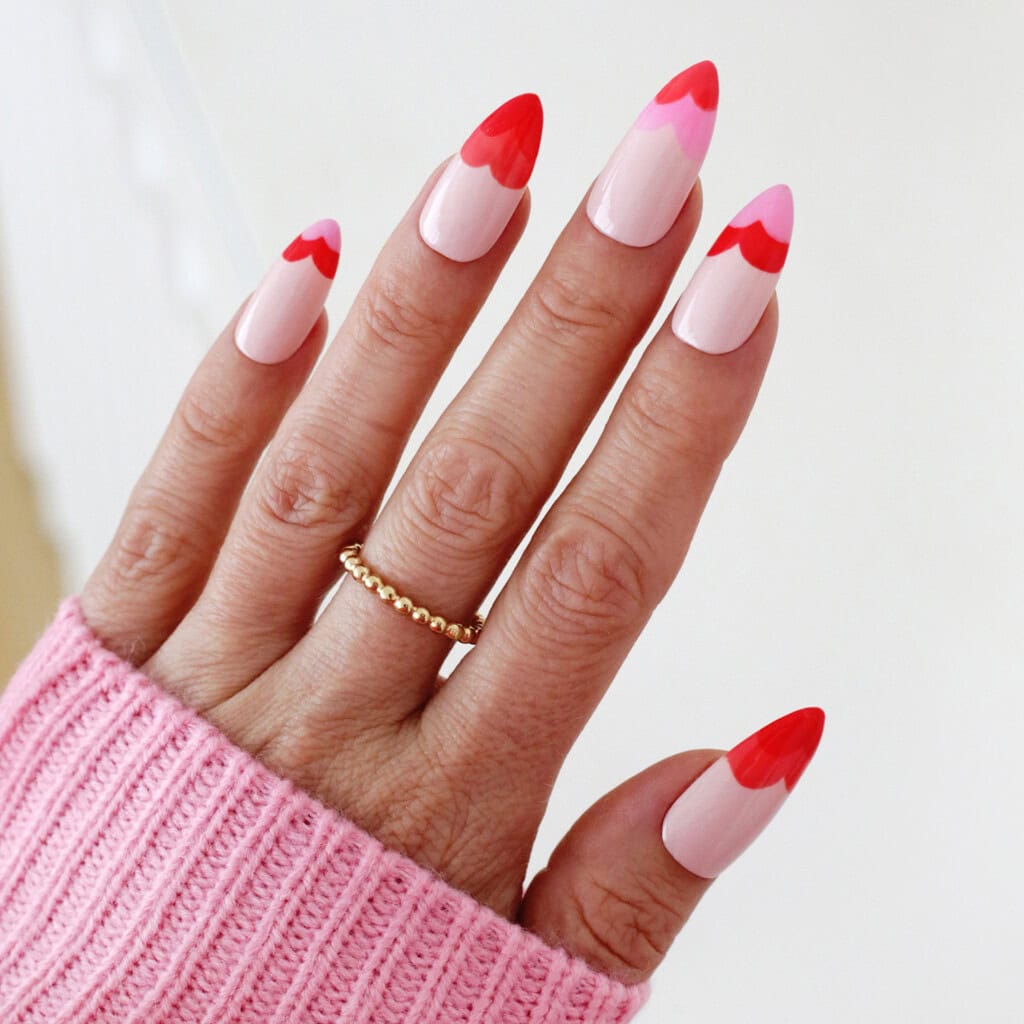
Overlapping Hearts
Whether you want this as a Valentine’s Day look or just feel pretty in pink, these overlapping hearts are just too cute.
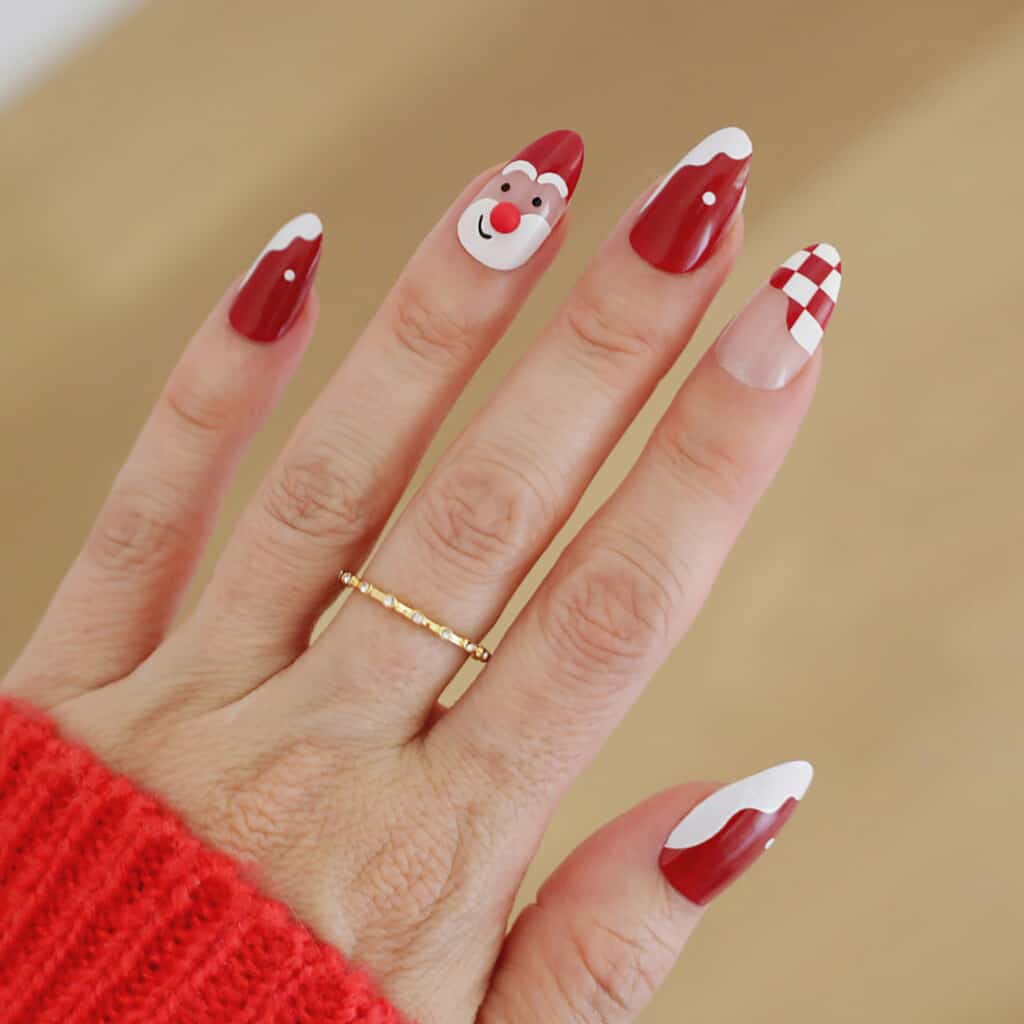
Santa Accent
These holiday nails are so fun and we love the 3D nose on the Santa.
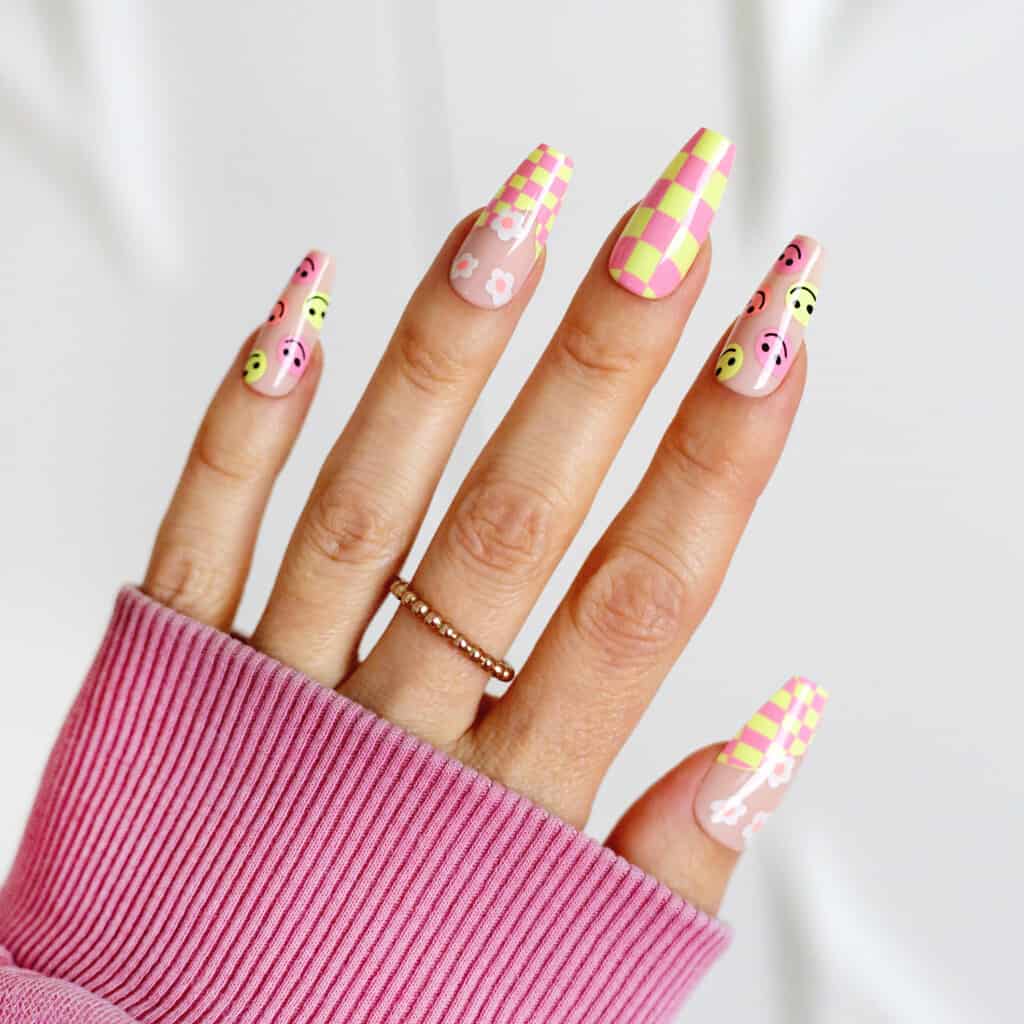
Summer Smiles
These checkered and smiley face nails are a fun maximalist look for spring and summer.
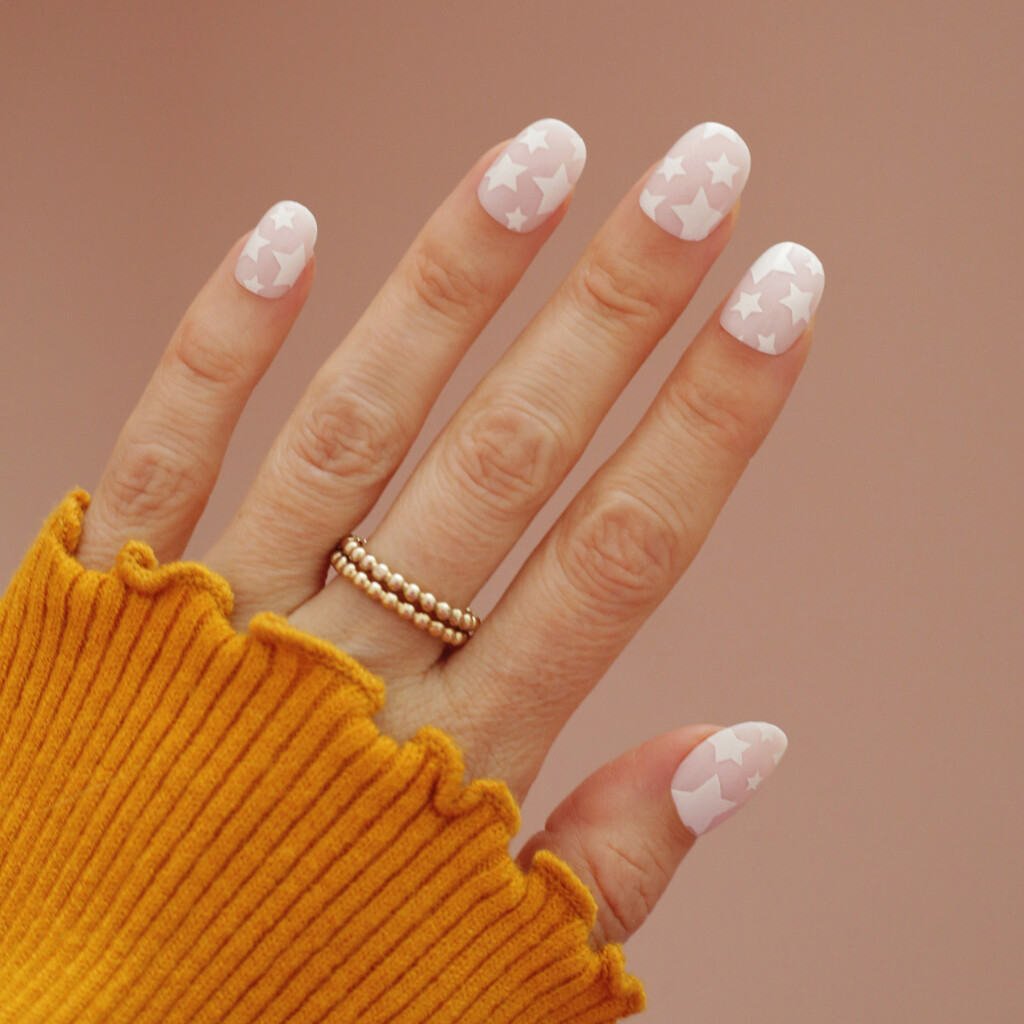
Starry Night
These star nails are perfect for the 4th of July or any summer starry night and are cute in long or short versions (you could also just do the stars on top of natural nails).
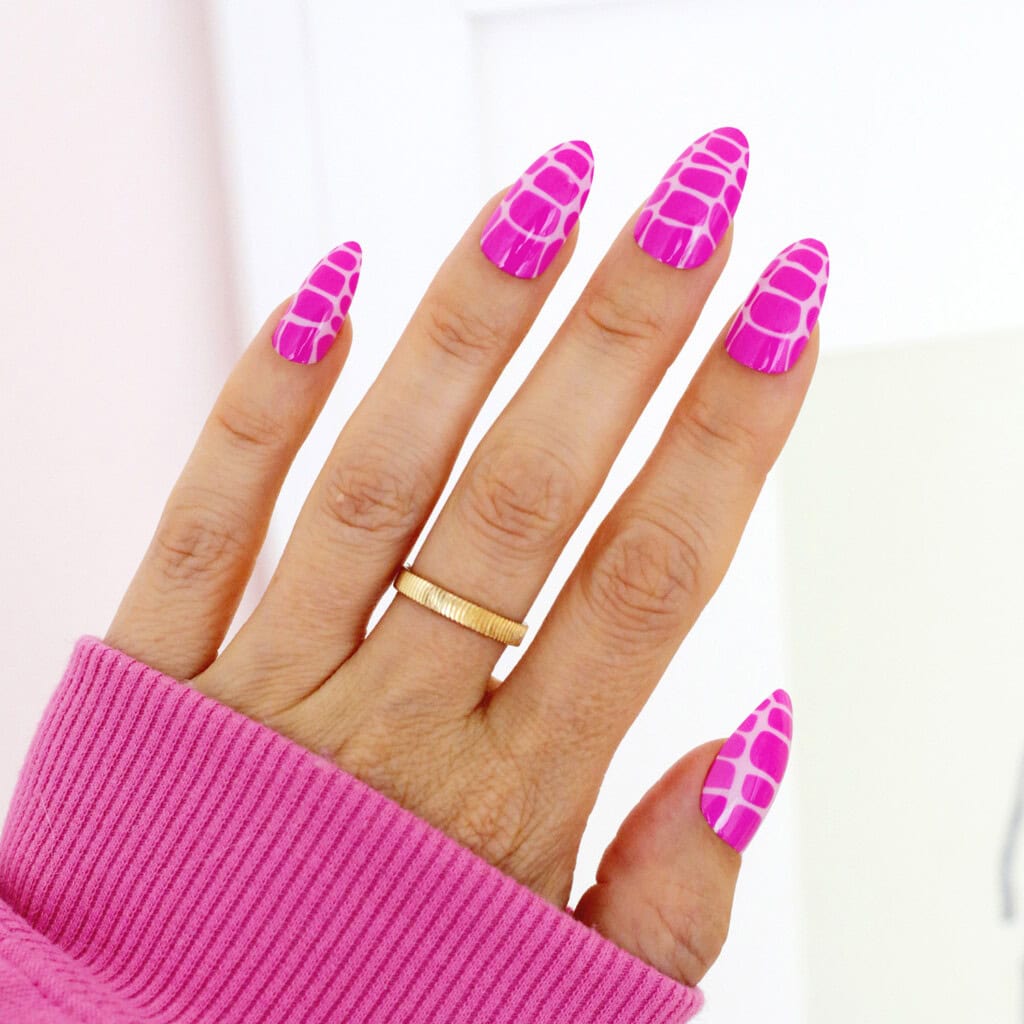
Hot Pink Crackle
These hot pink nails have a crackle look that’s part snakeskin and part tie-dye—perfect for spring and summer.
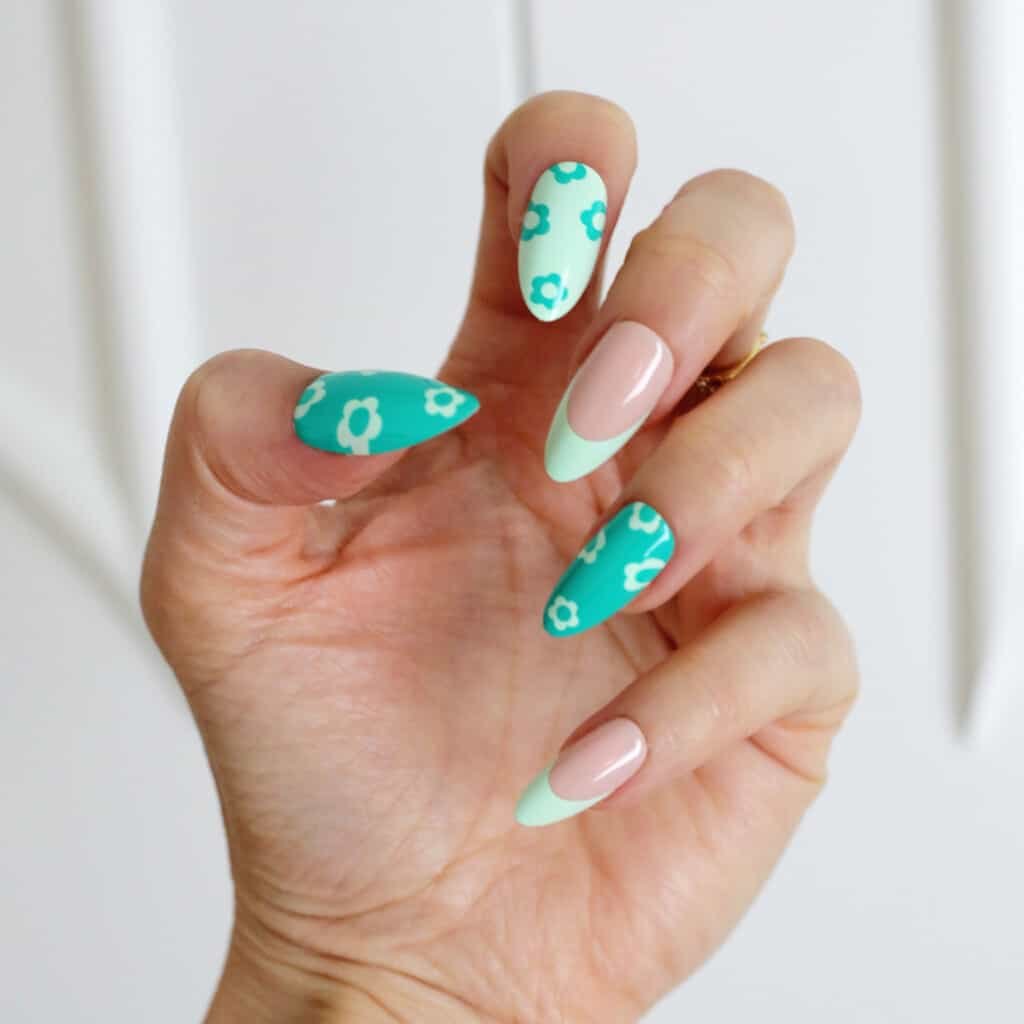
Green Gal
This green on green look is fun with the floral pattern and accent nails.
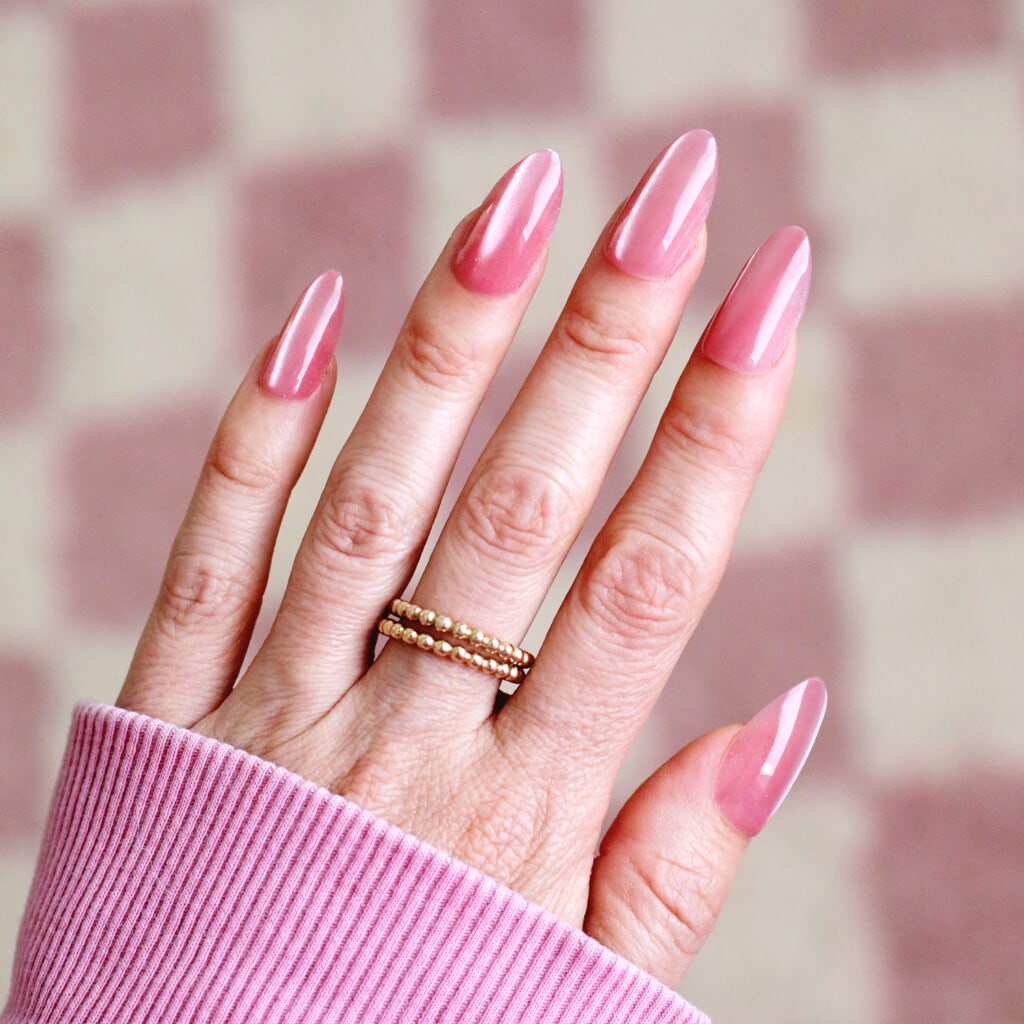
Bubblegum Velvet
These cat eye velvet nails are a favorite way to wear a trendy pink mani and are perfect for any time of year.
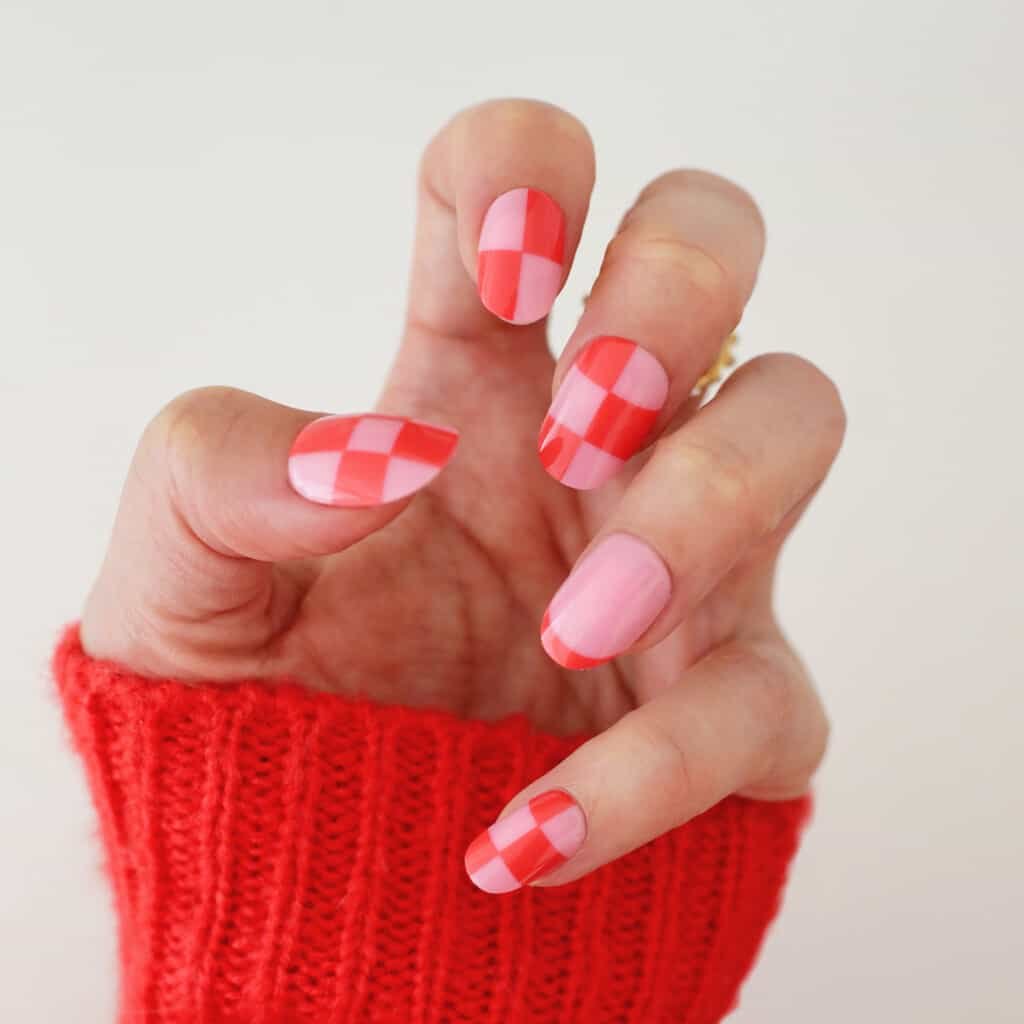
Checkered Craze
Bring on the checkered pattern with these red and pink nails, perfect for Valentine’s Day and beyond.
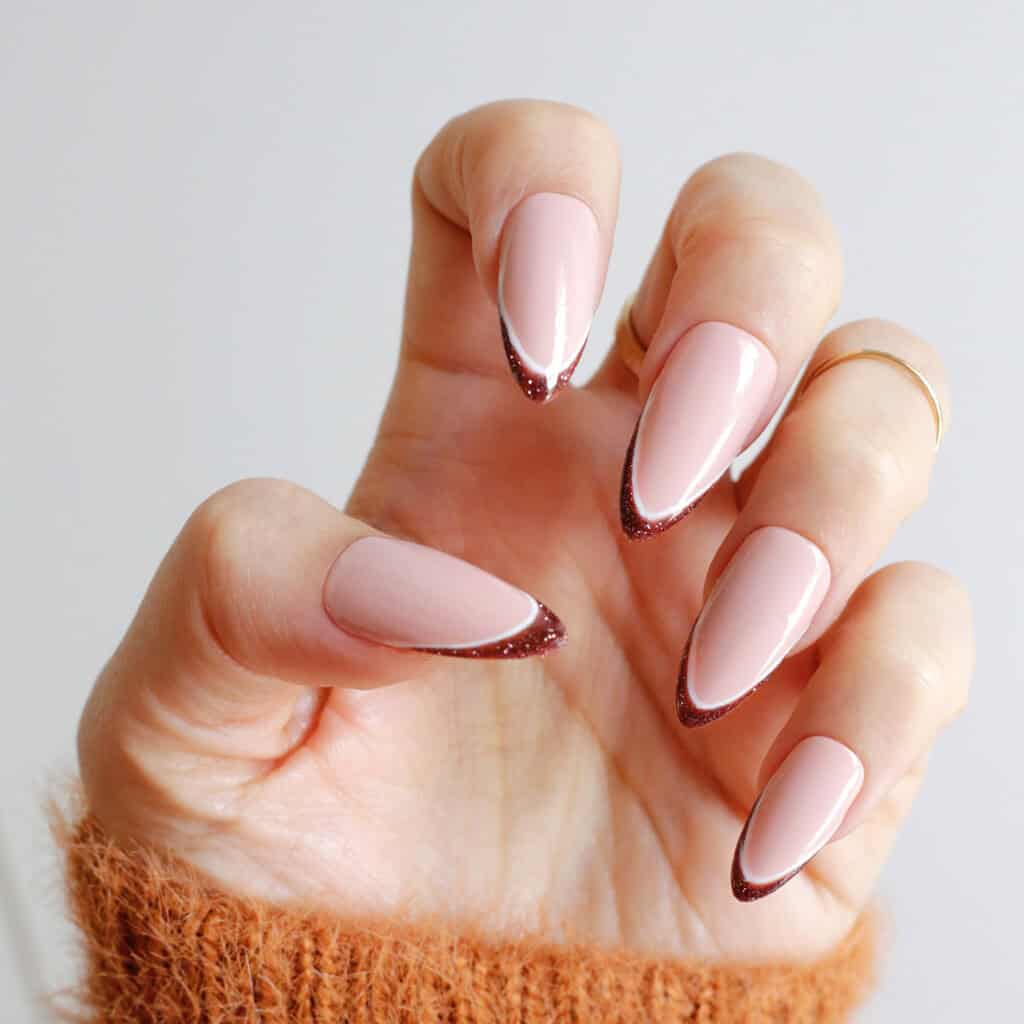
Chocolate Tips
These glitter chocolate brown French tips are perfect for the fall season.
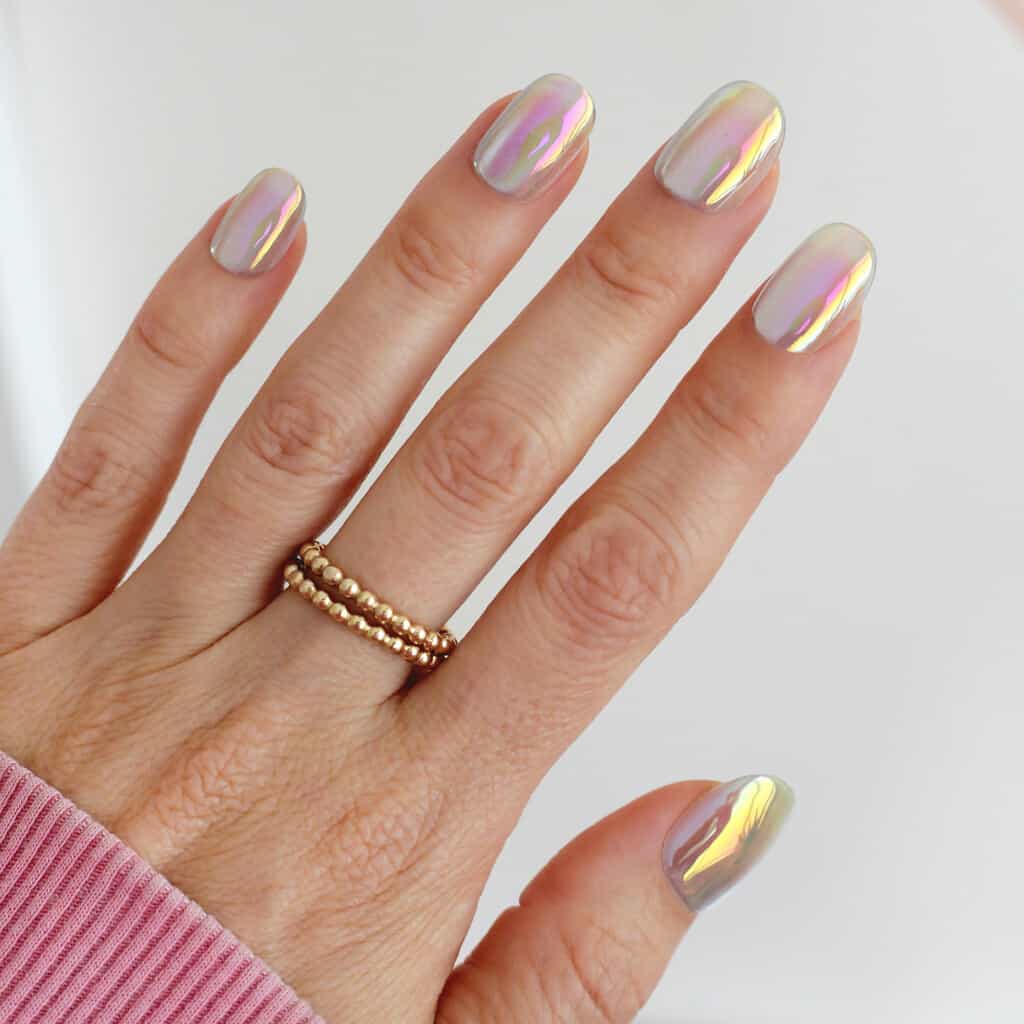
Lavender Chrome
This short iridescent chrome look is pretty for any season.
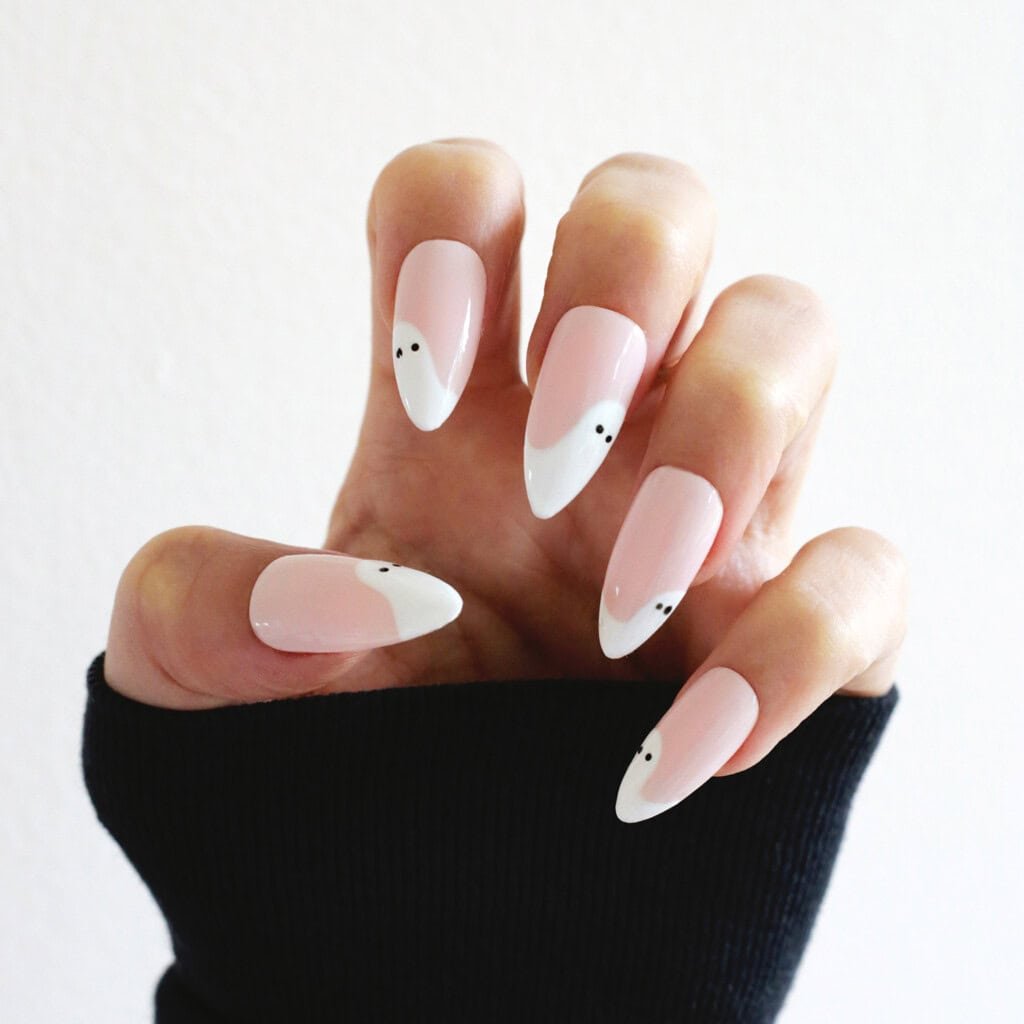
Hey Boo
Add these friendly ghosts to your mani with a brush and dotting tool for some cute Halloween fun.
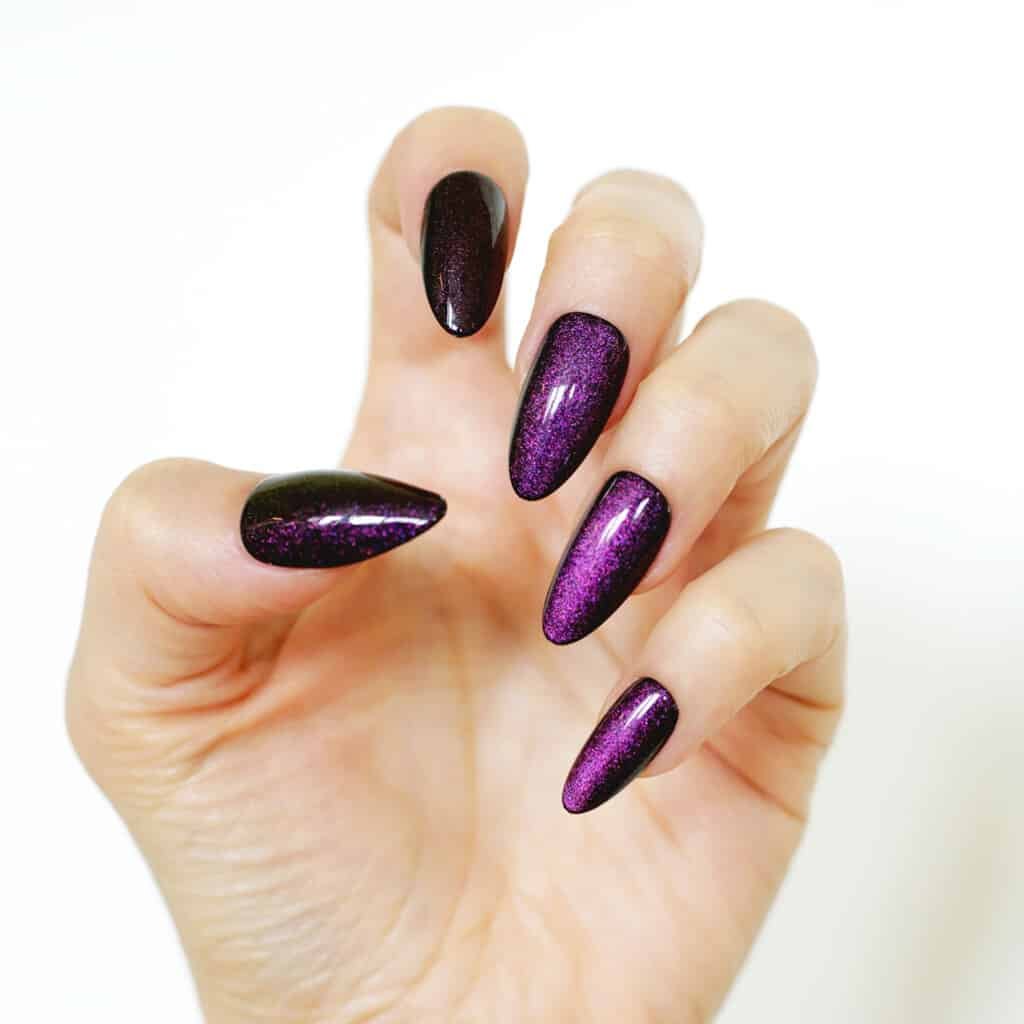
Purple Haze
Whether you just love purple or want that glam witchy look for Halloween, these glitter nails are just right.
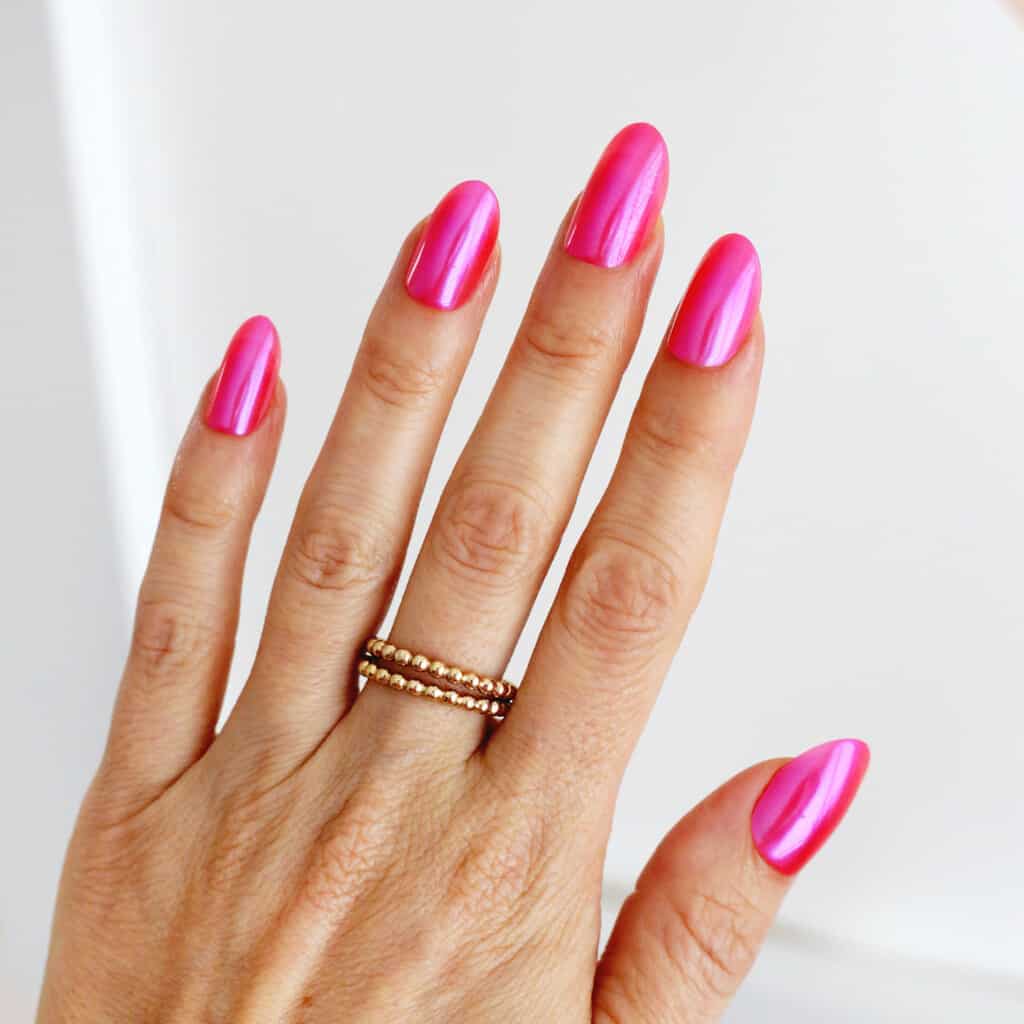
Iridescent Barbie
These hot pink iridescent nails are a Barbie lovers dream.
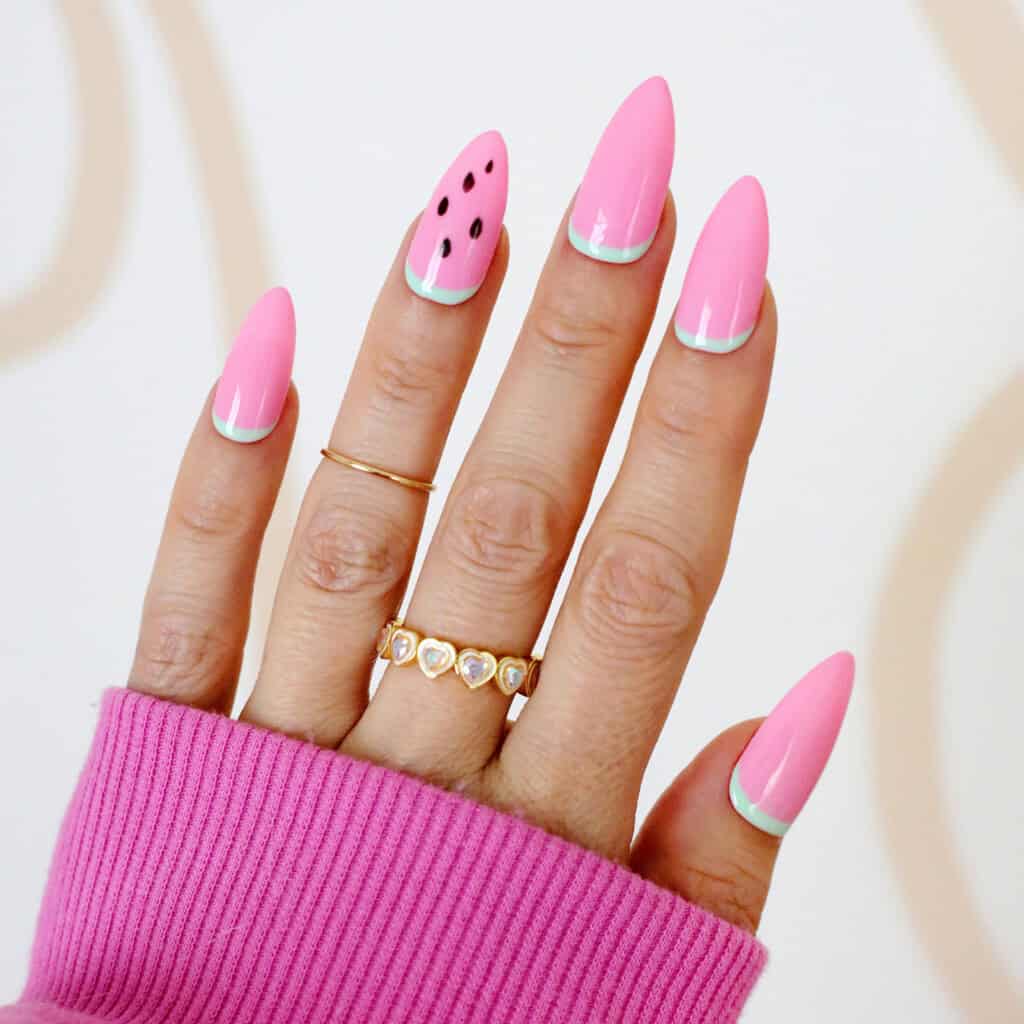
Watermelon Sugar
Show off these fruity tips at your next summer picnic or BBQ.
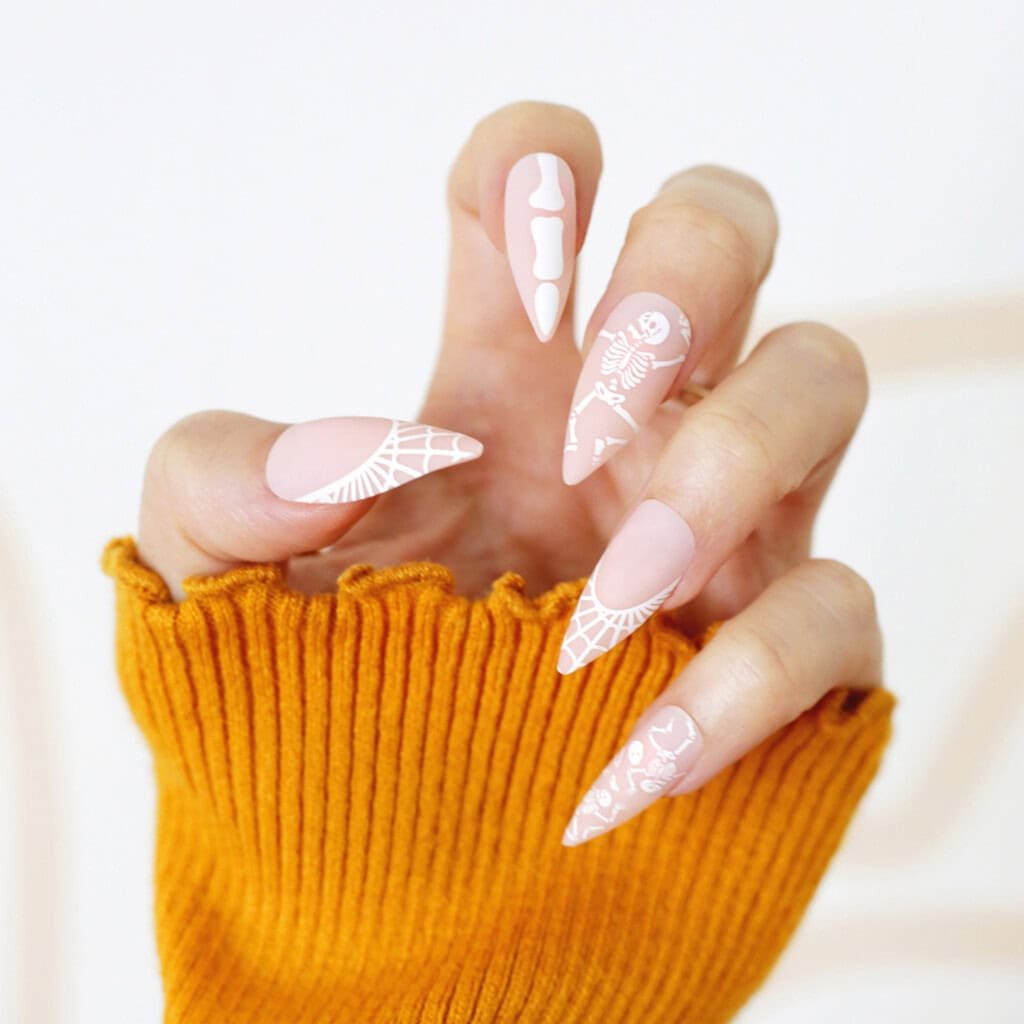
No Bones About It
Add a spooky vibe to your manicure with some skeleton and spider web details.
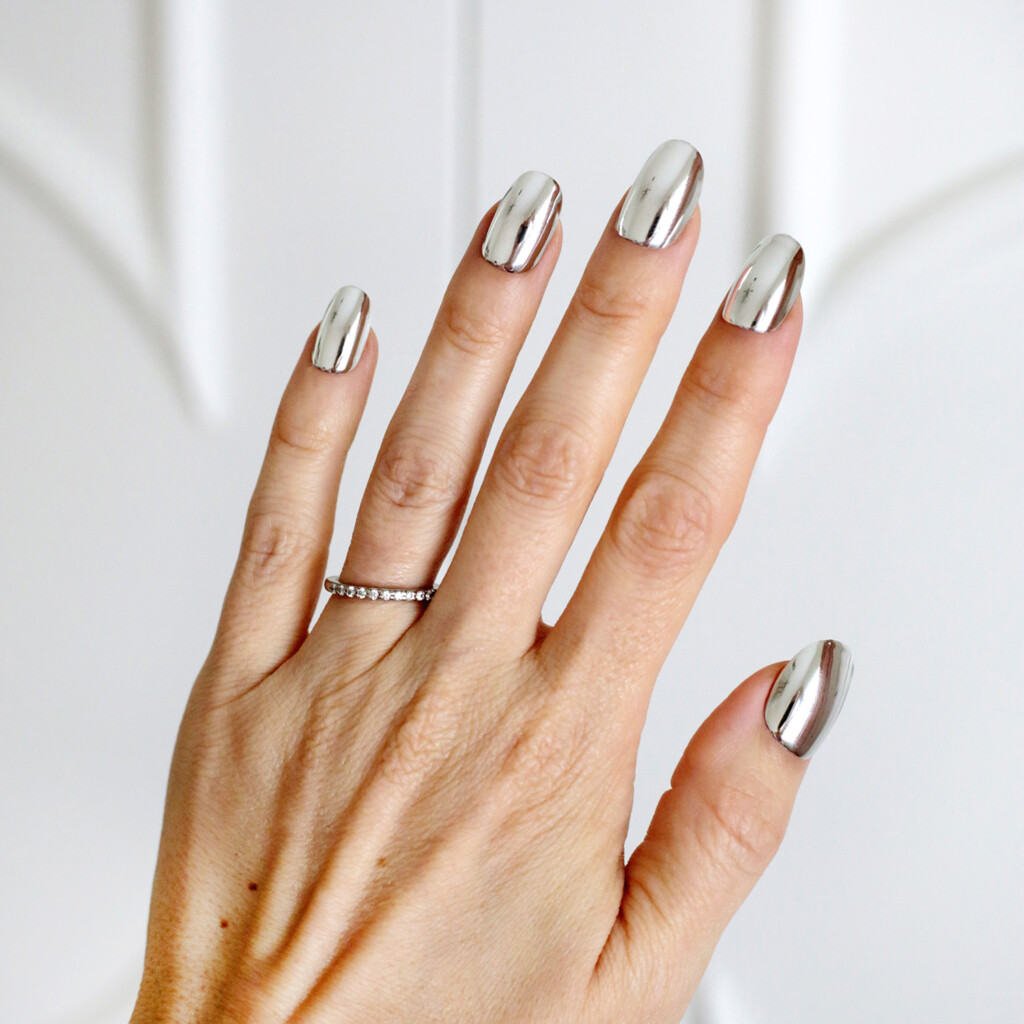
Mirror Ball
These short silver chrome nails are the ultimate in trendy nails.
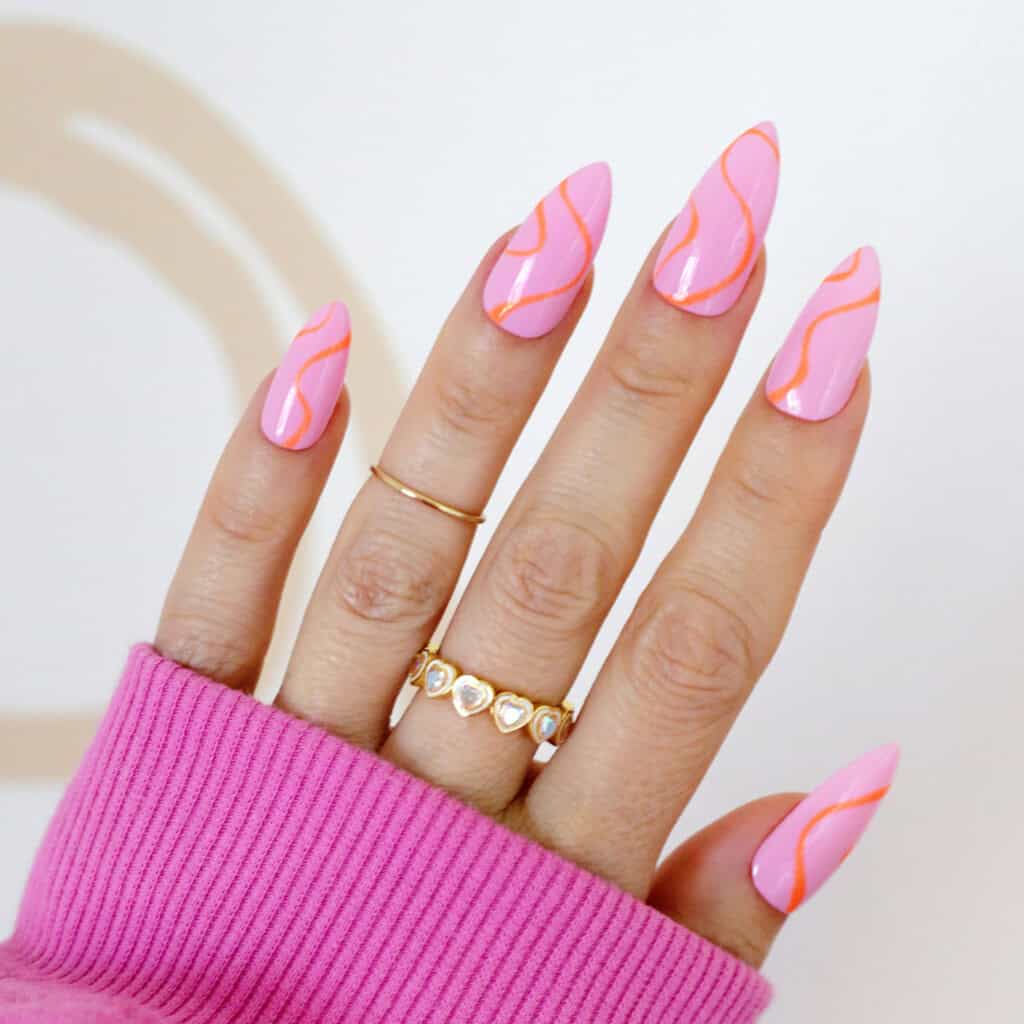
Summer Waves
This pink mani with orange accents are just the right amount of pattern to add a pop to your summer.
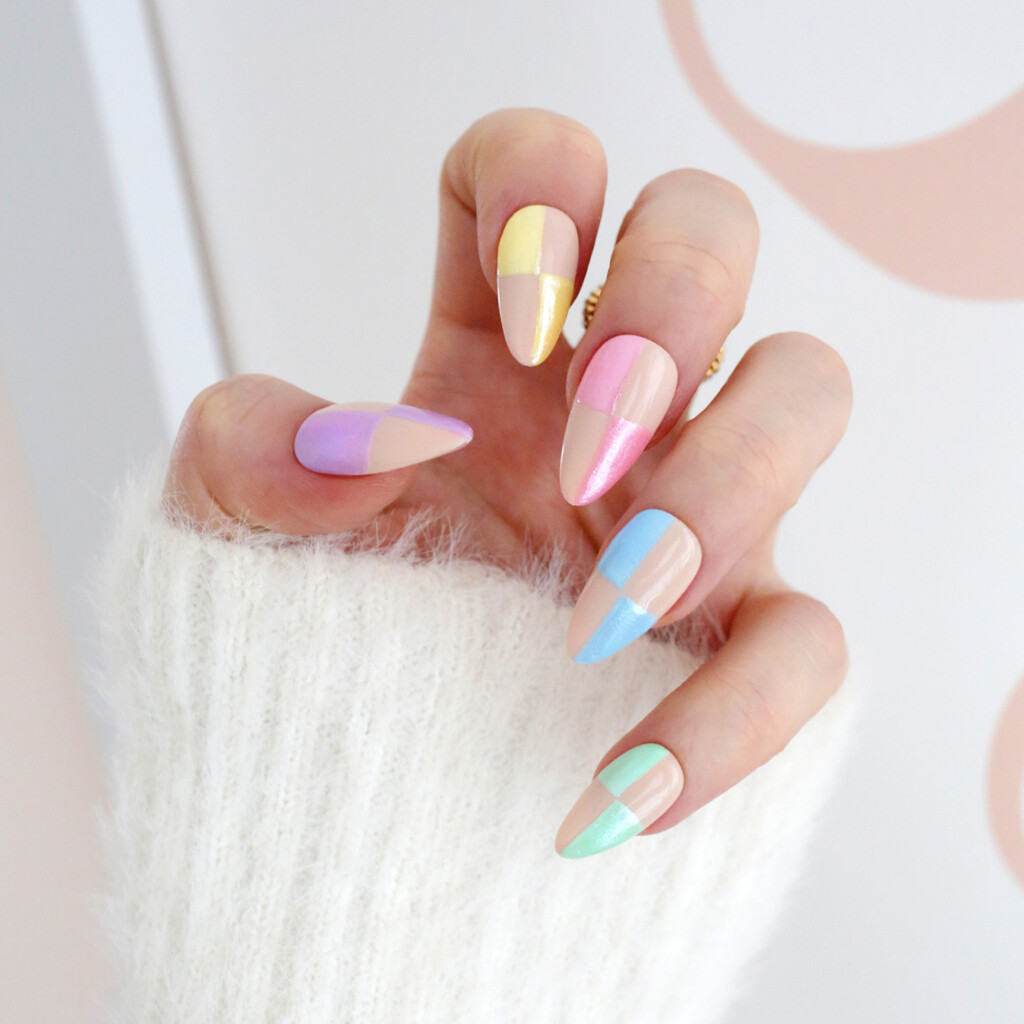
Checkered Pastel Chrome
Get in on the checkered and chrome trend with these pastel checkerboard nails.
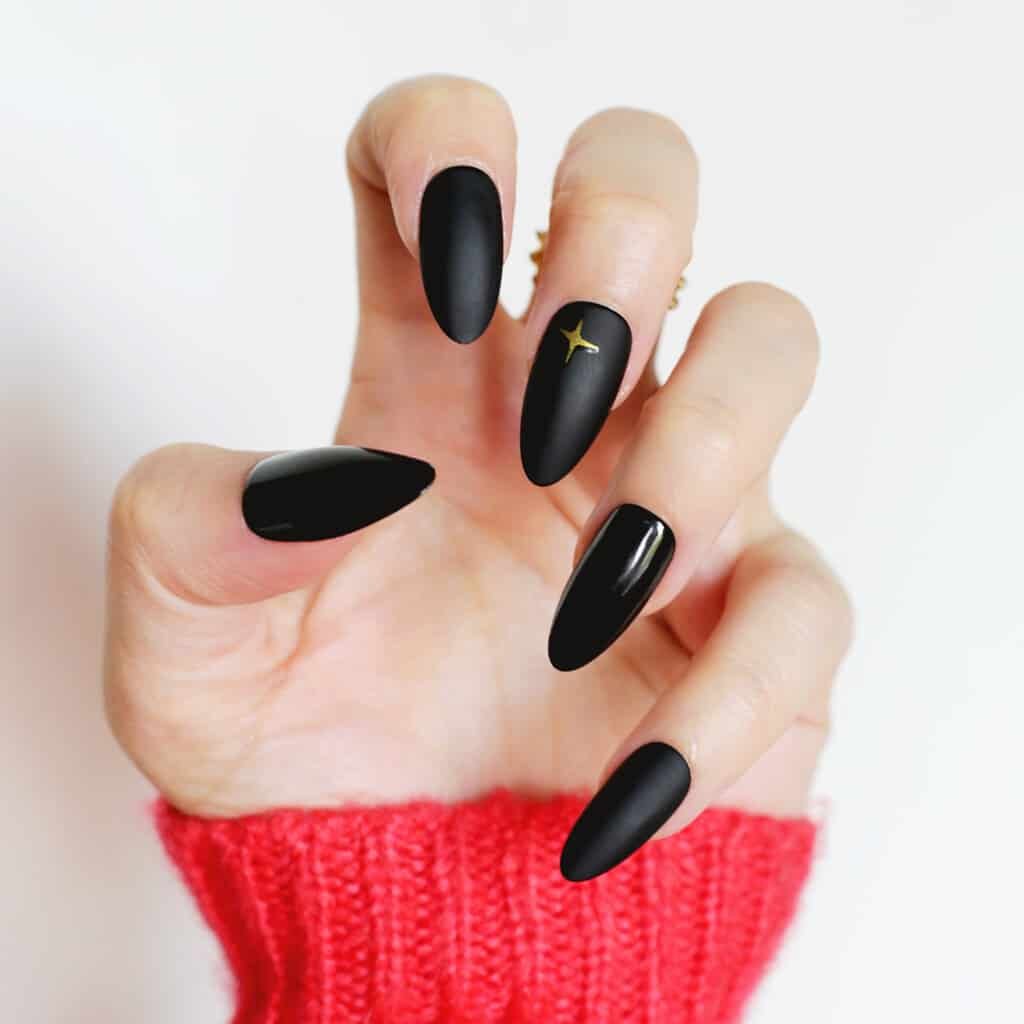
Black Night
This combo of matte and glossy black polish nails are perfectly chic for Halloween.
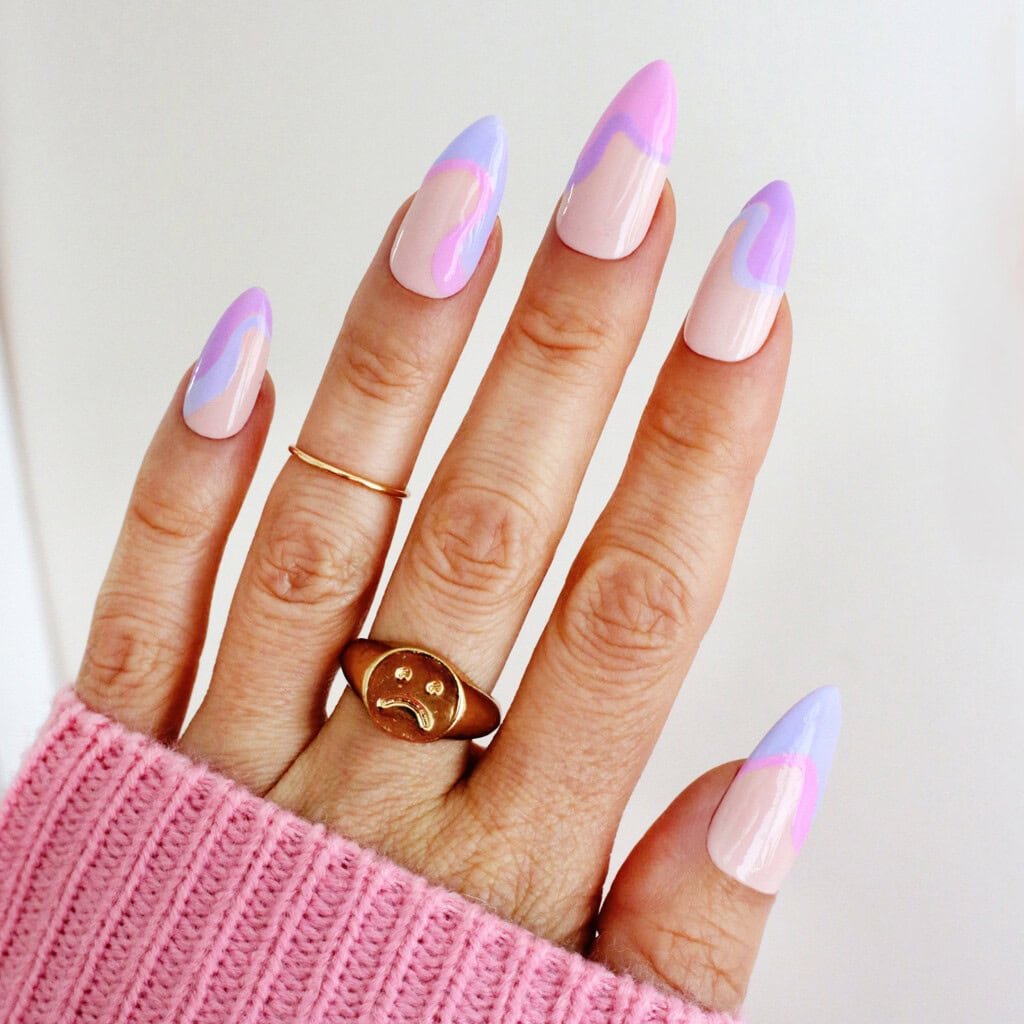
Lavender Swirl
Add some pastel pink and purple abstract swirls to your mani for spring and summer.
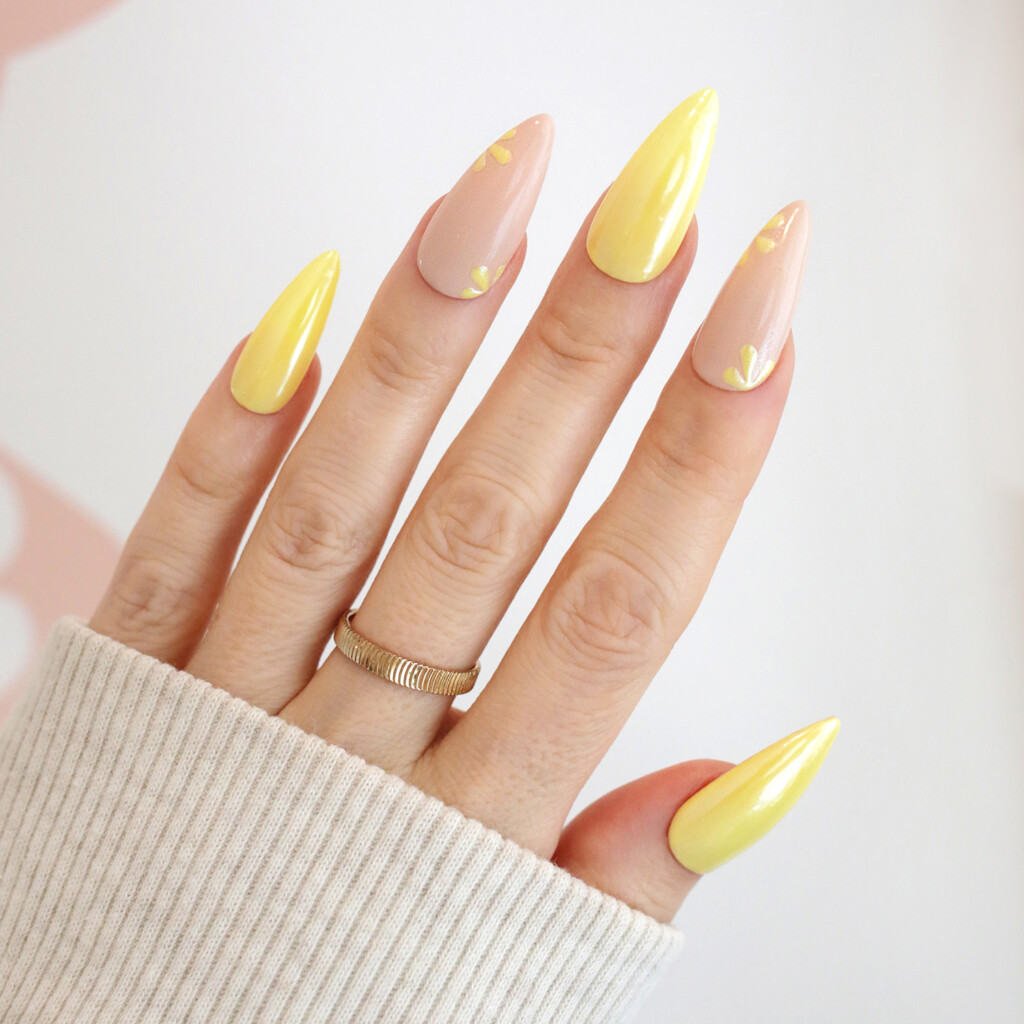
Sunny Side
Add some sun to your spring days with this cheerful yellow design.
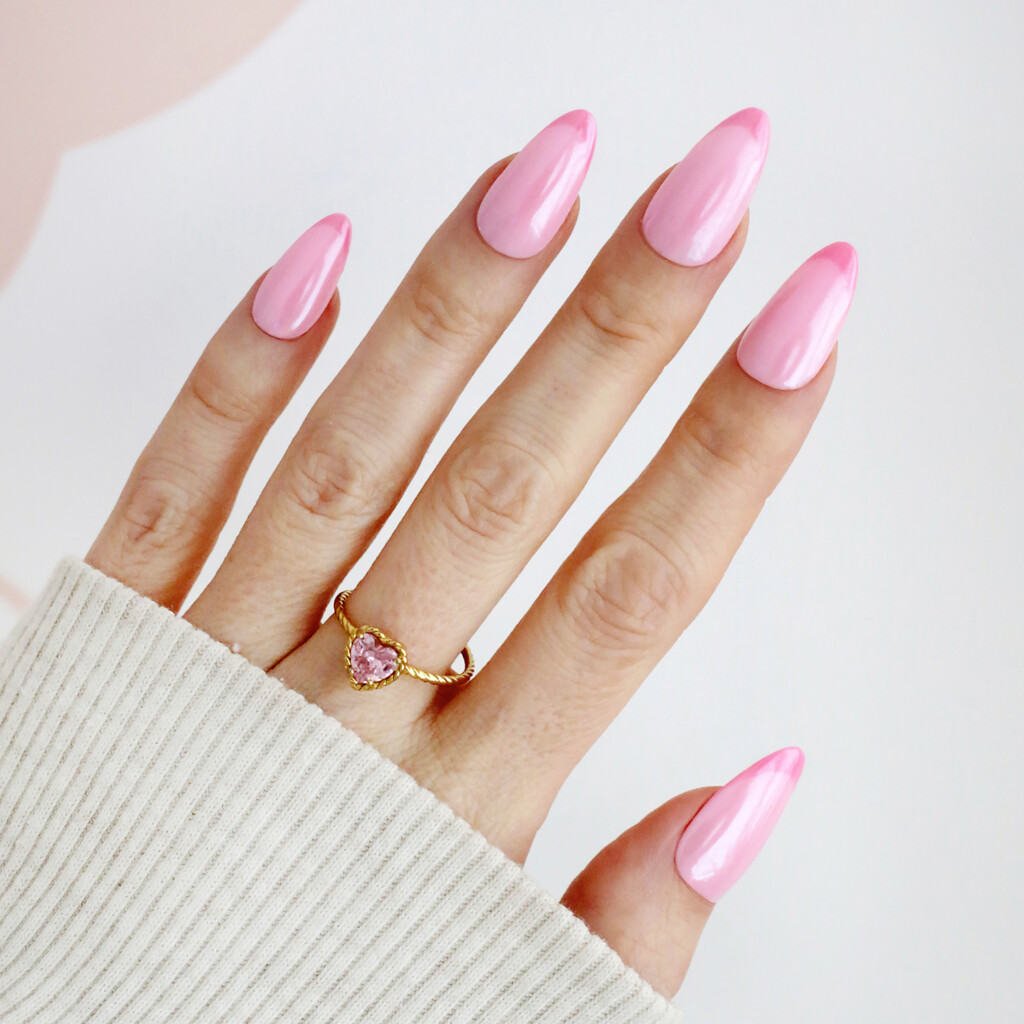
French Barbie
Go for Barbie with a chrome French tip for the ultimate pink mani look.
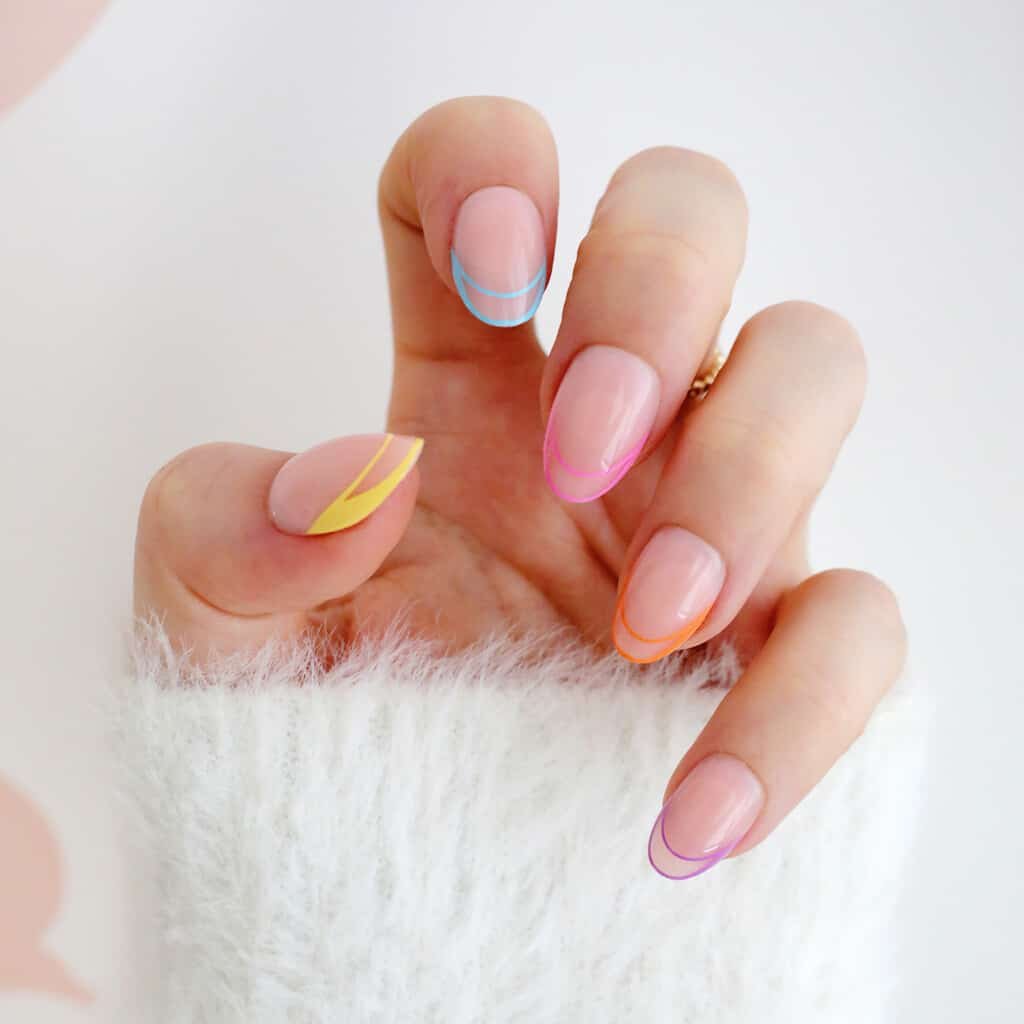
Rainbow Outline
These short rainbow French outline nails enter spring with a subtle pop of color over natural nails.
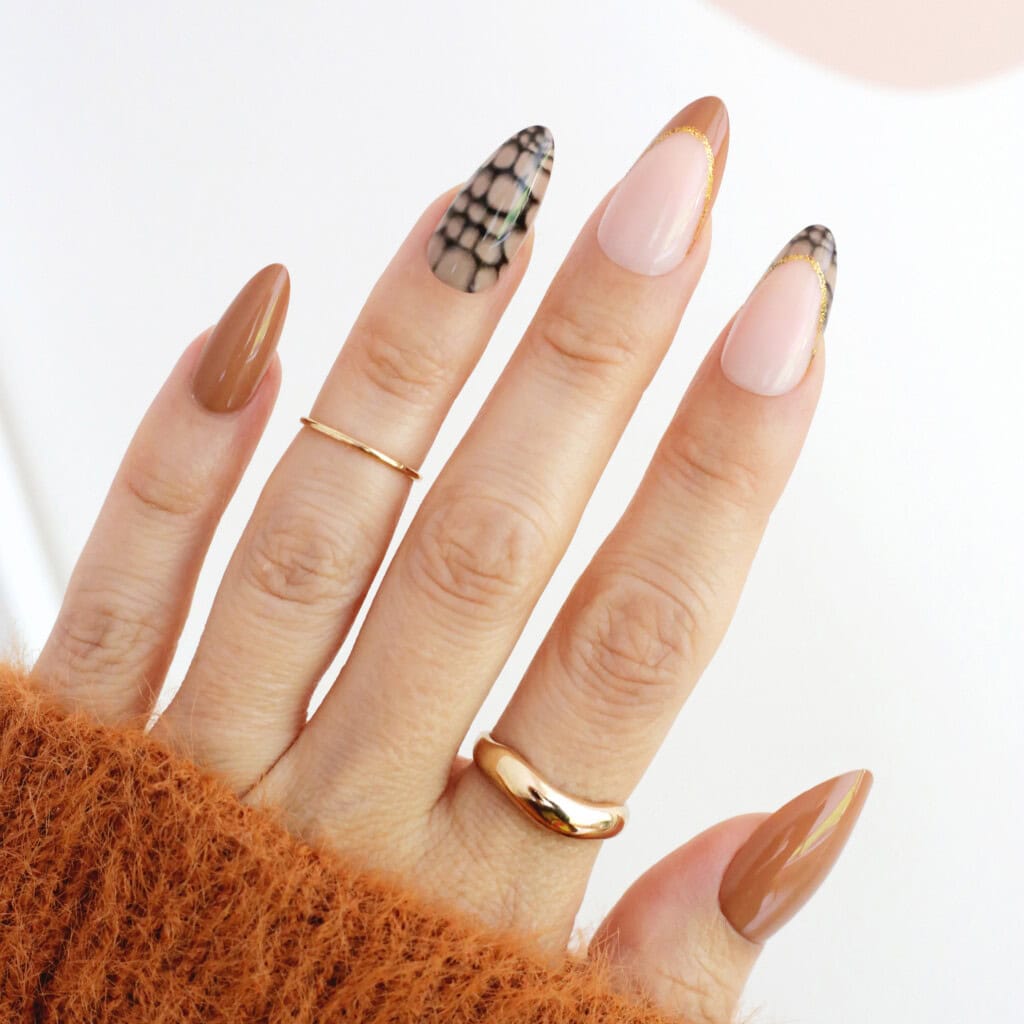
Snakeskin Accent
Perfect for fall, this brown and snakeskin accent mani hits in all the right places.
Santa Haute
This adorable Santa hat idea is one of our favorites and looks really pretty with an almond shaped nail.
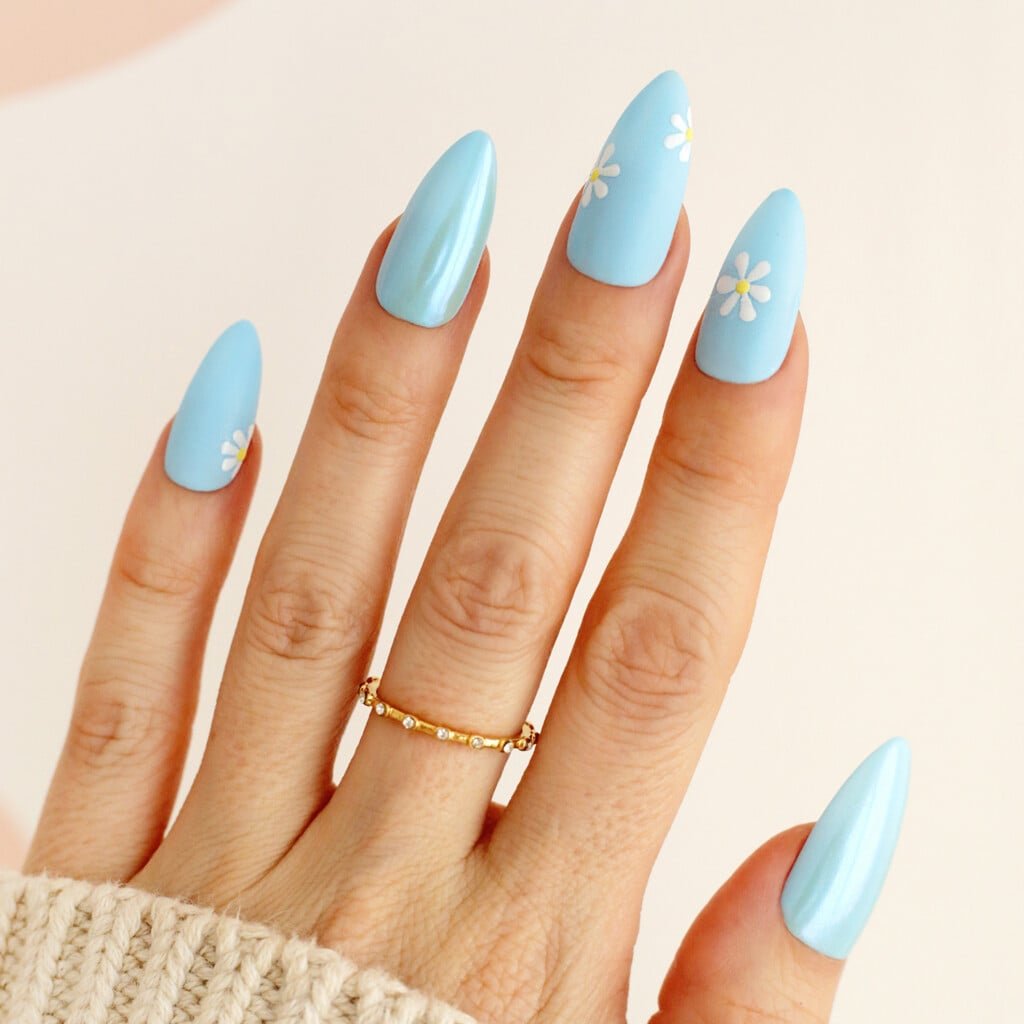
Sky Blue Daisies
This sky blue mani features friendly daisies and chrome accents nails (you can also use a toothpick to make the flowers).
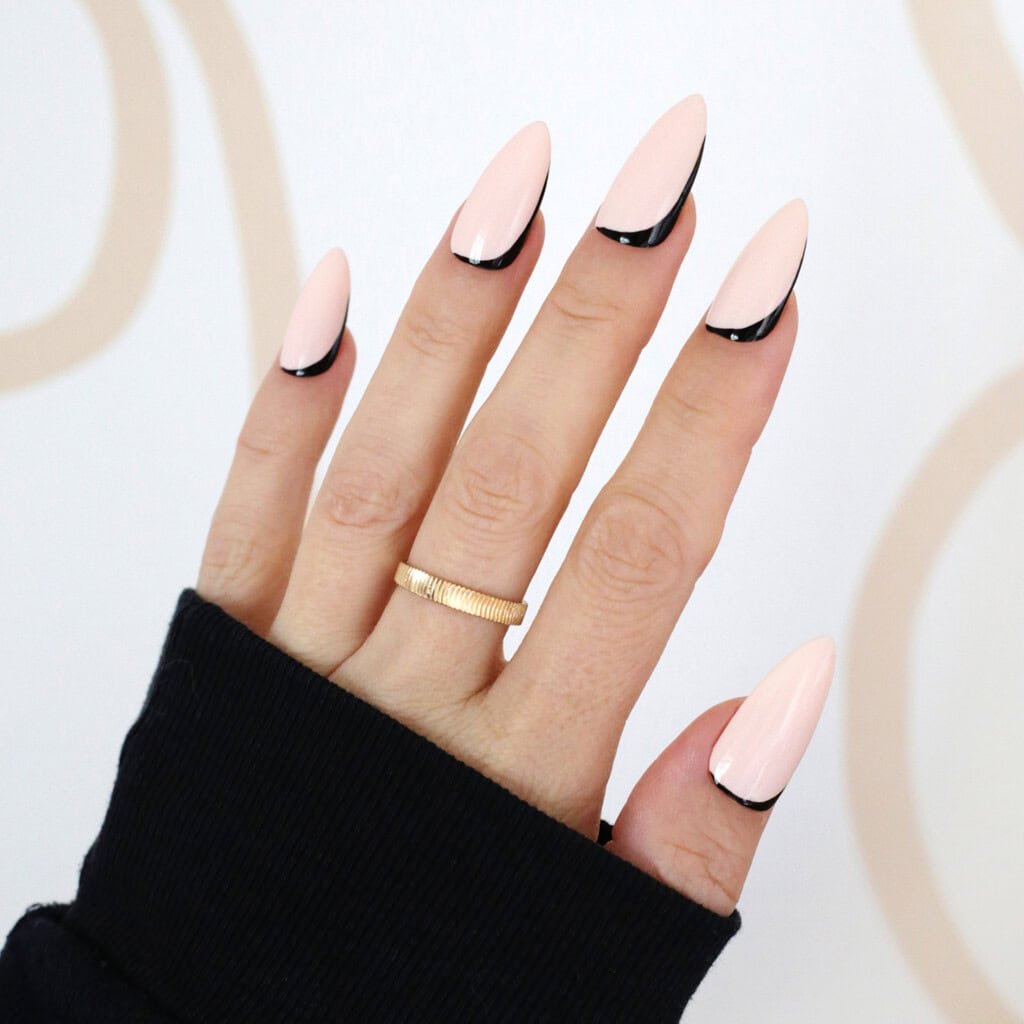
Hint of Black
Add a bit of drama to your nails with these sleek nails that have just the bottom side dipped in black polish.
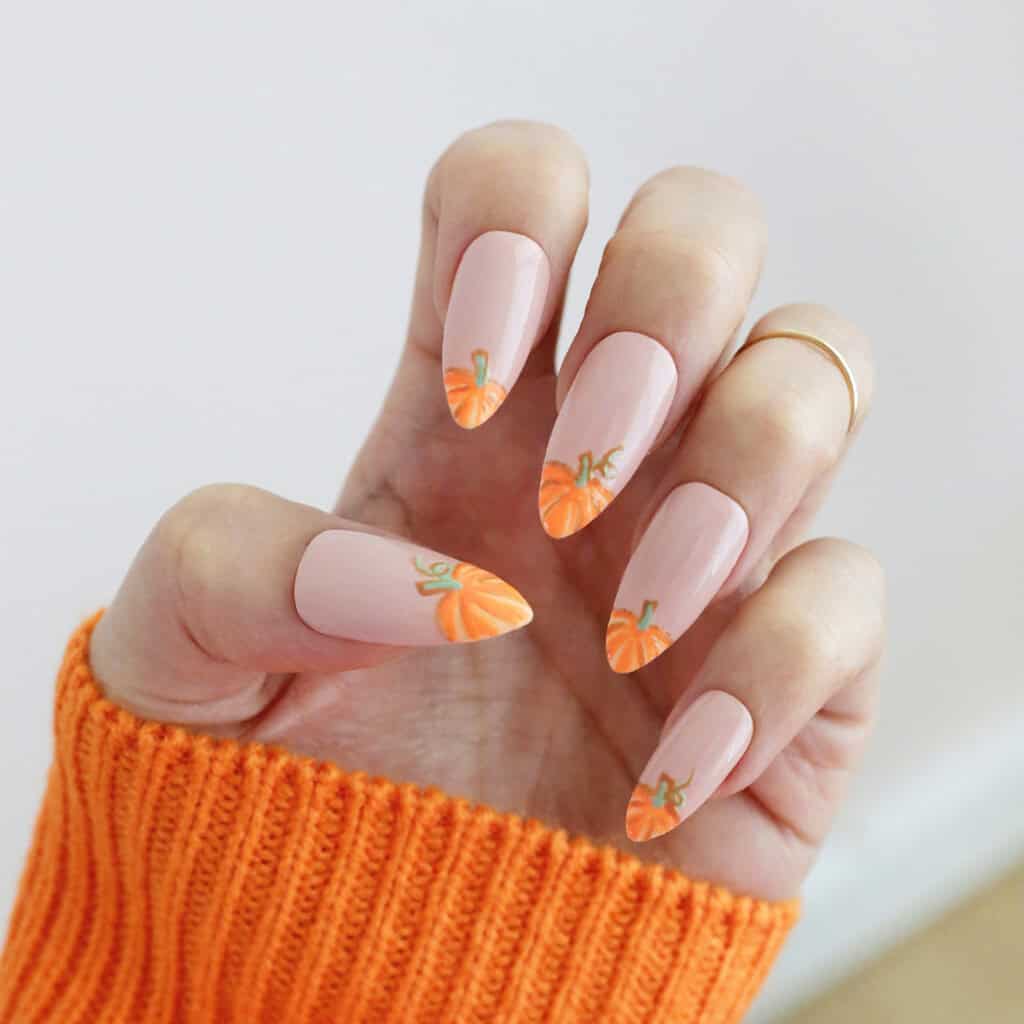
Pumpkin Patch
These nails are the perfect pumpkin patch accessories for your fall outings.
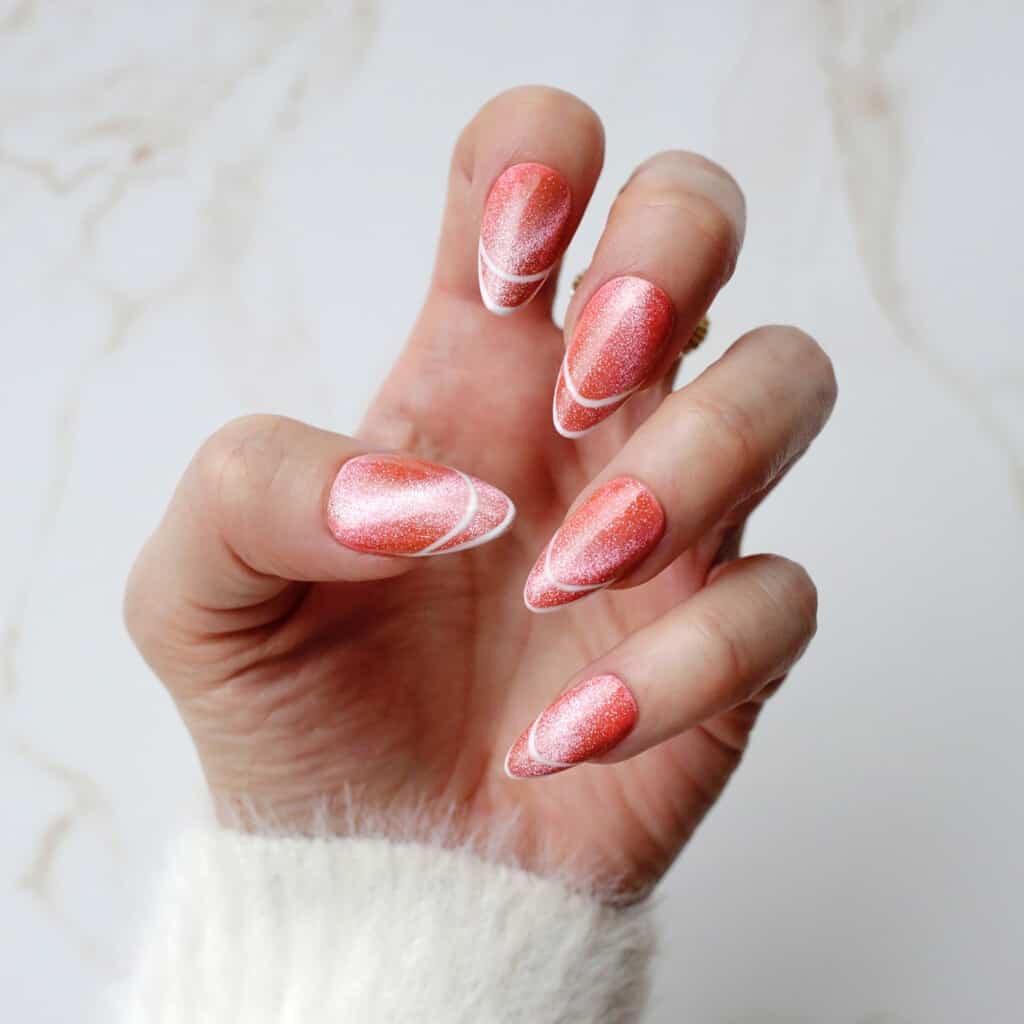
Coral Cat Eye
This coral cat eye effect is so glittery and pretty with a double French tip.
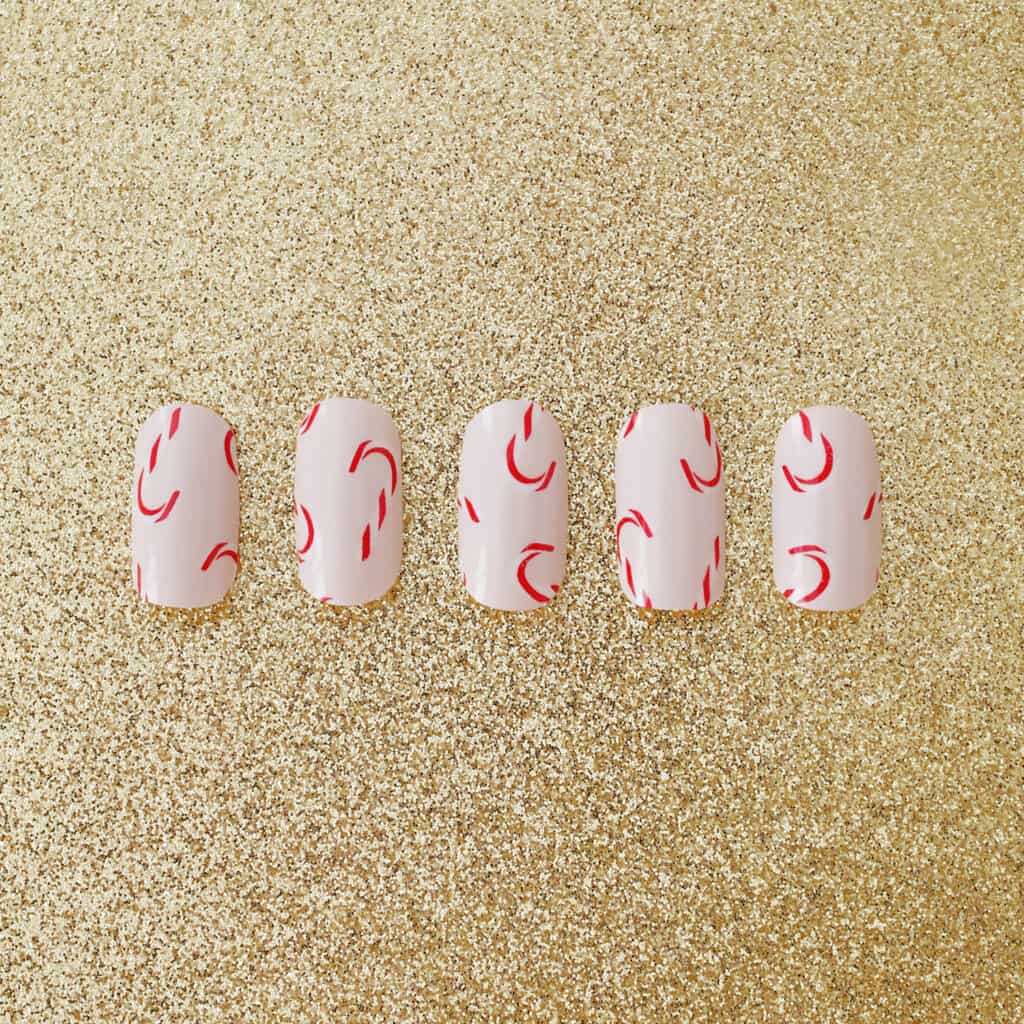
CANDY CANE LANE
An all over candy cane nail wrap is sure to keep your nails looking sweet this holiday.
EVERGREEN FRENCH TIPS
Pick your favorite shade of green and do a French tip for a colorful take on a classic design.
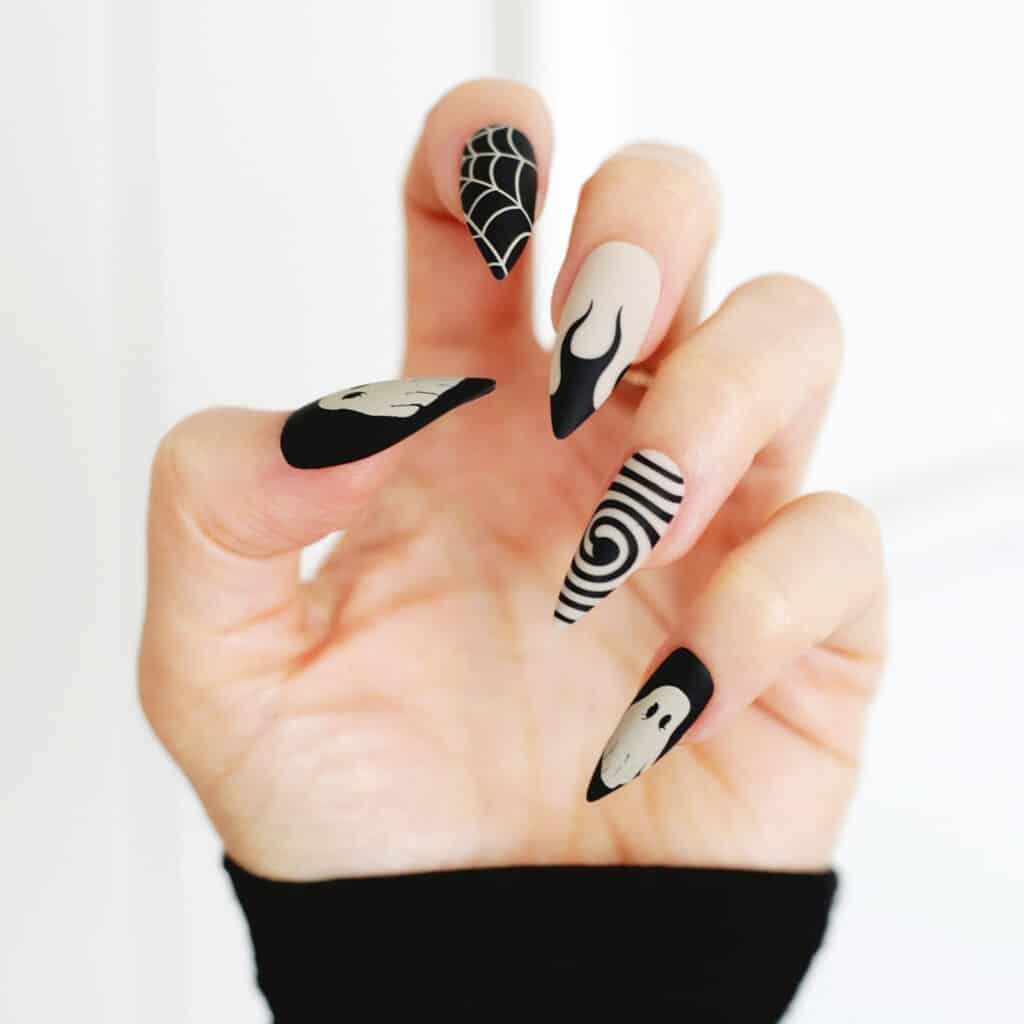
Halloween Town
Get into the spooky season with these taupe and black polish accent nails full of ghosts and spider webs for Halloween manicure fun (this would be fun on a coffin nail shape as well).
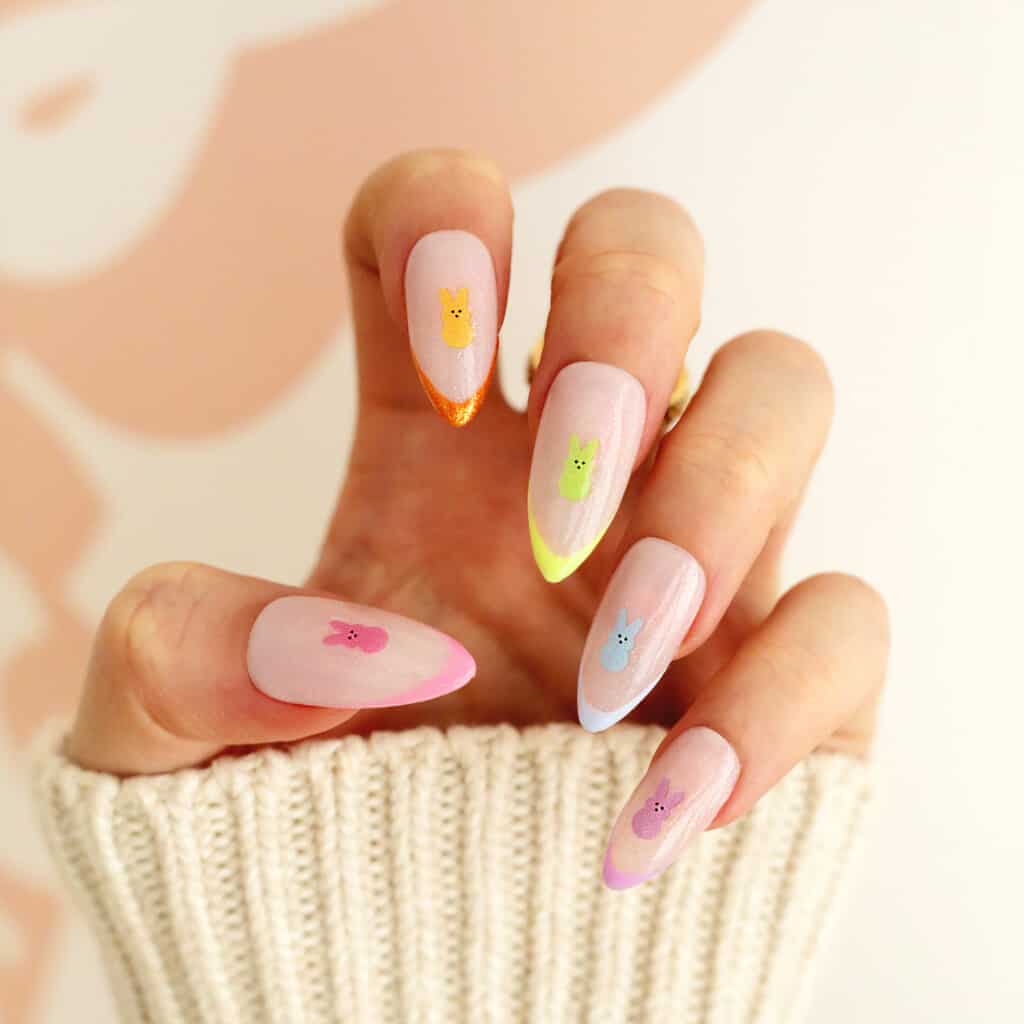
Where My Peeps At?
Rainbow colored pastel tips and little peeps are the perfect Easter egg hunt mani (or just use the peep stickers over natural nails with a clear coat topper).
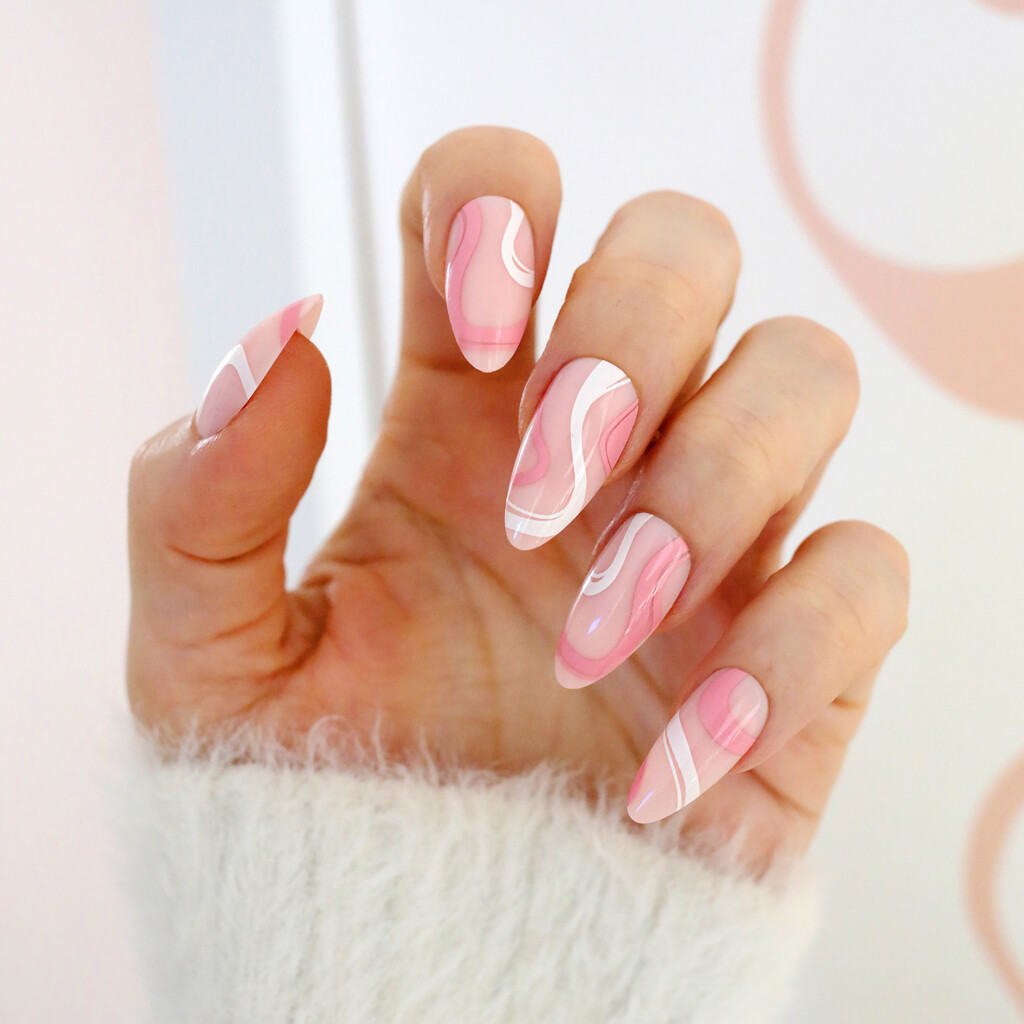
Pretty in Pink
These pink swirl nails will put a spring in your step!
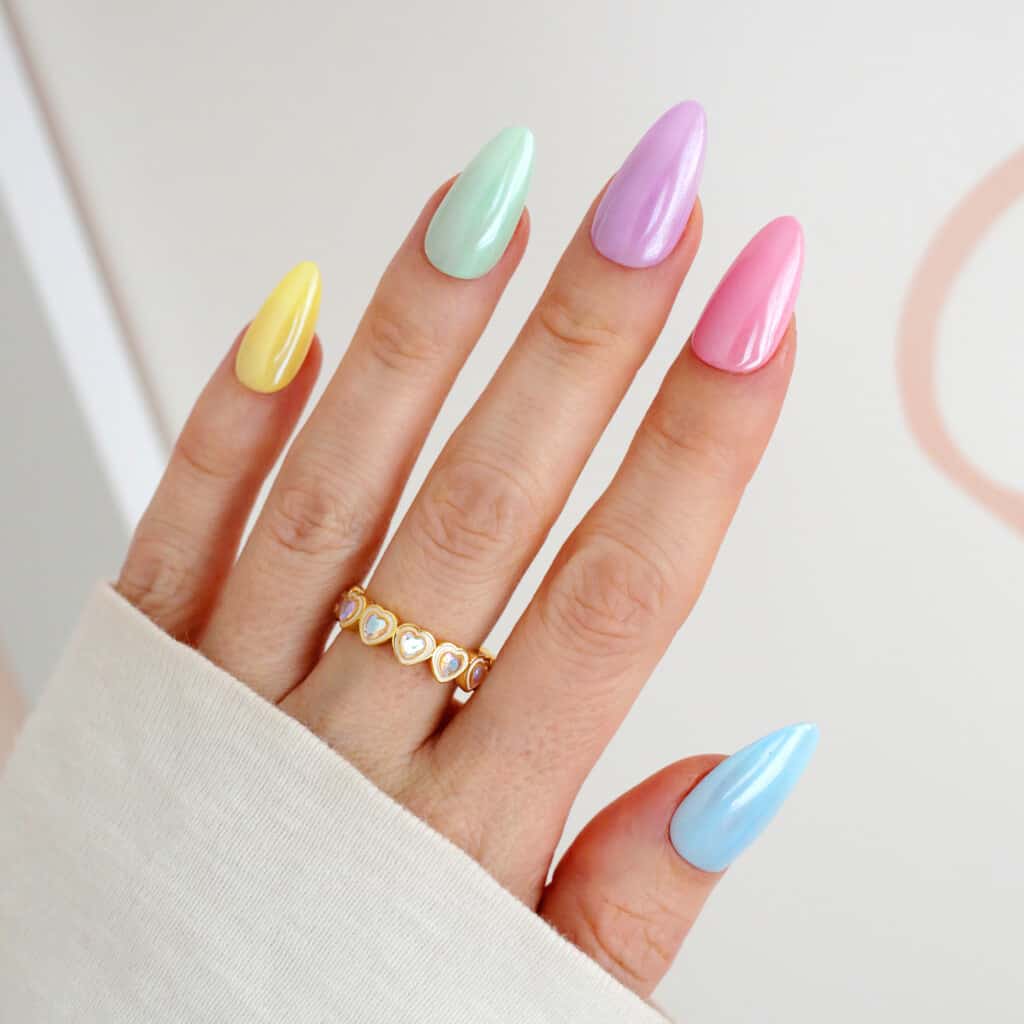
Pastel Chrome
These pastel chrome nails bring just the right amount of pastel power to your spring manicure.
Pink and Red Tips
These fun tips with the gold stars and gems add color and pattern to your holiday mani.
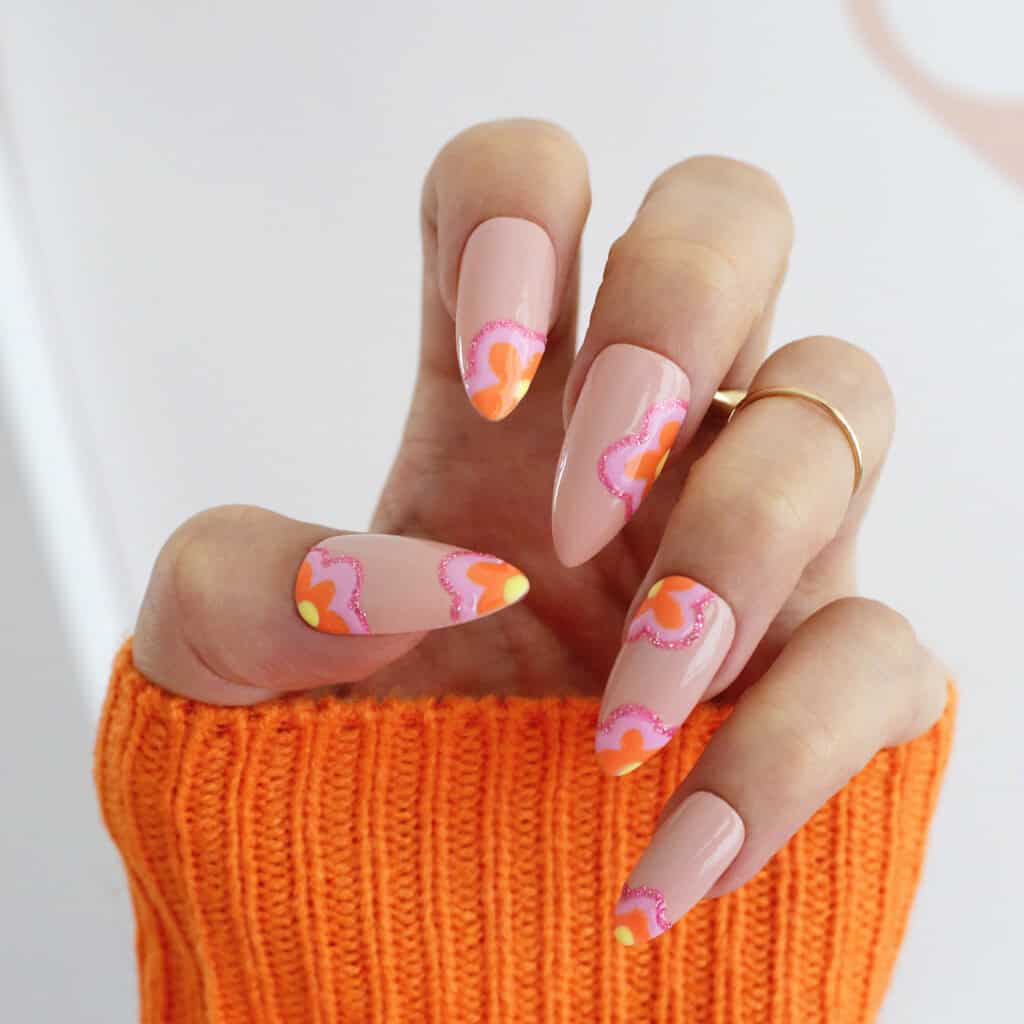
’70s Floral
Break out some updated Flower Child vibes with a glitter outlined ’70s floral look for spring or summer.
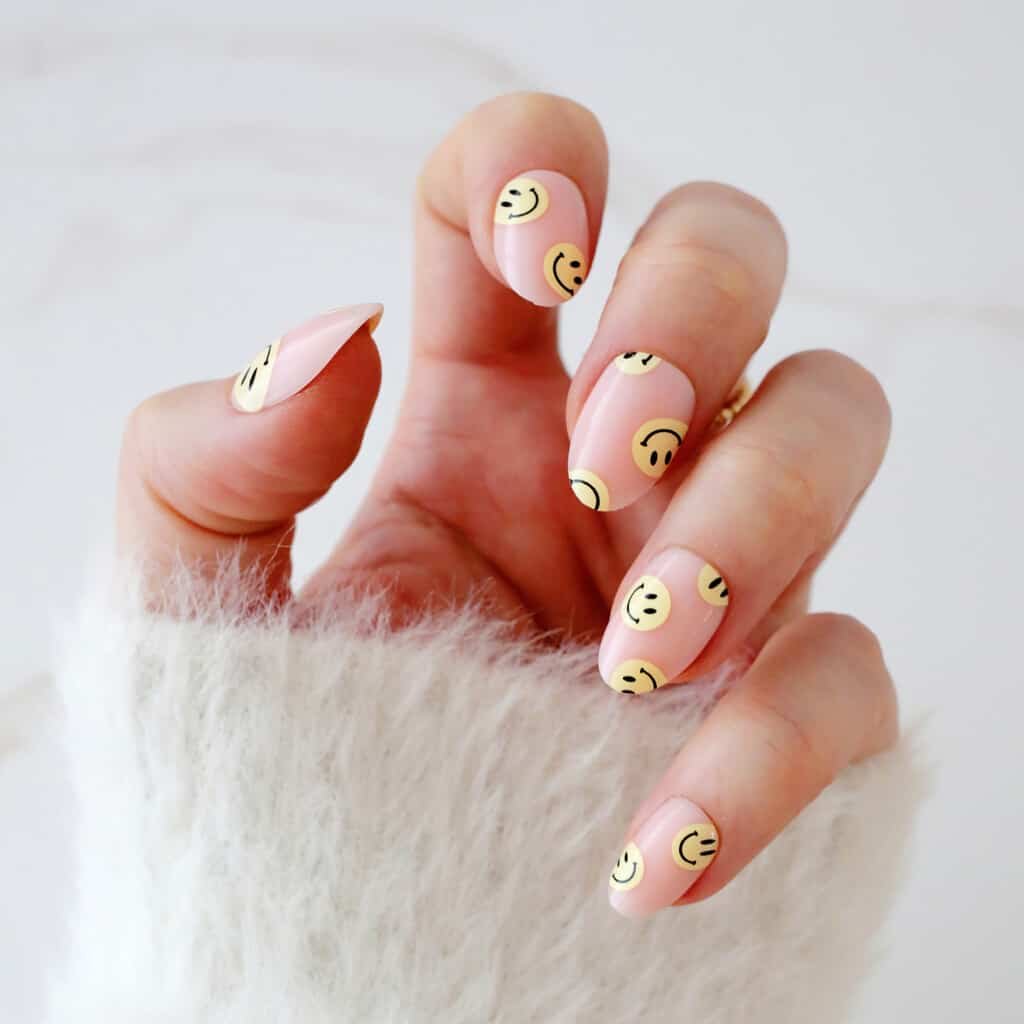
All Smiles
How cute are these short smiley face nails for spring or summer?
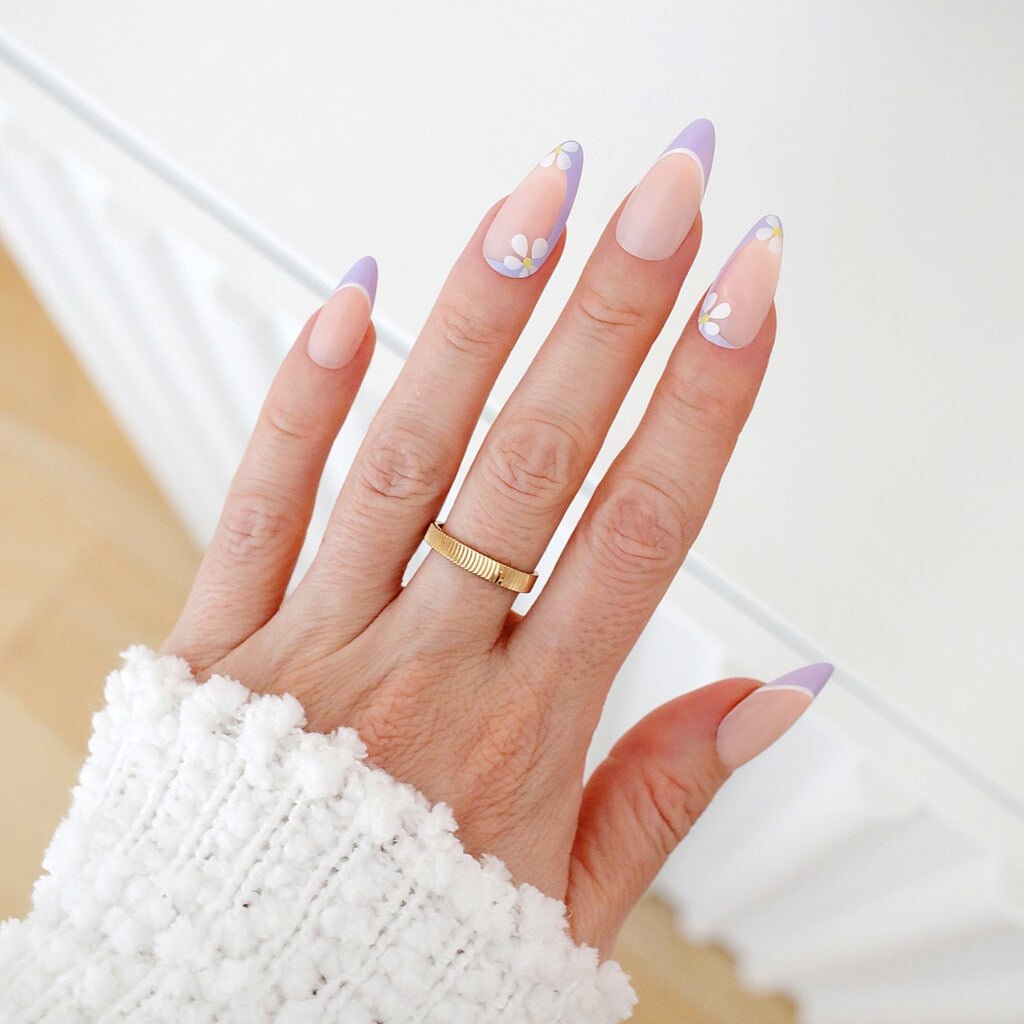
Lavender Love
These purple French tips with daisy details are the perfect welcome to spring weather.
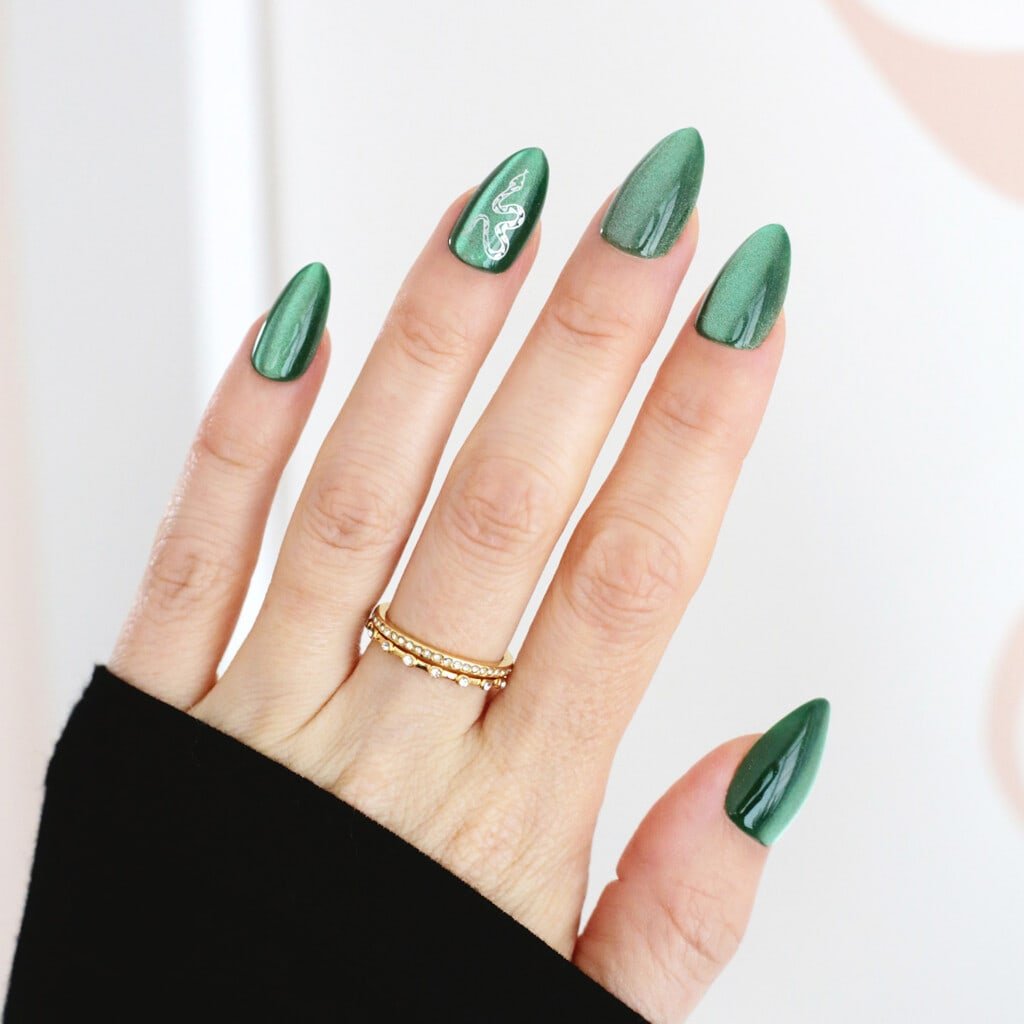
Slytherin Style
Show off your Slytherin allegiance with these velvet green nails with a silver snake accent.
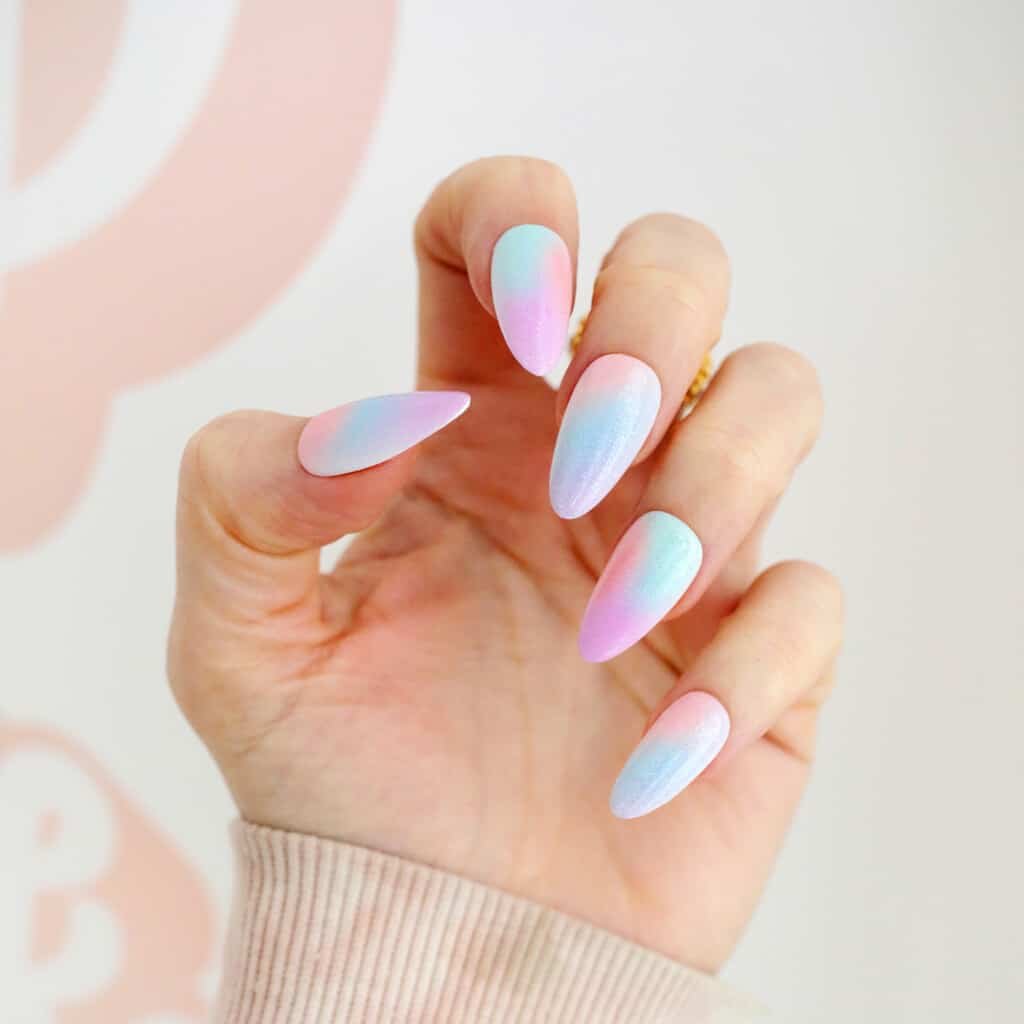
Pastel Rainbow Tie Dye
This pastel rainbow dream manicure is a colorful choice for the spring season and beyond.
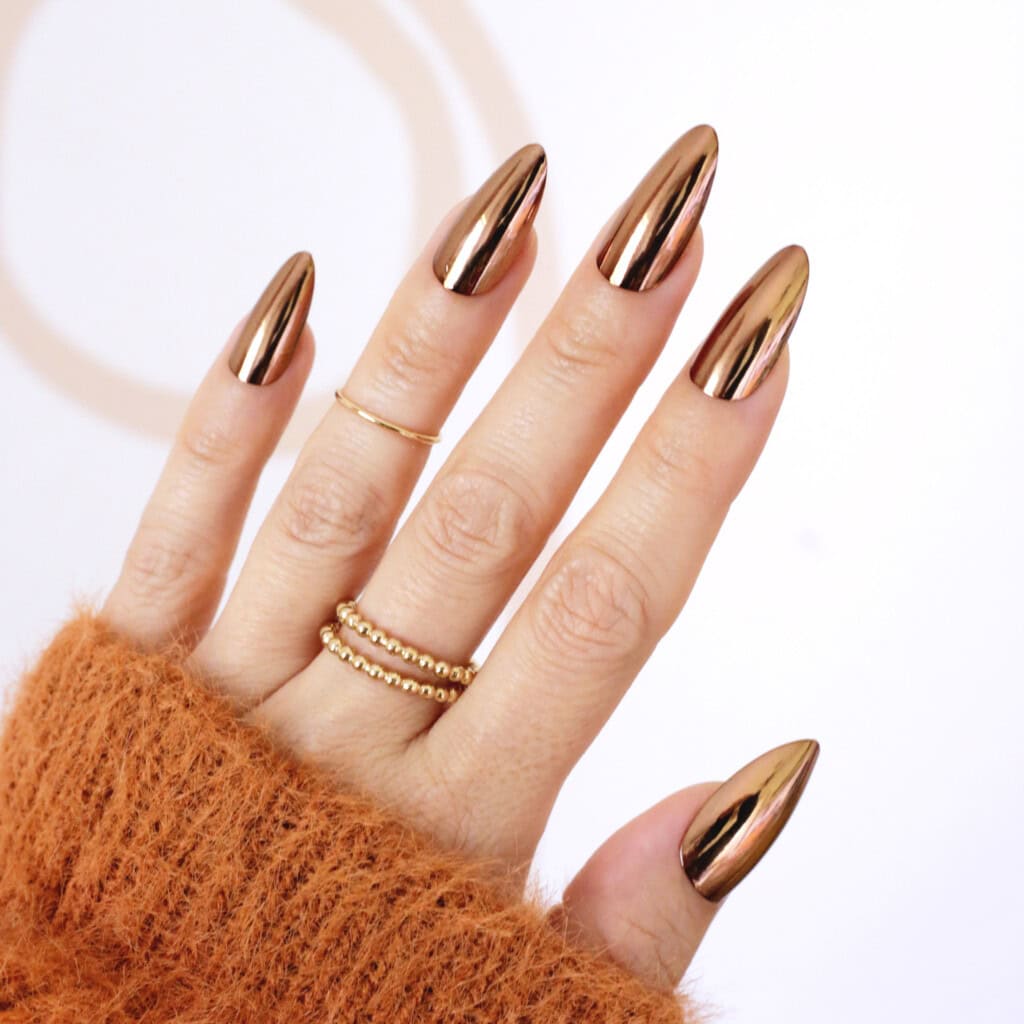
Chocolate Chrome
Bring on the mirrorball look with these chocolate chrome nails.
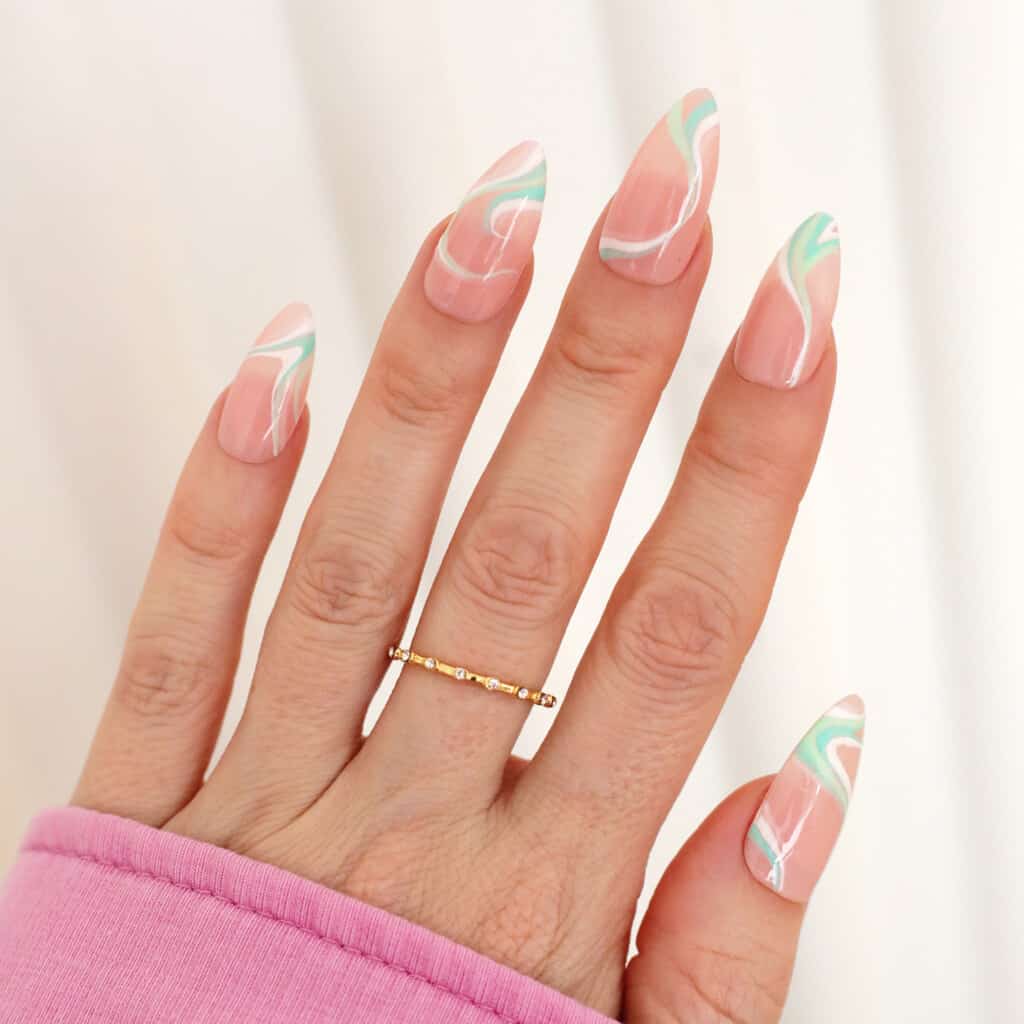
Minty Waves
These mint colored waves overtop a natural nail color will match all the new bud springing up in your yard.
Golden Tips
Go high style with this wavy gold tip design.
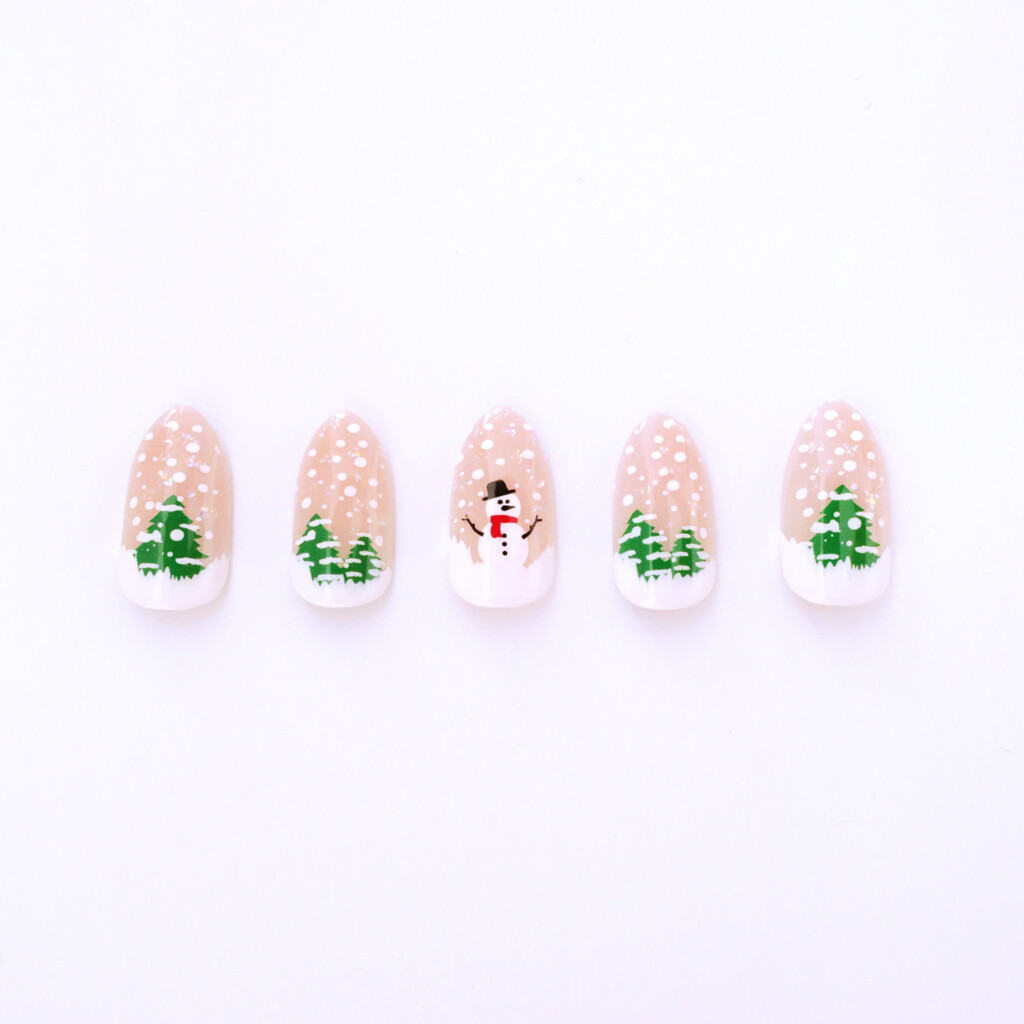
Frosty the Snowman
Make your nails a winter wonderland with a cute snowman and snow covered trees.
Rose Gold Shimmer
This design with double outlined glitter French tips is a classic design made sparkly perfect for Christmas into New Year’s Eve.
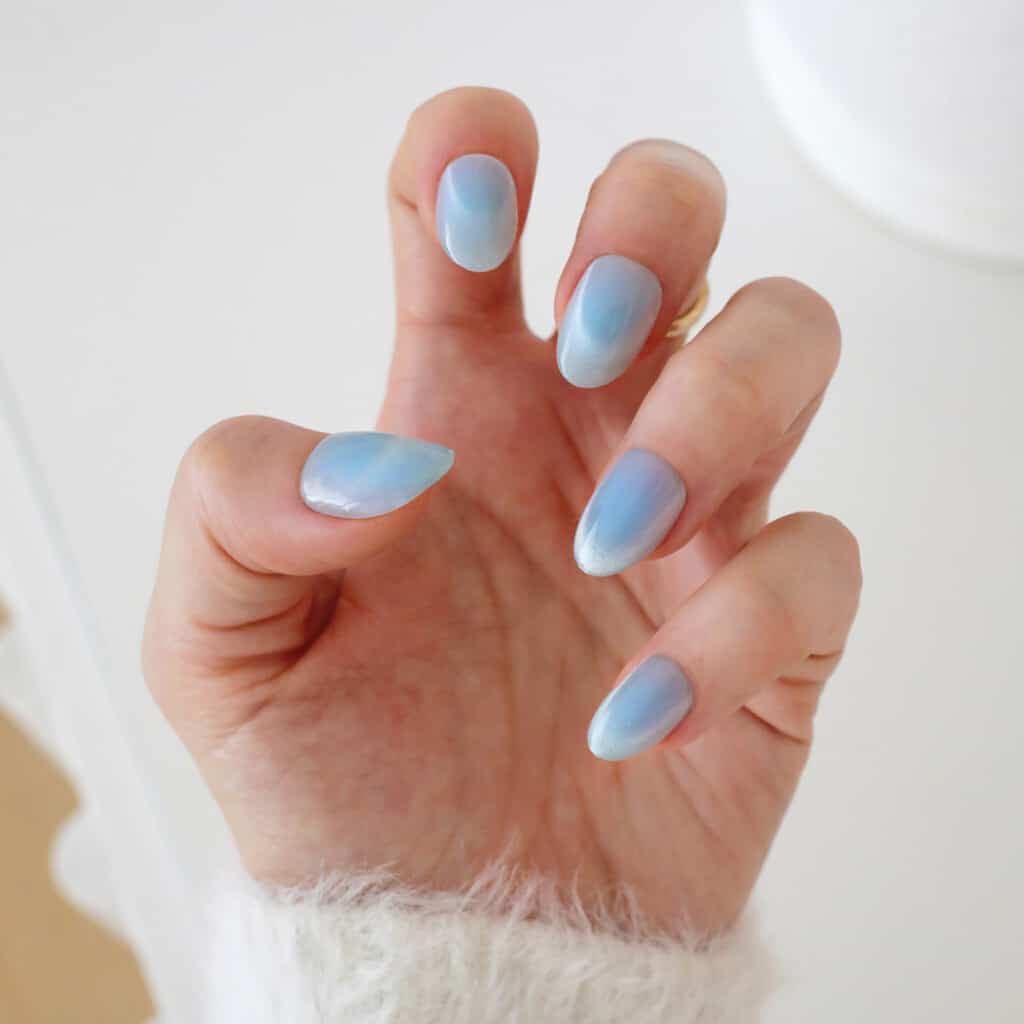
Blue Skies
These short velvet cat eye nails in a baby blue are a soft and pretty start to spring.
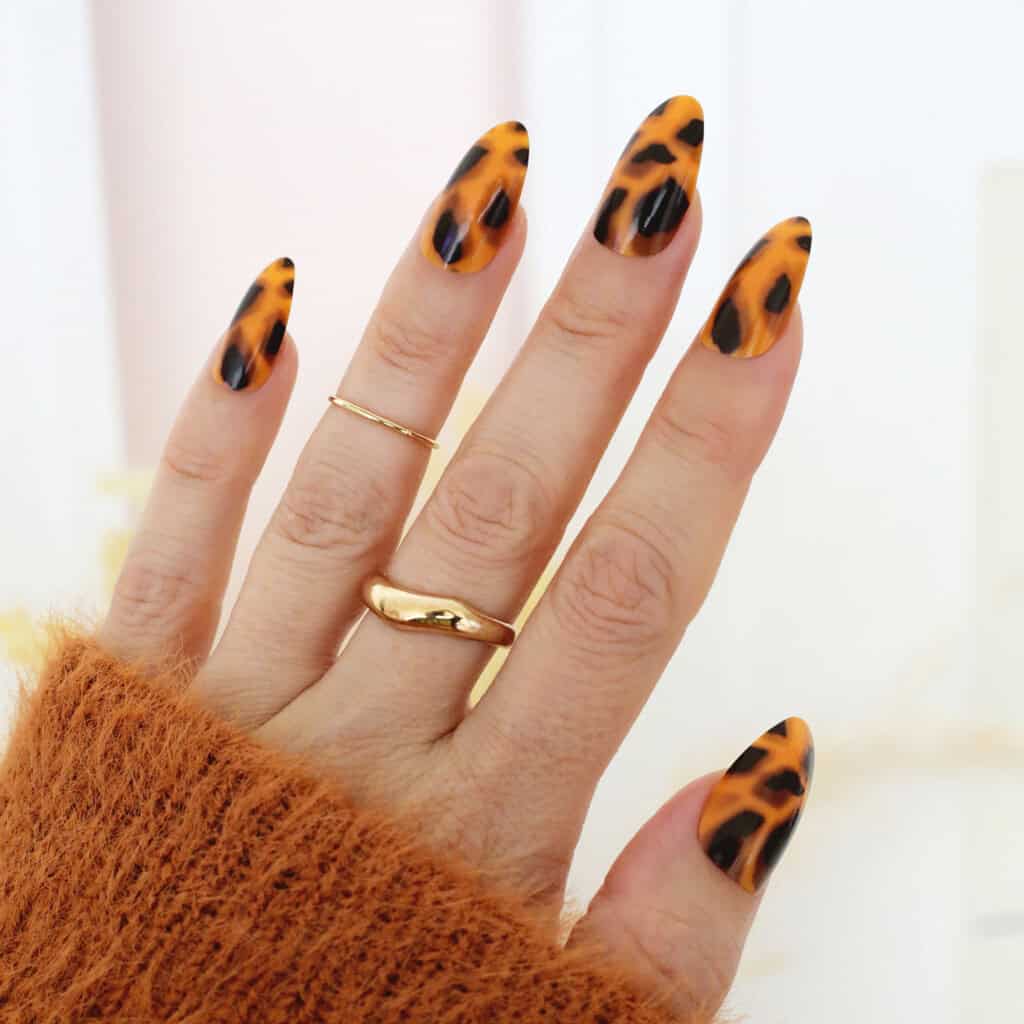
Lovely Leopard
Add some fun animal print to your wardrobe with this leopard design.
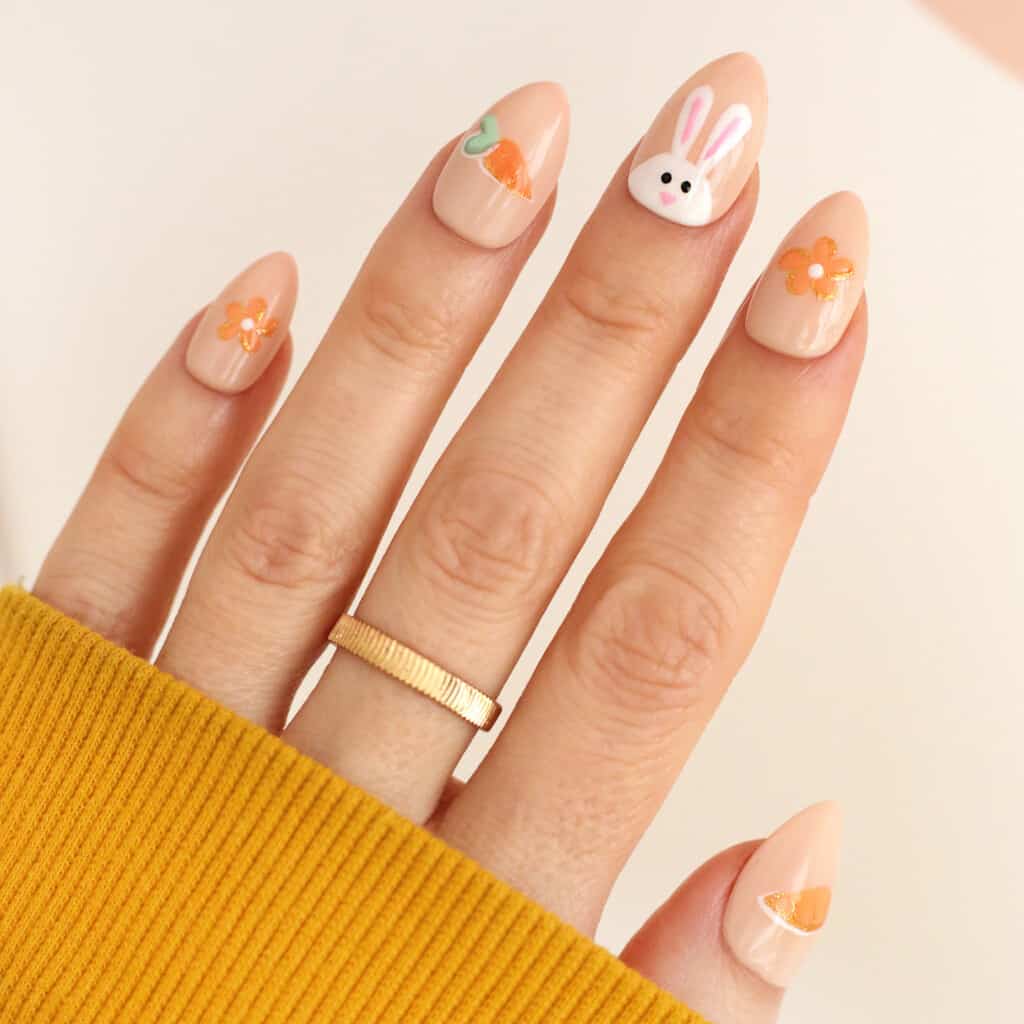
24 Carrot Bunny
Bunny faces and carrot details make a fun Easter manicure.
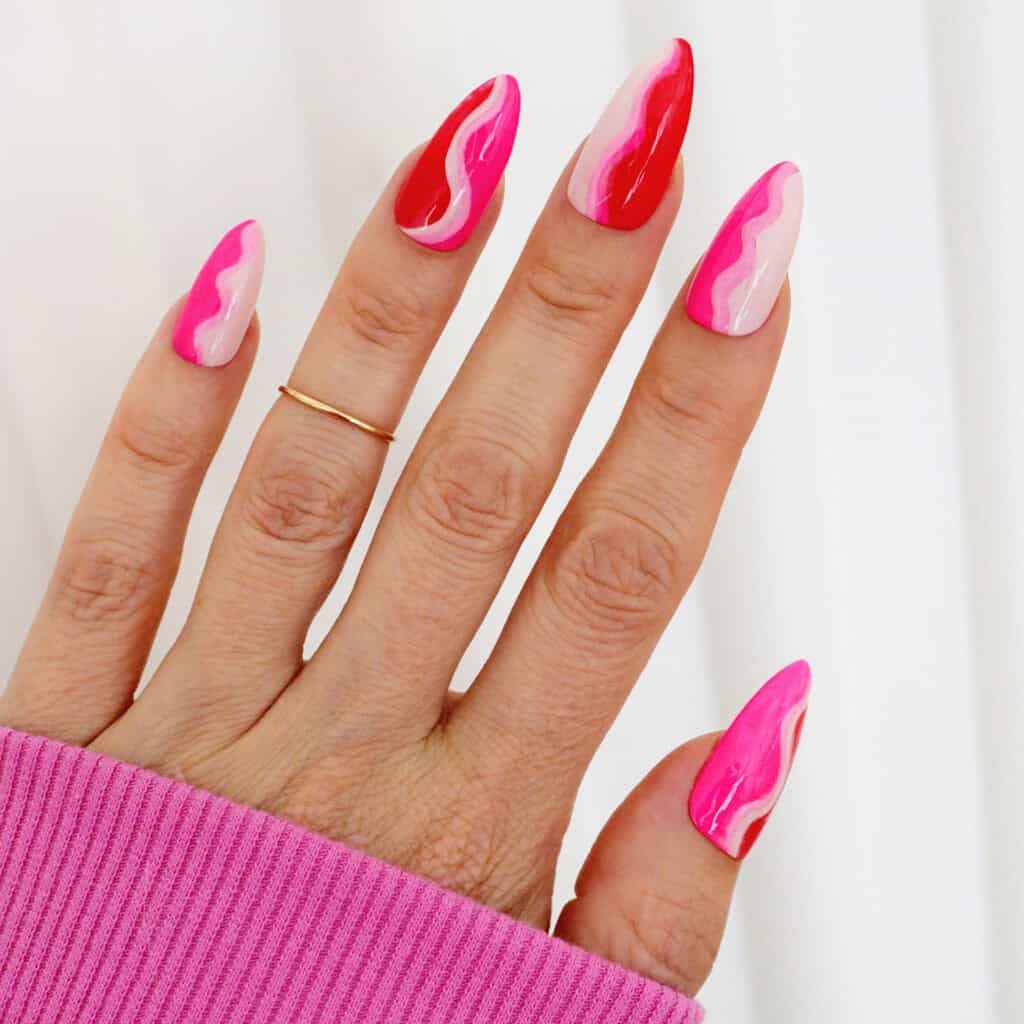
Barbie Waves
These neon pink and red gradient waves bring a pop of color to any Valentine’s Day or spring and summer look.
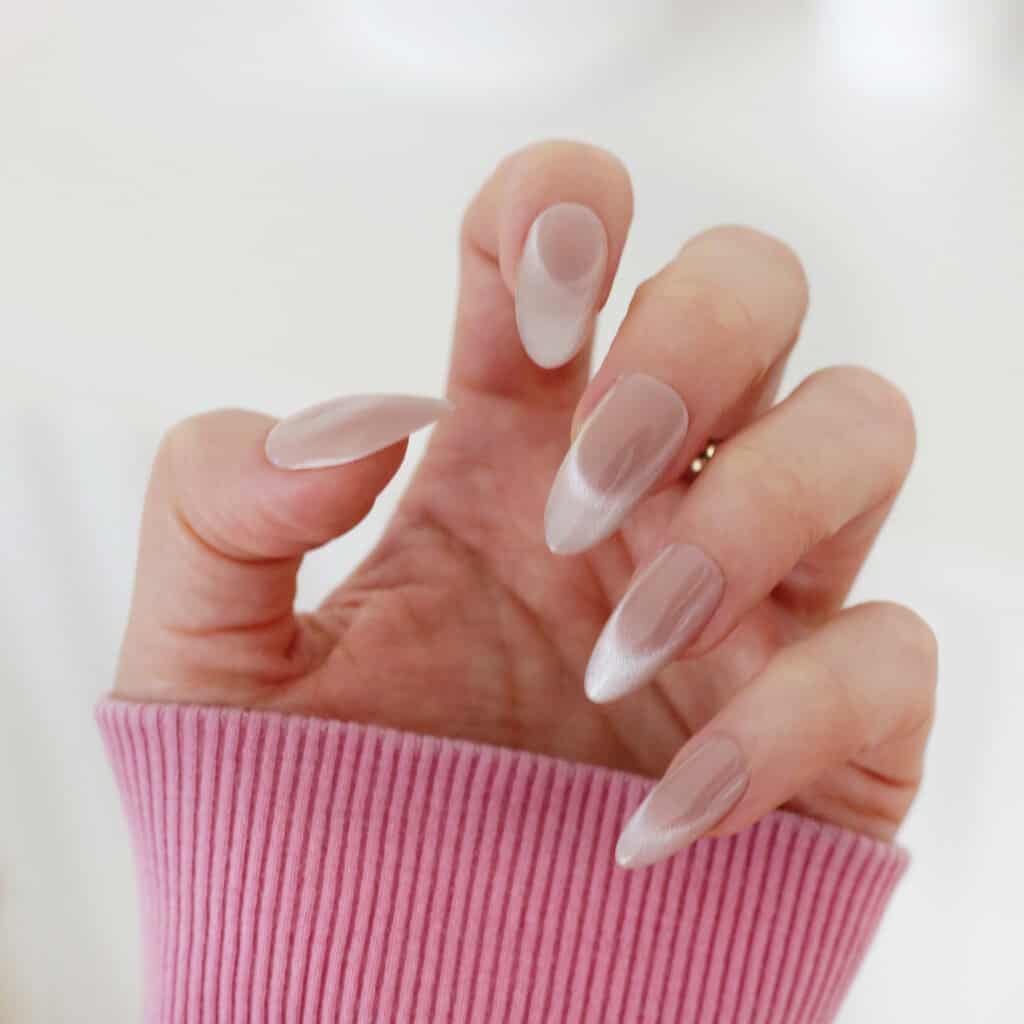
Nude Velvet
The velvet cat eye effect of these nude nails is stunning and matches any outfit all year long.
Greensleeves
These forest green nails with greenery decorations are delicate and festive without being too busy.
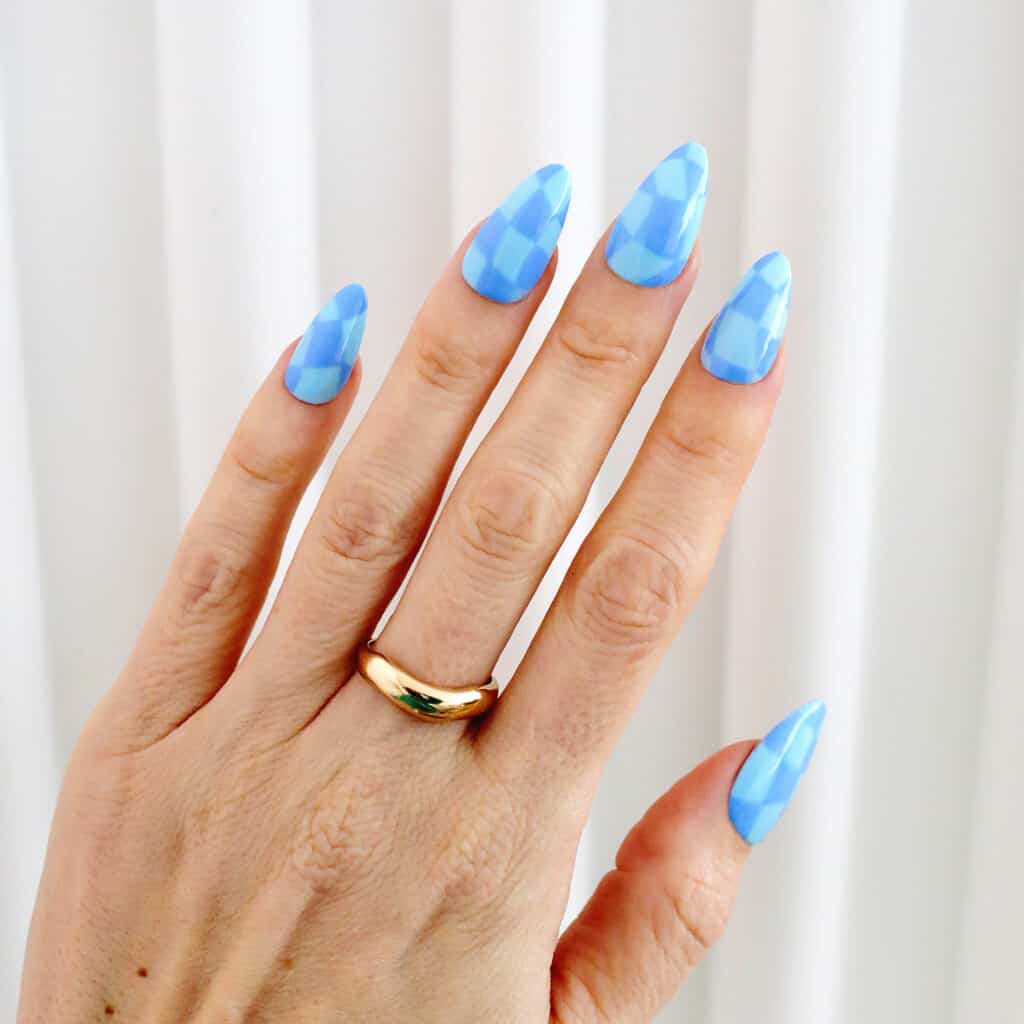
Wavy Checkerboard
Get into the checkered trend with this wavy design.
Lace and Pearls
Add the look of lace and pearls to your manicure for a fun yet sophisticated look.
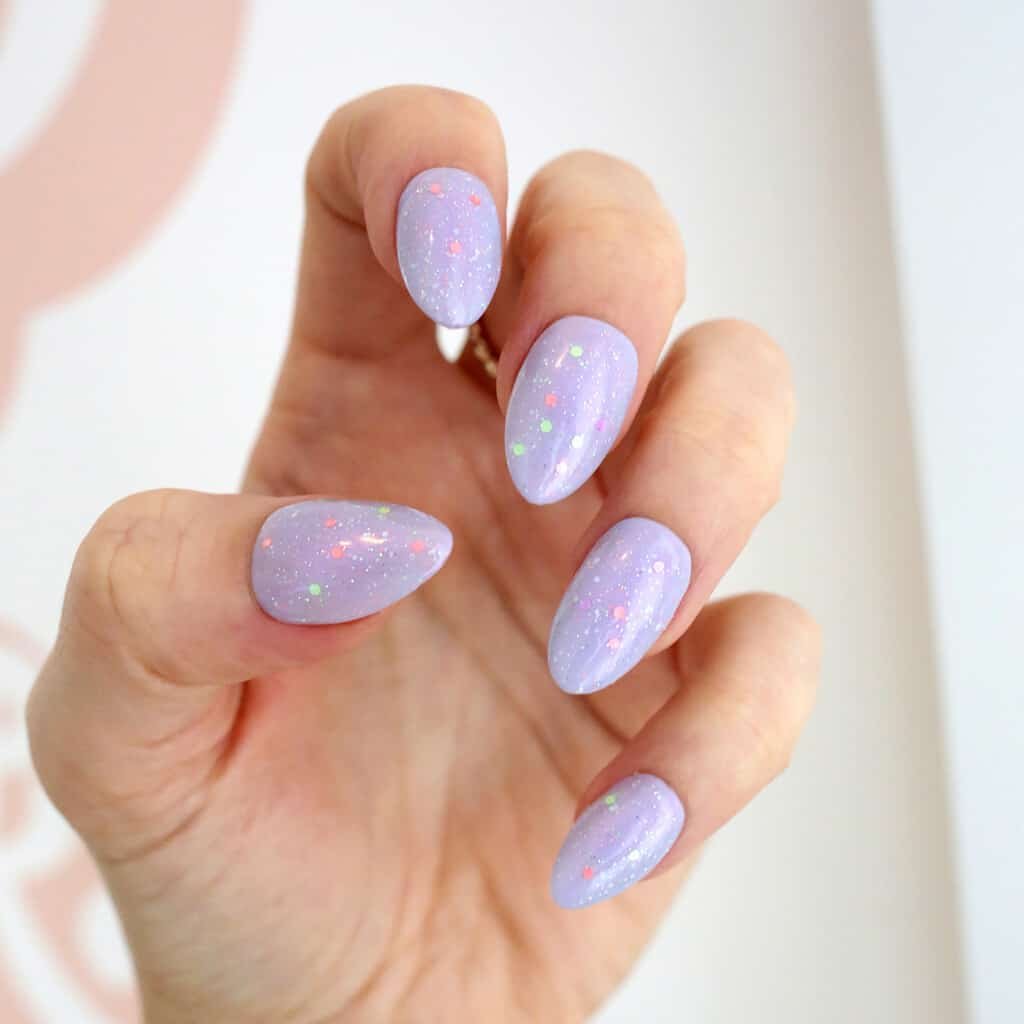
Pastel Confetti
Celebrate spring with pastel confetti chunky glitter over the top of your favorite spring pastel hue.
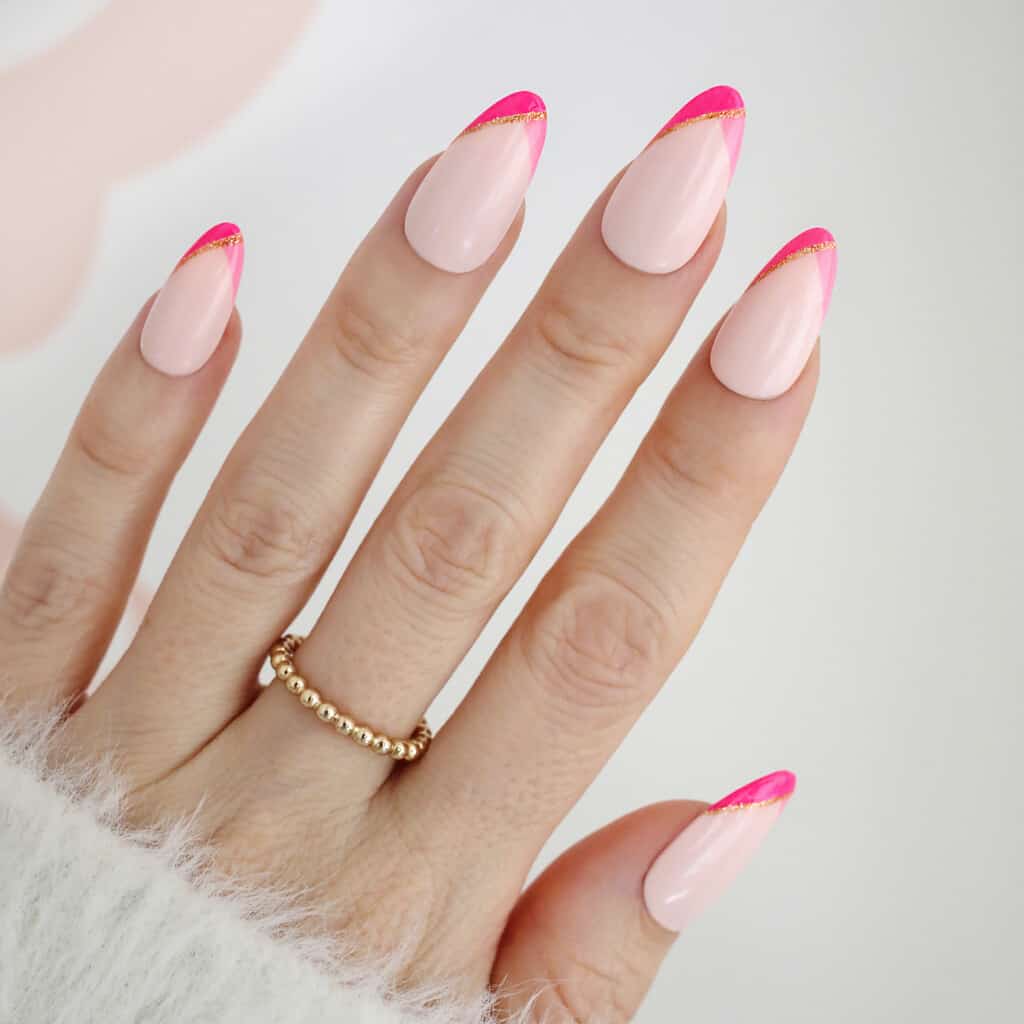
Pink Color Blocked Tips
Color block your French tip nails with pink neon and glitter liner for a fresh look.
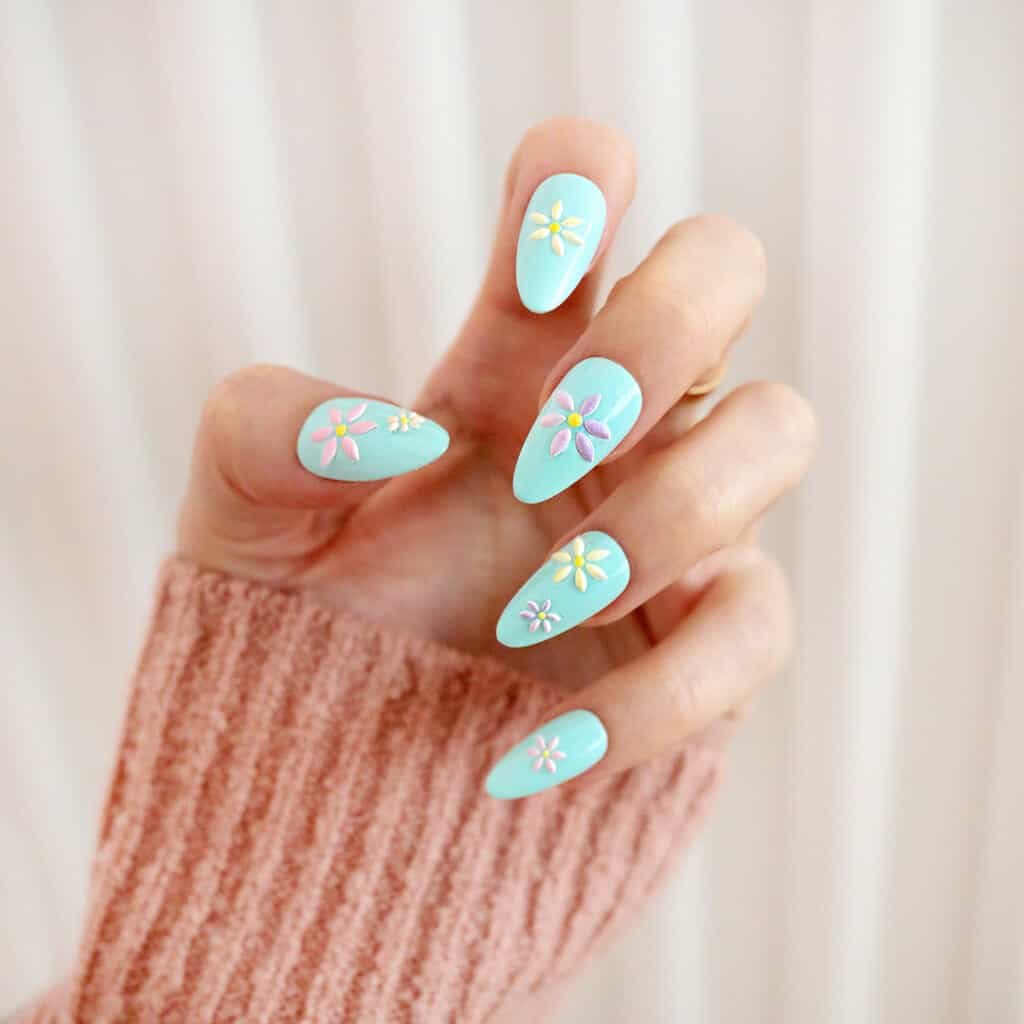
Pastel Rainbow Flowers
Add color with a mint green base and some rainbow pastel petals!
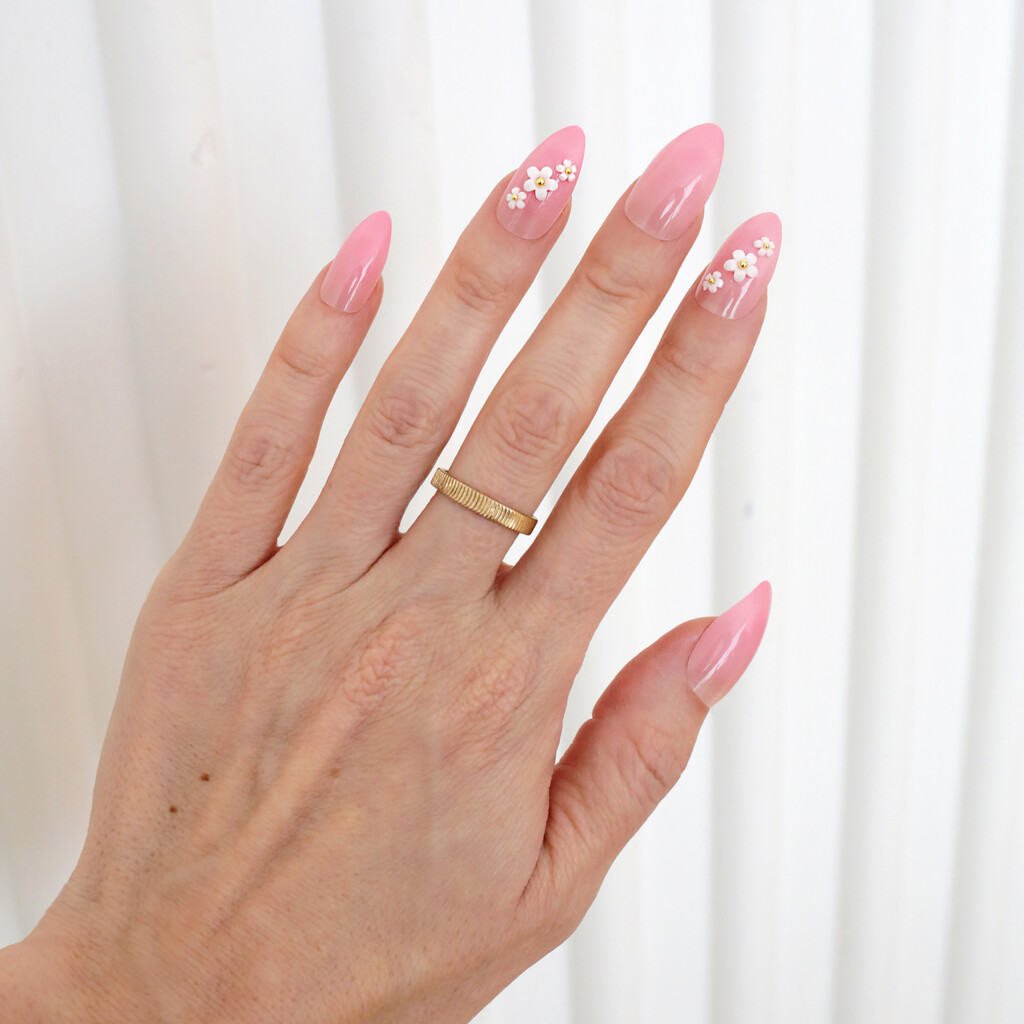
Daisy Dukes
These 3D flowers added to a pink ombre base are exactly what you need to leave your winter blues behind.
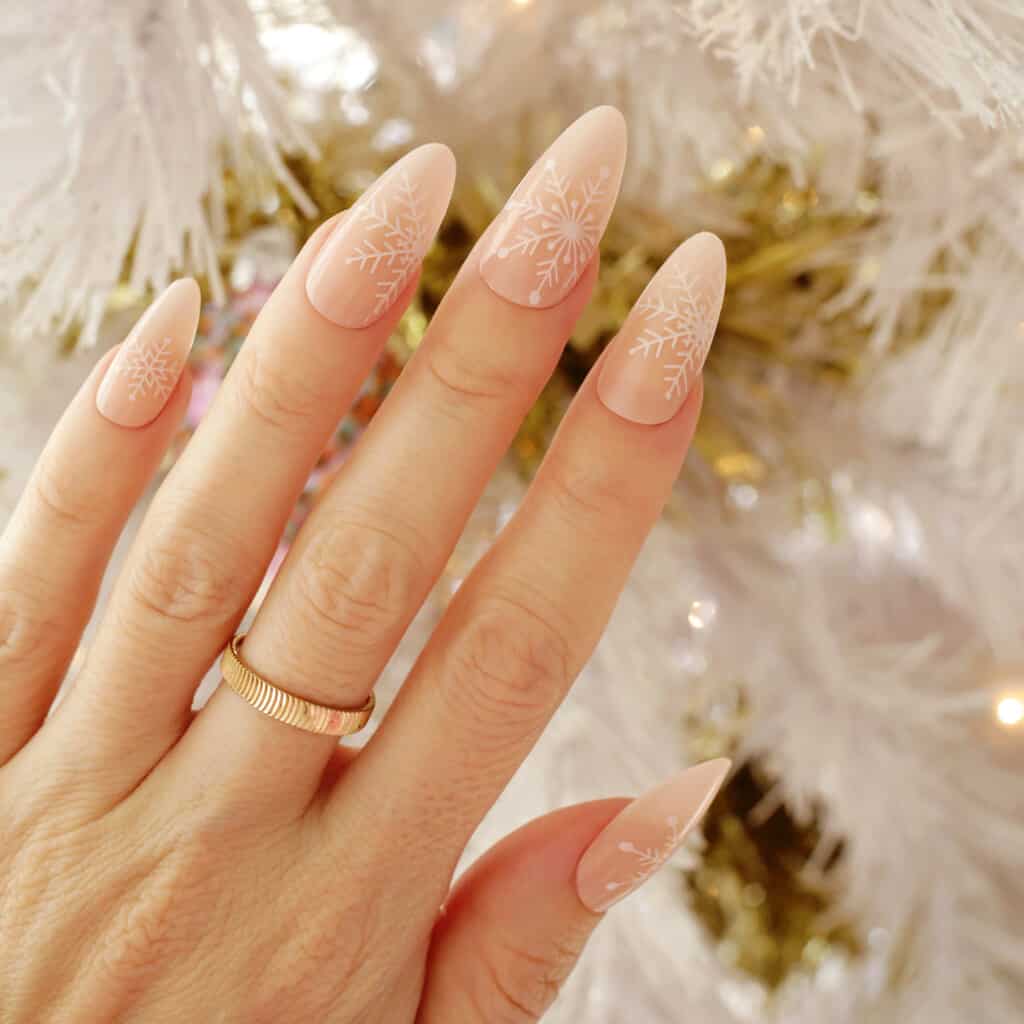
Snow Place Like Home
These large snowflakes make a statement on each nail and on a nude background they are subtle yet sweet.
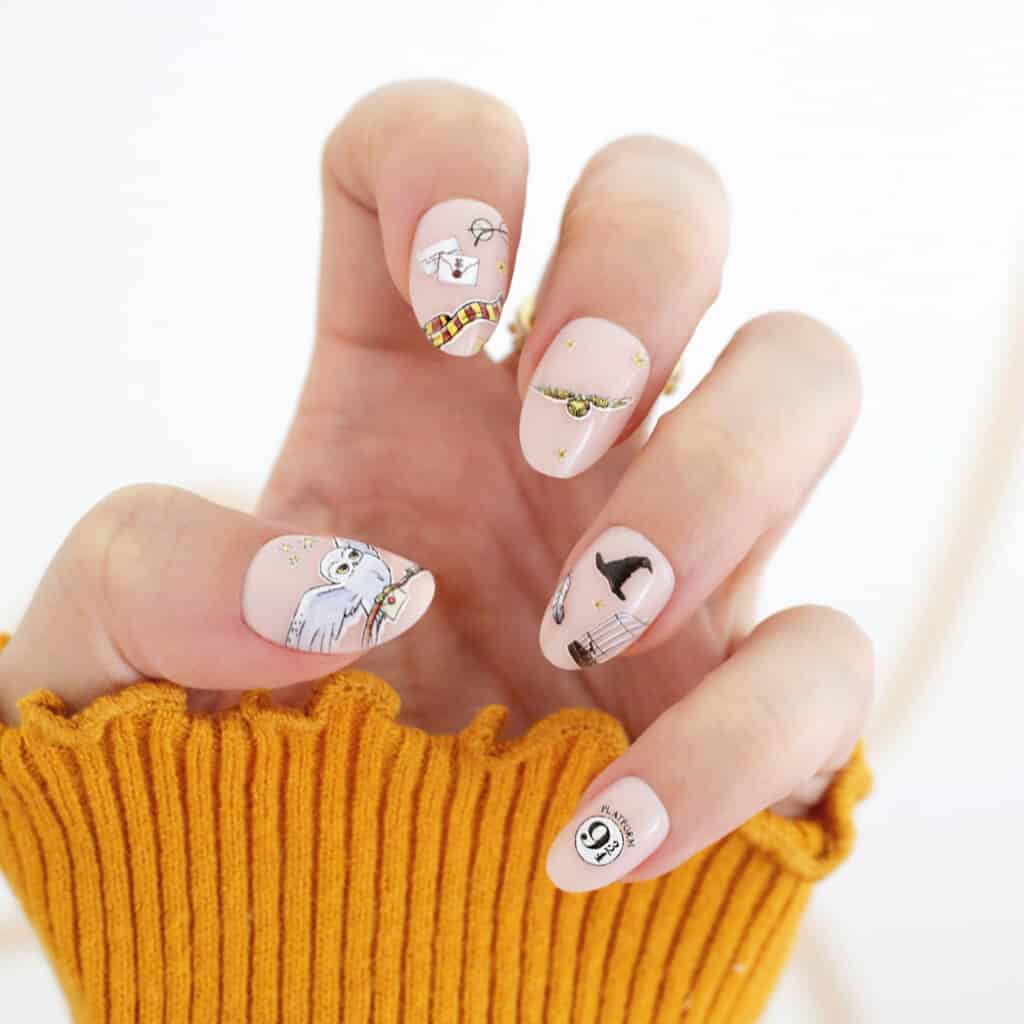
Harry Potter
Show your HP fandom off with these short Harry Potter nails fit for any witch or wizard.
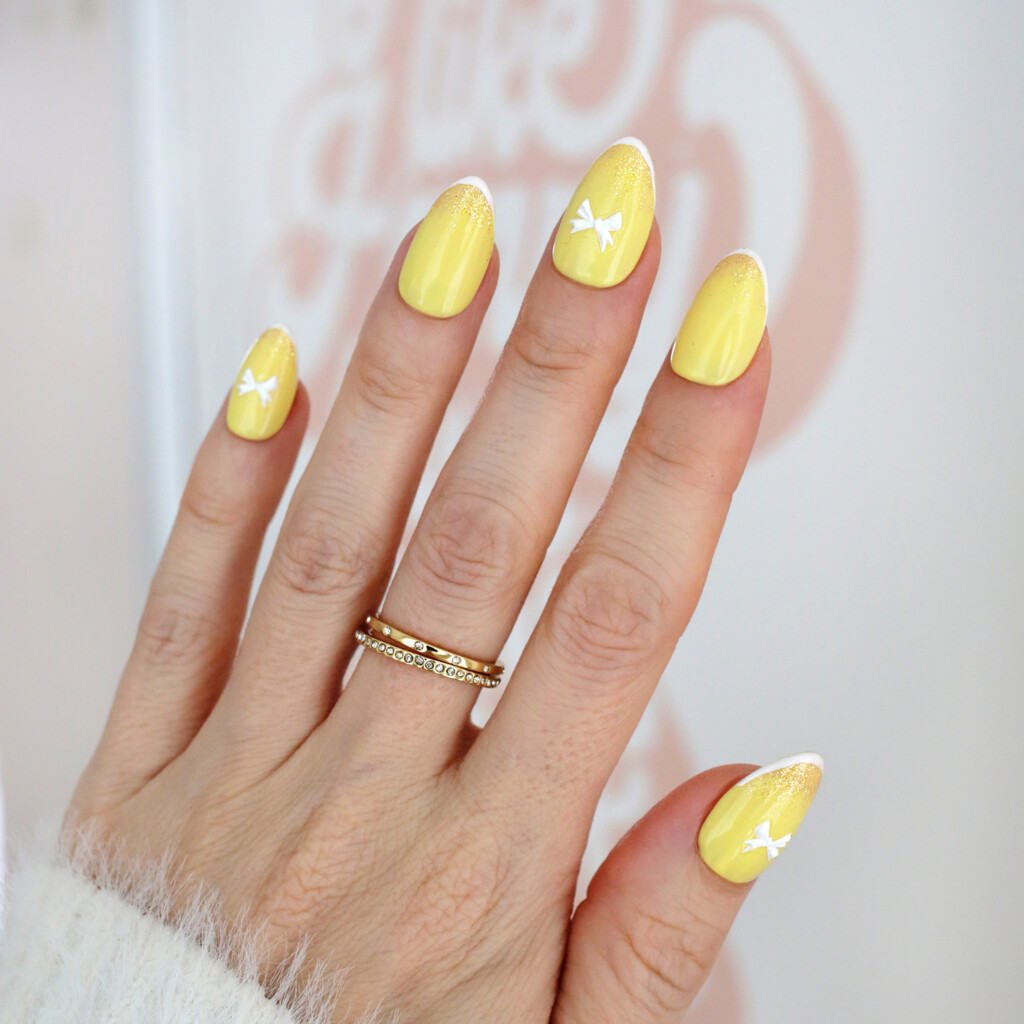
Sunshine Bows
Add a little sunshine to your Easter with these yellow glitter tipped nails with tiny bows.
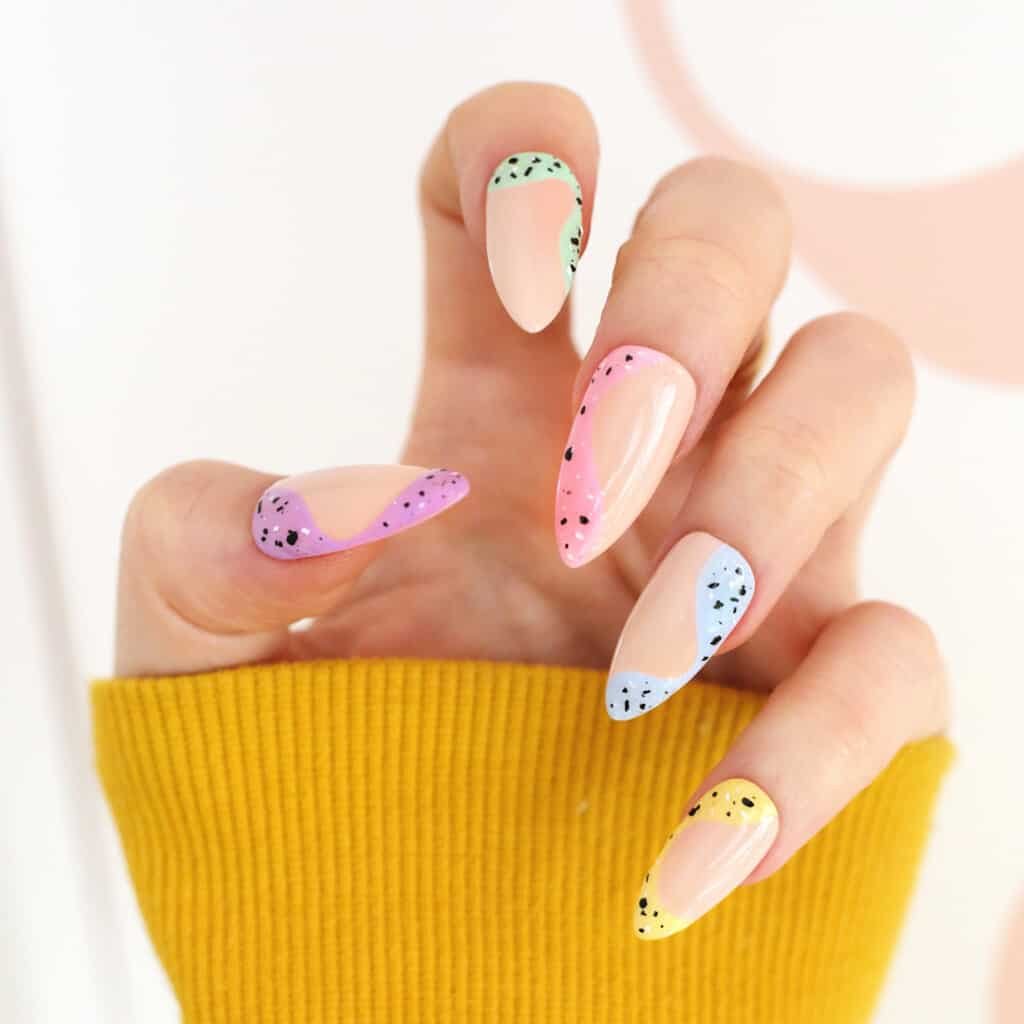
Whopper Waves
Copy your favorite Easter candy in a more abstract way with these speckled egg nails in pastel polishes.
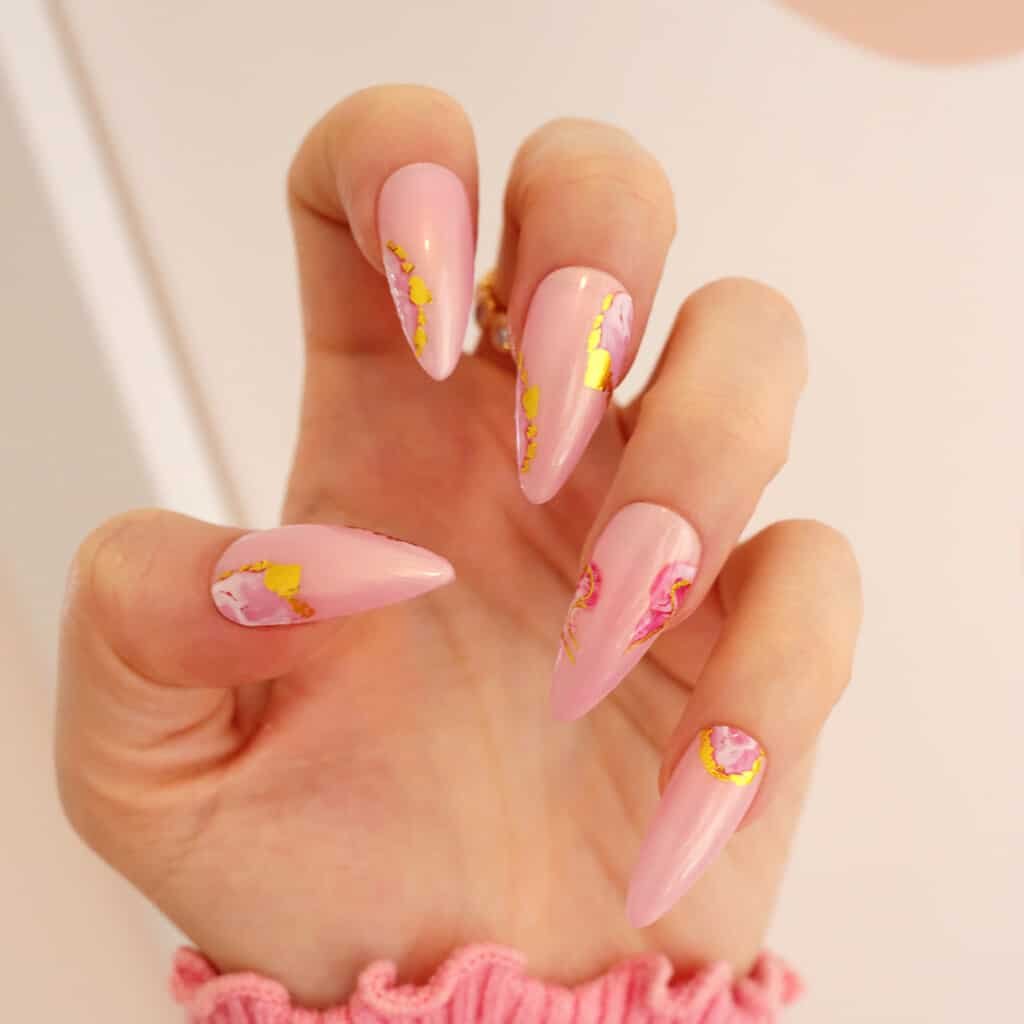
Pink Marble
Add some gold foil marble details to your pink mani for a sweet spring look.
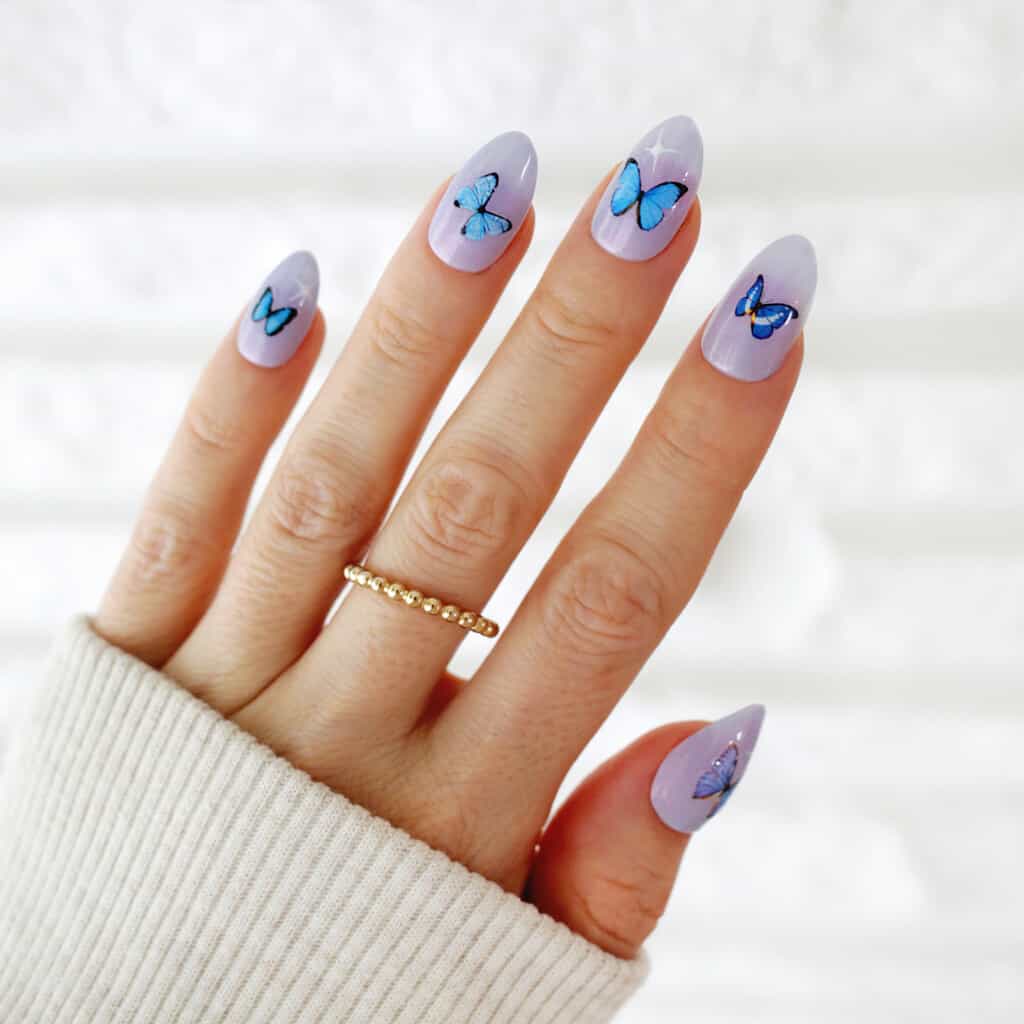
Blue Butterflies
Make your spring mani a breeze with butterfly decals.
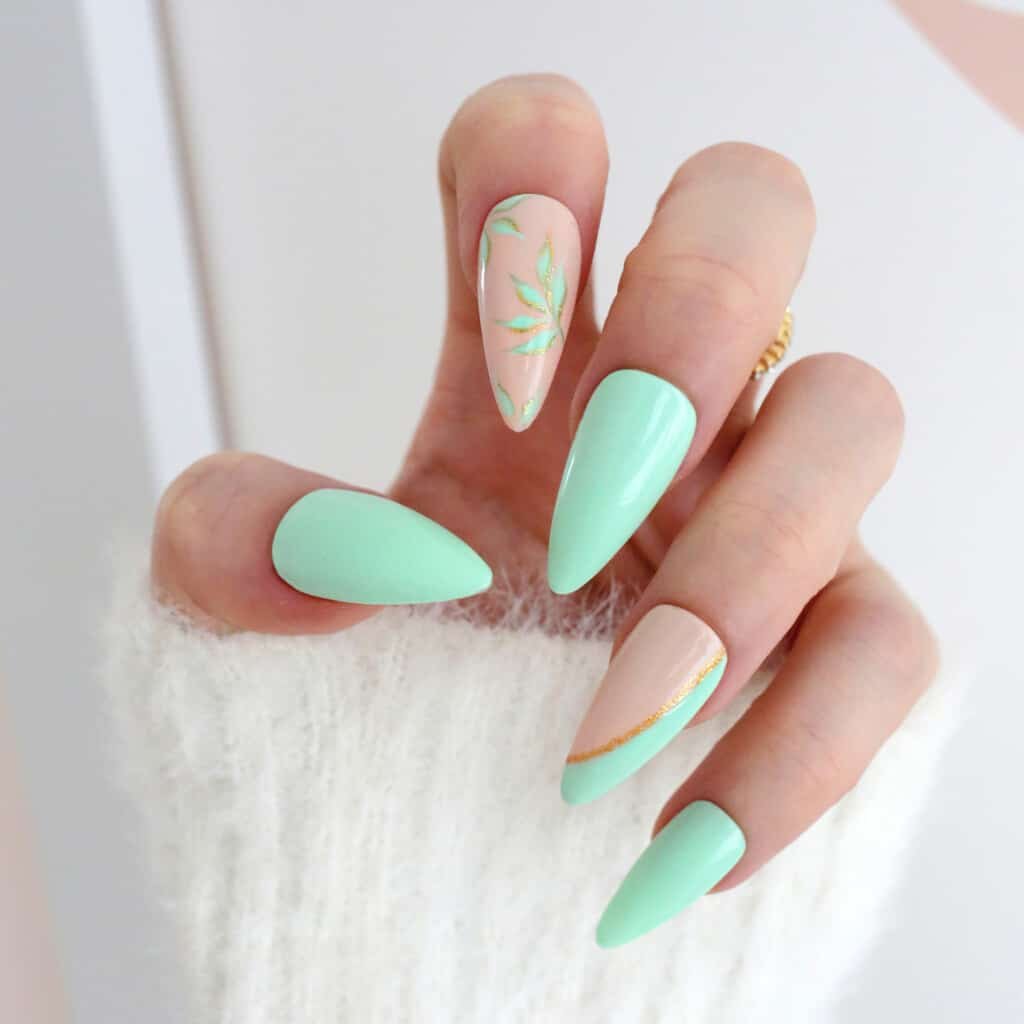
Spring Has Sprung
Have fun with accent nails with this mint greenery design.
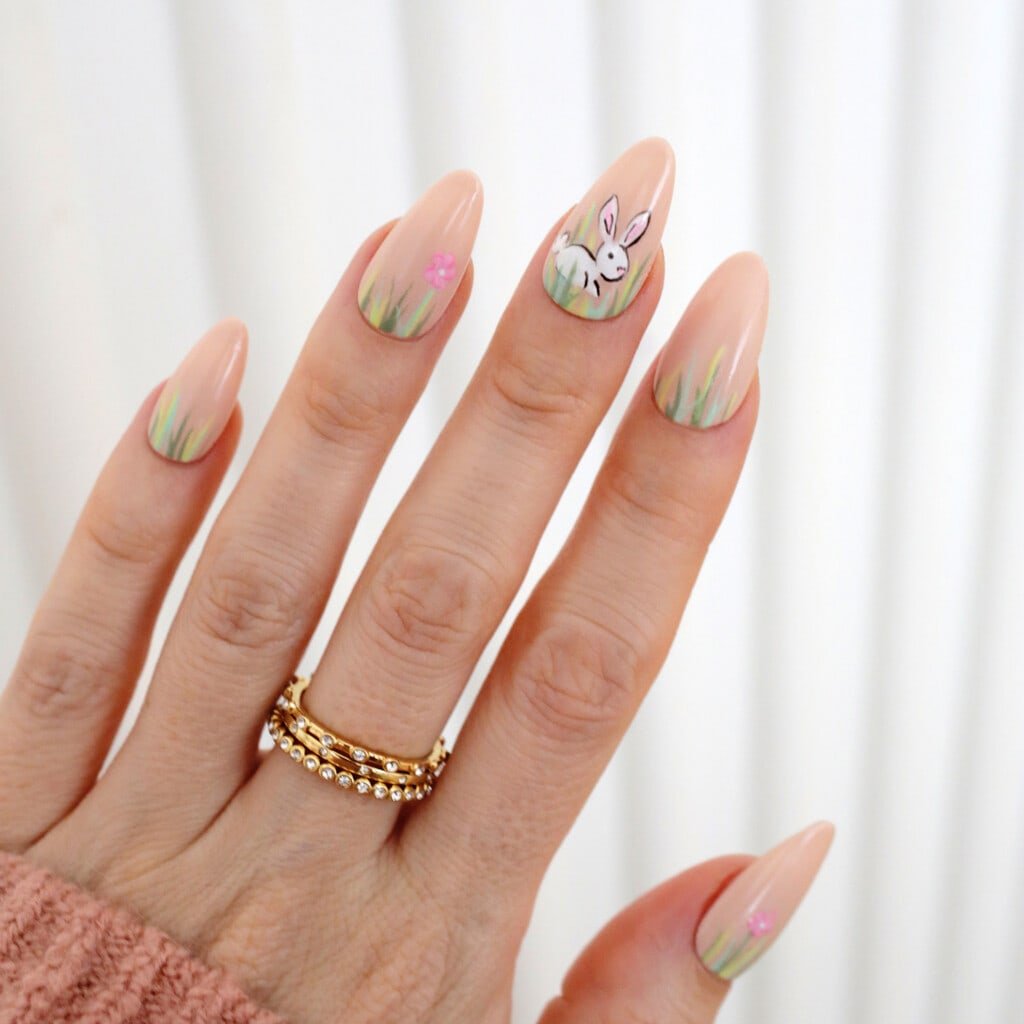
Bunny in the Grass
This adorable little bunny in a field is sure to make you smile on Easter morning.
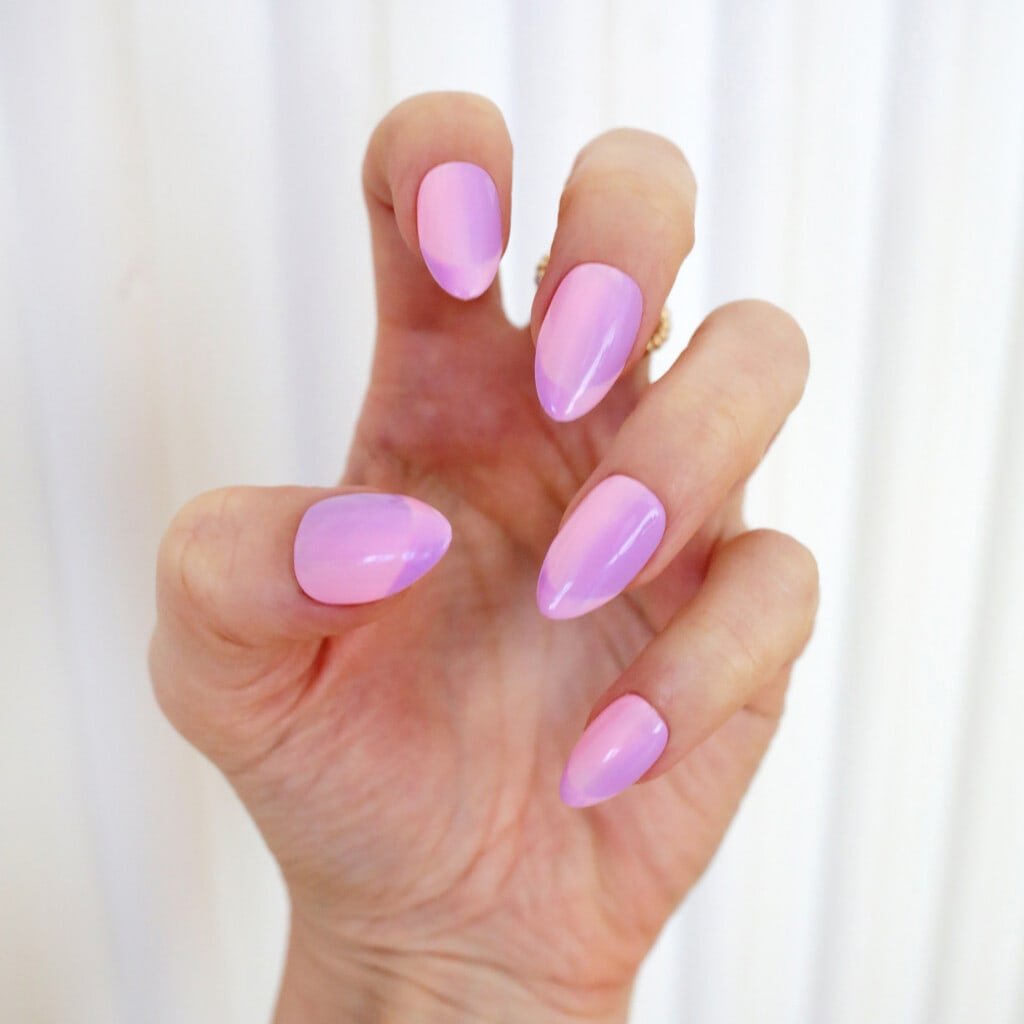
Spring Barbie
Try the hot trend of a reverse optical illusion French manicure in the perfect pink and purple pastel for spring.
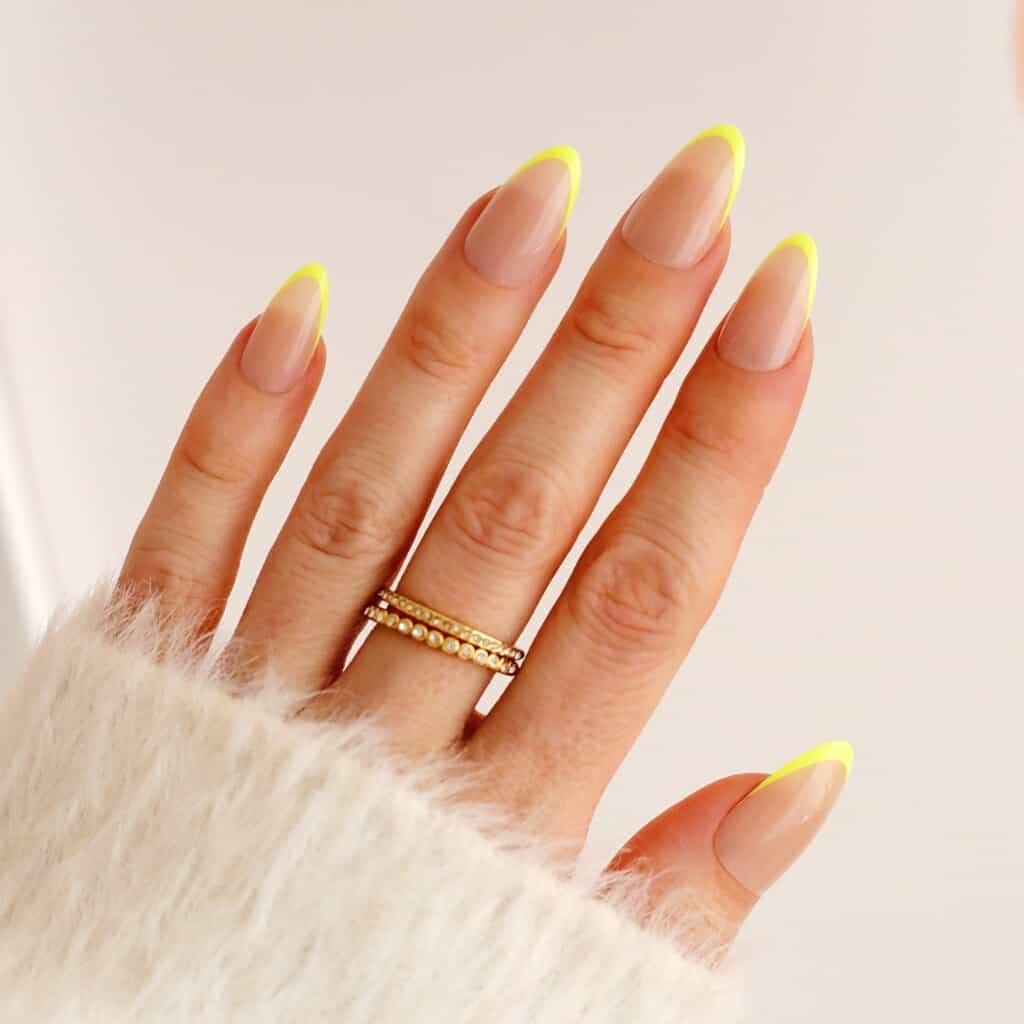
Walking on Sunshine
These neon yellow French tips are a sunny way to welcome in warmer weather.
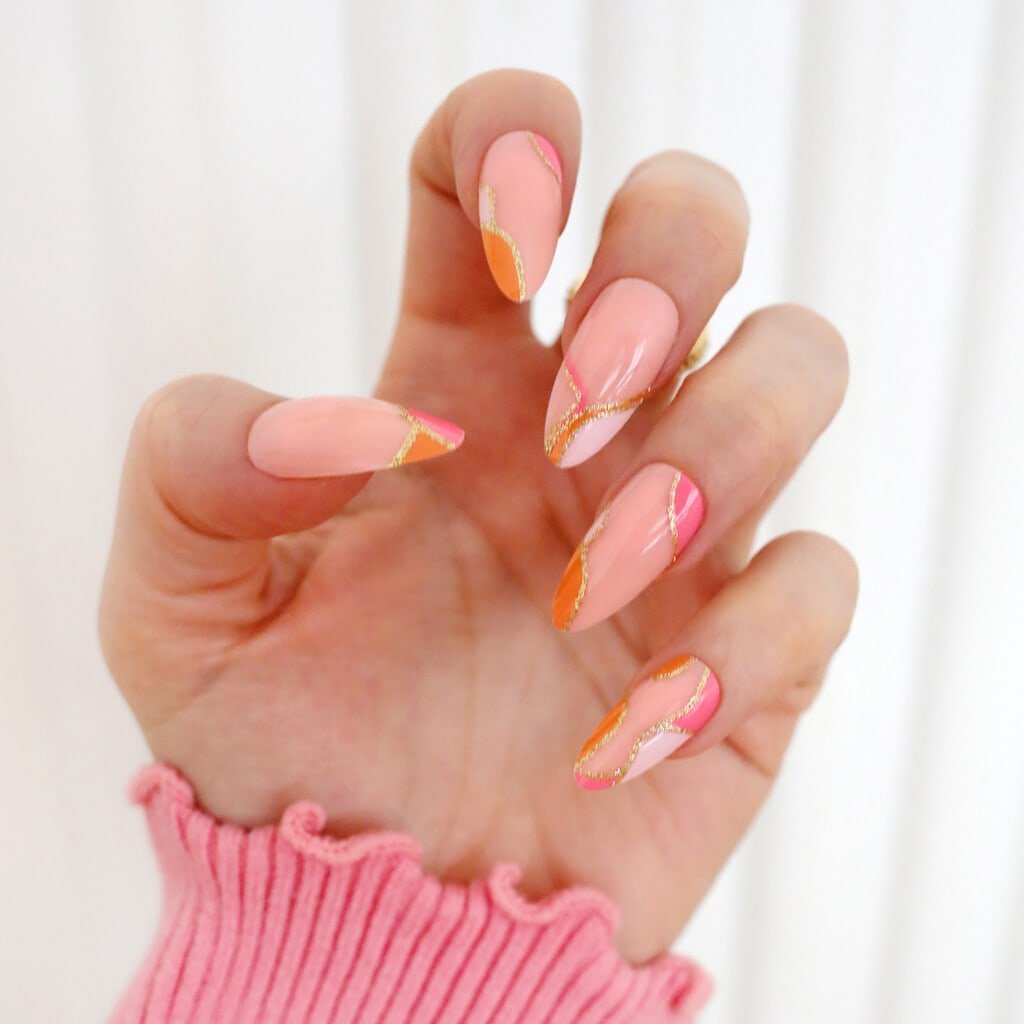
Color Block Sunset
These golden tone color blocked nails will make waves at the beach this summer.
Icy White
These short hologram nails remind us of pretty icicles and will still look on trend for New Year’s Eve.
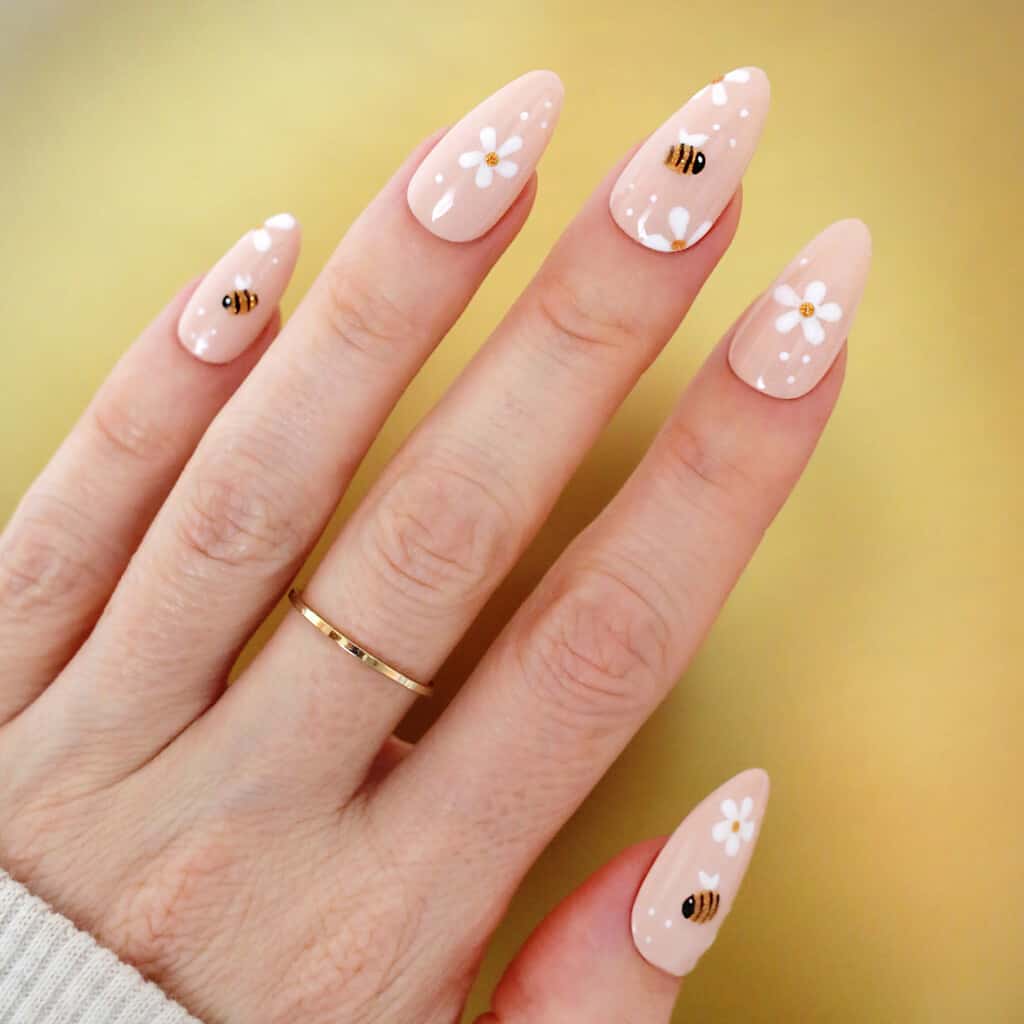
Bee Yourself
Bee excited for spring with these pretty pollinators (try adding the flowers and dots with a toothpick if you don’t have brushes and a dotting tool).
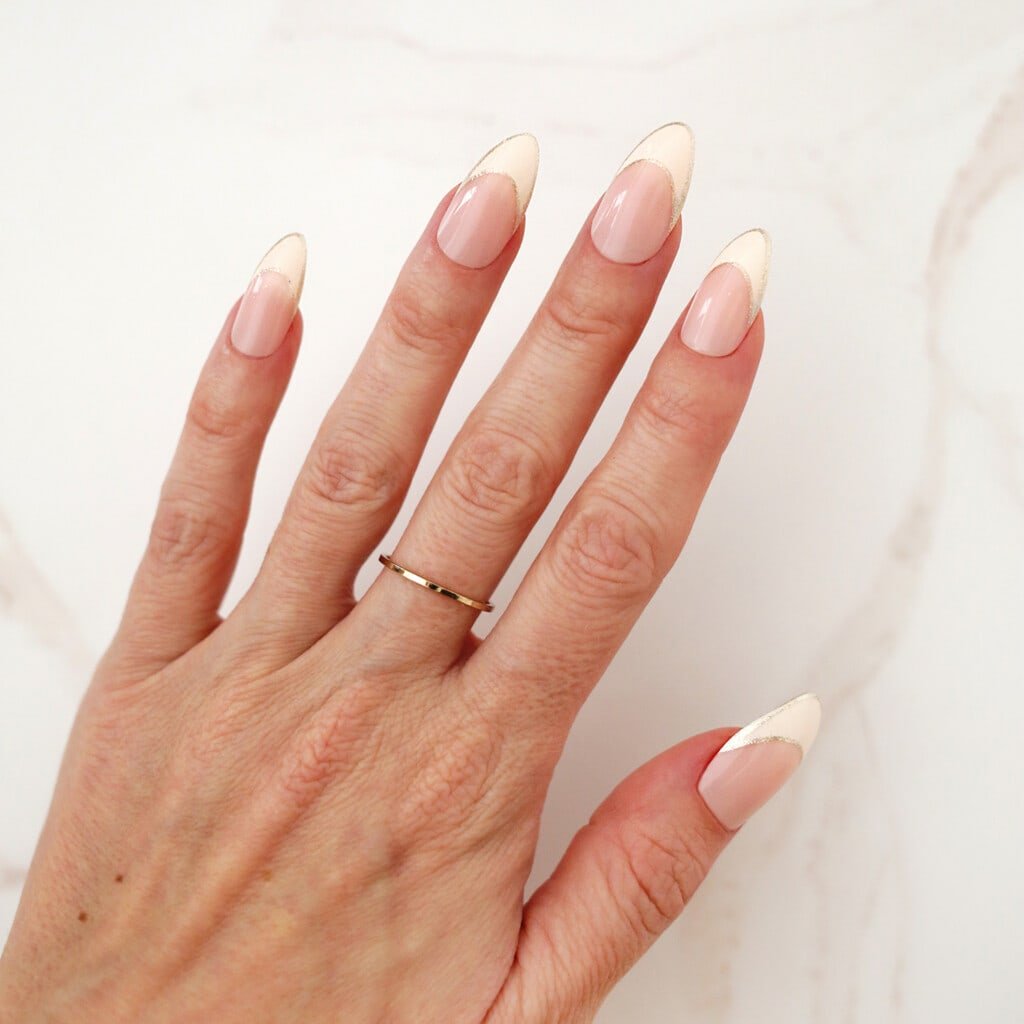
Glitter Lined
For a holiday twist on the classic French manicure design, try this doubled lined glitter option to add a little ooh la la.
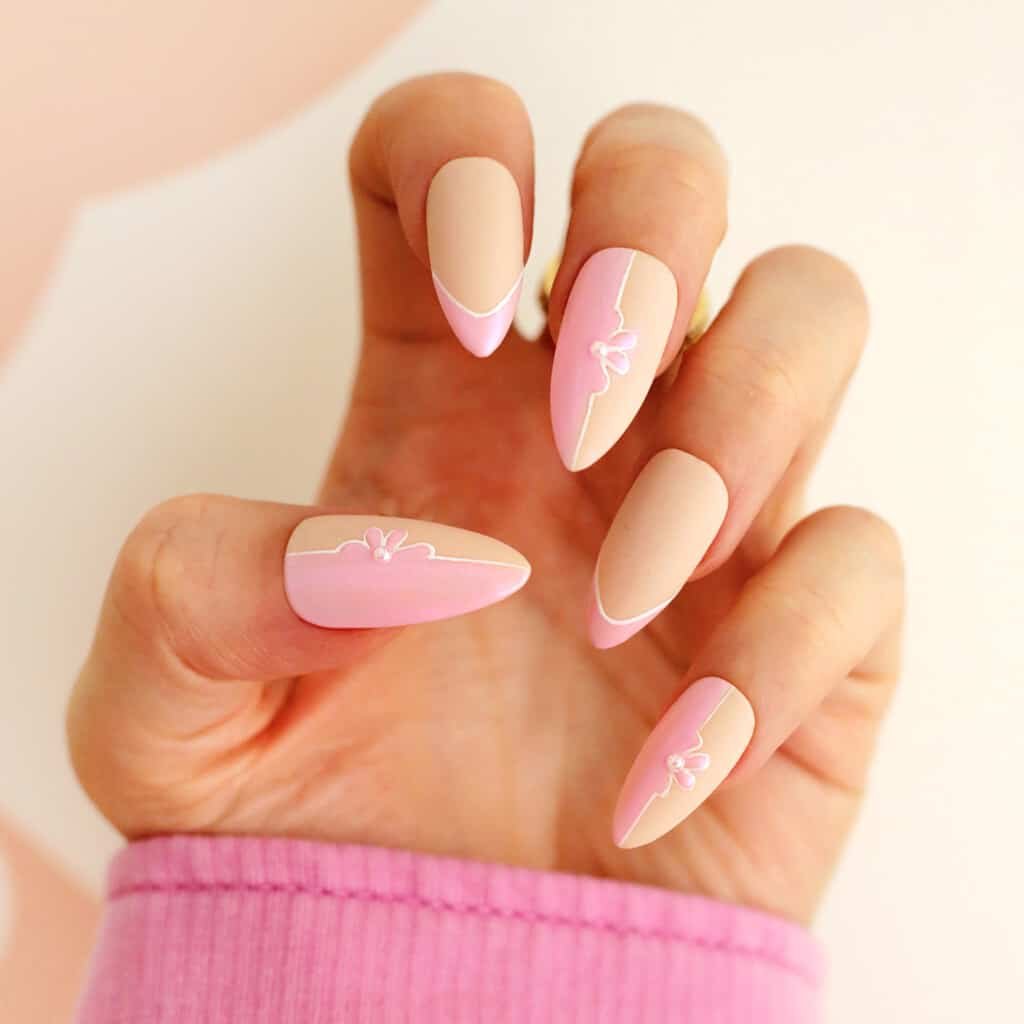
Floral Color Block
Add a flower outline to the color blocked look for a spring twist.
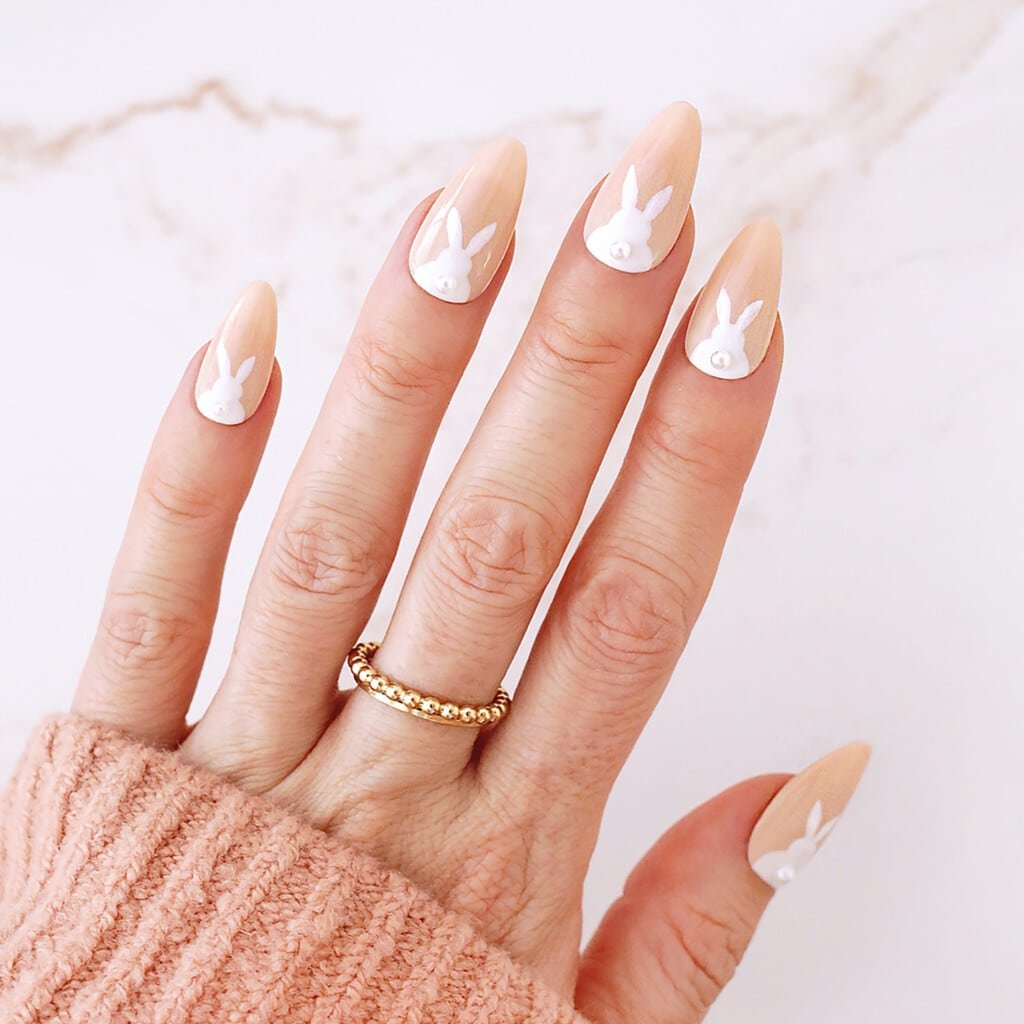
Bunny Tails
Hop into spring with these cute pearl bunny tail nails!
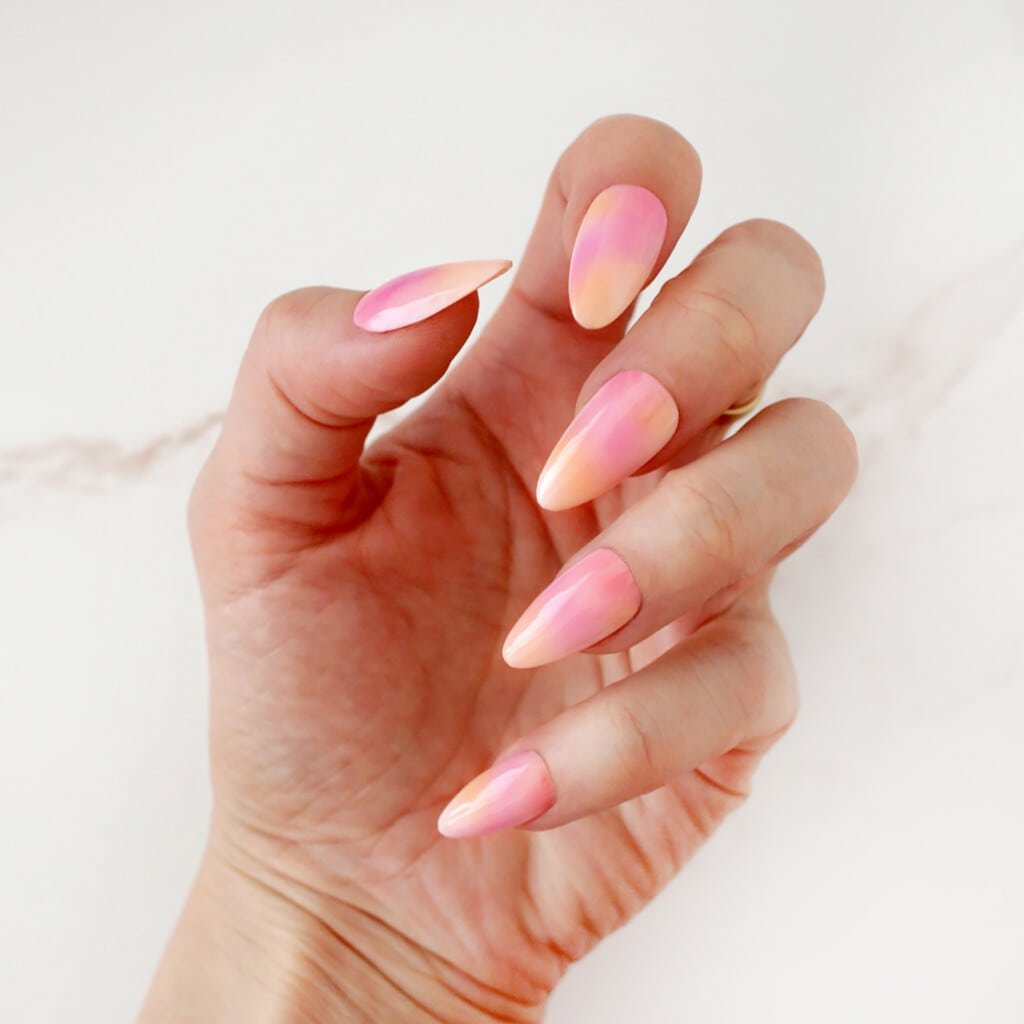
Sherbet Tie-Dye
Remind yourself of a spring sunrise with this pastel tie-dye color combo.
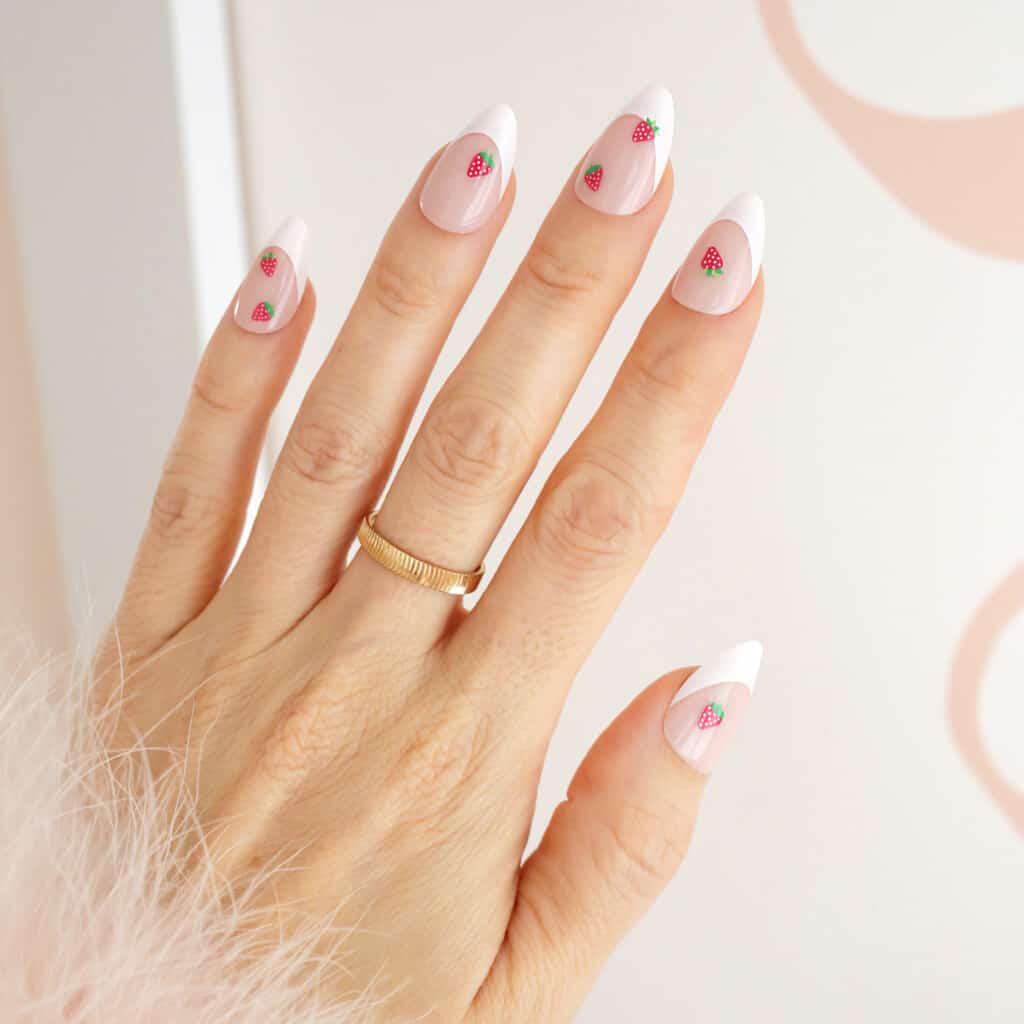
Strawberry Patch
Wear these to the strawberry patch and the berries won’t be the only thing looking fresh.
Silver Bells
These silver glitter French tip outlines are just the right touch of sparkle and can be done on long or short nails.
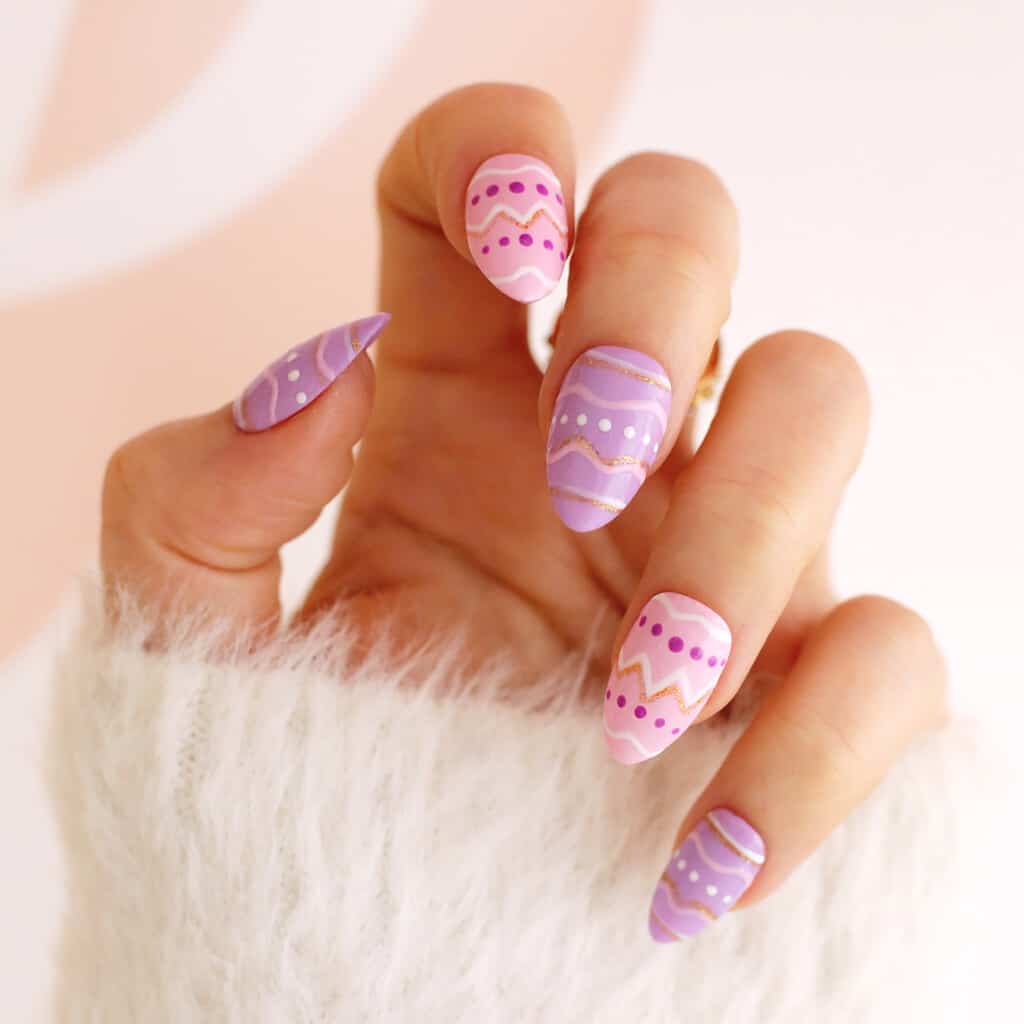
Egg Hunt
Add some Easter nail art with a brush and a dotting tool to make waves and dots for this pastel painted egg design!
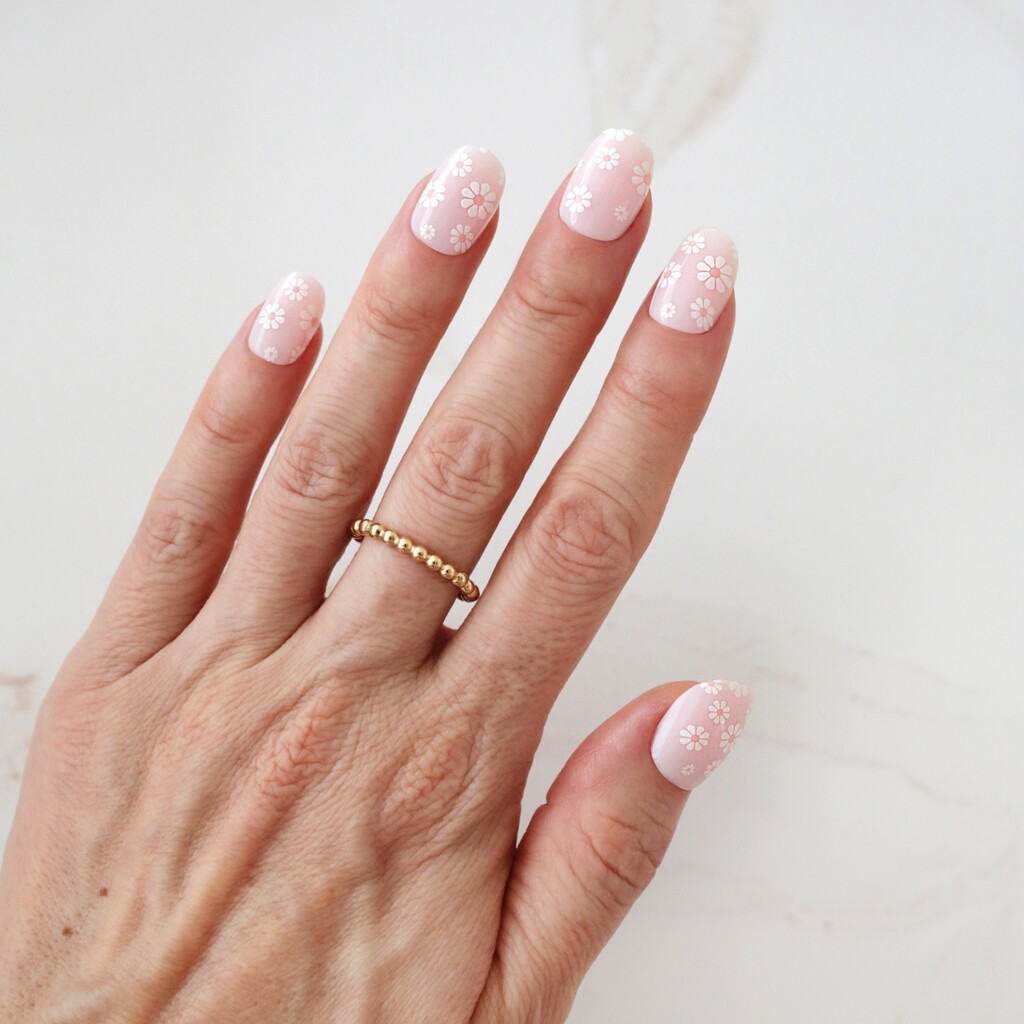
Daisy Fields
Daisies all over for a sweet floral design? Yes, please!
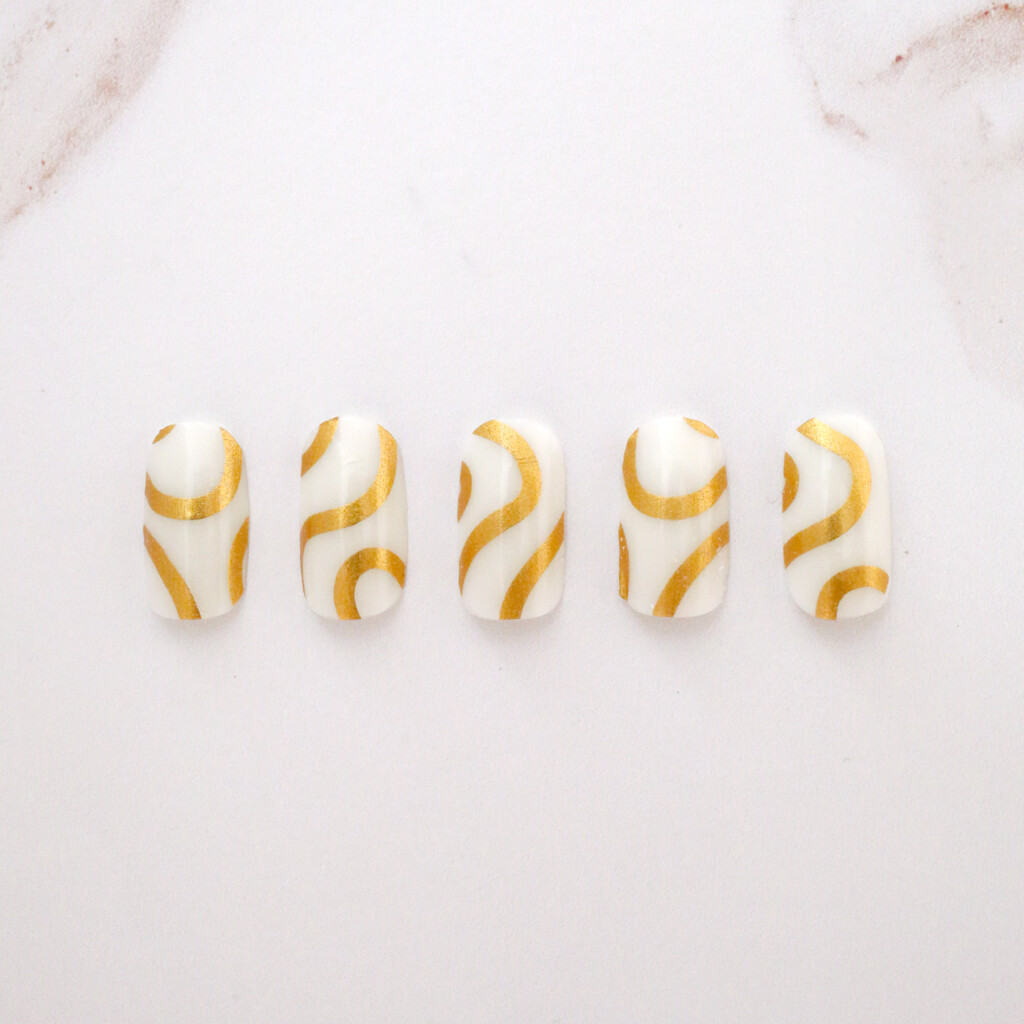
Gold Swirls
Modern but keeping in the holiday metallic theme are these fun gold foil swirl nails.
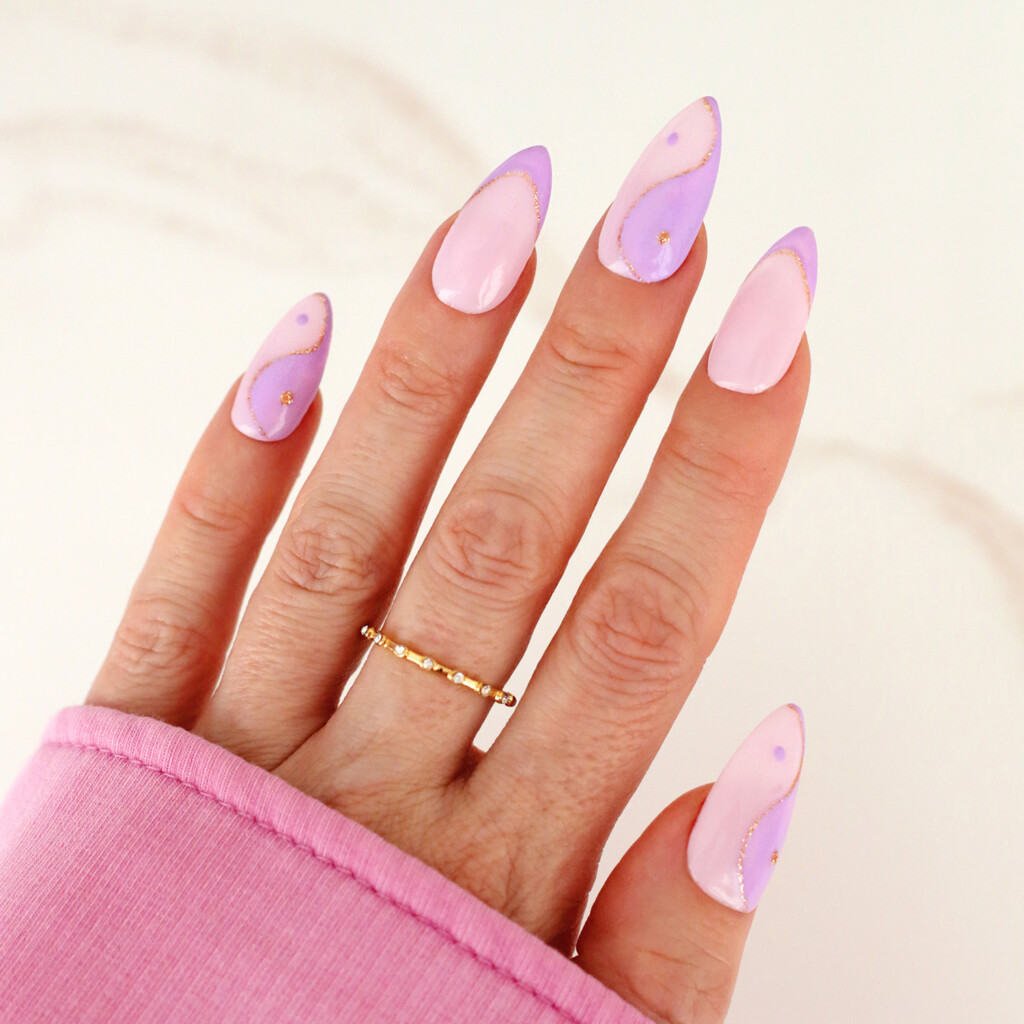
Pastel Yin Yang
This purple and pink yin yang design with gold glitter liner is fun for spring and well into summer.
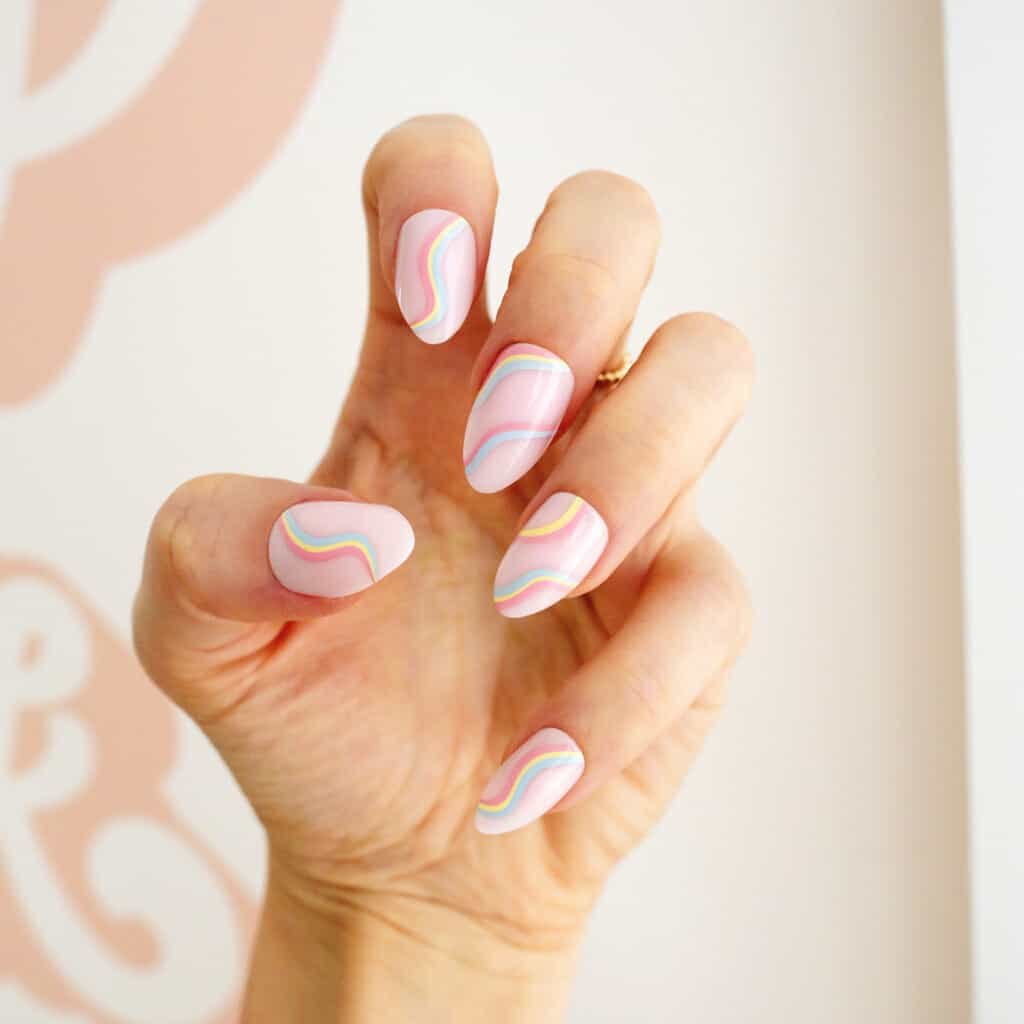
Rainbow Waves
Spring rain brings rainbows so let your nails get in on the color too with this rainbow nail design.
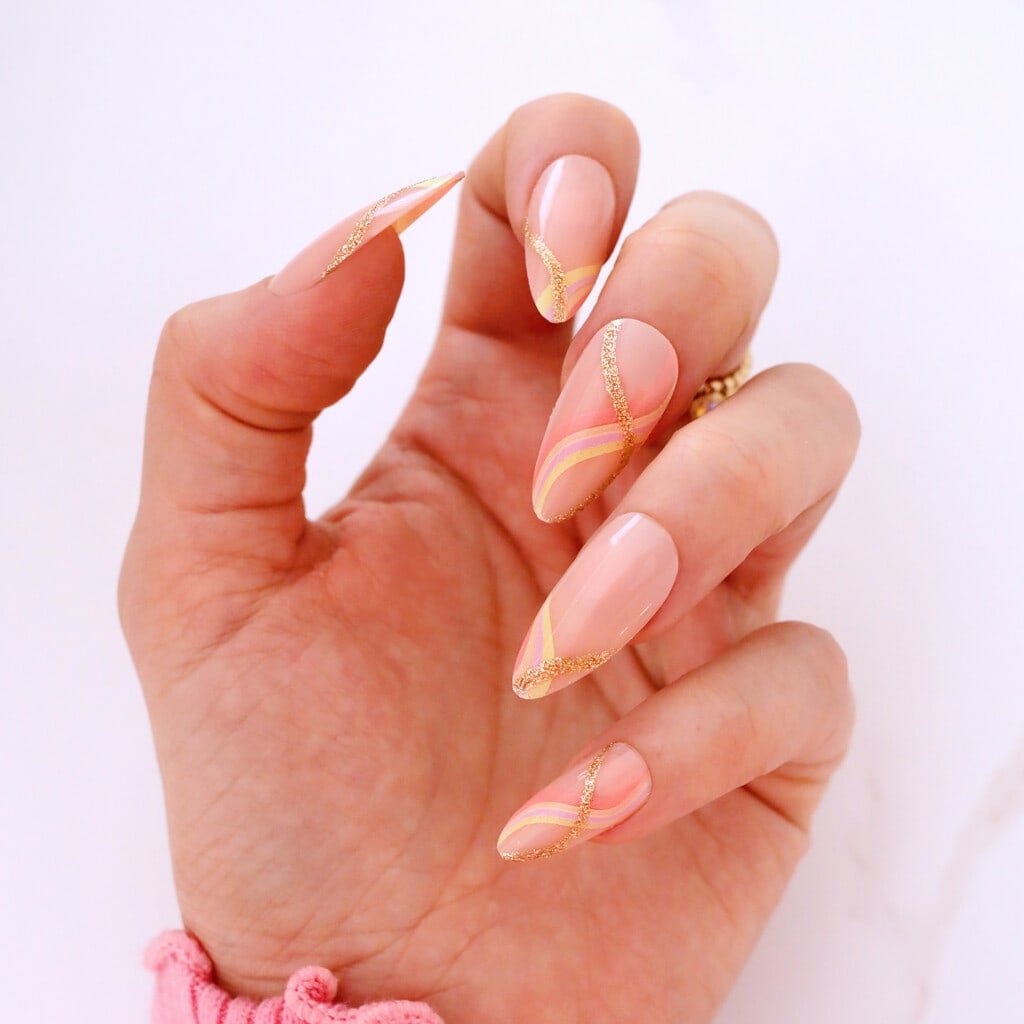
Sherbert Waves
These gold and sherbet colored glitter waves bring just the right amount of color and pattern to your manicure.
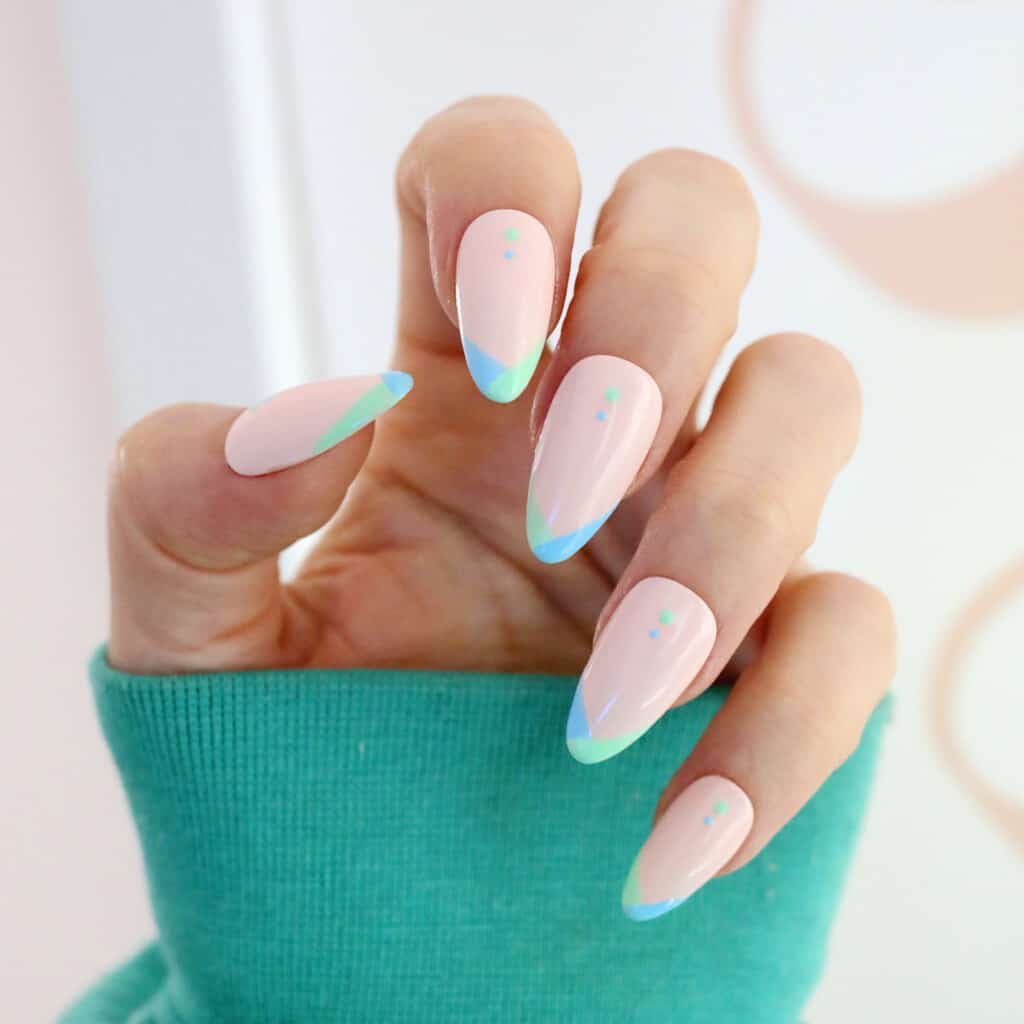
Color Blocked Tips
Color block your French tip nails with your favorite spring mint and green hues and a dotting tool or a toothpick for a fresh look.
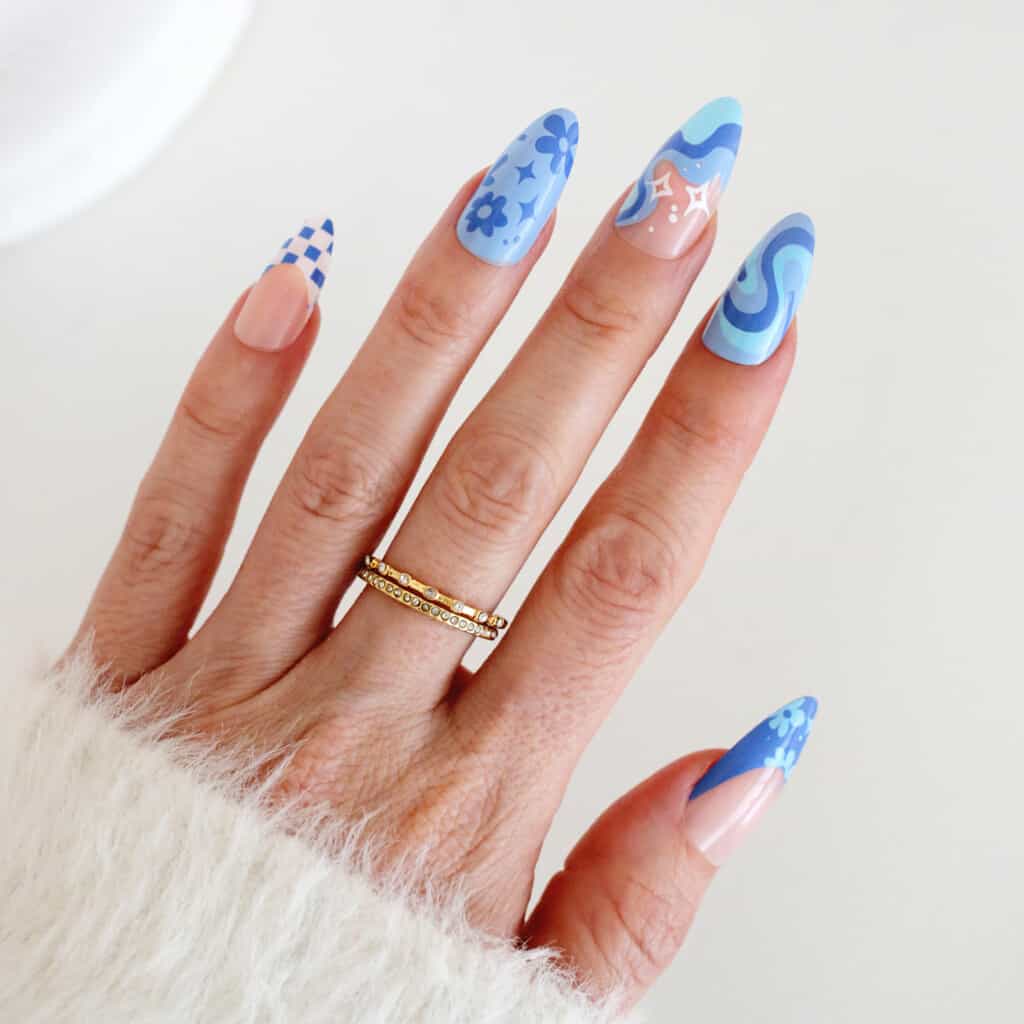
Pool Blue
Lounge poolside with these fun blue accent nails!
The Classic
While it may not be sparkly or colorful, the classic design of a French tip manicure is always a good choice if you want to do something elegant for any season.
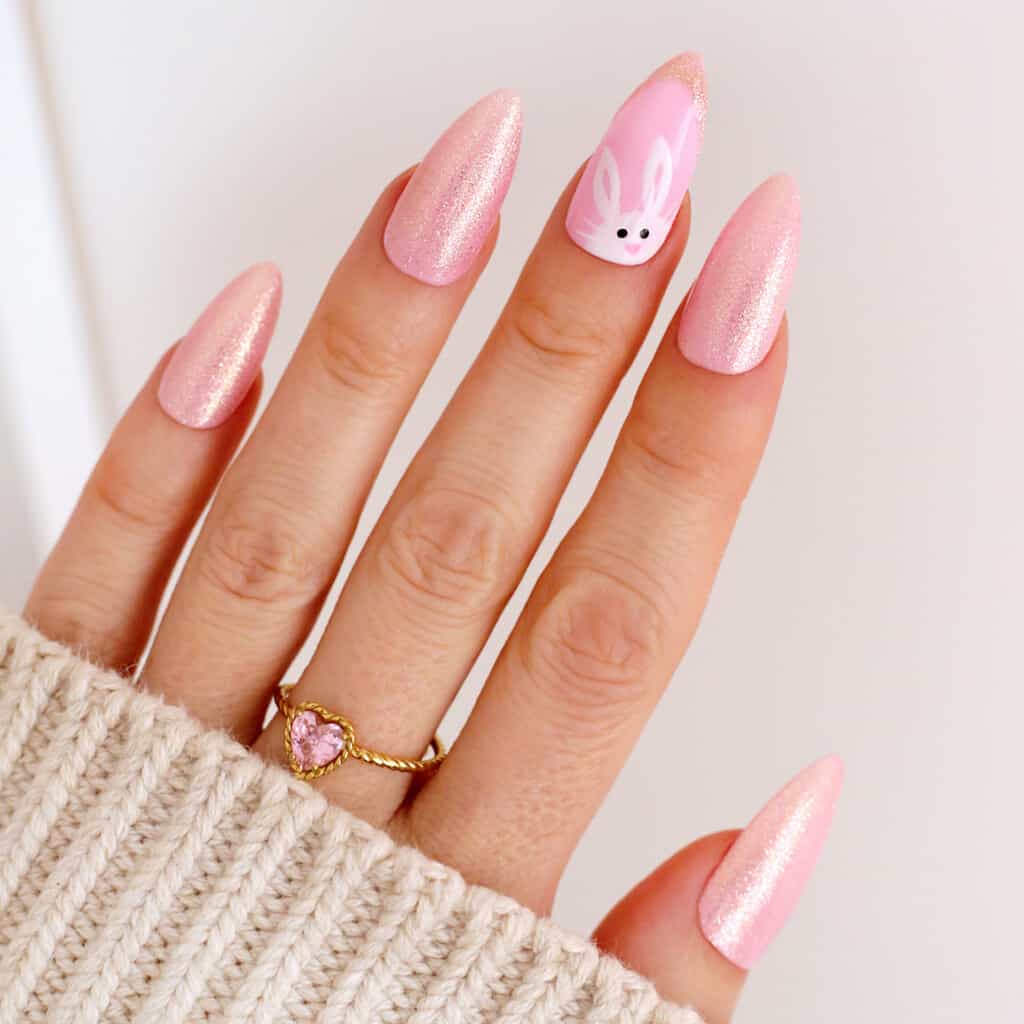
Here Comes Peter Cottontail
Hop right down the bunny trail by adding a sweet bunny face as an accent to these pastel-hued pink glitter nails.
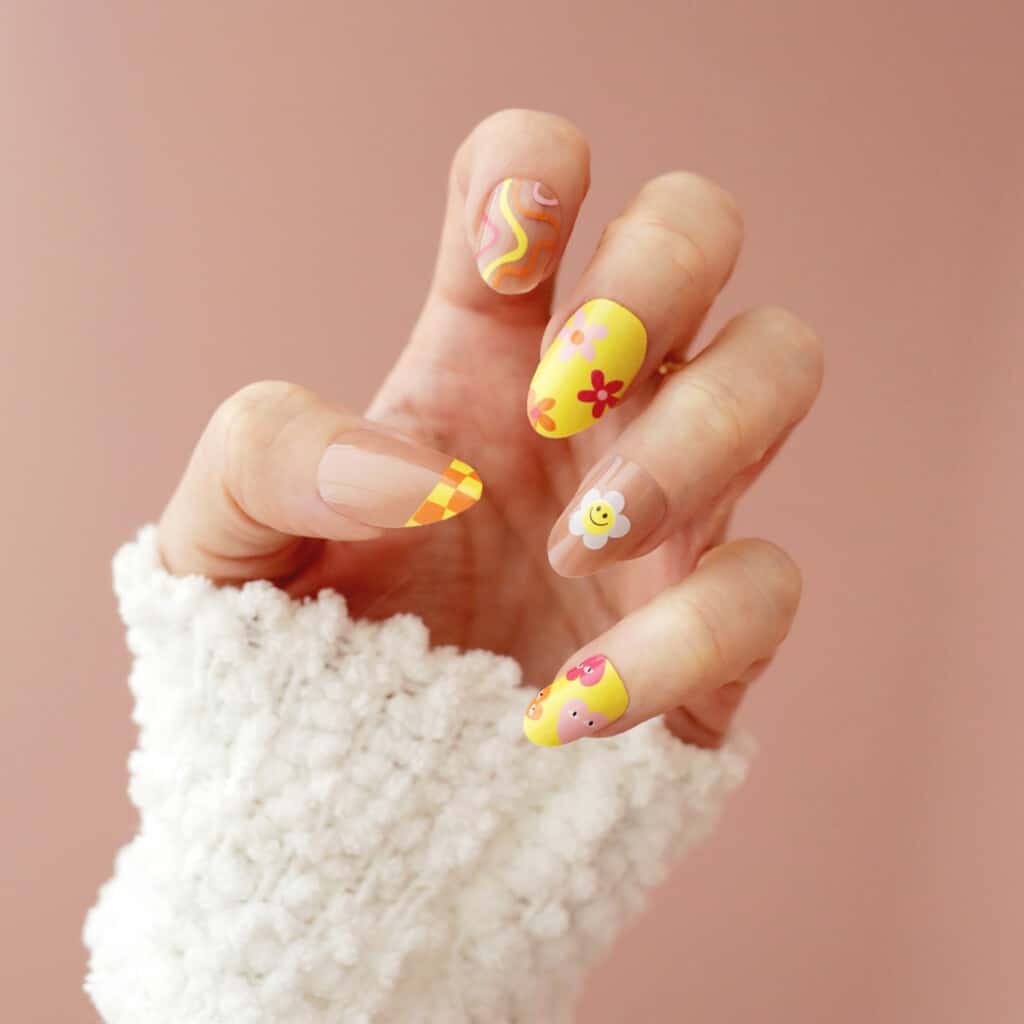
Happy Nails
These nails have such a happy vibe when you make every nail an accent nail!
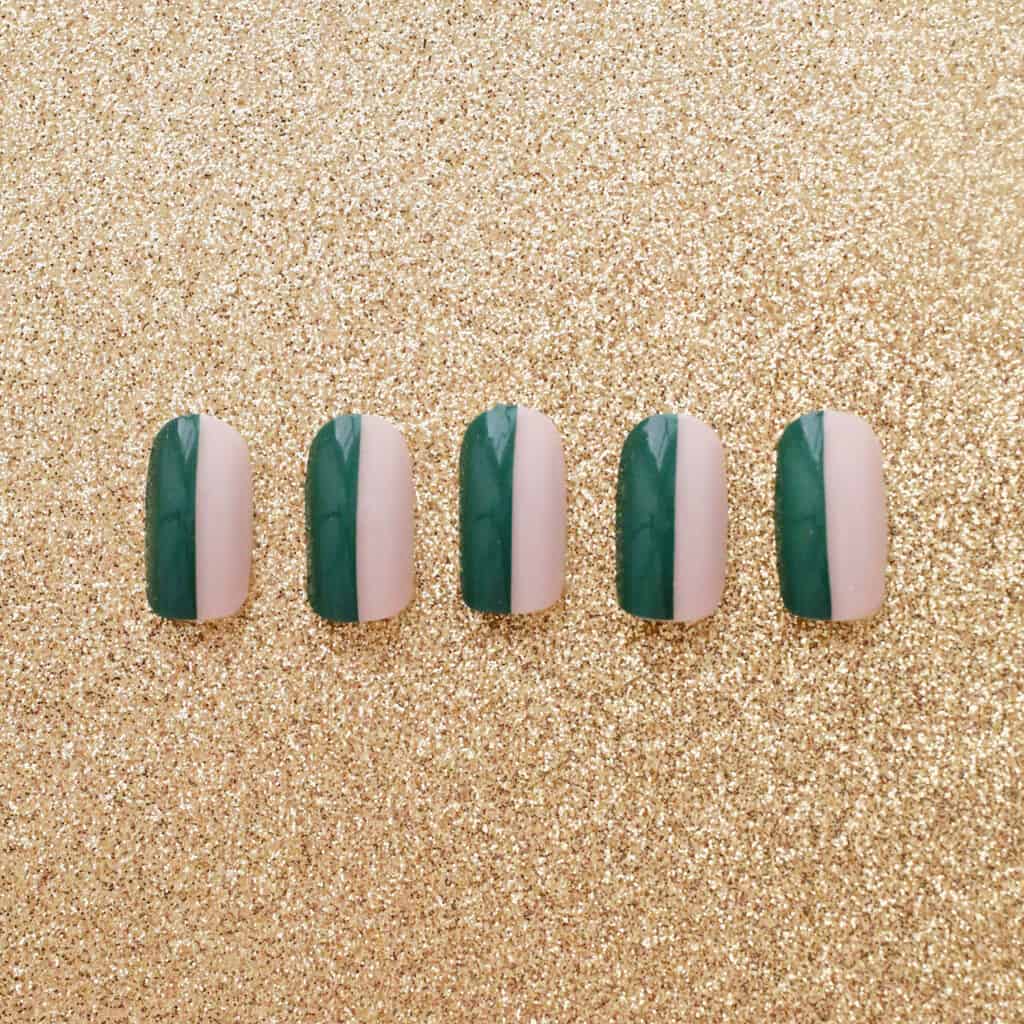
Color Block
These forest green and nude color block nails are a statement in a sleek modern way.
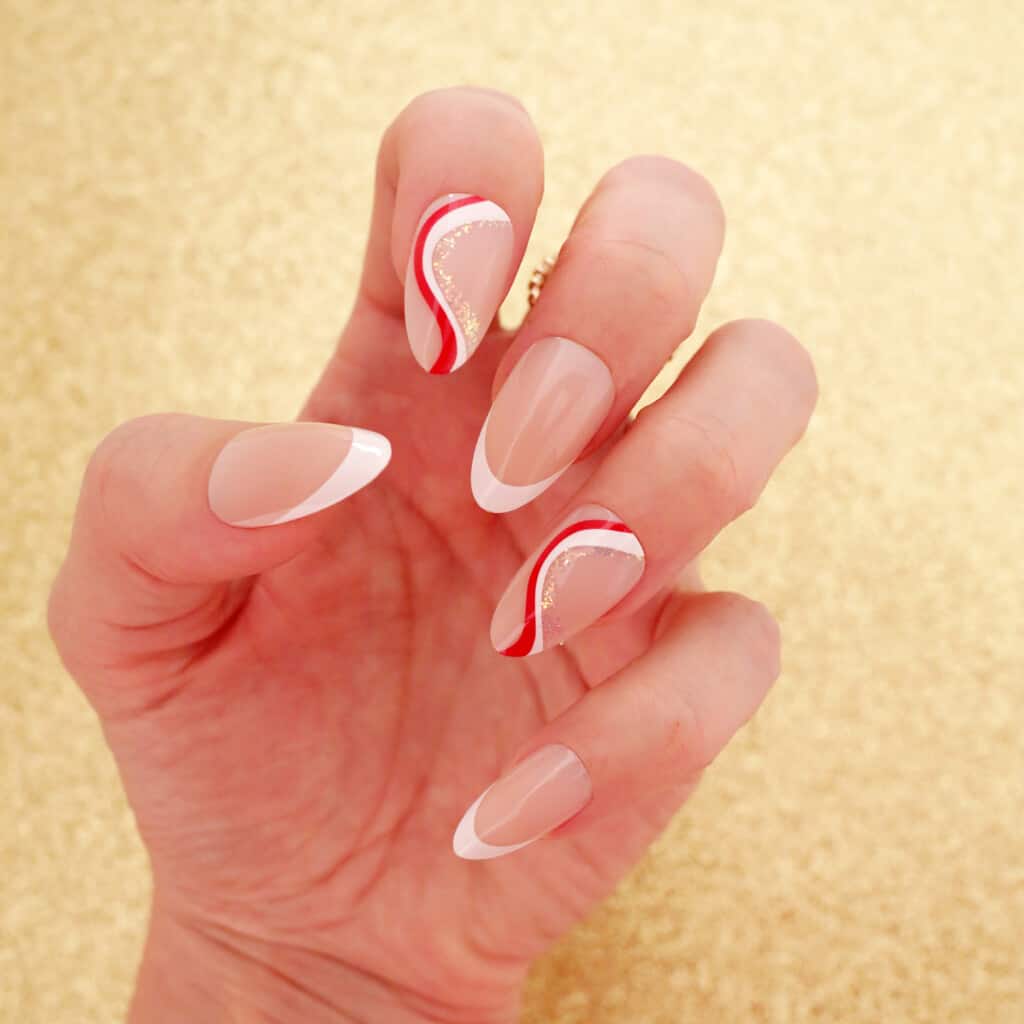
CANDY CANE WAVES
If literally candy canes are too cutesy for you, try this modern take with candy cane colored waves!
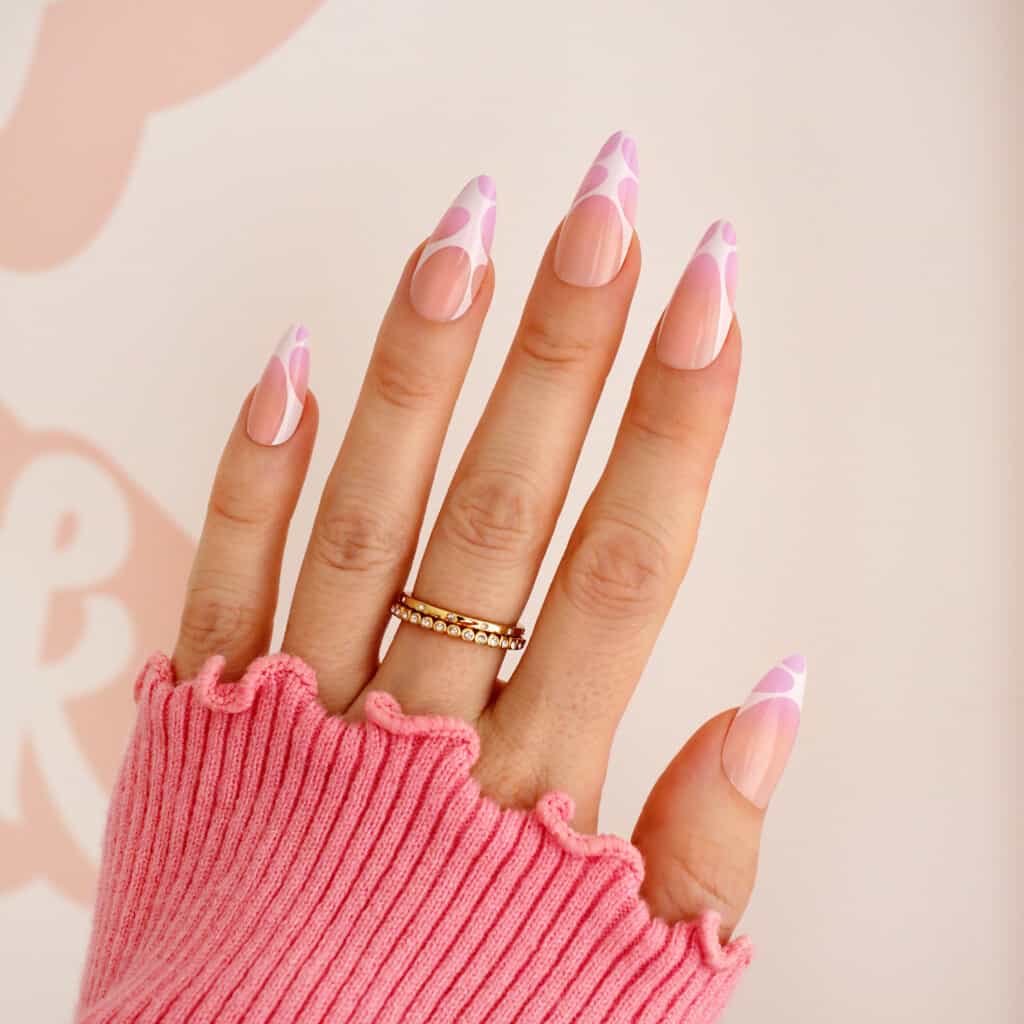
Purple Haze
These purple tipped nails are a cute way to bring some pastel hues to your manicure.
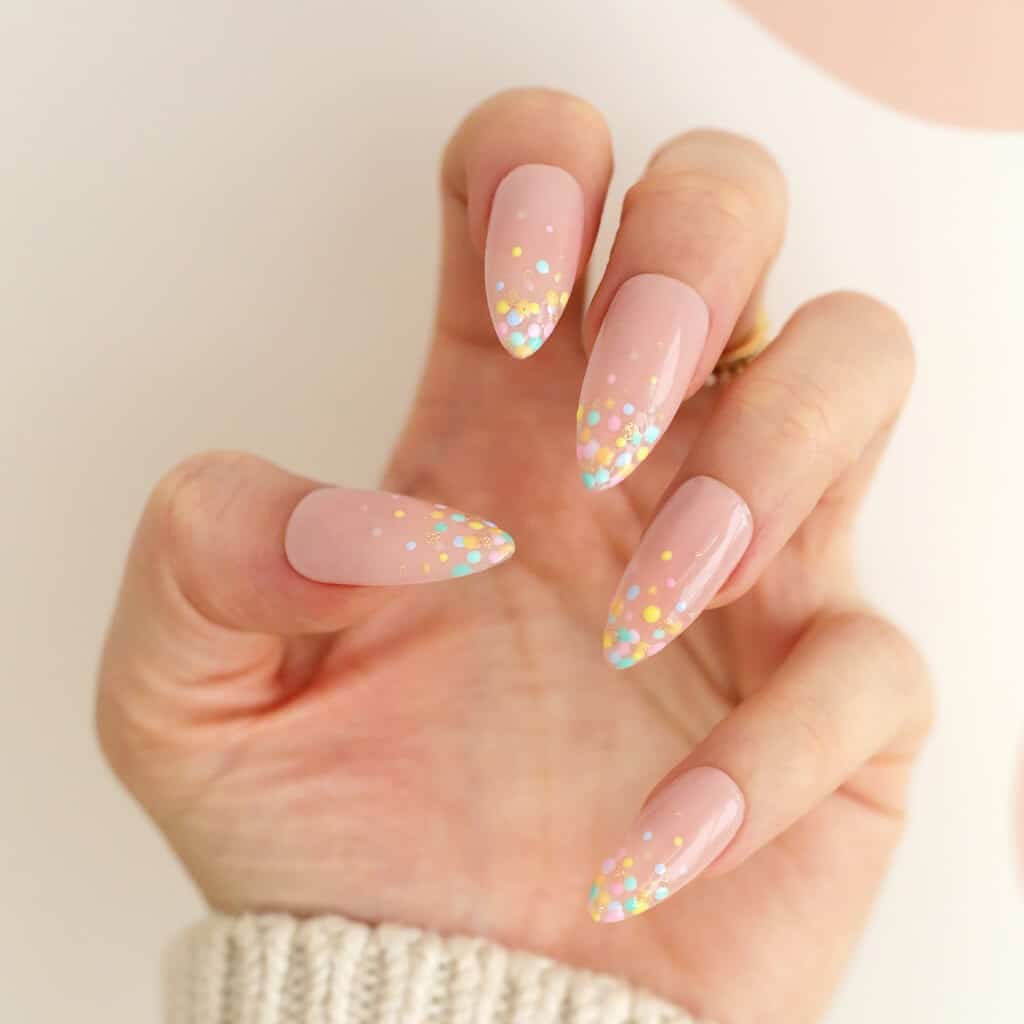
Pastel Confetti
Celebrate spring and Easter with these easy pastel confetti dot nails—just use a small dotting tool or a toothpick with different pastel shades!
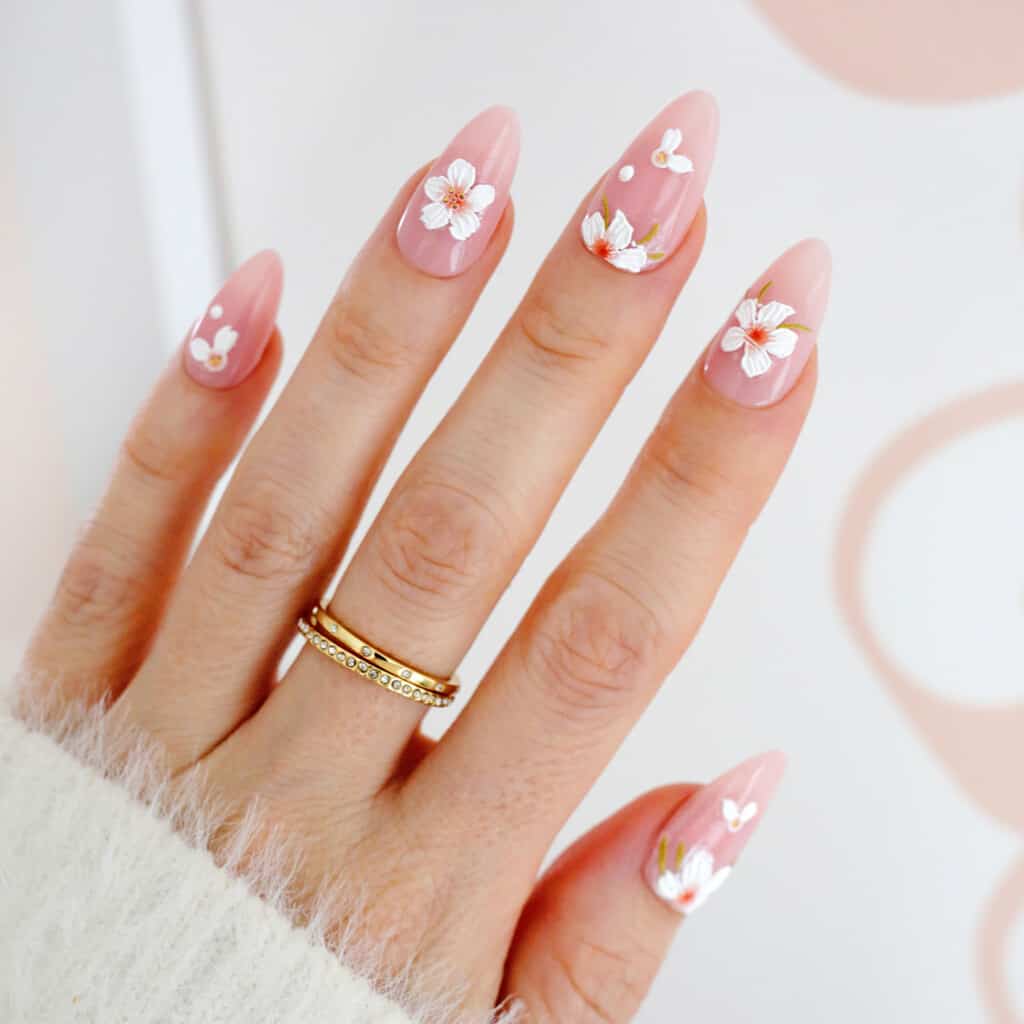
Easter Blossoms
These textured flowers look like spring perfection over a pink jelly hue.
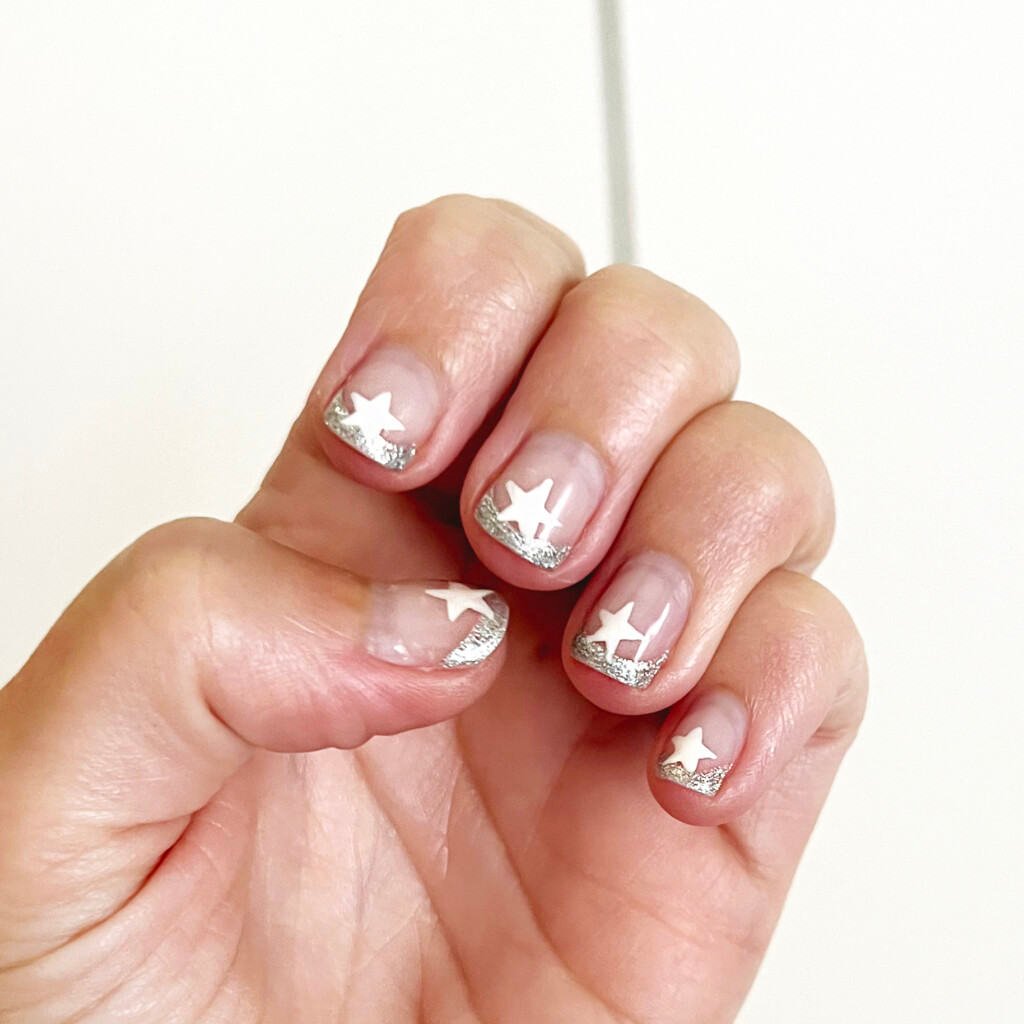
You’re A Star
Add some stars and glitter French tips to your natural nails for a fun yet simple look.
Hologram Holidays
Since the holidays are officially sponsored by all things glittery, these icy hologram coffin nails will look great by the fire as well as by the disco ball for New Year’s Eve.
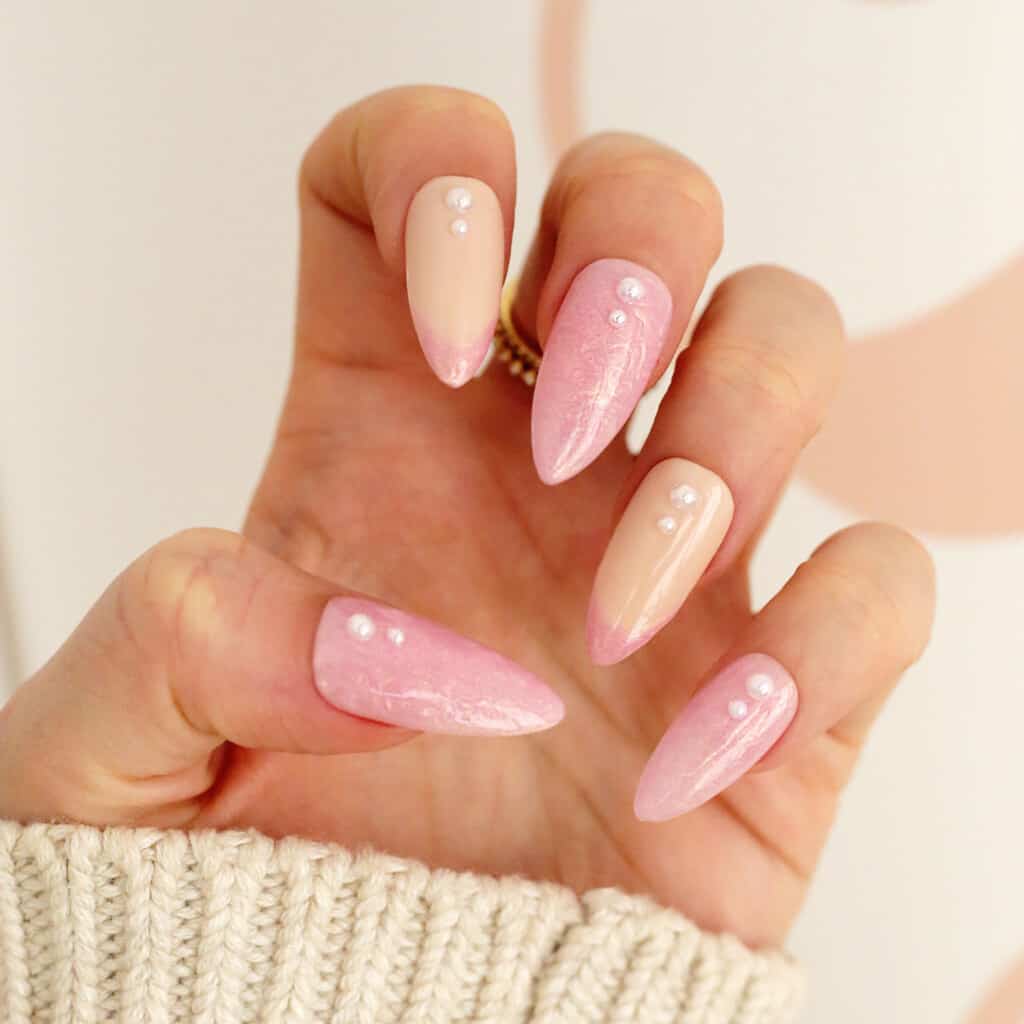
Pink Pearls
This pearl look manicure is a nail trend we love and can be done in your favorite spring shade and we love the small pearl accents for a possible Easter look (or you can use a dotting tool and white polish for a less 3D look).
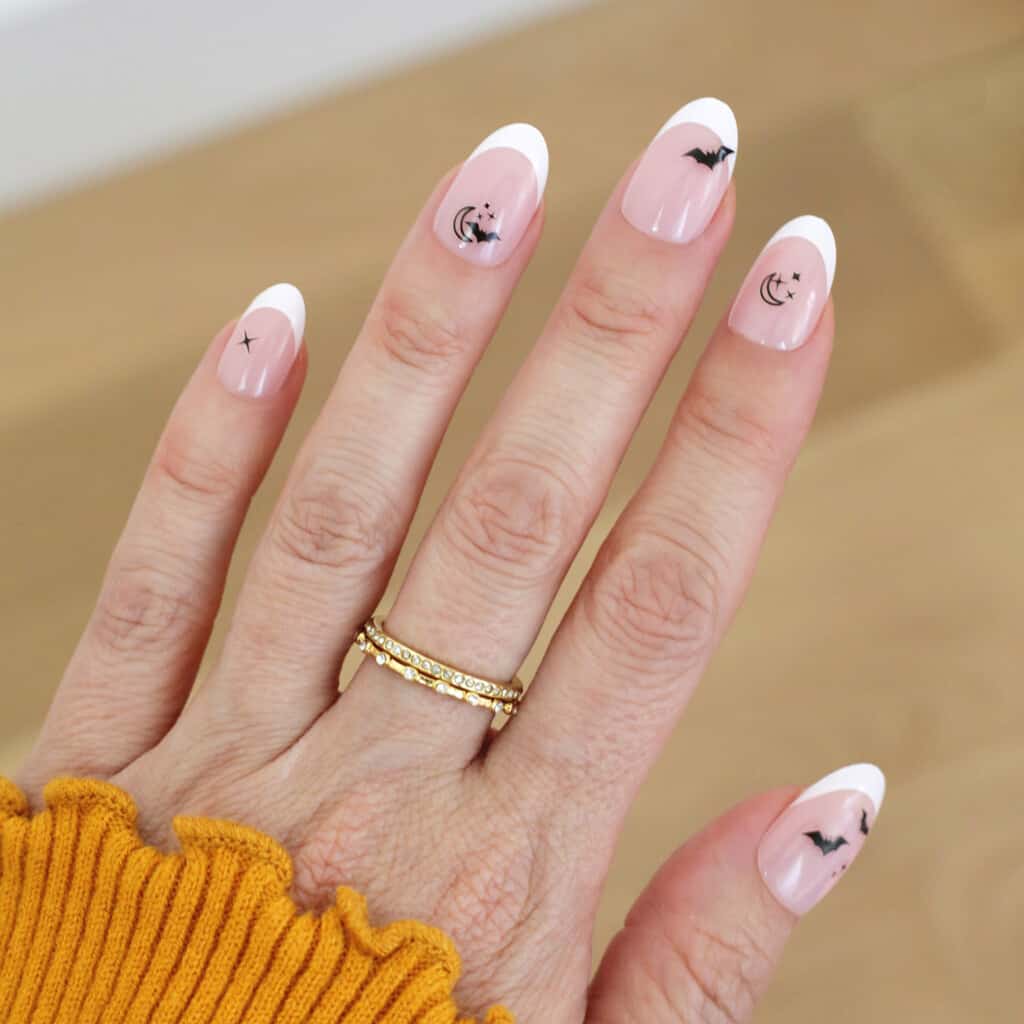
Spooky Symbols
Add some Halloween bat and moon decals to a French manicure and you have a simple yet cute Halloween vibe over a classic look.
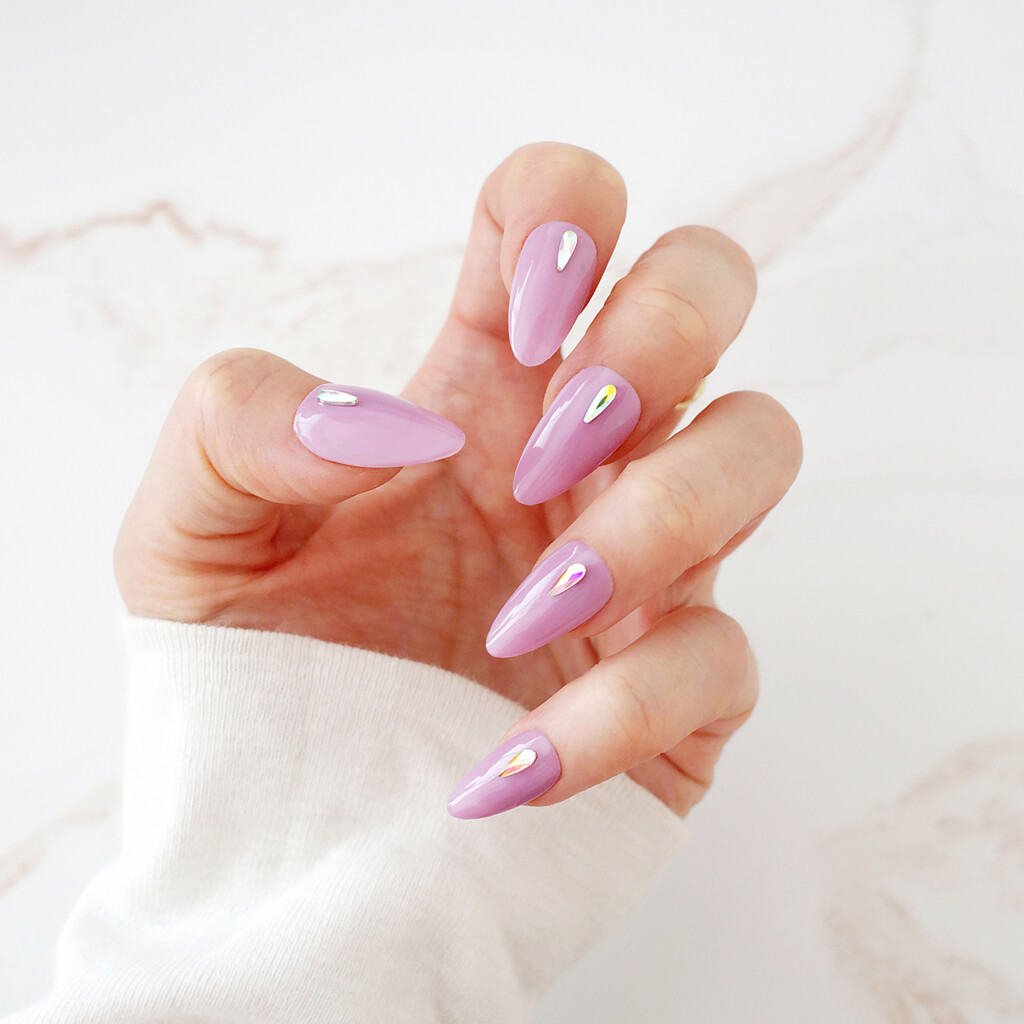
Grape Gemstones
These pastel purple jelly nails look so cute with a rhinestone accent.
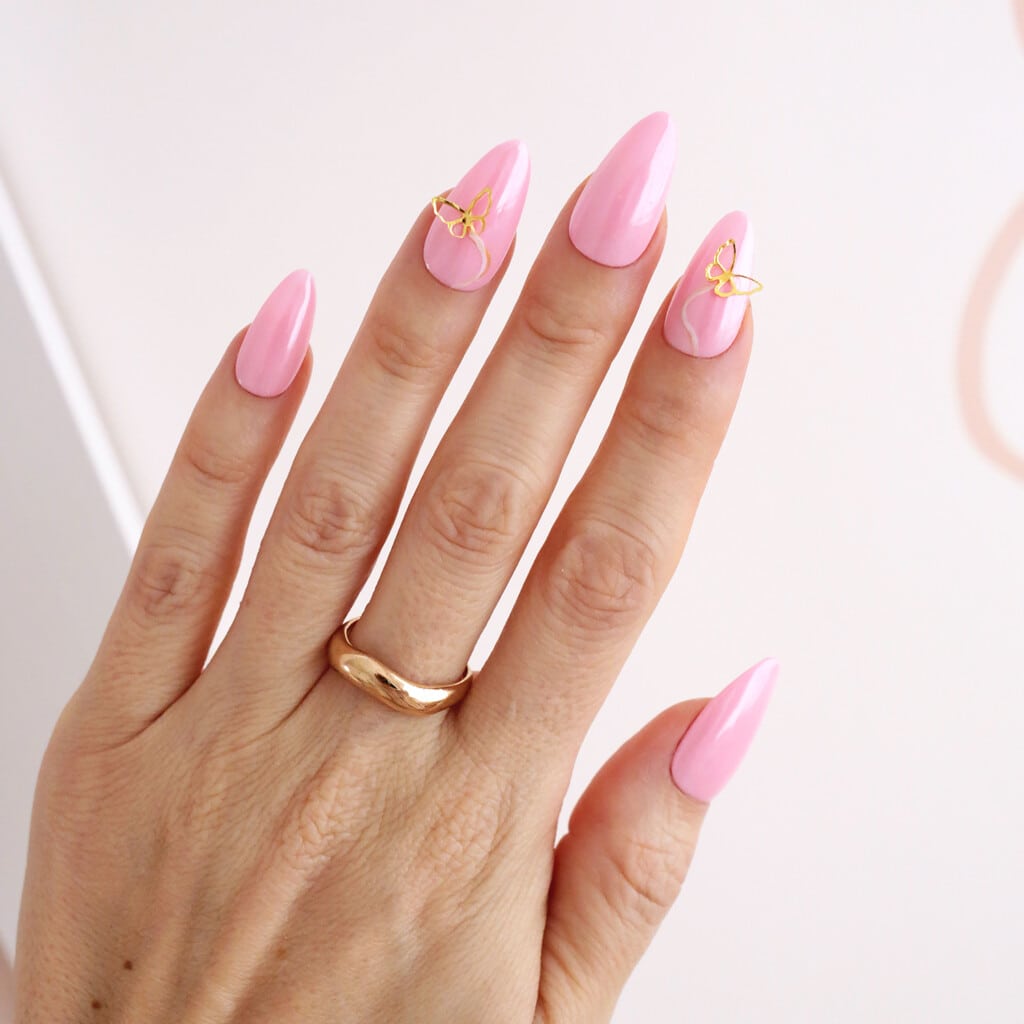
Bubblegum Butterfly
This bubblegum hue is just right for a spring pink mani with some 3D gold butterflies added for a little extra fun.
Candy Cane Striper
Glitter outlined candy cane stripes is the ultimate look for the Christmas nail maximalist.
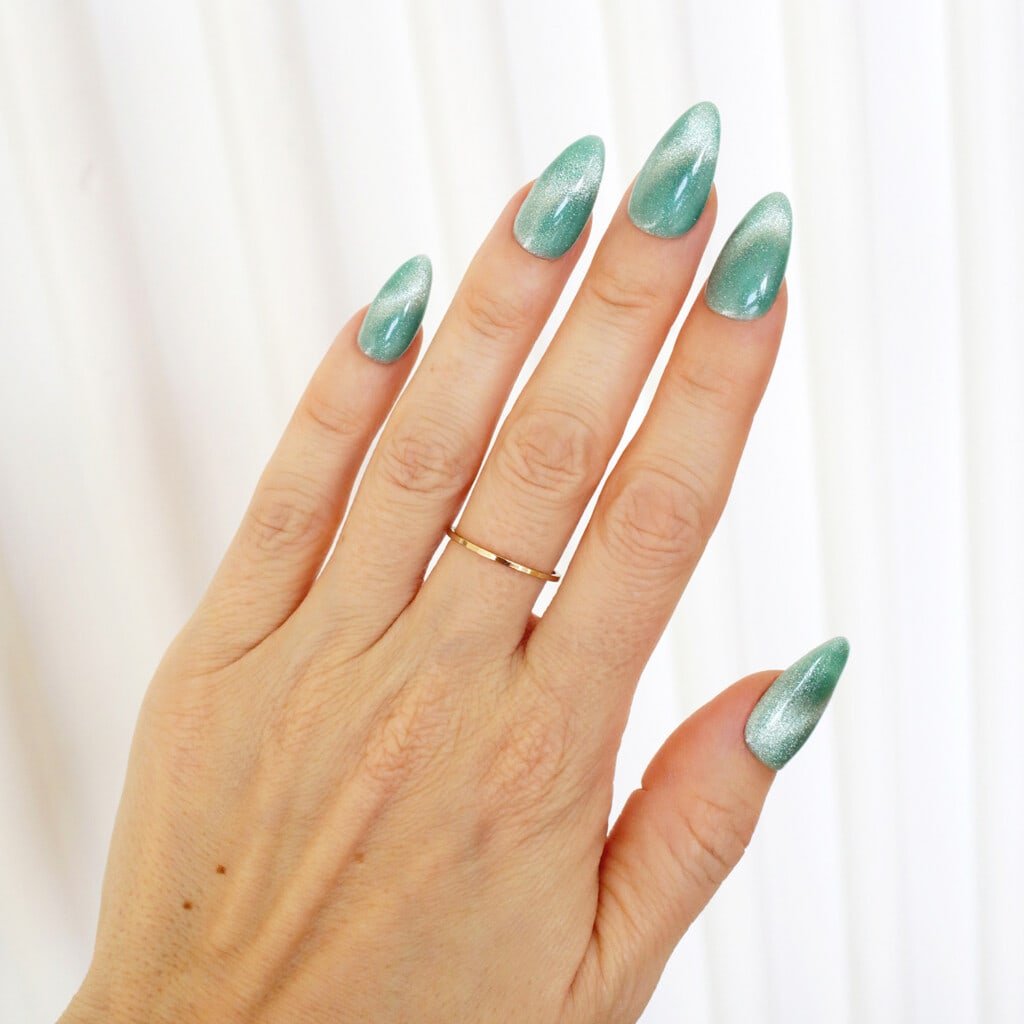
Green Grass Cat Eye
Welcome all the growing grass with this green cat eye effect.
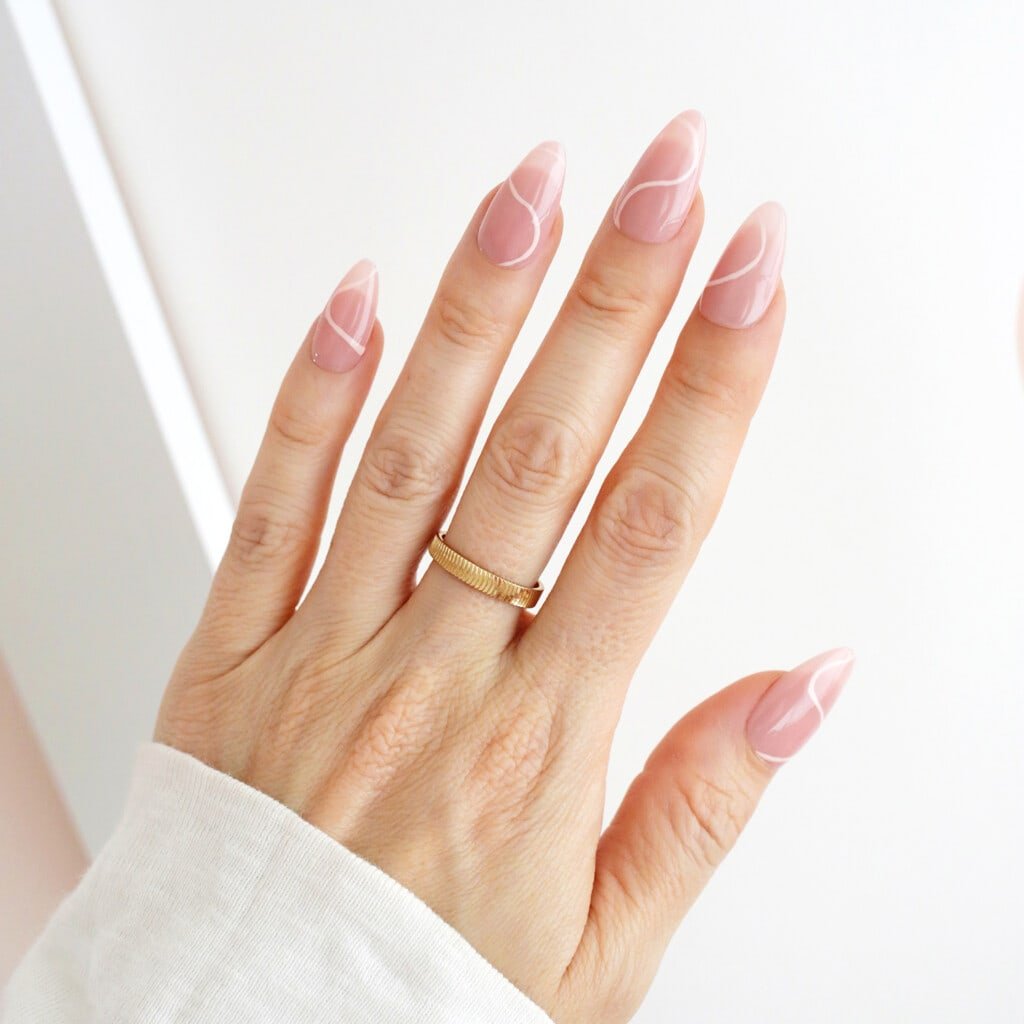
Sweet Swirl
Try a nude translucent shade with a simple abstract line swirl for an understated pattern.
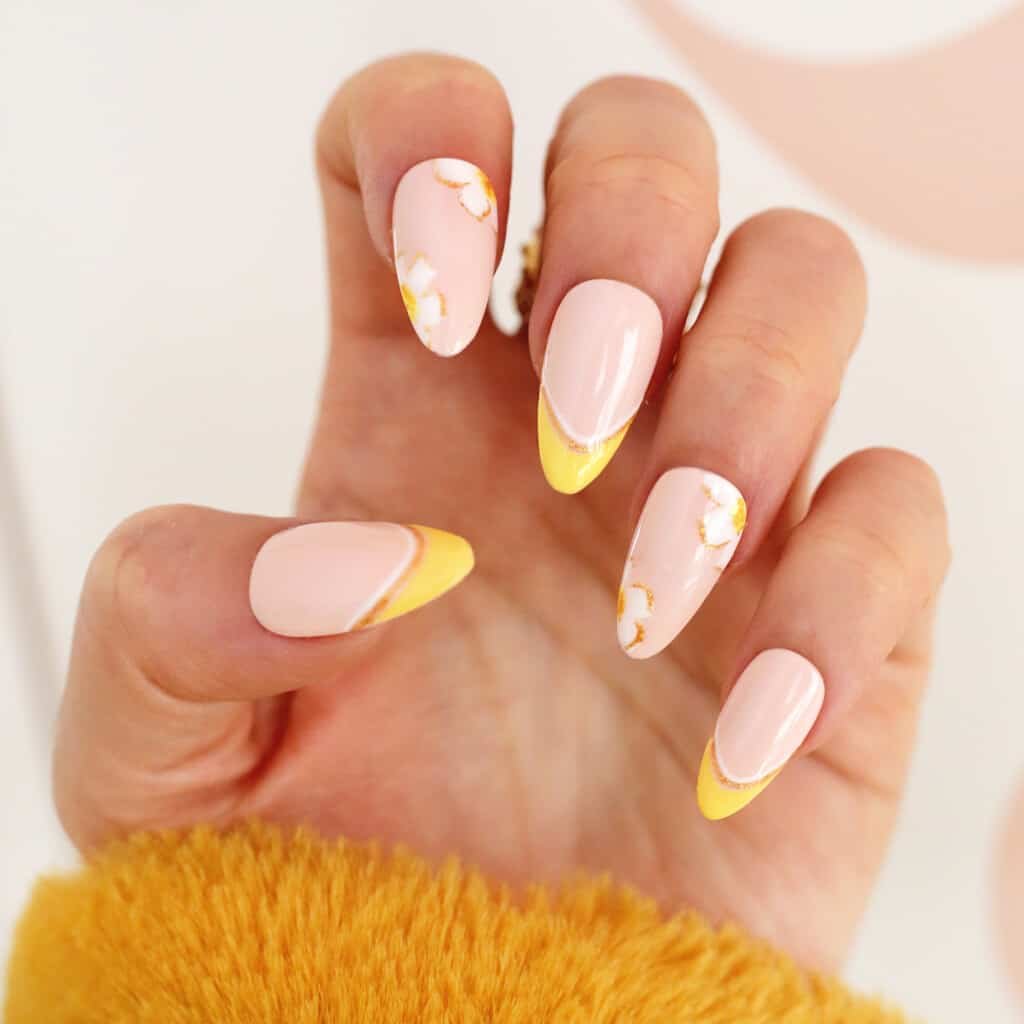
Sunny Daze
These happy yellow-tipped glitter nails will bring in the sunshine.
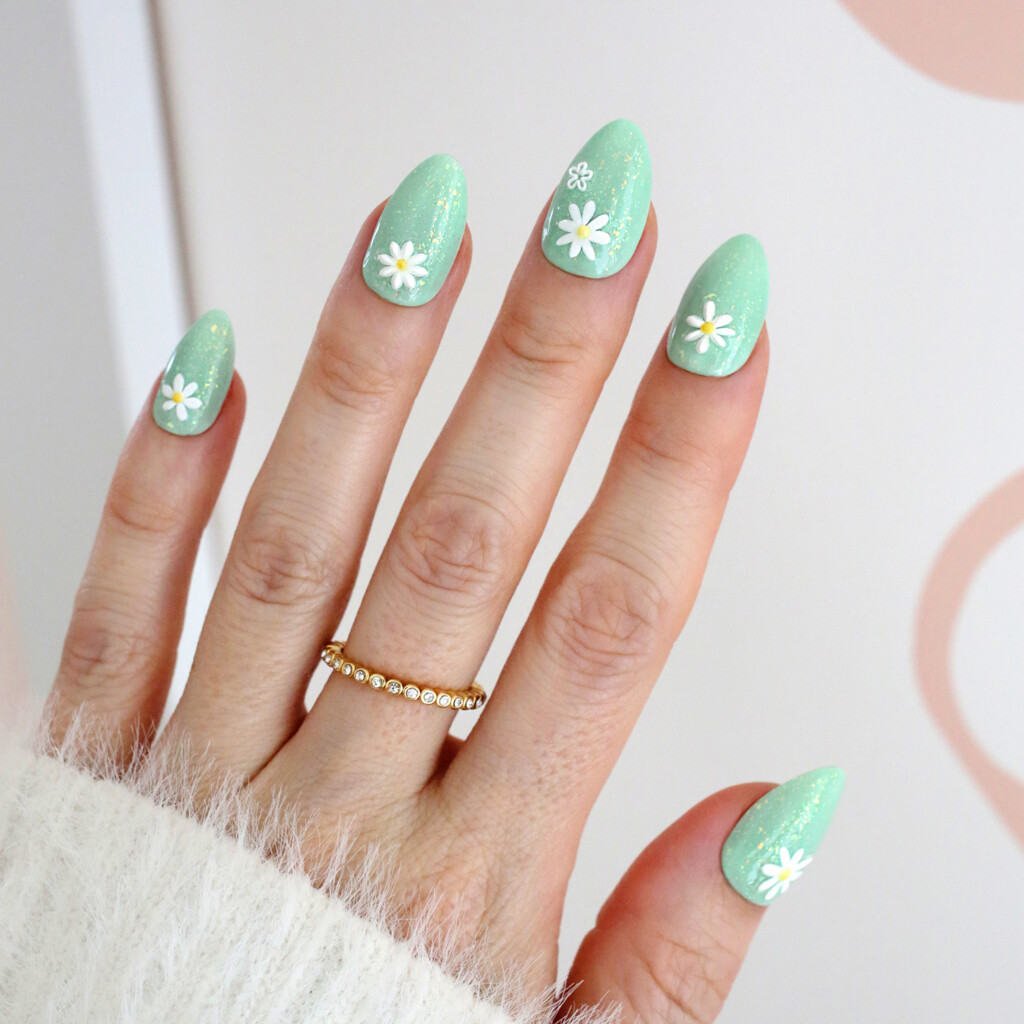
Daisy Fields
These mint green glitter nails with daisy accents are perfect for spring and summer.
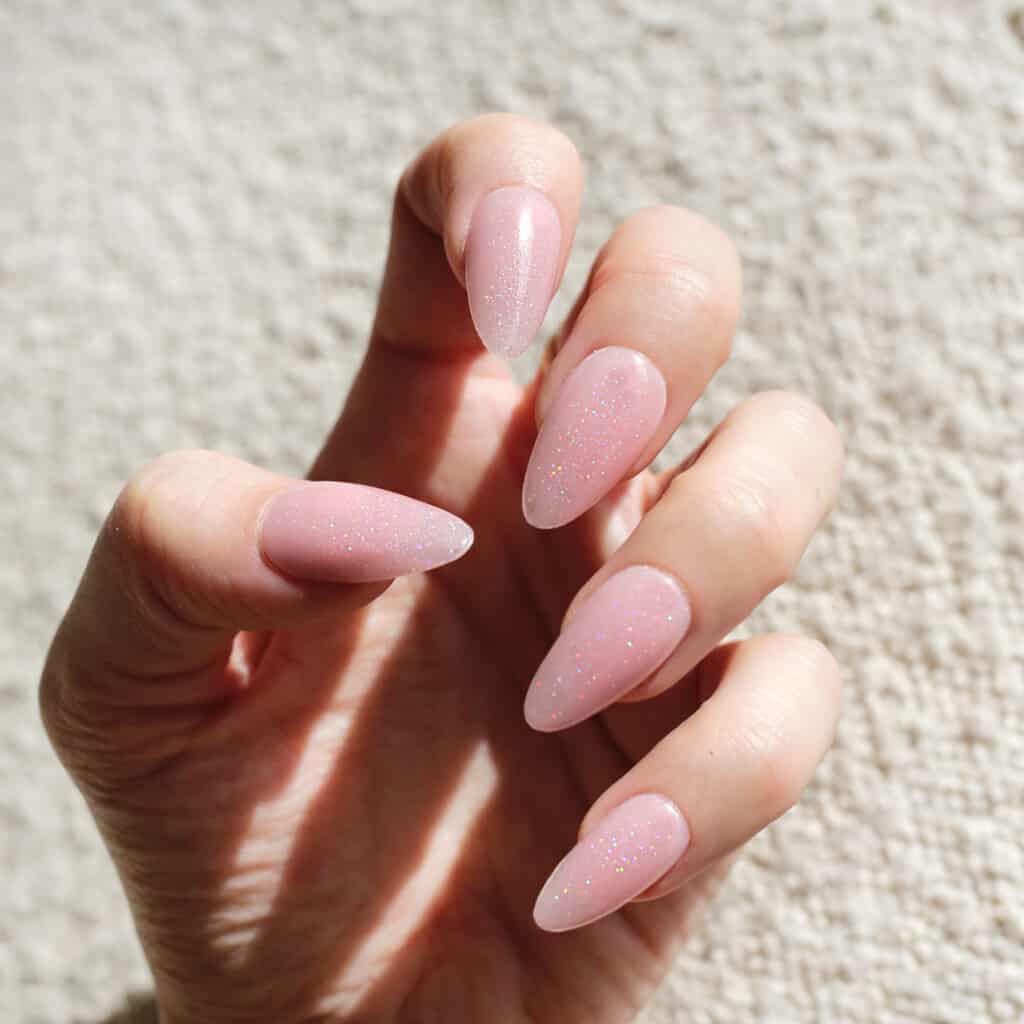
Pink Jelly Sparkle
These petal pink jelly nails have just the right amount of sparkle to be fun but not too over the top.
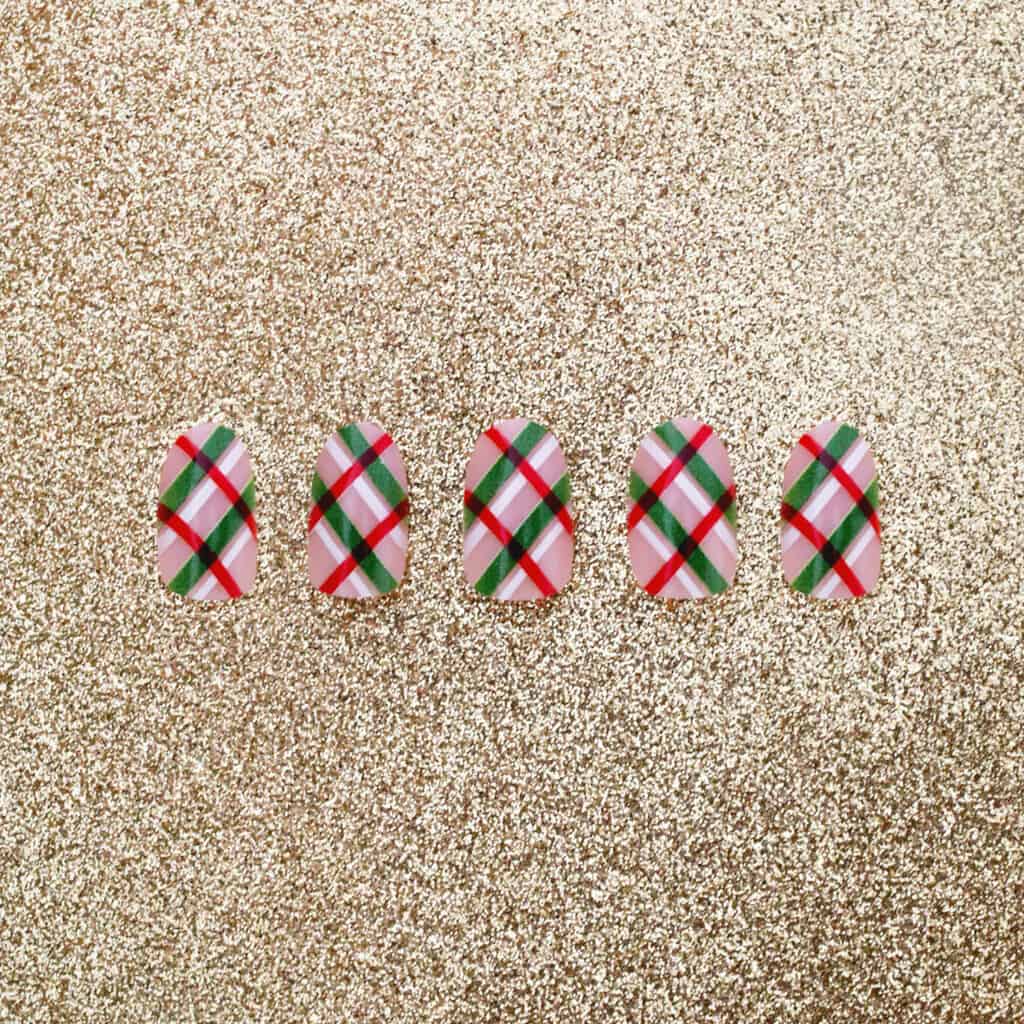
Mad For Plaid
Nothing says holiday spirit like a red and green plaid—so fun!
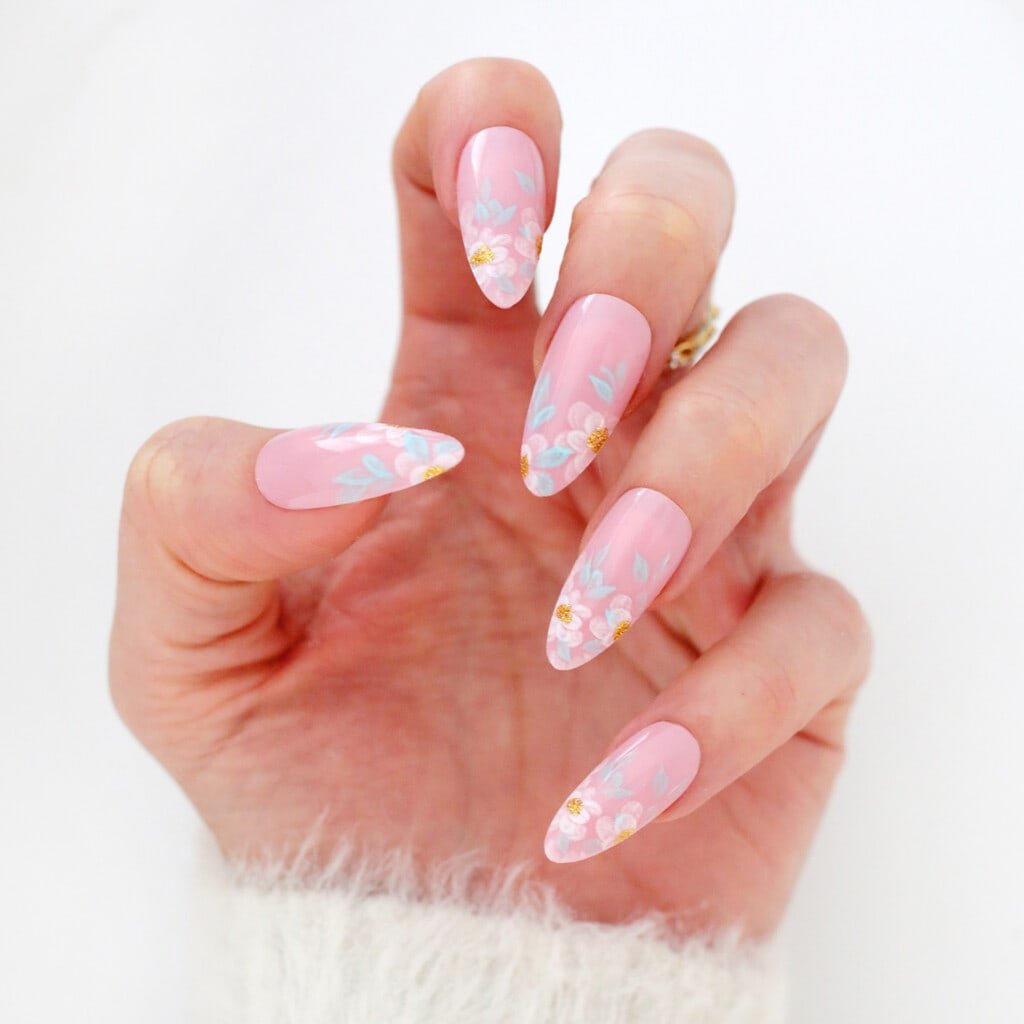
Easter Bouquet
These pretty floral nails will match just about any Easter outfit.
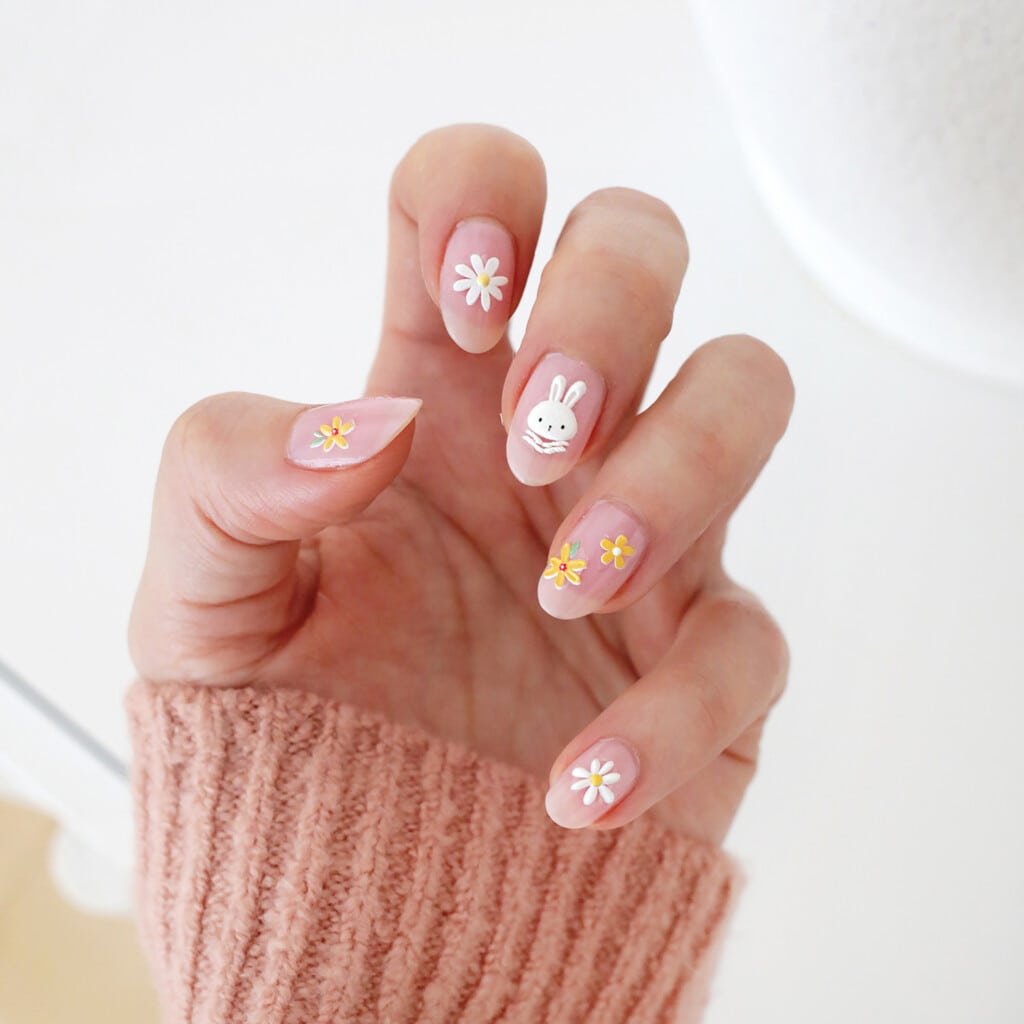
Floral Bunny
Spring flowers and a sweet bunny will put a hop in your step.
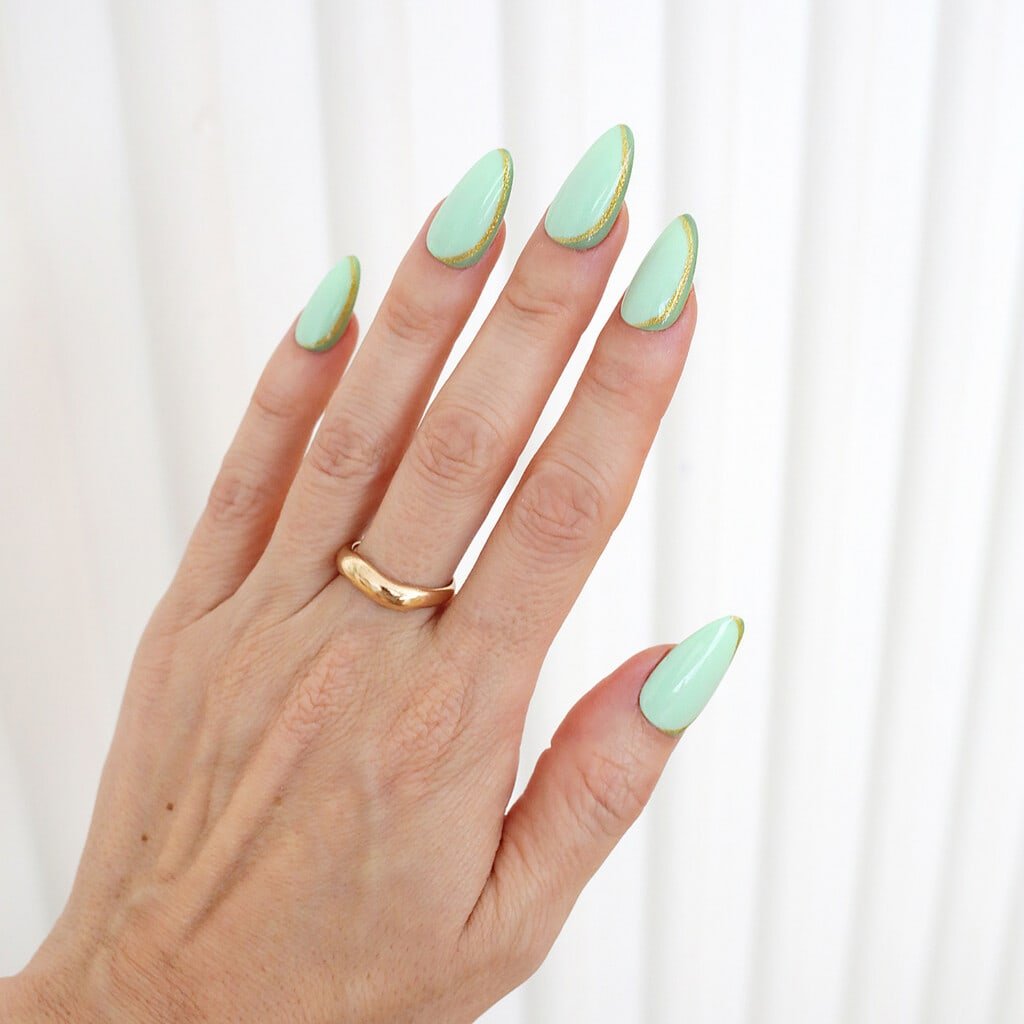
Mint and Gold
Try a mint green base with a gold glitter and sage green side accent.
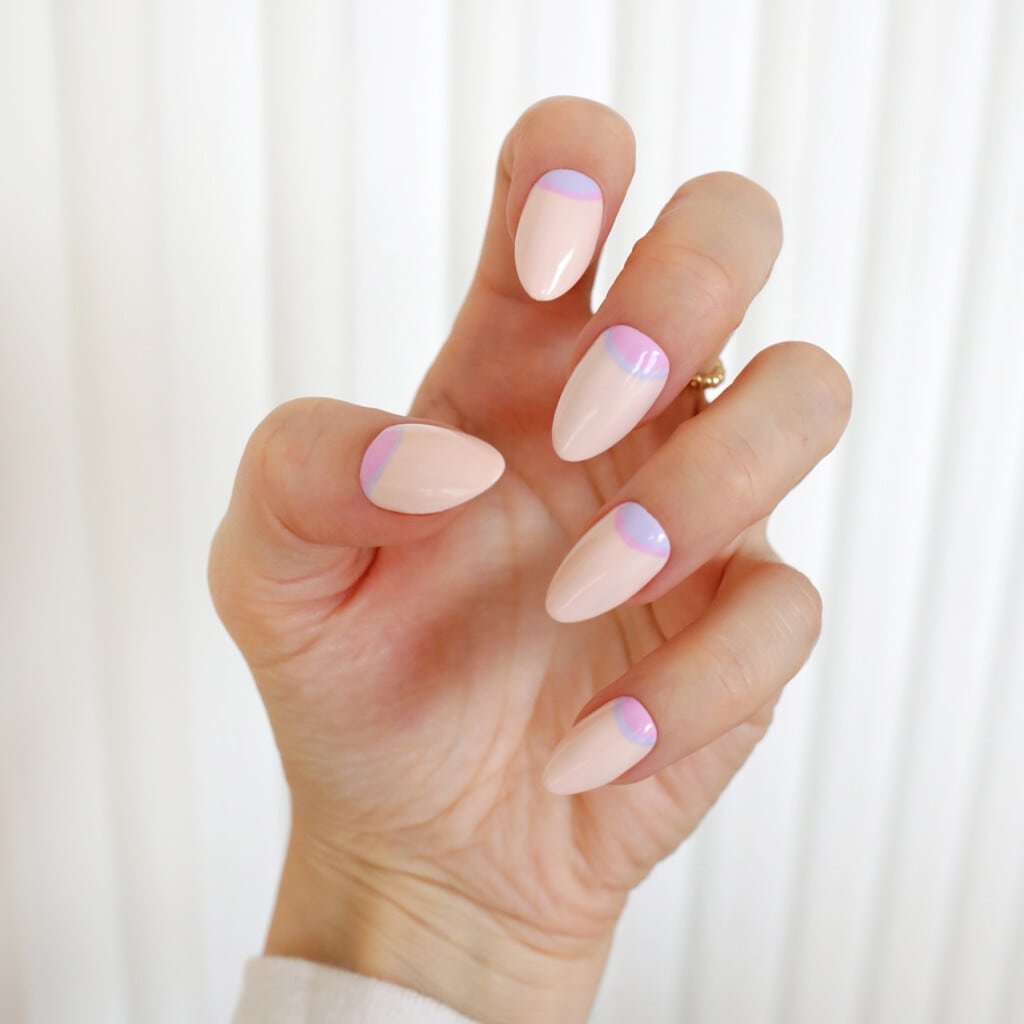
Purple Half Moons
These contrasting shades of purple make the half moon look into a pastel dream.
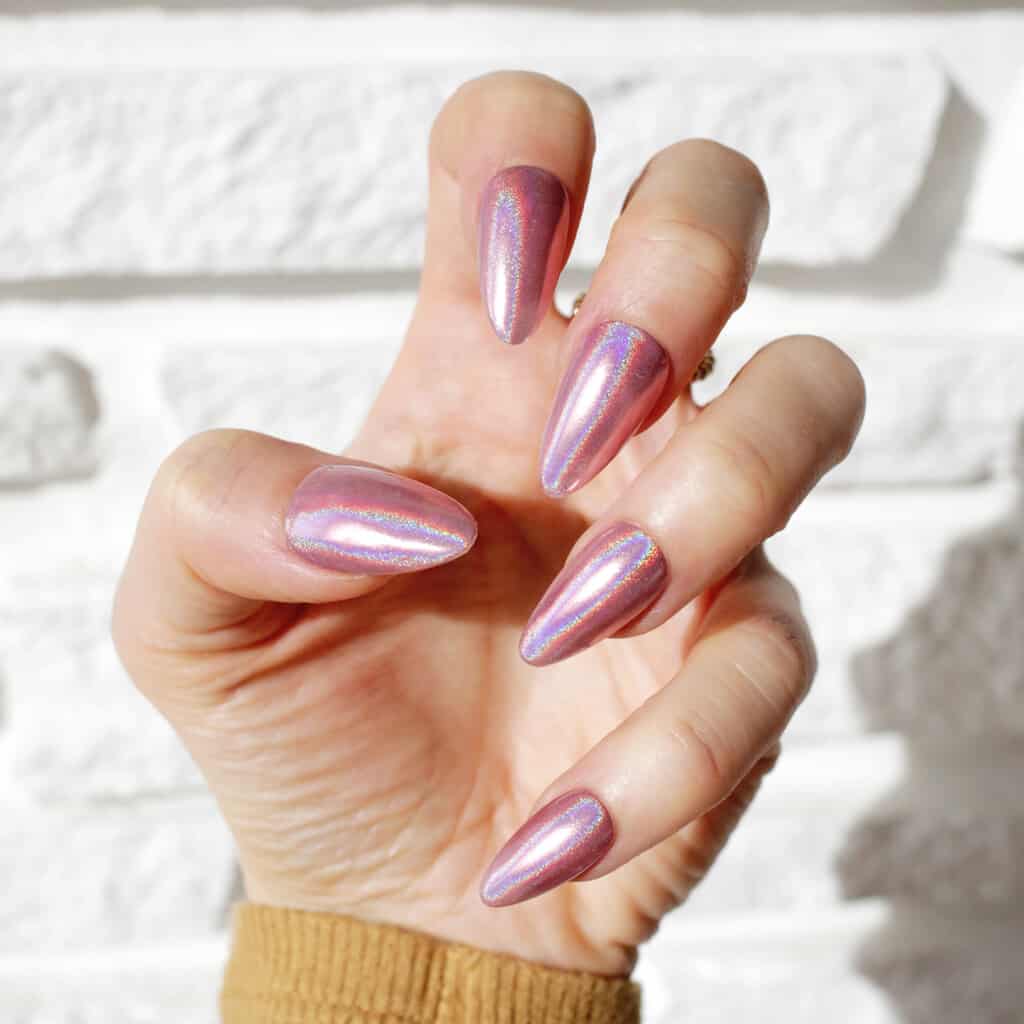
Pink Hologram
Take advantage of the spring sunshine and show off your hologram glitter pink mani in a bubblegum shade.
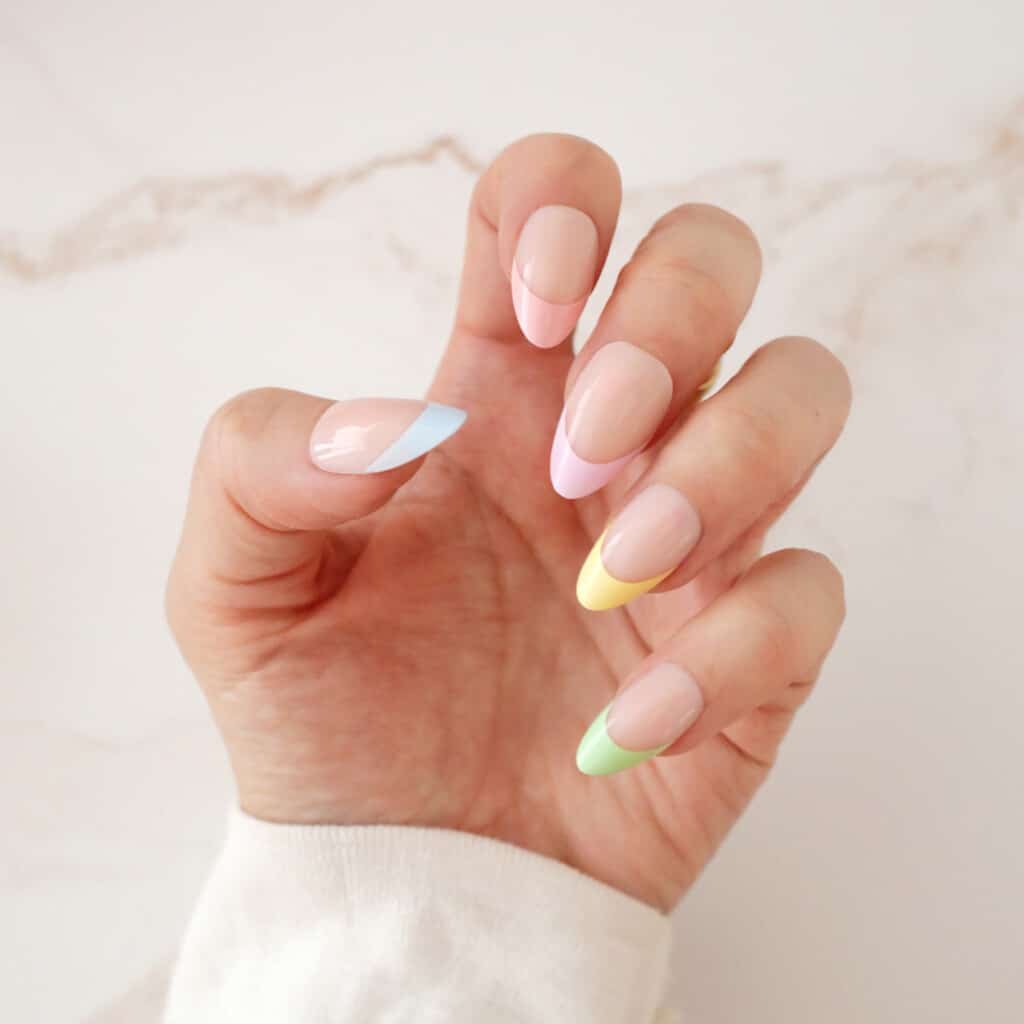
Pastel French Tips
To add a little color without going crazy, try rainbow-colored pastel French tips!
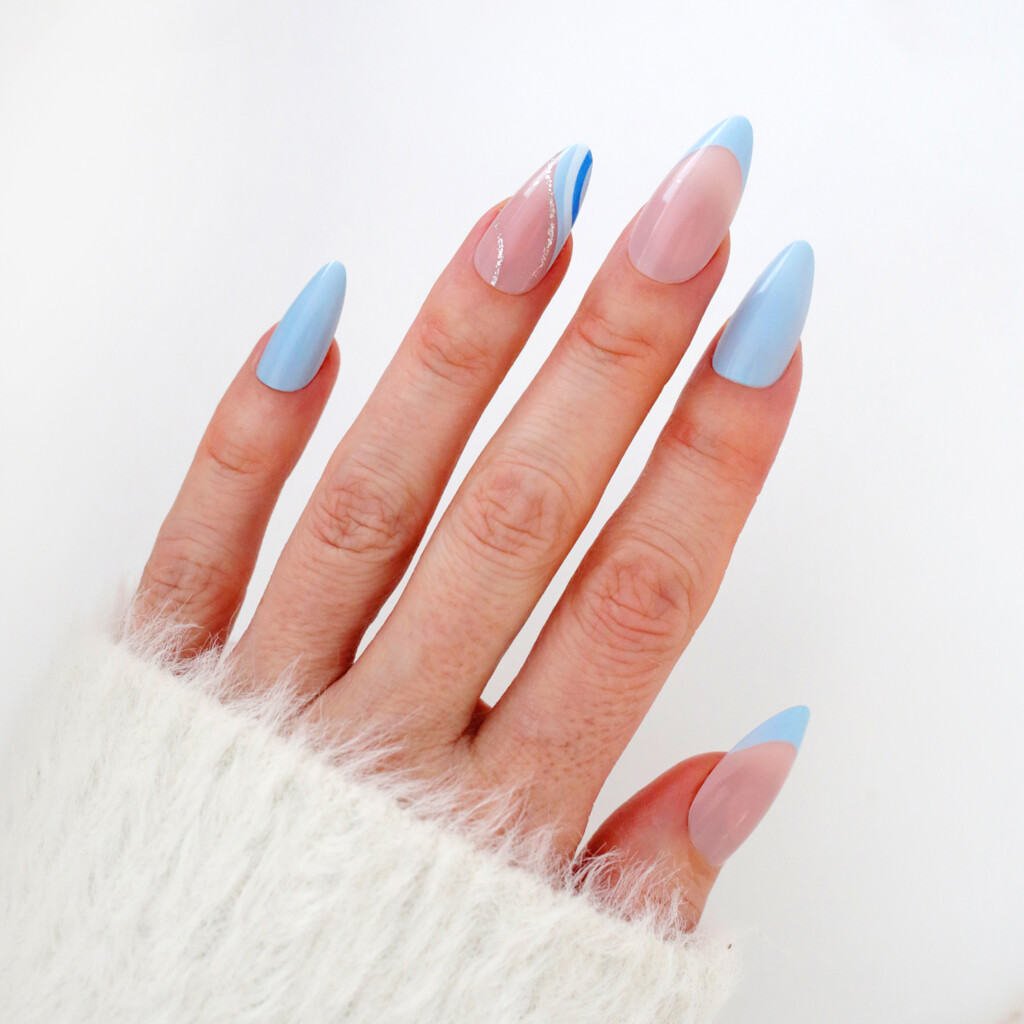
Baby Blues
These baby blue accent nails will match the return of spring blue skies.
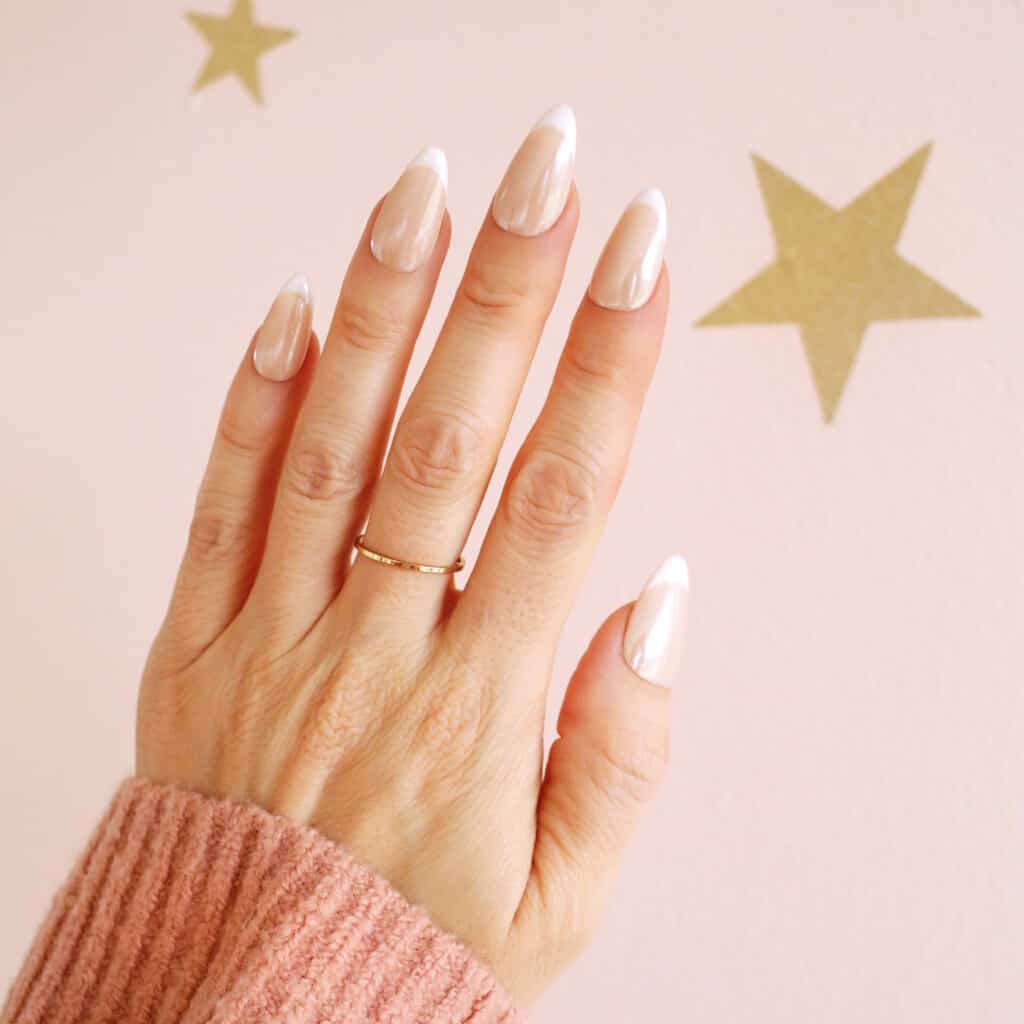
Glazed French Tips
A twist on a classic, the glazed French tip look is fresh and light for spring.
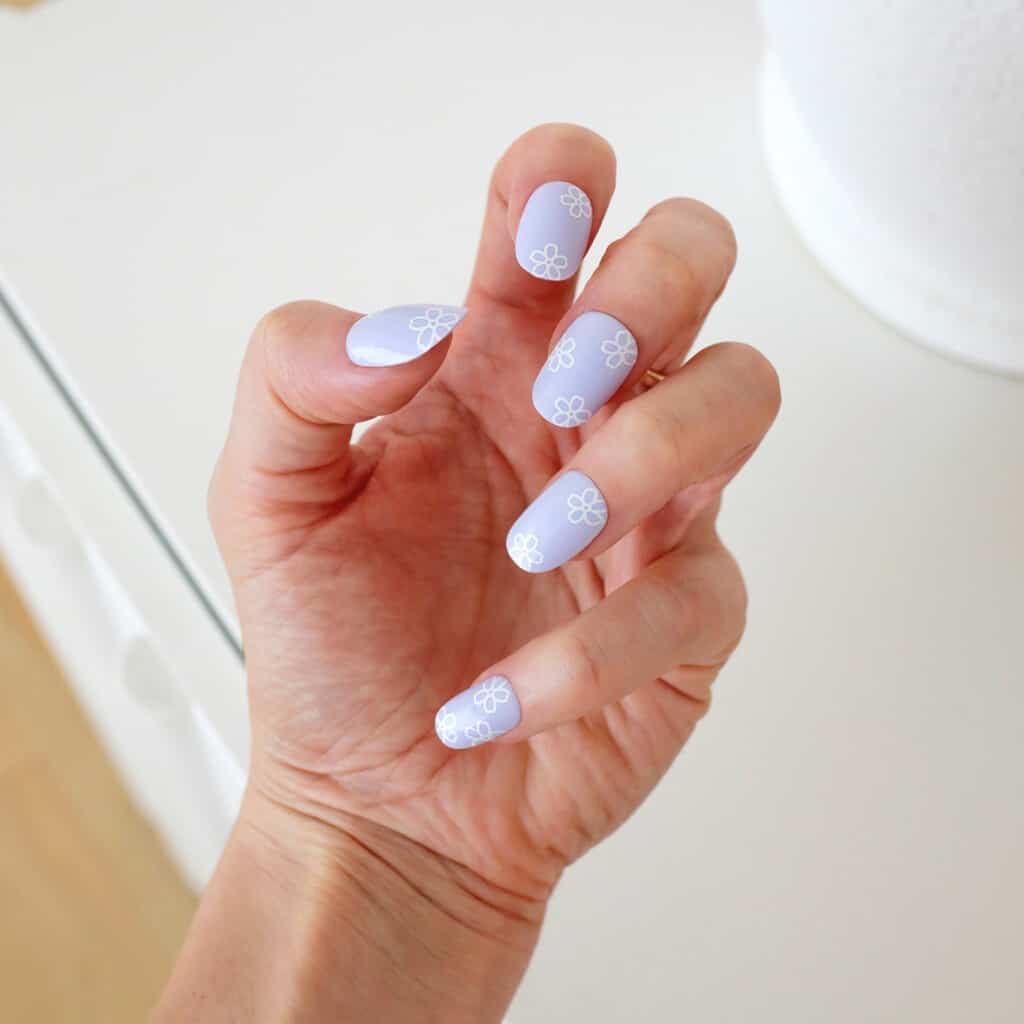
Lavender Love
Simple flower outlines on a pastel purple background are just the right look for spring.
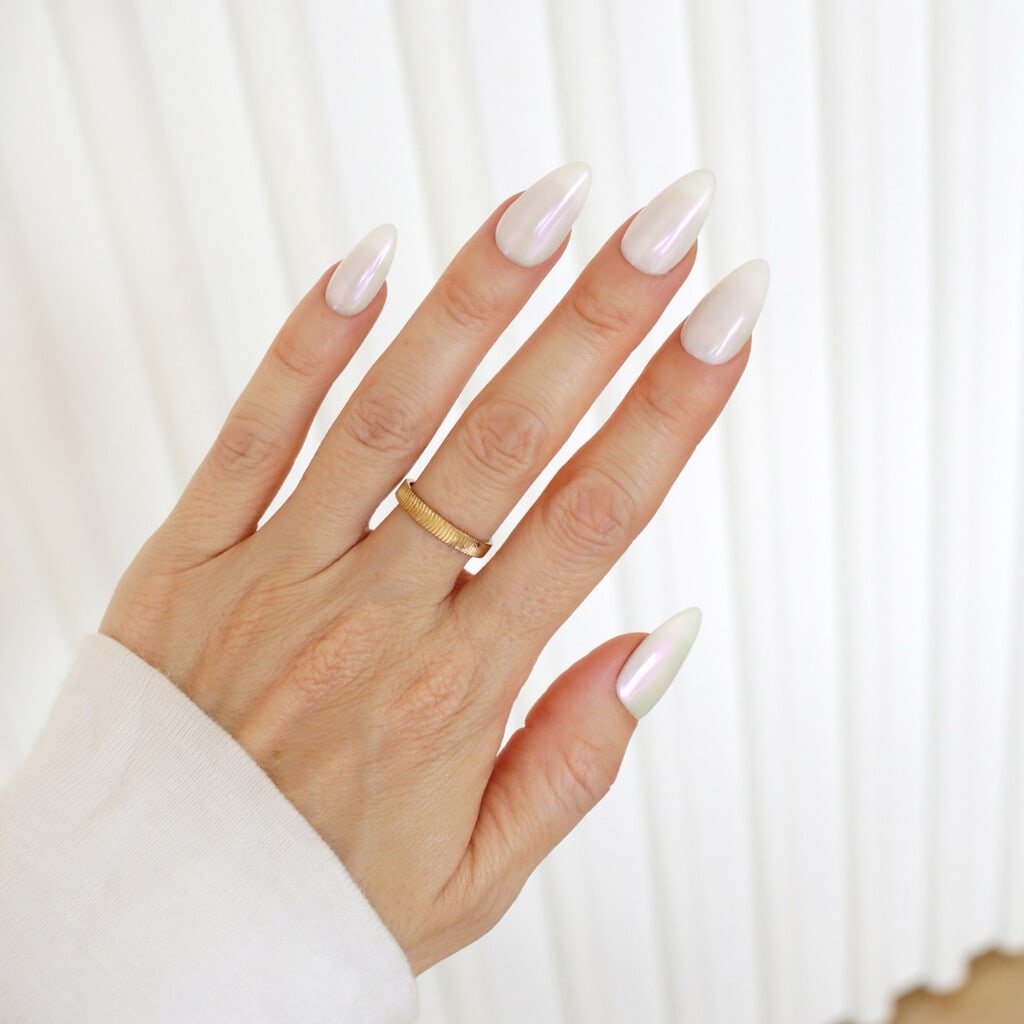
Donut Glazed
Add a slight iridescent shine to your nails for a look that will match any spring outfit.
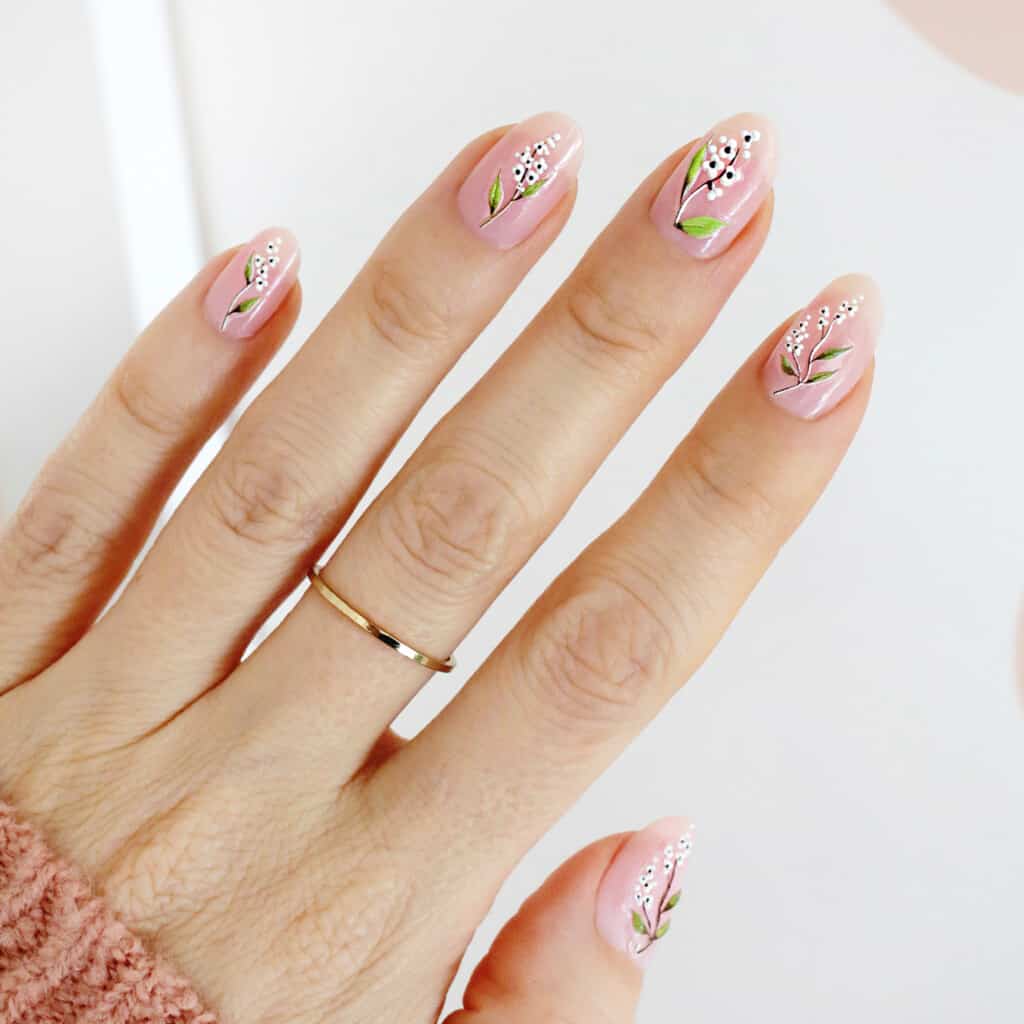
Botanical Babe
Add some flowers and greenery with nail art or these nail stickers for an at home mani.
Walking on Sunshine
These neon yellow French tips are a sunny way to welcome in warmer weather.
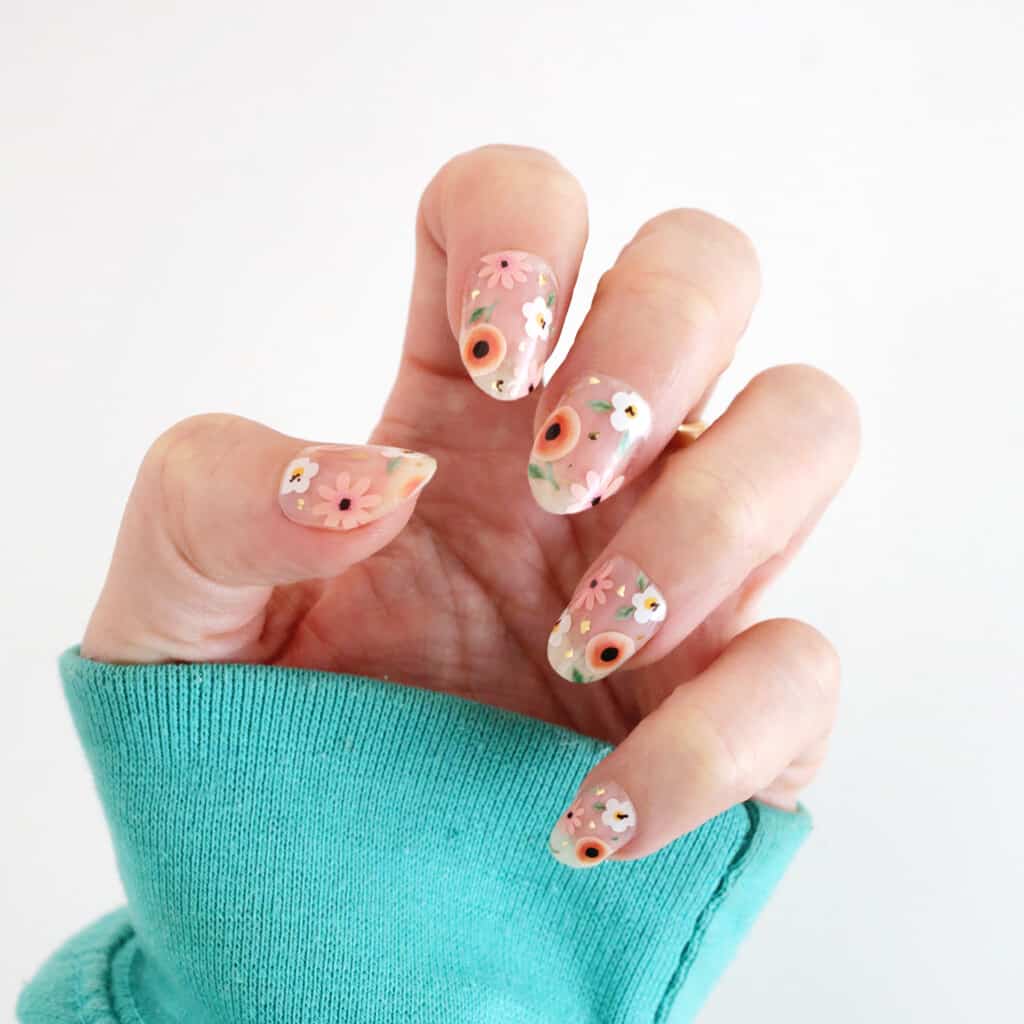
Clearly Floral
Try adding flower nail wraps to nude nails for a clearly cute manicure.
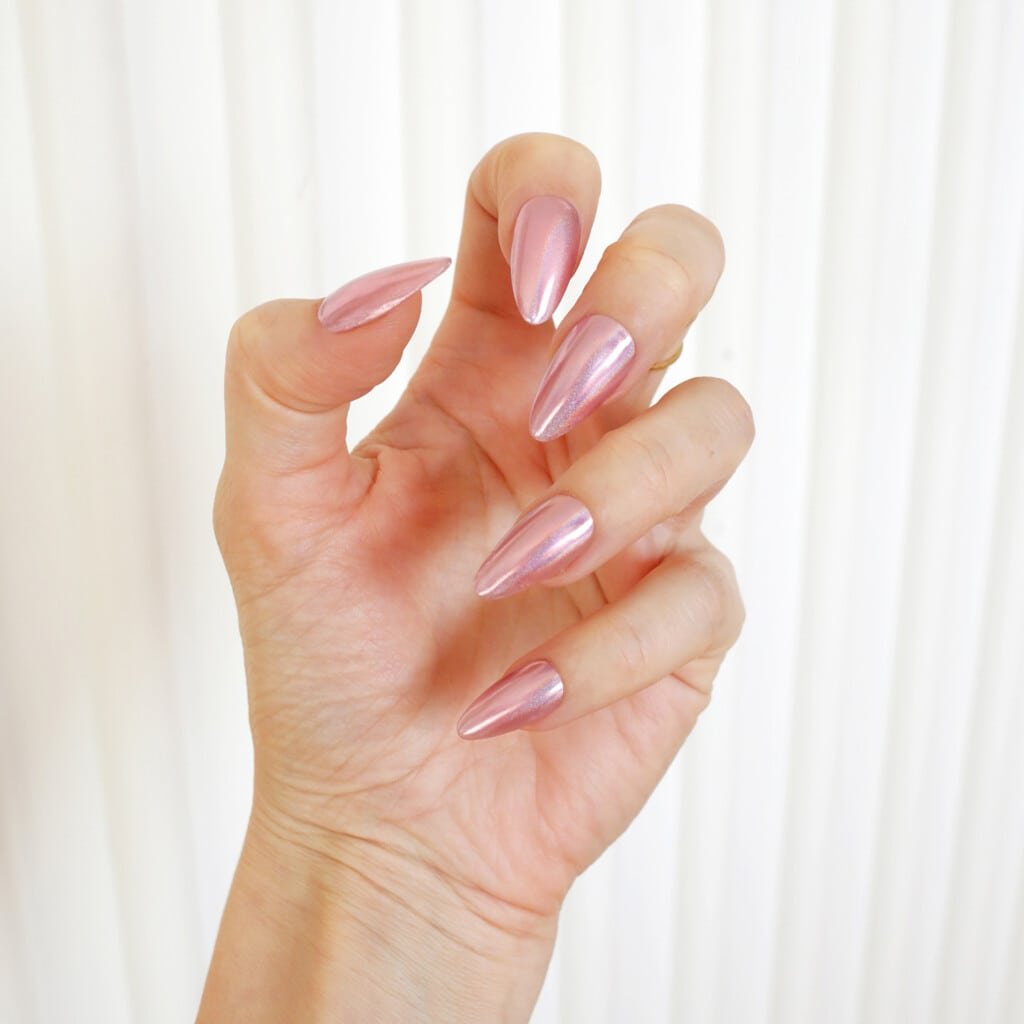
Petal Power Chrome
Join the chrome trend in your favorite pink hue.
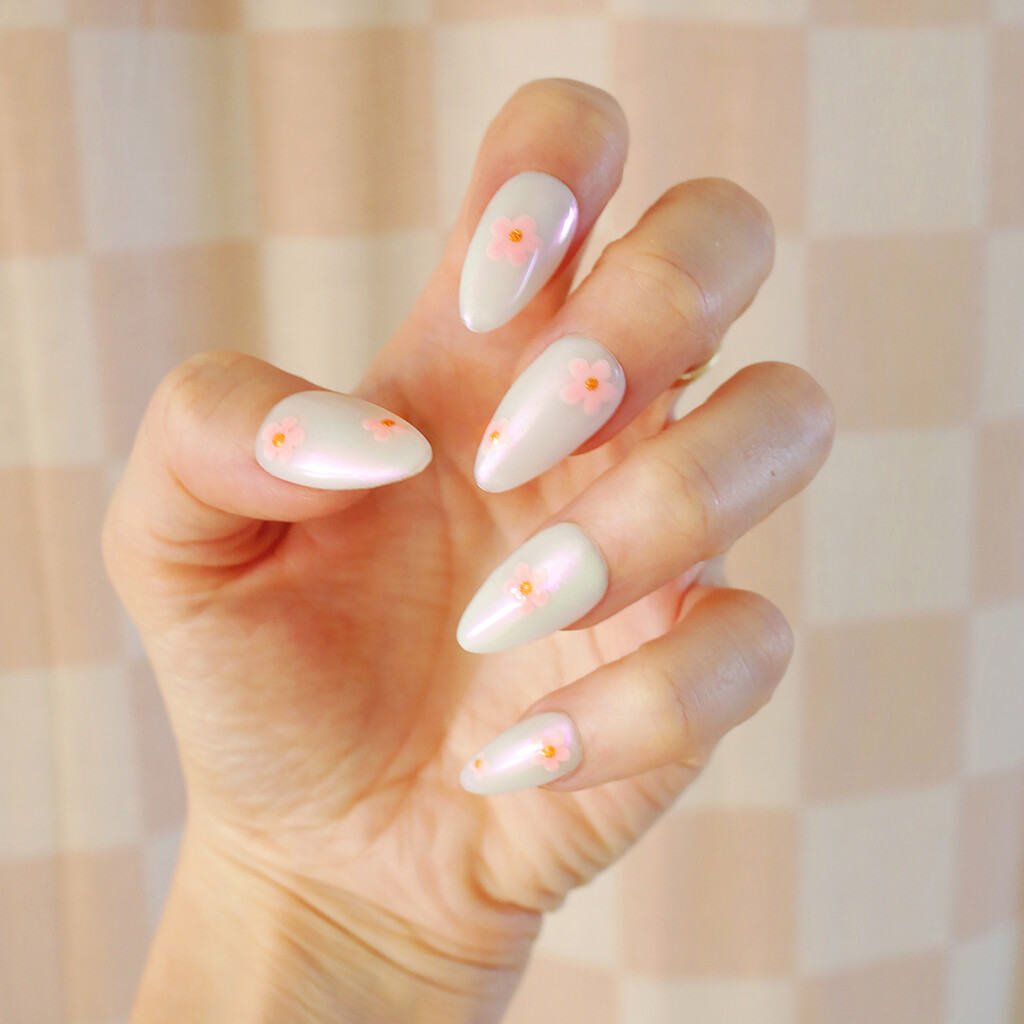
Sweet and Subtle
Light pink flowers on a shimmery white background is light and pretty for spring.
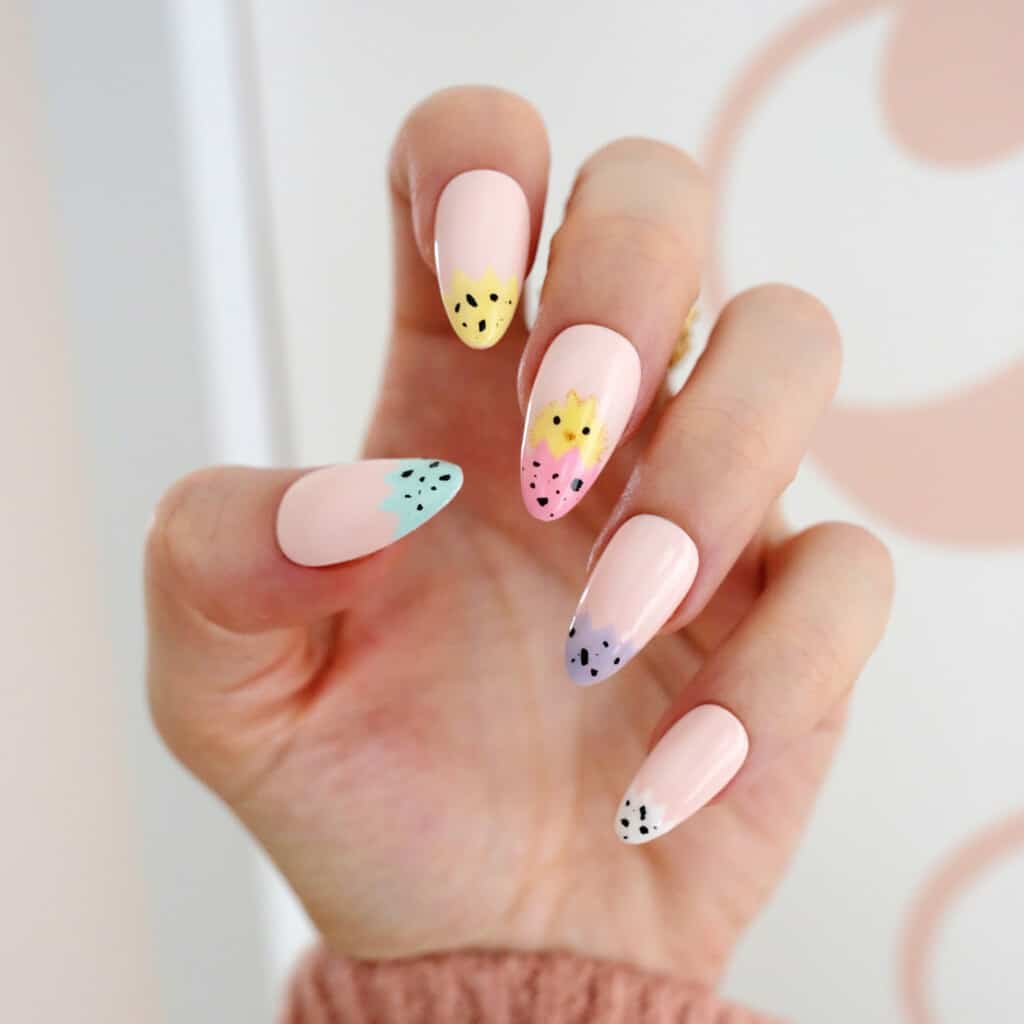
Baby Chick
How cute is this baby chick in an egg design?
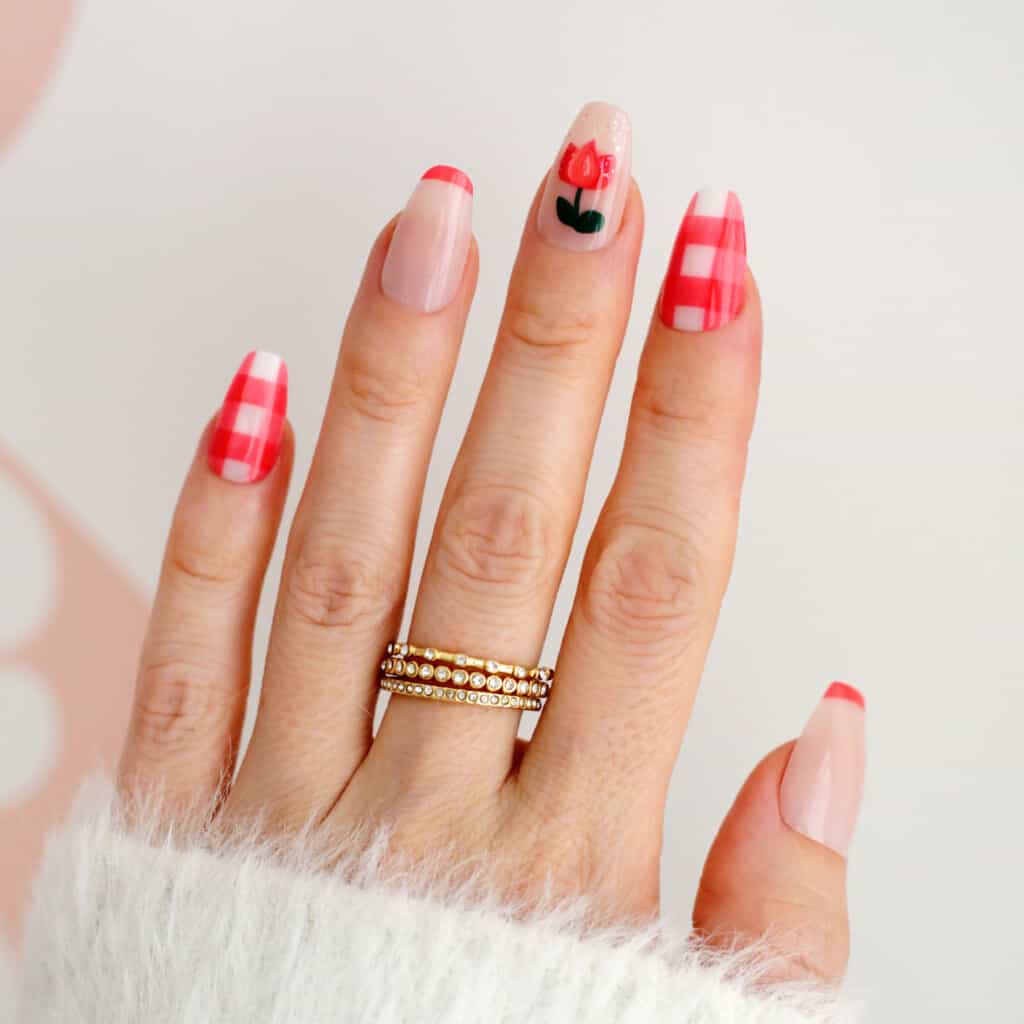
Field of Tulips
Add a sweet touch of spring to your manicure with this tulip and buffalo check design.
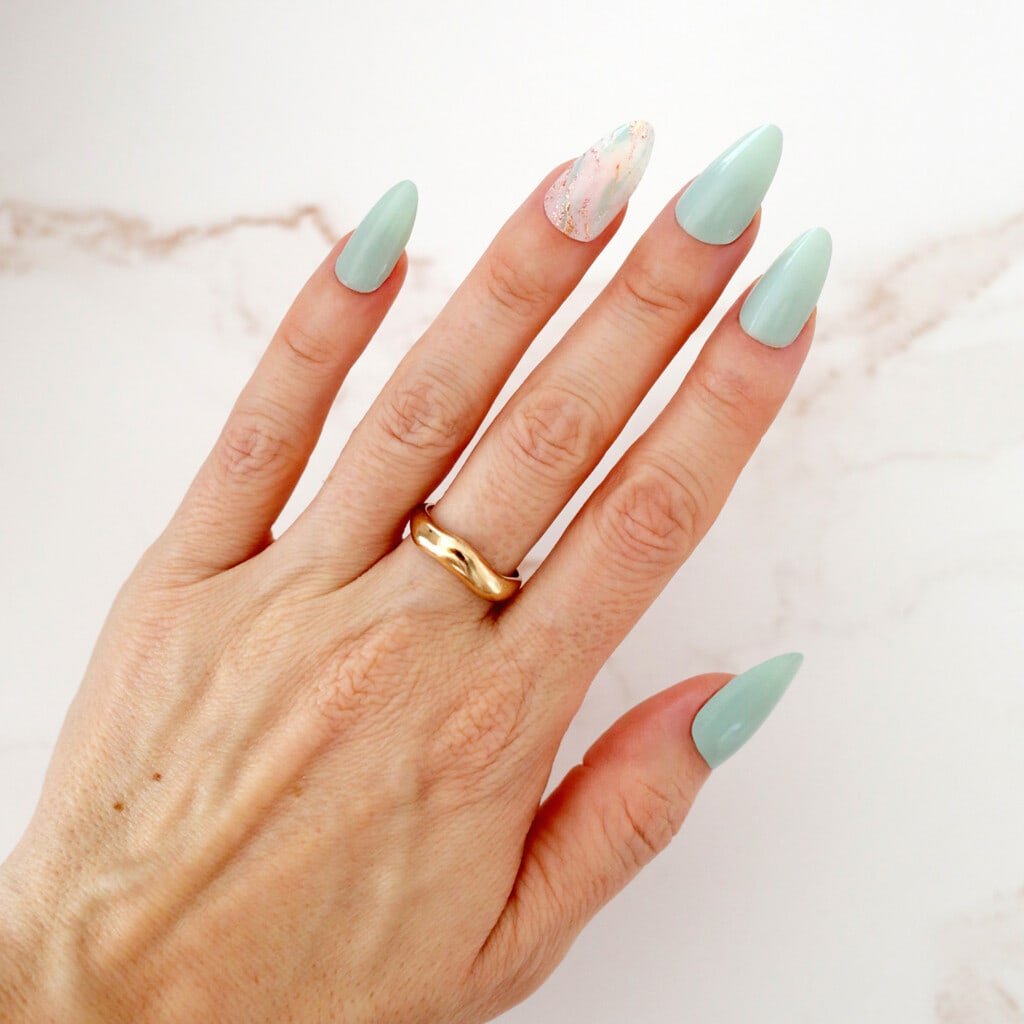
Mint Marble
A soft mint nail color with a gold marble accent nail looks fresh and light.
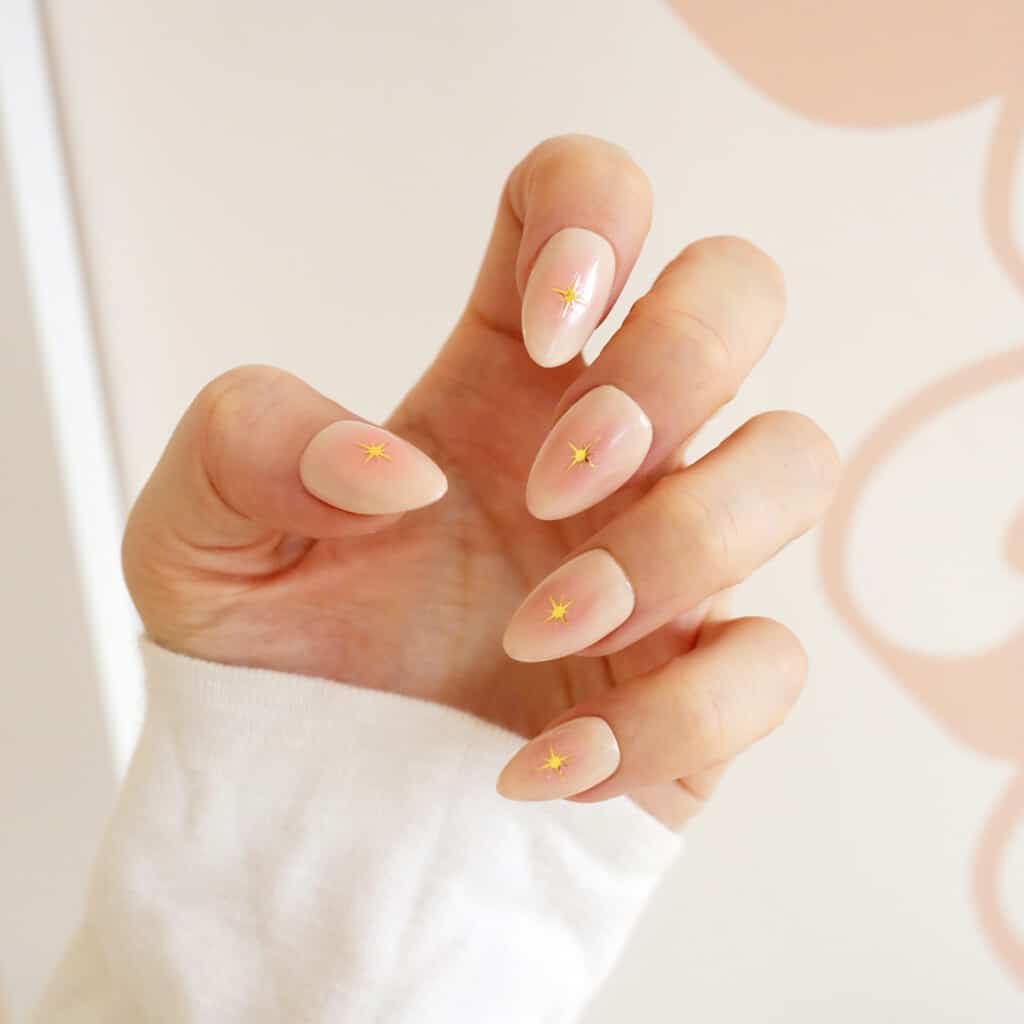
Star Kissed
Try these ombre blush centers accented with gold foil stars.
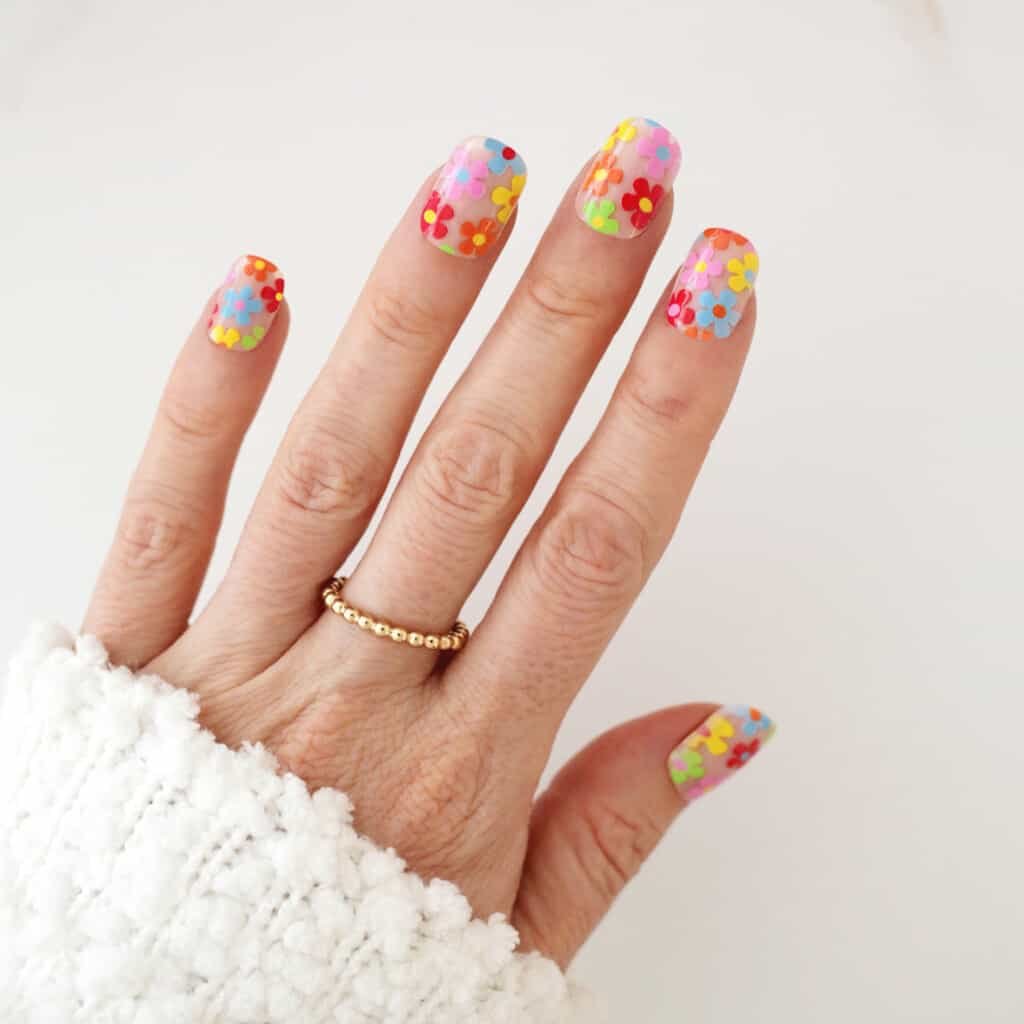
Flower Power
For a more bold look, try these bright flower power nails.
Green Waves
This wavy green pattern is modern but keeps you in the Christmas color palette.
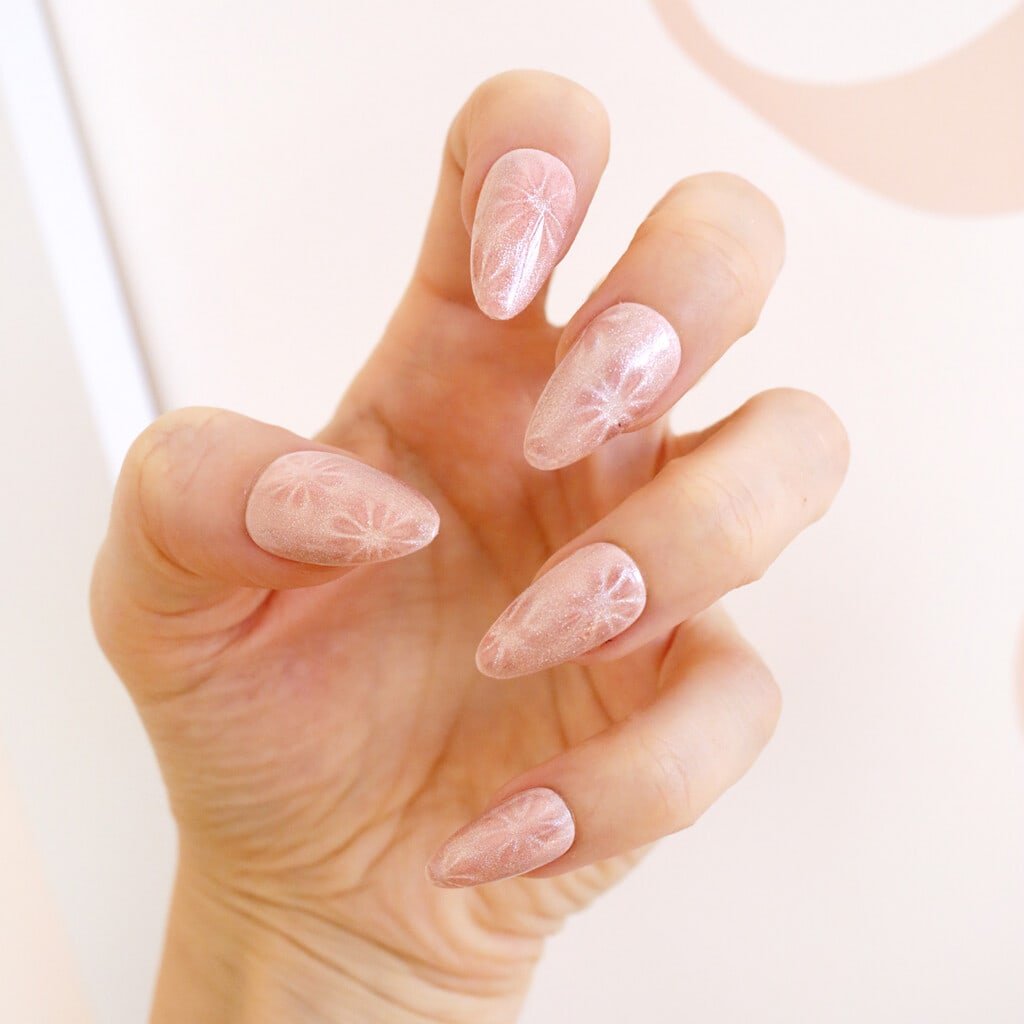
Pink Petals
Add a petal design into your favorite spring hue.
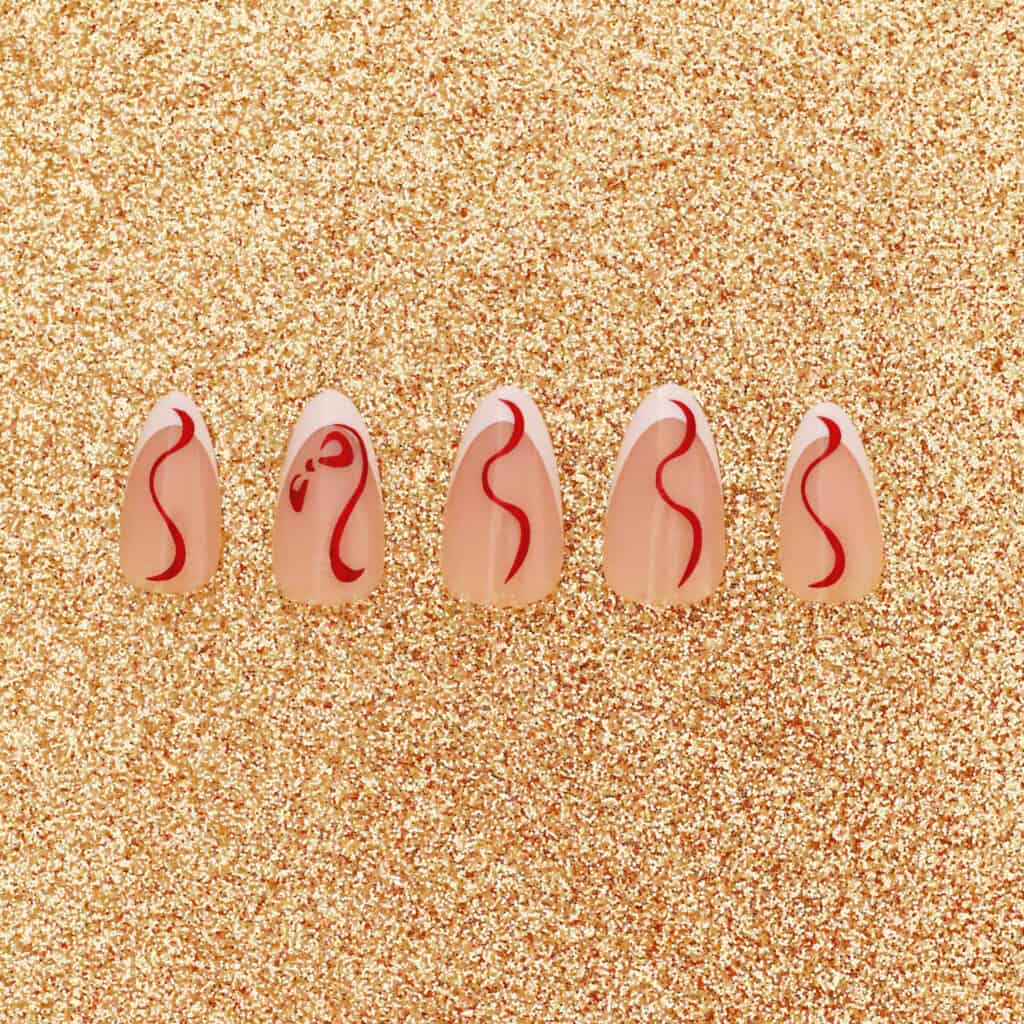
Wrapped With A Bow
These bow nails are cute and festive without being too busy or overboard.
Velvety Green
Go for a green velvet look to match the new leaves that are popping up outside.
Looking for more nail ideas? Check out:
]]>I’ve been a big fan of false lashes since my early 20s (which was like five years ago, right?!? How kind of you …).
I’ve done lots of variations to get a good lash look from simple false lashes, to lash extensions, to using Lashify lashes, to lash serums.
While I like the look of false lashes (especially for special occasions or photos), it’s not something I always felt like messing with every day. So doing a lash serum seemed like a good way to go to get “all the time” lashes.
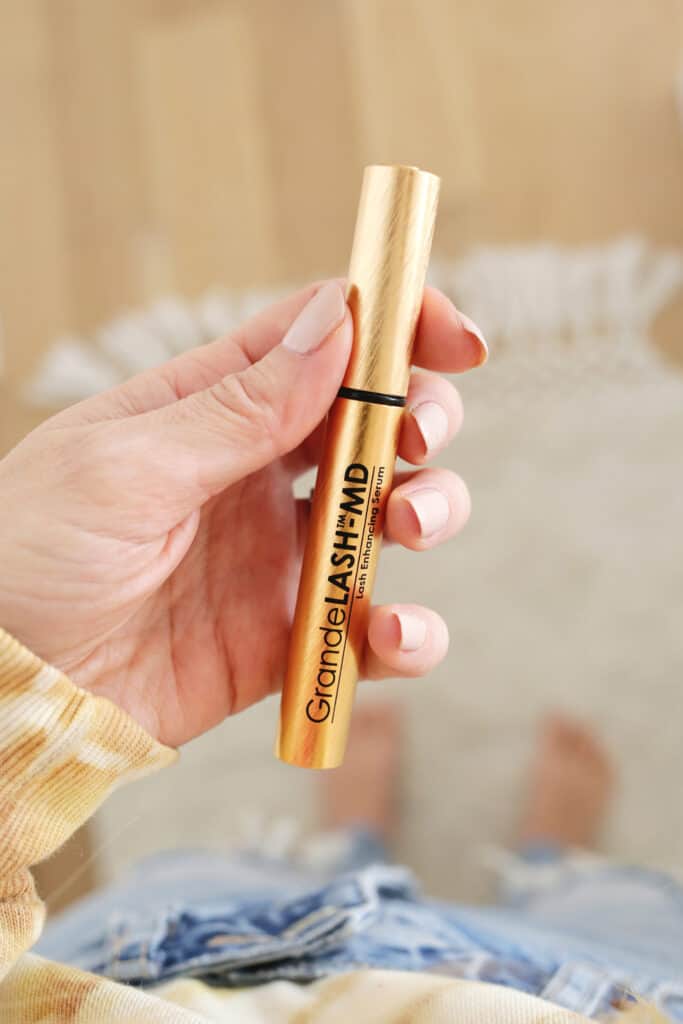
I’ll show you what happened when I tried GrandeLASH-MD Serum and how well I thought it worked!
Related: What Happened When I Tried Lashify Lashes
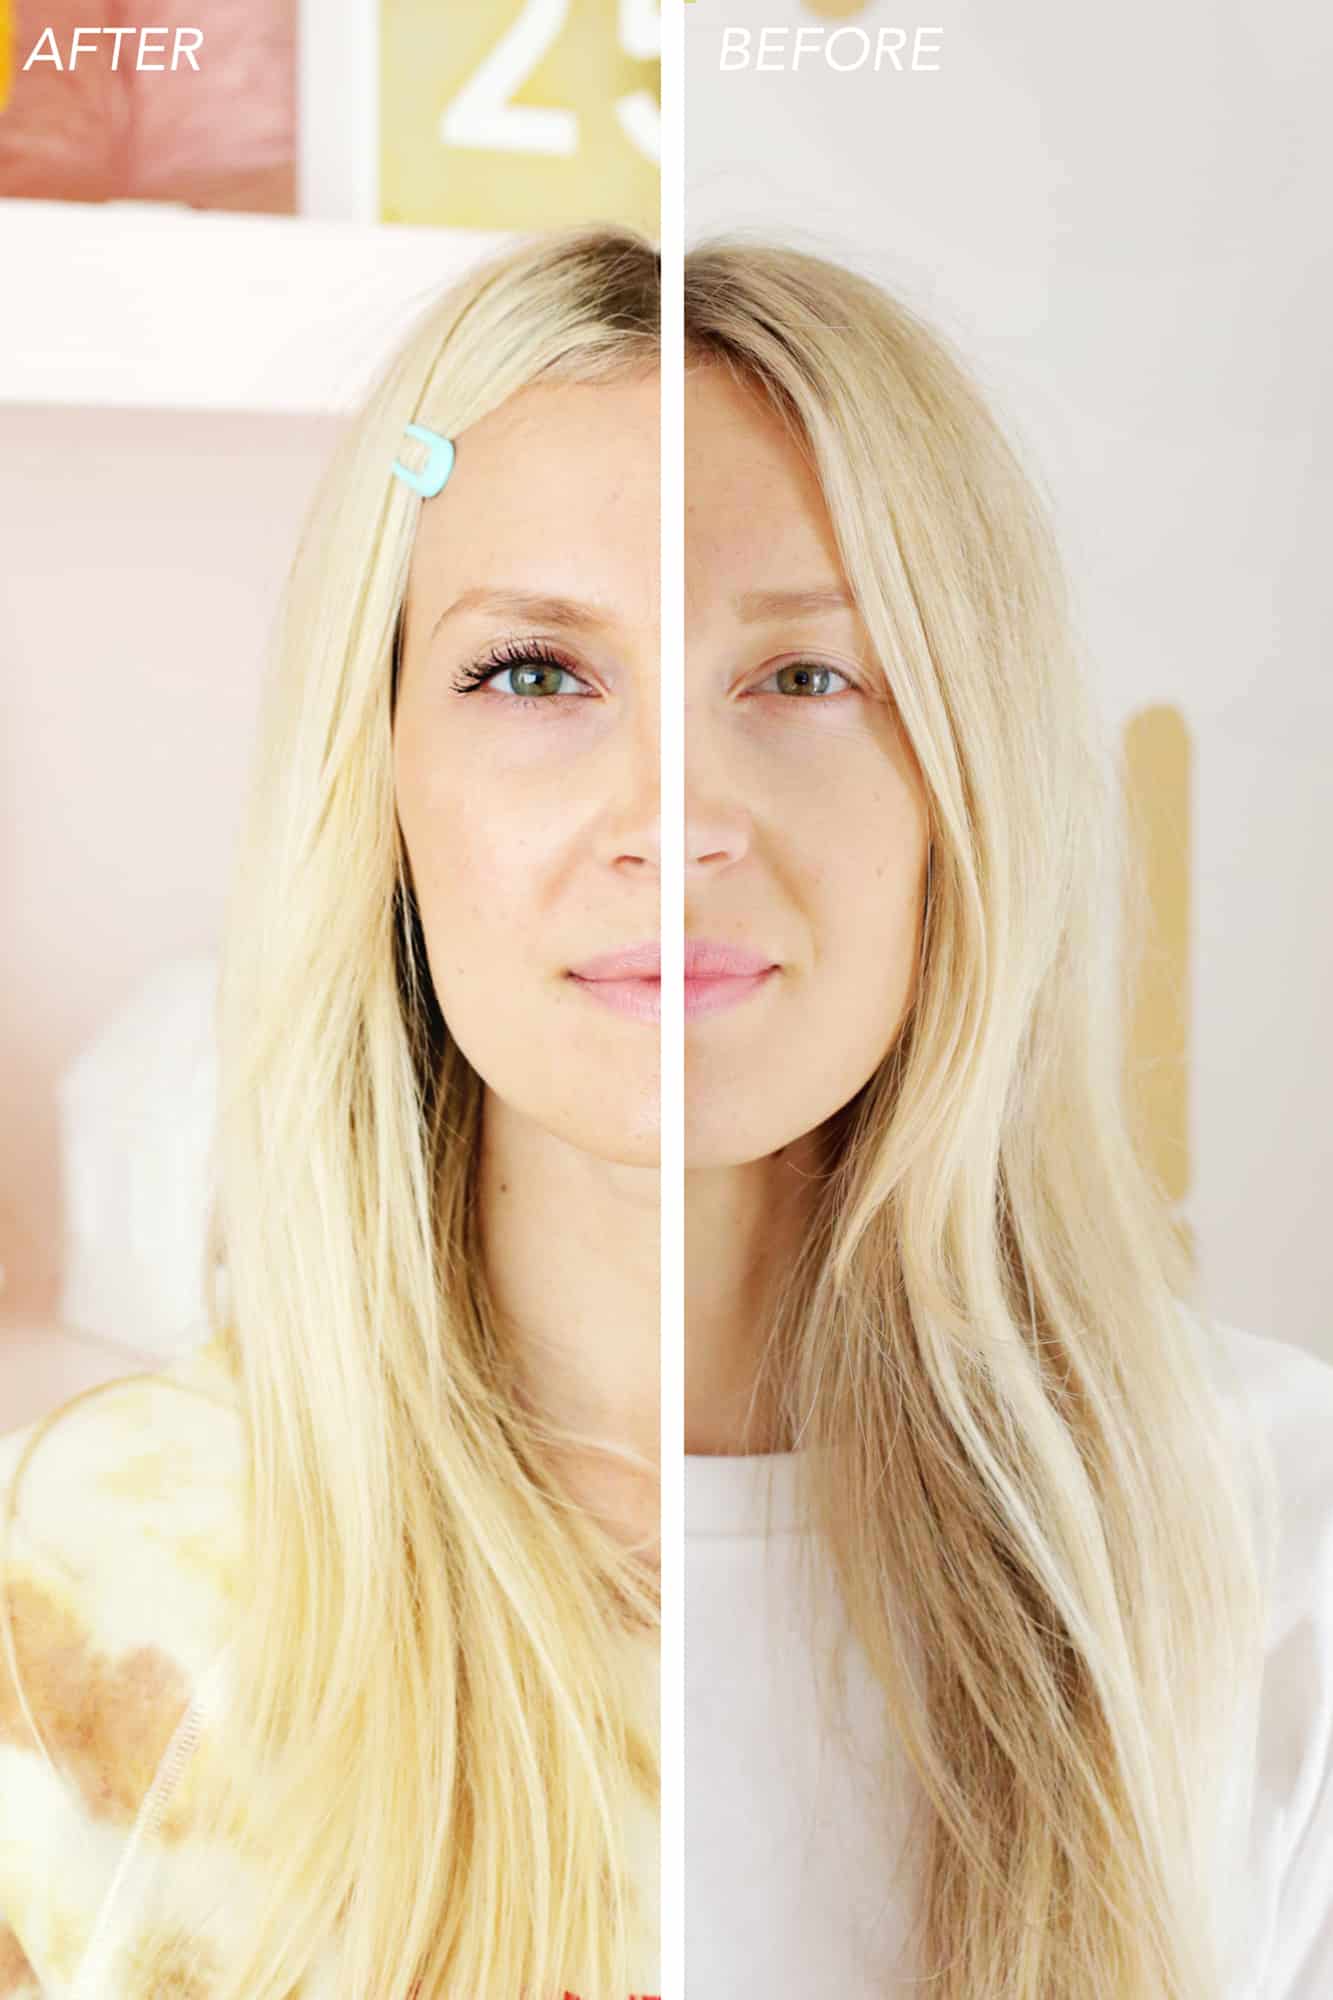
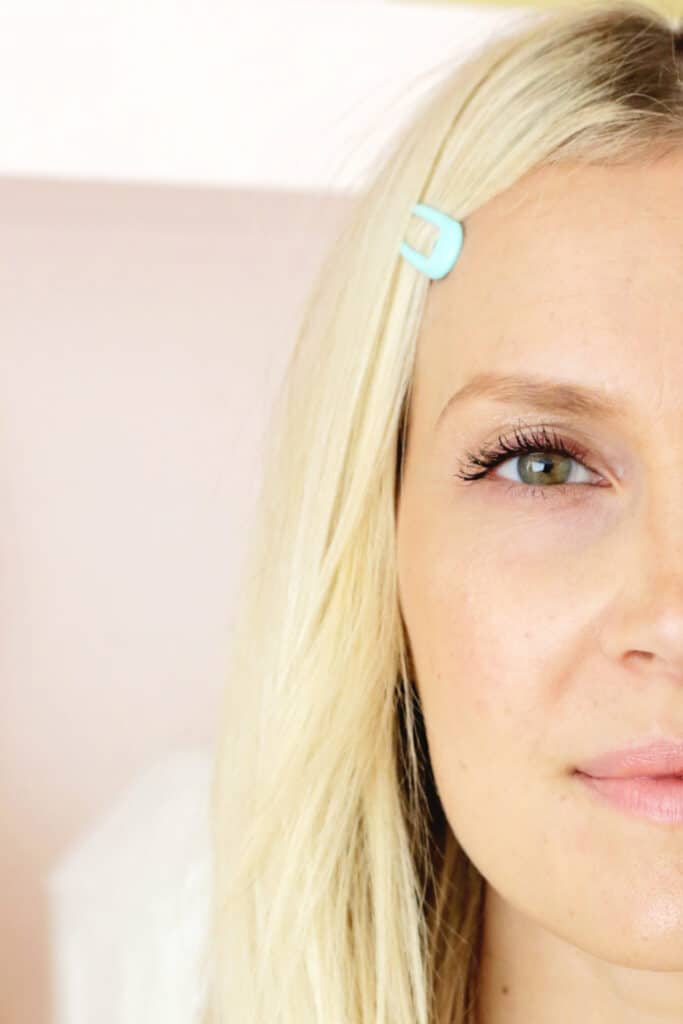
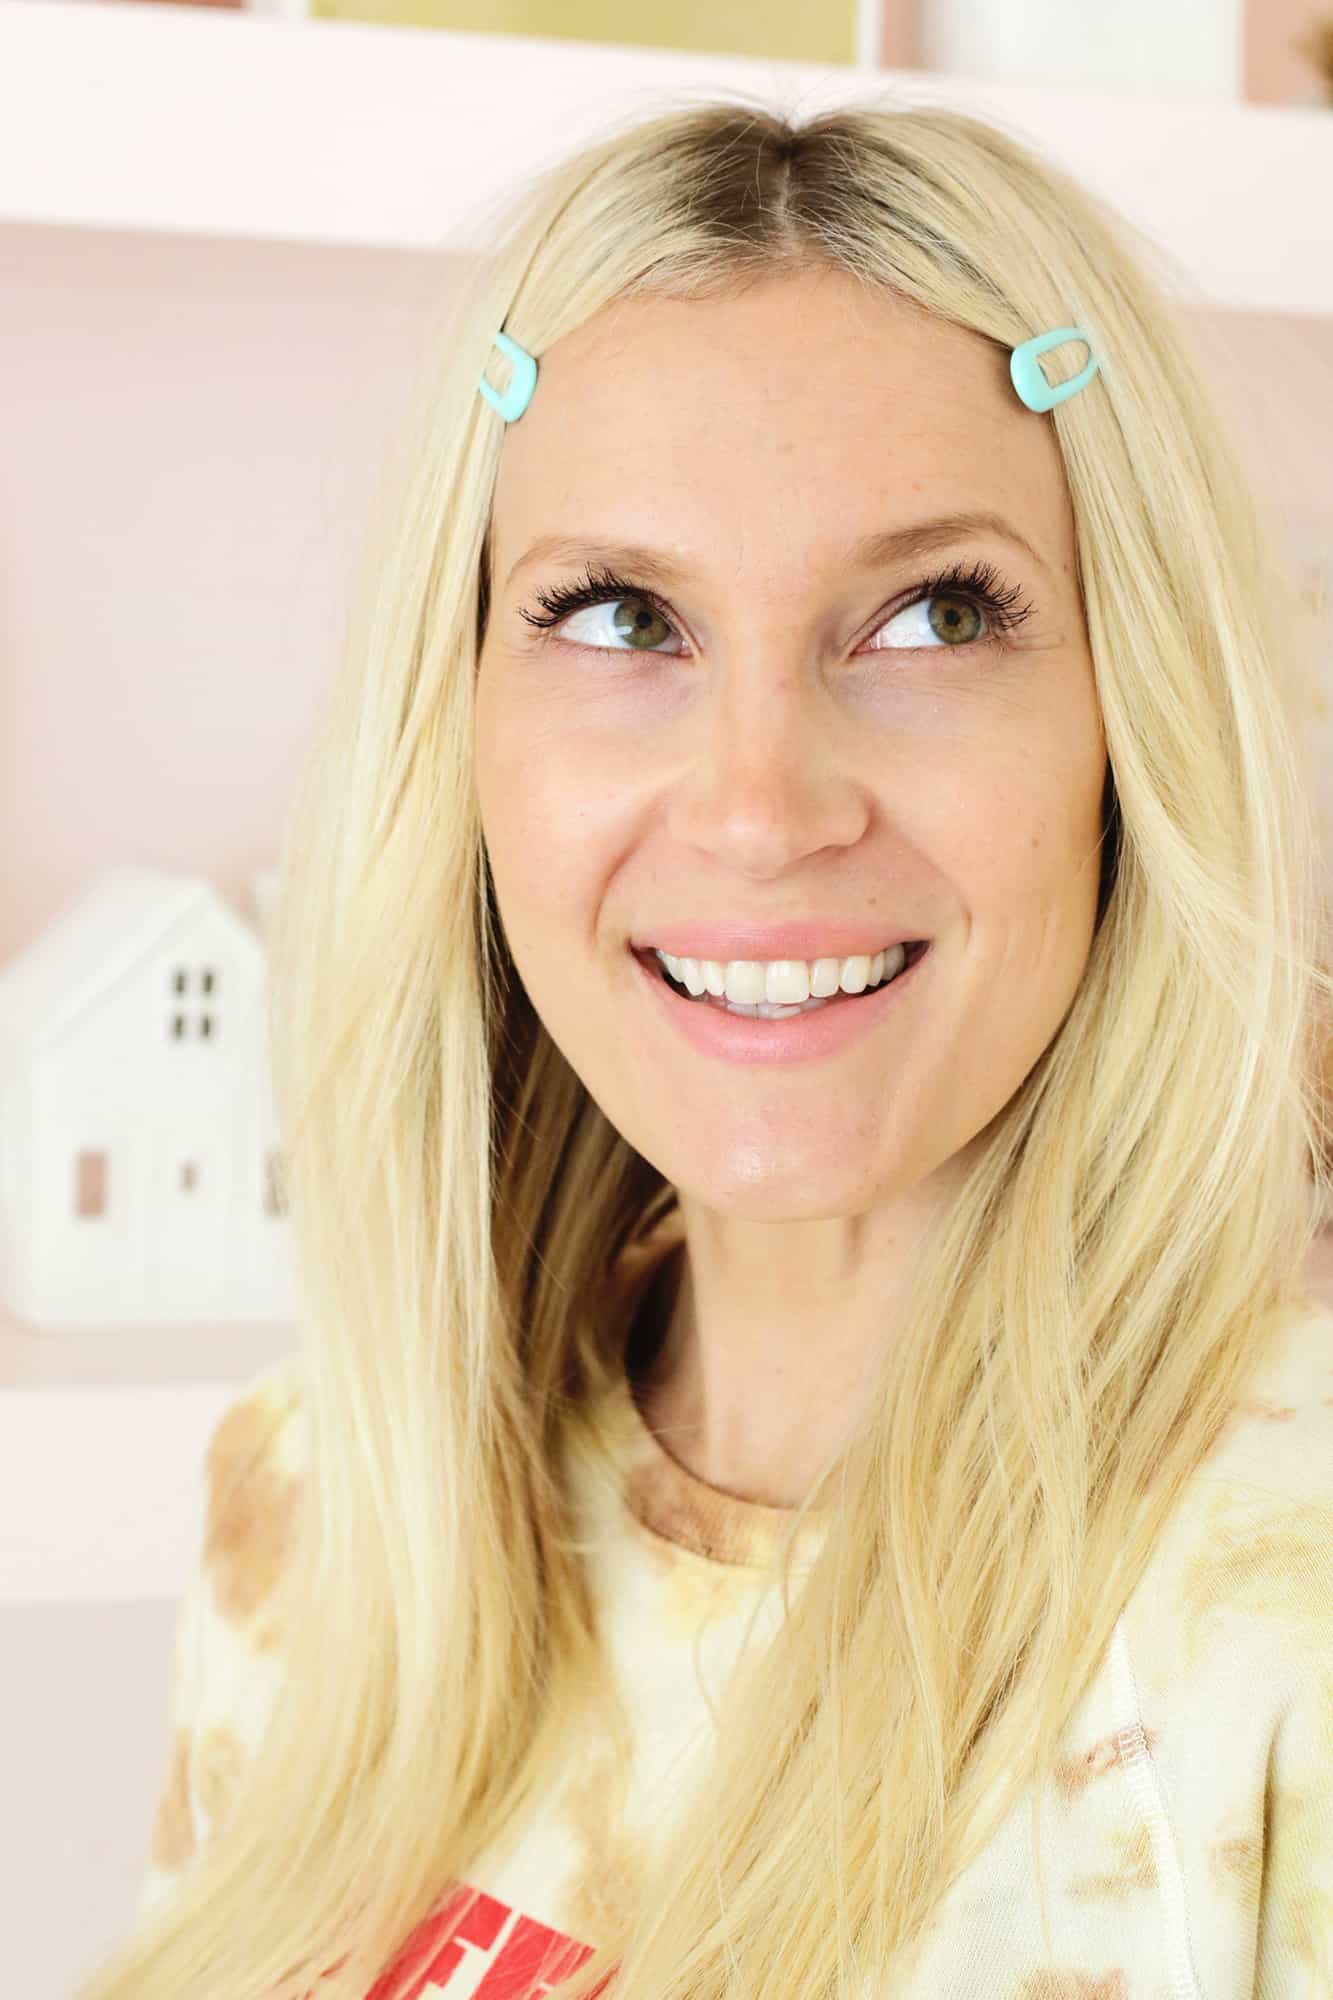
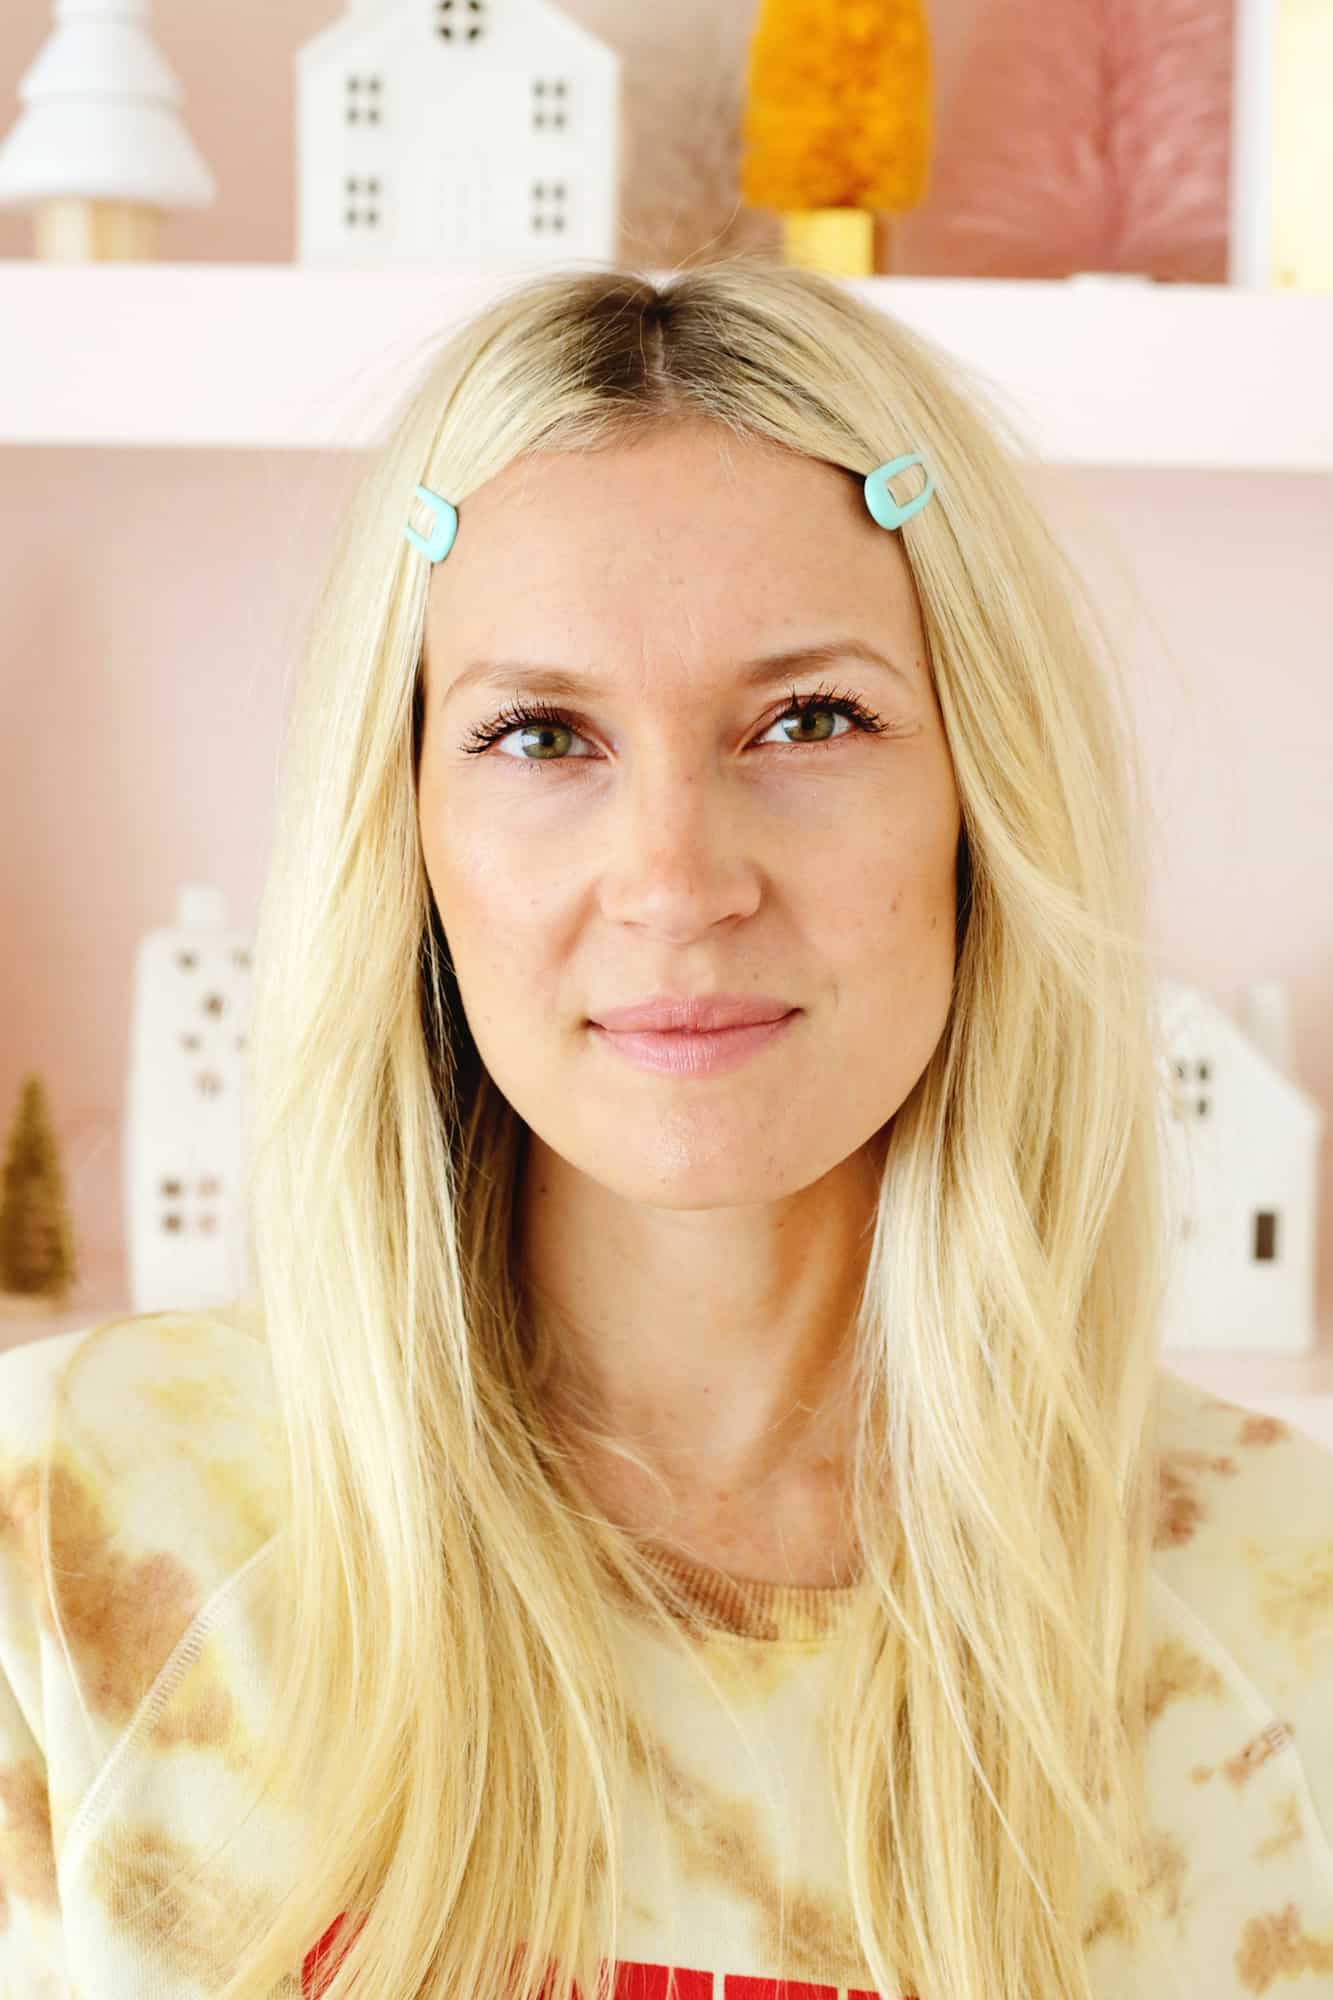
Granted, I am wearing mascara in the “after” photo above (check out the photo below for a comparison without mascara), but you can see that my lashes are quite more noticeable than they are in the “before” and I am thrilled with the results!!
Even though it’s been about six months of use, I still am shocked at times how amazing they appear when I look in the mirror!
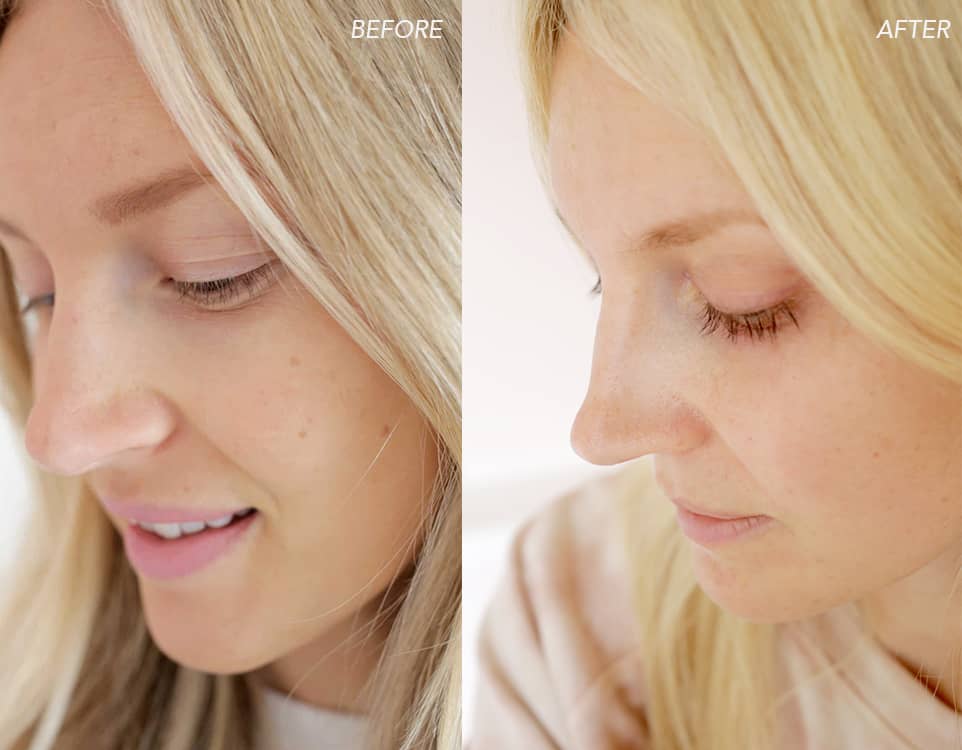
Here’s a photo without mascara on as well … I feel like mine tend to get a lot longer rather than also being a ton thicker (which I will take!), but a lot of people report much thicker lashes in general, too.
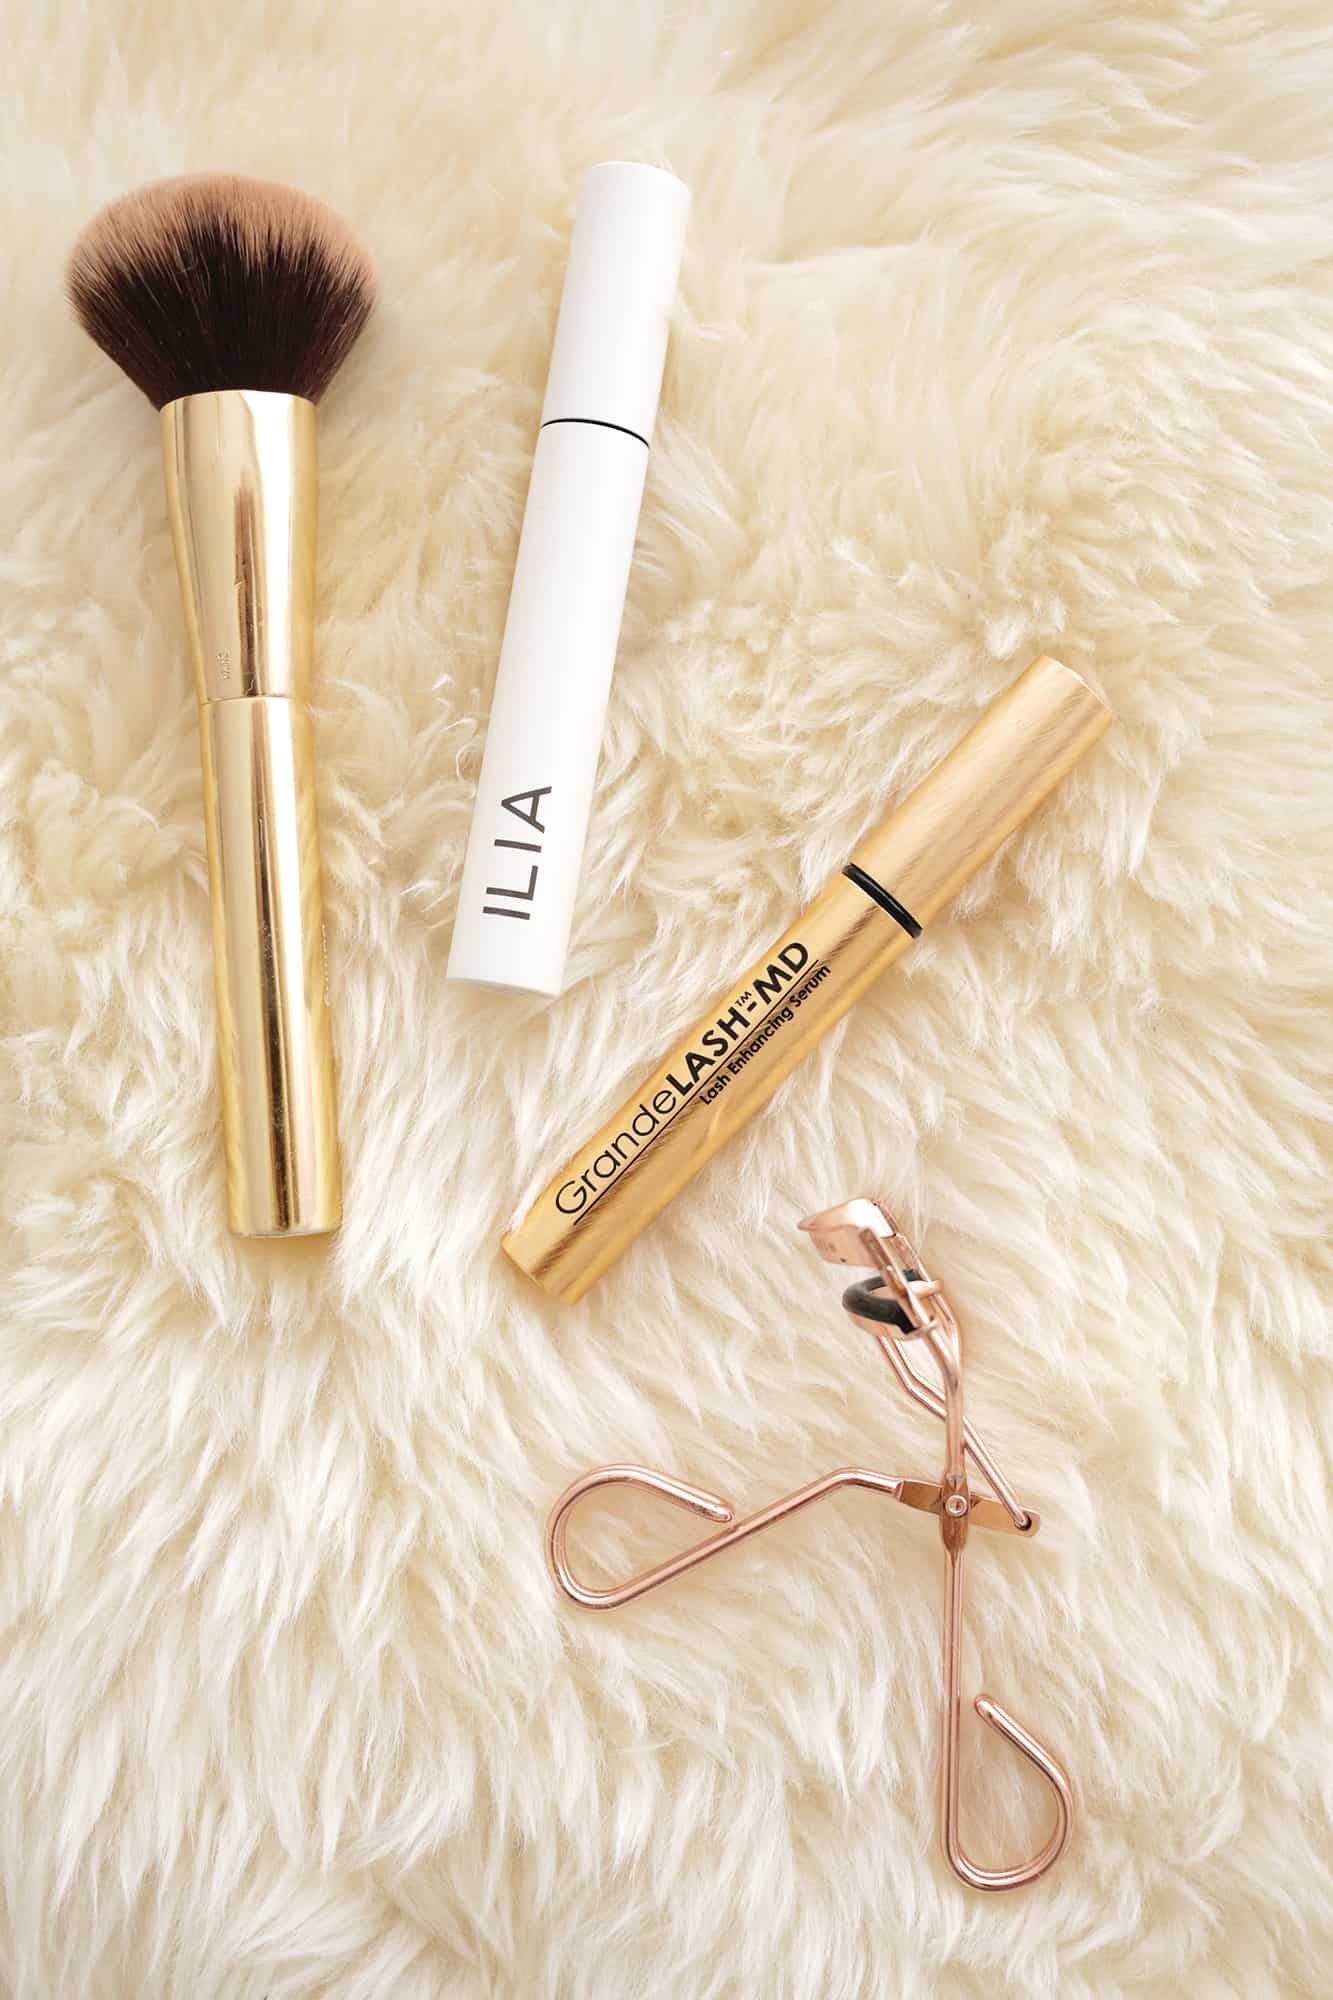
How Often Do I Have to Apply GrandeLASH-MD?
- You use the serum once a day. Just one dip does both eyes and you apply it like you would liquid eyeliner at the base of your lashes.
- You’ll want to apply it on the skin next to your lashes rather than on the lashes themselves. Give it two minutes or so to dry though before applying makeup or laying down.
How Long Does it Take to Work?
- It takes about four-to-six weeks to notice a difference, so if you’ve tried serums before but didn’t stick with it long, you may have quit before it started working.
- It takes about three months before you really see a full transformation, but it’s worth the wait!
How Do You Get the Most out of your “New” Lashes?
- To really make your longer lashes stand out, take advantage of an eyelash curler (especially for stick straight lashes like mine) to really show off your new length!
Is There a Mascara That’s Best to Use with GrandeLASH?
- GrandeLASH-MD does sell their own mascara with peptides, panthenols, and natural waxes to condition your lashes, but you can use whatever mascara you like!
- This mascara is our team favorite here at A Beautiful Mess. It’s a clean, non-toxic mascara and we all love it!!
Can I Use GrandeLASH if I Wear Contacts or Have Lash Extensions?
- Yes, you can! I do the serum in place of lash extensions, but if you are wanting a better set of lashes to start your extension on or are just doing them for a bit and don’t want to regress your lash serum progress, you can do both.
What Happens if I Stop Using it?
- Well, your lashes will just go back to the way they were before you started!
Can I Use GrandeLASH on my Eyebrows for Thicker Brows?
Most lash serums say they can also be used on brows as well, but GrandeLASH-MD doesn’t say that, and they also have a brow serum specifically for brows.
Like any product (especially products around the eyes), don’t use this if you have an allergic reaction, and discontinue if you experience a negative reaction.
In all honesty, I did have occasional itching at the baseline of my lids when I first started, but it wasn’t causing puffiness or redness so I just waited a bit to see if it went away and it did.
I don’t have crazy sensitive eyes, but I would say they are more on the sensitive side.
Overall, I’m thrilled with the results of using the lash serum and since I’ve grown them in I haven’t reached for the false lashes even once. So if you’re looking for longer, thicker lashes all the time, maybe give it a try and see if you love it too! xo. Laura
Want Even More Luscious Lash Drama? Give These Posts a Try!
]]>Big sun hats, rash guards, etc., are my best friends. BUT, I miss the glow and even skin tone that a tan could give.
I remember getting my first spray tan in maybe 2002? Wow, things have come a long way since then. The orange-tinted nightmare has now become, in some cases, a very convincing substitute for the real deal! So grateful for that.
My favorite kind of tan is an airbrush tan where someone has the spray machine and they do it manually.
Related: Check out our skincare archive for more!
 It’s usually not cheap, but proper preparation can have a major effect on how long your spray tan investment lasts. Here is the timeline I follow that’s given the best results:
Five days to 8 hours before your spray tan:
I like to start my exfoliating/hydrating routine about 3-5 days before my spray tan and carry it through until the night before—this way your skin is really optimally exfoliated and moisturized instead of a “last-ditch effort” the night before.
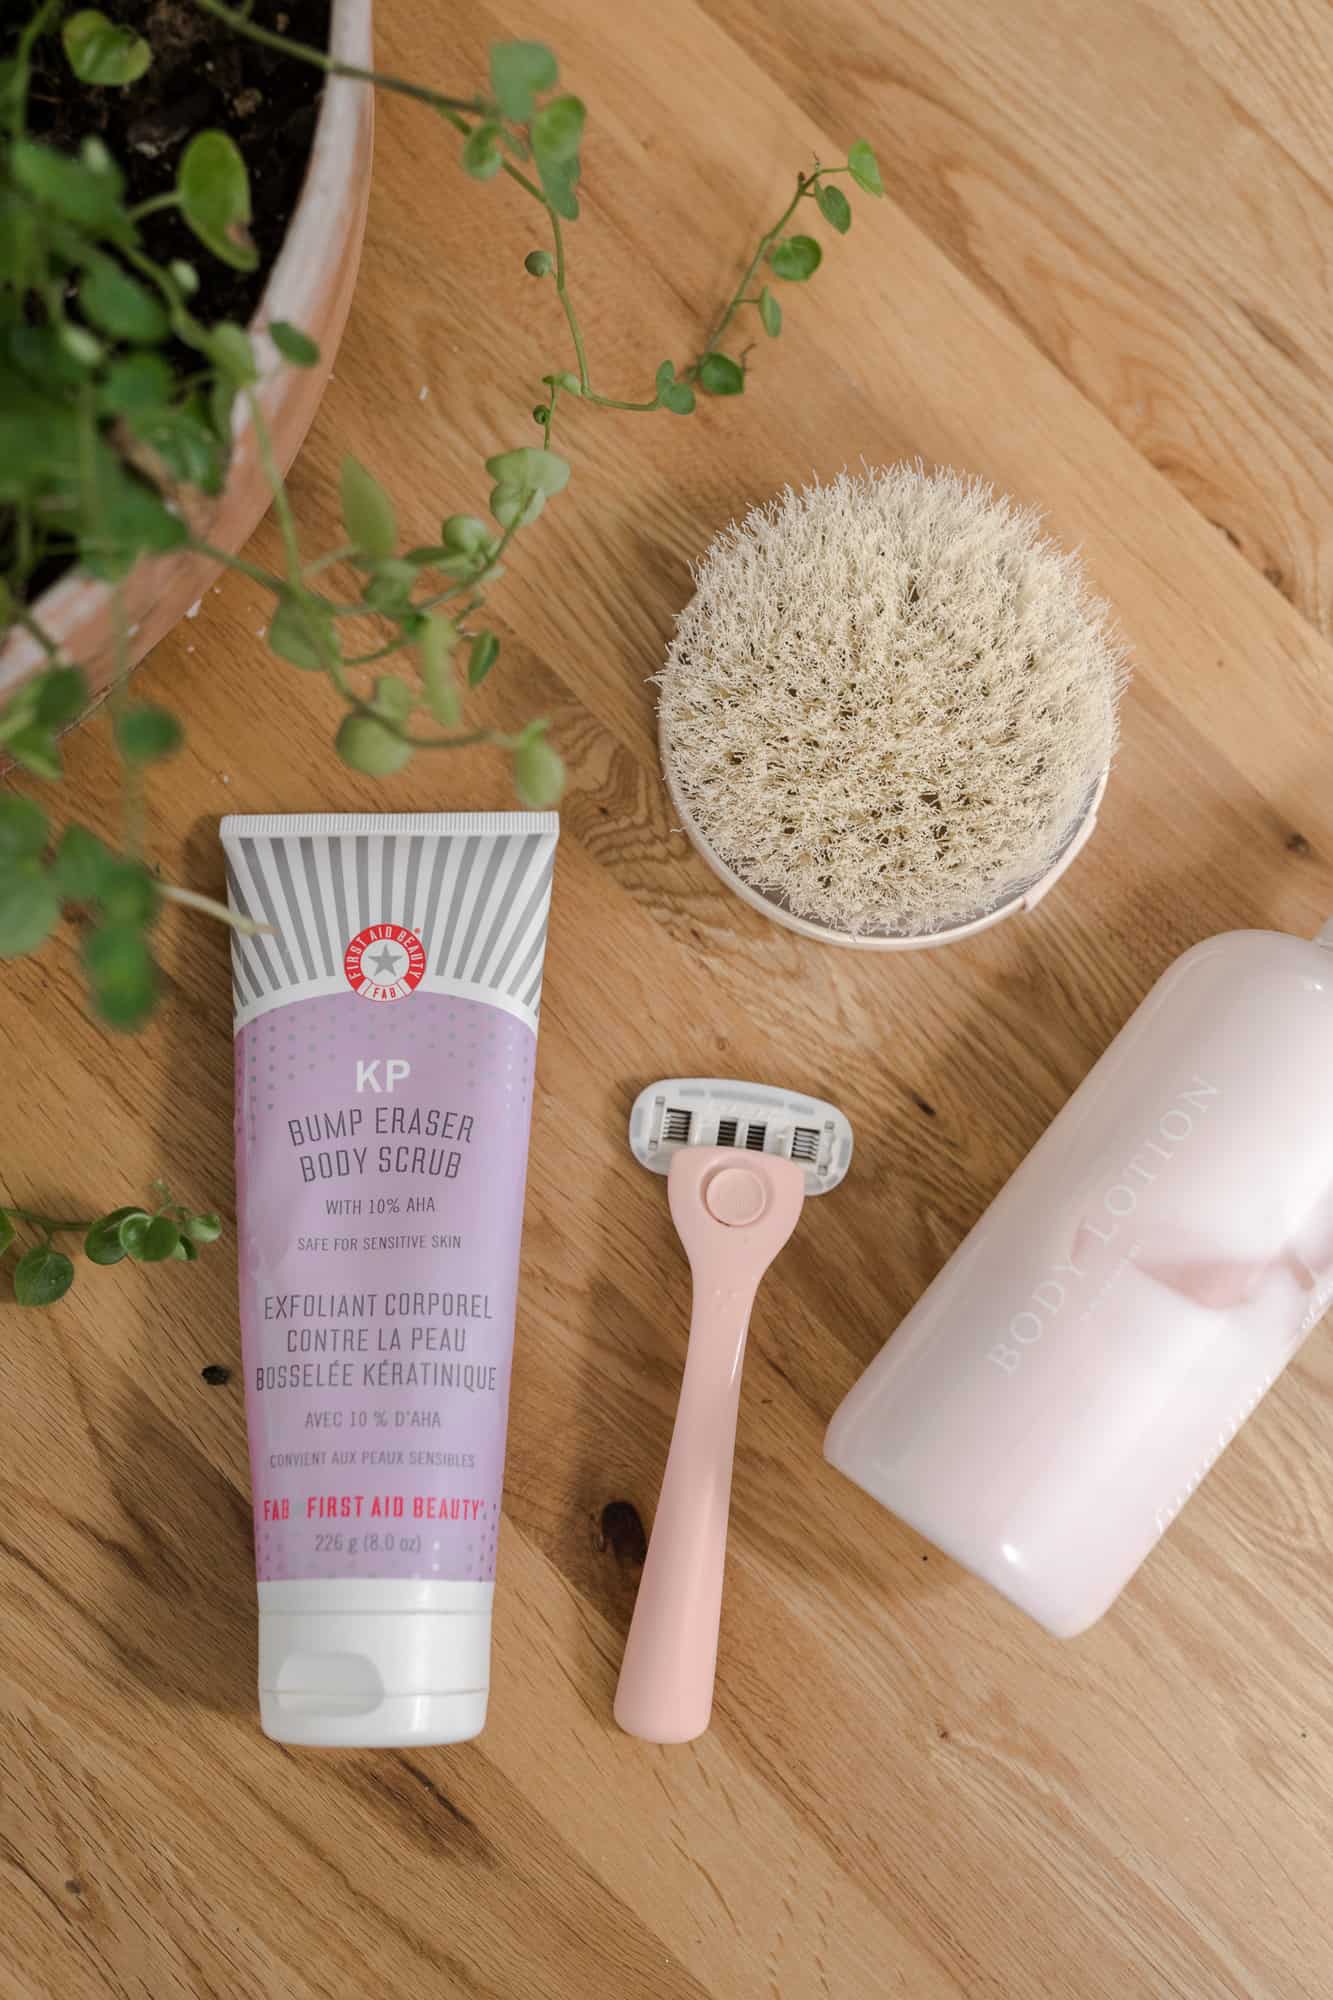
I absolutely love this scrub from First Aid Beauty. I have keratosis pilaris and this really helps with that as well as being a great physical exfoliant.
My favorite “scrubbing” tip is to actually exfoliate in gentle circles—this works just as well as a firm touch. Scrubbing hard is only going to inflame your skin, so be sweet to it.
My custom lotion from Function Of Beauty (use that link for 20% off your first order) is my favorite for quick and easy hydration.
I’ve recently started incorporating dry brushing into my routine again after years of not doing it, and I feel like dry brushing before your shower really helps to exfoliate even further.
Twenty-four to 12 hours before your appointment:
If you wax, wax at least 24 hours before your appointment. I shave, so I normally do that the night before my spray tan—at least 12 hours before.
Day of spray tan:
Take a shower so your skin is clean (remember, do not shave or wax!), and do not put any oil or lotion on your skin afterward. Anything on your skin could lead to the tan not developing correctly or getting streaky/blotchy.
If you’re worried about certain areas being too dry and taking on too much of the tanning solution, your salon should have a special oil-free lotion that you can apply to places like your nail beds and knuckles.
Be sure to wear loose clothing! Anything that rubs against your skin right after your spray tan will disrupt the tan’s development—I even go so far as to not wear a bra because I know that will leave marks.
Avoid sweating after your appointment. I usually wait until I wash off the tan for the first time to exercise or do anything I know will make me really sweaty.
Be sure to wait the appropriate amount of time before showering. Depending on what type of spray tan you get, there will be a period of time you’ll need to wait while the tan fully develops. Your esthetician/tech will tell you this info!
After your spray tan:
Hydrating is going to be key to prolonging the life of your tan—the dryer your skin, the more it’s going to flake off and disrupt your tan. This gradual tanning lotion from Vita Liberata made a spray tan I had last for 12 days—it was incredible and I swear by it!
Obviously, you have to shower, but the more you shower or are in the pool, you are shortening the life of your tan. I find that using a gradual tan lotion like the one above helps so much if you’re on a beach vacation or something where you’re in the water a lot.
I hope this was helpful, and if you have any favorite spray tan prep/maintenance tips, please share them below! xo Keely
]]>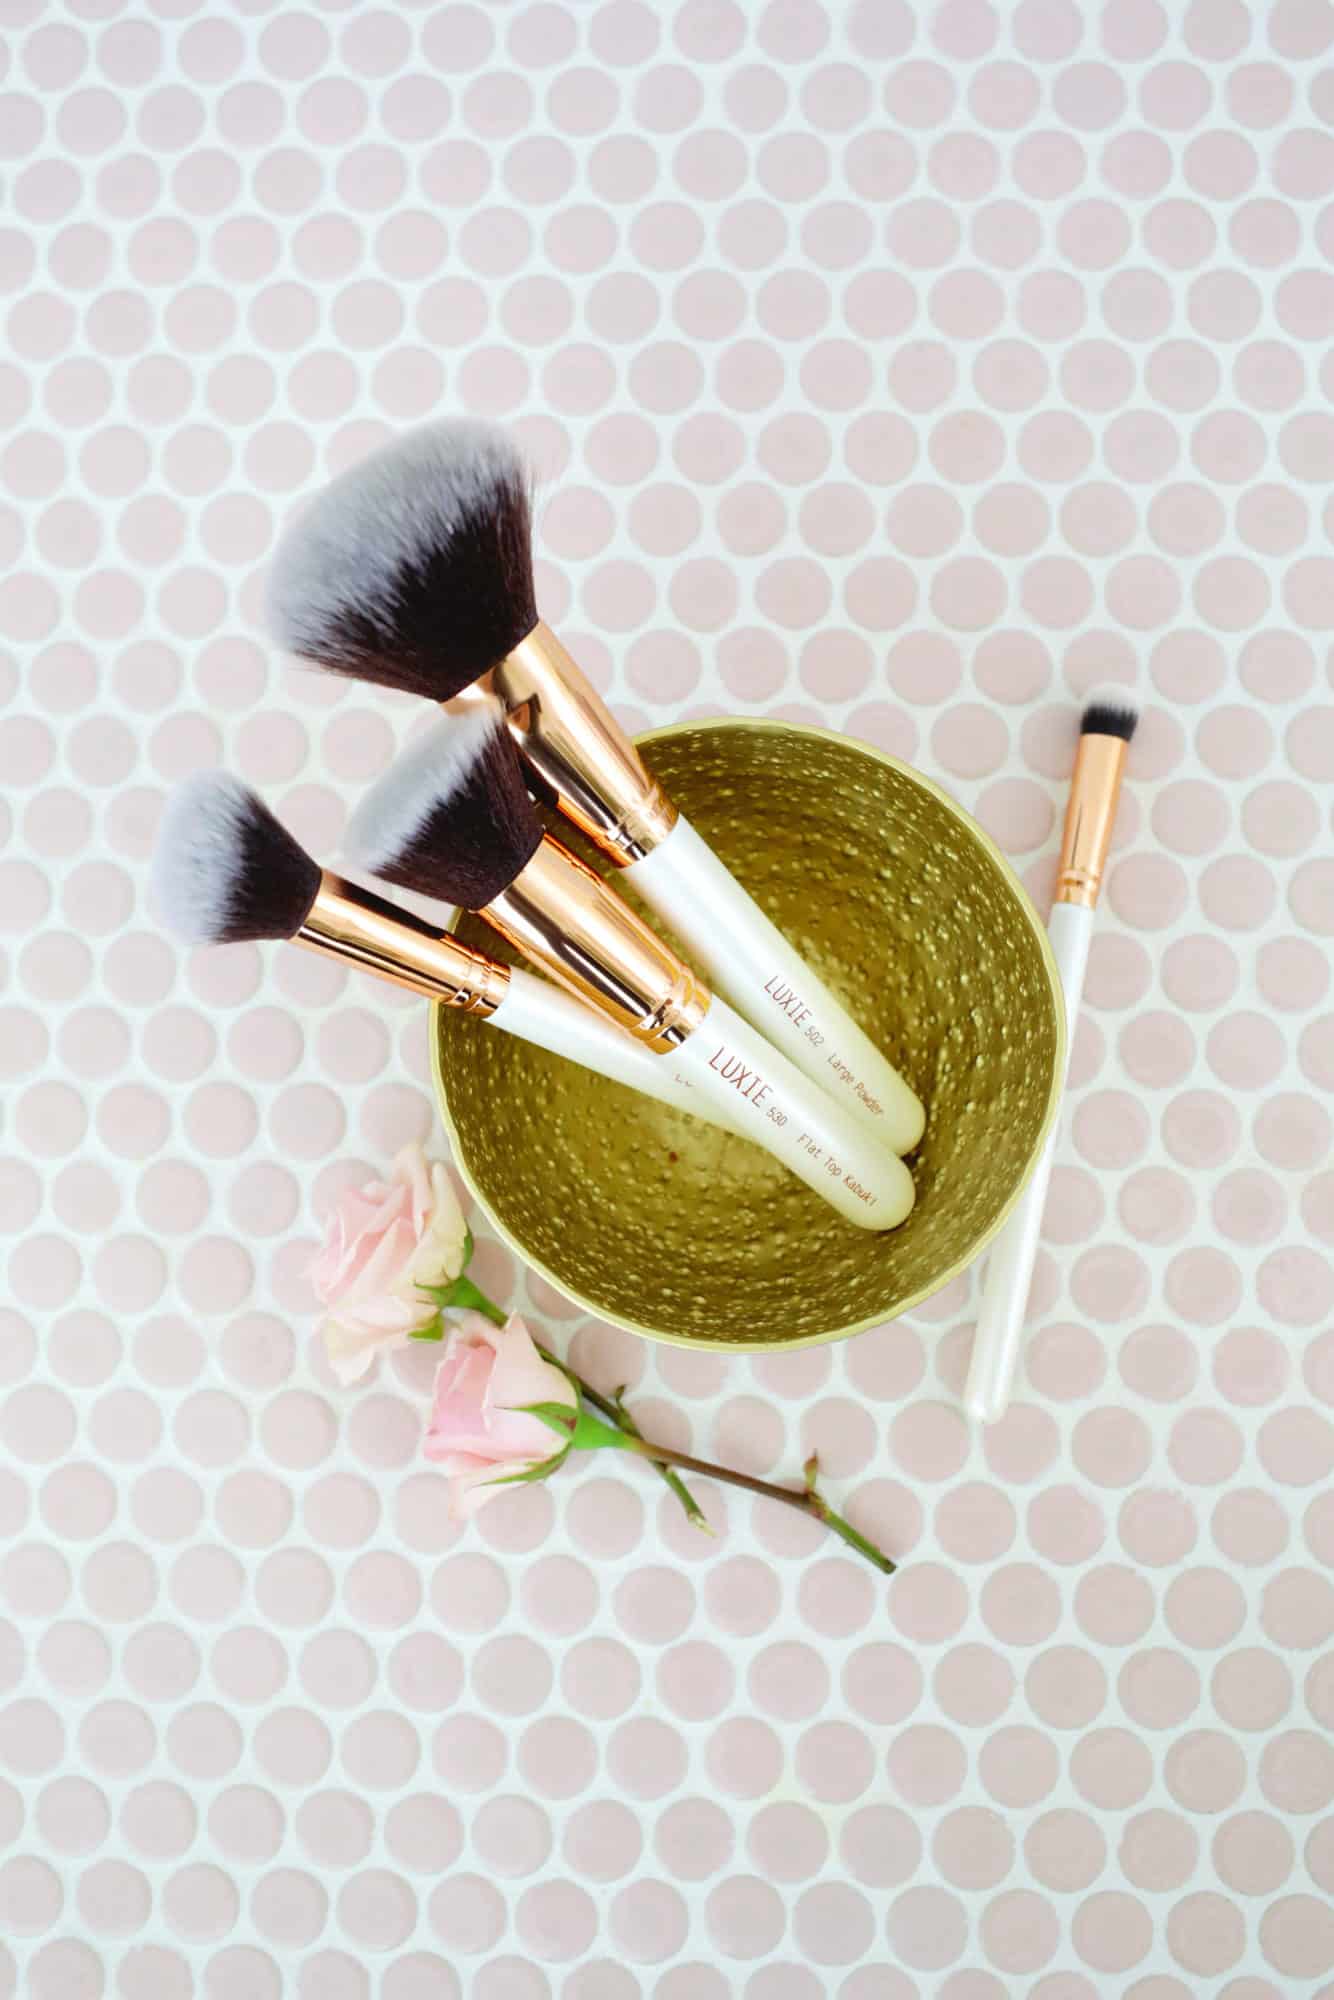 I hear a lot of jokes about how people “never” clean their makeup brushes. While that does make a me a little sad, I’m here not to shame you into cleaning them (really, who does that help?!), but to let you know how awesome cleaning your brushes can be!
This little chore is usually seen as kind of a pain, but once you commit to it, it can be a very soothing, satisfying, and intentional part of your beauty routine.
Related: How to Clean a Dishwasher, How to Clean a TV Screen, How to Clean a Washing Machine
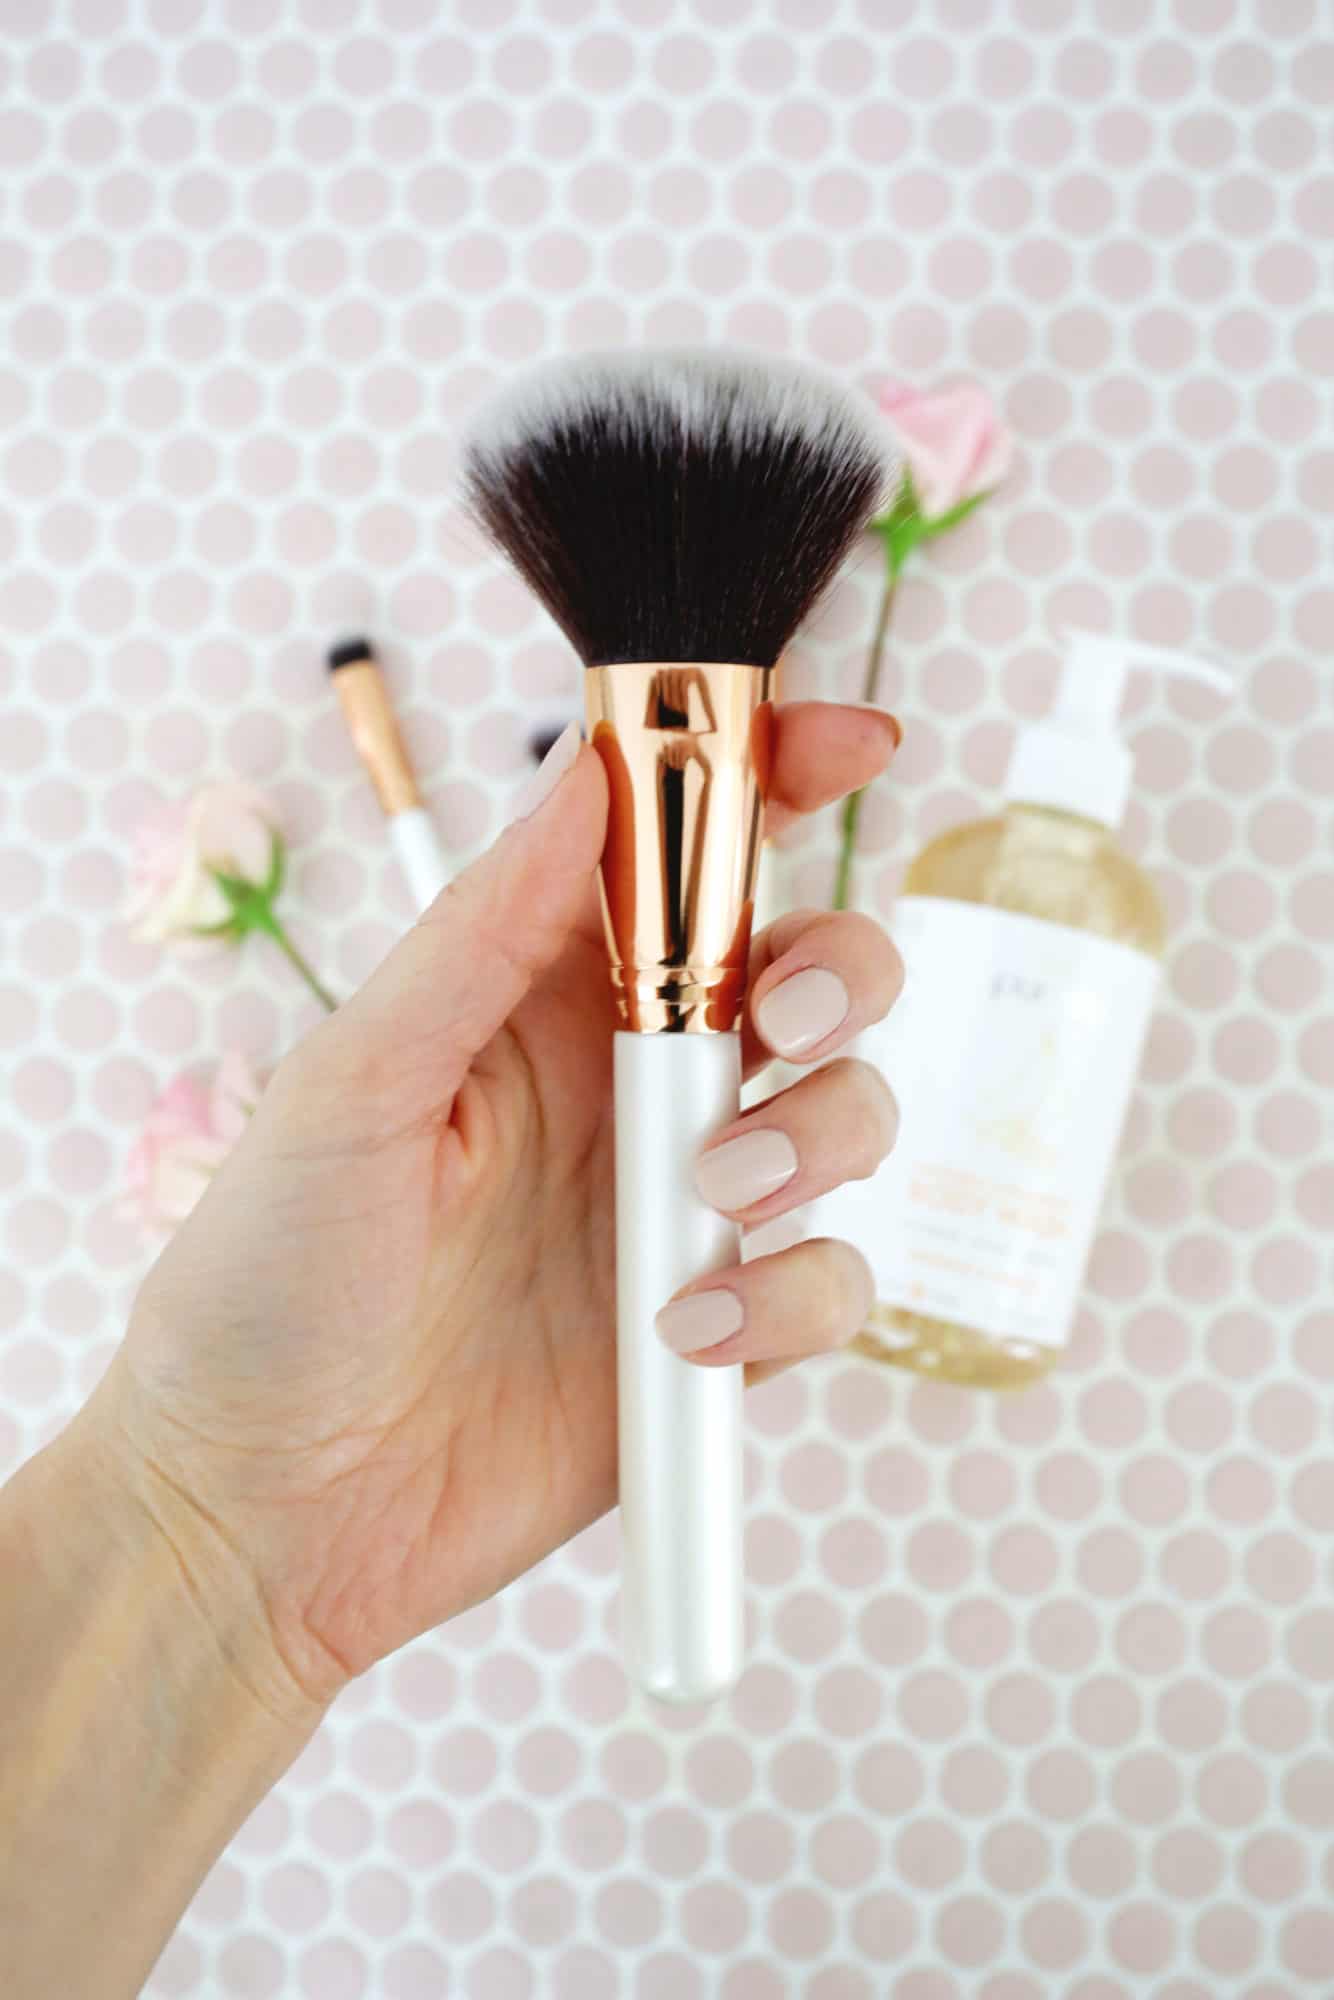 How often should you clean your makeup brushes?
Dermatologists recommend cleaning your brushes out at least once every 7-10 days, especially for your most-used brushes like foundation and concealer.
Why should you clean your makeup brushes?
Over time, brushes accumulate product, dead skin cells, and oils which can lead to bacteria in your brushes. This bacteria and debris can clog your pores and result in breakouts.
Once bristles are clean, they can more smoothly apply product—and who doesn’t love a flawless application?! Of course, one great benefit of keeping those bristles clean is it will prolong the life of your brushes.
 How do I clean my brushes?
Step 1: Gather all your brushes together.
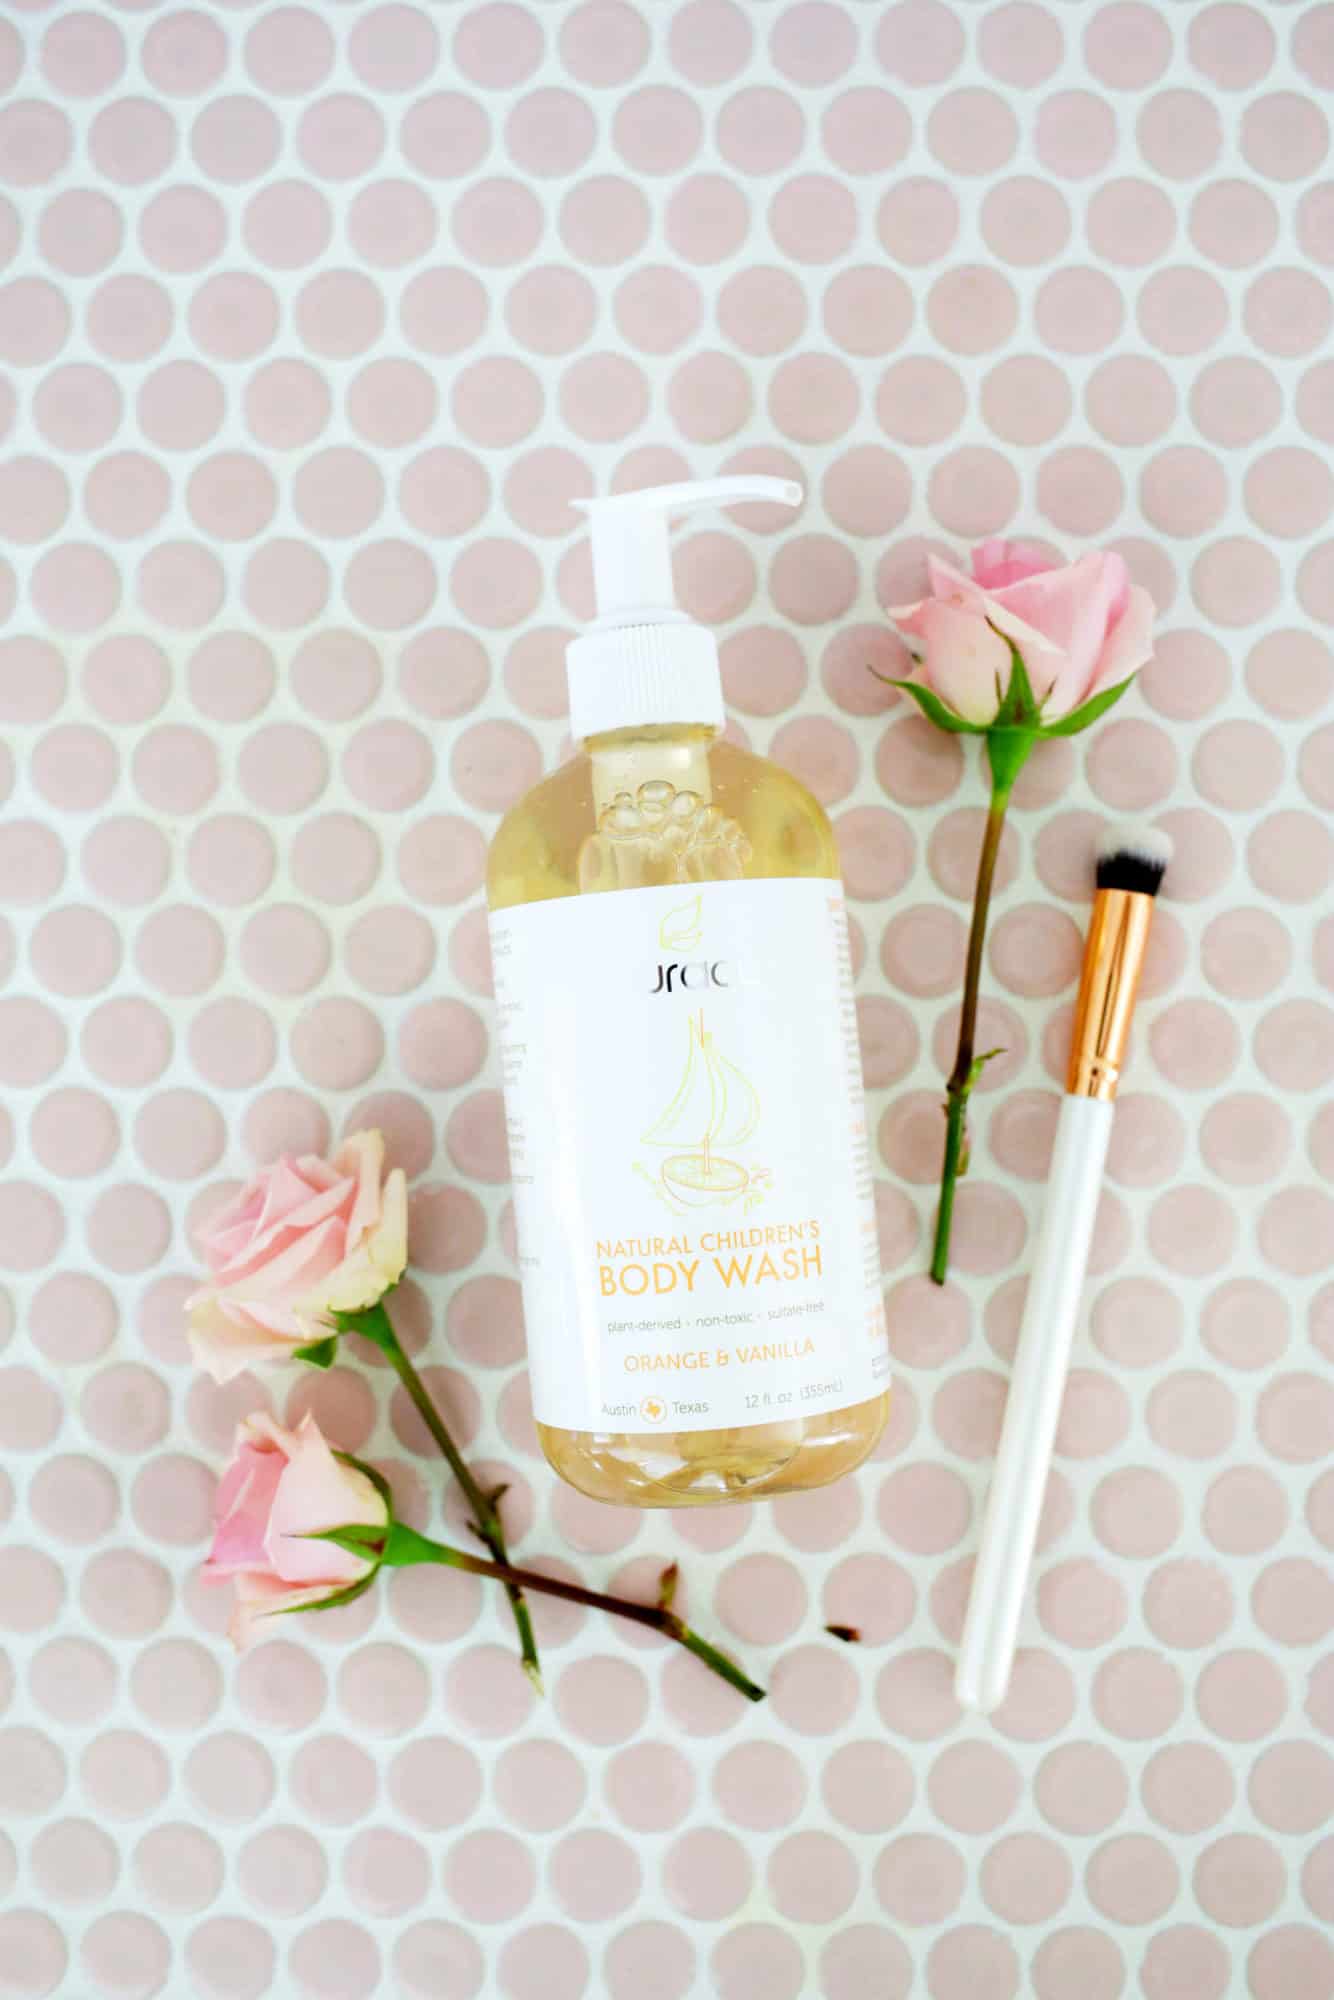
Step 2: Grab your favorite brush cleaner. This DIY for a solid cleaner is one of my favorites, but any gentle soap or shampoo will work. I especially love this Puracy soap.
Step 3: Dip your brush in water, being careful not to submerge the “ferule,” or the metal part that connects the bristles to the brush. Getting this wet can dilute the glue that holds the bristles to the brush and it can also breed bacteria.
Step 4: If using a solid cleaner, swirl your brush around the solid several times. If using a liquid cleaner, pump a very small drop into your hand and swirl in your hand. You’ll probably see product start to appear in your suds.
Step 5: Rinse in water, and maybe repeat if you see that there’s still some dirty water.
Step 6: Reshape your brush by squeezing it gently and shaping with your fingers, and lay it flat to dry.
That’s it! These steps literally take MINUTES and make such a big difference.
 Bonus tips:
I learned this tip at Sephora for when you need to disinfect brushes quickly. Spray a little bit of alcohol onto a towel and brush back and forth until you don’t see product coming off anymore.
You can find these clever little brush mats to swirl your soapy brushes on. The texture helps draw out product!
Hope this has been helpful. Happy cleaning!  xo Keely
 Hi! It’s been a while since I shared my skincare faves and a few things have changed. This past year, I’ve been more religious about my skincare, but I’ve also become more consistent with the products I use. You’ve probably heard people say it’s not good constantly to be bringing new products and ingredients in. So even though I LOVE to try out new products, I’ve been sticking closer to my favorites and it’s been really good for my skin.
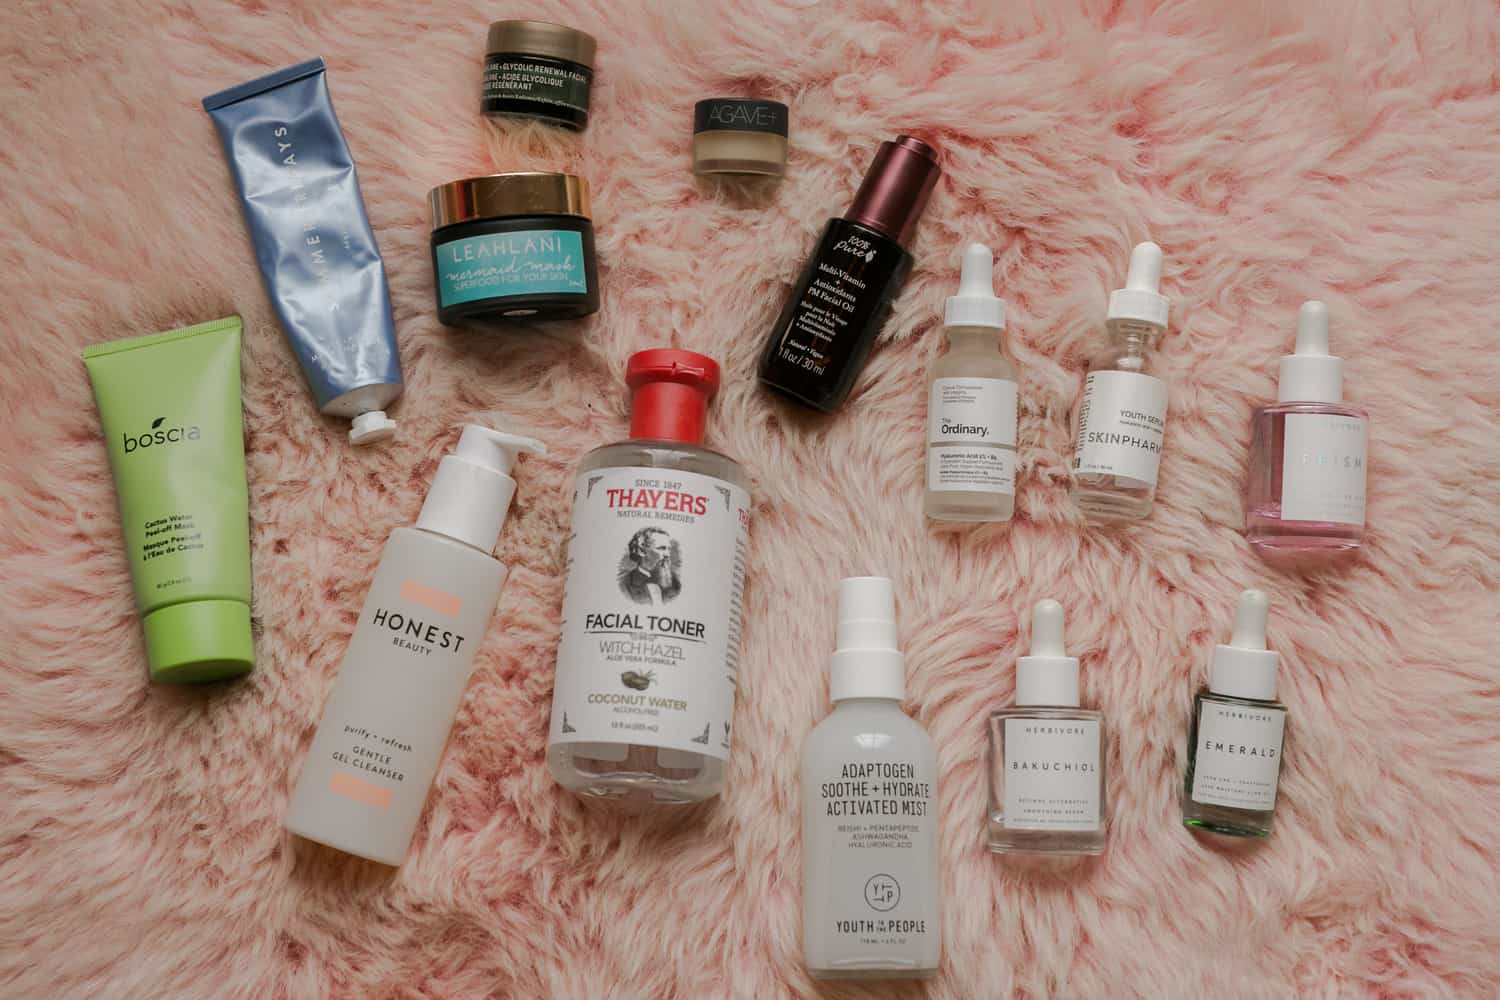 Here are some of my tried and true favorites. These are items I’ve purchased over and over and/or have used for years. My skin type is combination, but I would say leans toward dry—especially in the winter. I’m 37 and am trying to embrace the natural aging process. For me, staying super hydrated (with products, extra water and less coffee/alcohol) is making a positive difference.
One more note: While I do use a few conventional makeup products, I stick more closely to only clean products for skincare. For me, I’ve noticed far better results using clean products and it gives me peace of mind to know I’m cleaning all the questionable ingredients off every night and sleeping in ingredients that will nurture my skin. So, if I had to choose between swapping to natural skincare OR makeup, I would swap the skincare first.
Masks: I do a face mask at least one time per week, but up to three times. I focus mainly on moisturizing masks with a bit of exfoliating, but I am careful not to overdo it. I stay away from anything that dries my skin, so clay masks are not for me.
Leahlani Mermaid Mask I have used this for years and repurchased it over and over. With a base of honey, it is ultra moisturizing and filled with superfood ingredients. I typically put this on 30 minutes before I take a shower or bath and it’s my go-to when I am feeling dry. For sure my most used mask.
Boscia Cactus Water Peel Off Mask I LOVE these peel off masks. I tend to stick with this one, the pink mask and the sake bright white mask. The peel off is super fun and they are hydrating.
Summer Fridays Jet Lag Mask This is my go-to mask to sleep in. It’s also good for flights (or anywhere you might wear it in public) because it looks like lotion, not a “scary” mask. Haha.
Biossance Squalane + Glycolic Renewal Facial I love this mask because it’s not harsh at all, but good for a light exfoliation during these winter months.
Bite Beauty Agave+ Nighttime Lip Therapy This is the most glorious super-thick lip mask. I sleep with it every night because I struggle with chapped lips pretty often. I got some for my sister and she didn’t like it because it’s so thick, so make sure you want something super thick. For something lighter, I recommend Weleda Skin Food Lip Butter.
Cleanser + Toner:
Honest Beauty Gentle Gel Cleanser When removing makeup, I often do a double cleanse by first rubbing oil all over my face. Any carrier oil (jojoba, coconut, argan, etc.) works for this step. It doesn’t have to be labeled as a “cleansing oil.” Next, I rinse the oil off with a warm washcloth. After that, I cleanse with this water-based cleanser. On days I don’t wear makeup, I skip the oil step and go straight for the water-based gel cleanser.
Thayers Facial Toner I use this after I cleanse, before oils and serums everyday.
Acid + Oils:
The Ordinary Hyaluronic Acid 2% + B5 I use a couple drops of this every night before oils or serums.
Herbivore Prism Exfoliating Glow Serum Like I said above, I try to be very gentle with what exfoliators I use. This is perfect for my skin! I use it before bed either with an oil or by itself. This is one of my top must-haves for glowly skin.
*I love the gel mask version or Prism as well! These are definitely my favorite Herbivore products.
Herbivore Emerald This is a hemp-based oil. It’s super moisturizing and one of my favorite oils currently, but I will say you have to be OK with a cannabis scent. If you’re not OK with that scent, I’d recommend one of their other oils.
Serum:
Skin Pharm Youth Serum This is incredible for helping my skin feel plump. I use it anytime I am feeling a bit dehydrated (in addition to chugging water and herbal tea).
Backuchiol Retinol Alternative Serum I’m avoiding retinols (or keep them super minimal) because they can be harsh. That said, I still want a potent serum. This serum has a thin gel-like texture, so I use it anytime if I don’t want to go to bed slathered in oils. It is super moisturizing and gentle.
100% Pure Multi-Vitamin PM Facial Oil This is my oil-based serum. I love to go to bed with a super shiny face (aka a glazed donut face—lol), but since I wear eyelash extensions (oil causes them to fall out) I stay away from my eye area and don’t use this when my extensions are first filled each month. Swapping back and forth on my night serum has worked out pretty well for me!
Mist:
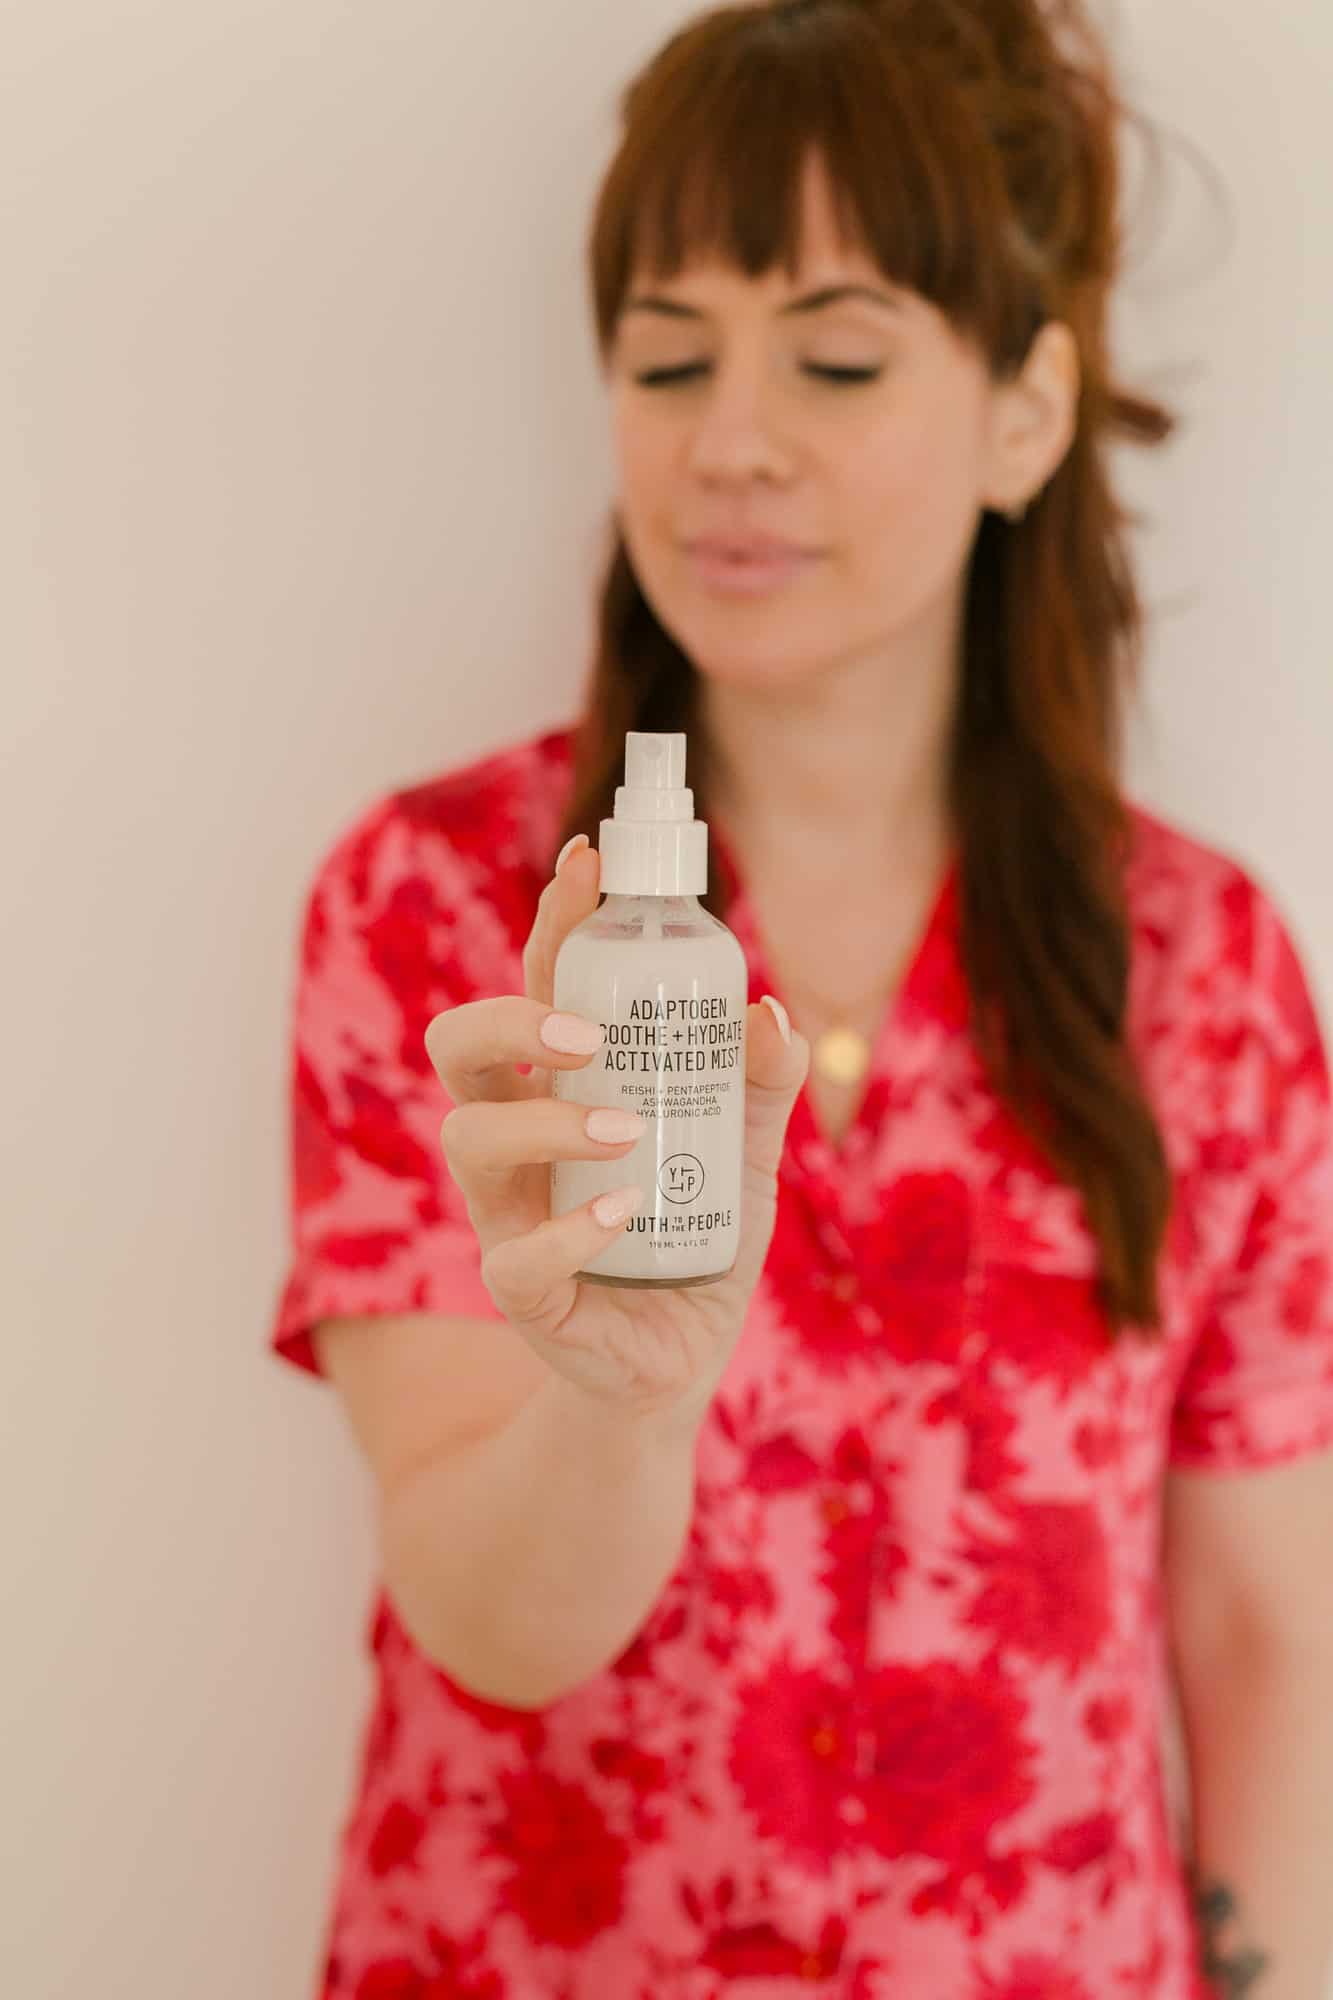
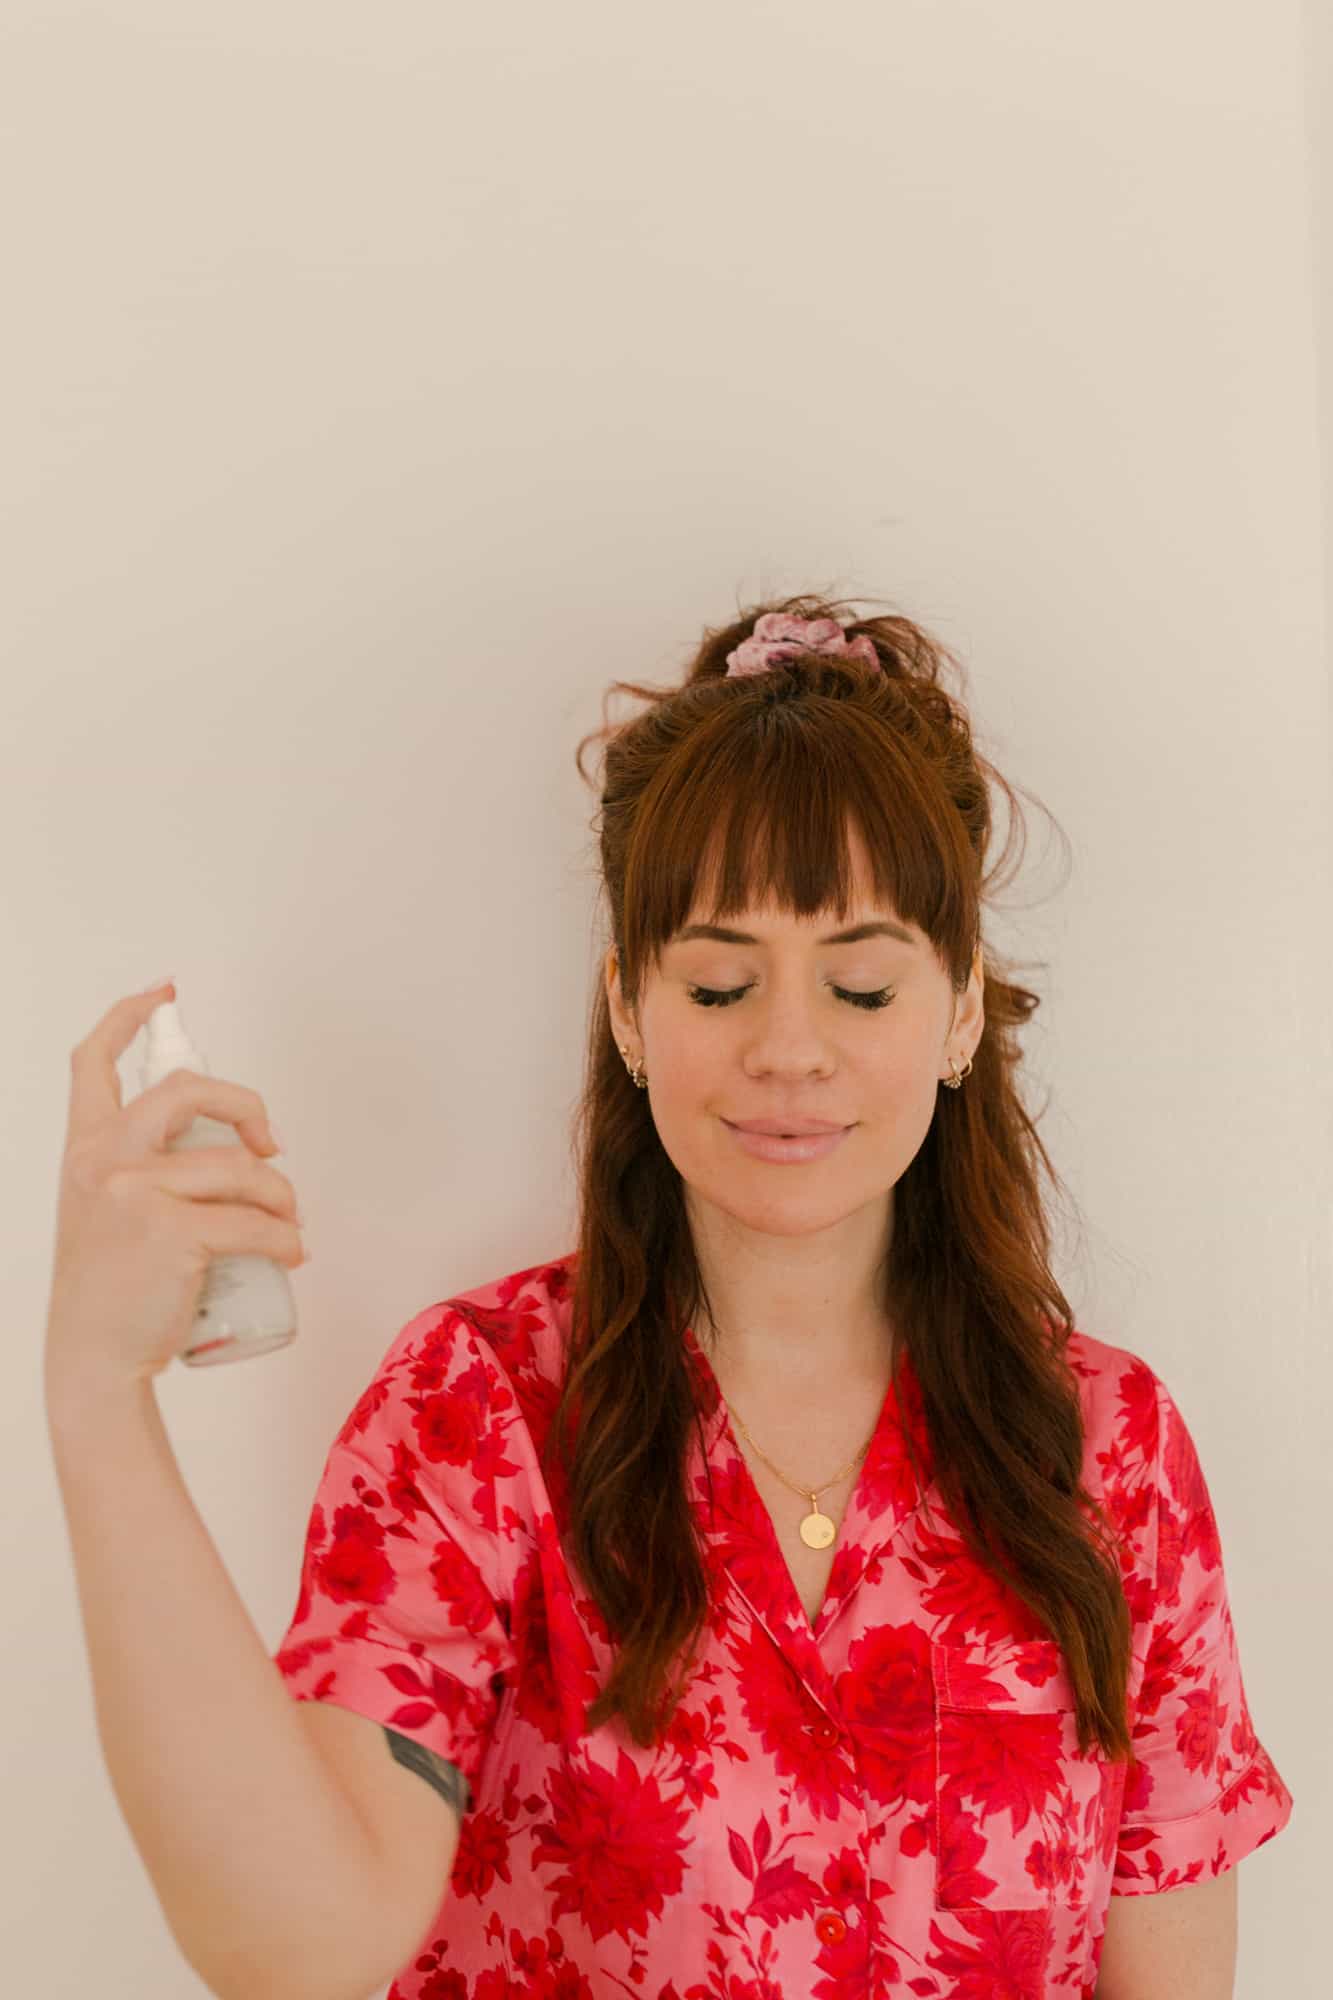
Youth To The People Adaptogen Mist I am obsessed with this mist. I use it when I wake up, before and after makeup, before bed, and all over my body after a shower. If my skin is every looking dry, I mist this on. I’ve used three bottles in the past six months—that’s how crazy I am about this mist. Haha.
Other items I missed in the photo, but use ALL the time:
Supergoop Unseen Sunscreen We go through a ton of this in our home—it’s a little pricey so I stock up every time I see a sale. I also use their makeup primer and finishing powder.
Weleda Skin Food Lotion I love that they carry this at Target. I use it as my hand lotion and body lotion. It’s perfect if you have dry skin—it’s VERY thick. I sent my grandma some (she wanted to try clean beauty!!!) and she hates it. So I guess it’s a matter of taste, but I love it.
Boscia Collagen Eye Mask I got these in a PR mailer recently (they’re brand new so I haven’t used them for long, just tried them out twice) and WOW. These are by far the most effective eye masks I’ve ever tried. They are crazy. My eyes looked so refreshed—I will definitely be repurchasing, but they’re pricey so I’ll be using them only for special occasions.
 Other skincare tips
This biggest change I’ve seen in my skin came a few years back when I drastically cut my alcohol, sugar and coffee consumption. I know that is no fun to hear, but it’s amazing what a difference it made for me. I had been using clean products for a few years, but when I made those diet changes I suddenly started to get a lot of compliments and questions about my skin.
There are two skincare treatments I got regularly last year that made a huge difference. They are both non-toxic. I got a lot of microneedling and a couple BBLs at SkinPharm in Nashville (they’re opening in Atlanta soon, too).
Microneedling is a collagen producing treatment. It can be pretty minimal (your face is a bit red) to pretty bloody (I started small and worked up to more intense treatments). I got prp injections with it a few times too, which is a natural treatment made from your own blood also known as “liquid gold.” I know it sounds gross, but it’s pretty much the best thing you can do if you want to work on skin texture issues the natural way.
BBL (or photofacial) is a light therapy that can help reduce sun damage. It was pretty dramatic on me and I definitely recommend it if you have an age spot you’d like to zap away. I’ve done my face, chest and arms and will definitely keep doing it over time. I have quite a bit of sun damage because I went to tanning beds when I was younger—the worst!
Anyway! If you have any questions I am happy to try and answer them! If you’re curious to learn more about clean beauty, see my article, Why Clean Beauty Matters. And remember, I am absolutely NOT trying to shame anyone who uses and loves conventional skincare products. Even just swapping out a few clean items is a great step! Nobody is perfect and no one has perfect skin. xx- Elsie
Credits//Author: Elsie Larson. Photography: Amber Ulmer. Photos edited with A Color Story Desktop.
]]>Naturally, I have pretty straight, short, and sparse lashes (especially compared to the thick, long, dark lashes my husband and daughter have—so jealous), so getting a full lash line is a modern-day miracle that I do not take for granted.
That being said, I feel like I have tried most of the lash options out there (you can read my thoughts on false lashes here), so when a friend was telling me about the Lashify System, it looked so interesting to me that I was dying to try it.
Table of Contents
 Faux lash strips have their place for me, but I find that the full strips can be hard to apply. The strip can be obvious if you don’t do a lot of eye makeup/liner, and they start to curl away from my eye on the edges quickly and never last overnight.
The smaller segmented strips I like better for application and staying power, but you can still see the base of the strips and they aren’t easy to find in a lot of fullness/length options like the full strips.
The individual lashes look the best at the base since they aren’t on strips, but I have a harder time getting them to stay put and in the direction I want them to go, so I’m constantly brushing them out so I don’t look crazy.
I did lash extensions for a year recently (and they look amazing!), but then became sensitive to the glue and had to stop.
While I do miss results of the extensions, they were also super expensive and you had to go to long appointments all the time, so there are a lot of things about it I don’t miss as well. I also tried the magnetic lashes that are on the market now and maybe there are some people that love them, but I could not get them to go on properly.
Every time I tried to take them off to attempt to position them again, they pulled out my real lashes so I stopped trying pretty quickly…
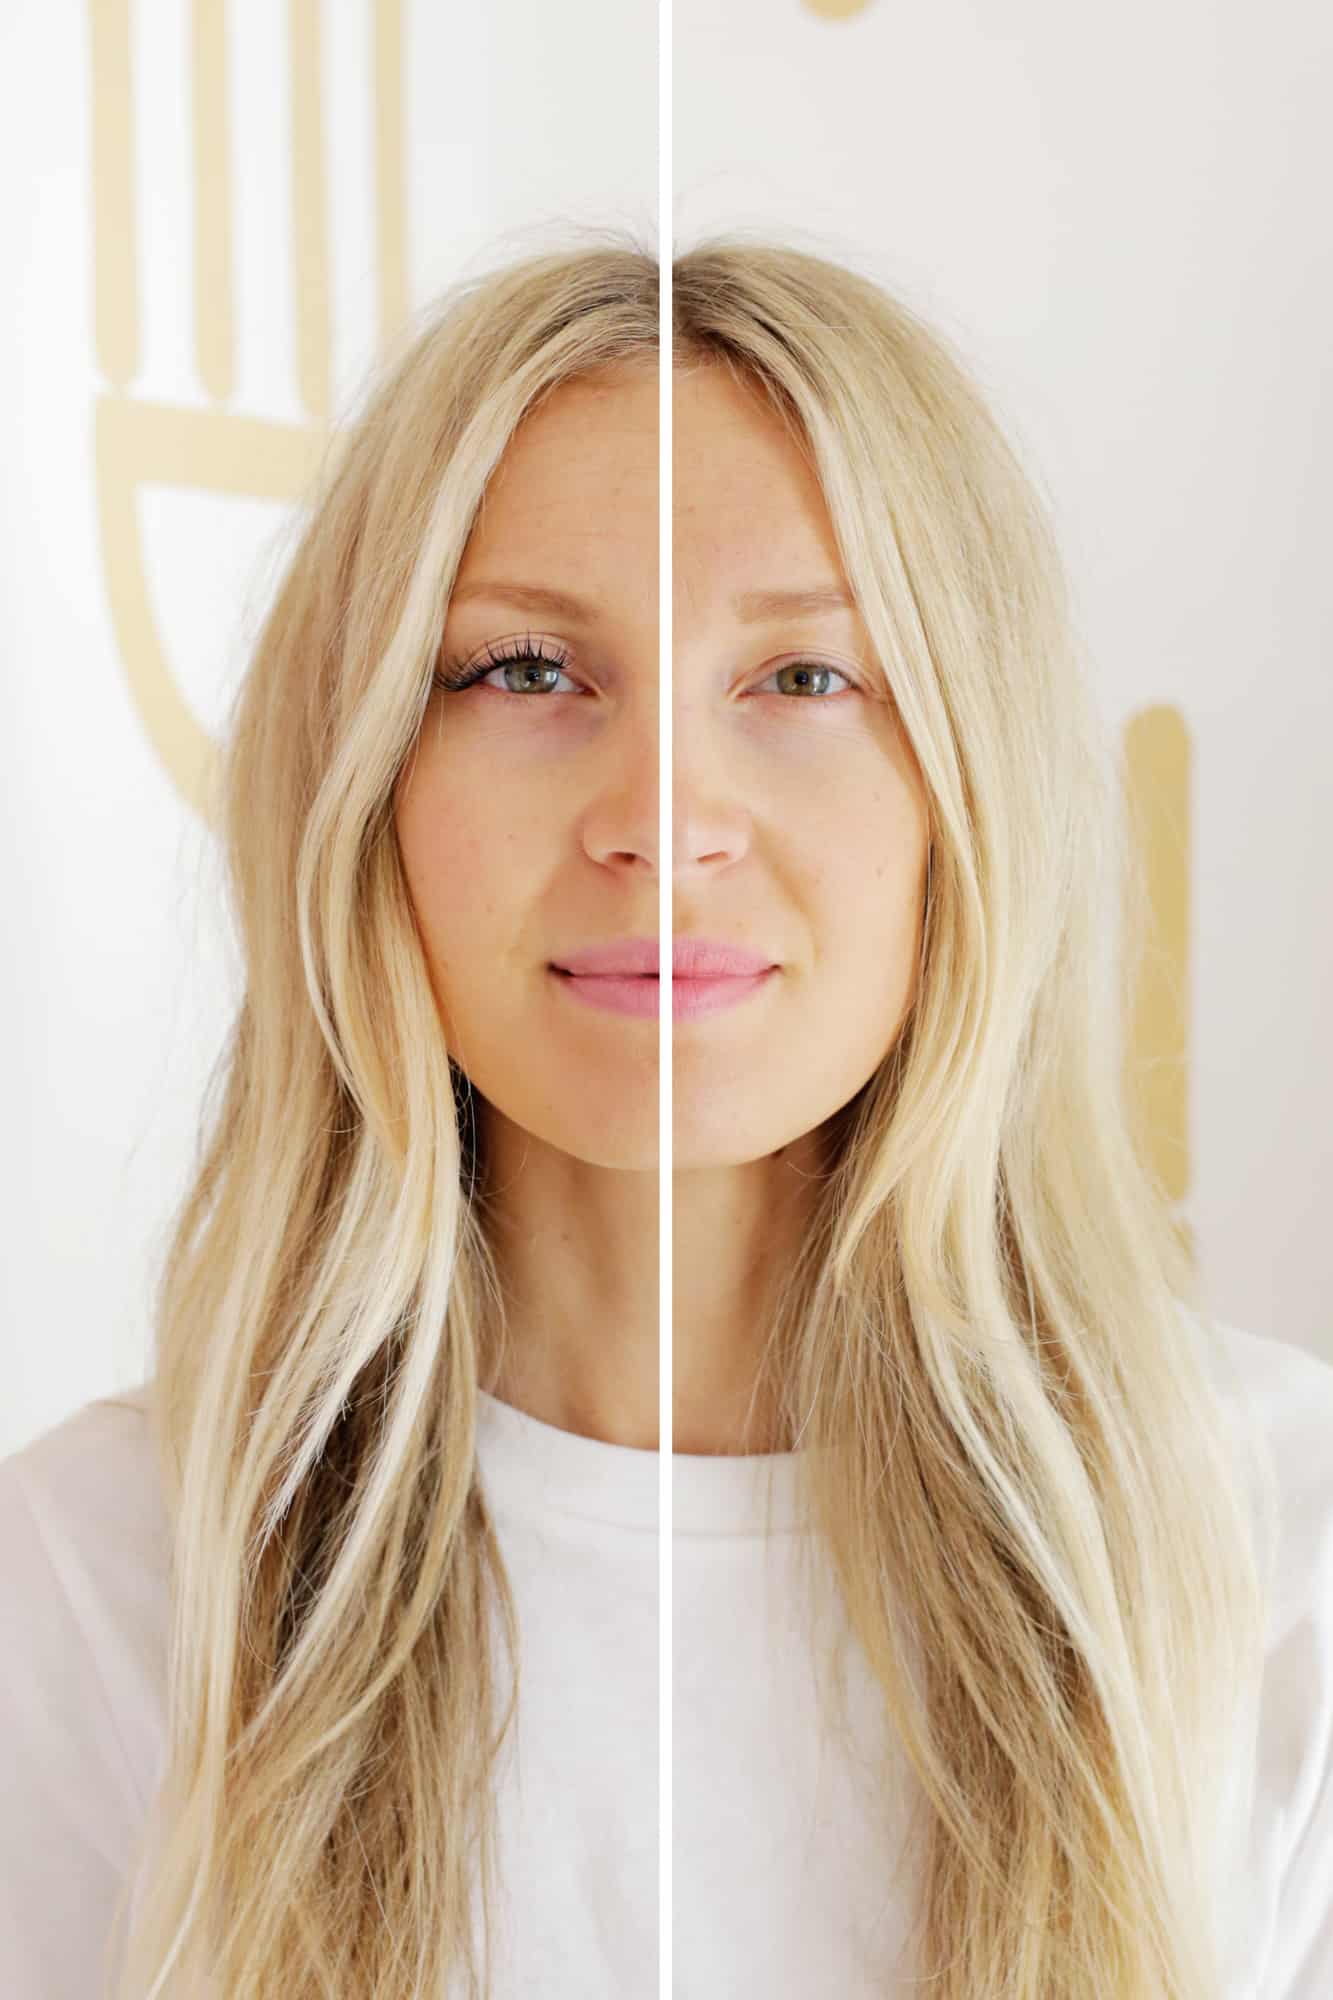
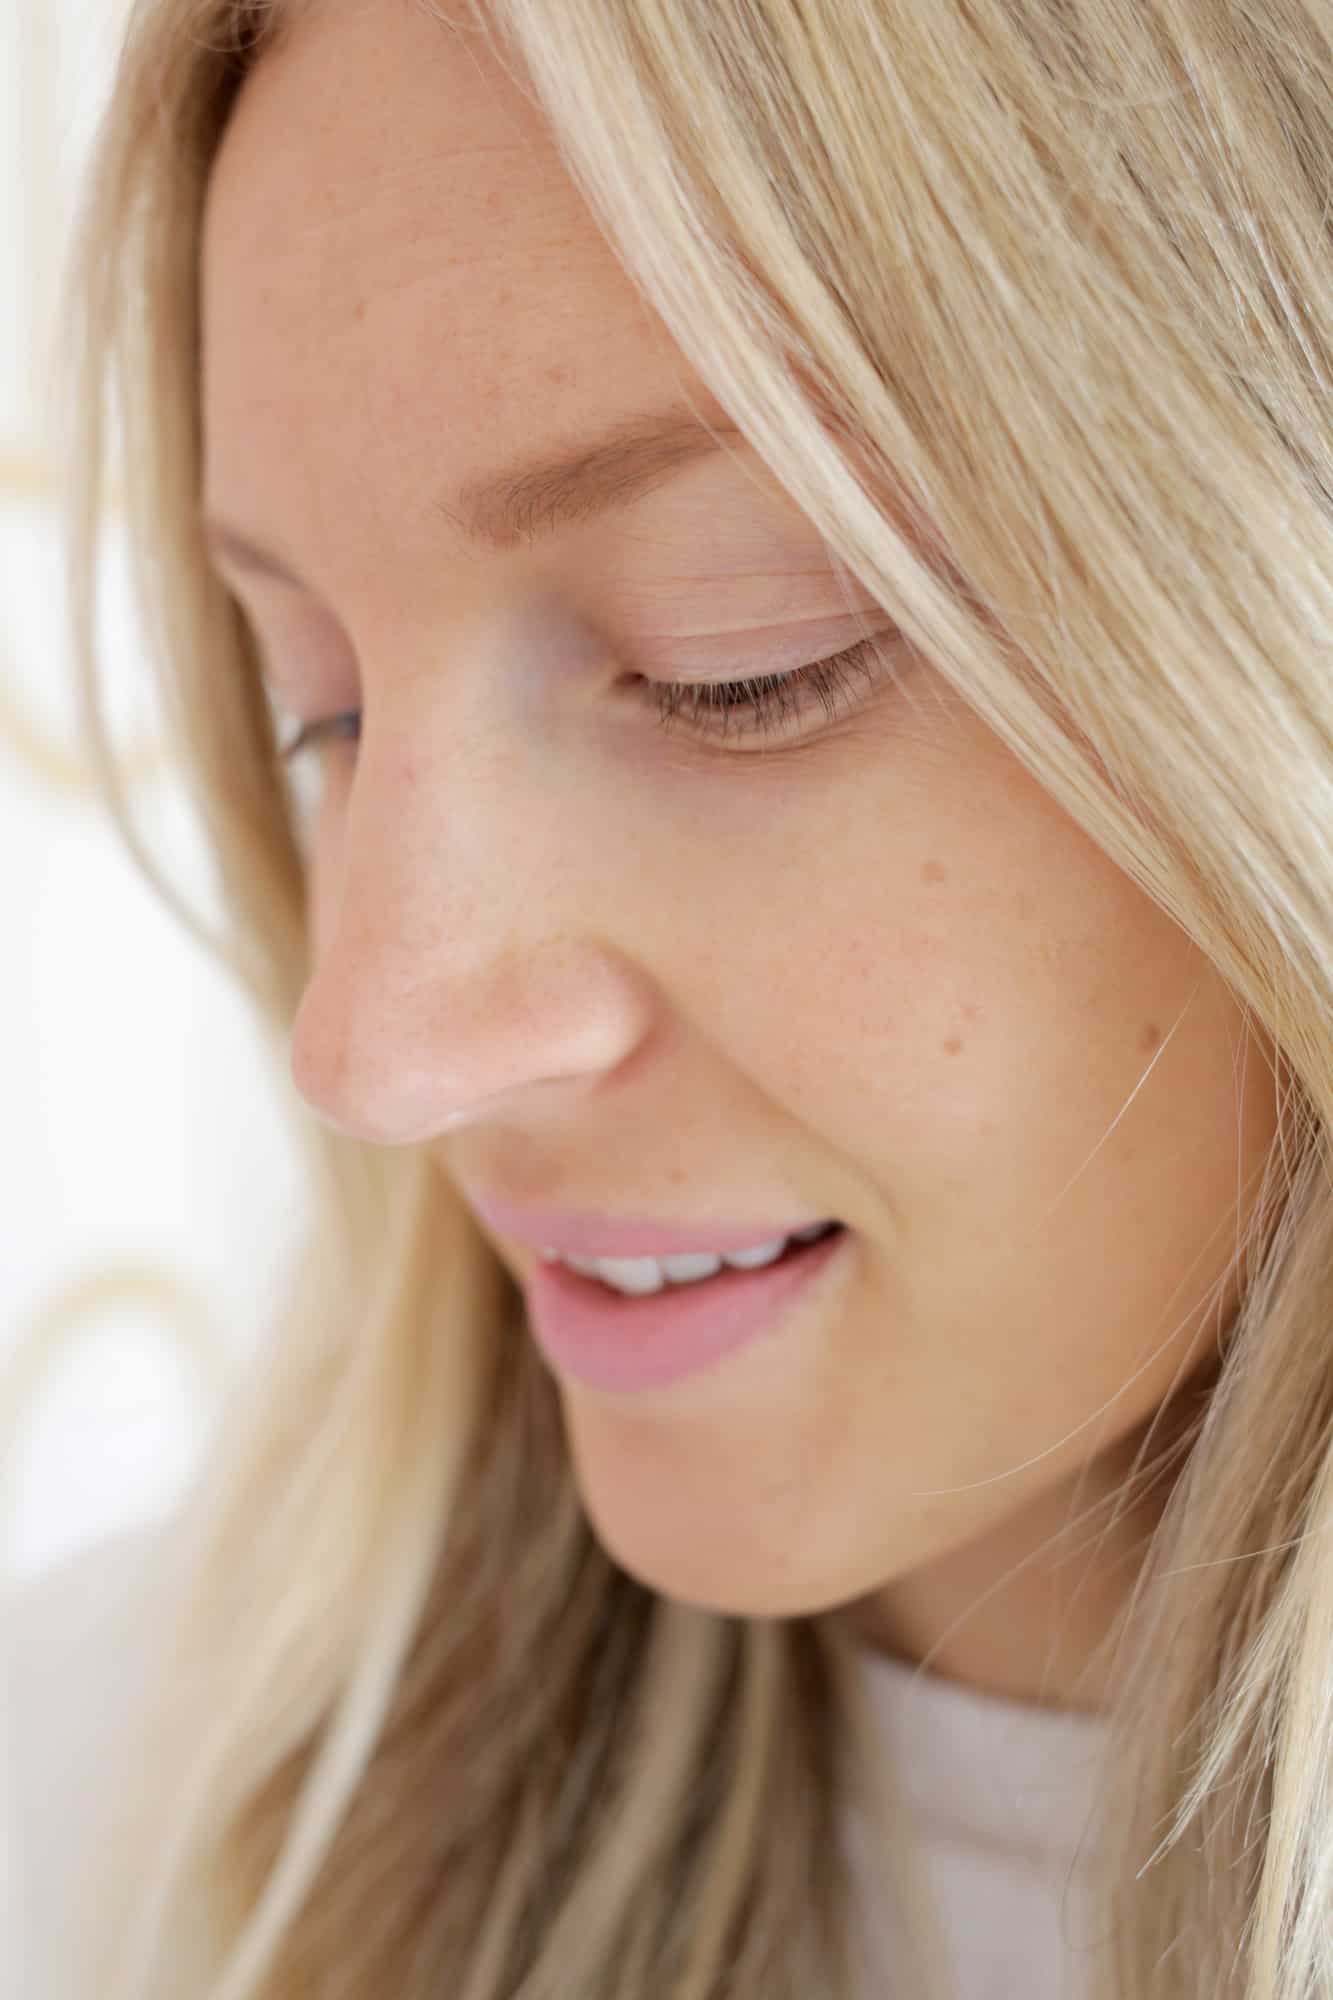 As you can see, my lashes are more on the sparse, straight, and light colored side, so they basically disappear with no eye makeup on.
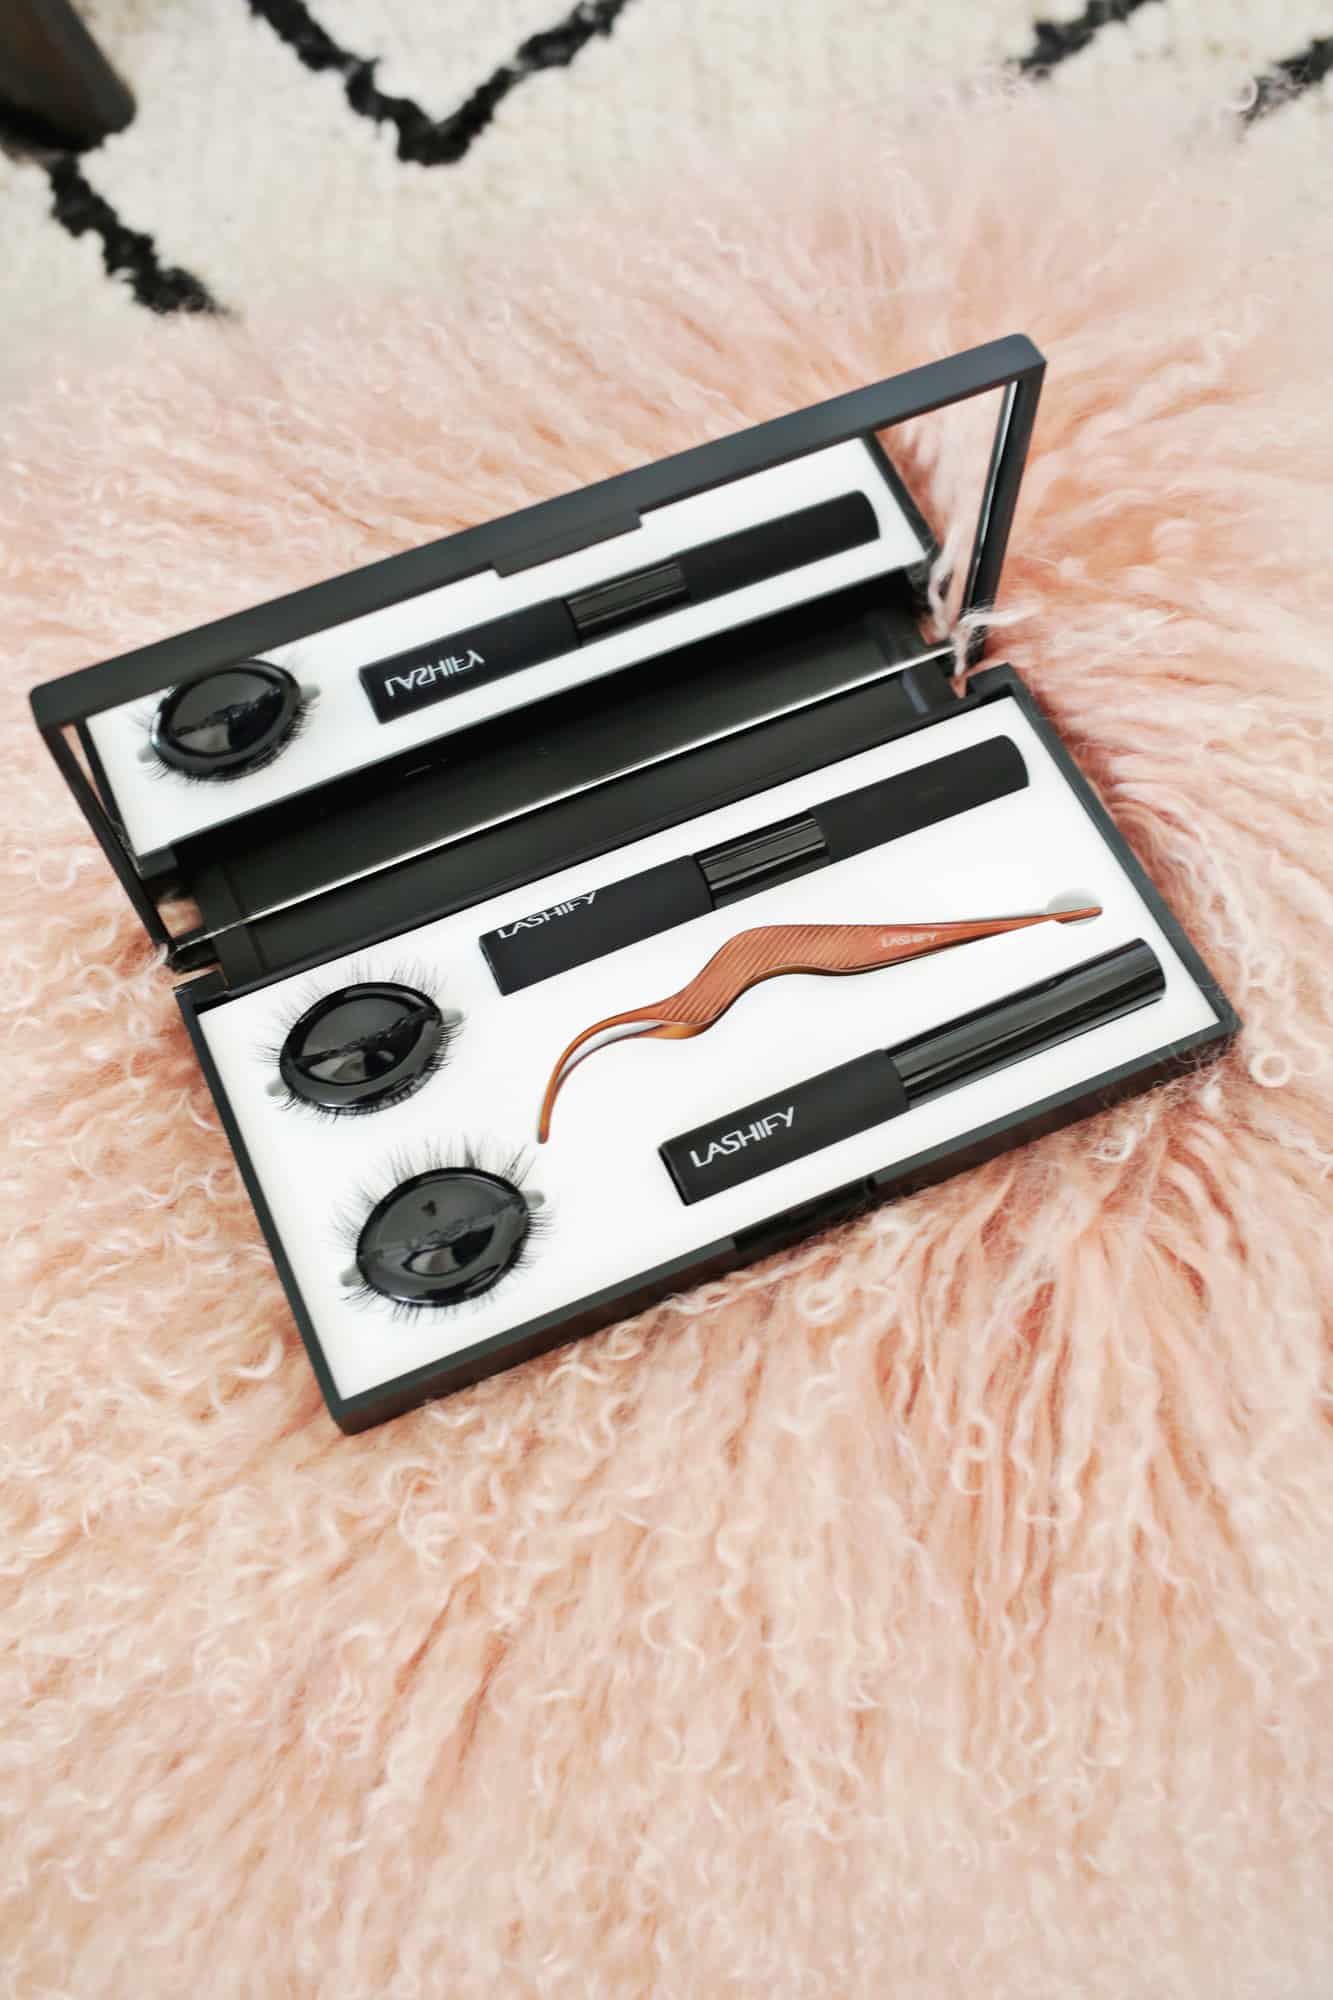 All that to say I’ve had some background with using false lashes and definitely have my opinions on each method, so I was so interested to try the Lashify lashes.
They are basically cluster lashes (or trio lashes as I’ve also seen that style called), but they are applied under your lash line instead of over/on top of your lash line (they should only be touching your lashes though, not attached to your waterline).
How Do You Apply Lashify Lashes?
To apply, you put an adhesive onto your lashes with a tiny mascara wand and position each lash grouping under your lash with their fuse control wand to stick it to the adhesive. Once you have all the lashes attached, you used the curved wand to press down and fuse the false lashes to your real ones.
The first time I tried it I was impressed with how good they looked as far as hiding the seam and knots of the lashes under your lash line. But, I could also tell that length of lashes was probably too long for my face, and I like when the most inner set of lashes is shorter than the rest so it looks more natural.
How Do I Pick The Best Length/Volume of Lashes?
Lashify sells lots of different lengths and volumes, so I tried shorter sets of different volumes to find the perfect Goldilocks fit.
I would say if you have no idea what length/volume of lashes to get, start with a set that’s somewhere in the middle as far as length and volume go and then you can dial it back or up from there as needed.
How Do I Remove Lashify Lashes?
The lashes came off pretty well—basically the same as taking off regular false lashes. They do warn you that sleeping on your back is best for these lashes (same with lash extensions), so the first time I tried them most mornings I had a wiggly lash I needed to reattach on the side I sleep on.
I do have one of these pillows that Elsie loves for training you to sleep on your back, but at the moment I have some back issues that make that position more uncomfortable, so I kind of have to sleep on my side for now.
The next time I tried Lashify Lashes, I slept on the edge of my pillow so my eyes weren’t as smushed into the pillow and it helped a ton! I didn’t have to reattach any side lashes until the very end of the week that time.
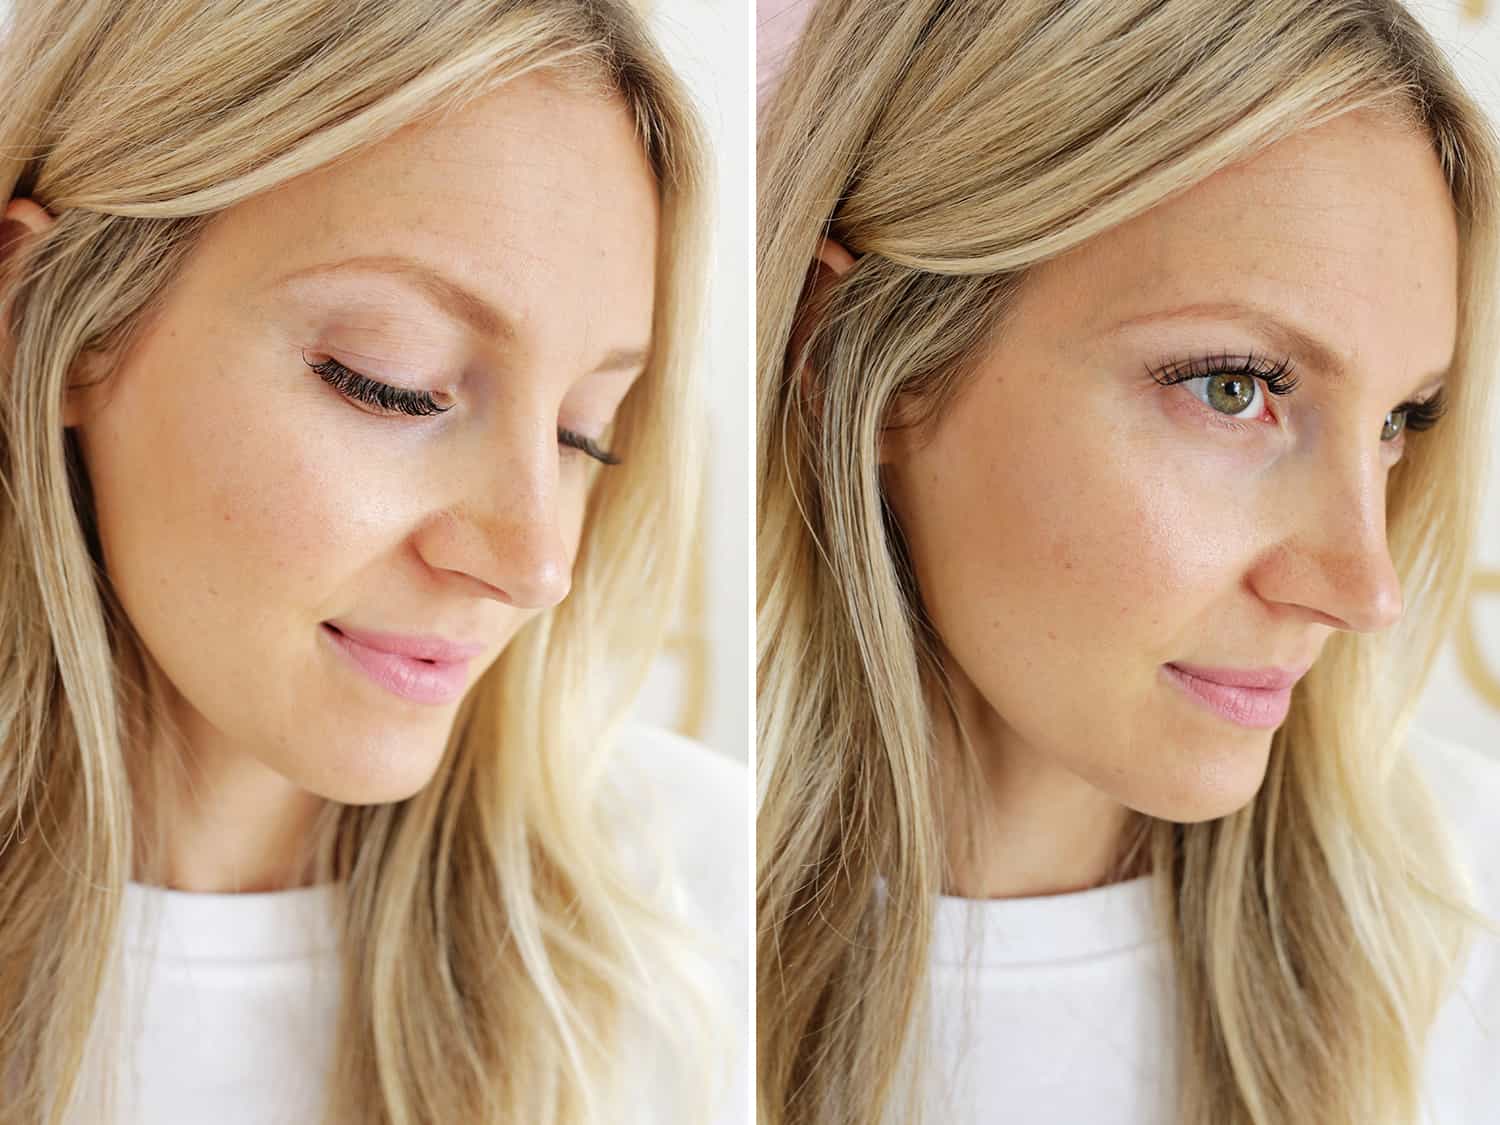

Pros of Lashify Lashes:
- They hide the lash strip amazingly well, so they look more like extensions. You can apply them rather quickly at home instead of with long appointments. It lasts for several days (even up to a week depending on how well you take care of them).
- You can wear them as much as you want back to back. It’s super easy to remove them to give your eyes a break whenever you want unlike extensions. And, they have a subscription service if you are wearing them all the time.
Cons of Lashify Lashes:
- It can be kind of expensive to get started (although still less than most charge for an initial lash extensions appointment). You may have to try a few sets to find your favorite fit of lashes.
- They don’t last as long as lash extensions. You can’t get them wet like extensions (you can shower with them but try not to get your eyes wet). And you may have to reapply more often if you are a side sleeper.
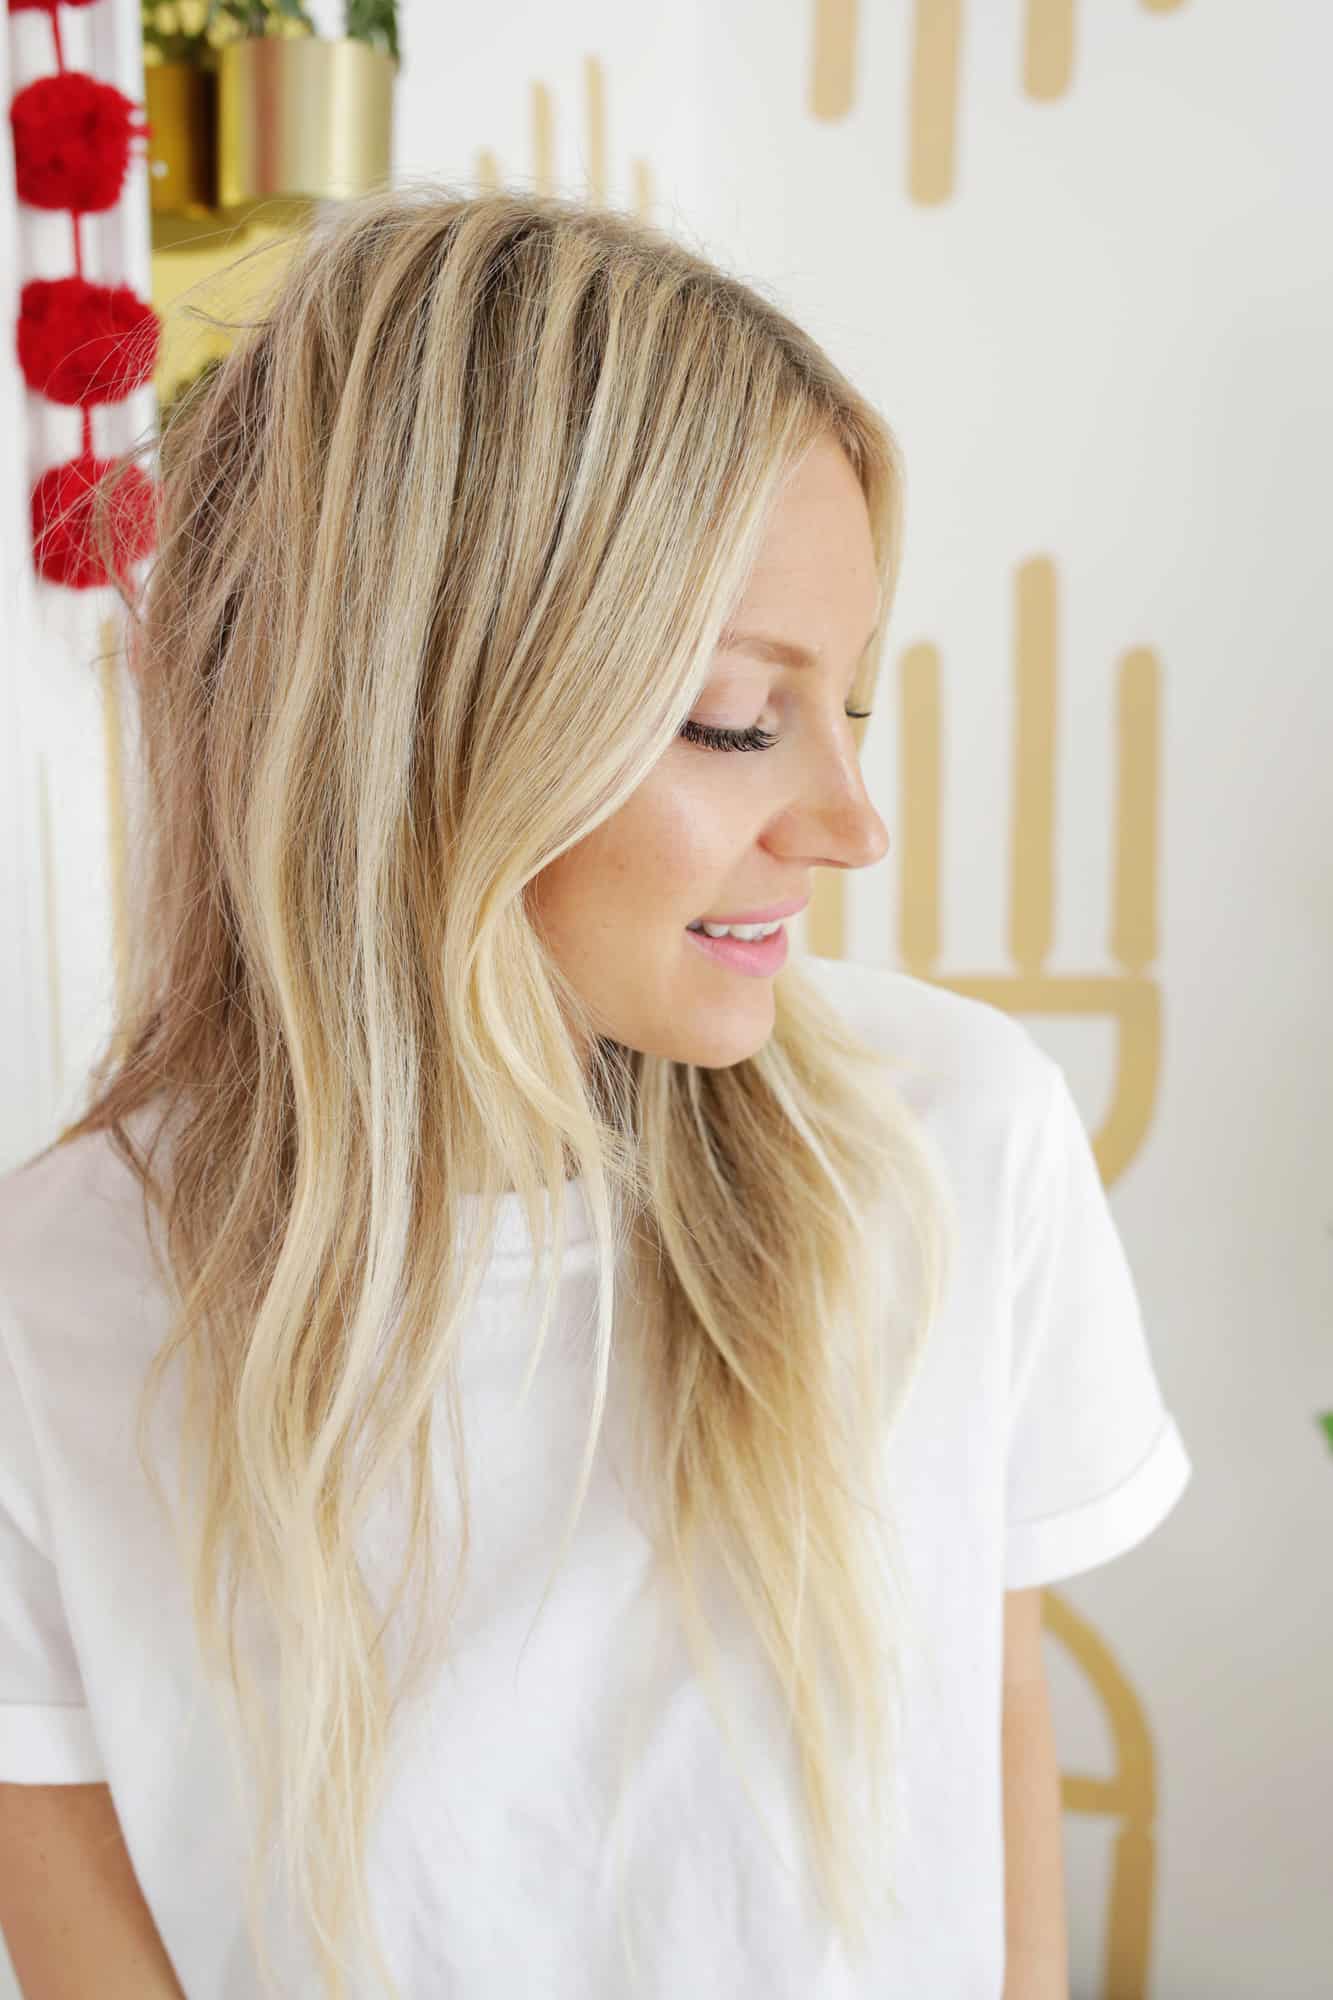 Originally, I got about four days out of each set of lashes before the ends were having trouble staying put. But once I added in their night bond to the routine and slept on the edge of my pillow instead of the middle, I got a week out of the next set pretty easily.
All in all, these seem like a great option for a long weekend or a trip that you want to look nice for but don’t want to go to all the hassle and commitment of lash extensions.
You can get the control kit to start out with, but it’s possible that you may not like either set of lashes they send with it. So you may be better off buying the items separately so you can choose your own lash length and fullness.
I’m wearing the Drama lashes in a 12mm size above for reference if that helps, but I have smaller more hooded-shaped eyes.
Also, if you already use a micellar water cleanser, you can probably use that rather than buying their cleanser to prep your eyes (I love using reuseable cotton rounds to do this.)
I used a duel-phase makeup remover instead of theirs and it seems to work just fine, so if you have items like that already, it can save you some money up front.
Want Longer Lashes All The Time? Try This:
- Try using a lash serum like GrandeLASH-MD. The photo below shows my real lashes with just mascara on (this mascara is the best I’ve ever used!) after using LashMD for about 5 months and the results are pretty amazing even on short sparse lashes like mine.
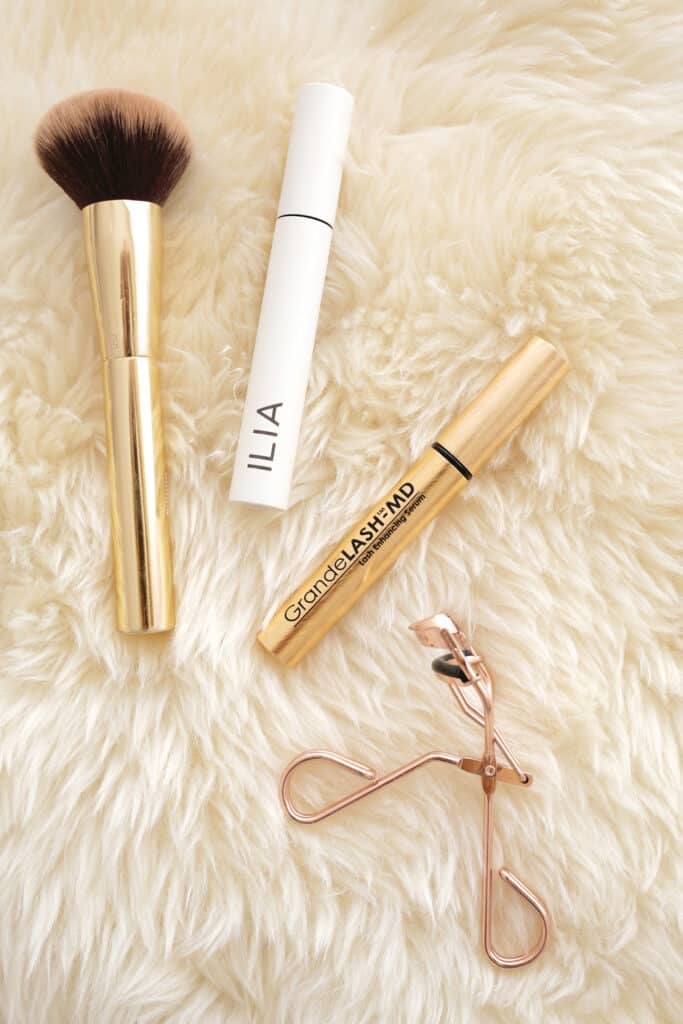
- You just swipe the GrandeLASH-MD on your lash line everyday and within a few months you should see a huge difference. It may not quite be false-lash level, but it’s pretty close for me and I don’t have to take them off and on all the time
Click Here to Read My Full Review of GrandeLASH-MD!
I hope that was a helpful (or at least fun!) look into this new kind of lashes I’ve been hearing about! I think I’ll definitely be using these for trips or weeks where I have several photo shoots that week, so I know I’ll be using them again soon.
Looking for More Beauty Trials and Makeup Posts?
]]>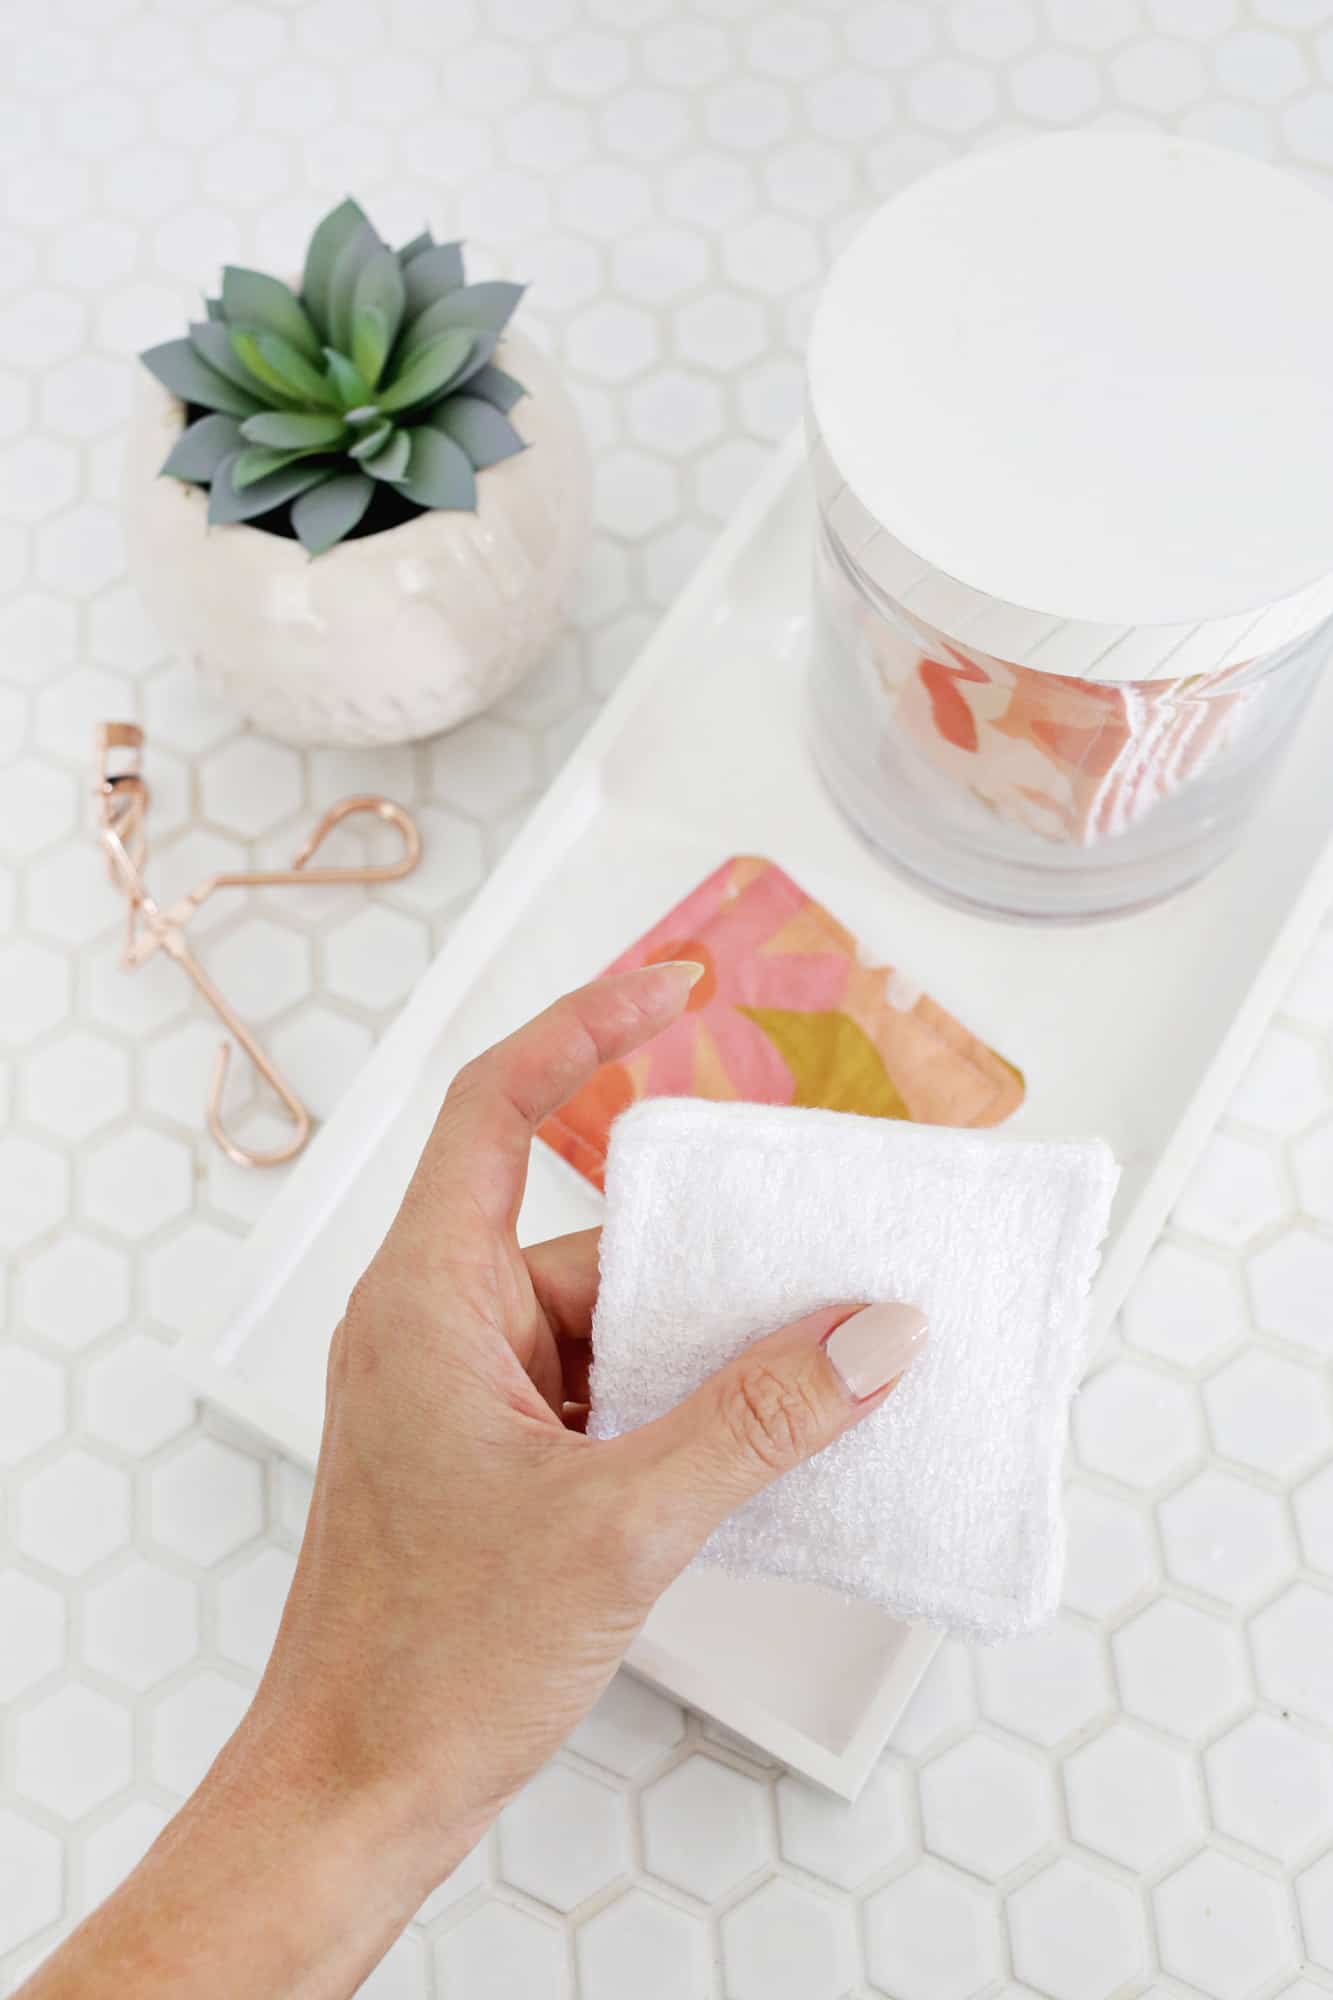 For the past few years, we have tried to switch out a lot of items in our home to reusable/sustainable options (like making this unpaper towel roll), and while we have made a lot of progress there, I decided I wanted to focus more on adding more reusable beauty/personal care items as well.
I don’t wear makeup every day, but when I do, I didn’t like the amount of cotton rounds that I was going through to take off the makeup, so I thought some reusable (washable!) makeup wipes would be perfect for the job!
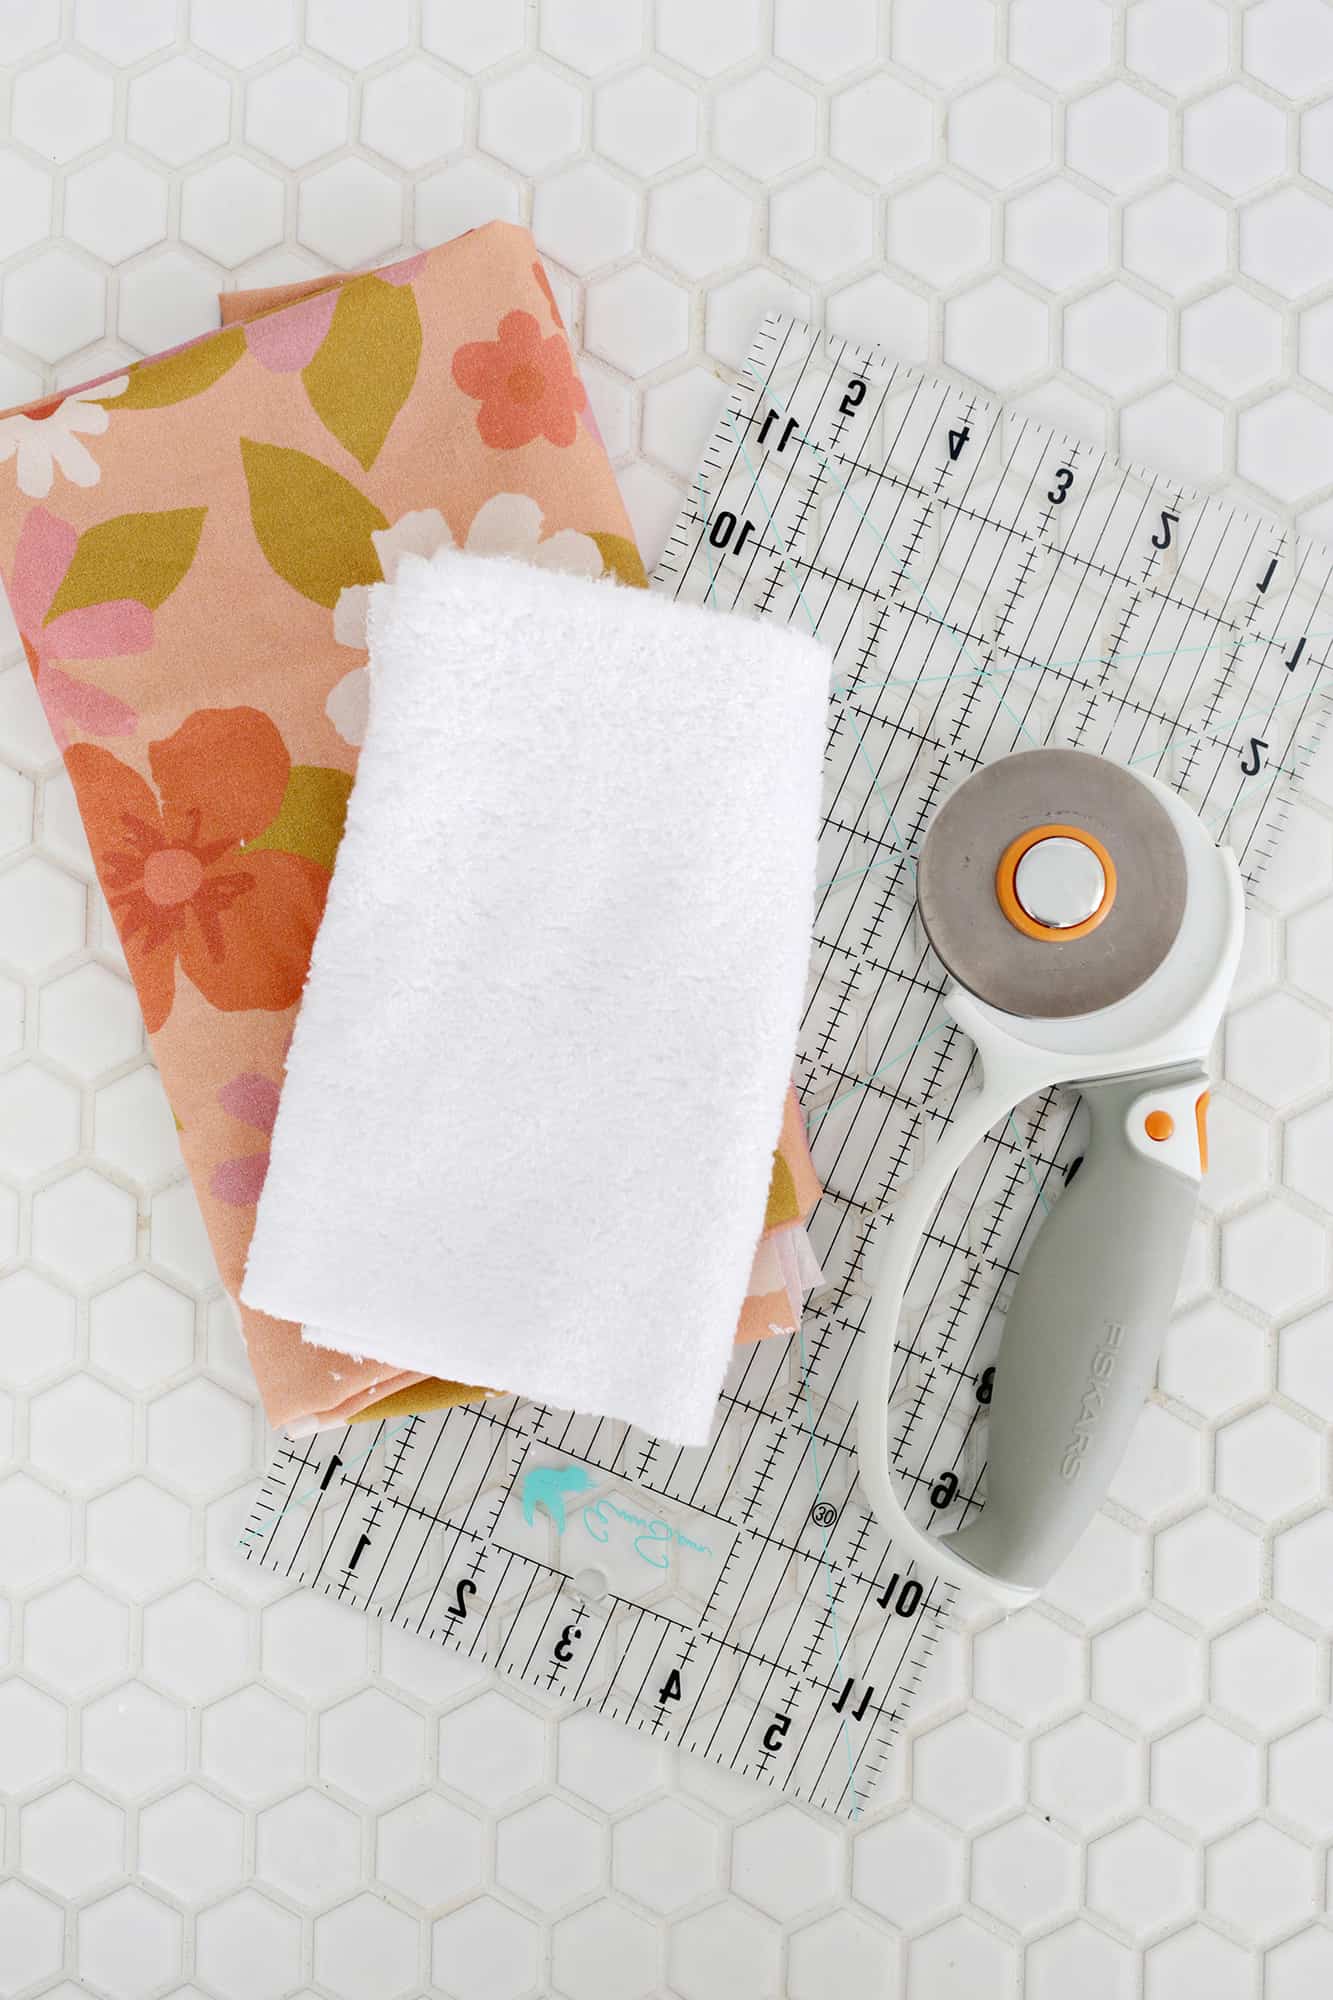 Supplies:
-terrycloth towel fabric
–cotton fabric
–ruler, mat, and rotary cutter
-sewing machine and straight pins
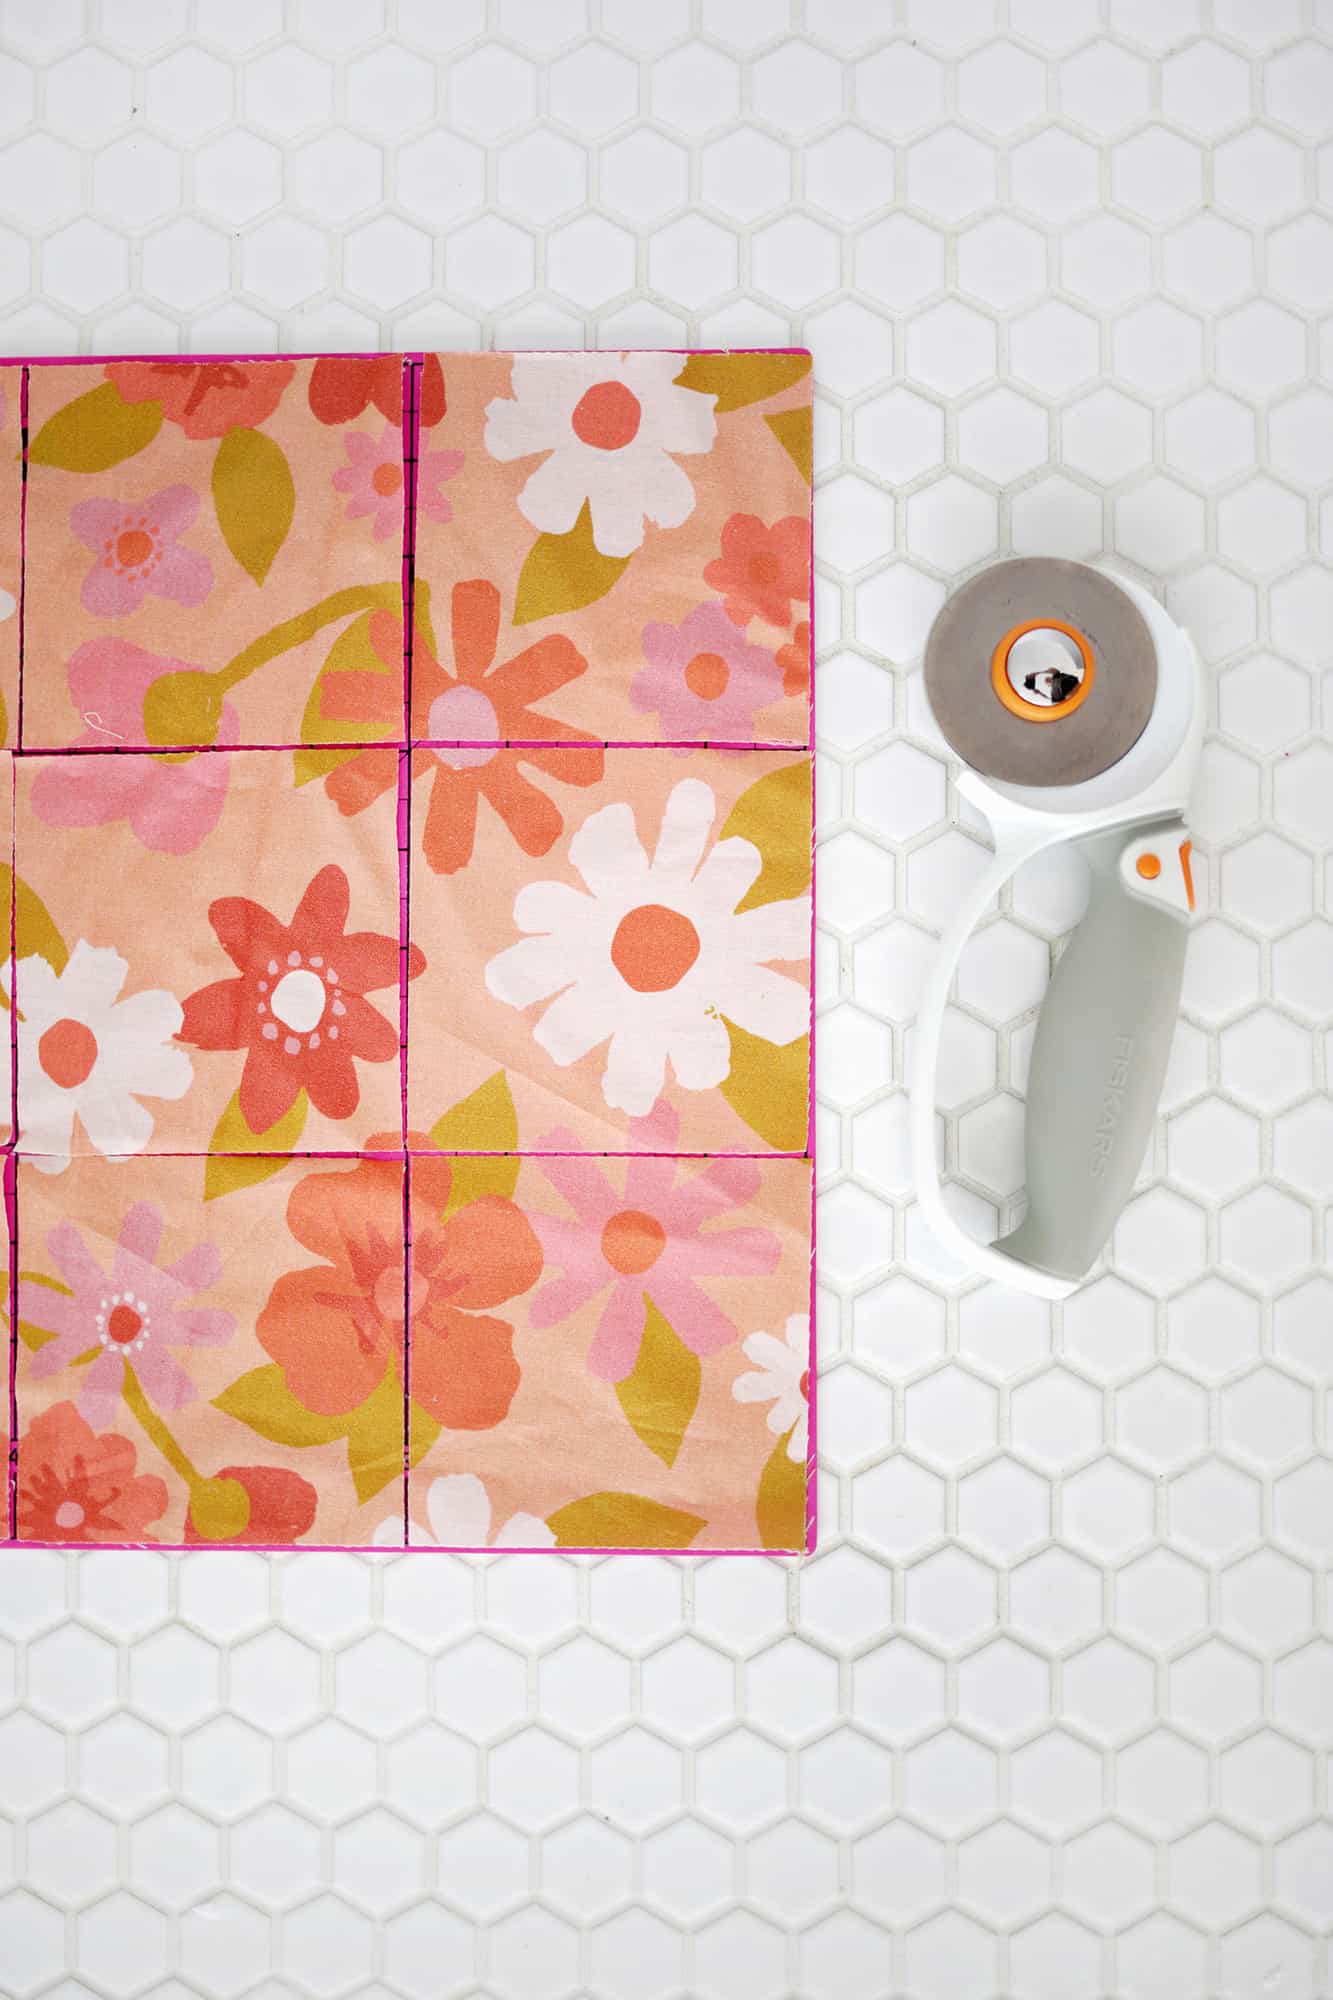 First, cut your cotton fabric into as many 4″ squares as you want finished wipes.
Usually, projects will tell you to wash your fabric first and then sew, but I was a little worried about the terrycloth unraveling in the washer without finished edges. So I decided to sew and then wash them in this case.
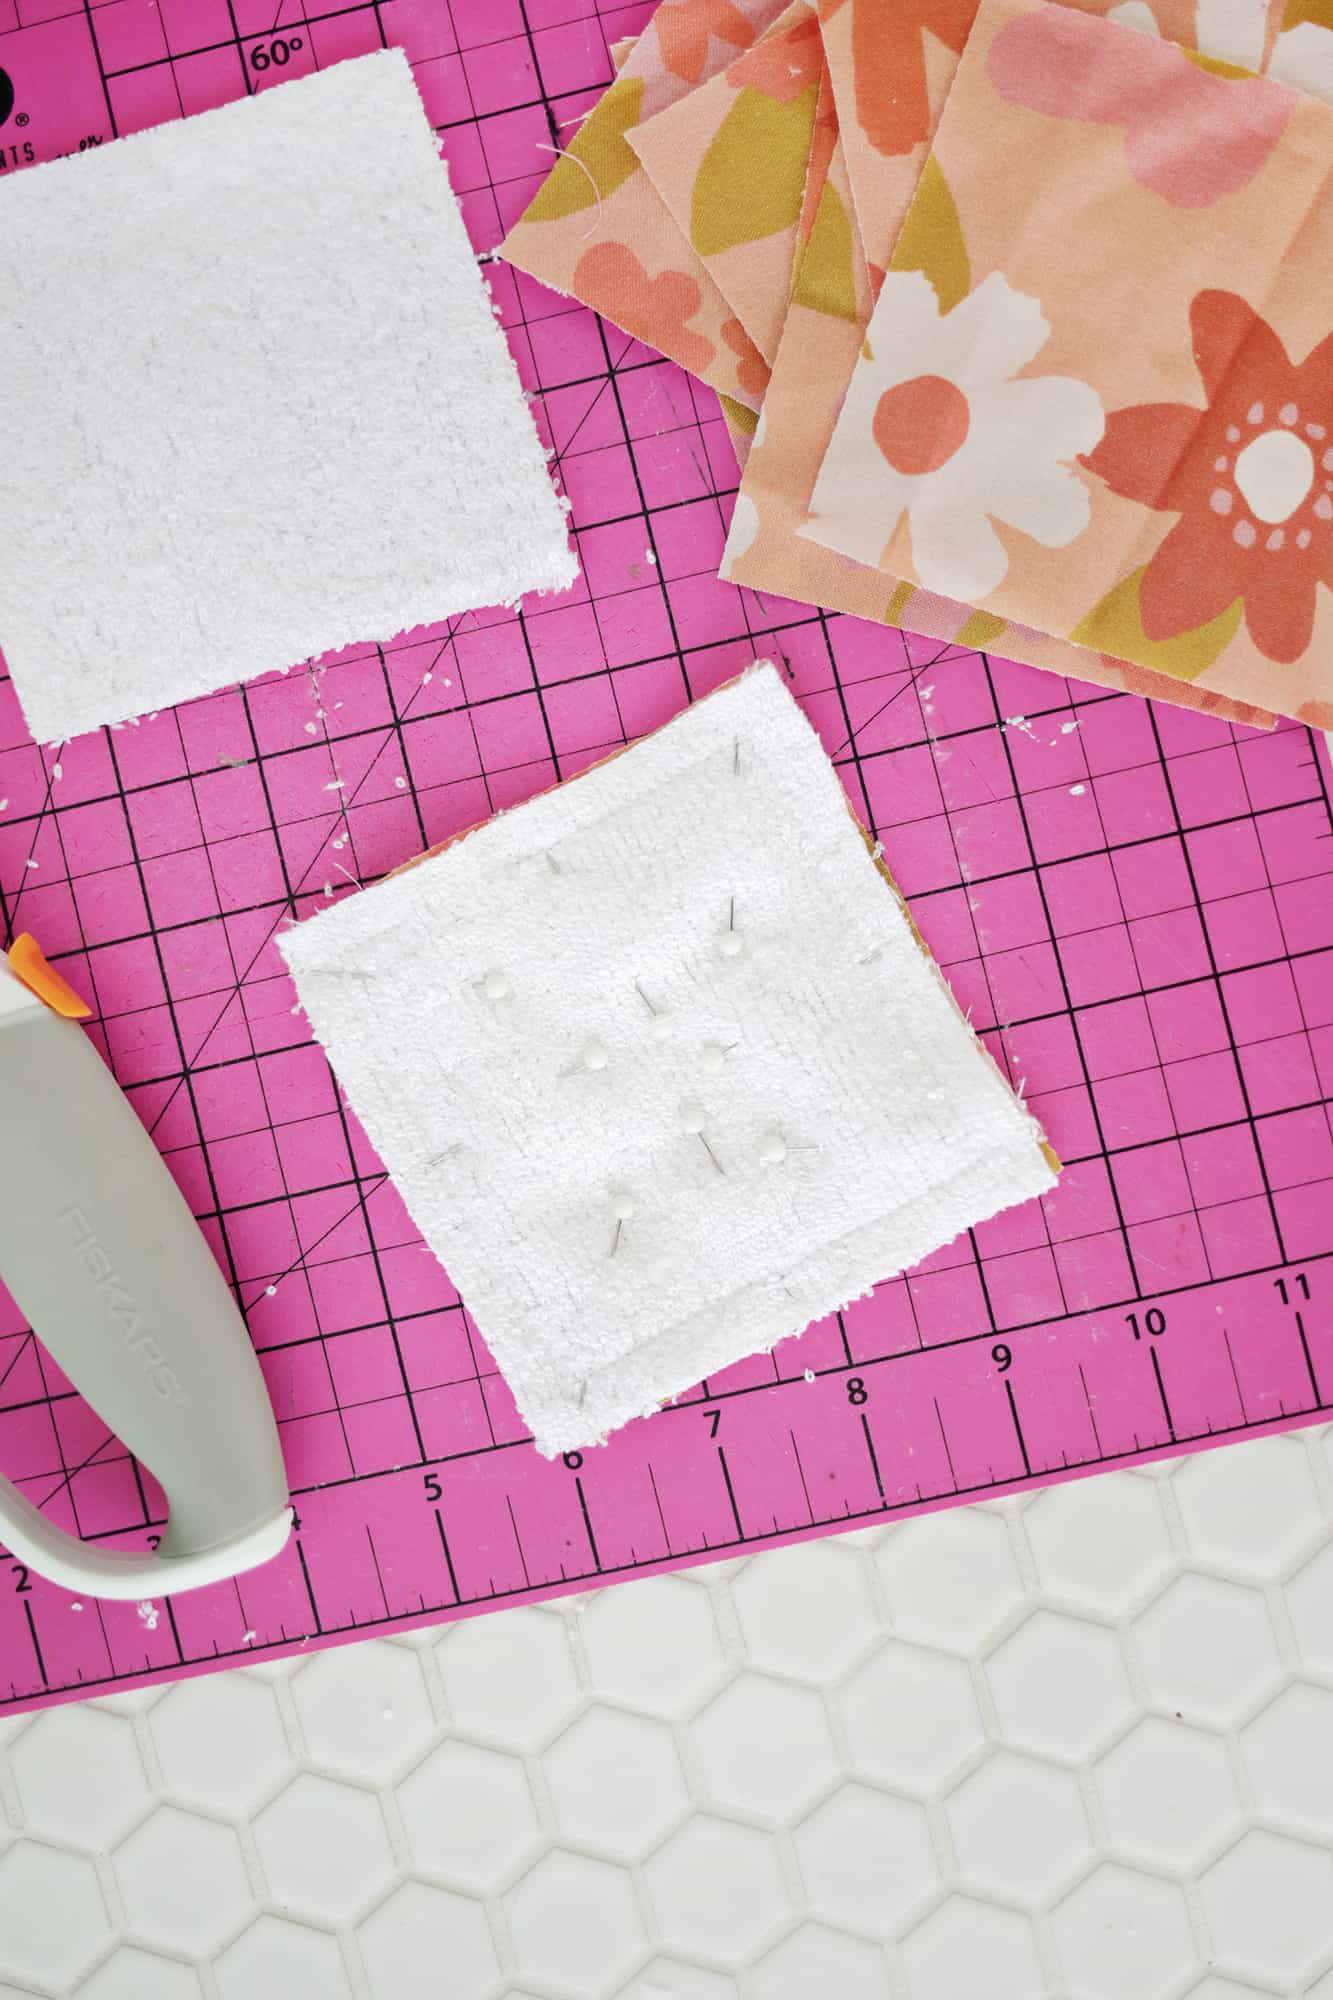 Repeat and cut the same number of 4″ squares with your terrycloth fabric. Pin your terrycloth fabric and your cotton squares together (right sides facing each other) and pin in place.
Sew all the way around your square with a 3/8″ seam allowance and leave a 1″ gap so you can turn your square right side out.
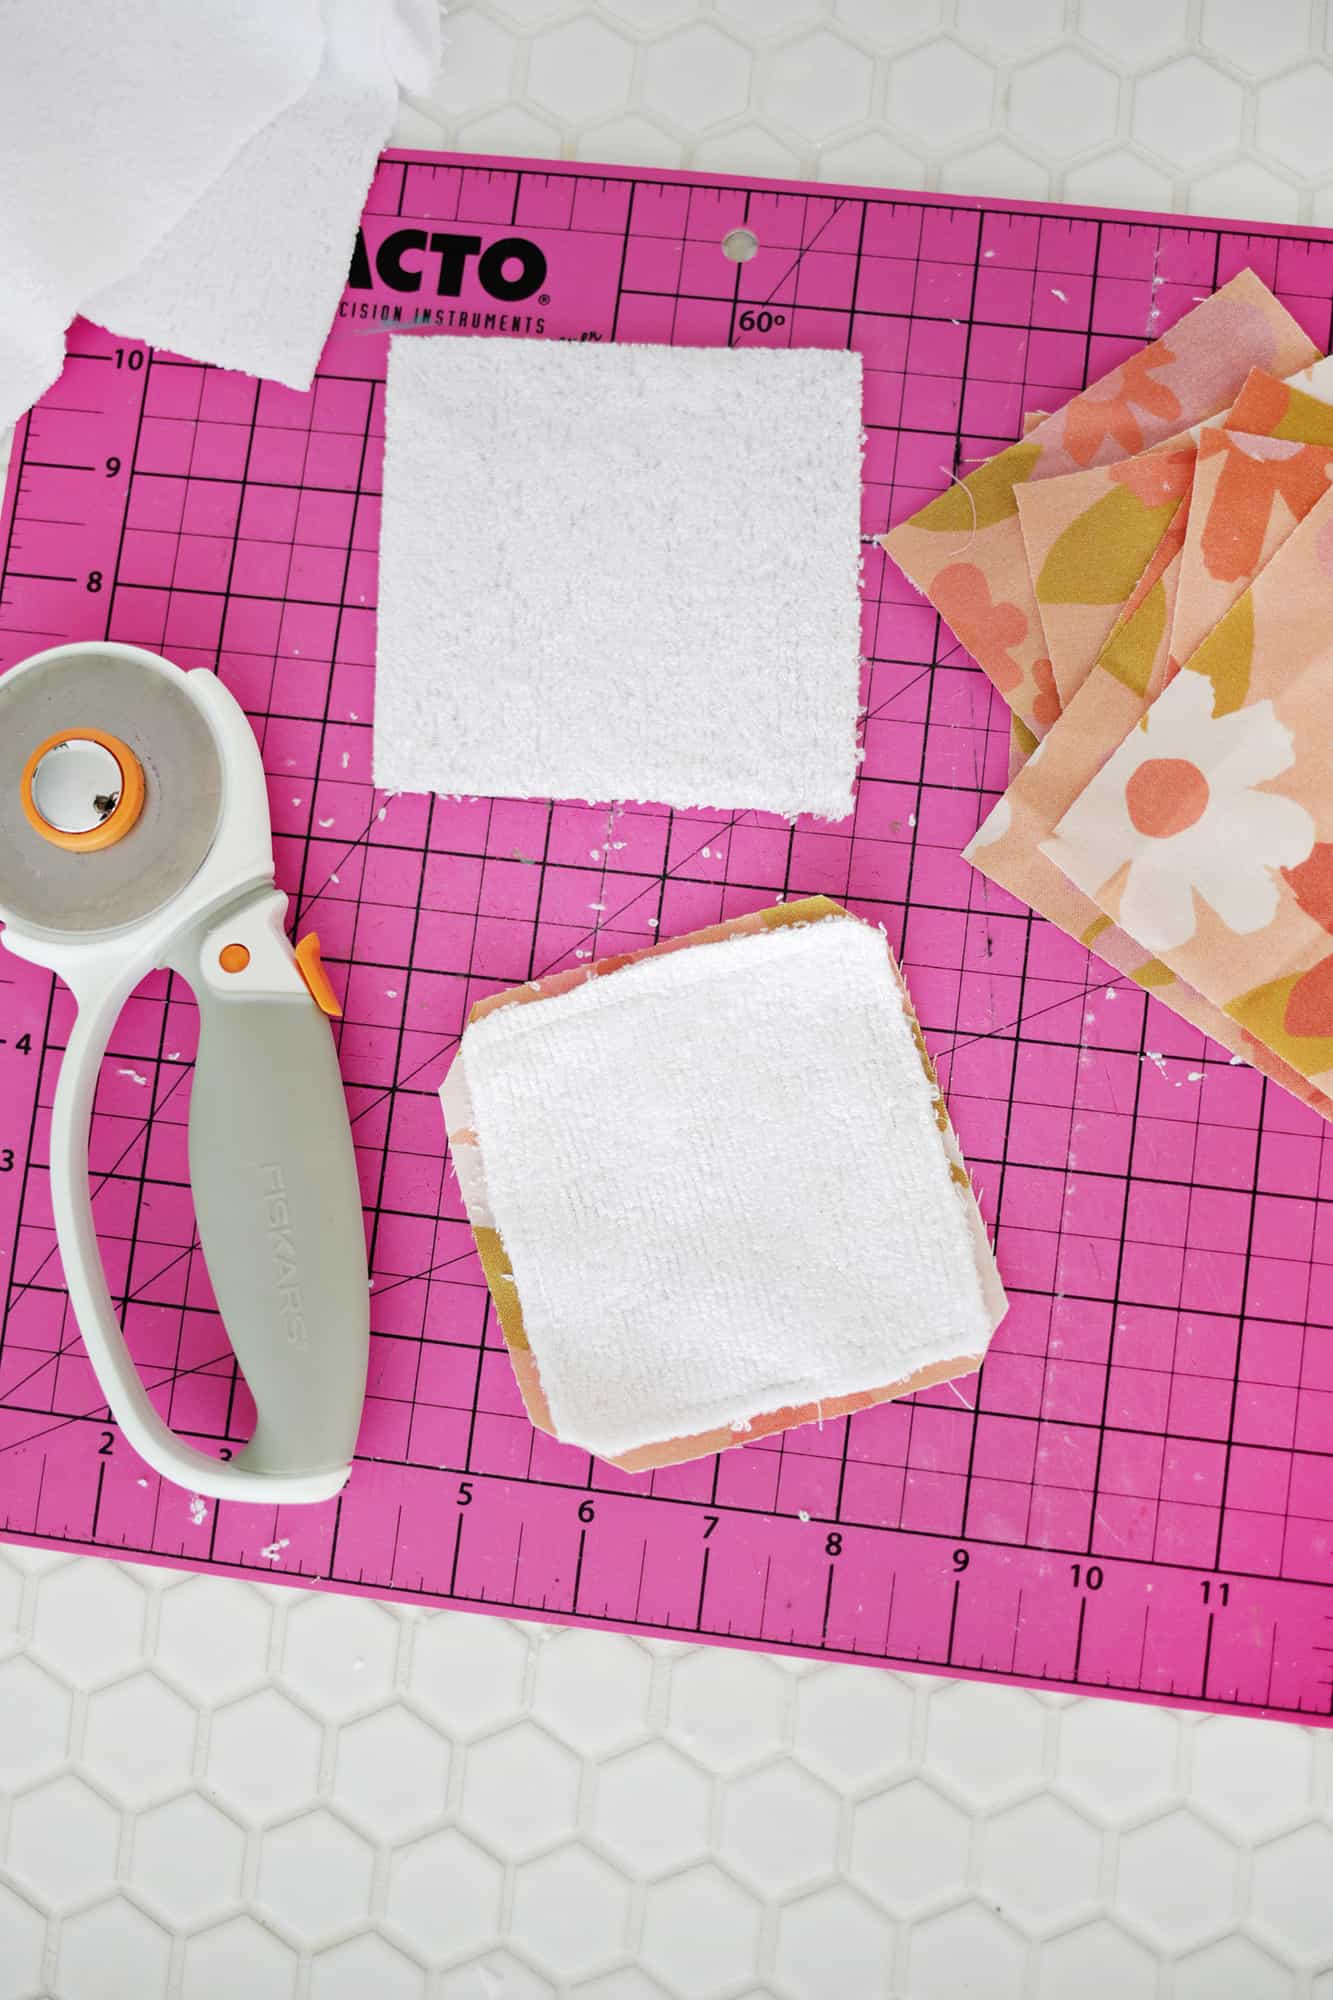 To reduce bulk when you turn your square, clip the corners and trim the seam allowance of the terrycloth in half. Turn your square right side out through the 1″ gap (you may want a chopstick to help you push it through and make sure the corners are properly turned) and pin flat.
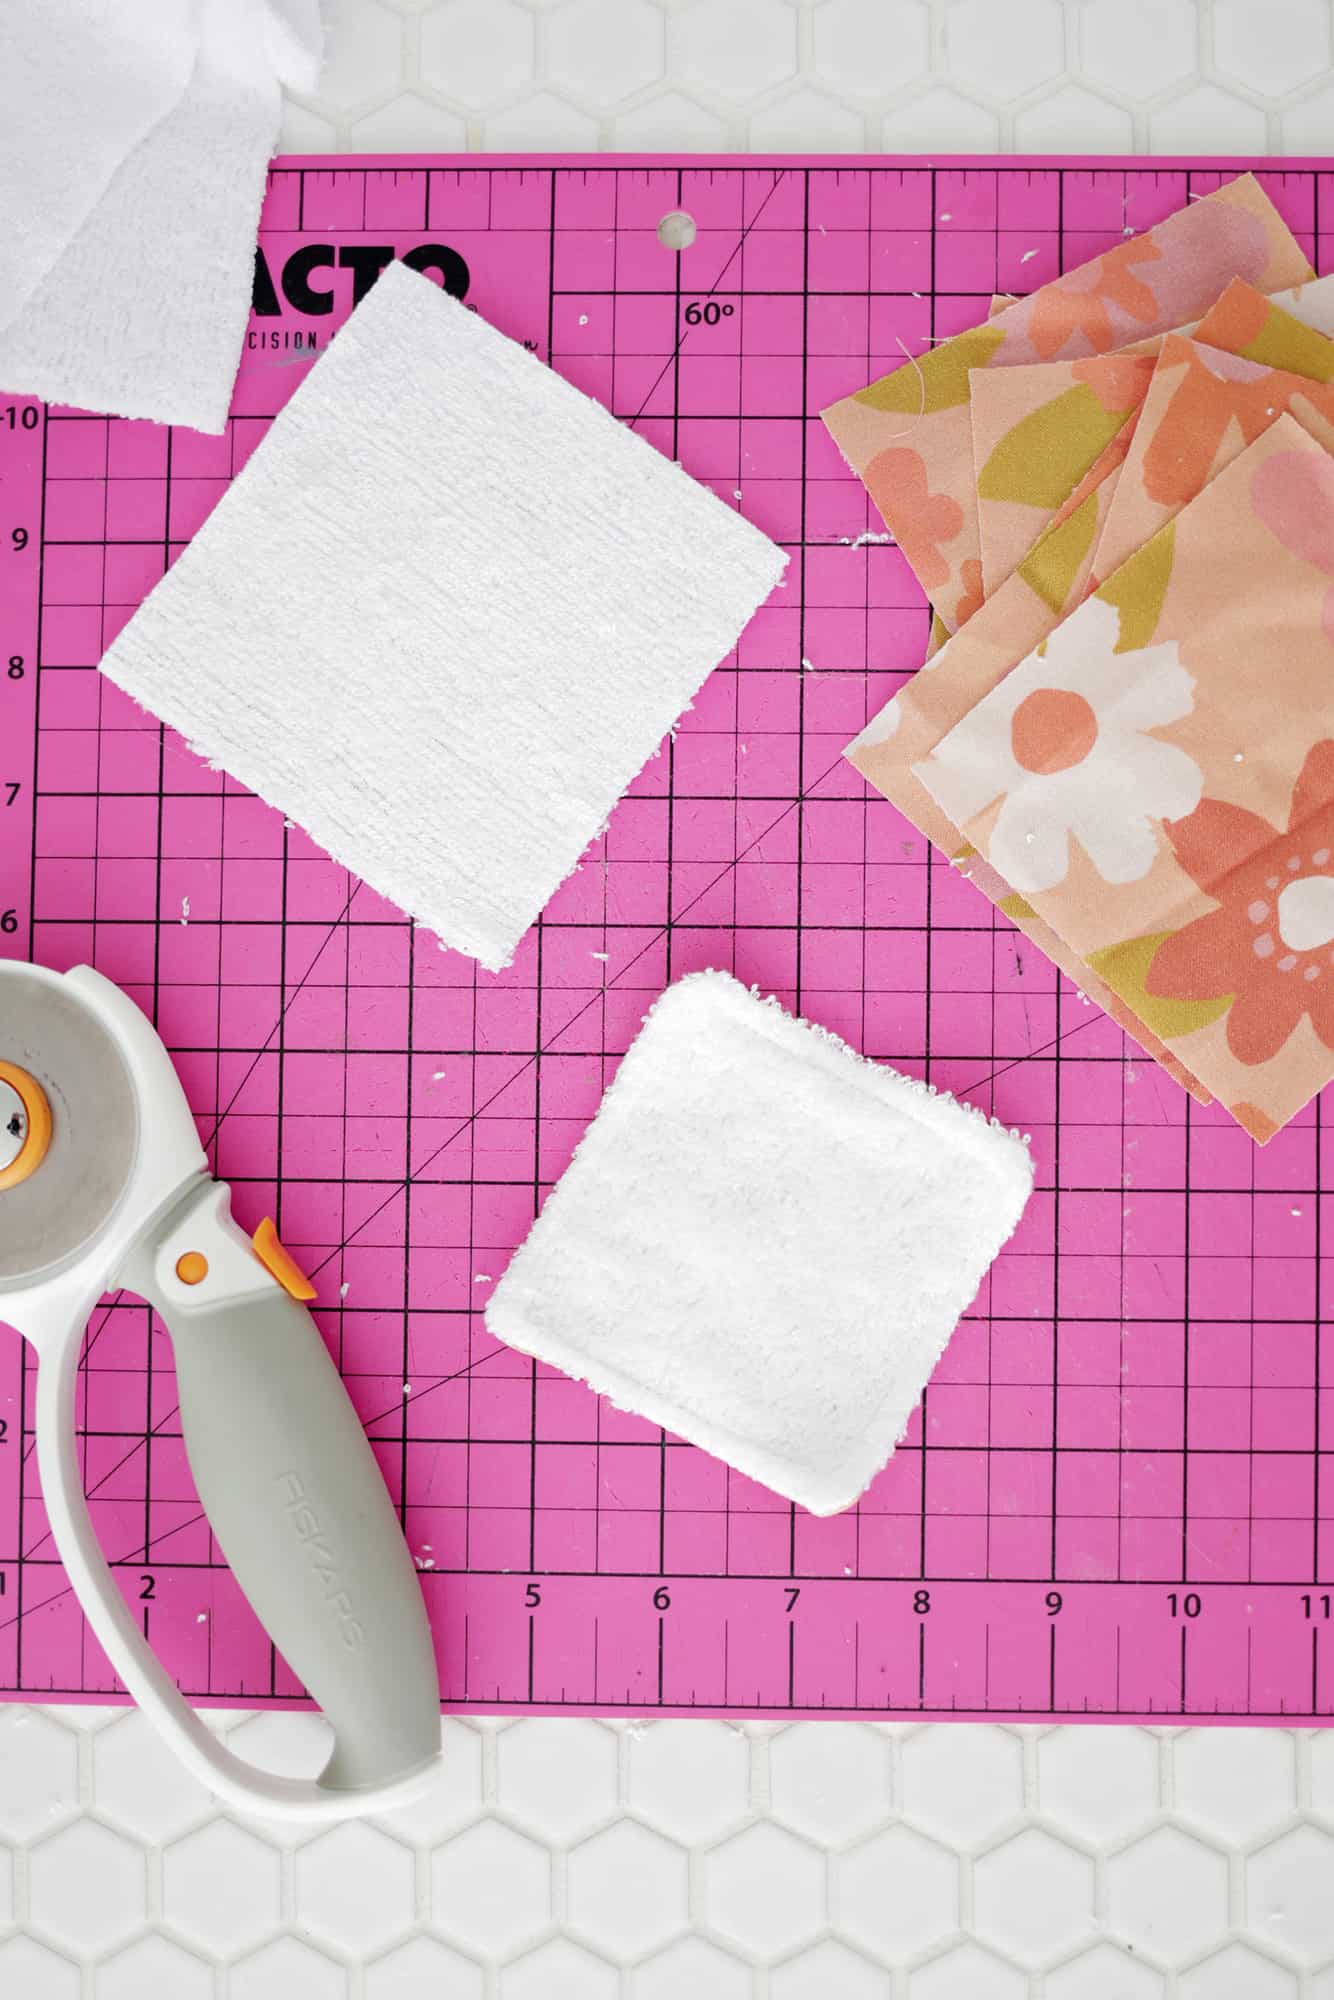 Sew a topstitch all the way around the square with a 1/4″ seam allowance, which will also sew your opening shut.
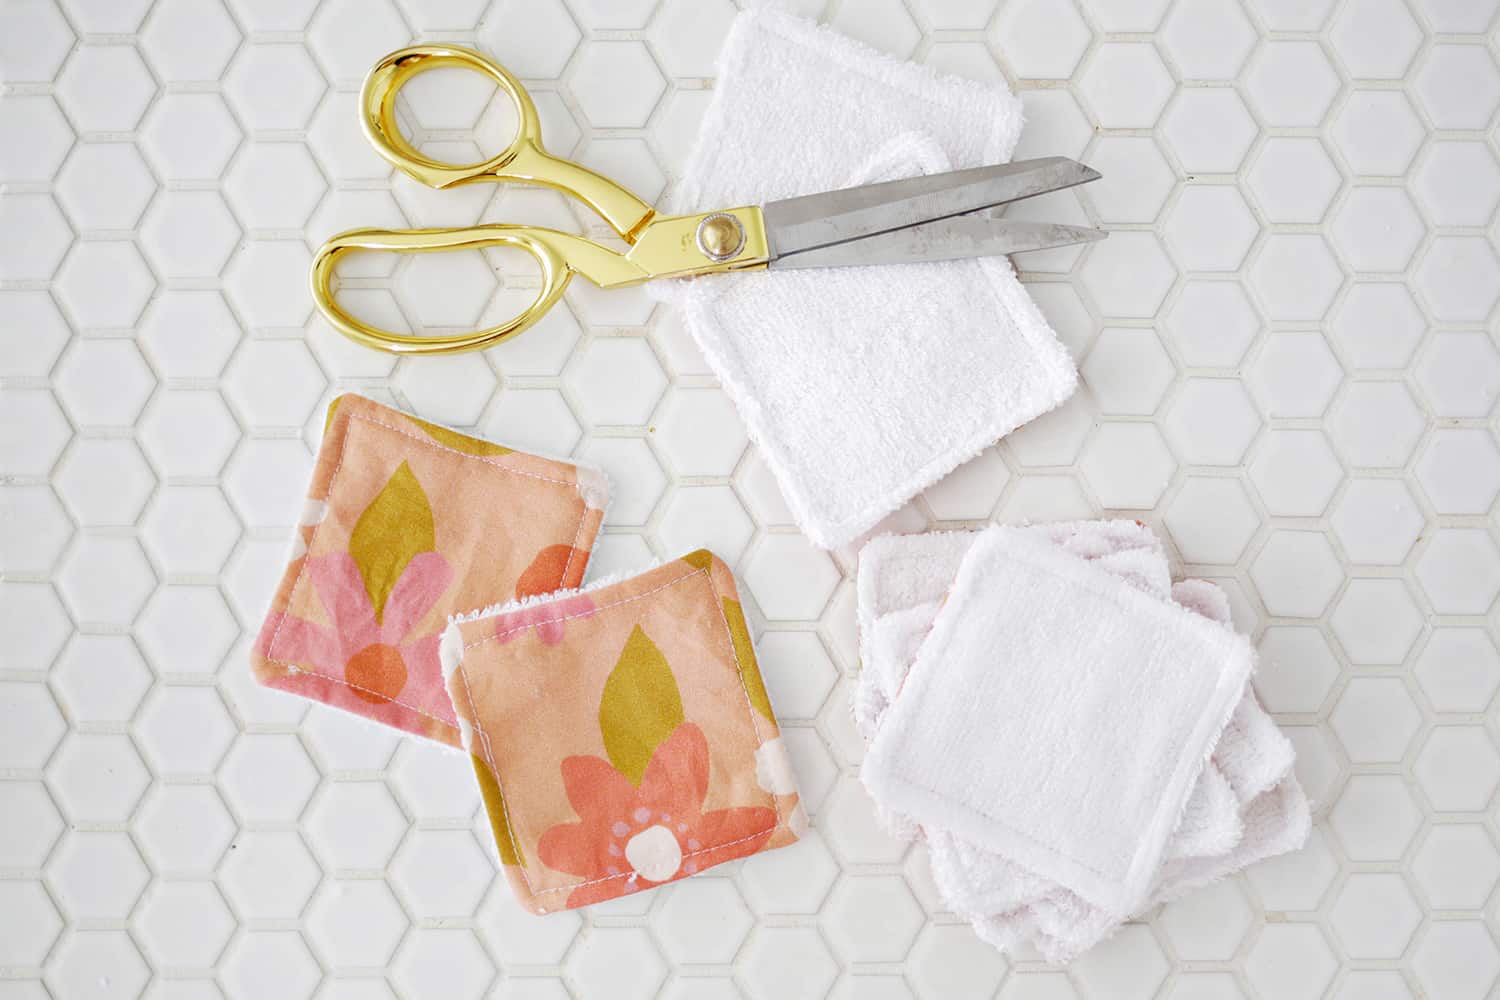 Once your wipes are complete, give them a quick wash in the washer and your wipes are ready to store in a glass jar and use on demand!
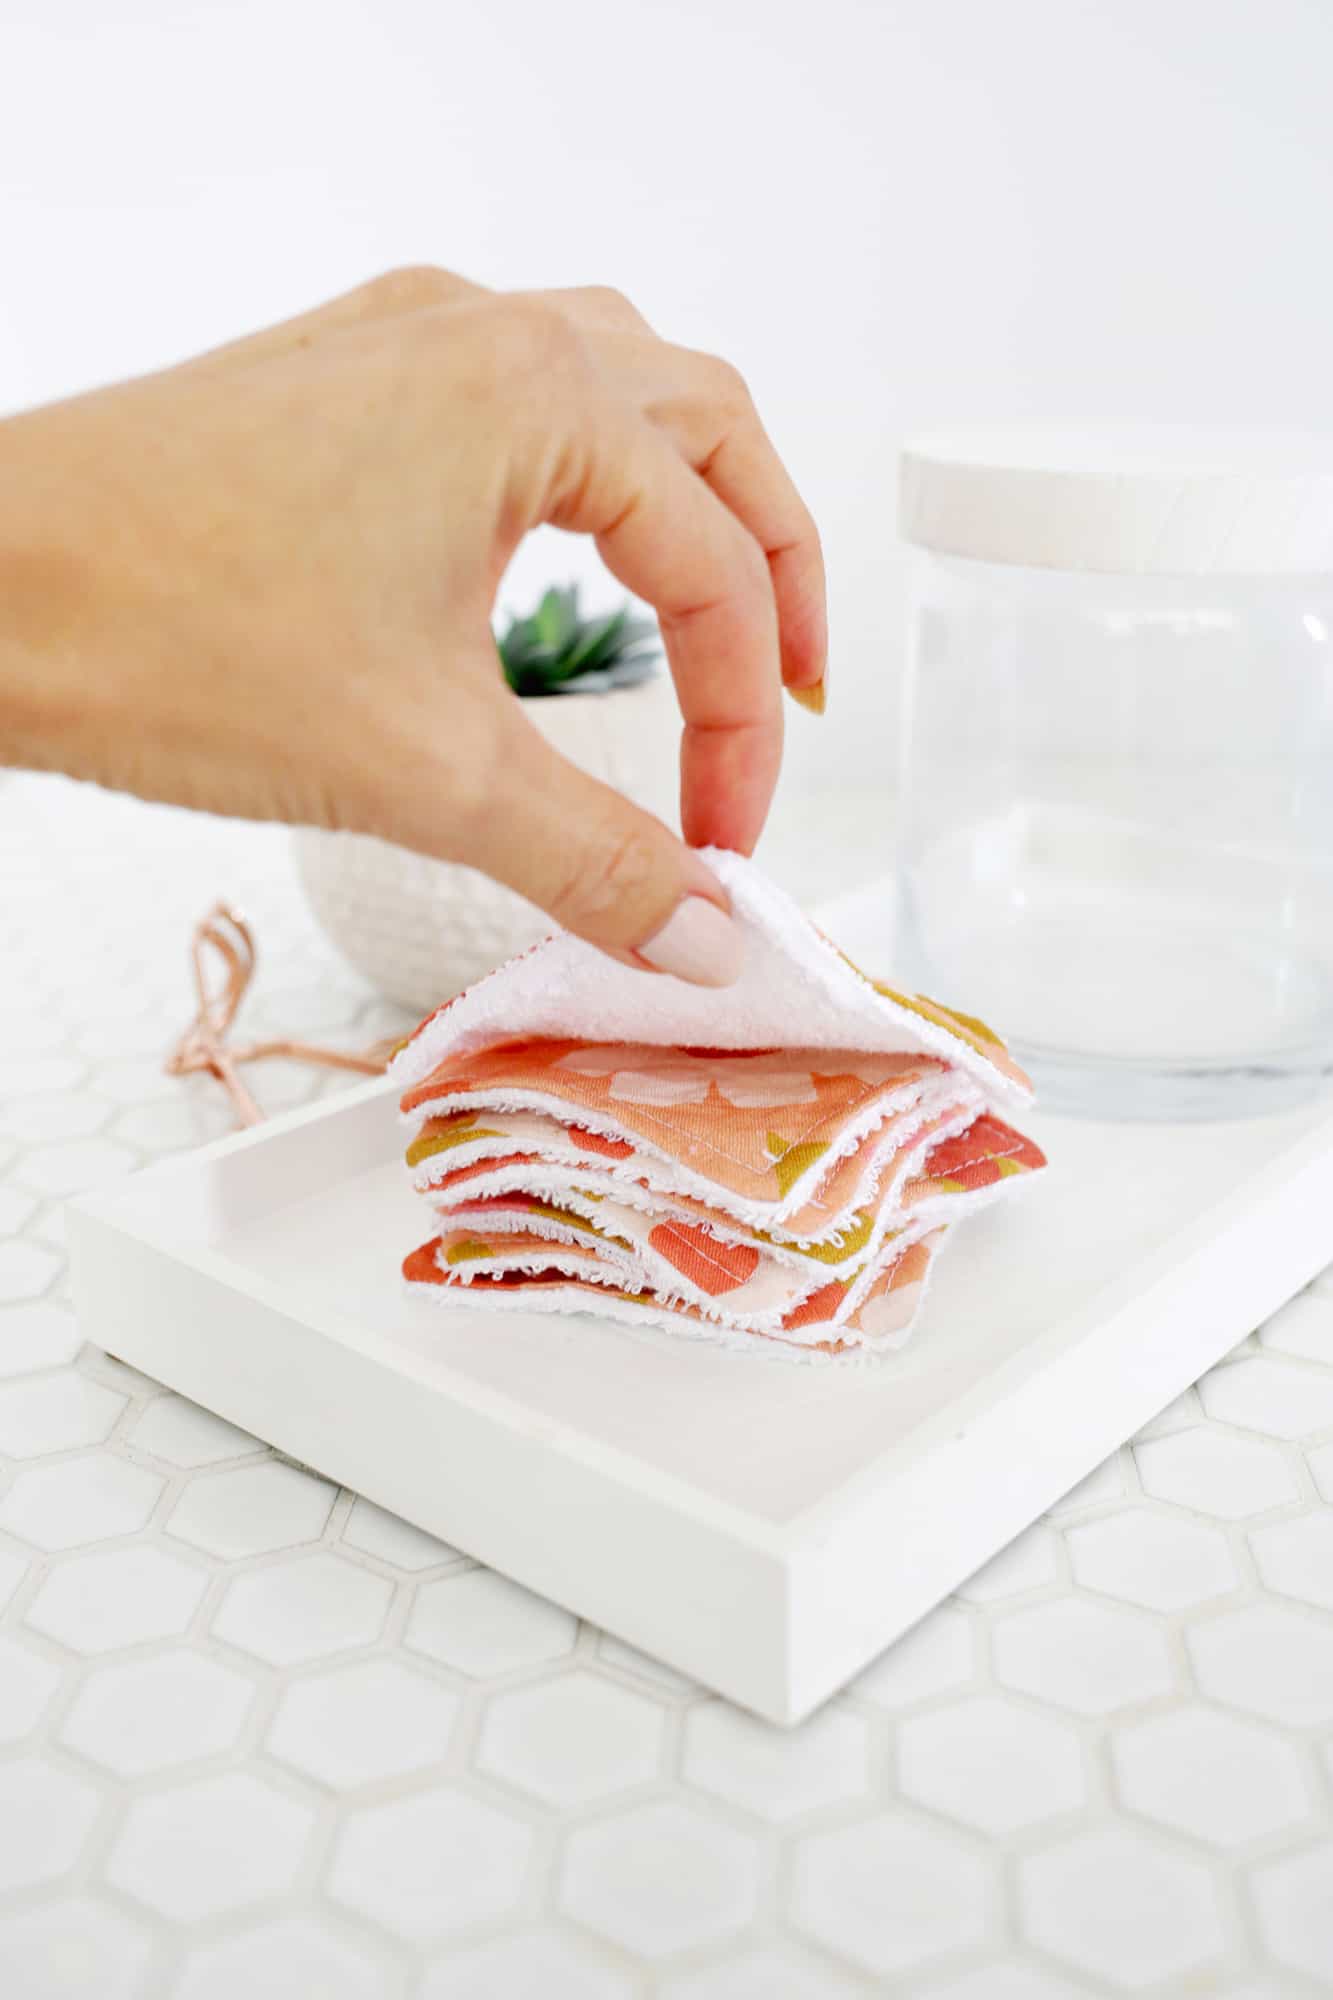
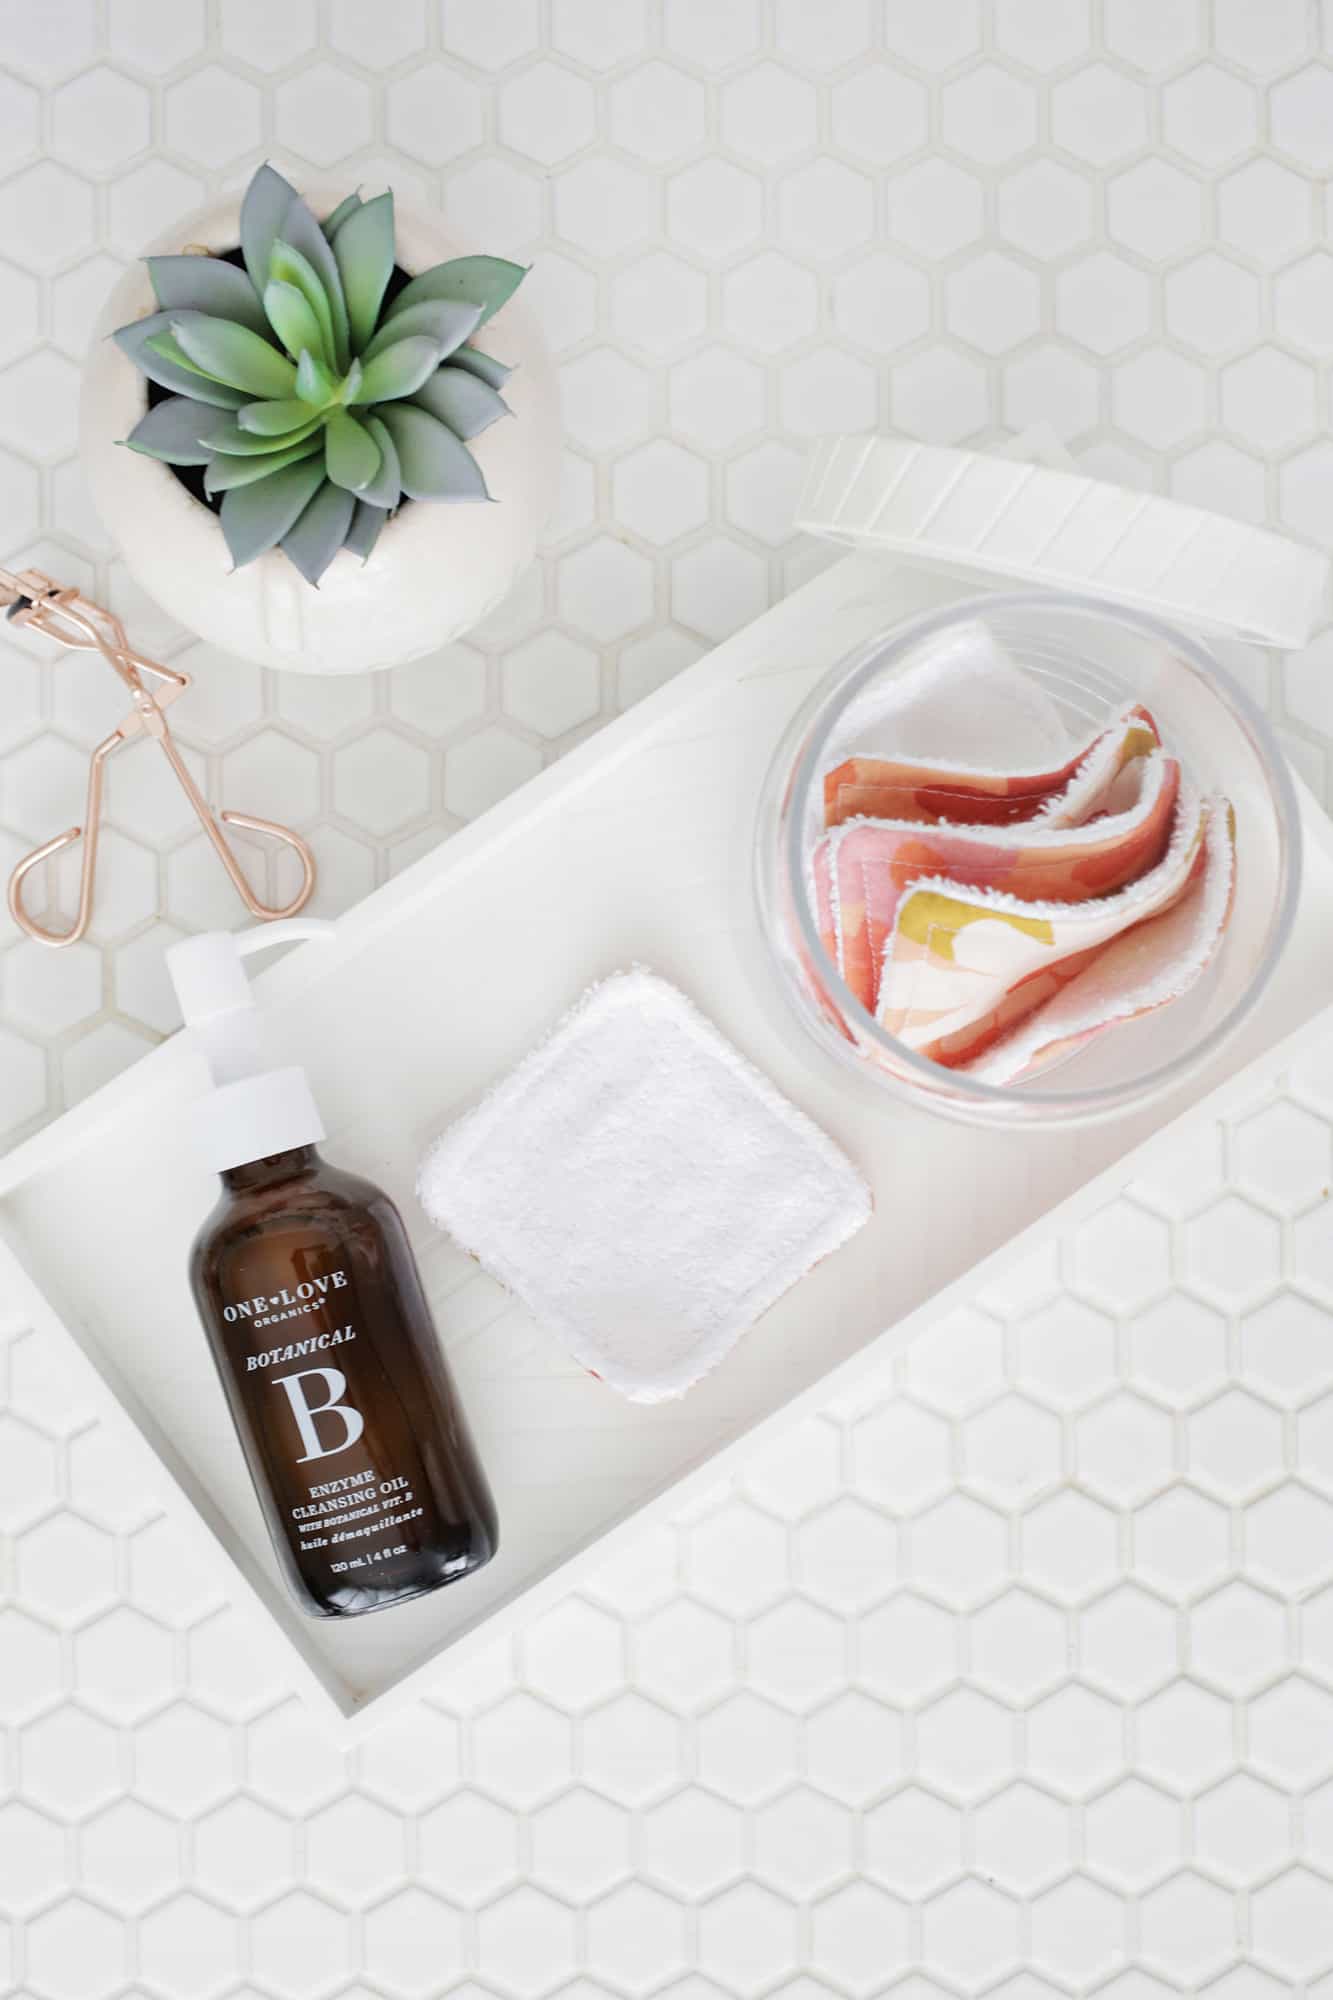
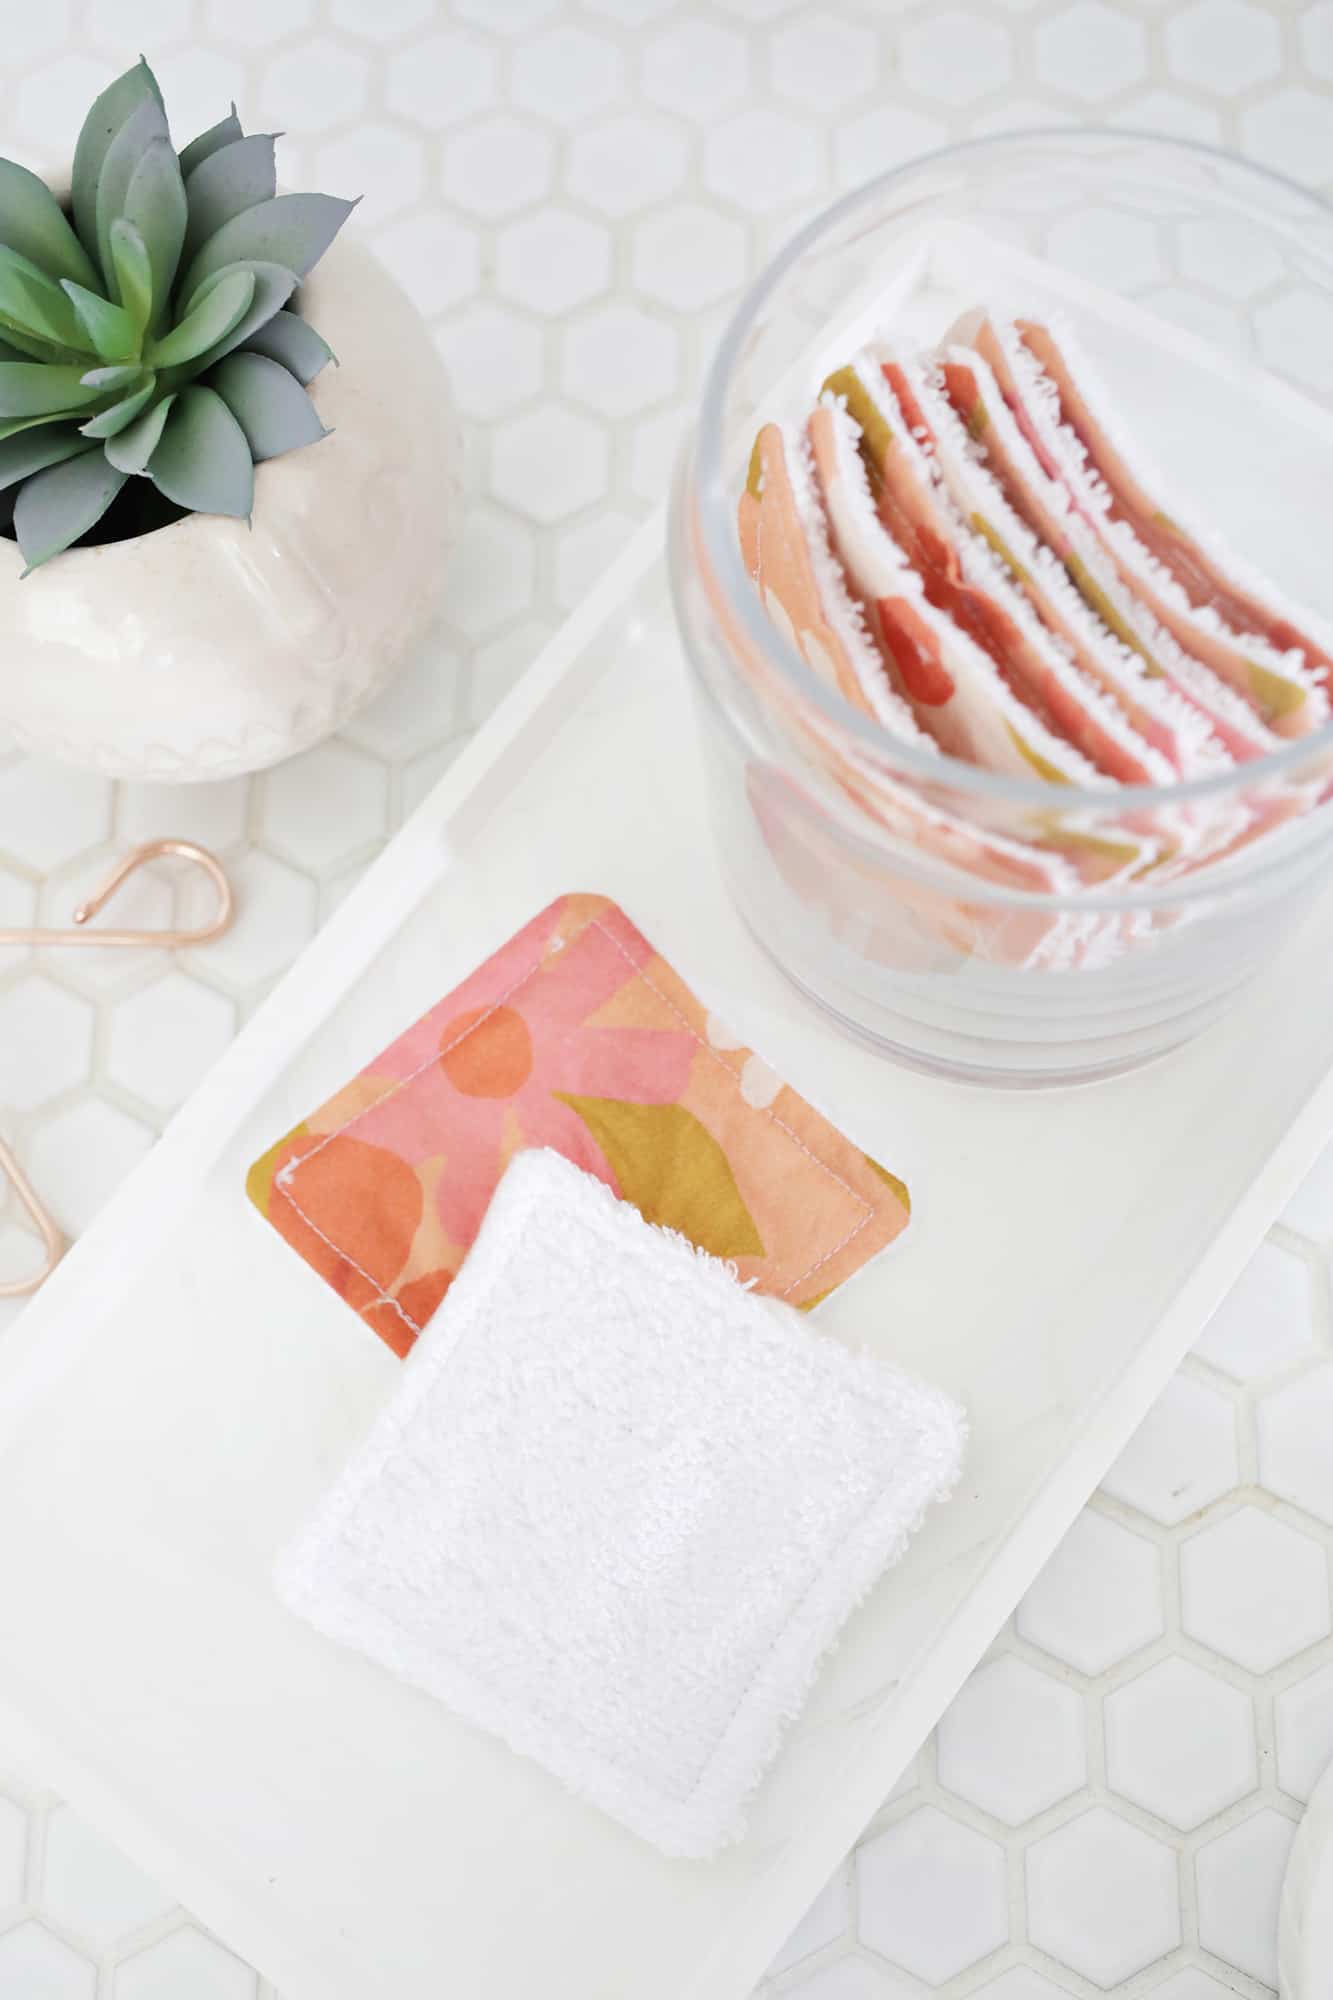 It’s a good idea to let your wipes air dry before stashing them in a container to wait to be washed, so you can either set them on your counter or get a little clip or something to keep them hanging while they dry (I think one of these picture clips may work well for that too!).
To wash your wipes, load them into a small mesh laundry bag for lingerie and wash on warm/hot with another load that you would wash on that setting (towels, etc.).
FYI: Your wipes probably won’t stay pure white for very long, but you’ll know they are clean, so that’s the main thing (you could always get a darker fabric too if you didn’t want to notice the makeup staining).
It’s also an option to do both sides with the terrycloth fabric if you would like, so you can use both sides for makeup removal—the fabric squares are a little harder to handle when both sides are the terrycloth, but with a little more patience, it’s doable.
And for those of you who love the idea of reusable wipes but don’t want to make your own, here’s a great option to buy some already made!
So far, I love these wipes and I especially love to use them with this oil cleanser (it’s a favorite of lots of us here on the ABM team) after using coconut oil to remove my eye makeup first.
You can also use these wipes to apply toner as well if that’s a part of your beauty routine. I would also suggest estimating how many you think you would use in a day and how often you do laundry so you can decide how many you would need to always have some clean. It’s good to think ahead! xo. Laura
]]>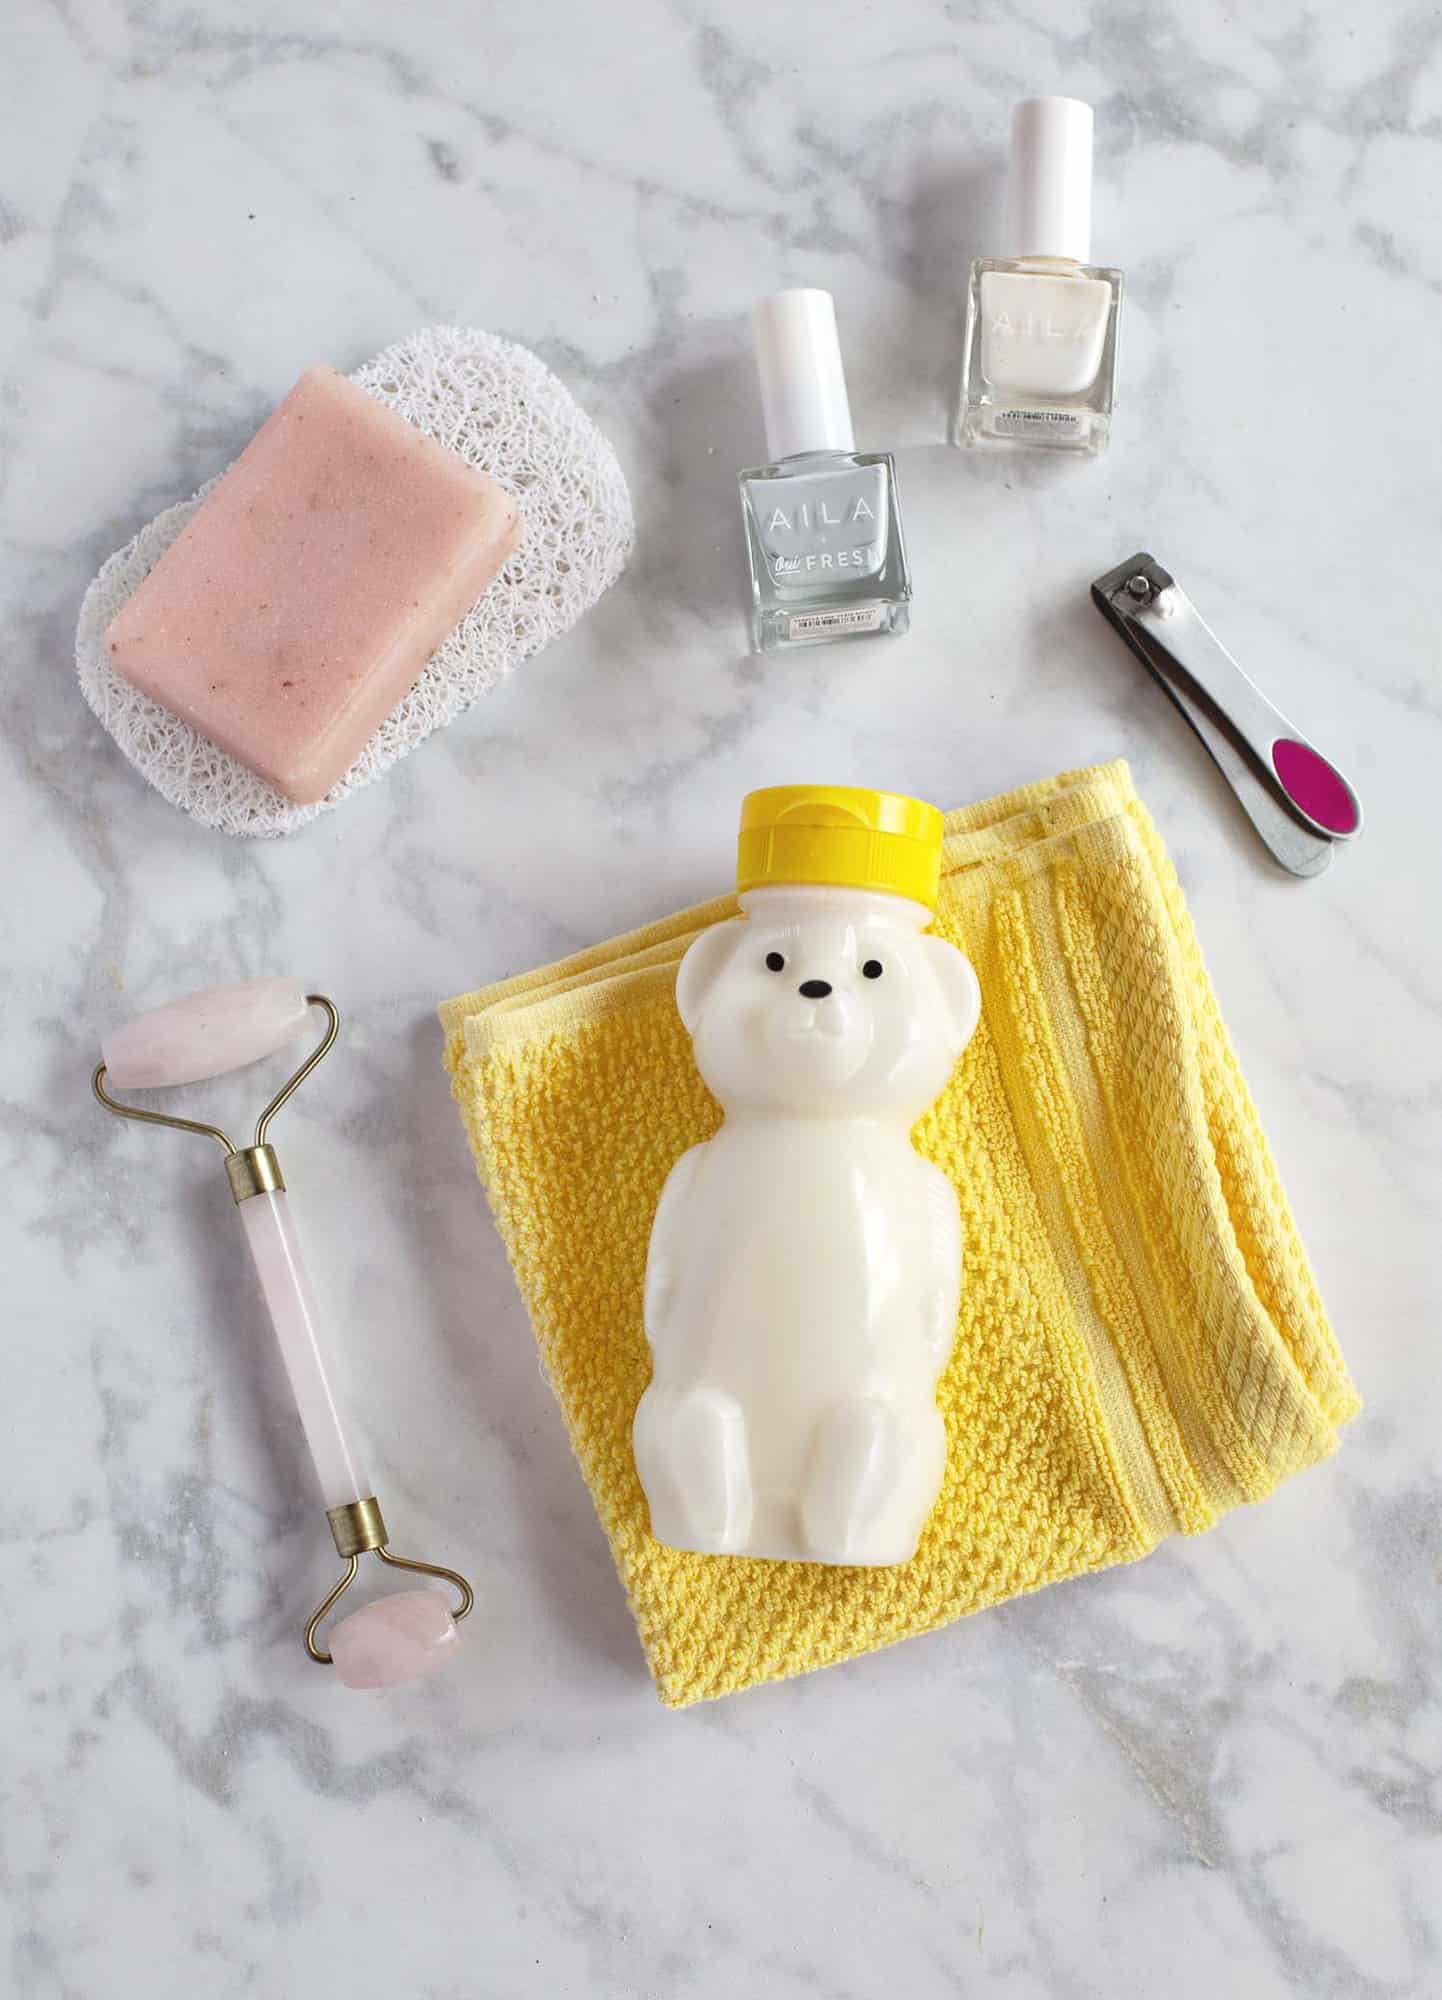 Winter is in full effect in southwest Missouri where I live, and my skin is feeling it! During the winter, I tend to get dry patches on my skin, especially my elbows, knees, and hands.
This winter skin homemade body oil is the perfect remedy. It’s kind of a hybrid between a lotion and a body oil. Here’s what the consistency is like:
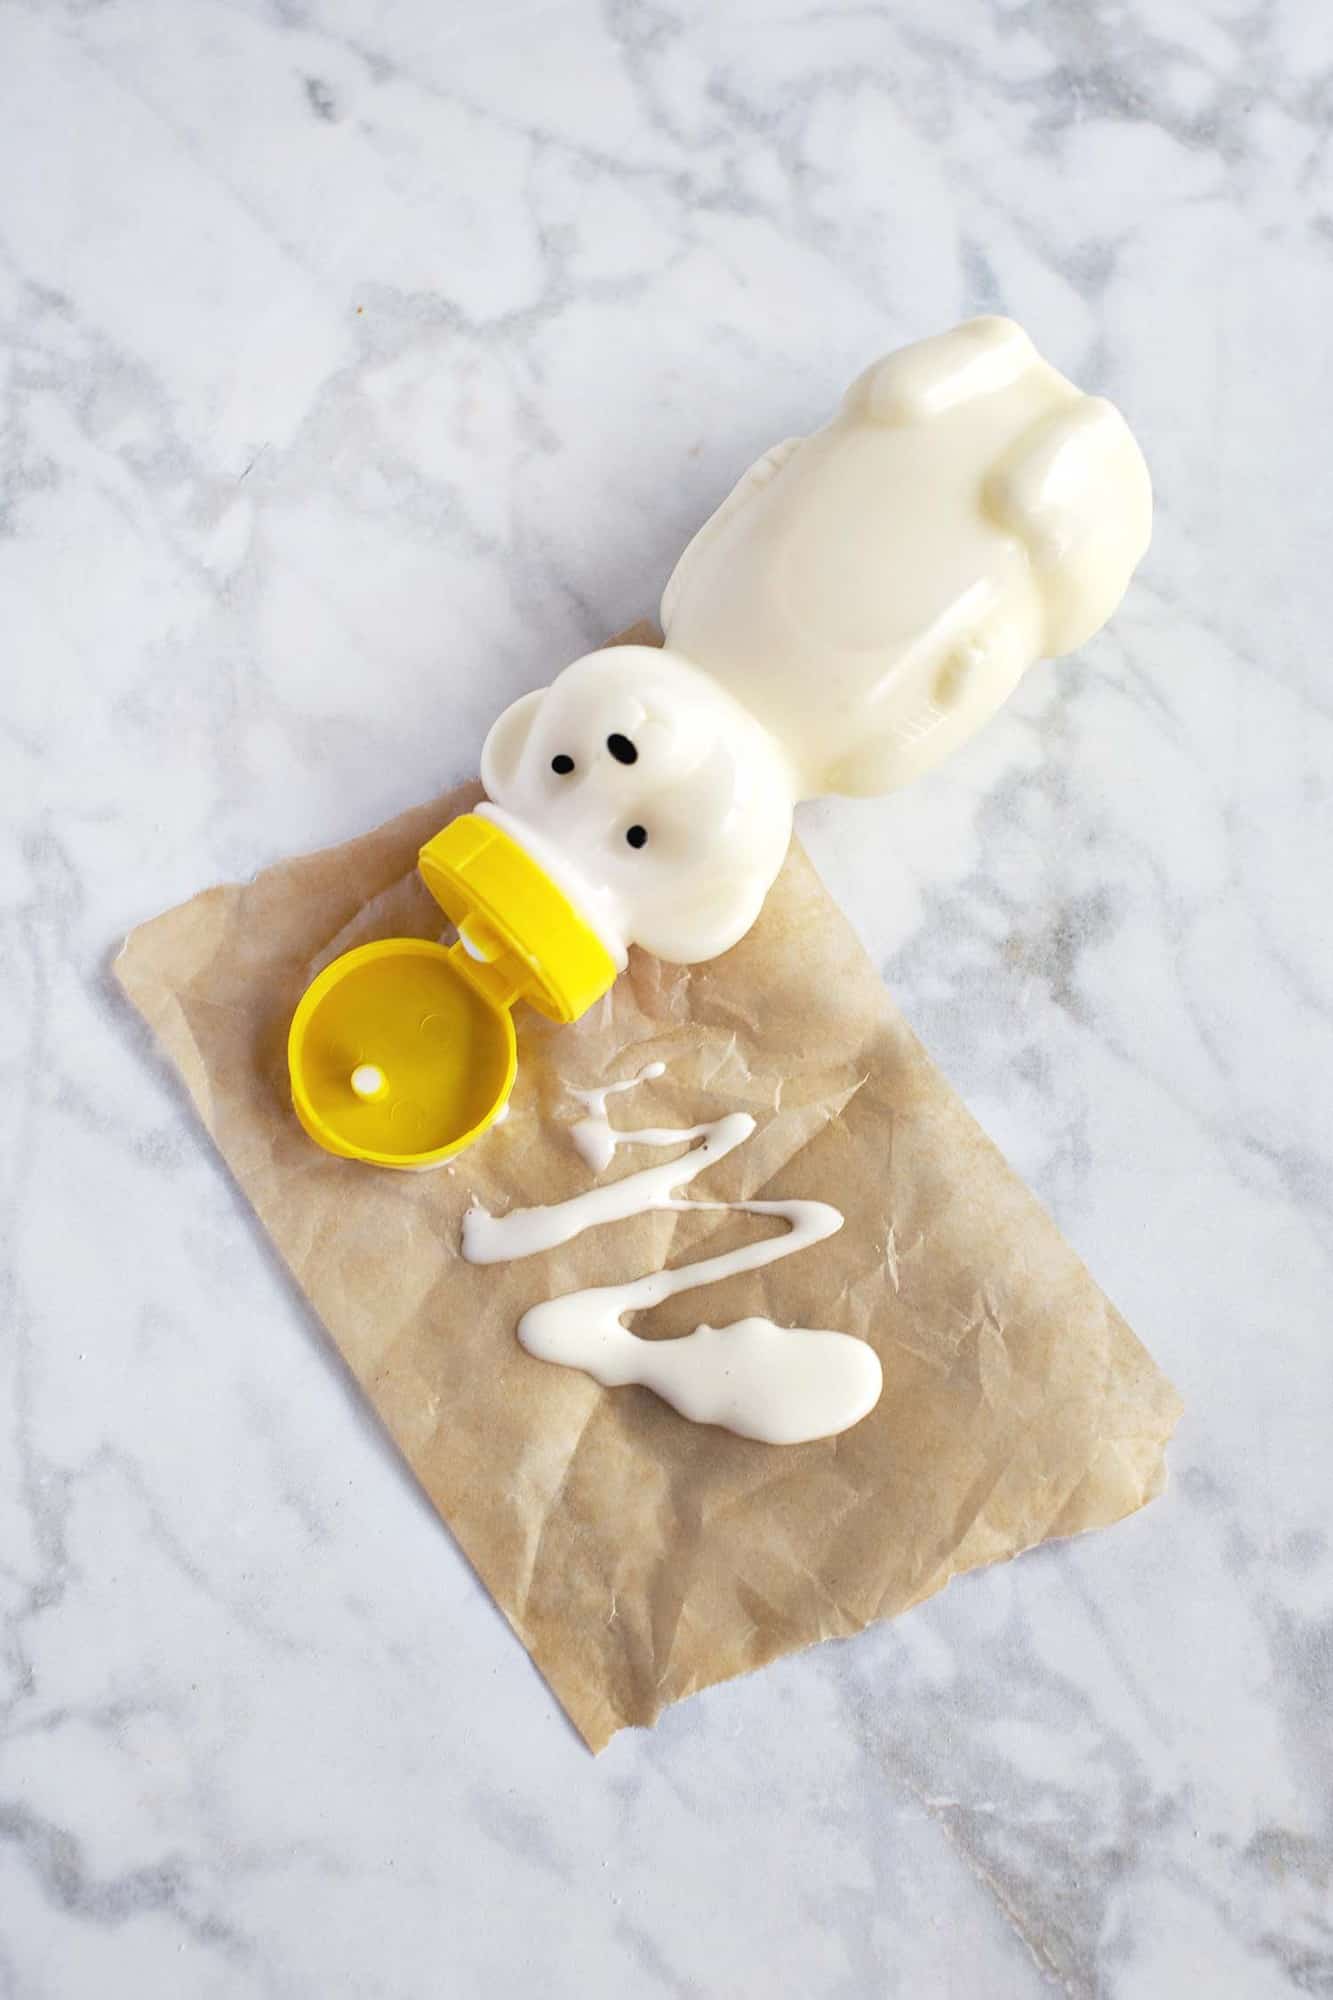 A little bit of this goes a long way! And, I especially love applying some of this to my feet and hands before bed so it can kind of soak in overnight.
I packed my version full of some pretty high end ingredients! You know how you’ll sometimes go to buy a product at the store and see that the first ingredient listed is water? Not so much here. It’s all good things for this homemade body oil.
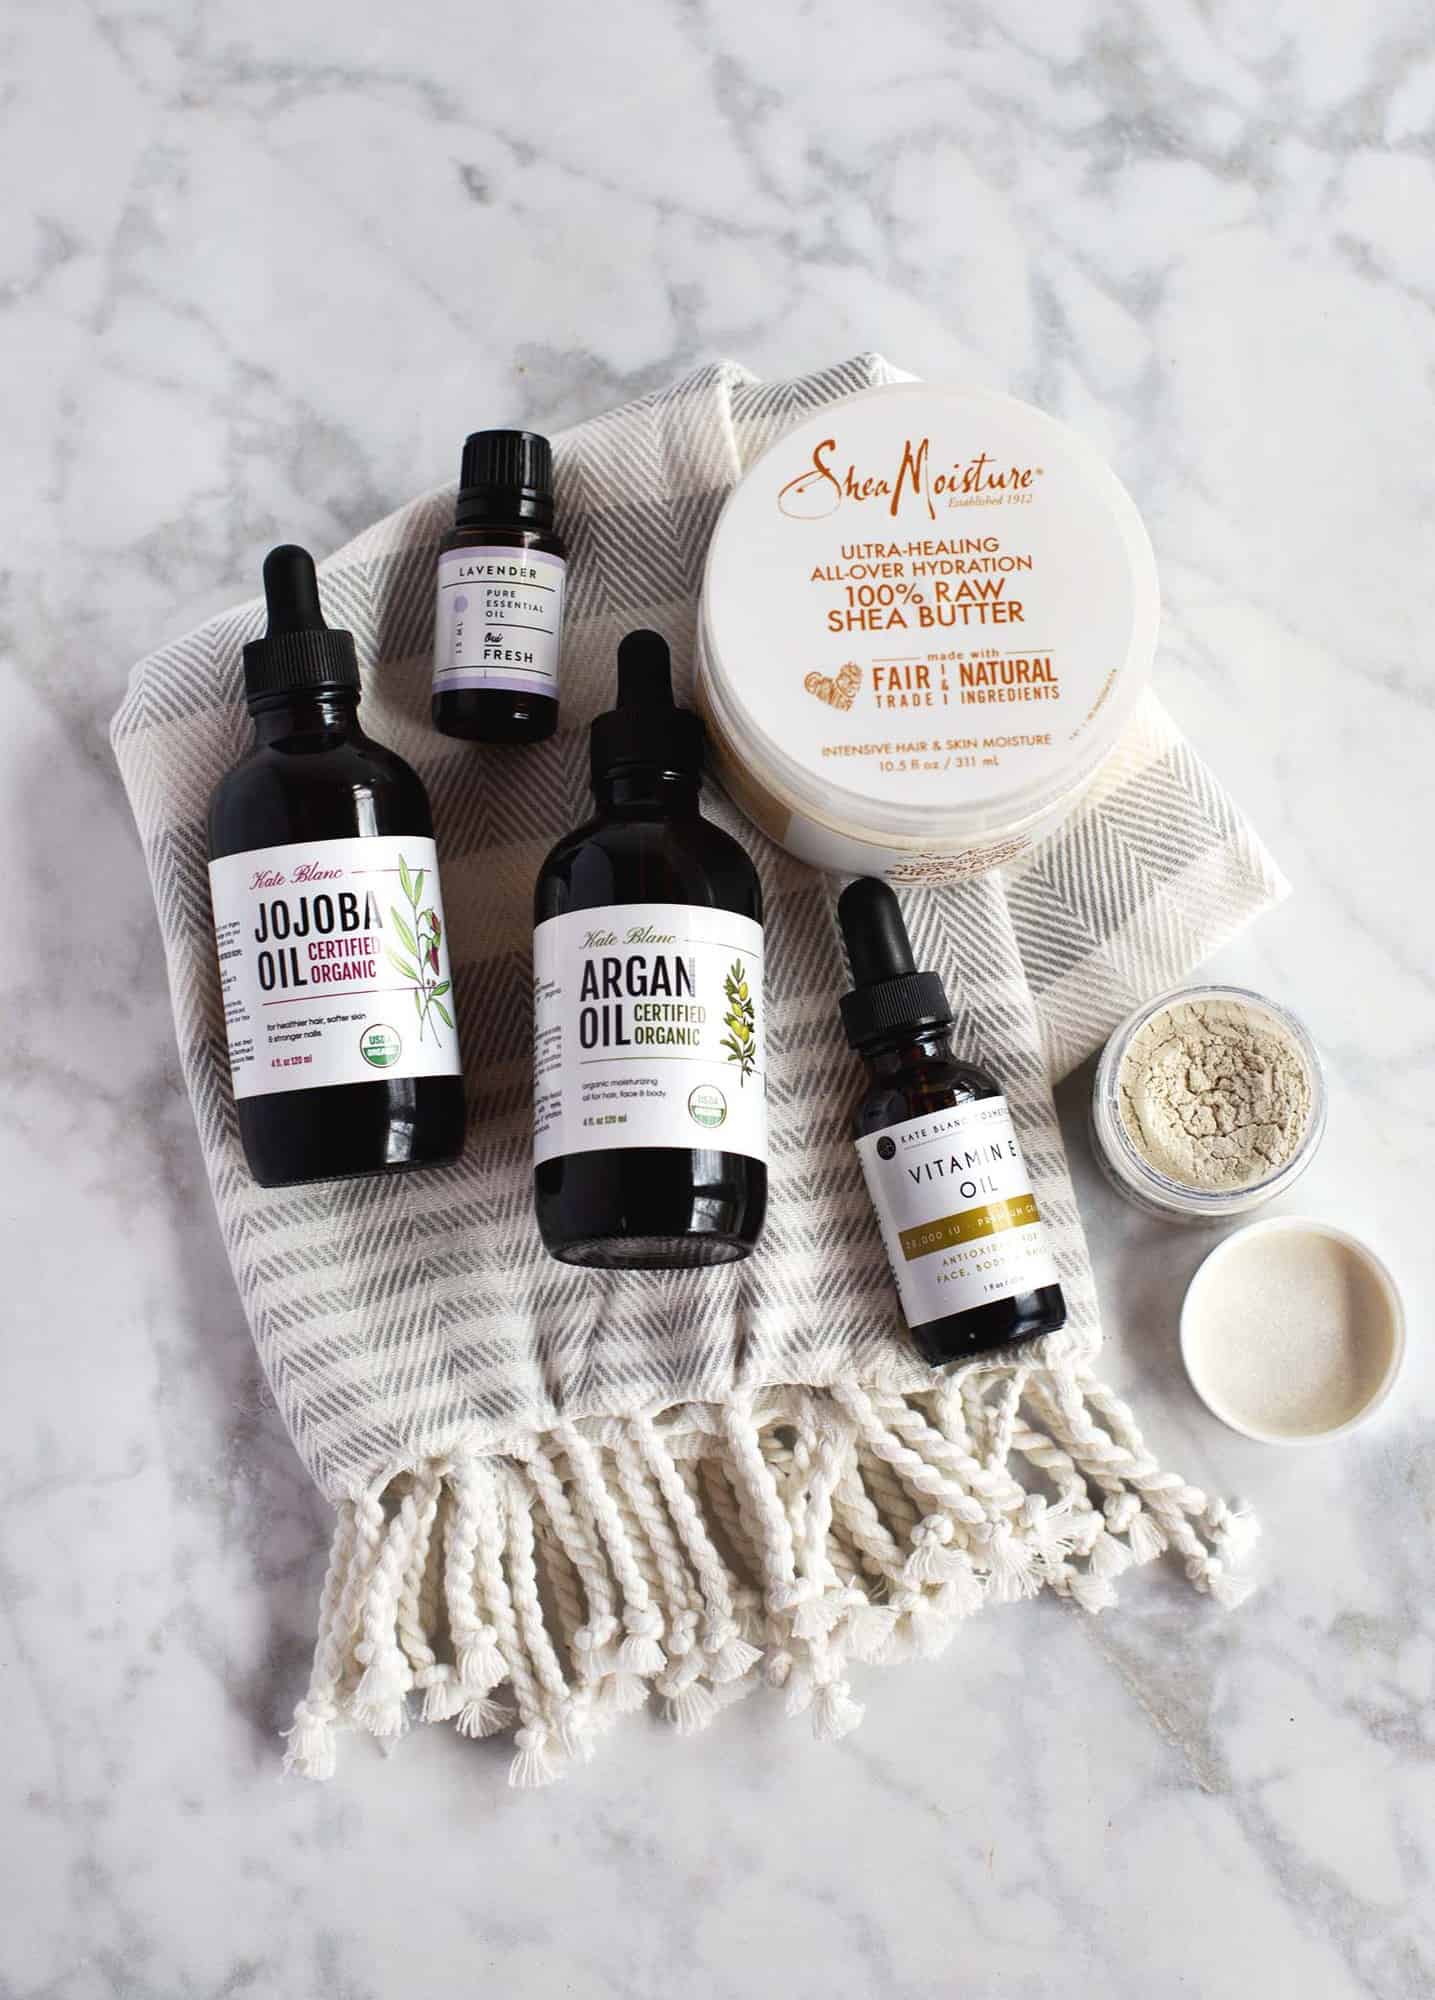 Here’s what I used in my winter skin homemade body oil:
-shea butter
–argan oil
–jojoba oil
-vitamin E oil
–essential oil for scent (lavender)
–mica powder for a little shimmer
You basically want to your body oil to be 1 part shea butter and 1 part oil. You can mix oils (like I did) or swap out the majority for something less expensive like coconut oil or even olive oil, which is still really great for your skin.
I added about 10-15 drops of lavender essential oil and a heaping teaspoon of the mica powder too, but both of those are optional and the oil would still be great without them.
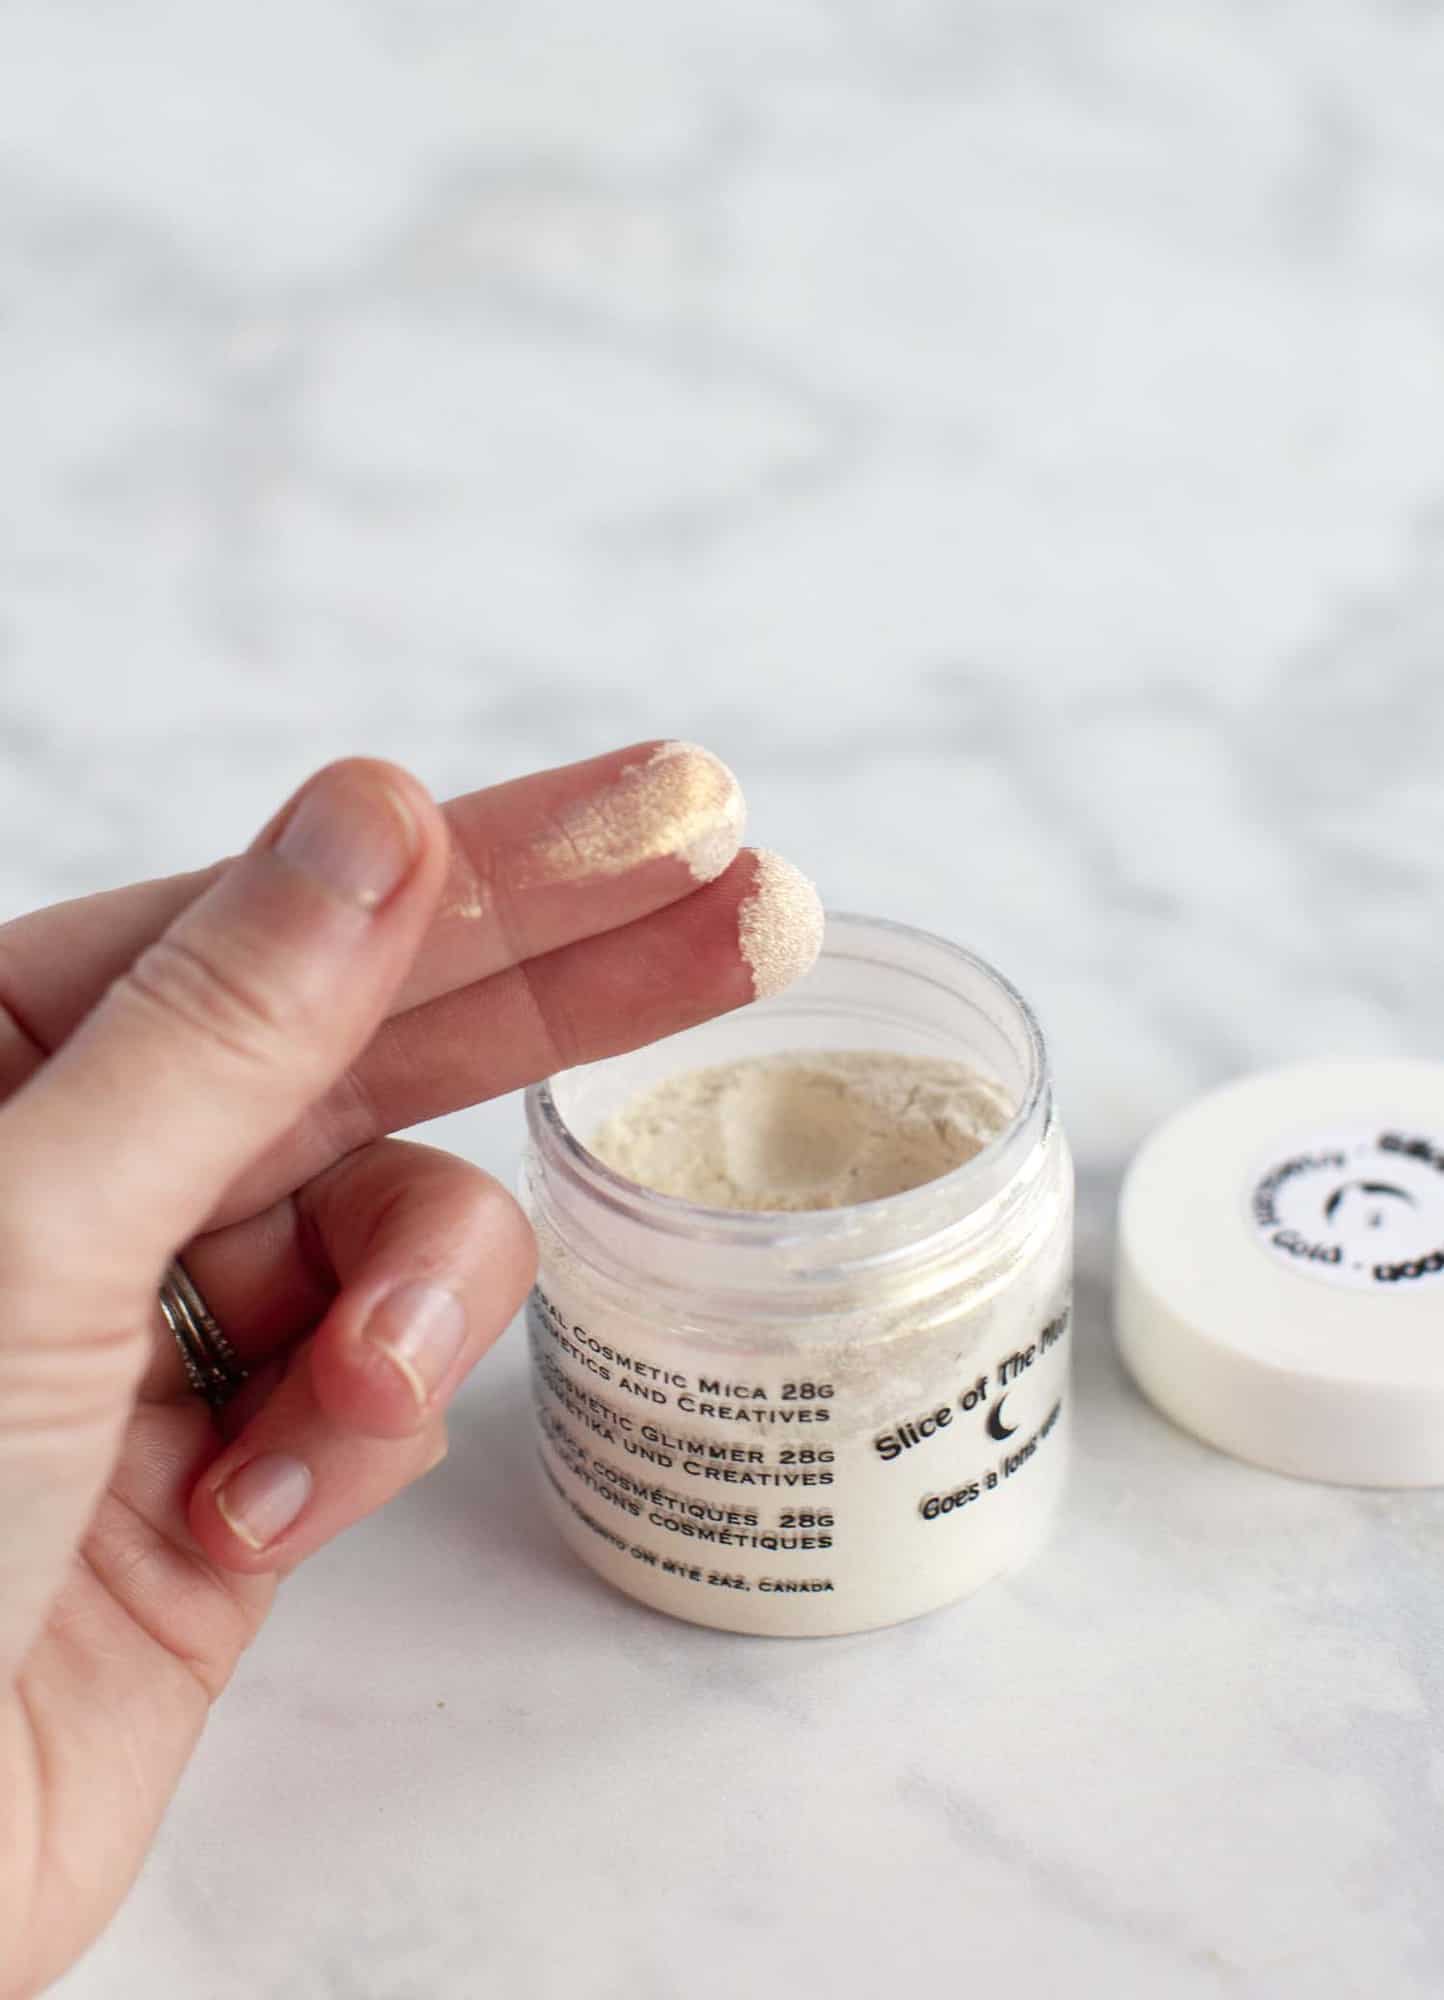 Here’s what the mica powder looks like. It’s actually really great for a little (natural) shimmer or to make DIY makeups with.
Just add all the ingredients to a glass jar and use an immersion blender to blend well until no clumps remain. My homemade body oil has an almost milky color with a kind of pearl shimmer from the mica.
Even though I’m not necessarily using this as a cosmetic (it’s really for dry skin), I do love how pretty and luxurious it looks.
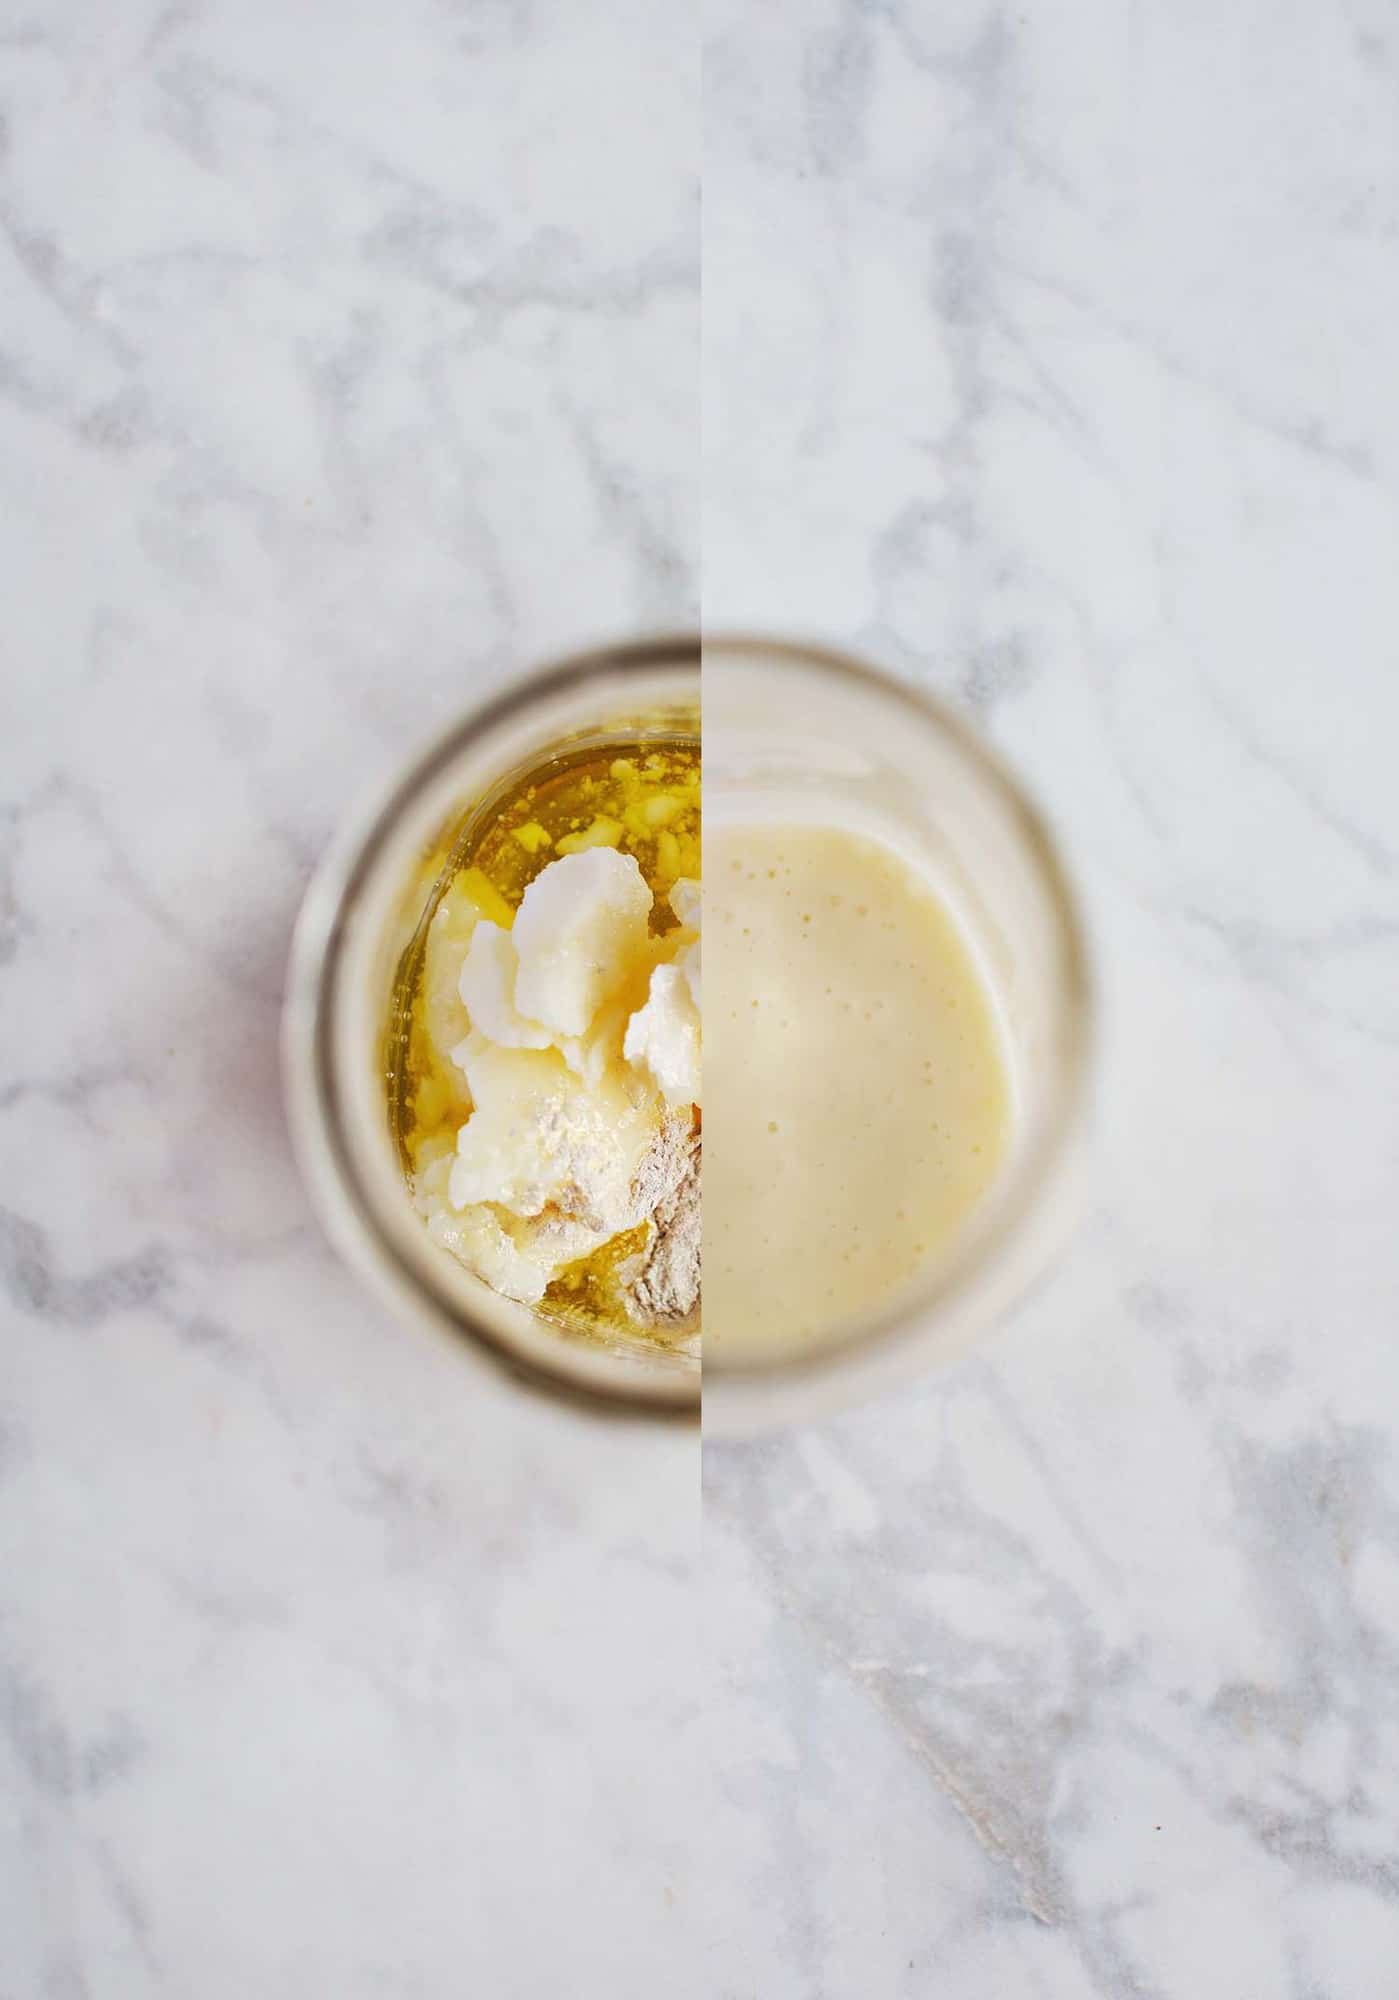 You can simply store it in any airtight container like a glass jar with a lid. But, as with any lotion or body oil, it’s nice to have something with a little spout or pour option.
I found some reusable honey bear containers at a local farming supply store (it’s a long story why I was there, but I thought these would be perfect for homemade lotions and things, so I bought them when I saw them).
But you could absolutely reuse something you may already have in your bathroom or kitchen cabinets or just use a clean glass jar. Hope your skin loves this stuff as much as mine! xo. Emma
P.S. This body oil can separate over time, or in extreme temperatures. If you notice this, just give the container a good shake and things will get blended up again.
]]>