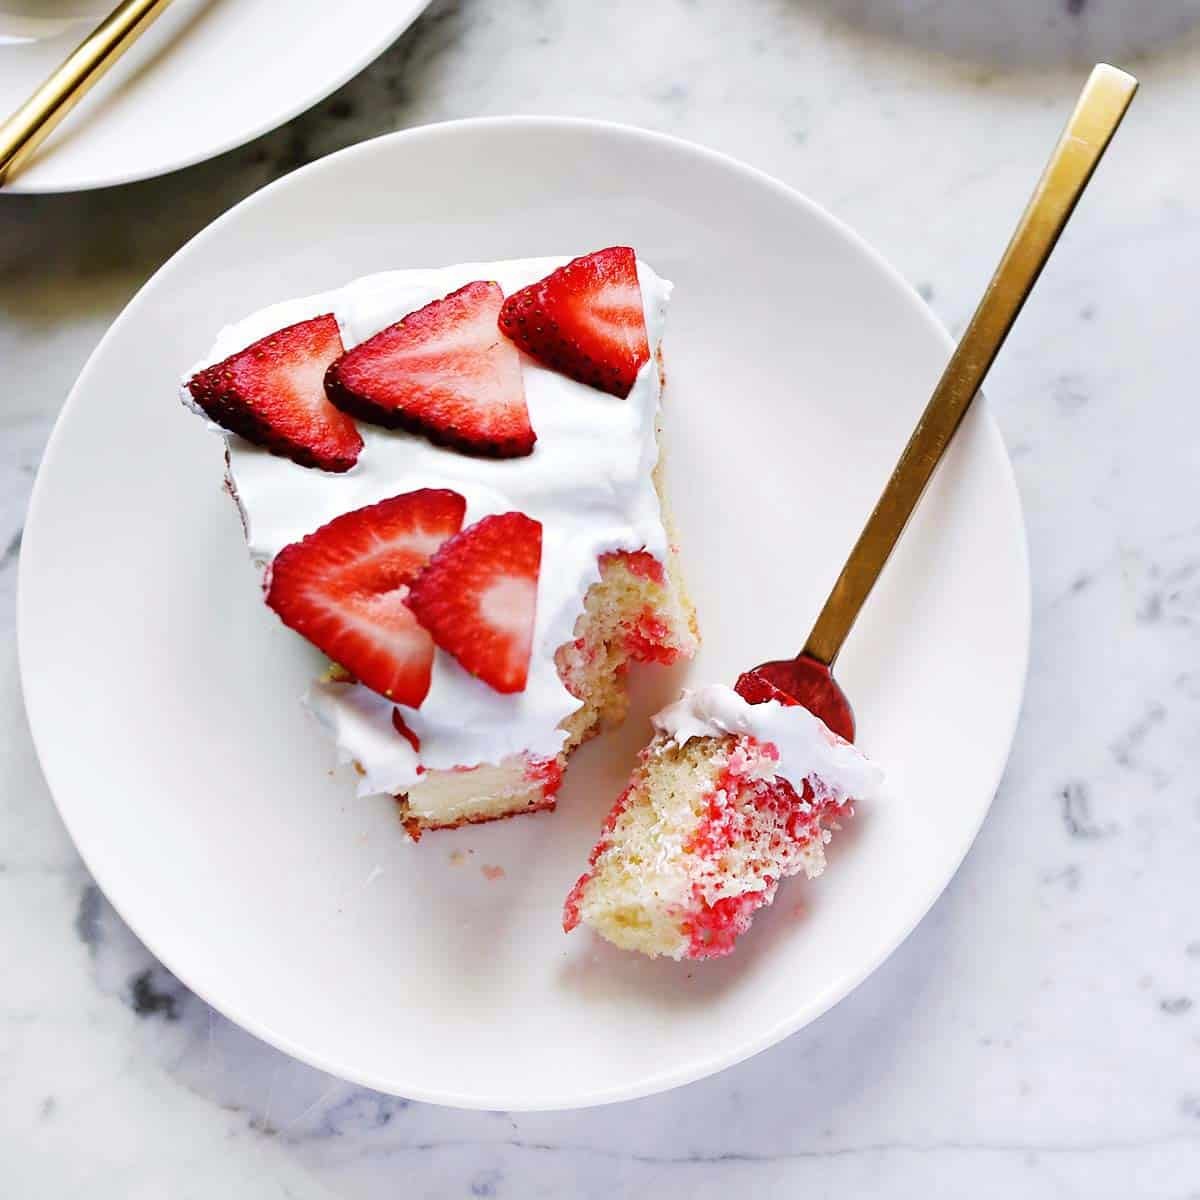
Personally, I like Jello poke cake best during the summer, as the cake gets refrigerated while the Jello sets so the cake is typically served cold. This is also a great cake recipe to turn into an easy flag cake if you need something for a 4th of July or Juneteenth celebration.
Related: If you love this poke cake, then you may also love Jello Salad, Ambrosia Salad, or Red Velvet Cake.
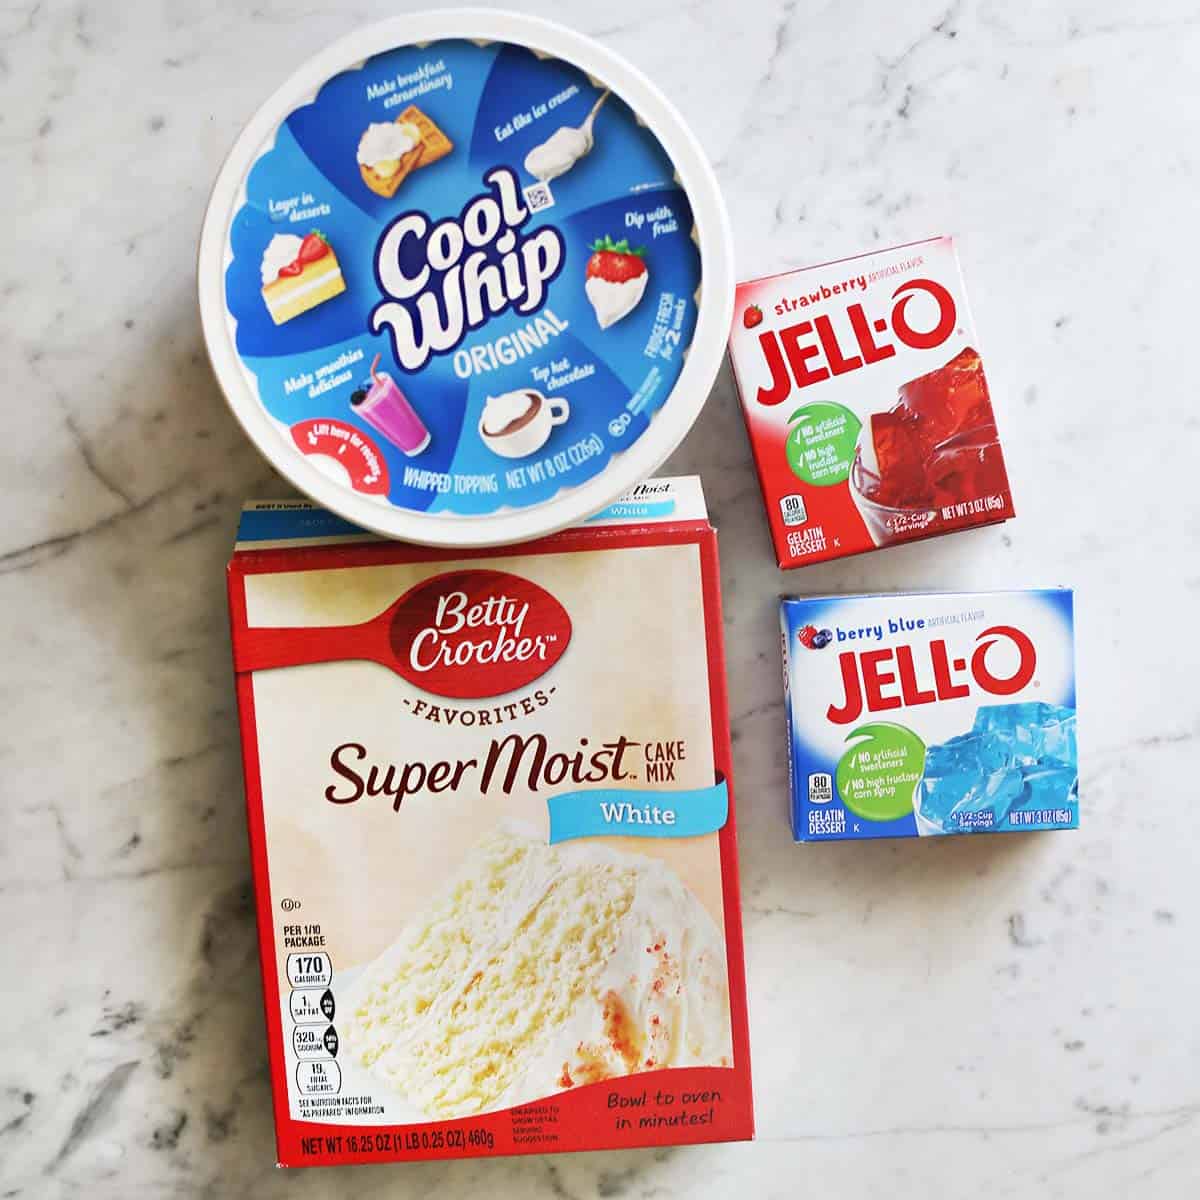
Ingredients
- White cake mix
- Jello mix
- Cool Whip
While these are the three main ingredients you will need, keep in mind the cake mix and Jello mix will require other ingredients. This may vary based on your cake mix brand, but this may include water, oil, eggs, or milk.
If you plan to turn your Jello poke cake into an easy flag cake, you will also need fresh strawberries and blueberries.
Directions
Prepare the cake mix according to the box directions to create a 9×13 cake. Once the cake is baked, remove it from the oven and let it cool in the pan for about 15 minutes.
While the cake is cooling, prepare the Jello mixture. In a heatproof bowl, dissolve the flavored gelatin in 1 cup of boiling water. Stir until the gelatin is completely dissolved. Add 1/2 cup of cold water to the gelatin mixture and stir well.
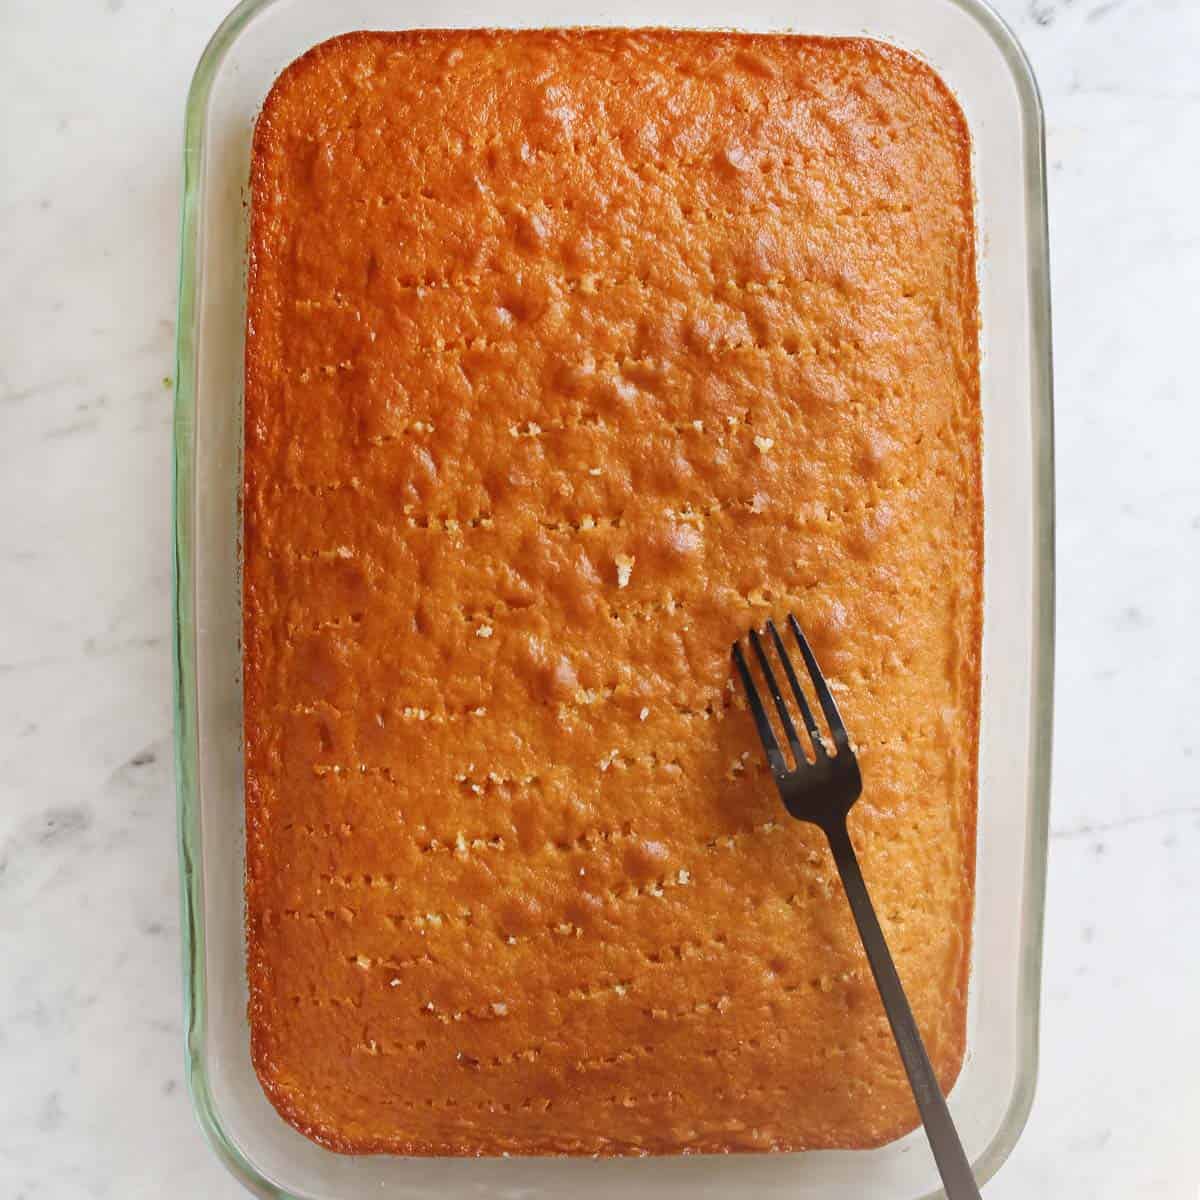
Use a fork to poke holes all over the cooled cake. Then, use a spoon or pastry brush to spoon the Jello mixture on top of the cake so it seeps into the holes.
Refrigerate the cake for 3-4 hours, so the Jello has time to set. Then, top the cake with Cool Whip and serve!
Easy Flag Cake
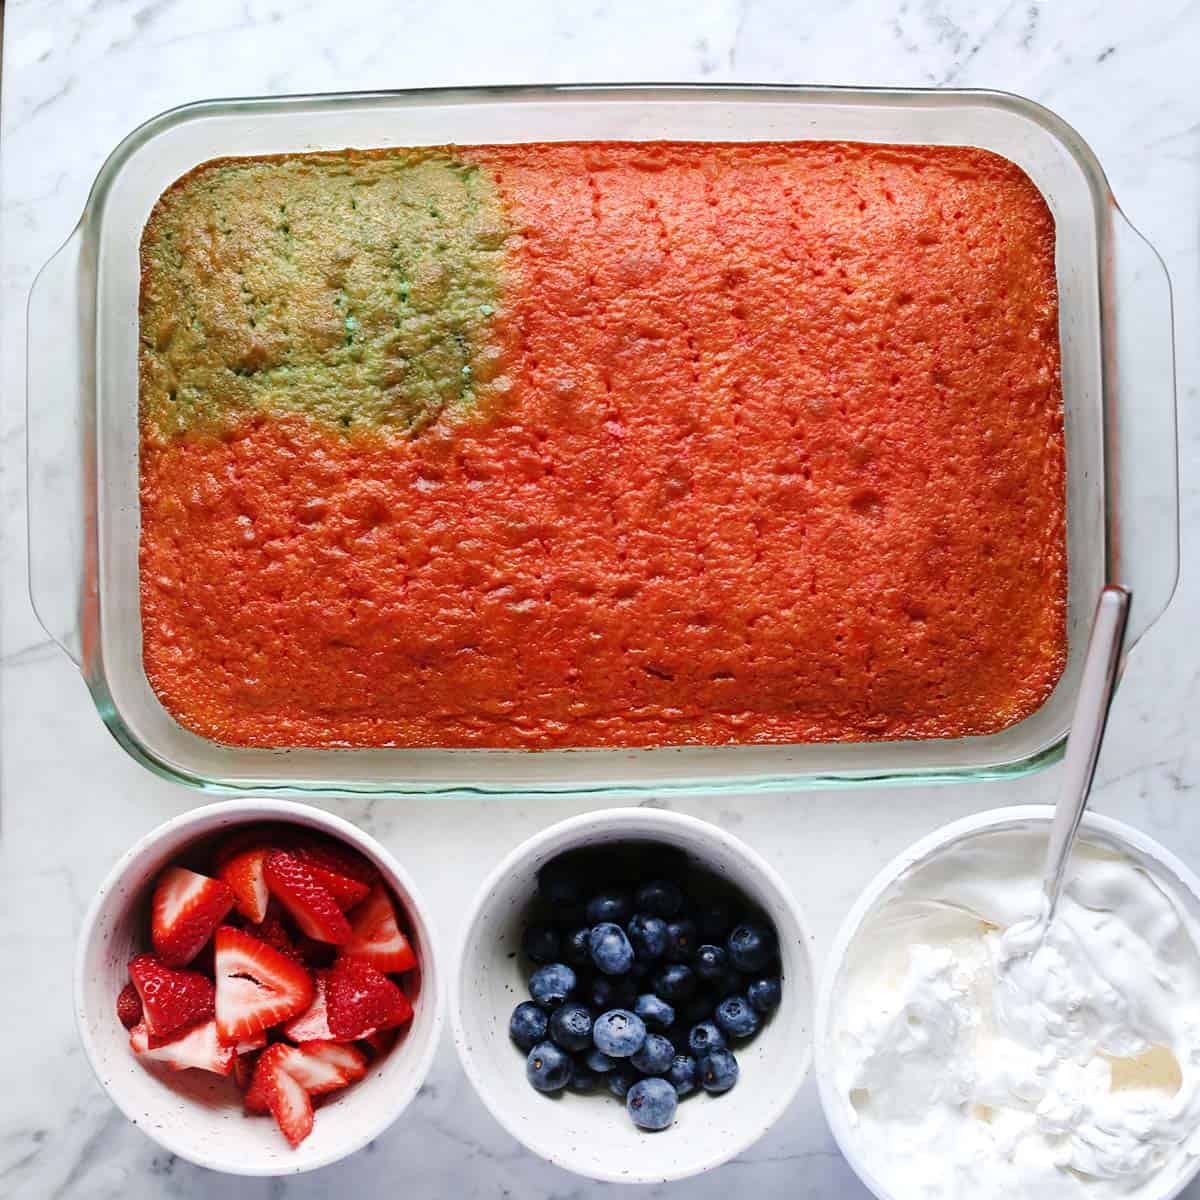
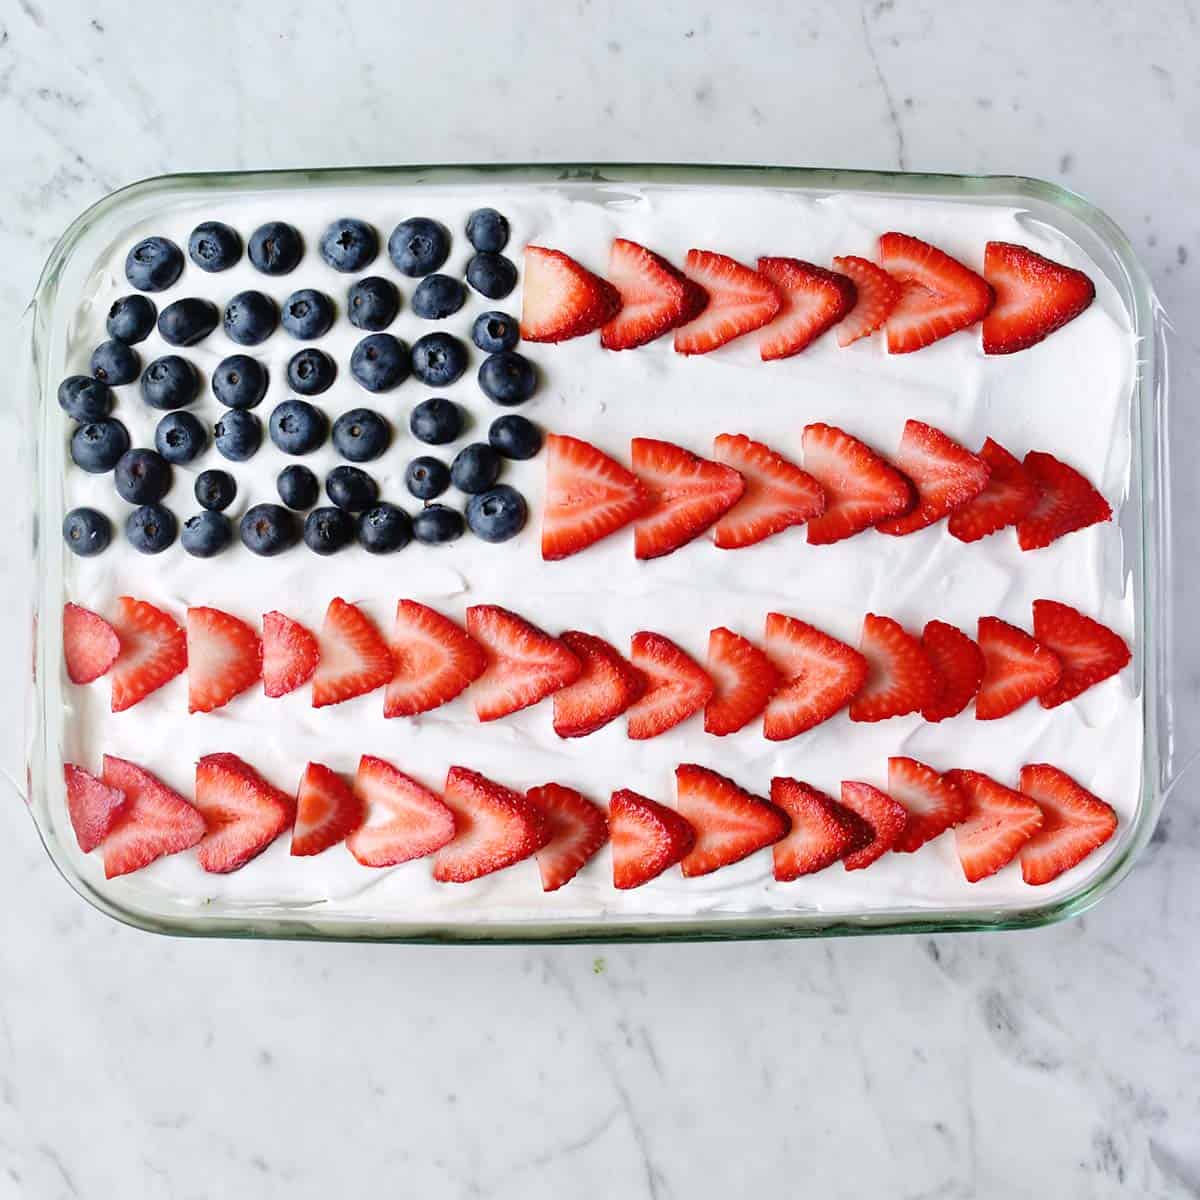
If you want to turn your Jello Poke cake into a an easy flag cake, simply use both red and blue Jello mixes and distribute them over the cake, like an American flag. You won’t use all of the blue Jello mix, so feel free to simply mix up half instead of the entire box.
Once the cake has set and the Cool Whip has been added, top with lines of fresh blueberries and sliced strawberries like an American flag.
Tips & Variations
- You can use any cake mix flavor. Some flavors will go better with certain Jello flavors than others. But any cake mix can become a poke cake. You can also bake a cake from scratch or use a pre-made (not frosted) cake from a bakery.
- Use any flavor of Jello you like! I think lemon or lime would be really fun for summer, too.
- You can use other frosting beyond Cool Whip (whipped topping) like cream cheese frosting or buttercream.
- Fresh fruit is optional as a topping, but I think it makes this Jello poke cake recipe feel more festive and finished.
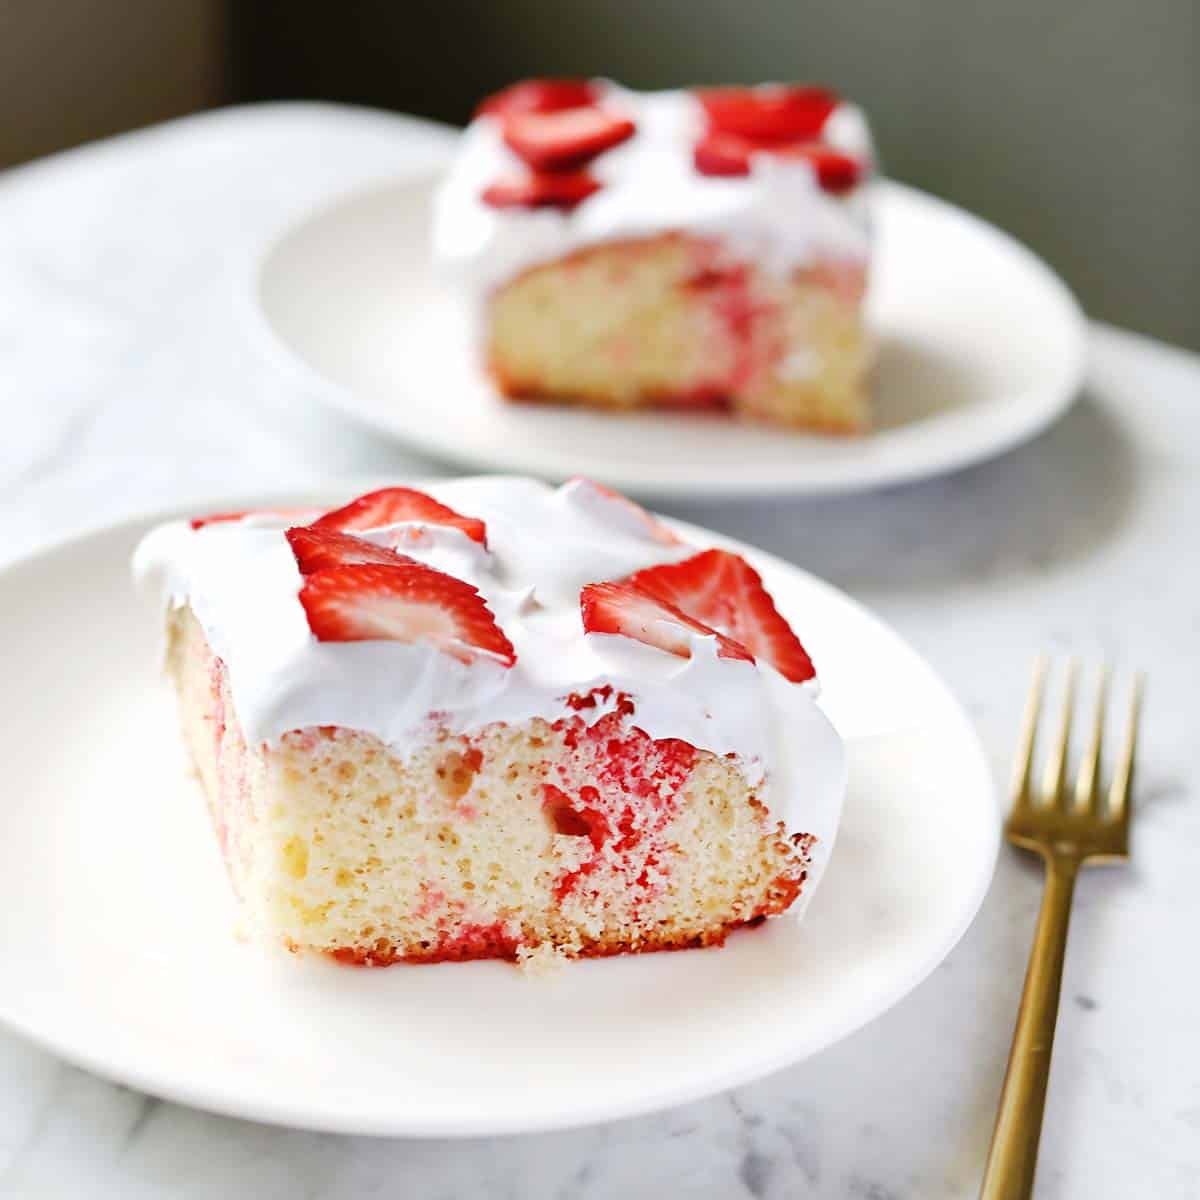
Making a Jello poke cake is a delightful way to elevate a simple cake into a visually stunning and delicious dessert. With its vibrant colors and fruity flavors, it’s bound to be a hit at any gathering.
The best part is you can customize it to your liking by choosing different flavors of cake and Jello. Happy baking!

Jello Poke Cake
Equipment
- 1 oven
Ingredients
- 1 box white cake mix
- 3 ounces box Jello mix
- 8 ounces whipped topping Cool Whip
Instructions
- Prepare the cake mix according to the box directions to create a 9×13 cake. Once the cake is baked, remove it from the oven and let it cool in the pan for about 15 minutes.
- While the cake is cooling, prepare the Jello mixture. In a heatproof bowl, dissolve the flavored gelatin in 1 cup of boiling water. Stir until the gelatin is completely dissolved.
- Add ½ cup of cold water to the gelatin mixture and stir well.
- Use a fork to poke holes all over the cooled cake.
- Then, use a spoon or pastry brush to spoon the Jello mixture on top of the cake so it seeps into the holes.
- Refrigerate the cake for 3-4 hours, so the Jello has time to set.
- Then top the cake with Cool Whip and fresh berries if using and serve!
Notes
- While these are the three main ingredients you will need, keep in mind the cake mix and Jello mix will require other ingredients. This may vary based on your cake mix brand, but this may include water, oil, eggs, or milk.
- If you plan to turn your Jello poke cake into an easy flag cake, you will also need fresh strawberries and blueberries.
- Jello poke cake can be stored covered in the refrigerator for 2-3 days after making.
Nutrition
Similar to the Shirley Temple it’s simply a lot more fun to order a drink named after a famous actor than a basic cola with grenadine. Roy Rogers, known as King of the Cowboys, called this one of his favorite drinks. The Roy Rogers mocktail is a non-alcoholic mixed drink that tastes like a cherry coke.
Related: Shirley Temple Drink, Butterbeer, Virgin Mojito, Arnold Palmer, Wendy’s Frosty, Cherry Limeade, Homemade Fruit Punch, Agua Fresca and Easy Homemade Grenadine.
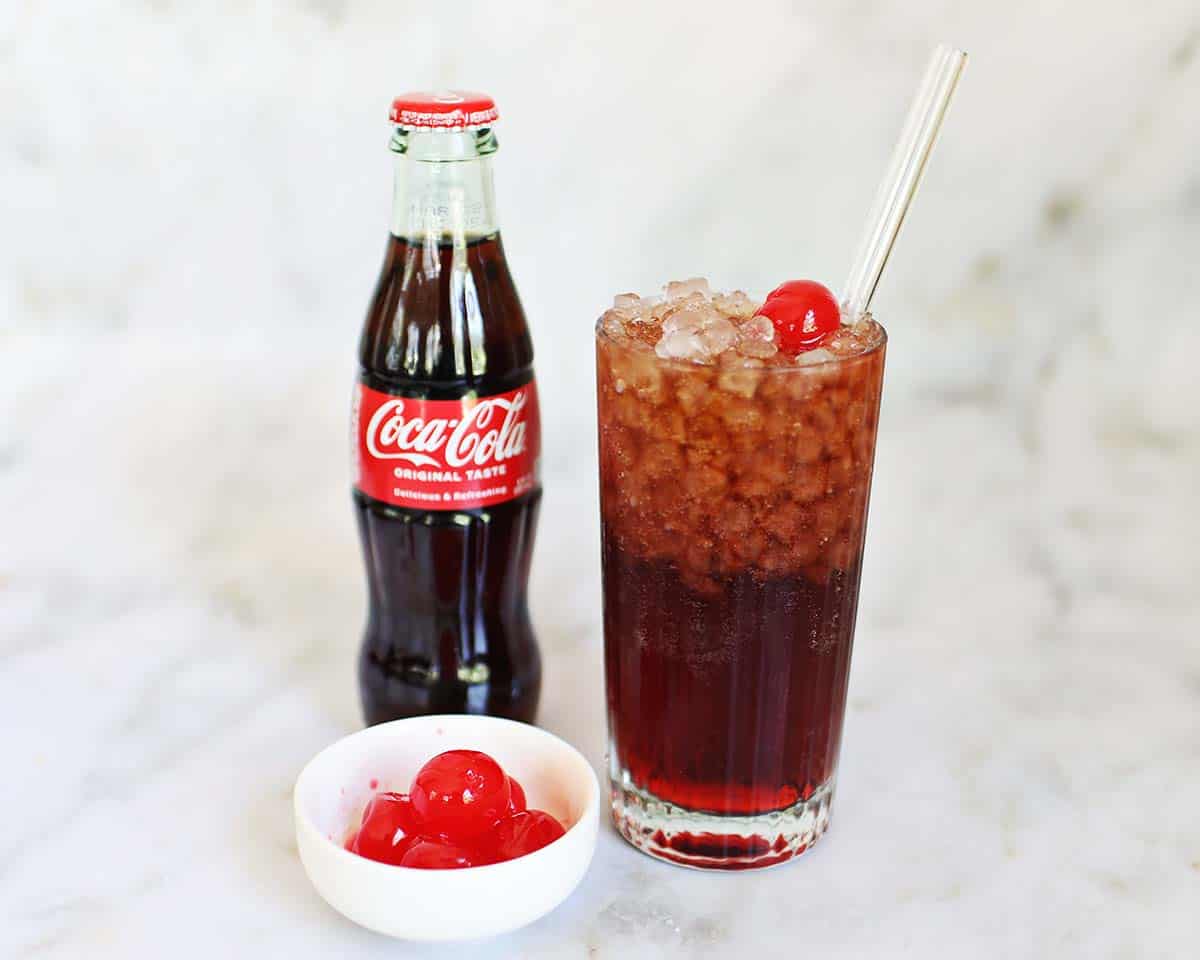
Table of Contents
Roy Rogers Drink – A Brief History
The Roy Rogers drink has always been an alcohol-free drink, and it’s a drink you could have ordered at an old-fashioned soda shop.
The famous mocktail was named after Roy Rogers, who acted in western films and musical cowboy movies in the 1940s and 1950s. Roy Rogers didn’t drink alcohol, so it makes sense that he had a soda drink named after him.
The drink originally became famous in 1950s soda shops and in time has become an iconic mocktail to order when you want a fun drink that doesn’t contain alcohol.
Like the Shirley Temple, it’s a fun sounding drink to order to feel fancy (something my 5- and 8-year-old daughters love to do in restaurants!). Let yourself feel fancy, we say!
What is in a Roy Rogers Drink?
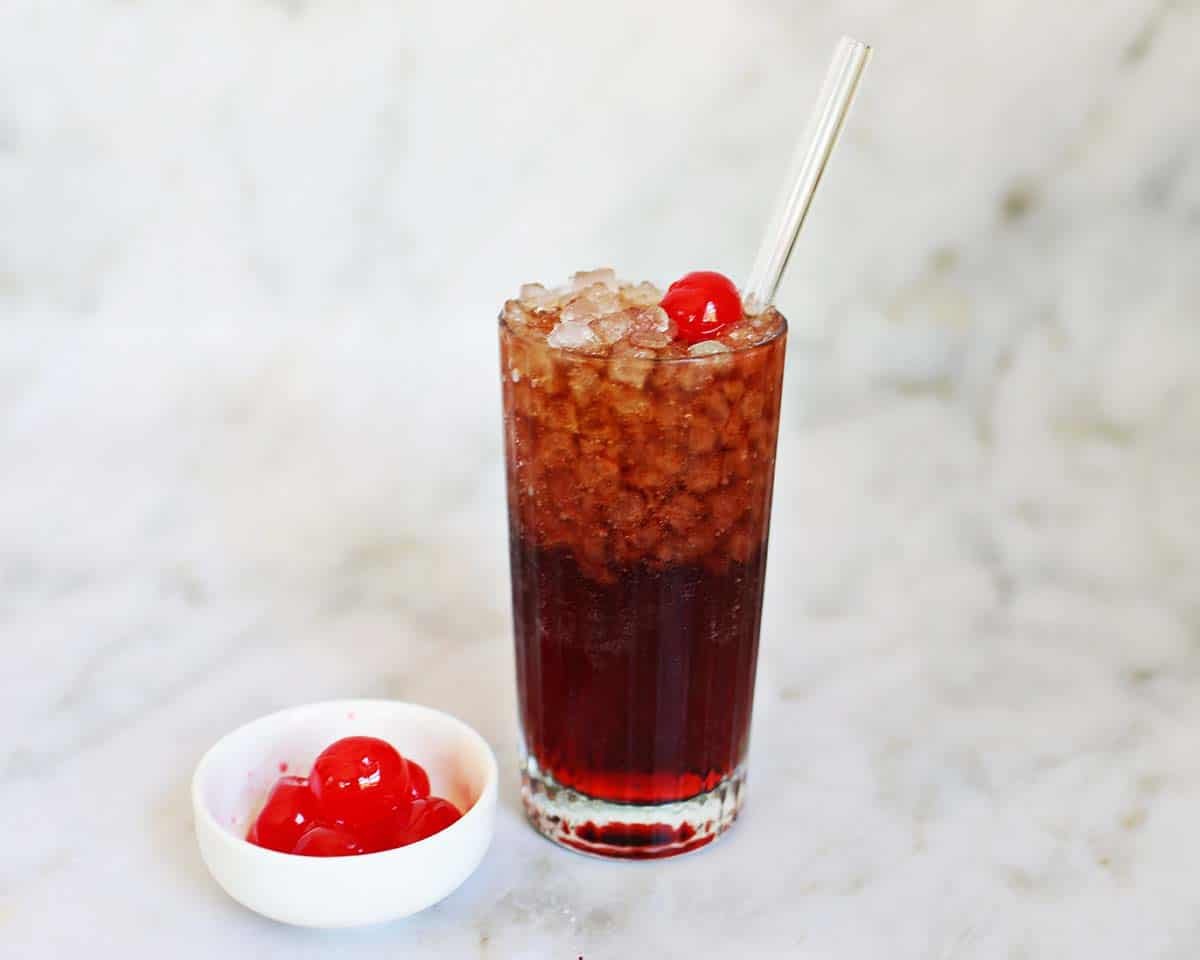
- Cola – I used Coca-Cola since it’s classic and so delicious. You can also choose a sugar free or organic cola if you like.
- Grenadine Syrup – You can buy grenadine syrup at many stores, and we also have an easy recipe to make your own grenadine (it’s a syrup made with pomegranate juice that is a bright red color).
- Maraschino Cherry – A must! Use one or a few.
- Ice Cubes Pebble or crushed ice is perfect if you have it.
The best glassware option to serve a Roy Rogers in is a collins glass or a highball glass. I also love to use glass straws for my homemade drinks.
How to Mix a Roy Rogers
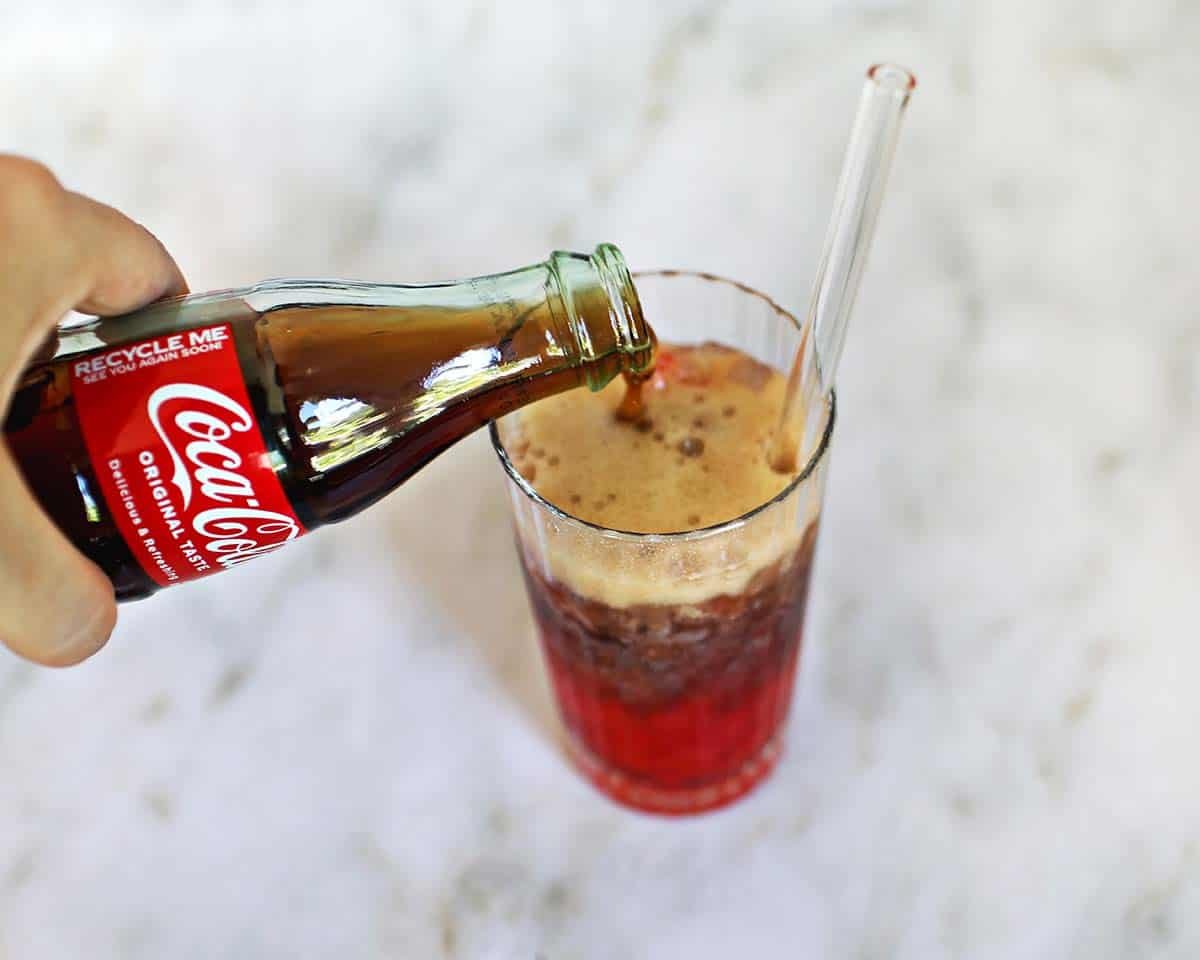
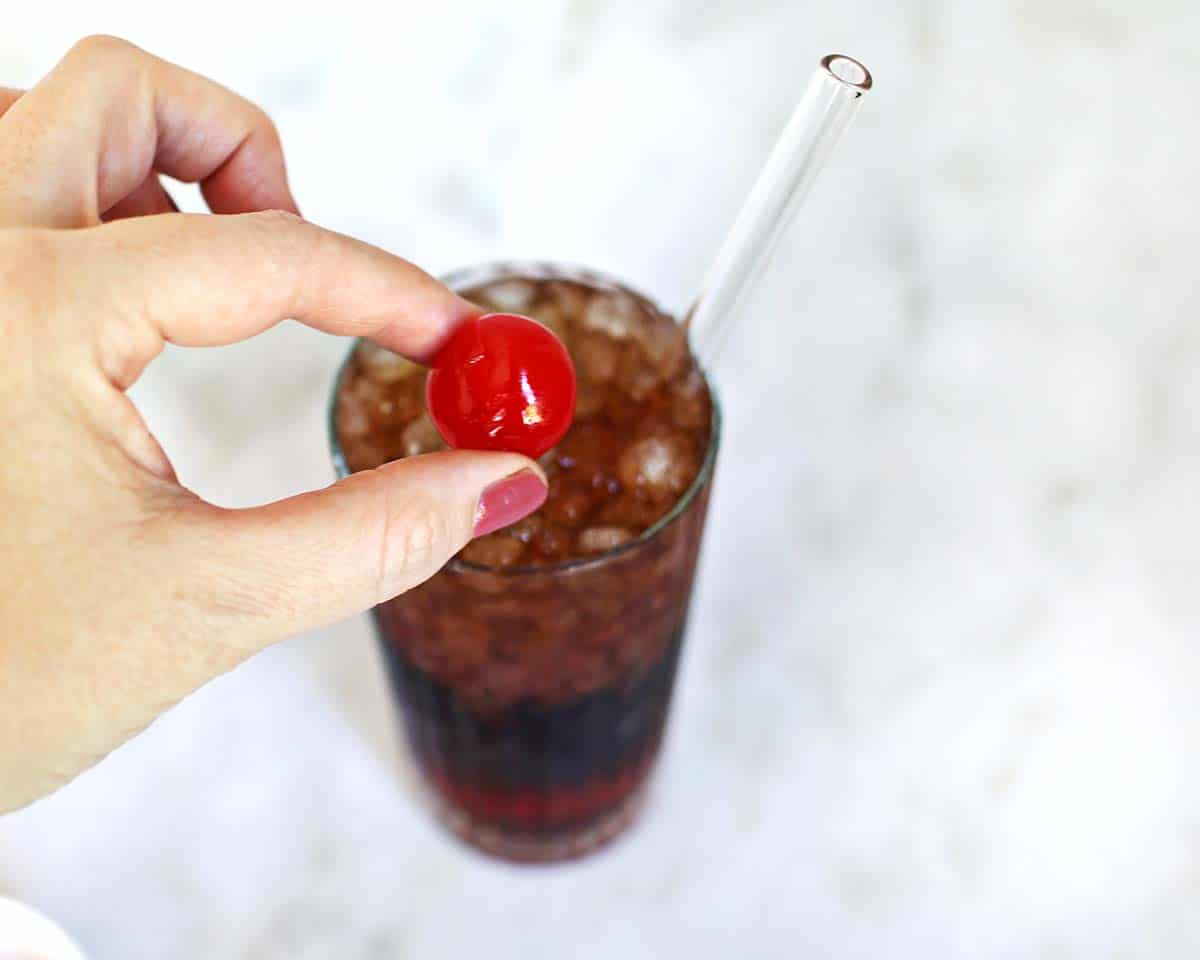
Fill a cup with ice and add half an ounce of grenadine to one ounce if you want it very sweet.
Pour cola to top it off. Give it a gentle stir with a straw to mix.
Garnish with a nice bright red maraschino cherry and your work here is done. Enjoy!
Tips for Making
- Add lime To make a more balanced version add just half an ounce of grenadine and the juice of half a lime. This will balance some of the sweetness with acidity and you will taste a bit more tartness.
- Fresh mint Add fresh mint as a garnish to enhance the sensory experience of this soda drink.
- Roy Rogers cocktail If you are dead set on turning this into a cocktail, keep the lime and add two ounces of dark rum, whiskey or vodka. You can use a shot of liquor of your choosing. If you add a shot of vodka Roy Rogers himself may not approve, but we won’t judge.
- Organic Cola If you want to make a healthier version with less sugar, try substituting cola for a prebiotic drink such as Olipop or Poppi.
More Recipes to Try:
- Pizza– Deep Dish Pizza Recipe, Chocolate Chip Pizza, Pizza Dough, Pizza Sauce
- Appetizers– Pinwheel Sandwiches, 30+ Finger Foods for a Party
- Non-Alcoholic Drinks– We love an easy mocktail! Orange Julius, Pumpkin Juice, Italian Soda, Bubble Tea, Root Beer Float, More Mocktail Recipes.
- Desserts– Kool-Aid Pie, Chocolate Cake Pops, Chocolate Covered Strawberries
FAQ
Frequently Asked Questions
Does a Roy Rogers drink contain alcohol?
Nope! Roy Rogers didn’t drink alcohol and his namesake drink is a classic soda shop drink that over time has become a classic mocktail as well.
What’s in a Roy Rogers drink?
Cola, grenadine syrup, maraschino cherry, and ice.
What is grenadine made of?
Grenadine is made of pomegranate juice, sugar and orange flower water. See our homemade grenadine recipe for more.
Roy Rogers Drink
Instructions
- Fill a cup with ice and add half an ounce of grenadine to one ounce if you want it very sweet.
- Top it off with cola. Stir well.
- Garnish with a nice bright red maraschino cherry and serve immediately.
Notes
- To make a more balanced “adult version,” add just half an ounce of grenadine and the juice of half a lime. This will balance some of the sweetness with acidity and is delicious.
- Add fresh mint as a garnish to enhance the sensory experience of this soda drink.
- If you are dead set on turning this into a cocktail, keep the lime and add two ounces of dark rum or whiskey. I don’t think Roy Rogers would approve, but if you must, you must. We won’t judge!
Nutrition
This is a dessert that I had a lot growing up—for whatever reason, it stands out in my mind as something that was made at church get-togethers. It’s funny the little things we remember.
Eclair cake is a spin on the classic French pastry. Eclairs are made of a (baked) choux dough filled with pastry cream, and then topped with a flavored icing (often chocolate). The cake version is layers dough/crust and pastry cream all topped with a chocolate ganache.
This chocolate eclair cake is a no-bake version, so it’s not made with the classic choux dough. If you’re looking for an eclair cake that more closely resembles a classic eclair, try this recipe from Food52.
Related: No-Bake Chocolate Silk Pie, No-Bake Banana Cream Pie, and 30+ Easy No-Bake Desserts.
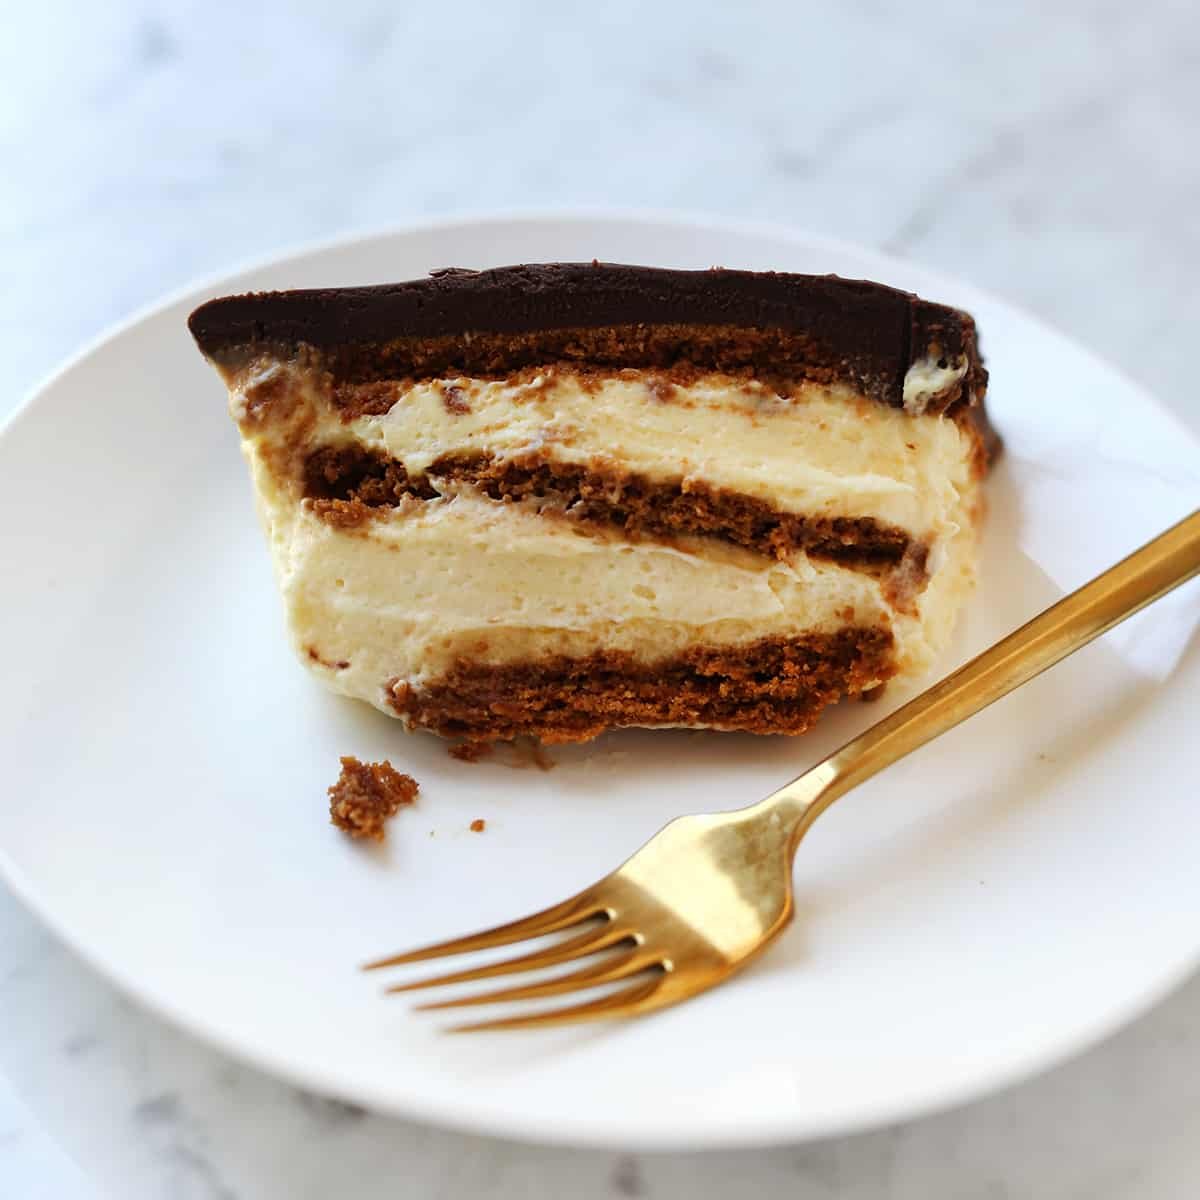
This eclair cake recipe is the easiest version I know—but it’s still very delicious. I recently made this for a group of friends and I’m happy to report this cake got rave reviews.
In addition to being easy to make, I also love that you can make this cake ahead. It’s best to make this at least eight hours before you plan to serve it, and up to 24 hours.
So, you can make this cake the morning before or even the night before a big dinner party.
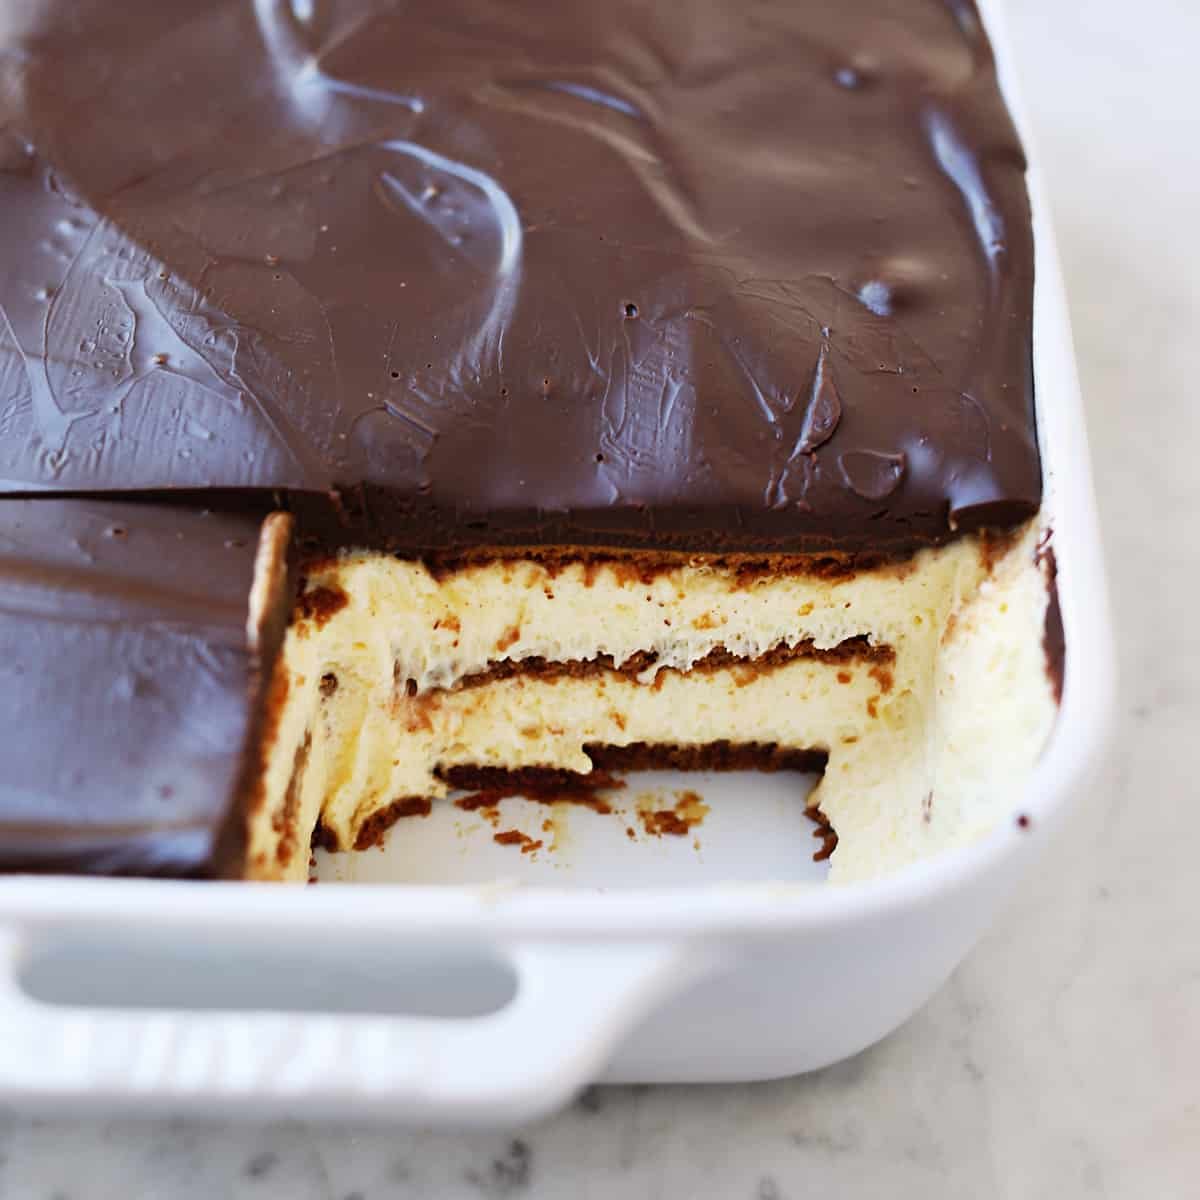
What is Eclair Cake Made of?
- Crust – Graham crackers, vanilla wafers, or Biscoff cookies are my favorites to use.
- Pudding – I use both French vanilla and cheesecake-flavored puddings.
- Whipped cream – You can use Cool Whip or make your own whipped cream.
- Chocolate ganache – Chocolate chips and heavy cream OR you can use chocolate frosting
Although my version here is super simple, there are ways to make this recipe even easier as noted above in the ingredients list.
However, I think the version you will find below (in the printable recipe card) is the perfect mix and creates a truly delicious eclair cake while still being a no-bake dessert.
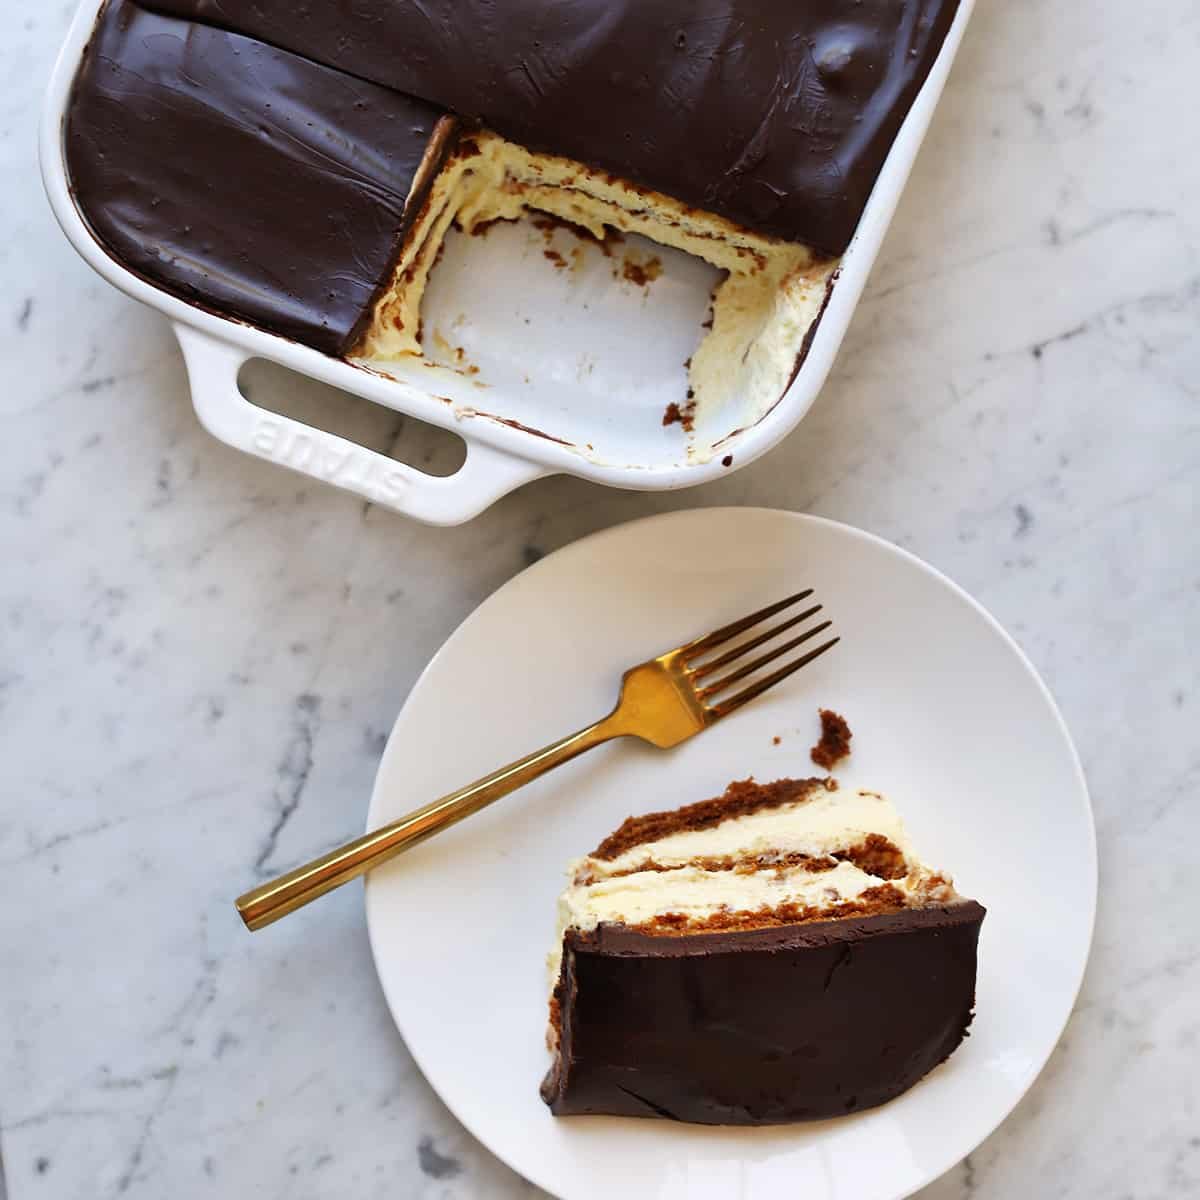
Other No-Bake Desserts You Will Love:
- No-Bake Peanut Butter Pie
- No-Bake S’mores Icebox Cake
- Chocolate No-Bake Cookies
- No-Bake Cherry Cheesecake
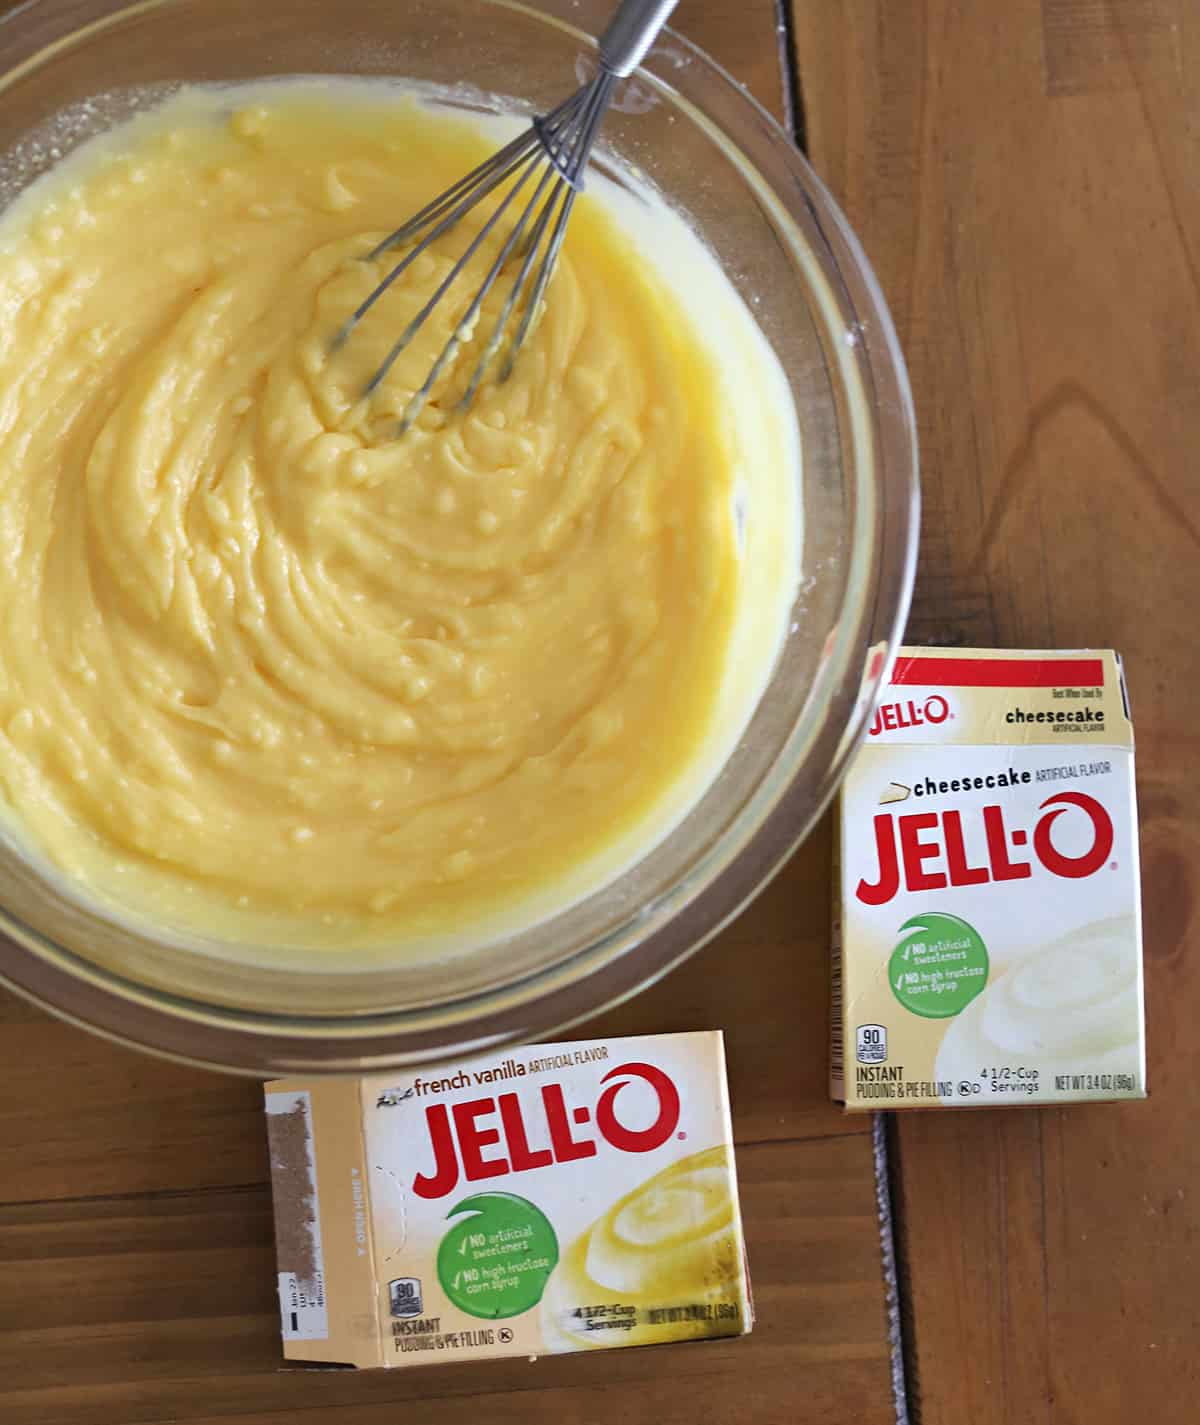
The filling is made of instant pudding and homemade whipped cream. I like to use one French vanilla and one cheesecake pudding mix. If you can’t find cheesecake pudding mix, you can simply use two vanilla instead.
If you are looking to flavor your eclair cake, this is an easy way to do it—simply substitute one or both of the instant pudding mixes for a flavor like banana or strawberry.
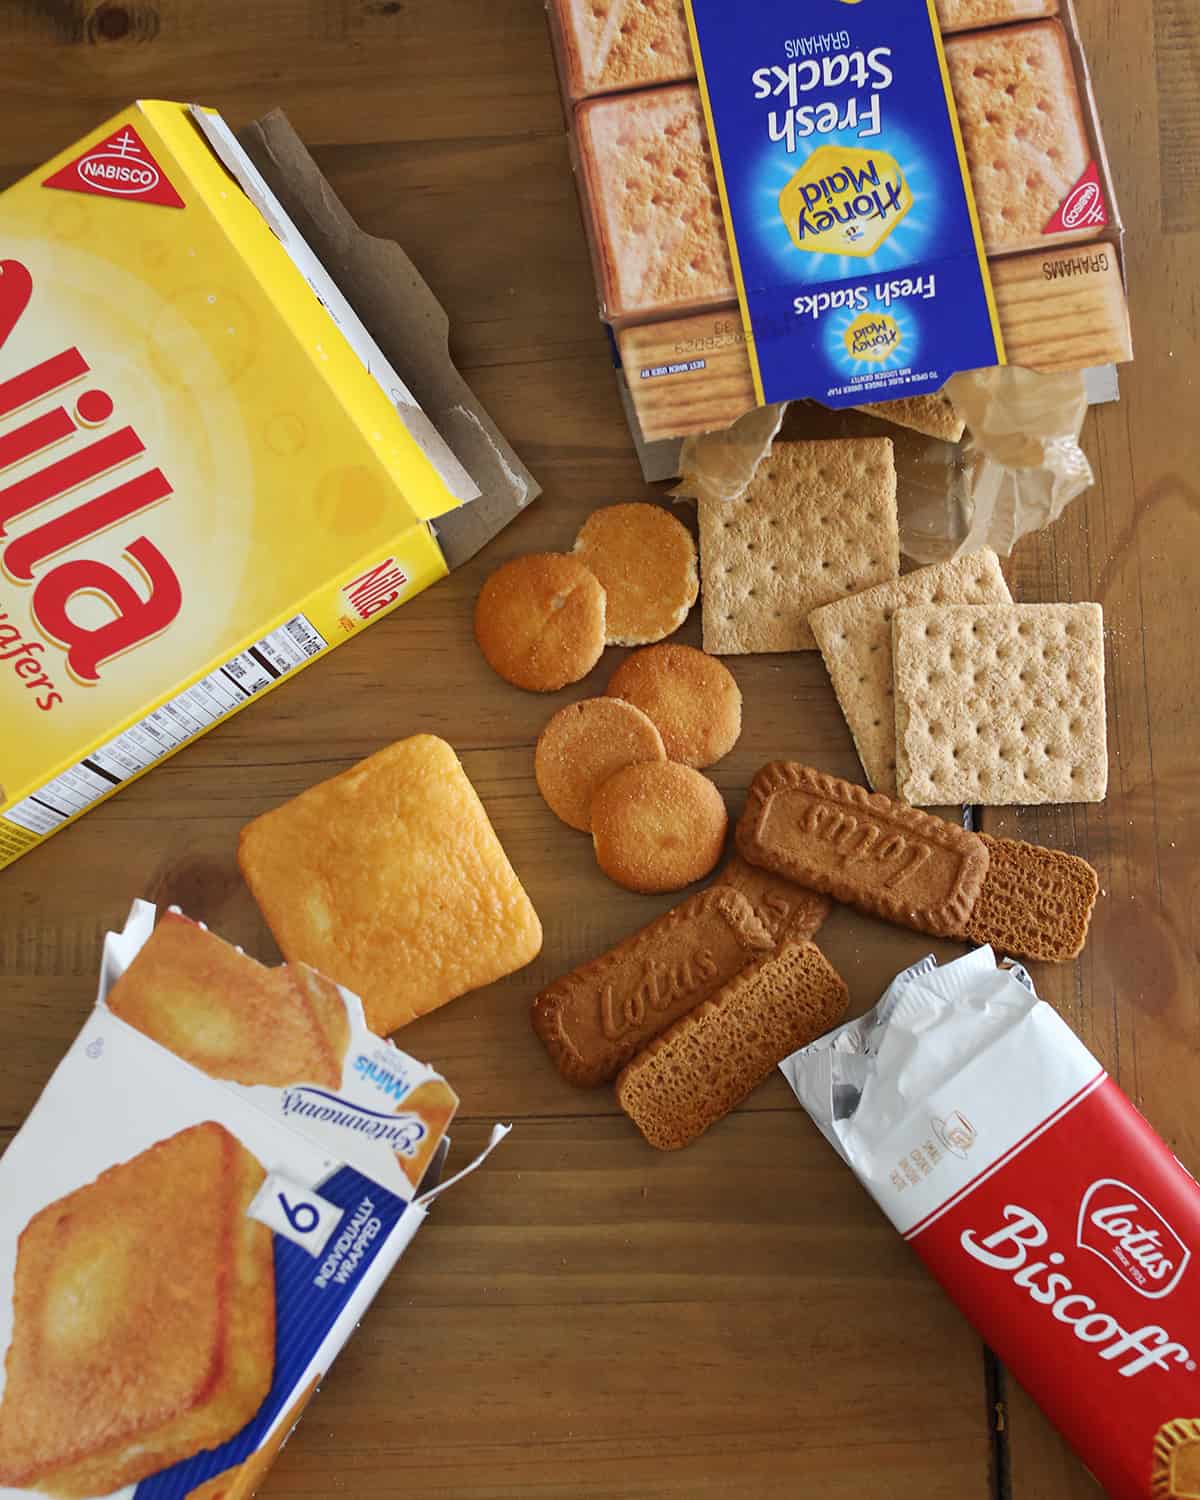
No-bake eclair cakes are most often made with graham crackers for the crust layers. This is a great option as they are already square or rectangle shaped, so they are easy to work with. But, two other options I like are vanilla wafers or Biscoff cookies.
If you are wanting to serve your eclair cake sooner than eight hours, or you want to make it and serve it immediately (or within an hour or two), be sure to use something for the crust layer that is soft in texture. A good option is pound cake cut into thin pieces.
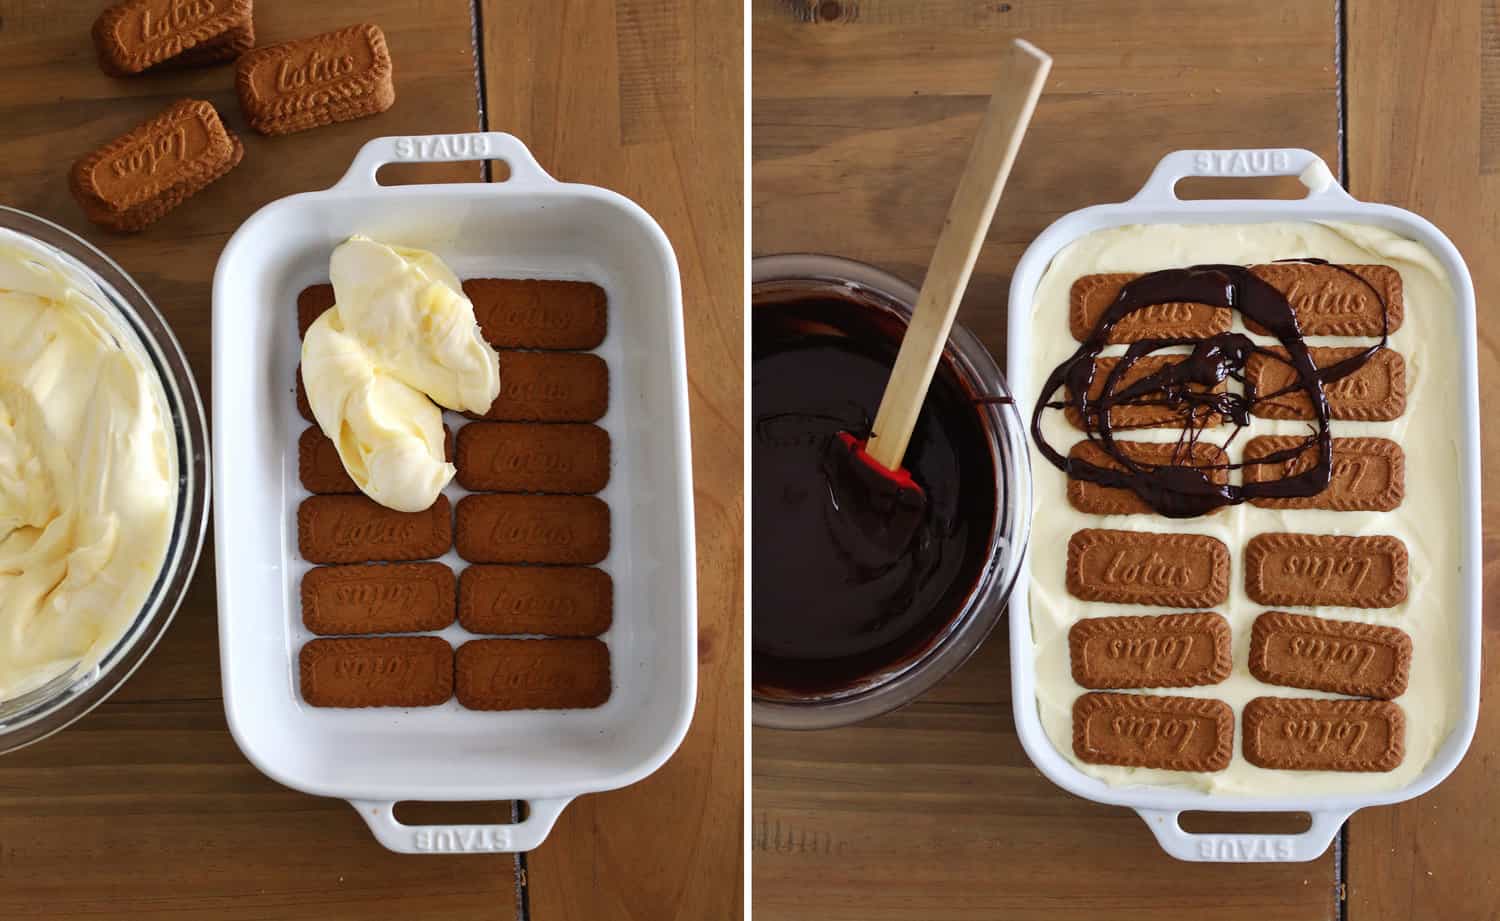
Once you have the filling made, you simply start the cake with a layer of the crust, then filling, crust, filling again, and then a top crust. Then, you pour the chocolate ganache over the top before refrigerating.
If you use a store-bought chocolate frosting instead of ganache, you will want to make sure the consistency is as spreadable as possible. You may need to microwave (in a microwave-safe bowl) for a few sections so it will easily spread over the top.
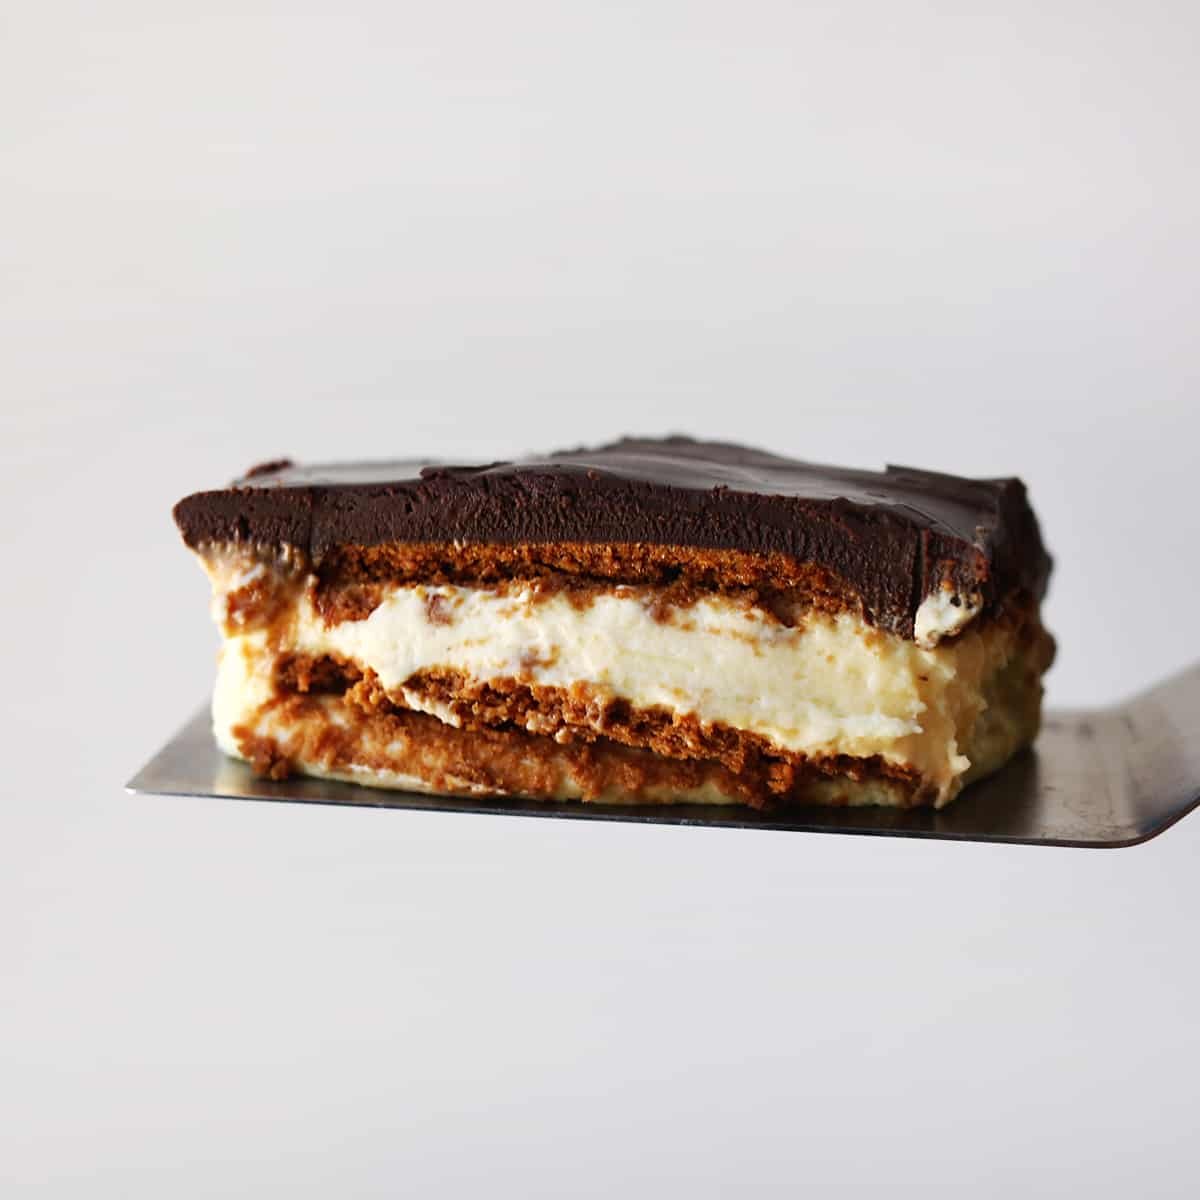
The hardest part about making this eclair cake recipe is serving it from the pan! Lol. This is such a soft, pudding like dessert it can be a little tricky to remove that first piece. But it’s worth it as this is such a crowd-pleasing dessert.
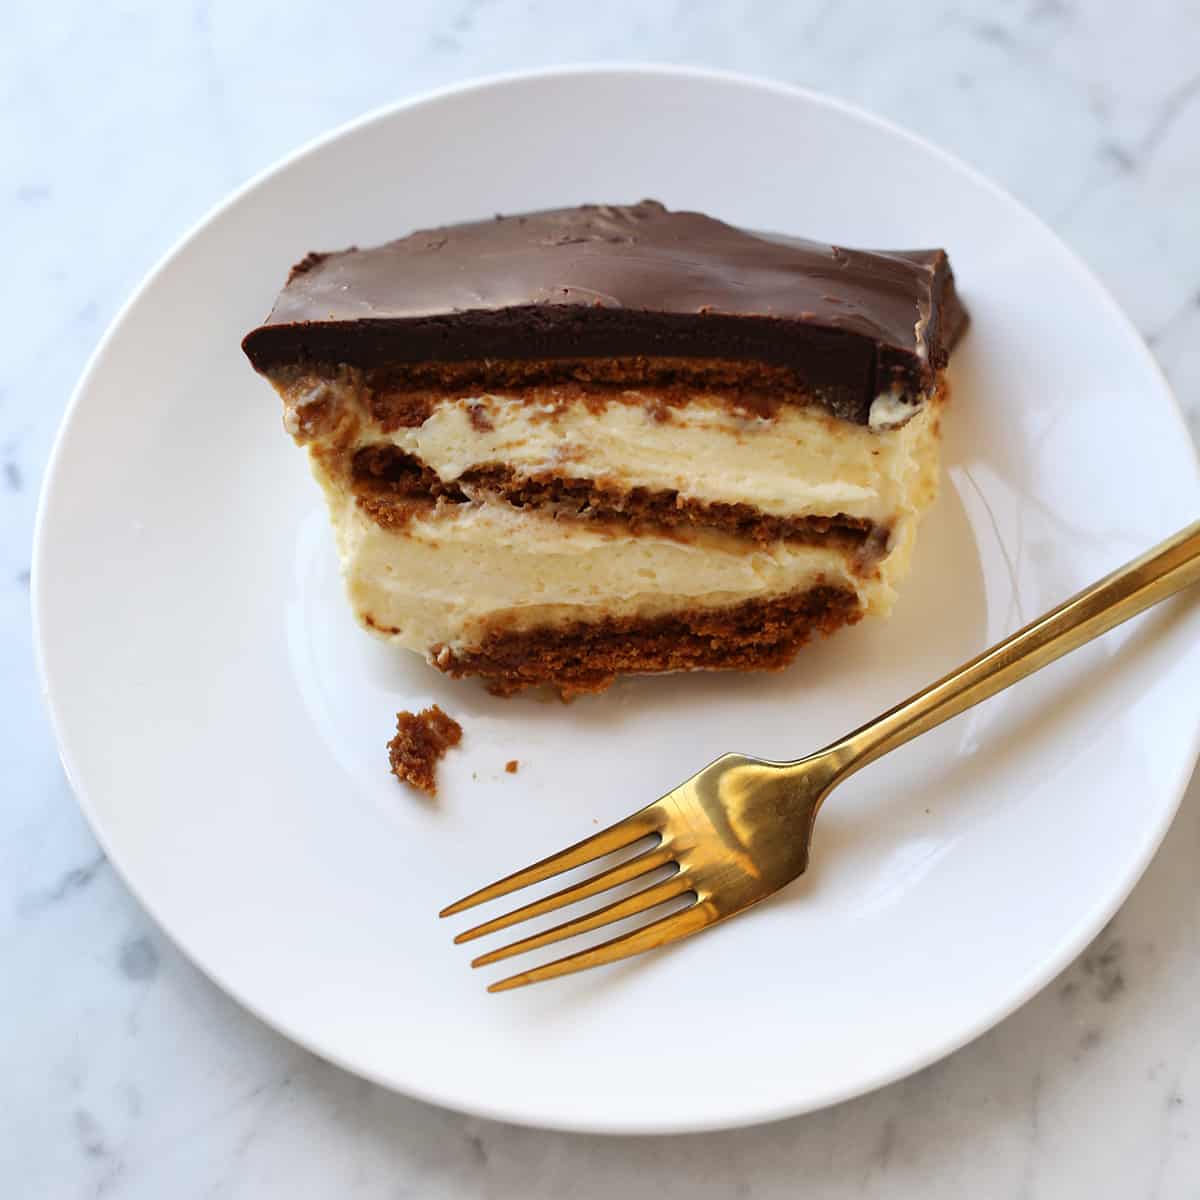
If you make this eclair cake, let us know what you think in the comments!
Elcair Cake – No-Bake
Ingredients
- 2 boxes instant pudding French vanilla and cheesecake flavors (3.4 ounce boxes)
- 3 cups milk
- 3 cups heavy whipping cream divided
- 1 box graham crackers, vanilla wafers, or other cookies see notes
- 1 ½ cups dark or semi sweet chocolate chips
Instructions
- In a mixing bowl, stir together the pudding mixes and 3 cups milk. This will make instant pudding.
- In the bowl of a stand mixer, whip 2 cups of heavy whipping cream for 2-4 minutes to make homemade whipped cream.
- Fold the whipped cream into the pudding mixture, until just combined.
- Line the bottom of the baking pan with graham crackers (or other cookie of choice).
- Add half the whipped pudding mixture, spread evenly.
- Add another layer of graham crackers or other cookies.
- Add the second half of the whipped pudding mixture, spread evenly.
- Add another layer of graham crackers or other cookies. Set aside while you make the ganache.
- In a microwave-safe bowl, combine 1 cup heavy whipping cream and the chocolate chips. Microwave in 30-second intervals, stirring in between, until just combined.
- Pour the chocolate ganache over the top layer of the eclair cake. Spread evenly.
- Cover with plastic wrap and refrigerate for at least 8 hours and up to 24 hours. Serve cold.
Notes
Nutrition
You can dress this up with crushed Oreos or Lucky Charm marshmallows. Or for a more adult version add a shot or two of espresso. I tend to make these with my kids I really go for it with the green food coloring (ha!) but if you want a more subtle color or even no color at all that’s easy to adjust.
Related: Next try our Wendy’s Frosty recipe or learn how to make a Root Beer Float.

Ingredients
- Vanilla ice cream
- Milk
- Mint extract
- Green food coloring
- Whipped cream

How to make a Shamrock Shake
It’s a little tricky to measure ice cream. I use a glass measuring cup but honestly you can simply eyeball it into your blender. Lean toward too much vs too little for a thicker milkshake.
In a blender add the ice cream, milk, extract and green food coloring. Blend until well combined.
Pour into your cup and top with whipped cream.

Tips Notes + Substitutions
- I like to use Blue Bunny Soft Vanilla Flavored Frozen Dairy Dessert in this recipe but any vanilla ice cream will work! We tend to buy this kind and the texture is softer and makes the final milkshake a little more airy / foamy and feels even more like the McDonald’s version to me.
- Mint extract is more authentic for this recipe but if you already have peppermint extract (maybe from Christmas baking) that is fine too. They do taste slightly different but both make a wonderful Shamrock shake.
- I used 10 drops of green food dye to get the vibrant color you see in these photos. Use less if you want a more subtle color or skip the food dye altogether.
- Make your own whipped cream or used a canned version for a more authentic copy cat experience.

- If you want to make this dairy free you can use dairy free ice cream, milk and whipped cream.
- These cups with dome lids are great for a party, otherwise any 12 oz cup will do.

More Milkshake and Smoothie Recipes
- Classic Milkshake
- Donut Milkshake
- Bushwacker
- Homemade Frappuccino
- Coconut Smoothie
- Banana Smoothie
- Blueberry Smoothie
- Peanut Butter Banana Smoothie


Shamrock Shake
Ingredients
- 2 cups vanilla ice cream
- ¾ cup milk
- ¼ teaspoon mint extract
- 8-10 drops green food dye
- ½ cup whipped cream
Instructions
- It’s a little tricky to measure ice cream. I use a glass measuring cup but honestly you can simply eyeball it into your blender. Lean toward too much vs too little for a thicker milkshake.
- In a blender add the ice cream, milk, extract and green food coloring.
- Blend until well combined.
- Pour into your cup and top with whipped cream.
Notes
- I like to use Blue Bunny Soft Vanilla Flavored Frozen Dairy Dessert in this recipe but any vanilla ice cream will work! We tend to buy this kind and the texture is softer and makes the final milkshake a little more airy / foamy and feels even more like the McDonald’s version to me.
- Mint extract is more authentic for this recipe but if you already have peppermint extract (maybe from Christmas baking) that is fine too. They do taste slightly different but both make a wonderful Shamrock shake.
- I used 10 drops of green food dye to get the vibrant color you see in these photos. Use less if you want a more subtle color or skip the food dye altogether.
- Make your own whipped cream or used a canned version for a more authentic copy cat experience.
- If you want to make this dairy free you can use dairy free ice cream, milk and whipped cream.
- These cups with dome lids are great for a party, otherwise any 12 oz cup will do.
Nutrition
Brown butter can be used in pretty much any recipe that calls for butter. I tend to use it in baked goods, like cookies, sweet breads or scones. It adds an almost nutty flavor bordering on caramel or toffee. Brown butter doesn’t require any ingredients beyond butter (salted or unsalted, but I tend to use unsalted) it simply requires a little extra time and attention.
Related: Next up try our recipes for espresso cookies, chocolate chip cookie bars or chocolate chip bread. Yum!

Ingredients
- Unsalted butter
- Granulated white sugar
- Brown sugar
- Egg
- Vanilla extract
- All purpose flour
- Salt
- Baking powder
- Chocolate chips
- Flaky sea salt, optional

How to make Brown Butter Cookies
First make the brown butter. Cut the butter into tablespoon pieces. In a small bot or saucepan heat the butter over medium to high heat for 7-8 minutes. Use a rubber spatula to stir it now and again so it heats evenly. The butter will foam some. Once you see small bits of brown and the butter smells very nutty (almost like caramel or toffee nut) remove from heat. Allow to cool to room temperature or close before using.
In a large mixing bowl add the cooled butter and sugars. Cream together. Then stir in the vanilla extract and egg.
In a smaller bowl combine the flour, salt and baking powder. Whisk together. Then add this dry mixture to the wet mixture and stir to make the dough.
Last add the chocolate chips. Refrigerate the dough for at least an hour to overnight before baking. I like to go ahead scoop all the dough into cookies before refrigerating, I will sometimes put half in the freezer (espeically if I make a double batch).
If using flaky sea salt add it to the tops of dough balls before baking. Bake at 350°F for 10-12 minutes. I tend to bake for 12 minutes but I usually check them after 10.

Tips and Notes
- You can use unsalted butter or salted butter to make brown butter. For this recipe (and most baked goods) I tend to use unsalted butter.
- Brown butter will not all turn brown, it will have small brown flecks in it. What browns in the milk solids, not the entire mixture. It can go from brown to burnt pretty quickly, so keep it an eye on it.
- Crack the egg in a separate, small bowl before adding to the batter. This way if you see some shell go in you can remove it (with a larger piece of shell) before adding to the batter.
- Chocolate chips are great but you could also use chopped chocolate or substitute other chips like peanut butter chips, white chocolate chips, toffee chips, etc.
- This recipe will make between 12-15 cookies depending how big you make them.

More Popular Cookie Recipes
- Butter Cookies
- Ricotta Cookies
- No Bake Cookies
- Oatmeal Raisin Cookies
- M&M cookies
- Pinwheel Cookies
- Cowboy Cookies
- Peanut Butter Cookies
- White Chocolate Macadamia Nut Cookies
- Molasses Cookies
- Birthday Cake Cookies


Brown Butter Chocolate Chip Cookies
Ingredients
- ½ cup unsalted butter
- ⅓ cup granulated sugar
- ⅓ cup brown sugar
- 1 egg
- 1 teaspoon vanilla extract
- 1 ¼ cups all purpose flour
- ¼ teaspoon salt
- ½ teaspoon baking powder
- 10 ounces chocolate chips
- 1 teaspoon flaky sea salt optional
Instructions
- First make the brown butter. Cut the butter into tablespoon pieces. In a small bot or saucepan heat the butter over medium to high heat for 7-8 minutes. Use a rubber spatula to stir it now and again so it heats evenly. The butter will foam some. Once you see small bits of brown and the butter smells very nutty (almost like caramel or toffee nut) remove from heat. Allow to cool to room temperature or close before using.
- In a large mixing bowl add the cooled butter and sugars. Cream together. Then stir in the vanilla extract and egg.
- In a smaller bowl combine the flour, salt and baking powder. Whisk together.
- Then add this dry mixture to the wet mixture and stir to make the dough.
- Last add the chocolate chips. Refrigerate the dough for at least an hour to overnight before baking. I like to go ahead scoop all the dough into cookies before refrigerating, I will sometimes put half in the freezer (espeically if I make a double batch).
- If using flaky sea salt add it to the tops of dough balls before baking. Bake at 350°F for 10-12 minutes. I tend to bake for 12 minutes but I usually check them after 10.
Notes
- You can use unsalted butter or salted butter to make brown butter. For this recipe (and most baked goods) I tend to use unsalted butter.
- Brown butter will not all turn brown, it will have small brown flecks in it. What browns in the milk solids, not the entire mixture. It can go from brown to burnt pretty quickly, so keep it an eye on it.
- Crack the egg in a separate, small bowl before adding to the batter. This way if you see some shell go in you can remove it (with a larger piece of shell) before adding to the batter.
- Chocolate chips are great but you could also use chopped chocolate or substitute other chips like peanut butter chips, white chocolate chips, toffee chips, etc.
Nutrition
While bread pudding has it’s roots from England (and that’s where I first had it) to me it feels like a dish that could have easily been created in the southern US. It feels like country cooking and reminds me of it’s savory cousin, Stuffing, a Thanksgiving staple.
Related: If you love this next try our French Toast Casserole.

Ingredients
- Bread – stale bread is best, see notes
- Unsalted butter
- Eggs
- Milk
- Granulated white sugar
- Vanilla extract
- Cinnamon

How to make Bread Pudding
Tear up the bread into small pieces. Butter or lightly grease your baking dish and add the bread pieces to it.
Melt the butter. Drizzle half the melted butter over the bread pieces.
In a medium sized mixing bowl add the eggs, milk, sugar, vanilla and cinnamon. Whisk until well combined, you really want to break up the eggs so the yolks and whites are well combined. Then stir in the butter (hopefully slightly cooled by now).
Pour the egg batter over the bread pieces. Lightly press the bread down so all the pieces get soaked, it will spring back some and that’s fine.
Bake at 350°F for 40-45 minutes. The bread pudding will puff up toward the end of baking. Once removed from the oven it will settle back down. Cool for 10-12 minutes before slicing into it.

Notes
- You can use any type of bread for this but I love sourdough. Sandwich bread, hot dog buns, dinner rolls, etc. will all work though.
- You do want the bread stale, this allows it to soak up the egg batter well and that’s what makes the final dish so spongy and delicious. If your bread is not stale then toast in your toaster, air fryer or oven for a few minutes.
- Use part brown sugar (up to half) to add more flavor.
- Add raisins for classic old fashioned bread pudding.
- Add a bread pudding glaze – not really necessary but traditional and easy. Whisk together powdered sugar with a little vanilla extract and just enough milk to make a pourable glaze. Alternative idea- sprinkle the bake with powdered sugar.

More Homemade Desserts
- Best Brownies
- Funnel Cake
- Flan
- Red Velvet Cake
- Cream Pie
- Cinnamon Rolls
- Chocolate Chip Cookie Bars
- Tiramisu
- Monkey Bread


Bread Pudding
Ingredients
- 6 slices bread
- ¼ cup butter
- 4 eggs
- 2 cups milk
- ⅔ cup granulated white sugar
- 1 teaspoon vanilla extract
- 1 teaspoon cinnamon
Instructions
- Tear up the bread into small pieces.
- Butter or lightly grease your baking dish and add the bread pieces to it.
- Melt the butter. Drizzle half the melted butter over the bread pieces.
- In a medium sized mixing bowl add the eggs, milk, sugar, vanilla and cinnamon. Whisk until well combined, you really want to break up the eggs so the yolks and whites are well combined.
- Then stir in the butter (hopefully slightly cooled by now).
- Pour the egg batter over the bread pieces. Lightly press the bread down so all the pieces get soaked, it will spring back some and that’s fine.
- Bake at 350°F for 40-45 minutes. The bread pudding will puff up toward the end of baking. Once removed from the oven it will settle back down.
- Cool for 10-12 minutes before slicing into it.
Notes
- You can use any type of bread for this but I love sourdough. Sandwich bread, hot dog buns, dinner rolls, etc. will all work though.
- You do want the bread stale, this allows it to soak up the egg batter well and that’s what makes the final dish so spongy and delicious. If your bread is not stale then toast in your toaster, air fryer or oven for a few minutes.
- Use part brown sugar (up to half) to add more flavor.
- Add raisins for classic old fashioned bread pudding.
- Add a bread pudding glaze – not really necessary but traditional and easy. Whisk together powdered sugar with a little vanilla extract and just enough milk to make a pourable glaze. Alternative idea- sprinkle the bake with powdered sugar.
Nutrition
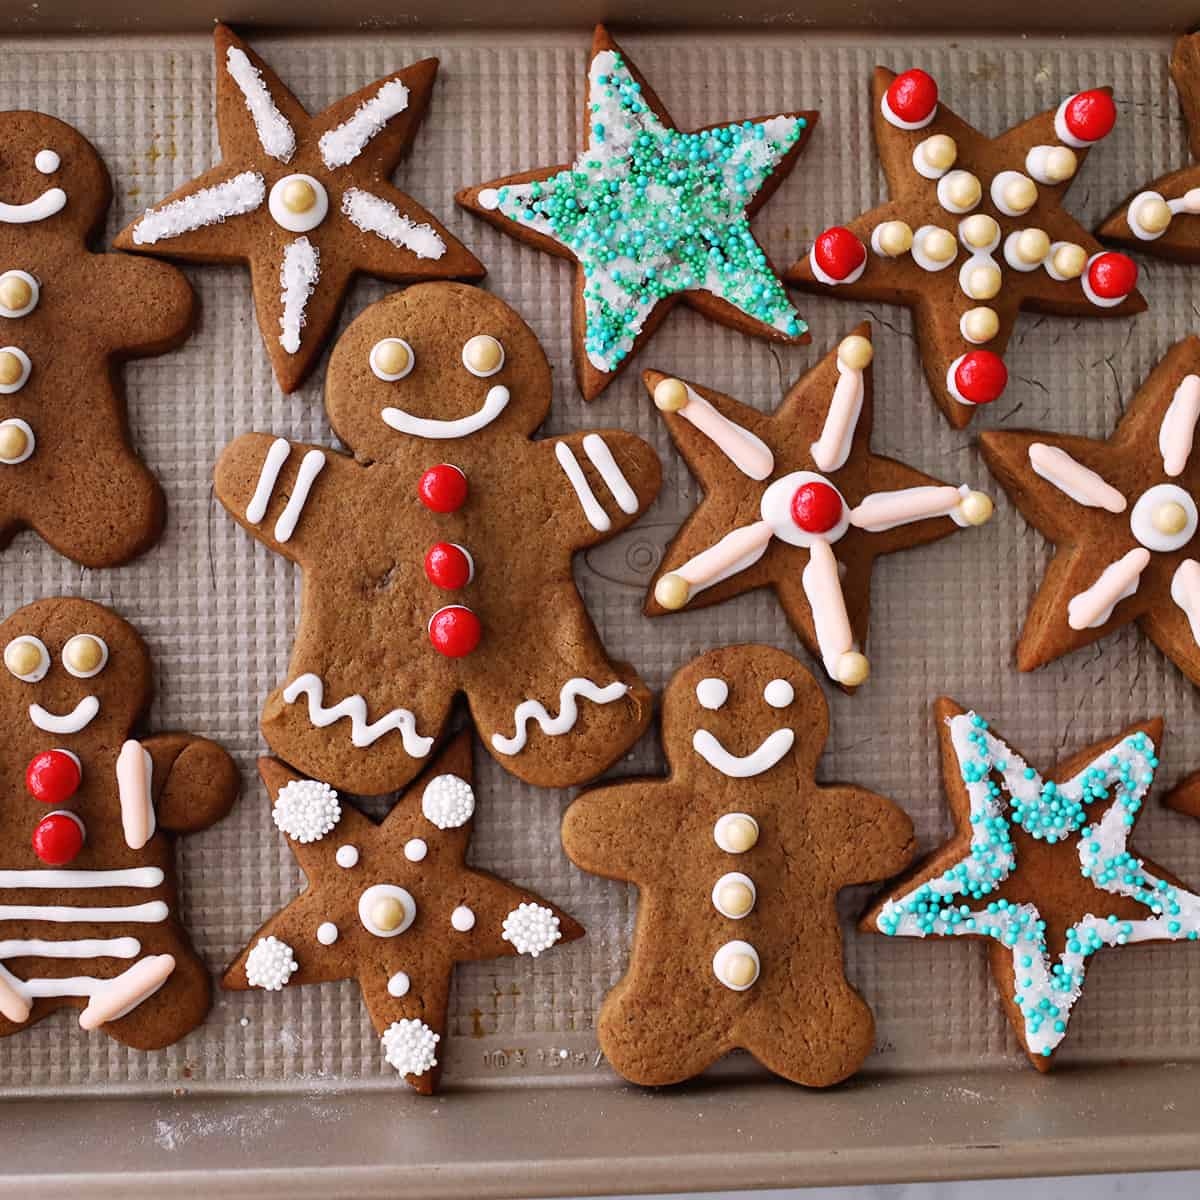
This recipe delivers perfect dough for cutout shapes (similar to sugar cookies) with all the cinnamon and spice flavor you love from gingerbread.
Gingerbread cookies are my husband’s favorite cookie, and I make this recipe multiple times each holiday season. I hope you enjoy it as much as we do!
Related recipes: Snowball Cookies, Pinwheel Cookies, Peanut Butter Blossoms.
Gingerbread Cookie Ingredients:
- 1 cup (2 sticks) salted butter, room temperature
- 1 cup granulated white sugar
- 1 egg
- 2 tablespoons white vinegar
- 1 cup dark molasses
- 5 cups all purpose flour
- 1 1/2 teaspoons baking soda
- 1/2 teaspoon salt
- 2 teaspoons ground ginger
- 2 teaspoons ground cinnamon
- 2 teaspoons pumpkin pie spice
- 1 teaspoon ground cloves
How to Make Gingerbread Cookies:
- Mix the flour, baking soda, salt and all spices. Set mixture aside.
- In your stand mixer bowl, combine butter and sugar and beat until mixture is fully combined—about 3 minutes. Scrape down sides if needed.
- Slowly add the molasses, egg and vinegar until fully combined. It’s normal for the mixture to appear curdled.
- Add the flour mixture slowly, scraping sides as needed. Be sure the bottom and top of your bowl are both fully combined. If the dough is crumbly, it is not fully mixed.
- Divide the dough into 3-5 flattened balls and cover in plastic wrap.
- Chill the dough for at least 30 minutes before rolling. Chilling is an essential step to create cutout shapes with nice edges. If you skip this step, your cookies may lose some shape while baking.
- Preheat oven to 350 degrees.
- Roll dough using as small amount of flour as necessary. I use parchment paper to roll if my dough is sticky at all. Dough should be about half an inch thick for a nice, soft cookie.
- Place cutout shapes on a parchment lined baking sheet. Gather and re-roll shapes as needed. You do not need to chill your dough again unless it becomes very soft.
- Bake cookies at 350 degrees for 10 minutes. Allow cookies to cool on pan for 5 minutes before transferring.
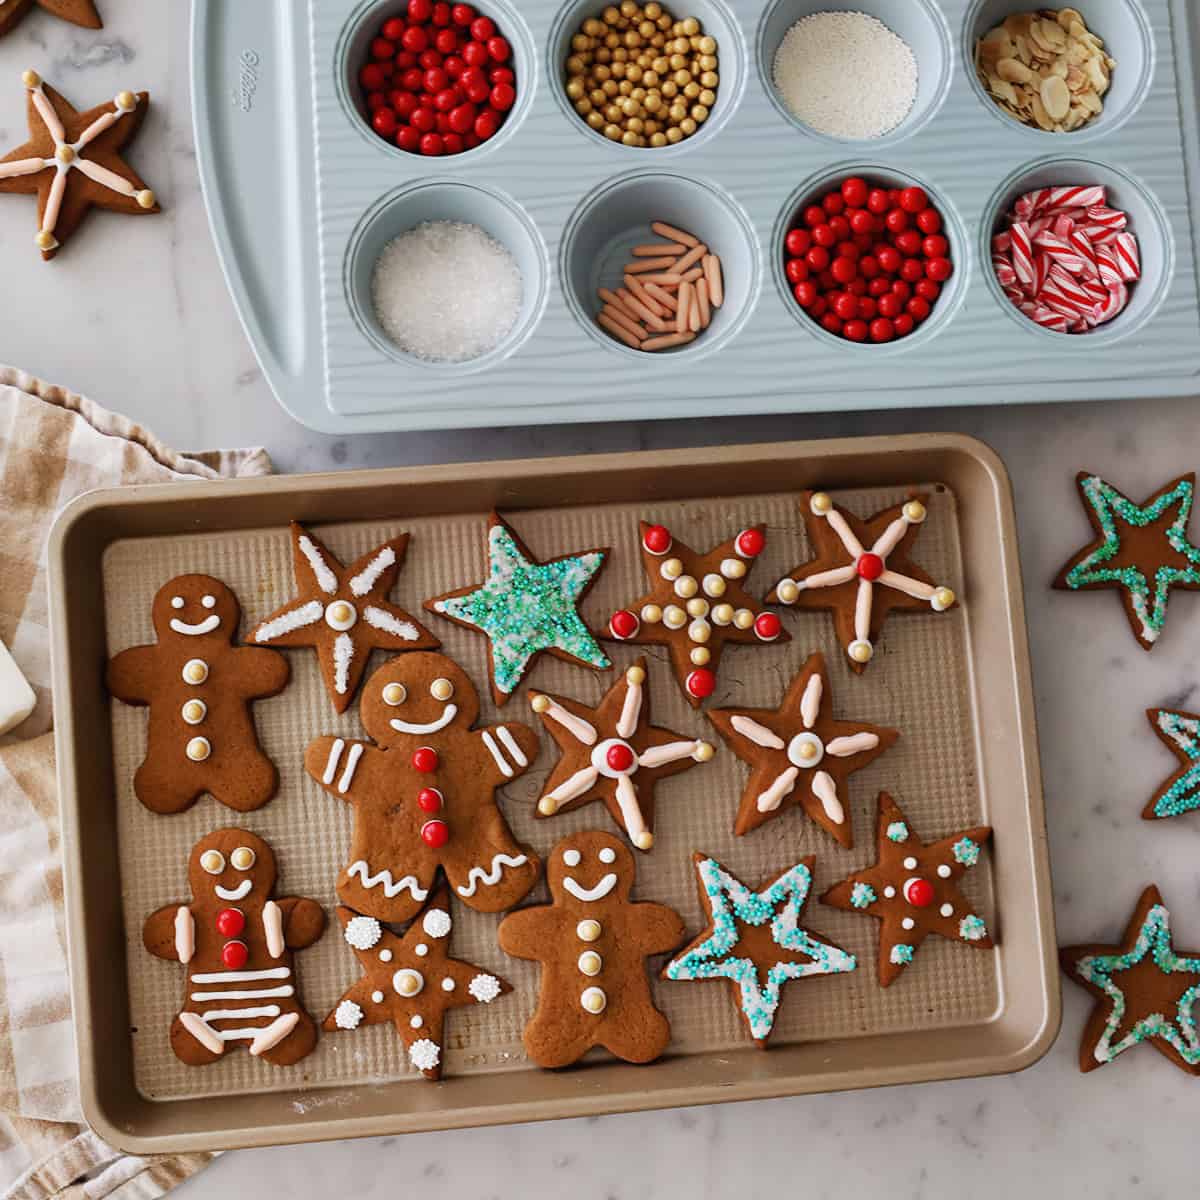
- Decorate your cookies as you like. I used this royal icing recipe. We also have a vegan royal icing recipe.

Tips for Making Gingerbread Cookies:
- If you prefer crispy gingerbread, simply roll the dough thinner (1/4 inch) and bake for 12 minutes instead of 10.
- You can use light or dark molasses, but do not use blackstrap or cooking molasses or your cookies will be bitter. I used the brand Grandma’s Original Molasses, which is easy to find in the U.S.
- Here’s a link to Christmas cookie cutters I used.

More Holiday Recipes:
Other recipes you may like:
FAQ
Frequently Asked Questions
How long can you keep the dough refrigerated?
While the minimum time to chilling your dough is 30 minutes, there really is no maximum. You can keep your dough in the fridge for up to 3 days with no issues.
Can you freeze this dough?
Yes. This recipe makes a lot of dough, so if you aren’t able to use it within two to three days, freeze it for a future cookie session.
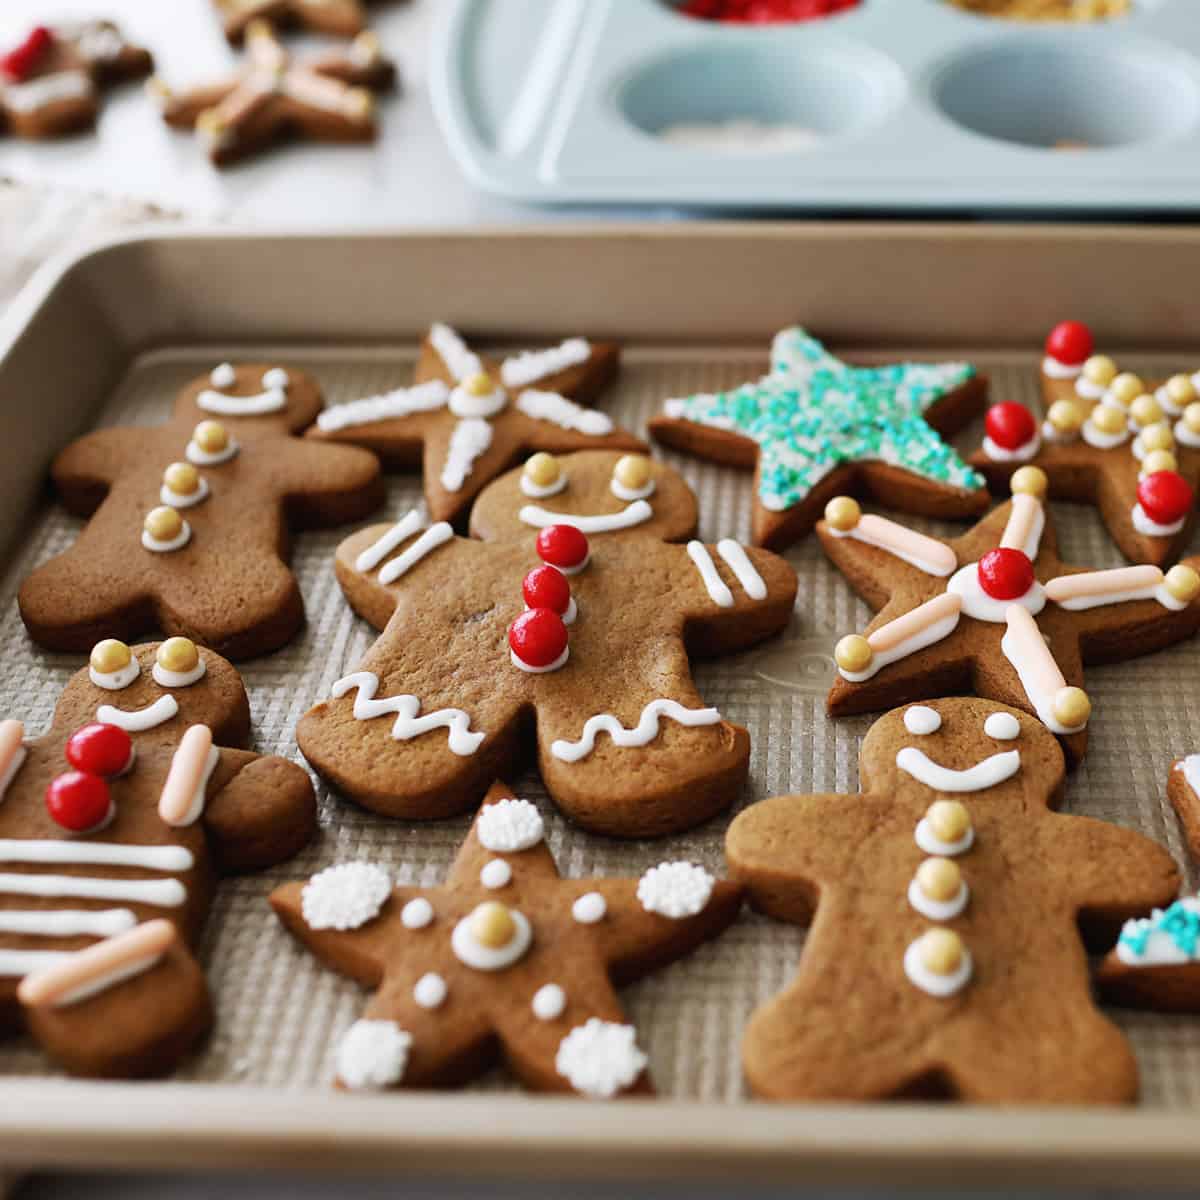
P.S. Love this post? Check out my Gingerbread House Decorating Party.

Soft & Chewy Gingerbread Cookies
Ingredients
- 1 cup salted butter room temperature
- 1 cup granulated white sugar
- 1 egg
- 2 tablespoons white vinegar
- 1 cup dark molasses
- 5 cups all-purpose flour
- 1 ½ teaspoon baking soda
- ½ teaspoon salt
- 2 teaspoons ginger
- 2 teaspoons cinnamon
- 2 teaspoons pumpkin pie spice
- 1 teaspoon cloves
Instructions
- Mix the flour, baking soda, salt and all spices. Set mixture aside.
- In your stand mixer bowl, combine butter and sugar and beat until mixture is fully combined, about 3 minutes. Scrape down sides if needed.
- Slowly add molasses, egg and vinegar until fully combined. It’s normal for the mixture to appear curdled.
- Add flour mixture slowly, scraping sides as needed. Be sure the bottom and top of your bowl are both fully combined. If the dough is crumbly, it is not fully mixed.
- Divide the dough into 3-5 flattened balls and cover in plastic wrap.
- Chill the dough for at least 30 minutes before rolling. Chilling is an essential step to create cutout shapes with nice edges. If you skip this step your cookies may lose some shape while baking.
- Preheat oven to 350 degrees.
- Roll dough using as small amount of flour as necessary. I use parchment paper to roll if my dough is sticky at all. Dough should be about half an inch thick for a nice, soft cookie.
- Place cutout shapes on a parchment lined baking sheet. Gather and re-roll shapes as needed. You do not need to chill your dough again unless it becomes very soft.
- Bake cookies at 350 degrees for 10 minutes. Allow cookies to cool on pan for 5 minutes before transferring.
- Decorate your cookies as you like. I used this royal icing recipe. We also have a vegan royal icing recipe.
Nutrition
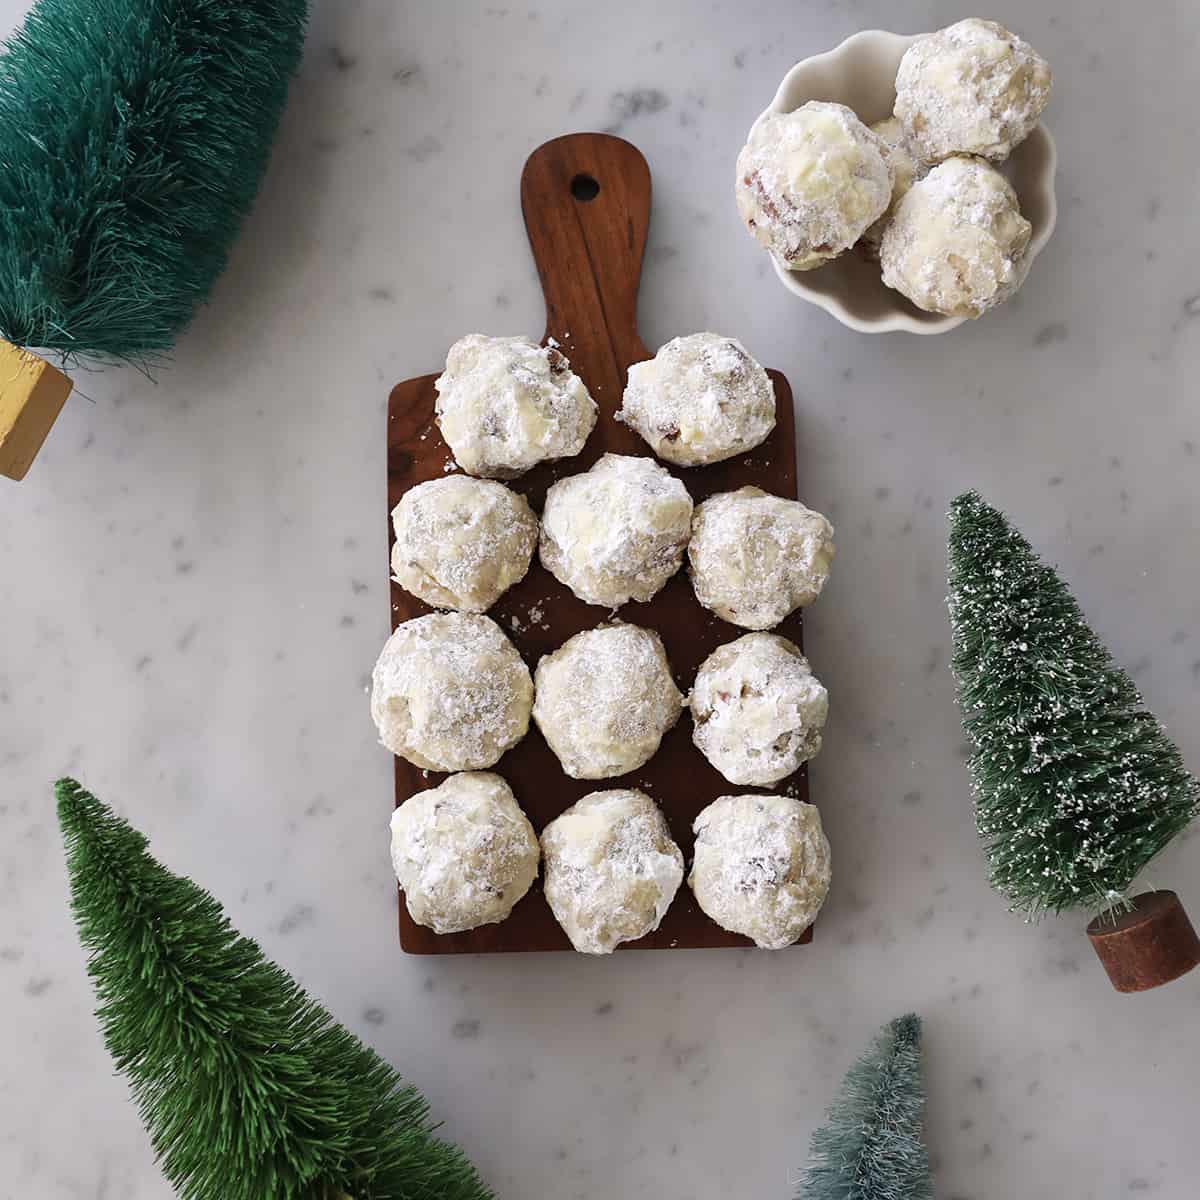
Snowball cookies go great with coffee, tea, or hot chocolate. But look out, as they are shockingly addictive.
Related: Gingerbread Cookies, Butter Cookies, The Best Cookie Recipes
Snowball Cookie Ingredients:
- All-purpose flour
- Pecans (or other nuts)
- Butter
- Salt
- Vanilla extract
- Powdered sugar (confectioner’s sugar)
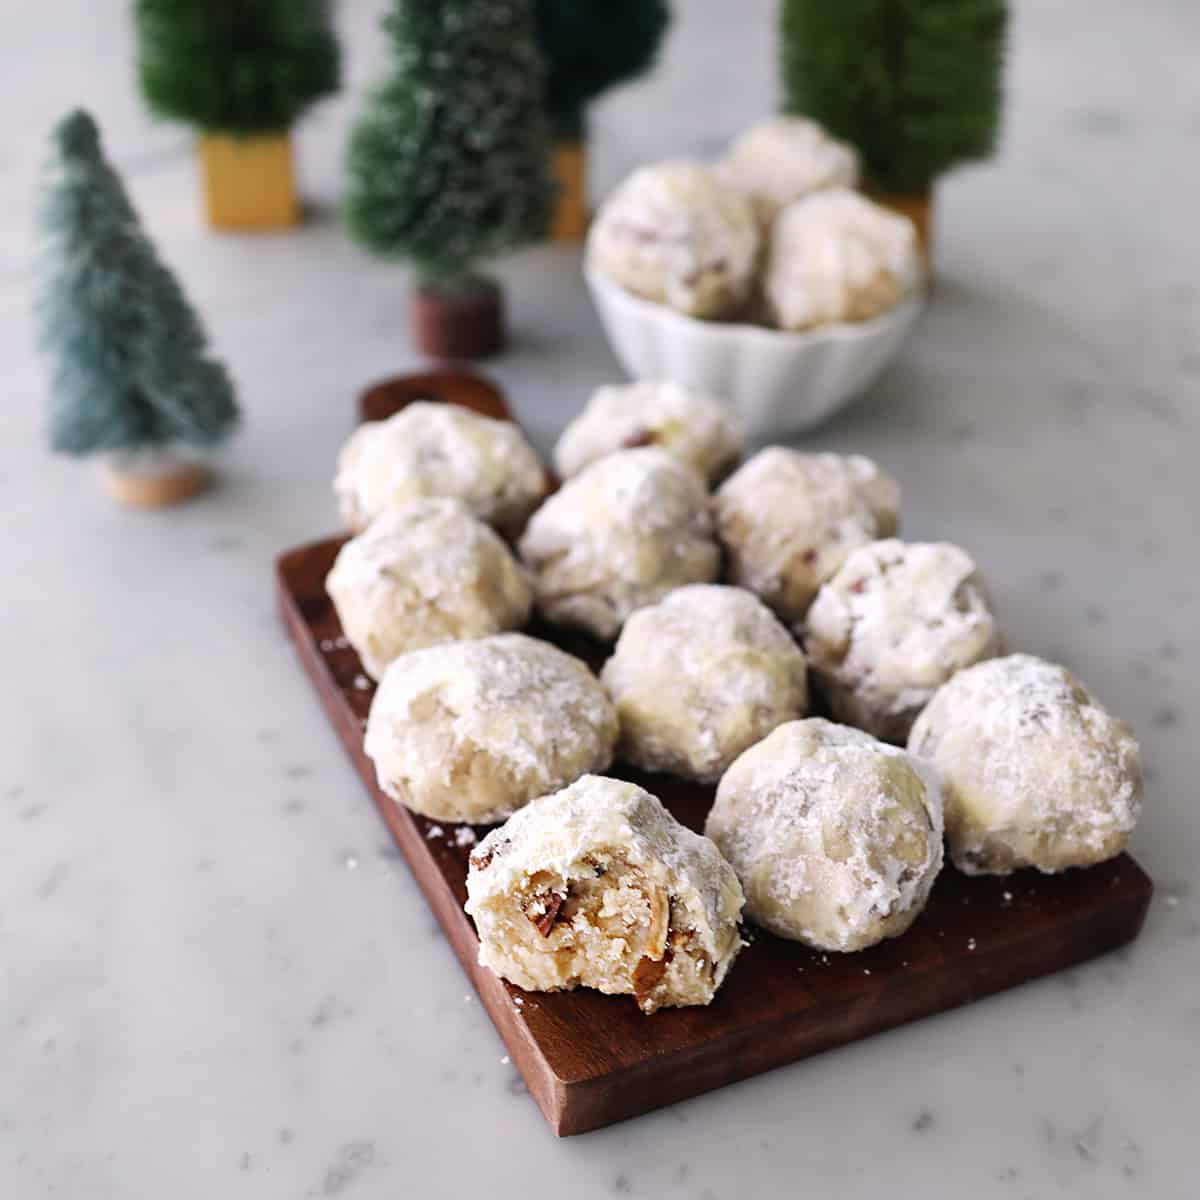
Directions:
Snowball cookies have three main steps for success. First, toast the nuts for maximum flavor. Then, make and bake the cookies.
Last, roll the still-warm cookies in powdered sugar for that snowball effect and melt-in-your-mouth flavor. I like to roll them once, and after I’ve rolled them all, I will roll each one more time for maximum snow effect!
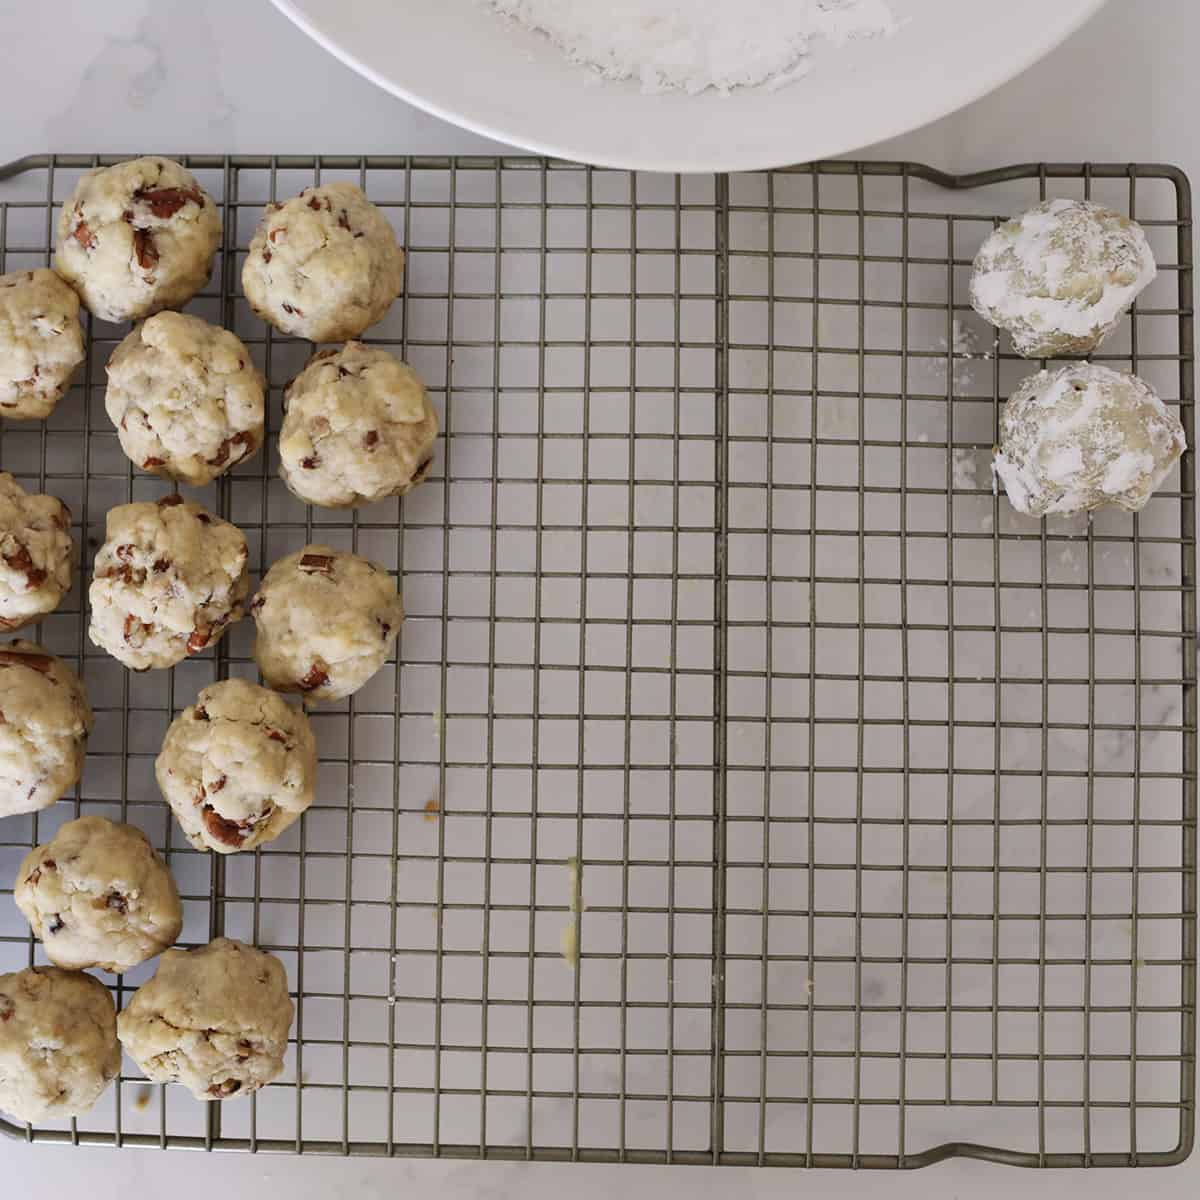
Tips for Making:
- Nuts – I like pecans, but sometimes snowball cookies are made with walnuts or other nuts. It’s up to your preference (or if allergies are an issue). Whatever nut you use, give them a good toasting before chopping them well.
- Roll each dough ball so it’s a 2-3 bite cookie. These don’t bake for long, so you don’t necessarily want oversized cookies.
- Roll the snowball cookies in powdered sugar while they are still warm, and then once more. The first layer will melt some (a good thing!), but for that snowy look, you’ll want a second layer.
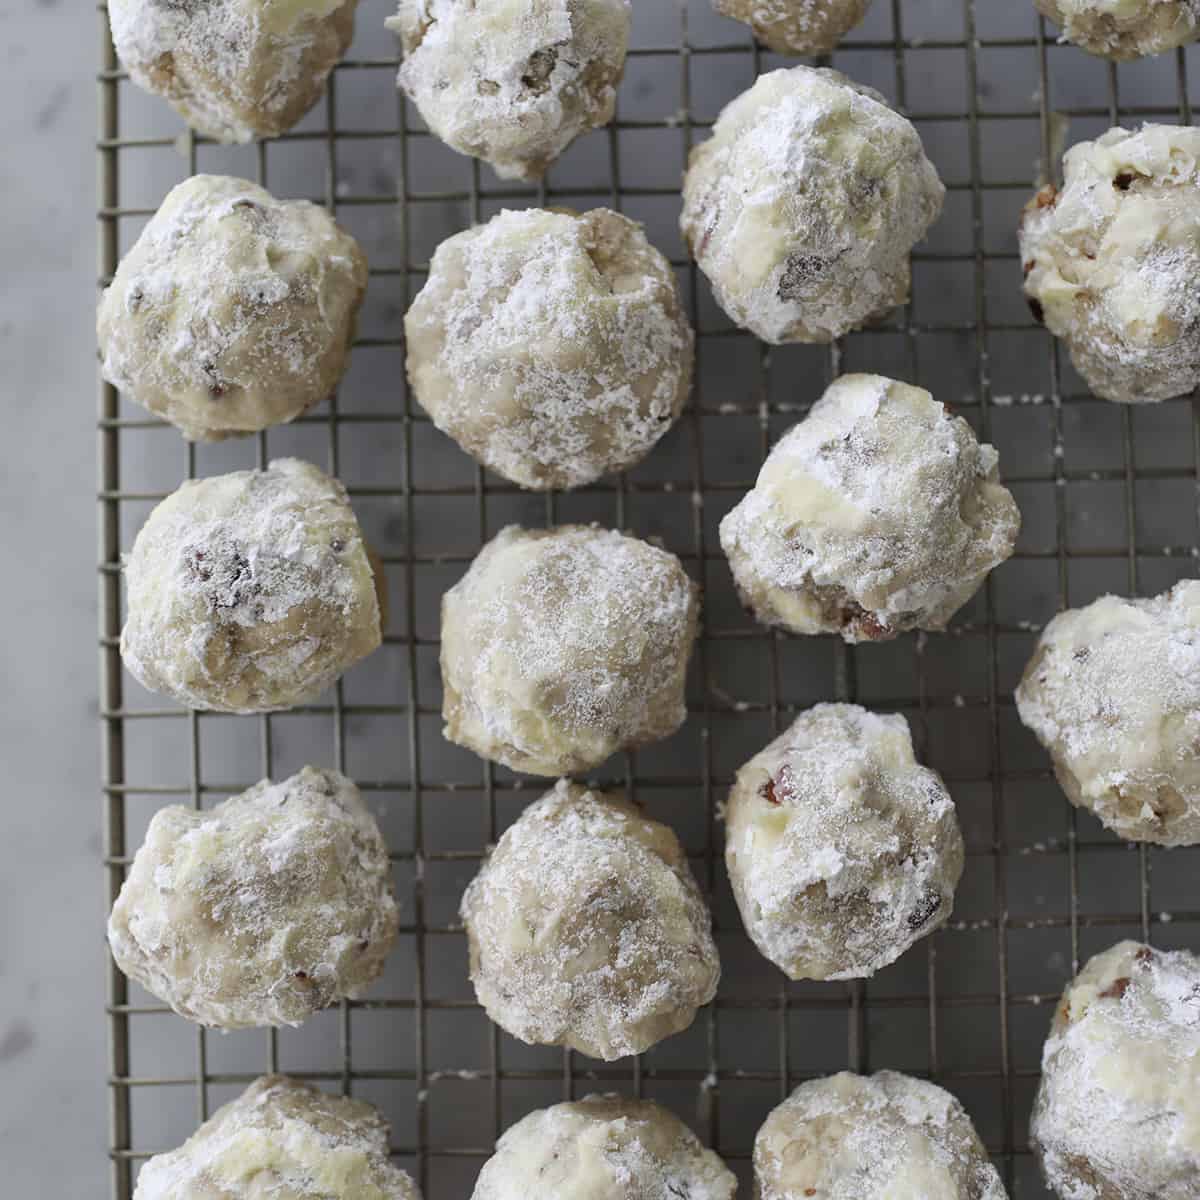
Serving Suggestion – Coffee!
Snowball cookies go great with a hot beverage like coffee or tea (see our favorite herbal tea-it’s tastes like red hots candy!).
Here’s how to take your at-home coffee game to the next level:
- How to Brew Coffee in a Chemex
- How to Brew Coffee in an Aeropress
- Make Your Own Latte at Home (Without an Expensive Espresso Machine)
FAQ
Frequently Asked Questions
Why did my snowball cookies turn out flat?
Snowball cookies should not flatten. Since they do not contain a leavening agent, the main factor to check is that the dough is chilled before baking.
Can snowball cookie dough be frozen?
Yes. You can freeze the dough in balls to bake later. Once they are baked, you can roll them in powdered sugar.
Are snowball cookies the same as Italian wedding cookies?
They are very similar cookies. Italian wedding cookies are sometimes made with different nuts (like almonds) and sometimes shaped into a crescent moon shape before baking.
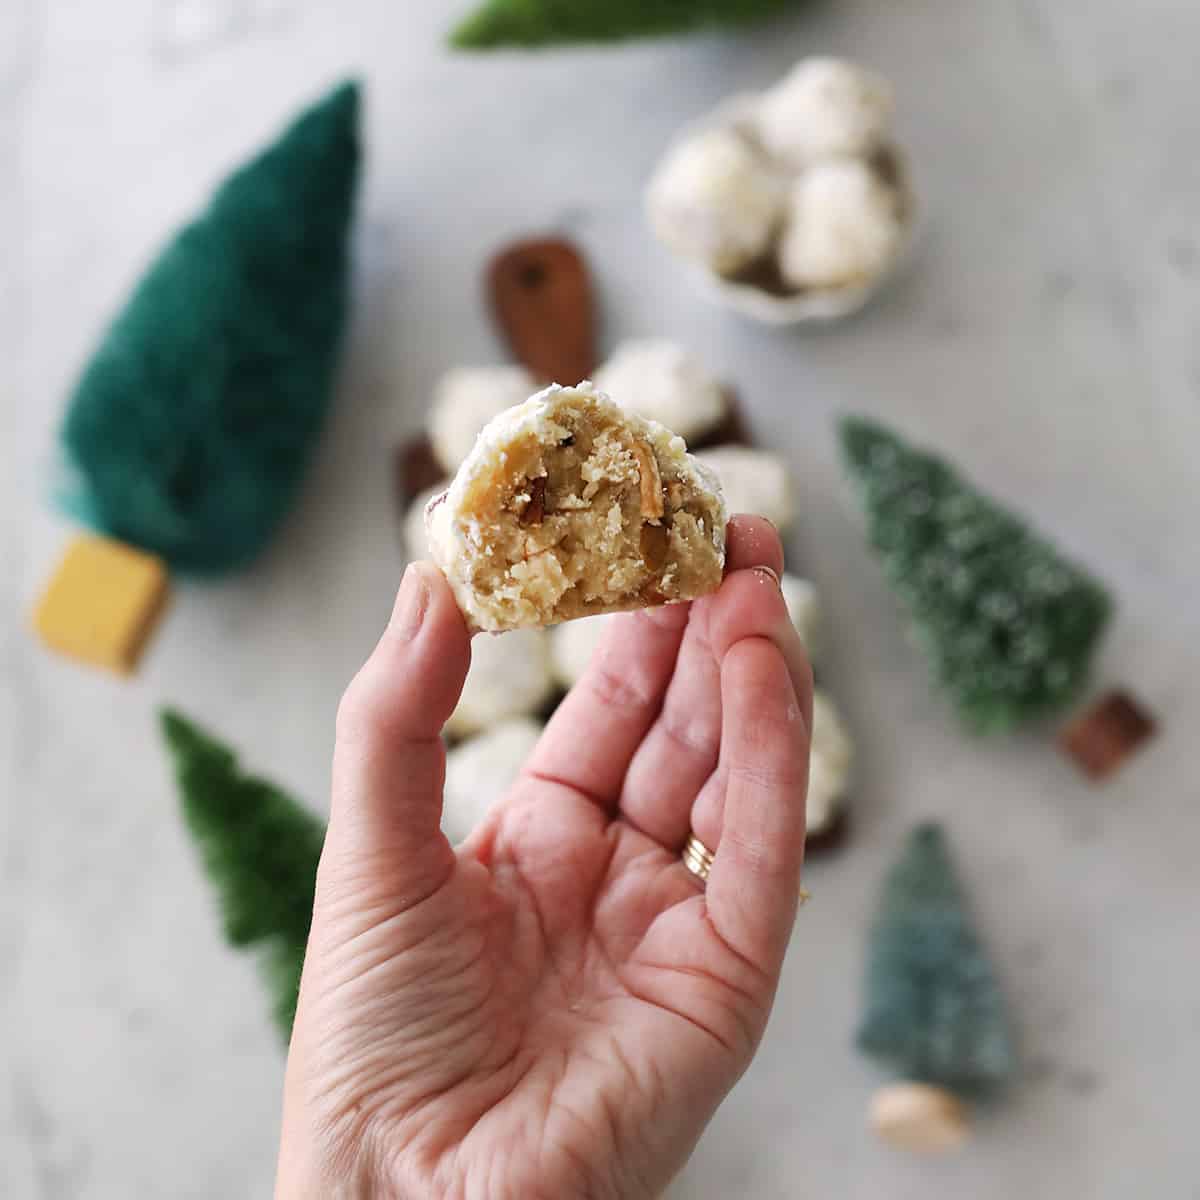

Snowball Cookies
Ingredients
- 2 ⅛ cups all-purpose flour
- ¾ cup pecans
- ½ teaspoon salt
- 1 cup butter softened
- 1 ½ teaspoon vanilla extract
- ¾ cup powdered sugar divided
Instructions
- In a dry pan, toast the pecans over medium heat until very fragrant.
- Once they are cool enough to handle, chop well.
- In a medium mixing bowl, stir together the flour, chopped pecans, and salt. Set aside.
- In a large mixing bowl, cream together the softened butter, vanilla extract, and 1/2 cup powdered sugar.
- Add the dry ingredients to the wet and stir until a dough forms.
- Cover and refrigerate for one hour, up to overnight.
- Roll into balls and place on a baking sheet.
- Bake at 400°F for 8-10 minutes. The bottoms should just begin to brown.
- Once cool enough to handle (but still warm), roll them in the remaining powdered sugar. Once you've rolled all the cookies, roll each one a second time.
Notes
Nutrition
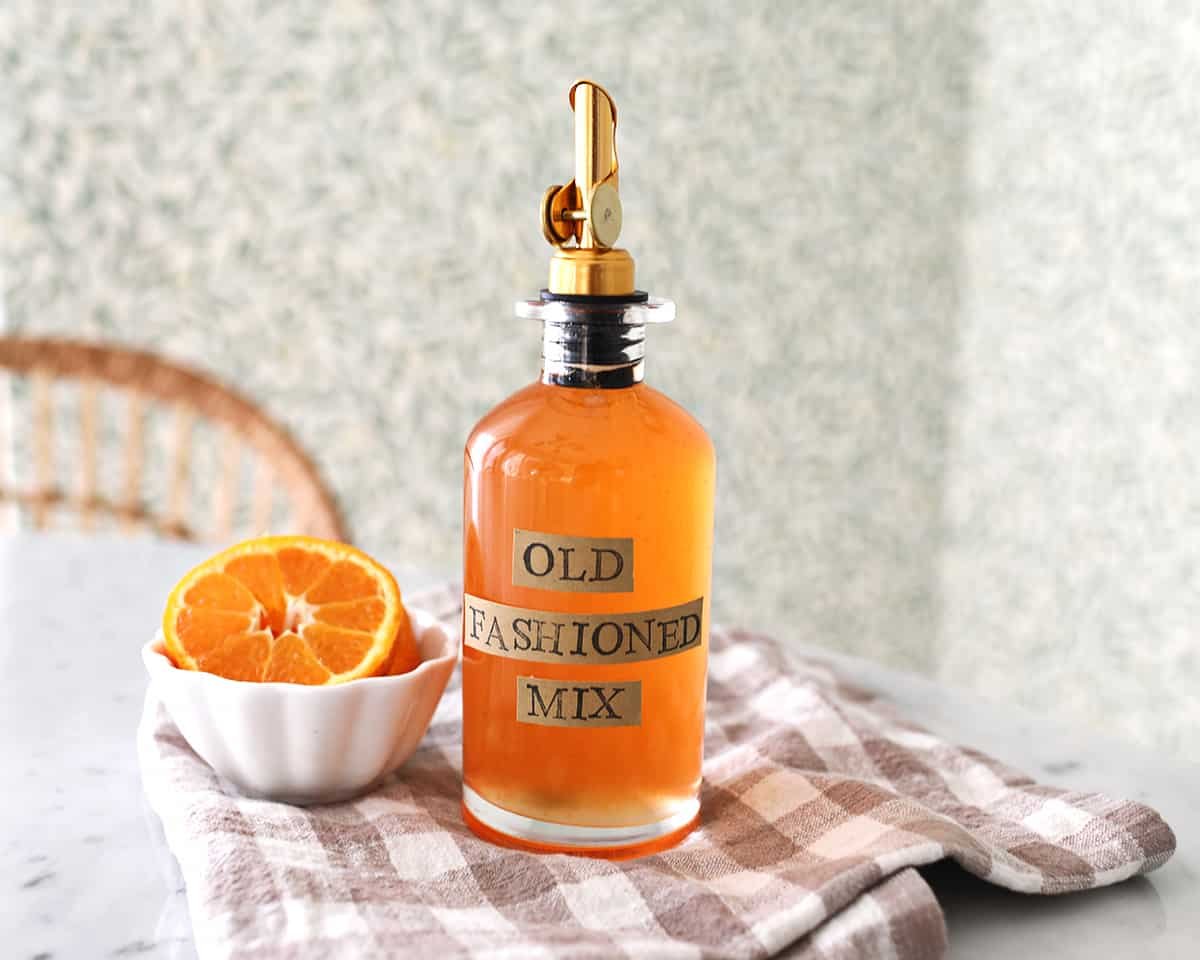
This recipe is simple and you can whip it up and enjoy it for weeks (or even months) in your fridge. Having this mix on hand makes mixing a cocktail faster and less messy. All you have to do is mix it with your spirit, shake, and pour over ice.
Related: If you’re already making some homemade syrups, why not try our Homemade Margarita Mix, Homemade Sour Mix, Classic Old Fashioned and Simple Syrup, and Mint Simple Syrup recipes while you are at it?!
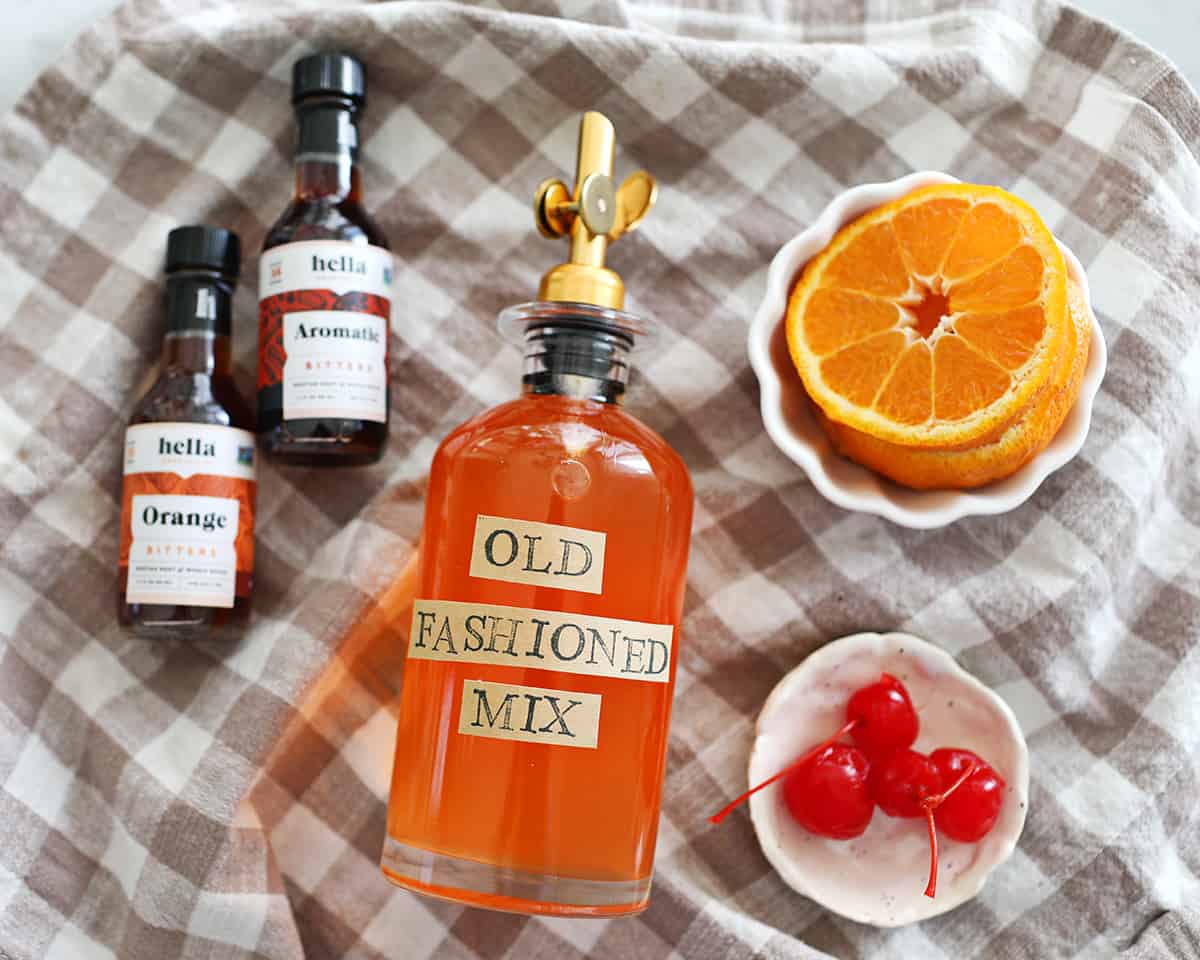
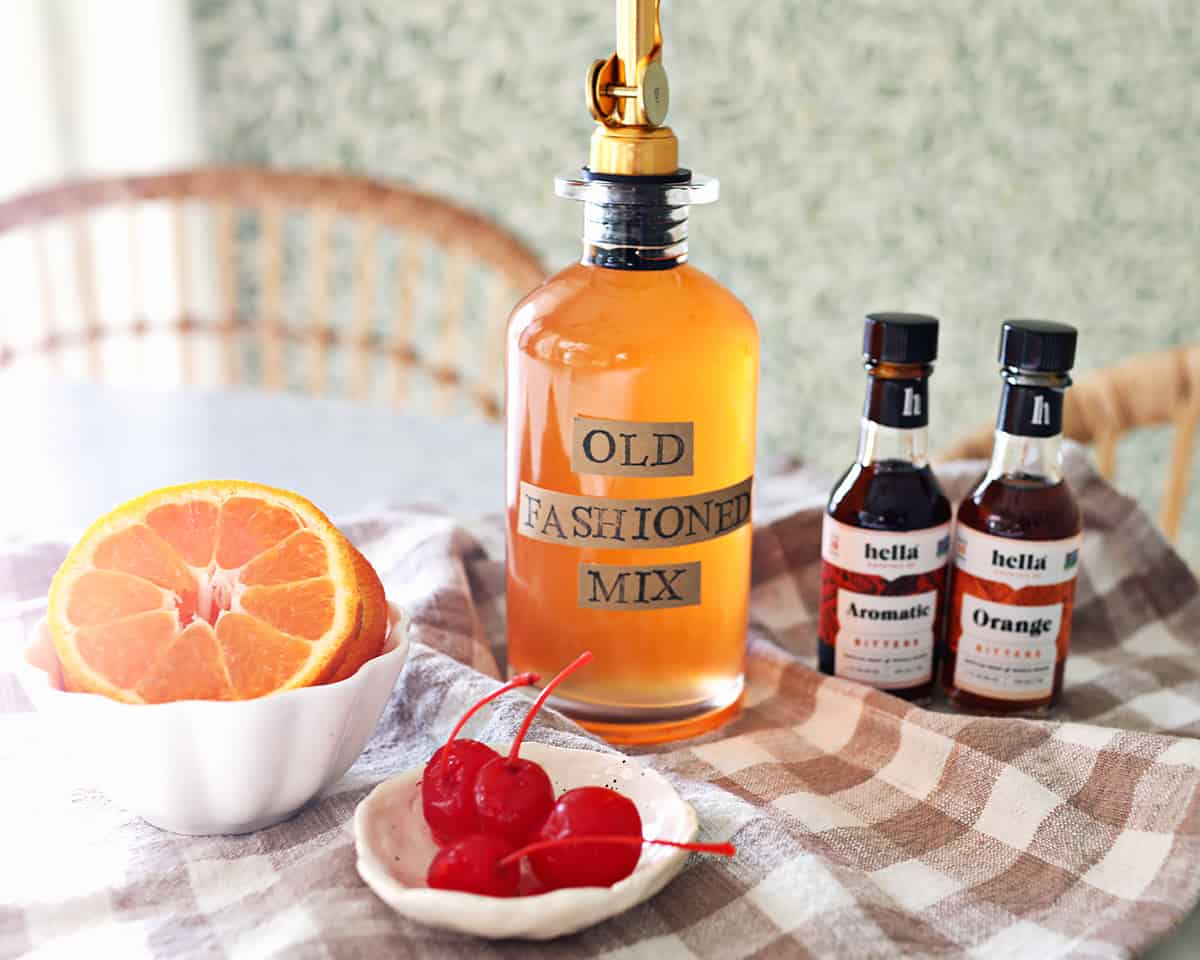
Old Fashioned Mix Ingredients
- granulated white sugar
- water
- freshly squeezed clementine juice
- maraschino cherries
- cinnamon stick
- aromatic and orange bitters
How to Make Old Fashioned Simple Syrup
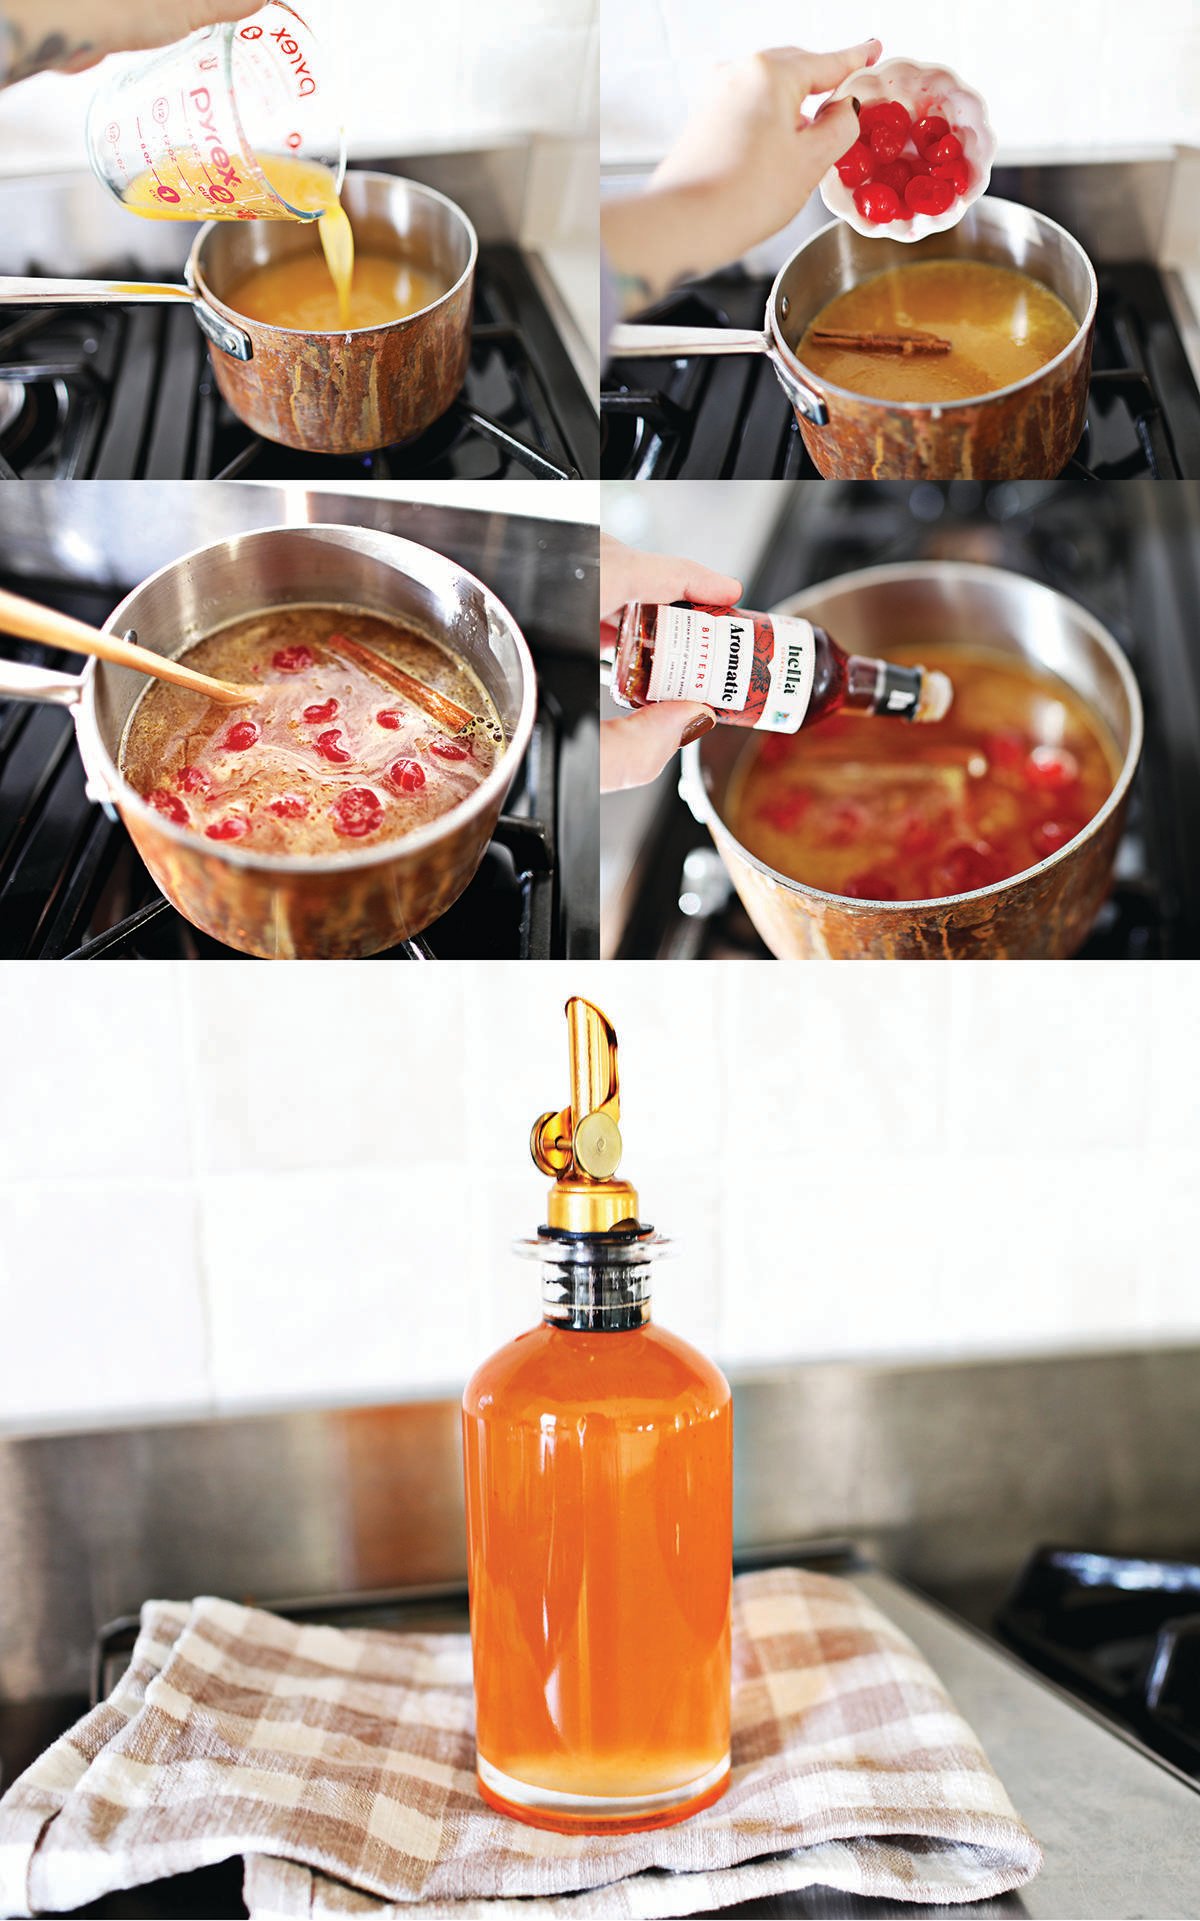
In a sauce pan, combine 3 cups sugar, 2 cups water, and 1 cup freshly squeezed clementine juice. I used 5 clementines and a citrus juice hand press to juice them.
Next, add 5 maraschino cherries cut into halves and stems removed. Add one cinnamon stick. Let the mixture simmer on medium heat until the sugar has completely dissolved into the water.
Next, remove the mixture from the heat and let it sit to cool and for the flavors to steep for one hour.
After the ingredients have steeped for one hour, add aromatic and orange bitters. I used about 50 drops of each bottle, or you can measure out 1/2 tablespoon of each bitter type.
Use a fine mesh strainer and a funnel to decant your syrup into a glass bottle. I used this bottle set for mine.
As a finishing touch, you can use rubber stamps to create a label like I did. This is especially useful if you are getting ready for a party where guests will serve themselves, or if you are making more than one type of syrup.
Tips for Mixing an Old Fashioned
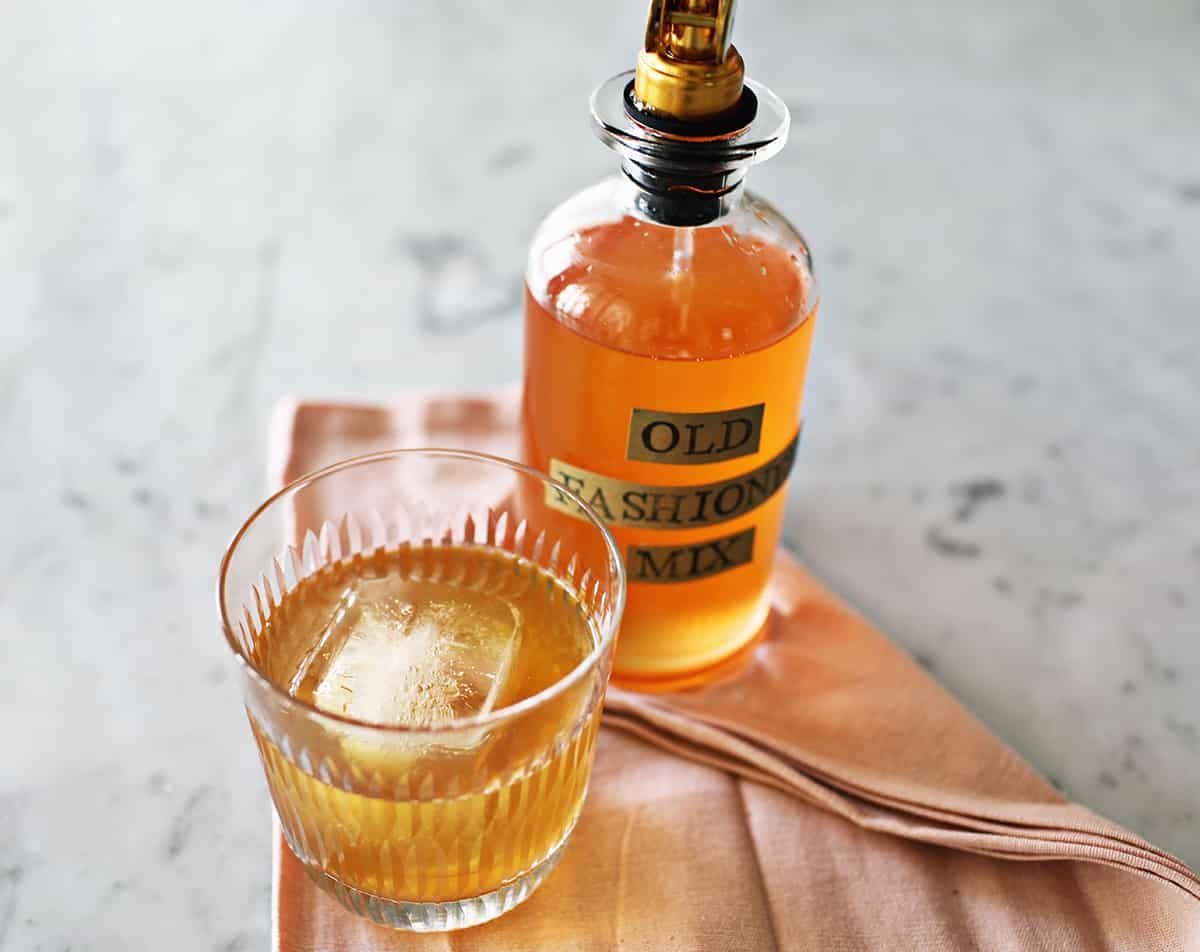
- To mix an Old Fashioned using this recipe, combine 2 ounces high quality bourbon and 1 ounce of mix. Stir and pour over a large ice cube to serve in a whiskey glass.
- Garnish your drink with an orange wedge and a maraschino cherry.
- If you are in the market for glassware that works great for an old fashioned, these glasses are great for whiskey cocktails.
An Old Fashioned Pairs Well With
Other recipes you may like:
- 20 Easy Party Appetizer Ideas
- 5 Tips for Creating the Perfect Cheese Platter
- Favorite Homemade Brownies
FAQ
Frequently Asked Questions
What does an Old Fashioned taste like?
An Old Fashioned is a sweet cocktail made with bourbon or rye. They are spirit forward (boozy) with a flavor of oranges and cherries.
How long does homemade simple syrup last?
Homemade simple syrups, like this recipe, will stay good in the refrigerator for at least a month. I often use them for a few months. If you notice them becoming cloudy, crystalizing, or the taste has changed it’s time to replace.
Homemade Old Fashioned Mix
Ingredients
- 3 cups granulated white sugar
- 2 cups water
- 1 cup freshly squeezed clementine juice 5 clementine oranges
- 5 maraschino cherries
- 1 cinnamon stick
- ½ tablespoon aromatic bitters
- ½ tablespoon orange bitters
Instructions
- In a sauce pan, combine 3 cups sugar, 2 cups water and 1 cup freshly squeezed clementine juice (I used 5 clementines and a citrus juice hand press to juice them. Next, add 5 maraschino cherries cut into halves and stems removed. Add one cinnamon stick. Let the mixture simmer on medium heat until the sugar has completely dissolved into the water.
- Next, remove the mixture from the heat and let it sit to cool and for the flavors to steep for one hour.
- After the ingredients have steeped for one hour, add aromatic and orange bitters. I used about 50 drops of each bottle or you can measure out 1/2 tablespoon of each bitter type.
- Use a fine mesh strainer and a funnel to decant your syrup into a glass bottle. I used this bottle set for mine. As a finishing touch, you can use rubber stamps to create a label like I did.This is especially useful if you are getting ready for a party where guests will serve themselves or if you are making more than one type of syrup.
Notes
- If you don’t have clementines, you can uses oranges as a substitution.
- If you prefer to add the cocktail bitters to each drink individually, omit them from this mix recipe.
Nutrition
Related: Butterbeer Recipe, Oreo Dip, Cookie Dough Dip, Wendy’s Frosty, Orange Julius Recipe.

What is Candy Salad?
Candy Salad is a fun way to served a mixed assortment of different types of candies. Our recipe is for gummy candy salad, combining all our favorite gummy candies into a large serving (salad) bowl. We store our candy salad with a scoop for easy serving. The airtight container keeps the candy fresh and we serve scoops in small bowls for family movie nights.
This recipe became viral on TikTok. Candy Salad videos have been sweeping the internet, creating a fun and very sweet candy salad trend. When I saw it, I knew it was an immediate yes for my family because we love gummy candy and I knew my children would enjoy the activity of creating this candy mix together. Try making this for your summer get-togethers.

Candy Salad Ingredients
- Gummy Bears – Choose your favorite flavors.
- Gummy Worms – Choose sour or sweet.
- Sour Punch Bites
- Watermelon Gummies
- Starmix – Or any variety pack gummies.
- Nerds Gummy Clusters
- Peach Rings – Or peach gummies.
- Gummy Sharks
- Happy Cola Gummies
- SweetTarts Chewy Fusions
- Sour Brite Crawlers
- Mini Starbursts
Important note: Substitute any favorite gummy candies of your own. Eyeballing the ingredients is sufficient and anything goes.
We mixed some bags of store-bought gummies such as Haribo with a big bag of mixed candy we purchased from a bulk candy store. We used a salad bowl with a wood lid as well as a metal scoop for serving the candy mix.

Instructions
In a large salad bowl, decant a variety of gummy candies. Mix together with a large wooden spoon.
If you have any long candies such as sour straws or nerds rope, cut them into smaller pieces before adding to the mixture.
Store in an airtight container in a cool, dry place. Use a scoop to serve portions.

Tips for Making
- When stored in an airtight container, this candy salad will stay fresh for several months.
- This is a great recipe to bring for a road trip or a family vacation.
- Feel free to substitute your favorite candies. This is the key to making the perfect candy salad.
- Choose flavors that blend well together.

Variations
- Chocolate Candy Salad – Combine miniature candy bars, M&Ms and chocolate candies.
- Reeses Candy Salad – Mix various types of Reese’s candies along with peanuts and chocolate candies to create a peanut butter cup-themed candy salad.
- Sour Candy Salad – Use sour candies such as Sour Patch Kids and Warheads to create a mouth puckering sour candy mixture.
- Fruit Candy Salad – Use fruit flavored candies and Skittles, Starburst and Twizzlers or any fruity candy.
- Halloween Candy Salad – Choose candies in a yellow, lavender, black and white color scheme. Find themed candies such as gummy eyeballs or gummy fingers for a creepy vibe.
- Christmas Candy Salad – Choose candies in a color scheme of red, green and white. Incorporate stars, candy cane stripes and gumdrops into your mix.
- 4th of July Candy Salad – Choose candy in a color scheme of red, white and blue.
- Easter Candy Salad – Mix jelly beans, candy eggs and pastel gummy candies for a fun Easter-themed mix.
More Movie Night Recipes

Candy Salad
Equipment
- 1 salad bowl with airtight lid
- 1 scoop
Ingredients
- 1 cup gummy bears
- 1 cup gummy worms
- 1 cup nerds gummy clusters
- 1 cup peach rings
- 1 cup gummy sharks
- 1 cup mini starbursts
Instructions
- In a large salad bowl, decant a variety of gummy candies.
- Mix together with a large wooden spoon.
- If you have any long candies such as sour straws or nerds rope, cut them into smaller pieces before adding to the mixture.
- Store in an airtight container in a cool, dry place. Use a scoop to serve portions.
Notes
- When stored in an airtight container, this candy salad will stay fresh for several months.
- This is a great recipe to bring for a road trip or a family vacation.
- Feel free to substitute your favorite candies. This is the key to making the perfect candy salad.
- Choose flavors that blend well together.