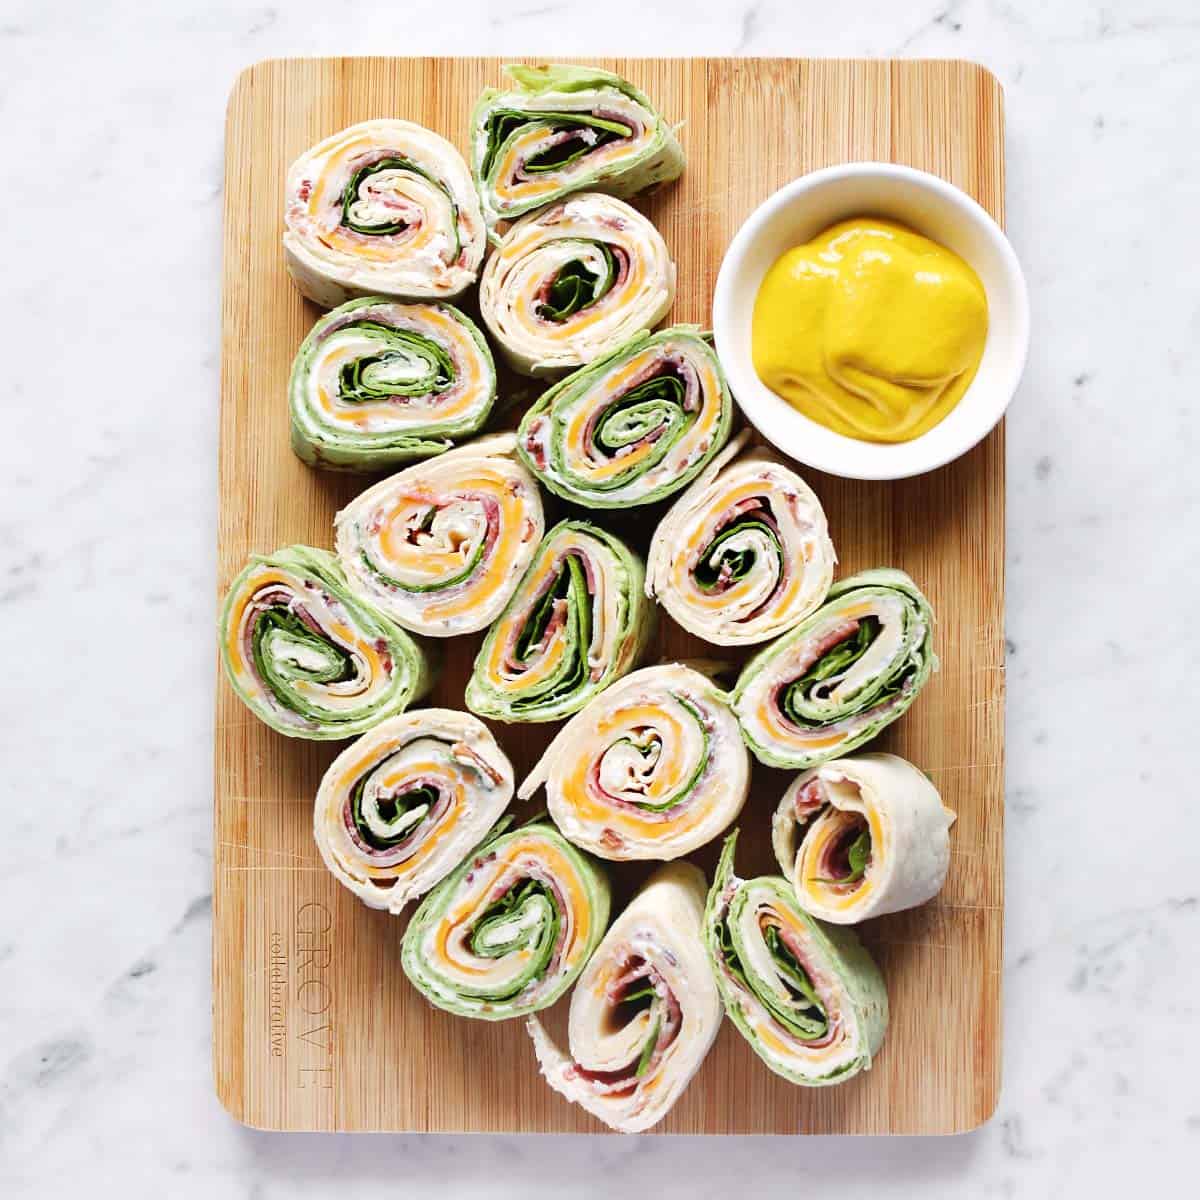
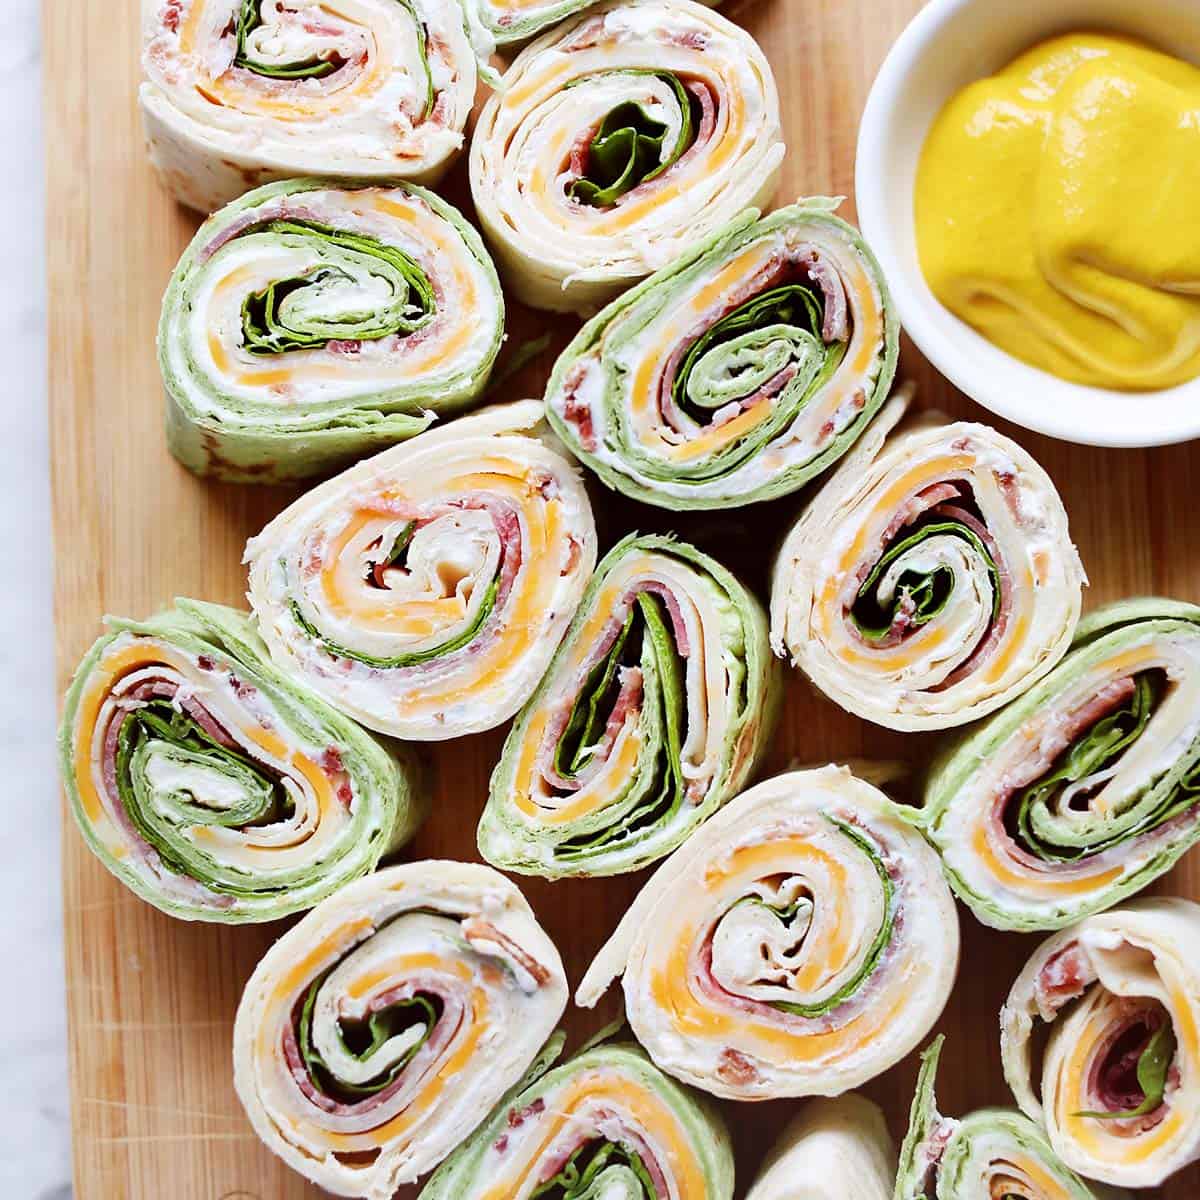
The secret to a great pinwheel sandwich is the cream cheese filling! This is the “glue” that keeps this rolled up sandwich looking great and it tastes amazing. I like to make the cream cheese filling with ranch and bacon bits, but there are many different options and variation to try.
Related: Looking for more easy appetizers? Try 30 Easy Finger Foods for a Party, 50 Easy BBQ Side Dishes or 75 Summer Dinner Ideas.
Basic Ingredients
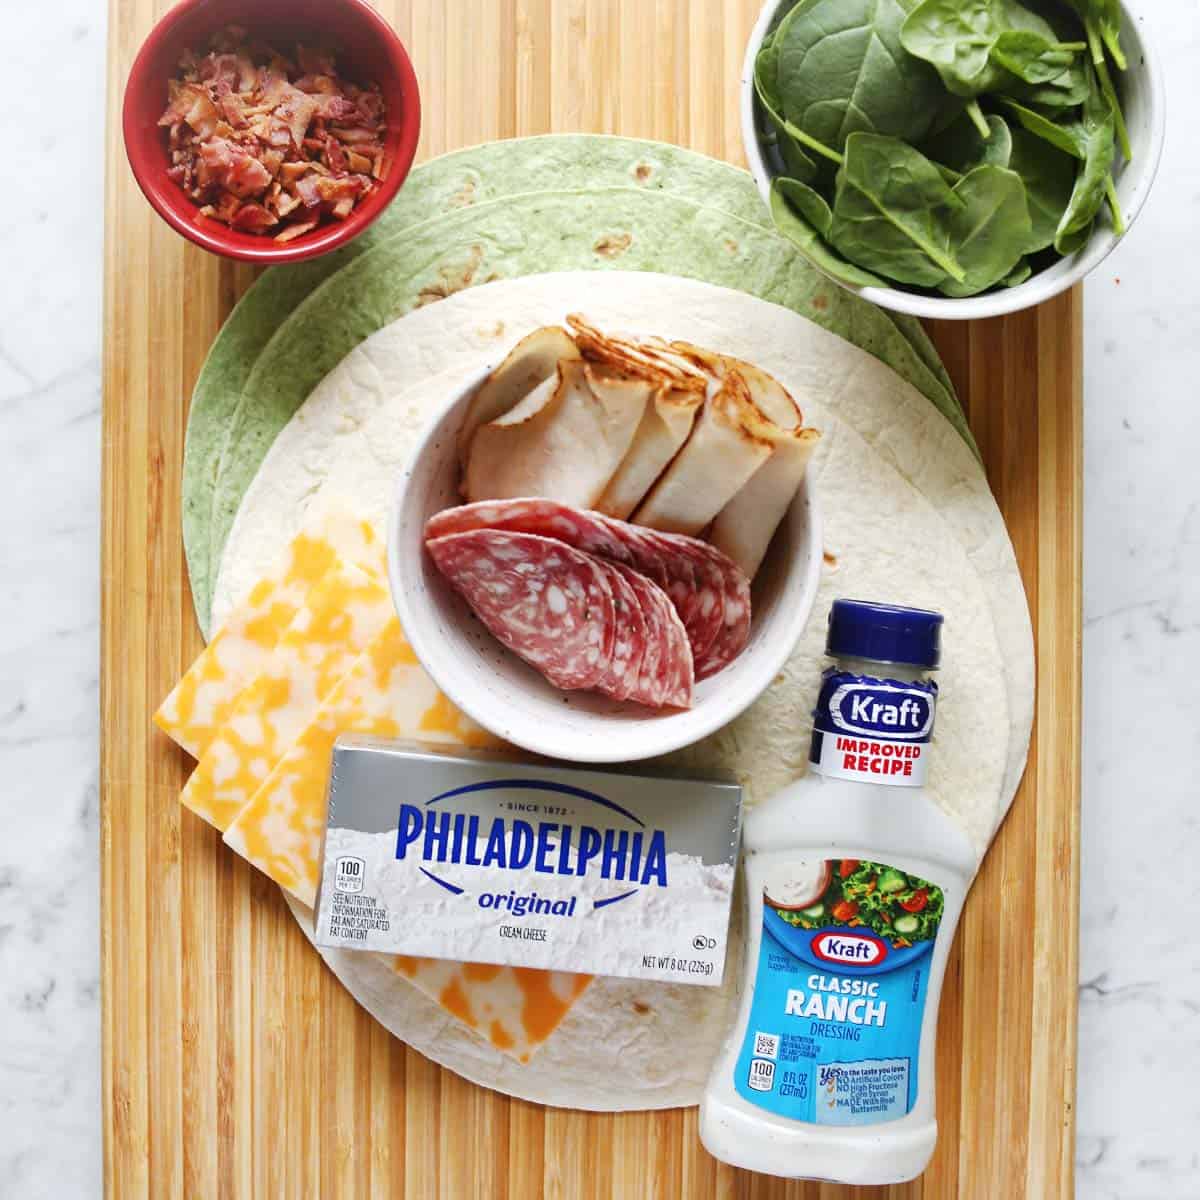
- Flour tortillas
- Cream cheese
- Ranch dressing – store bought or homemade
- Bacon
- Sliced cheddar cheese – colby is great too
- Deli meat – I like smoked turkey, salami or ham
- Veggies like romaine lettuce, cucumber, avocado or spinach
How to Make Pinwheel Sandwiches
Combine the softened cream cheese with the ranch dressing and bacon (chopped).
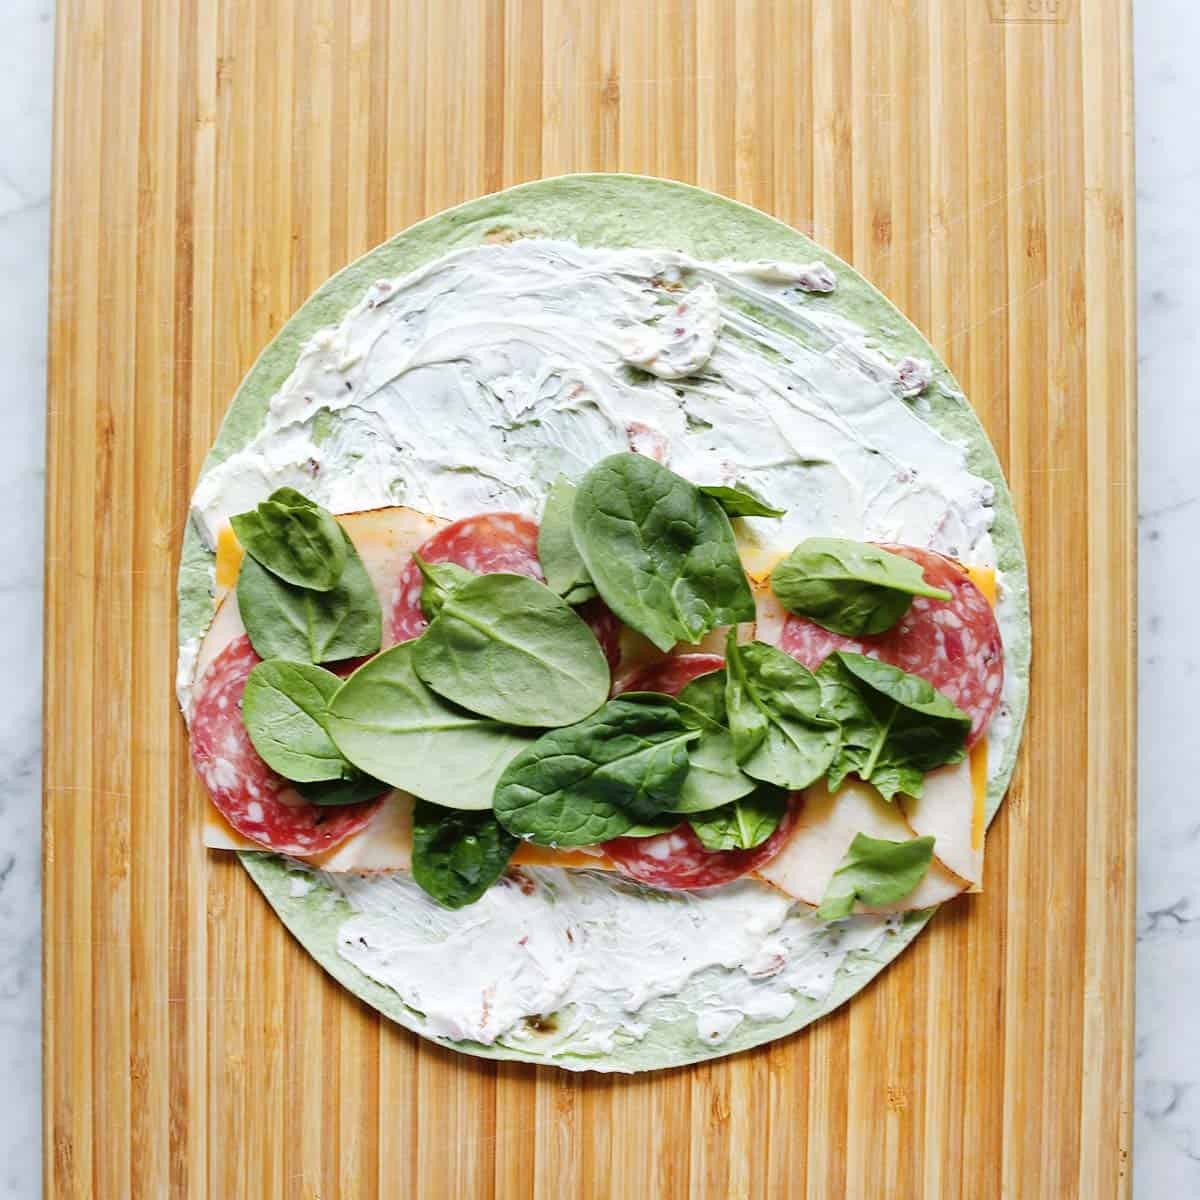
Lay out a tortilla shell. Spoon the cream cheese mixture on top and spread into a thin layer, coating the entire tortilla.
Layer on the sliced cheese, deli meat, and spinach. Place it toward the bottom 1/3 of the tortilla (not the center).
Roll up the tortilla and slice into pinwheels. The cream cheese holds these together pretty well, BUT if you have issue with them wanting to unroll, add a toothpick to the pinwheel. Use a sharp knife to cut the rolled tortilla into pinwheels.
Additional Filling Ideas
- For the cream cheese filling, you could omit the ranch dressing and add a packet of ranch seasoning instead. The bacon is also optional.
- If you don’t want to use a cream cheese filling, you could swap it for hummus for a similar effect.
- Any cheese that comes in slices (or that you can slice) will work. You could also try a crumbly cheese like feta.
- Any deli meat you prefer can work for pinwheel sandwiches: turkey, chicken, salami, pepperoni, or even bacon strips.
- You can add more or less vegetables: lettuce, spinach, sliced bell peppers, thinly sliced tomato, or fresh herbs like cilantro or basil.
- Pickled items will work as well: bread and butter pickles, olives, pickled carrots, etc.
More Appetizer Recipes
Other recipes to make for a party:
- The Best Fruit Salad
- Creamy Pasta Salad
- Deviled Eggs
- Ambrosia Salad
- Egg White Bites
- Homemade Chex Mix
Frequently Asked Questions
Can I make pinwheel sandwiches ahead of time?
Yes, pinwheel sandwiches can be made the day before and refrigerated until ready to serve. The one factor you’ll want to consider are any ingredients (like sliced tomatoes) that could create additional moisture during storage.
How do I store pinwheel sandwiches and how long do they last?
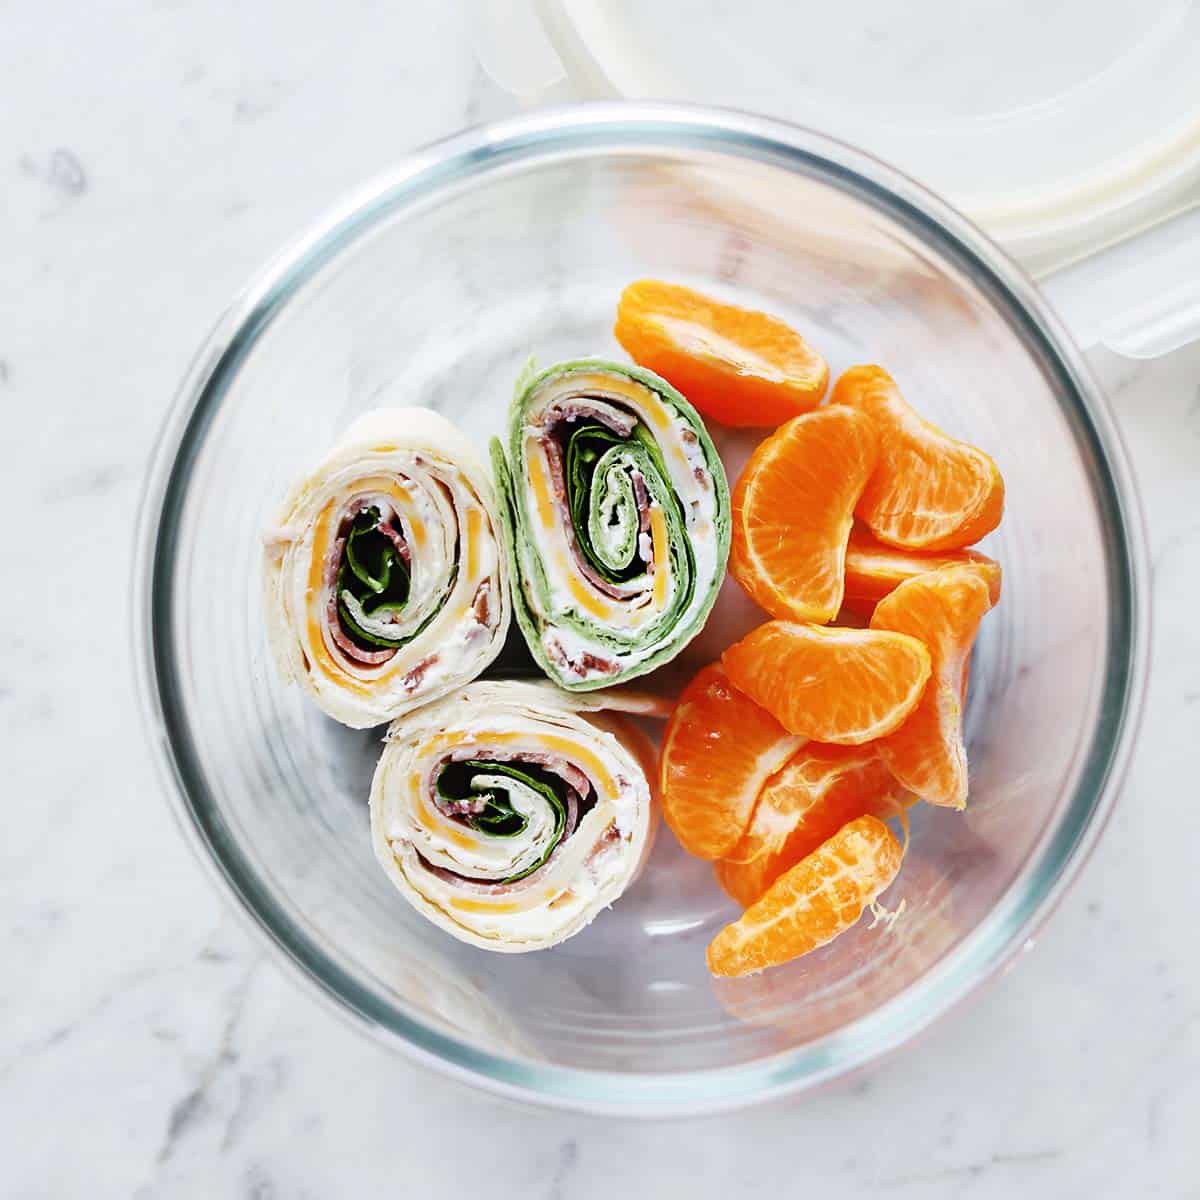
You can store pinwheel sandwiches in an airtight container in the refrigerator. This could be a ziplock bag or Tupperware-type container.
You could also store them on a serving tray or cutting board wrapped in plastic wrap. They can be stored this way for 2-3 days.
Pinwheel Sandwiches
Ingredients
- 4 tortillas soft
- 8 ounces cream cheese softened
- ¼ cup ranch dressing
- 3 strips bacon
- 8 slices cheese
- 8 slices deli turkey
- 16 slices salami
- 1 cup spinach leaves
Instructions
- Combine the softened cream cheese with the ranch dressing and bacon (chopped).
- Lay out a tortilla shell. Spoon the cream cheese mixture on top and spread into a thin layer, coating the entire tortilla.
- Layer on the sliced cheese, deli meat, and spinach. Place it toward the bottom 1/3 of the tortilla (not the center).
- Roll up the tortilla and slice into pinwheels.
- The cream cheese holds these together pretty well, BUT if you have issue with them wanting to unroll, add a toothpick to the pinwheel.
Notes
- For the cream cheese filling, you could omit the ranch dressing and add a packet of ranch seasoning instead. The bacon is also optional.
- If you don’t want to use a cream cheese filling, you could swap it for hummus for a similar effect.
- Any cheese that comes in slices (or that you can slice) will work. You could also try a crumbly cheese like feta.
- Any deli meat you prefer can work for pinwheel sandwiches: turkey, chicken, salami, pepperoni or even bacon strips.
- You can add more or less vegetables: lettuce, spinach, sliced bell peppers, thinly sliced tomato, or fresh herbs like cilantro or basil.
- Pickled items will work as well: bread and butter pickles, olives, pickled carrots, etc.
Nutrition
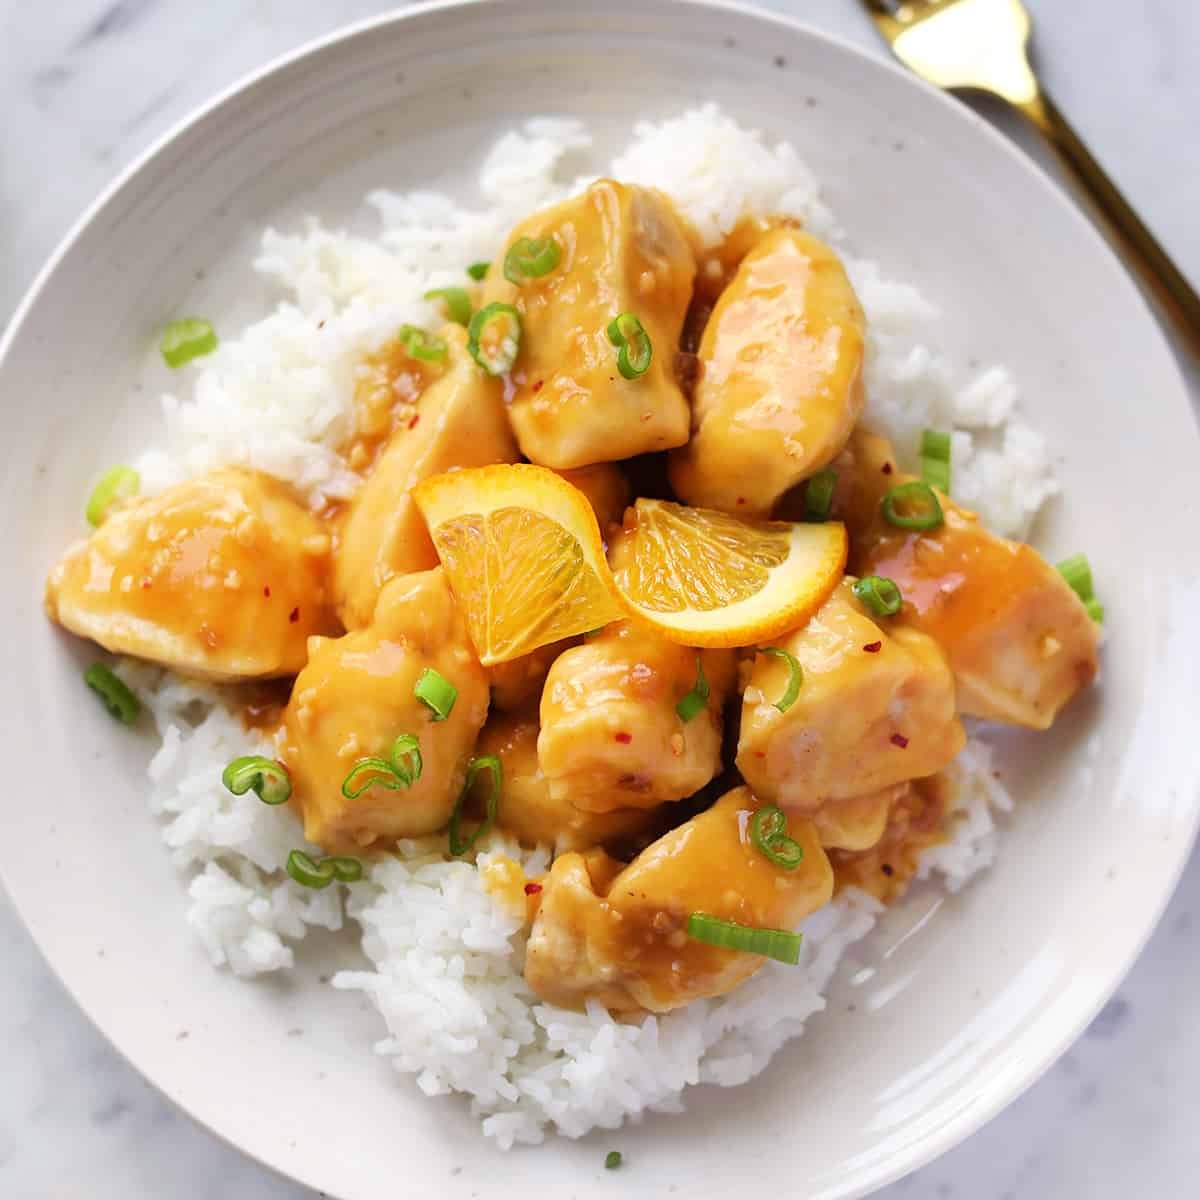
A lot of weeknight dinners we make at our house are pretty basic. We make some kind of protein (meat or plant-based) with rice or pasta. So, I like to have easy ways to change this up flavor-wise. And that’s where this orange chicken sauce recipe comes in.
Related: Check out Cashew Chicken Sauce, Sweet & Sour Sauce, Air Fryer Chicken or give our Easy Chicken Pot Pie a try!
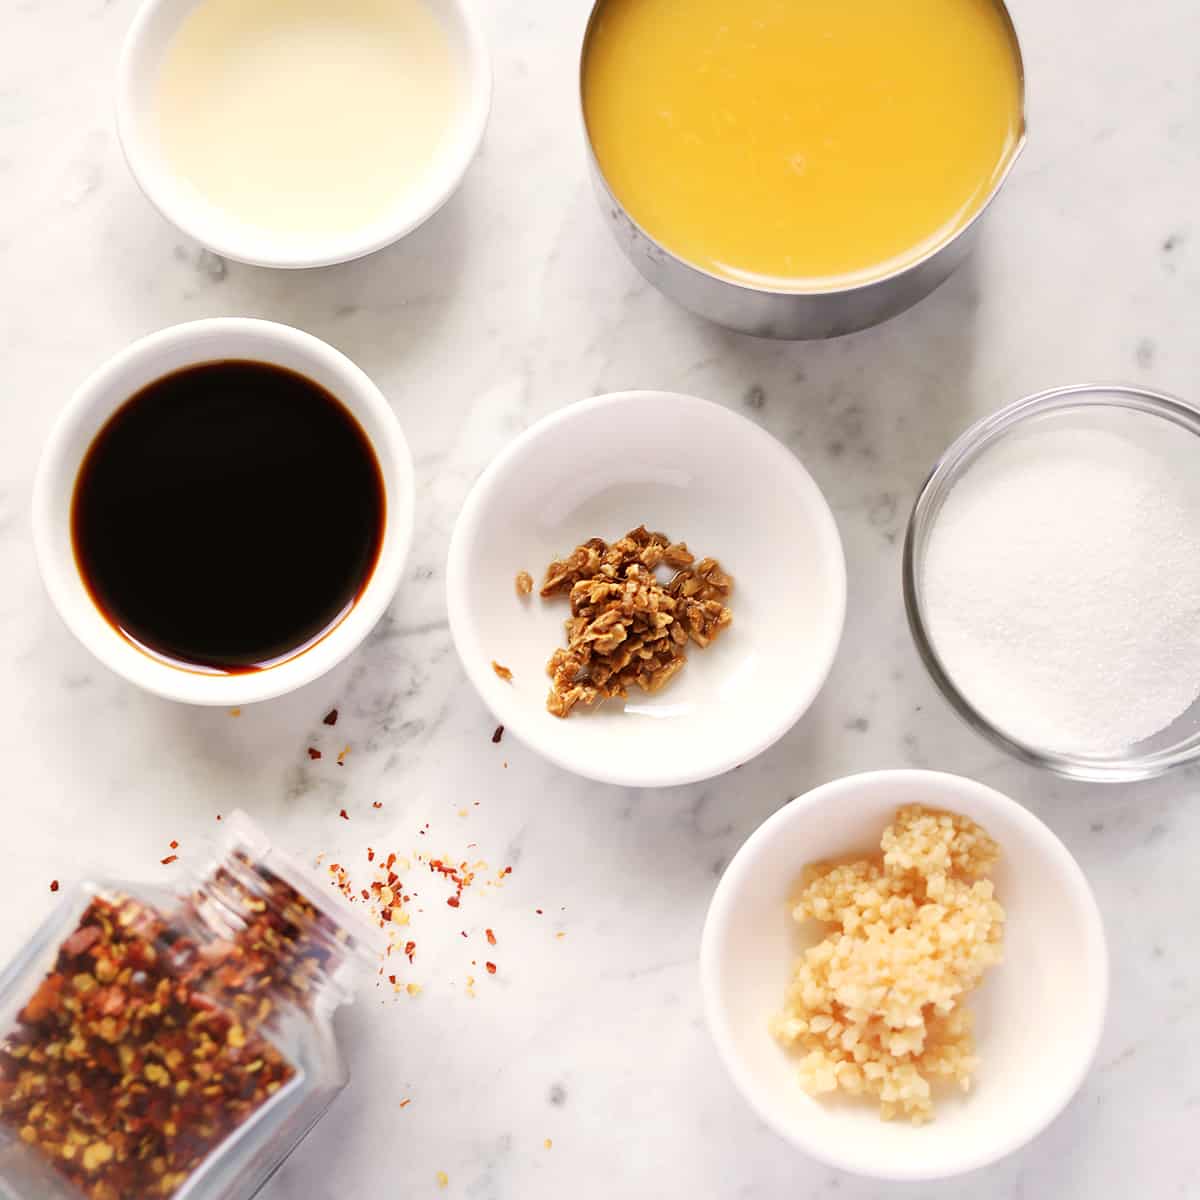
Orange Chicken Sauce Ingredients:
- Olive oil
- Ginger
- Garlic
- Orange Juice + Zest
- Granulated White Sugar
- Rice Vinegar
- Soy Sauce
- Cornstarch
- Red Pepper Flakes
Directions:
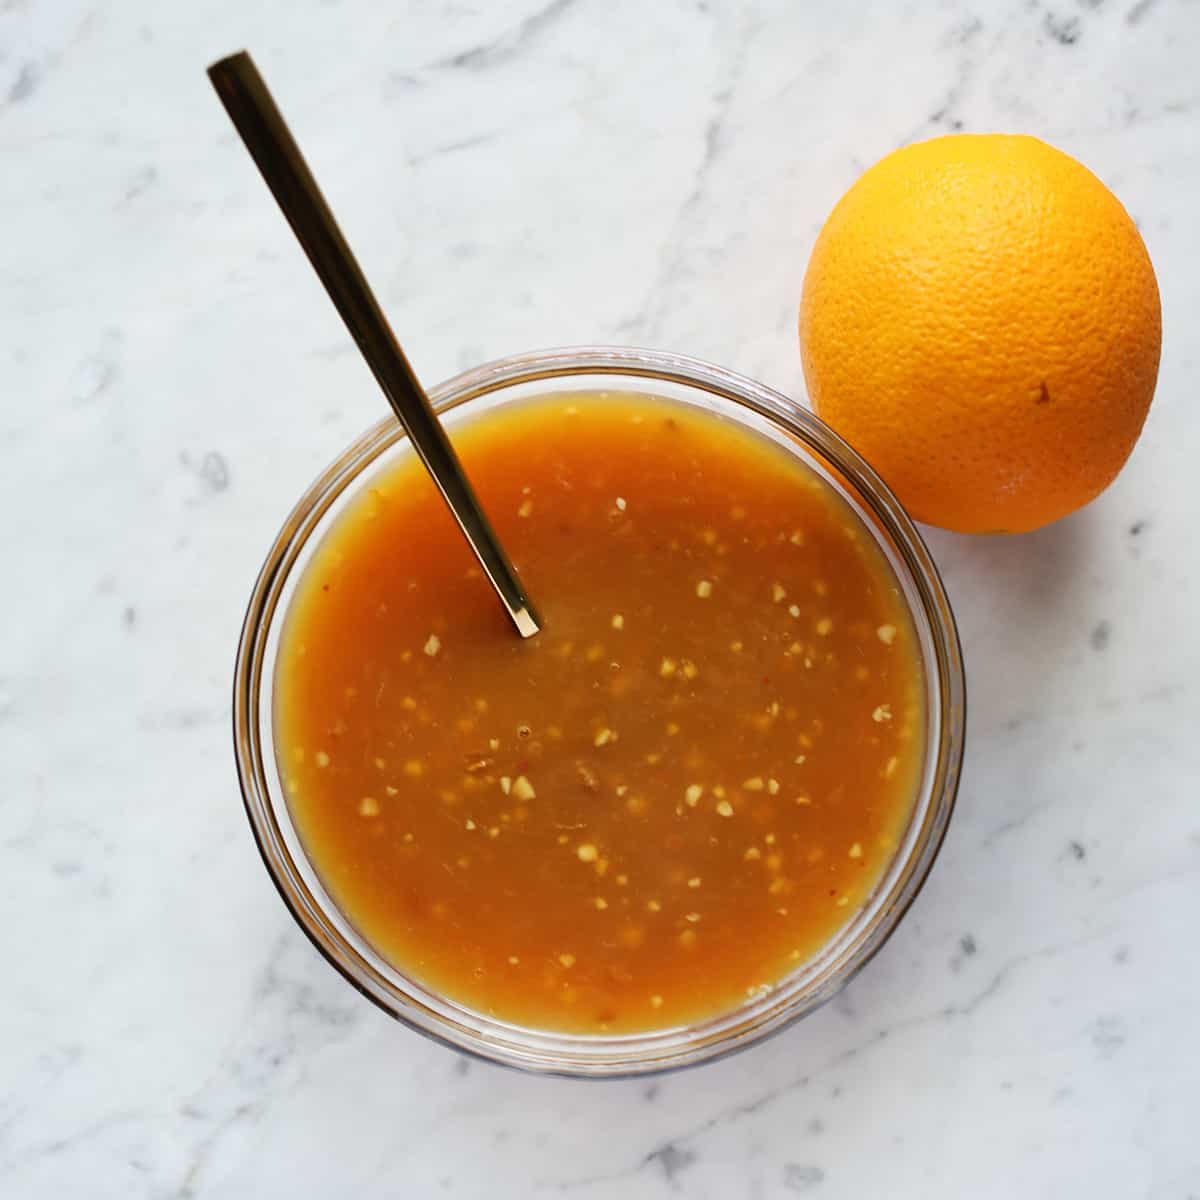
Cook the minced ginger and garlic in the olive oil over medium/high heat for a minute or two. Then, add the orange juice, zest, sugar, rice vinegar, and soy sauce. Whisk until the sugar dissolves. Stir in the red pepper flakes.
In a small bowl or glass, stir together the cornstarch with one tablespoon water. This creates a thick slurry mixture. Slowly pour this into the sauce, stirring as you do.
Continue to cook until the sauce thickens. Taste and add more soy sauce or red pepper flakes if needed.
Tips & Substitutions:
- You can substitute honey for the granulated white sugar if you like.
- If you don’t have rice vinegar, you can use white vinegar instead.
- Sauce is like gravy in that if it’s not thickening as much as you want after you’ve added the cornstarch, turn the heat up a little and continue to cook. Keep an eye on it though, as it can thicken quickly.
- You can store orange chicken sauce in an airtight container in the refrigerator for up to a week—just rewarm before using.
Serving Suggestions:
- You can use this Springfield-Style Cashew Cauliflower recipe and substitute this orange chicken sauce for a vegetarian-friendly option.
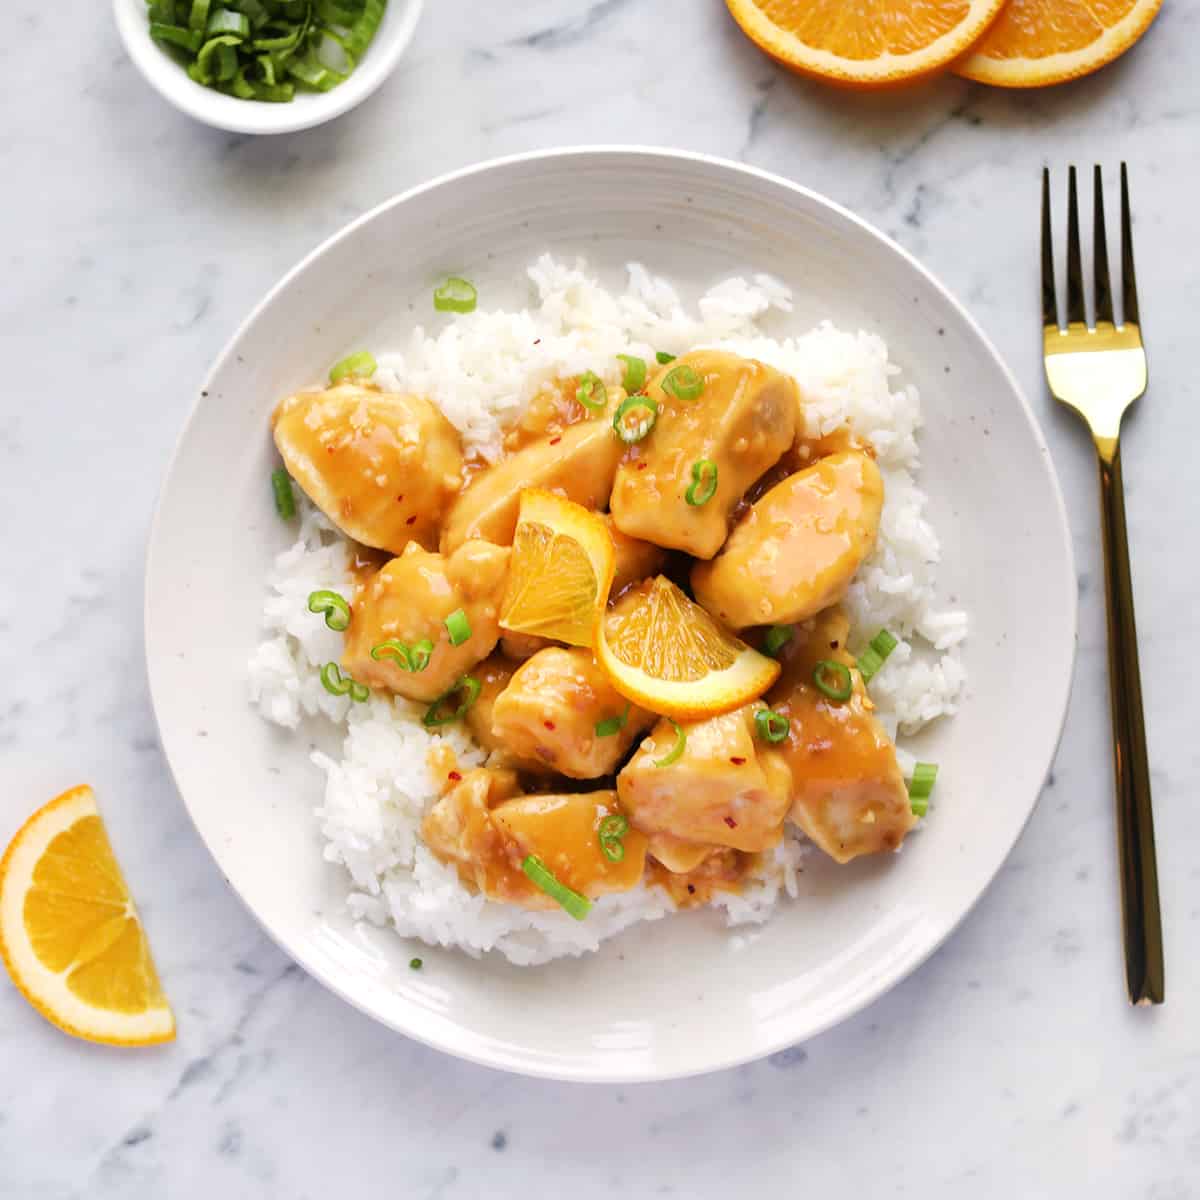
- When we make rice, I always use a rice cooker since it’s so easy, and then I can focus on making the chicken and sauce while the rice cooker does its thing.
- I like to add a few chopped green onions over this sauce just before serving.

Orange Chicken Sauce
Ingredients
- 1 teaspoon olive oil
- 1 tablespoon ginger minced
- 3 cloves garlic minced
- 1 cup orange juice and zest from orange
- 2 tablespoons granulated white sugar
- 2 tablespoons rice vinegar
- 2 tablespoons soy sauce
- ¼ teaspoon red pepper flakes
- 1 tablespoon cornstarch
Instructions
- In a sauce pan, cook the minced ginger and garlic in the olive oil over medium/high heat for a minute or two.
- Then, add the orange juice, zest, sugar, rice vinegar, and soy sauce.
- Whisk until the sugar dissolves.
- Stir in the red pepper flakes.
- In a small bowl or glass, stir together the cornstarch with one tablespoon water. This creates a thick slurry mixture.
- Slowly pour this into the sauce, stirring as you do.
- Continue to cook until the sauce thickens. Taste and add more soy sauce or red pepper flakes if needed.
Notes
- You can substitute honey for the granulated white sugar if you like.
- If you don’t have rice vinegar, you can use white vinegar instead.
- Sauce is like gravy in that if it’s not thickening as much as you want after you’ve added the cornstarch, turn the heat up a little and continue to cook. Keep an eye on it though, as it can thicken quickly.
- You can store orange chicken sauce in an airtight container in the refrigerator for up to a week, just rewarm before using.
Nutrition
Carbonara also manages to be one of those pasta dishes that feels both light but rich and filling at the same time. The main components are pancetta (or bacon), egg yolks and cheese.
Related: Pomodoro Sauce, Vodka Sauce, Alfredo Sauce, Pesto and Bruschetta.

Ingredients
- Pancetta, or thick cut bacon
- Parmesan
- Egg yolks
- Garlic
- Spaghetti noodles
- Salt and pepper
Pasta water is also a critical component of this recipe, but you will make it as you cook the noodles.

Directions
Cook the pasta according to the package directions for al dente. Before straining, reserve some of the pasta water.
In a large saucepan, cook the pancetta (or bacon) until fully cooked, but not too crispy. Then toss in the garlic and cook for another minute.
In a small bowl, add a few tablespoons of the (hot) pasta water to the egg yolk and stir to incorporate. Add a few more tablespoons at a time, stirring in between. The goal here is heat up the yolks gradually so they don’t curdle/cook once added to the pan.
Now add the pasta and yolk mixture to the pancetta pan. Reduce the heat to low and toss everything with tongs. Sprinkle in the cheese and continue to toss until the cheese begins to melt. Taste and add any salt or pepper as needed. Serve warm.

Tips & Substitutions
- Pancetta is the traditional option for carbonara sauce, but sometimes this ingredient is difficult to find at the grocery stores I frequent. If that’s the case for you as well, thick cut bacon will also work for this recipe.
- If you do notice the eggs curdling or cooking too fast, it’s OK! This will only change the texture, it doesn’t mean the dish is completely ruined. It will be more like fried rice than traditional carbonara but still tasty.
- I will often add a sprinkle of fresh herbs, like parsley, before serving just for a little added flavor and green, but this is optional and not necessarily traditional.

Serving Suggestions
I love this carbonara recipe alongside a big salad or vegetable side dish. Here are some ideas.
- Homemade Caesar Salad
- Roasted Asparagus
- Roasted Brussels Sprouts
- Roasted Green Beans
- Roasted Cauliflower
- Air Fryer Zucchini
- Air Fryer Green Beans
- Air Fryer Cauliflower
- Air Fryer Brussels Sprouts
- Air Fryer Asparagus

Carbonara Sauce
Ingredients
- 2 ounces pancetta
- ¼ cup Parmesan cheese
- 2 egg yolks
- 1 clove garlic
- 8 ounces spaghetti noodles
- ¼ cup pasta water
- salt and pepper
Instructions
- Cook the pasta according to the package directions for al dente. Before straining, reserve some of the pasta water.
- In a large saucepan, cook the pancetta (or bacon) until fully cooked, but not too crispy.
- Then toss in the garlic and cook for another minute.
- In a small bowl, add a few tablespoons of the (hot) pasta water to the egg yolk and stir to incorporate. Add a few more tablespoons at a time, stirring in between. The goal here is heat up the yolks gradually so they don’t curdle/cook once added to the pan.
- Now add the pasta and yolk mixture to the pancetta pan. Reduce the heat to low and toss everything with tongs.
- Sprinkle in the cheese and continue to toss until the cheese begins to melt.
- Taste and add any salt or pepper as needed. Serve warm.
Notes
Nutrition
More Summer recipes: Tomato Burrata, The Best Fruit Salad, Chicken Salad, Deviled Eggs, Healthy Grain Bowls, Tom Collins, Mojito, Agua Fresca
Ingredients in 7 Layer Salad
- Iceberg Lettuce – This is the base layer of the salad and adds a nice crunchy texture.
- Frozen Peas – You can add your peas to the salad when they are half thawed.
- Hard Boiled Eggs – I love hard boiled eggs as an addition to this salad—they add so much!
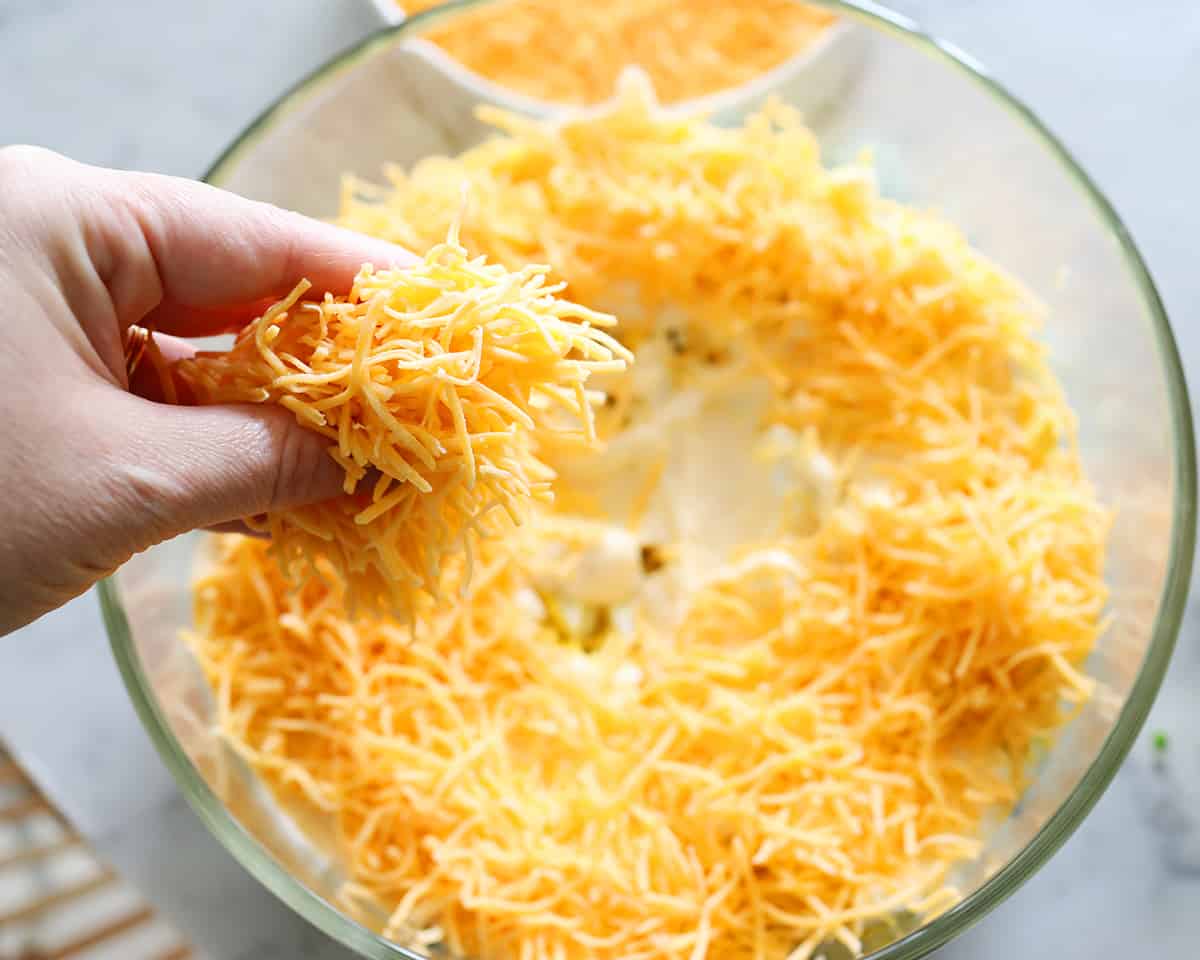
- Cheddar Cheese – Shredded sharp cheddar cheese is so delicious in this salad. Alternatively, you can add cubed cheese, but make sure you chop it small.
- Red Onions – To me, no salad is complete without some onion.
- Crispy Bacon – This makes the salad a grand slam. Feel free to substitute for turkey bacon or vegan bacon if you like.
- Homemade Dressing – You will whip up a quick dressing made of mayonnaise, sour cream, sugar, apple cider vinegar, salt and pepper.
There is some debate about which seven ingredients create the seven layers, so customize it to your personal tastes! Other optional layers are halved cherry tomatoes, grape tomatoes, green onions, celery, romaine lettuce, cucumbers or red bell peppers. I also think chopped up chicken is a very good idea. Feel free to customize the layers to your personal taste.
How to assemble 7 Layer Salad
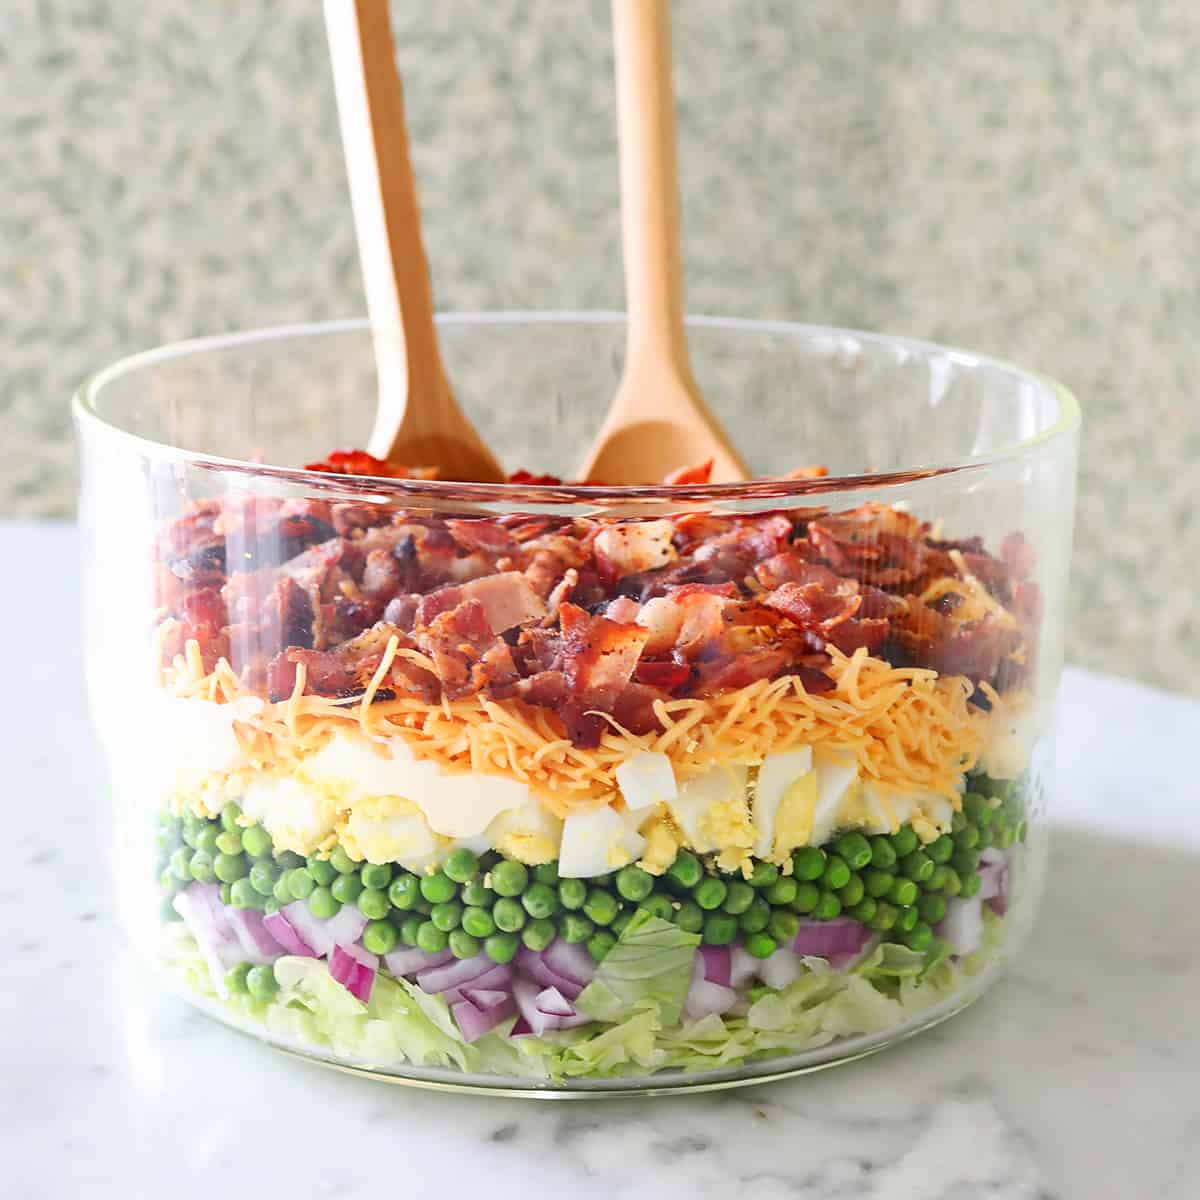
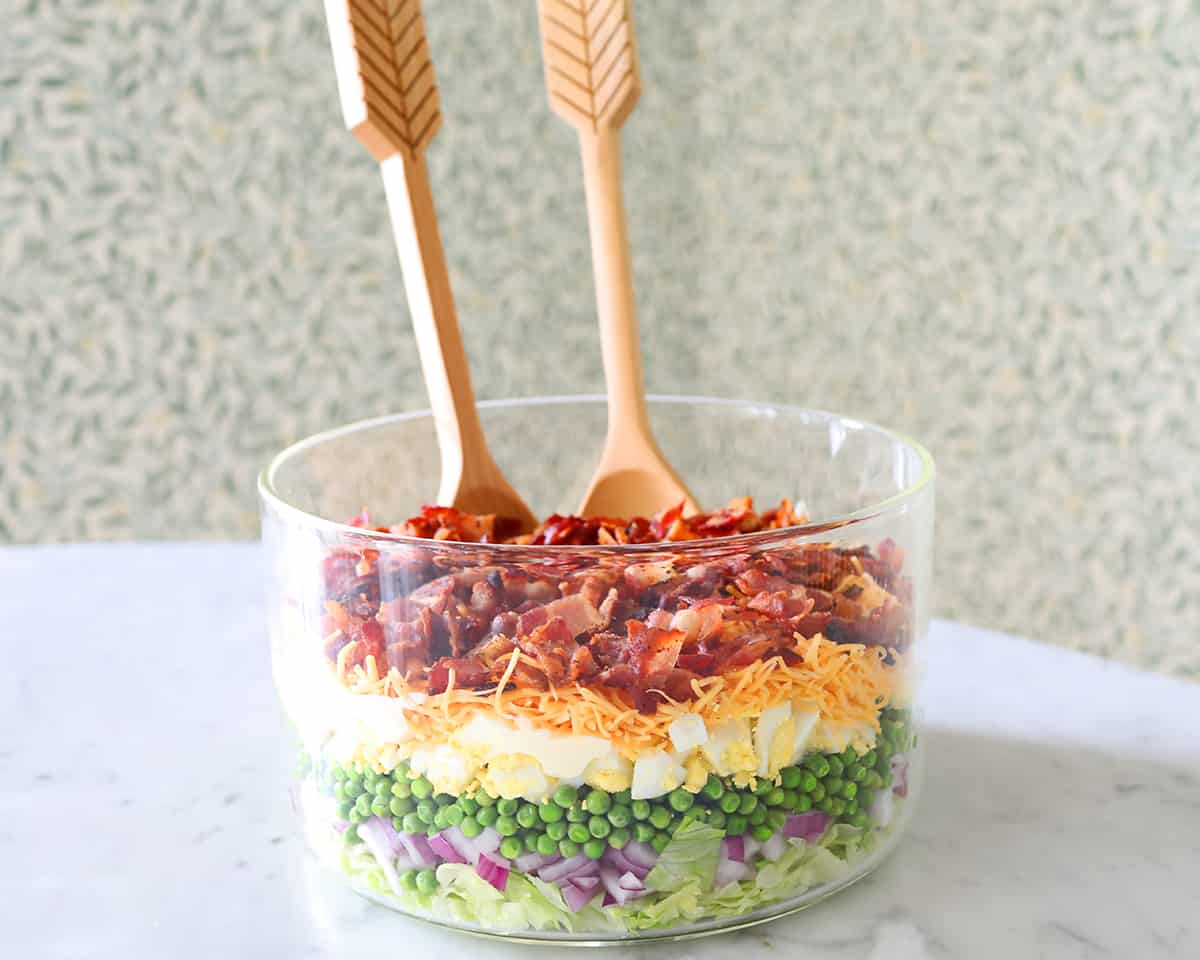
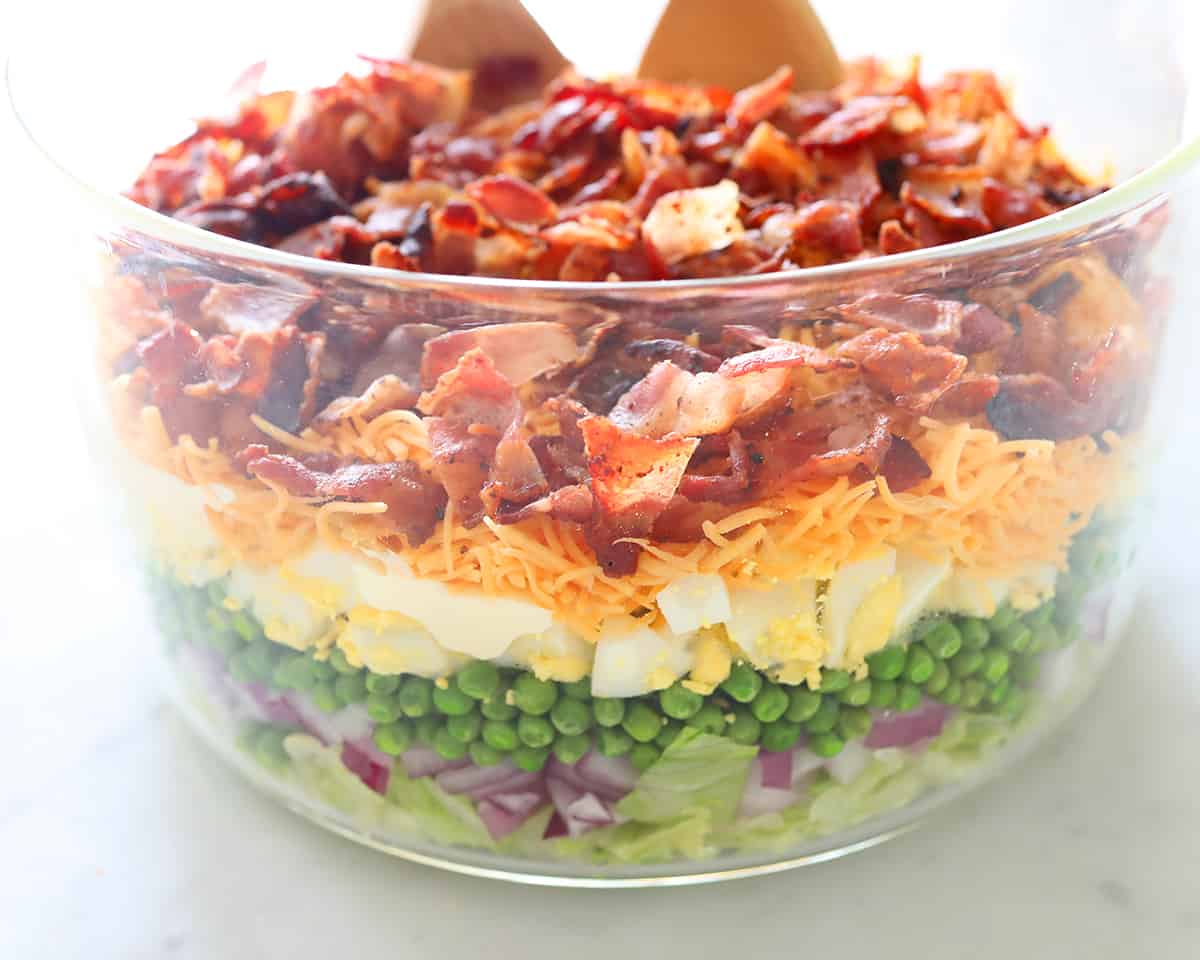
The 7 Layer Salad must be served in a glass bowl so you can see all the layers. It’s a very visually pleasing salad. I chose this glass bowl because it shows the layers really well. A trifle bowl is a great option as well. The salad is meant to be served without mixing the layers, so people can scoop straight down and get a scoop of all the layers.
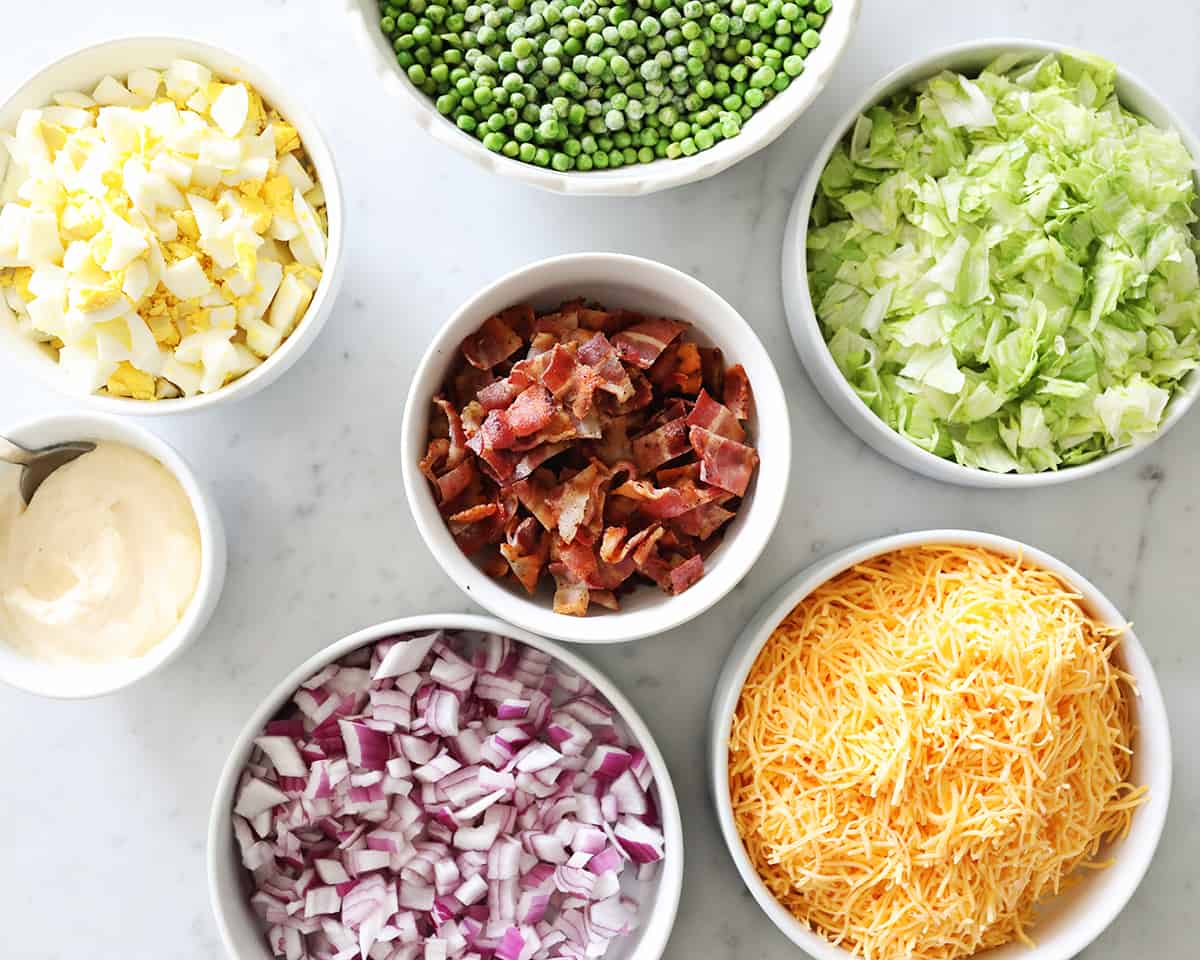
Prep your ingredients by mixing up the dressing (instructions below), cooking the bacon and eggs and chopping all the ingredients.
To assemble your salad, begin by adding one layer at a time to your glass bowl. I went in this order: lettuce, onion, peas, hard boiled eggs, dressing, shredded cheese and bacon.
7 Layer Salad Dressing
In a medium bowl, whisk together the mayonnaise, sour cream, sugar, apple cider vinegar, salt, and pepper until well combined. The dressing should be smooth and creamy. If you want to add a bit of texture to your dressing, you can add half a cup of parmesan cheese.
Cover the bowl and refrigerate the dressing while you prepare the rest of the salad. Chilling the dressing helps the flavors meld together.
How far ahead can I make this salad?
The ideal time to make this salad is 1-2 hours before serving, but you can do as much as the night before. Seal it until you are ready to serve.
Tips for Making
- Choose a glass bowl, so you can see the seven layers.
- Customize the dressing according to your taste. If you prefer a tangier flavor, increase the amount of apple cider vinegar. You can also add a dash of hot sauce for some heat.
- If you’re serving the salad at a party or potluck, consider providing a small label or note next to the bowl, listing the layers. This way, guests can see and appreciate each ingredient that goes into the salad.
- Grab your picnic blanket, this is a perfect recipe for a meal outdoors!
- Miracle Whip can be subbed for mayo if you are a fan. I personally will stay loyal to the mayo version.
- Leftovers can be kept in the refrigerator for up to two days. However, the salad is best enjoyed on the day it’s made.
Serving Suggestions/Goes Great With
Other recipes you may like:
FAQ
Frequently Asked Questions
What is the history of a 7 Layer Salad?
The 7 Layer Salad is a southern recipe from the 1950s. Although the recipe has had many variations, the basic concept has remained the same.
7 Layer Salad
Ingredients
- 1 head iceberg lettuce chopped
- 10 ounces frozen peas 1 bag
- 10 ounces cheddar cheese shredded
- 1 red onion chopped
- 6 hard boiled eggs chopped
- ½ pound bacon cooked and crumbled
- 1 cup mayonaise
- 1 cup sour cream
- 2 tablespoons sugar
- 1 tablespoon apple cider vinegar
- ½ teaspoon salt
- ¼ teaspoon black pepper
Instructions
- The 7 Layer Salad must be served in a glass bowl so you can see all the layers. It’s a very visually pleasing salad. I chose this glass bowl because it shows the layers really well. The salad is meant to be served without mixing the layers, so people can scoop straight down and get a scoop of all the layers.
- Prep your ingredients by mixing up the dressing (instructions below), cooking the bacon and eggs and chopping all the ingredients.
- To assemble your salad, begin by adding one layer at a time to your glass bowl. I went in this order: lettuce, onion, peas, hard boiled eggs, dressing, shredded cheese and bacon.
- Dressing – In a medium bowl, whisk together the mayonnaise, sour cream, sugar, apple cider vinegar, salt, and pepper until well combined. The dressing should be smooth and creamy. Cover the bowl and refrigerate the dressing while you prepare the rest of the salad. Chilling the dressing helps the flavors meld together.
Notes
- Choose a glass bowl, so you can see the seven layers.
- Customize the dressing according to your taste. If you prefer a tangier flavor, increase the amount of apple cider vinegar. You can also add a dash of hot sauce for some heat.
- If you’re serving the salad at a party or potluck, consider providing a small label or note next to the bowl, listing the layers. This way, guests can see and appreciate each ingredient that goes into the salad.
- Grab your picnic blanket, this is a perfect recipe for a meal outdoors!
- Leftovers can be kept in the refrigerator for up to two days. However, the salad is best enjoyed on the day it’s made.
Nutrition
If you love the Taco Bell Chalupa, this is a copycat version you can make at home by combining a deep fried tortilla shell (similar to flatbread) with ground beef, sour cream, cheese, lettuce and tomato. We love to make this chalupa recipe at home. And it’s easy to customize with all sorts of different taco fillings such as chicken or vegetarian fillings.
Related: Homemade Arepas, Tostadas, Elotes and Margarita Cocktail.

Ingredients
- Chalupa shells – Fried of baked.
- Ground beef – seasoned with Taco seasoning
- Shredded cheese – we like to use cheddar or a Mexican blend.
- Sour cream – This optional ingredients adds a creamy flavor.
- Lettuce – shredded iceburg lettuce adds crunch to the recipe. This can be substituted for Greek yogurt if you like.
- Tomato – You may use chopped tomatoes or salsa.
You can add other toppings like salsa, pico de gallo or guacamole too!

What are Chalupas?
Chalupas are a traditional food originating from South-Central Mexico including the states of Hidalgo, Puebla, Guerrero and Oaxaca. They are made with flat fried dough and filled with meats, cheeses, salsa and shredded lettuce.
The Taco Bell version is Americanized and combines the shell of a chalupa with the fillings of a taco. There are many ways to customize the fillings in a chalupa.
How to make Chalupas
Cook the ground beef, seasoning with the taco seasoning, on medium high heat until cooked through. No pink should remain. Shred the cheese, lettuce and cut up the tomatoes.
Fry / heat your chalupa shell according to whichever method you prefer (three options below).
Fill the shell with the cooked beef, sour cream, cheese, lettuce and tomatoes. Serve warm.

Tips and Substitutions
- Ground beef can be substituted for any ground meat like turkey or chicken.
- I like to use store bought chalupa shells (which you can also buy online) but if you want to make your own try this whole wheat flatbread recipe and then use one of the methods below for frying the chalupas after they are baked.
- To make this chalupa recipe vegetarian you could use refried beans or black beans in place of the beef.
- Other great chalupa fillings include: carnitas, al pastor, or barbacoa.
- This recipe is best served the day it is made. If you want to make these ahead I recommend making / prepping the fillings and toppings and then heating the shells when you are ready to eat.

More Tex-Mex and Latin American Recipes
- Carne Asada
- Chilaquiles
- Quesadillas
- Torta
- Pozole
- Chicharron
- Avocado Salsa
- Mango Salsa
- Mole Sauce
- Queso
- Enchilada Sauce
- Chicken Verde Enchiladas
- Taco Dip
- Birria Tacos
- Birria Pizza
- Chimichangas
- Fajitas
- Flan

Best Way to Cook Chalupa Shells
There are three ways to warm / fry chalupa shells: oven, air fryer or stove top. You can see the results of these methods in the photo above (from right: oven, air fryer, and two stove top).
- Oven Method- Heat oven to 425°F. Brush both sides of the shell with a little oil and place on a baking sheet. Bake for 5-6 minutes, flipping halfway through. Then place in a taco holder or similar device to help keep it’s shape.
- Air Fryer Method- Air fry at 400°F for 3 minutes. Then place in a taco holder or similar device to help keep it’s shape.
- Stove Top Method- Add a few teaspoons of oil to a pan and heat over medium/high heat. Pan fry the shell for 1-2 minutes on both sides or until browned. Placed folded in half until ready to fill.
In my opinion the best way is to pan fry on the stove top. However, if you are cooking many at once then I would recommend the oven so they can all be warm at the same time as chalupas are best when served warm.


Chalupa
Ingredients
- 4 chalupa shells
- 1 pound ground beef
- 2 tablespoons taco seasoning
- ½ cup sour cream
- 1 cup cheese
- 2 cups lettuce
- 2 roma tomatoes
Instructions
- Cook the ground beef, seasoning with the taco seasoning, on medium high heat until cooked through. No pink should remain.
- Shred the cheese, lettuce and cut up the tomatoes.
- Fry / heat your chalupa shell according to whichever method you prefer (three options below).
- Fill the shell with the cooked beef, sour cream, cheese, lettuce and tomatoes. Serve warm.
Notes
Nutrition
I will sometimes serve taco salad in a tortilla bowl for a pretty presentation. But if I don’t have any my other favorite way to serve this is to melt cheese on to tortilla chips and then serve the taco salad on top. Sort of a taco salad nachos situation.
Related: Chalupa, Carnitas, Al Pastor, or Barbacoa.

Ingredients
- Lean ground beef (or ground turkey or chicken)
- Taco seasoning
- Black beans
- Lettuce or salad greens
- Onion
- Tomato
- Bell pepper
- Tortilla bowls or chips
- Toppings: shredded cheese, salsa, sour cream, hot sauce, etc.

How to make Taco Salad
First brown the meat and season with taco seasoning. Drain and add the beans to the last few minutes of cooking so everything gets warm together. Once the meat is cooked, set aside.
Next prep the vegetables. Rinse the lettuce, tomatoes and bell pepper. Chop up everything to how you like it for a salad. Some people prefer big pieces of bell pepper or onion, it’s totally up to you.
If you are using tortilla bowls that need warming or are making your own (like I do for this spicy tempeh taco salad recipe) do that now.
Assemble your taco salad: tortilla bowl or chips, lettuce, meat mixture, cheese, other vegetables, salsa and sour cream. This is how I layer it, you do you. Enjoy warm.

Notes and Substitutions
- You can swap the black beans for any canned cook beans you prefer.
- If you have leftovers, especially the meat and bean mixture, you can use it in other recipes like tacos, nachos or rice bowls.
- You could absolutely make your own toppings for this: salsa, guacamole, avocado salsa, mango salsa, pico de gallo.

More Mexican and Tex-Mex Recipes
- Chalupa
- Quesadillas
- Ceviche
- Torta
- Pozole
- Elote
- Chicharron
- Mole Sauce
- Chipotle Sauce
- Queso
- Enchilada Sauce
- Chicken Verde Enchiladas
- Taco Dip
- Birria Tacos
- Chimichangas
- Fajitas
- Huevos Rancheros


Taco Salad
Ingredients
- 1 pound lean ground beef
- 2 tablespoons taco seasoning
- 15 ounces cooked black beans 1 can
- 1 head lettuce
- ½ red onion
- 1-2 tomatoes
- 1 bell pepper
- 4 tortilla bowls
Instructions
- First brown the meat and season with taco seasoning.
- Drain and add the beans to the last few minutes of cooking so everything gets warm together. Once the meat is cooked, set aside.
- Next prep the vegetables. Rinse the lettuce, tomatoes and bell pepper. Chop up everything to how you like it for a salad.
- If you are using tortilla bowls that need warming or are making your own do that now.
- Assemble your taco salad. Enjoy warm.
Notes
- You can swap the black beans for any canned cook beans you prefer.
- You can swap the ground beef for ground turkey or ground chicken or tempeh.
- If you have leftovers, especially the meat and bean mixture, you can use it in other recipes like tacos, nachos or rice bowls.
- You will also want toppings for this like: shredded cheese, salsa, sour cream, hot sauce, etc.
- My other favorite way to serve this is to melt cheese on to tortilla chips and then serve the taco salad on top. Sort of a taco salad nachos situation.
Nutrition
Pizza cupcakes truly could not be easier to make! You only need 5 ingredients and about 25 minutes. Makes these and tell us what you think.
Related: Next up try our deep dish pizza recipe or Detroit style pizza.

Ingredients
- Pizza dough – roll out refrigerated (like Pillsbury) is best
- Olive oil
- Pizza sauce – store bought or make your own
- Mozzarella cheese
- Mini pepperoni
- Italian seasoning – optional but I really like to add it

How to make Pizza Cupcakes
Roll out the pizza crusts and use a 4 inch round cookie cutter to cut into small circles.
Use a pastry brush to brush the inside of each cupcake cavity with oil. You want to see a little bit of oil pooling in the bottom. Not lots but enough that we will get a few crispy areas during baking.
Add the pizza crusts to the prepared cupcake tin. Then add a little bit of cheese in the bottom, topped with sauce, then topped with more cheese, then pepperonis on top. Sprinkle with Italian seasoning if using.
Bake at 400°F for 13-15 minutes. For my oven 13 minutes in a good amount. The edges should turn very golden brown and the cheese will begin to bubble. Remove from the oven and allow to cool for a few minutes before removing from the pan. Serve warm.

Notes
- If you want to use other cheeses anything that melts can work. Sometimes I will sprinkle on a little Parmesan cheese during the last couple minutes of baking.
- If you want to add other toppings beyond pepperoni feel free.
- The recipe card amounts below will make 12 pizza cupcakes in a standard size muffin pan.

More Great Pizza Recipes
- Pizza Bagels
- English Muffin Pizza
- St. Louis Style Pizza
- Stuffed Crust Pizza
- Cookie Pizza
- Homemade Calzone


Pizza Cupcakes
Ingredients
- 2 cans roll out refrigerated pizza dough each 13 oz.
- 2 tablespoons olive oil
- ½ cup pizza sauce
- ¾ cup shredded mozzarella cheese
- ¼ cup mini pepperoni
- ¼ teaspoon Italian seasoning
Instructions
- Roll out the pizza crusts and use a 4 inch round cookie cutter to cut into small circles.
- Use a pastry brush to brush the inside of each cupcake cavity with oil. You want to see a little bit of oil pooling in the bottom. Not lots but enough that we will get a few crispy areas during baking.
- Add the pizza crusts to the prepared cupcake tin.
- Then add a little bit of cheese in the bottom, topped with sauce, then topped with more cheese, then pepperonis on top.
- Sprinkle with Italian seasoning if using.
- Bake at 400°F for 13-15 minutes. For my oven 13 minutes in a good amount. The edges should turn very golden brown and the cheese will begin to bubble.
- Remove from the oven and allow to cool for a few minutes before removing from the pan. Serve warm.
Notes
- If you want to use other cheeses anything that melts can work. Sometimes I will sprinkle on a little Parmesan cheese during the last couple minutes of baking.
- If you want to add other toppings beyond pepperoni feel free.
- The recipe card amounts below will make 12 pizza cupcakes in a standard size muffin pan.
Nutrition
You can use ground beef, ground turkey, ground chicken or even a combination of ground meats (like ‘Boston Burger’ which is typically beef and pork) depending what you have or how much fat / protein you want in your meal. We most often use ground turkey at our house but please note the nutrition facts in the recipe card use ground beef as that is what is pictured here.
This air fryer hamburger recipe is a great one to top with homemade Big Mac sauce, Chick-fil-A sauce, BBQ sauce (my favorite!) or Buffalo sauce if your feeling spicy.

Ingredients
- Ground beef – or another ground meat
- Onion powder
- Garlic powder
- Soy sauce
- Worcestershire sauce
You will also need hamburger fixings including: buns, lettuce, tomato, cheese and / or other toppings and sauce you prefer.

How to make Air Fryer Hamburgers
In a small to medium sized mixing bowl stir or mash together the ground meat, onion powder and garlic powder. Form four patties from the mixture.
In a small bowl or glass combine the soy sauce and Worcestershire sauce. Brush this over the patties, both sides, after you place them in your air fryer basket.
Air fry at 375°F (this is sometimes labeled ‘Roast’ on air fryers) for 10-12 minutes, flipping the patties halfway through cooking. Once done use a meat thermometer to check that they are done. The internal temperature should reach 160°F.
Toast the hamburger buns in the air fryer for the last minute of cooking or in a dry pan. Top your burgers with whatever fixings you prefer.

Tips and Notes
- I don’t preheat my air fryer before making burgers. But if you do you may be able to reduce the cook time a minute or two.
- You can add parchment paper to an air fryer but I don’t when making homemade burgers. If you do, cut slits or holes in the paper so the fat from the burgers can drip through as this is one of the benefits of air fryer.
- I want to make a cheeseburger I add a slice or two of cheese to the top of the burger for the last two minutes they are cooking.
- All air fryers, like ovens, can run slightly differently so for me I tend to need to cook my burgers for the full 12 minutes. If you prefer your hamburgers with some pink in the center, medium to medium done, try 9-10 minutes the first time you make this recipe and see.

More Air Fryer Recipes
- Air Fryer Hot Dogs
- Air Fryer Chicken Wings
- Air Fryer Steak
- Air Fryer Meatballs
- Air Fryer Chicken
- Air Fryer Fried Chicken
- Air Fryer Salmon
- Air Fryer Fish
- Air Fryer Bacon
- Air Fryer Grilled Cheese
- Air Fryer Chicken Tenders


Air Fryer Hamburgers
Ingredients
- 1 pound ground beef or any ground meat
- ½ teaspoon onion powder
- ½ teaspoon garlic powder
- 2 teaspoons soy sauce
- 1 teaspoon worcestershire sauce
Instructions
- In a small to medium sized mixing bowl stir or mash together the ground meat, onion powder and garlic powder.
- Form four patties from the mixture.
- In a small bowl or glass combine the soy sauce and Worcestershire sauce. Brush this over the patties, both sides, after you place them in your air fryer basket.
- Air fry at 375°F (this is sometimes labeled ‘Roast’ on air fryers) for 10-12 minutes, flipping the patties halfway through cooking. Once done use a meat thermometer to check that they are done. The internal temperature should reach 160°F.
- Toast the hamburger buns in the air fryer for the last minute of cooking or in a dry pan. Top your burgers with whatever fixings you prefer.
Notes
Nutrition

I have never been a fan of boiled hot dogs. I also don’t love hot dogs made in the microwave although I admit it’s convenient. I love a grilled hot dog, but I don’t currently own a grill. So to me the absolute best hot dog is a hot dog made in the air fryer. It’s faster than the oven. Plus, I feel silly turning the oven on if I’m only making one hot dog. I also love how air fryer hot dogs manage to be cooked all over and can even begin to blister like they do when grilled or oven roasted.
Related: Here are my favorite things to make in my air fryer. I need to update that post to also include hot dogs. Lol.

Ingredients
- Hot dogs
- Hot dog buns
- Condiments for serving – ketchup, mustard, etc.
In case you’re curious my favorite hot dog toppings are mustard and french fried onions. I like the crunch and flavor it adds.

How to make Air Fryer Hot Dogs
Add the hot dogs to the air fryer. Air fry at 390°F for 5 minutes, rotating the hot dogs halfway through. I sometimes just shake the basket it a bit rather than perfectly rotating them.
Then add the hot dogs to the buns (use tongs, they will be hot). Air fry for another 1-2 minutes. This warms the buns and is worth the effort.
Remove the hot dogs and buns from the air fryer and top with whatever you like. Enjoy!

Tips and Notes
- I personally don’t preheat my air fryer before starting this recipe. If you do, good for you! And you can likely reduce the cooking time by a minute.
- This recipe is for classic or standard size hot dogs. If using jumbo or larger sizes hot dogs increase the cook time by 1-2 minutes.
- I like adding diagonal slices to the top of the hot dog. This is not necessary but it gives the hot dog slightly more texture after cooking and it’s pretty. But if I forget, no biggie.

More Air Fryer Recipes
- Air Fryer Okra
- Air Fryer French Fries
- Air Fryer Steak
- Air Fryer Chicken Wings
- Air Fryer Meatballs
- Air Fryer Asparagus
- Air Fryer Brussels Sprouts


Air Fryer Hot Dogs
Ingredients
- 4 hot dogs
- 4 hot dog buns
Instructions
- Add the hot dogs to the air fryer.
- Air fry at 390°F for 5 minutes, rotating the hot dogs halfway through.
- Then add the hot dogs to the buns (use tongs, they will be hot).
- Air fry for another 1-2 minutes. This warms the buns and is worth the effort.
- Remove the hot dogs and buns from the air fryer and top with whatever you like.
Notes
- I personally don’t preheat my air fryer before starting this recipe. If you do, good for you! And you can likely reduce the cooking time by a minute.
- This recipe is for classic or standard size hot dogs. If using jumbo or larger sizes hot dogs increase the cook time by 1-2 minutes.
- I like adding diagonal slices to the top of the hot dog. This is not necessary but it gives the hot dog slightly more texture after cooking and it’s pretty.
Nutrition
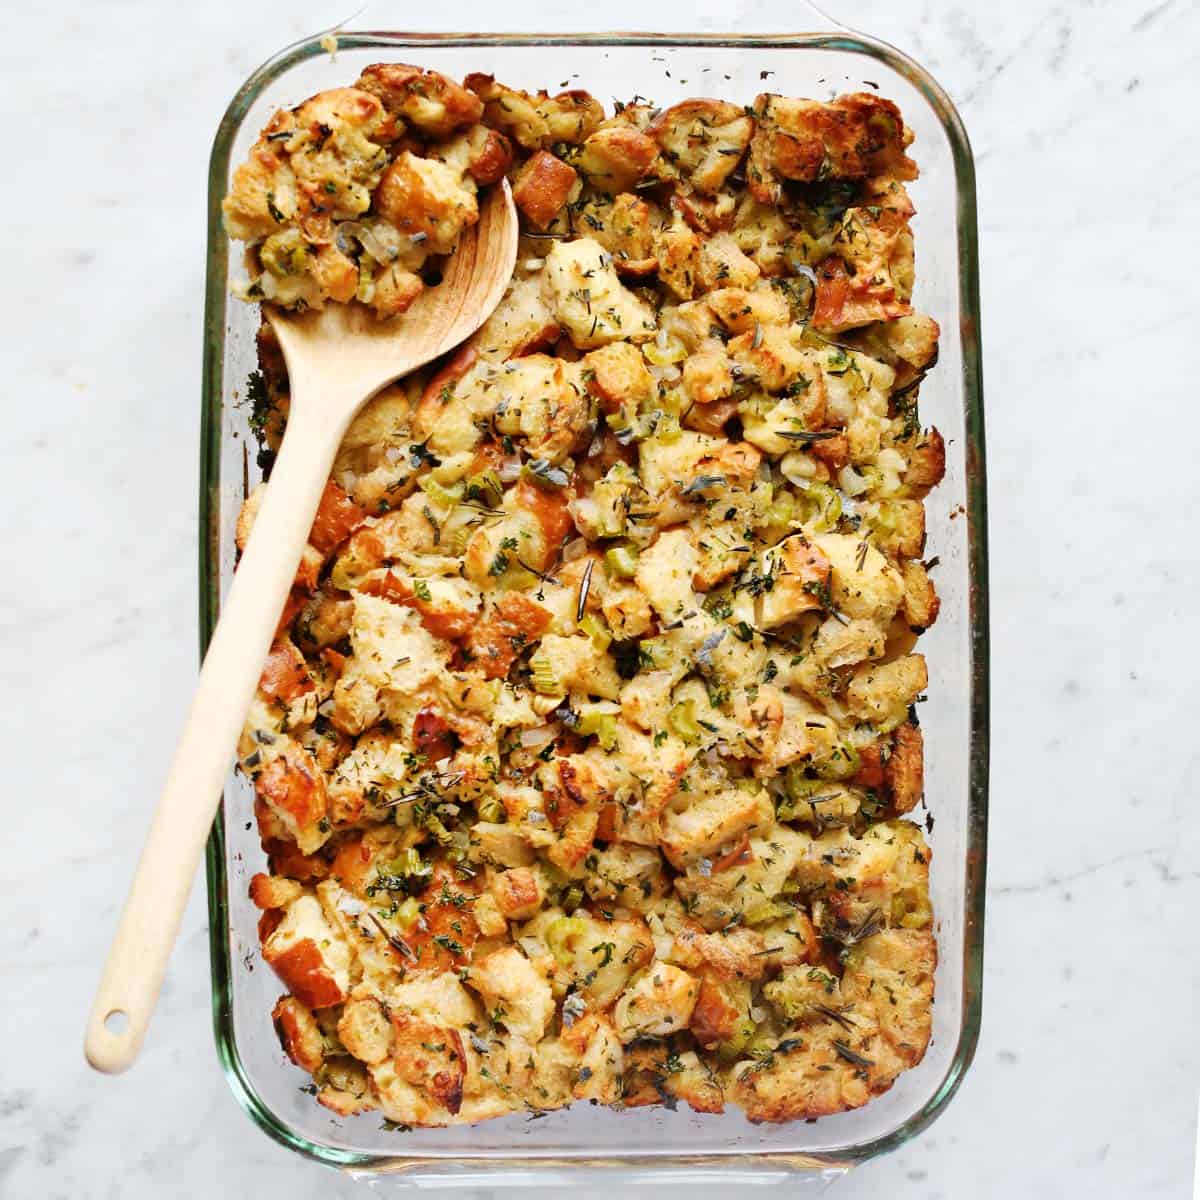
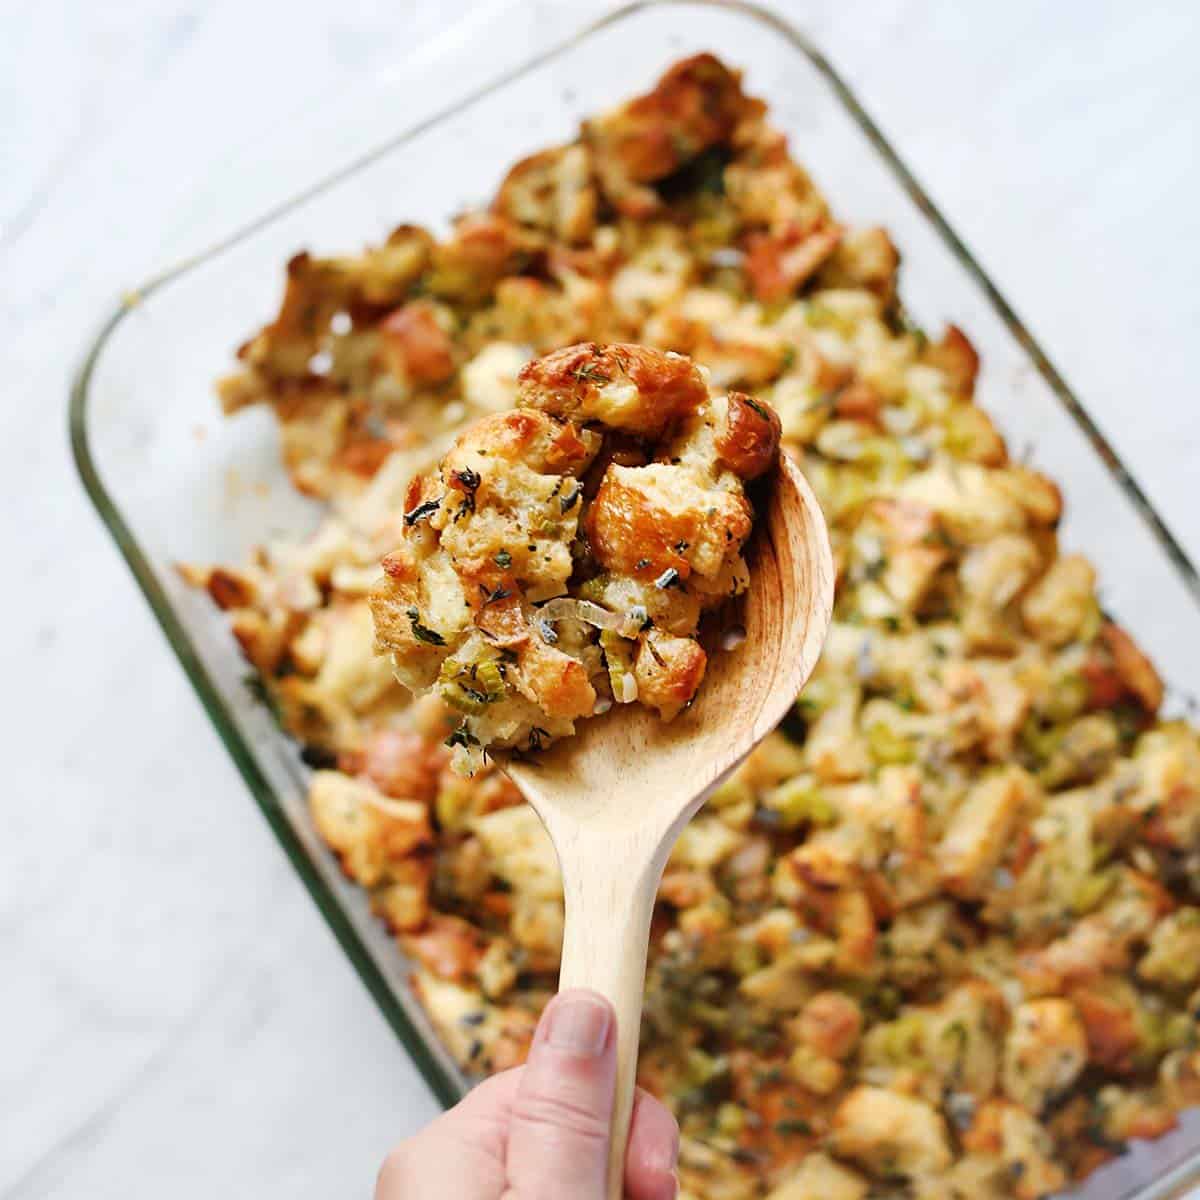
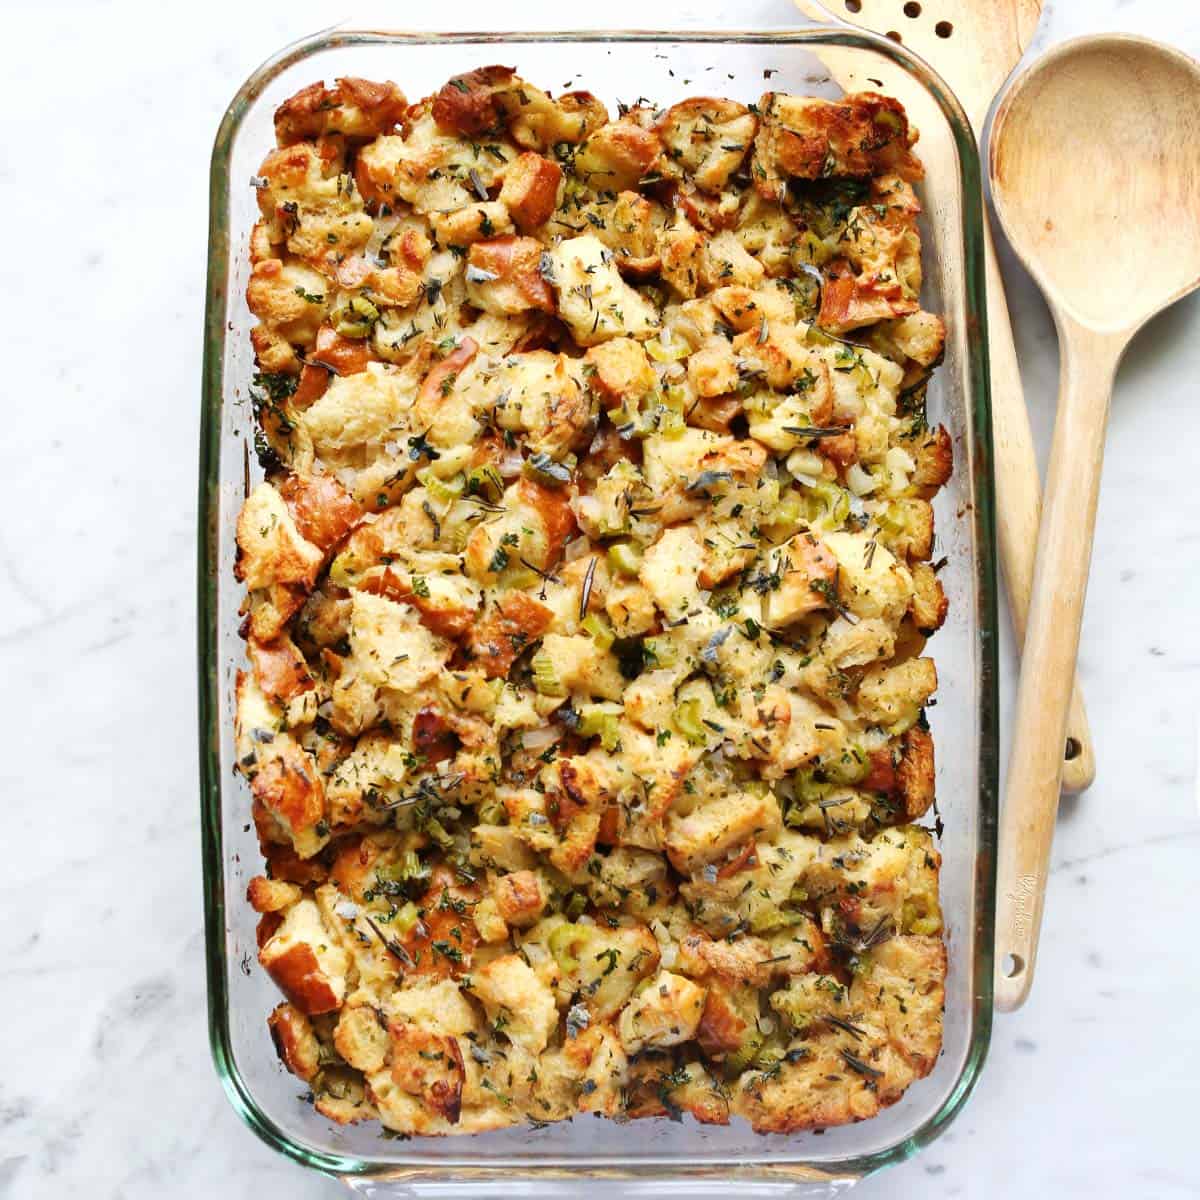
This homemade stuffing recipe is one of my favorite side dishes, alongside mashed potatoes. It may be a regional thing but I know some people call this dressing. However, I’ve always called it stuffing as you can also use this recipe to stuff a turkey with. Whatever you call it, this is essentially a savory bread pudding and I am here for it!
Related: Try our Green Bean Casserole, Broccoli Casserole, Corn Casserole, the Best Baked Macaroni and Cheese, or Jello Salad. And if you have leftover herbs from this recipe, try this Thanksgiving Stove Simmer.
Ingredients
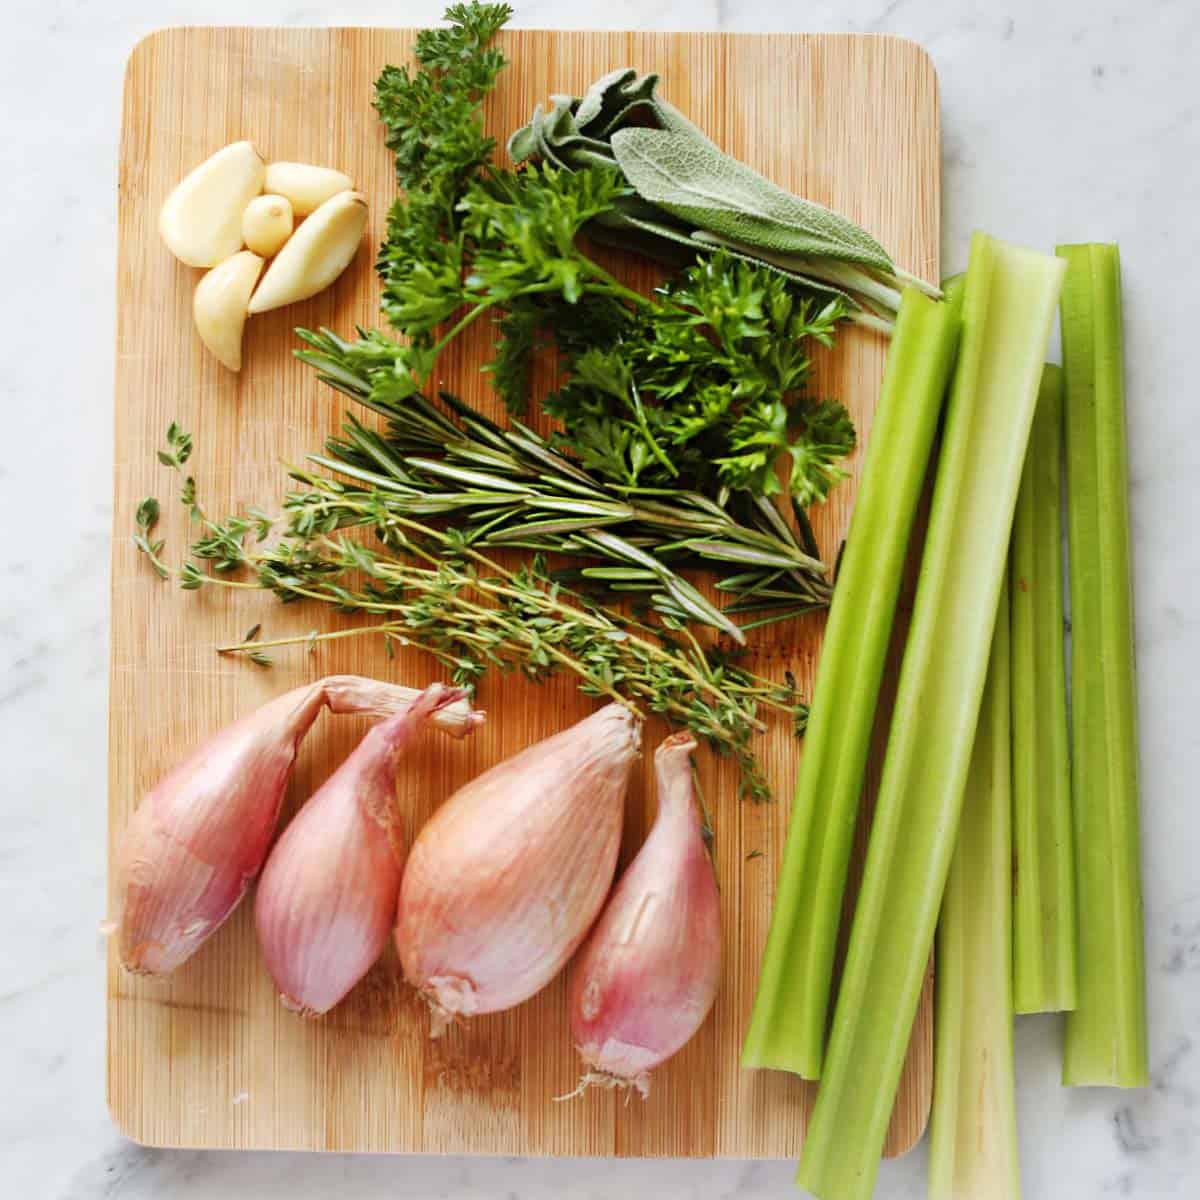
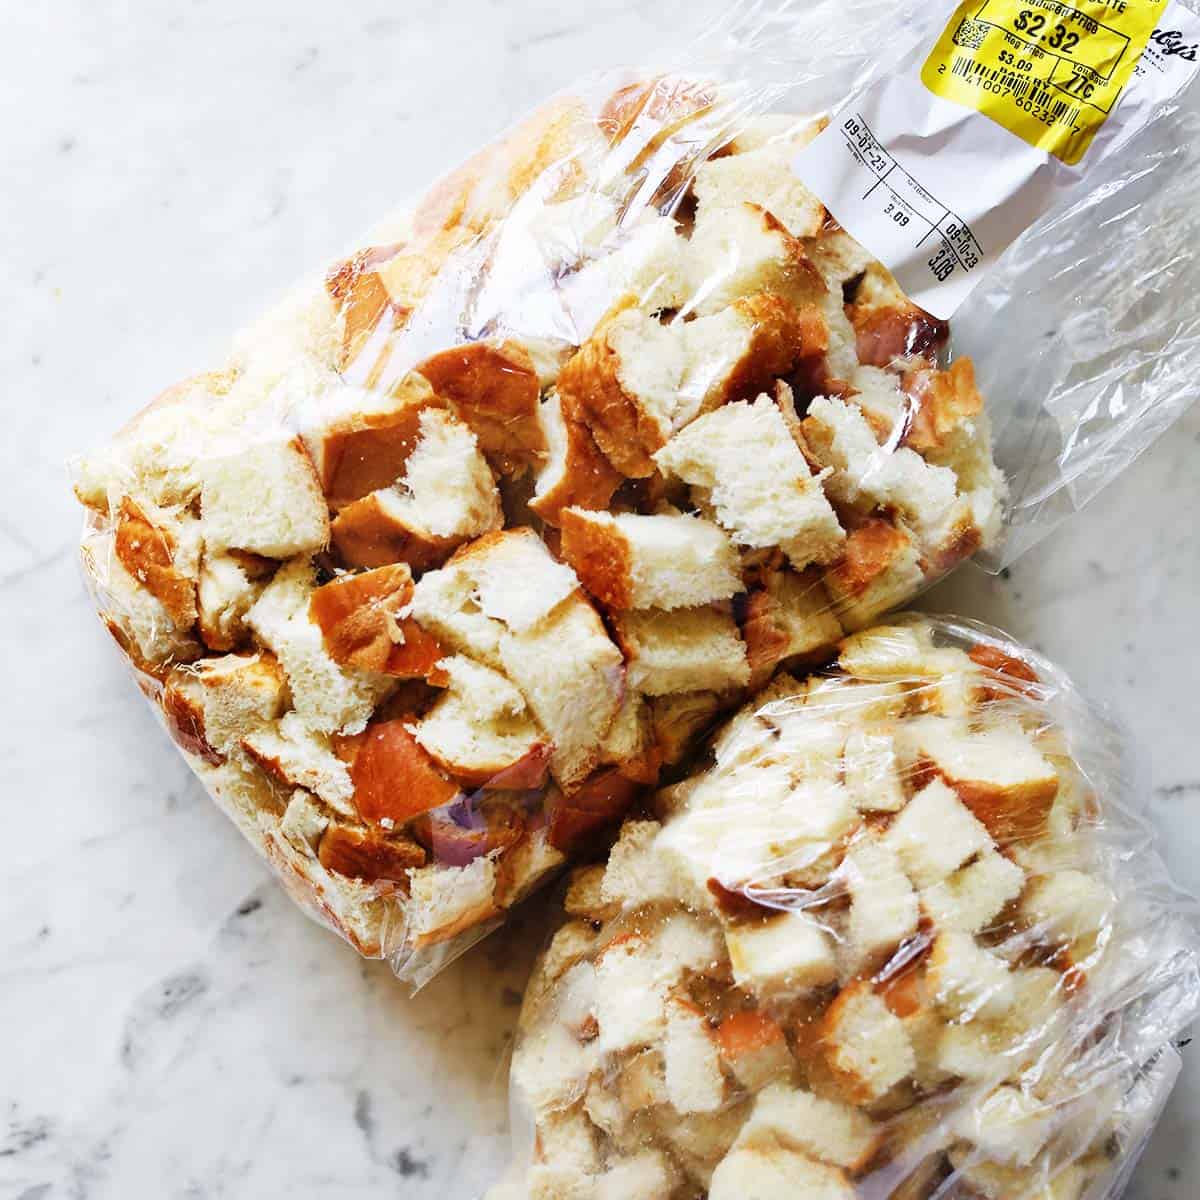
- Bread – stale bread is great! Any kind: sourdough bread, Italian, cornbread, white sandwich, etc will work for this recipe. Choose your favorite.
- Butter
- Shallots
- Garlic
- Celery
- Sage
- Parsley
- Rosemary
- Thyme
- Chicken broth or stock
- Eggs
- Salt and black pepper
How to make stuffing casserole
Cube the bread the night before into bread cubes. I like to leave it in a bag, loosely sealed, so it dries out some. It doesn’t have to be completely dry or stale, but fresh soft bread isn’t as good for this recipe.
Chop up the shallots and celery. Mince the garlic. Chop up the fresh herbs.
In a large skillet, melt the butter over medium heat until melted. Then stir in the shallots, garlic and celery. Cook for 2-3 minutes. Then stir in most of the fresh herbs, reserving around 1/3 of them to top the stuffing with before baking.
Stir together the chicken stock and eggs until well combined.
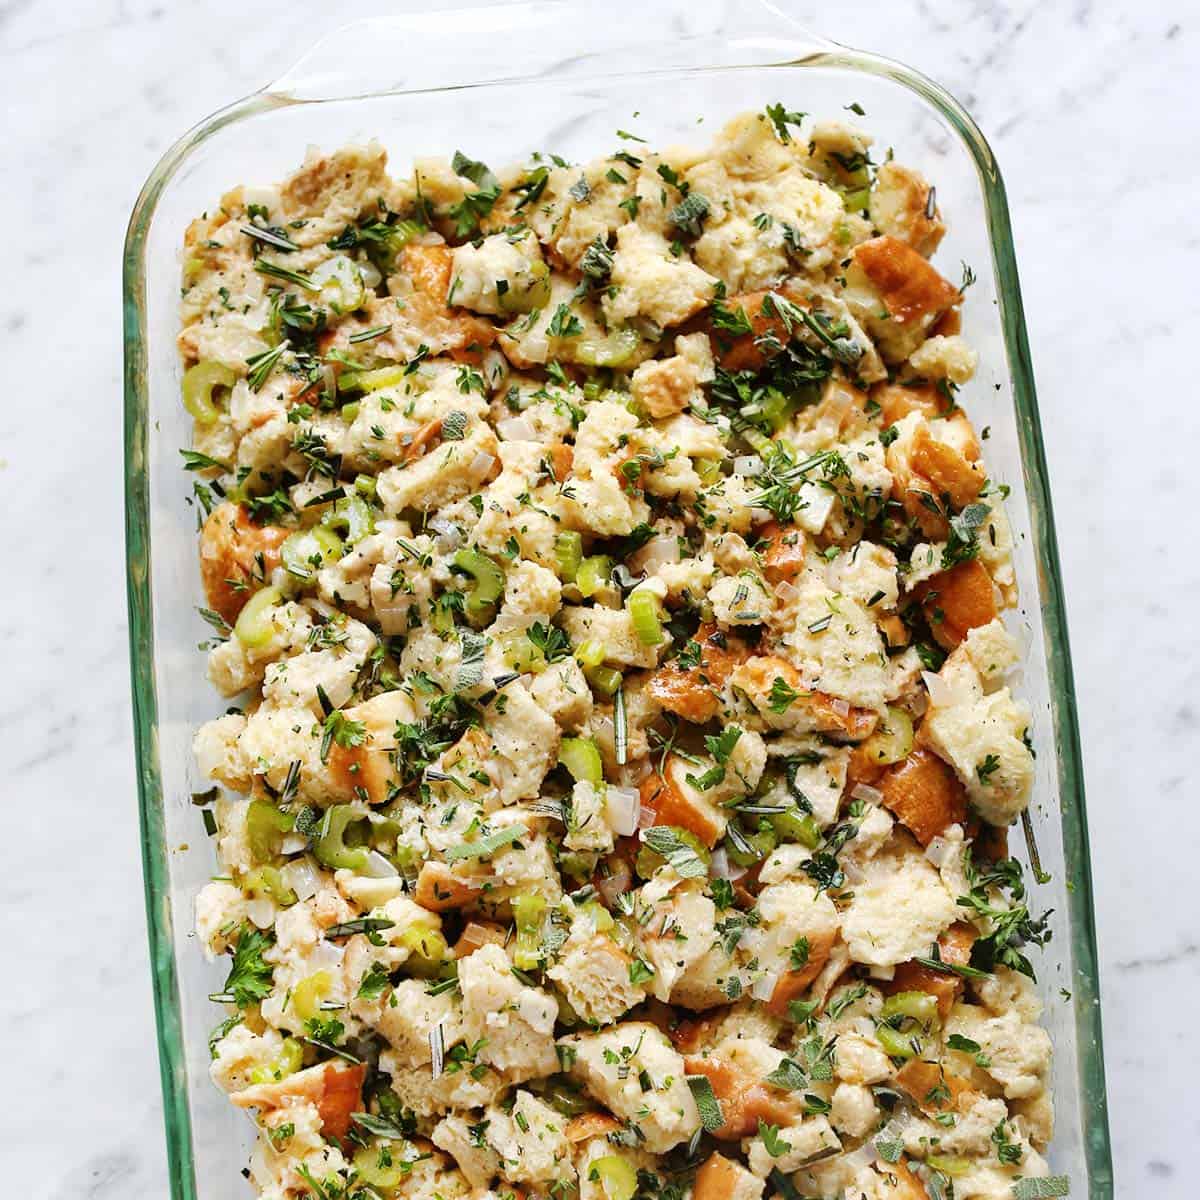
In a large bowl, or two if needed, add the breadcrumbs, cooked shallot mixture, and the chicken stock mixture. Stir until everything is well coated and combined. Season well with salt and pepper.
Butter a 9×13 baking dish, or coat in nonstick cooking spray. Add the stuffing mixture to the pan. Top with the remaining herbs. Cover in aluminum foil.
Bake in the oven at 350°F (177°C) for 20 minutes, then remove the foil and continue to bake for another 25-28 minutes. The total bake time will be 45-48 minutes. The stuffing should look golden brown along the edges when done.
Tips & Substitutions
- You can substitute the shallots for a yellow onion or white onion if needed.
- Another great addition to this classic stuffing recipe is some cooked sausage. YUM!
- I like to buy the day-old bread that’s on sale at the grocery store for this, if I don’t have leftover bread to use. Also, you can save random bits in a bag in the freezer leading up to making this recipe.
- If you want to make this ahead, simply follow this recipe until the point of baking. Instead, store it in the refrigerator until you are ready to bake.
- You can use this recipe to stuff a Thanksgiving turkey, but keep in mind depending on the size of bird this may make too much stuffing to all fit inside the cavity. You may have enough to cook this stuffing in an 8×8 size pan in addition to stuffing the turkey. But, again, it depends on the size of bird you are preparing.
- Use the leftovers in other recipes like a Thanksgiving sandwich, burger or wrap.
Serving Suggestions
To me, this is a Thanksgiving stuffing recipe and that’s usually when I make this each year. That being said, here are some main course recipes that would be delicious alongside this.
Frequently Asked Questions
Can I make stuffing casserole ahead of time?
Yes. Simply follow this recipe up to the point of baking. Then instead of popping it in the oven, cover in foil and refrigerate for a day or two until you are ready to bake.
Can I freeze stuffing?
Yes, stuffing freezes well. Simply store it in an airtight container and it should keep in the freezer for a month or more. Rewarm in the oven or microwave.
What can I do with leftover Thanksgiving stuffing?
Add to a turkey sandwich or serve warm with a fried egg for breakfast. Thanksgiving leftovers are so good and one of my favorite parts of the holiday!
Best Stuffing Recipe
Equipment
- 1 9×13 casserole dish
Ingredients
- 22 ounces stale bread
- 1 cup butter
- 4 shallots
- 5 cloves garlic
- 1 ½ cups celery
- 2 tablespoons sage
- 2 tablespoons parsley
- 2 tablespoons rosemary
- 2 tablespoons thyme
- 2 cups chicken stock
- 2 eggs
- salt and pepper
Instructions
- Cube the bread the night before you make this. I like to leave it in a bag, loosely sealed, so it dries out some. It doesn’t have to be completely dry or stale, but fresh soft bread isn’t as good for this recipe.
- Chop up the shallots and celery. Mince the garlic. Chop up the fresh herbs.
- In a large sauce pan, heat the butter over medium heat until melted. Then stir in the shallots, garlic and celery. Cook for 2-3 minutes.
- Then stir in most of the fresh herbs, reserving around 1/3 of them to top the stuffing with before baking.
- Stir together the chicken stock and eggs until well combined.
- In a large mixing bowl, or two if needed, add the breadcrumbs, cooked shallot mixture, and the chicken stock mixture.
- Stir until everything is well coated and combined. Season well with salt and pepper.
- Butter a 9×13 baking dish, or coat in nonstick cooking spray.
- Add the stuffing mixture to the pan. Top with the remaining herbs. Cover in aluminum foil.
- Bake at 350°F (177°C) for 20 minutes, then remove the foil and continue to bake for another 25-28 minutes.
- The total bake time will be 45-48 minutes. The stuffing should look golden brown along the edges when done.