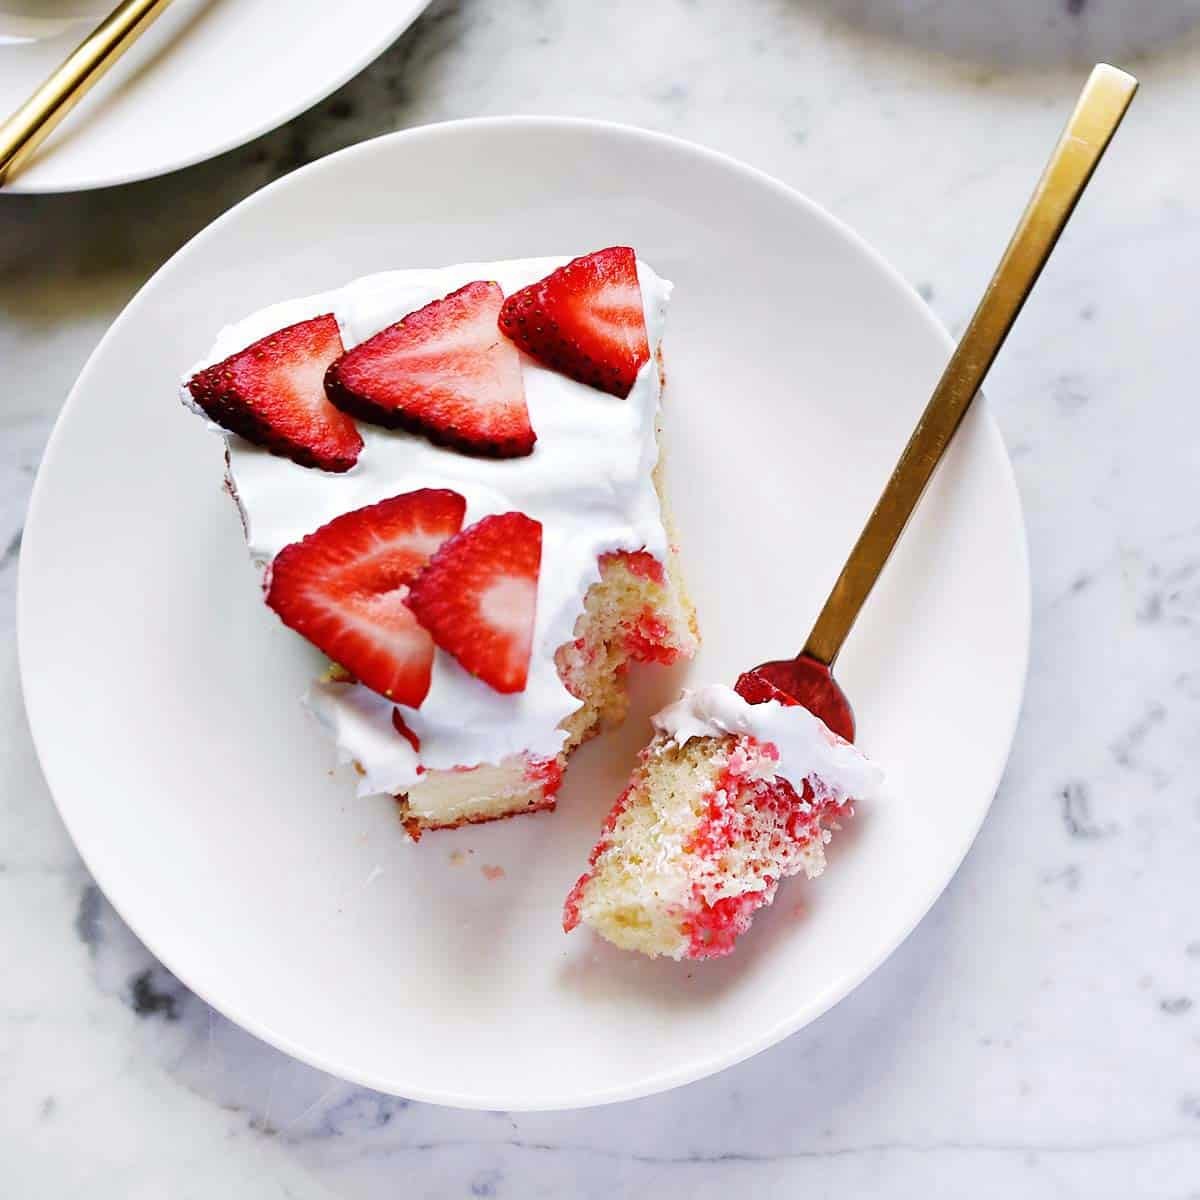
Personally, I like Jello poke cake best during the summer, as the cake gets refrigerated while the Jello sets so the cake is typically served cold. This is also a great cake recipe to turn into an easy flag cake if you need something for a 4th of July or Juneteenth celebration.
Related: If you love this poke cake, then you may also love Jello Salad, Ambrosia Salad, or Red Velvet Cake.
Ingredients
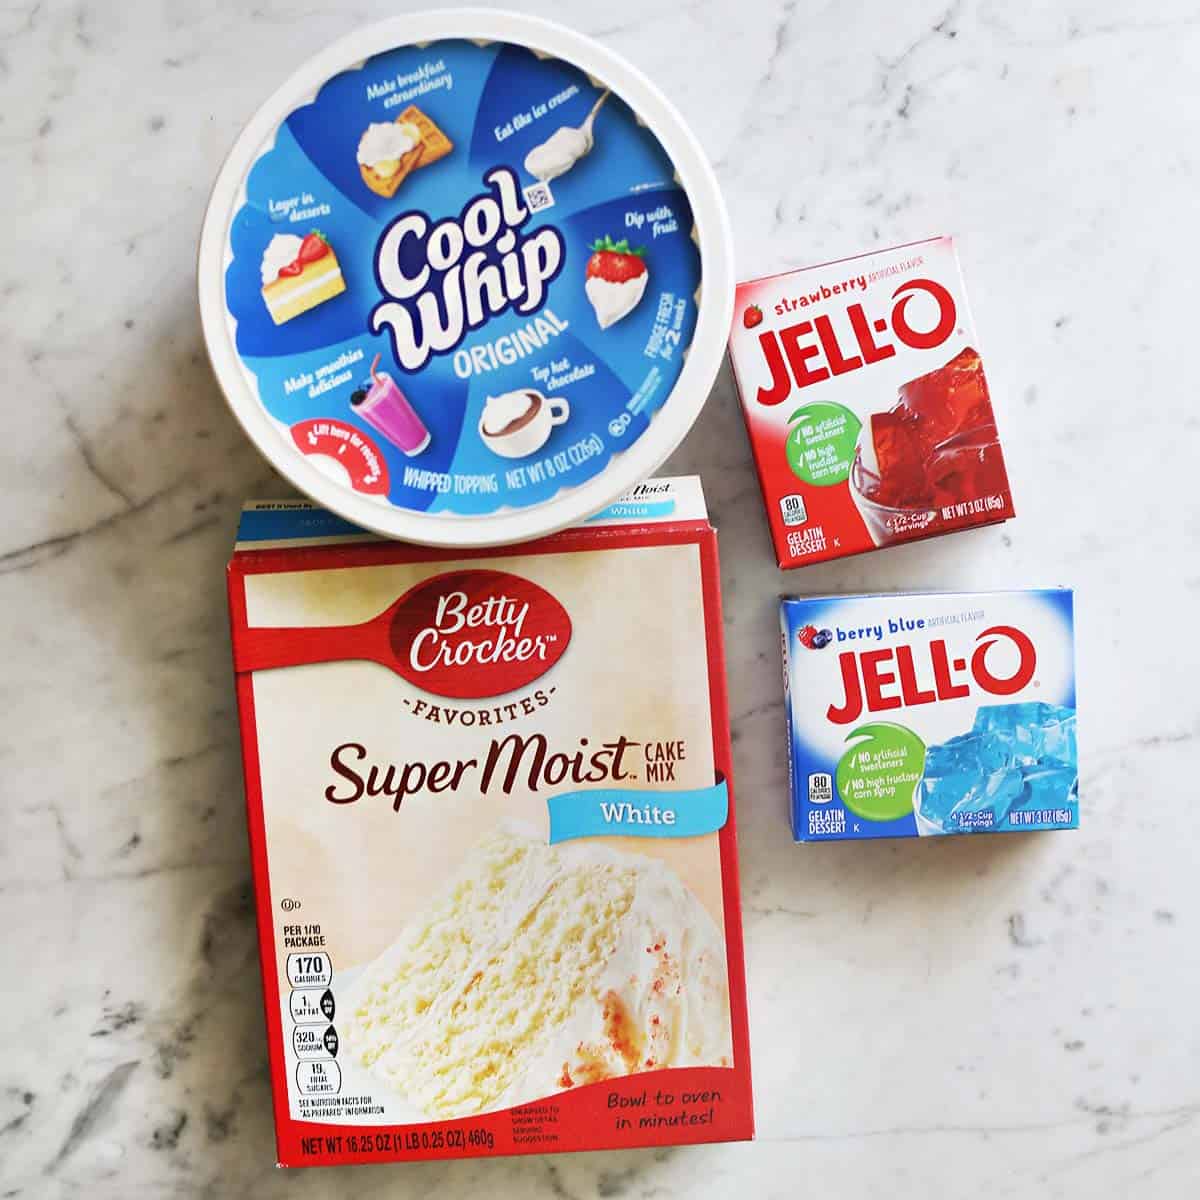
- White cake mix
- Jello mix
- Cool Whip
While these are the three main ingredients you will need, keep in mind the cake mix and Jello mix will require other ingredients. This may vary based on your cake mix brand, but this may include water, oil, eggs, or milk.
If you plan to turn your Jello poke cake into an easy flag cake, you will also need fresh strawberries and blueberries.
Directions
Prepare the cake mix according to the box directions to create a 9×13 cake. Once the cake is baked, remove it from the oven and let it cool in the pan for about 15 minutes.
While the cake is cooling, prepare the Jello mixture. In a heatproof bowl, dissolve the flavored gelatin in 1 cup of boiling water. Stir until the gelatin is completely dissolved. Add 1/2 cup of cold water to the gelatin mixture and stir well.
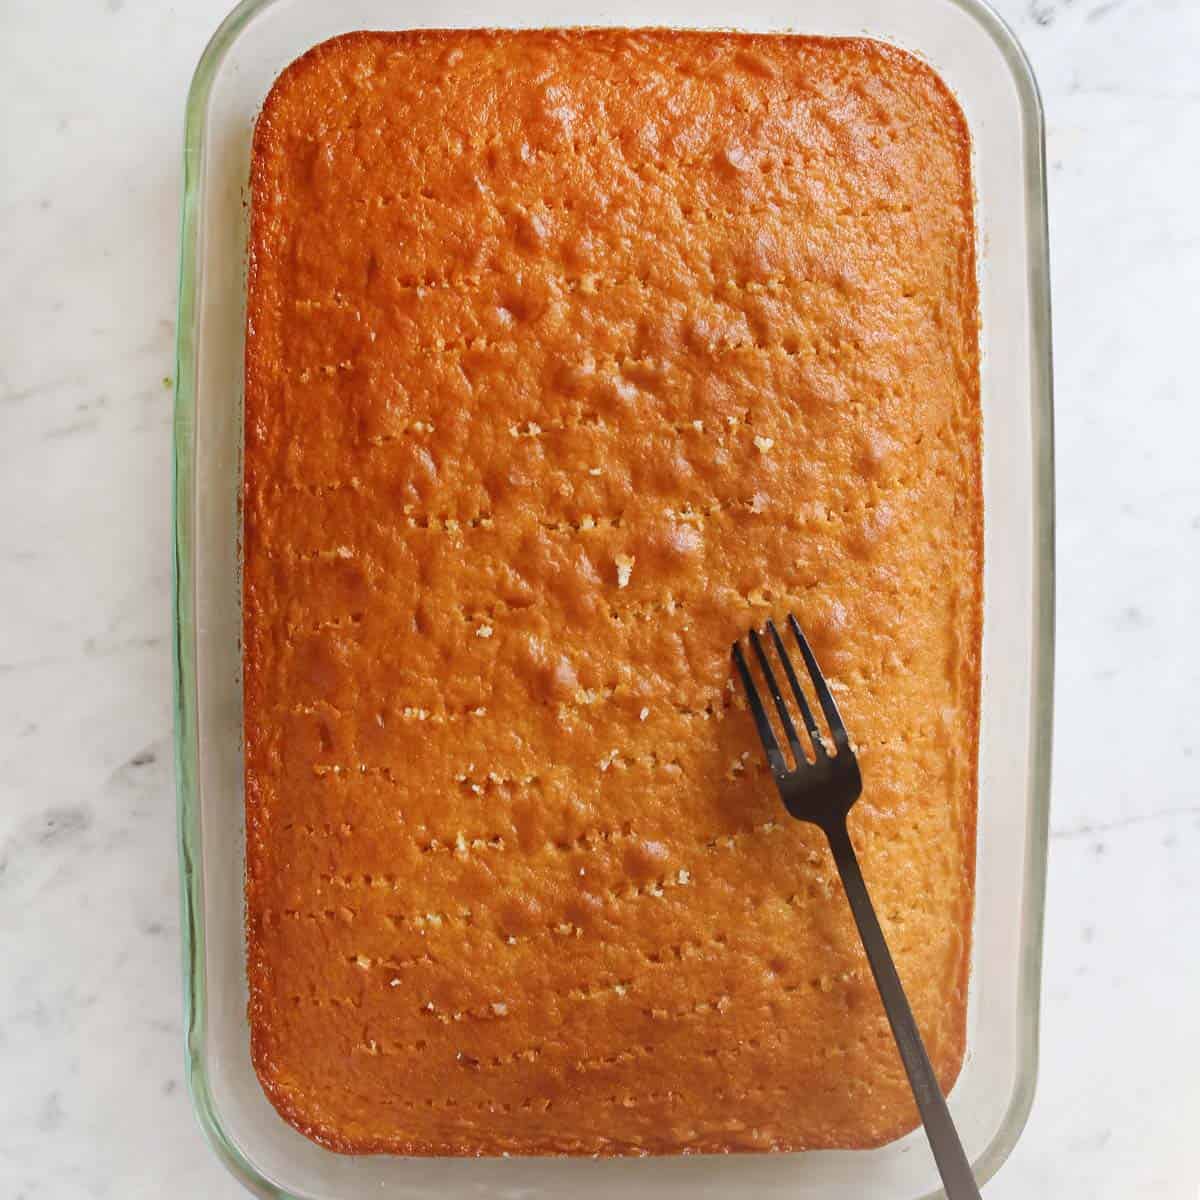
Use a fork to poke holes all over the cooled cake. Then, use a spoon or pastry brush to spoon the Jello mixture on top of the cake so it seeps into the holes.
Refrigerate the cake for 3-4 hours, so the Jello has time to set. Then, top the cake with Cool Whip and serve!
Easy Flag Cake
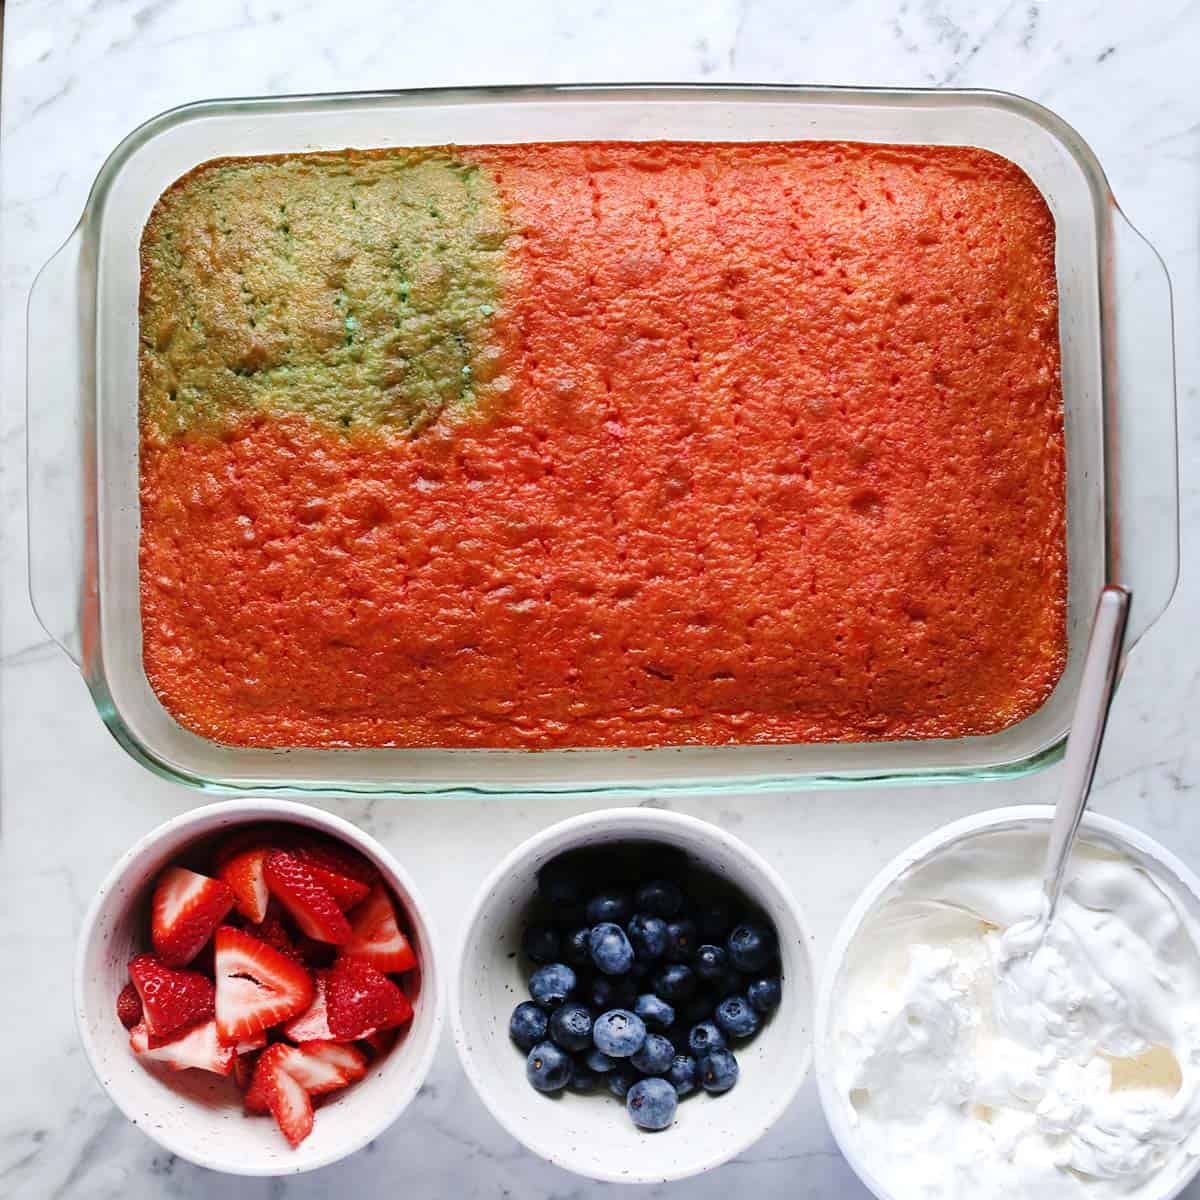
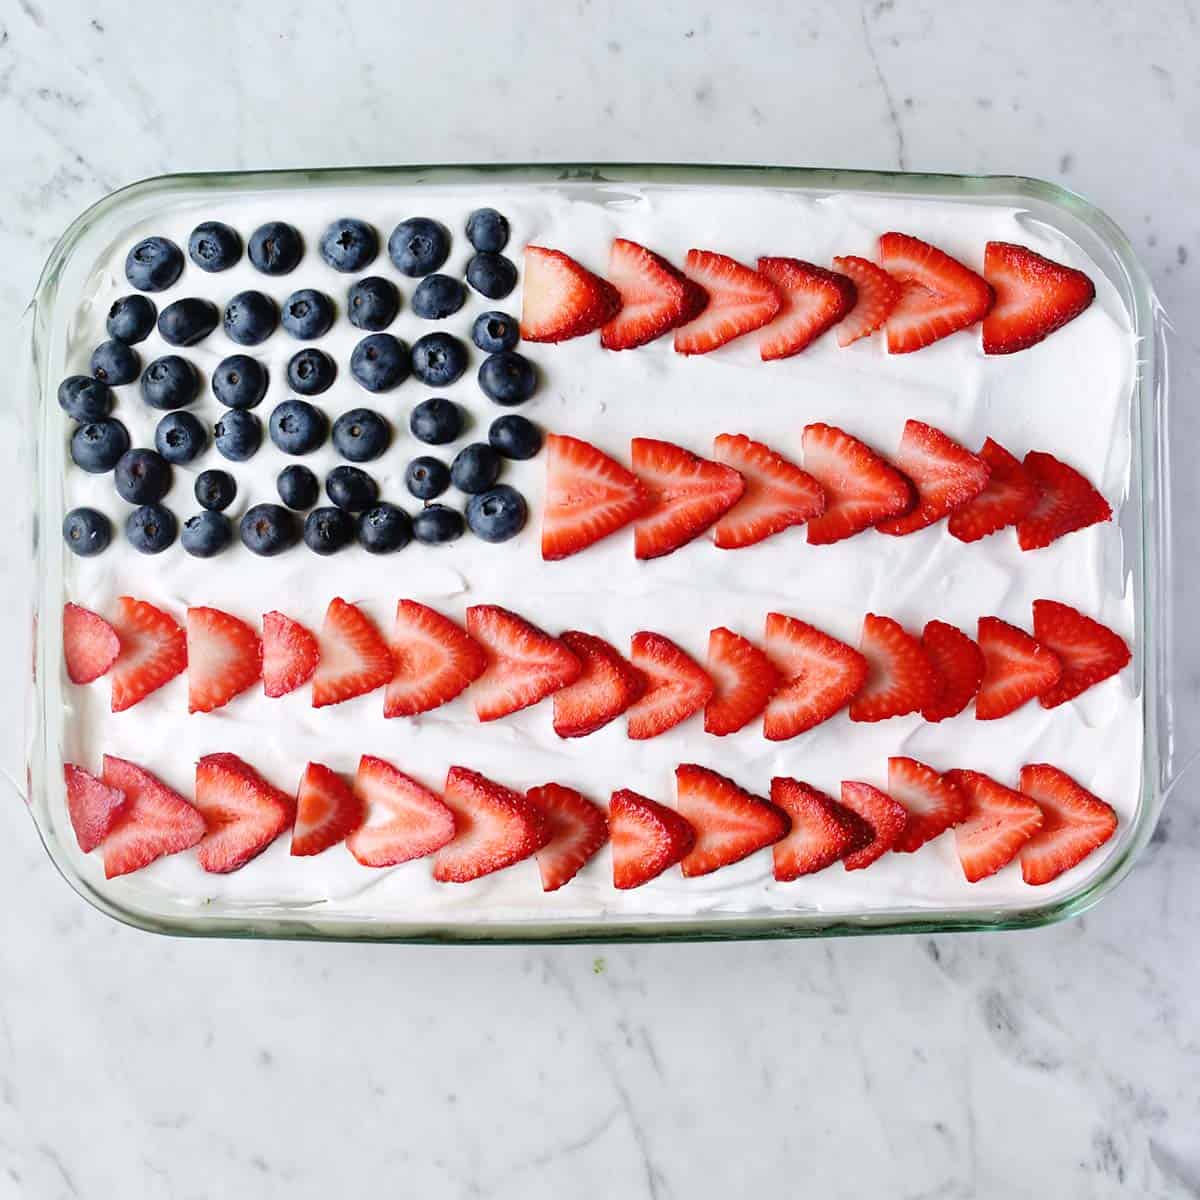
If you want to turn your Jello Poke cake into a an easy flag cake, simply use both red and blue Jello mixes and distribute them over the cake, like an American flag. You won’t use all of the blue Jello mix, so feel free to simply mix up half instead of the entire box.
Once the cake has set and the Cool Whip has been added, top with lines of fresh blueberries and sliced strawberries like an American flag.
Tips & Variations
- You can use any cake mix flavor. Some flavors will go better with certain Jello flavors than others. But any cake mix can become a poke cake. You can also bake a cake from scratch or use a pre-made (not frosted) cake from a bakery.
- Use any flavor of Jello you like! I think lemon or lime would be really fun for summer, too.
- You can use other frosting beyond Cool Whip (whipped topping) like cream cheese frosting or buttercream.
- Fresh fruit is optional as a topping, but I think it makes this Jello poke cake recipe feel more festive and finished.
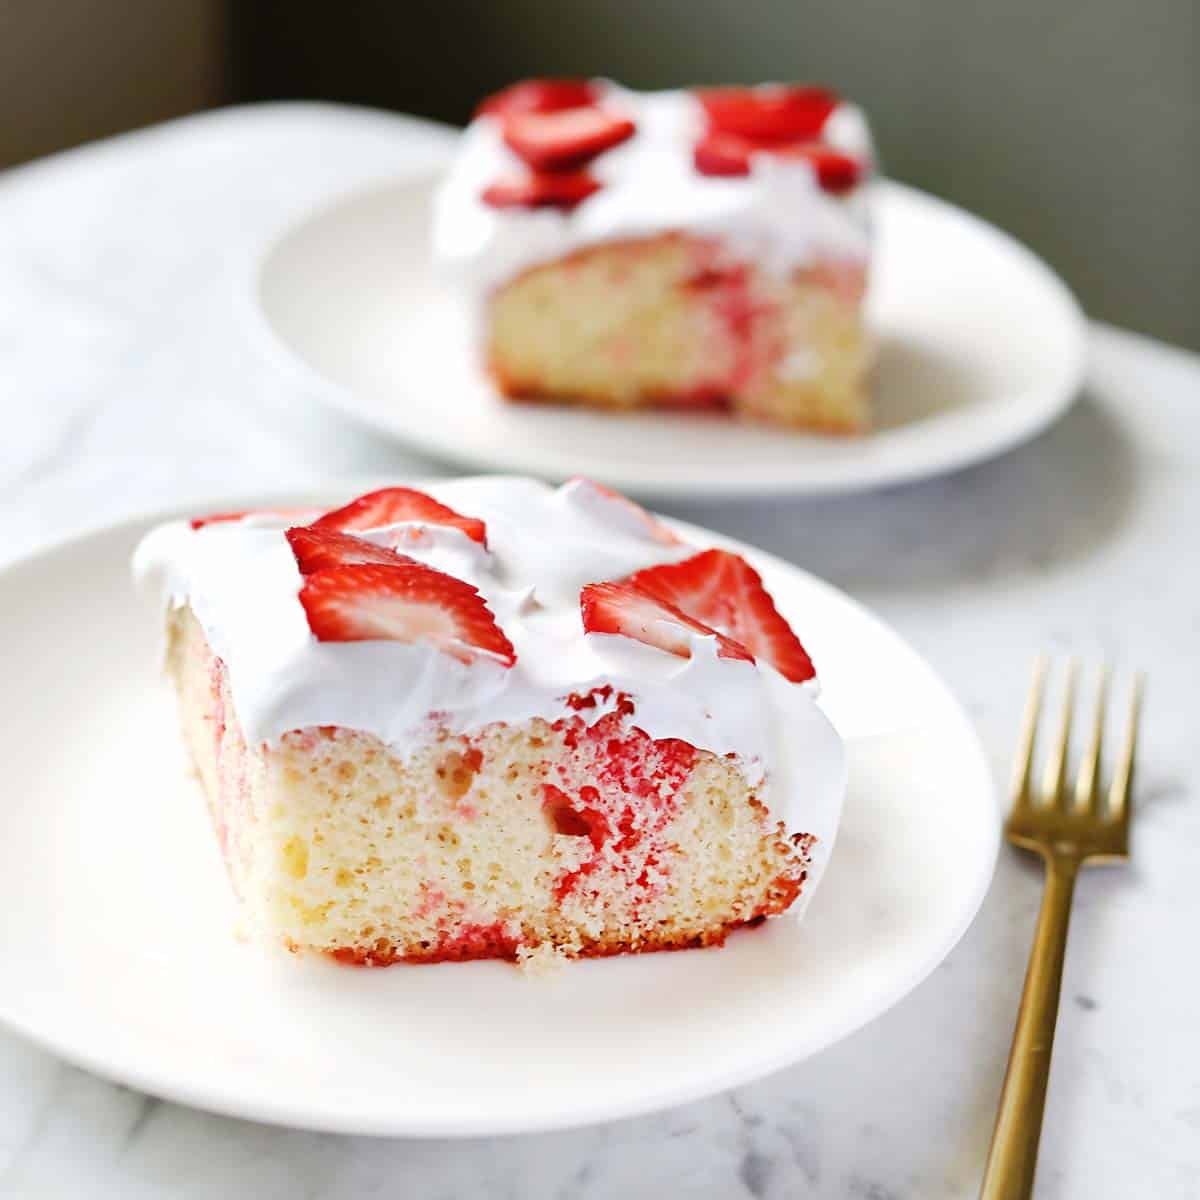
Making a Jello poke cake is a delightful way to elevate a simple cake into a visually stunning and delicious dessert. With its vibrant colors and fruity flavors, it’s bound to be a hit at any gathering.
The best part is you can customize it to your liking by choosing different flavors of cake and Jello. Happy baking!

Jello Poke Cake
Equipment
- 1 oven
Ingredients
- 1 box white cake mix
- 3 ounces box Jello mix
- 8 ounces whipped topping Cool Whip
Instructions
- Prepare the cake mix according to the box directions to create a 9×13 cake. Once the cake is baked, remove it from the oven and let it cool in the pan for about 15 minutes.
- While the cake is cooling, prepare the Jello mixture. In a heatproof bowl, dissolve the flavored gelatin in 1 cup of boiling water. Stir until the gelatin is completely dissolved.
- Add ½ cup of cold water to the gelatin mixture and stir well.
- Use a fork to poke holes all over the cooled cake.
- Then, use a spoon or pastry brush to spoon the Jello mixture on top of the cake so it seeps into the holes.
- Refrigerate the cake for 3-4 hours, so the Jello has time to set.
- Then top the cake with Cool Whip and fresh berries if using and serve!
Notes
- While these are the three main ingredients you will need, keep in mind the cake mix and Jello mix will require other ingredients. This may vary based on your cake mix brand, but this may include water, oil, eggs, or milk.
- If you plan to turn your Jello poke cake into an easy flag cake, you will also need fresh strawberries and blueberries.
- Jello poke cake can be stored covered in the refrigerator for 2-3 days after making.
Nutrition
This is a dessert that I had a lot growing up—for whatever reason, it stands out in my mind as something that was made at church get-togethers. It’s funny the little things we remember.
Eclair cake is a spin on the classic French pastry. Eclairs are made of a (baked) choux dough filled with pastry cream, and then topped with a flavored icing (often chocolate). The cake version is layers dough/crust and pastry cream all topped with a chocolate ganache.
This chocolate eclair cake is a no-bake version, so it’s not made with the classic choux dough. If you’re looking for an eclair cake that more closely resembles a classic eclair, try this recipe from Food52.
Related: No-Bake Chocolate Silk Pie, No-Bake Banana Cream Pie, and 30+ Easy No-Bake Desserts.
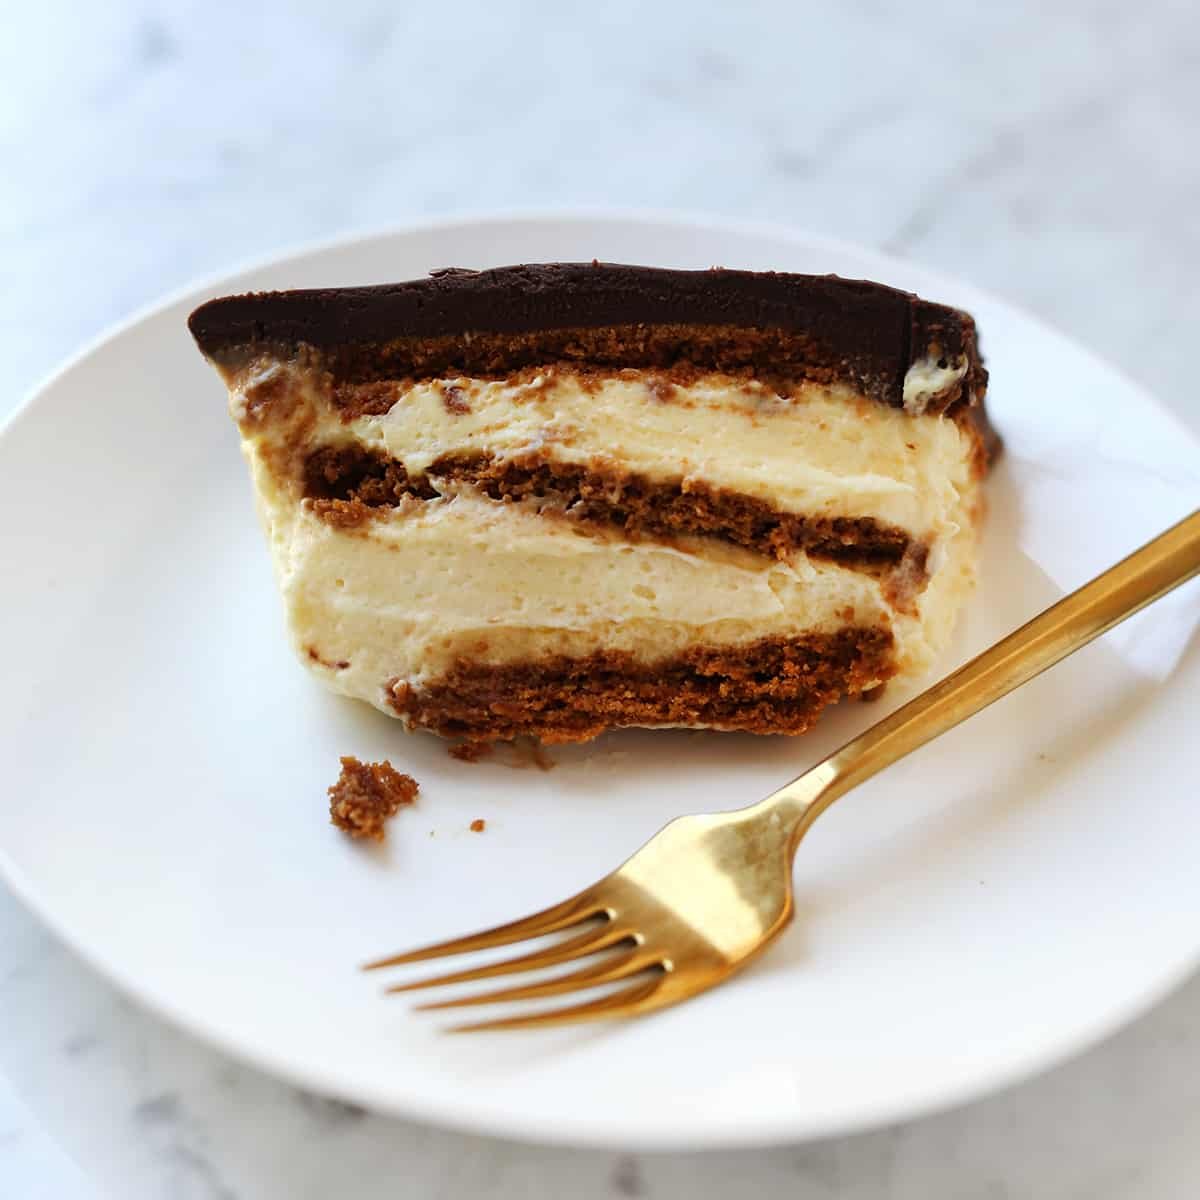
This eclair cake recipe is the easiest version I know—but it’s still very delicious. I recently made this for a group of friends and I’m happy to report this cake got rave reviews.
In addition to being easy to make, I also love that you can make this cake ahead. It’s best to make this at least eight hours before you plan to serve it, and up to 24 hours.
So, you can make this cake the morning before or even the night before a big dinner party.
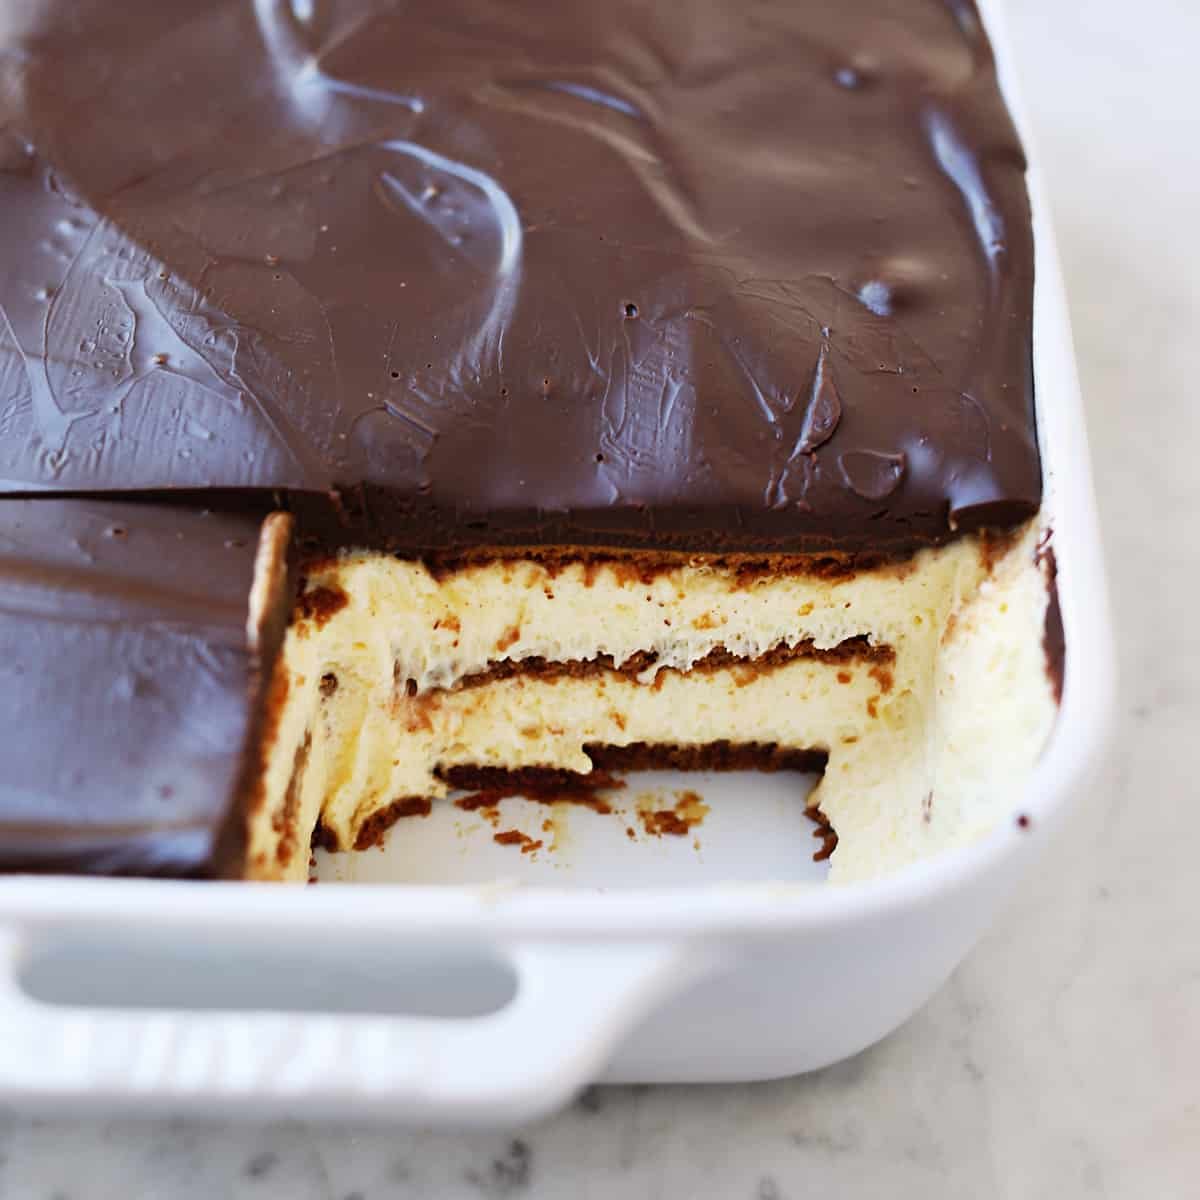
What is Eclair Cake Made of?
- Crust – Graham crackers, vanilla wafers, or Biscoff cookies are my favorites to use.
- Pudding – I use both French vanilla and cheesecake-flavored puddings.
- Whipped cream – You can use Cool Whip or make your own whipped cream.
- Chocolate ganache – Chocolate chips and heavy cream OR you can use chocolate frosting
Although my version here is super simple, there are ways to make this recipe even easier as noted above in the ingredients list.
However, I think the version you will find below (in the printable recipe card) is the perfect mix and creates a truly delicious eclair cake while still being a no-bake dessert.
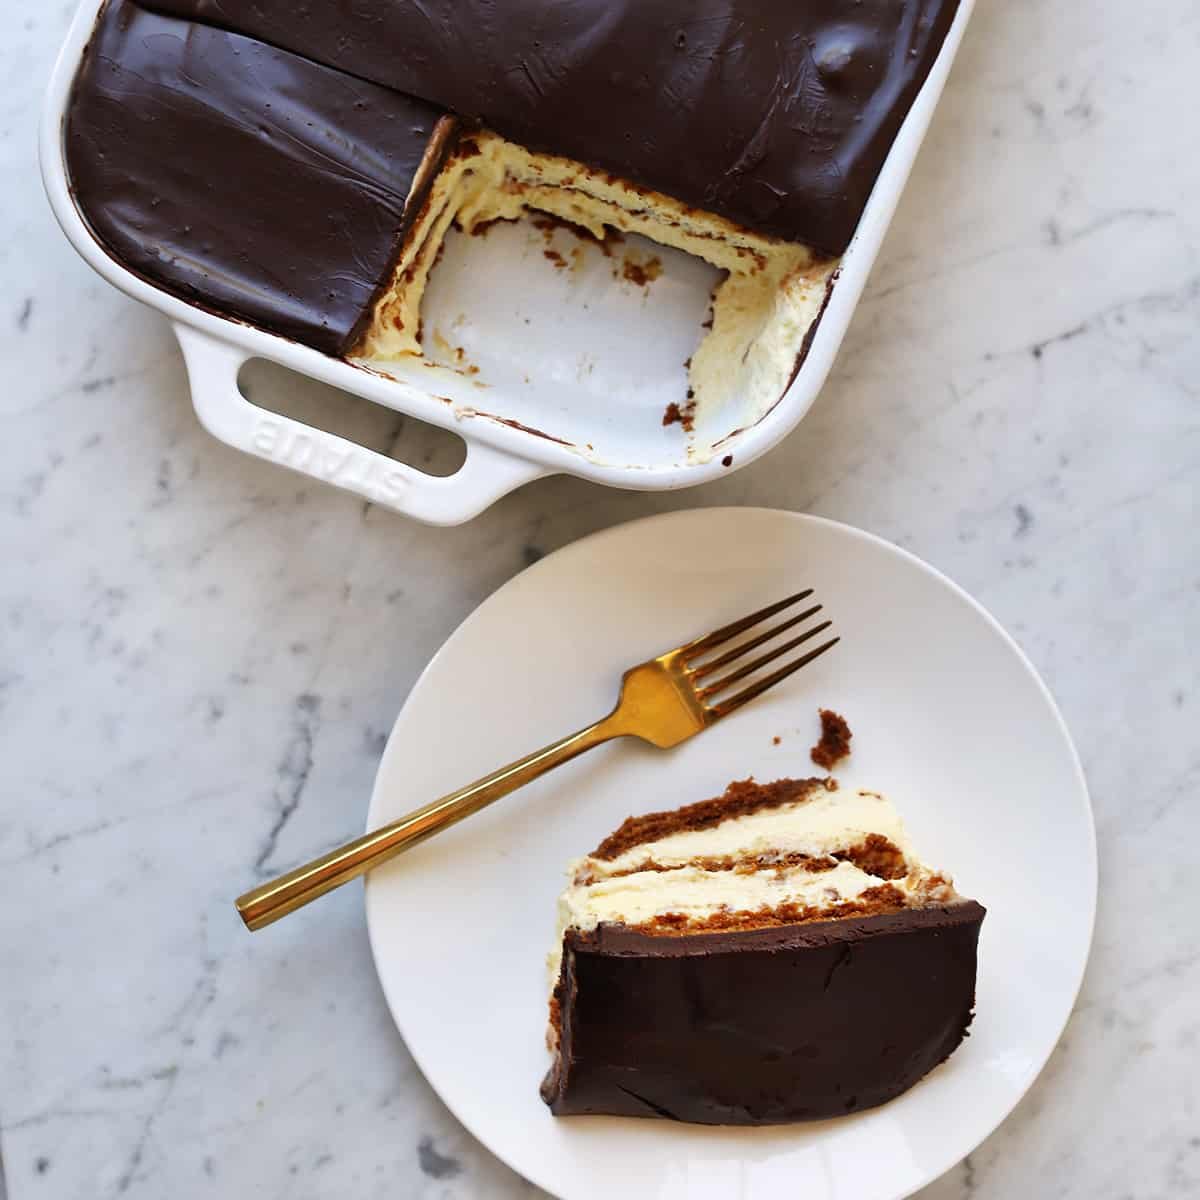
Other No-Bake Desserts You Will Love:
- No-Bake Peanut Butter Pie
- No-Bake S’mores Icebox Cake
- Chocolate No-Bake Cookies
- No-Bake Cherry Cheesecake
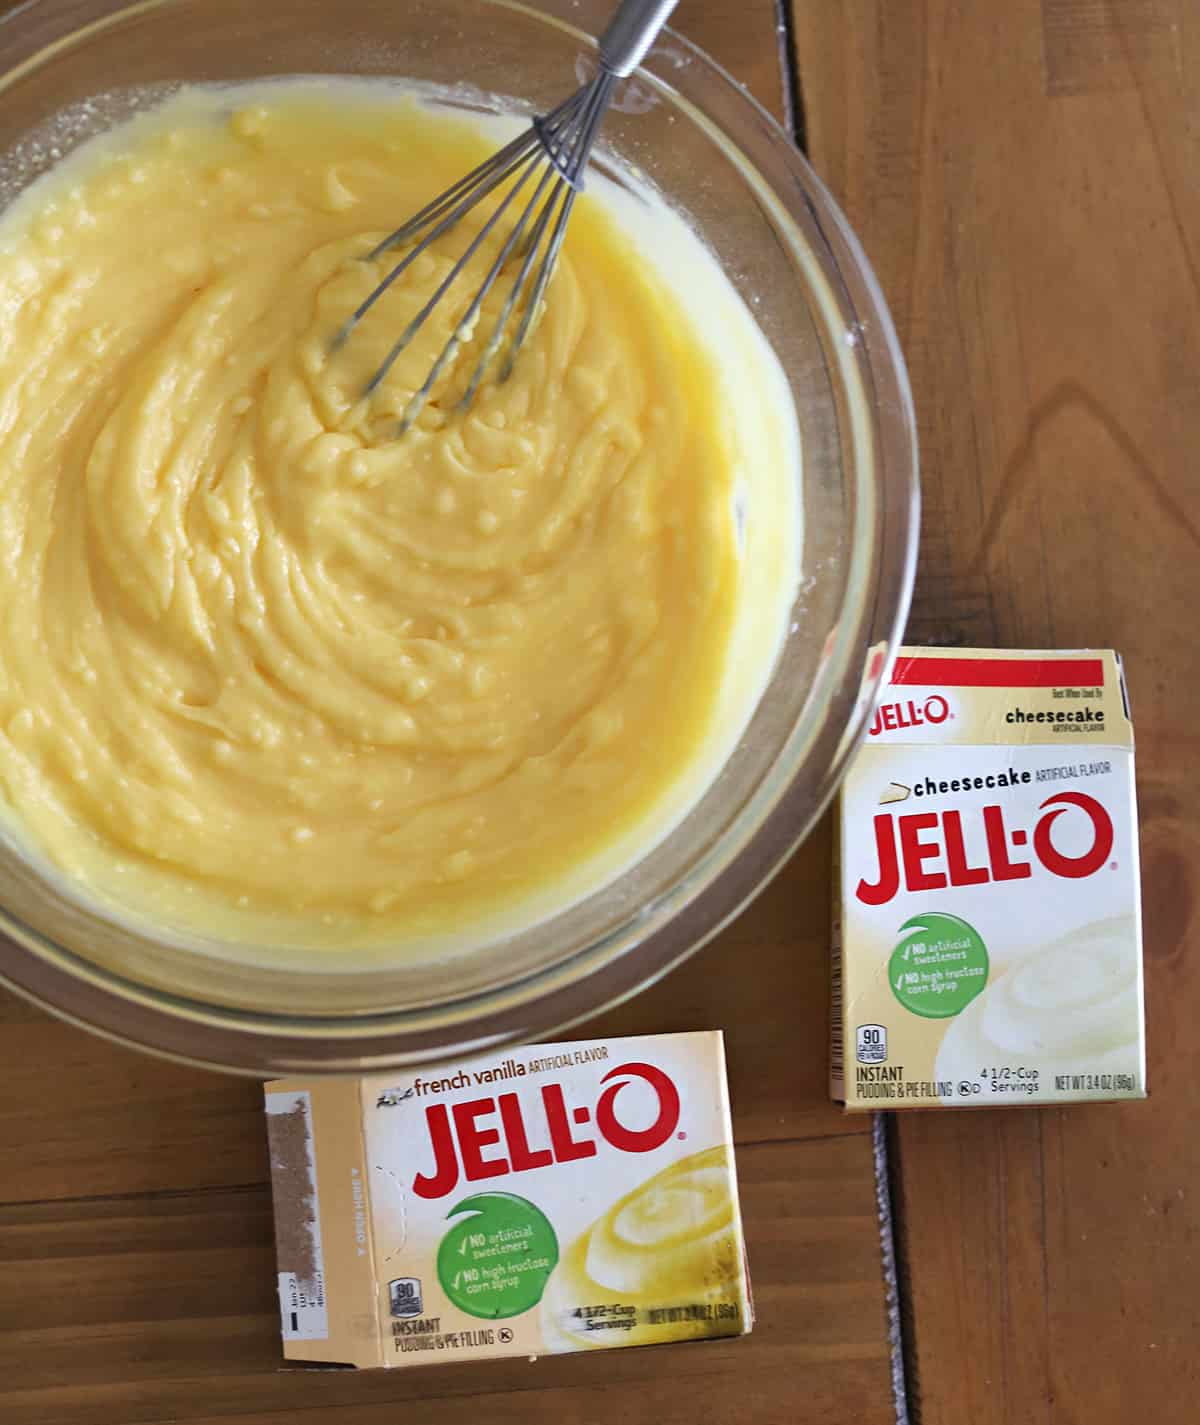
The filling is made of instant pudding and homemade whipped cream. I like to use one French vanilla and one cheesecake pudding mix. If you can’t find cheesecake pudding mix, you can simply use two vanilla instead.
If you are looking to flavor your eclair cake, this is an easy way to do it—simply substitute one or both of the instant pudding mixes for a flavor like banana or strawberry.
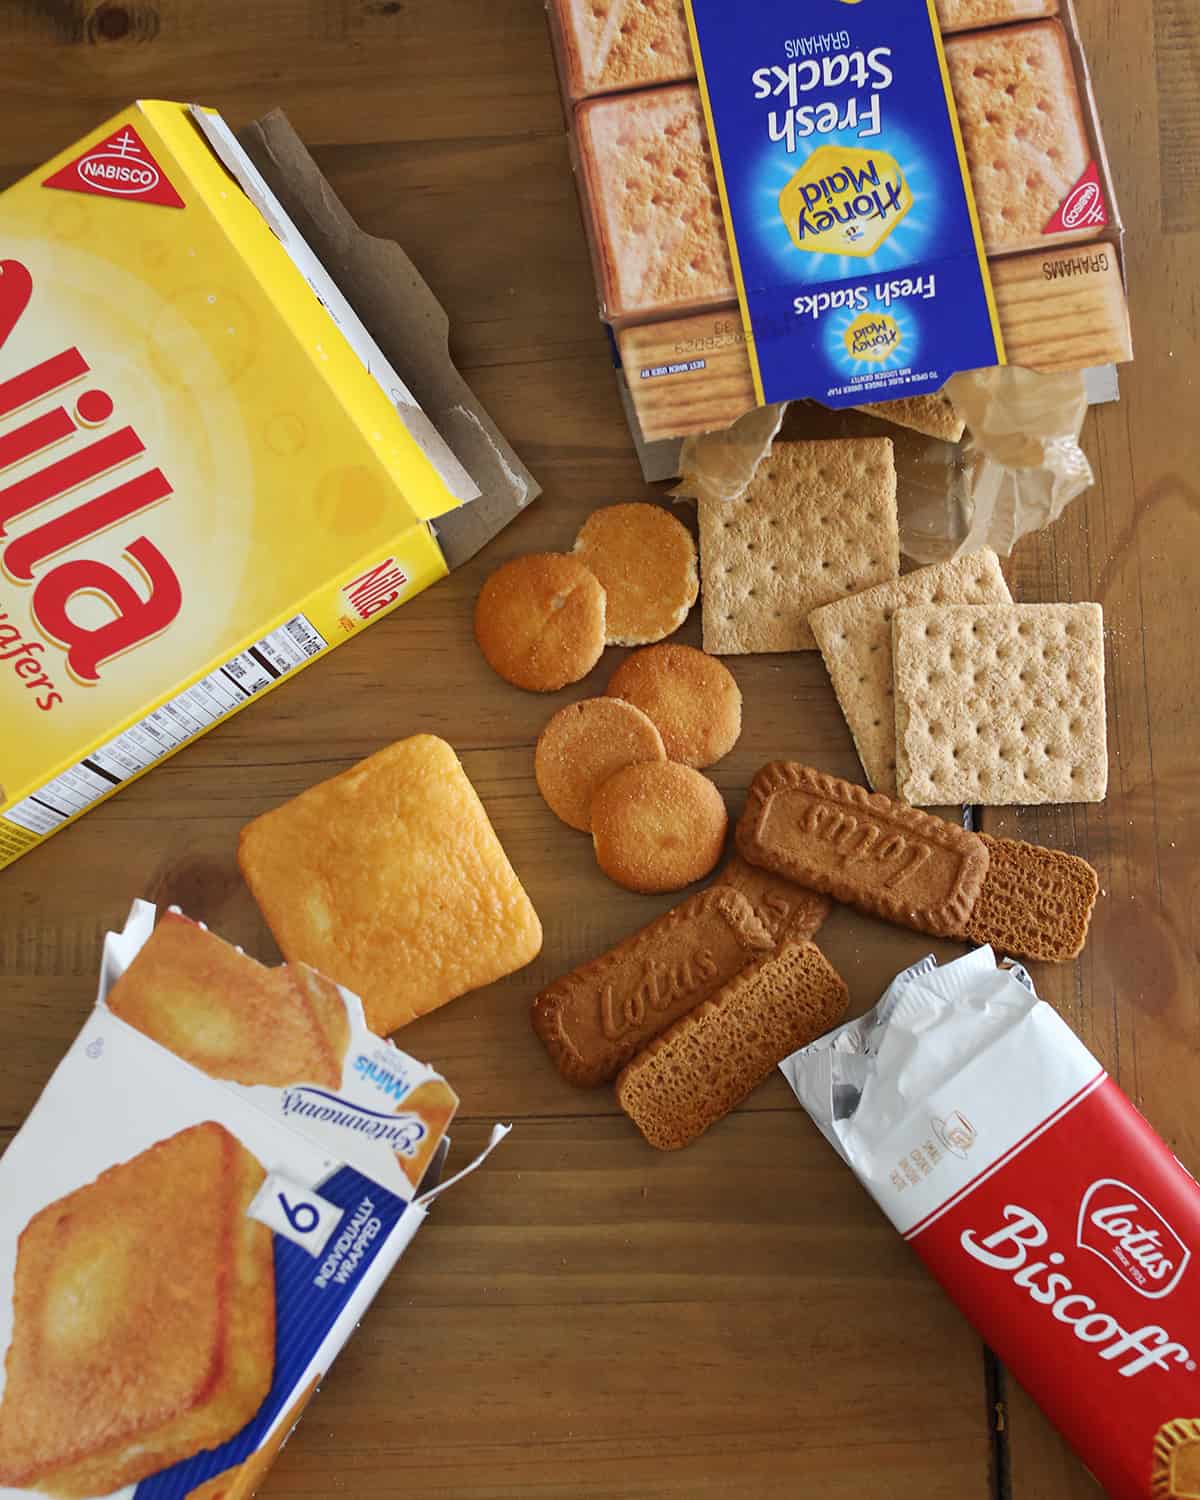
No-bake eclair cakes are most often made with graham crackers for the crust layers. This is a great option as they are already square or rectangle shaped, so they are easy to work with. But, two other options I like are vanilla wafers or Biscoff cookies.
If you are wanting to serve your eclair cake sooner than eight hours, or you want to make it and serve it immediately (or within an hour or two), be sure to use something for the crust layer that is soft in texture. A good option is pound cake cut into thin pieces.
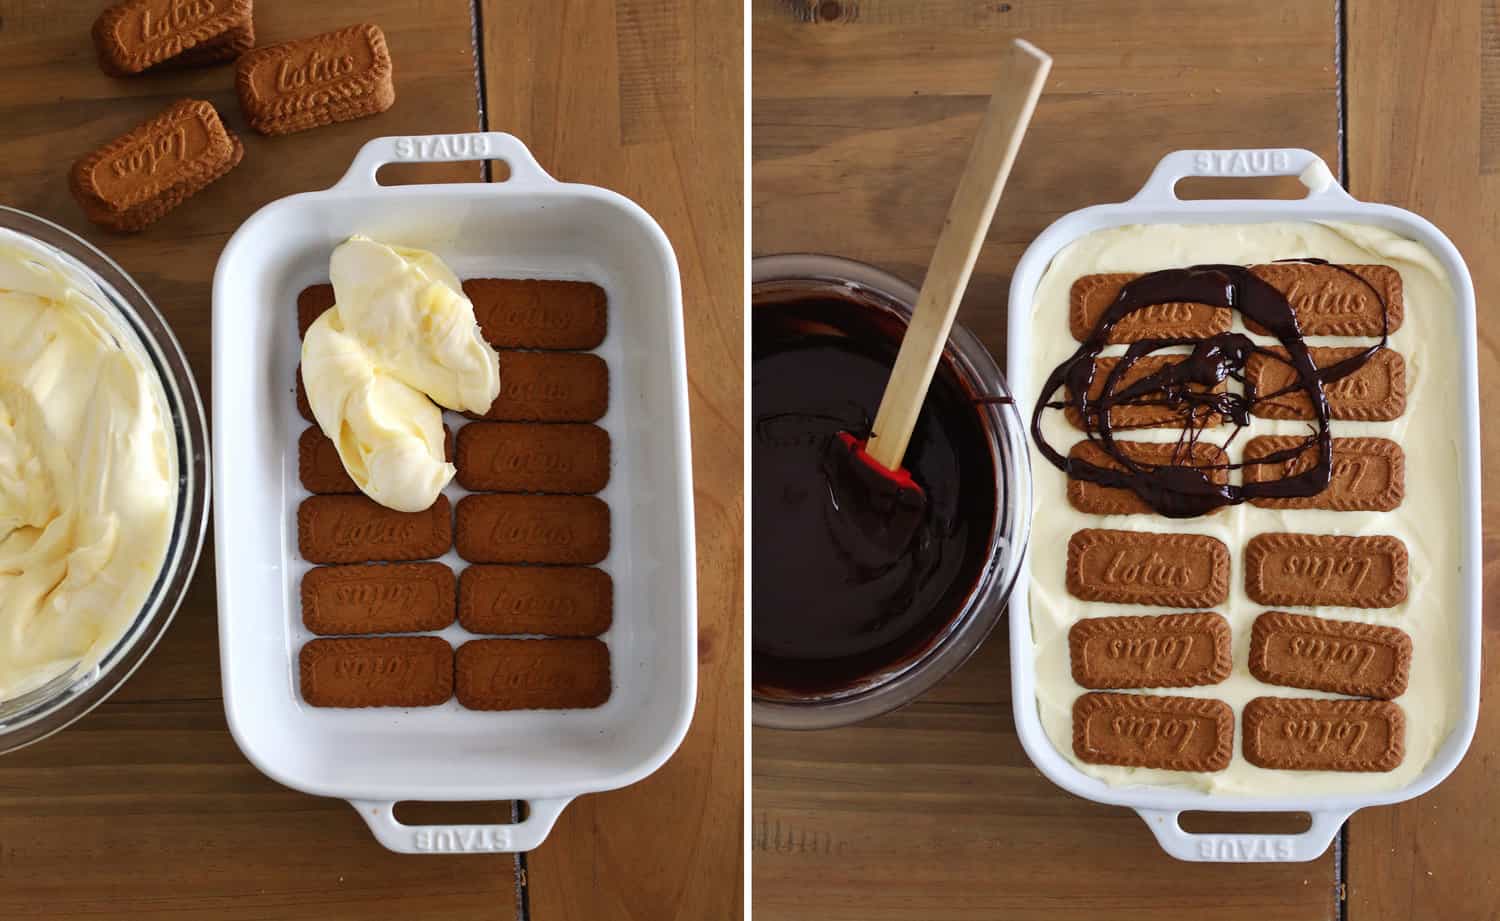
Once you have the filling made, you simply start the cake with a layer of the crust, then filling, crust, filling again, and then a top crust. Then, you pour the chocolate ganache over the top before refrigerating.
If you use a store-bought chocolate frosting instead of ganache, you will want to make sure the consistency is as spreadable as possible. You may need to microwave (in a microwave-safe bowl) for a few sections so it will easily spread over the top.
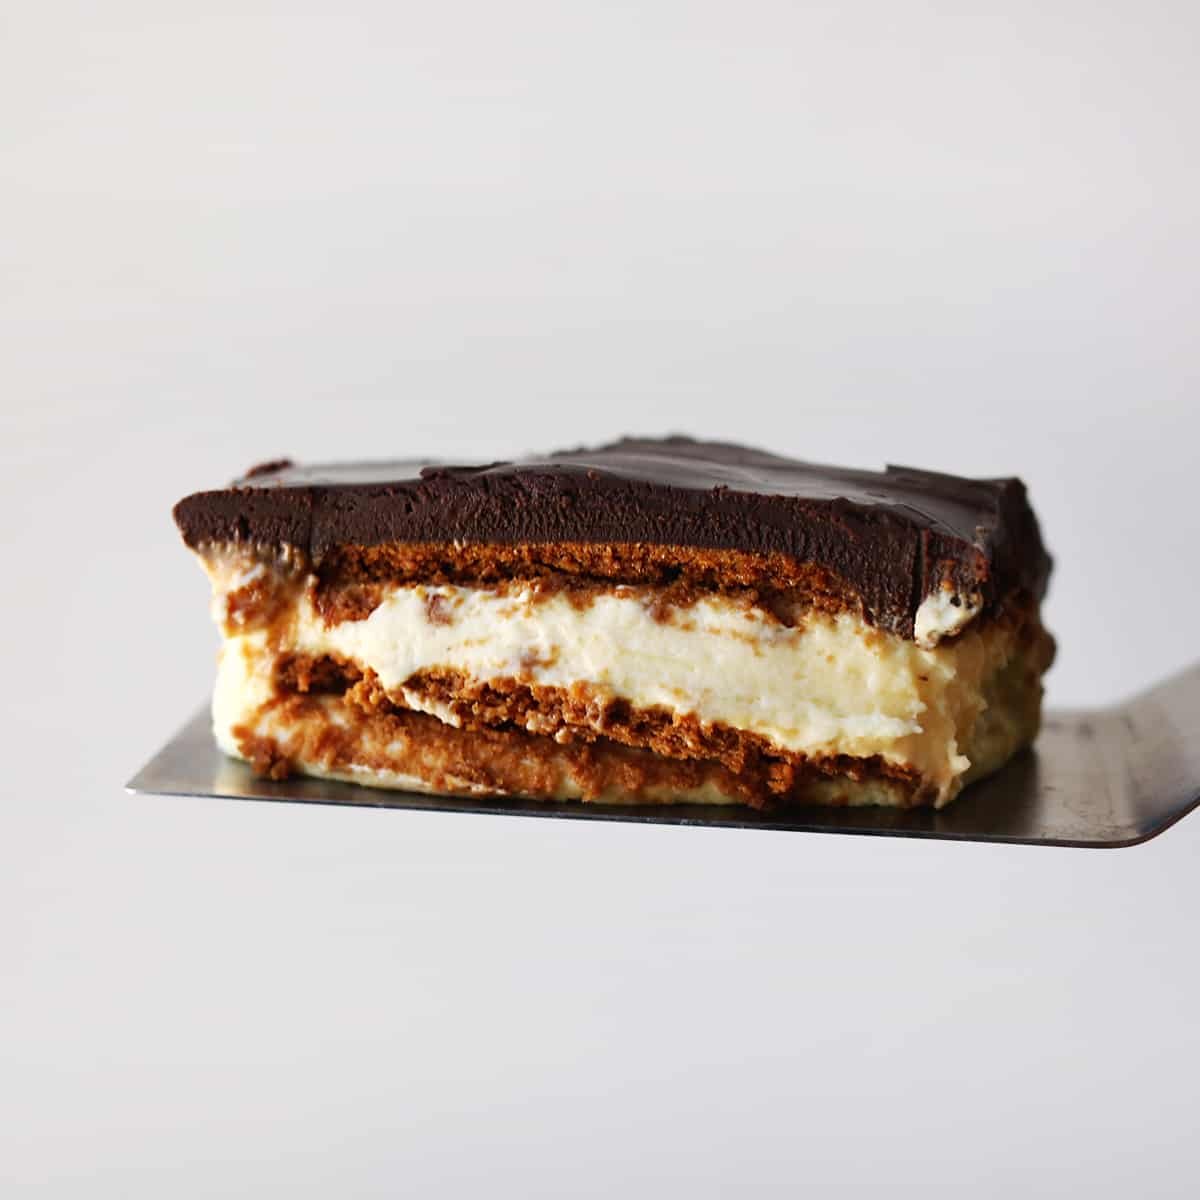
The hardest part about making this eclair cake recipe is serving it from the pan! Lol. This is such a soft, pudding like dessert it can be a little tricky to remove that first piece. But it’s worth it as this is such a crowd-pleasing dessert.
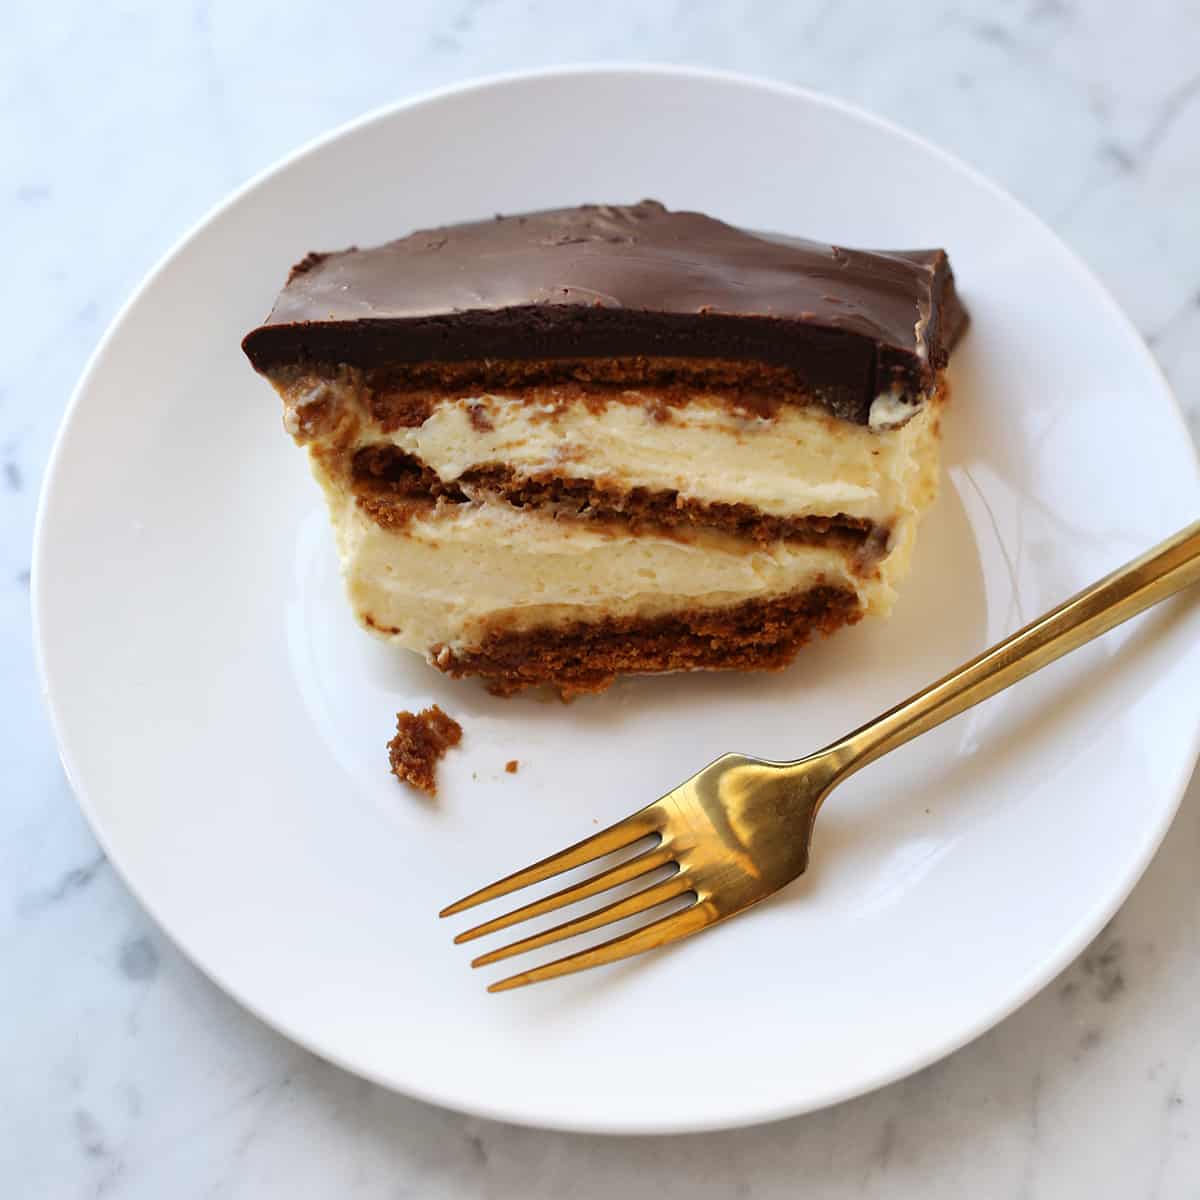
If you make this eclair cake, let us know what you think in the comments!
Elcair Cake – No-Bake
Ingredients
- 2 boxes instant pudding French vanilla and cheesecake flavors (3.4 ounce boxes)
- 3 cups milk
- 3 cups heavy whipping cream divided
- 1 box graham crackers, vanilla wafers, or other cookies see notes
- 1 ½ cups dark or semi sweet chocolate chips
Instructions
- In a mixing bowl, stir together the pudding mixes and 3 cups milk. This will make instant pudding.
- In the bowl of a stand mixer, whip 2 cups of heavy whipping cream for 2-4 minutes to make homemade whipped cream.
- Fold the whipped cream into the pudding mixture, until just combined.
- Line the bottom of the baking pan with graham crackers (or other cookie of choice).
- Add half the whipped pudding mixture, spread evenly.
- Add another layer of graham crackers or other cookies.
- Add the second half of the whipped pudding mixture, spread evenly.
- Add another layer of graham crackers or other cookies. Set aside while you make the ganache.
- In a microwave-safe bowl, combine 1 cup heavy whipping cream and the chocolate chips. Microwave in 30-second intervals, stirring in between, until just combined.
- Pour the chocolate ganache over the top layer of the eclair cake. Spread evenly.
- Cover with plastic wrap and refrigerate for at least 8 hours and up to 24 hours. Serve cold.
Notes
Nutrition
This recipe delivers perfect dough for cutout shapes (similar to sugar cookies) with all the cinnamon and spice flavor you love from gingerbread.
Gingerbread cookies are my husband’s favorite cookie, and I make this recipe multiple times each holiday season. I hope you enjoy it as much as we do!
Related recipes: Snowball Cookies, Pinwheel Cookies, Peanut Butter Blossoms.
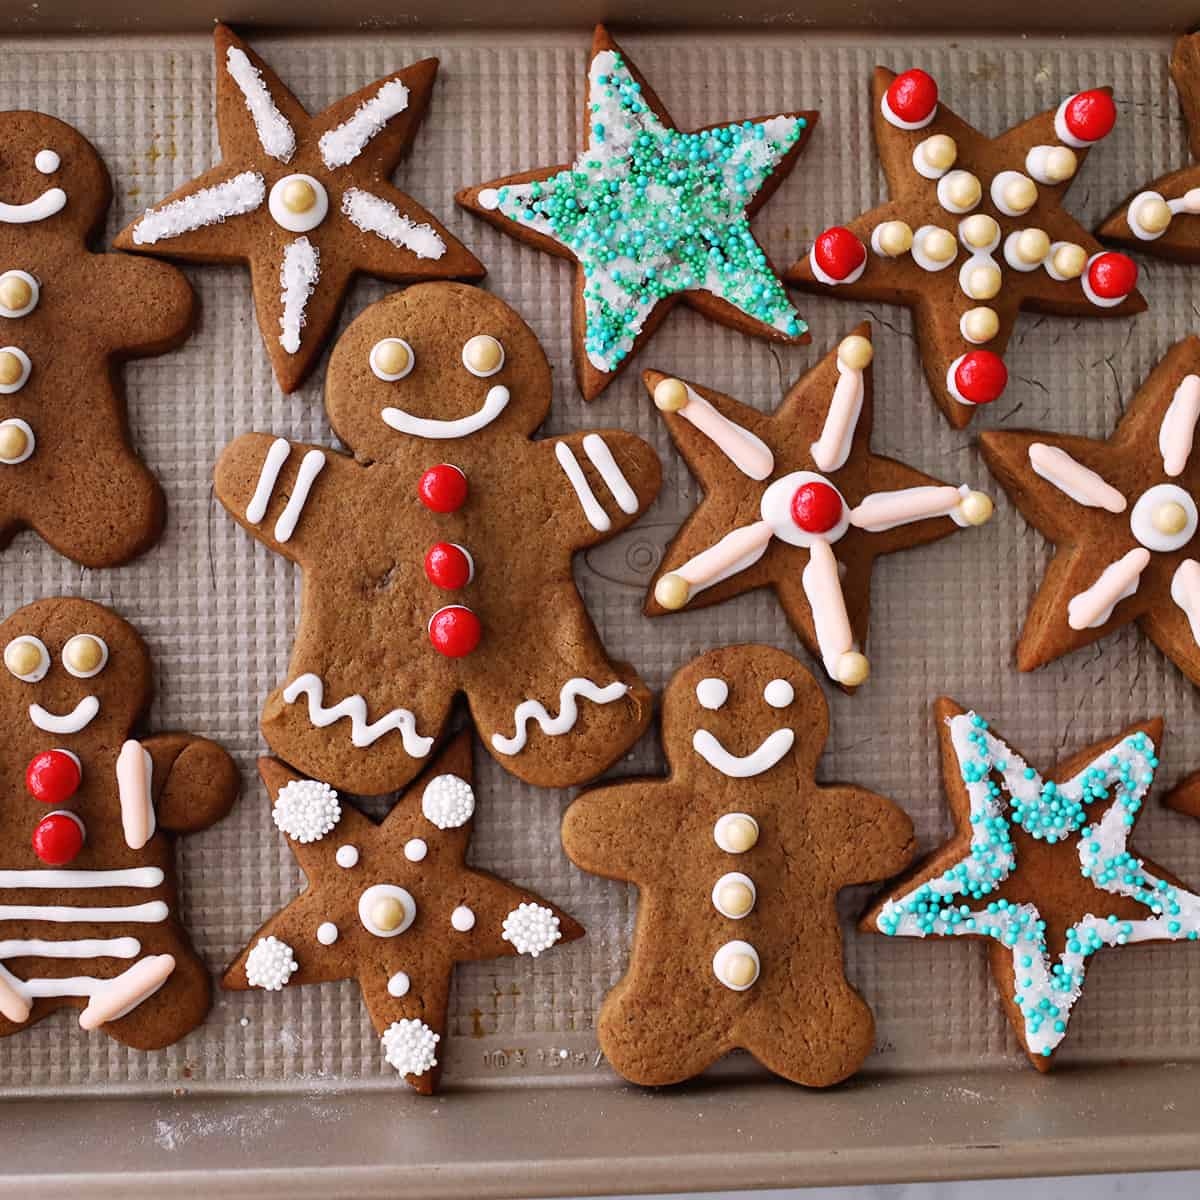
Gingerbread Cookie Ingredients:
- 1 cup (2 sticks) salted butter, room temperature
- 1 cup granulated white sugar
- 1 egg
- 2 tablespoons white vinegar
- 1 cup dark molasses
- 5 cups all purpose flour
- 1 1/2 teaspoons baking soda
- 1/2 teaspoon salt
- 2 teaspoons ground ginger
- 2 teaspoons ground cinnamon
- 2 teaspoons pumpkin pie spice
- 1 teaspoon ground cloves
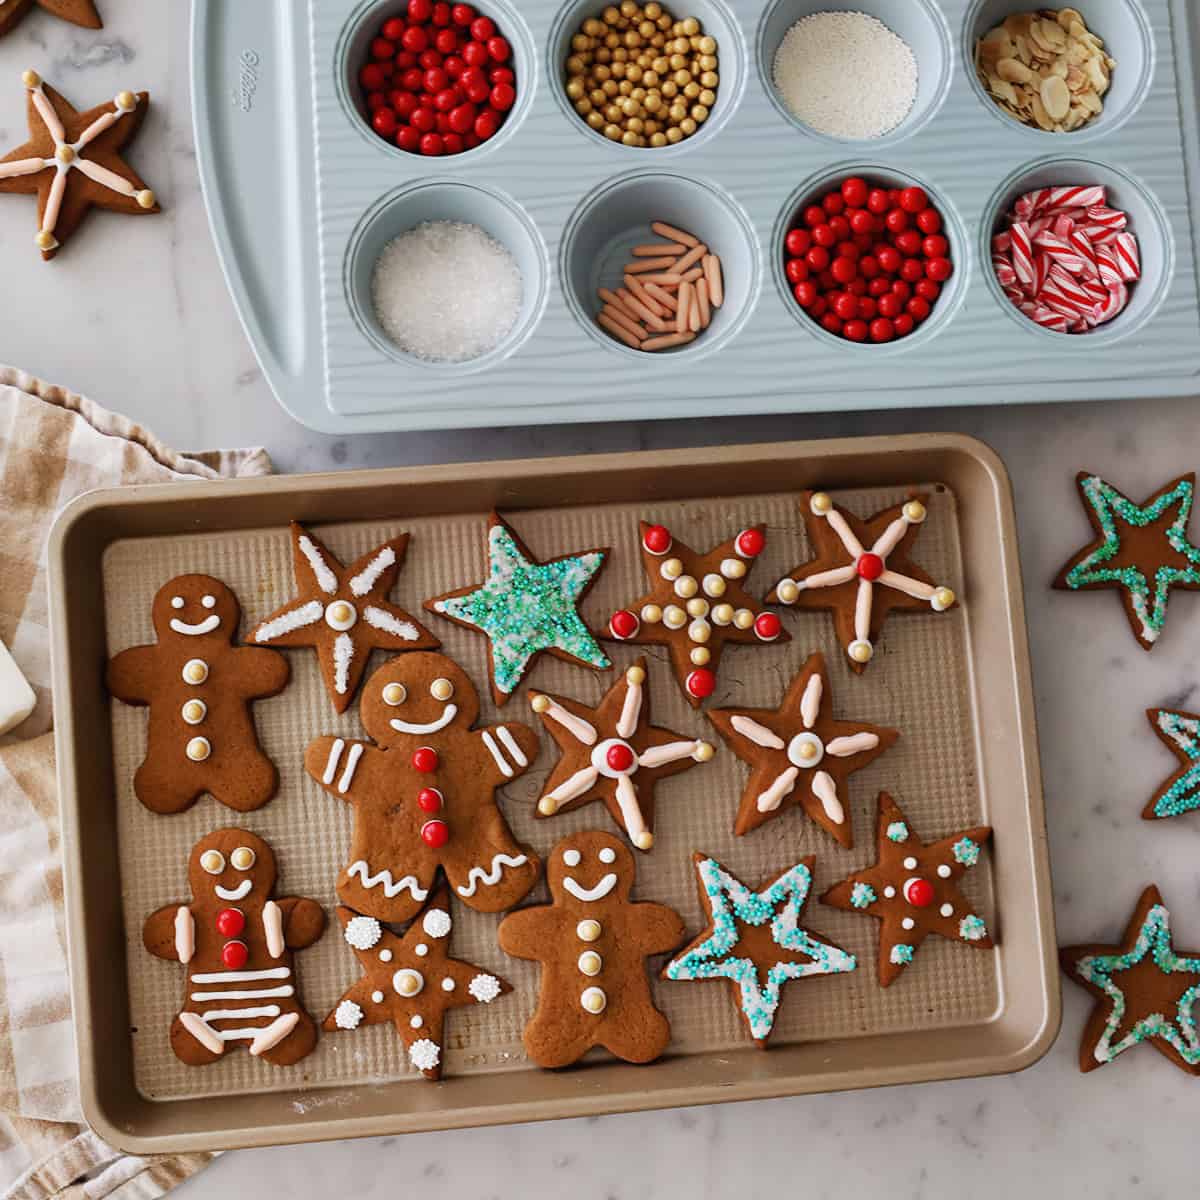
How to Make Gingerbread Cookies:
- Mix the flour, baking soda, salt and all spices. Set mixture aside.
- In your stand mixer bowl, combine butter and sugar and beat until mixture is fully combined—about 3 minutes. Scrape down sides if needed.
- Slowly add the molasses, egg and vinegar until fully combined. It’s normal for the mixture to appear curdled.
- Add the flour mixture slowly, scraping sides as needed. Be sure the bottom and top of your bowl are both fully combined. If the dough is crumbly, it is not fully mixed.
- Divide the dough into 3-5 flattened balls and cover in plastic wrap.
- Chill the dough for at least 30 minutes before rolling. Chilling is an essential step to create cutout shapes with nice edges. If you skip this step, your cookies may lose some shape while baking.
- Preheat oven to 350 degrees.
- Roll dough using as small amount of flour as necessary. I use parchment paper to roll if my dough is sticky at all. Dough should be about half an inch thick for a nice, soft cookie.
- Place cutout shapes on a parchment lined baking sheet. Gather and re-roll shapes as needed. You do not need to chill your dough again unless it becomes very soft.
- Bake cookies at 350 degrees for 10 minutes. Allow cookies to cool on pan for 5 minutes before transferring.
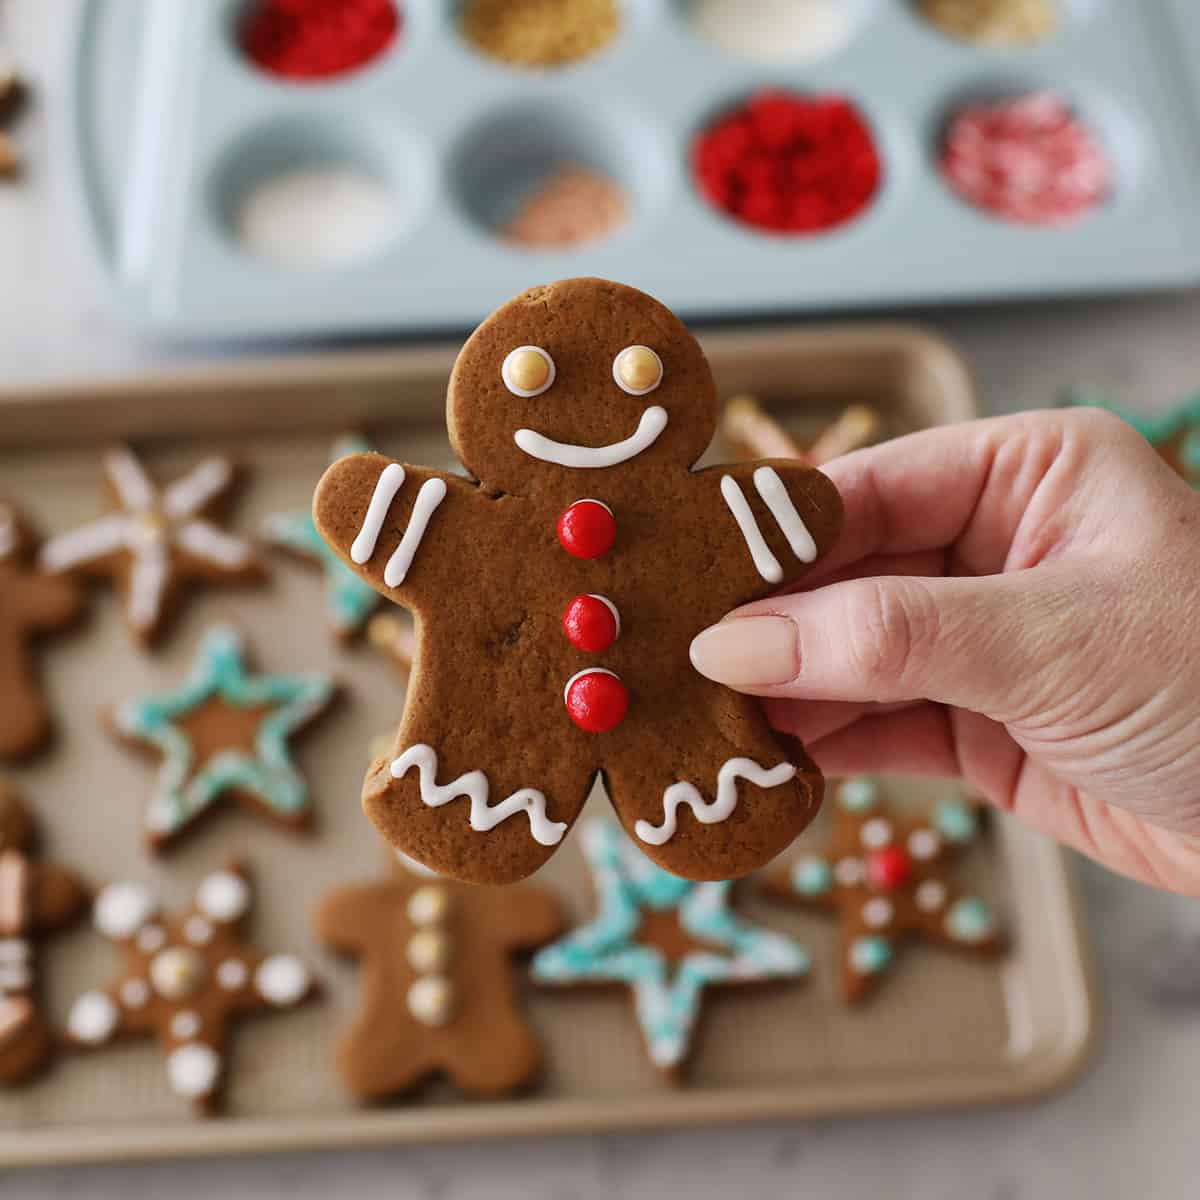
- Decorate your cookies as you like. I used this royal icing recipe. We also have a vegan royal icing recipe.

Tips for Making Gingerbread Cookies:
- If you prefer crispy gingerbread, simply roll the dough thinner (1/4 inch) and bake for 12 minutes instead of 10.
- You can use light or dark molasses, but do not use blackstrap or cooking molasses or your cookies will be bitter. I used the brand Grandma’s Original Molasses, which is easy to find in the U.S.
- Here’s a link to Christmas cookie cutters I used.
More Holiday Recipes:
Other recipes you may like:
FAQ
Frequently Asked Questions
How long can you keep the dough refrigerated?
While the minimum time to chilling your dough is 30 minutes, there really is no maximum. You can keep your dough in the fridge for up to 3 days with no issues.
Can you freeze this dough?
Yes. This recipe makes a lot of dough, so if you aren’t able to use it within two to three days, freeze it for a future cookie session.
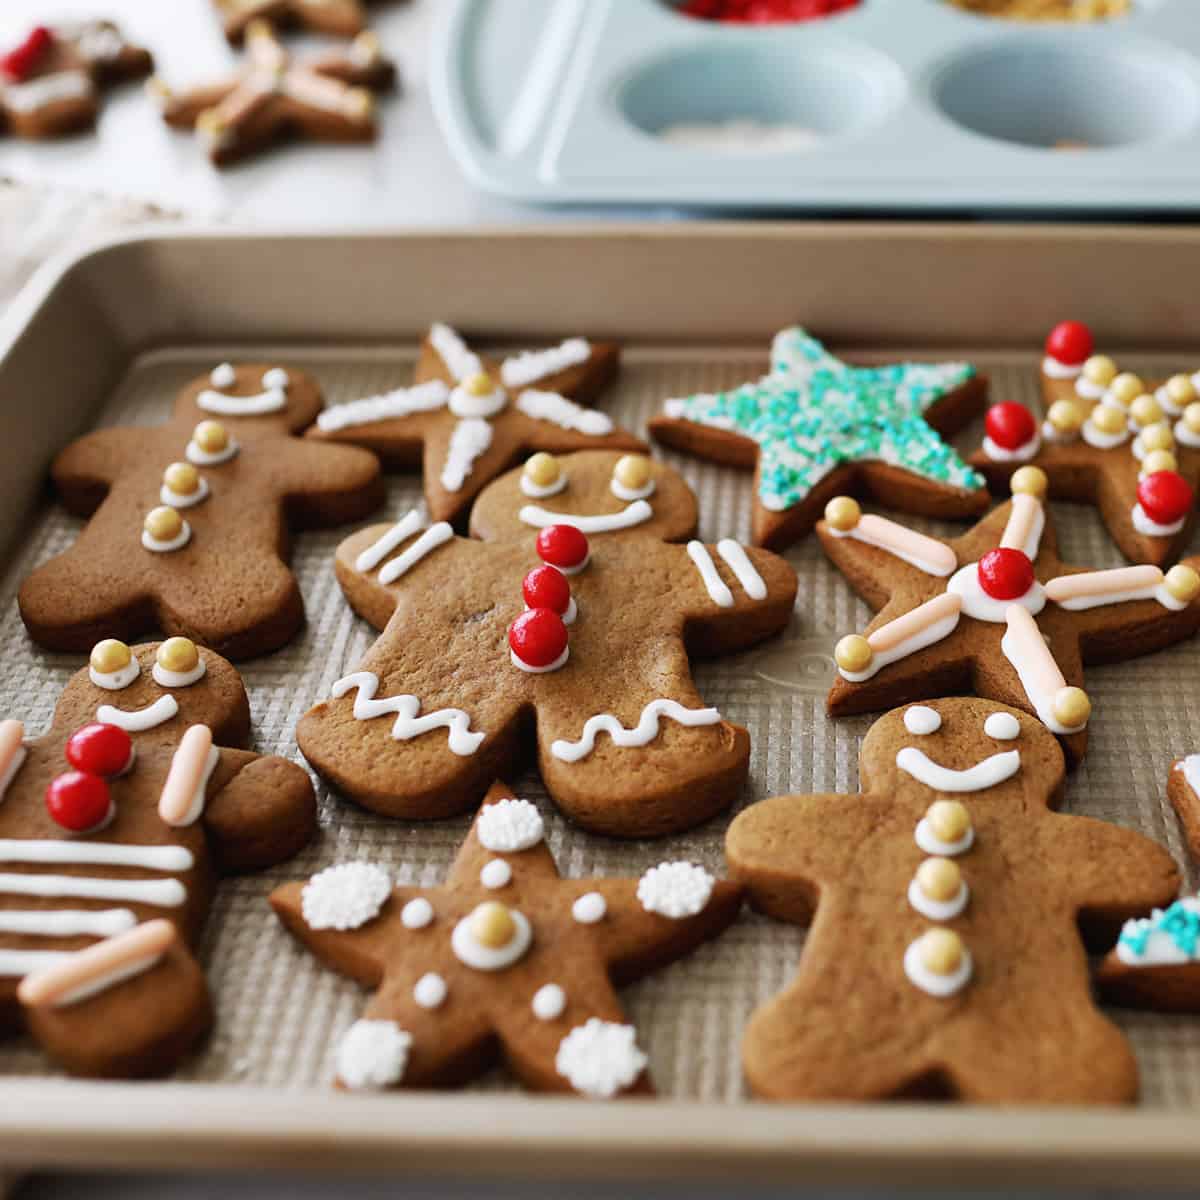
P.S. Love this post? Check out my Gingerbread House Decorating Party.

Soft & Chewy Gingerbread Cookies
Ingredients
- 1 cup salted butter room temperature
- 1 cup granulated white sugar
- 1 egg
- 2 tablespoons white vinegar
- 1 cup dark molasses
- 5 cups all-purpose flour
- 1 ½ teaspoon baking soda
- ½ teaspoon salt
- 2 teaspoons ginger
- 2 teaspoons cinnamon
- 2 teaspoons pumpkin pie spice
- 1 teaspoon cloves
Instructions
- Mix the flour, baking soda, salt and all spices. Set mixture aside.
- In your stand mixer bowl, combine butter and sugar and beat until mixture is fully combined, about 3 minutes. Scrape down sides if needed.
- Slowly add molasses, egg and vinegar until fully combined. It’s normal for the mixture to appear curdled.
- Add flour mixture slowly, scraping sides as needed. Be sure the bottom and top of your bowl are both fully combined. If the dough is crumbly, it is not fully mixed.
- Divide the dough into 3-5 flattened balls and cover in plastic wrap.
- Chill the dough for at least 30 minutes before rolling. Chilling is an essential step to create cutout shapes with nice edges. If you skip this step your cookies may lose some shape while baking.
- Preheat oven to 350 degrees.
- Roll dough using as small amount of flour as necessary. I use parchment paper to roll if my dough is sticky at all. Dough should be about half an inch thick for a nice, soft cookie.
- Place cutout shapes on a parchment lined baking sheet. Gather and re-roll shapes as needed. You do not need to chill your dough again unless it becomes very soft.
- Bake cookies at 350 degrees for 10 minutes. Allow cookies to cool on pan for 5 minutes before transferring.
- Decorate your cookies as you like. I used this royal icing recipe. We also have a vegan royal icing recipe.
Nutrition
Snowball cookies go great with coffee, tea, or hot chocolate. But look out, as they are shockingly addictive.
Related: Gingerbread Cookies, Butter Cookies, The Best Cookie Recipes
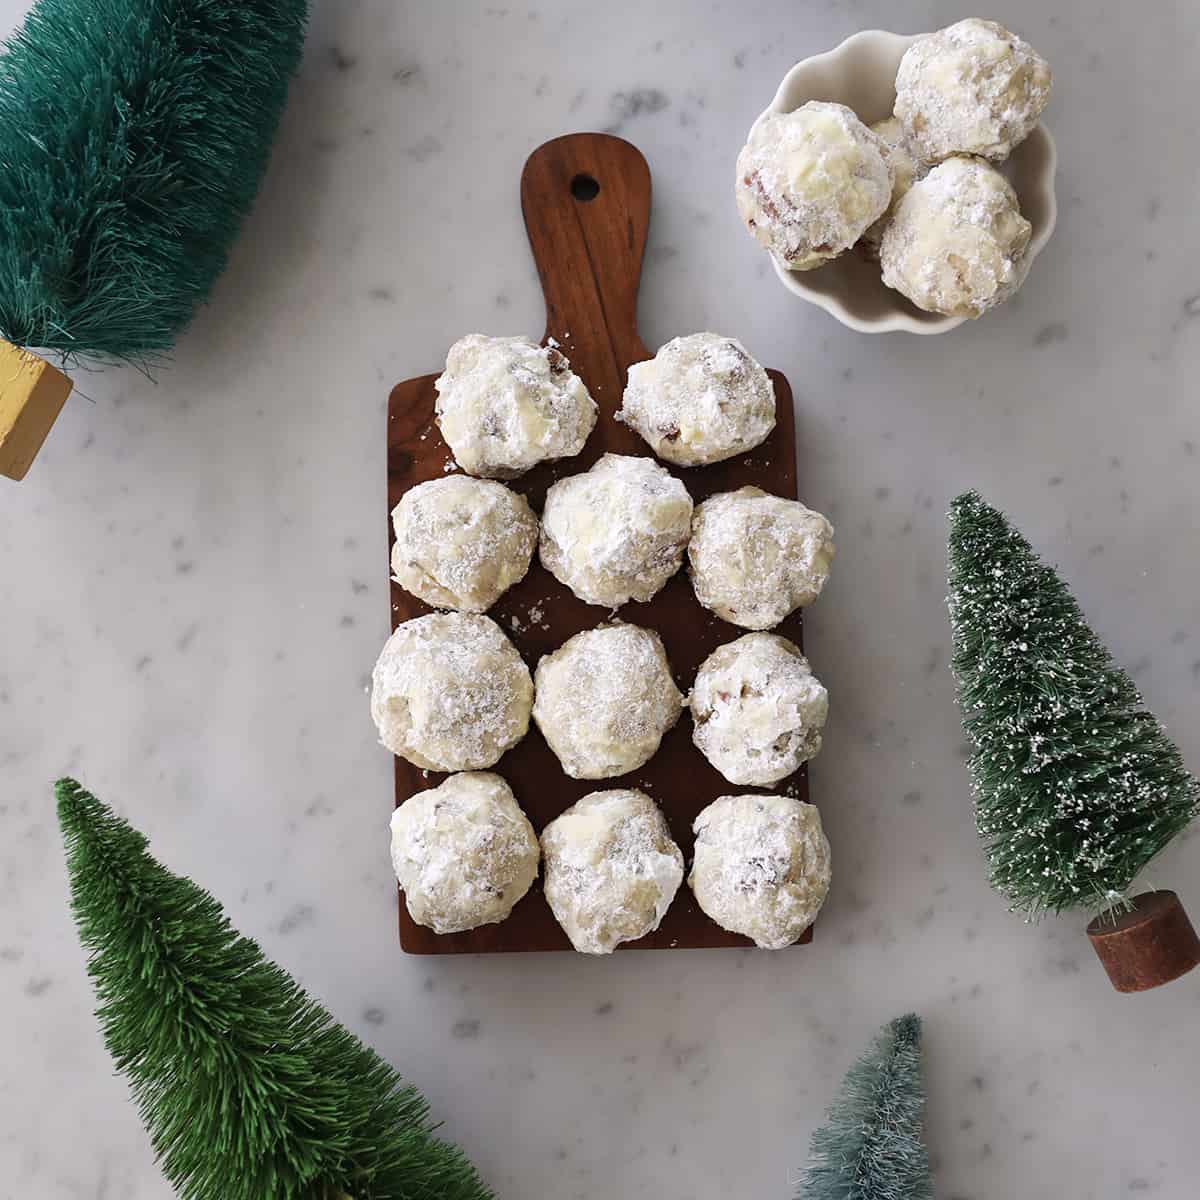
Snowball Cookie Ingredients:
- All-purpose flour
- Pecans (or other nuts)
- Butter
- Salt
- Vanilla extract
- Powdered sugar (confectioner’s sugar)
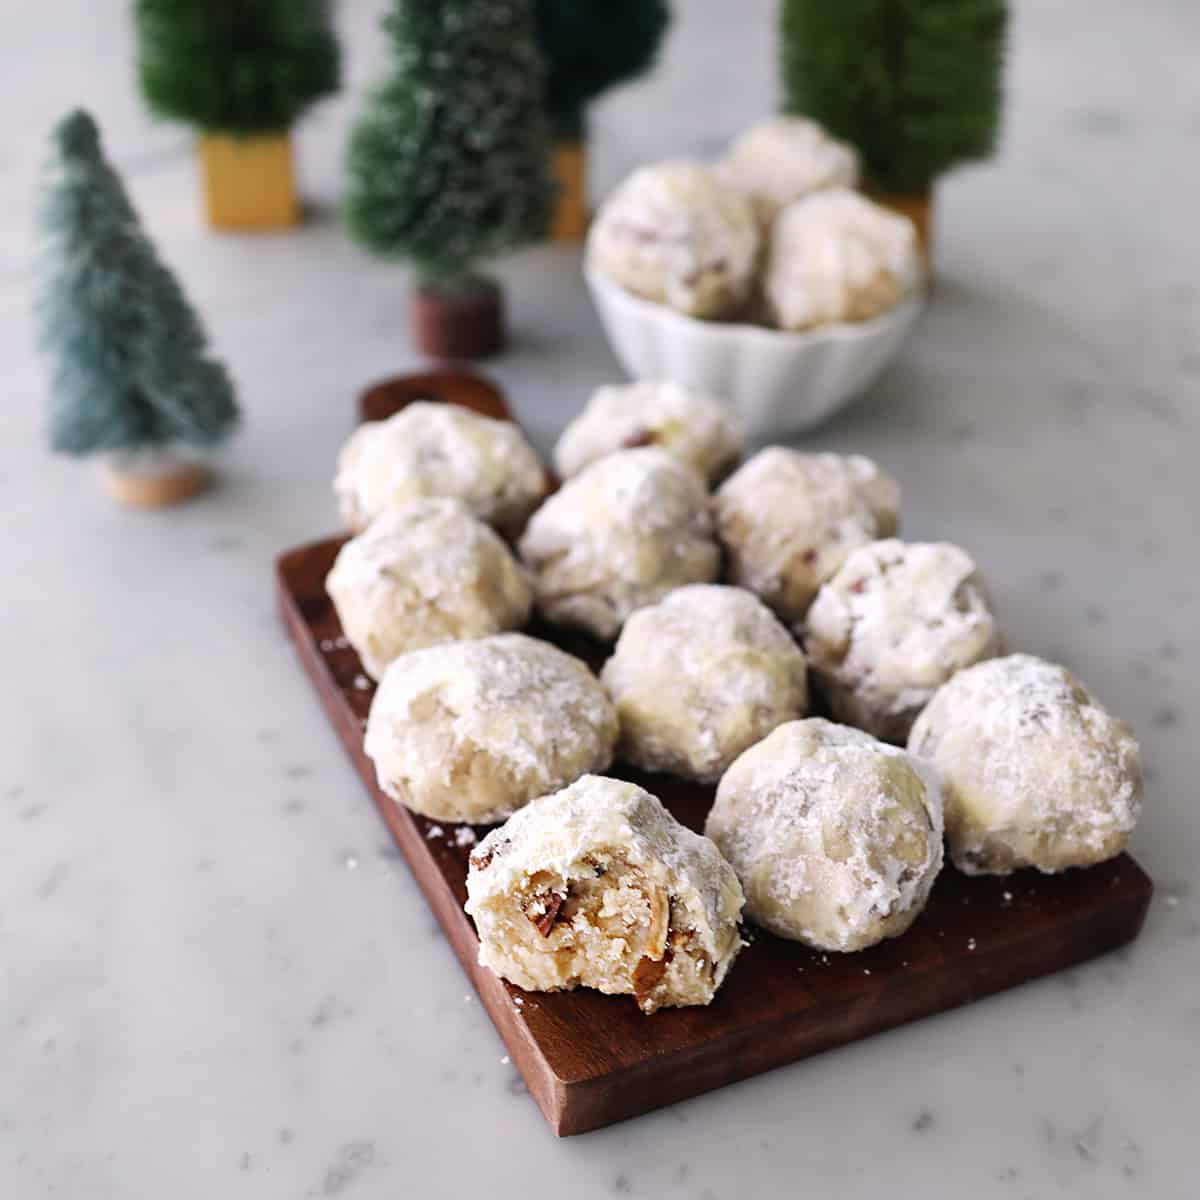
Directions:
Snowball cookies have three main steps for success. First, toast the nuts for maximum flavor. Then, make and bake the cookies.
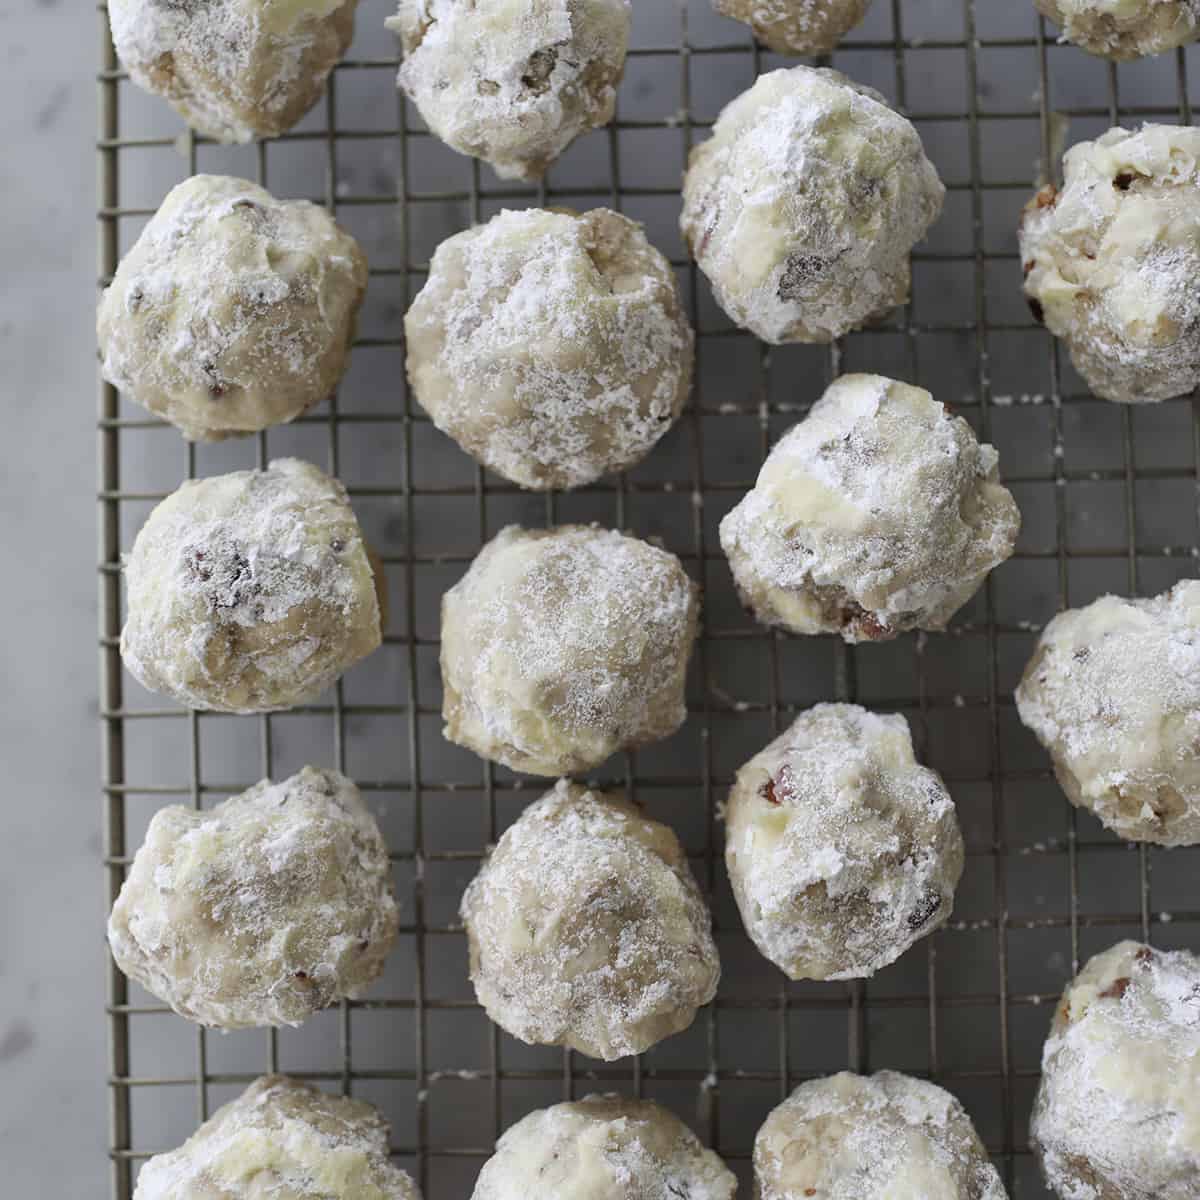
Last, roll the still-warm cookies in powdered sugar for that snowball effect and melt-in-your-mouth flavor. I like to roll them once, and after I’ve rolled them all, I will roll each one more time for maximum snow effect!
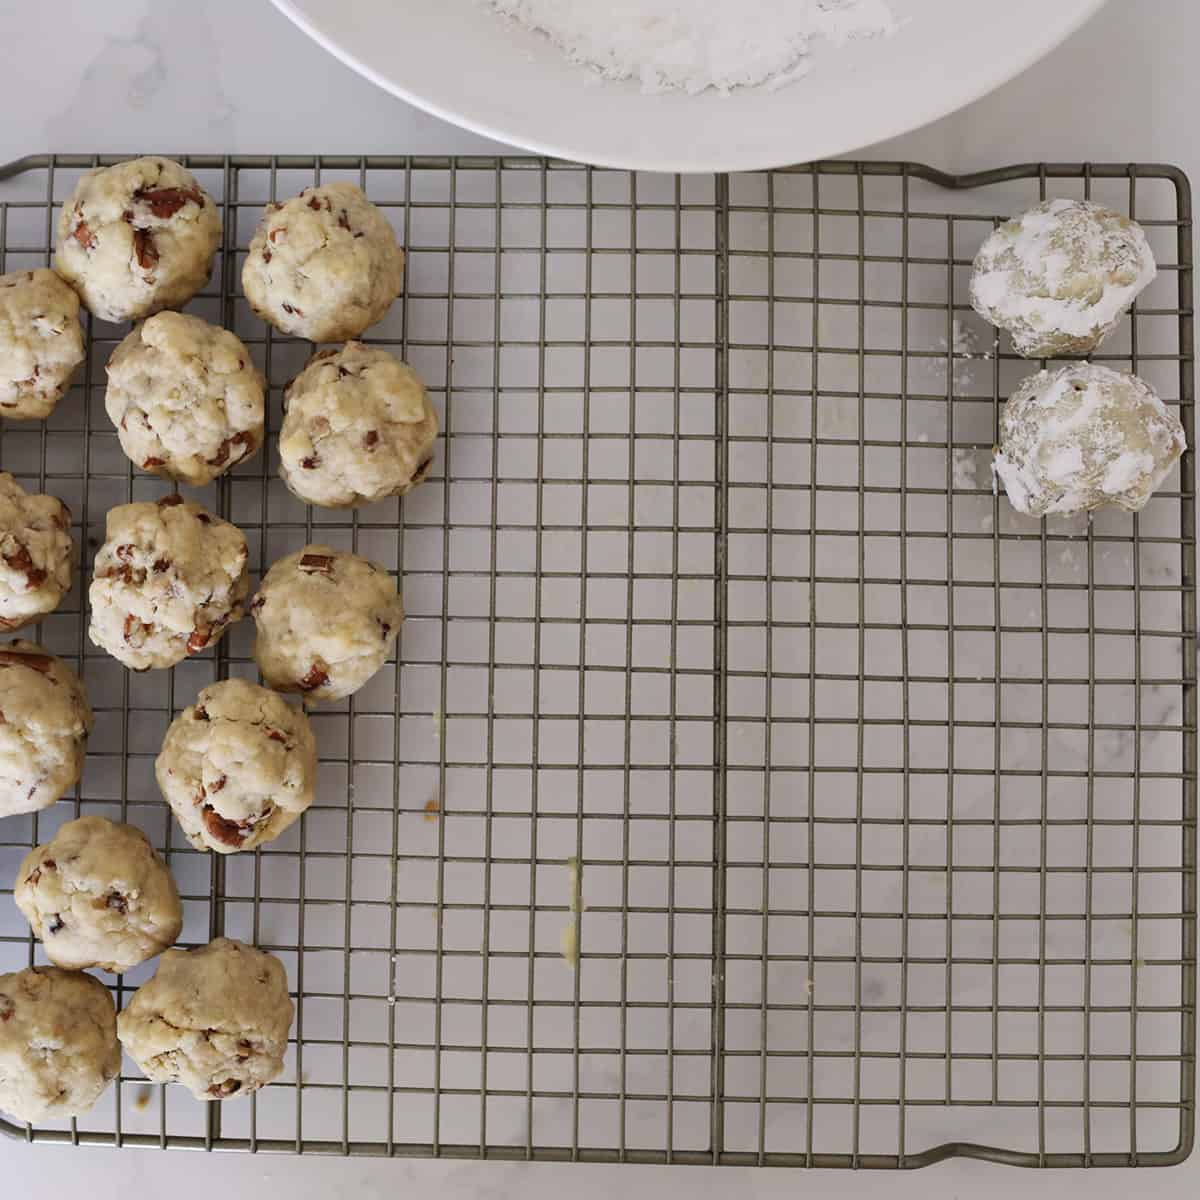
Tips for Making:
- Nuts – I like pecans, but sometimes snowball cookies are made with walnuts or other nuts. It’s up to your preference (or if allergies are an issue). Whatever nut you use, give them a good toasting before chopping them well.
- Roll each dough ball so it’s a 2-3 bite cookie. These don’t bake for long, so you don’t necessarily want oversized cookies.
- Roll the snowball cookies in powdered sugar while they are still warm, and then once more. The first layer will melt some (a good thing!), but for that snowy look, you’ll want a second layer.
Serving Suggestion – Coffee!
Snowball cookies go great with a hot beverage like coffee or tea (see our favorite herbal tea-it’s tastes like red hots candy!).
Here’s how to take your at-home coffee game to the next level:
- How to Brew Coffee in a Chemex
- How to Brew Coffee in an Aeropress
- Make Your Own Latte at Home (Without an Expensive Espresso Machine)
FAQ
Frequently Asked Questions
Why did my snowball cookies turn out flat?
Snowball cookies should not flatten. Since they do not contain a leavening agent, the main factor to check is that the dough is chilled before baking.
Can snowball cookie dough be frozen?
Yes. You can freeze the dough in balls to bake later. Once they are baked, you can roll them in powdered sugar.
Are snowball cookies the same as Italian wedding cookies?
They are very similar cookies. Italian wedding cookies are sometimes made with different nuts (like almonds) and sometimes shaped into a crescent moon shape before baking.
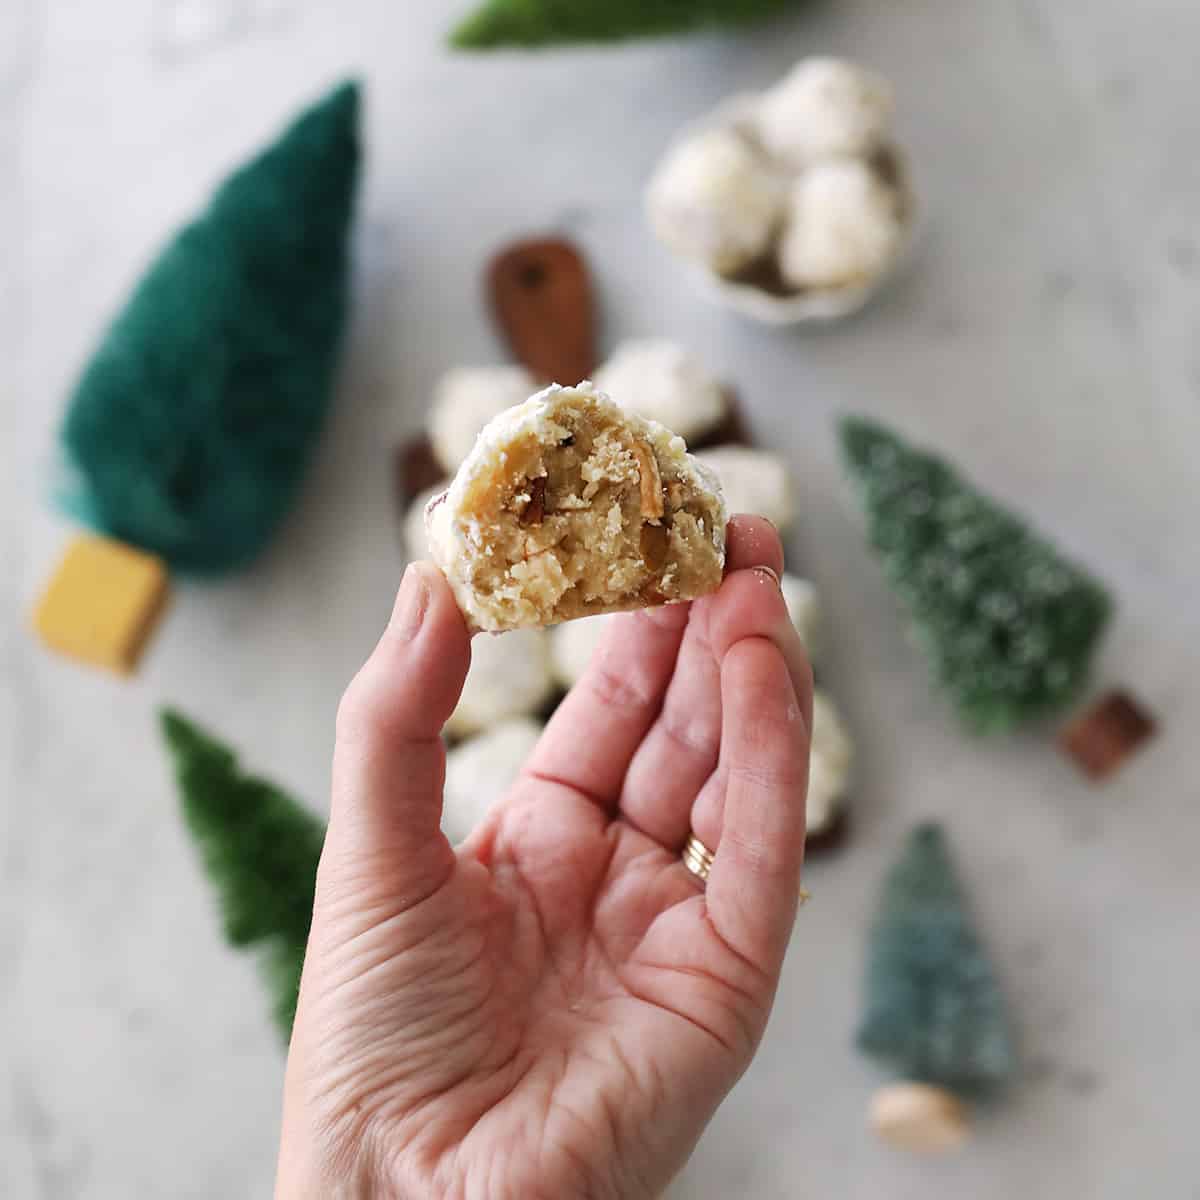

Snowball Cookies
Ingredients
- 2 ⅛ cups all-purpose flour
- ¾ cup pecans
- ½ teaspoon salt
- 1 cup butter softened
- 1 ½ teaspoon vanilla extract
- ¾ cup powdered sugar divided
Instructions
- In a dry pan, toast the pecans over medium heat until very fragrant.
- Once they are cool enough to handle, chop well.
- In a medium mixing bowl, stir together the flour, chopped pecans, and salt. Set aside.
- In a large mixing bowl, cream together the softened butter, vanilla extract, and 1/2 cup powdered sugar.
- Add the dry ingredients to the wet and stir until a dough forms.
- Cover and refrigerate for one hour, up to overnight.
- Roll into balls and place on a baking sheet.
- Bake at 400°F for 8-10 minutes. The bottoms should just begin to brown.
- Once cool enough to handle (but still warm), roll them in the remaining powdered sugar. Once you've rolled all the cookies, roll each one a second time.
Notes
Nutrition
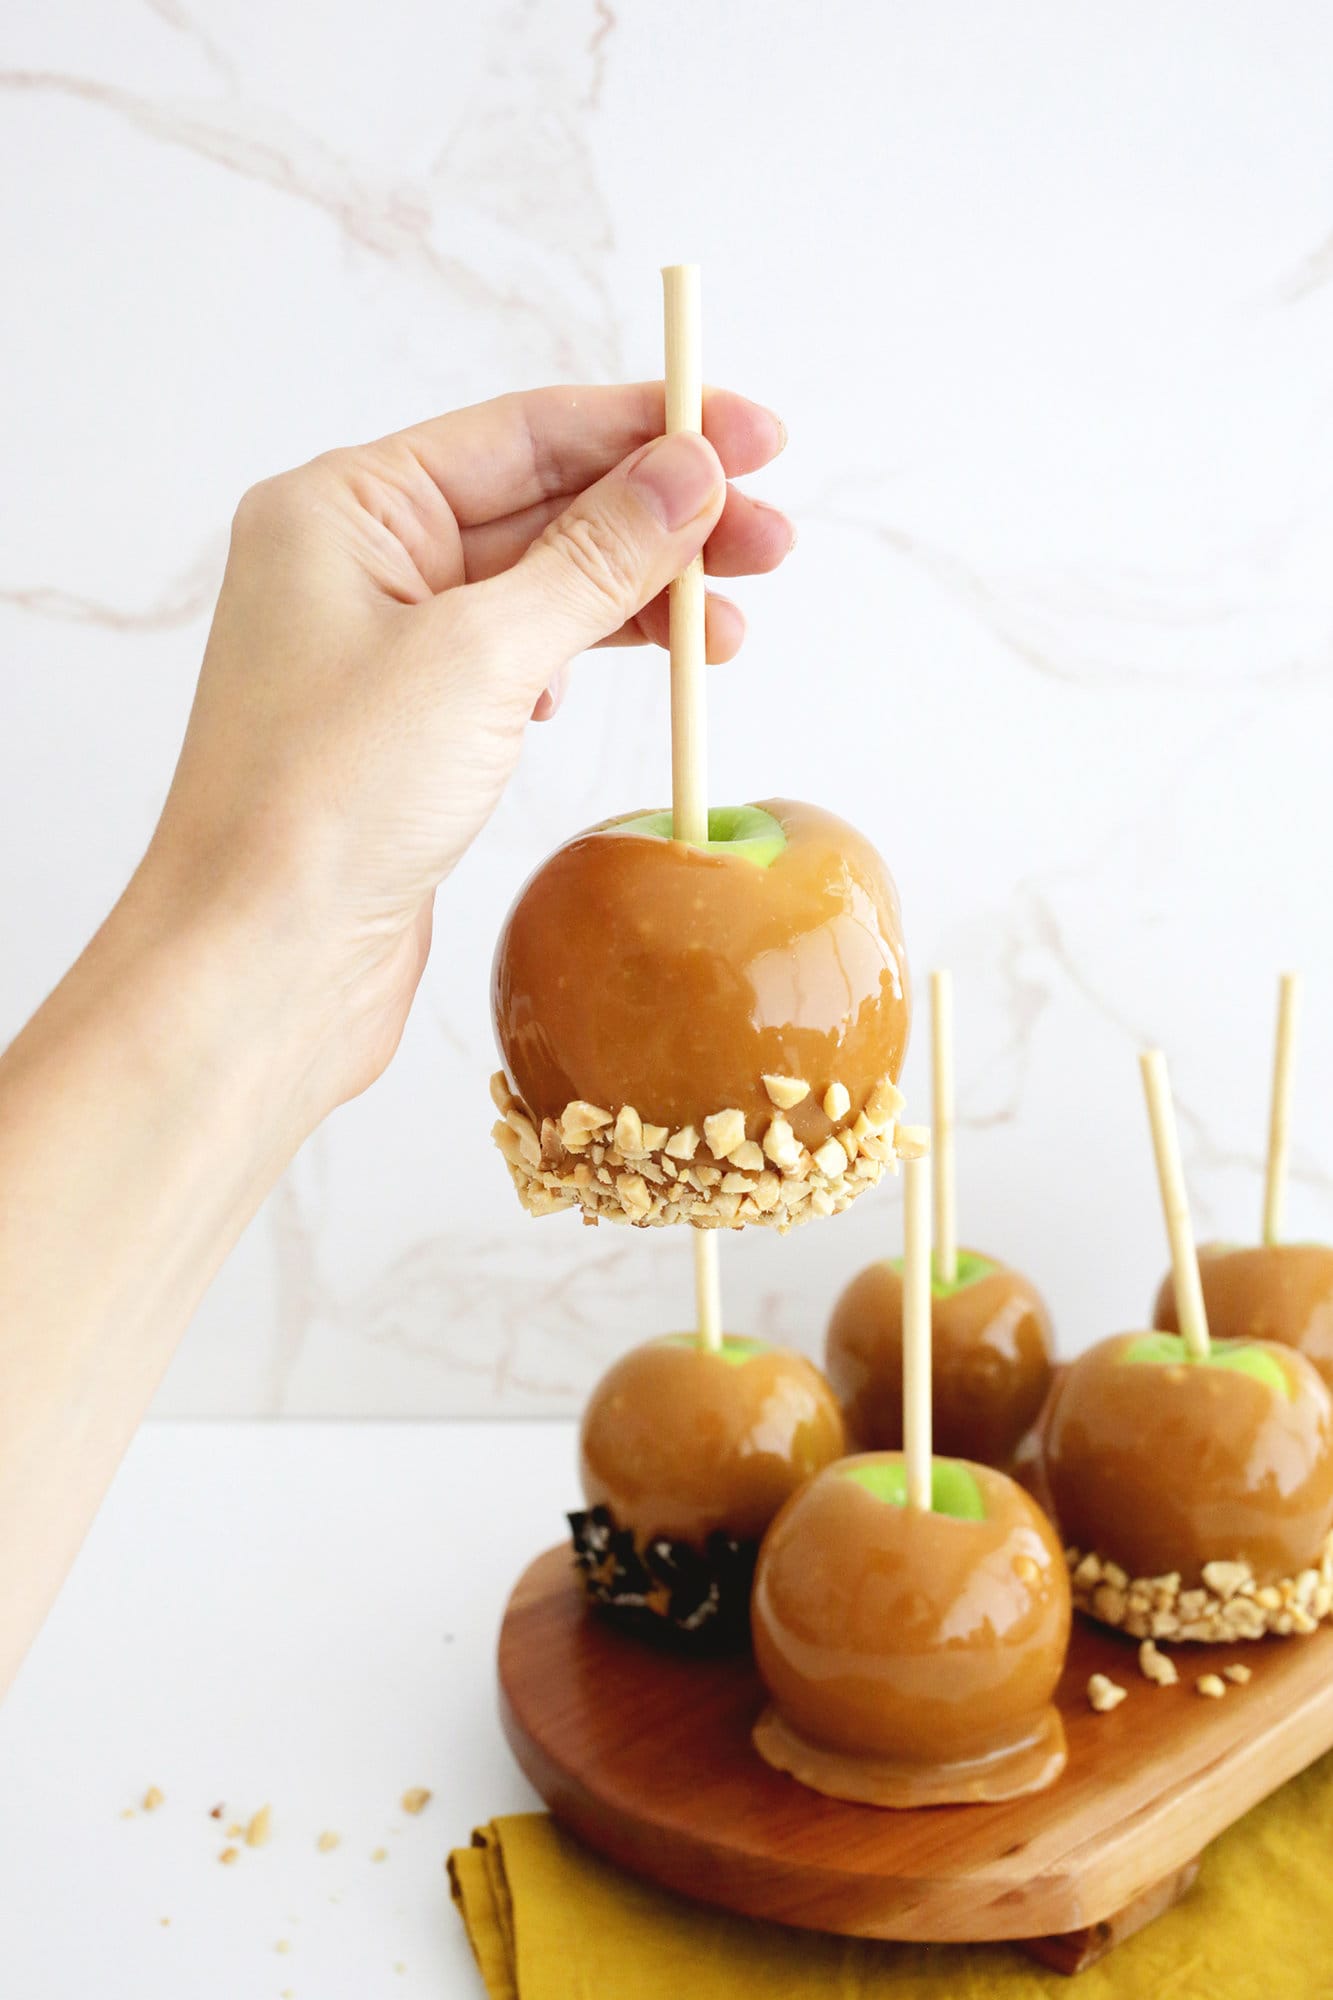
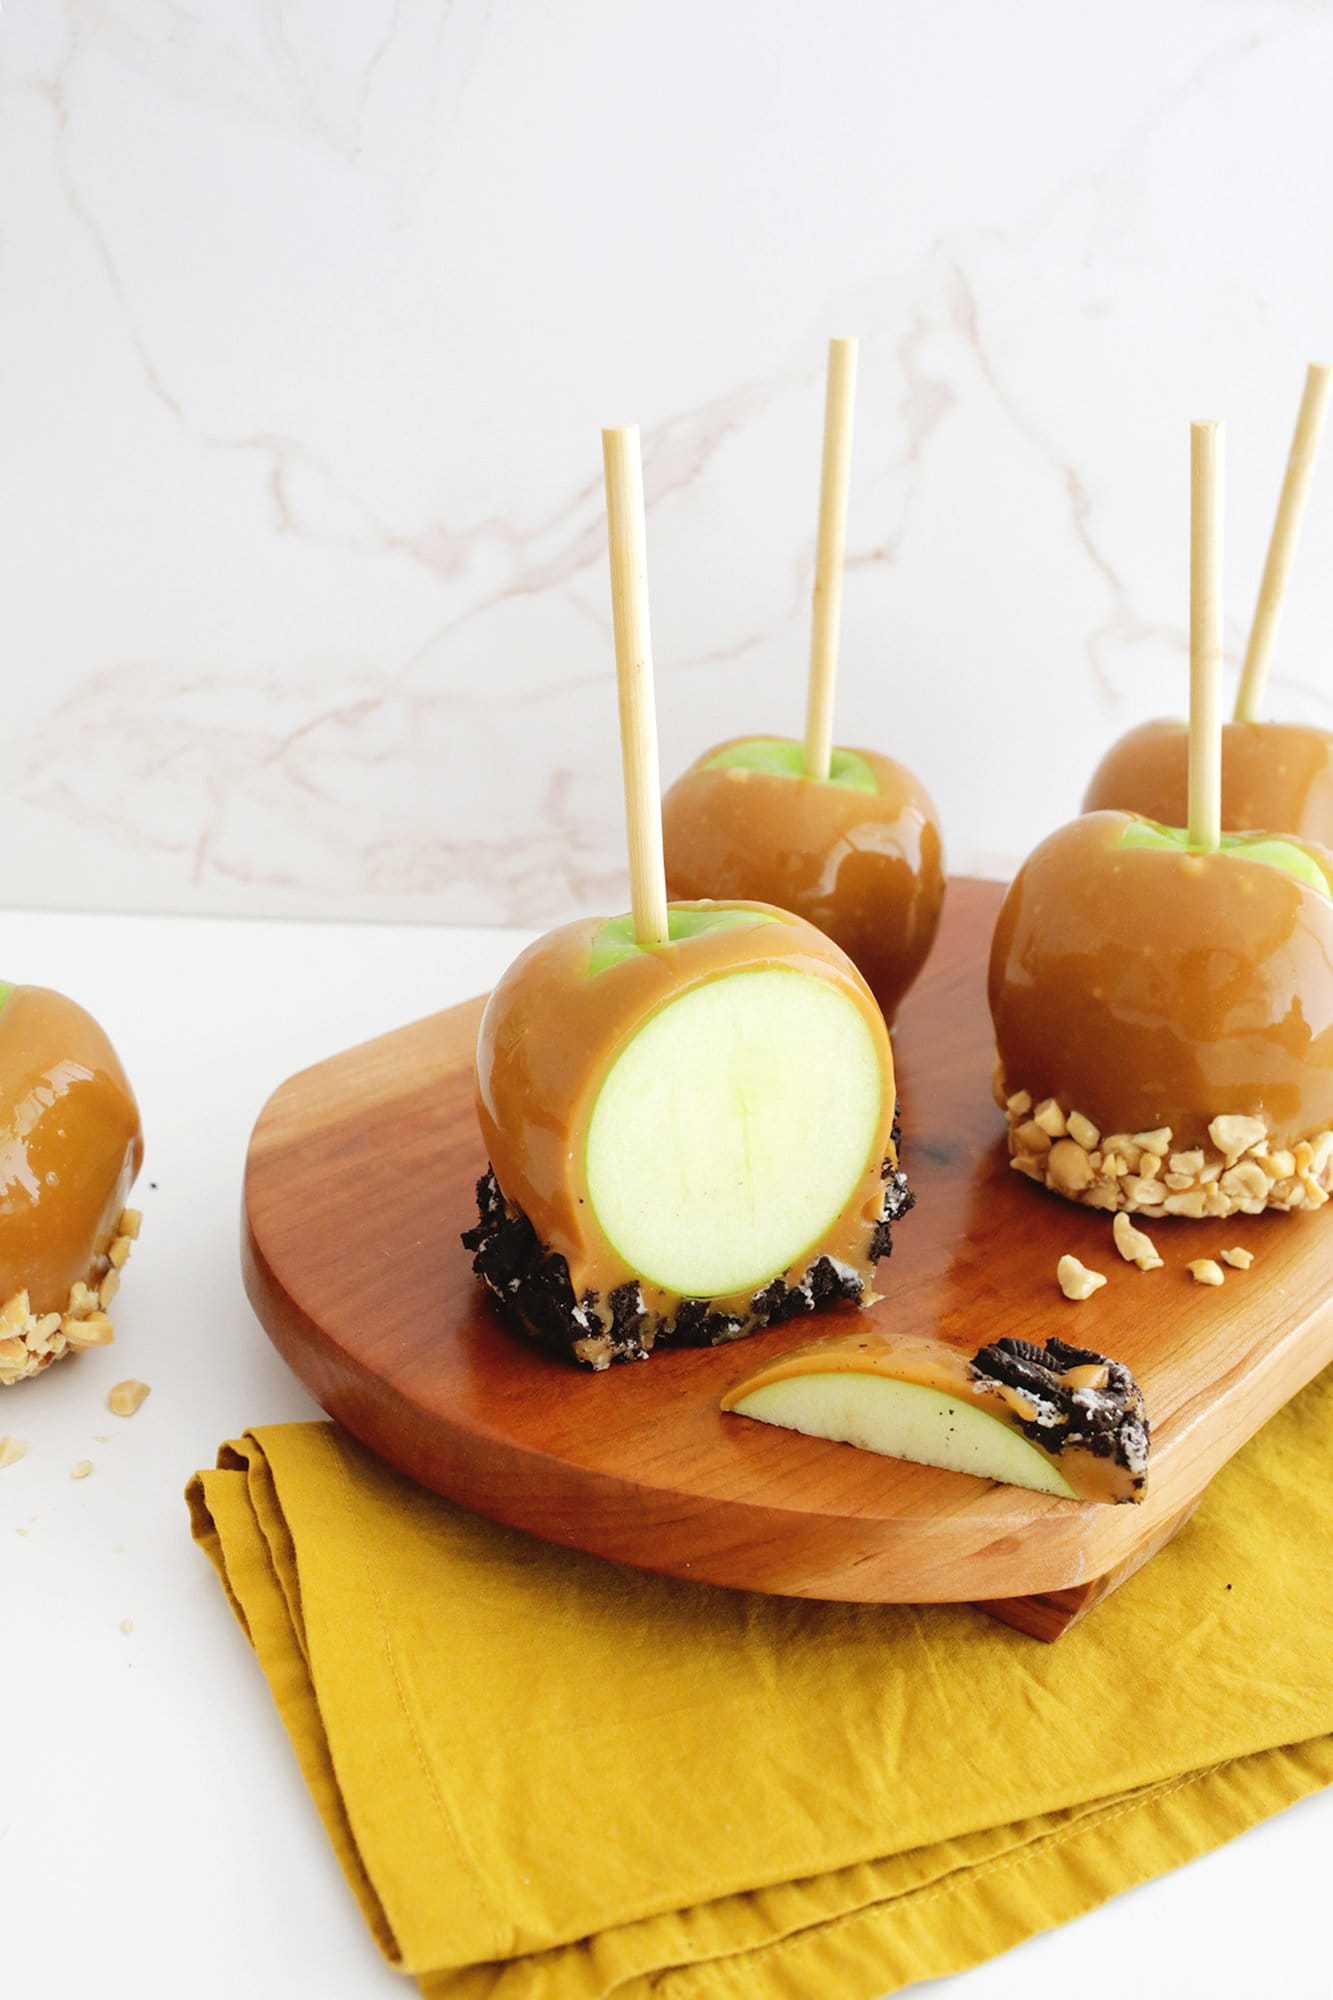
Caramel apples also make great gifts so you can make a batch to hand out at Halloween parties, as a thank-you present, or just make a few for your family on a crisp fall day. Add fun toppings to make it a gourmet treat!
Looking for more fall recipes? Check out:
- 15 Pumpkin Desserts To Bake This Fall
- Candy Apples
- Classic Hot Toddy
- Overnight Cinnamon Rolls – Small Batch
- Soft Pumpkin Muffins
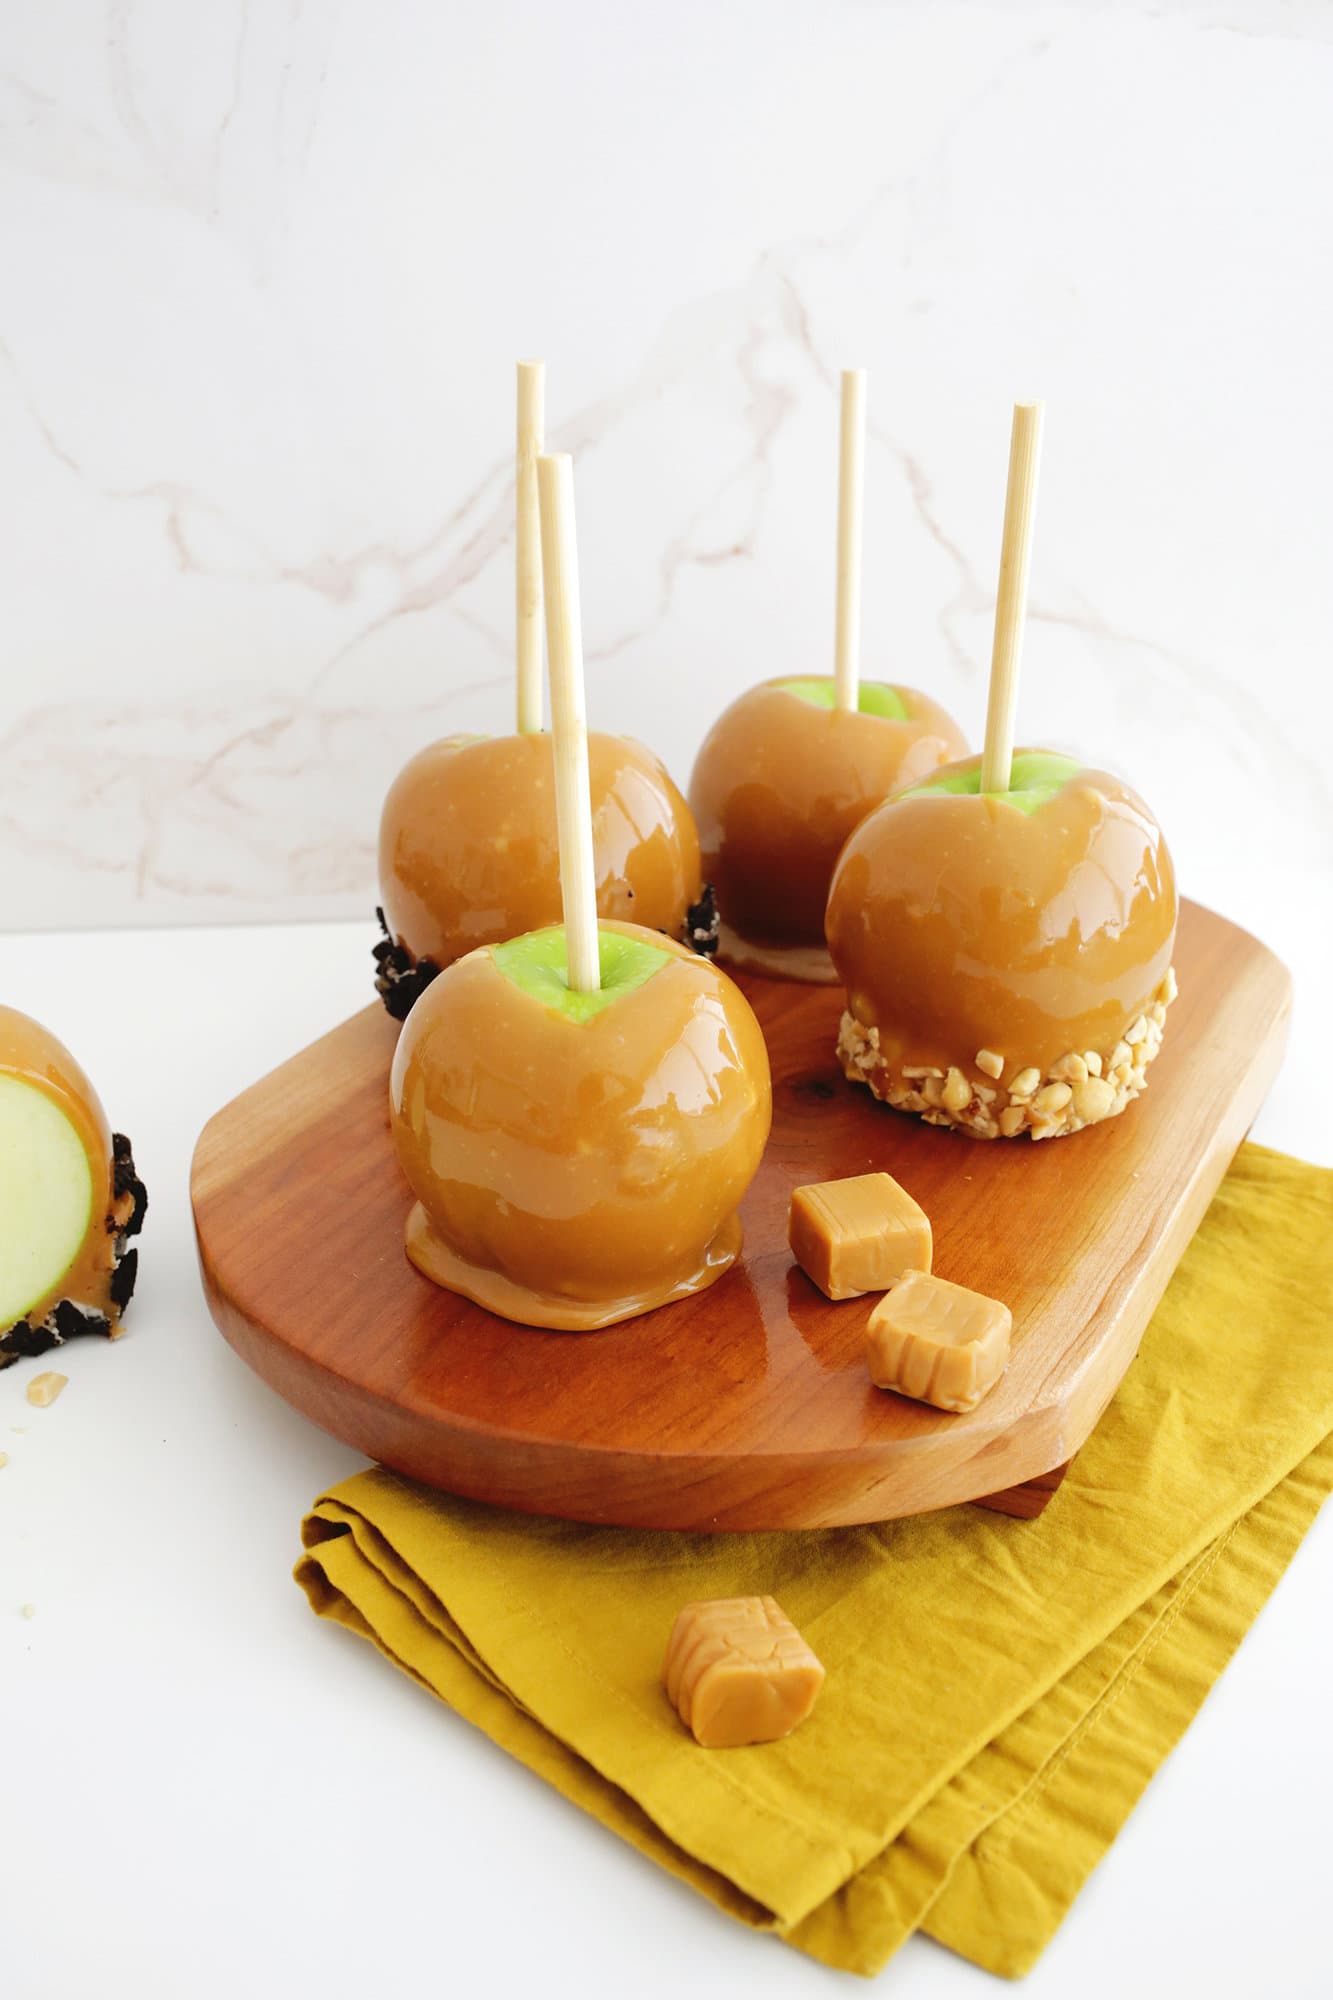
What kind of apples are best for caramel apples?
The variety of apple that you choose for your caramel apple depends entirely on your taste! If you have a sweet tooth, you would probably enjoy a sweeter variety like a Fuji, Honeycrisp, Gala, or a Pink Lady as your apple base. For a more tart contrast to your sweet caramel topping, Granny Smith apples are the most popular choice. These are all firmer choices than say a softer Macintosh variety and give you a better crunch factor when eating your treat.
Caramel Apple Tip! Look for apples that are small to medium in size and round in shape for that perfect caramel apple look!
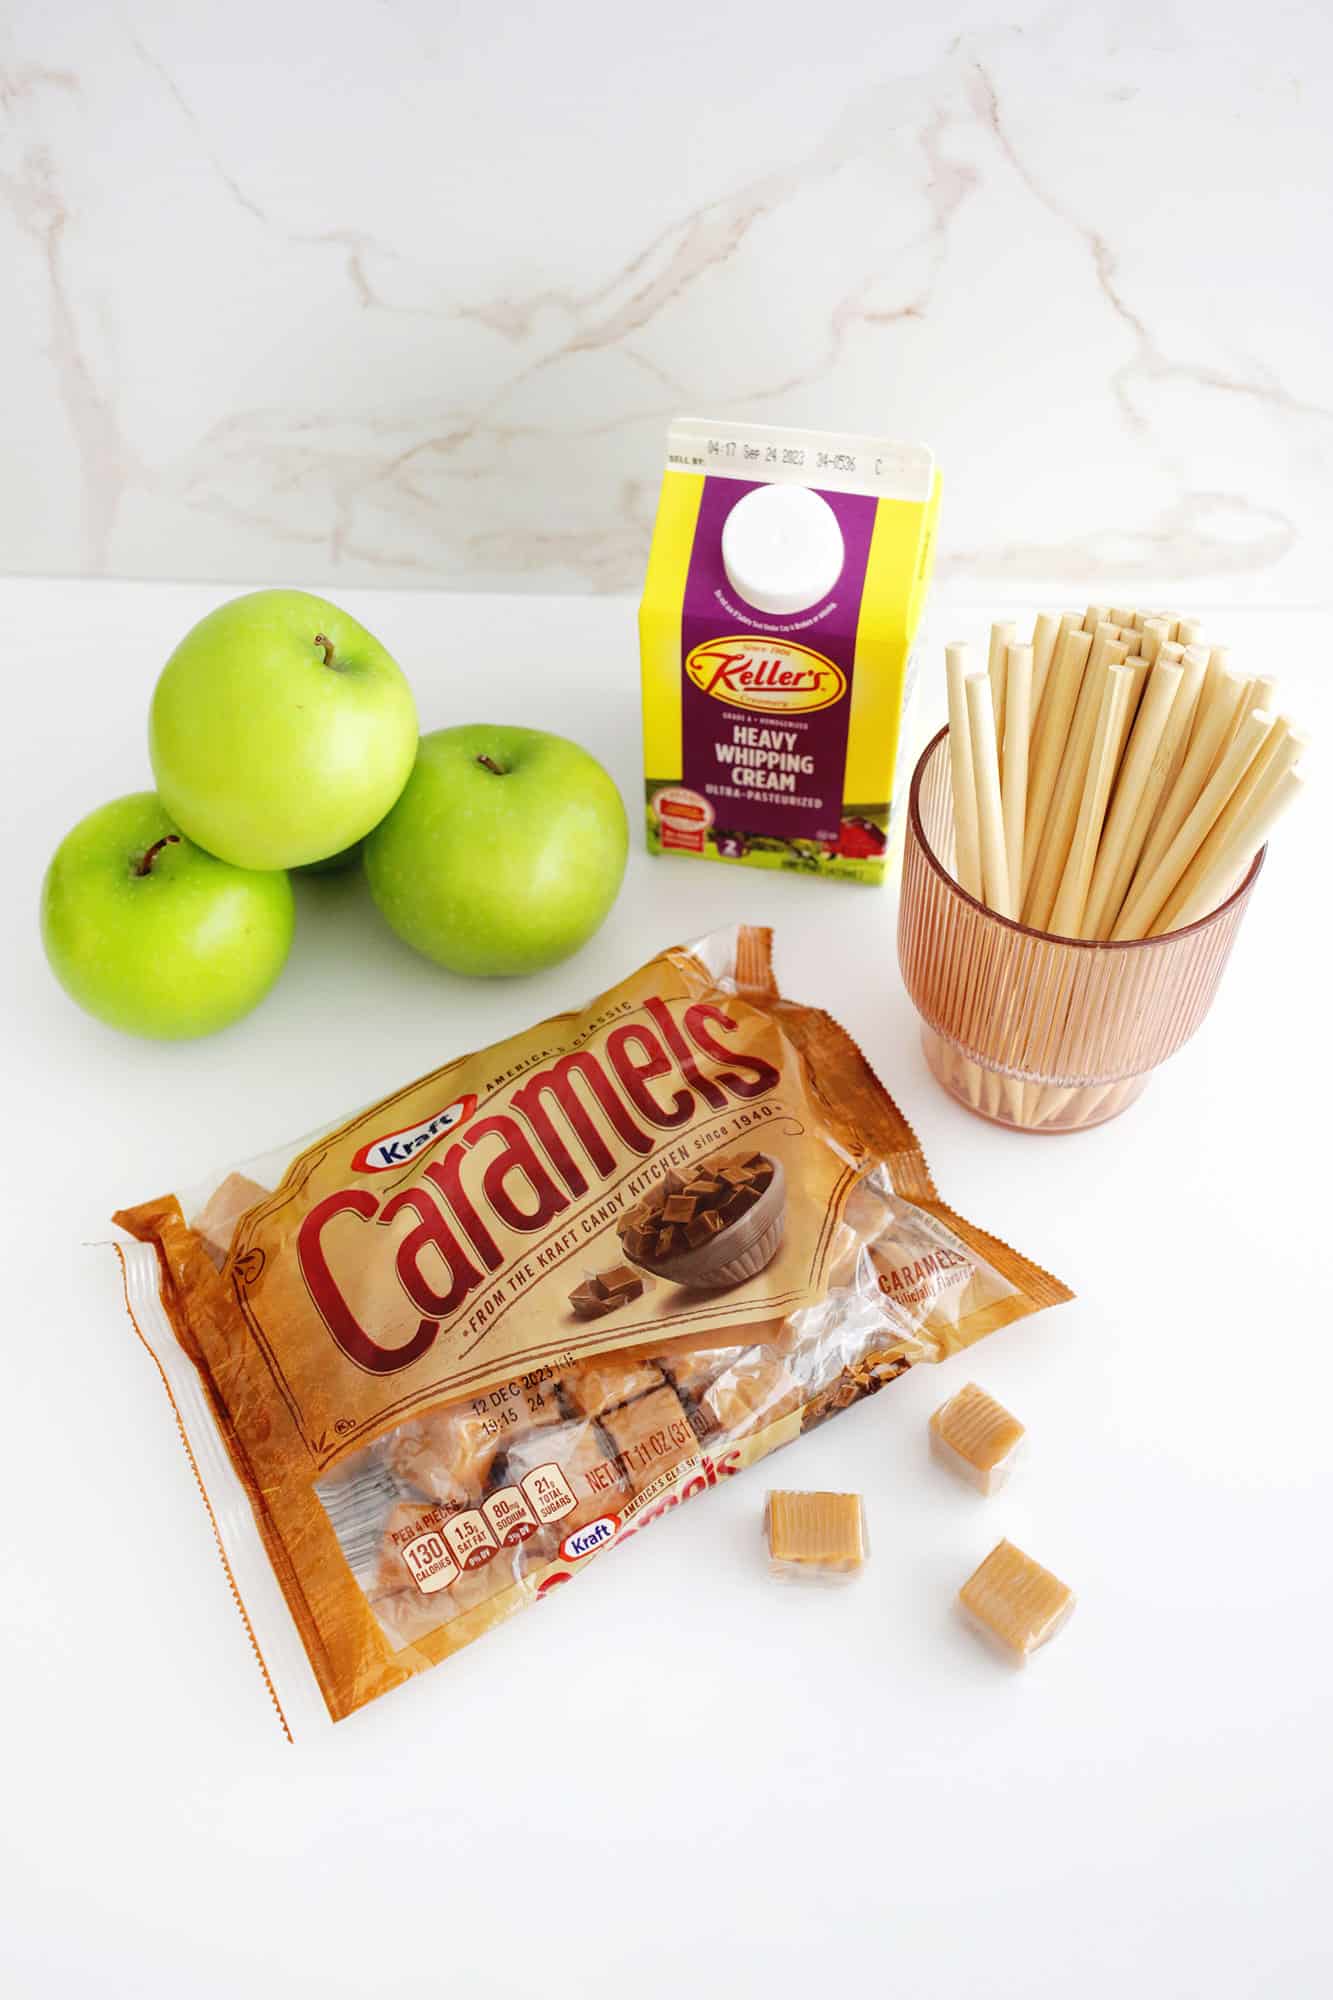
Caramel Apple Ingredients:
- Wrapped Caramels: Using premade caramels is the fastest and easiest way to go about making your caramel apples. Most grocery stores sell these in the baking area or right next to the apples in fall, but you can also get them online if your local store doesn’t carry them.
- Fresh Apples: Choose a firm apple that is either more sweet or more tart depending on how much sweetness you want to add to the caramel layer. Make sure to wash off the wax before dipping your apple so that the caramel has a better chance of sticking and won’t slide off.
- Heavy Cream or Milk: Just adding a little heavy cream or milk to the caramel will help thin it out a bit to make it more “dippable.”
- Toppings (optional): For a gourmet caramel apple, you can do a second dip after the caramel into fun toppings like crushed candy bars like Butterfingers or mini M&Ms, pretzels, sprinkles, flaked sea salt, chopped pecans or other nuts, crushed Oreos, or coconut! You can also use chopped dark chocolate, milk chocolate, or white chocolate chips as well.
Looking for a delicious caramel dip to eat with apples? Try our Cream Cheese Fruit Dip (4 Ways!)
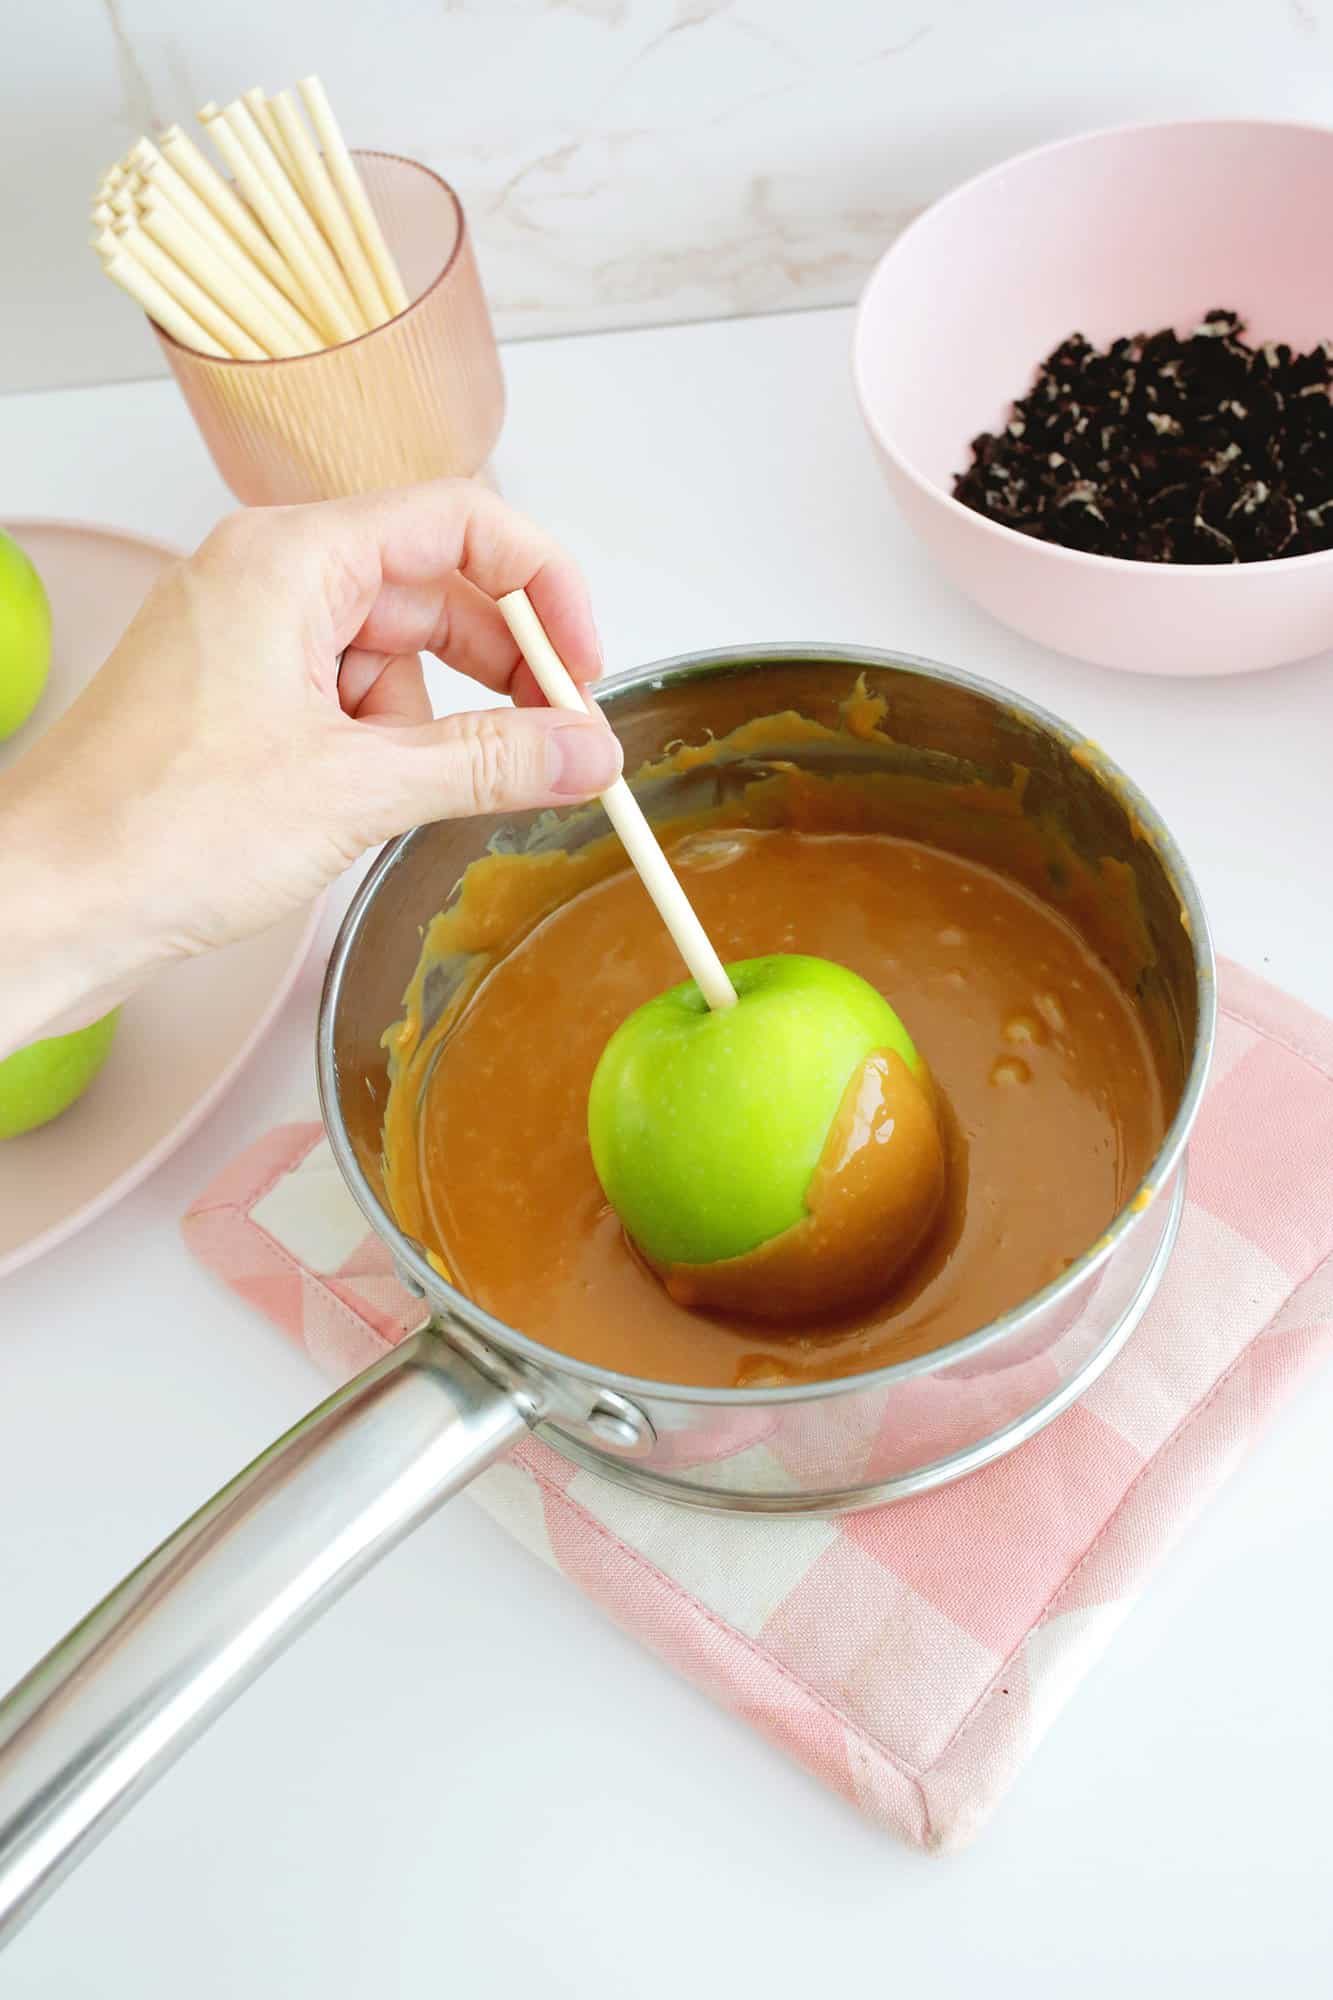
Tools You Need To Make Caramel Apples:
- Skewers: While the classic caramel apple is usually perched upon a wooden stick, you can also use a popsicle stick, or, in a pinch, even just stick a fork into it if you don’t have any thick skewers at home.
- Melting tools: To melt your caramel, you want either a microwave and microwave-safe bowl, a saucepan, a double-boiler pot, or a glass Pyrex-type bowl to set on top of a saucepan of boiling water.
- Nonstick Cooking Spray: You’ll want to make sure your apples don’t stick to the plate or pan you are placing them on, so use some nonstick cooking spray on the surface first to make sure you can remove them easily. You can also use a lined baking sheet to cool your apples on, so just lay some wax paper on a baking sheet or flat surface.
- Dipping container (optional but helpful): While you can just roll your apple around in the bowl or pot you melted the caramel in, for smaller batches it’s also nice to have a Pyrex glass measuring cup to melt the caramel in so you have a nice little container to dunk the apple right in to.
Tips for Making Caramel Apples:
- Remove the wax from your apples. You’ll want to wash your apples and try to remove the wax from the apples before dipping them so the caramel will stick better. Run the apples under some hot water and use a fruit wash or dish soap and a clean scrubby pad or textured towel to rub vigorously over the apples to help remove some of the wax. Dry apples very well so no moisture remains.
- Chill apples before and after dipping. After you add your skewer, you can chill your apples in the fridge so that the caramel sets up faster and less will run off the surface when dipping (and then put them back in the fridge so the caramel will set up faster).
- Have toppings already prepped. If you are dipping your apple into toppings, make sure you already have your bowls of toppings ready so the caramel doesn’t set before you can get your toppings together.
- Drizzle chocolate after cooling: You can also drizzle melted chocolate over your apple for a yummy addition, but wait until the apples are cool so the warm caramel doesn’t melt the chocolate.
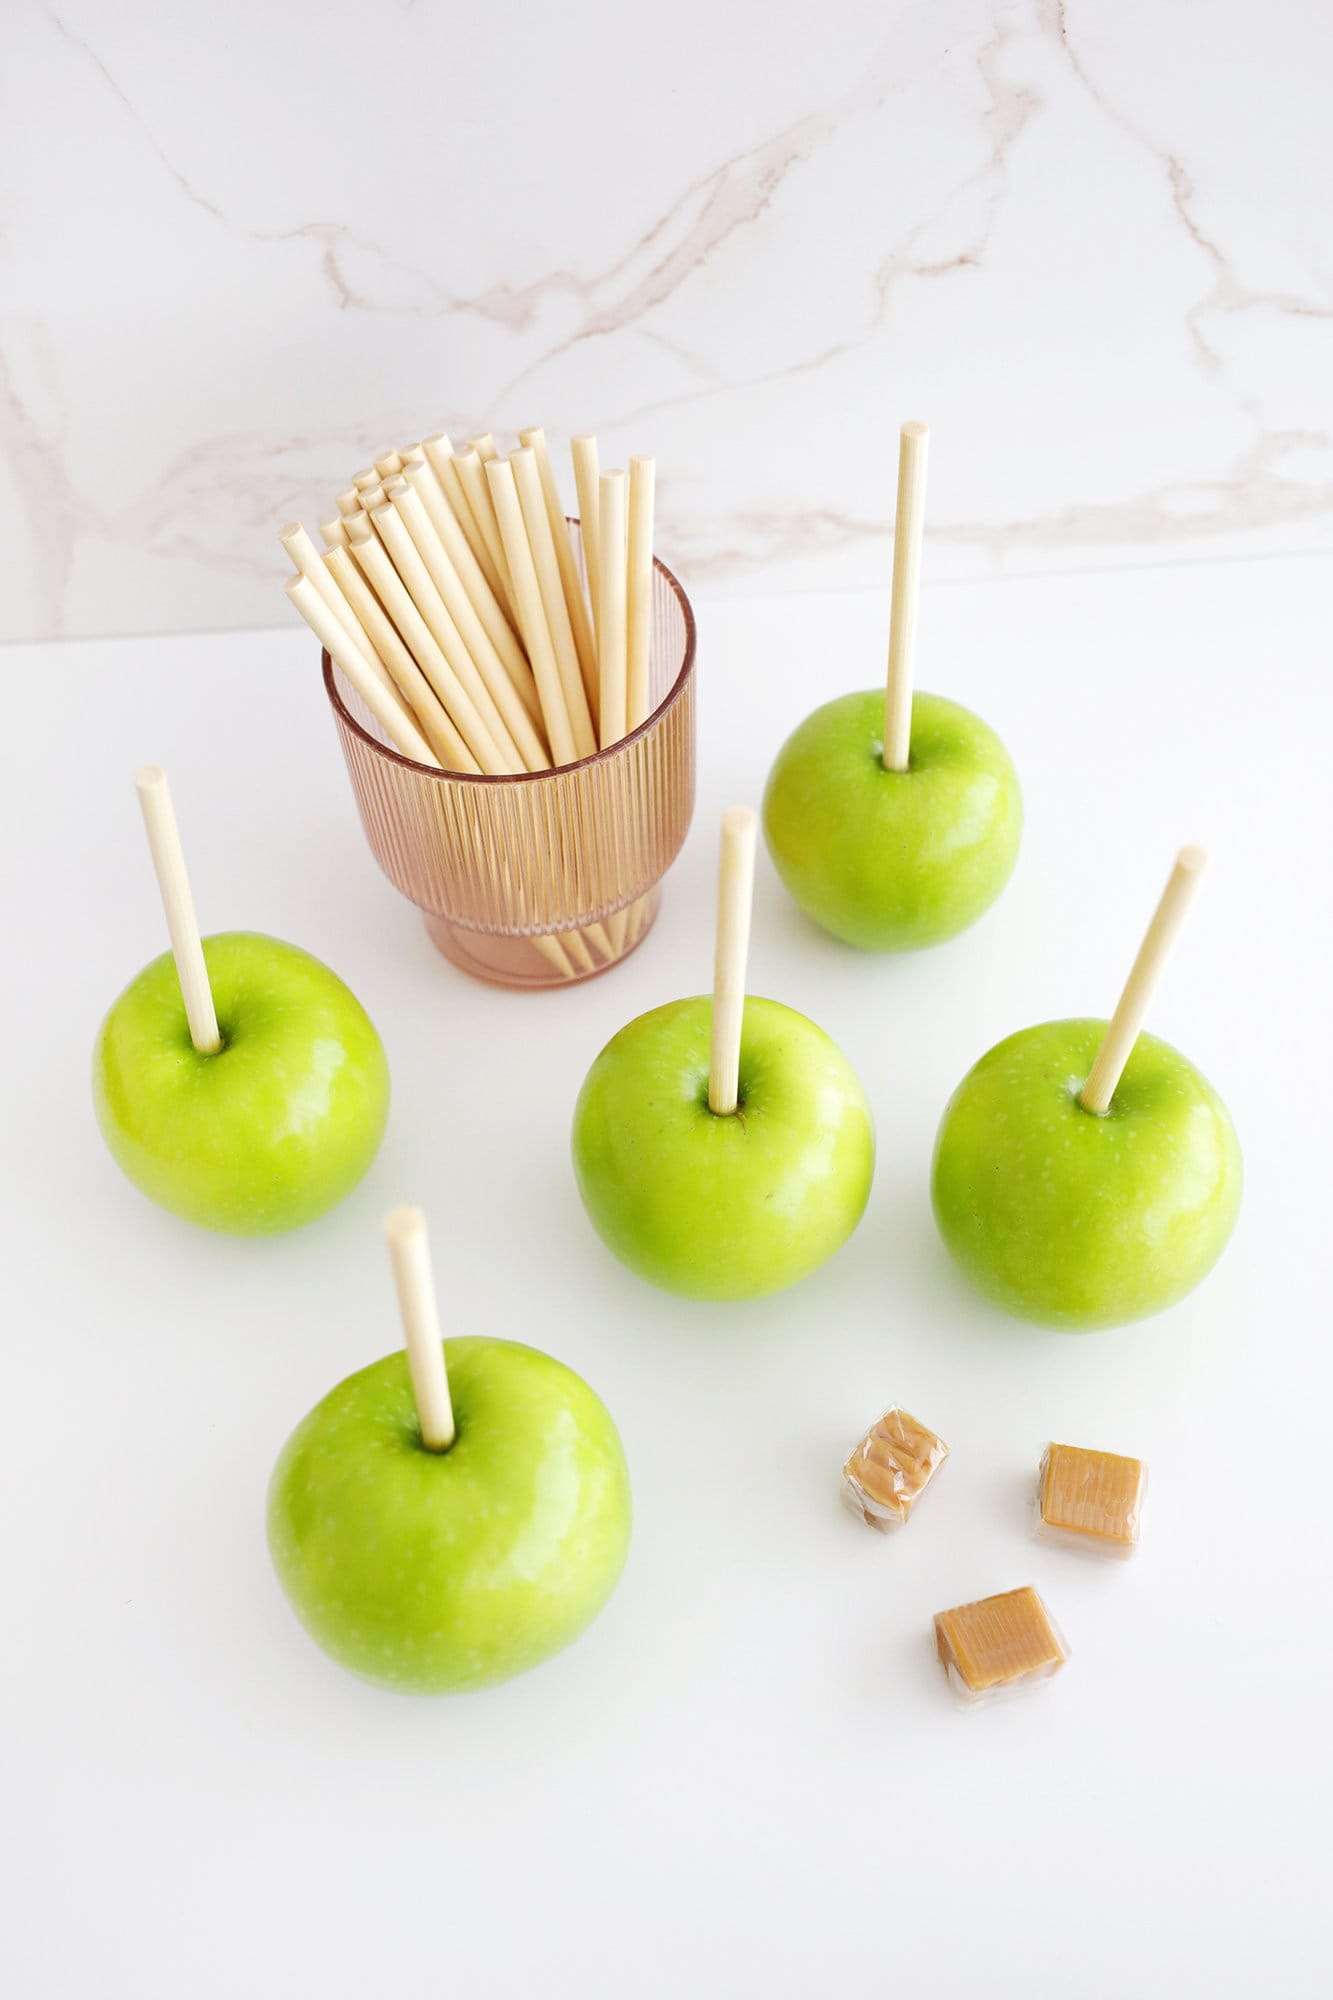
How to Make Caramel Apples:
Prepare the apples: Once clean, make sure the apples are thoroughly dry before dipping! Skewer your apple with your stick or fork and set aside.
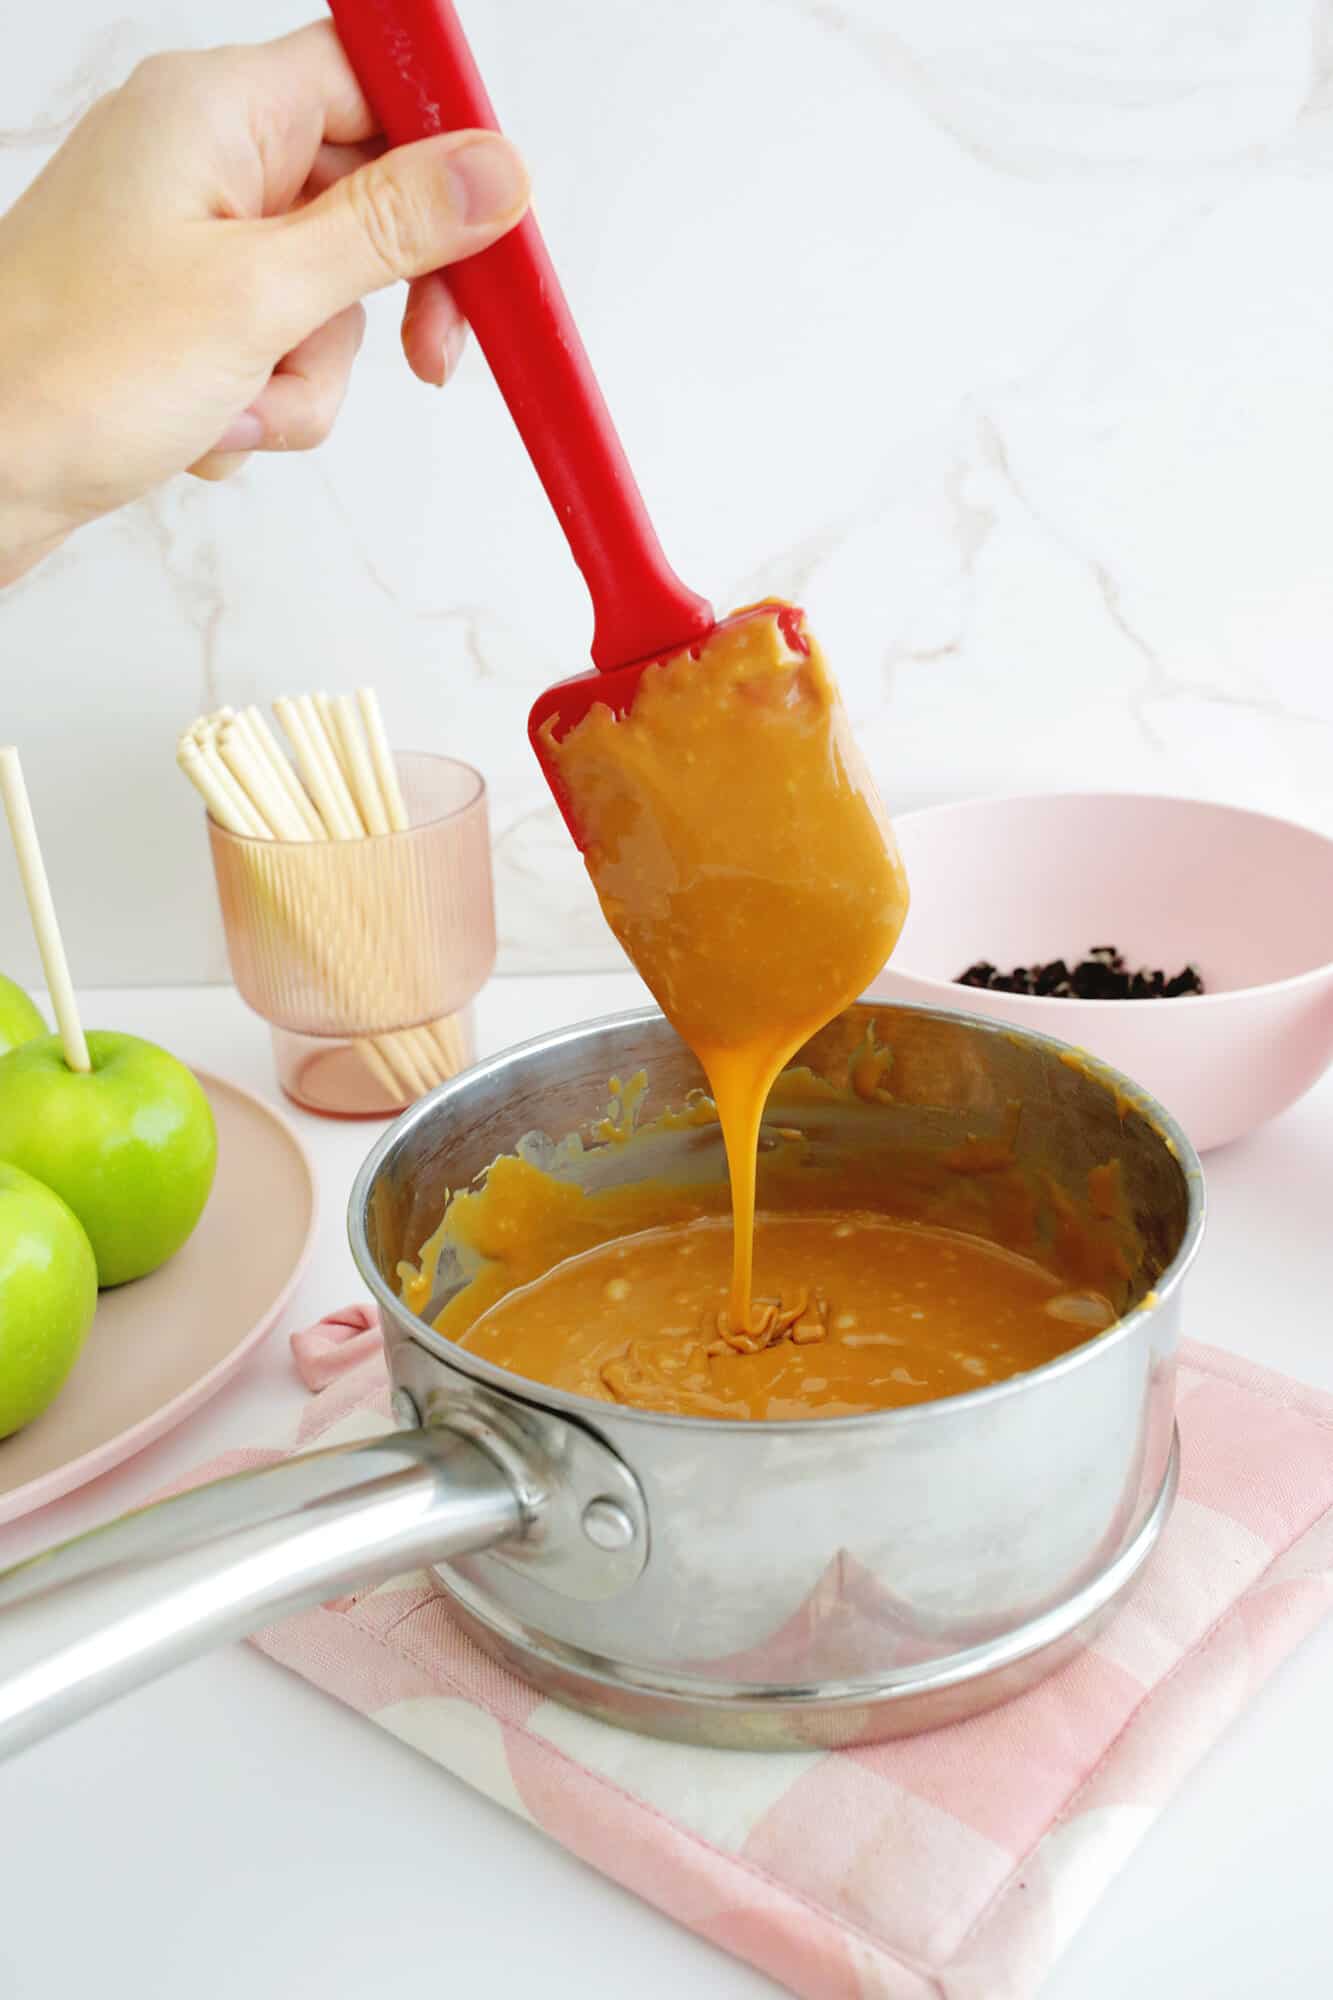
Melt the caramel: Put your caramels and heavy cream/milk in a microwave-safe bowl and heat for 30-second increments, stirring well between each heating session, until the caramel is smooth and melted. If the mixture seems thin, let it sit for a minute or two to thicken up a bit before dipping.
Can I make caramel apples on the stovetop without a microwave?
Yes! If you don’t have a microwave, you can still make caramel apples easily in a saucepan, a double-boiler pot, or a glass Pyrex-type bowl set on top of a saucepan of boiling water (it will take longer to melt this way, so be patient).
For a regular saucepan, add caramels and milk to the pan and heat on medium-low heat, stirring until melted. If using the double-boiler or bowl on top method, just bring a few inches of water to a boil in a pot, set the top of the double boiler or glass bowl on top with your caramel and milk, reduce the heat to a low boil/simmer and stir occasionally until melted.
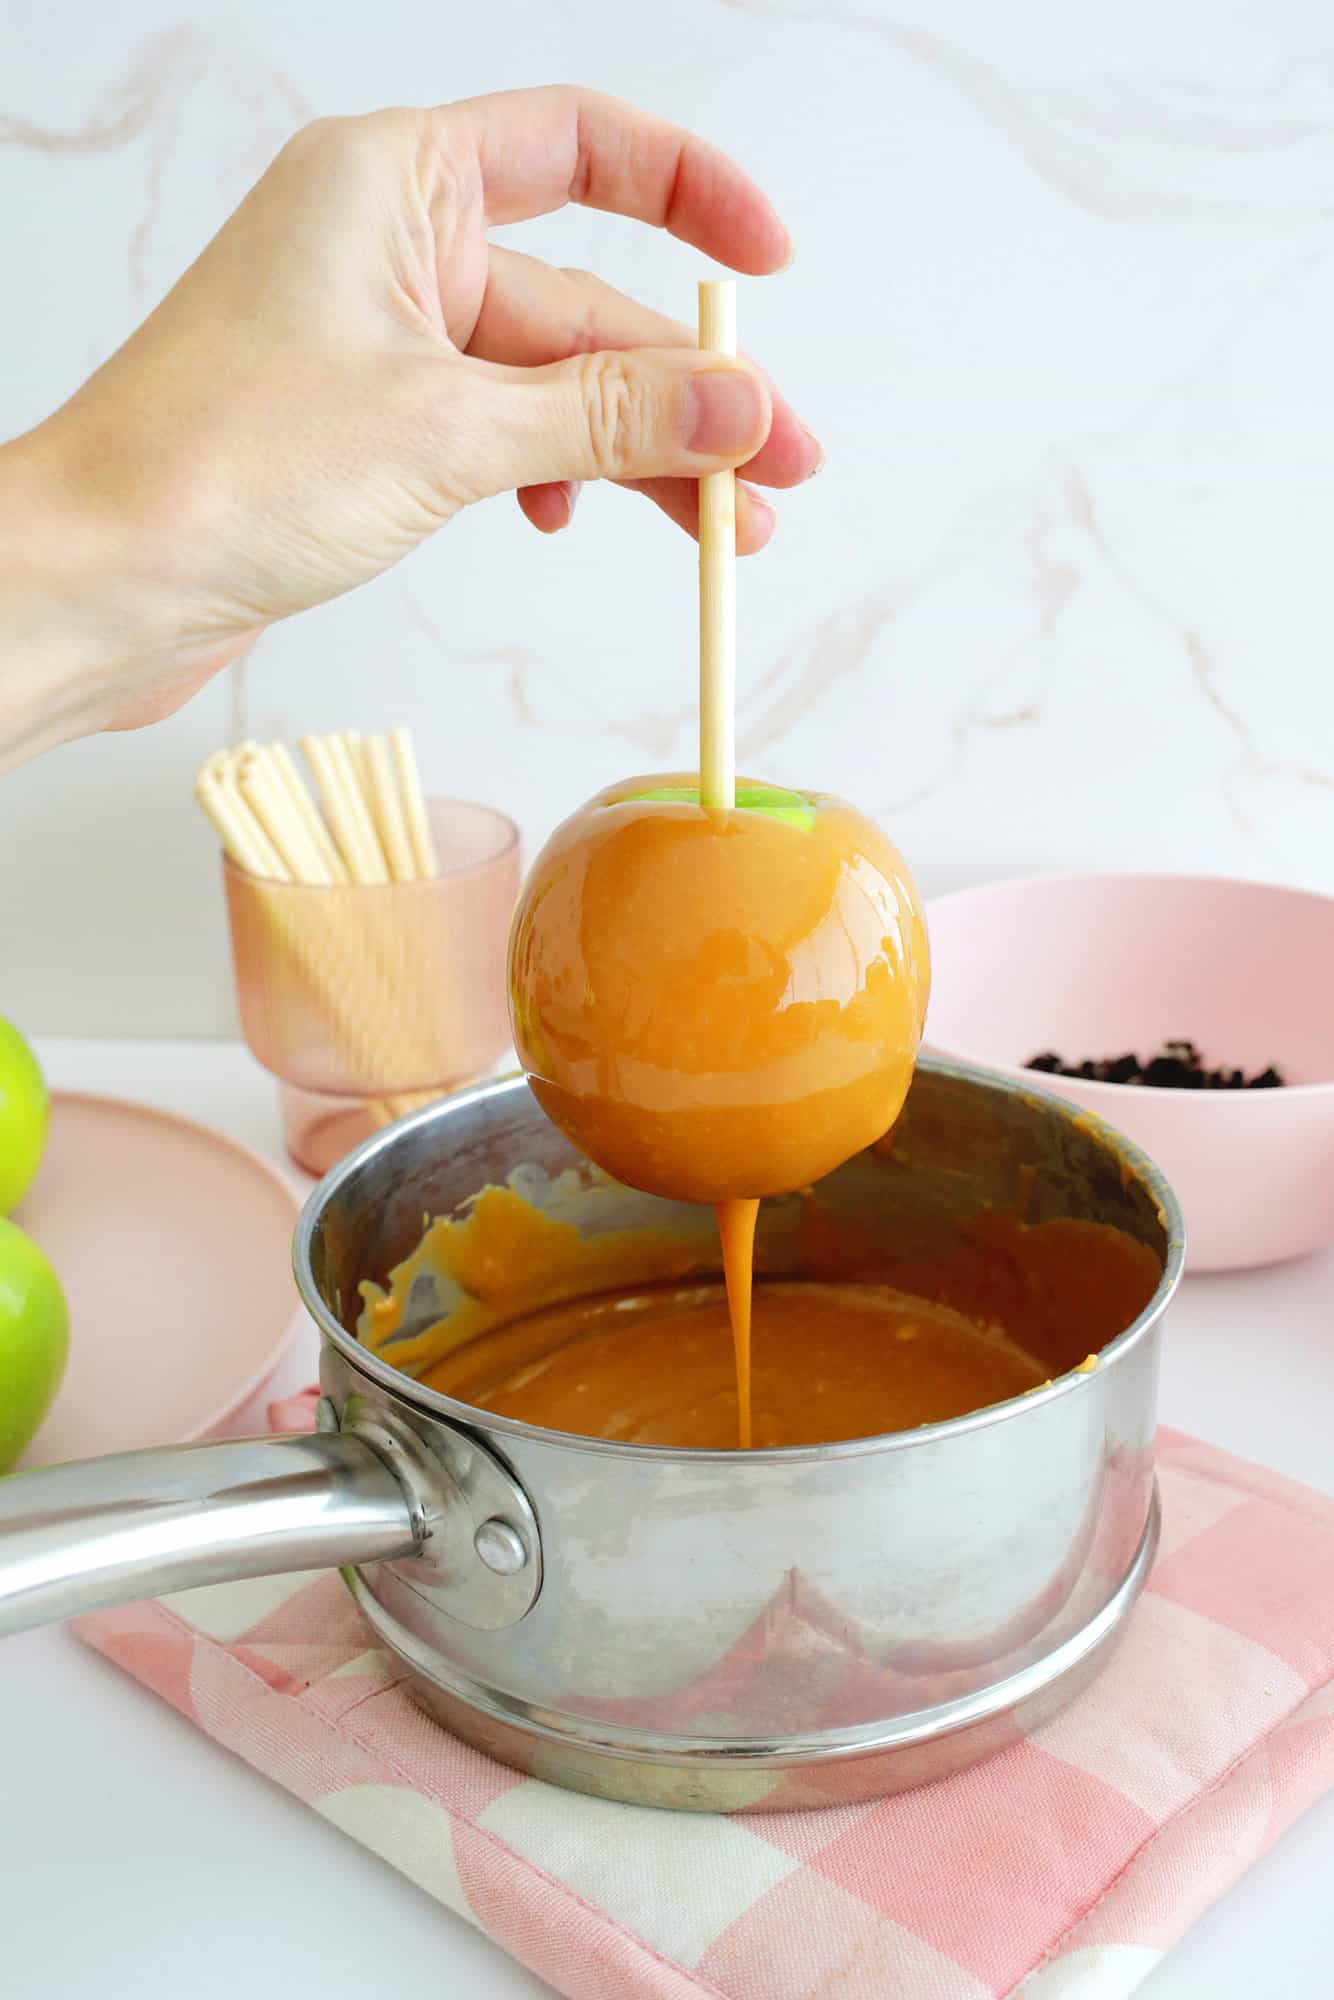
Dip apples: Now that your caramel is melted, spray a tray or plate with nonstick cooking spray and dip your apple into the melted caramel at an angle, twisting it around until the apple is coated as well as you would like.
Lift the apple to let the excess caramel drip off and scrape the bottom over the side of the bowl to get extra excess. As the caramel gets lower in the bowl, you can also use a spoon to pour the caramel over the apple to cover the sides or tilt the bowl or pan so the caramel pools in one spot.
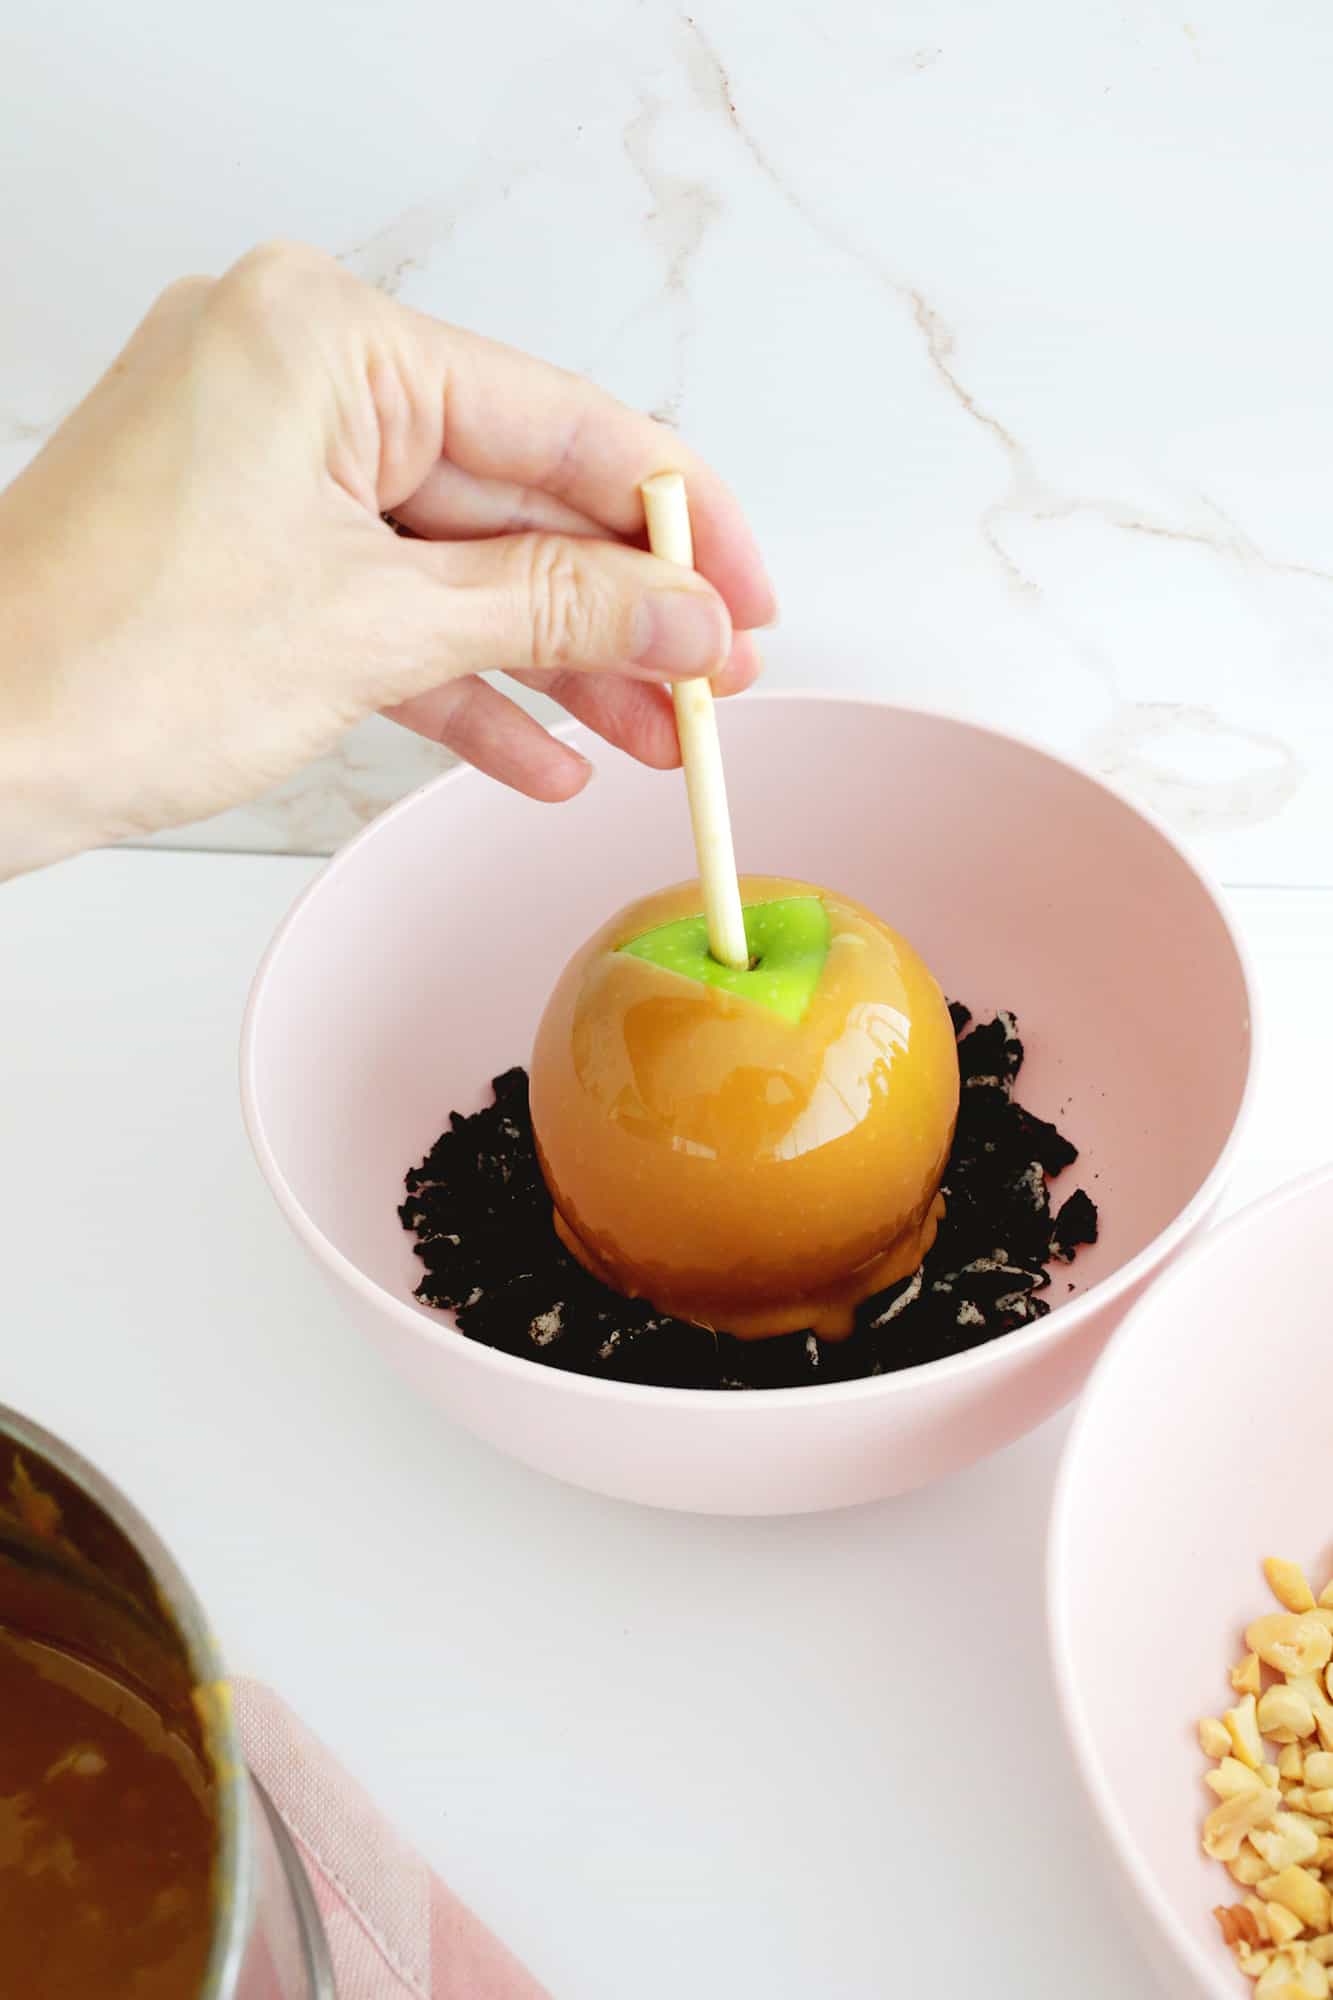
After dipping in your caramel, you can do a second dip into your topping of choice to give it some added flavor before setting it on your tray or plate. Try some black and orange sprinkles for a Halloween caramel apple treat!
If your caramel starts to set as you continue dipping your apples, reheat it for 15 seconds at a time in the microwave until the texture is dippable again.
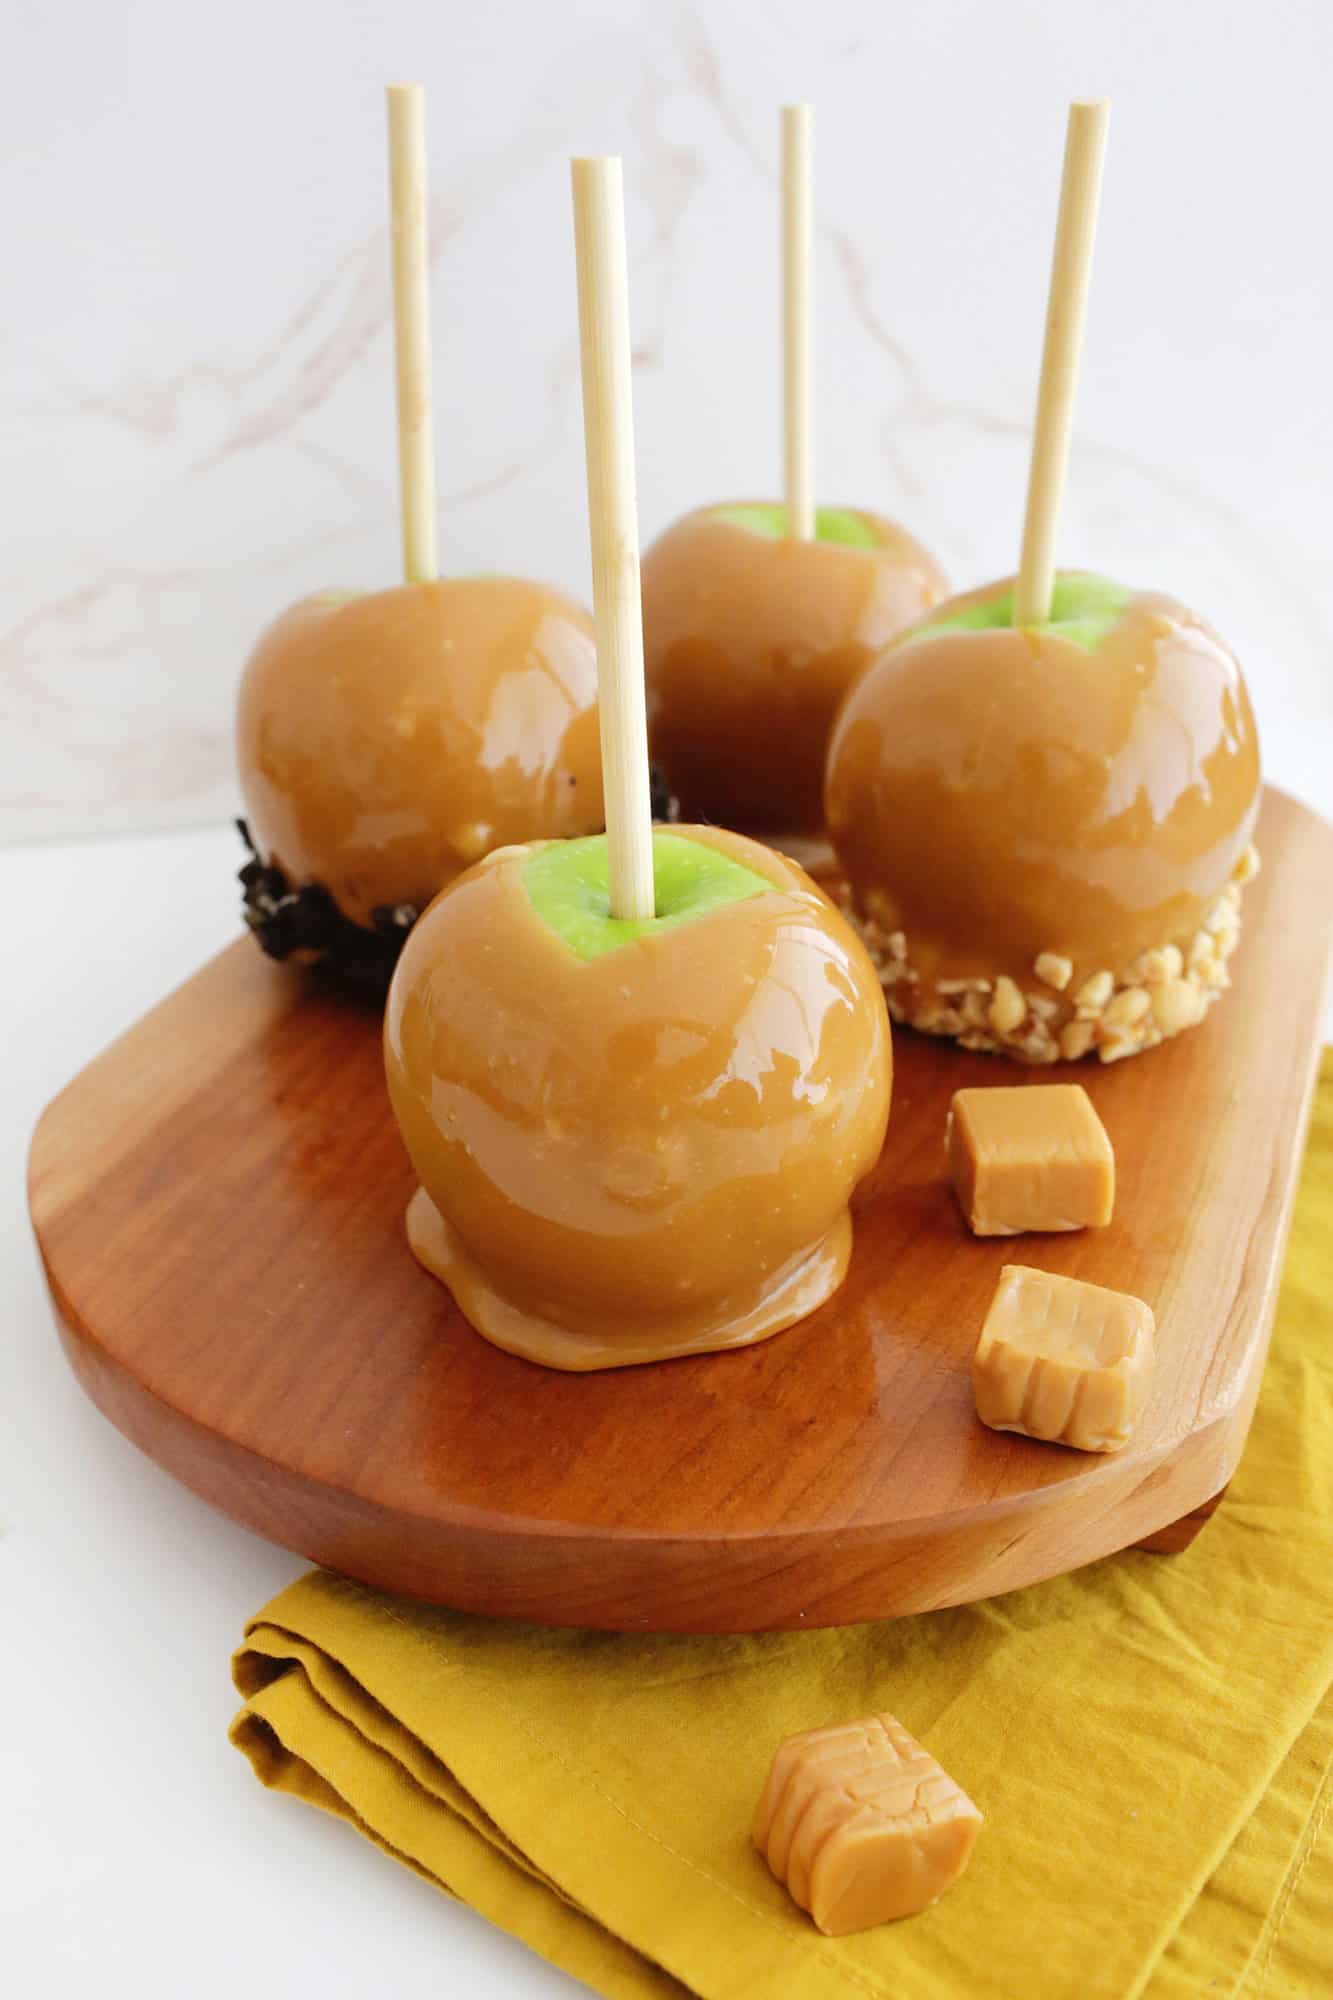
Let the caramel set: Let your apples cool in the fridge for about 15-30 minutes to allow the caramel to fully set on your nonstick sprayed parchment paper or lined wax paper surface. Now your apple is ready to eat!
How do I store caramel apples?
You can store caramel apples in the fridge for up to two weeks and you can also wrap them in cellophane or clear treat bags individually to give as gifts!
Caramel Apple Tip: Don’t cut into your apples until you are ready to eat them, otherwise they will start to turn brown.
Looking for more apple recipes? Check out:
- Apple Dumplings
- No-Bake Caramel Apple Cheesecake
- Baked Apple Donuts with Cinnamon Sugar
- 5-Minute Apple Crisp (For One!)
- Apple Dumpling Monkey Bread
- Easy Apple Pie Bars
Easiest Homemade Caramel Apple
Equipment
- 8-10 wooden skewers
- microwave or saucepan or double boiler if using the stove
- microwave or heatproof bowl
Ingredients
- 2 11-ounce bag of wrapped caramels like Kraft brand
- 8-10 small to medium apples
- 3 tablespoons heavy whipping cream or milk
- chopped toppings of your choice
Instructions
- Prepare the apples: Make sure the apples are thoroughly dry before dipping! Skewer your apple with your stick or fork and set aside.
- Melt the caramel: Put your caramels and heavy cream/milk in a microwave-safe bowl and heat for 30-second increments, stirring well between each heating session, until the caramel is smooth and melted. If the caramel seems thin, let it sit for a minute or two to thicken up a bit before dipping.
- Dip the apples: Now that your caramel is melted, spray a tray or plate with nonstick cooking spray and dip your apple into the melted caramel at an angle, twisting it around until the apple is coated as well as you would like. Lift the apple to let the excess caramel drip off and scrape the bottom over the side of the bowl to get extra excess. As the caramel gets lower in the bowl, you can also use a spoon to pour the caramel over the apple to cover the sides or tilt the bowl or pan so the caramel pools in one spot.After dipping in your caramel, you can do a second dip into your topping of choice to give it some added flavor before setting it on your tray or plate. Try some black and orange sprinkles for a Halloween caramel apple treat!If your caramel starts to set as you continue dipping your apples, reheat it for 15 seconds at a time in the microwave until the texture is dippable again.
- Let the caramel set: Let your apples cool in the fridge for about 15-30 minutes to allow the caramel to fully set. Now your apple is ready to eat!
Notes
Nutrition
Candy apples may look like an impressive dessert (and hard to make), but it’s actually pretty easy (just like our Easy Caramel Apples!)! We’ll show you how …
And just as a side note, since the sugar is extremely hot and you can get burned if not careful, we don’t recommend doing this project with kids. Just let them eat the final result rather than help with this one.
Looking for more fall treats? Check out:
- Easy Pumpkin Cookies
- Homemade Caramel Sauce
- Baked Apple Donuts with Cinnamon Sugar
- Apple Cinnamon Hot Toddy
What are candy apples?
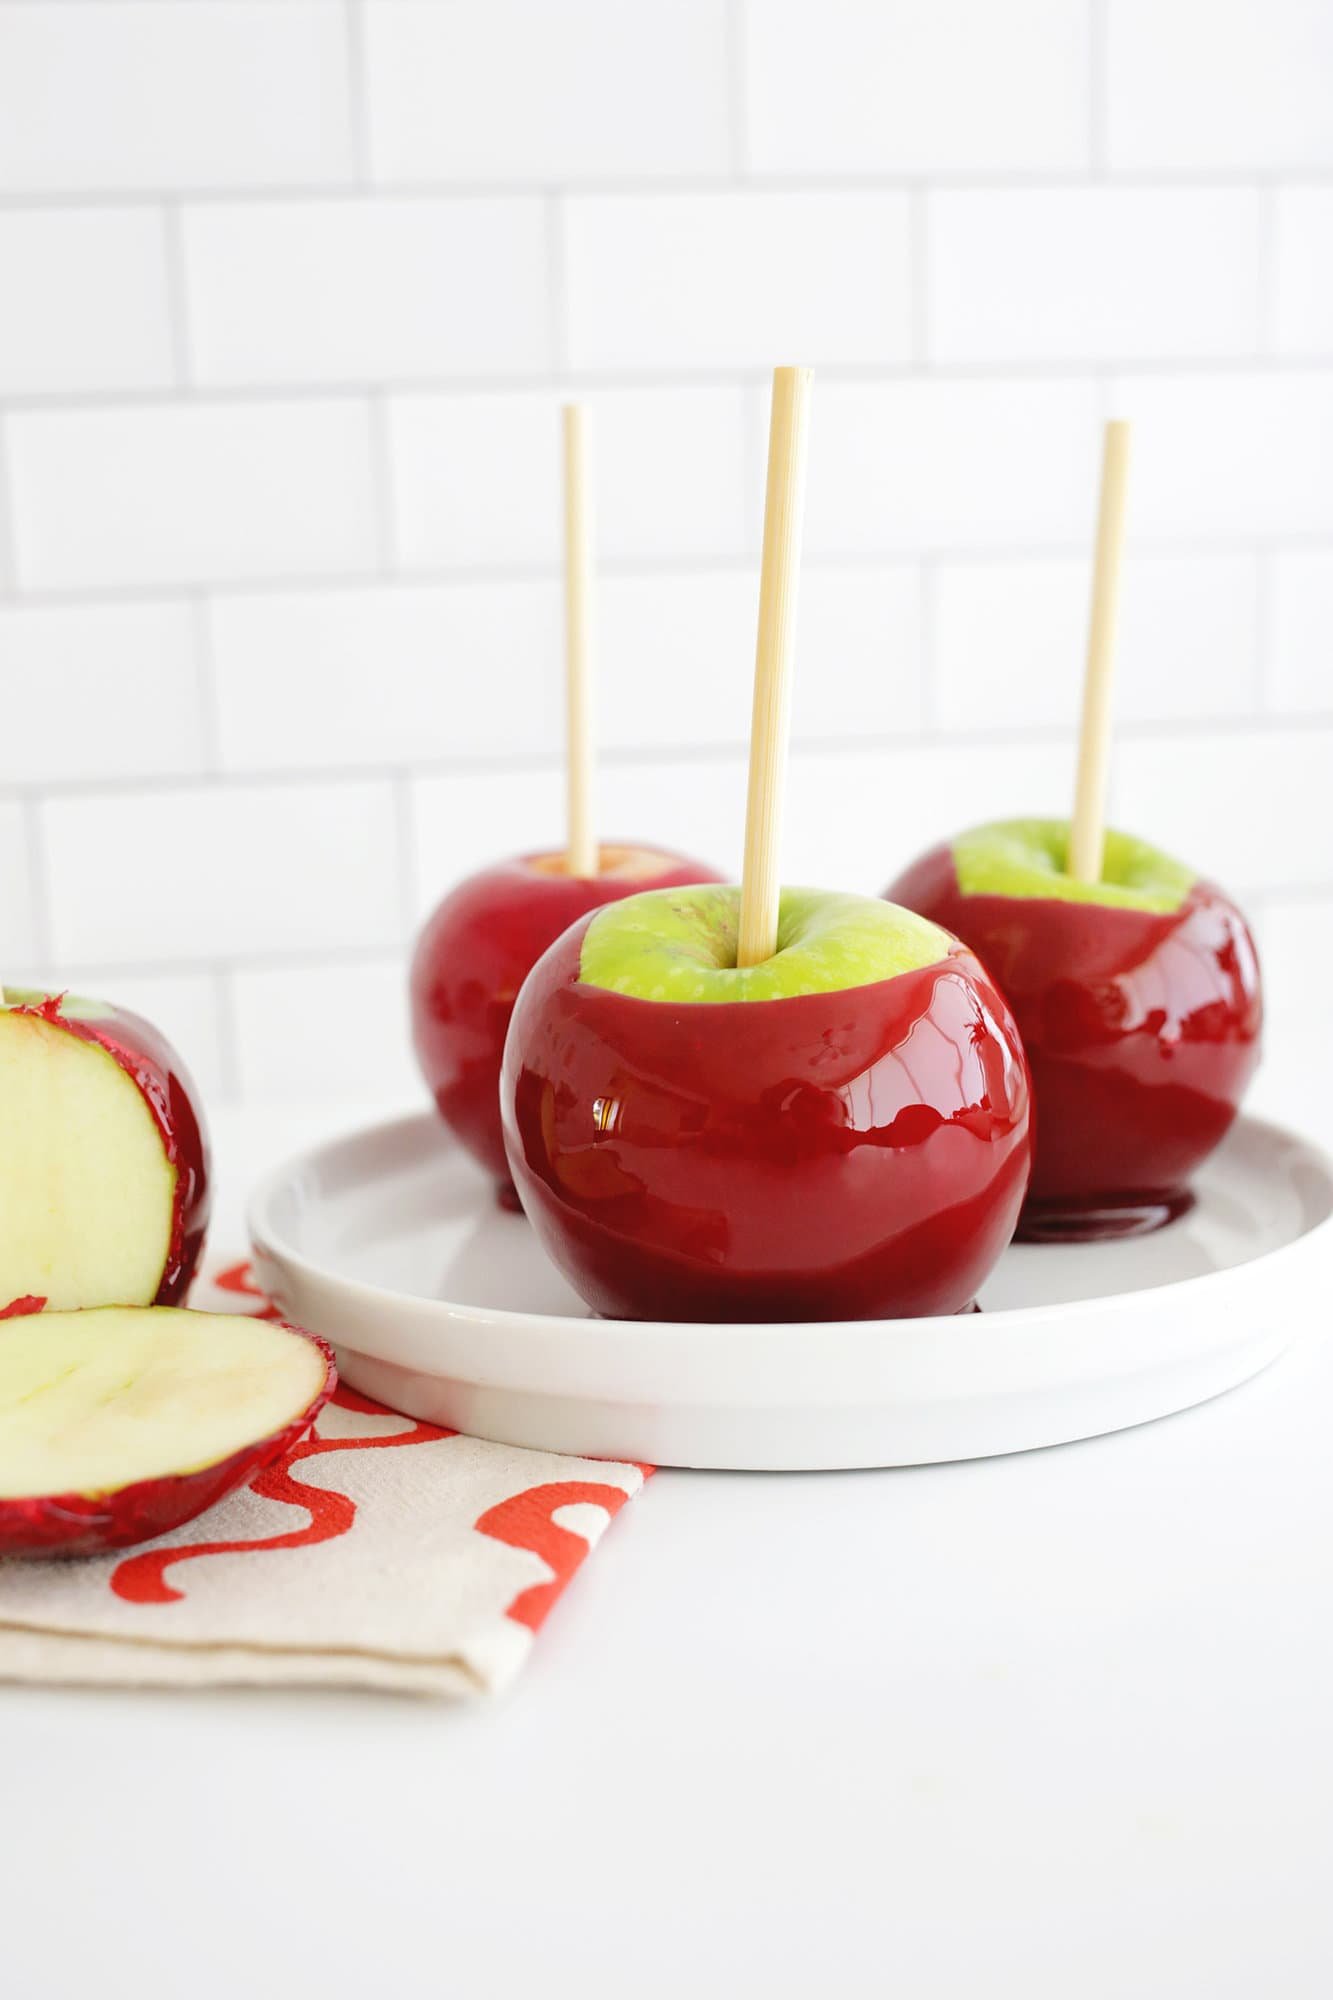
Candy apples are a whole apple on a stick dipped in hot melted sugars which hardens to form a thin candy shell. While usually red, they can also be dyed other colors and they first appeared in 1908 in New Jersey when candy maker William Kolb created them. Red Hots candies were a popular choice to use for the outer coating, so some prefer to make theirs a cinnamon flavor coating to mimic that nostalgic flavor.
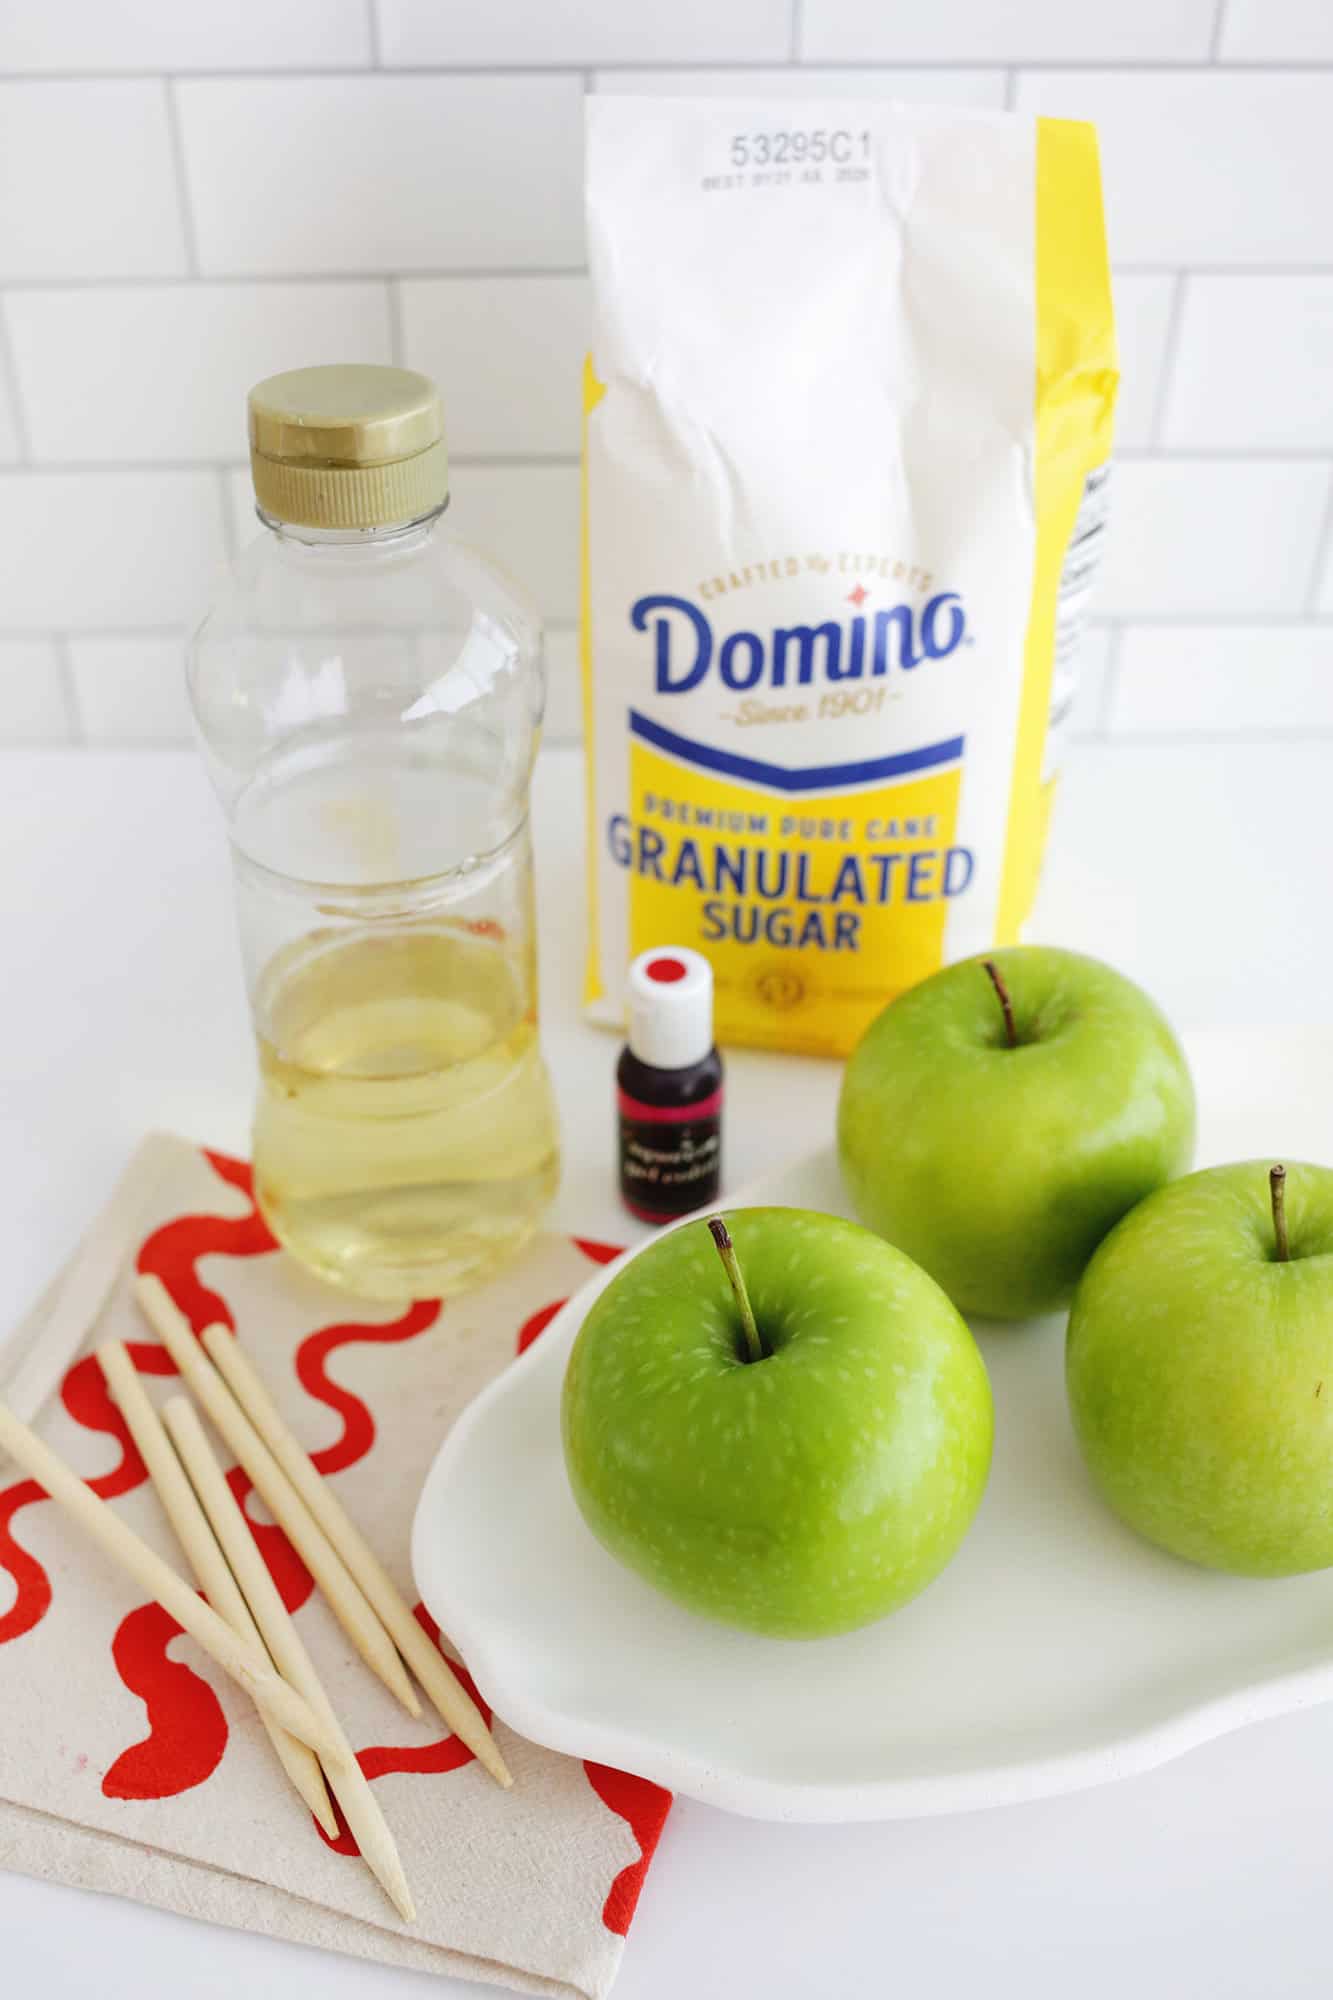
Ingredients for candy apples:
- Apples: Using smaller apples will get you more finished apples out of one batch of candy coating. Try and pick ones with a nice round shape for the best looking candy apples.
- White sugar: This candy apple recipe uses plain granulated white sugar to give the candy coating its sweetness.
- Light corn syrup: Corn syrup helps you get that smooth candy finish.
- Water: The water mostly boils off while the candy rises up to the proper hard crack stage temperature.
- Red food coloring: Gel food coloring is preferred if you have it since it’s more concentrated so the color is brighter for the best candy apples.
Frequently Asked Questions
What types of apples are best to use for candy apples?
While Granny Smith apples are probably one of the biggest favorites for candy apples due to their tart flavor, you can really use any variety that you like! Just be sure to pick a more firm variety like a Gala, Fuji, or Honeycrisp rather than a softer option like a Macintosh.
Supplies for candy apples:
- Apple skewers: You can also use popsicle sticks or even sticks from branches for your skewers, but we like these bamboo ones since they already have a point for easy insertion.
- Candy thermometer: Having a candy thermometer with a pot clip is super helpful. You can also use a multi purpose digital thermometer but you’ll have to stand there and hold it if you don’t have a clip.
Frequently Asked Questions
What is hard crack stage?
Hard crack stage is one of the highest temperatures used in candy making at 300°-310°. There is almost no water remaining in the mixture, so it hardens rather than staying softer like a taffy.
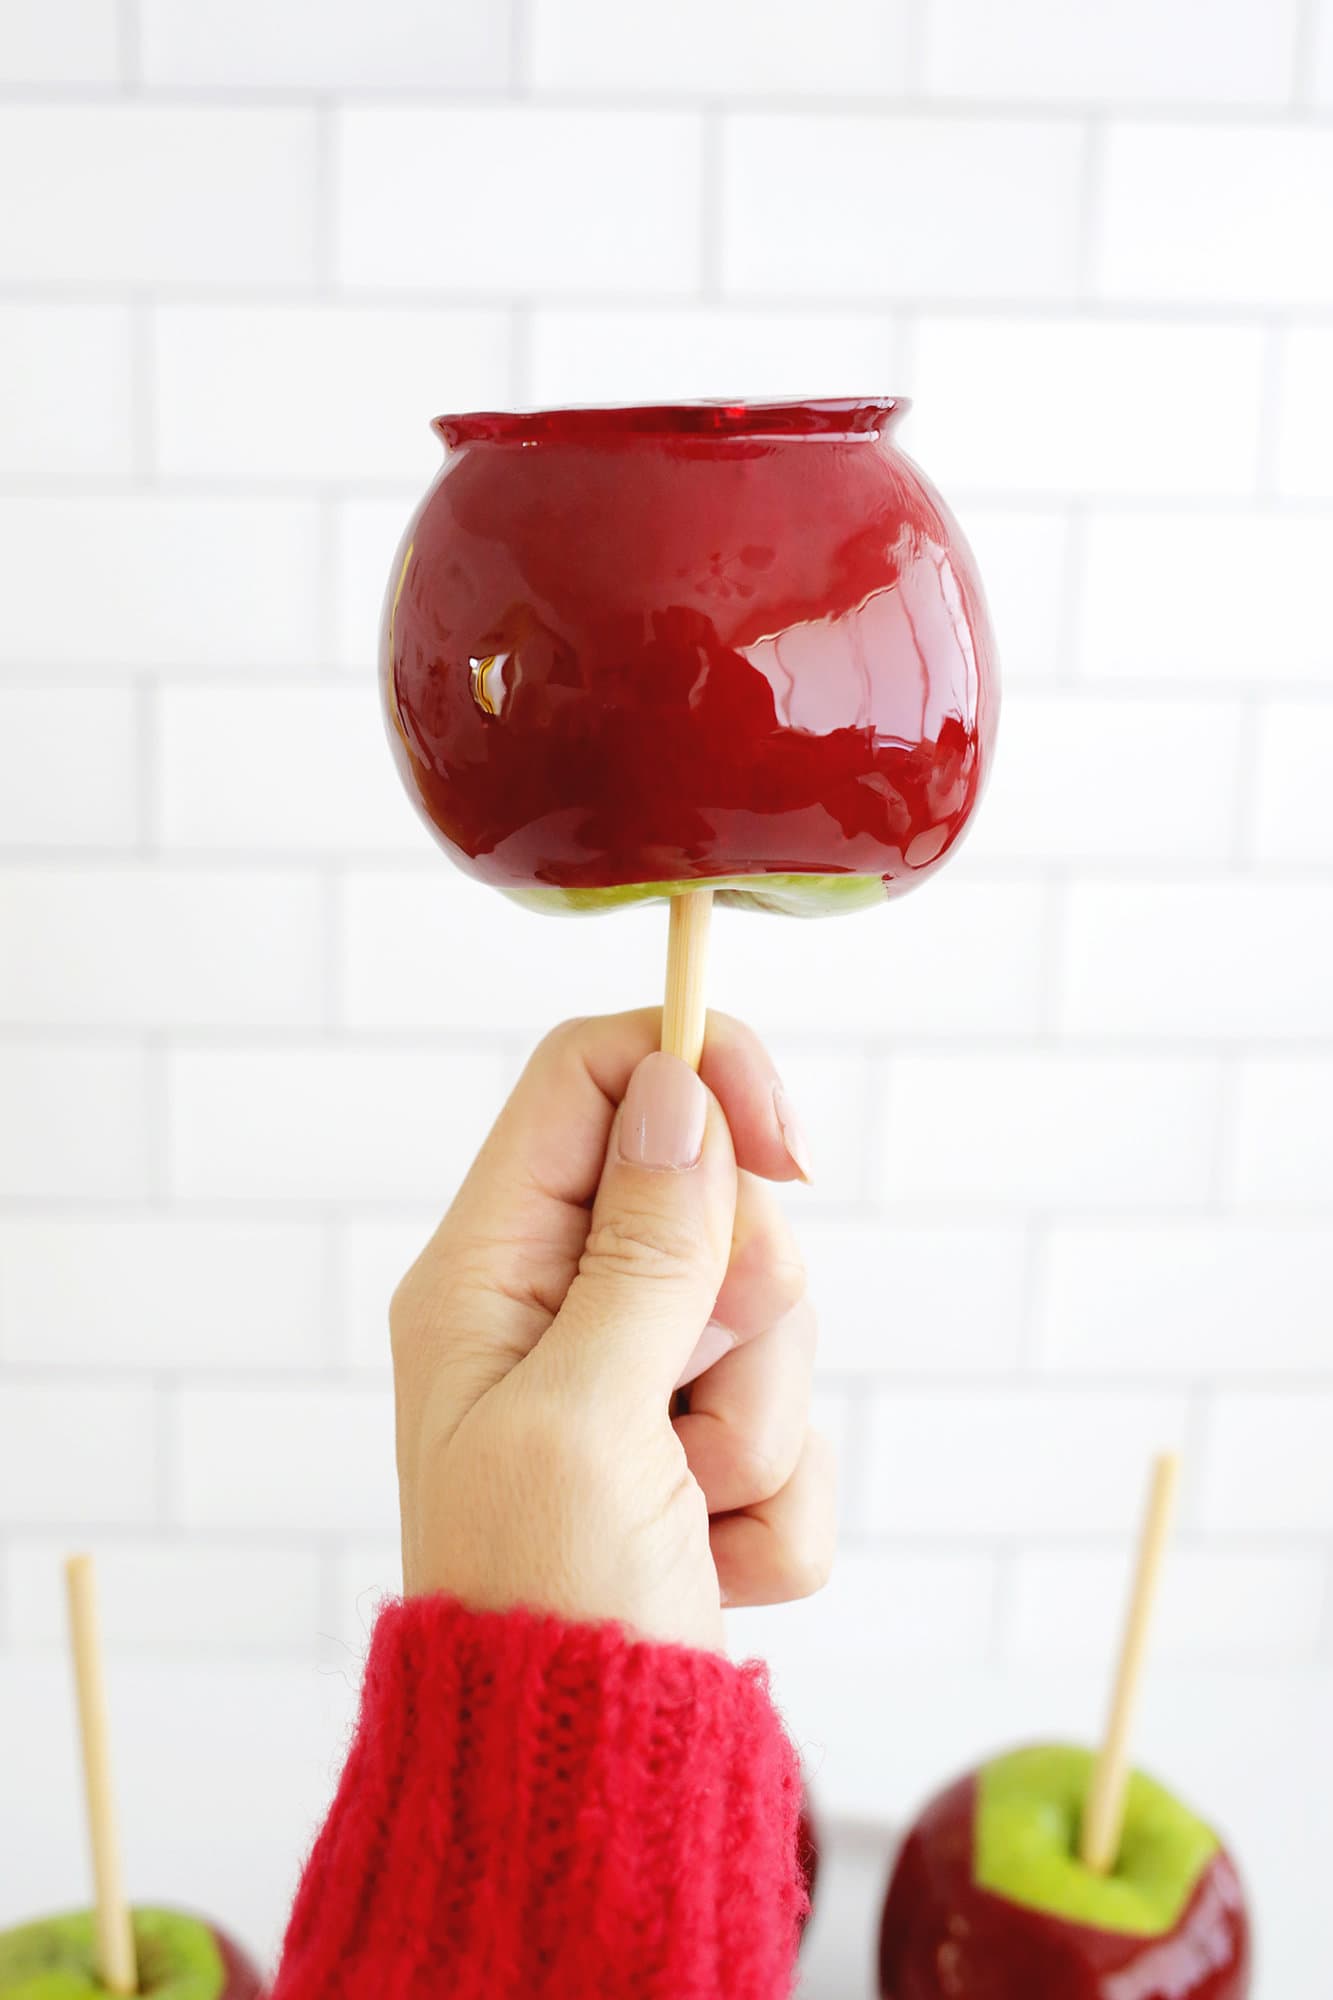
How to prepare your apples:
Wash and dry apples: You want to try and remove any wax coating that’s on the apples so your coating will stick and you can avoid getting annoying bubbles that pop out of the coating.
You can scrub them really well with a clean textured scrubber after rinsing them in hot water and rub them dry with a textured towel to try and remove as much wax as you can, or some people like to boil water and dip the apples in the water for about 5 seconds before rubbing dry (longer than 8-10 seconds can start to cook the apples, so don’t leave them in too long!).
Make sure the apples are fully dry before dipping as any amount of water will create bubbles in your coating.
Add skewers: Push or tap your wooden skewers or lollipop sticks halfway into the top of your dried apples and set aside.
How to make candy apples:
Prepare your pan: Prepare a sheet pan or parchment paper sprayed with nonstick spray or butter so you’ll be able to remove the apples easily once cooled.
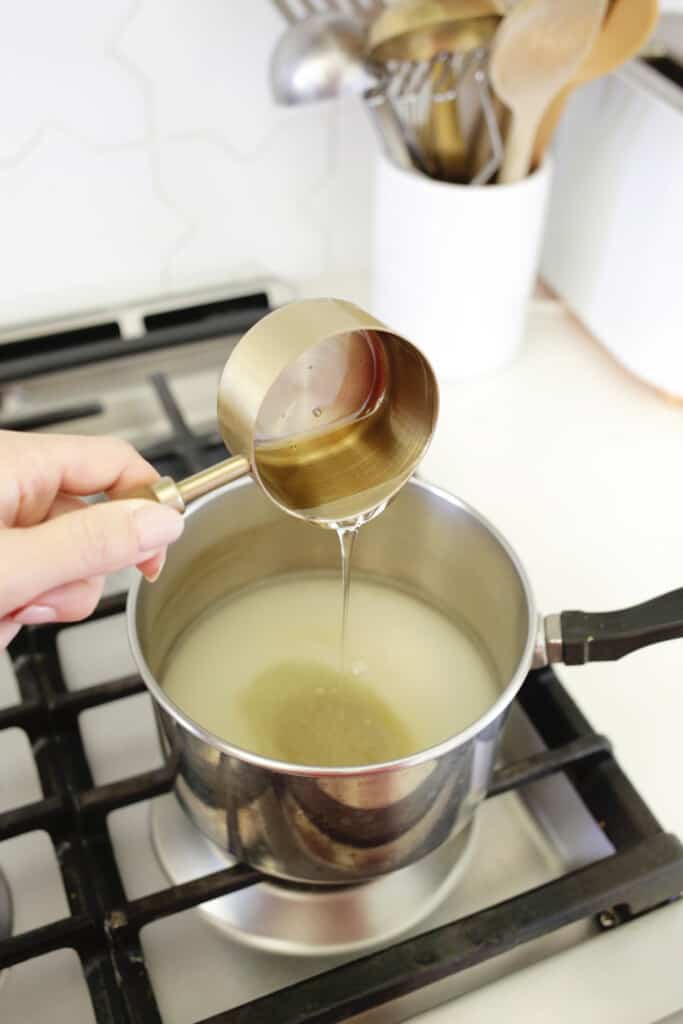
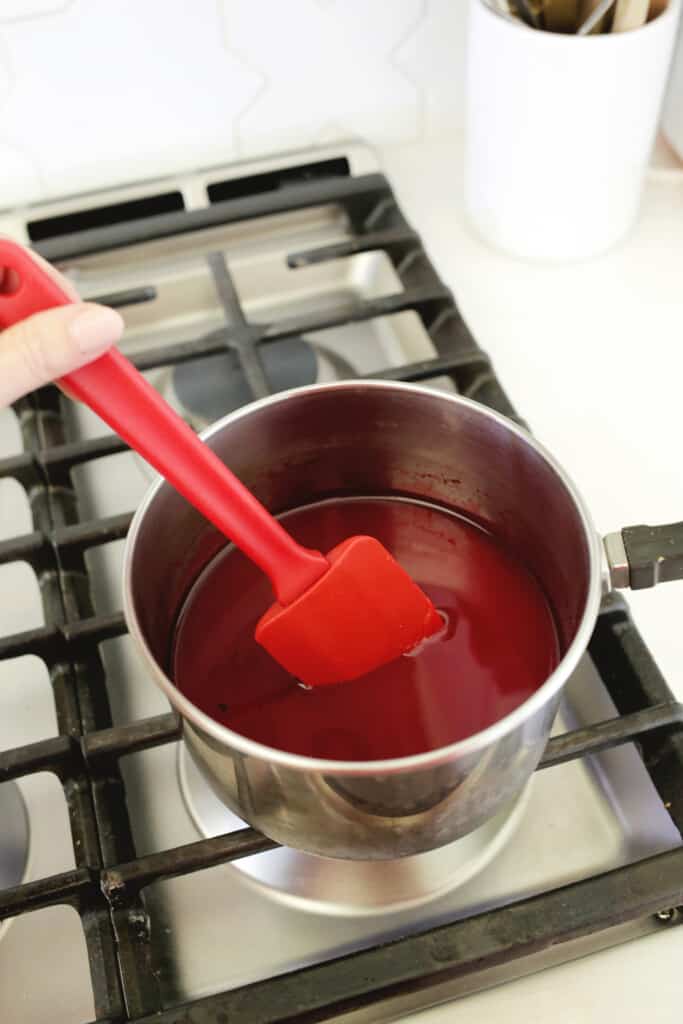
Cook your coating: Combine sugar, water, corn syrup, and food coloring in a saucepan over medium heat. Stir together with a wooden spoon or silicone spatula and bring the sugar mixture to a boil with a candy thermometer clipped to your pot (make sure it’s not touching the bottom of the pot or it won’t be an accurate read).
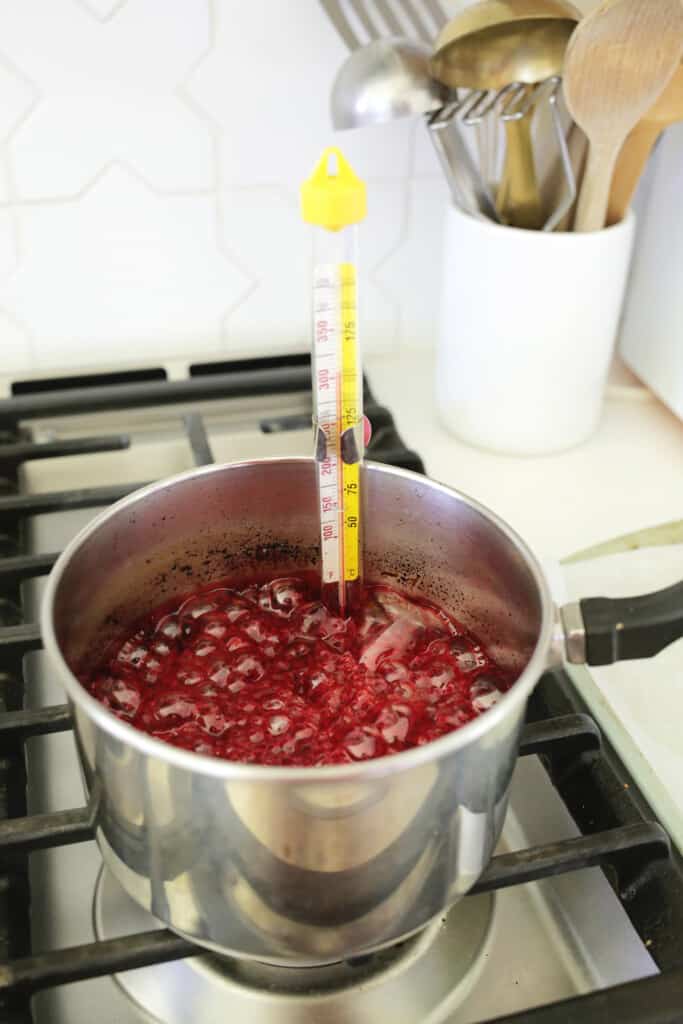
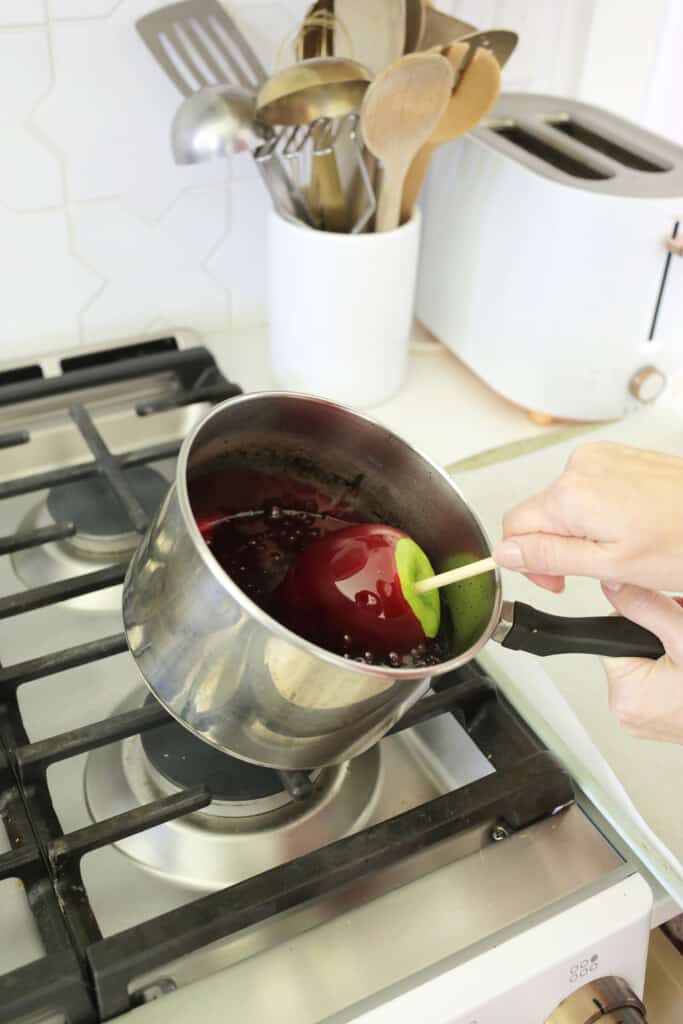
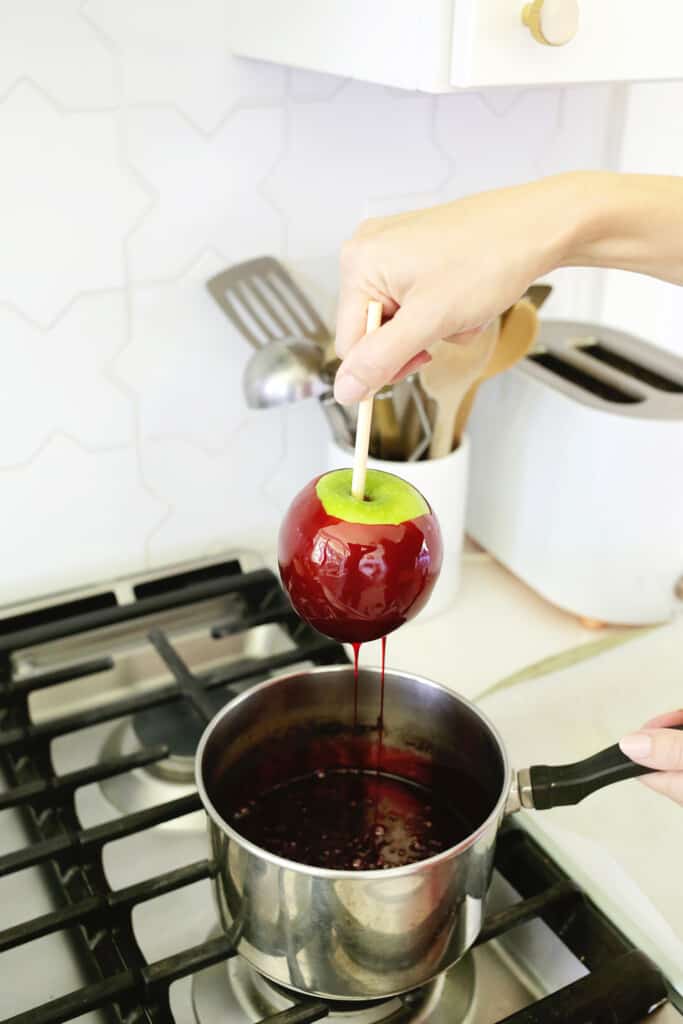
Bring coating up to 300°: Let the mixture boil for about 15-20 minutes on medium-high heat until it reaches between 300°-310°. Remove the coating from the heat and allow the bubbles to settle down for a minute until smooth.
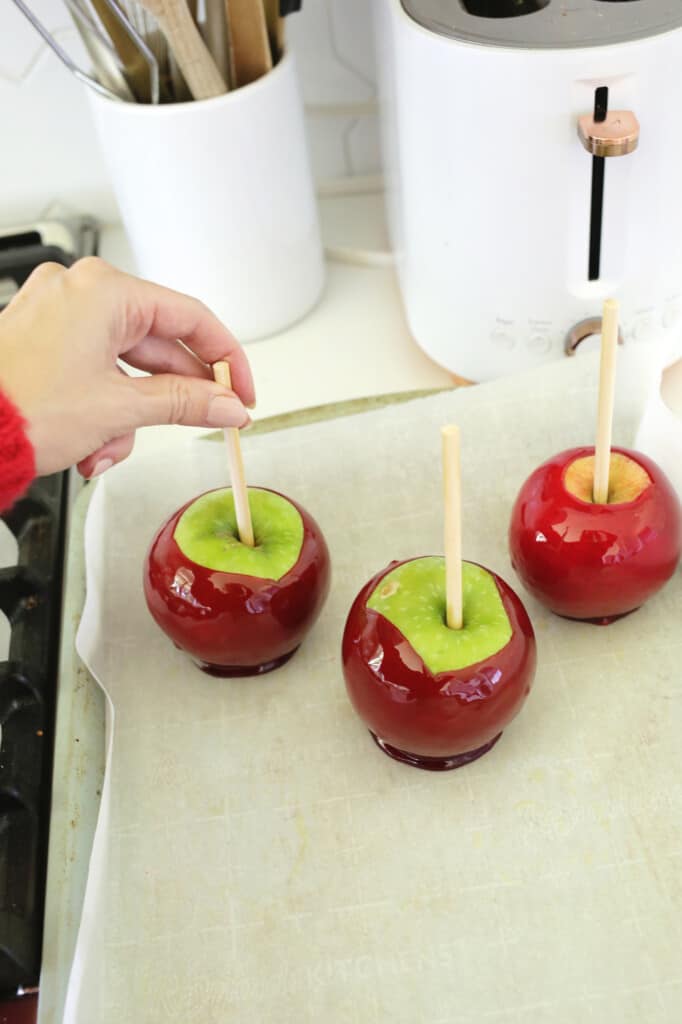
Dip your apples: Working quickly, tilt your pan to the side and dip an apple in the candy mixture, swirling the apple to get each side coated. Pull the apple out and let the excess drip off before placing on a prepared baking sheet, wax paper, silicone mat or parchment paper (just coat whichever one you use with cooking spray).
If the candy coating starts to harden before you are done dipping all your apples, put it back on medium heat until it thins out again.
NOTE: Remember, this sugar is very hot, so be sure to keep your skin away from the sugar to avoid burns. You can also have a bowl of ice water nearby just in case you make contact with the sugar so you can quickly dip your hand in that, or even use heatproof gloves made for cooking.
Let cool: Once all your apples are dipped, let the coating harden (it just takes a few minutes) and your apples are ready to eat! Remember, candy apples have a hard sticky coating, so eat with caution!
Frequently Asked Questions
What’s the best way to eat a candy apple?
Biting right into a candy apple is almost impossible and just asking for dental bills. Kids can lick the hard outside coating like a giant lollipop, but it’s most practical to cut the candy apple into slices before eating.
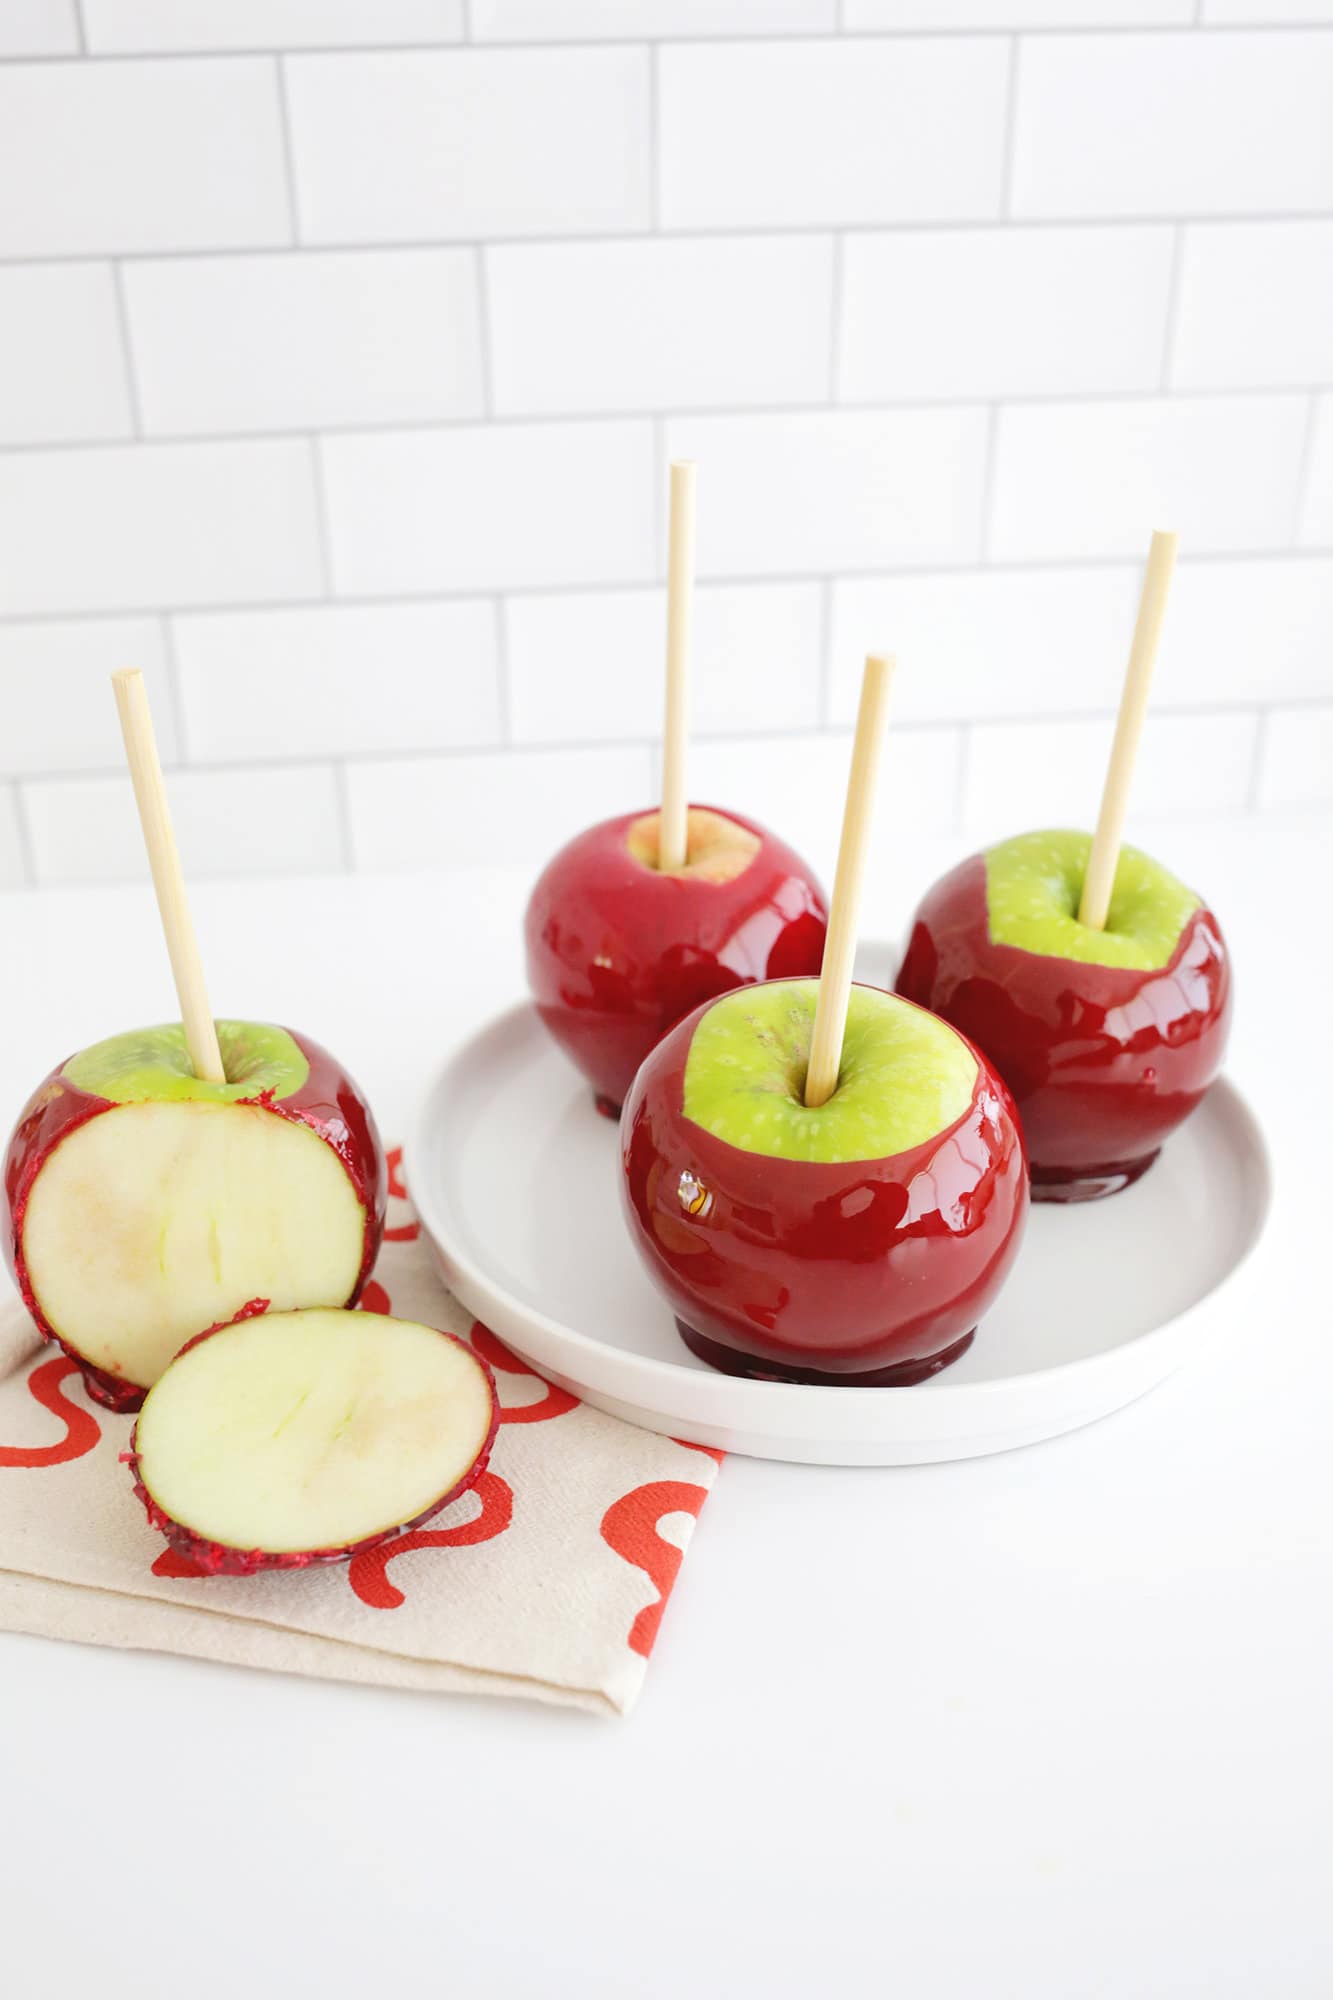
Tips for Making Candy Apples
- Use organic apples if you can since some companies don’t use wax on their apples so you don’t have to try to remove it. Or use apples from a local orchard that doesn’t wax their apples.
- Make sure your sugar reaches the 300° mark or the coating won’t harden and it will be more of a taffy texture.
- Try and keep the candy shell thin when you dip; it doesn’t need to be super thick and will be harder to eat.
- If you want to add a topping to your apples, just roll them in chopped coconut, nuts or sprinkles before the candy coating sets.
- You can make your candy apples a color other than red if you want! Just remember the color of the apple comes through a bit and may muddle your final color depending on what shade you pick, but purple or black for Halloween is fun!
Frequently Asked Questions
How do I make Cinnamon Candy Apples?
You can easily add a teaspoon of cinnamon flavor to your candy mixture to create a fall flavor with a touch of cinnamon!
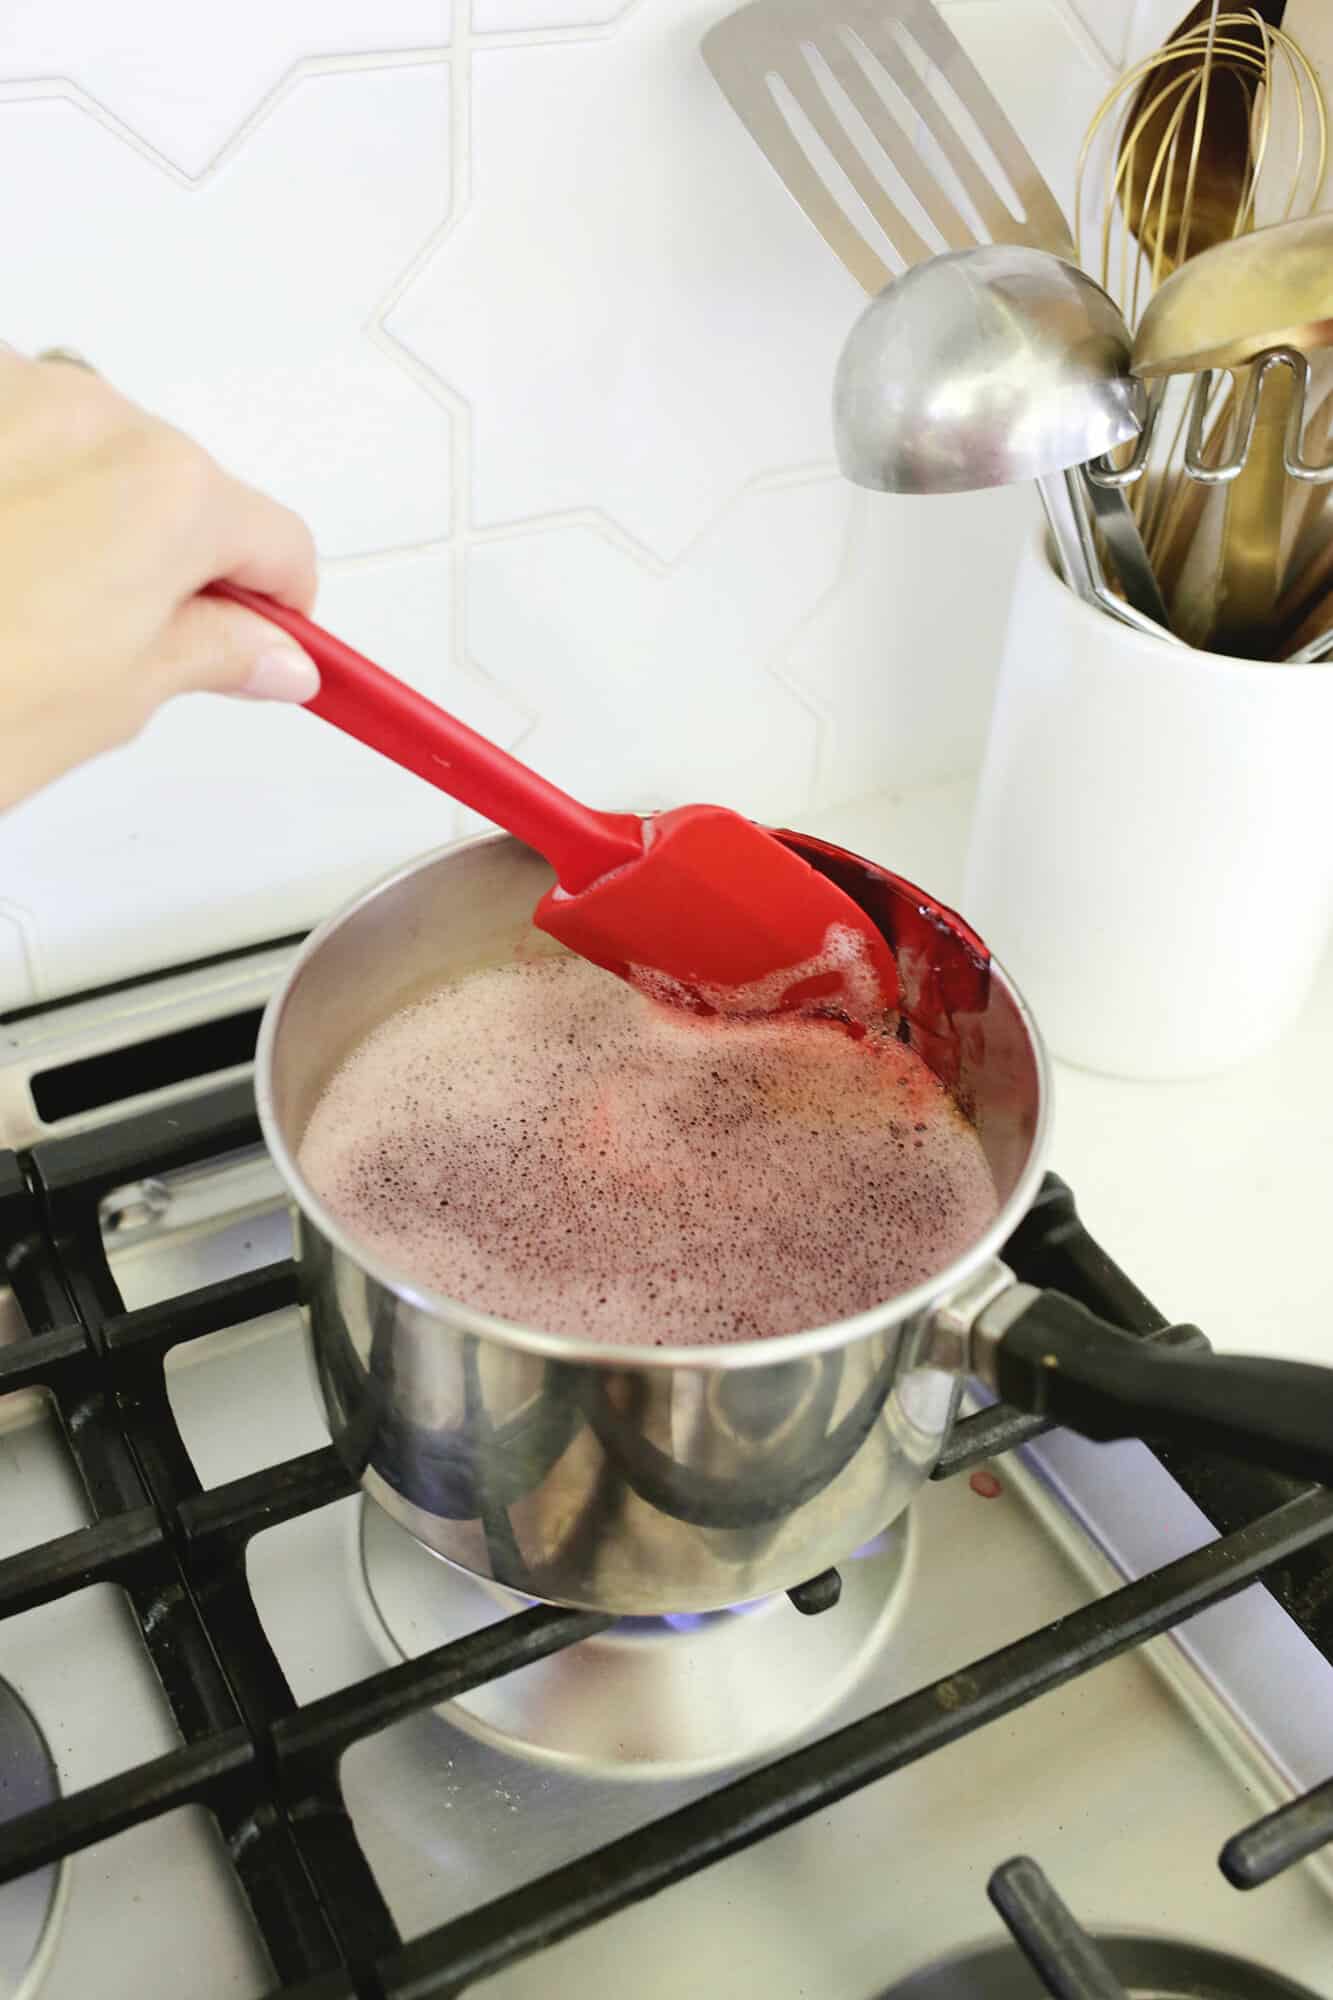
What the best way to clean your pot after making candy apples?
Now that your candy apples are made, you may be staring at your pot thinking “Now, how am I ever going to clean that?!” It’s actually pretty easy!
- Fill your pot with water.
- Boil the water on the stove, stirring every so often.
- Once the candy leftover is dissolved, pour the water out and the hardened sugar is gone!
If you have some sugar up on the sides of your pot above the boiling water line, just use a spatula to keep pulling up some of the hot water over that spot until it starts to dissolve.
You can also dip your thermometer into the water as it boils to remove any hardened candy for the tip of that as well.
Frequently Asked Questions
How do you avoid bubbles in your candy apples?
While sometimes bubbles are a bit of a mystery in candy apples, making sure you’ve removed as much wax as possible, checking that the apples are totally dry before dipping, and allowing the bubbles in the coating to settle before dipping will give you the best chance of a totally smooth mirror-like finish on your candy apples.
How do you store candy apples?
Candy apples can be stored in an airtight container for up to three days in the refrigerator, although they are usually best eaten in the first 24 hours. The outer hard shell will last longer than three days, but the hole that is poked into the apple is what starts to oxidize the apple after a few days and makes it mushy inside.
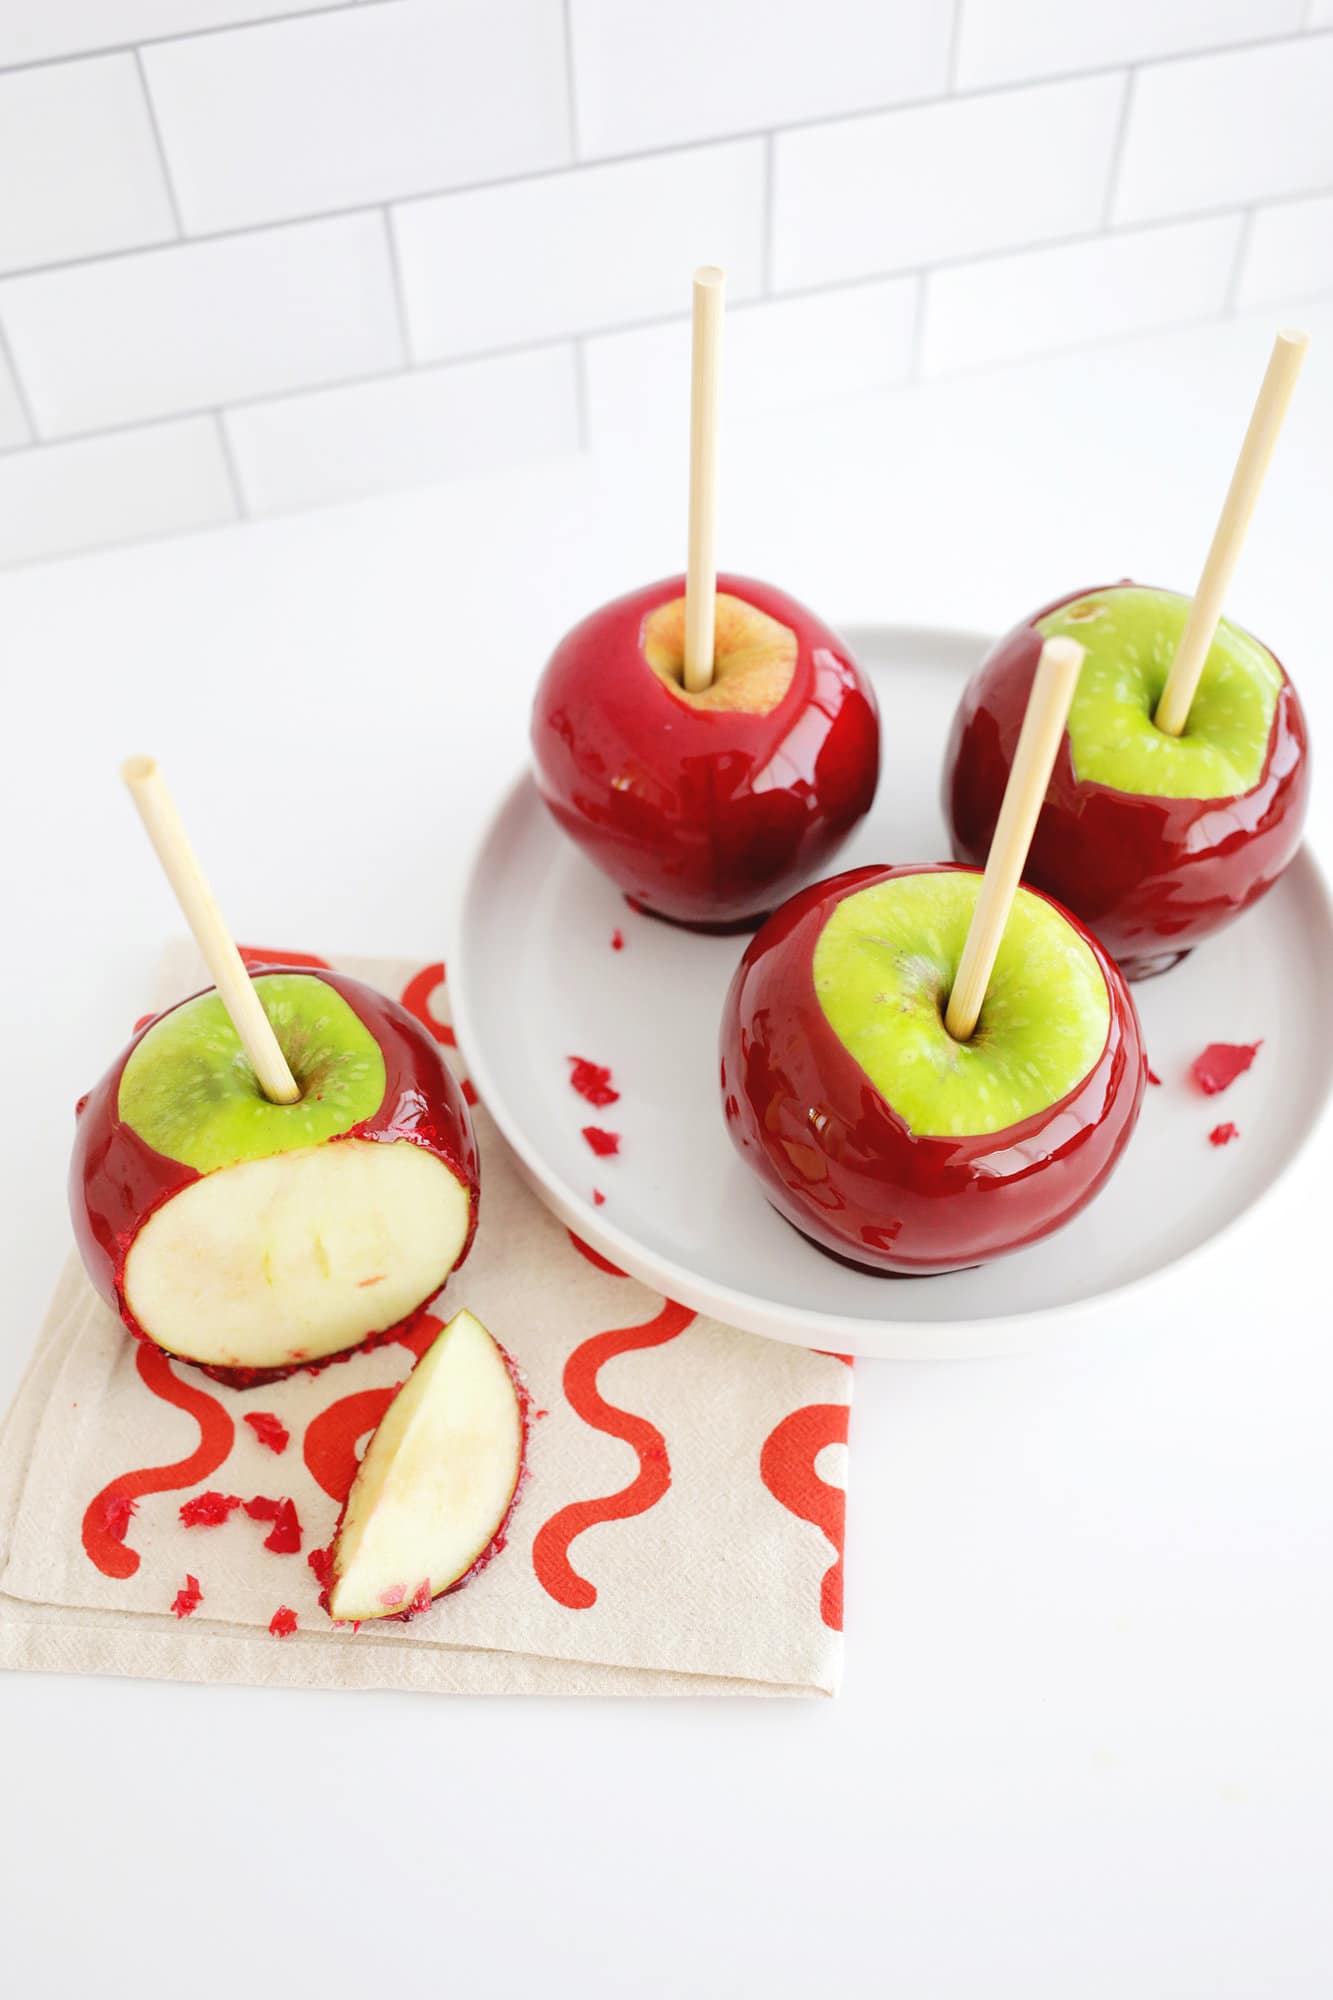

Easiest Candy Apples
Equipment
- wooden skewers
- saucepan
- candy thermometer
Ingredients
- 8-10 apples
- 2 cups white sugar
- ¾ cup water
- ½ cup corn syrup
- ½ teaspoon red gel food coloring
Instructions
- Prepare your pan: Prepare a sheet pan or parchment paper sprayed with nonstick spray or butter so you’ll be able to remove the apples easily once cooled.
- Cook your coating: Add the sugar, water, corn syrup, and food coloring to a saucepan over medium heat. Stir together and bring to a boil with a candy thermometer clipped to your pot (make sure it’s not touching the bottom of the pot or it won’t be an accurate read).
- Bring coating up to 300°: Let the mixture boil for about 15-20 minutes until it reaches between 300°-310°. Remove the coating from the heat and allow the bubbles to settle down for a minute until smooth.
- Dip your apples: Working quickly, tilt your pan to the side and dip an apple in the coating, swirling the apple to get each side coated. Pull the apple out and let the excess drip off before placing on a sheet pan or parchment paper.If the candy coating starts to harden before you are done dipping all your apples, put it back on medium heat until it thins out again.
- Let cool: Once all your apples are dipped, let the coating harden (it just takes a few minutes) and your apples are ready to eat! Remember, candy apples have a hard sticky coating, so eat with caution!
Notes
How to prepare your apples:
Wash and dry apples: You want to try and remove any wax that’s on the apples so your coating will stick and you can avoid getting annoying bubbles that pop out of the coating. You can scrub them really well with a clean textured scrubber after rinsing them in hot water and rub them dry with a textured towel to try and remove as much wax as you can, or, some people like to boil water and the dip the apples in the water for about 5 seconds before rubbing dry (longer than 8-10 seconds can start to cook the apples so don’t leave them in too long!). Make sure the apples are fully dry before dipping as any amount of water will create bubbles in your coating. Add skewers: Push or tap your skewers halfway into the top of your dried apples and set aside.Tips for Making
- Use organic apples if you can since some companies don’t use wax on their apples so you don’t have to try to remove it. Or use apples from a local orchard that doesn’t wax their apples.
- Make sure your sugar reaches the 300° mark or the coating won’t harden and it will be more of a taffy texture.
- Try and keep the candy shell thin when you dip; it doesn’t need to be super thick and will be harder to eat.
- You can make your candy apples a color other than red if you want! Just remember the color of the apple comes through a bit and may muddle your final color depending on what shade you pick, but purple or black for Halloween is fun!
Nutrition
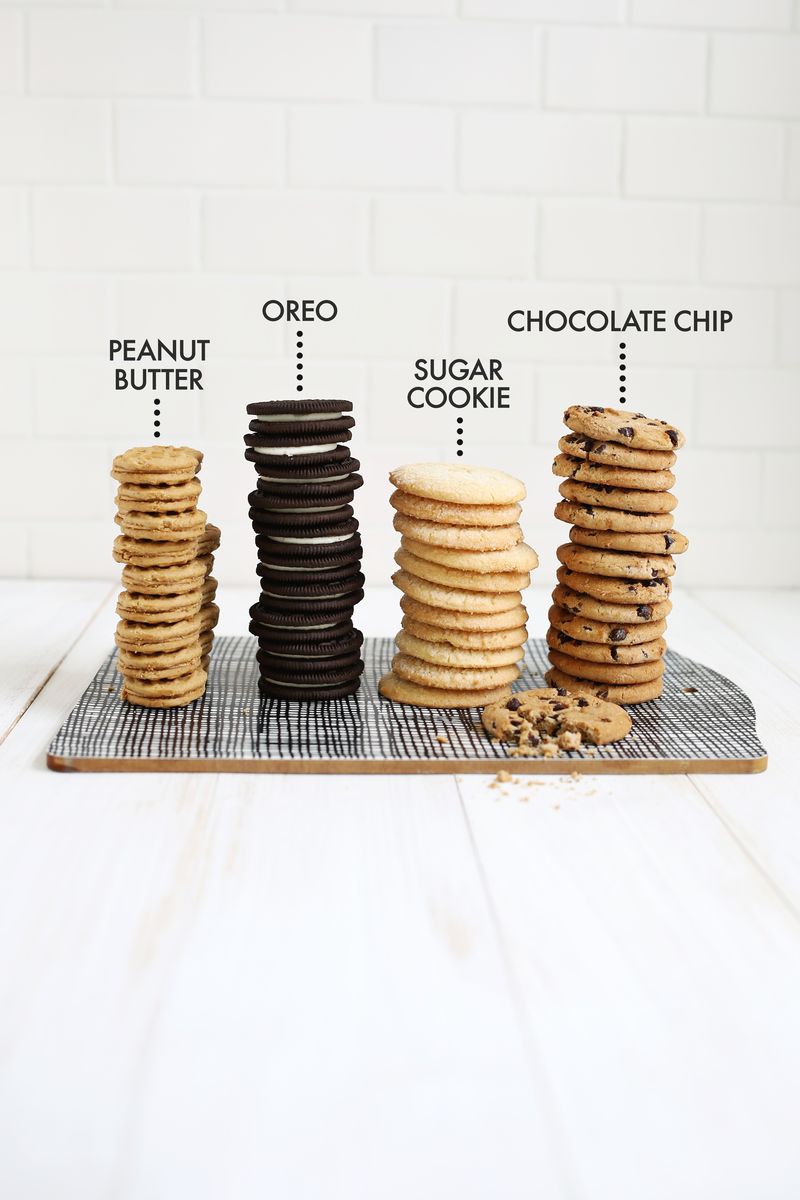
Homemade cookie butter from any cookie! I hope you appreciate the hours I’ve spent with cookies over the last couple of days—all the tasting and sampling of cookie after cookie. It was all for you guys!
But seriously, we wanted to bring you a recipe that would work for any cookie. So we searched until we found the perfect base for our cookie butter, and I think we found it!
You can either make one of our many delish cookie recipes to use for this, or you can buy some at the store to get started.
Related: Cookie Dough Dip, Oreo Dip, Dunkaroo Funfetti Dip, and 30+ Easy No-Bake Desserts.
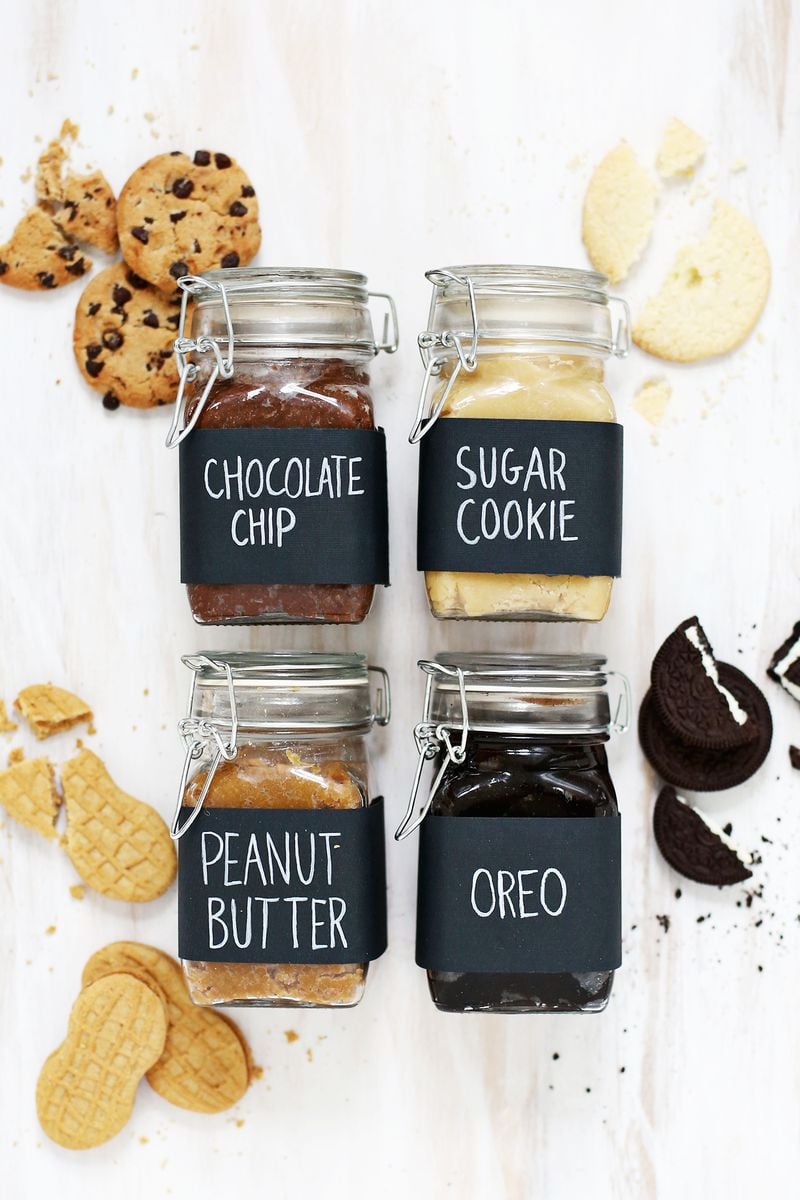
2 cups cookie crumbs
1/2 stick butter
1/2 cup sweetened condensed milk
1/4 cup evaporated milk
water as needed
jars with lids for gifting/storage
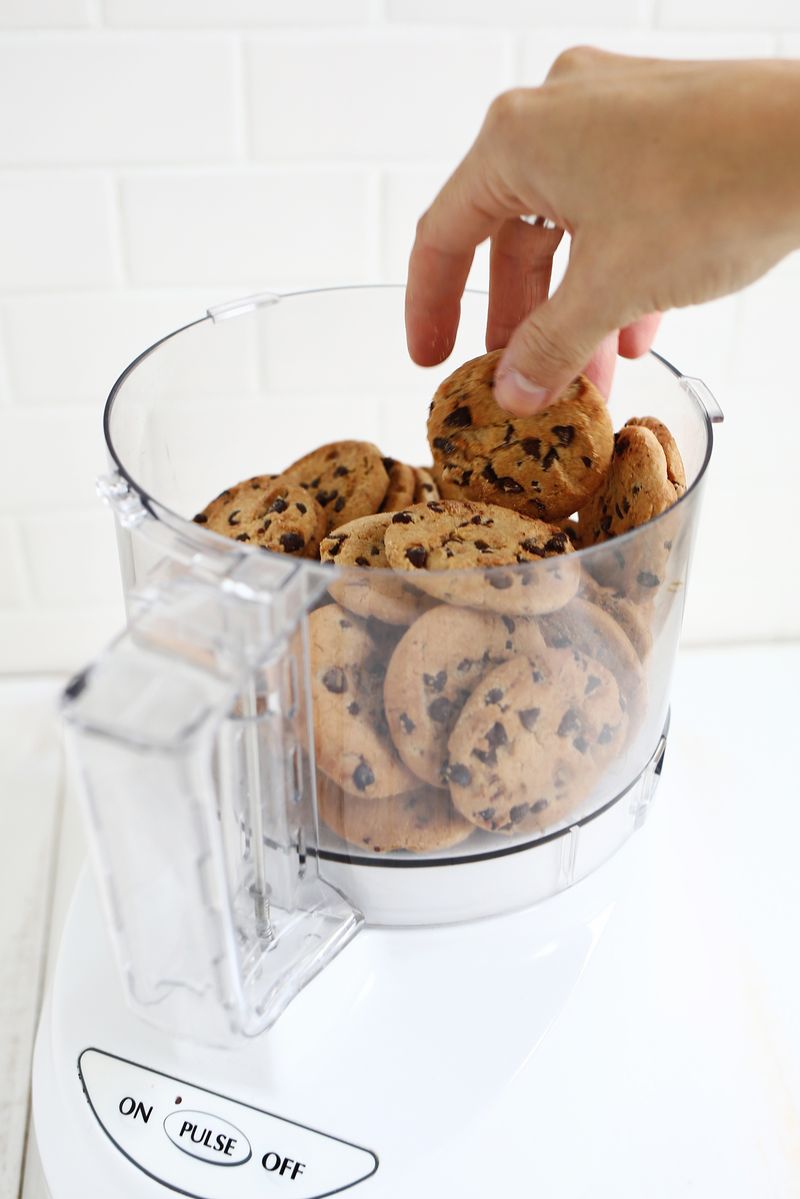
If you do have a filling (like an Oreo or Nutter Butter would), then you’ll want to open the cookie and scrape out the filling with a butter knife first. You want a dry crumb to work with, so the filling has to be removed.
Some cookies have a solid middle that you can’t open and get to (like a Milano cookie), but I think that would be OK since the chocolate chip cookies have some chocolate bits mixed in and they turned out fine.
Place your cookies into a food processor and blend until it forms a very fine powder.
You’ll need 2 cups, so just keep blending cookies until you get there (since all the cookies are different sizes or have two sides per cookie, the number of cookies needed won’t be the same).
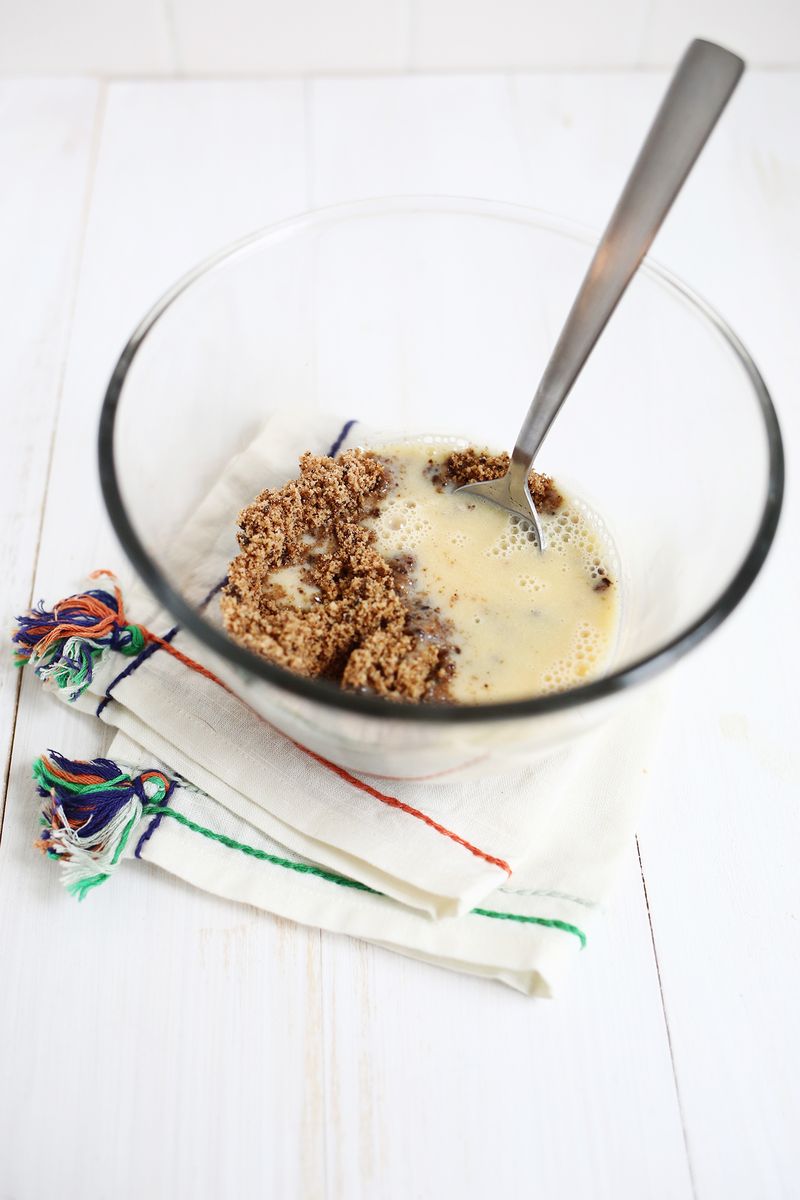
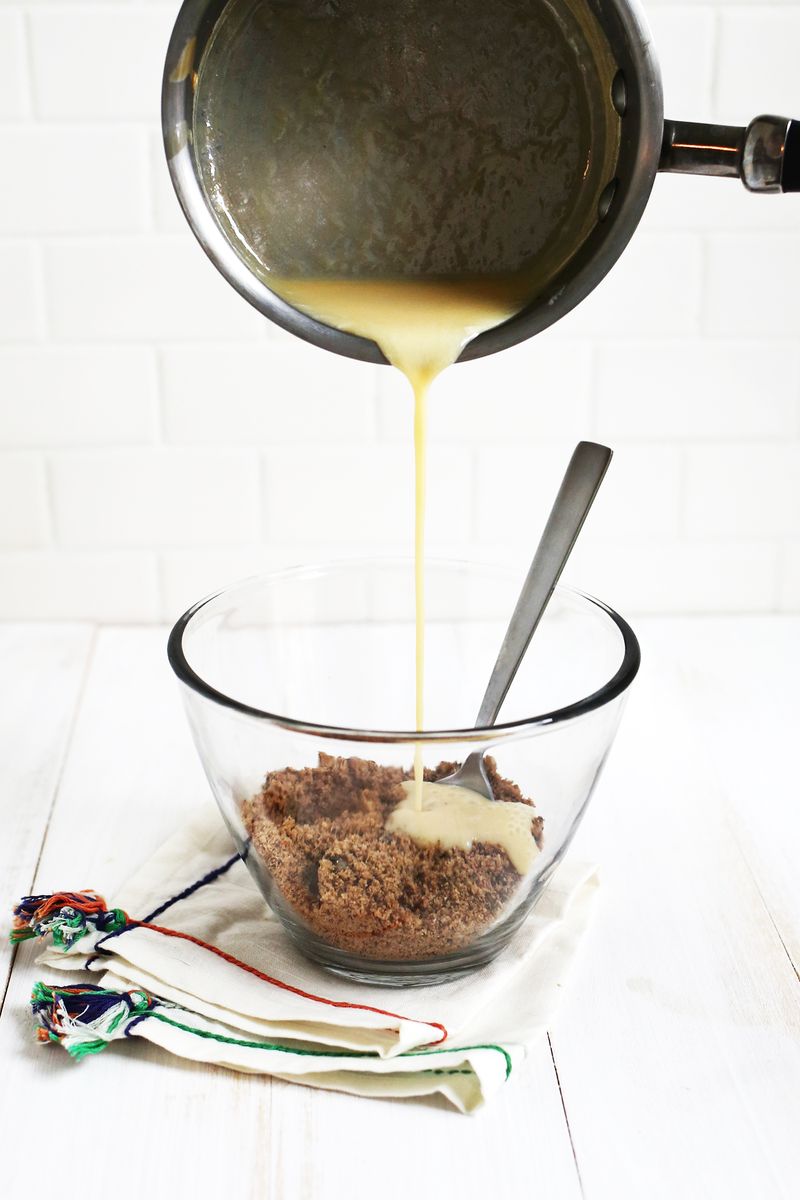
Starting with 1/2 cup of the liquid, pour it into your cookie crumbs and mix together with a spoon. Keep adding small amounts of the liquid until the cookie butter is just wet enough to stay together.
Depending on how dry the cookie is to begin with, you’ll need more or less liquid. Really buttery cookies (like the sugar cookies) didn’t need nearly as much as the drier Oreo cookies, so just keep checking and stirring as you add the liquid.
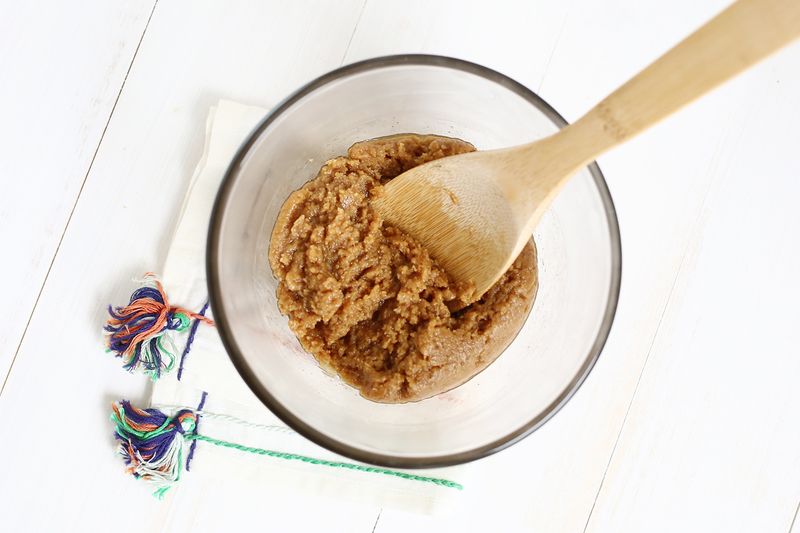
But if you want to make the cookie butter smoother and easier to dip things in, then remove the cookie butter from the fridge and stir very small amounts of water (start with 1/8 teaspoon) into the dough.
At first it will look like the water is separating from the dough, but just keep stirring and mashing.
You should start to notice that the cookie butter loosens up a bit as you stir in more water. Keep adding and stirring until you get to a consistency you like and refrigerate the mixture again.
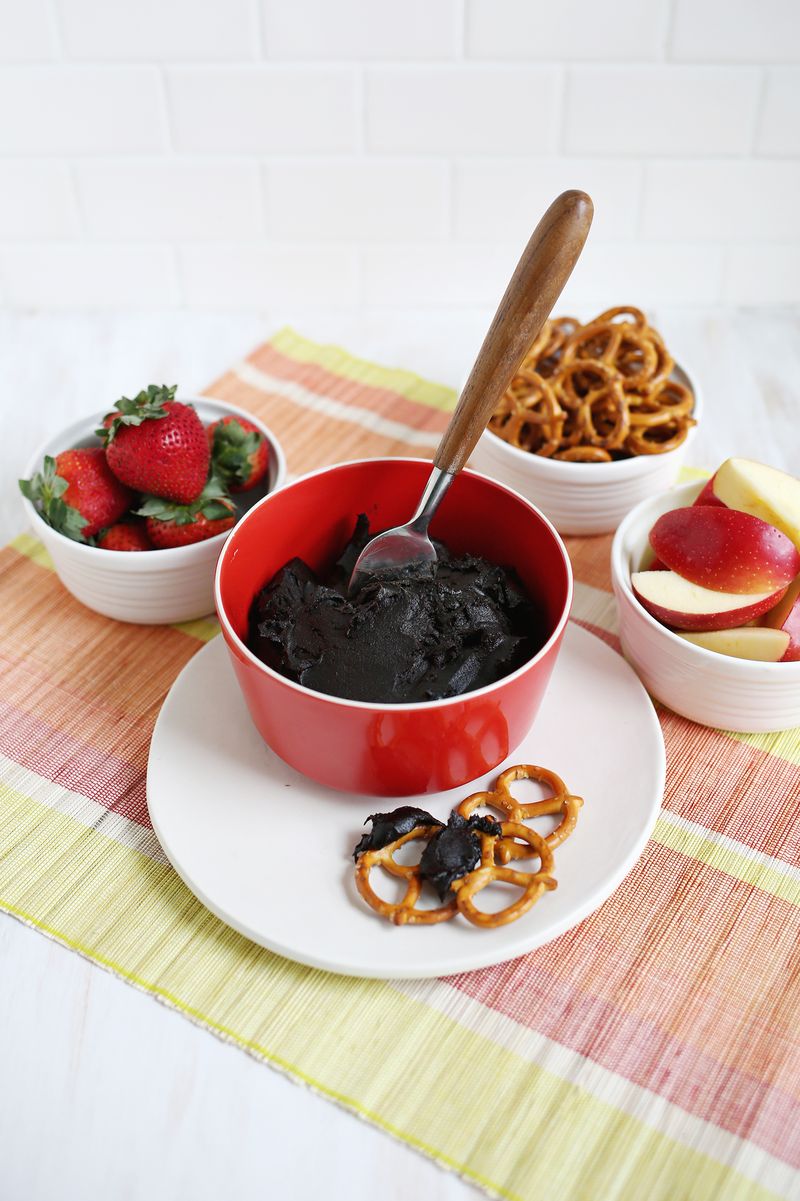
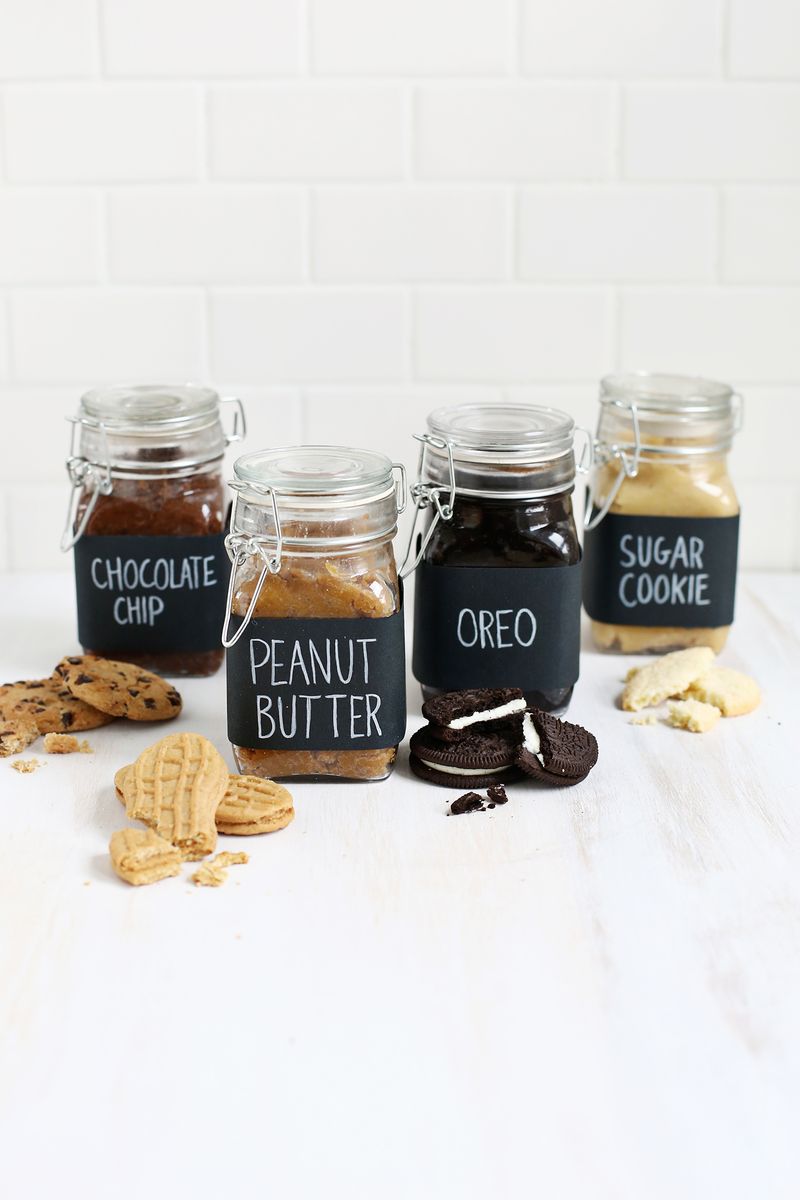
I love all my cookie butter children equally, buuuut, the Oreo is my secret favorite. I am addicted to chocolate-covered pretzels, so you can imagine how good dipping pretzels into the Oreo cookie butter is. Elsie ate it with apples one morning for breakfast!
And of course, spooning the cookie butter into jars (these small jars with wooden lids are really cute for gifting) and adding a simple paper label makes your homemade treat the perfect gift!
If you’d rather just skip to the eating part, you can also just buy some already made cookie butter and get to the good part faster.
If you are gifting these, they would be a great gift with a cute apron or some pretty kitchen utensils, too. What cookies would you use to make yours? xo. Laura
Homemade Cookie Butter
Ingredients
- 2 cups cookie crumbs
- ½ stick butter
- ½ cup condensed milk sweetened
- ¼ cup milk evaporated
- water as needed
Instructions
- First you’ll want to make your cookie crumbs. If you have a cookie with no creamy middle filling (like a chocolate chip or sugar cookie), then you can put them straight into the food processor. If you do have a filling (like an Oreo or Nutter Butter would), then you’ll want to open the cookie and scrape out the filling with a butter knife first.You want a dry crumb to work with, so the filling has to be removed. Some cookies have a solid middle that you can’t open and get to (like a Milano cookie), but I think that would be OK since the chocolate chip cookies have some chocolate bits mixed in and they turned out fine. Place your cookies into the food processor and blend until it forms a very fine powder. You’ll need 2 cups, so just keep blending cookies until you get there (since all the cookies are different sizes or have two sides per cookie, the number of cookies needed won’t be the same).
- In a small saucepan, heat the butter over low heat until melted, and then stir in your sweetened condensed milk and evaporated milk until it’s all melted together. Starting with 1/2 cup of the liquid, pour it into your cookie crumbs and mix together with a spoon. Keep adding small amounts of the liquid until the cookie butter is just wet enough to stay together. Depending on how dry the cookie is to begin with, you’ll need more or less liquid. Really buttery cookies (like the sugar cookies) didn’t need nearly as much as the drier Oreo cookies, so just keep checking and stirring as you add the liquid.
- Once your cookie butter is blended, allow it to cool in the fridge for an hour or two. If you want to, you can actually stop at this point, and it will taste delicious.But if you want to make the cookie butter smoother and easier to dip things in, then remove the cookie butter from the fridge and stir very small amounts of water (start with 1/8 teaspoon) into the dough. At first it will look like the water is separating from the dough, but just keep stirring and mashing.You should start to notice that the cookie butter loosens up a bit as you stir in more water. Keep adding and stirring until you get to a consistency you like and refrigerate the mixture again.
- Store your cookie butter in the fridge and it should be good for at least a week or two. It may be good for even longer but it usually doesn’t last long enough to find out! And here’s a quick video tutorial of the process:
Nutrition

Making homemade funnel cake is super easy . It’s very similar to pancake batter—we are basically deep frying pancakes!
Related: And if you love pancakes then you should also try our crepes and french toast recipes next.

Ingredients
- Pancake mix
- Water
- Vanilla extract
- Oil – canola or vegetable
- Powdered Sugar, also called Confectioner’s Sugar

How to make Funnel Cake
Mix together the pancake mix and water. Add to a squeeze bottle or pour through a funnel.
Heat the oil to right around 350°F or a little less. Then pour the batter in, making a spider web type shape. Wait 20-30 seconds, flip, then fry for another 15-20 seconds. Remove to a bed of paper towels to remove excess oil.
Dust with powder sugar before serving.

Notes & Tips
- I tried three different store bought pancake mixes. The one that worked best was Bisquick.
- In the process of testing a few mixes, I learned that it’s all about batter texture. If your batter is super runny, like you could drink it through a straw, it won’t hold together well when you go to deep fry it. You want a thick paste consistency.
- I like making smaller, two to three bite-sized funnel cakes as they are easier to maneuver in the hot oil. But you can use this same recipe to make large size funnel cakes, like the fair, if you prefer.
- It works best if you pour the batter through a squeeze bottle (like the one pictured above) rather than a funnel into the oil. This gives me a little more control as I work.

More Fun Dessert Recipes
- Eclair Cake
- Gooey Butter Cake
- Chocolate Cake Pops
- Birthday Cake Pops
- Oreo Cake Pops
- Brownies
- Rice Pudding
- Flan
- Jello Poke Cake
- Angel Food Cake
- Red Velvet Cake
- Chocolate Cake
- Chocolate Chip Cookie Bars
- Tiramisu
- Chocolate Tart
- Chocolate Covered Strawberries


Easy Funnel Cake
Equipment
- squeeze bottle
Ingredients
- 1 cup pancake mix
- ½ cup water
- 1 teaspoon vanilla extract
- ¼ cup powdered sugar
Instructions
- Mix together the pancake mix and water. Add to a squeeze bottle.
- Heat the oil to right around 350°F or a little less.
- Then pour the batter in, making a spider web type shape. Wait 20-30 seconds, flip, then fry for another 15-20 seconds.
- Remove to a bed of paper towels to remove excess oil.
- Dust with powder sugar before serving.
Notes
Nutrition
Flan will always remind me of my late grandmother, Corina. She was from Venezuela. My grandmother was not passionate about cooking, but she did have a few dishes she made us grandchildren now and again. Flan was one of them. I have always had a sweet tooth so my memories of her flan have a lot of staying power.

Ingredients
- Granulated white sugar
- Eggs
- Sweetened condensed milk
- Evaporated milk
- Vanilla bean

How to make Flan
In a small pot heat the sugar over medium heat until dissolves and turns a light brown color. It should begin to smell like caramel. Remove from heat and pour the liquid into the ramekins, distributing it equally.
In a large mixing bowl stir together the egg yolks, sweetened condensed milk, evaporated milk and seeds from the vanilla bean. Stir until the ingredients are well combined. Pour into the ramekins.
Bake at 350°F in a water bath for 45 minutes. They will still have a slight jiggle even after baking. Allow to fully cool and then refrigerate for at least an hour. I like to make flan the day before I plan to serve it so it can refrigerate overnight.
Run a thin knife around the edge of the flan, between the custard and the ramekin dish. Then place a small plate over the ramekin and flip over. The flan should easily remove from the ramekin, if not give it a few light taps to loosen the bottom. Some of the caramel will pour out the sides, this is normal and adds to the presentation.

Tips and Notes
- Evaporated milk can be substituted for whole milk in this recipe.
- I use 6 egg yolks because I love the richness and color it brings to this recipe. That being said you could use 3 eggs (whites + yolks) instead. But if you do use all yolks save the white to make meringue, egg white bites or omelettes.
- Vanilla bean can be substituted for 1 teaspoon vanilla extract. But I really love using vanilla bean in this recipe as it adds that beautiful speckled look to the flan as well as so much flavor. Spanish flan is a very simple, made of very few ingredients, so using high quality vanilla bean elevates it.
- Tips for baking with a water bath. I will place the ramekins in a casserole or roasting pan, whatever I plan to bake them in. Then fill with the caramel and custard batter. I heat water in my gooseneck kettle (to 200°F or around this) and then once I place the baking pan in the oven I carefully fill it with the hot water. Removing the pan from the oven once baking is done is the hardest part—just be careful not to spill the hot water.
- Instead of 6 ramekins you could bake this in one, 9-inch glass pie pan for one large flan instead of individual ones. Increase the baking time by 5-8 minutes.

More Latin American and Tex-Mex Recipes
- Barbacoa
- Carnitas
- Carne Asada
- Ceviche
- Torta
- Pozole
- Elote
- Chicharron
- Avocado Salsa
- Mango Salsa
- Mole Sauce
- Chipotle Sauce
- Chimichurri Sauce
- Queso
- Enchilada Sauce
- Chicken Verde Enchiladas
- Taco Dip
- Birria Tacos
- Birria Pizza
- Arepas
- Chimichangas
- Fajitas

Flan can be served all on it’s own, no styling necessary. But in the above photos you can see I saved the used vanilla bean and styled a few of the flan with that. Another option that I think is super fun is creating crunchy sugar tops to place on top of the flan before serving. The crunchy sugar is a fun juxtaposition to the silky smooth custard—much like crème brûlée.
Sugar Top Ingredients
- Granulated white sugar
- Light corn syrup
- Water

How to make Spun Sugar
First prepare your work surface. Place a few small bowls down on a cutting board. Lightly oil them. Also be sure your work surface is covered with plastic wrap or wax paper in case some of your sugar gets off the cutting board.
In a small pot, stir together the sugar, corn syrup and water over medium heat until the sugar dissolves. Turn the heat up and use a candy thermometer to check the sugar’s temperature. Once it reaches 300°F, remove from the stove top. Allow the mixture to cool to around 280°F.
Dip a fork in the mixture. Pull the sugar up over the oiled bowls and wave it around, like a wand. This will stretch the sugar and give it time to cool some as it drops toward the bowls. I like to wear an oven mit while I do this. Always be careful when you work with really hot sugar. Once that cools, lightly oil your clean hands and gently work the spun sugar off the bowls. Lightly press to form small nests; place over the tops of your inverted flans.


Flan
Ingredients
- 1 cup granulated white sugar
- 6 egg yolks
- 14 ounces sweetened condensed milk
- 12 ounces evaporated milk
- 1 vanilla bean
Instructions
- In a small pot heat the sugar over medium heat until dissolves and turns a light brown color. It should begin to smell like caramel.
- Remove from heat and pour the liquid into the ramekins, distributing it equally.
- In a large mixing bowl stir together the egg yolks, sweetened condensed milk, evaporated milk and seeds from the vanilla bean. Stir until the ingredients are well combined. Pour into the ramekins.
- Bake at 350°F in a water bath for 45 minutes. They will still have a slight jiggle even after baking.
- Allow to fully cool and then refrigerate for at least an hour. I like to make flan the day before I plan to serve it so it can refrigerate overnight.
- Run a thin knife around the edge of the flan, between the custard and the ramekin dish. Then place a small plate over the ramekin and flip over. The flan should easily remove from the ramekin, if not give it a few light taps to loosen the bottom.
Notes
- Evaporated milk can be substituted for whole milk in this recipe.
- I use 6 egg yolks because I love the richness and color it brings to this recipe. That being said you could use 3 eggs (whites + yolks) instead. But if you do use all yolks save the white to make meringue, egg white bites or omelettes.
- Vanilla bean can be substituted for 1 teaspoon vanilla extract. But I really love using vanilla bean in this recipe as it adds that beautiful speckled look to the flan as well as so much flavor. Spanish flan is a very simple, made of very few ingredients, so using high quality vanilla bean elevates it.
- Tips for baking with a water bath. I will place the ramekins in a casserole or roasting pan, whatever I plan to bake them in. Then fill with the caramel and custard batter. I heat water in my gooseneck kettle (to 200°F or around this) and then once I place the baking pan in the oven I carefully fill it with the hot water. Removing the pan from the oven once baking is done is the hardest part—just be careful not to spill the hot water.
- Instead of 6 ramekins you could bake this in one, 9-inch glass pie pan for one large flan instead of individual ones. Increase the baking time by 5-8 minutes.
Nutrition
Related: How to Build a Champagne Tower, French 75, Dirty Martini, French Martini.
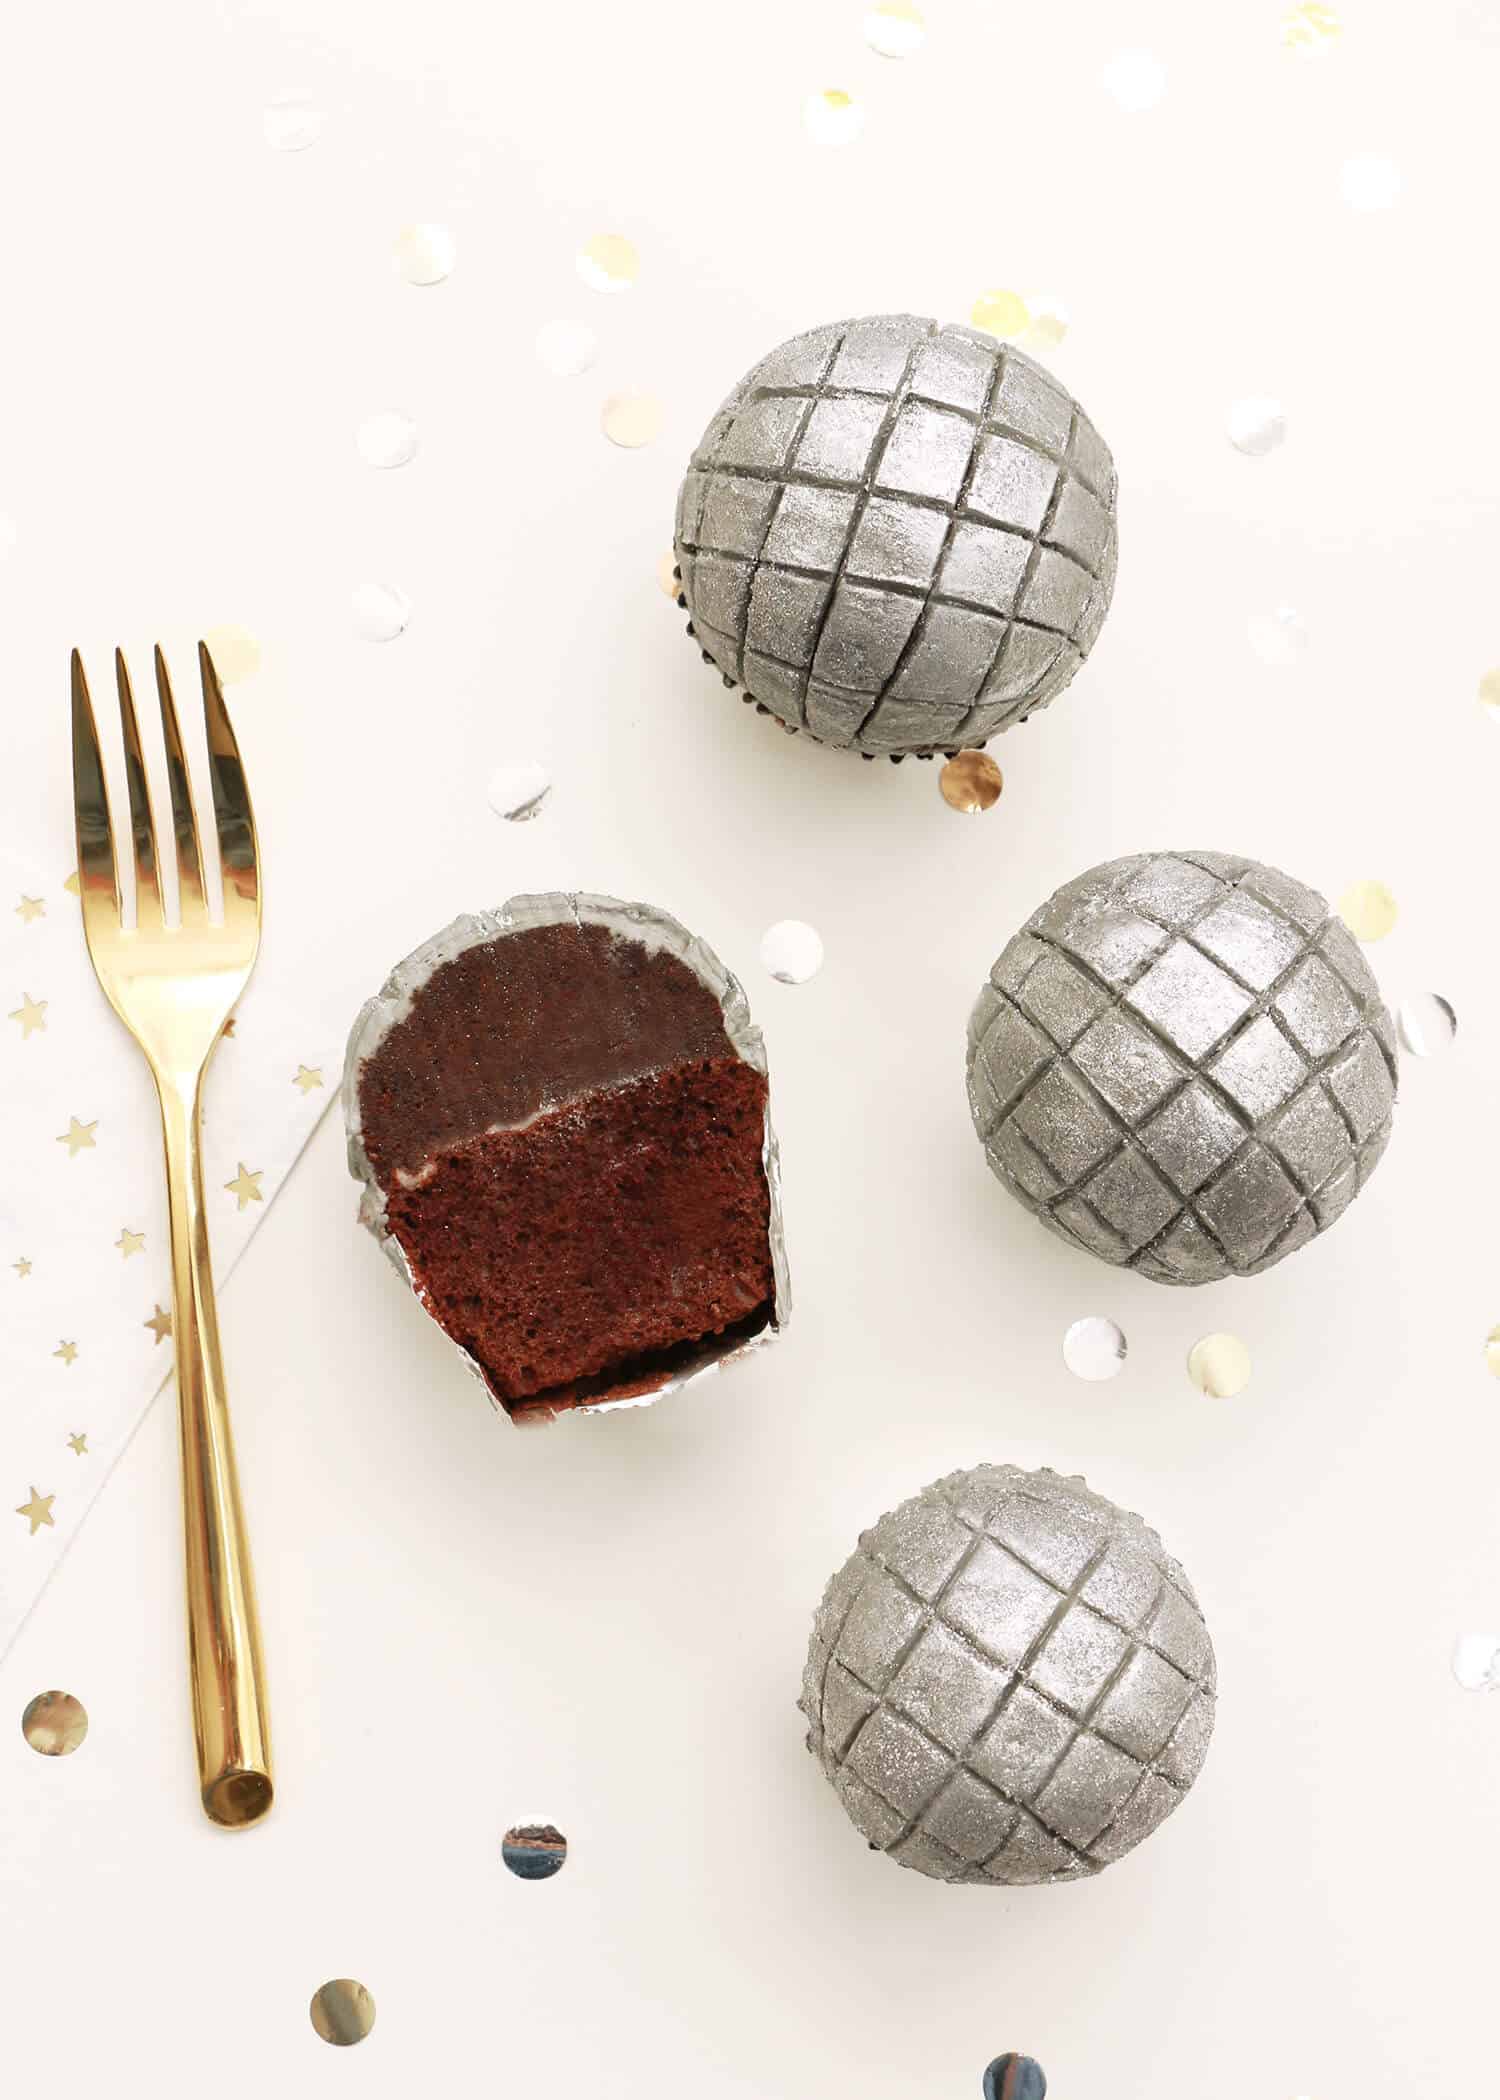
To celebrate this year, I thought that I’d make some disco ball cupcakes because what goes more perfectly with NYE than shiny, glittery disco balls?!
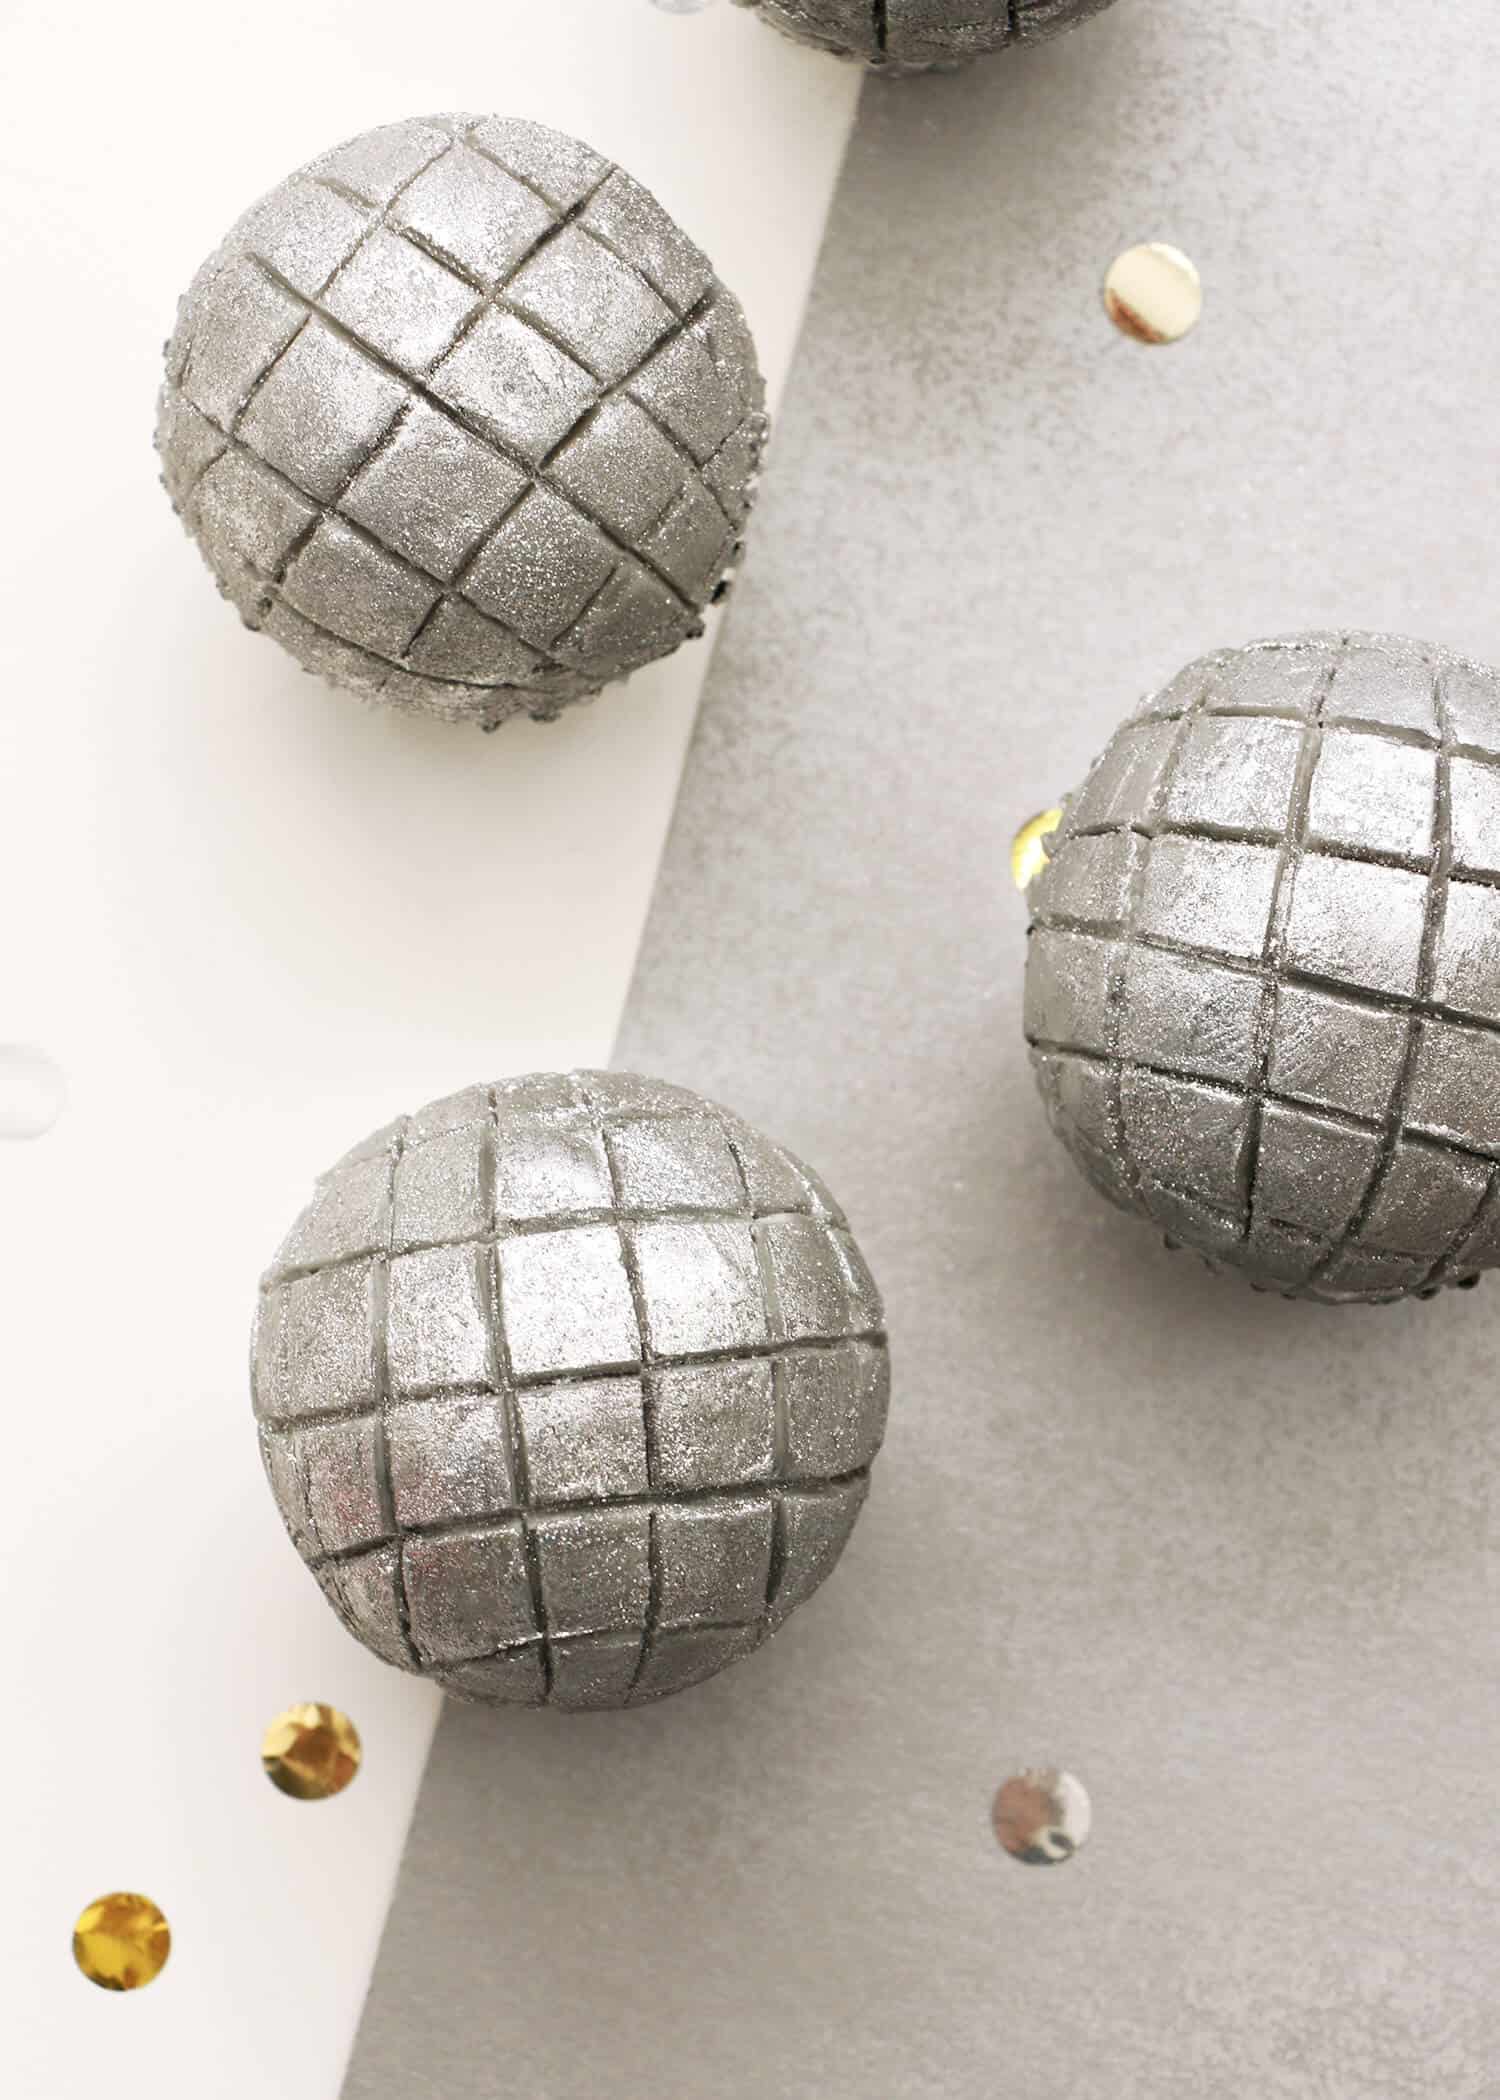
You might think these are cupcakes topped with fondant tiles at first glance, but NOPE, no fondant on here! Believe it or not, there isn’t anything on top of these aside from buttercream frosting and a little edible glitter.
I’ve covered all the details below; follow along so that you too can start the new year off on the sweetest, sparkliest note.
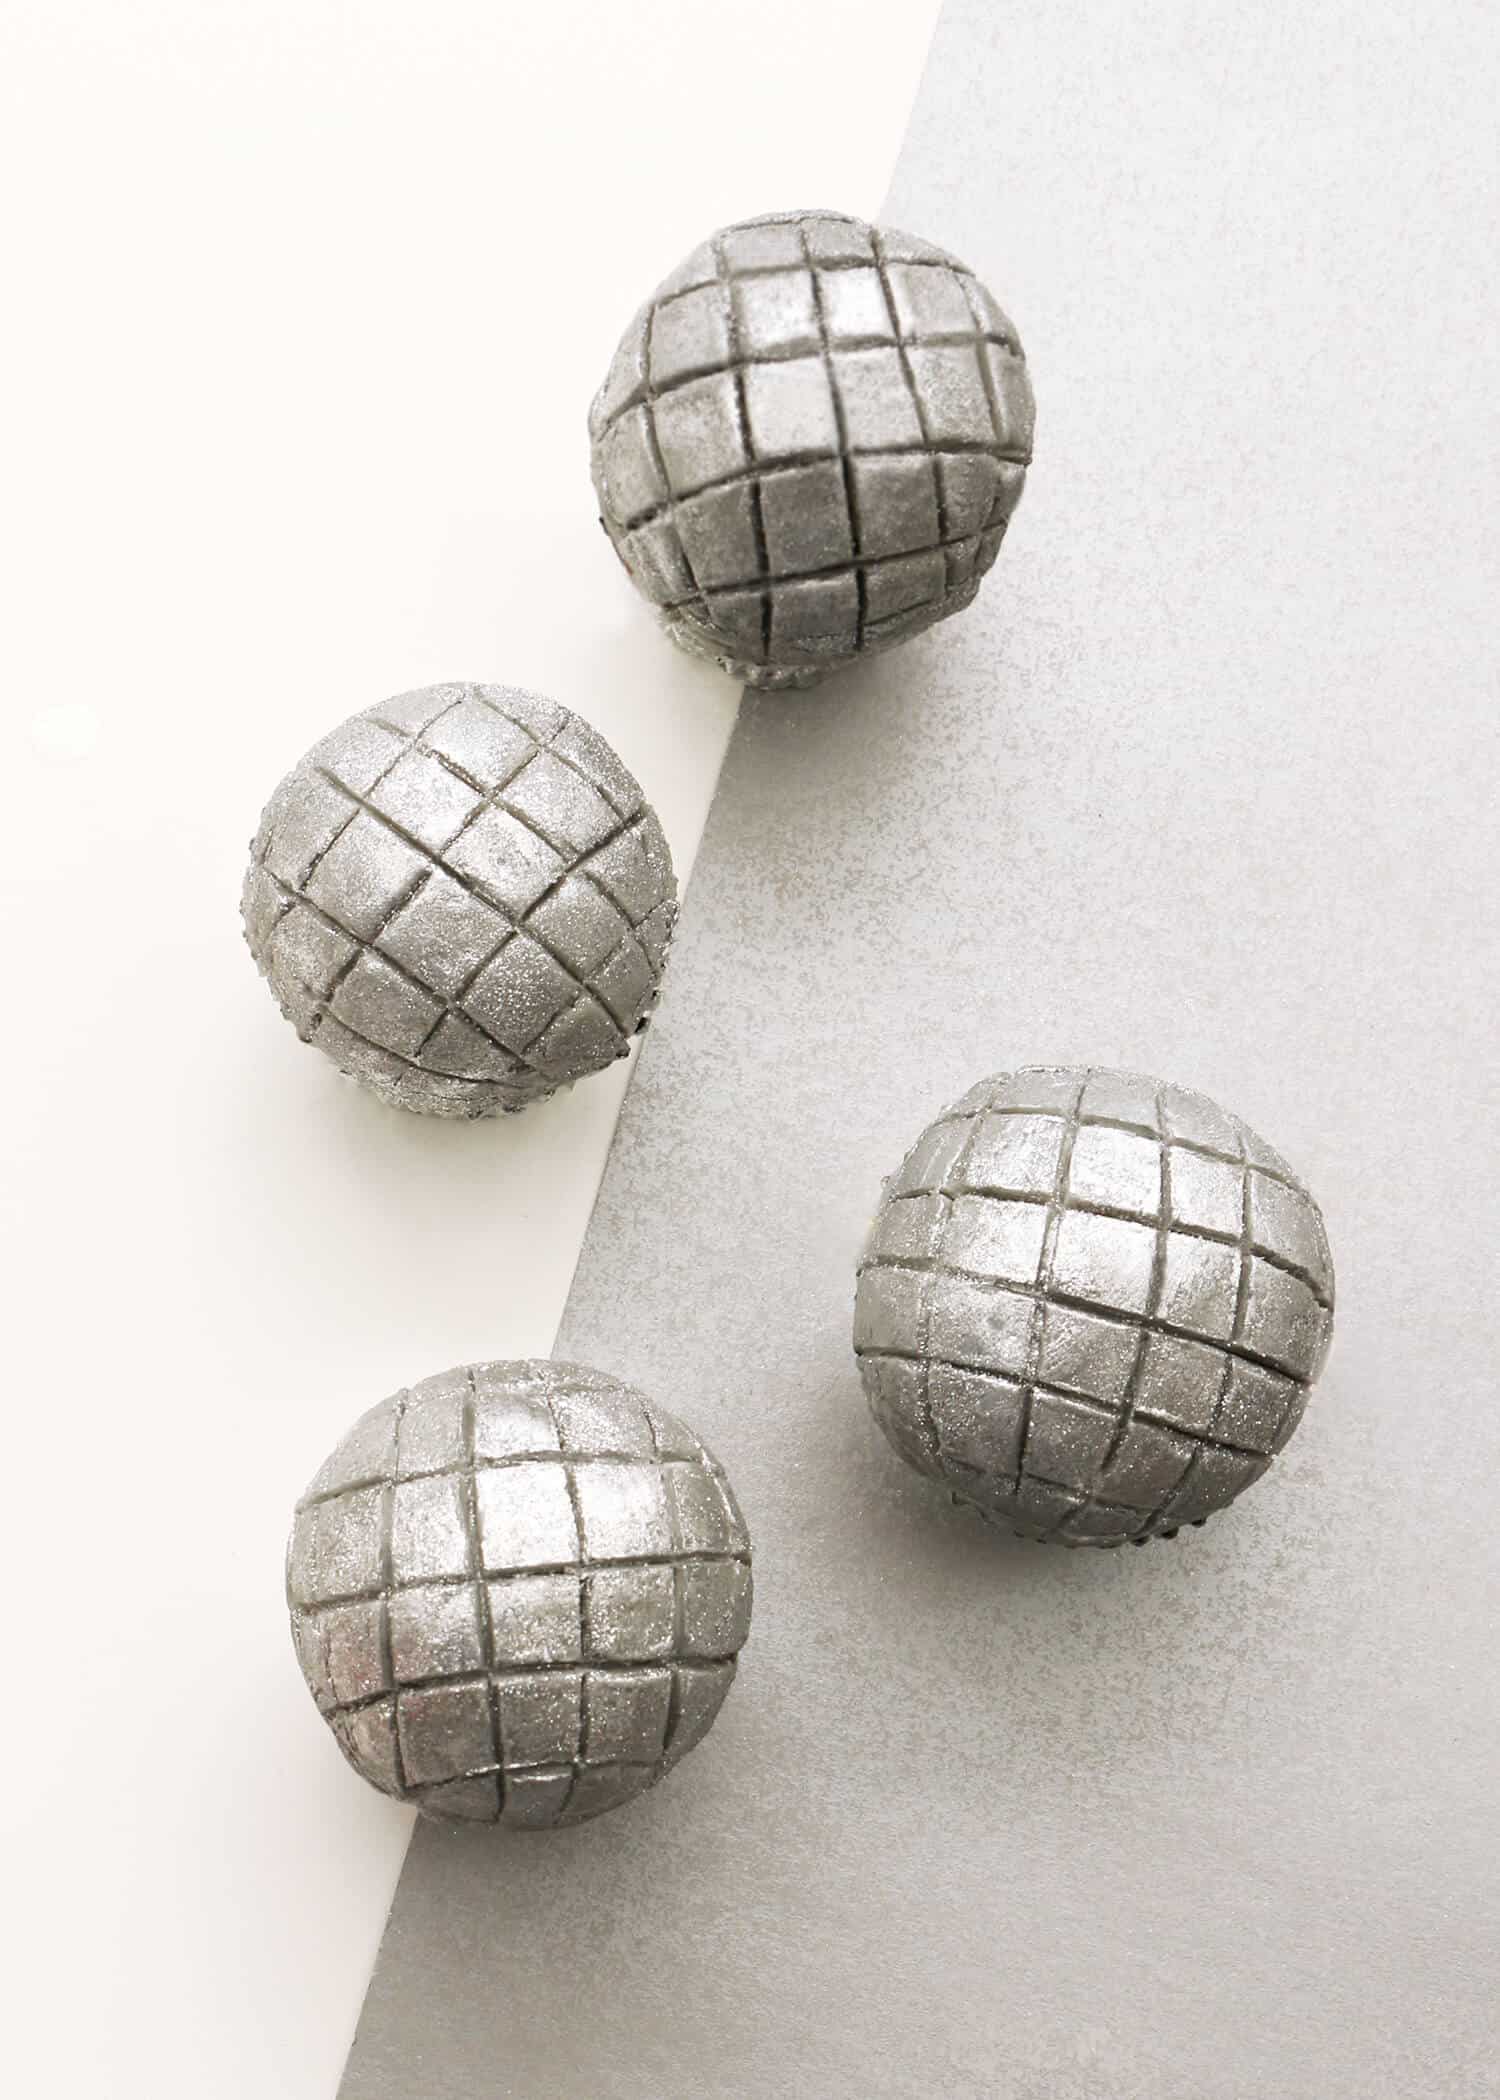 Disco Ball Cupcakes, makes 12 cupcakes
For the cupcakes:
1 box chocolate cake mix
silver cupcake liners
For the buttercream frosting:
2 cups unsalted butter, softened
4 cups powdered sugar
1 tablespoon vanilla extract
black gel food coloring
edible silver luster dust
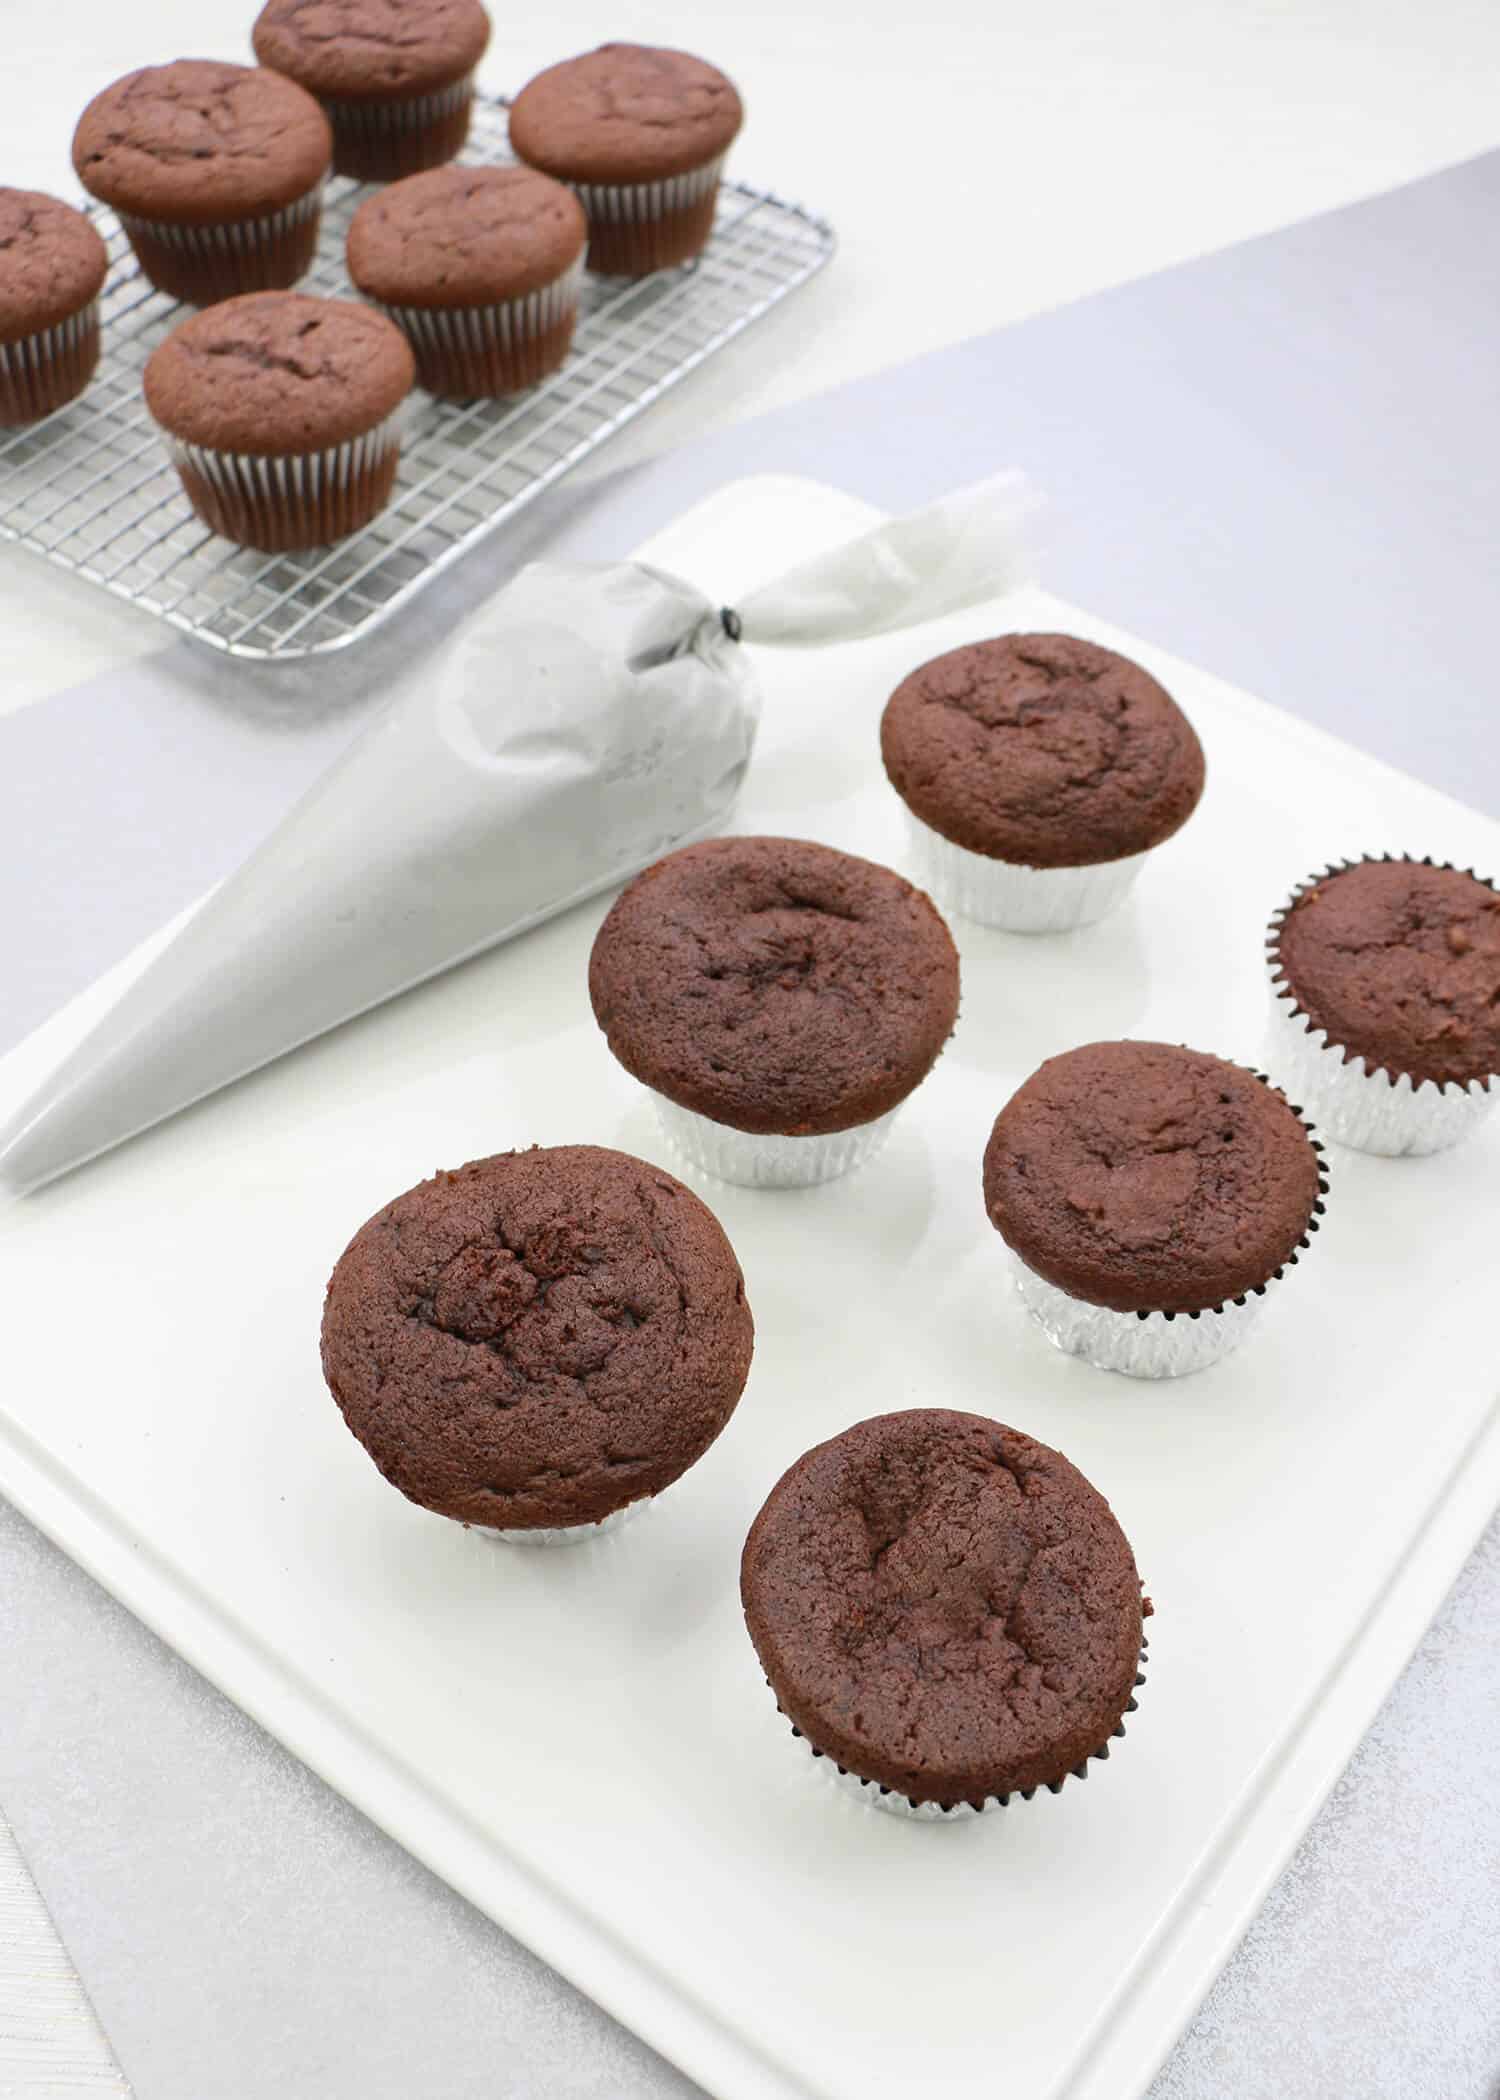 Mix your box cake with the ingredients listed on the package. Line cupcake pans with silver cupcake liners. Even though the recipe says you’ll be making 12 cupcakes, each disco ball is actually two cupcakes (bonus!), so fill all 24 liners. Bake cupcakes at 325°F for 25 minutes.
Once baked, divide the cupcakes by the shape of their tops. Set the 12 most level cupcakes together to serve as the bases for each disco ball, and the 12 larger (more dome-shaped) cupcakes together. Allow the cupcakes to cool to room temperature.
While the cupcakes are cooling, prepare your buttercream. In a large bowl or bowl of your stand mixer, beat the butter on low speed for 1 minute.
Gradually add in the powdered sugar and vanilla extract, and beat until smooth. Add in one small drop of black gel food coloring. Mix until the color is combined. If the gray is too light, add a little more until you’ve achieved the most similar shade to silver.
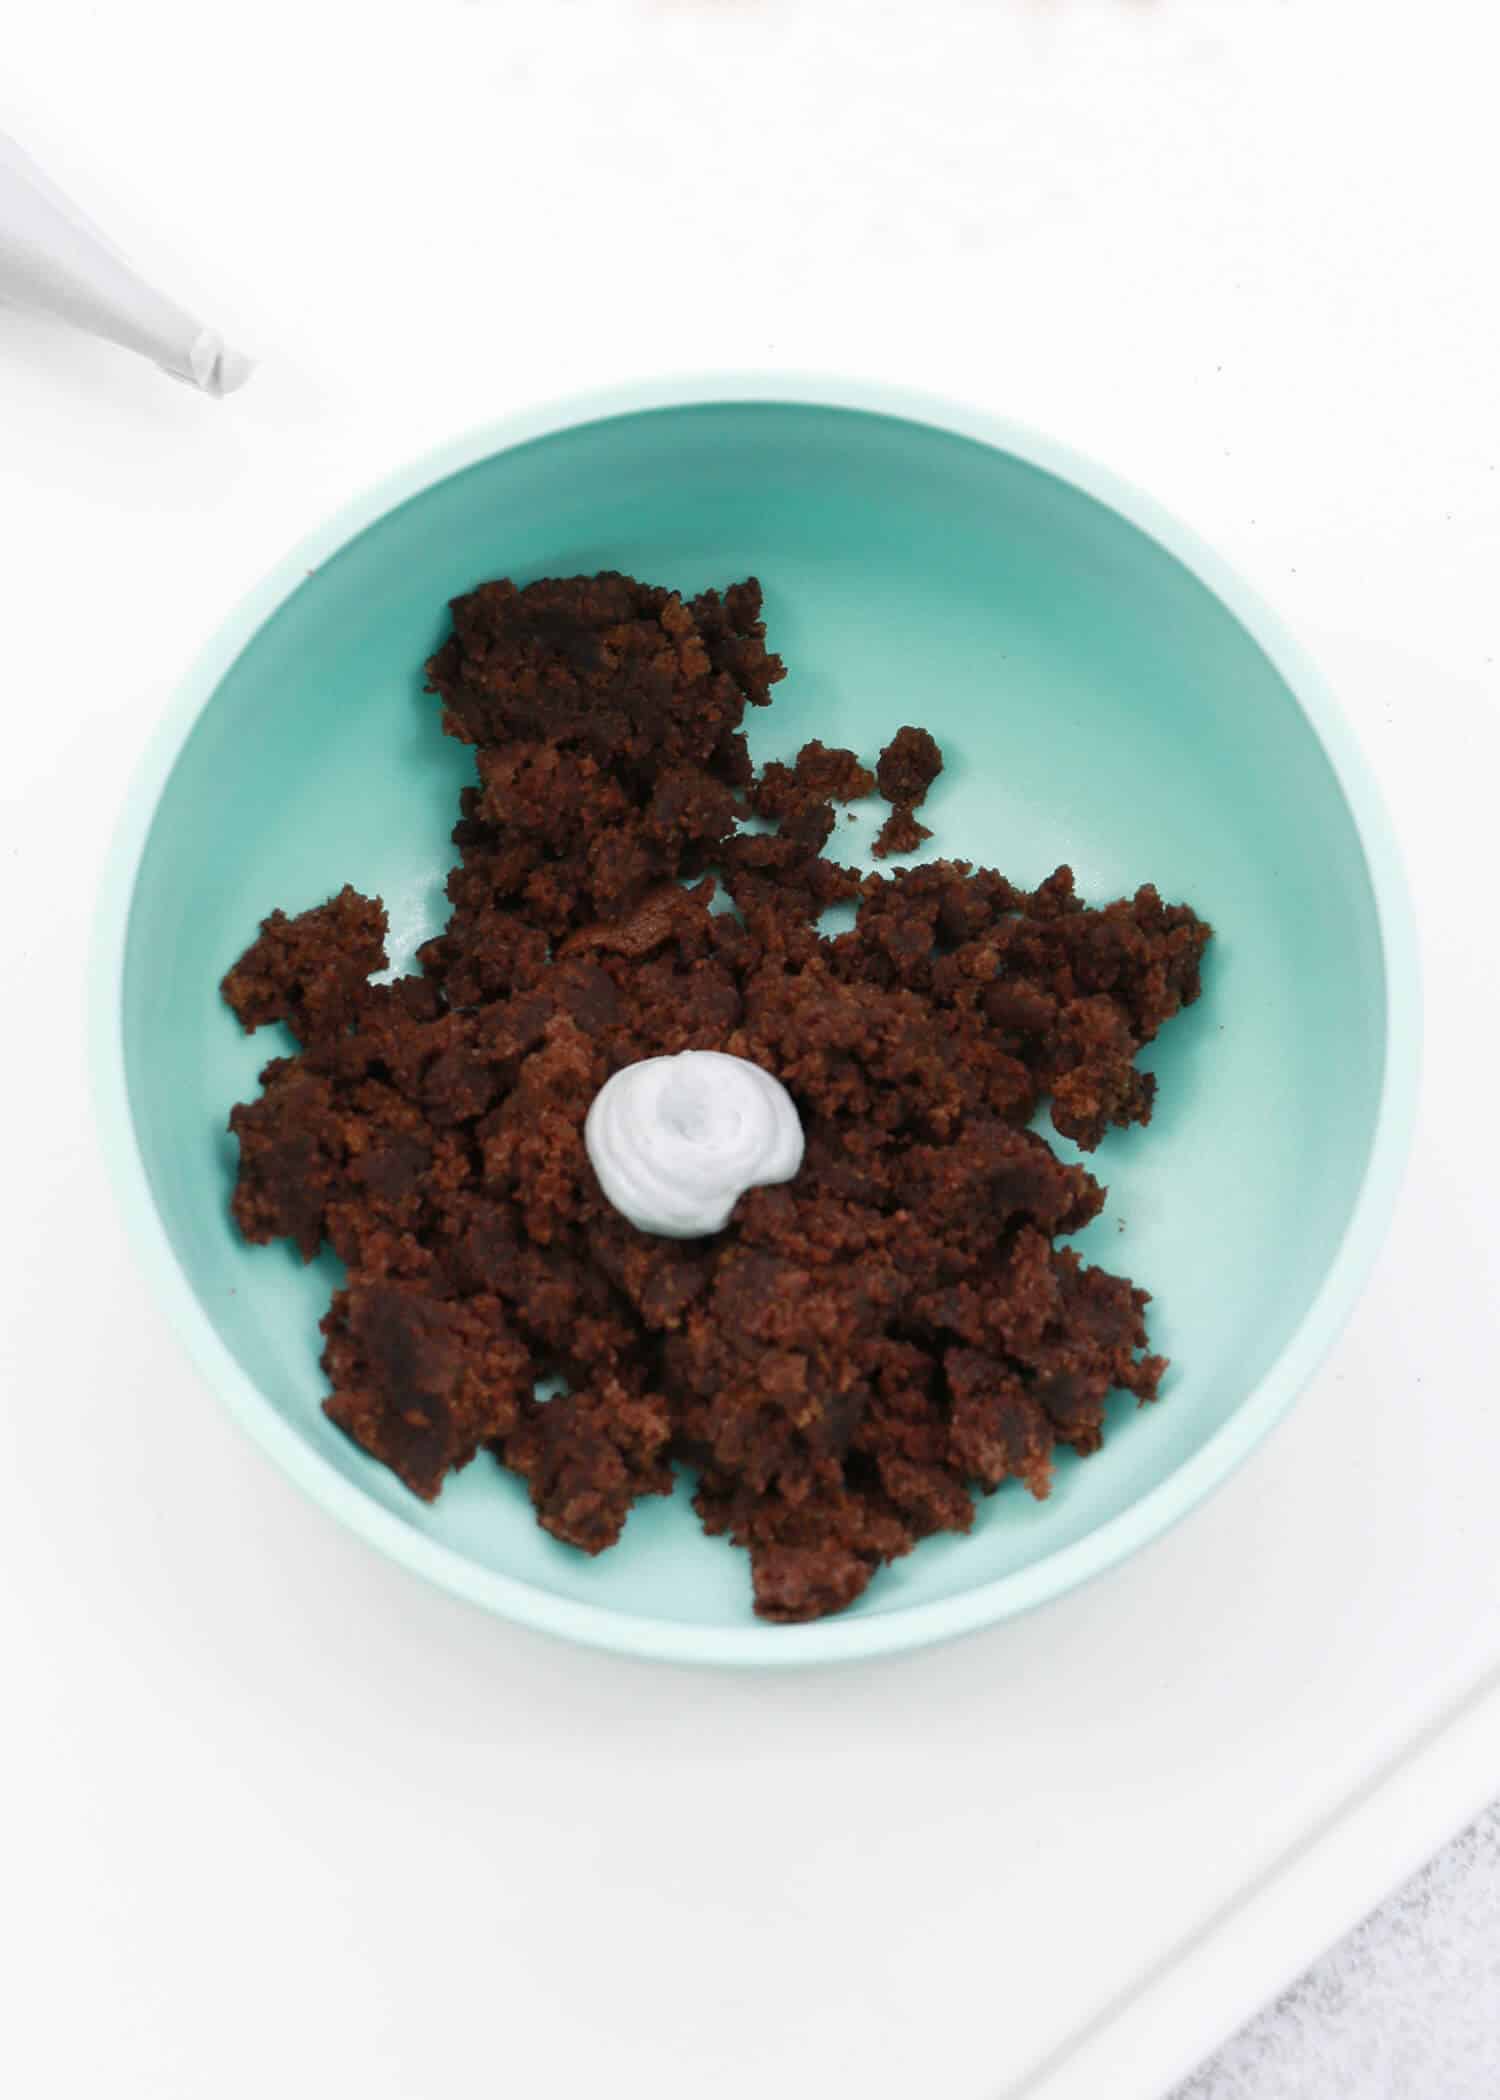 In a bowl, add one of your large (domed) cupcakes and break it down with your hands until you have a bowl of crumbs. Add one large dollop of frosting into the bowl, mix together with your hands (just as you would if you were making a cake pop), and roll the mixture into a ball shape.
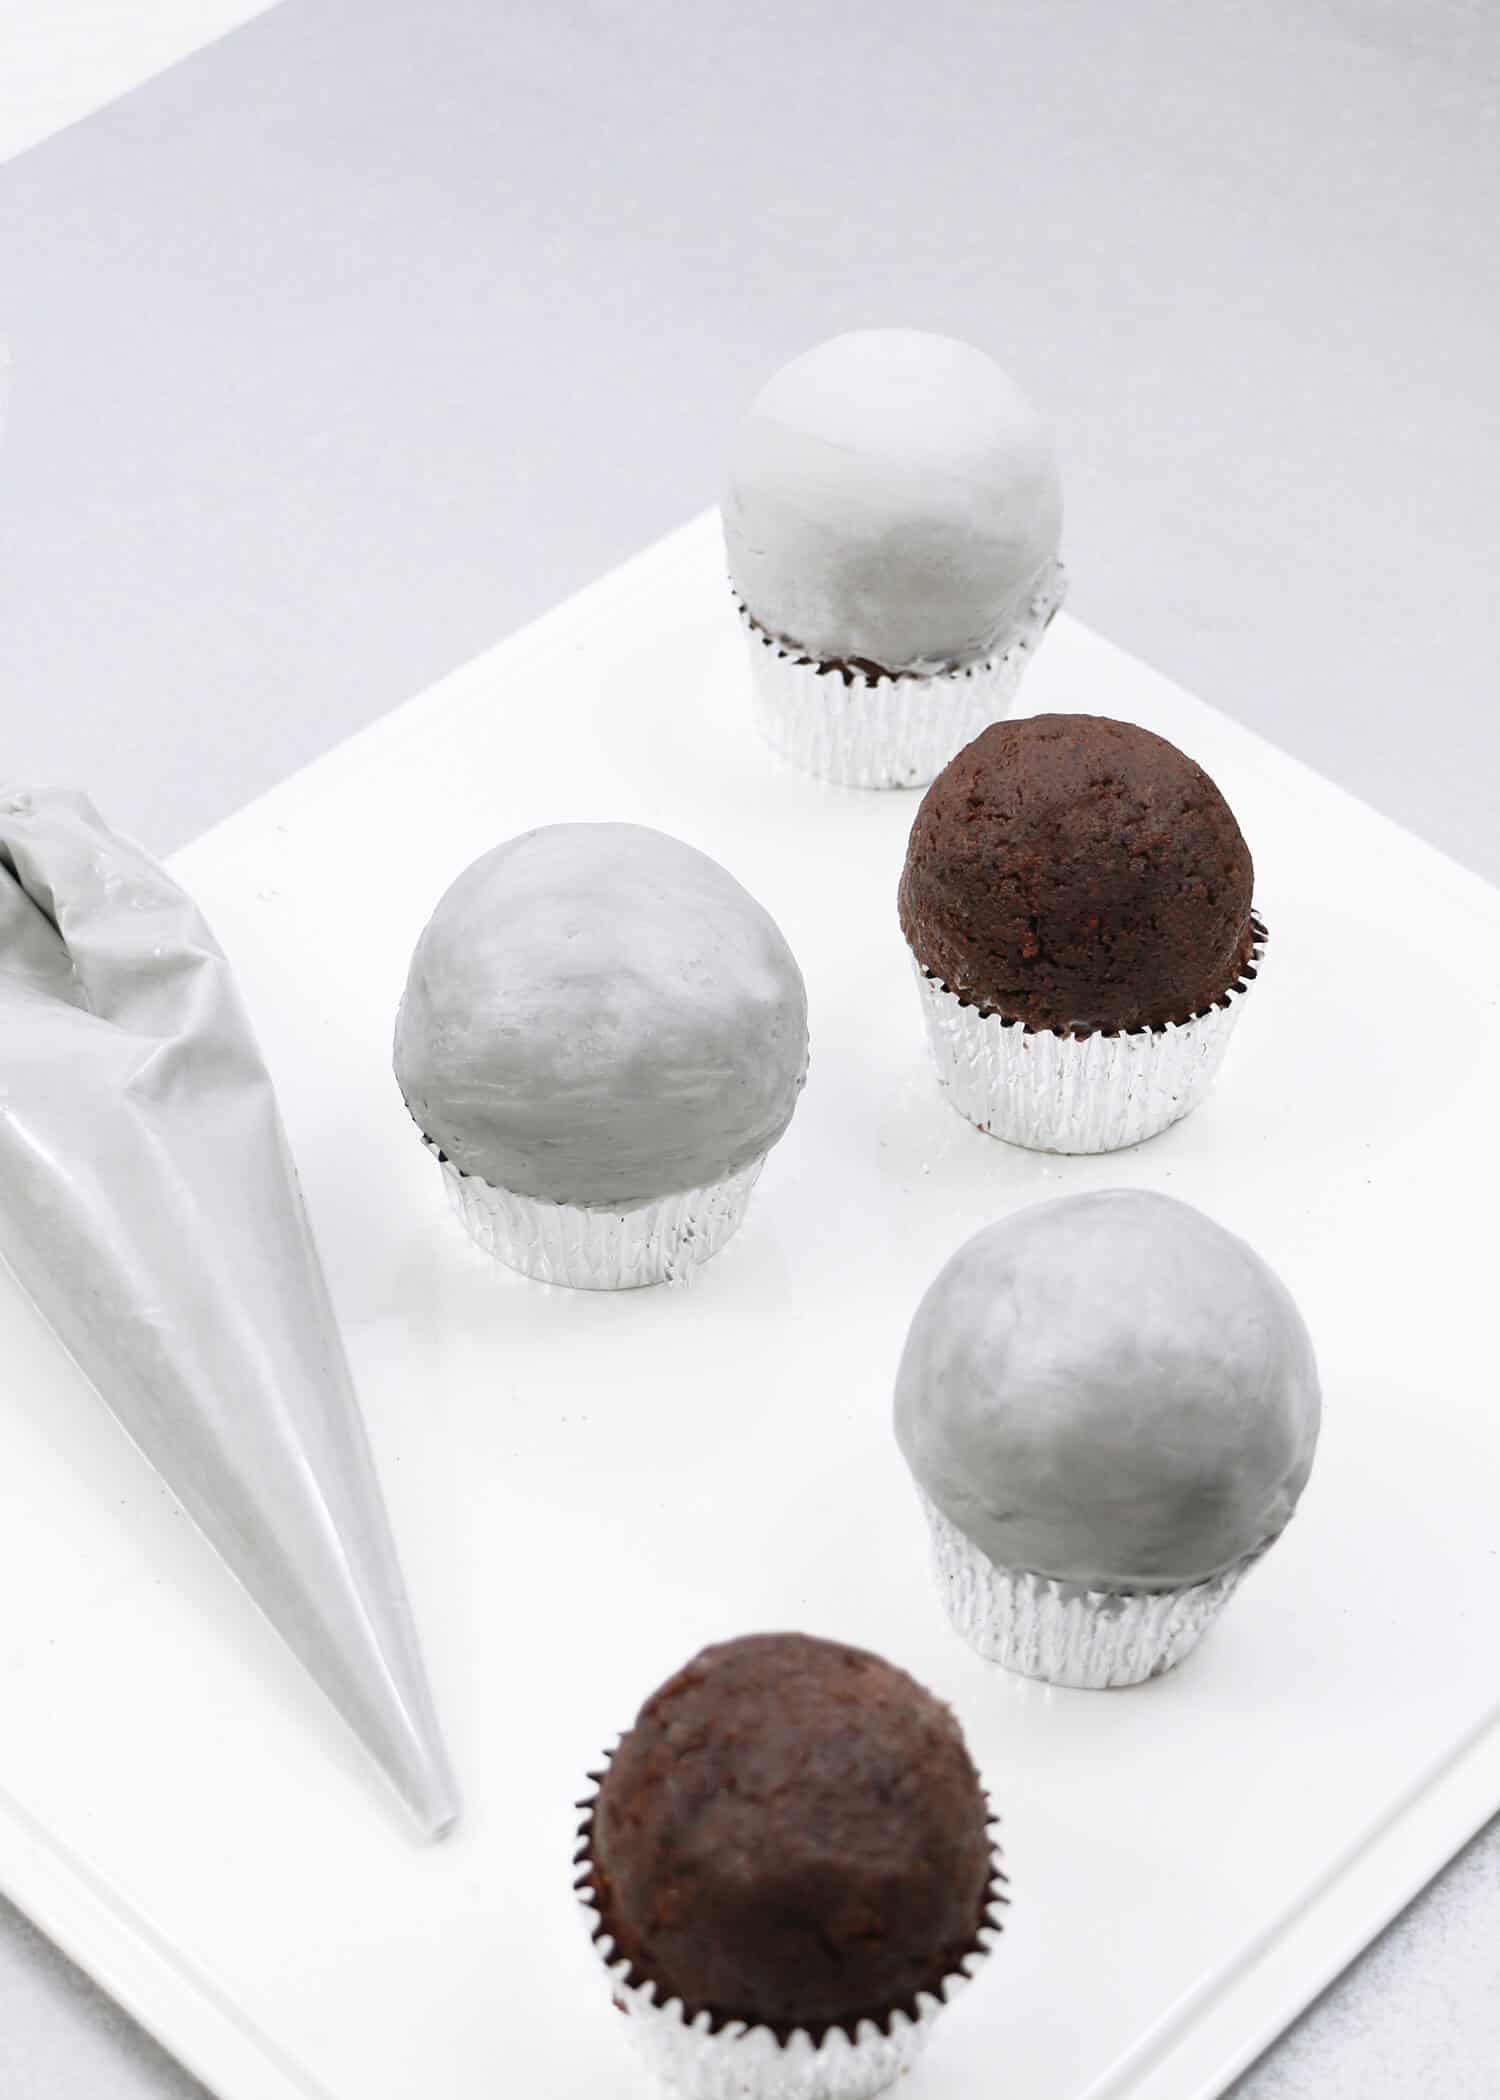 Lightly frost the top of one of your smaller (more level) cupcakes, and then position the cake ball on top. Use your palm to gently shape the cake ball to a dome shape.
Frost with a thin layer of gray buttercream, smooth with a spatula (or your finger), and then place the cupcake in the freezer for 5-10 minutes to allow the frosting to set. Repeat the process with your other cupcakes as well, pairing each of the smaller cupcakes with a larger cupcake for the topper.
You’ll notice that once the frosting sets in the freezer it becomes MUCH easier to work with—any uneven spots can easily be smoothed with your fingers once the frosting has firmed.
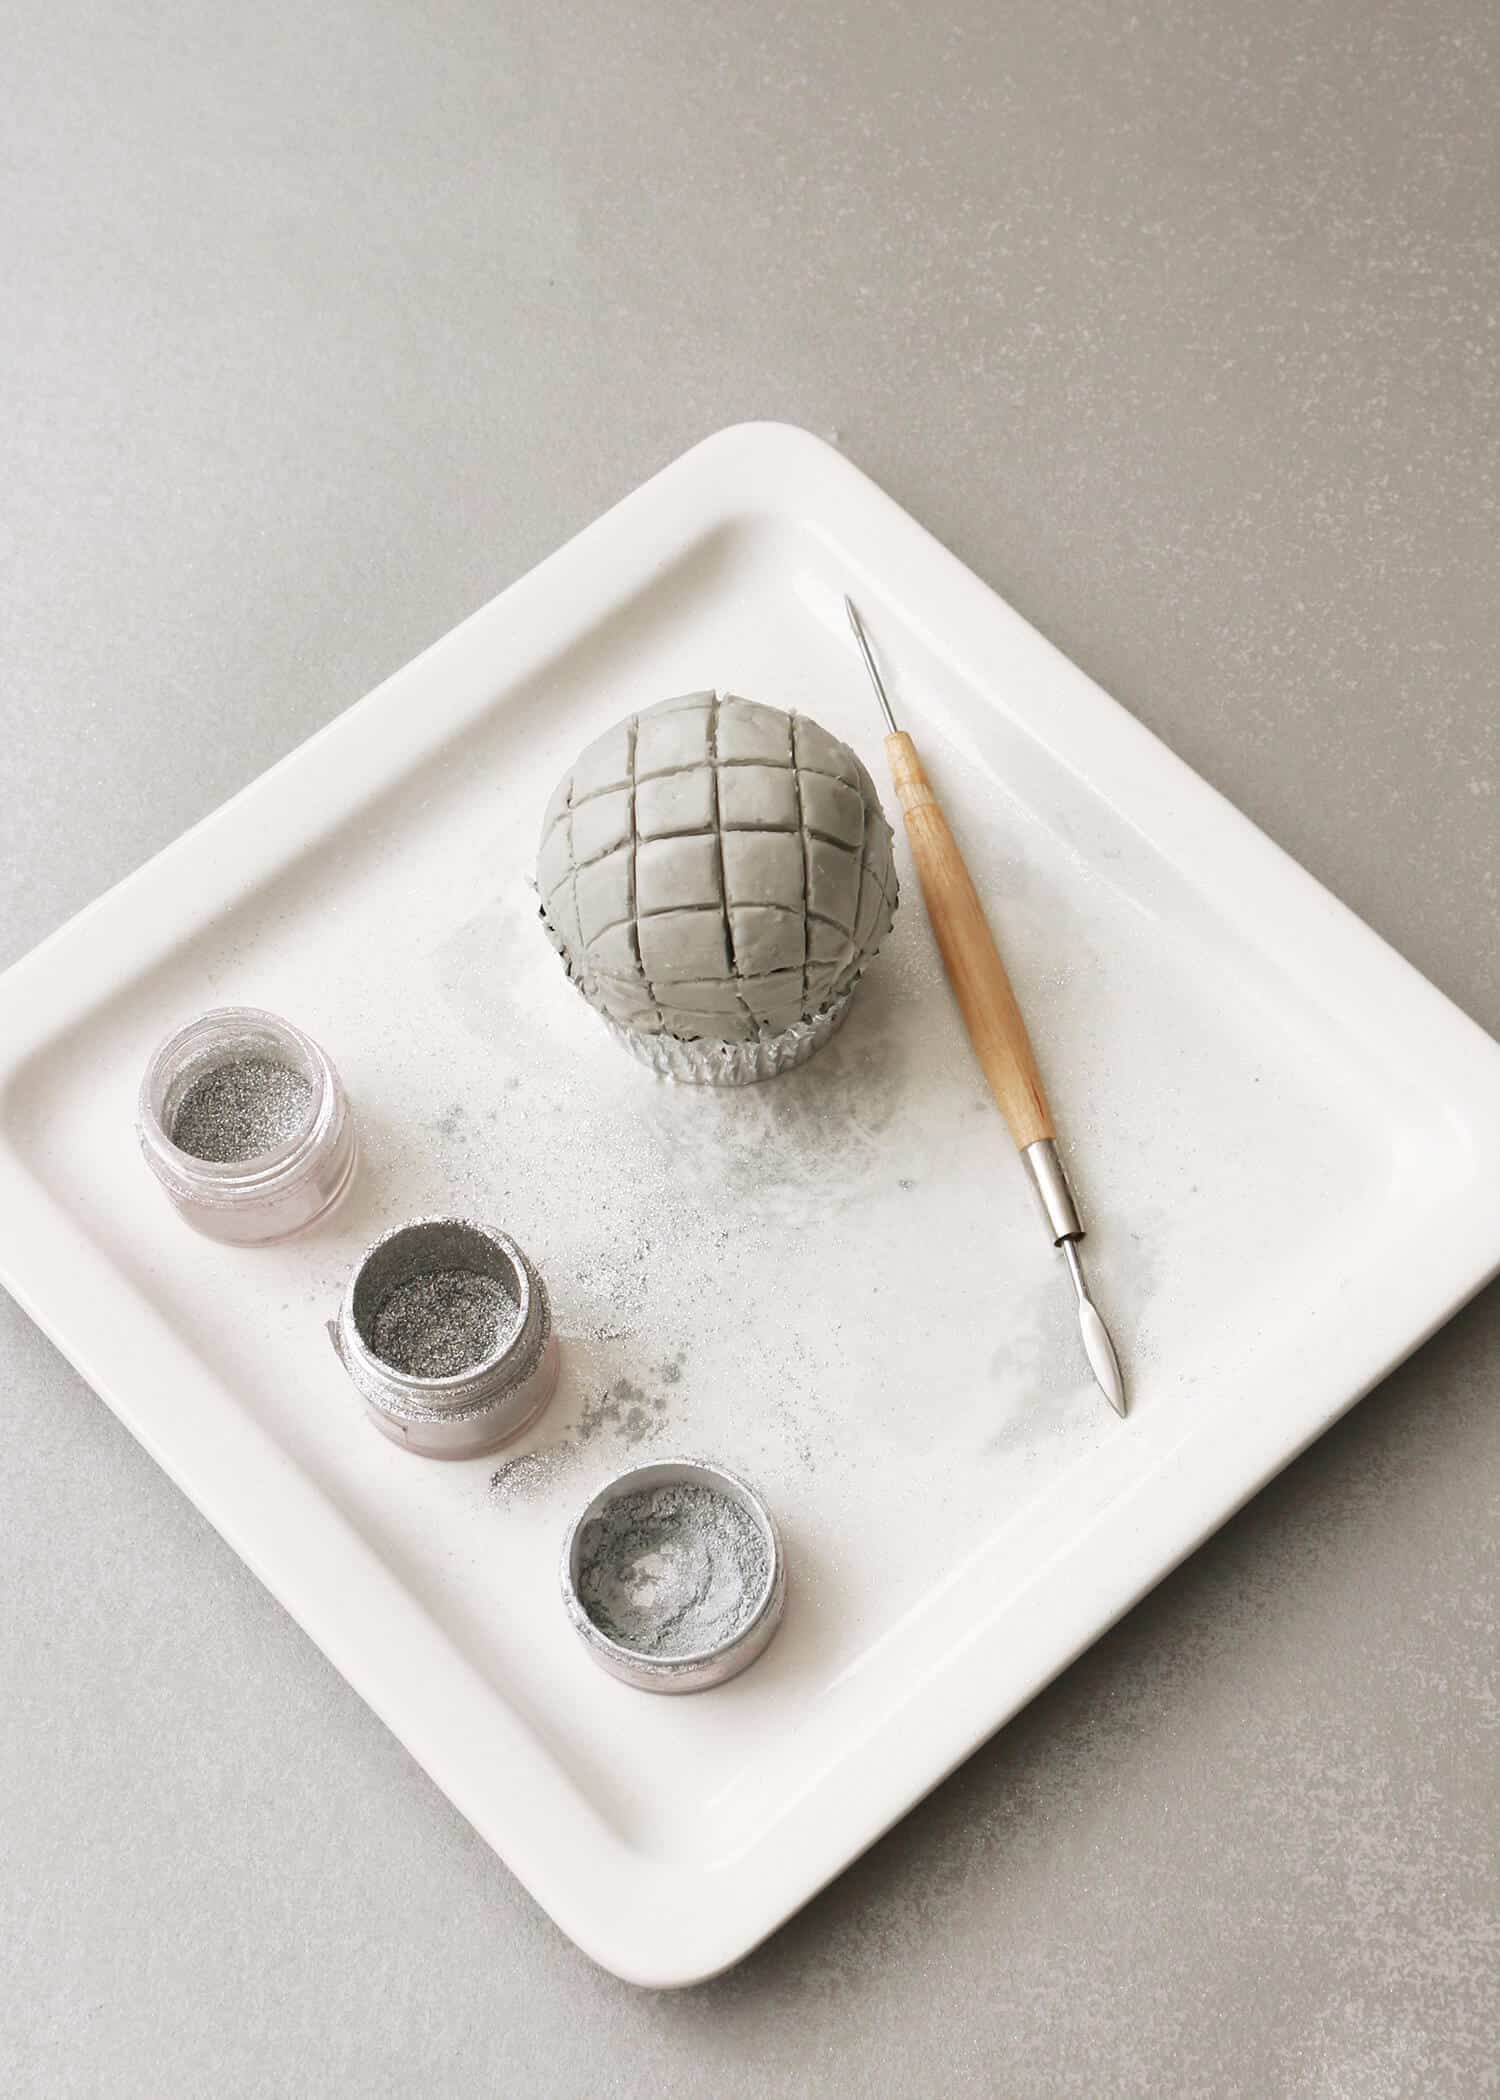 Take a couple of your cupcakes out of the freezer and allow them to slightly come to room temperature. As they do, make your indentations into the frosting.
Use a trussing needle, toothpick, or any flat edge (ruler, spatula, etc.) to make horizontal and vertical lines across the cupcake, roughly 1/2-inch apart.
If you notice your frosting is cracking as you make the indentations, the frosting is too cold. Allow it to sit untouched for a little longer if you’re having that issue.
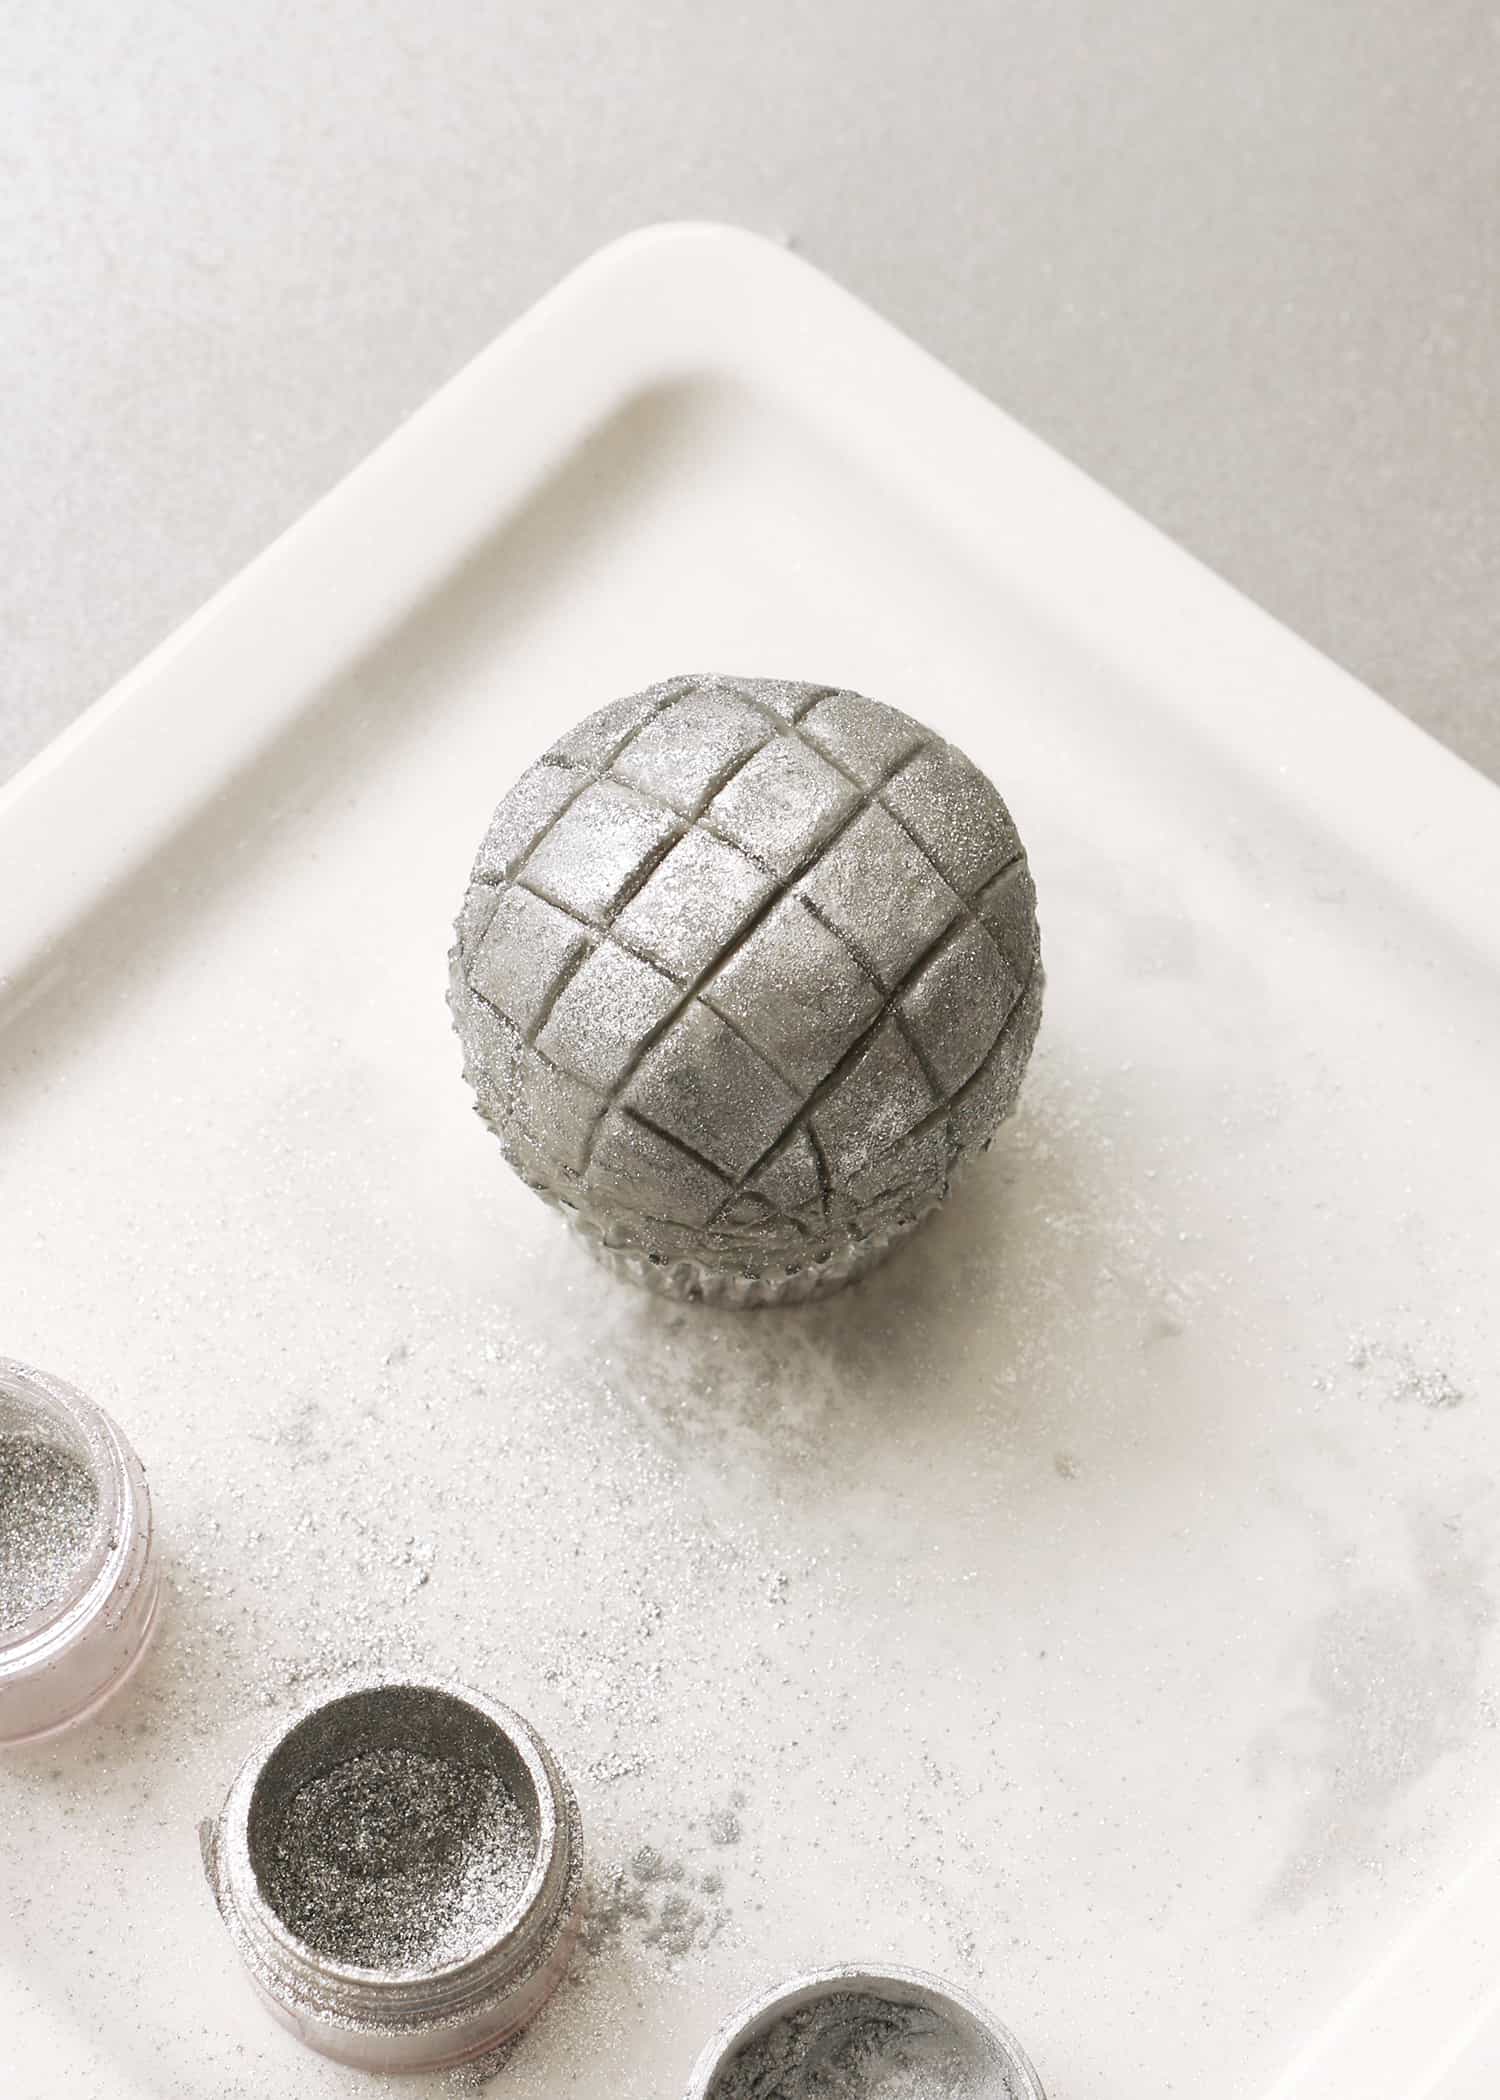 Once your lines have been made, use your fingertip to add the silver luster dust onto the surface of each cupcake. Make sure the frosting is still cold while you’re doing this.
If it’s warmed too much while you were adding the lines, place the cupcake back into the fridge or freezer for a few minutes until the frosting is firm to the touch.
And voilà, a disco ball cupcake! Repeat the indenting and glittering steps with your other domed cupcakes until you have a dozen disco balls ready to party!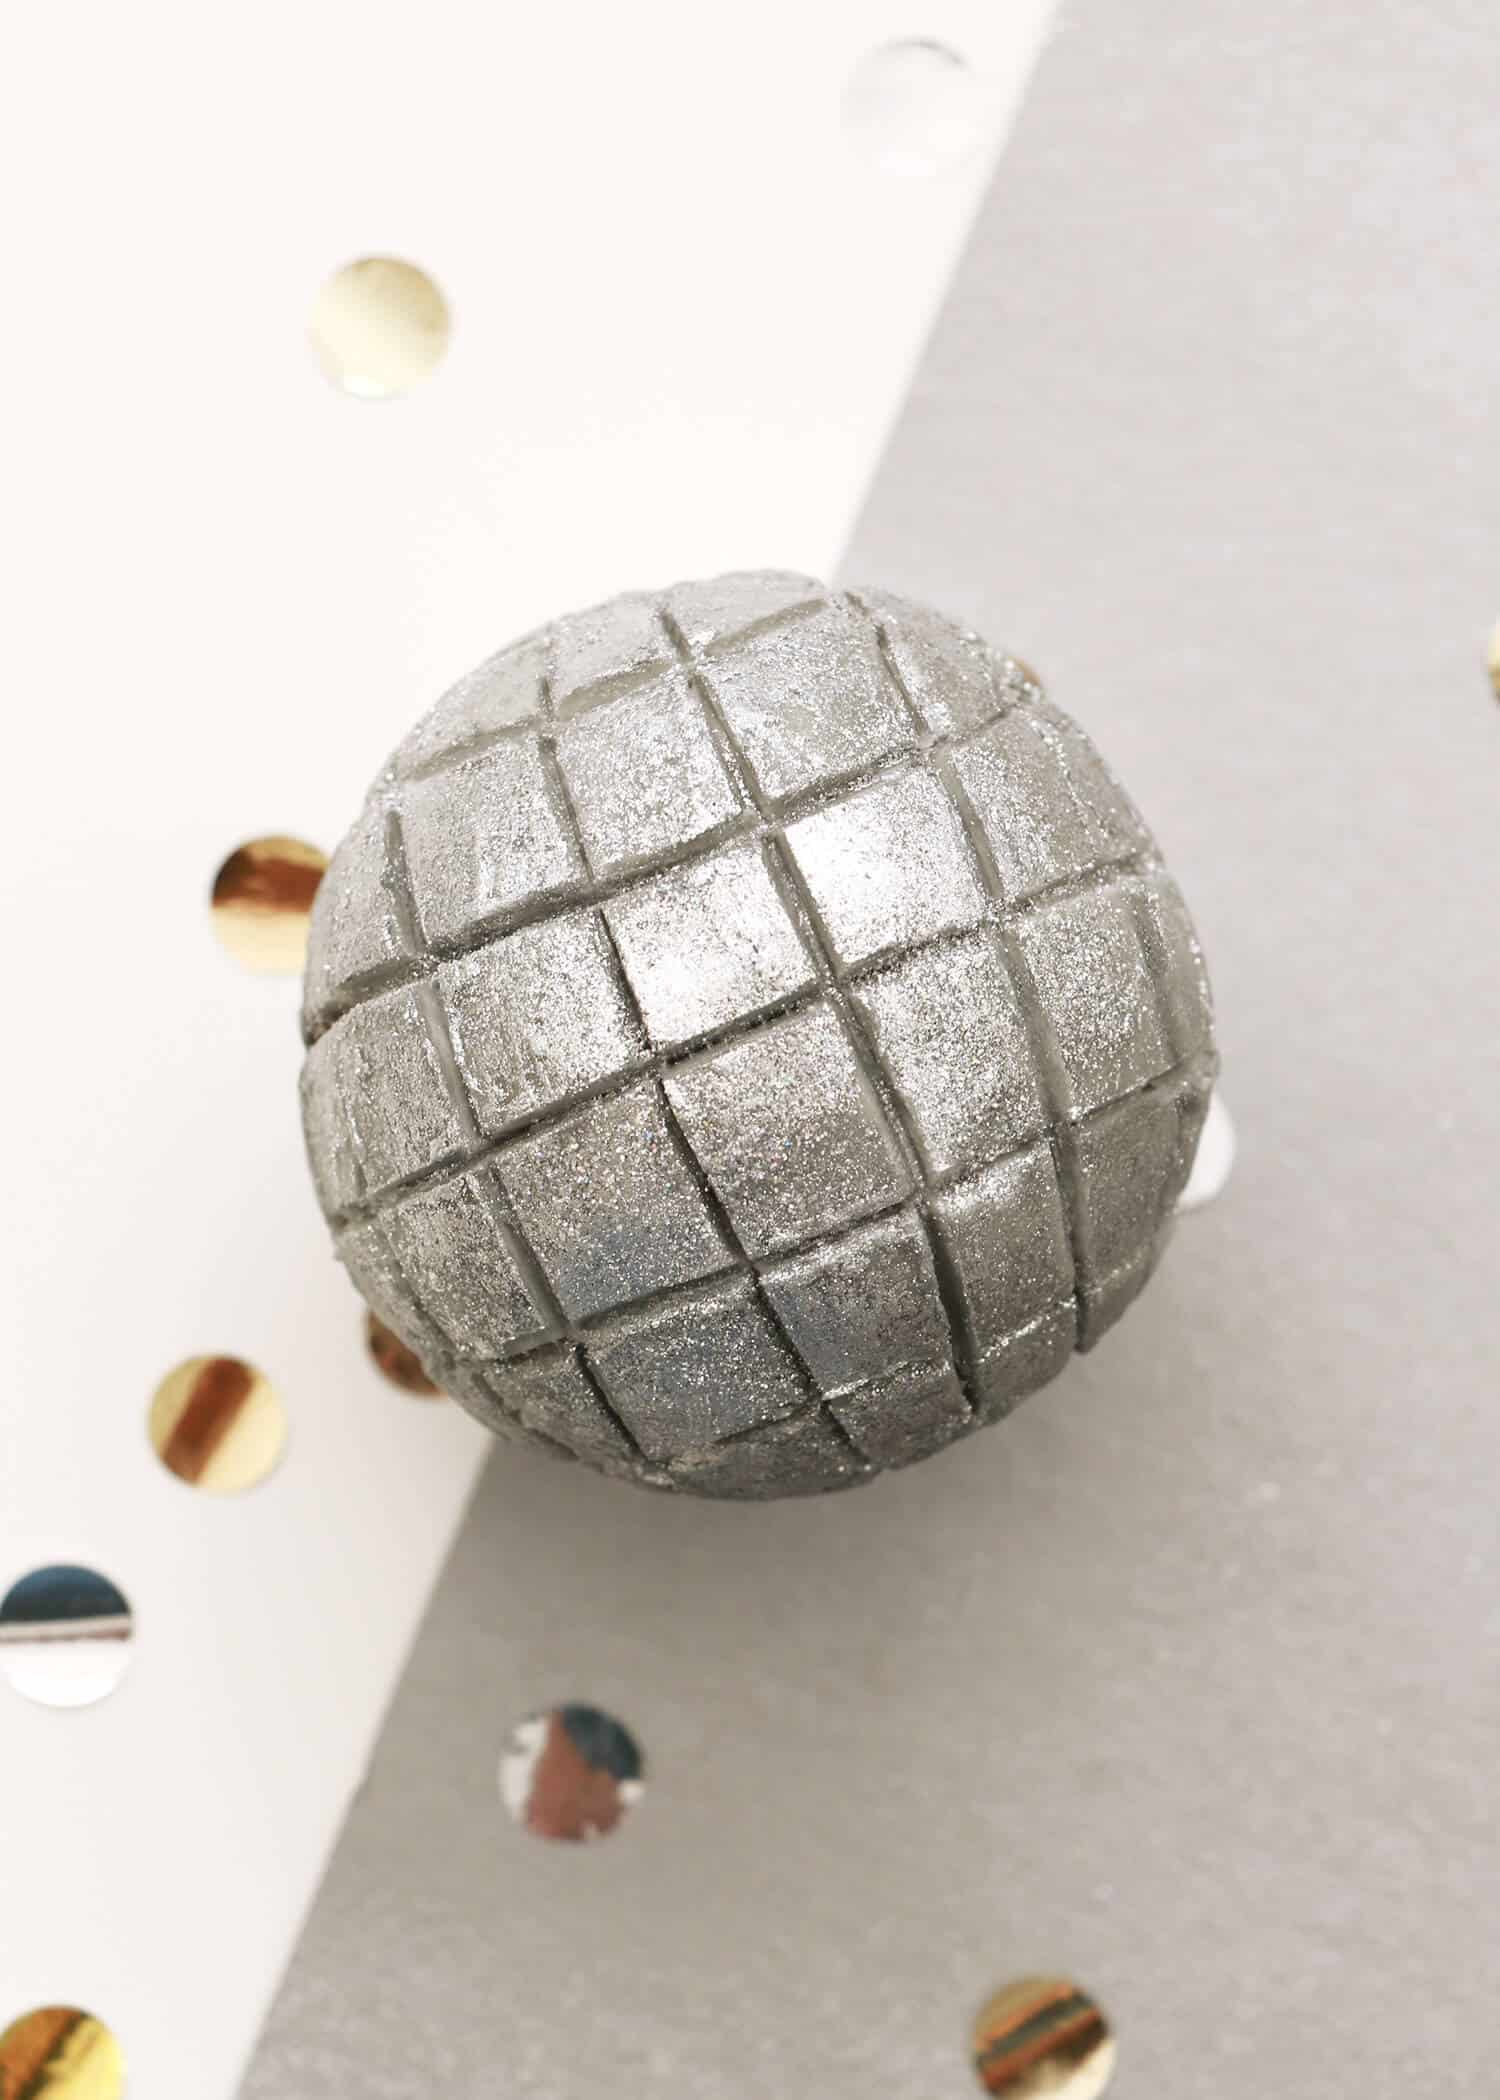 These cupcakes do take some time with all the in-and-out of the freezer business, but they’re totally worth it. If you’re attending or hosting a New Year’s party, they are the perfect treat to ring in the new year with! xo. Alana
Disco Ball Cupcakes
Ingredients
For the Cupcakes:
- 1 box chocolate cake mix
- silver cupcake liners
For the buttercream frosting:
- 2 cups unsalted butter softened
- 4 cups powdered sugar
- 1 tablespoon vanilla extract
- gel food coloring black
- edible silver luster dust
Instructions
- Mix your box cake with the ingredients listed on the package. Line cupcake pans with silver cupcake liners. Even though the recipe says you’ll be making 12 cupcakes, each disco ball is actually two cupcakes (bonus!) so fill all 24 liners. Bake cupcakes at 325°F for 25 minutes. Once baked, divide the cupcakes by the shape of their tops. Set the 12 most level cupcakes together to serve as the bases for each disco ball, and the 12 larger (more dome-shaped) cupcakes together. Allow the cupcakes to cool to room temperature.
- While the cupcakes are cooling, prepare your buttercream. In a large bowl or bowl of your stand mixer, beat the butter on low speed for 1 minute. Gradually add in the powdered sugar and vanilla extract, and beat until smooth. Add in one small drop of black gel food coloring. Mix until the color is combined. If the gray is too light, add a little more until you’ve achieved the most similar shade to silver.
- In a bowl, add one of your large (domed) cupcakes and break it down with your hands until you have a bowl of crumbs. Add one large dollop of frosting into the bowl, mix together with your hands (just as you would if you were making a cake pop), and roll the mixture into a ball shape.
- Lightly frost the top of one of your smaller (more level) cupcakes, and then position the cake ball on top. Use your palm to gently shape the cake ball to a dome shape. Frost with a thin layer of gray buttercream, smooth with a spatula (or your finger), and then place the cupcake in the freezer for 5-10 minutes to allow the frosting to set. Repeat the process with your other cupcakes as well, pairing each of the smaller cupcakes with a larger cupcake for the topper. You’ll notice that once the frosting sets in the freezer it becomes MUCH easier to work with—any uneven spots can easily be smoothed with your fingers once the frosting has firmed.
- Take a couple of your cupcakes out of the freezer and allow them to slightly come to room temperature. As they do, make your indentations into the frosting. Use a trussing needle, toothpick, or any flat edge (ruler, spatula, etc.) to make horizontal and vertical lines across the cupcake, roughly 1/2-inch apart. If you notice your frosting is cracking as you make the indentations, the frosting is too cold. Allow it to sit untouched for a little longer if you’re having that issue.
- Once your lines have been made, use your fingertip to add the silver luster dust onto the surface of each cupcake. Make sure the frosting is still cold while you’re doing this. If it’s warmed too much while you were adding the lines, place the cupcake back into the fridge or freezer for a few minutes until the frosting is firm to the touch. And voilà, a disco ball cupcake! Repeat the indenting and glittering steps with your other domed cupcakes until you have a dozen disco balls ready to party!