Plus, there are SO many different ideas for clay bead bracelets! I’m going to share lots in this post, but you can dream up so many more.
Clay beads are usually made of polymer clay and come in any and every color you can think of. Clay bead bracelets are fun to make for many ages, including older kids.
I actually bought my 13-year-old niece the same clay bead kit I bought myself and we both love making jewelry from it. Also, keep in mind any of these clay bead bracelet ideas could be repeated or made larger into a necklace if you wanted.
Related: Shrinky Dinks – Ultimate Guide, How to Make Friendship Bracelets
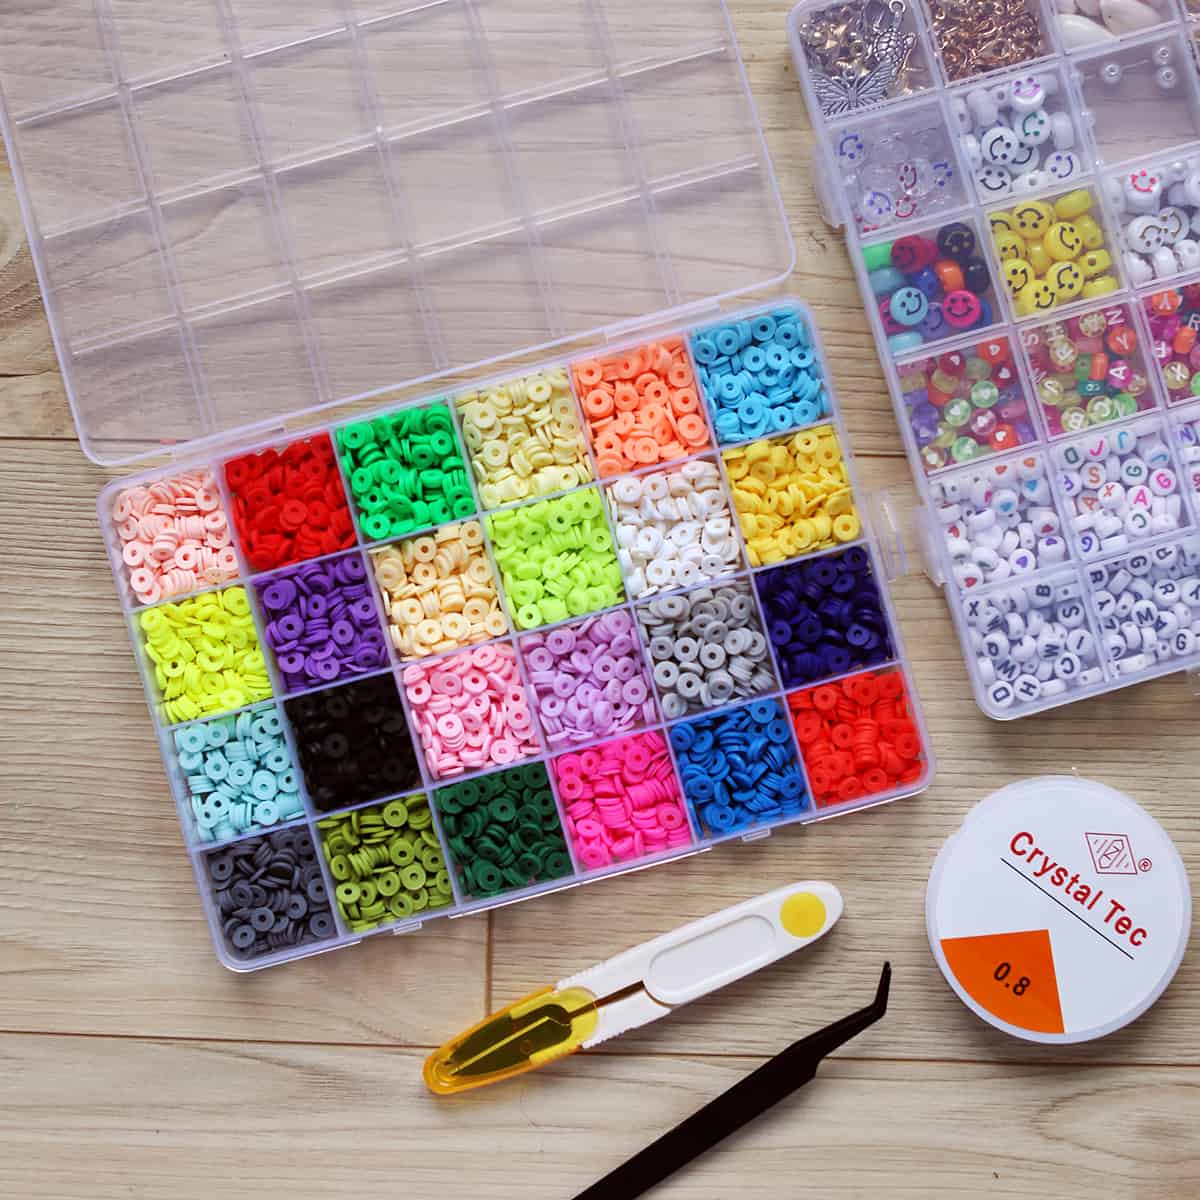
Clay Bead Bracelet Supplies:
- Clay beads
- Elastic cord/Crystal string – I like to use colors but clear works well, too.
- Acrylic letter beads and other accent beads or charms (some kits come with these)
- Crimping beads – for closures
- Connectors – I use these on bracelets with an elastic cord so you can pull it over your hand, so you don’t need to fasten a clasp, which can be difficult one-handed.
- Scissors – the smaller, the better (some jewelry pliers would work for this too)
- Jewelry pliers – for crimping beads and other jewelry making tasks
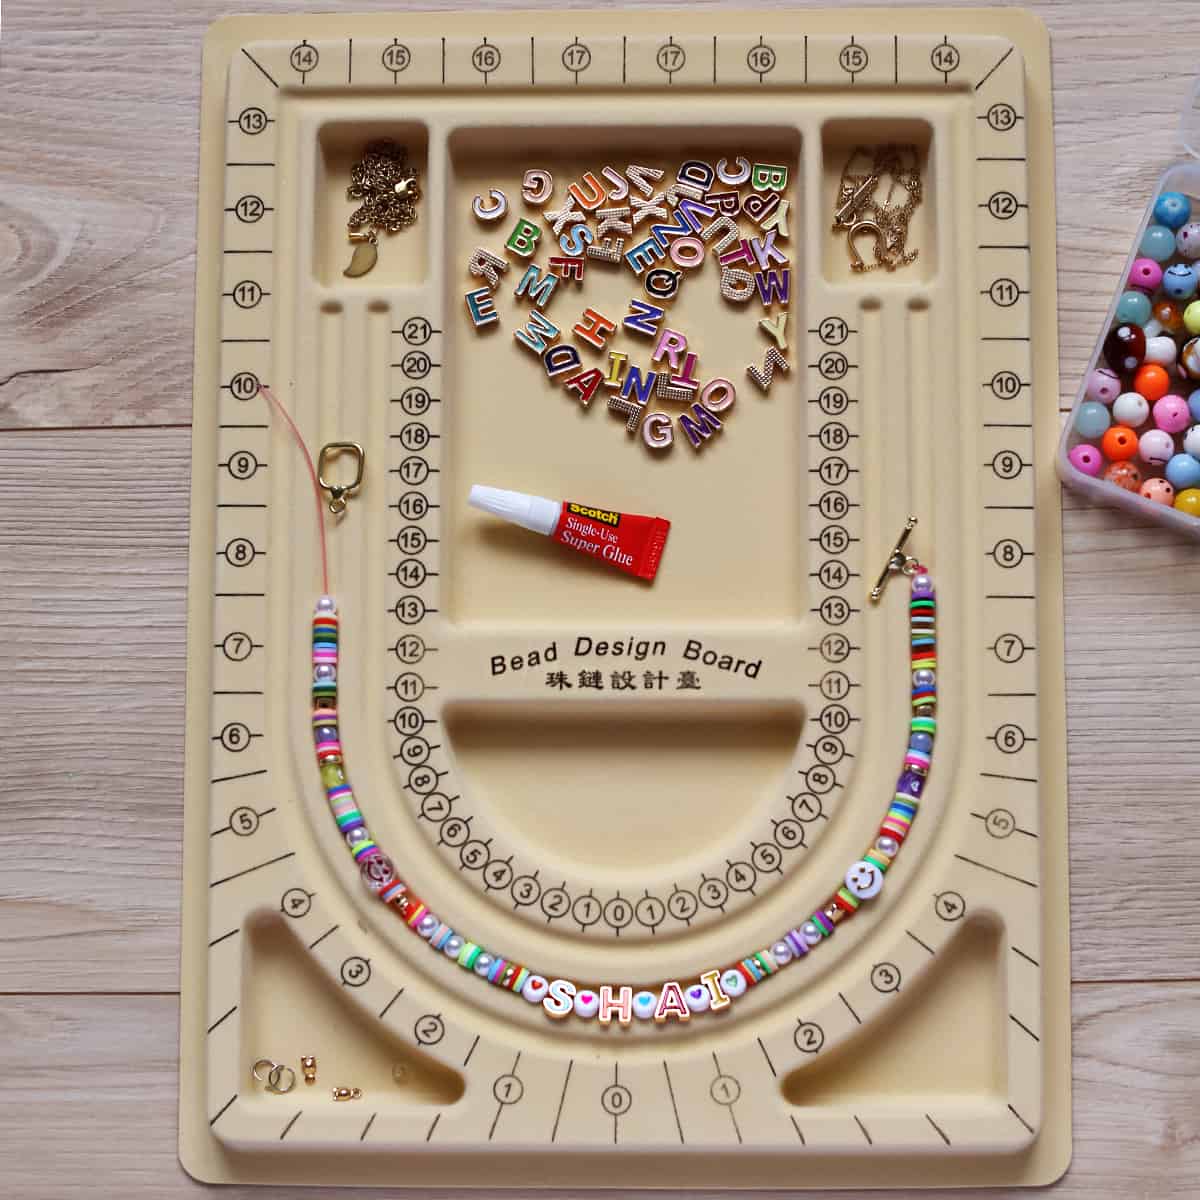
- Bead board – or a felt to cover your work surface
There are many different ways you can design your clay bead bracelet with different accessories or clasp and closures. But these are the basic supplies that I used to make the bracelets you see pictured.
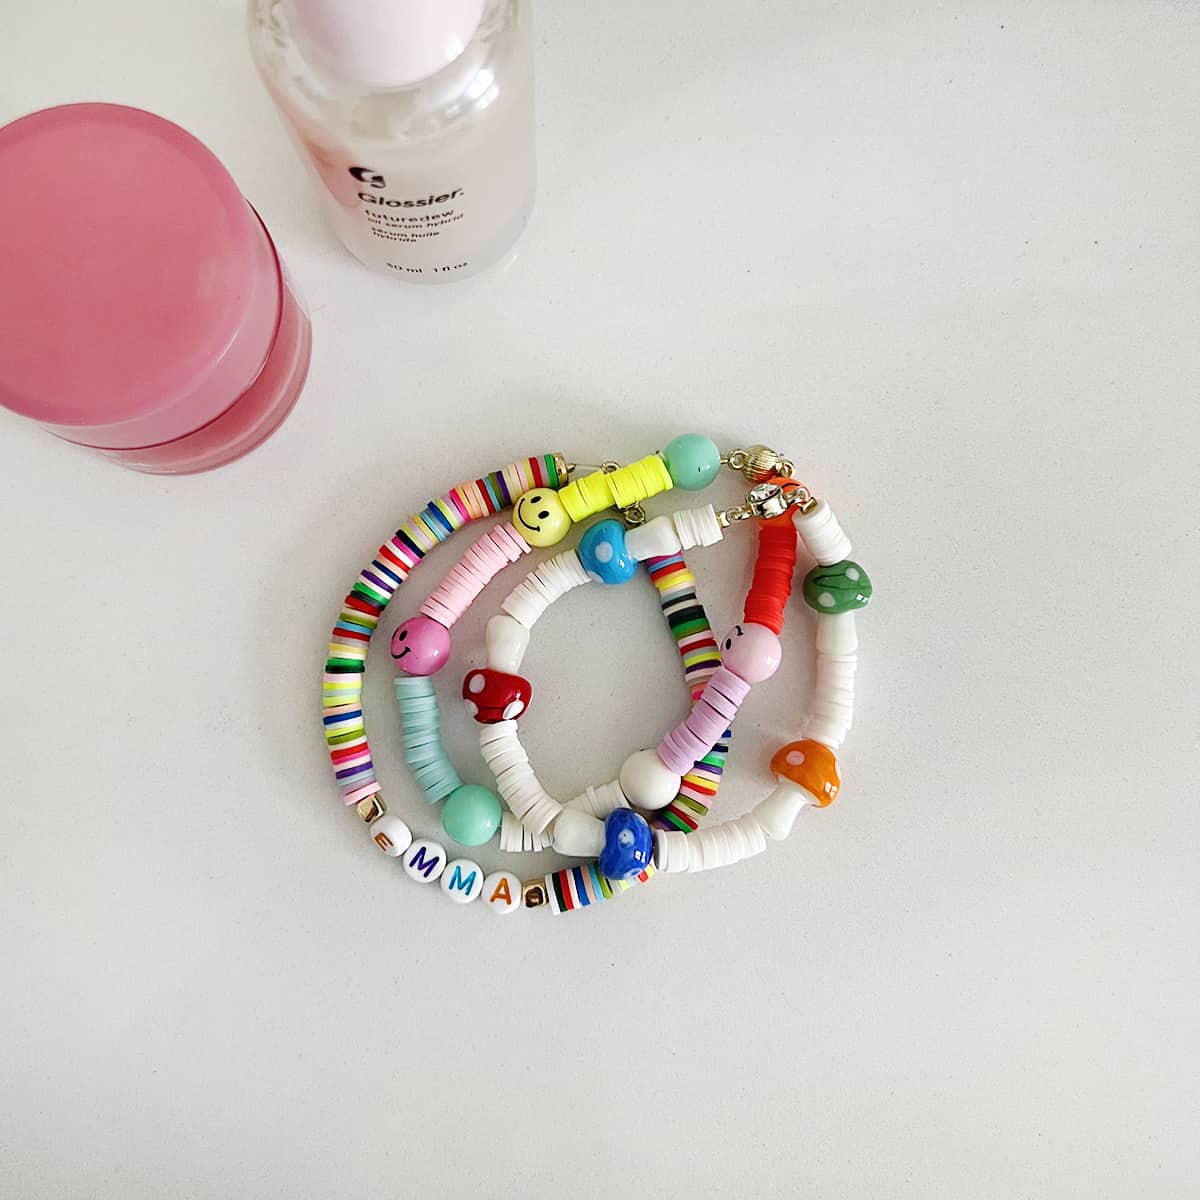
How to Make Bead Bracelets:
- Design your bracelet. I like to lay out the beads on my bead board to make sure I am happy with my design before I start stringing the beads together. This way, I can make sure I like the colors or I can change out the charms or other accent beads I’m using in my design.
- Cut a piece of elastic cord twice as big as the widest part of your hand so you have plenty to work with.
- Loop the bottom of the cord through a crimping bead, then one side of the connector, then back through the same crimping bead again.
- Use your pliers to crimp (smash down) the crimping bead, fastening the cord in place.
- String your design onto the cord.
- Check that the bracelet is the length you design (if not, add or take off beads).
- Add another crimping bead to the end, loop the cord through the other side of the connector, and then through the same crimping bead and pull tight.
- Use your pliers again to crimp down on the bead, fastening the cord in place.
- If you have extra cord on either side, you can snip it off and/or tuck it into the beads beside it.
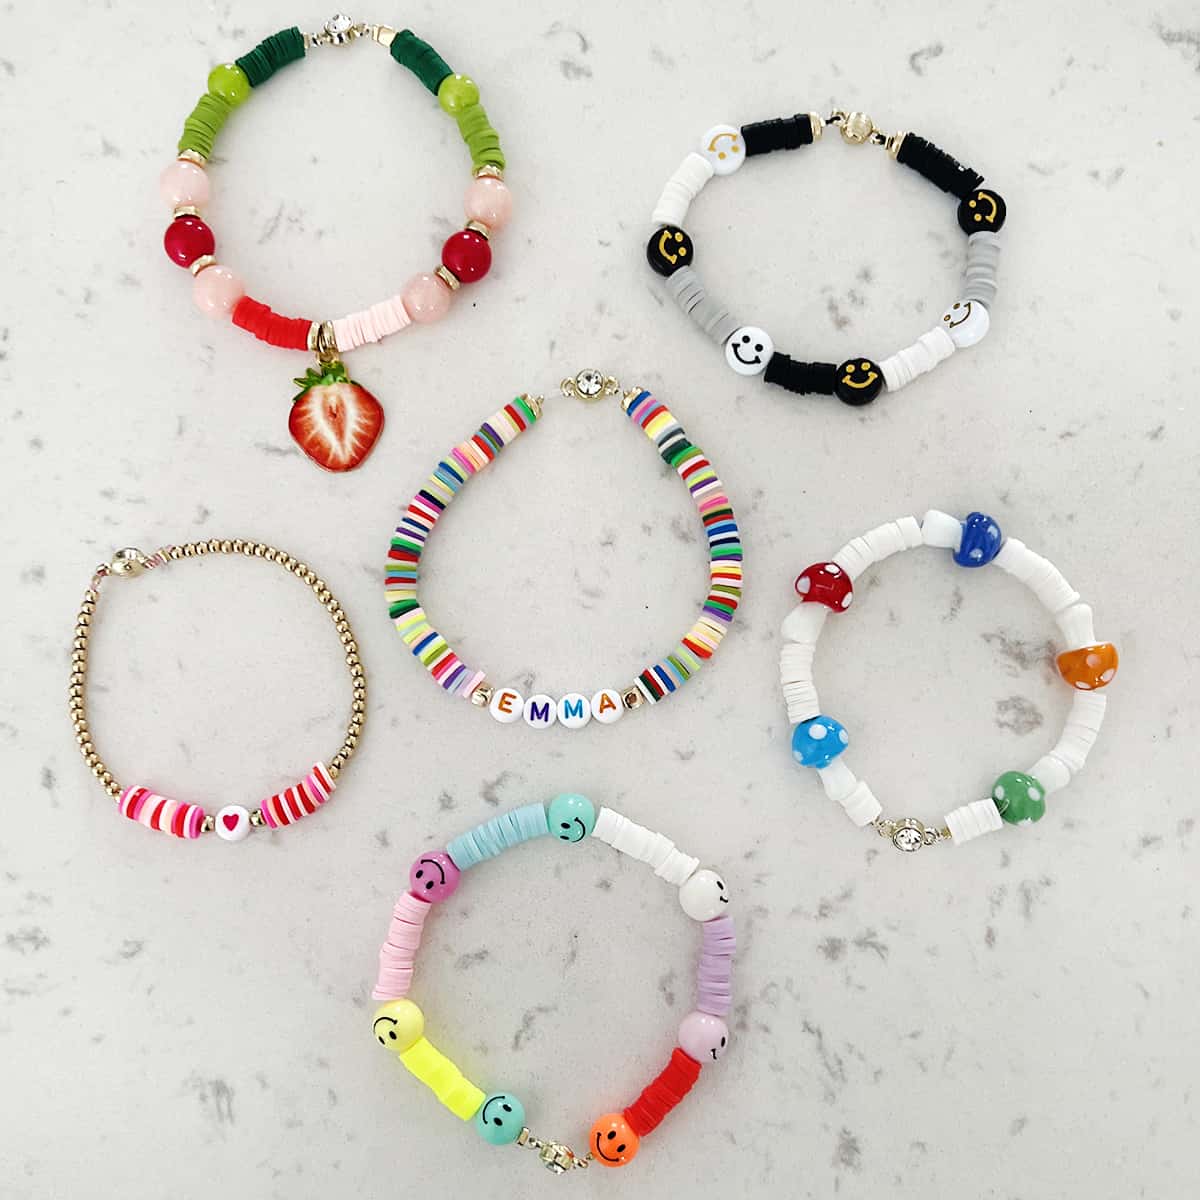
Clay Bead Bracelet Ideas:
Here are some ideas for different kinds of designs and color combinations you can try!
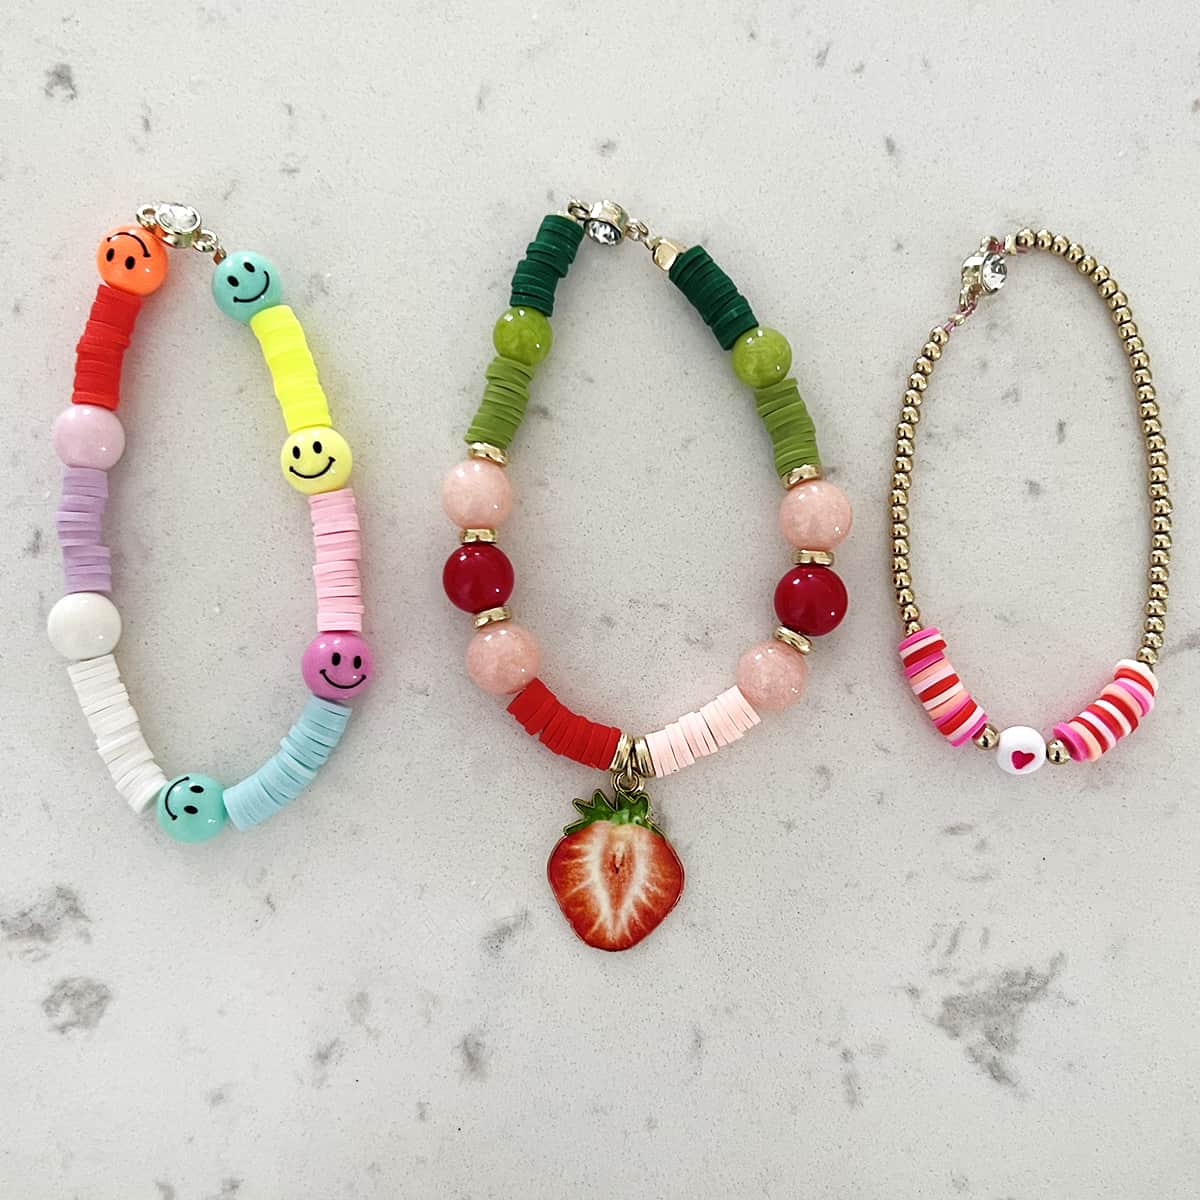
- Multicolored! You can repeat the colors or just add them at random.
- Use all primary colors (red, blue, yellow)
- Use all secondary colors (orange, green, purple)
- Monochromatic – use all one tone or only one color bead for a solid look.
- All white or black
- Break up clusters with charms or a glass bead.
- Add your name or a friend’s name for gifting.
- Add a charm or multiple charms for a charm bracelet look.
- Fill most of the bracelet with small gold beads and use the colored clay beads as an accent.
Where to Buy Beads?
Below, I will link many of the specific beads and charms I’ve bought online. But also keep in mind that you can buy beads and jewelry making supplies from many different places like thrift stores, estate sales, Etsy and eBay.
Also, if you have old jewelry that you no longer wear, you might take it apart and repurpose it in your designs.
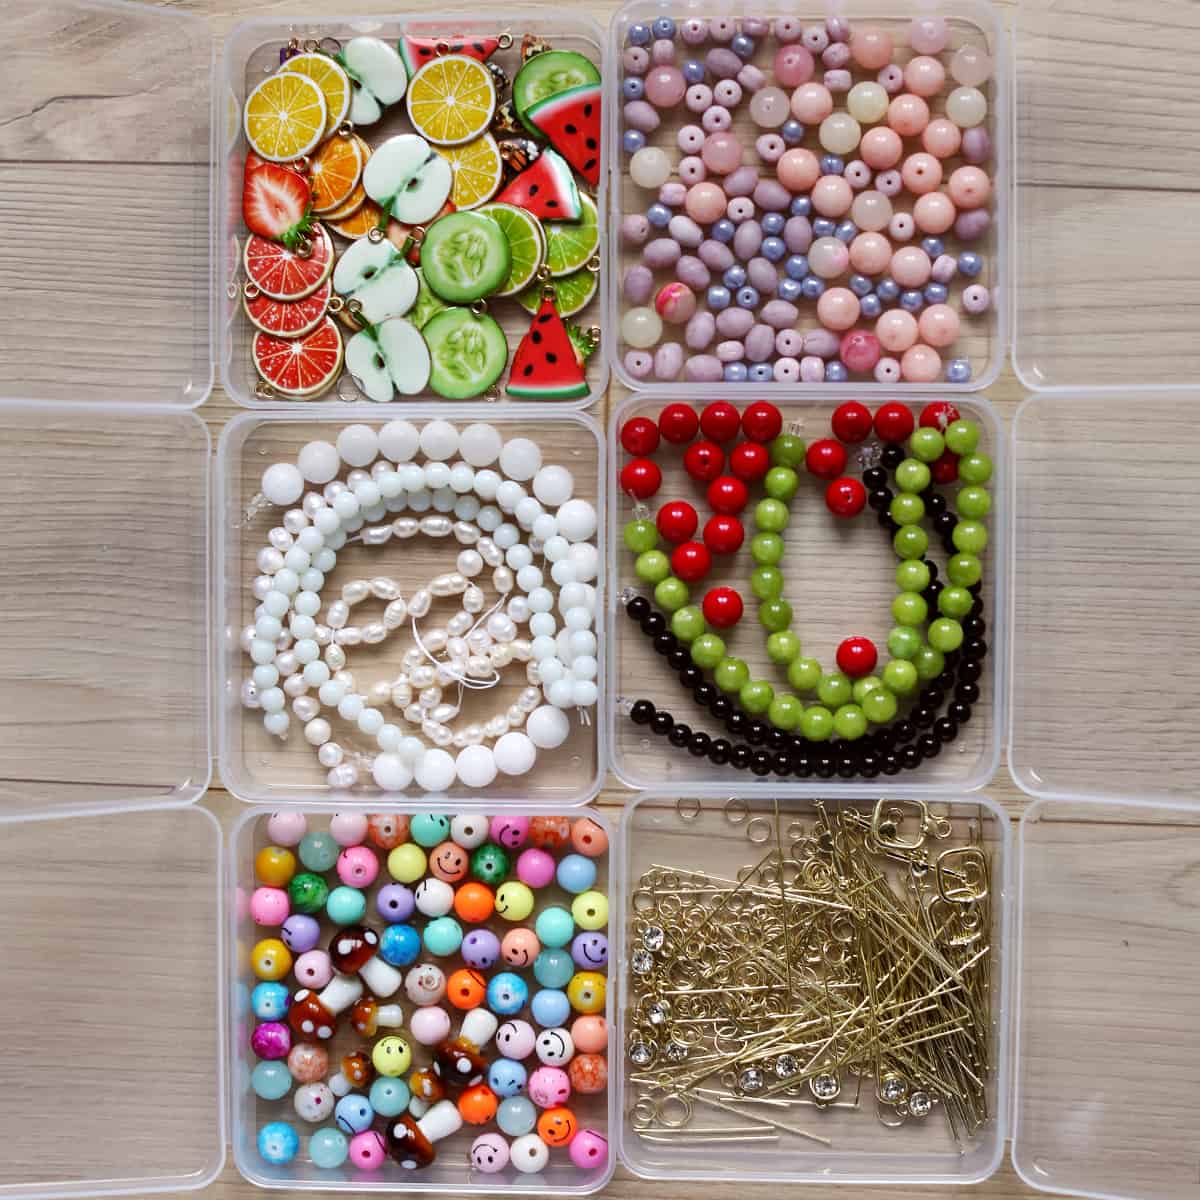
- My favorite basic clay bead bracelet kit (includes cord and tools)
- Metal letters
- Fruit charms
- Mushroom beads
- Freshwater pearl beads
Frequently Asked Questions
How many clay beads make a bracelet?
For an adult with small to medium hands, 125-150 clay beads will make a bracelet. You may need more or less or smaller or larger sized bracelets.
What string do you use for clay bead bracelets?
Elastic cord (sometimes called crystal string) is best. You can use clear or a color. But this cord will have some stretch so you can easily pull the bracelet on and off your hand without needing to use a clasp.
Are clay bead bracelets waterproof?
Polymer clay (which is usually what clay beads are made of) is waterproof. However, most bracelets will have other materials like string and charms and these may not hold up to soaking.
Can clay beads be washed?
Yes. Gently wash with soap and water if you get food or dirt on your bracelet. The colors will not run or fade.
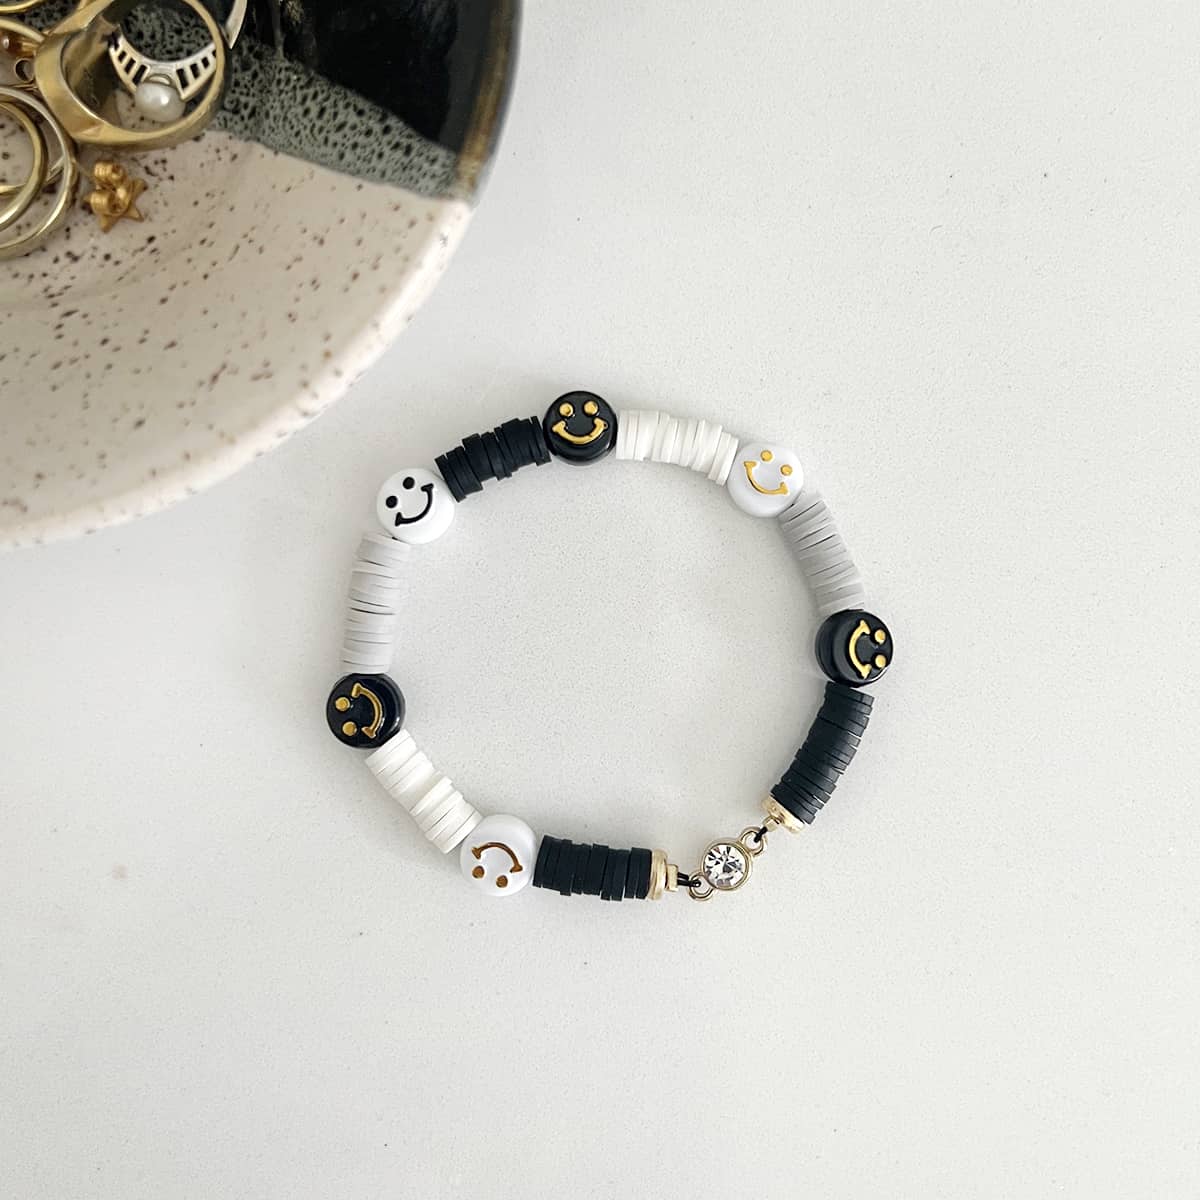
DIY clay bead bracelets are such a fun project anyone can do. I also love that it’s something you can work on while watching a movie. 
Related: 15 Crafts You Can Do While Watching TV
More Easy DIY Projects:
- Weaving Class: The Basics – A step-by-step guide for beginners
- How to make a Marble Clay Ring Dish
- Learn to make Homemade Bath Bombs
Clay Bead Bracelet – Ideas
Ingredients
- clay beads
- elastic cord
- letter beads or other accents optional
- crimping beads
- connectors
- scissors
- jewelry pliers
- bead board
Instructions
- Design your bracelet – I like to lay out the beads on my bead board to make sure I am happy with my design before I start stringing the beads together. This way I can make sure I like the colors or I can change out the charms or other accent beads I’m using in my design.
- Cut a piece of elastic cord twice as big as the widest part of your hand, so you have plenty to work with.
- Loop the bottom of the cord through a crimping bead, then one side of the connector, then back through the same crimping bead again.
- Use your pliers to crimp (smash down) the crimping bead, fastening the cord in place.
- String your design onto the cord.
- Check that the bracelet is the length you design (if not, add or take off beads).
- Add another crimping bead to the end, then loop the cord through the other side of the connector, then through the same crimping bead and pull tight.
- Use your pliers again to crimp down on the bead, fastening the cord in place.
- If you have extra cord on either side, you can snip it off and/or tuck it into the beads beside it.
Notes
- Multicolored! You can repeat the colors or just add them at random.
- Use all primary colors (red, blue, yellow)
- Use all complimentary colors (orange, green, purple)
- Monochromatic – use all one tone or only one color bead for a solid look
- All white or black
- Break up clusters with charms or a glass bead
- Add your name or a friend’s name for gifting
- Add a charm or multiple charms for a charm bracelet look
- Fill most of the bracelet with small gold beads and use the colored clay beads as an accent.
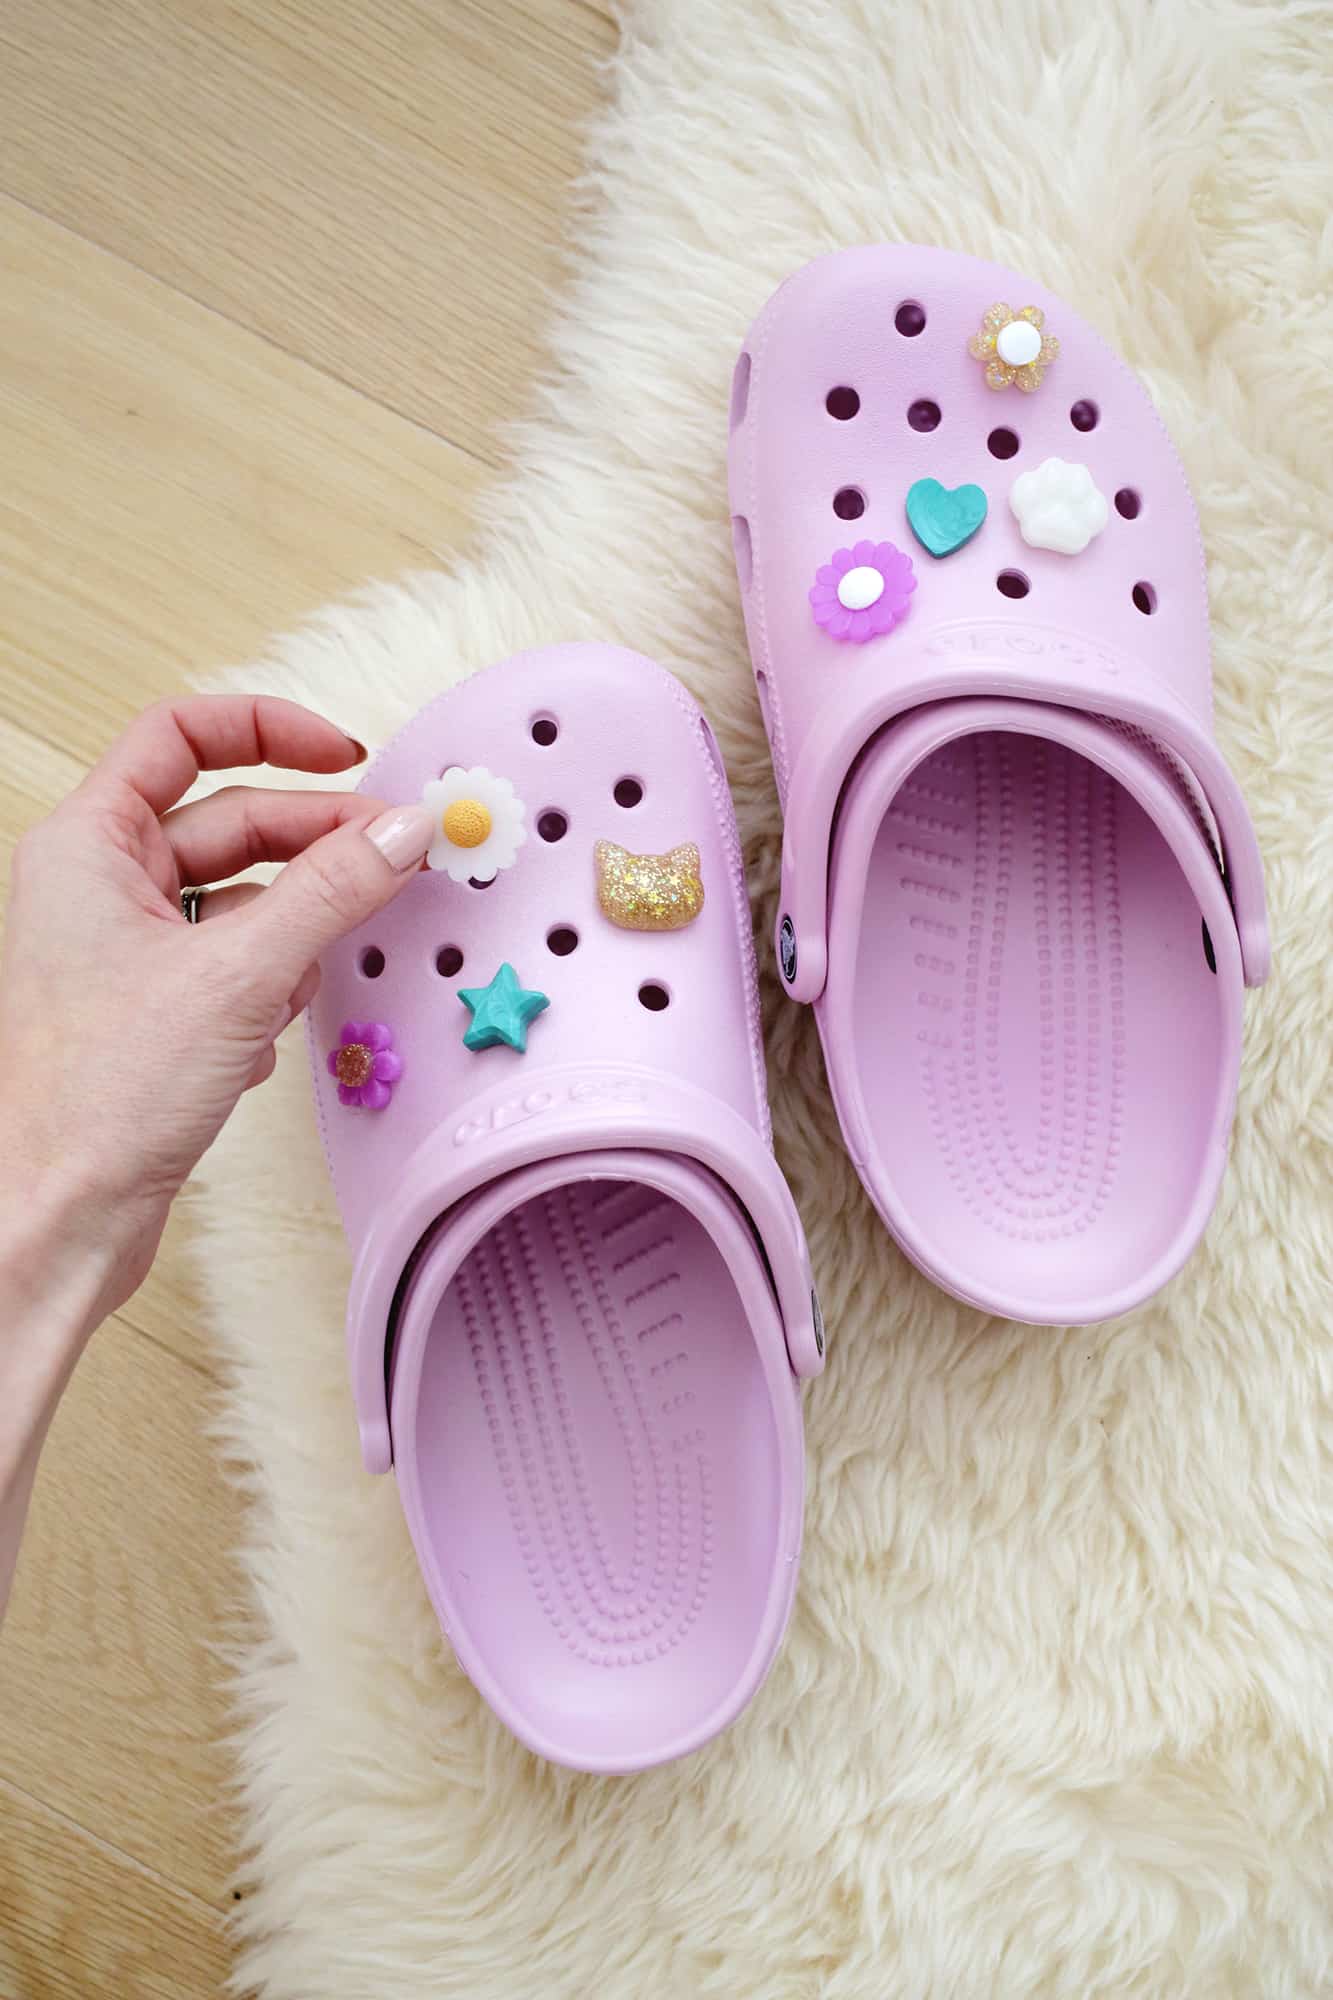
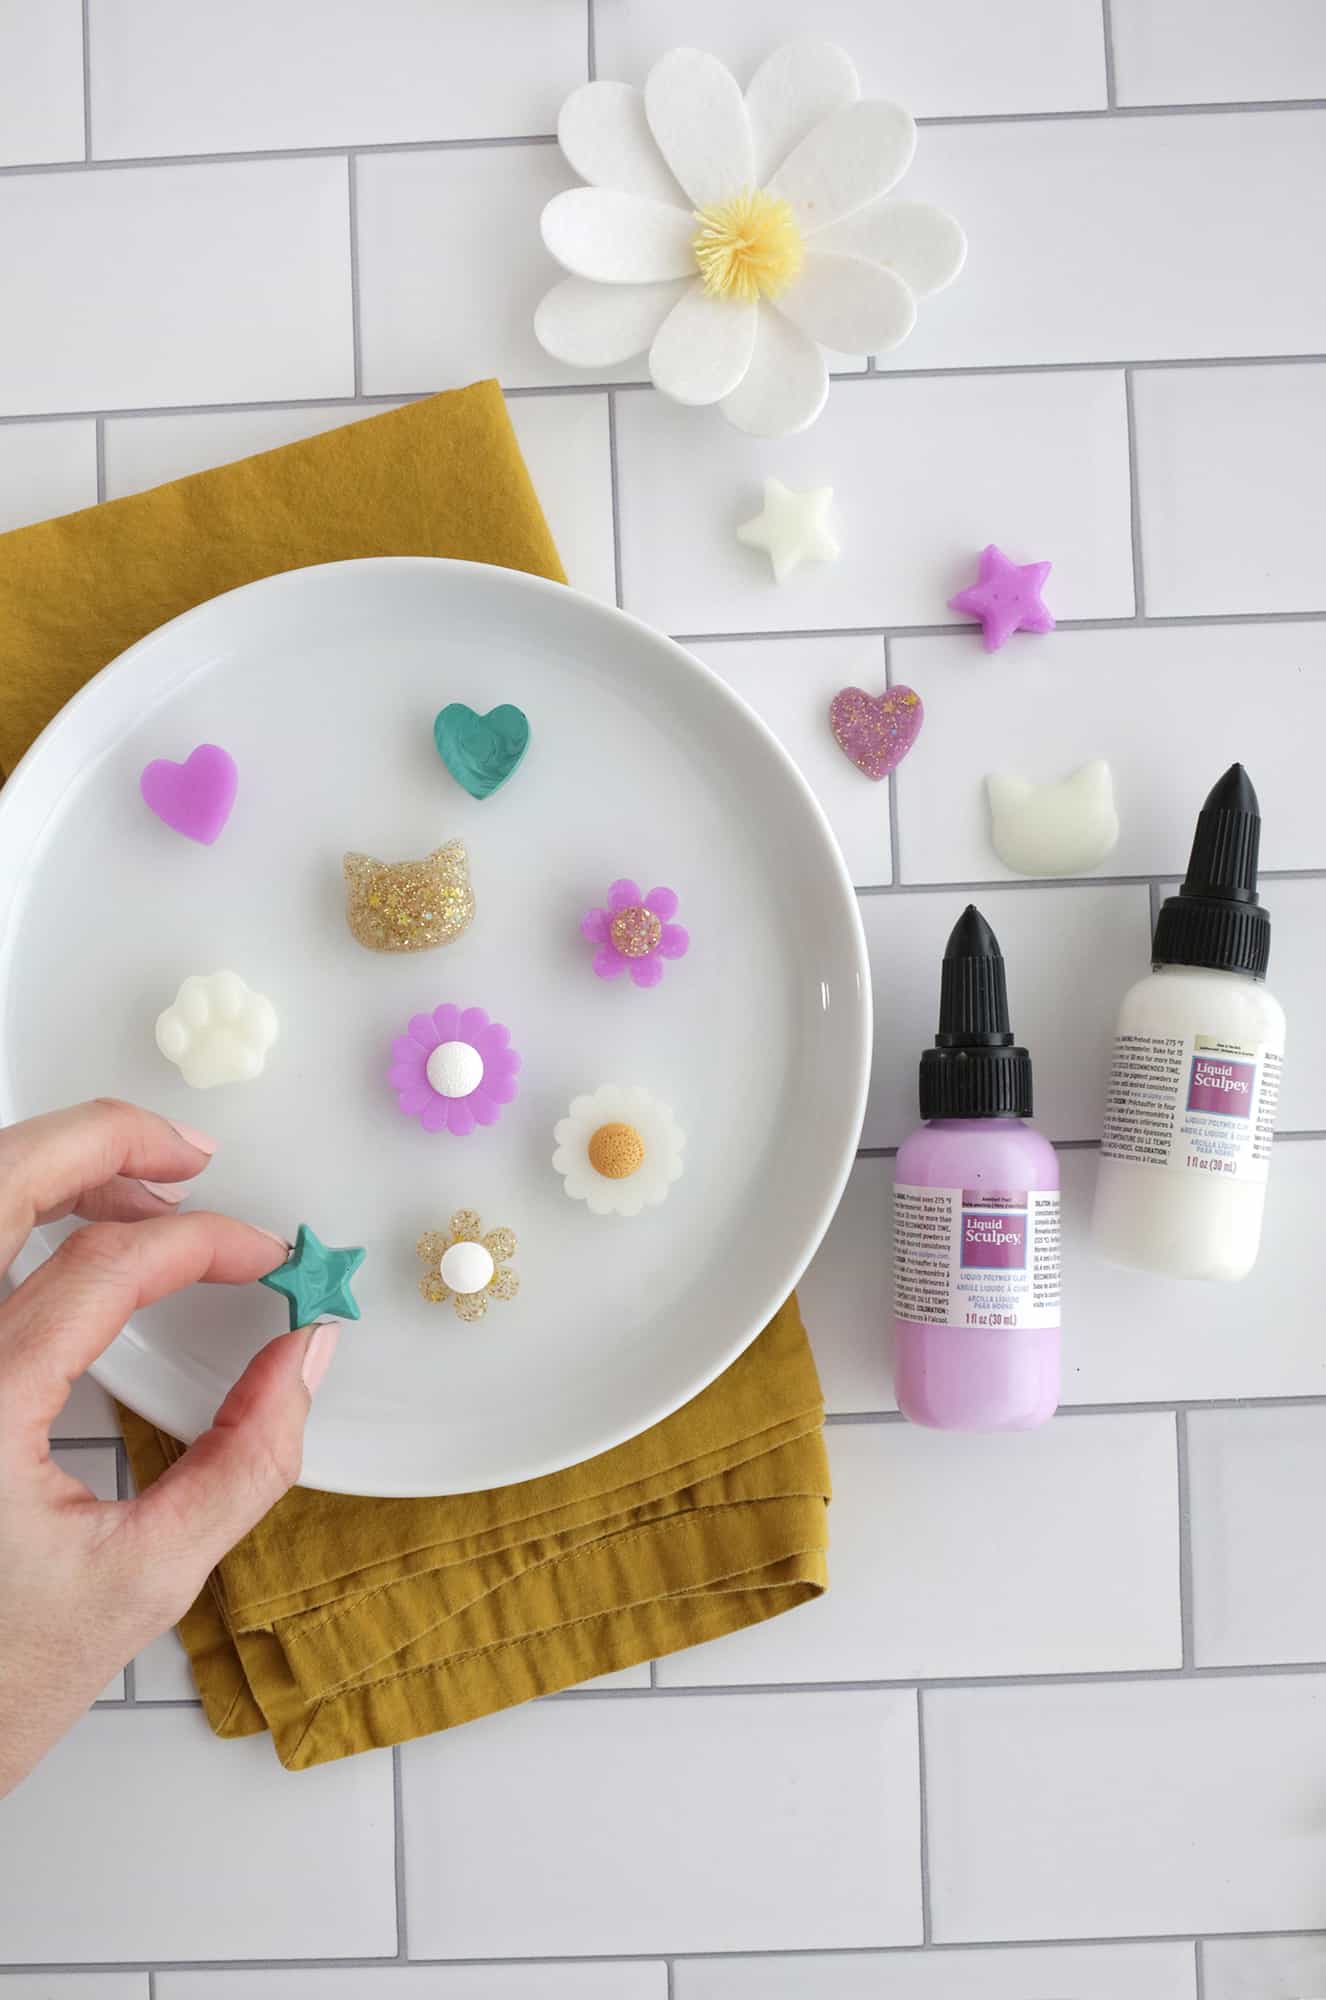
We are partnering with Sculpey on this post since their Liquid Sculpey is the perfect material for making charms (and so much more, like these Statement Hair Clips!).
I love fun, fast, easy DIYs that you can do at home, and Liquid Sculpey projects like this is one that older kids and tweens can get into as well!
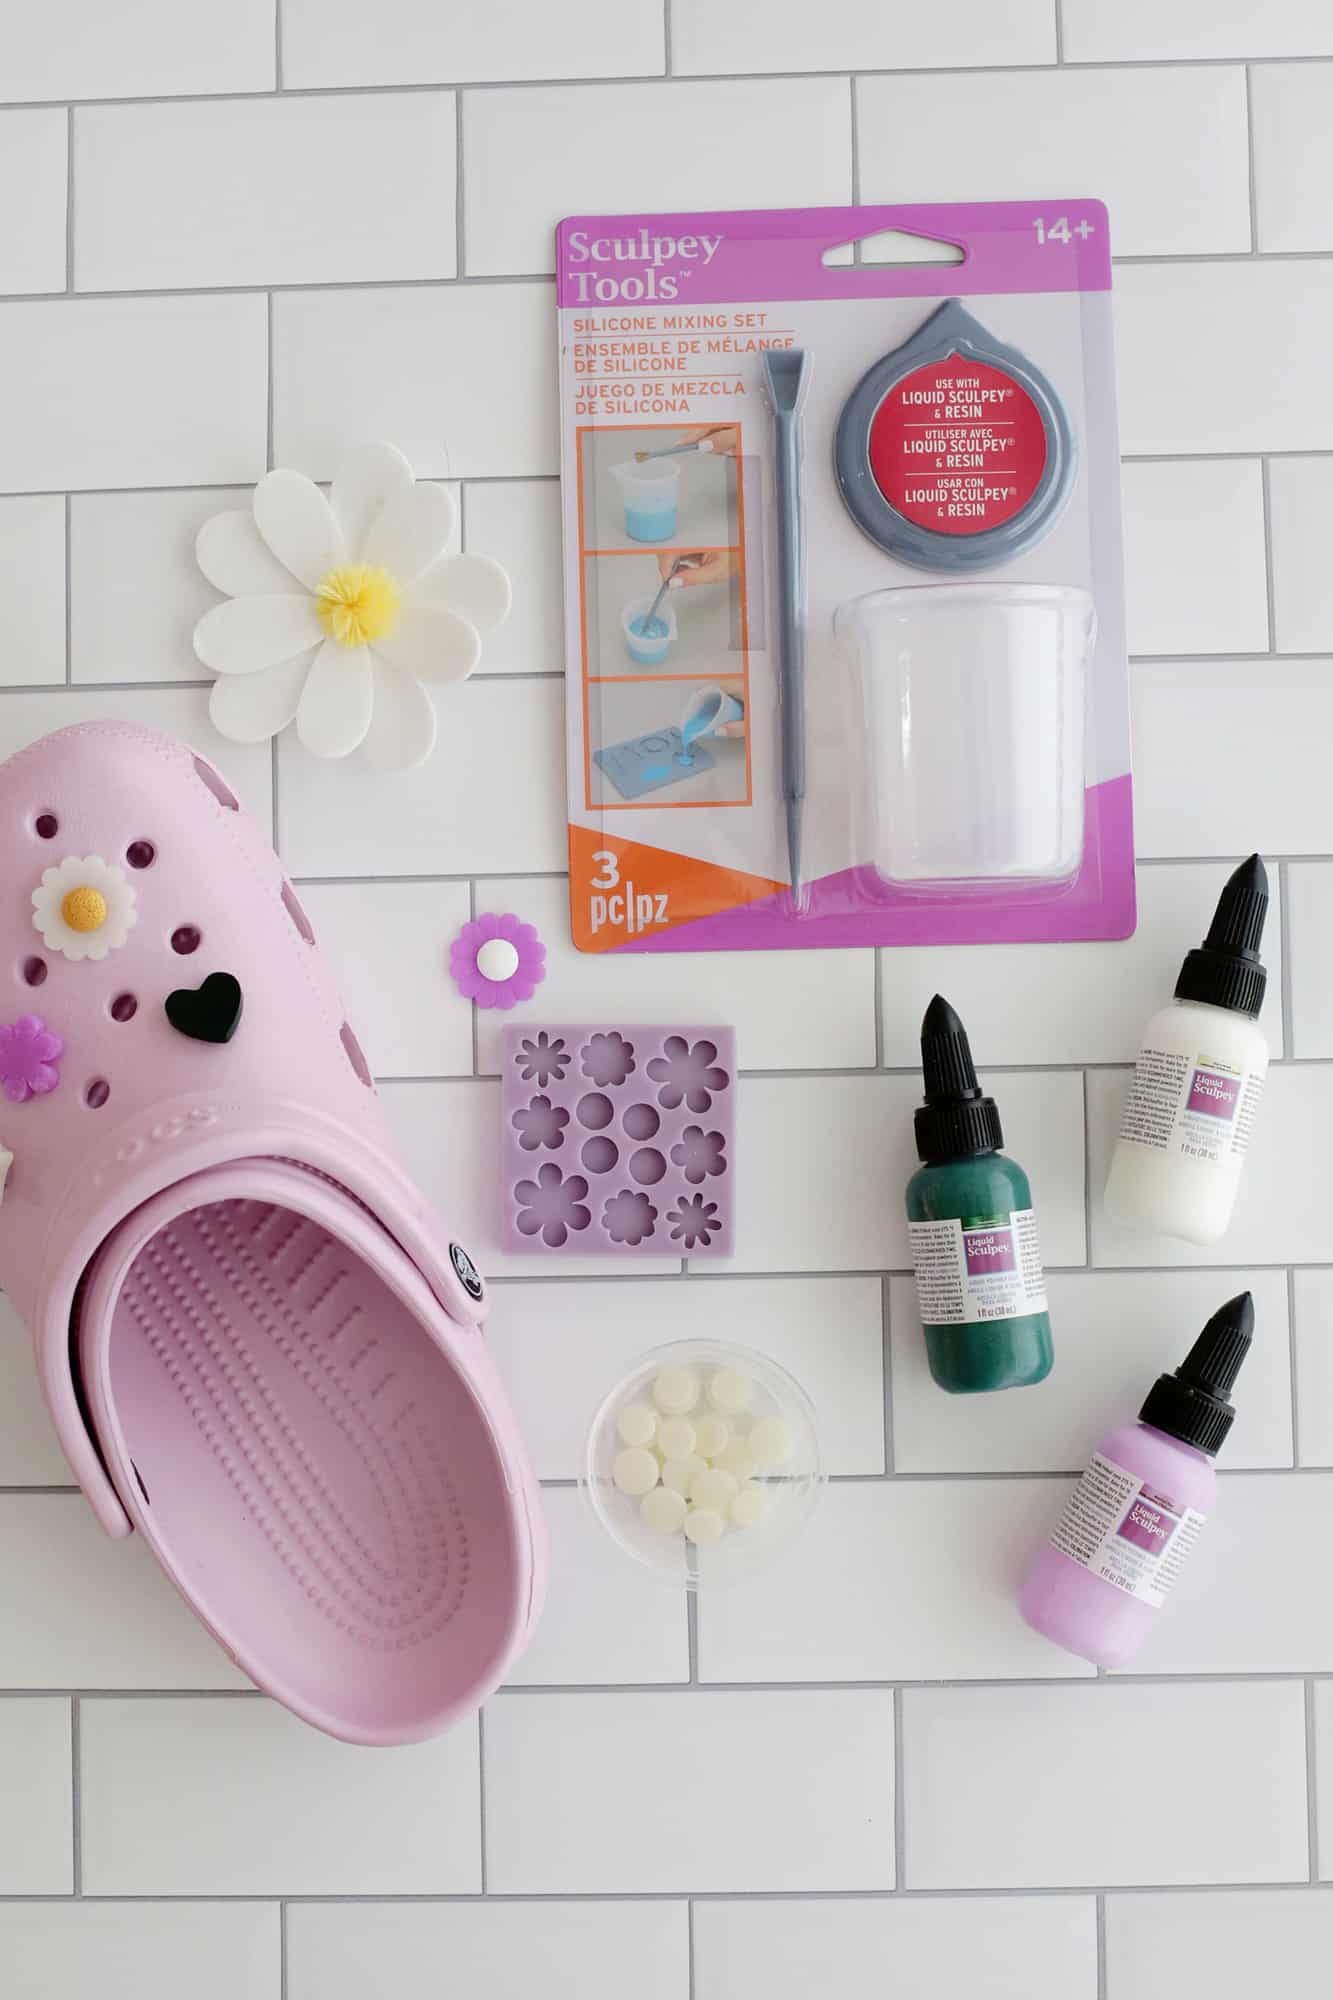
Supplies:
–Liquid Sculpey in your favorite colors
–Sculpey mixing cup set (optional but super helpful!)
–silicone mold in your favorite charm shapes
–charm backings
-super glue (I like these gel control tip ones)
–pair of cute Crocs!
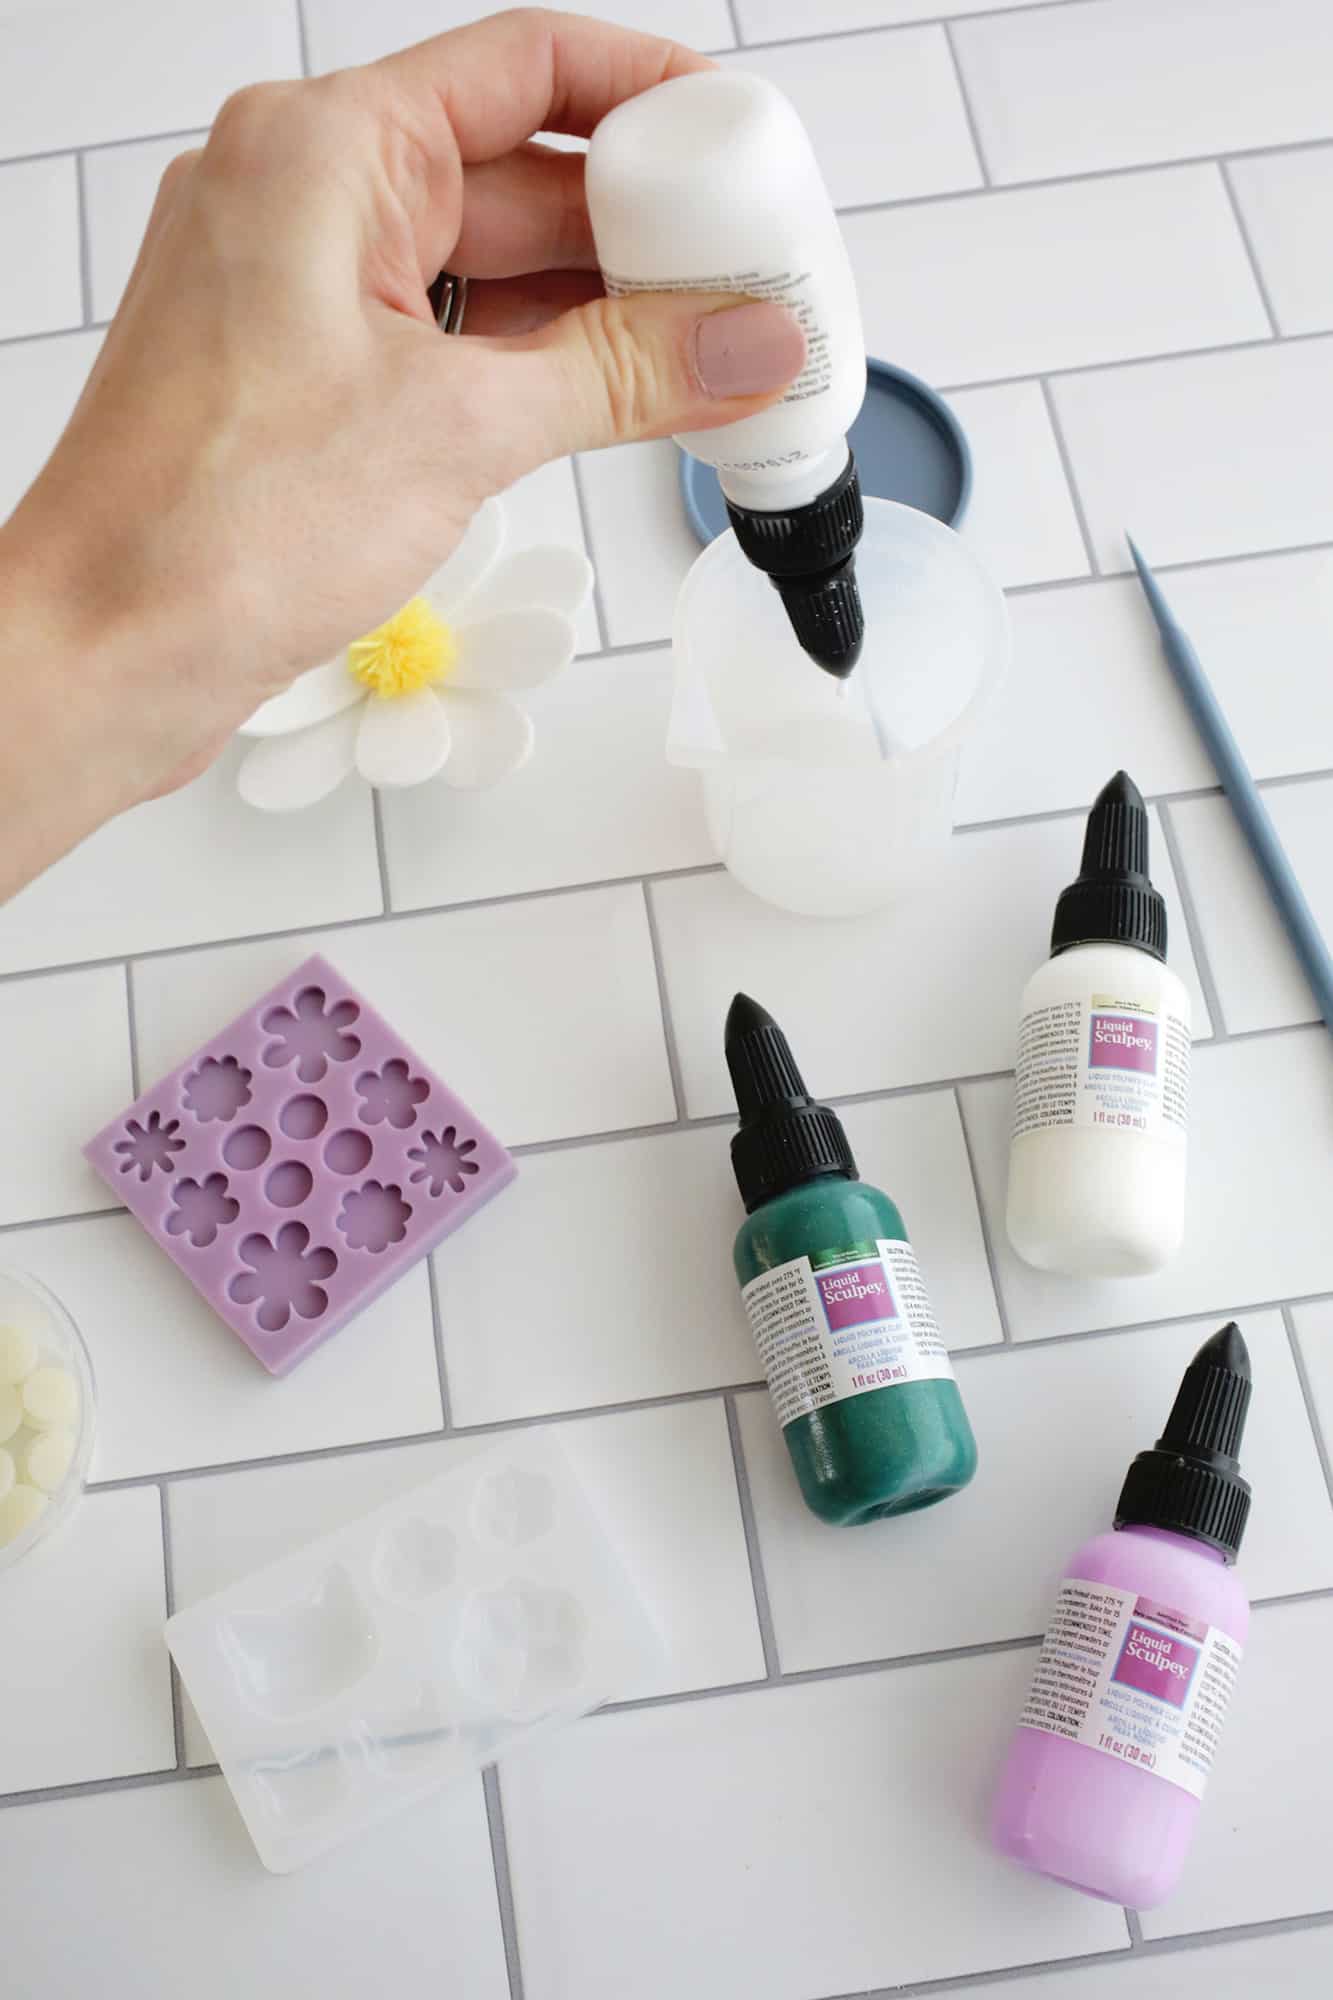
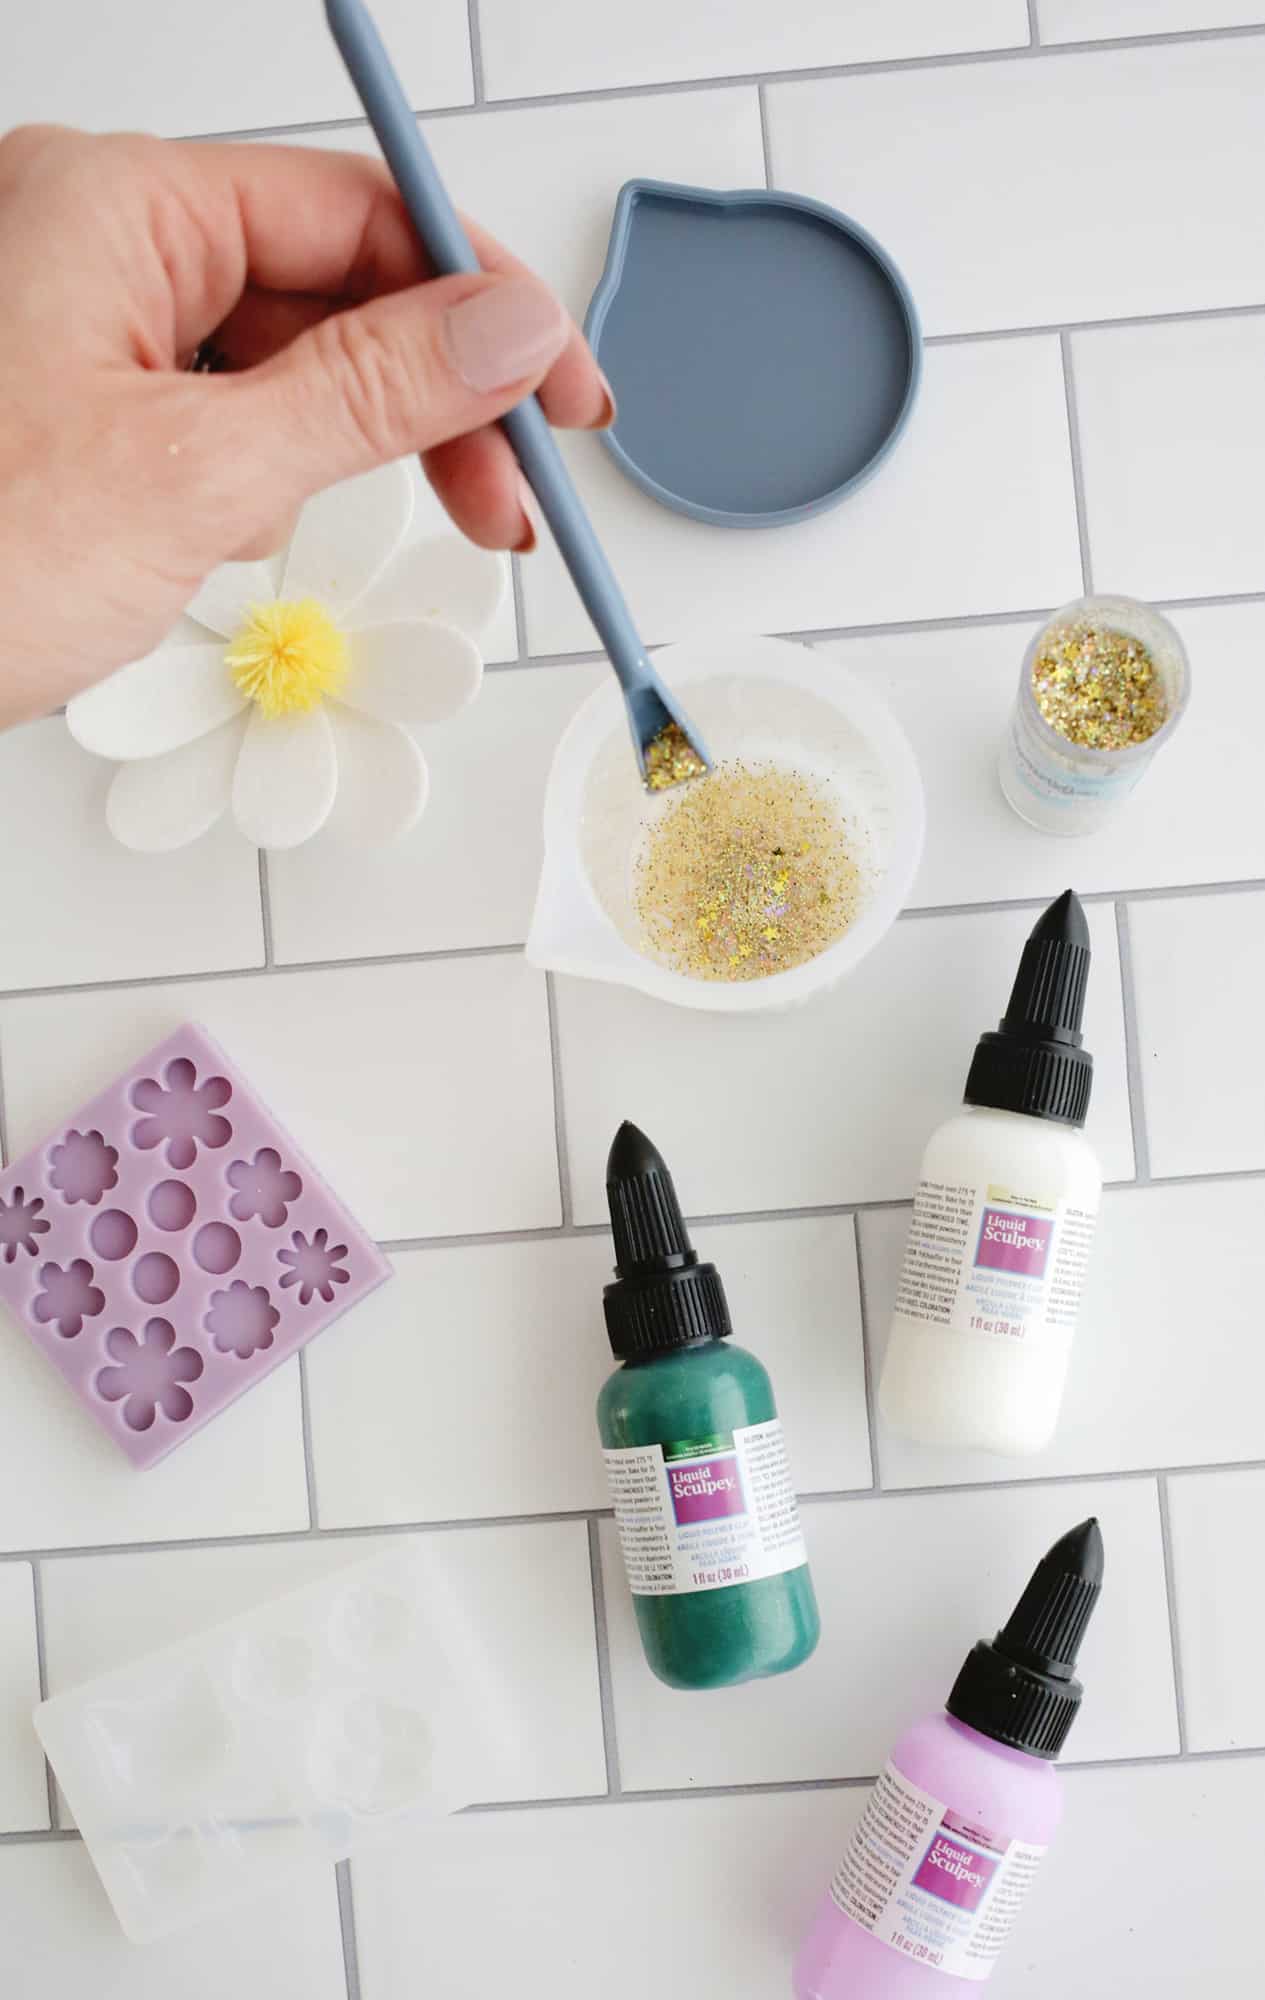
First, you’ll want to lay out your silicone molds and decide which colors you want to go with which molds. Before pouring your Liquid Sculpey into the molds, you’ll want to stir the liquid in the bottle, or, if you are mixing colors, you can use the oven-safe silicone cup that comes with a dual-end stir stick.
The cup is super helpful since it’s clear so you can see the color you are mixing, it’s got a measuring scale on the cup for easy measurements, and a spout for easy-pouring. If you have any leftovers in the cup, either pop on the lid to save for another day or just bake it and peel it out for an easy way to clean the cup!
Using the stir stick is a great way to add glitter and sparkle to your creations, as the scoop end allows you to add glitter and mica to your cup with no mess (and you can use the pointed end to pop any bubbles that appear!).
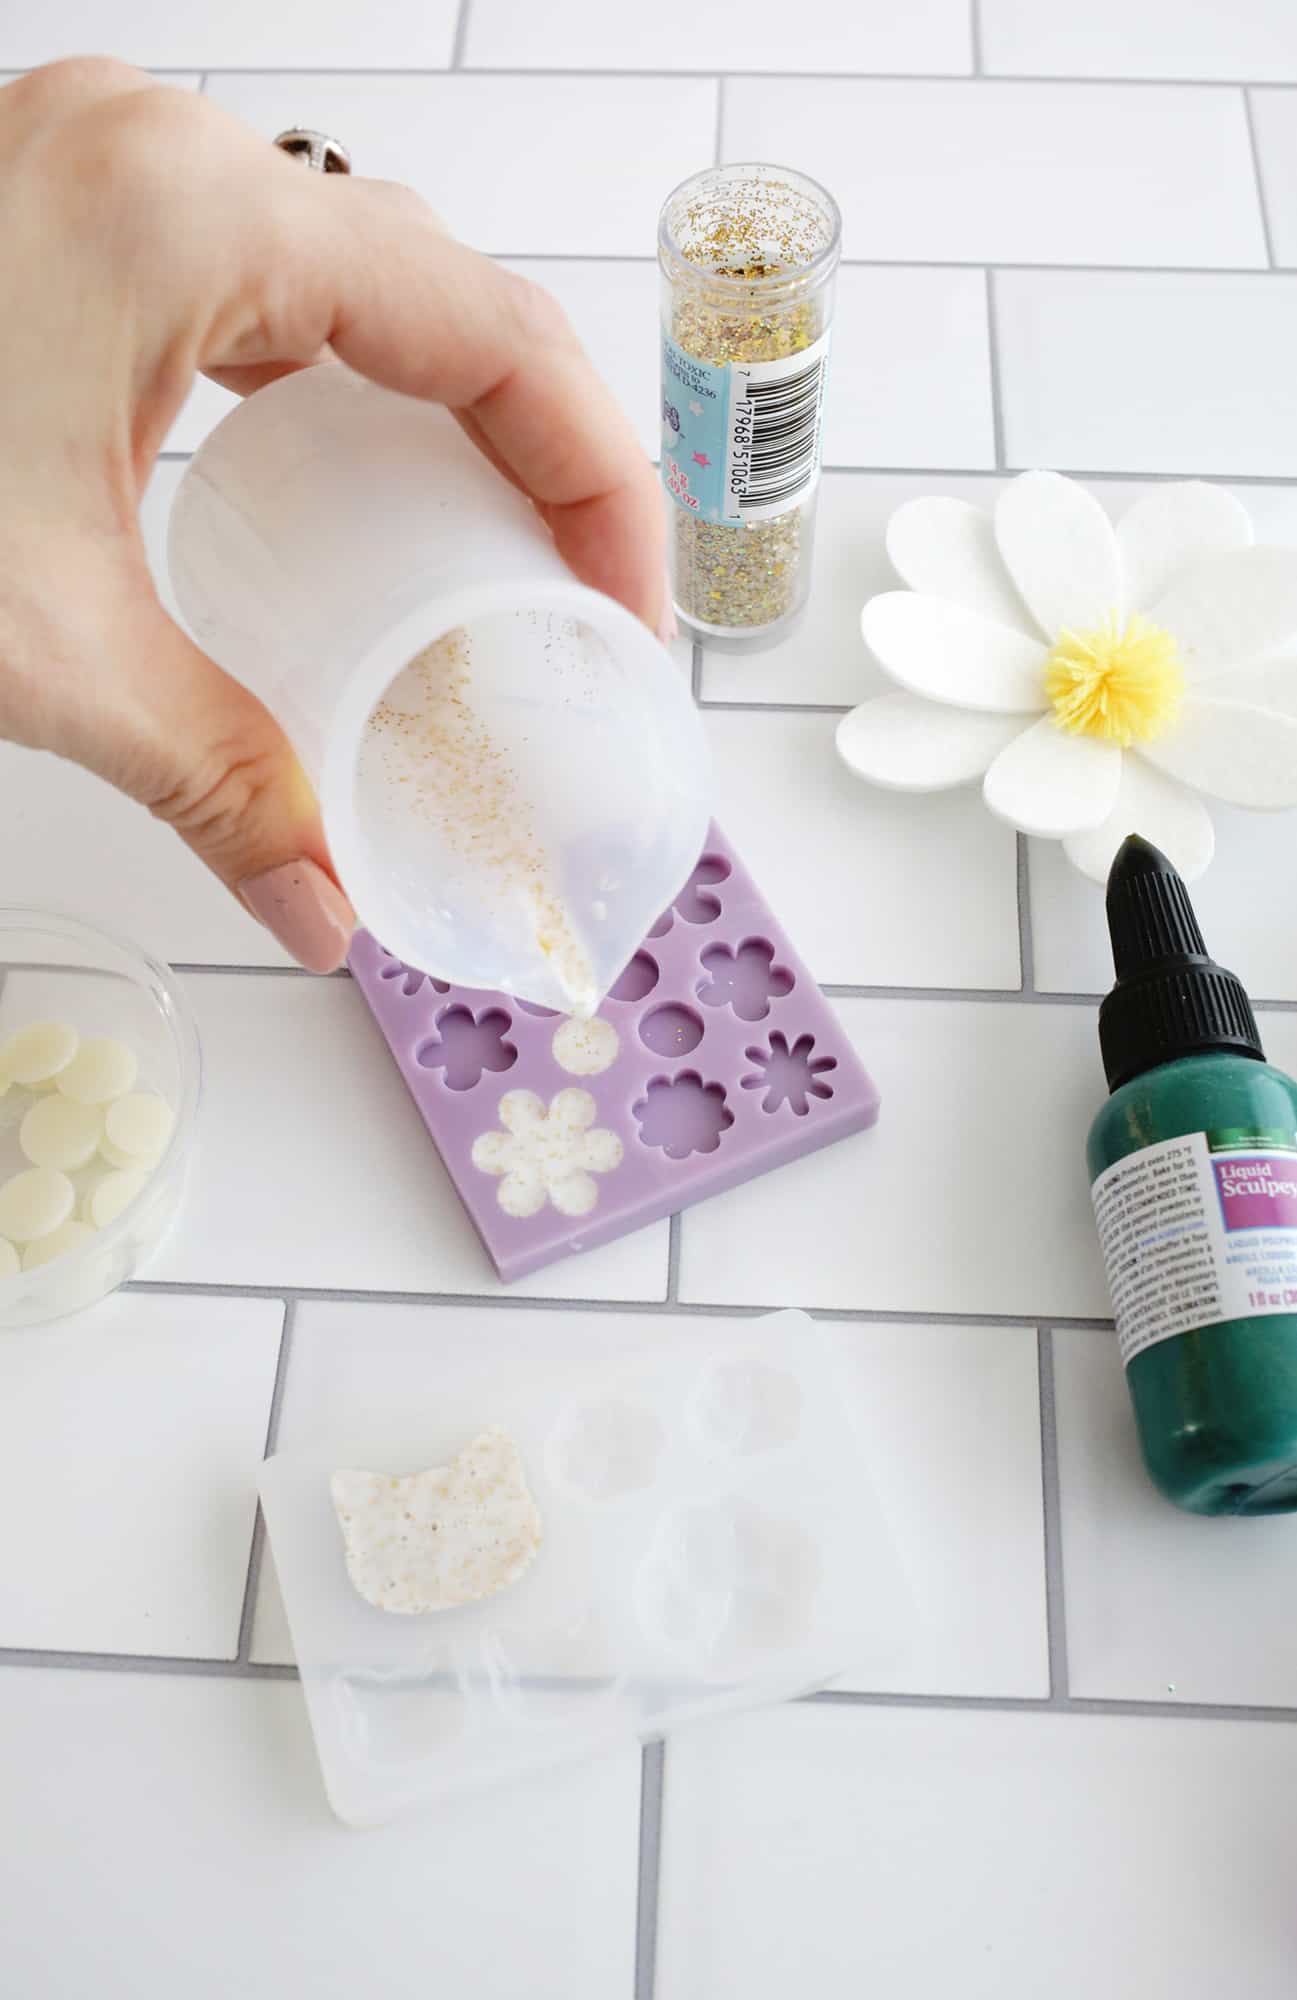
Once your colors are stirred, pour or squeeze the color into the molds doing either all one color, sections of color for a color-blocked look, or pour more than one color and marble with a toothpick.
Bake your molds at 275° for 15 minutes per every 1/4″ of Liquid Sculpey (so 15 minutes for 1/4″ thick and 30 minutes for 1/2″ thick). Allow the molds to cool and then pop out your charms!
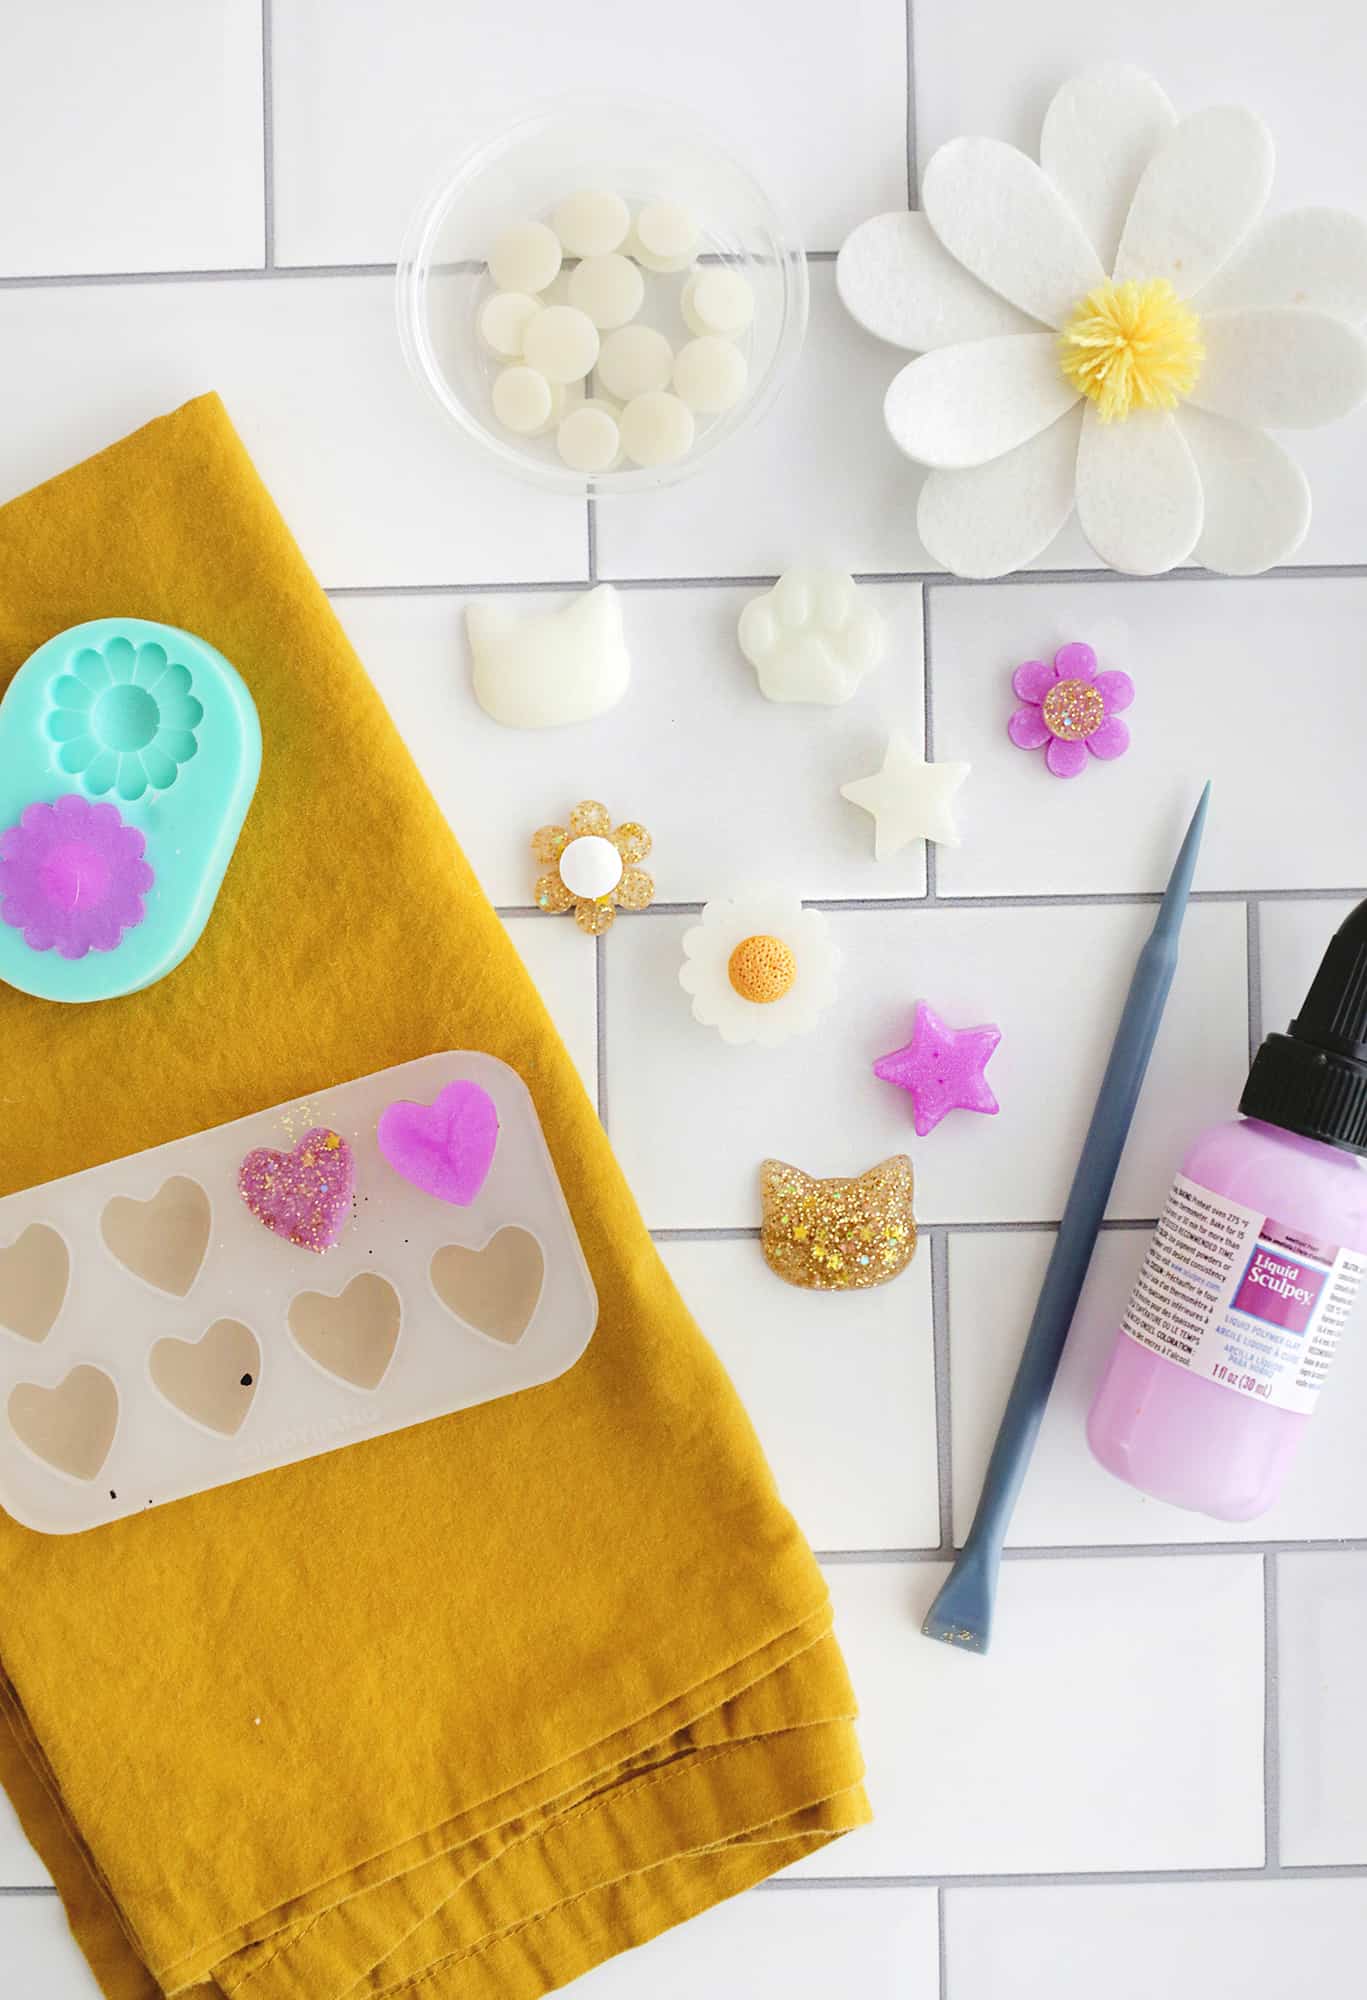
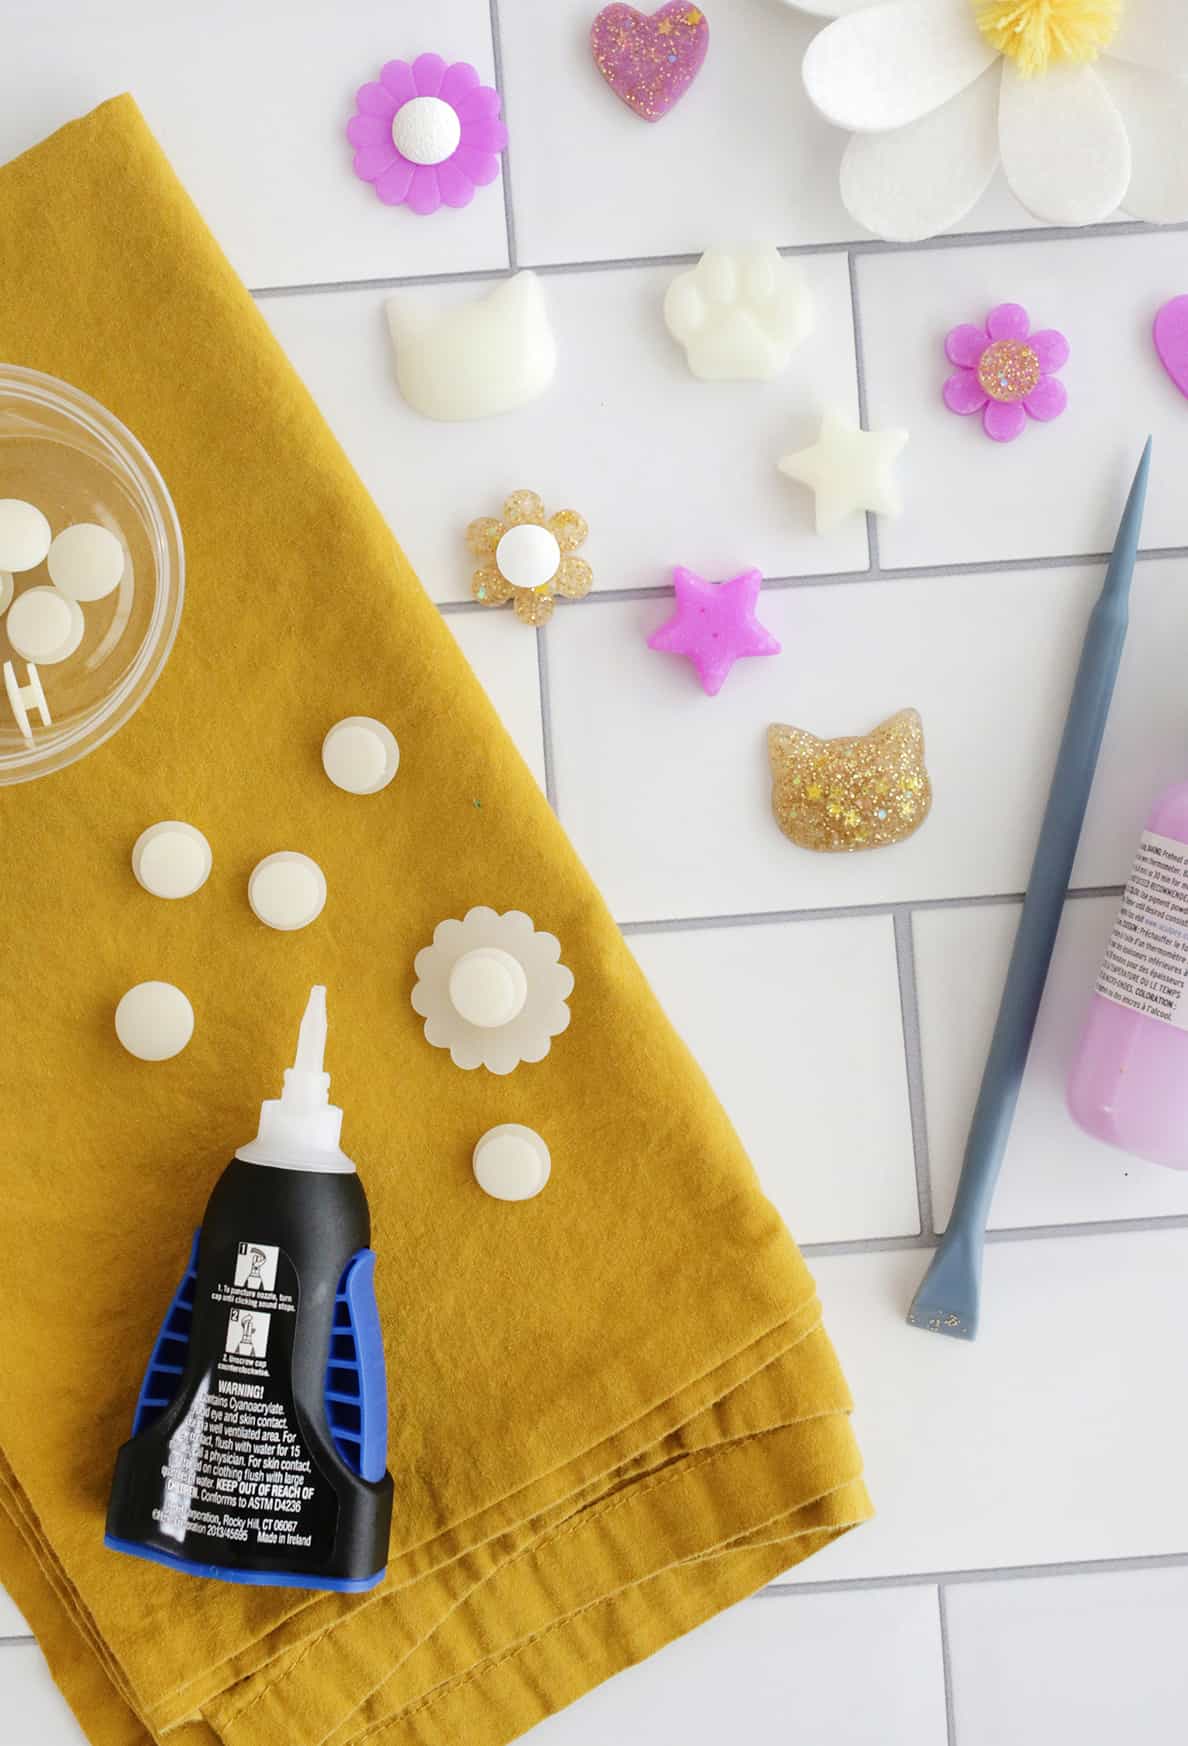
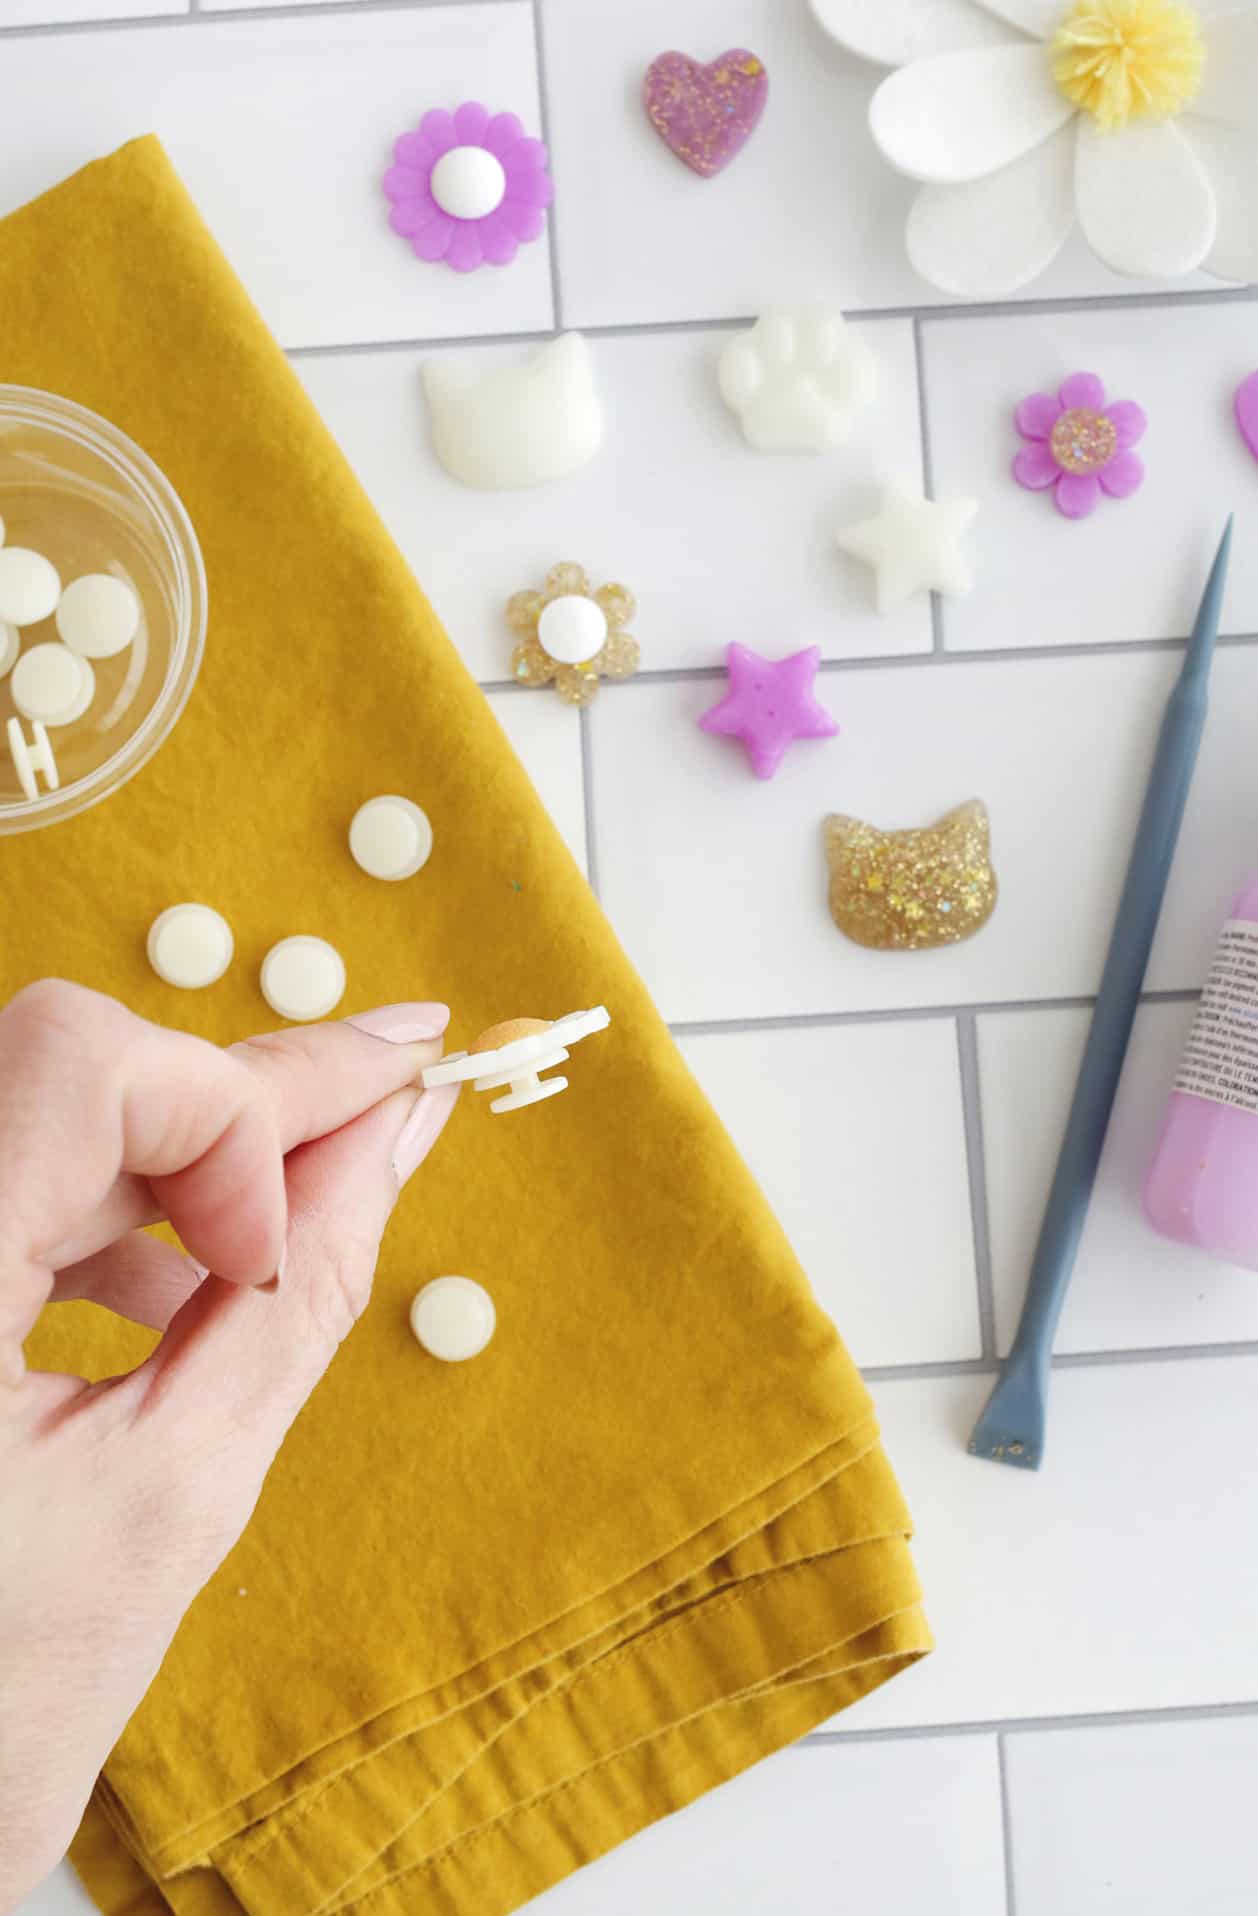
Once the charms are totally cool, use the super glue to glue them to the charm backings and allow the glue to set.
Once the glue is dry, you are ready to decorate with your Croc charms!
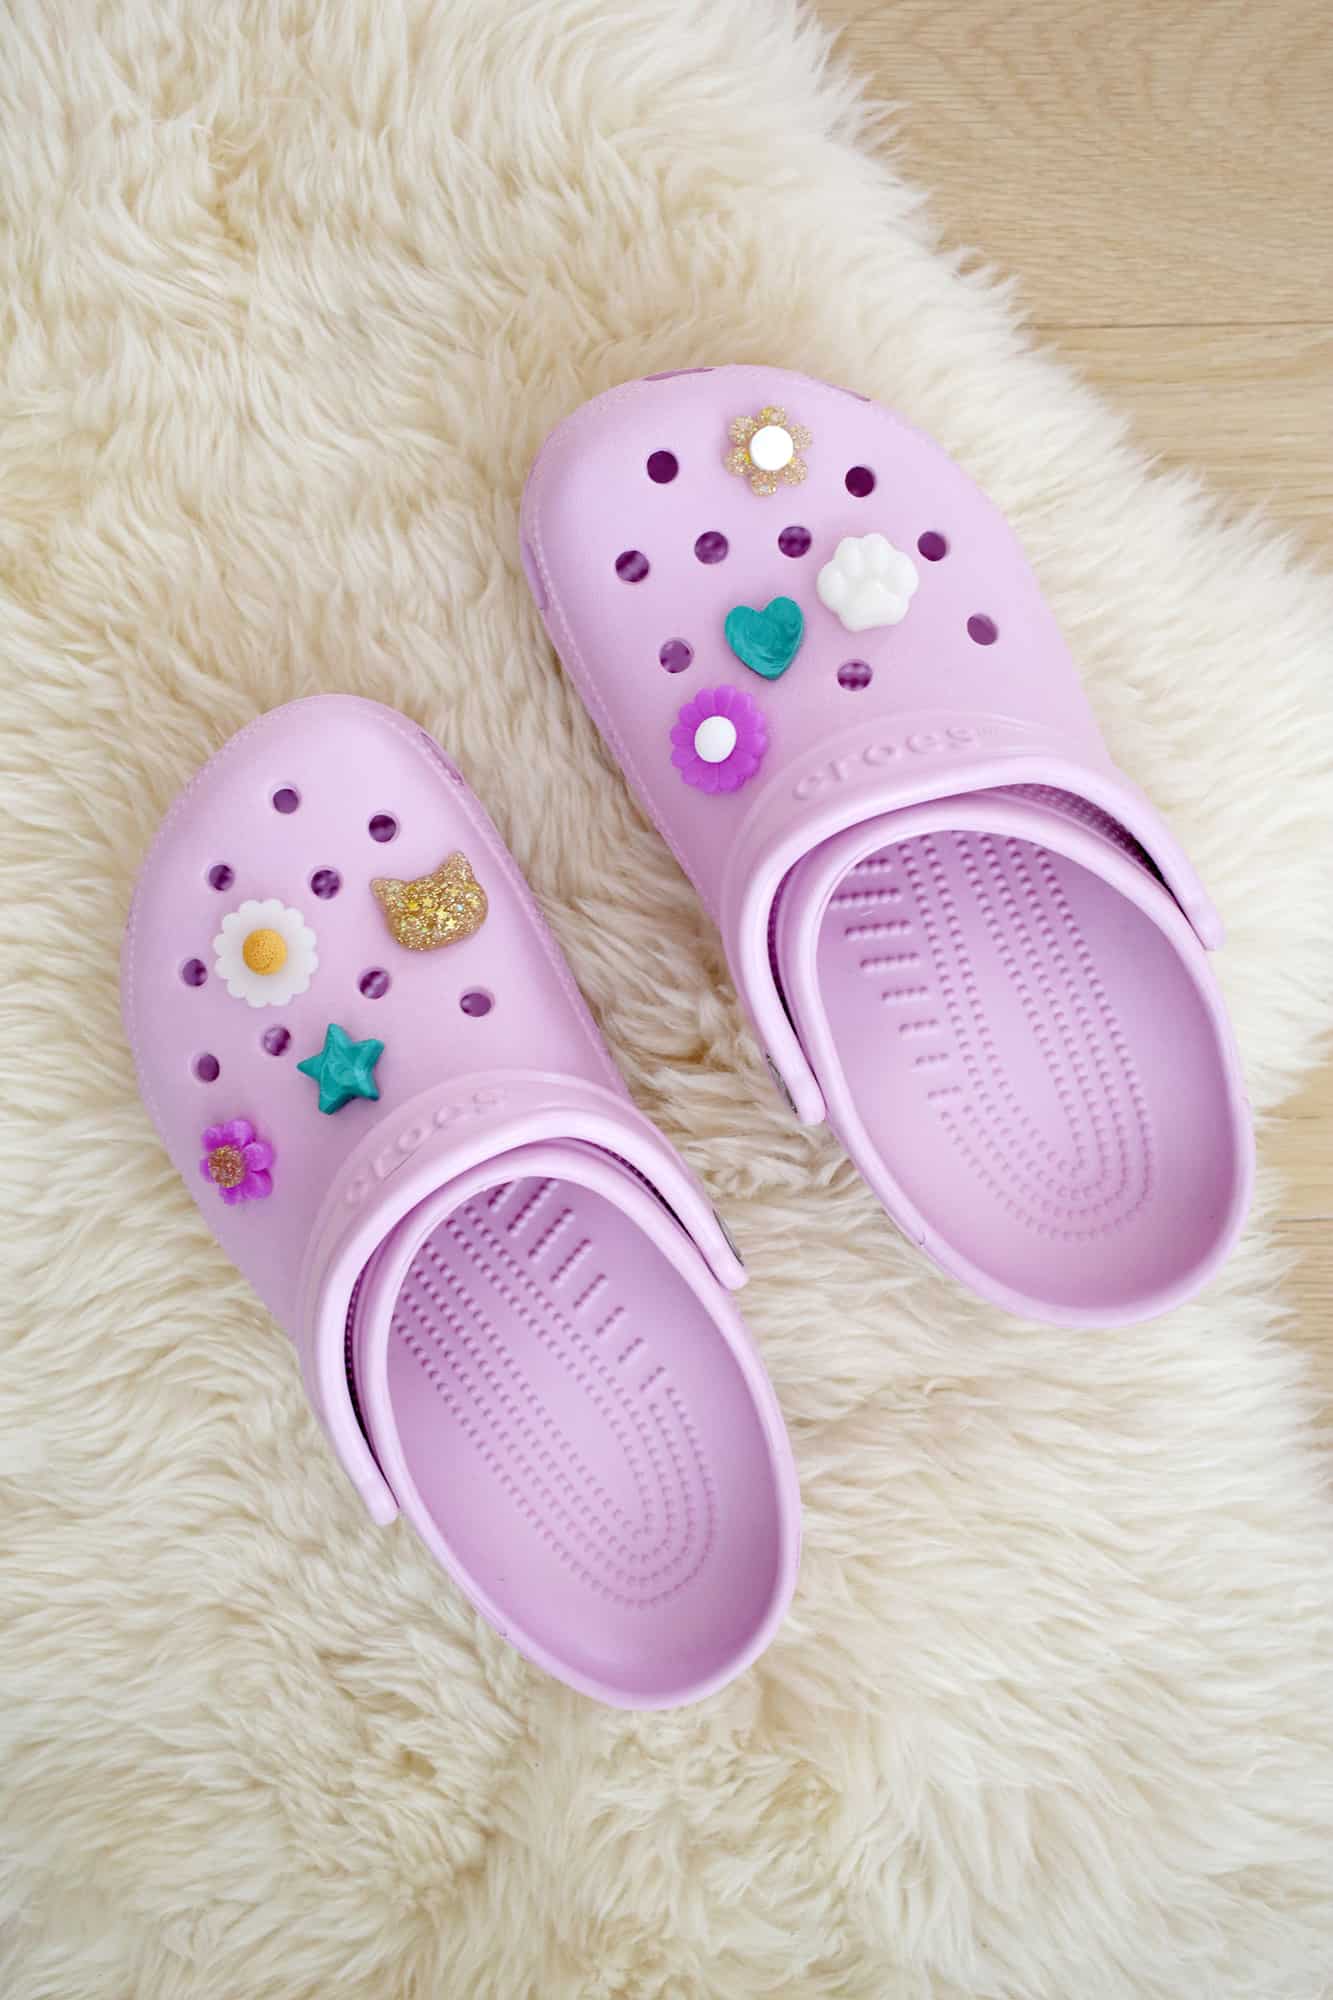
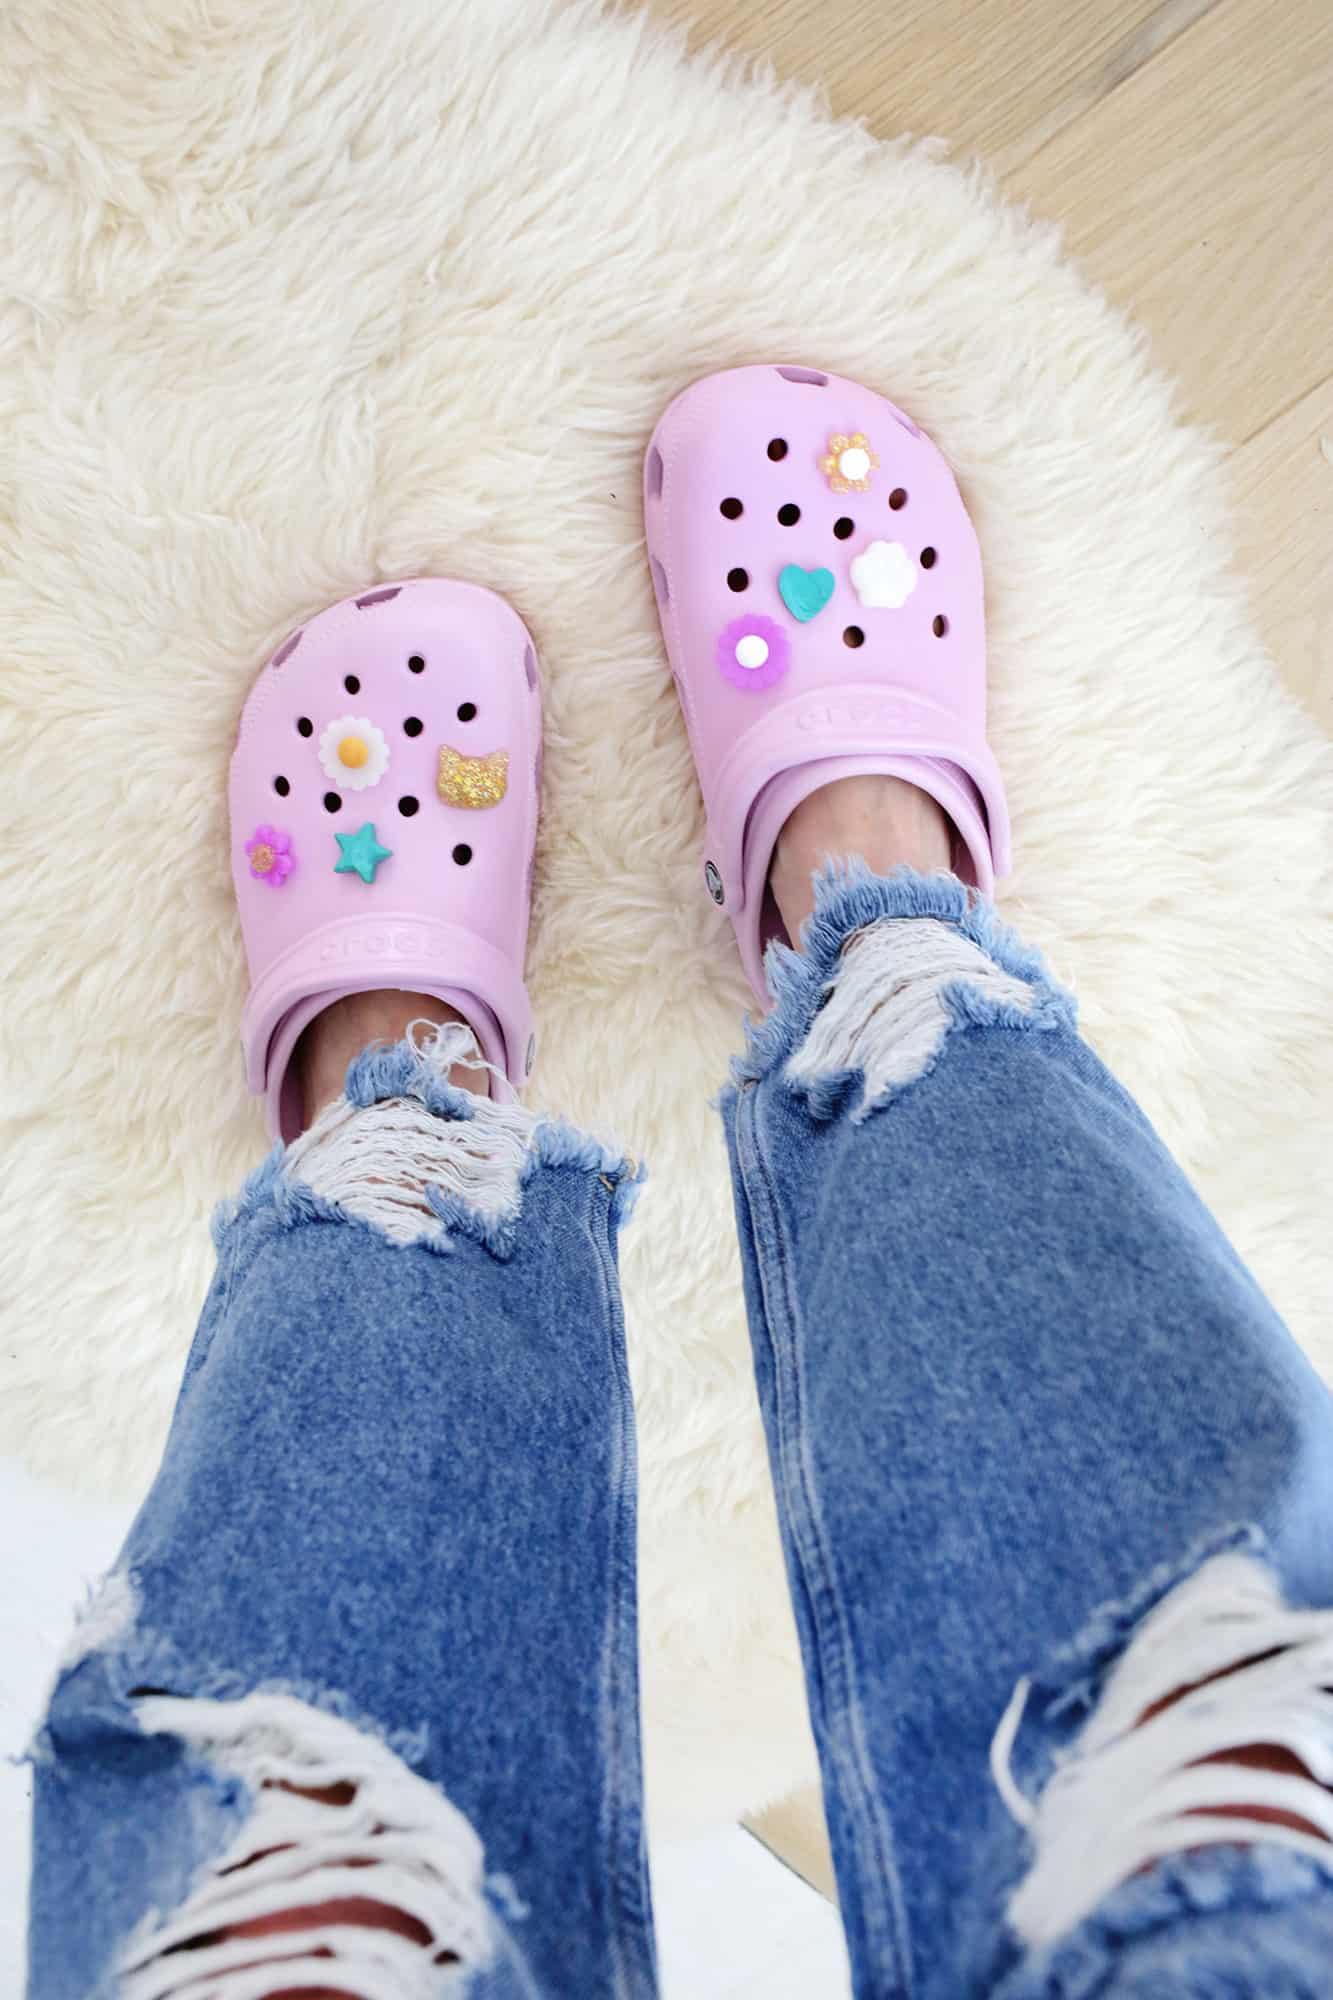
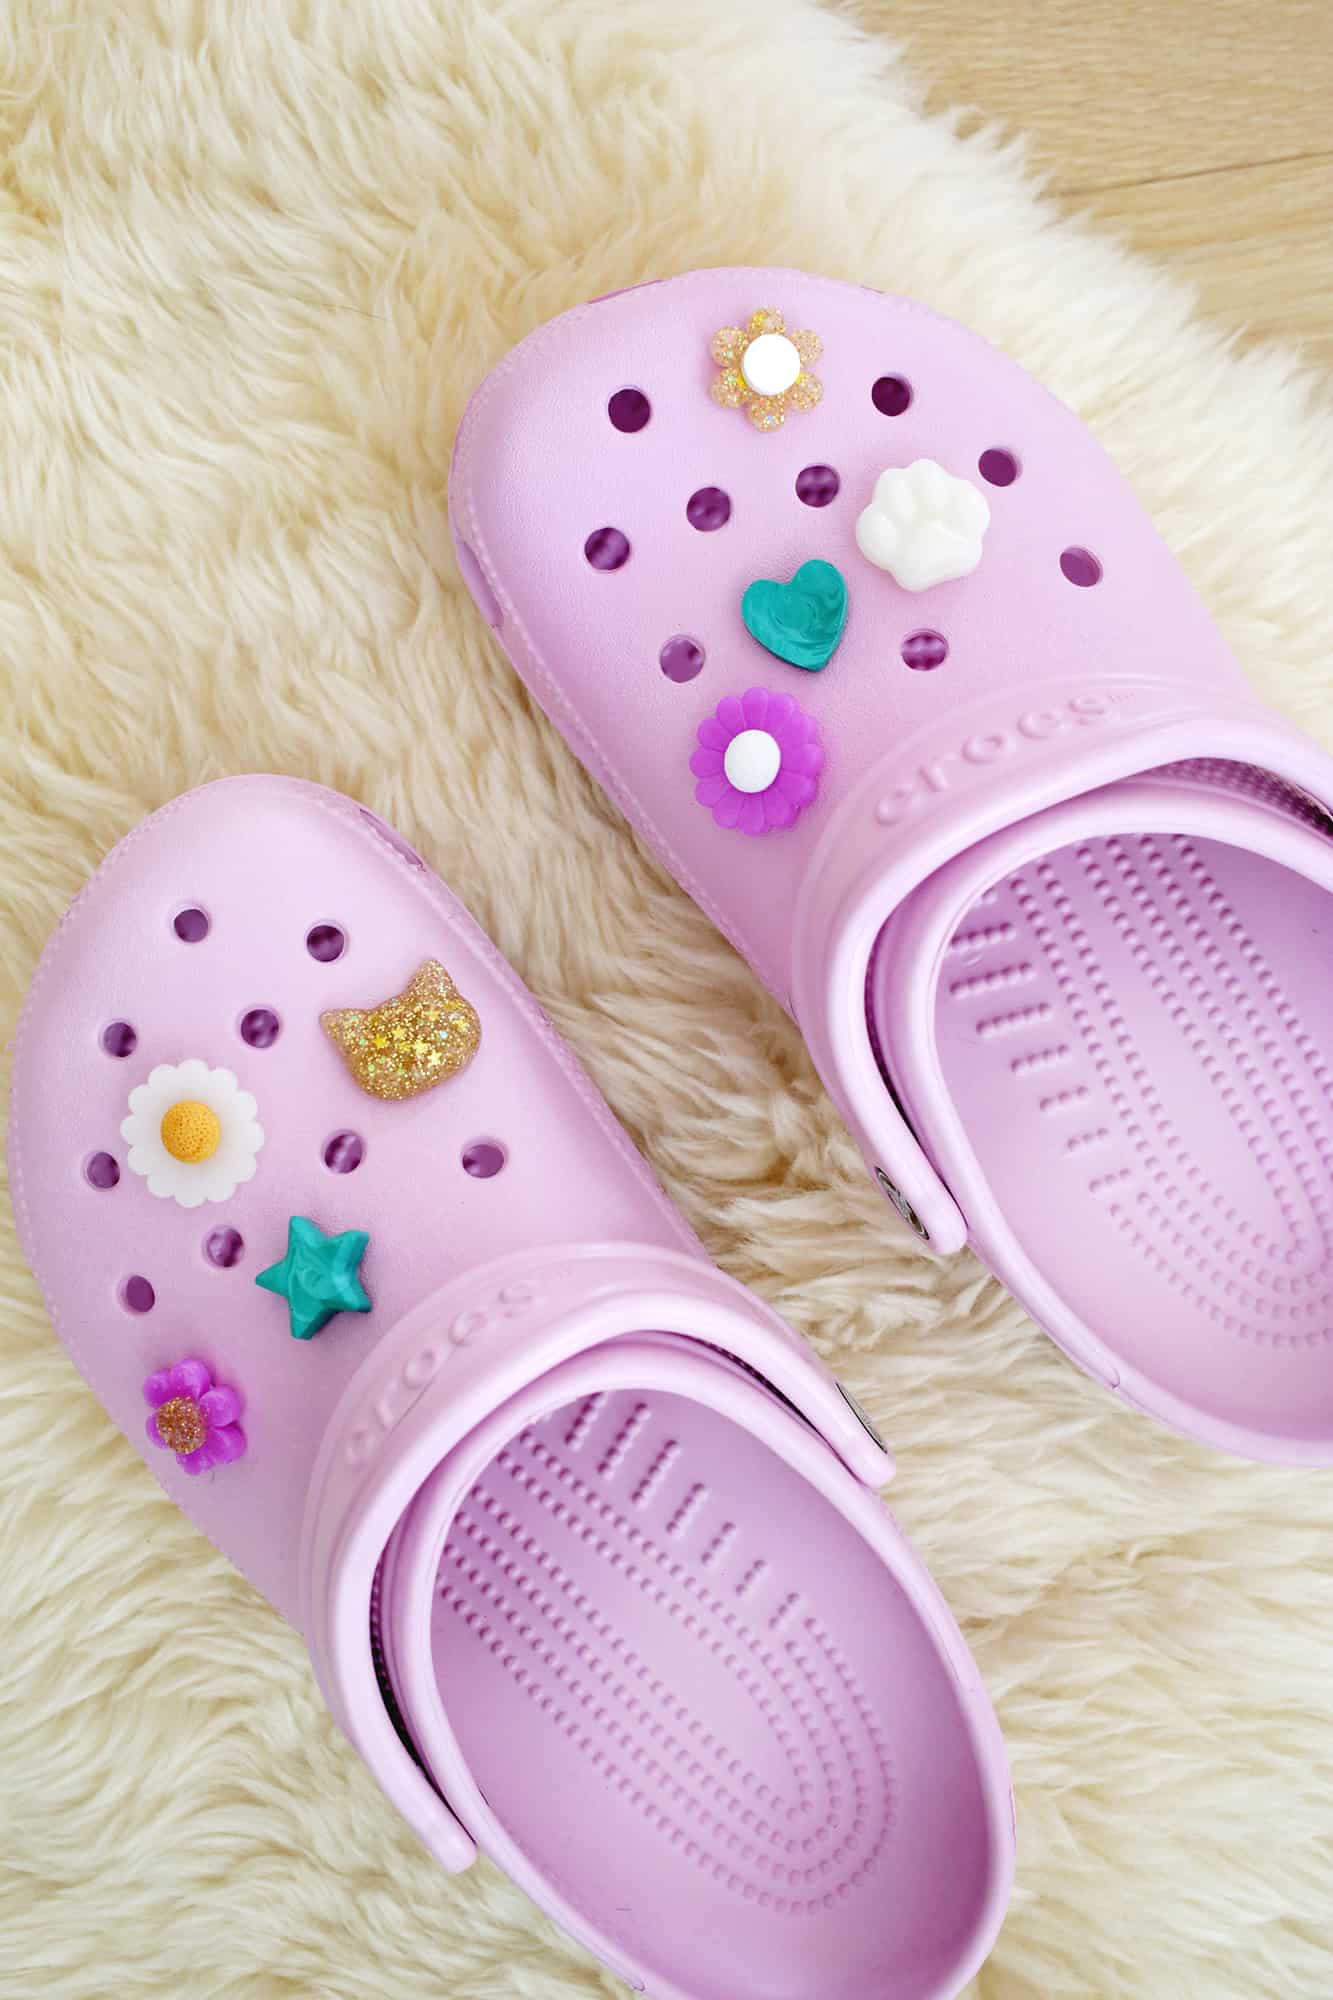
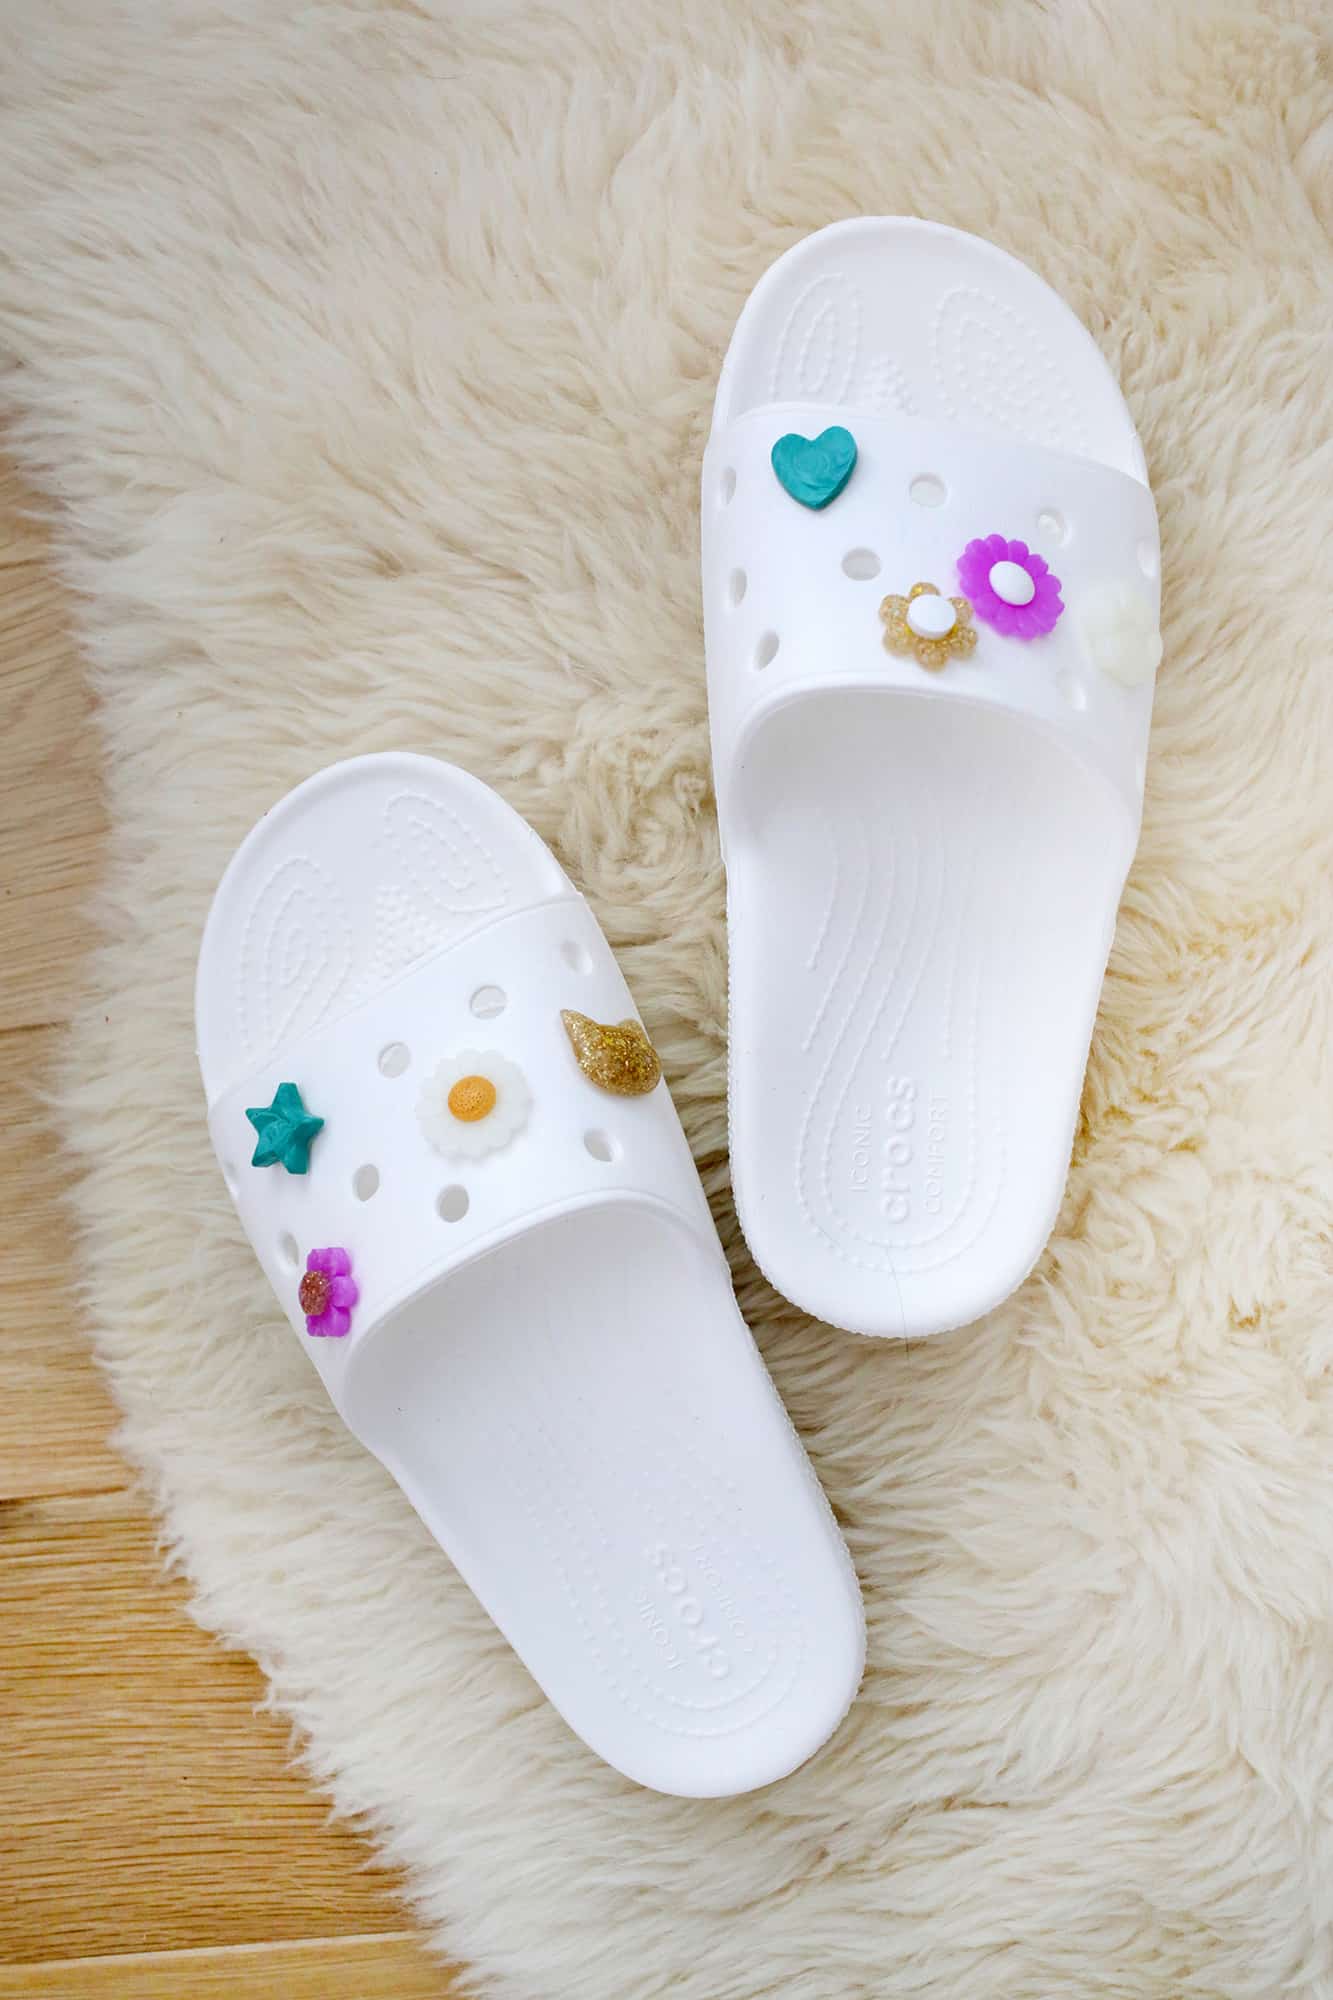
So much cuter with charms!! And if you like this idea but aren’t a fan of the more classic style Crocs, you can get these sandal slides which are perfect for the beach or the pool.
Making these Croc charms with Liquid Sculpey was so fast, fun, and easy, and I love how you can customize all the colors to your liking and add glitter and mica for an extra shine (my daughter thought the glow-in-the-dark color was so cool, too).
You could also use this method to make custom pins with backings like these or necklace charms. The possibilities are endless!
I know Crocs can be very polarizing as well (you either love them or hate them!), so let us know in the comments if you are team Crocs and what kinds of charms you would love to make for your pairs! xo. Laura

Easy Croc Charm DIY
Equipment
- Sculpey mixing cup set (optional but super helpful!)
Ingredients
- Liquid Sculpey in your favorite colors
- charm backings
- 1 silicone mold in your favorite charm shapes
- super glue
- 1 pair of cute Crocs
Instructions
- First you’ll want to lay out your silicone molds and decide which colors you want to go with which molds.
- Before pouring your Liquid Sculpey into the molds you’ll want to stir the liquid in the bottle, or, if you are mixing colors you can use the oven-safe silicone cup that comes with a dual-end stir stick. The cup is super helpful since it’s clear so you can see the color you are mixing, it’s got a measuring scale on the cup for easy measurements, and a spout for easy-pouring (and if you have any leftovers in the cup, either pop on the lid to save for another day or just bake it and peel it out for a easy way to clean the cup!). Using the stir stick is a great way to add glitter and sparkle to your creations as the scoop end allows you to add glitter and mica to your cup with no mess (and you can use the pointed end to pop any bubbles that appear!).
- Once your colors are stirred, pour or squeeze the color into the molds doing either all one color, sections of color for a color-blocked look, or, pour more than one color and marble with a toothpick.
- Bake your molds at 275° for 15 minutes per every 1/4″ of Liquid Sculpey (so 15 minutes for 1/4″ thick and 30 minutes for 1/2″ thick). Allow the molds to cool and then pop out your charms!
- Once the charms are totally cool, use the super glue to glue them to the charm backings and allow the glue to set. Once the glue is dry, you are ready to decorate your Crocs!
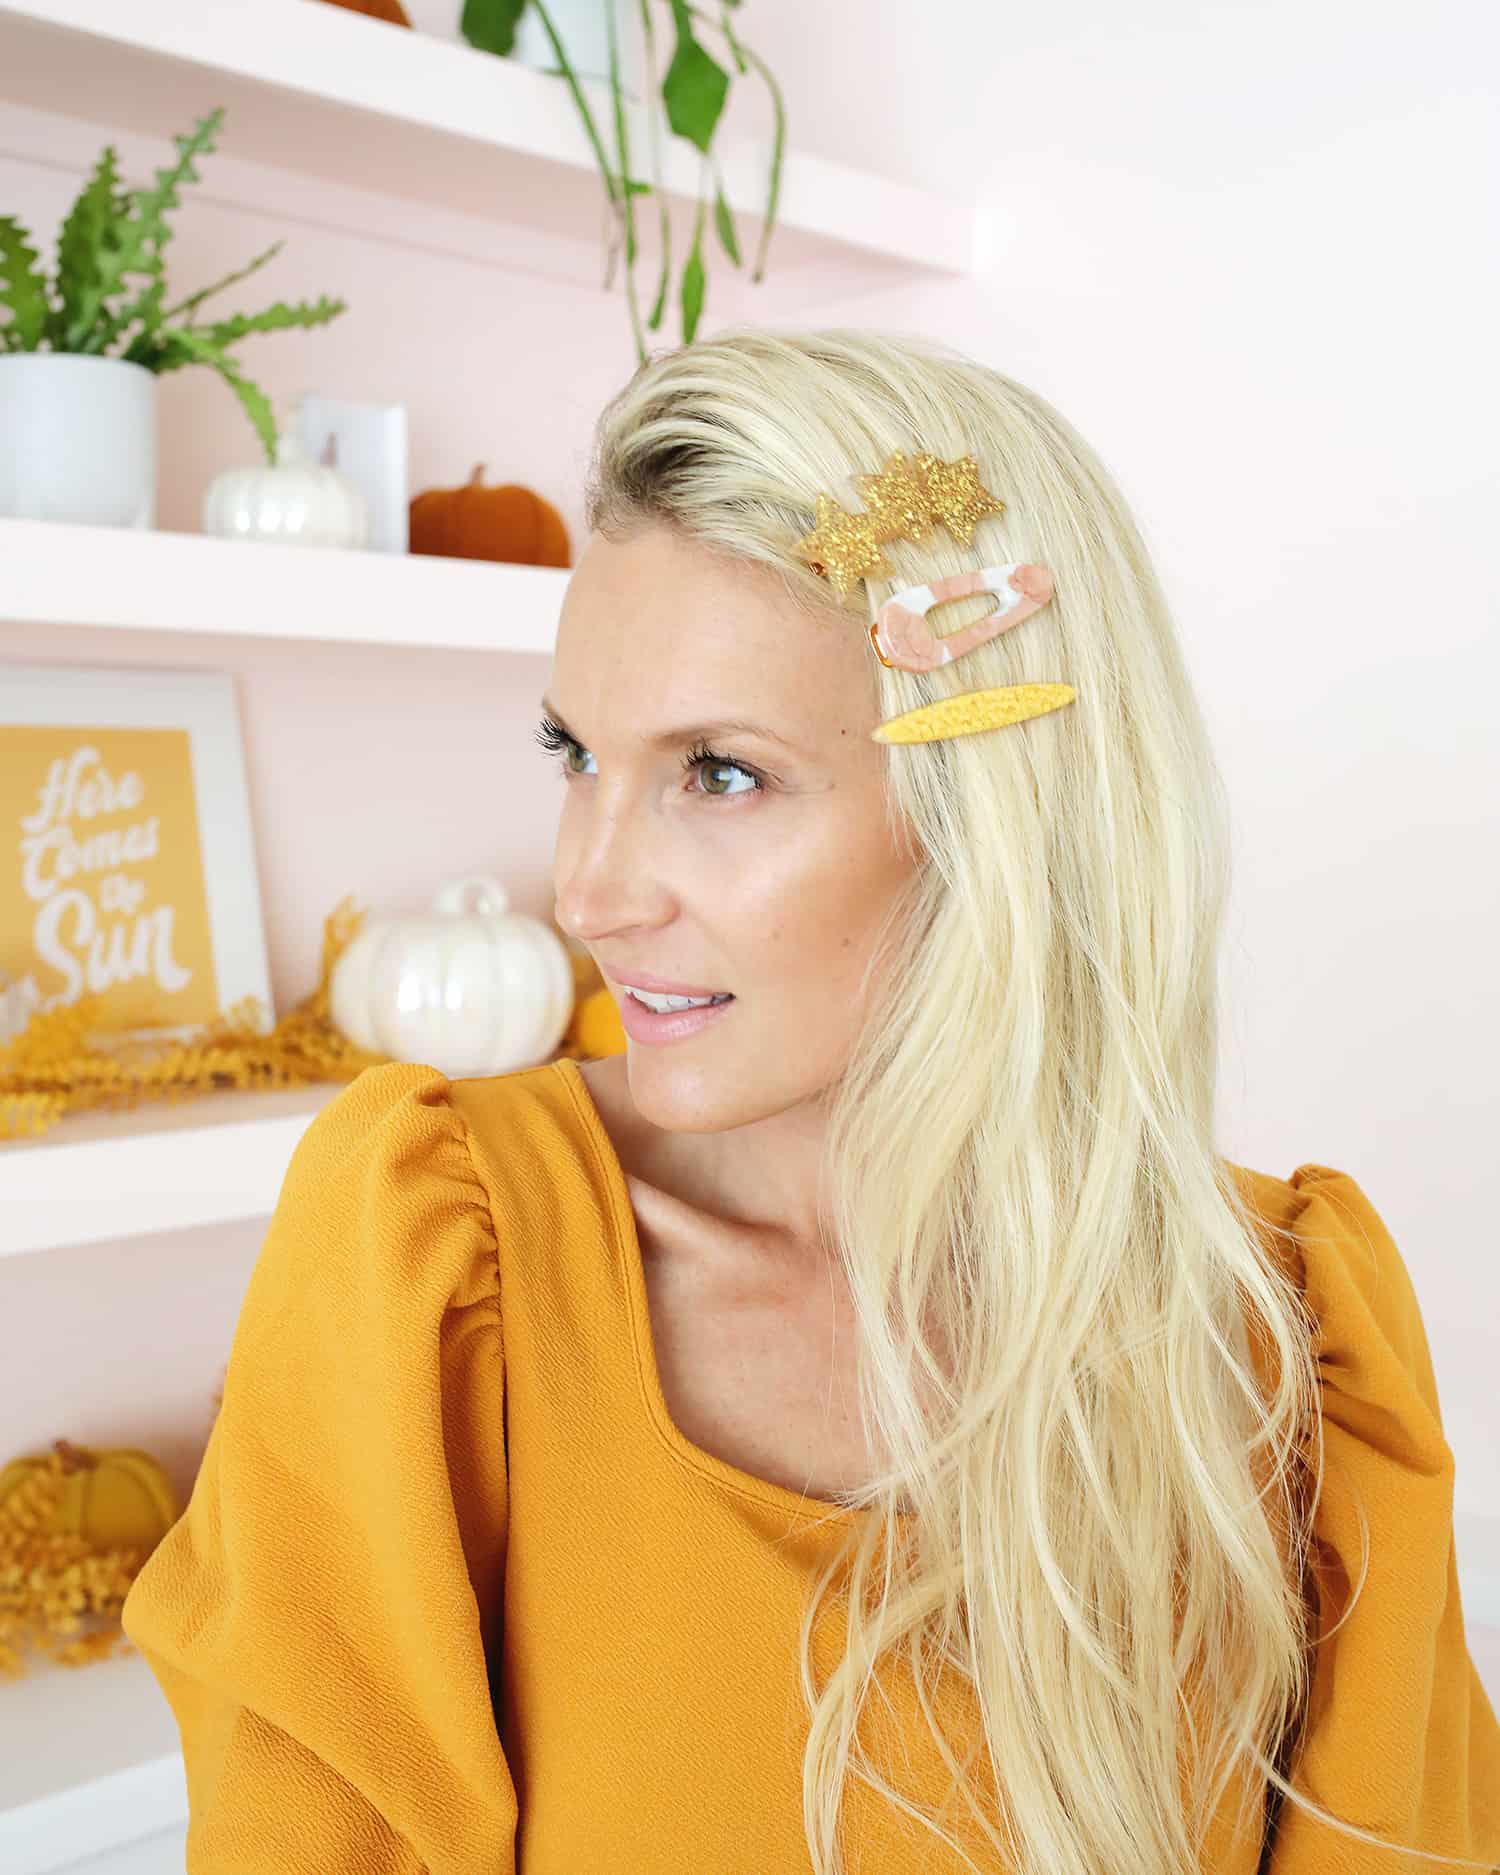
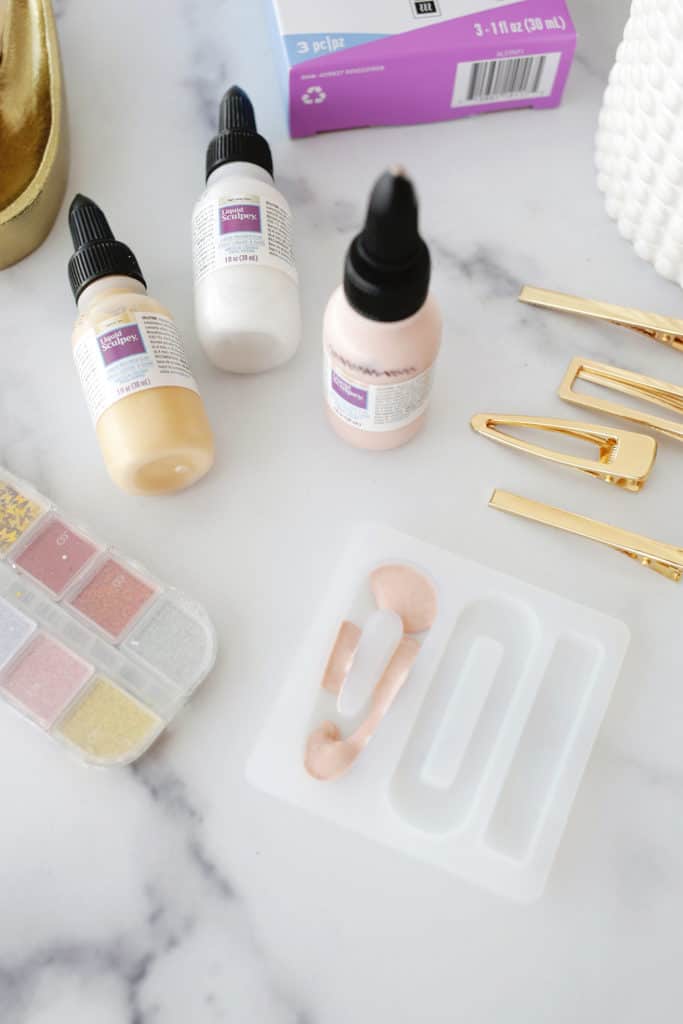
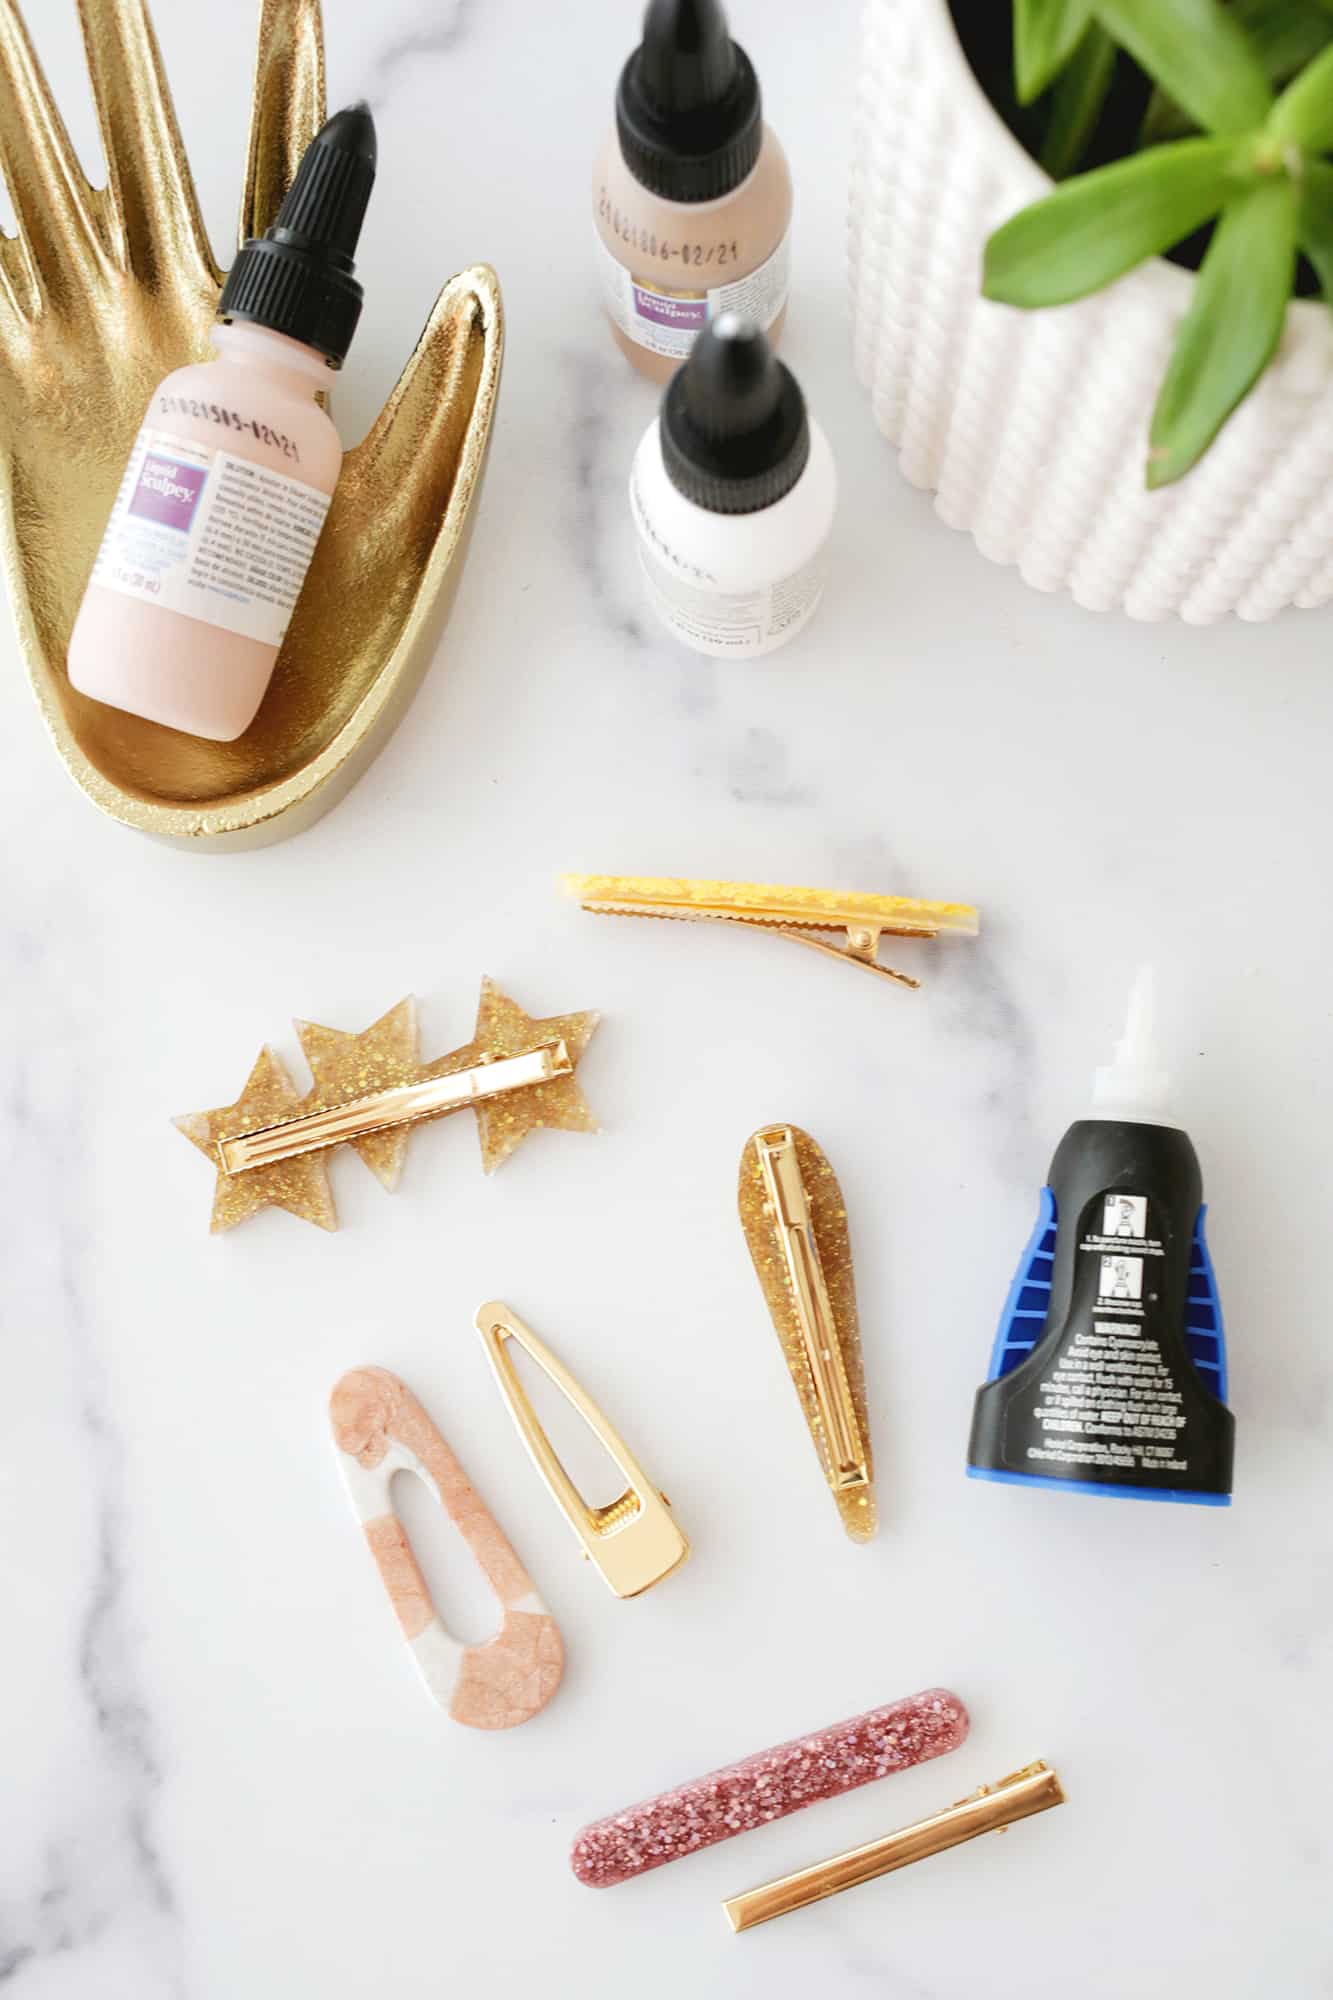
Today, we are partnering with Sculpey to show you how you can make a bunch of different statement hair clips in one afternoon—all from the comfort of your own home! This is the first time I’ve use the liquid clay from Sculpey and it was so easy and so fun to use. I’ll show you how I made mine!
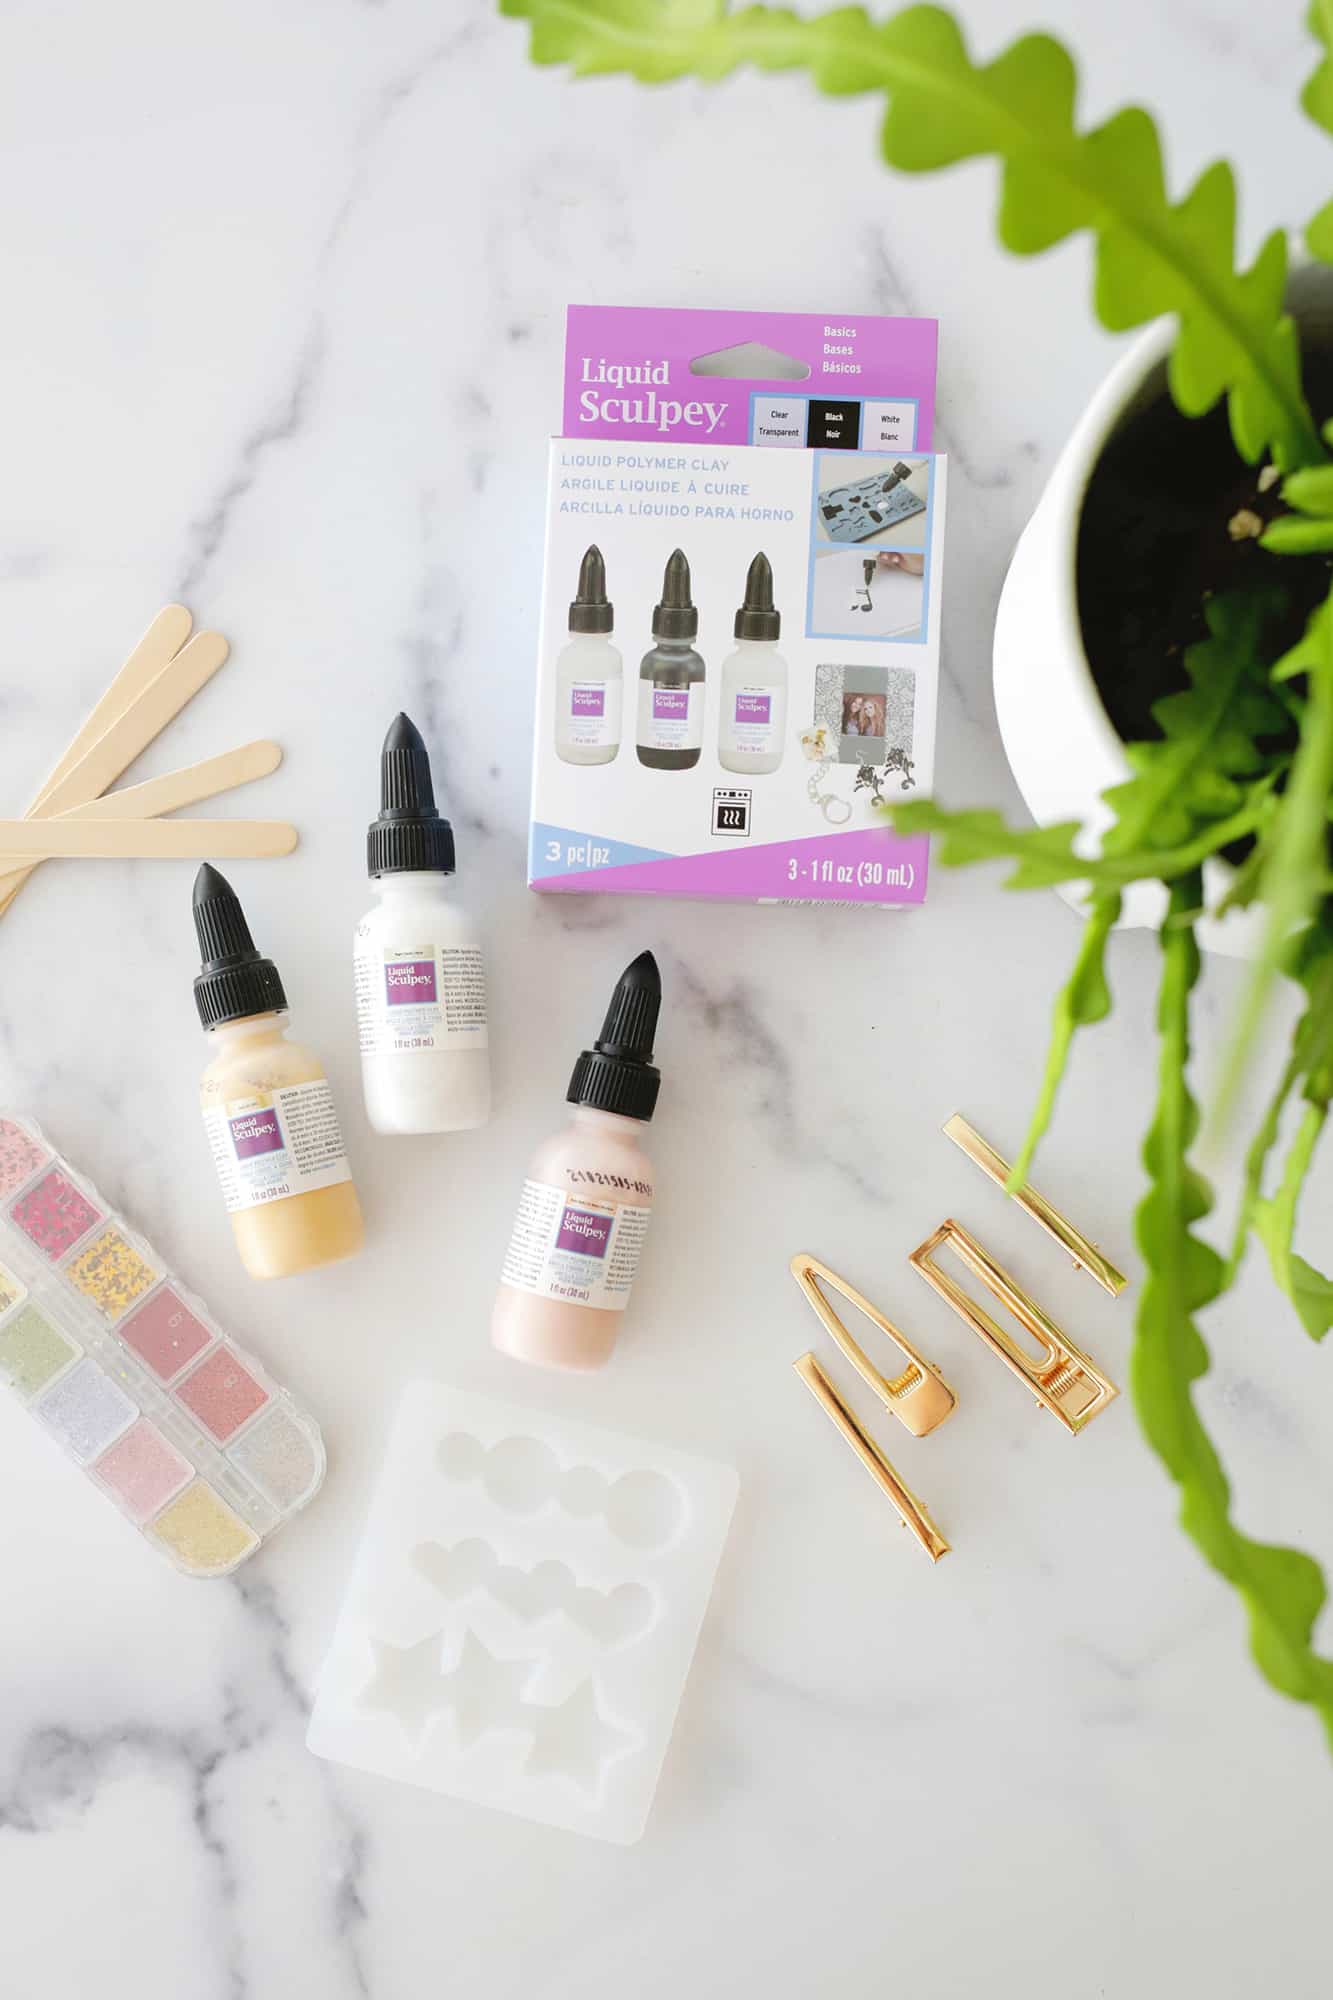
Supplies
- Sculpey Liquid Clay in various colors
- Barrette molds
- Barrette clips (this kit comes with the mold and the clips)
- Glue (this is my favorite one to use)
- Toothpicks or popsicle sticks
- Baking tray to bake clips on in oven
- Sculpey Clay Thinner (optional)
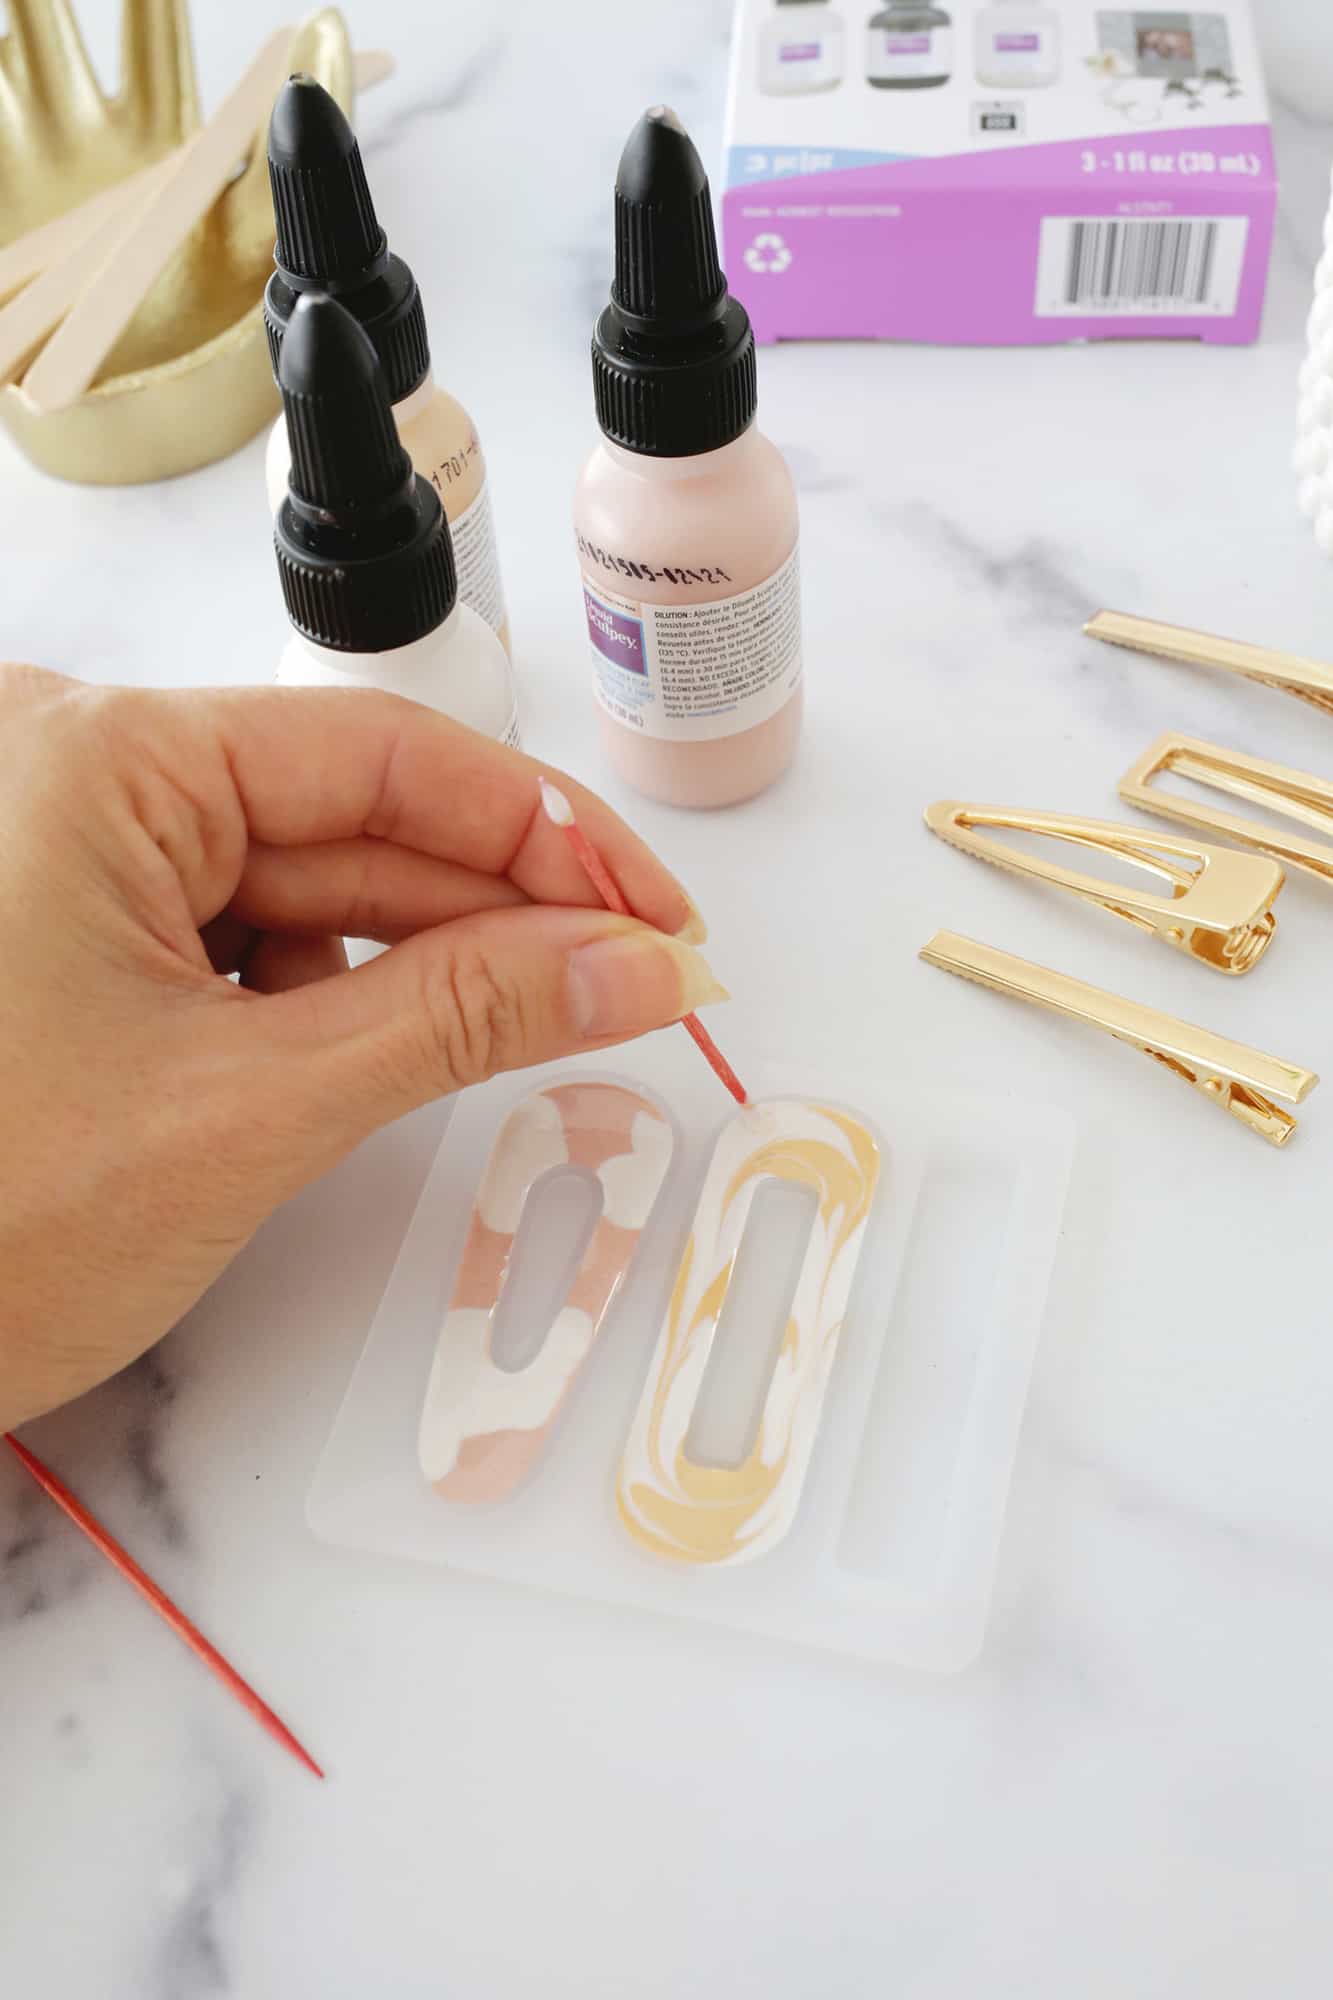
How to Make Your Own Statement Hair Clips At Home
- Open the lid of your liquid clay and stir the clay well with a popsicle stick. You can also add thinner to your clay if you want a more thin consistency, or you can let it sit out overnight with the cap off for a thicker consistency.
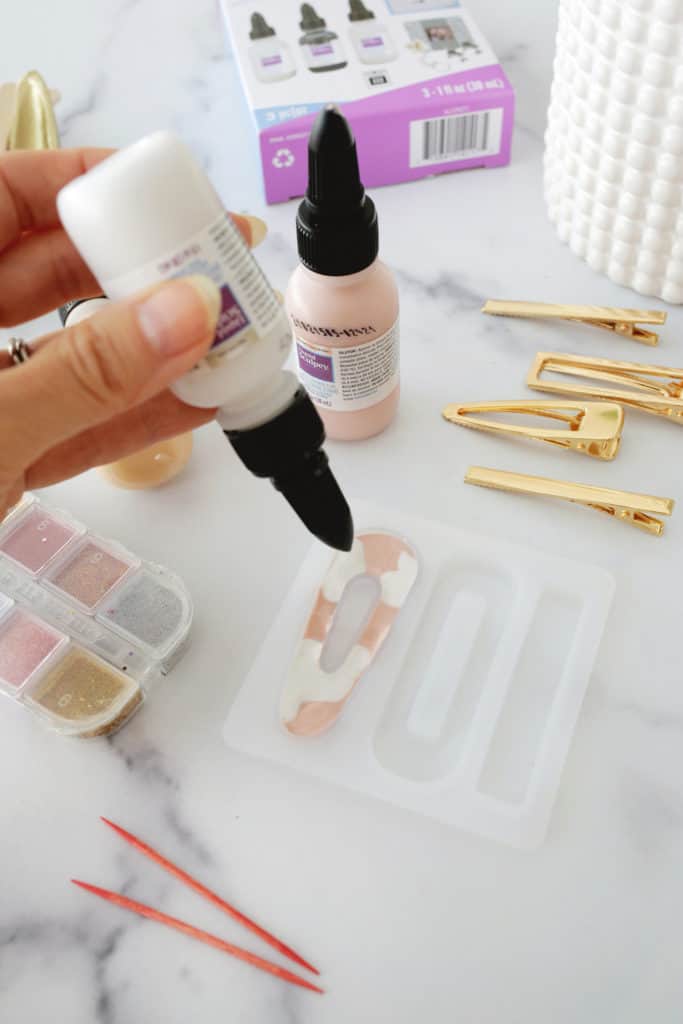
2. Twist the cap back on and twist the nozzle to open the clay and squeeze your color into your mold. There are lots of looks you can create with your liquid clay, but here are my favorite ones to do!
- Color blocked clips: To get a color block look, squeeze one color into half of your mold and straighten the edge where it will hit the other color with a toothpick so it’s as squared off as you can get it. Pour in the second color on the other side.
- Marbled clips: To get a swirled marbled look, squeeze one color in different spot of your mold and another color in the leftover areas (creating a tortoise shell-type of pattern).
Drag a toothpick or popsicle stick through the colors to swirl them. Make sure that your stick is touching the bottom of the mold when you drag it since the bottom of the mold will be the top when it’s done baking.
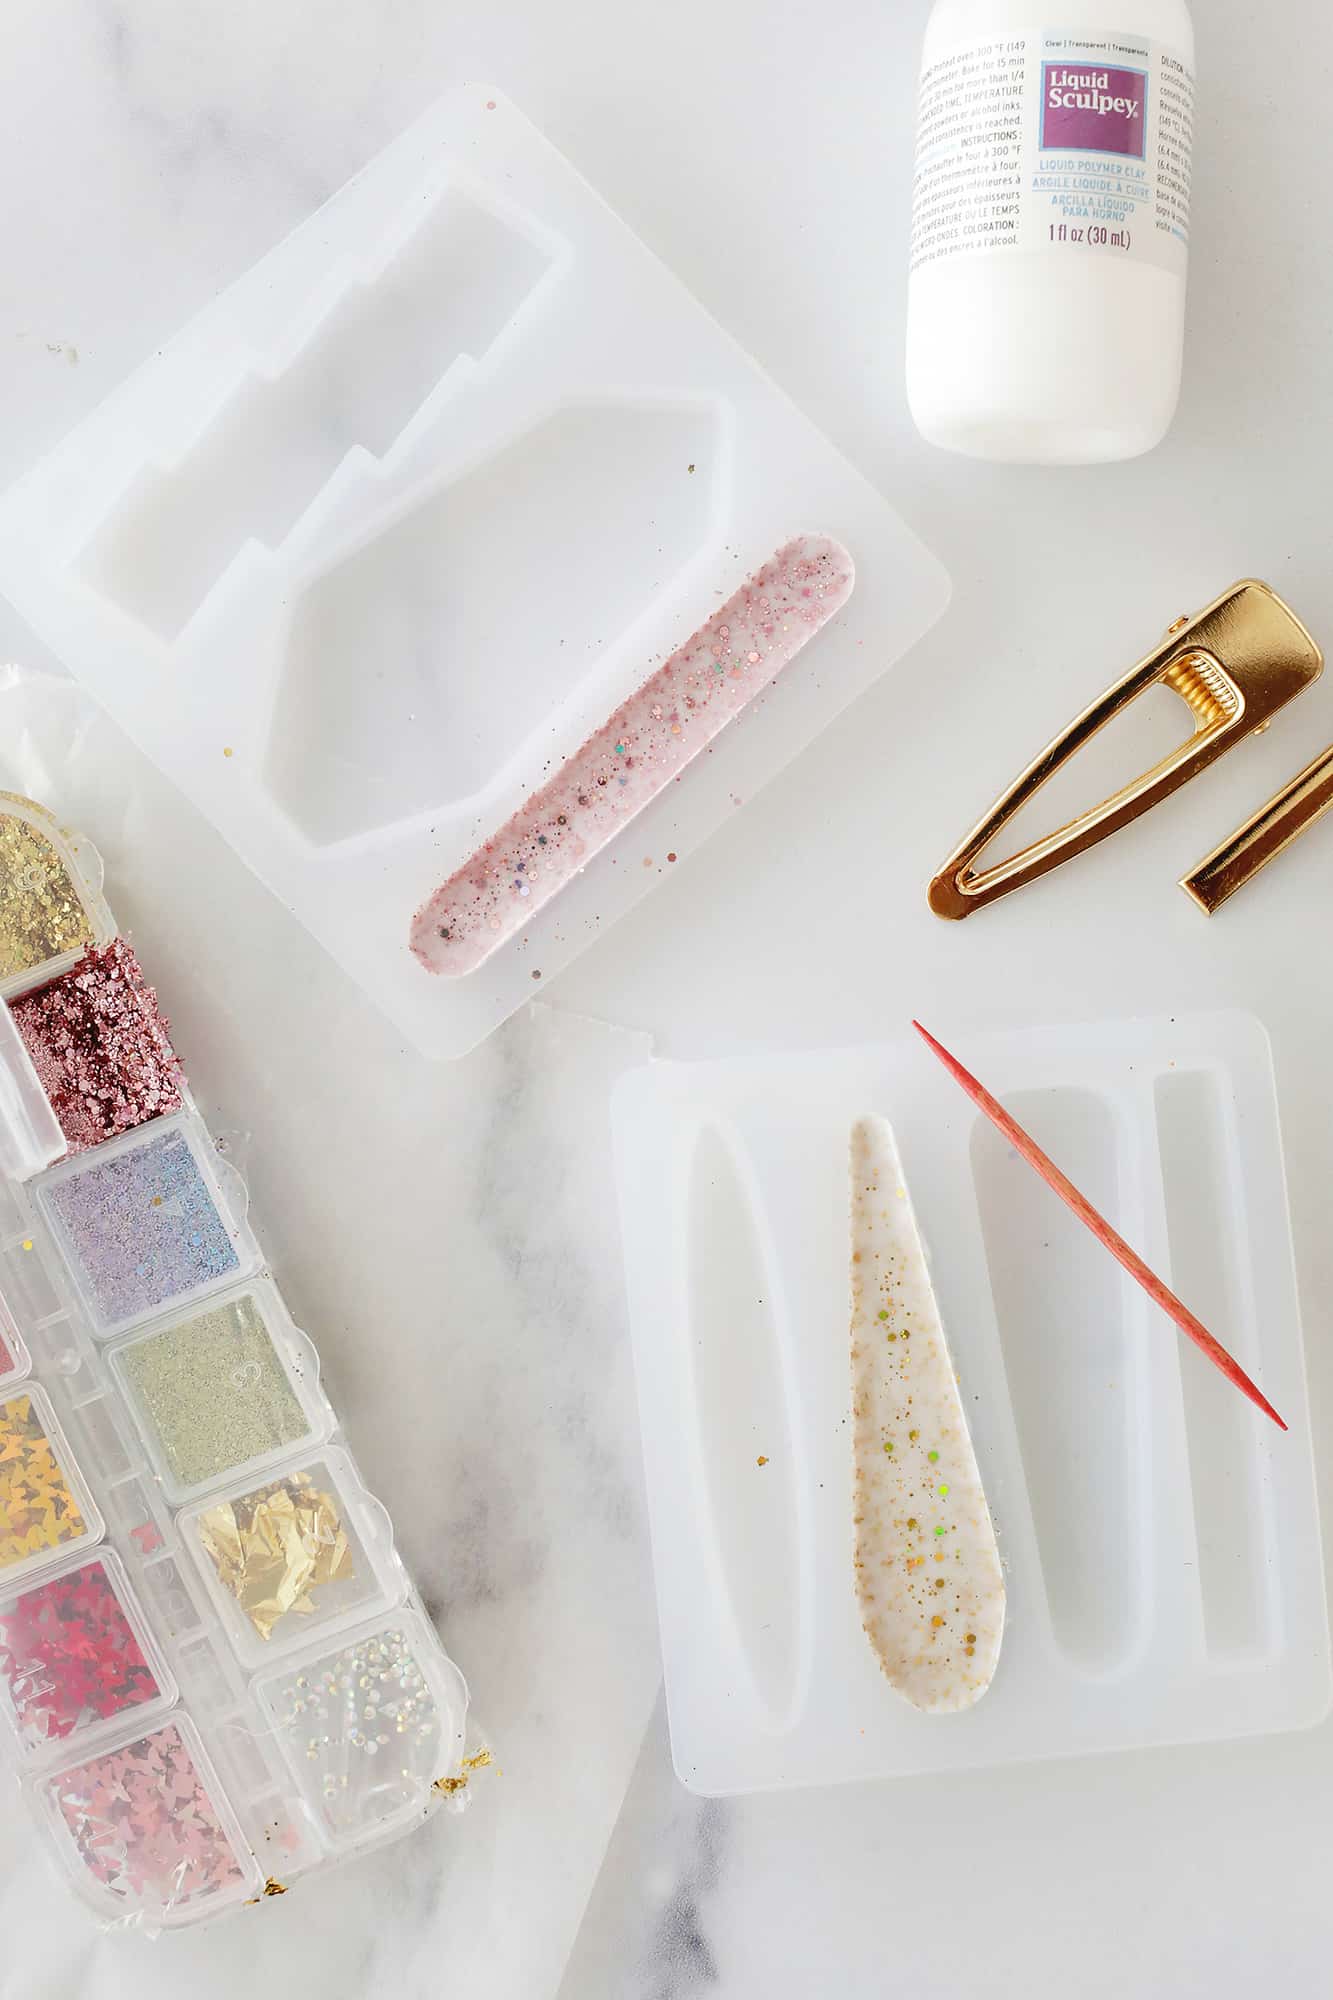
- Tortoise shell clips: To get a tortoise shell look, squeeze one color in different spots/corners of your mold and another color in the leftover areas.
- Glitter clips: To get a glitter look, use the clear liquid clay to fill your mold about 2/3 full and then pour in small glitter shapes or loose glitter.
Mix in with a toothpick until it’s evenly distributed, add more clear liquid clay until mold is full, and stir again. If you want a solid glitter look, add more, and use less glitter if you want it to be more spread out.
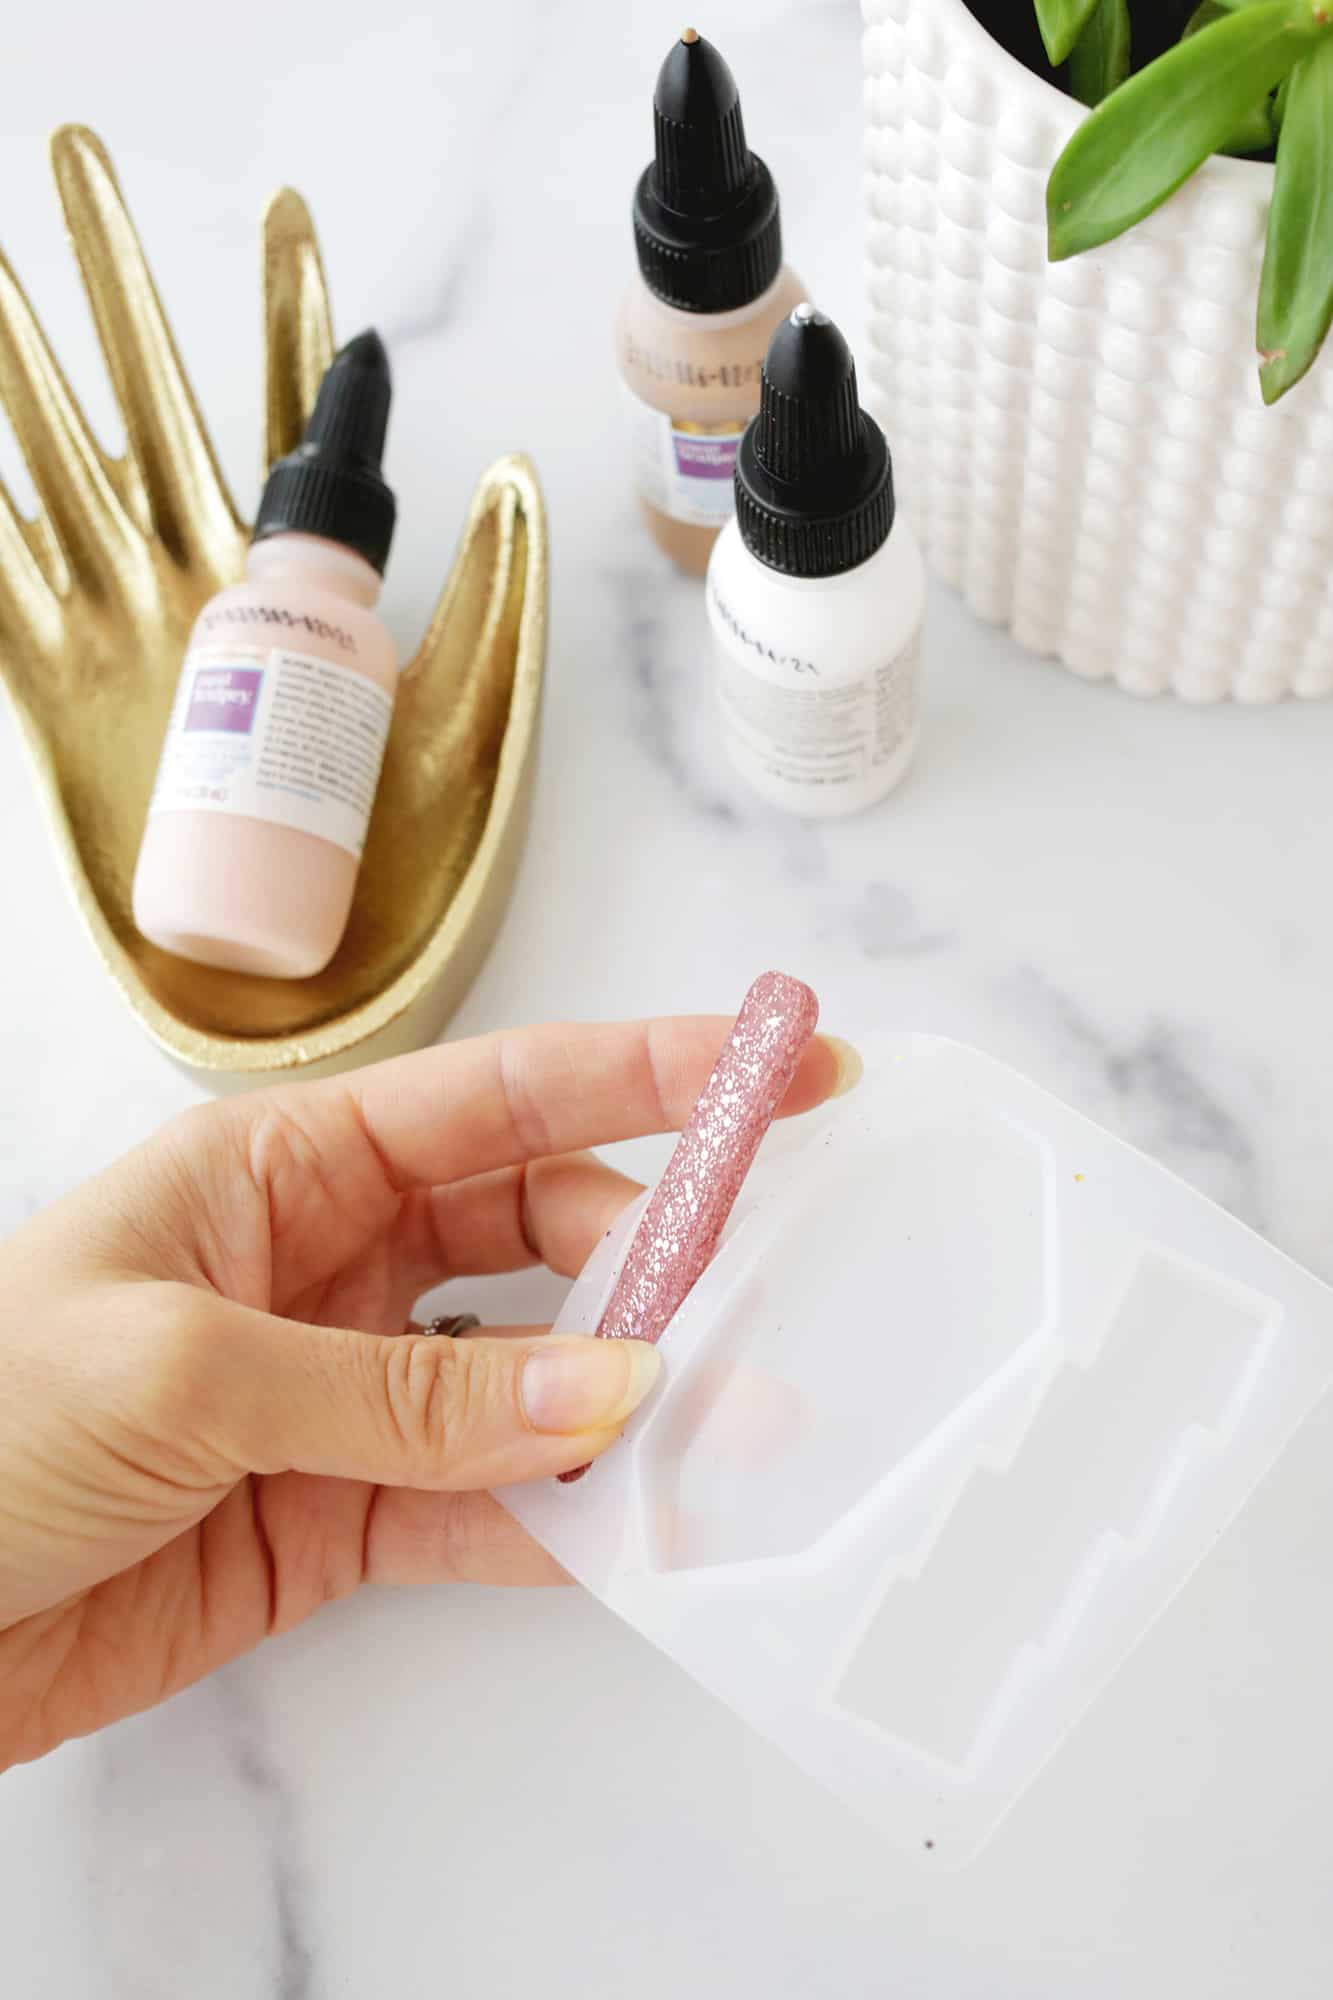
3. Once your molds are ready, bake them in the oven at 275° for 15 minutes (do 30 minutes if your molds are over 1/4″ thick).
4. When molds are done baking, pull them out of the oven and allow them to cool before popping them out of the mold. If you have any edges sticking up from the main part of your barrette, you can cut that edge off with scissors or an X-Acto knife.
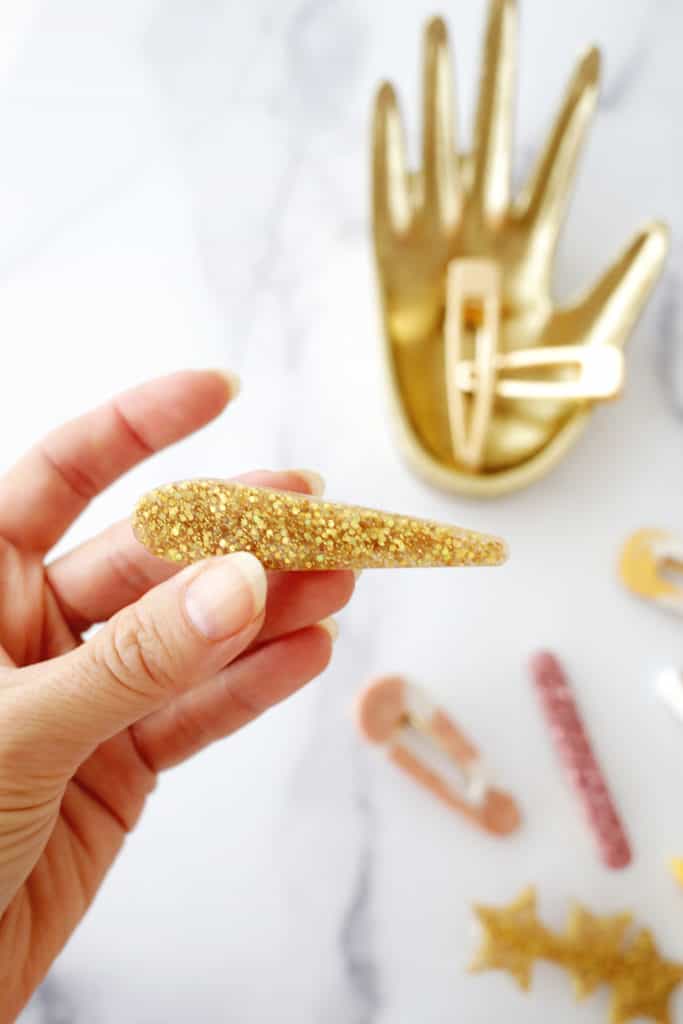
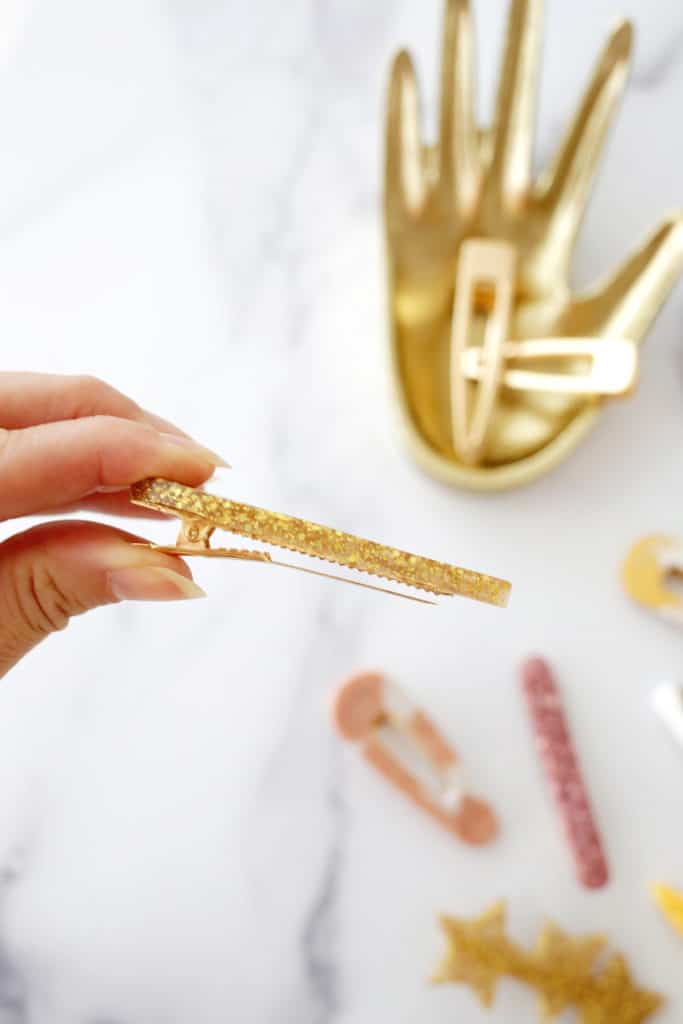
5. Once your clay has cooled, glue it onto the top of a barrette backing, let the glue set and you are ready to wear your creations!
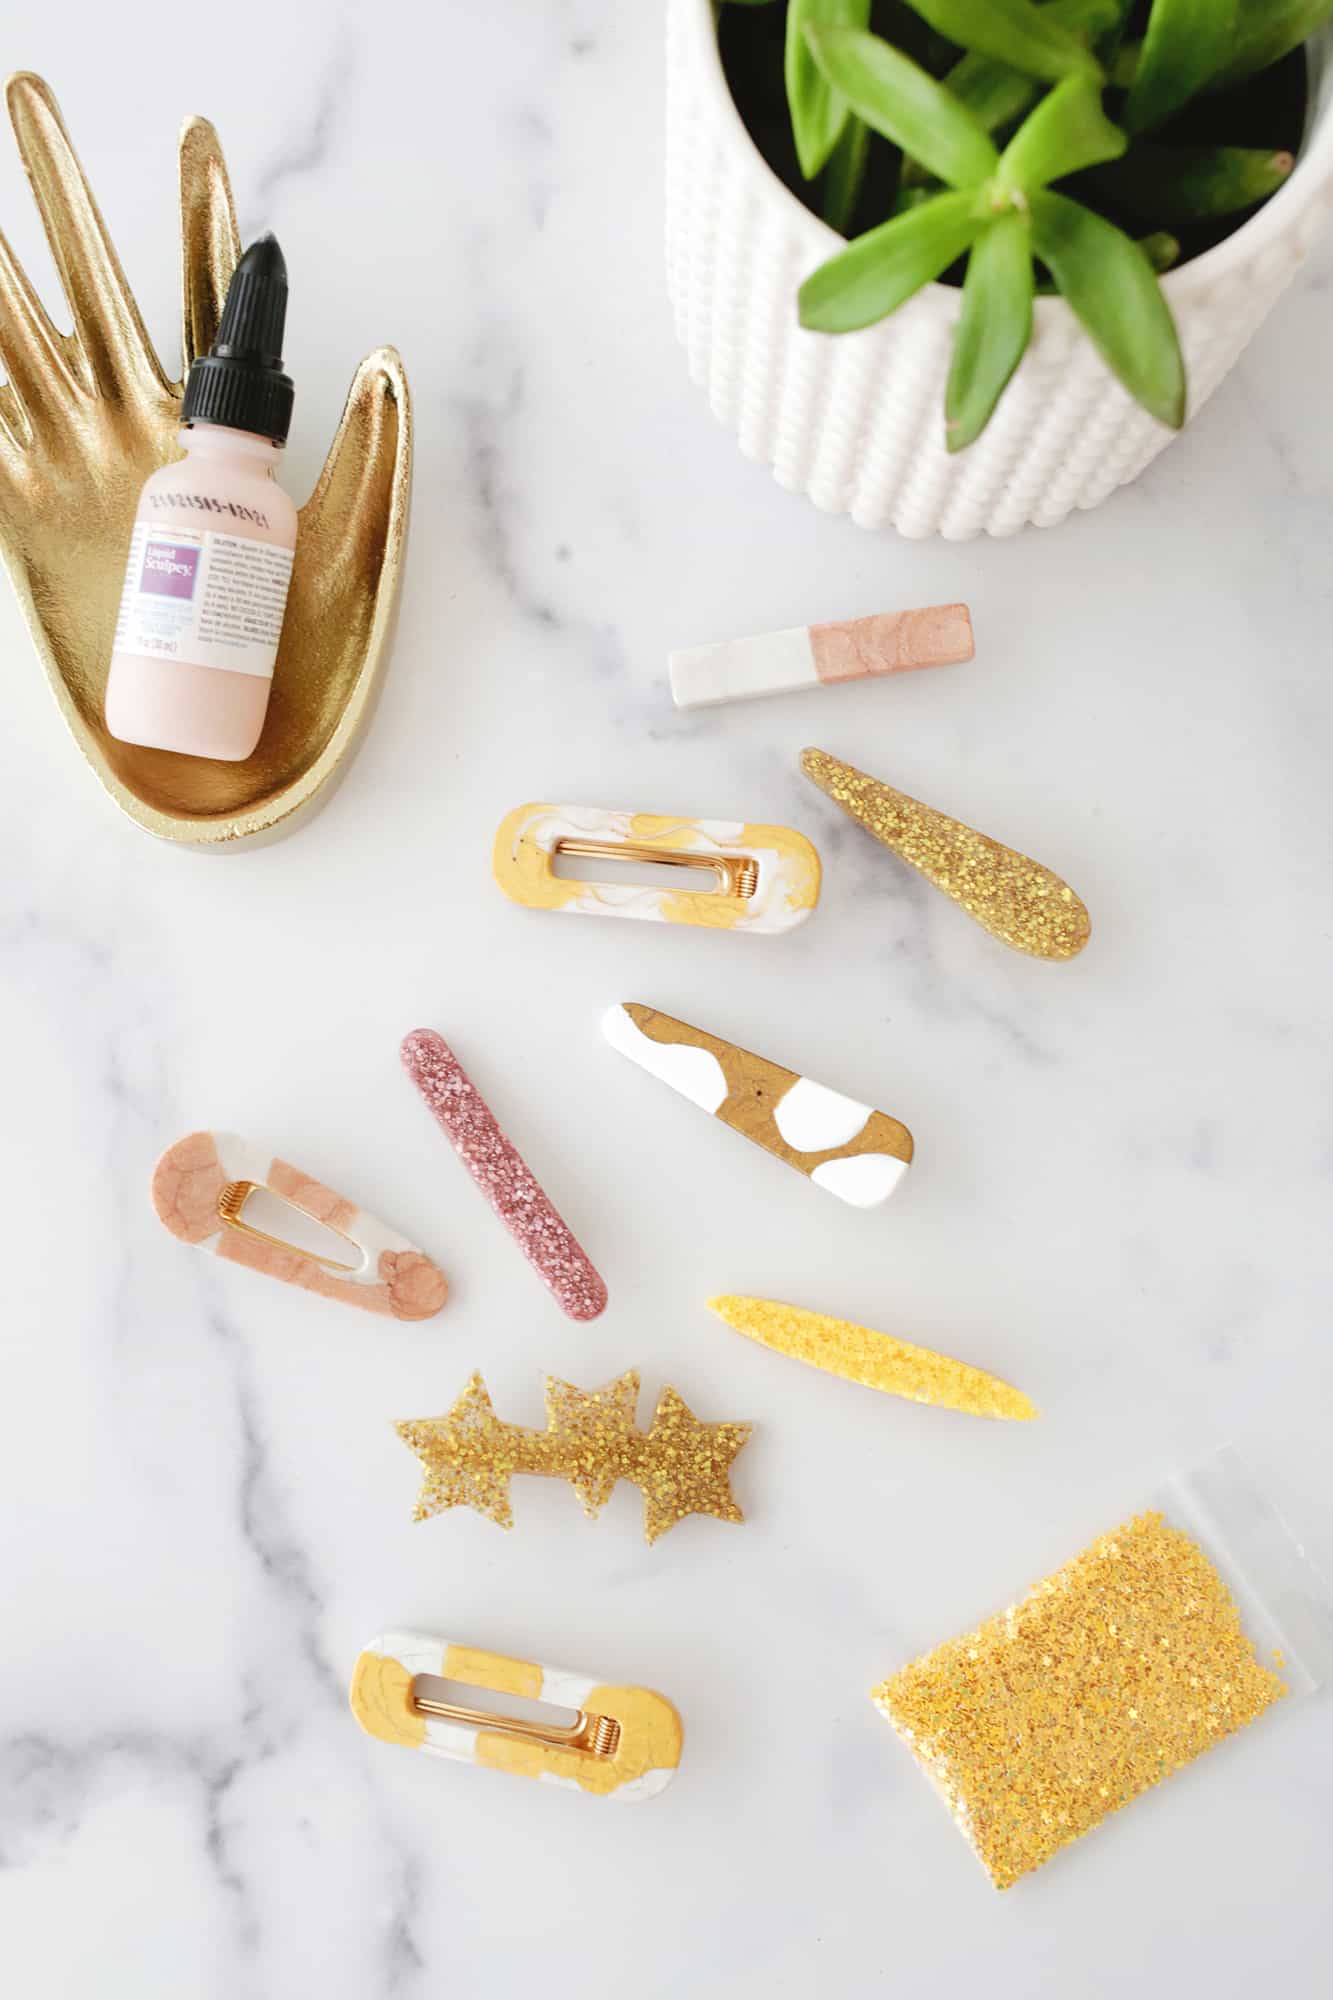
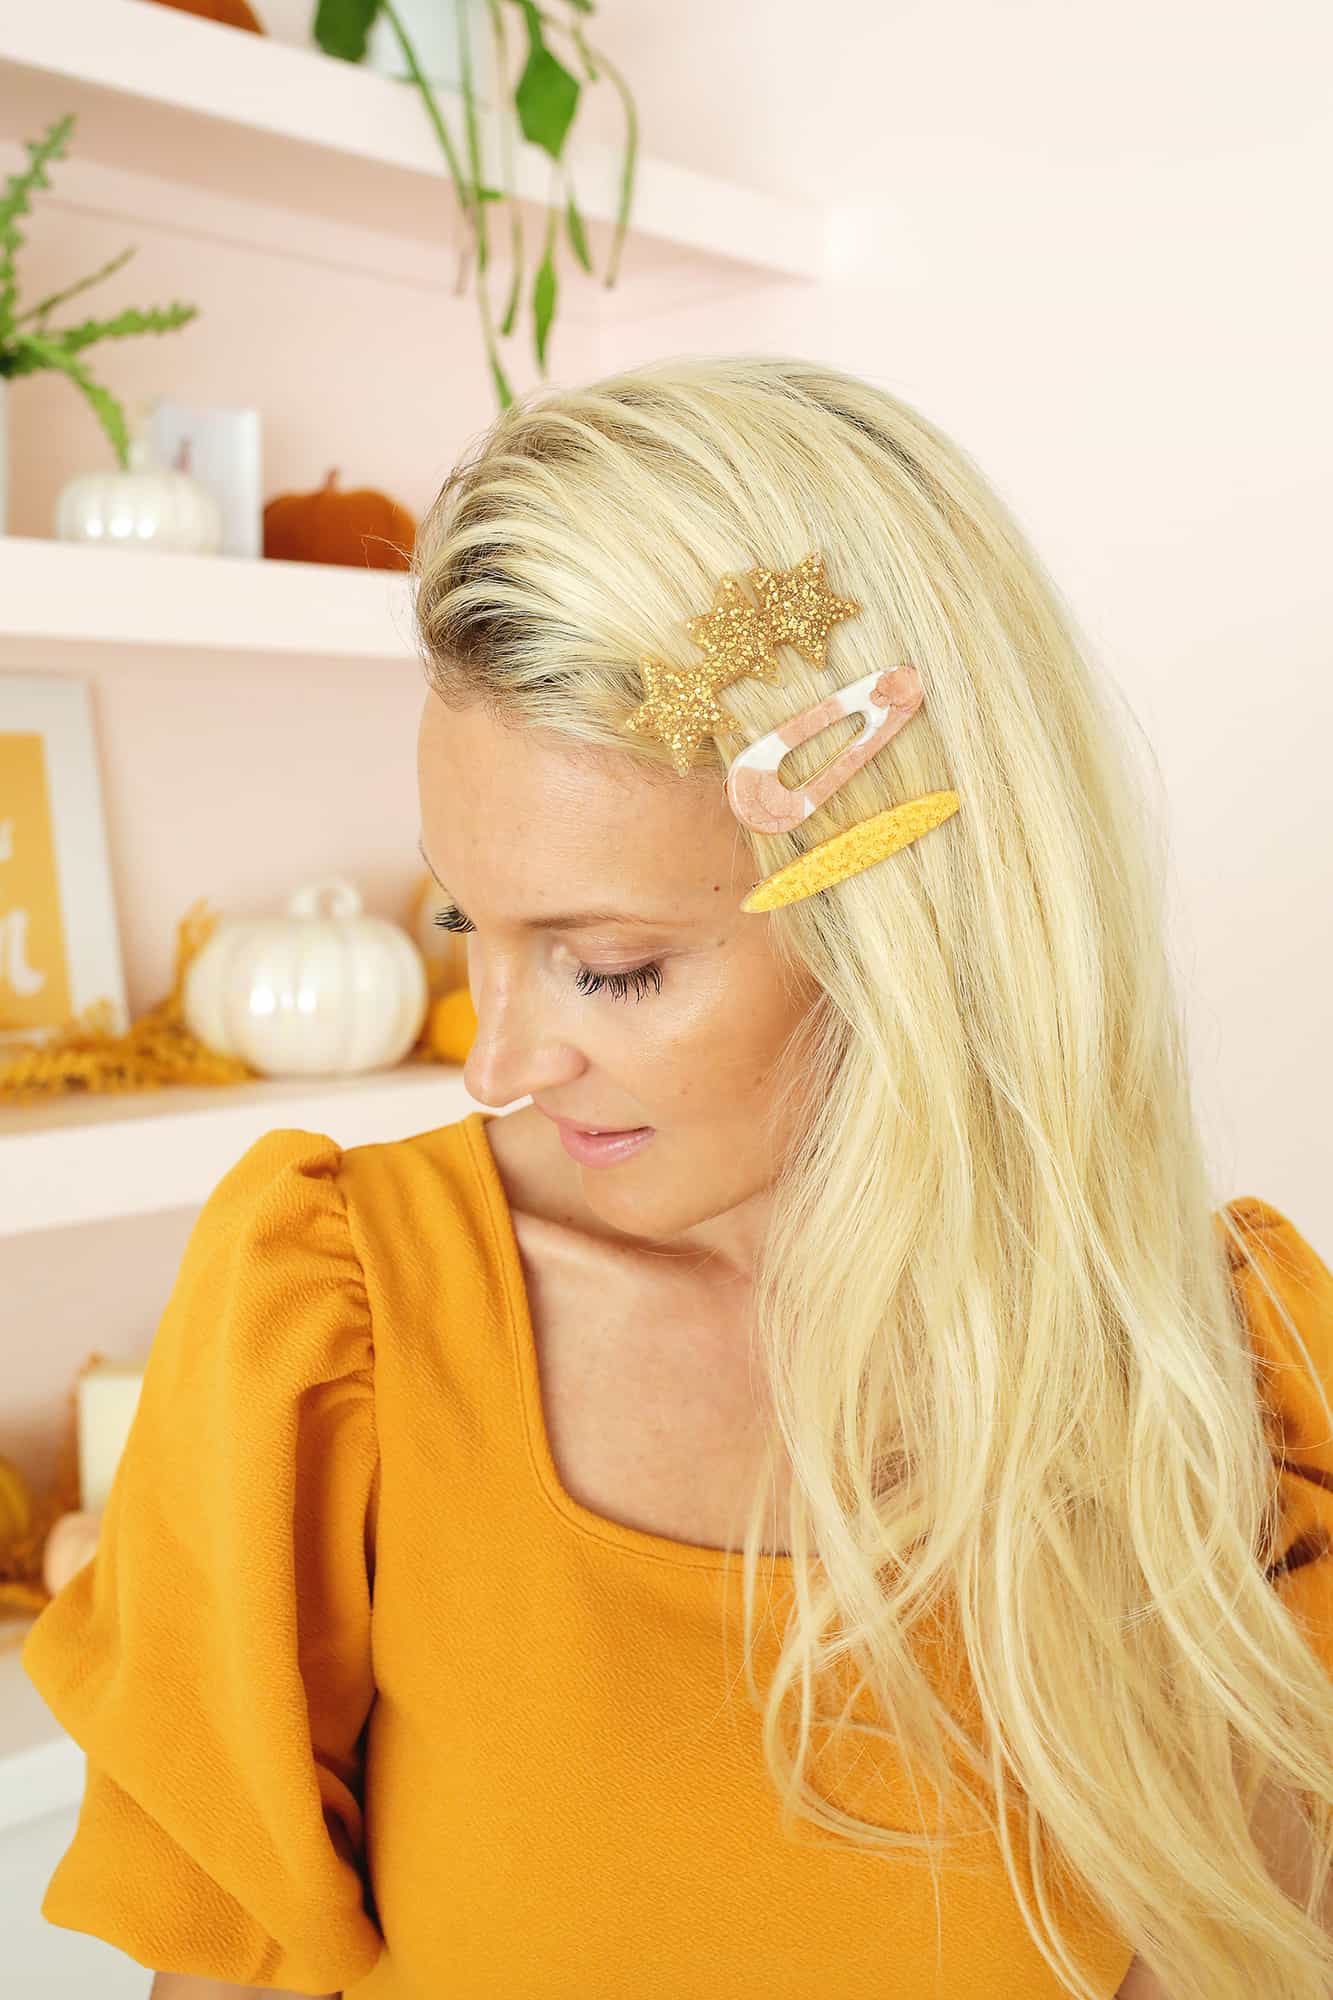
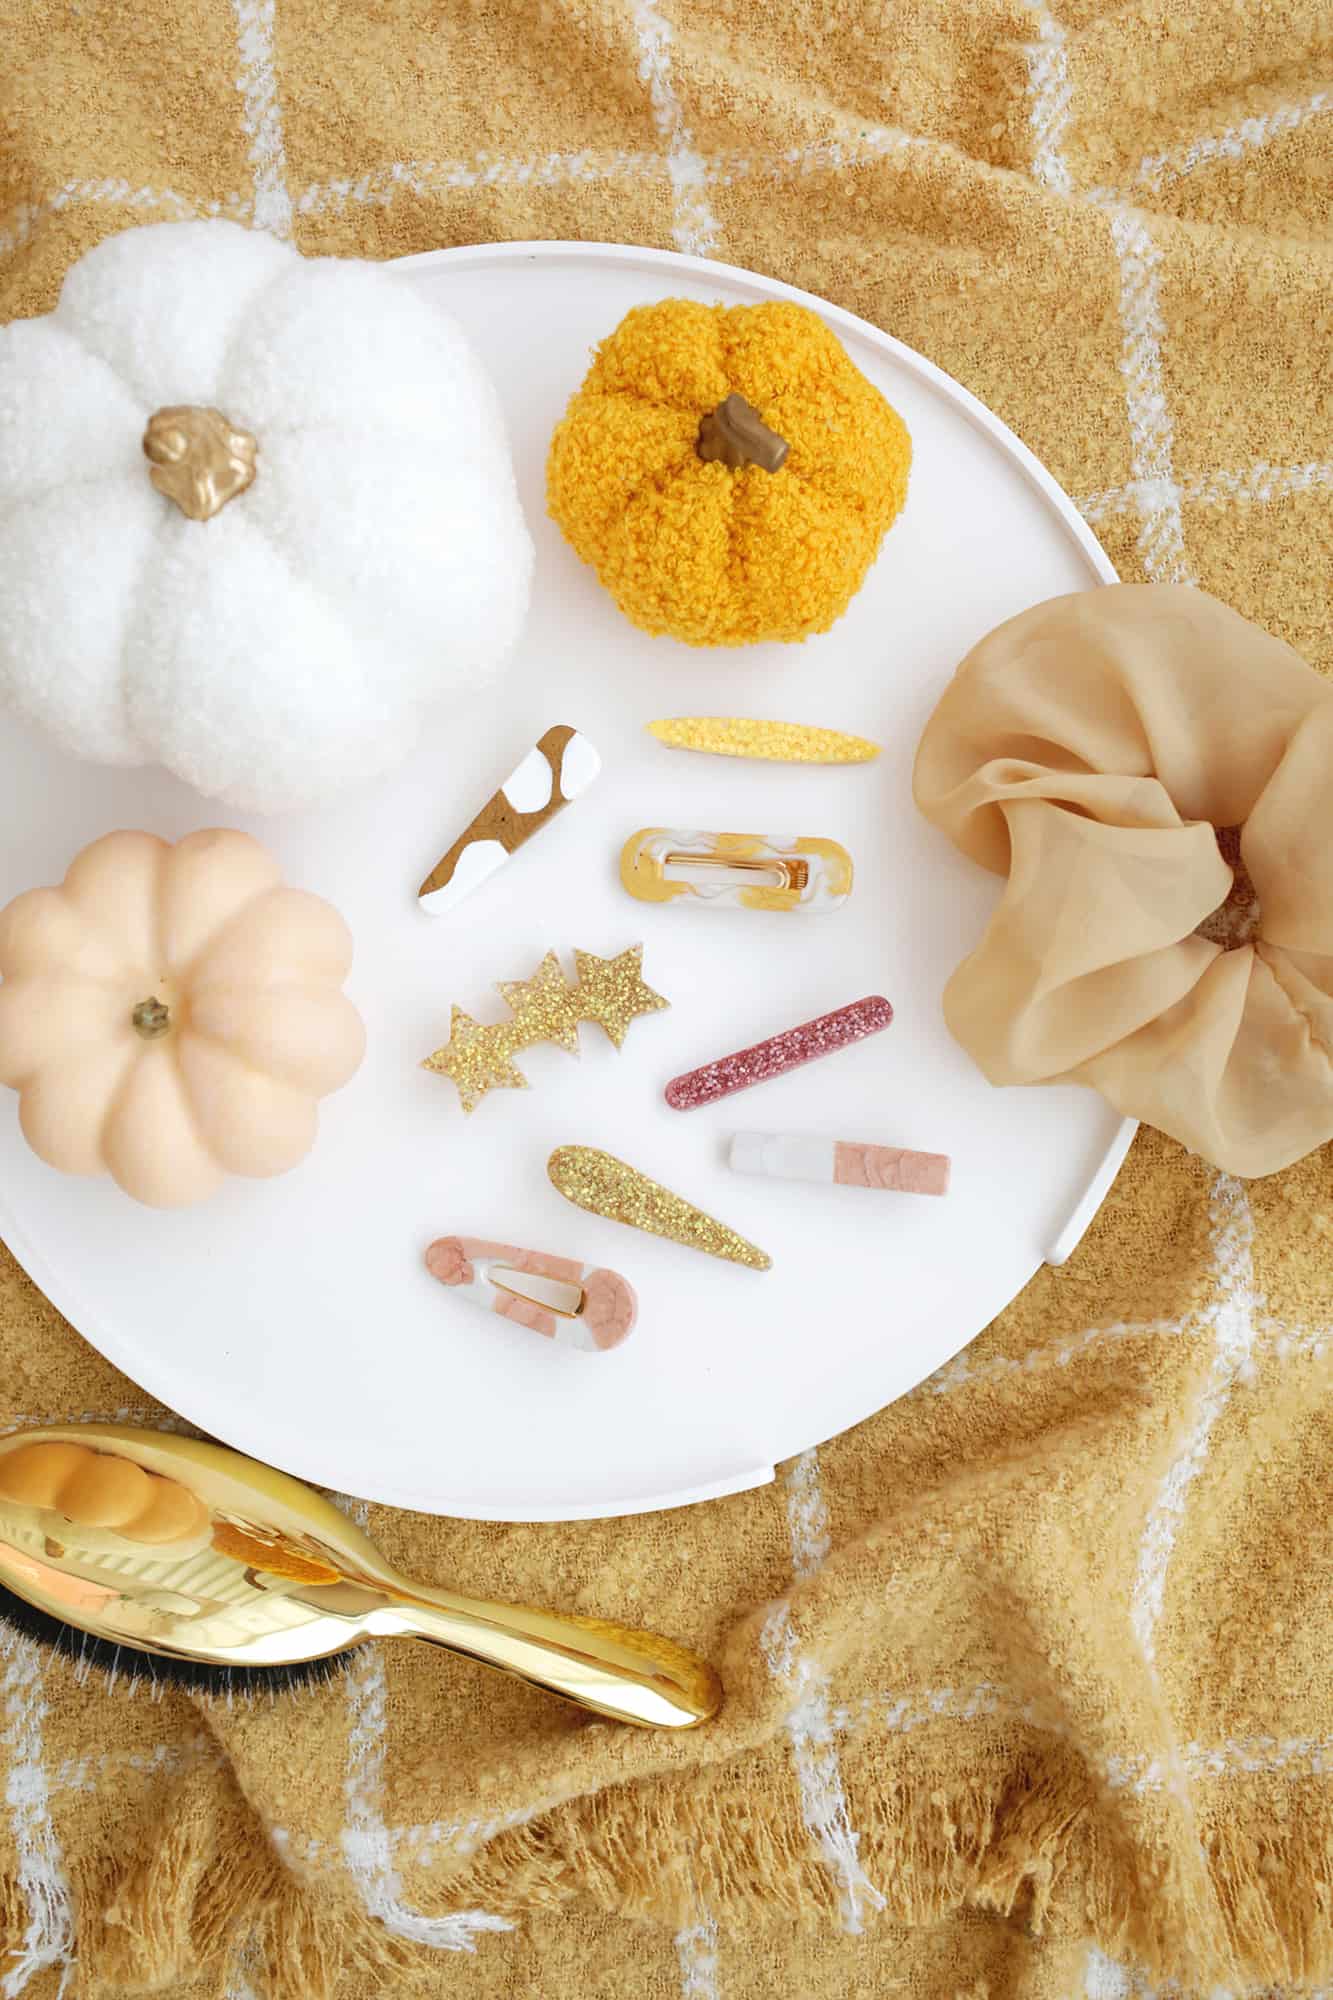
These clips turned out so cute, and your pals will be so impressed when they find out you made them yourself! Using the Sculpey liquid clay was so easy and it was really fun to be able to personalize all the clips to my favorite colors and designs.
Can you believe I made all of those in one afternoon?! And you can create so much more than hair clips with the liquid clay—from Croc charms for your shoes, home décor, jewelry, scrapbooking and beyond!
So, are you sold on making your own clips now? What kind of clips would you make? Color block? Glitter? Tortoise shell? All of them?? xo. Laura
Like This Post? Check Out More Easy Hair DIYs:
- 3 Trendy Hair Clips
- Padded Velvet Headband DIY
- Easy Rosemary Hair Growth Spray DIY
- No-Sew Braided Velvet Headband
If you’re looking for an easy to keep your hair accessories organized, check out Emma’s hair accessory organizer DIY!
FAQ
Frequently Asked Questions
What type of glue is best to glue the barrette holders to the barrettes?
You’ll want to use a multi-surface glue since you are gluing a rubber-like material to a metal surface.
A gel super glue should work well, but just make sure that the glue you are trying is for many different surfaces and that you give it adequate time for the glue to set before wearing.
Can I use the liquid clay for other DIYs as well?
Yes! There are tons of uses for Sculpey liquid clay! Besides using it in molds to make hair clips and jewelry, you can also write with it to add words/phrases to DIYs like we did with this wreath project.

How To Make Statement Hair Clips At Home
Equipment
- oven
- Toothpick or popsicle sticks
- Baking sheet
Ingredients
- Sculpey Liquid Clay in various colors
- Barrette molds
- Barrette clips
- Glue
- Clay thinner (optional)
Instructions
- Open the lid of your liquid clay and stir the clay well with a popsicle stick. You can also add thinner to your clay if you want a more thin consistency, or you can let it sit out overnight with the cap off for a thicker consistency.
- Twist the cap back on and twist the nozzle to open the clay and squeeze your color into your mold.
- To get a color block look, squeeze one color into half of your mold and straighten the edge where it will hit the other color with a toothpick so it’s as squared off as you can get it. Pour in the second color on the other side.
- To get a tortoise shell look, squeeze one color in different spots of your mold and another color in the leftover areas.
- To get a glitter look, use the clear liquid clay to fill your mold about 2/3 full and then pour in small glitter shapes or loose glitter. Mix in with a toothpick until it’s evenly distributed, add more clear liquid clay until mold is full, and stir again. If you want a solid glitter look, add more, and use less glitter if you want it to be more spread out.
- Once your molds are ready, bake them in the oven at 275° for 15 minutes (do 30 minutes if your molds are over 1/4″ thick).
- When molds are done baking, pull them out of the oven and allow them to cool before popping them out of the mold.
- Once your clay has cooled, glue it onto the top of a barrette backing, let the glue set and you are ready to wear your creations!
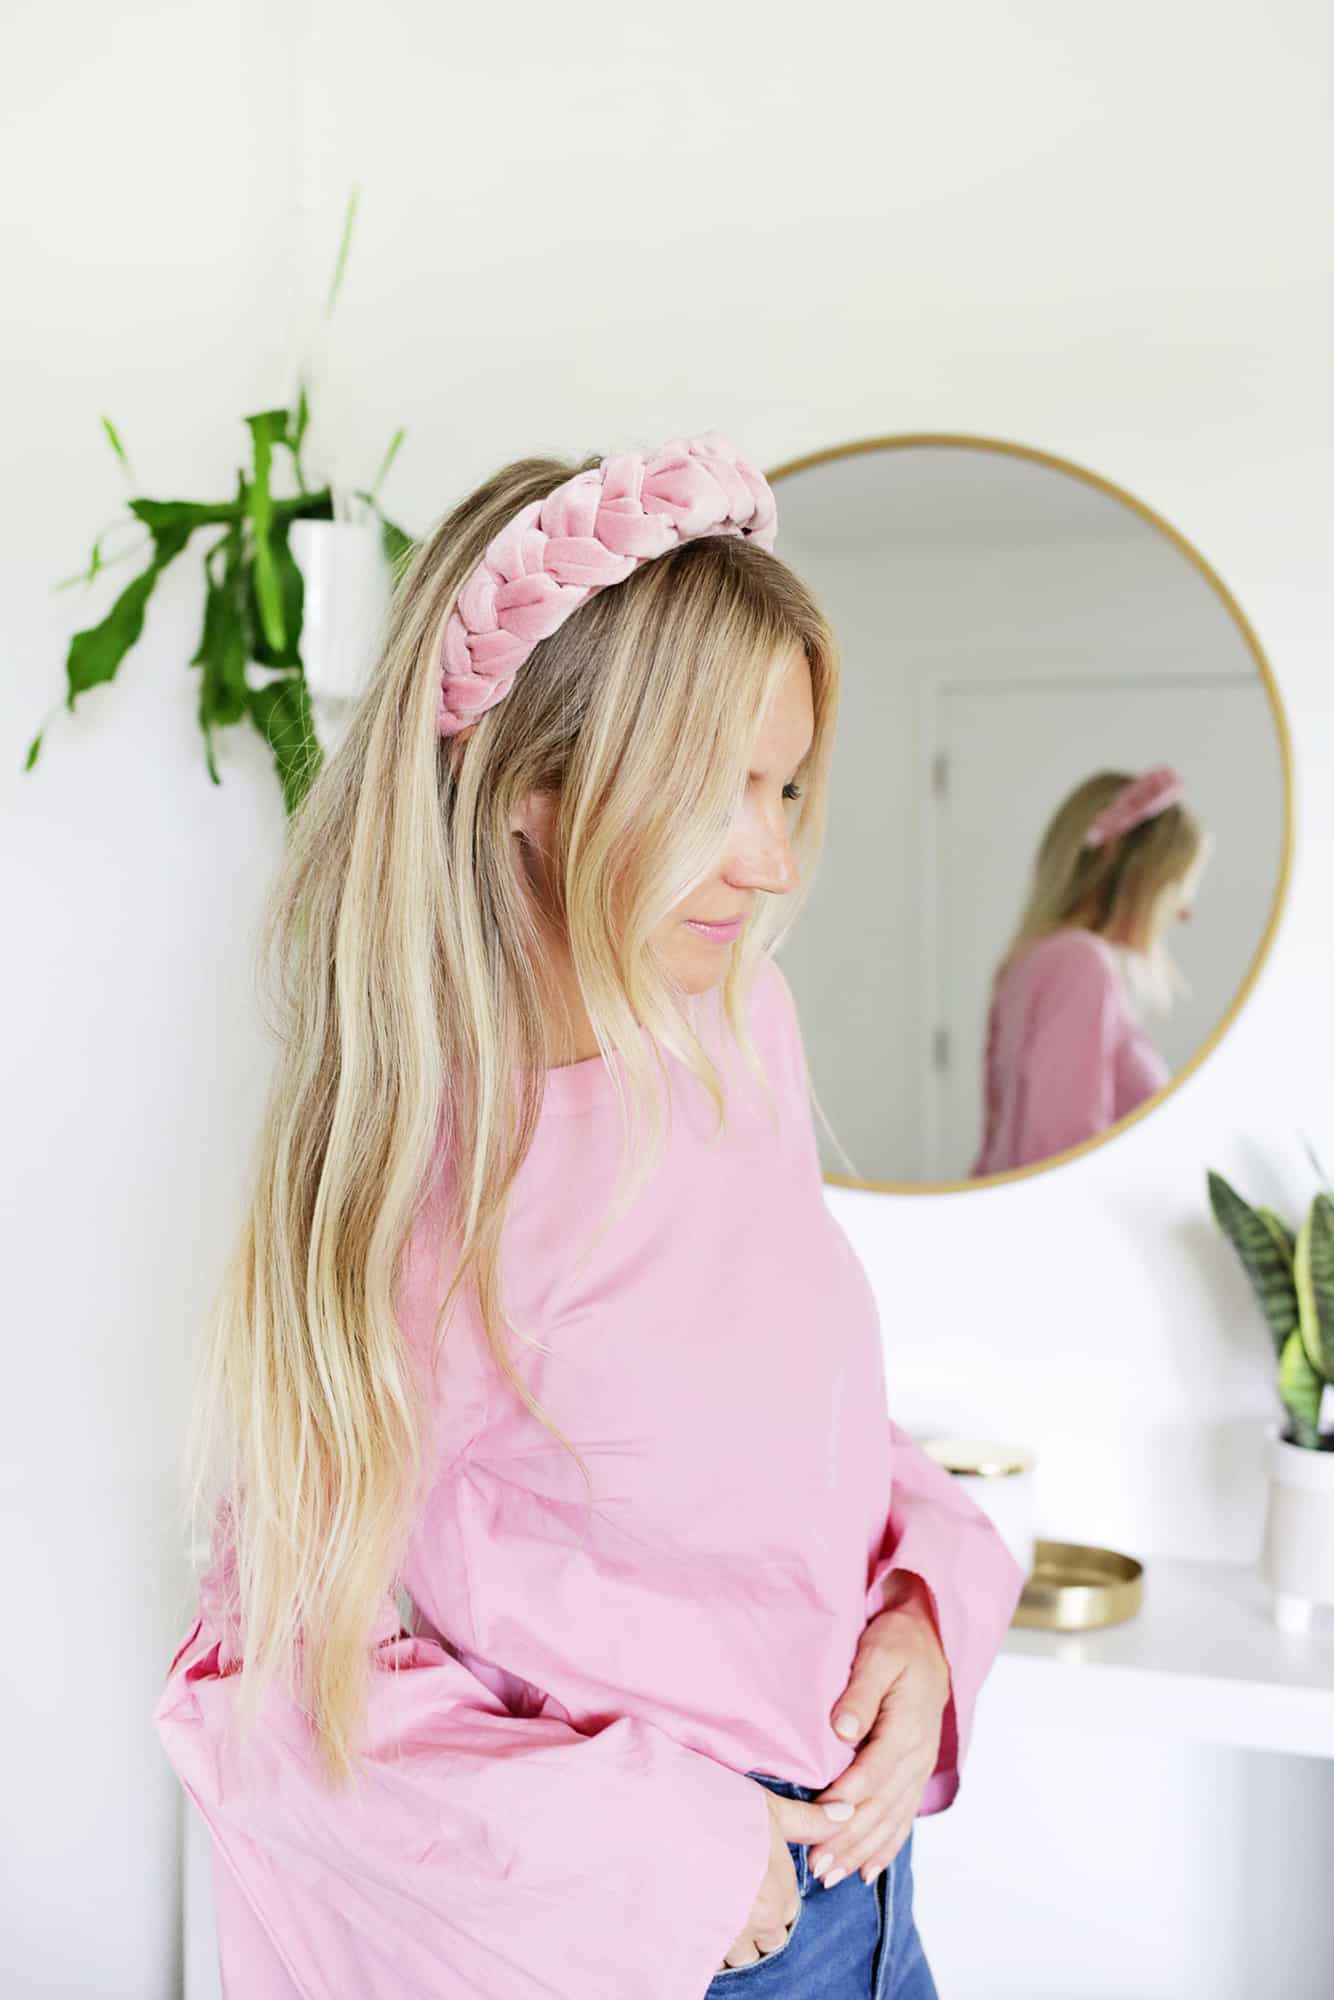
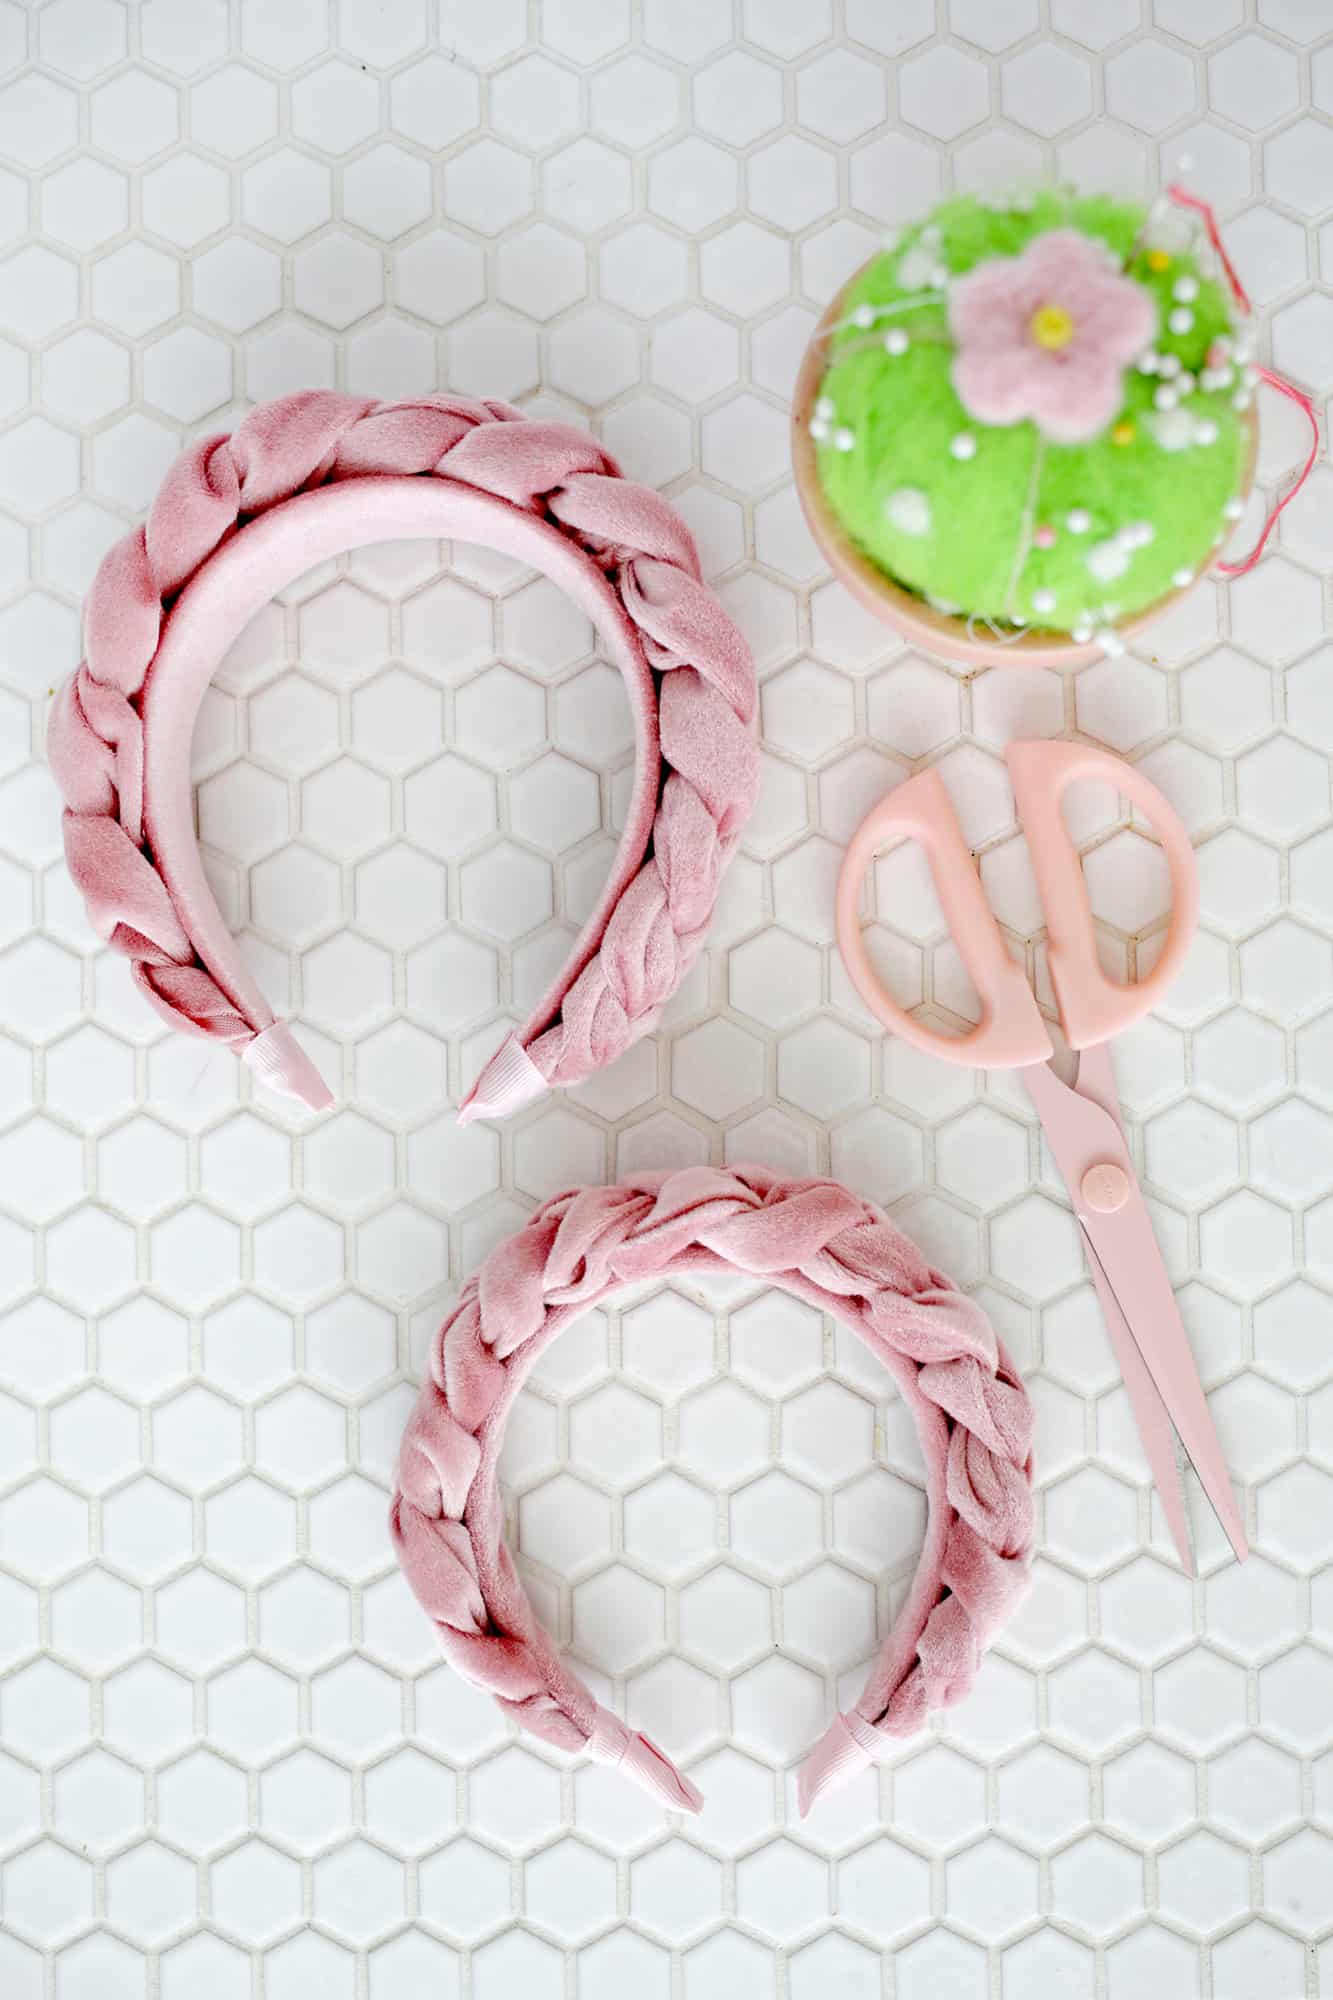
Headbands are just a fun accessory, as they can totally add a lot to a look and it only takes seconds to throw one on and take your look up a few notches. It was a lot easier than I thought to make a padded headband, so I thought it would also be fun to do a no-sew option with a braided version, as I’ve seen those all over my Pinterest feed as well lately.
The no-sew makes it super easy and you can whip up a batch of these for gifts or in different colors for yourself in no time! I made a thicker/wider version for myself and a thinner version to match with my daughter Lola.
Related: 25+ Easy Hair Tutorials For Any Occasion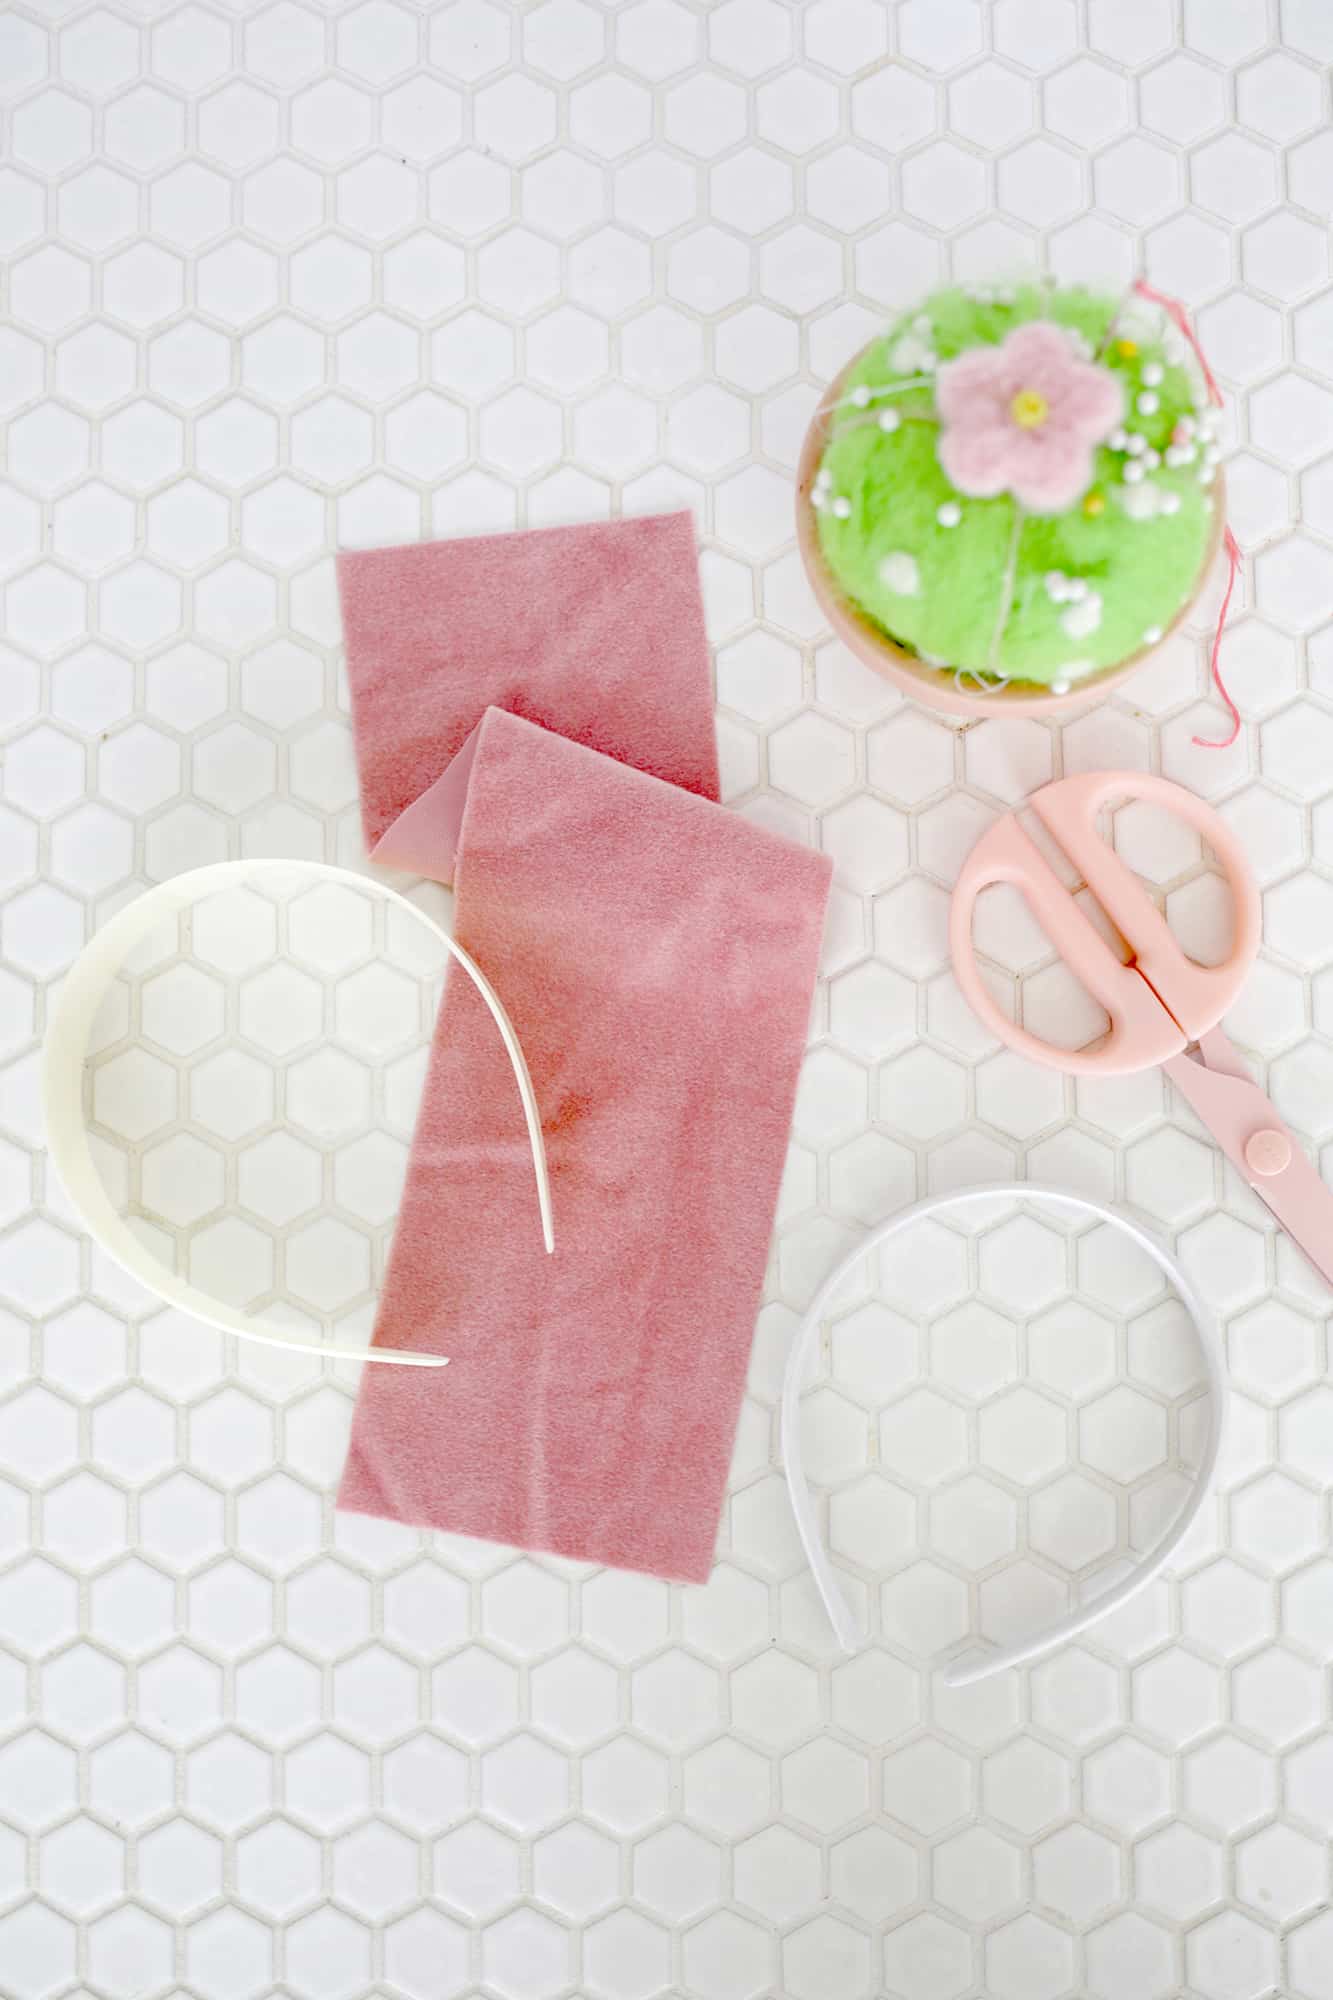 Supplies:
-1/4 yard of velvet fabric
-fabric scissors
-rotary cutter, ruler and mat (optional)
-hot glue gun
-ribbon that matches the color of the velvet
-headbands (I used this thick one for me and this thin one for Lola)
-straight pins
 For the first step, you’ll want to cover your headband with some velvet so it matches seamlessly with your braid on top. Cut a band of velvet as long as your headband and as wide as the circumference of the widest part of your headband.
Place your headband in the middle of the velvet so it’s covering the underside and use your hot glue to glue the velvet to the length of the underside of the headband.
Fold up the velvet on one side and cut it so it covers half of the top of your headband. Repeat the process with the other side so your underside is fully covered and you have a seam running down the middle of the top of your headband (it can overlap a little or just have the sides meet together in the middle, either way it will be covered so it doesn’t matter very much).
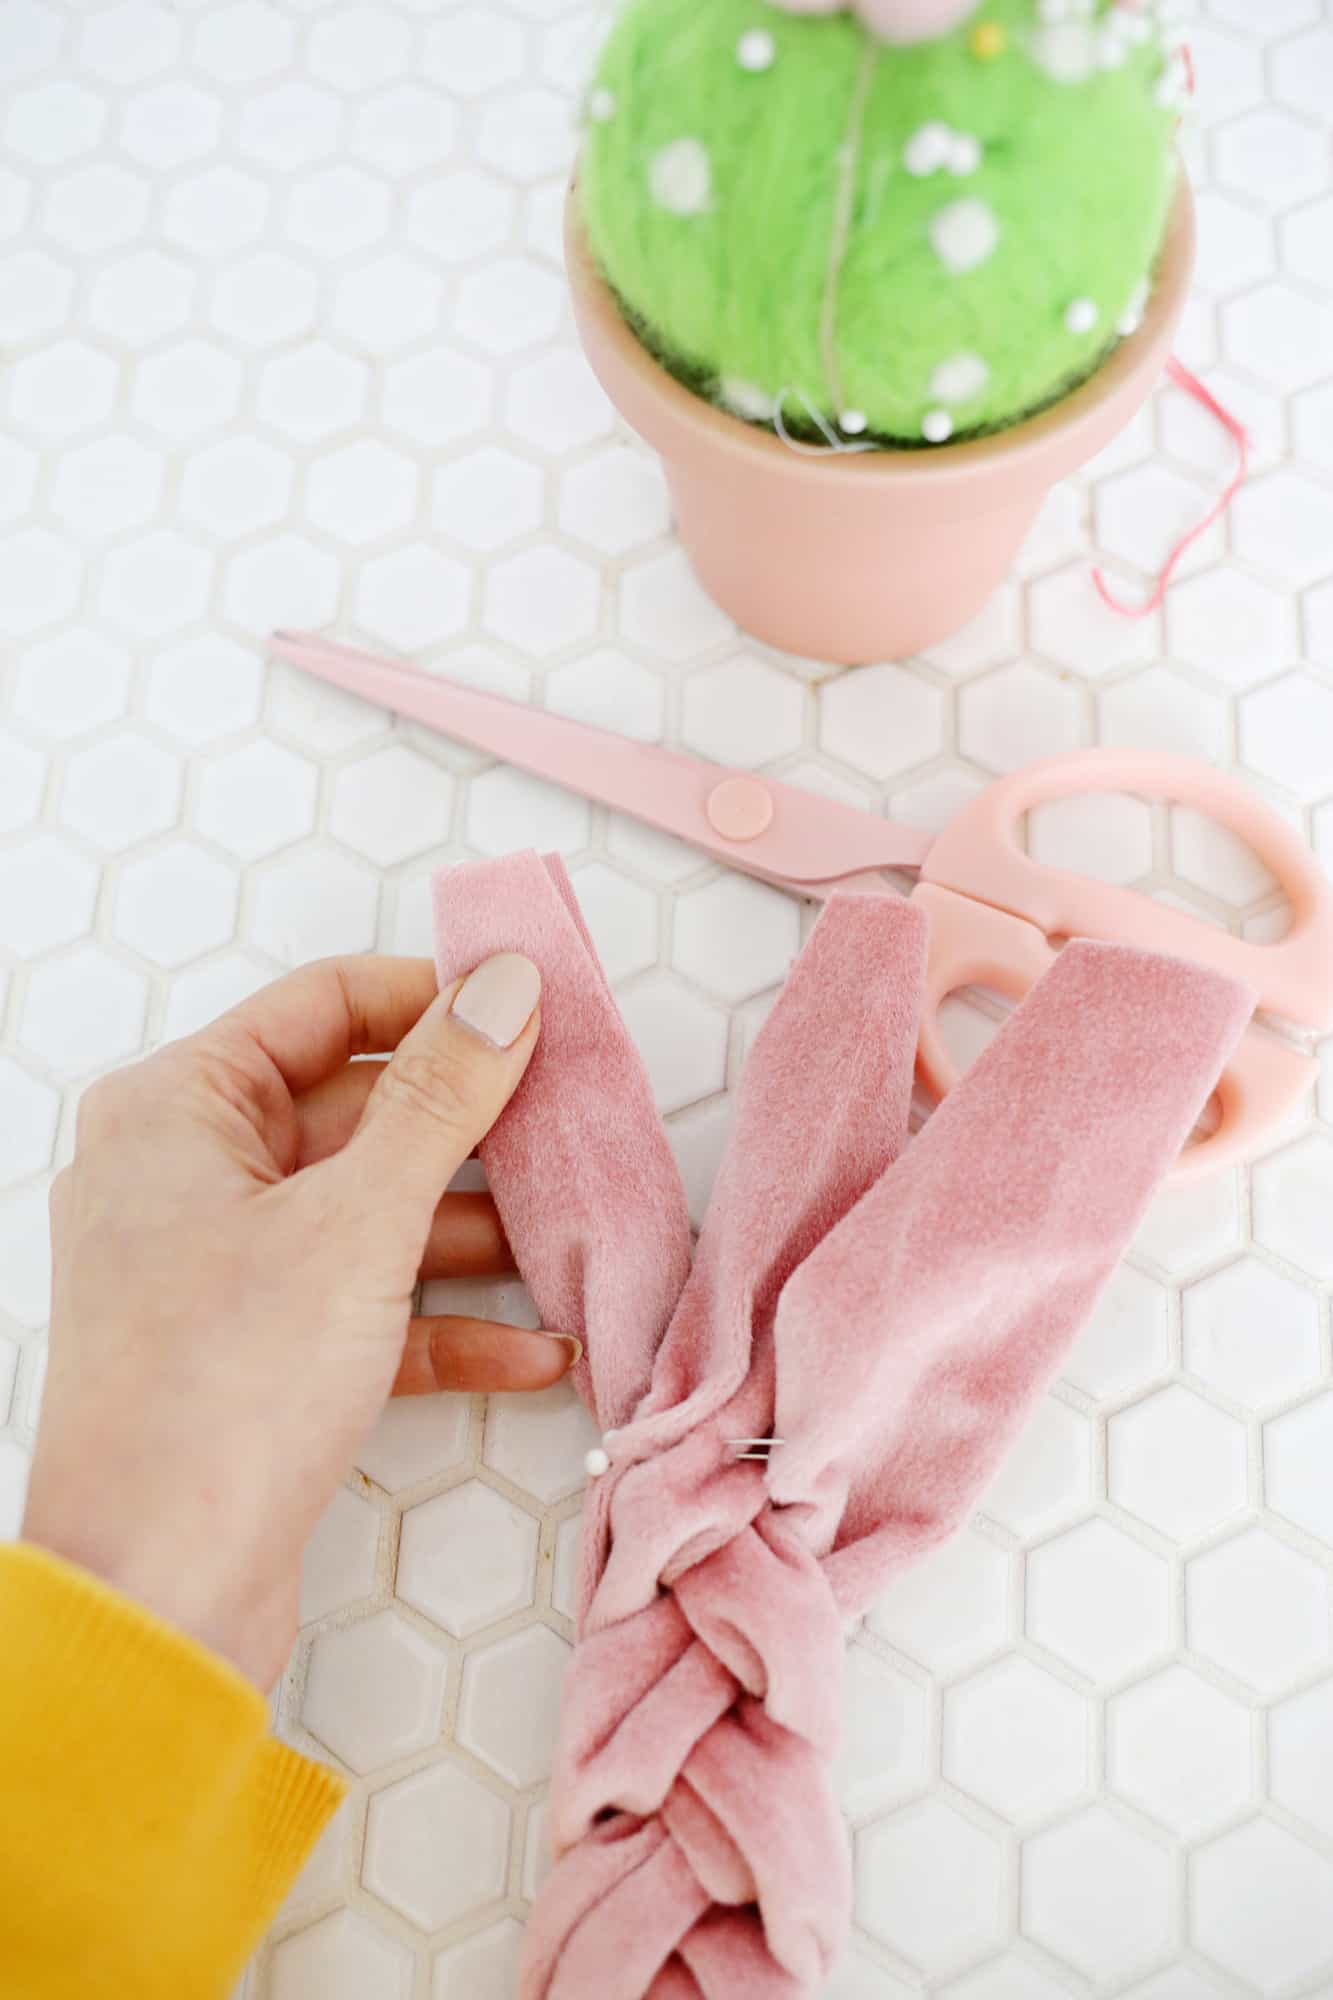 For the wider headband, cut three strips of velvet that are 25″ long and 4″ wide (and for the smaller headband cut them 25″ long and 3″ wide). Fold your strips in half lengthwise and stack the three strips on top of each other so you can braid them together.
Use a straight pin to keep the three strips together and set something heavy on that end so you can braid the tails (you could set it under a couch leg or something while you braid or get someone else to hold it for you).
You’ll want to twist the strands so that the cut side of the fabric stays on the bottom side at all times, so just keep checking that your cut ends are hidden and twist/rotate the fabric as needed to make that happen.
Once your braid is complete, place it against your headband to check the length and trim it if it’s longer than your headband length. Once you have a good length, you can unbraid the last 3″ of each end to gradually cut some of the fabric strip width off of the ends of the tails (as you see above in the photo). That will make the ends less bulky and tapered a bit as the braid ends on each side.
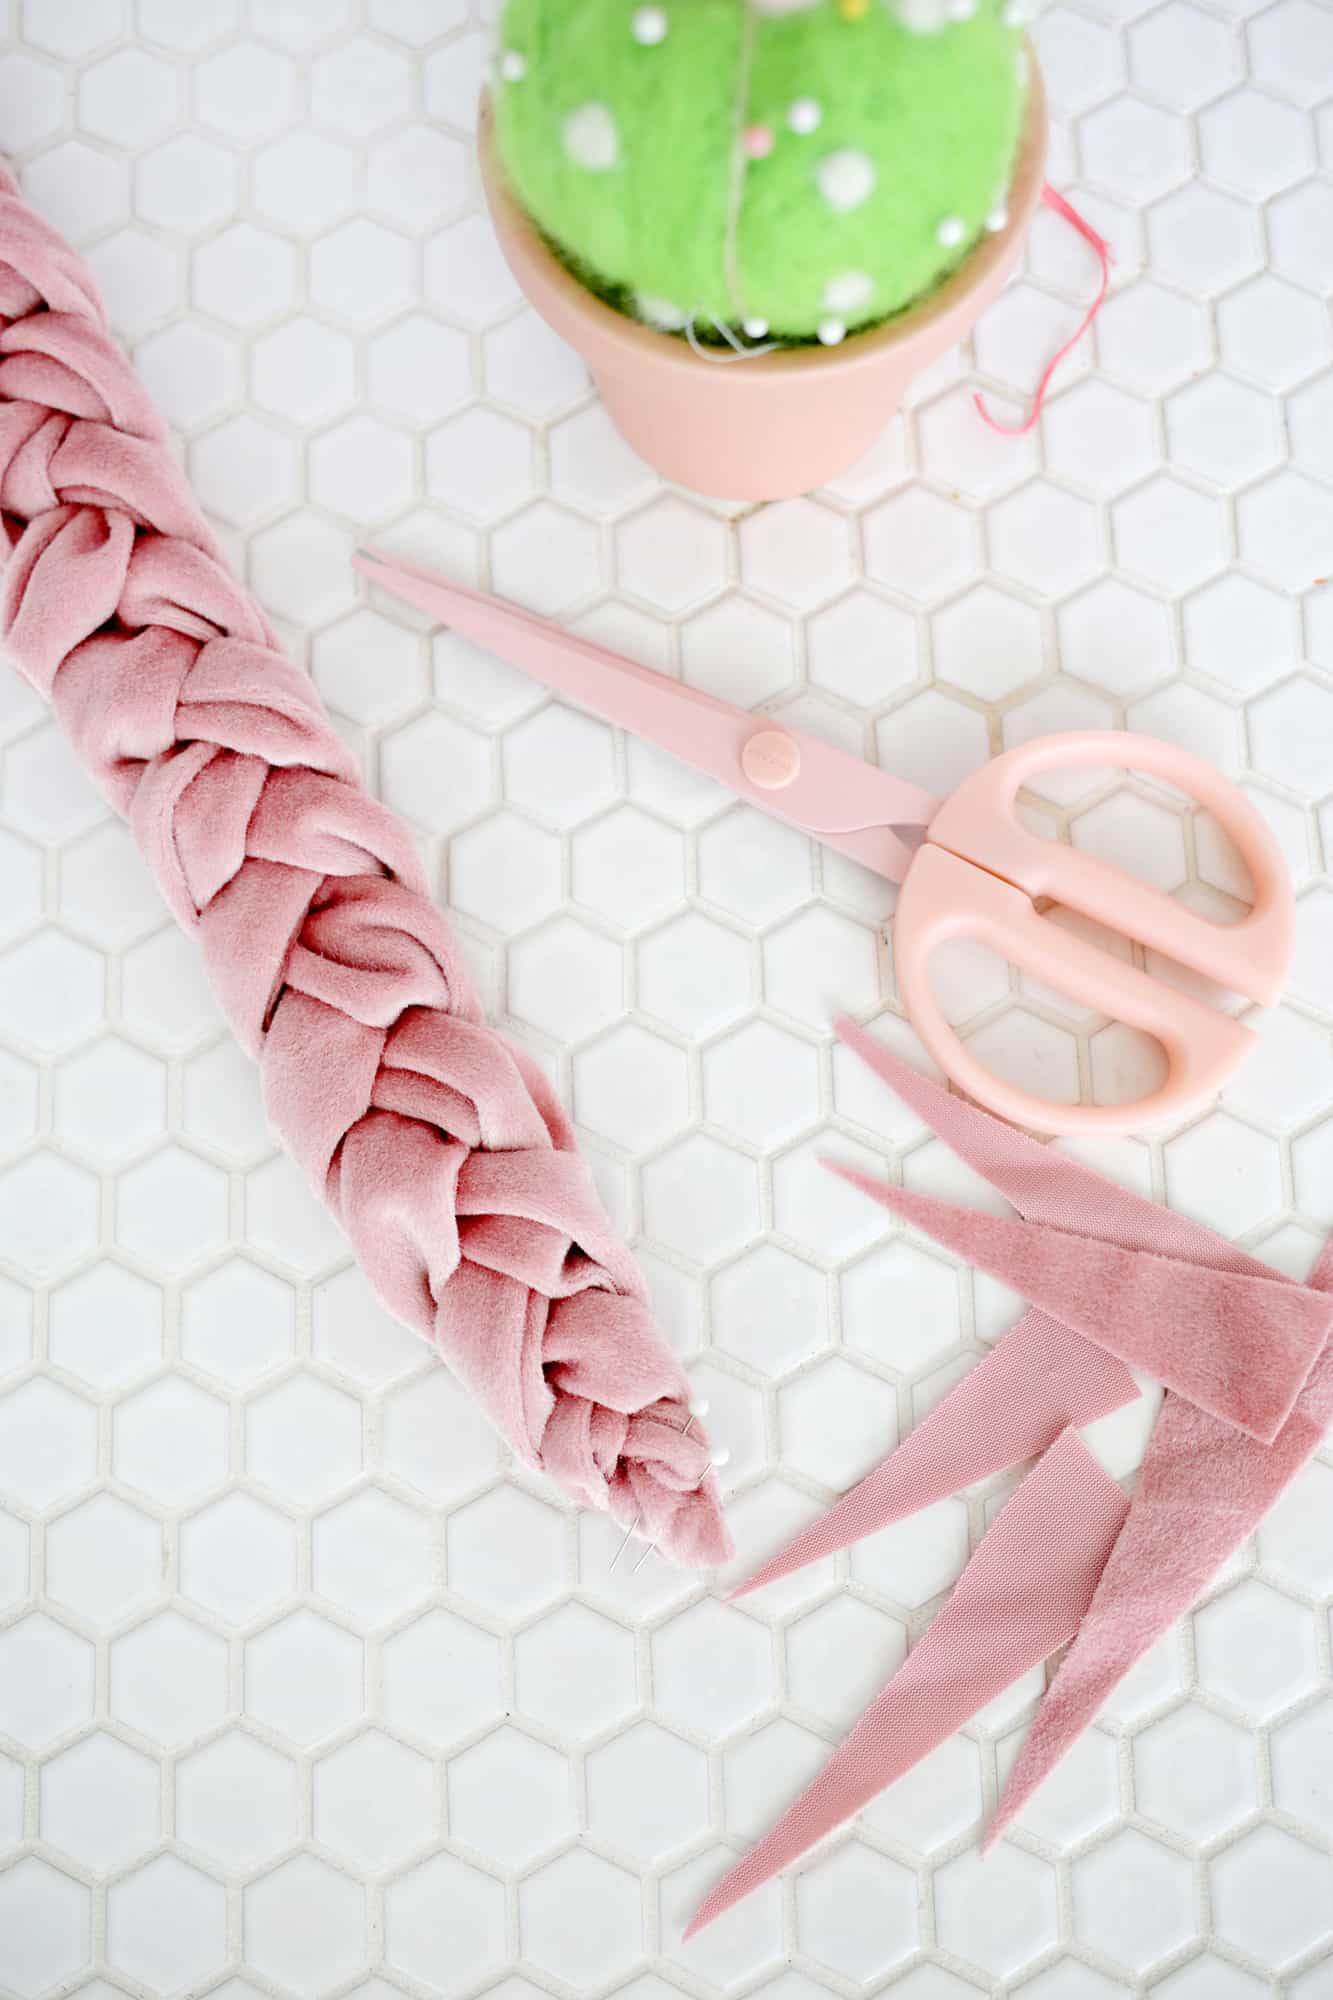 Once you remove as much bulk as you want, rebraid and pin your ends together, then use a hot glue gun to glue the ends together.
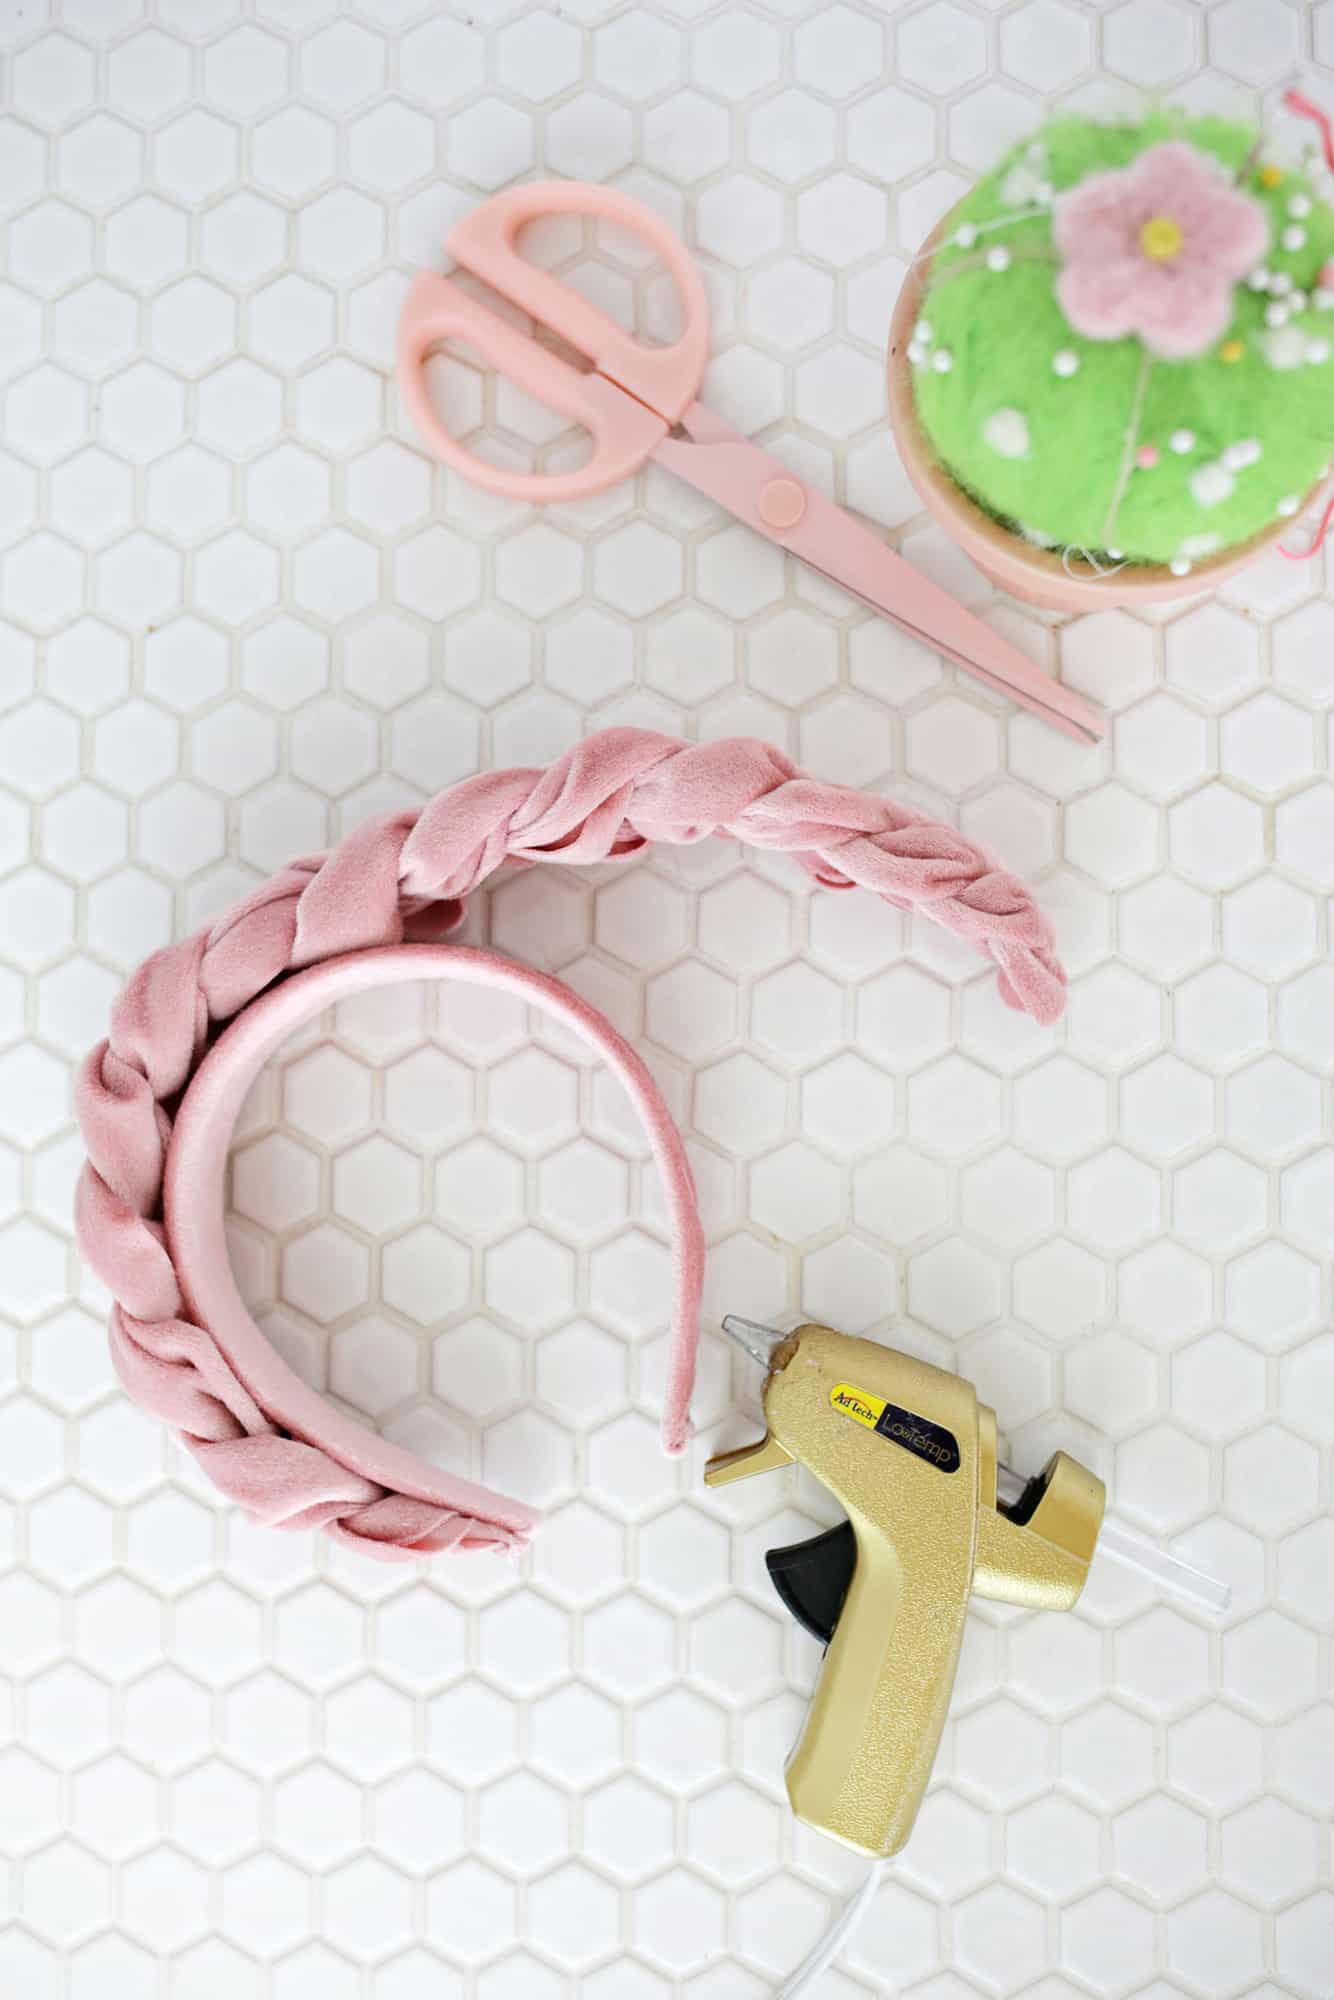
Now that your braid is the right length and tapered, glue it to the topside of your velvet headband with a generous amount of hot glue. Take some ribbon and fold and glue the cut edges so you have a strip about 2 1/4″ long with folded edges on both sides (so the ribbon won’t unravel).
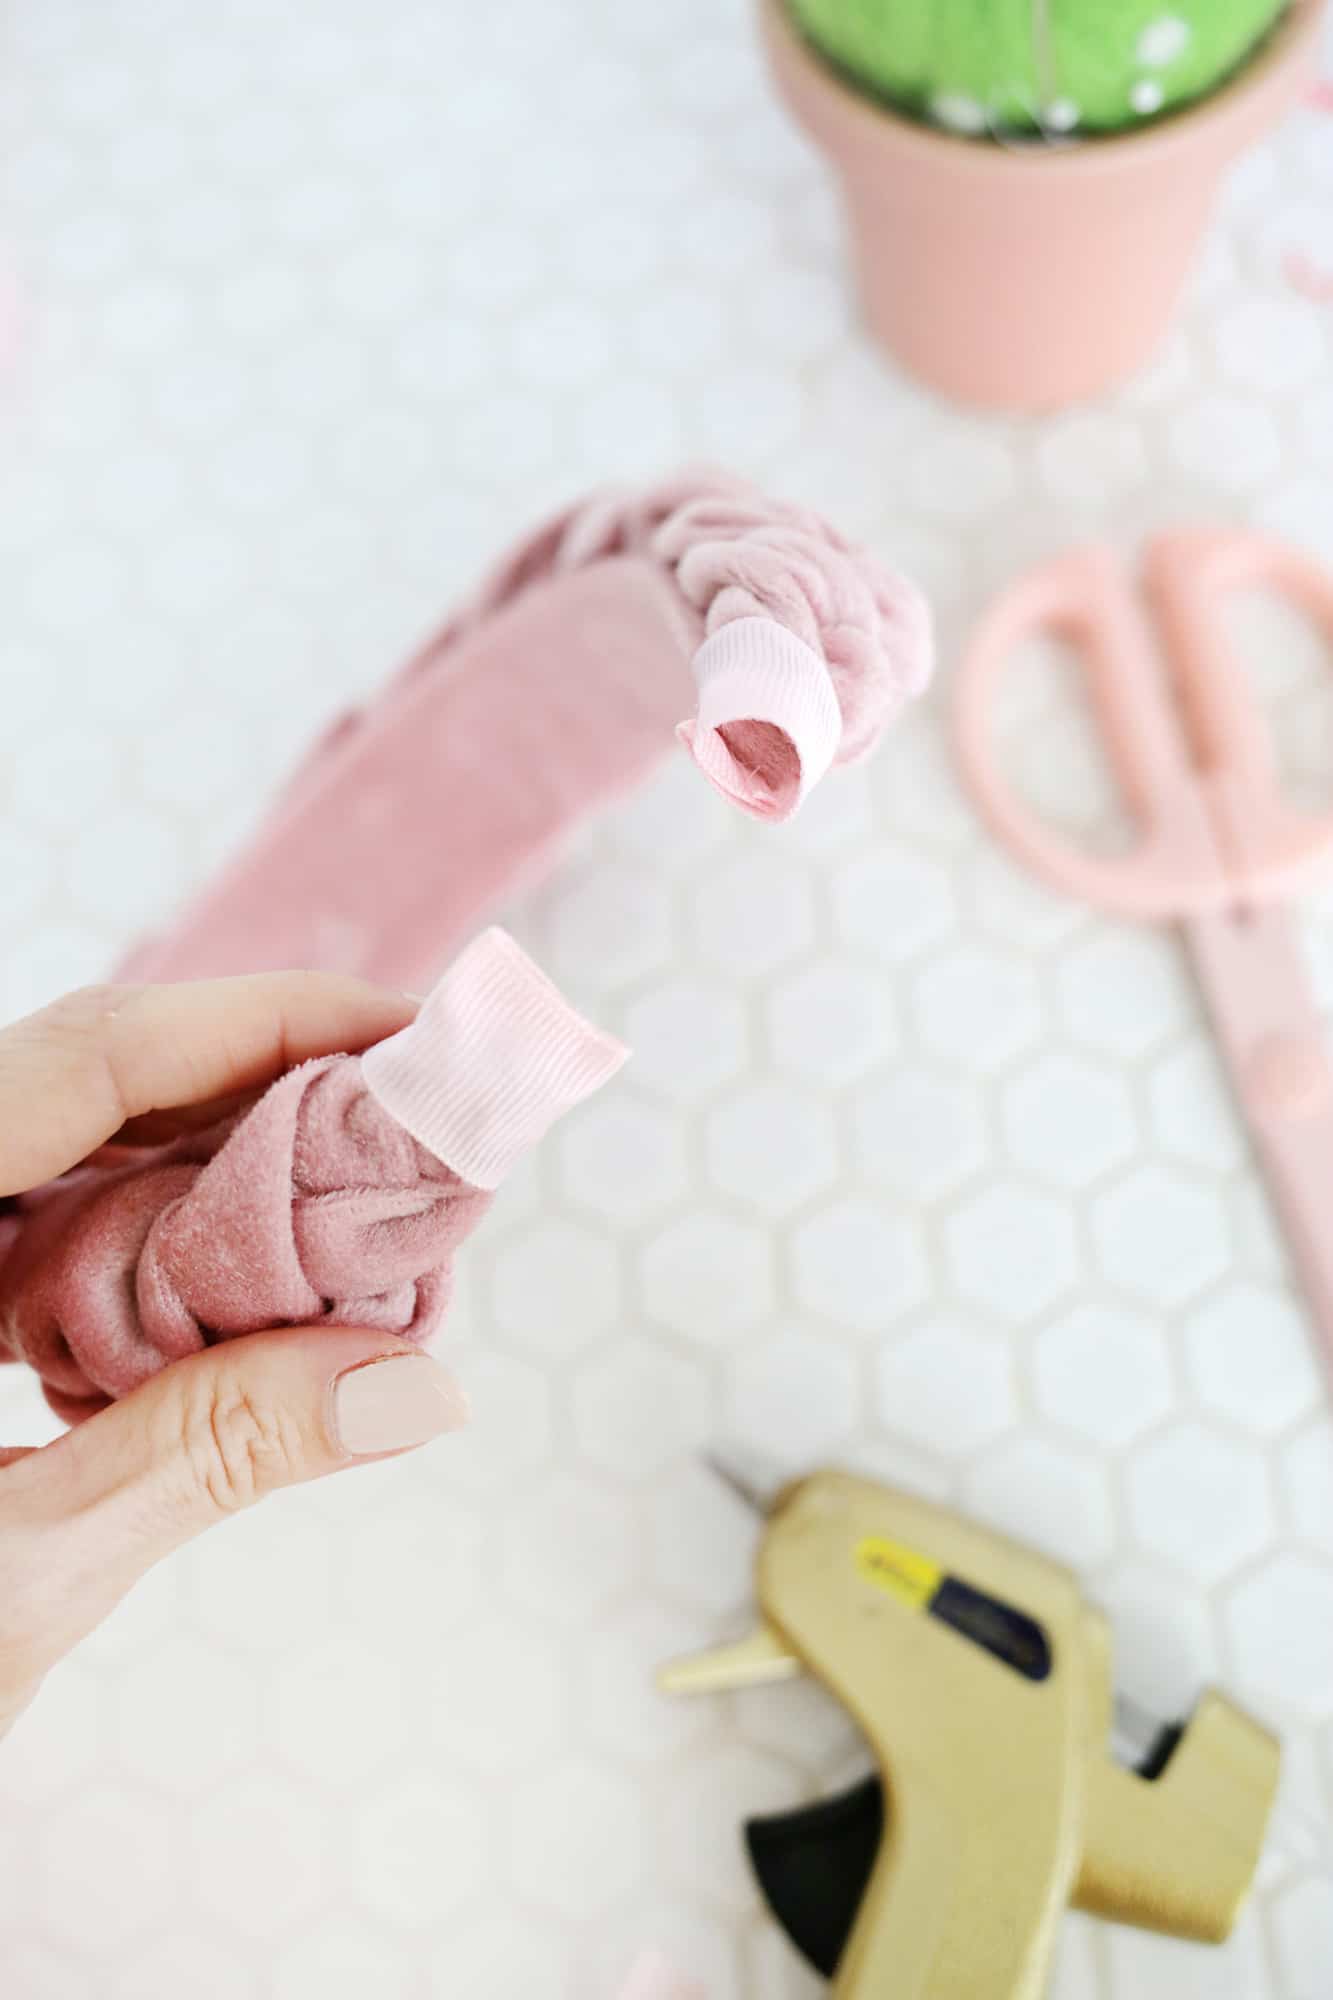
Starting on the underside of the headband, glue the start of the strip folded side down and wrap it around the end of your headband so that it overhangs the headband just a little. Wrap it around and glue it in place on the underside.
Use some glue in the overhang opening of the ribbon and pinch that opening shut while the glue sets to finish off the ends. Once your glue has set, your headband is ready to wear!
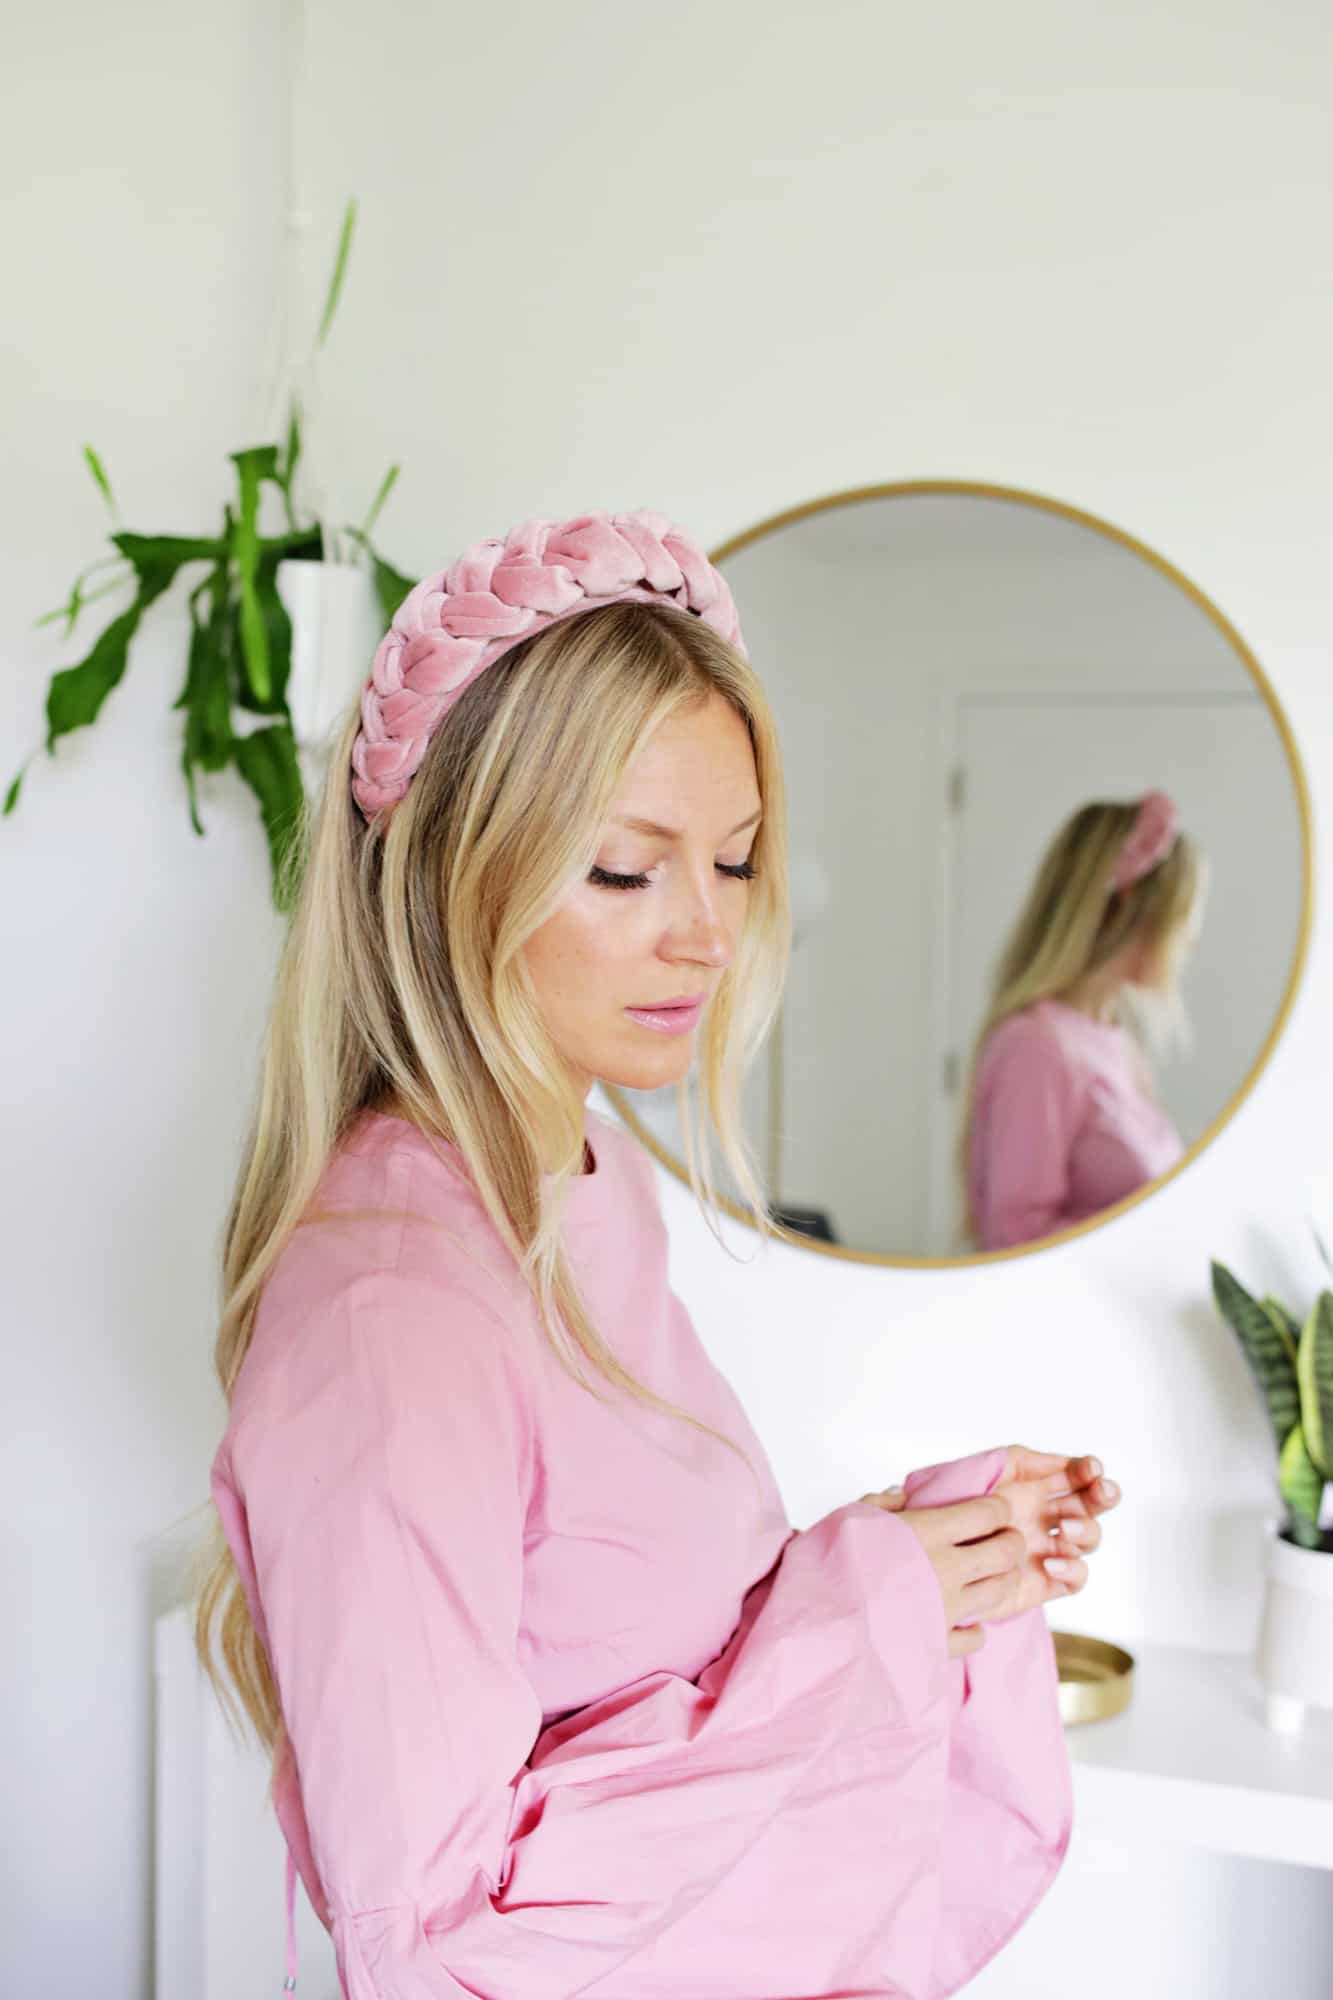

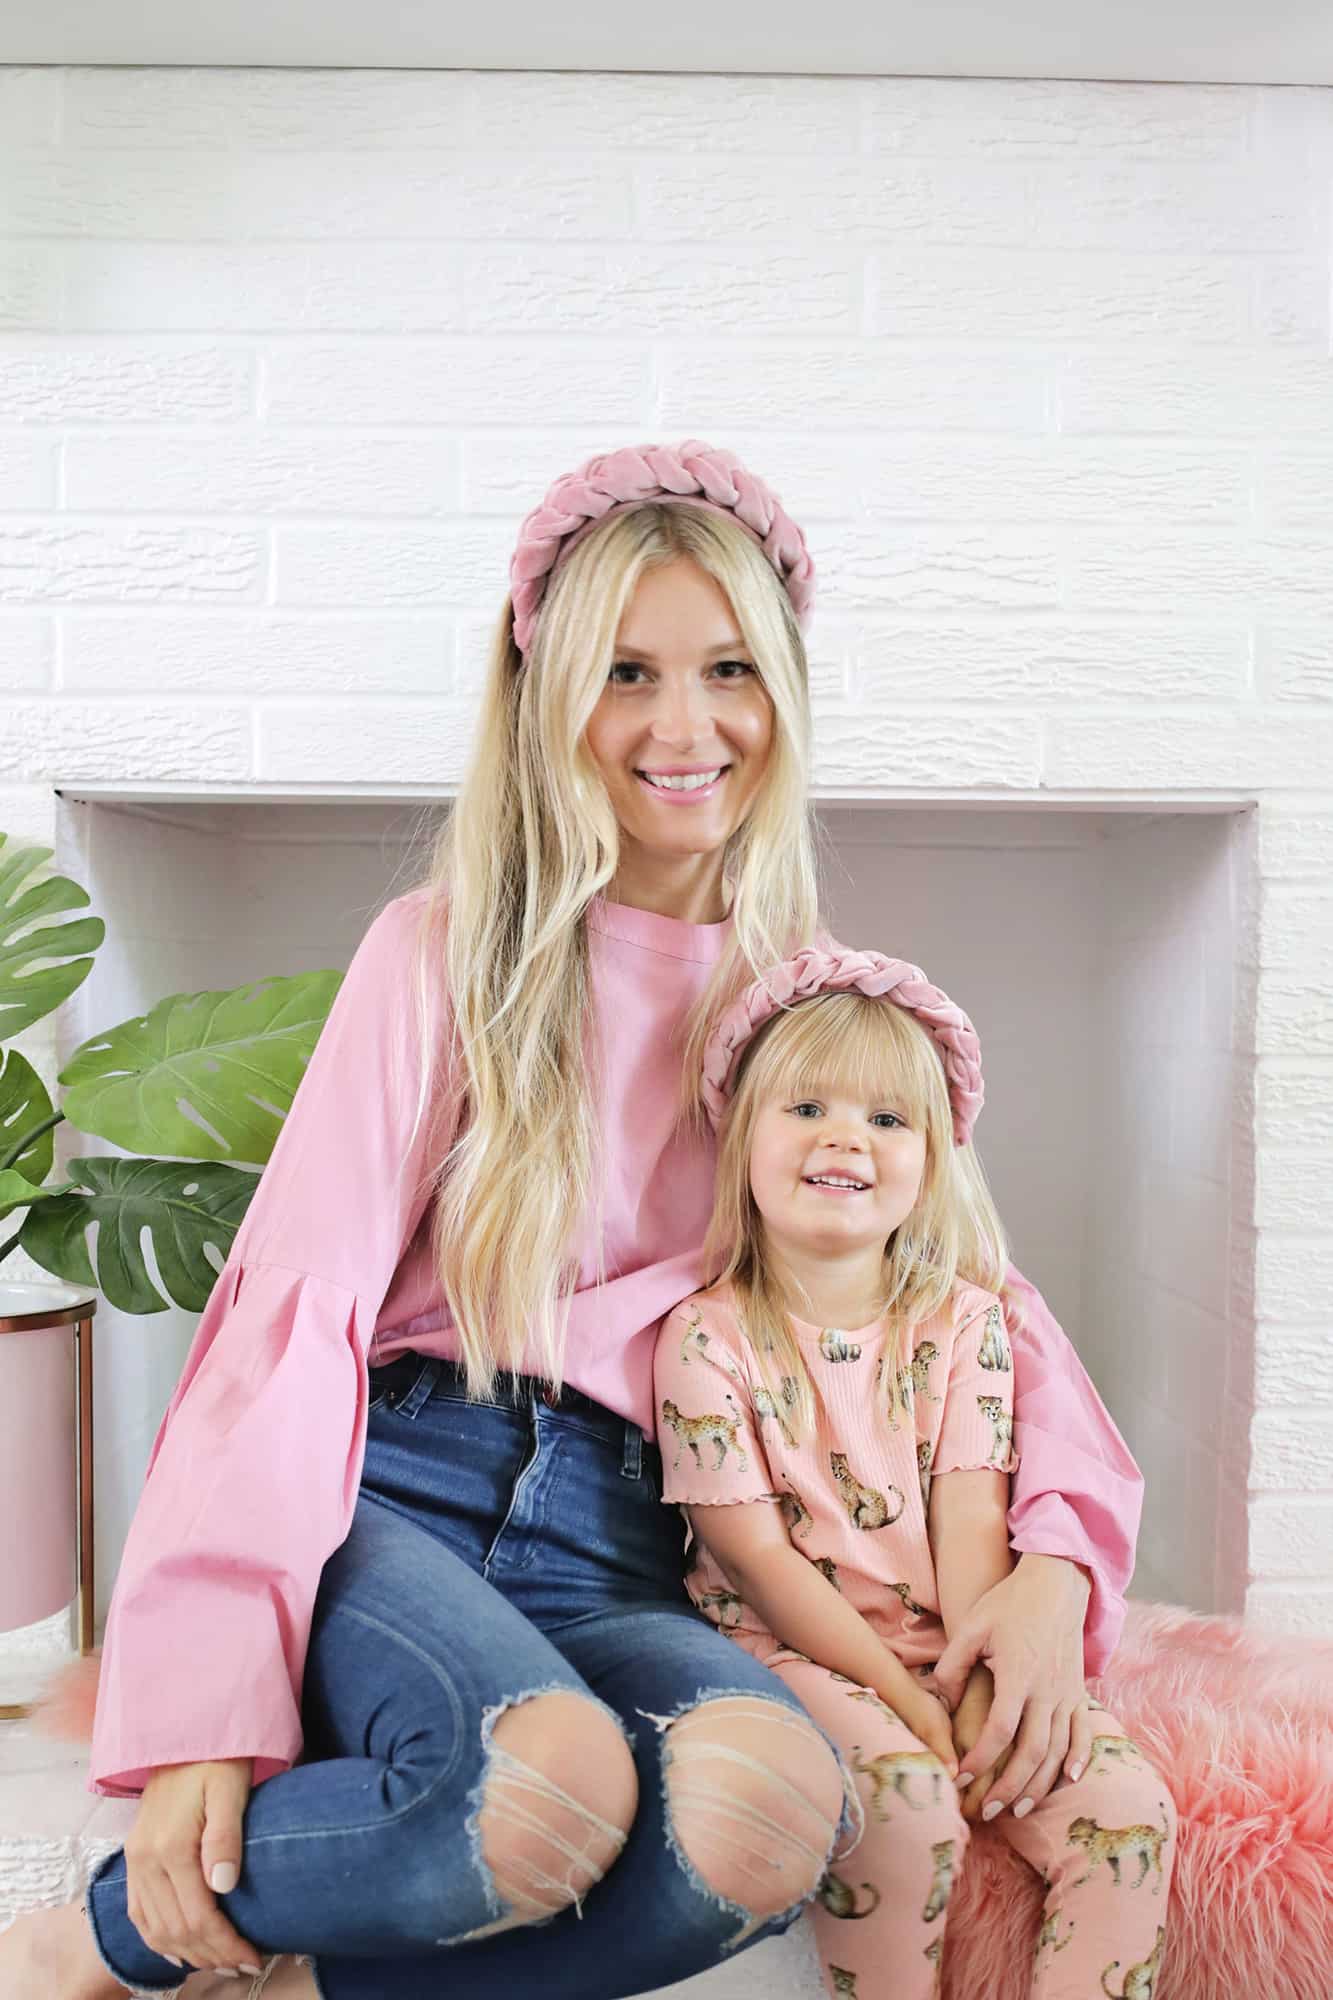 SO cute! You can either make the thinner version for a kiddo to match with like I did, or make it for yourself if you just want a look that’s a little less dramatic.
Either way, this is a super easy way to create a pretty look for any occasion and I realized that if you make this in a color similar to your own hair color, it will look like you have an awesome headband braid braided into your hair … I think I’m going to make another one in a tan color for just that reason! xo. Laura

No-Sew Braided Velvet Headband
Ingredients
- 1/4 yard of velvet fabric
- fabric scissors
- rotary cutter, ruler and mat (optional)
- hot glue gun
- ribbon that matches the color of the velvet
- headbands (I used this thick one for me and this thin one for Lola)
- straight pins
Instructions
- For the first step, you’ll want to cover your headband with some velvet so it matches seamlessly with your braid on top. Cut a band of velvet as long as your headband and as wide as the circumference of the widest part of your headband. Place your headband in the middle of the velvet so it’s covering the underside and use your hot glue to glue the velvet to the length of the underside of the headband. Fold up the velvet on one side and cut it so it covers half of the top of your headband. Repeat the process with the other side so your underside is fully covered and you have a seam running down the middle of the top of your headband (it can overlap a little or just have the sides meet together in the middle, either way it will be covered so it doesn’t matter very much).
- For the wider headband, cut three strips of velvet that are 25″ long and 4″ wide (and for the smaller headband cut them 25″ long and 3″ wide). Fold your strips in half lengthwise and stack the three strips on top of each other so you can braid them together. Use a straight pin to keep the three strips together and set something heavy on that end so you can braid the tails (you could set it under a couch leg or something while you braid or get someone else to hold it for you). You’ll want to twist the strands so that the cut side of the fabric stays on the bottom side at all times, so just keep checking that your cut ends are hidden and twist/rotate the fabric as needed to make that happen.
- Once your braid is complete, place it against your headband to check the length and trim it if it’s longer than your headband length. Once you have a good length, you can unbraid the last 3″ of each end to gradually cut some of the fabric strip width off of the ends of the tails (as you see above in the photo). That will make the ends less bulky and tapered a bit as the braid ends on each side.
- Once you remove as much bulk as you want, rebraid and pin your ends together then use a hot glue gun to glue the ends together.
- Now that your braid is the right length and tapered, glue it to the topside of your velvet headband with a generous amount of hot glue.
- Take some ribbon and fold and glue the cut edges so you have a strip about 2 1/4″ long with folded edges on both sides (so the ribbon won’t unravel).
- Starting on the underside of the headband, glue the start of the strip folded side down and wrap it around the end of your headband so that it overhangs the headband just a little. Wrap it around and glue it in place on the underside. Use some glue in the overhang opening of the ribbon and pinch that opening shut while the glue sets to finish off the ends. Once your glue has set, your headband is ready to wear!
]]>
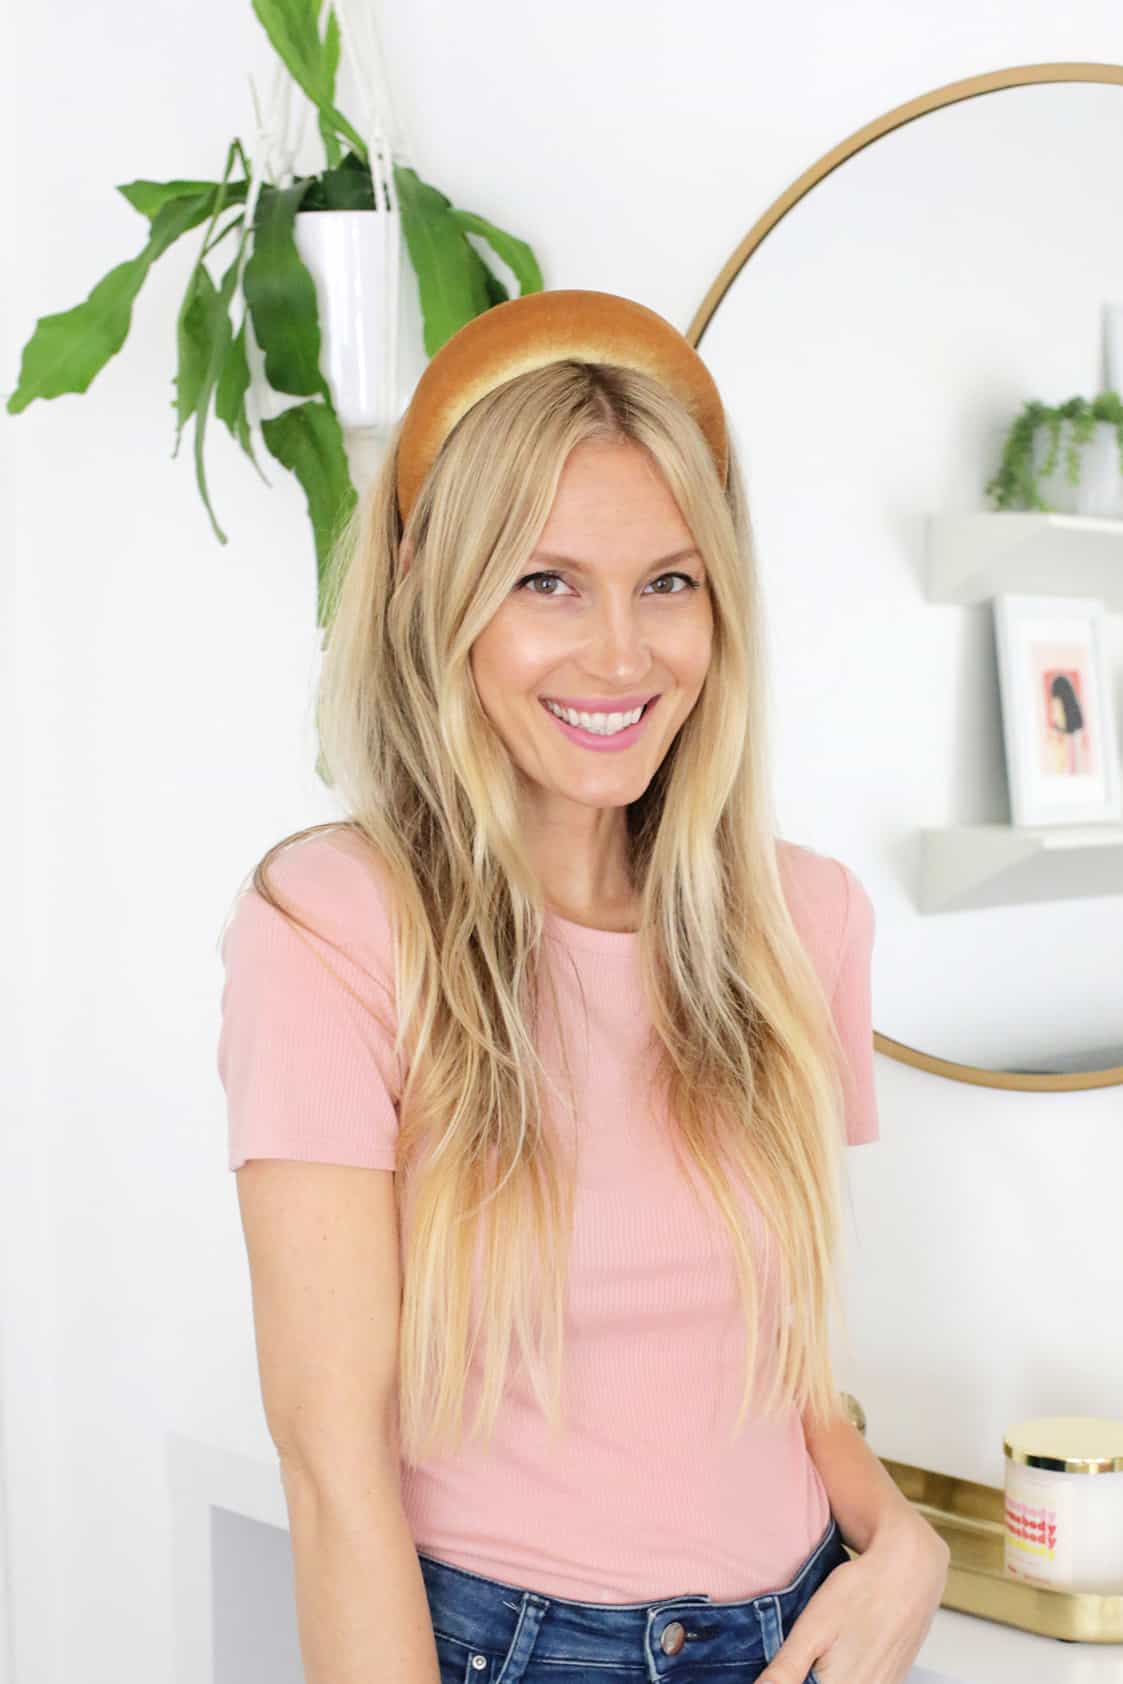 Have you gotten on board with the padded headband trend yet? Padded headbands are super versatile (as it’s something you can wear with a casual tee and jeans) or use to make a statement with a dressier outfit as well!
You may think these aren’t something you can DIY easily, but you’re wrong! Here’s how to make your own!
Related: 25+ Easy Hair Tutorials For Any Occasion
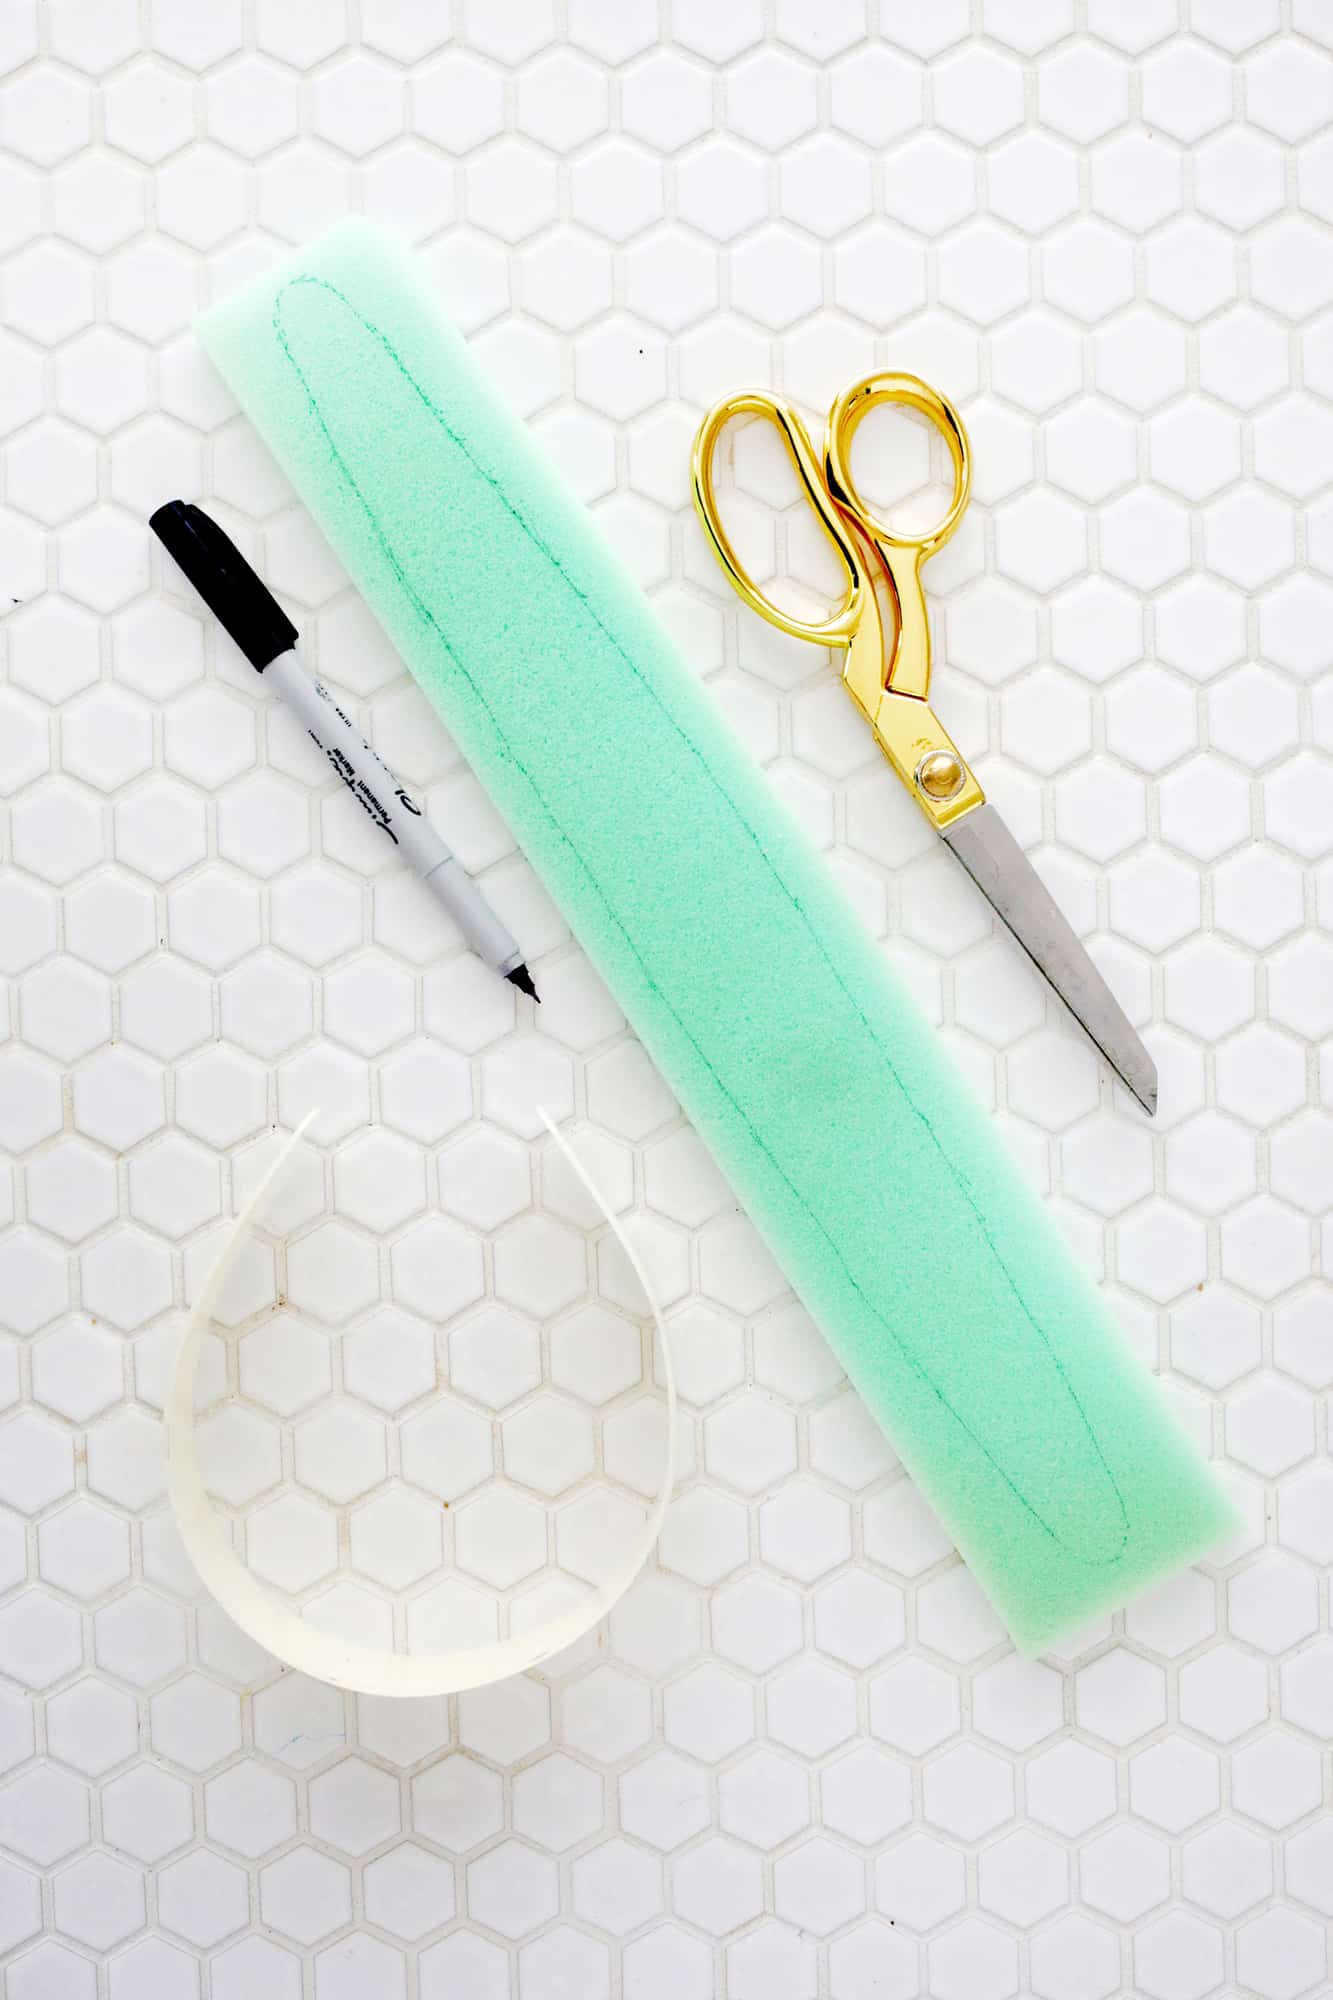
Supplies:
-1/4 yard of fabric that has at least a little stretch to it (I used this gold velvet)
–1/2″ upholstery foam
-scrap paper for template
–1 1/2″ plastic headband
-fabric scissors and straight pins
-sewing machine
-hot glue gun
First, you’ll want to trace your headband onto your craft foam. Use your scissors to cut out your shape.
Use your scissors to cut and shave off the last 3″ of your foam so the ends taper down to be thinner and it won’t be super thick behind your ears. It doesn’t have to be super perfect since we’ll place the cut side down, so don’t worry too much about it being a little bumpy.
If you want an extra high headband like the one I made, trace a second piece of foam from the middle 6″ section of the headband (to hive extra height at the top) and repeat the process of tapering down the ends like you did with the large piece.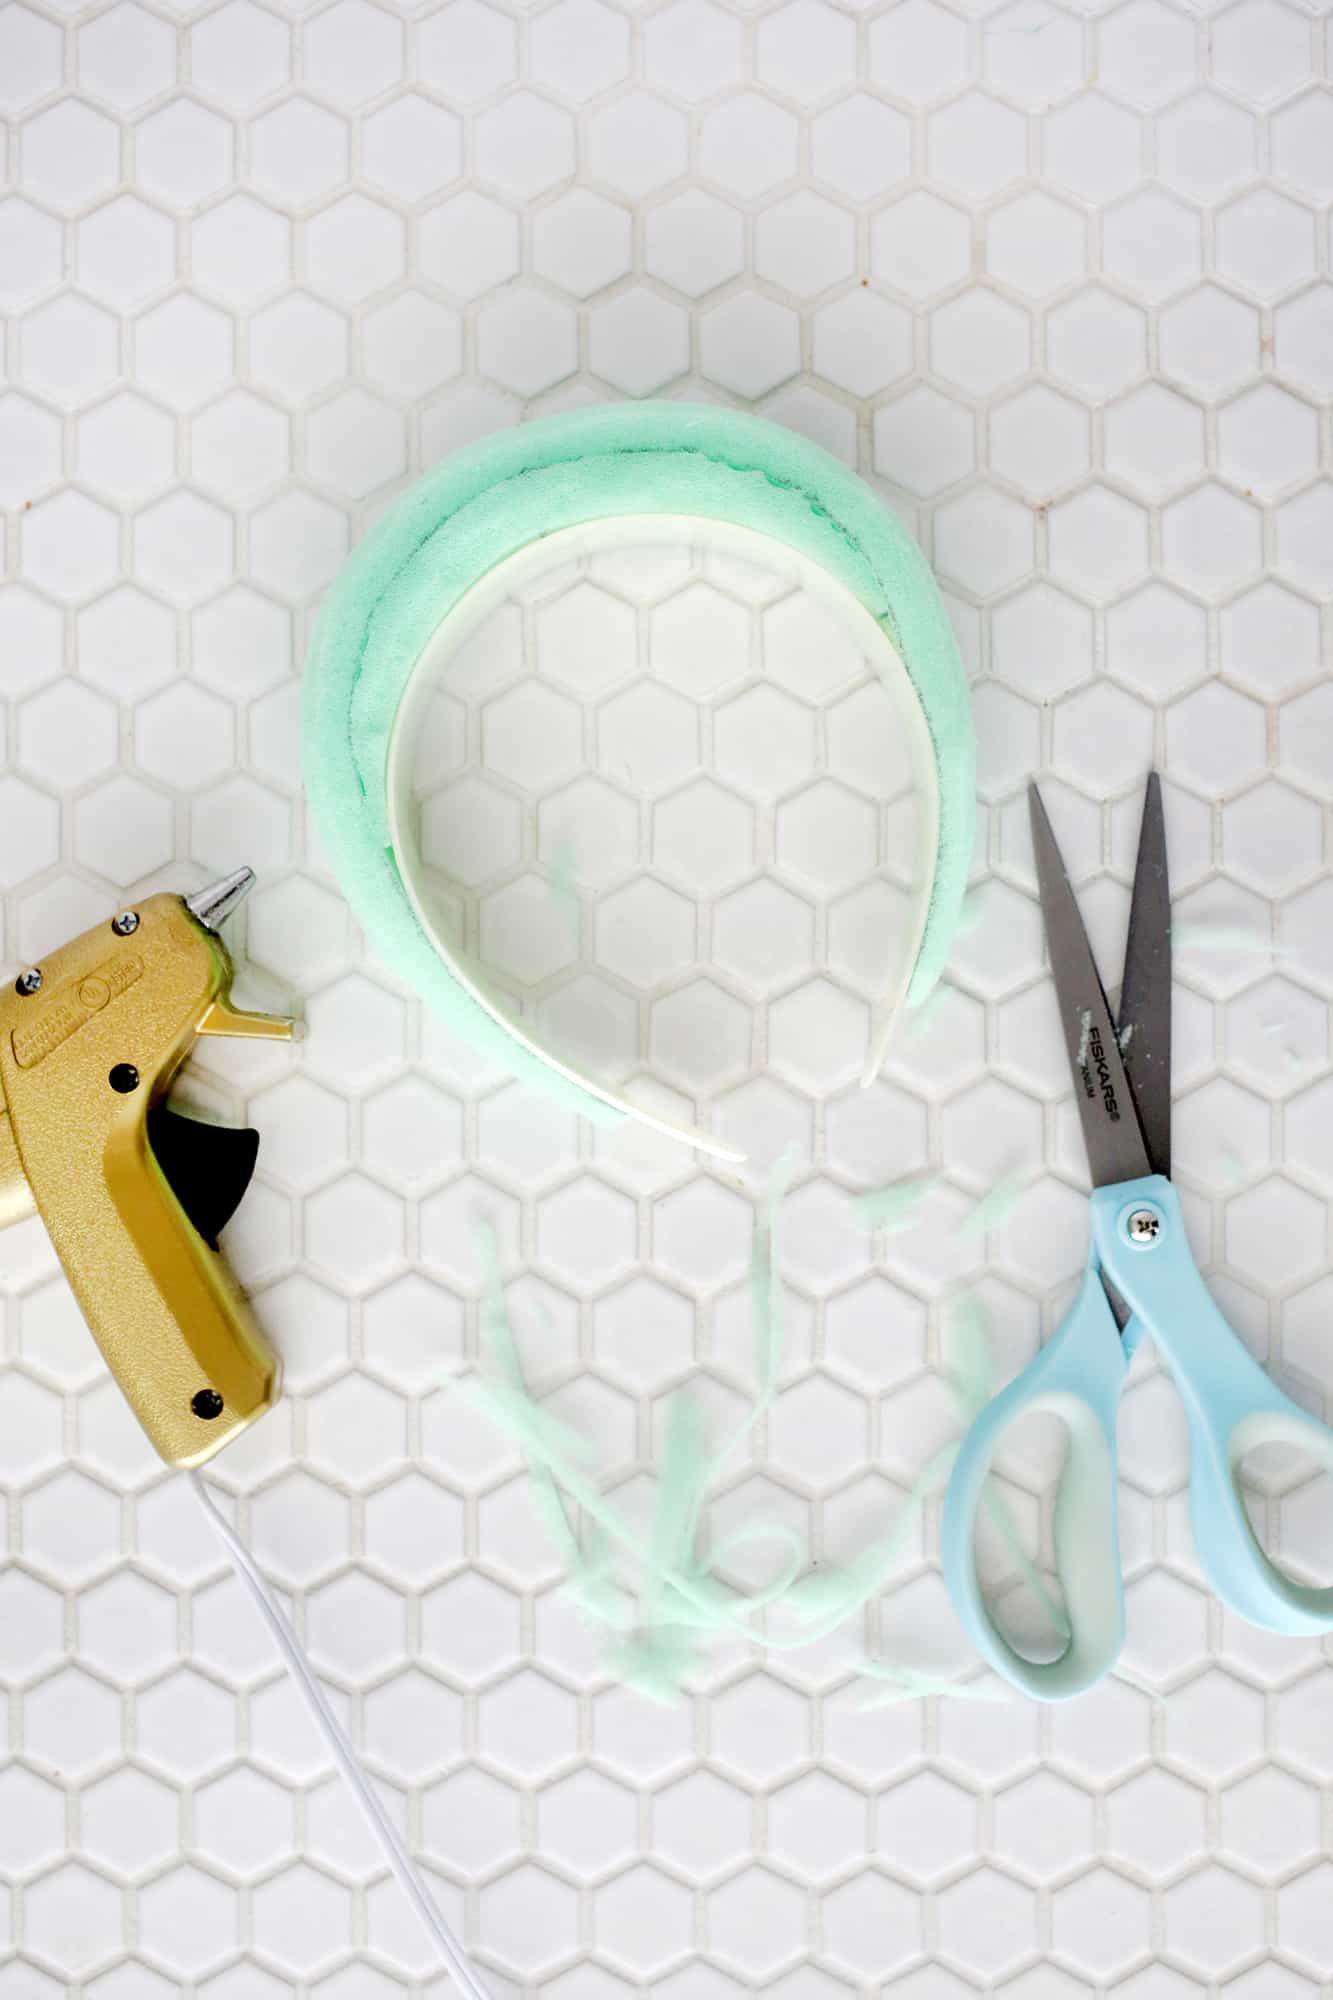
Use hot glue to attach your foam to your headband with the smaller section in the middle first (cut side down) and then the larger piece on top (cut side down as well).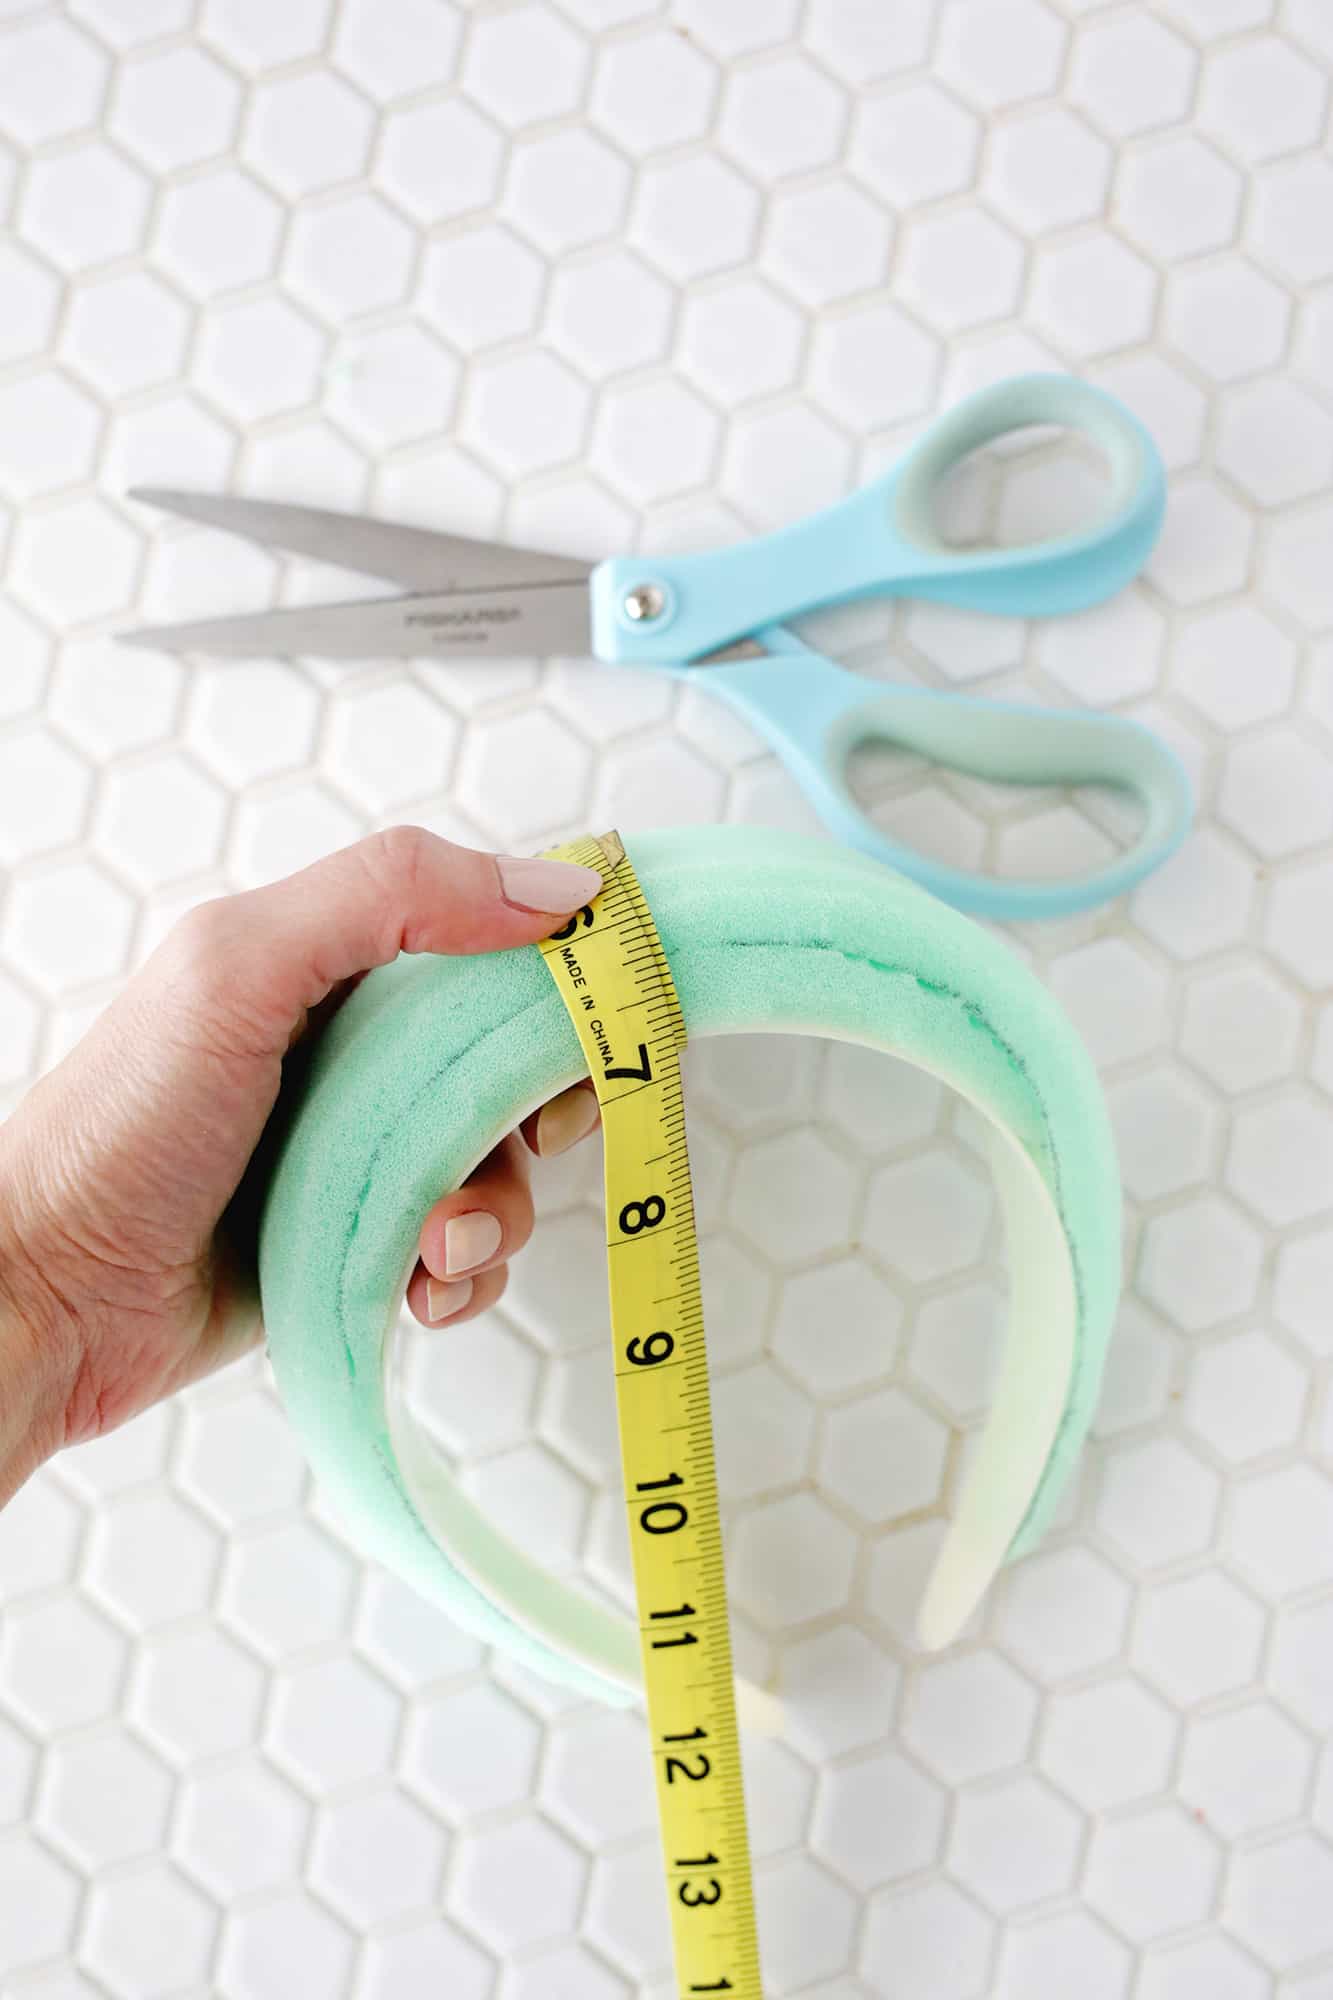
To make the template for your fabric cover, measure the thickness of the middle of your headband, the thickness of the ends of your headband, and the overall length of your headband across the top of the foam.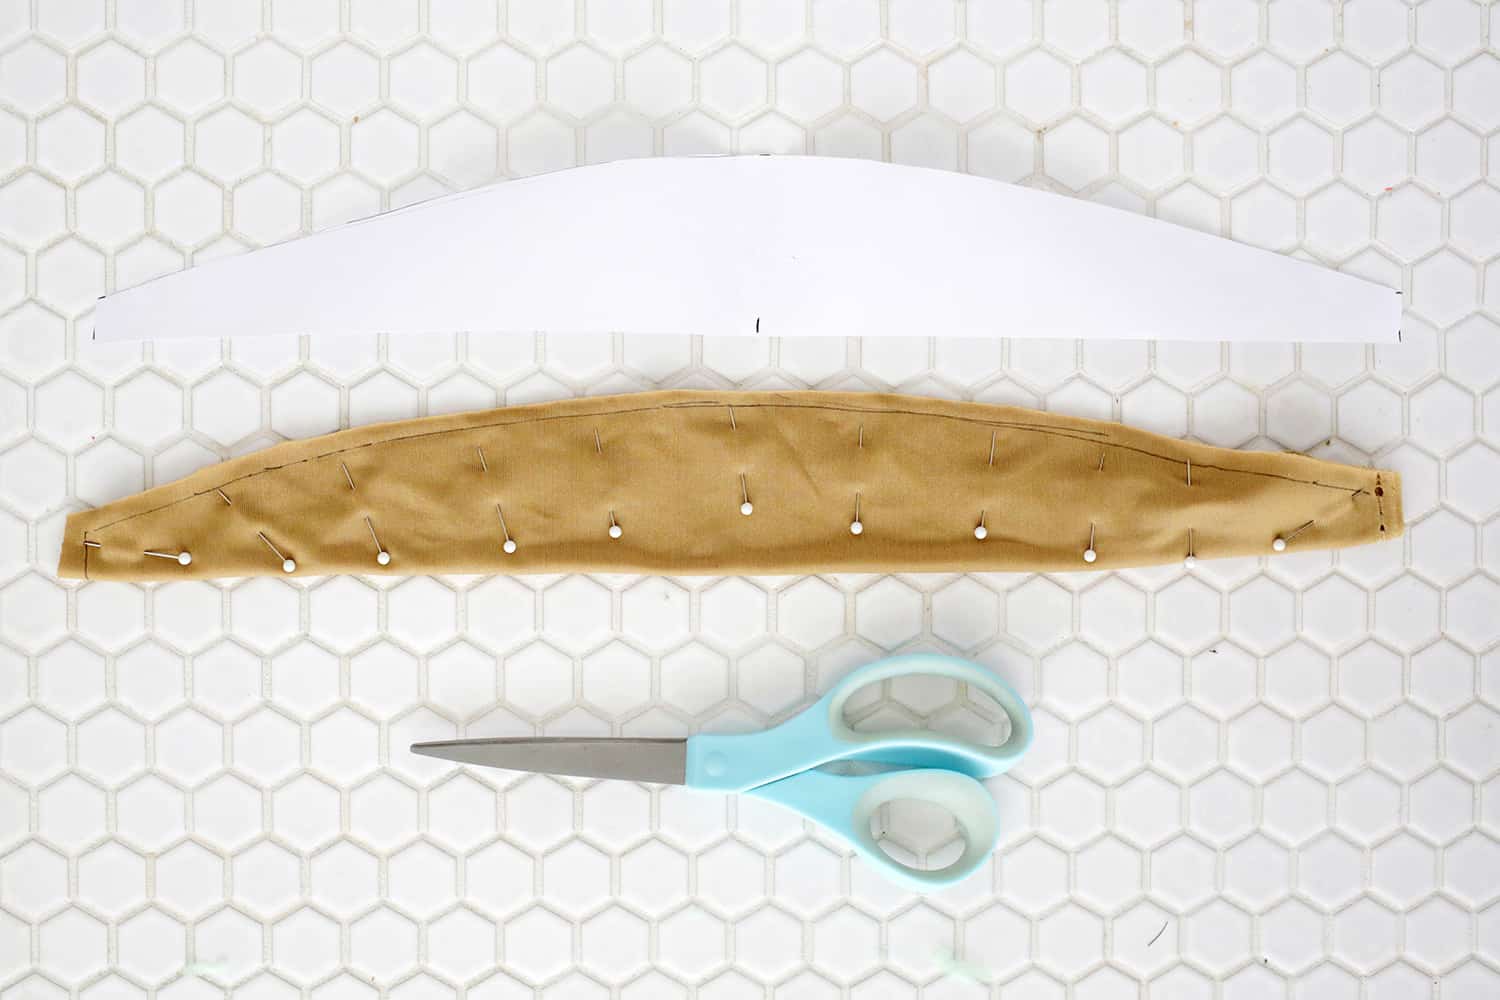
To make your paper template, mark the length of your headband, and at the middle point, go up on the paper and make a mark half the height of your middle thickness measurement. At each end, go up on the paper and make a mark half the height of your end thickness measurement. Connect the three points with a slight curve so you have a shape that looks like the one above.
Fold your fabric right side in and place your template on the fold. Cut out your fabric and pin the folded layers together.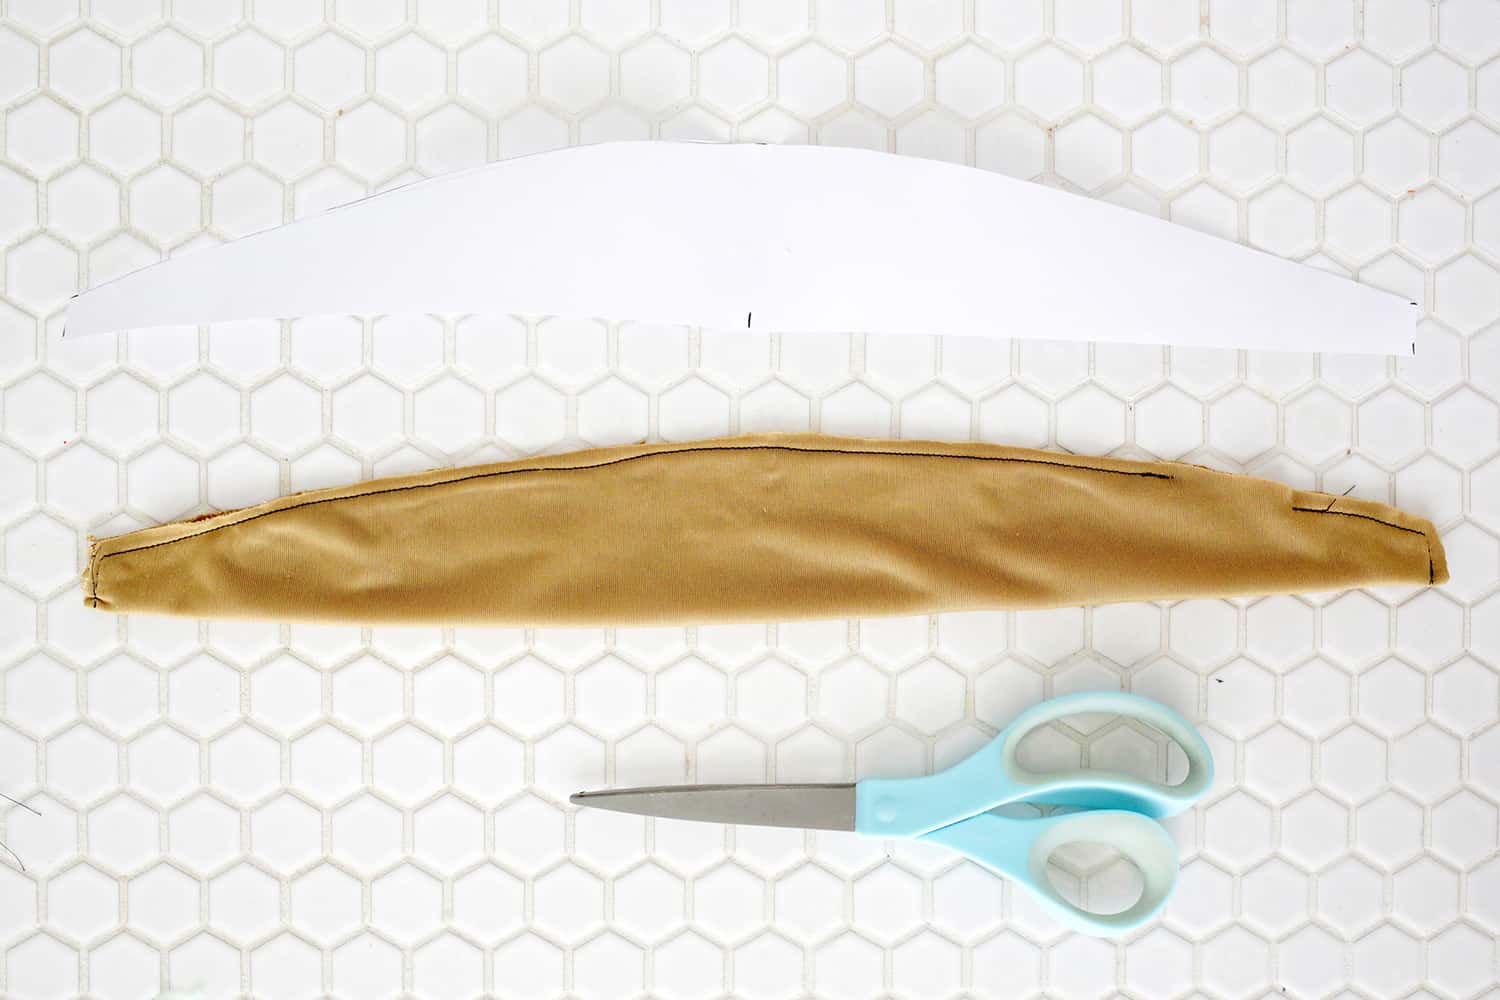
Sew around the edge with a 1/4″ seam allowance, leaving a 2″ gap near one end to turn your fabric through again.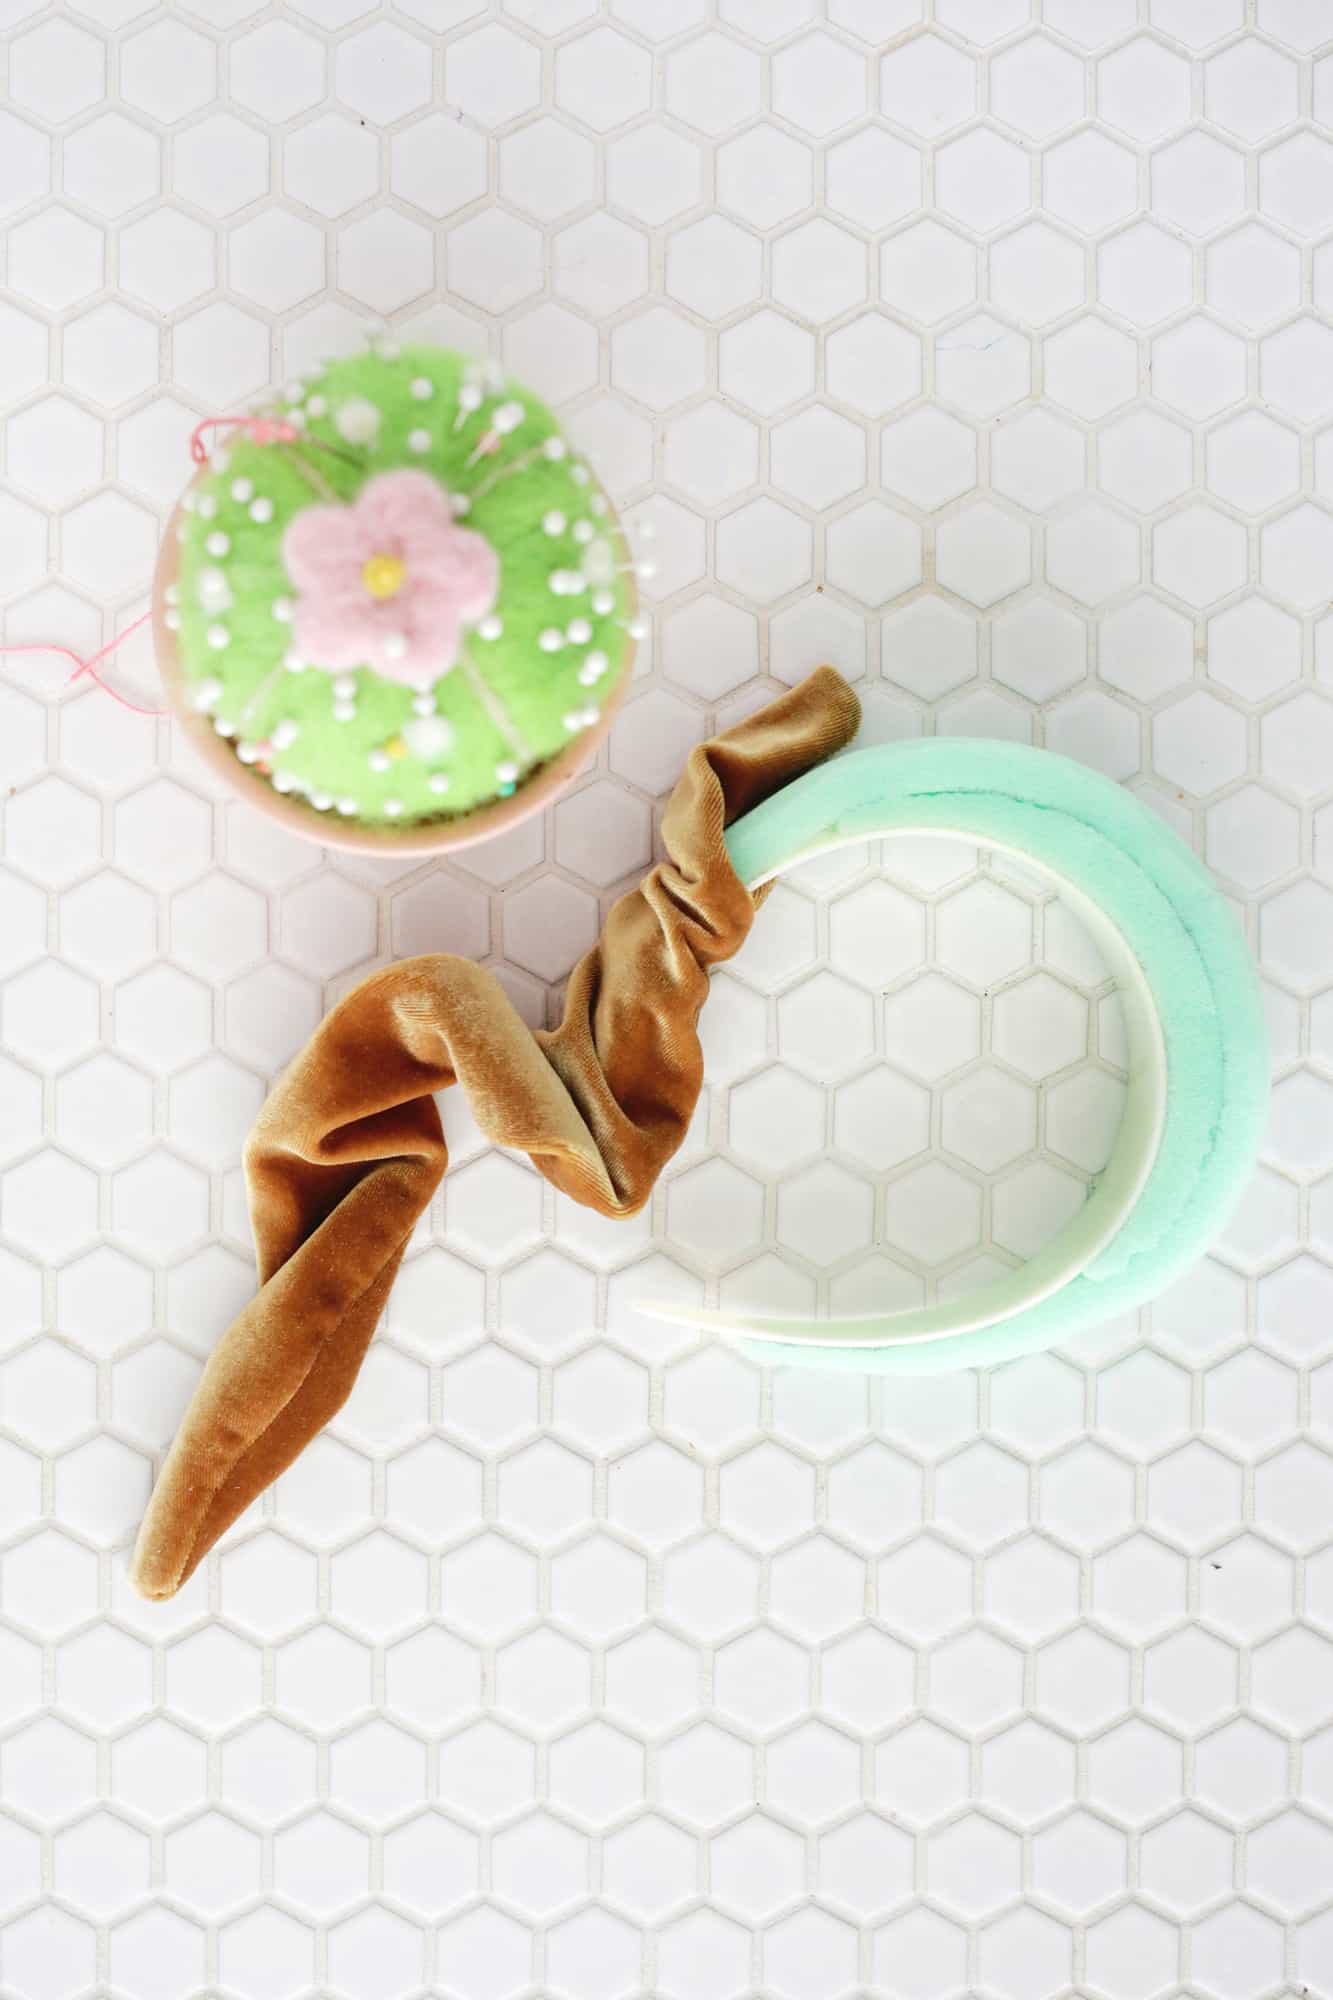
Turn your fabric through the hole and slide your headband into one side until fully in, and then slip the other end in as well (this is why you want to do this with a stretchy fabric). I’ve noticed that depending on the fabric and how much stretch it has, your fabric cover may fit perfectly or may seem pretty big once you put it on.
So if it’s too big, make note how much fabric is hanging off each end if you center the cover on the headband, remove the cover, and remake your template to be that new length instead.
So if you had first measured a 15″ length but there is 1.5″ extra hanging off of each side, redraw the template to be 12″ wide instead with the same thicknesses for the middle and ends. Trace that new template onto your fabric and resew it to be smaller.
Cut the excess fabric and repeat the process of turning it and inserting the headband. If there’s any spot where the cover is not fitting as snugly as you would like, you can keep removing it and sewing that section a little smaller until it all fits snug.
Once your headband is inserted and you are happy with the fit, hand sew your opening closed and your headband is ready to wear!
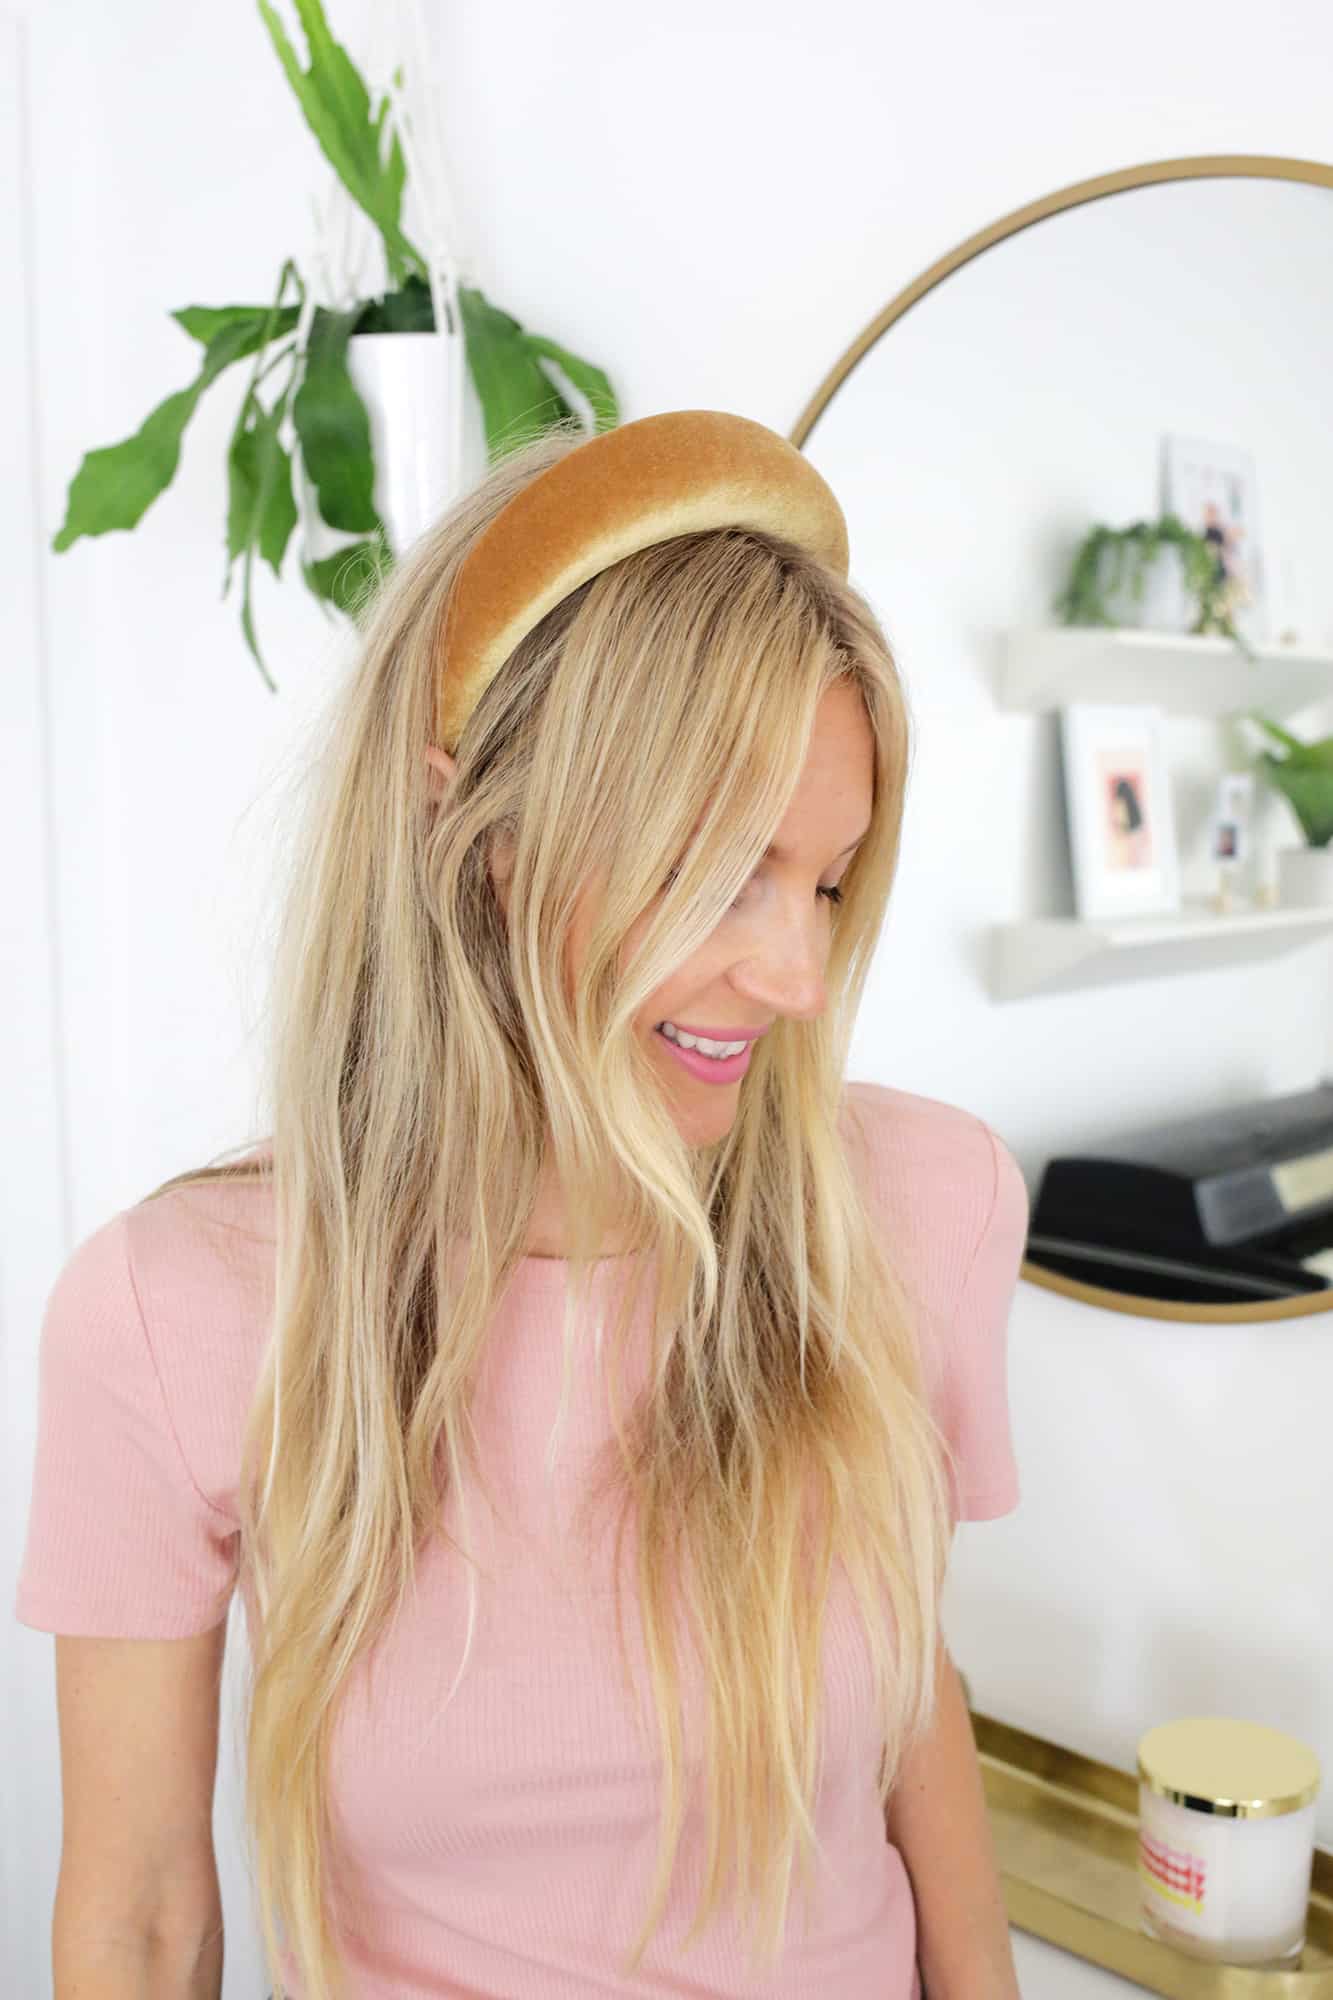

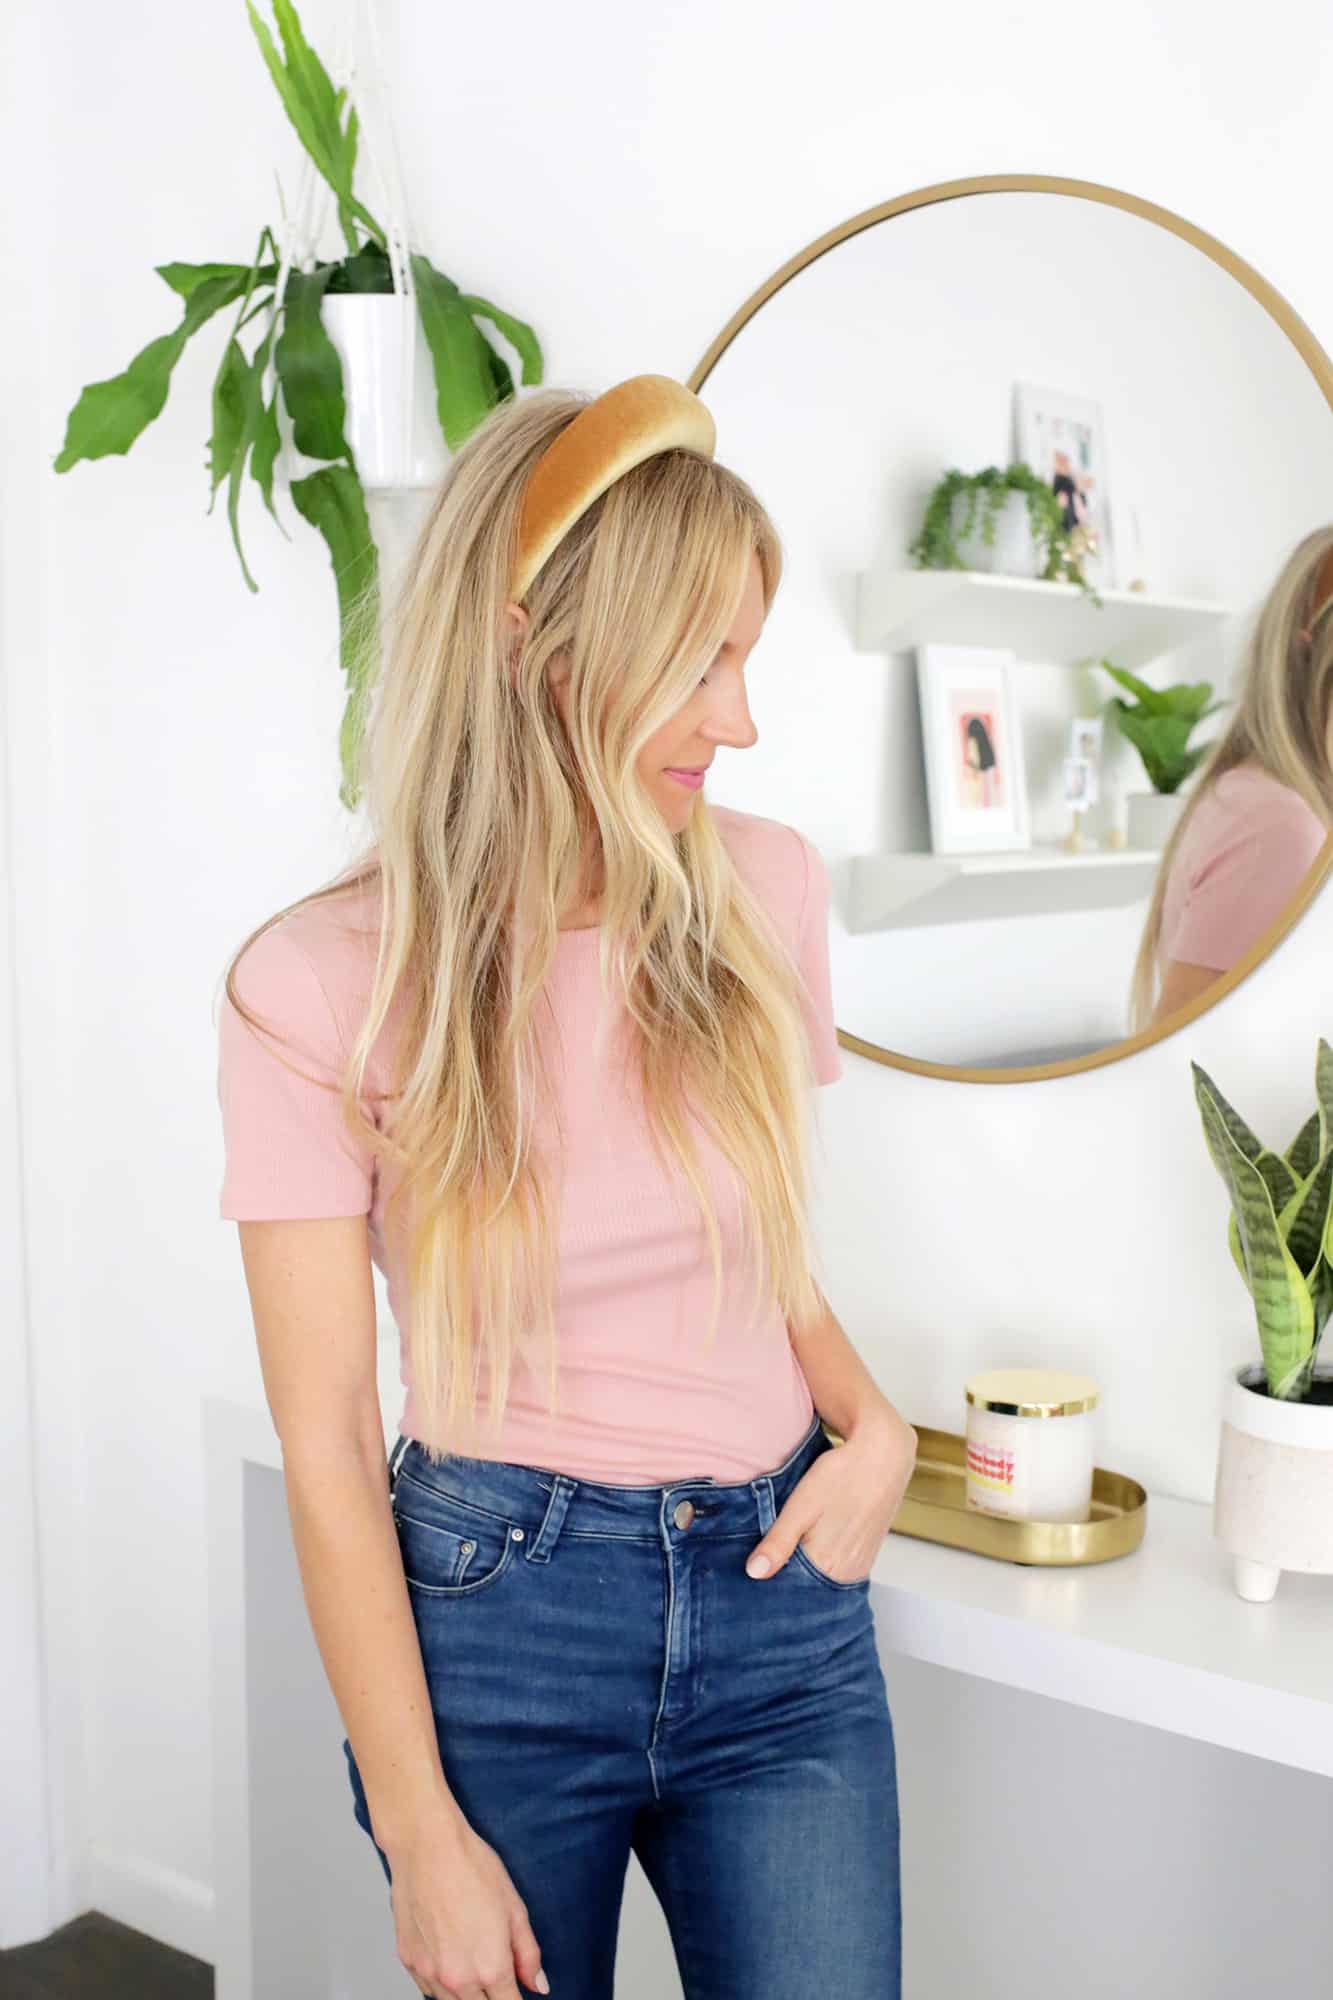 So fun! Velvet is a great choice for these headbands as well as they don’t slide around as much as a more slippery fabric may.
You could definitely batch-make these in different colors/patterns and be set for the season! Do you think you’ll give the padded headband a try? You should! xo. Laura
Love a good headband DIY? Check out…
]]> I haven’t always taken great care of my skin as a teen/young adult, but in the last five years I’ve definitely become so much more aware of trying to care for my body in better ways. That includes cleaner beauty products in my routine and washing my face is now a must before bed.
I also have pretty long hair and lots of little baby hairs in the front of my hairline that get weird (or weirder I should say) if they get wet, so a spa headband is totally necessary when doing my face wash routine at night. I’ve always wanted one of those cute versions with a giant bow on top, so I decided to make my own and I love how it came out!
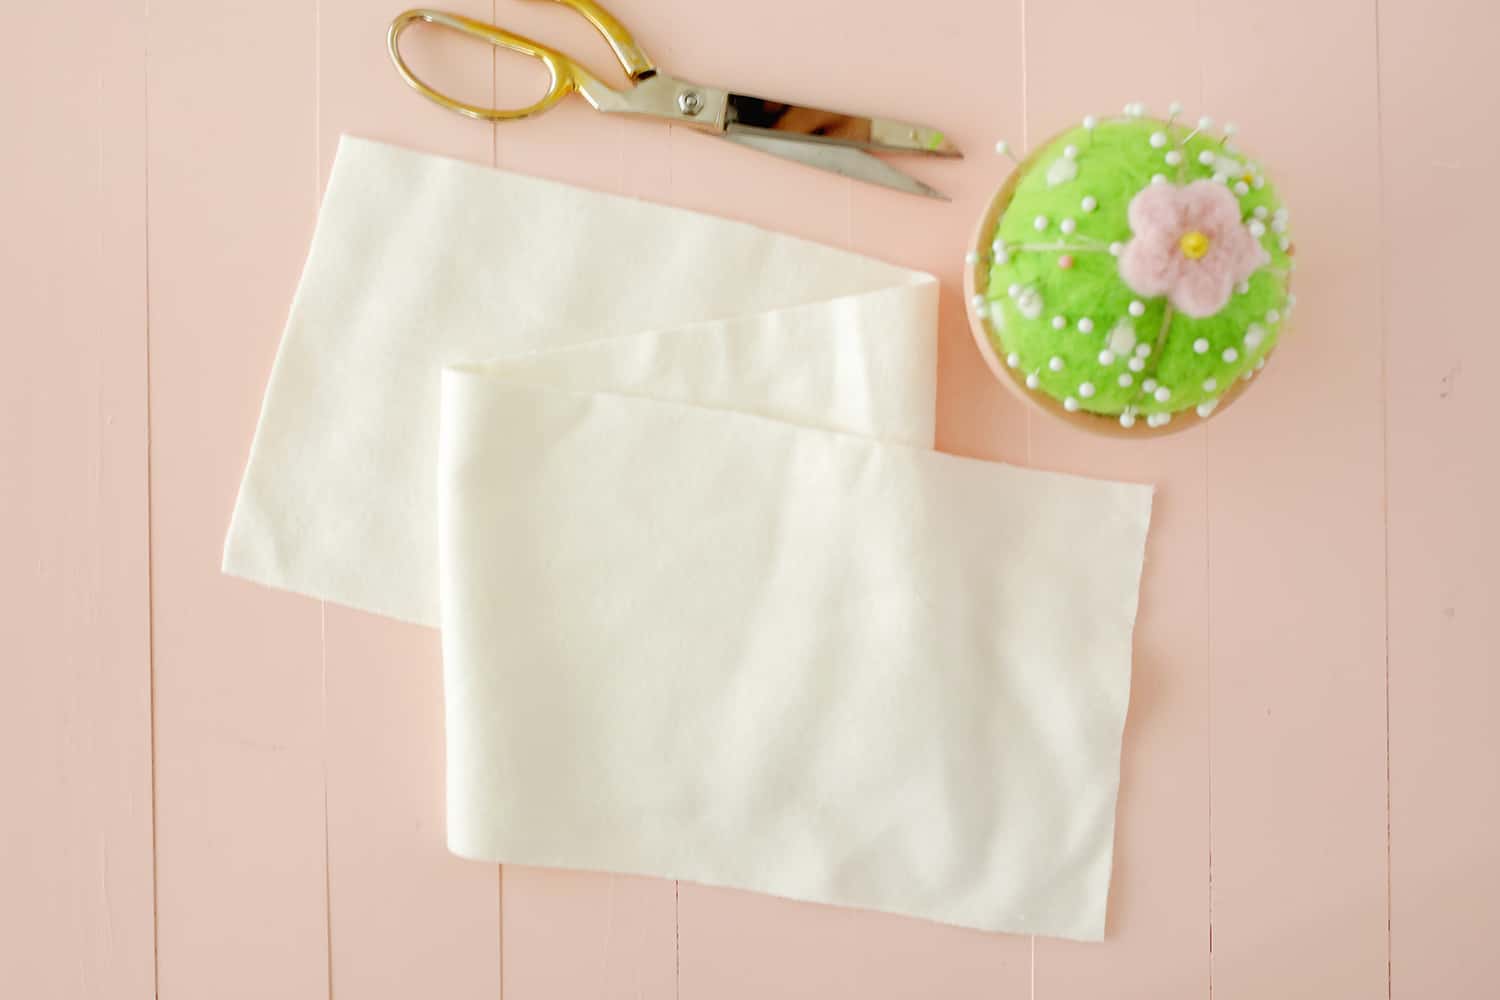
Supplies:
–cotton flannel fabric (a quarter yard)
-straight pins and fabric scissors
–1/2″ elastic (two pieces 18″ long)
–1/4″ elastic (two pieces 18″ long)
-sewing machine
 Cut a large rectangle of flannel that is 6″ x 27″ for the main body of the headband. If you have a serger sewing machine, sew around the outside of the rectangle to keep the edges from fraying, and if you don’t have a serger, use a zig-zag stitch on your regular machine around the edges instead.
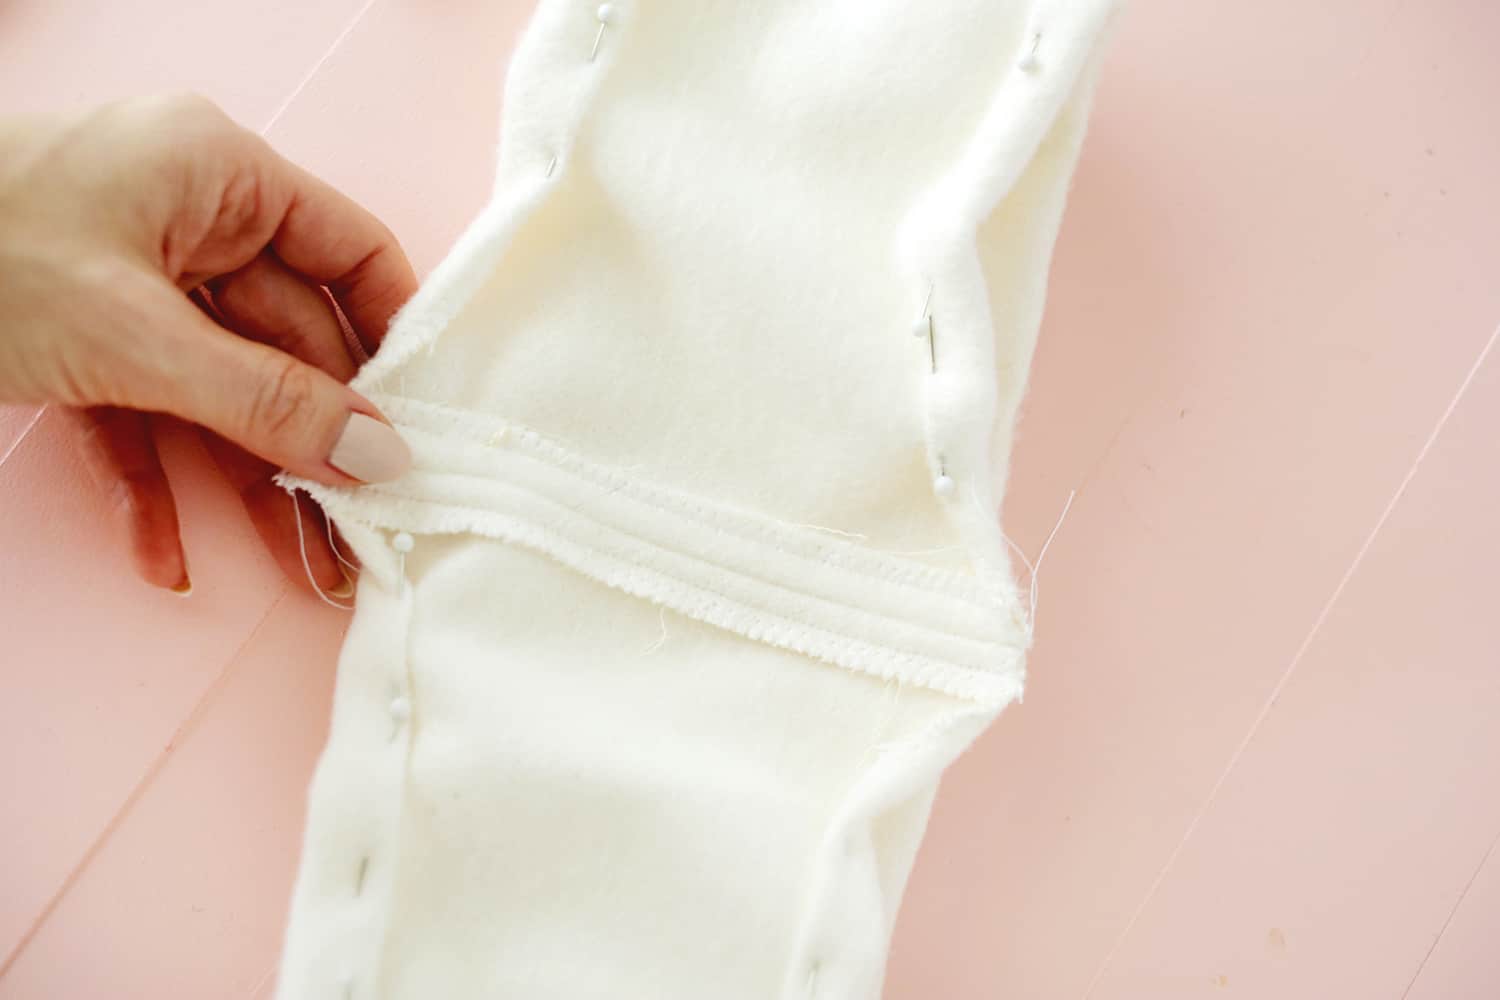 You’ll want to make your long rectangle into a loop for the headband, so fold it in half, line up the edges, and pin them together. Sew with a 1/2″ seam allowance and then press your seams flat and top stitch each flap flat so the underside looks like what you see above.
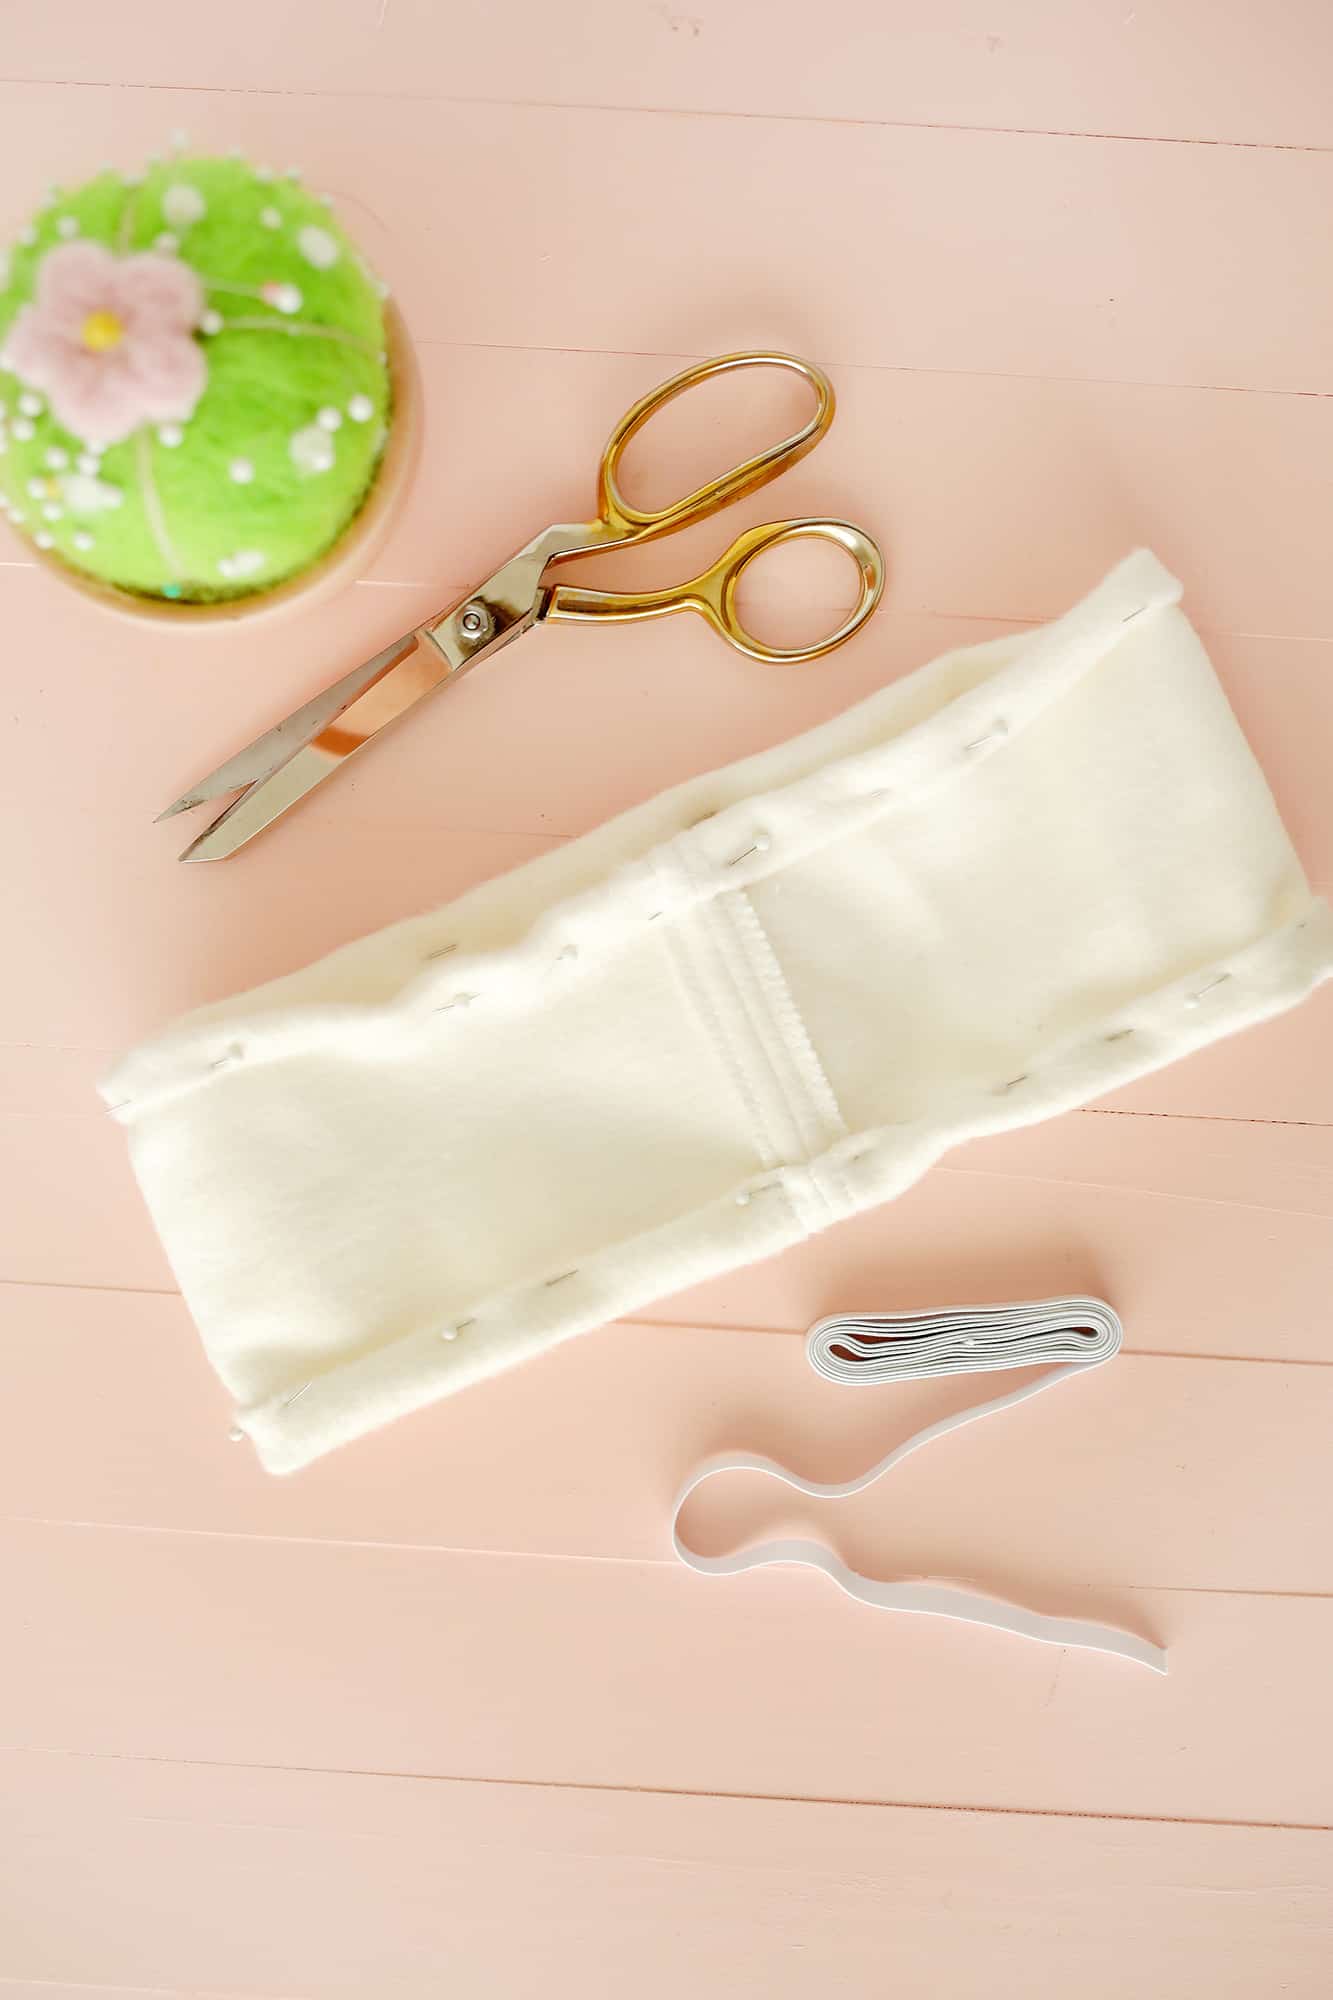 Fold under your zig-zag edge on the top and bottom edge of the headband and pin so that you’ll have a 1/2″ channel of space with which to thread your 1/2″ elastic through.
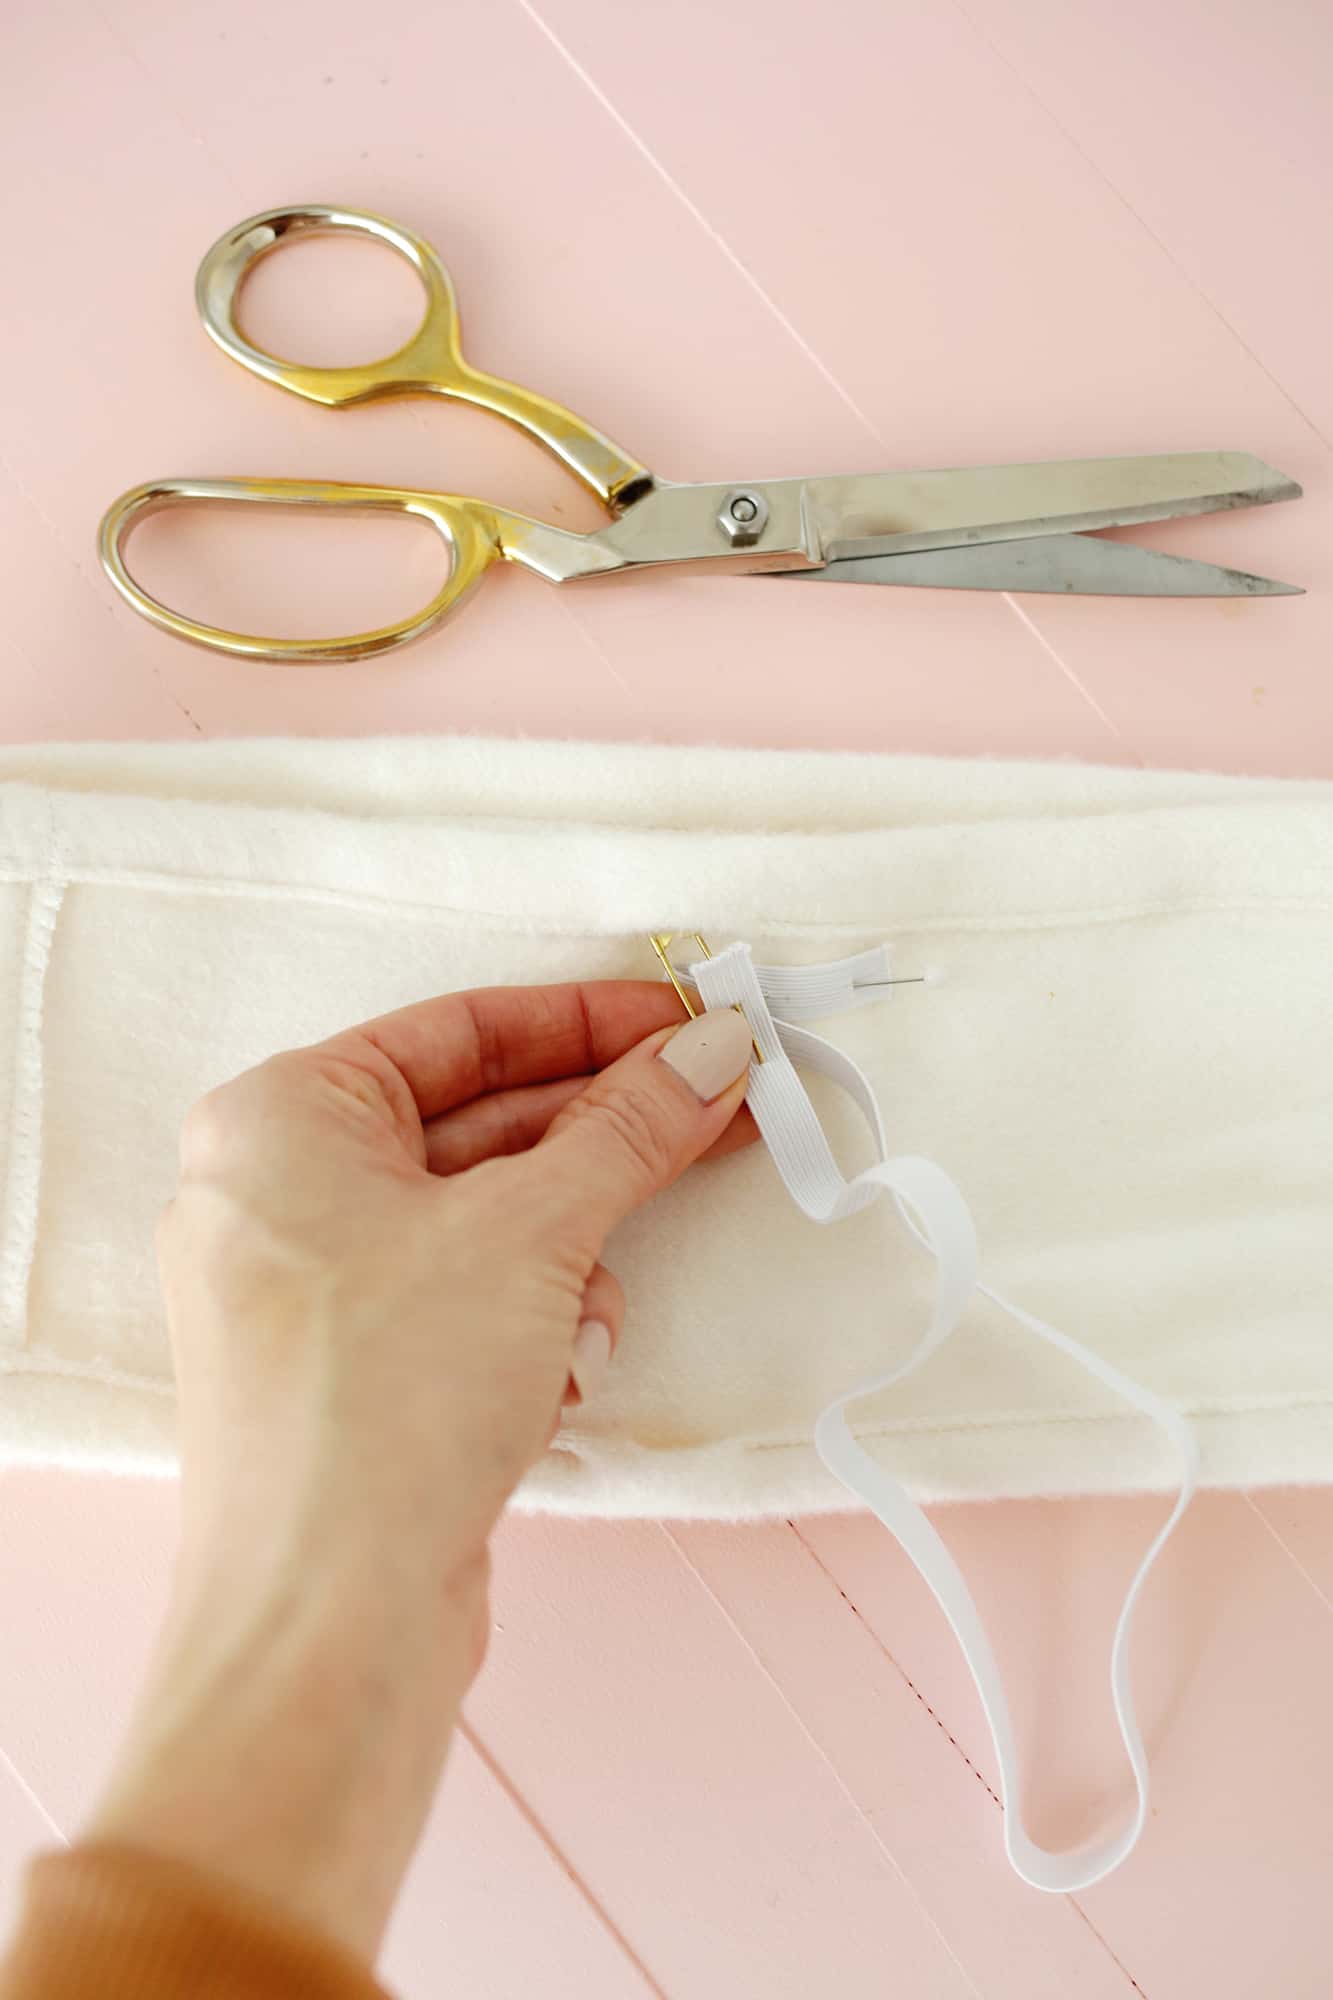 Sew all the way around the folded edges with the smallest seam allowance you can while leaving 1″ gap in the top and bottom channels to add your elastic through. Pin a large safety pin onto one side of your elastic and pin the other side to just outside of your gap opening to keep it in place.
Thread your 1/2″ elastic all the way through the channel and back out, feeling and guiding the safety pin through with your fingers from the outside. Pin in place. Repeat with your second 1/2″ elastic.
You can try on your headband at this point and if it’s too loose cut off some of the elastic to make them both shorter and tighter (just make sure to trim your 1/4″ elastic to that same length).
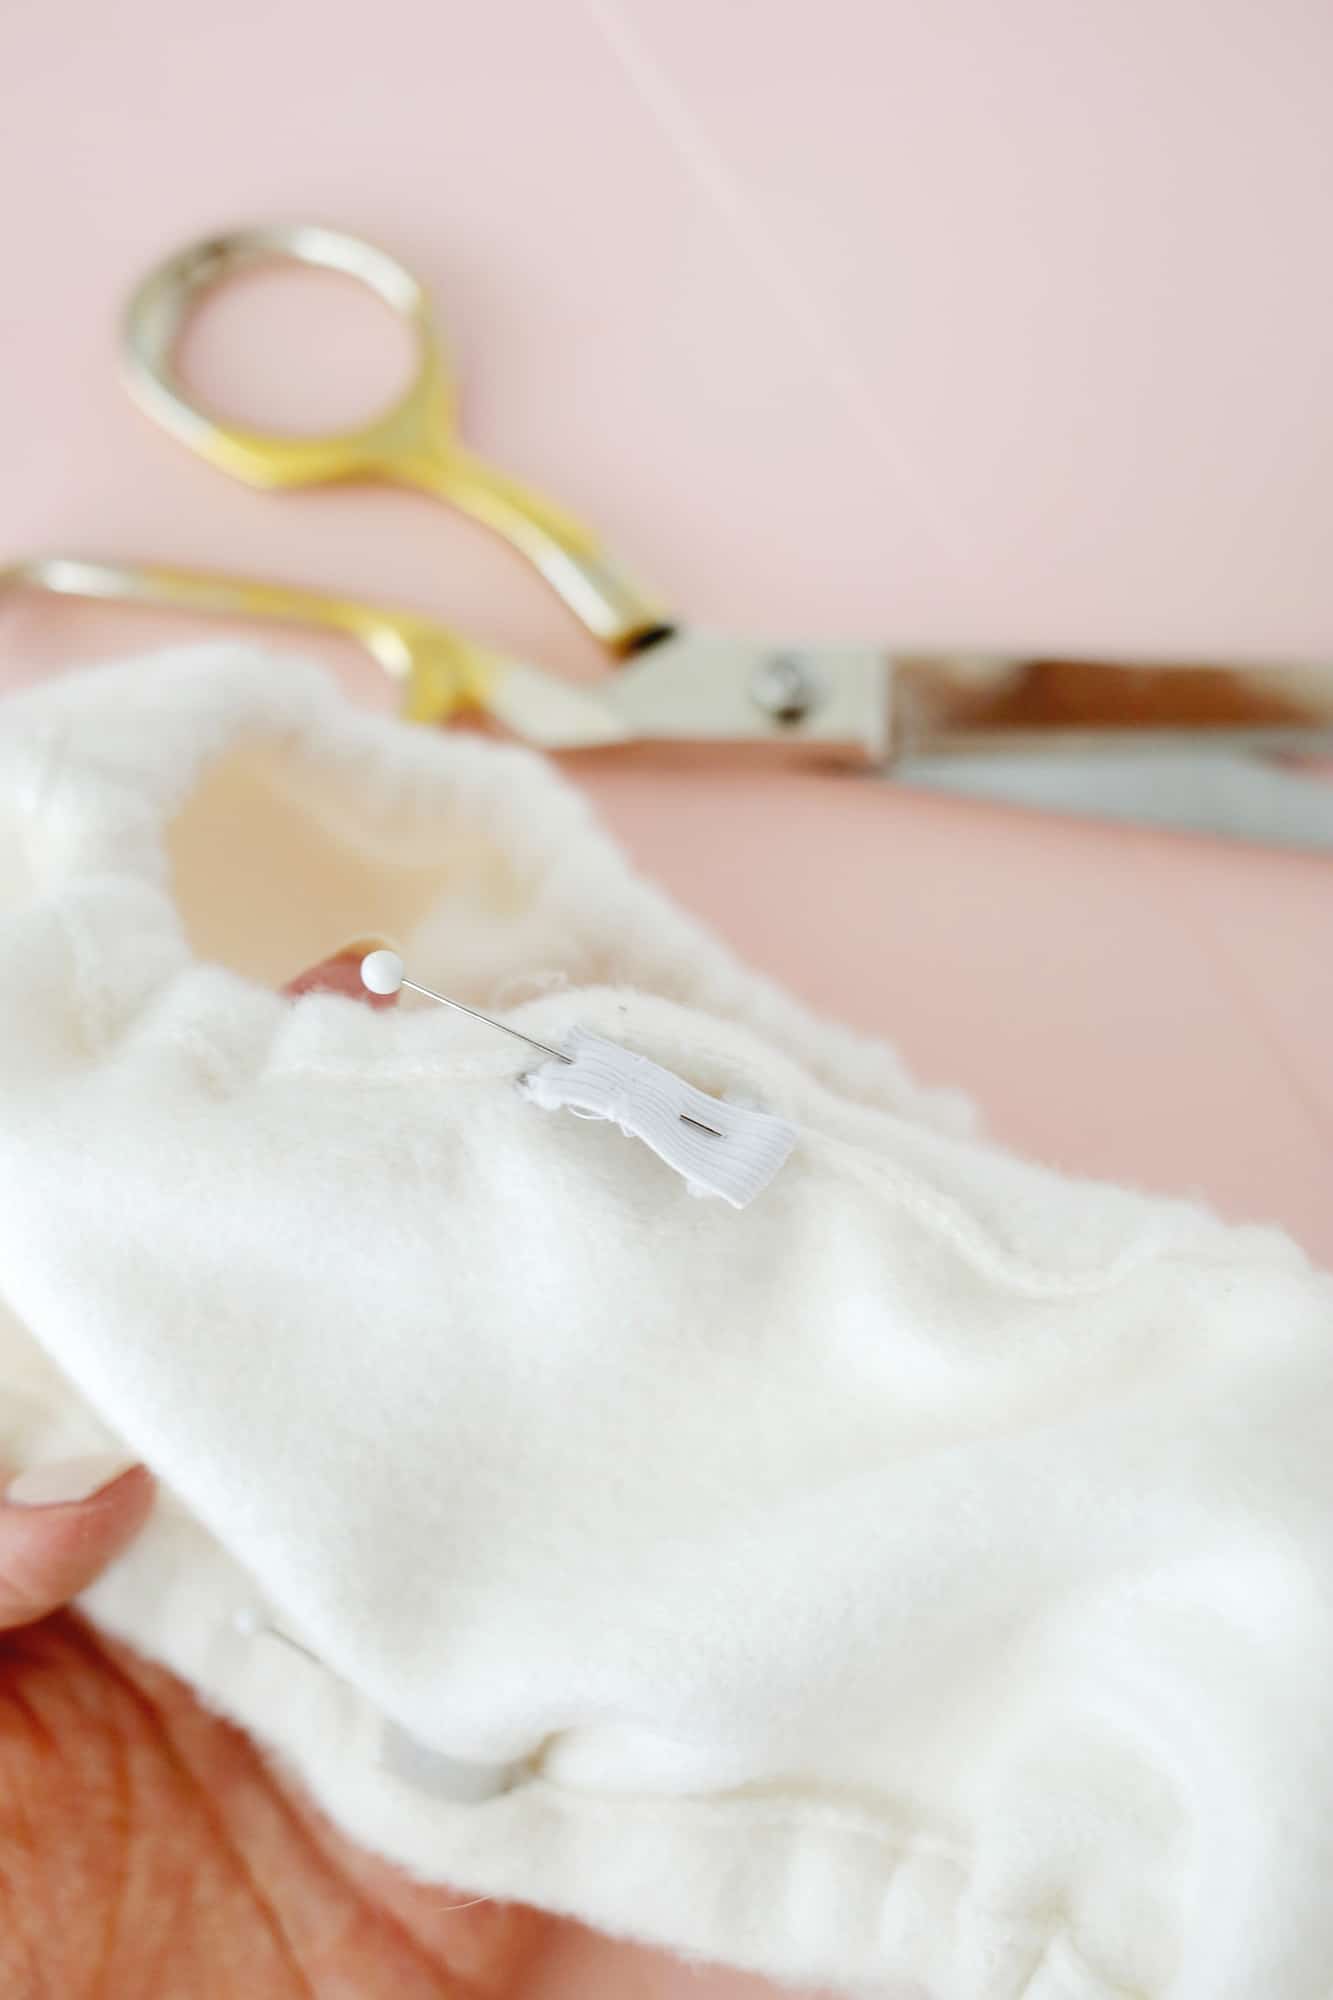 Once you have both elastics through, overlap and pin your elastic ends together and sew to join. Push them through back into the channels and then hand stitch the openings closed.
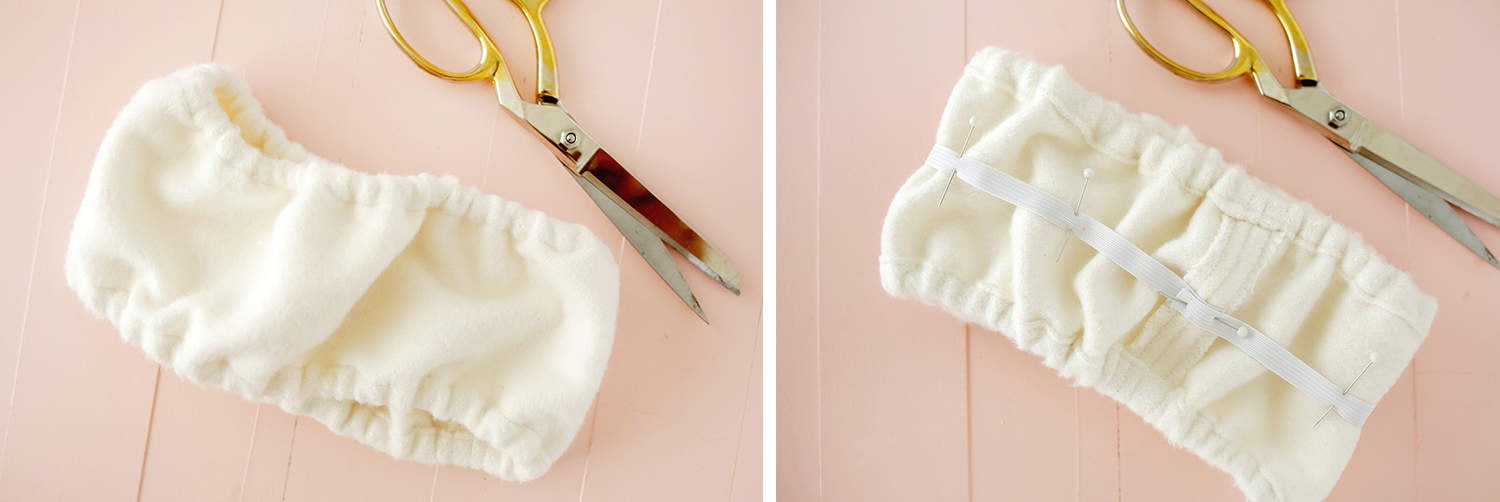 You should now have a headband that fits but is kind of puffy if you turn it right side out and put it on. So we are going to add a little more elastic to the body part to make that look a little nicer. This step is optional, but I think it does look better.
I ended up adding two elastic bands instead of just one as you see in the photo (I think the two bands makes it look optimal), but one will definitely help if you want to do half the work—haha!
Take your elastic band, fold it in half and mark the middle point with a pen or marker. Pin the two elastic ends overlapping where your headband seam is (see photo above on the right), fold your headband at that seam to find its middle point on the opposite end of the headband and pin the middle of the headband to the marked middle of the elastic so the elastic is evenly spaced.
Fully stretch out your headband (you may need a second pair of hands for this or find a small box or pillow to stretch it around) and then pin the elastic to the headband every 2-3″. If you do one piece of elastic, do it right down the middle and if you do two then space them evenly in the middle section of the headband.
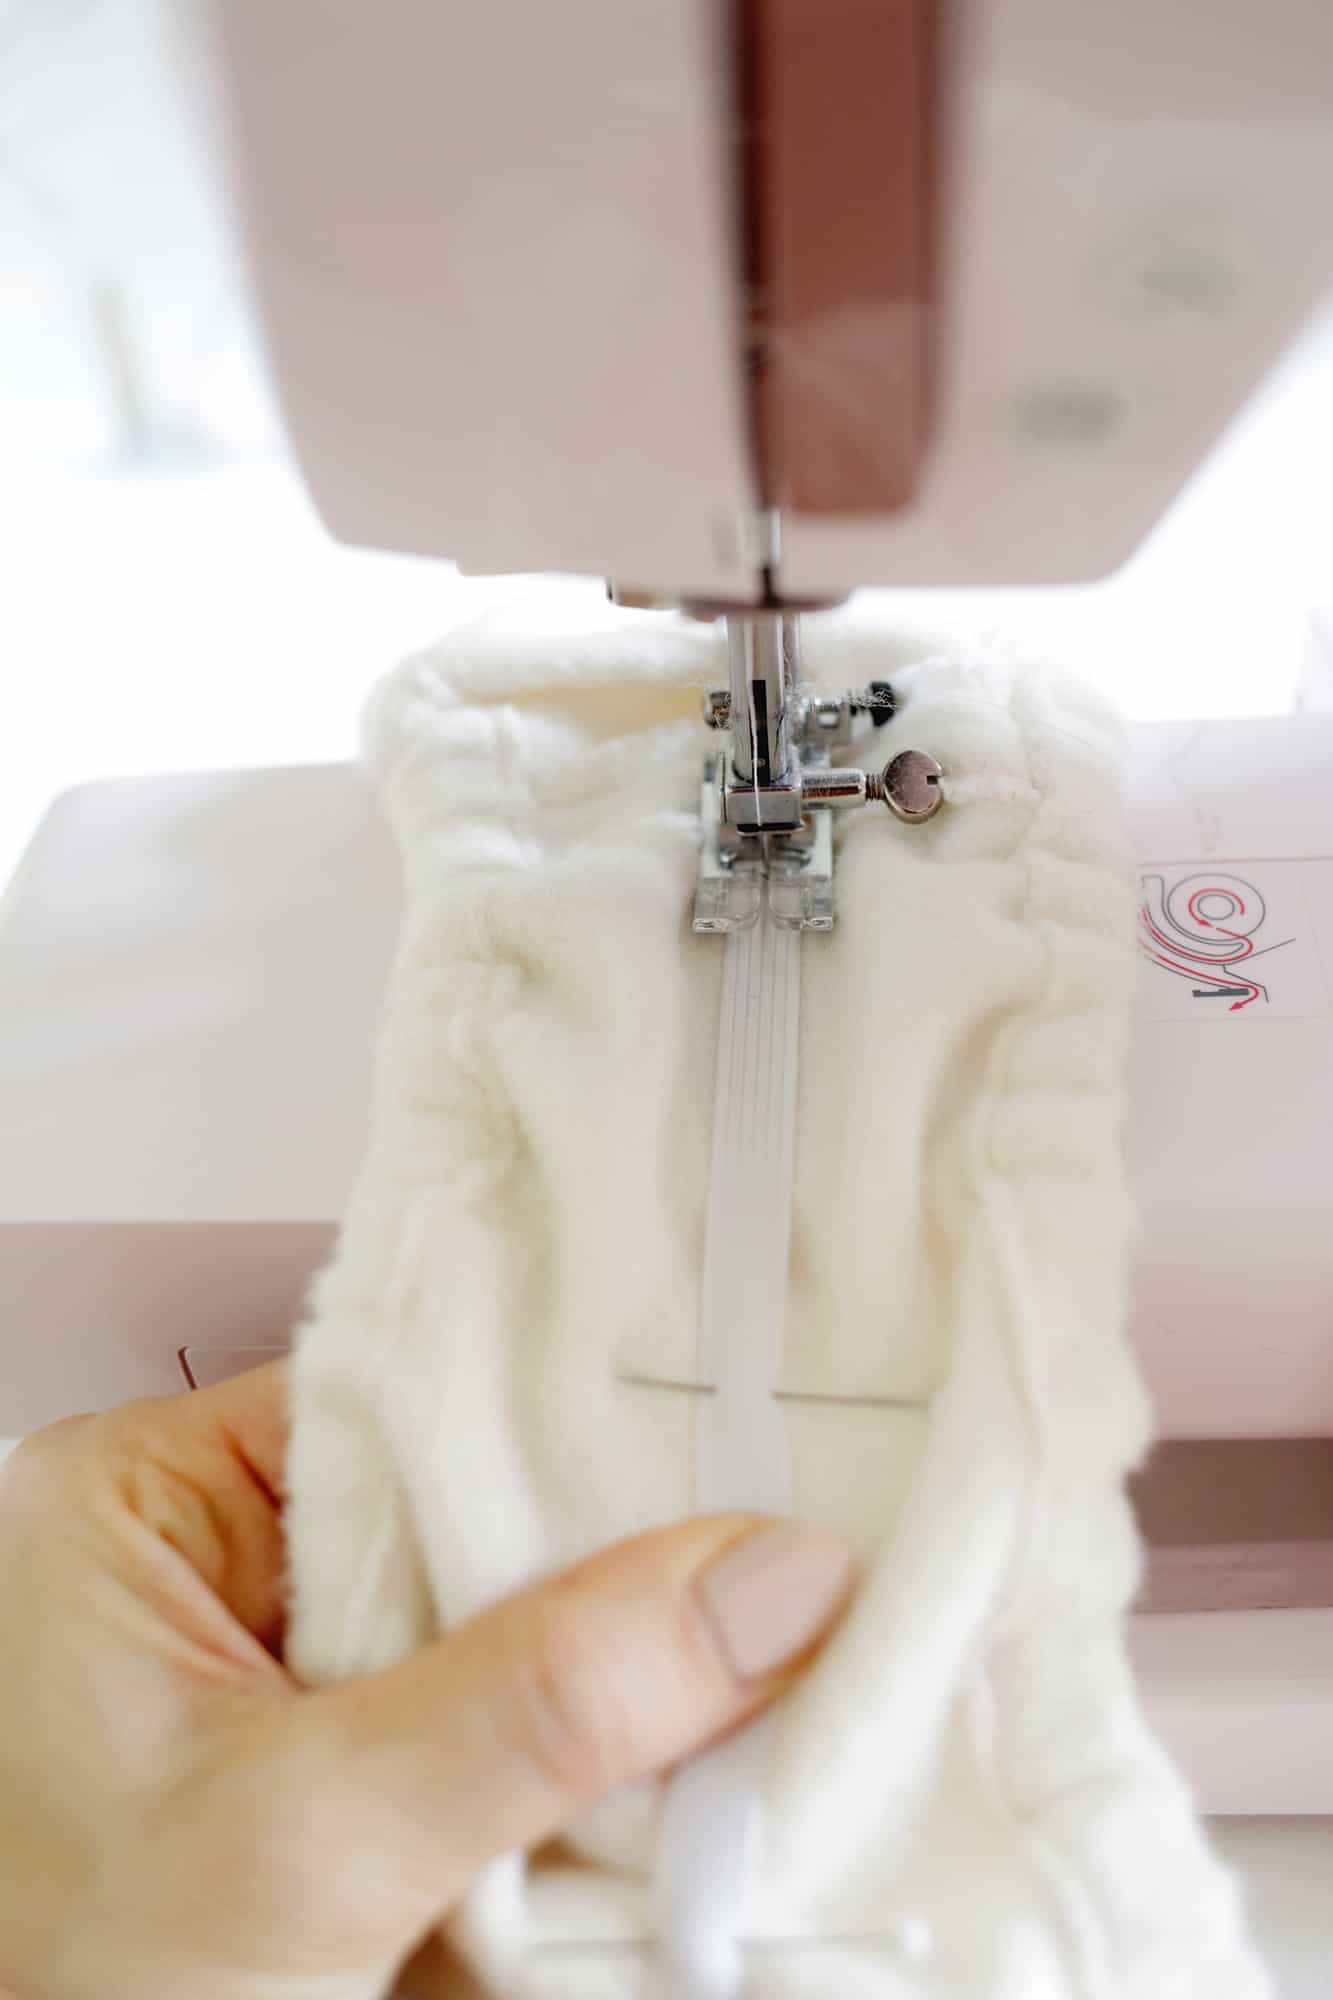
Sew down the middle of your elastic all the way around. To do this properly you need to pull it out so it’s stretched and flat with the headband as you sew (keep one hand pulling away from you behind the needle and the other in front of the needle pulling forward towards you a little).

See? The elastic helps to hold the middle section close to your head too so it’s nice and tidy rather than puffy. Turn your headband right side out.
 Cut two 7″ x 5.5″ rectangles to be the bow of your headband and cut a rectangle 3.5″ x 5.5″ to be the middle section of the bow. Pin the two larger rectangles together and sew around the outside with a 1/2″ seam allowance leaving a 1-2″ gap for turning.
Fold your smaller rectangle in half, longways, and sew down the length with a 1/2″ seam allowance making a tube with both ends open. Zig-zag stitch around your sewn edges to keep them from fraying and turn both your pieces right side out. Hand-sew your bow rectangle opening closed.
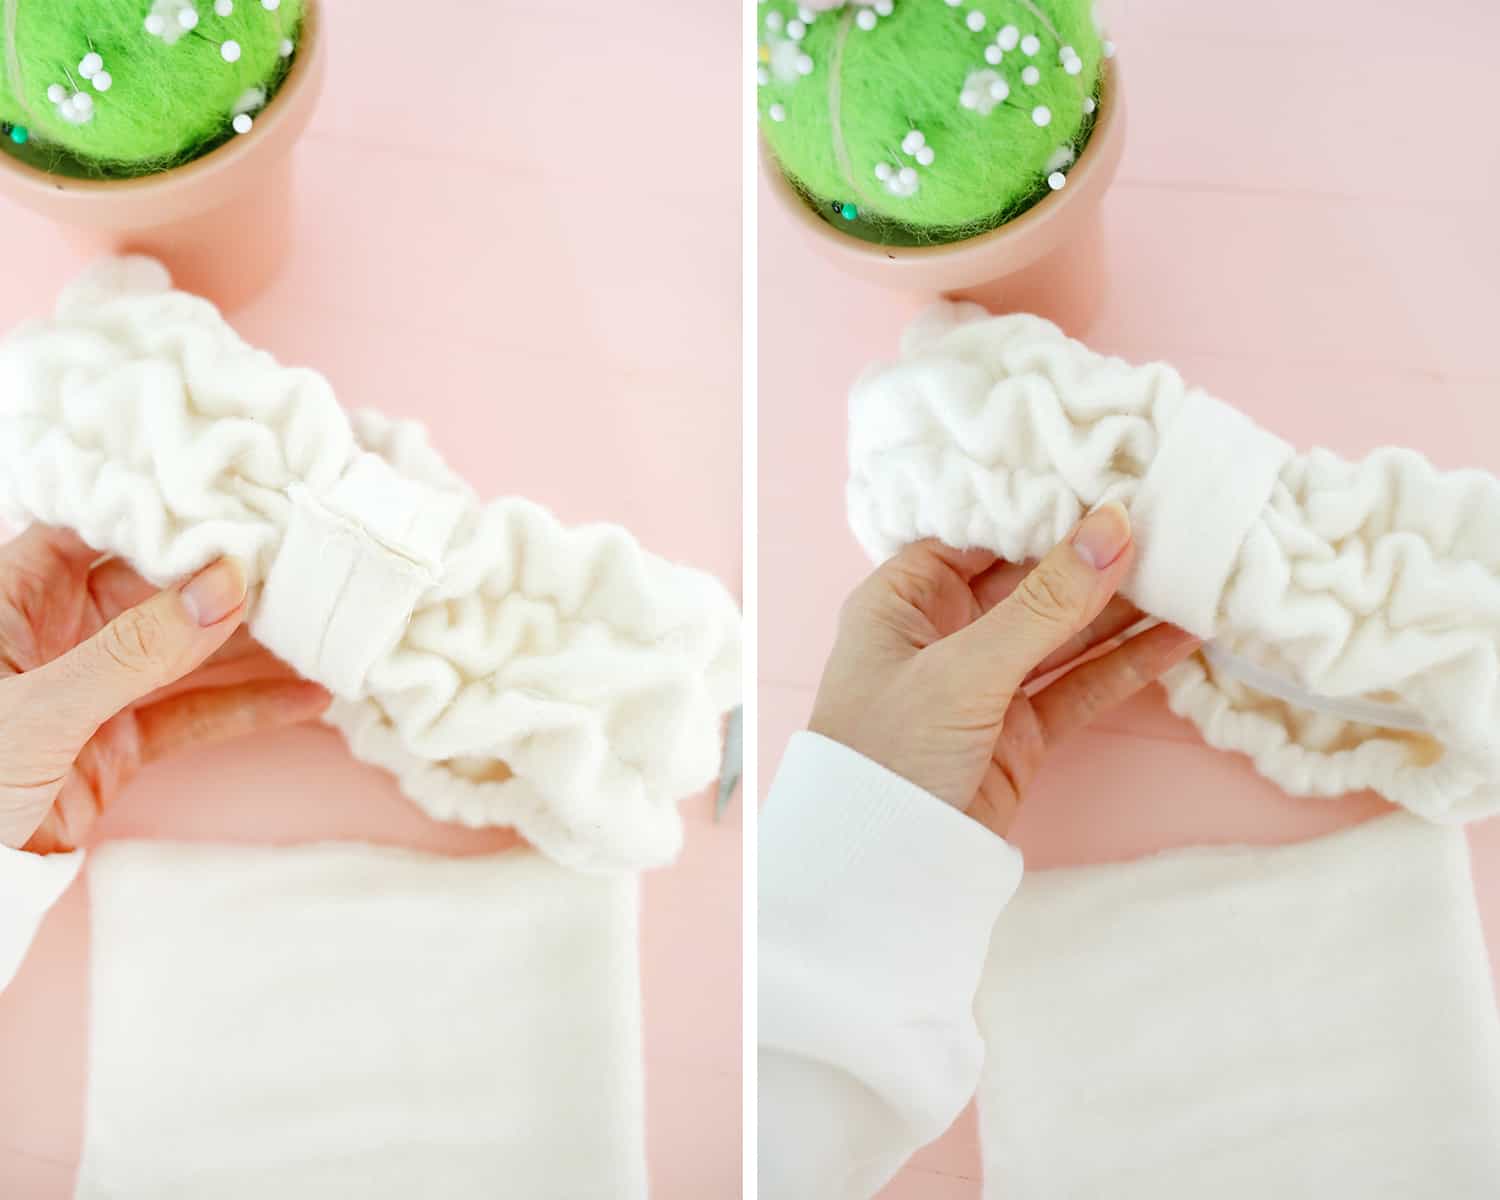 With the seam facing outward, wrap your bow middle around your headband and sew the ends together with a 1/4″ seam allowance. Zig-zag stitch the seam allowance. Turn your bow middle so the seam side is on the inside.
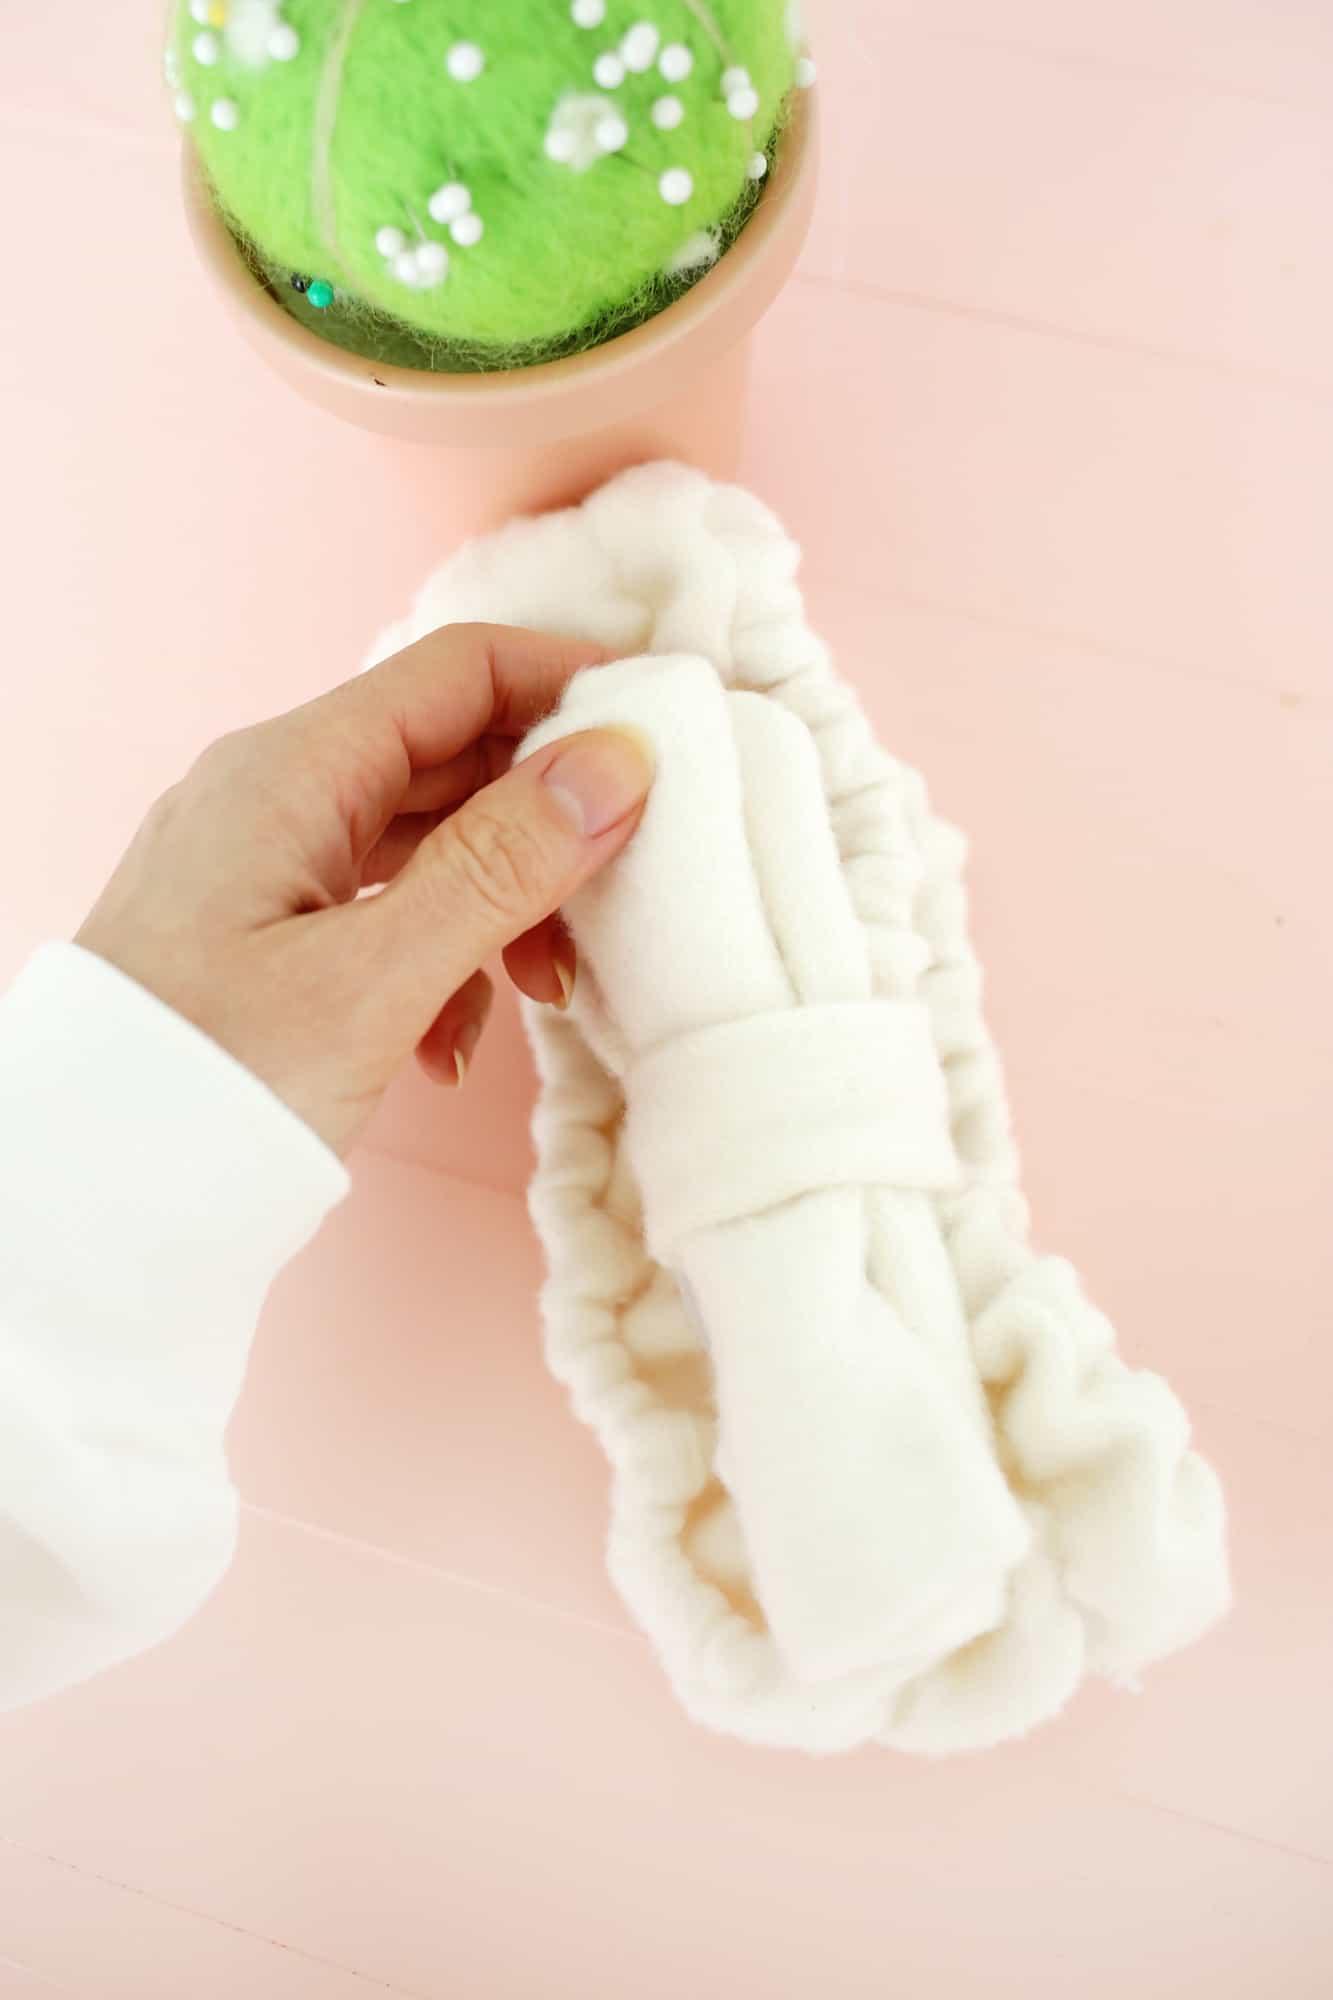 Roll your bow like a fruit roll-up and thread it through your bow middle.
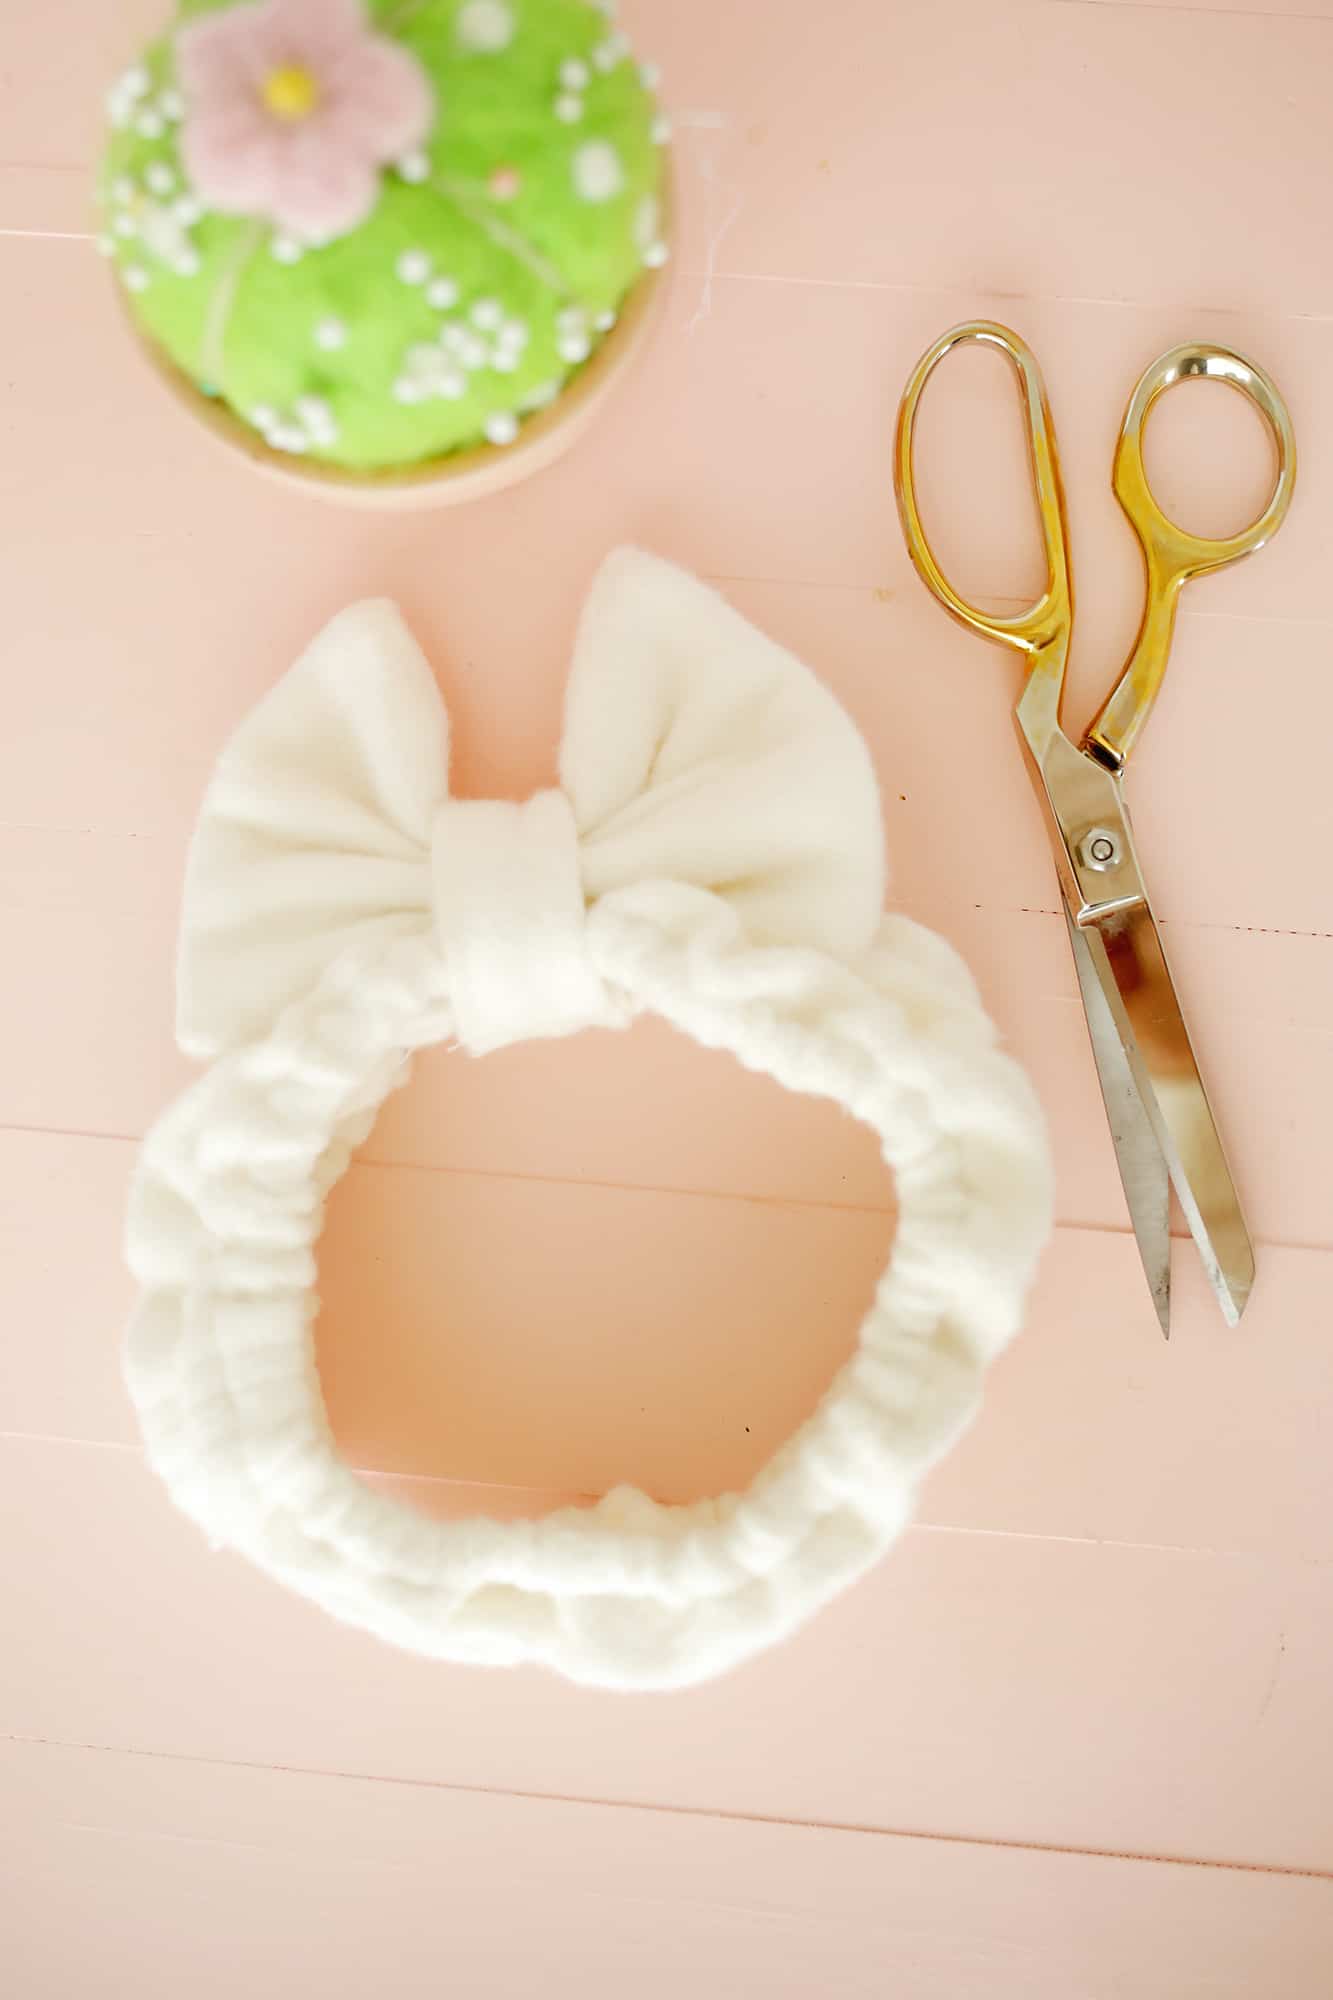
Unroll your bow, fluff it up, and your headband is ready to use!
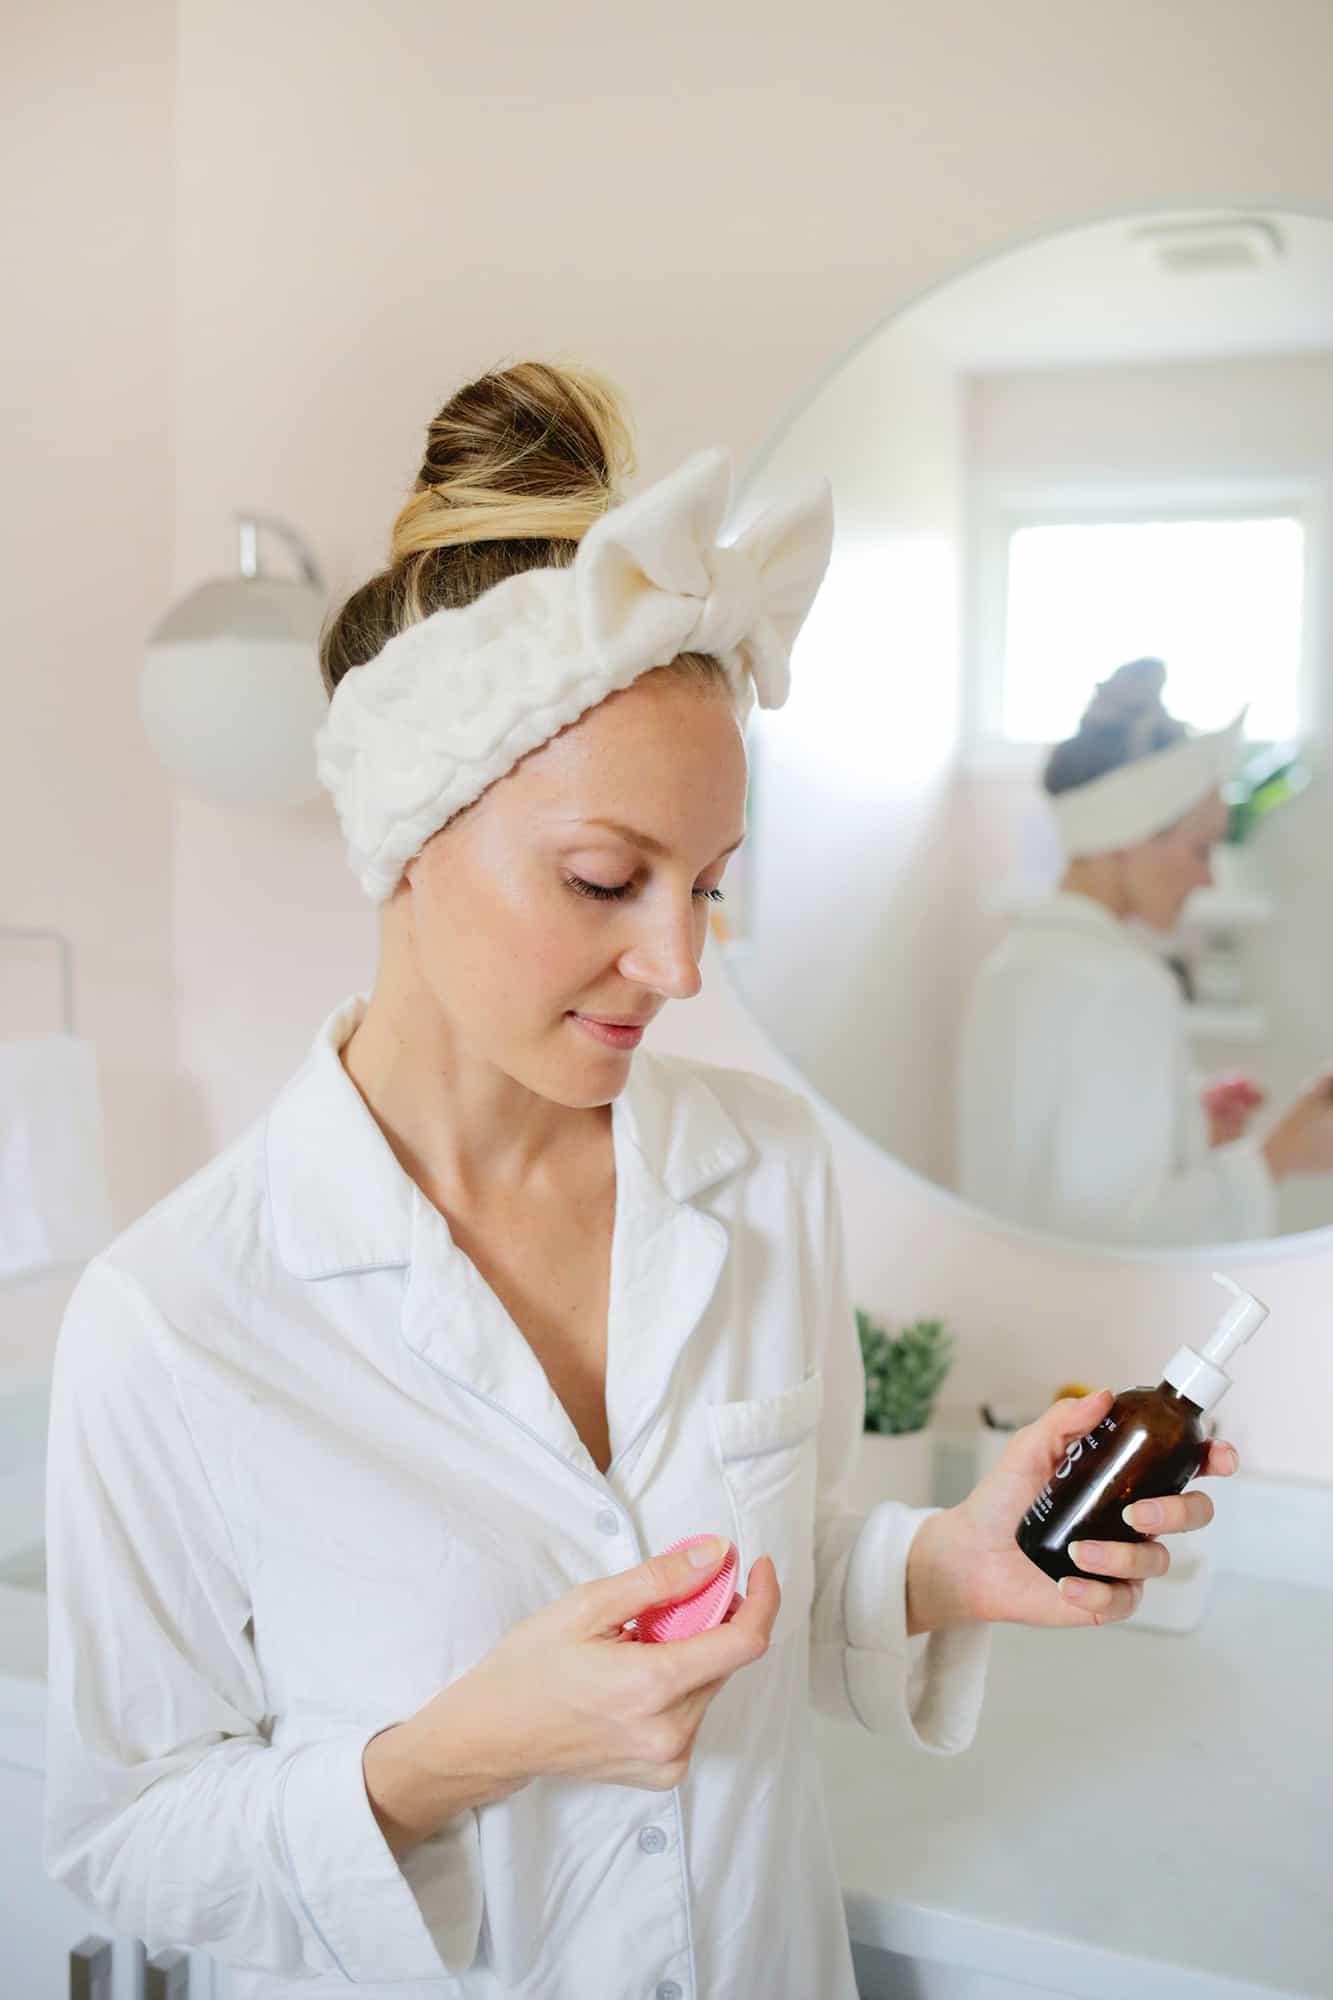
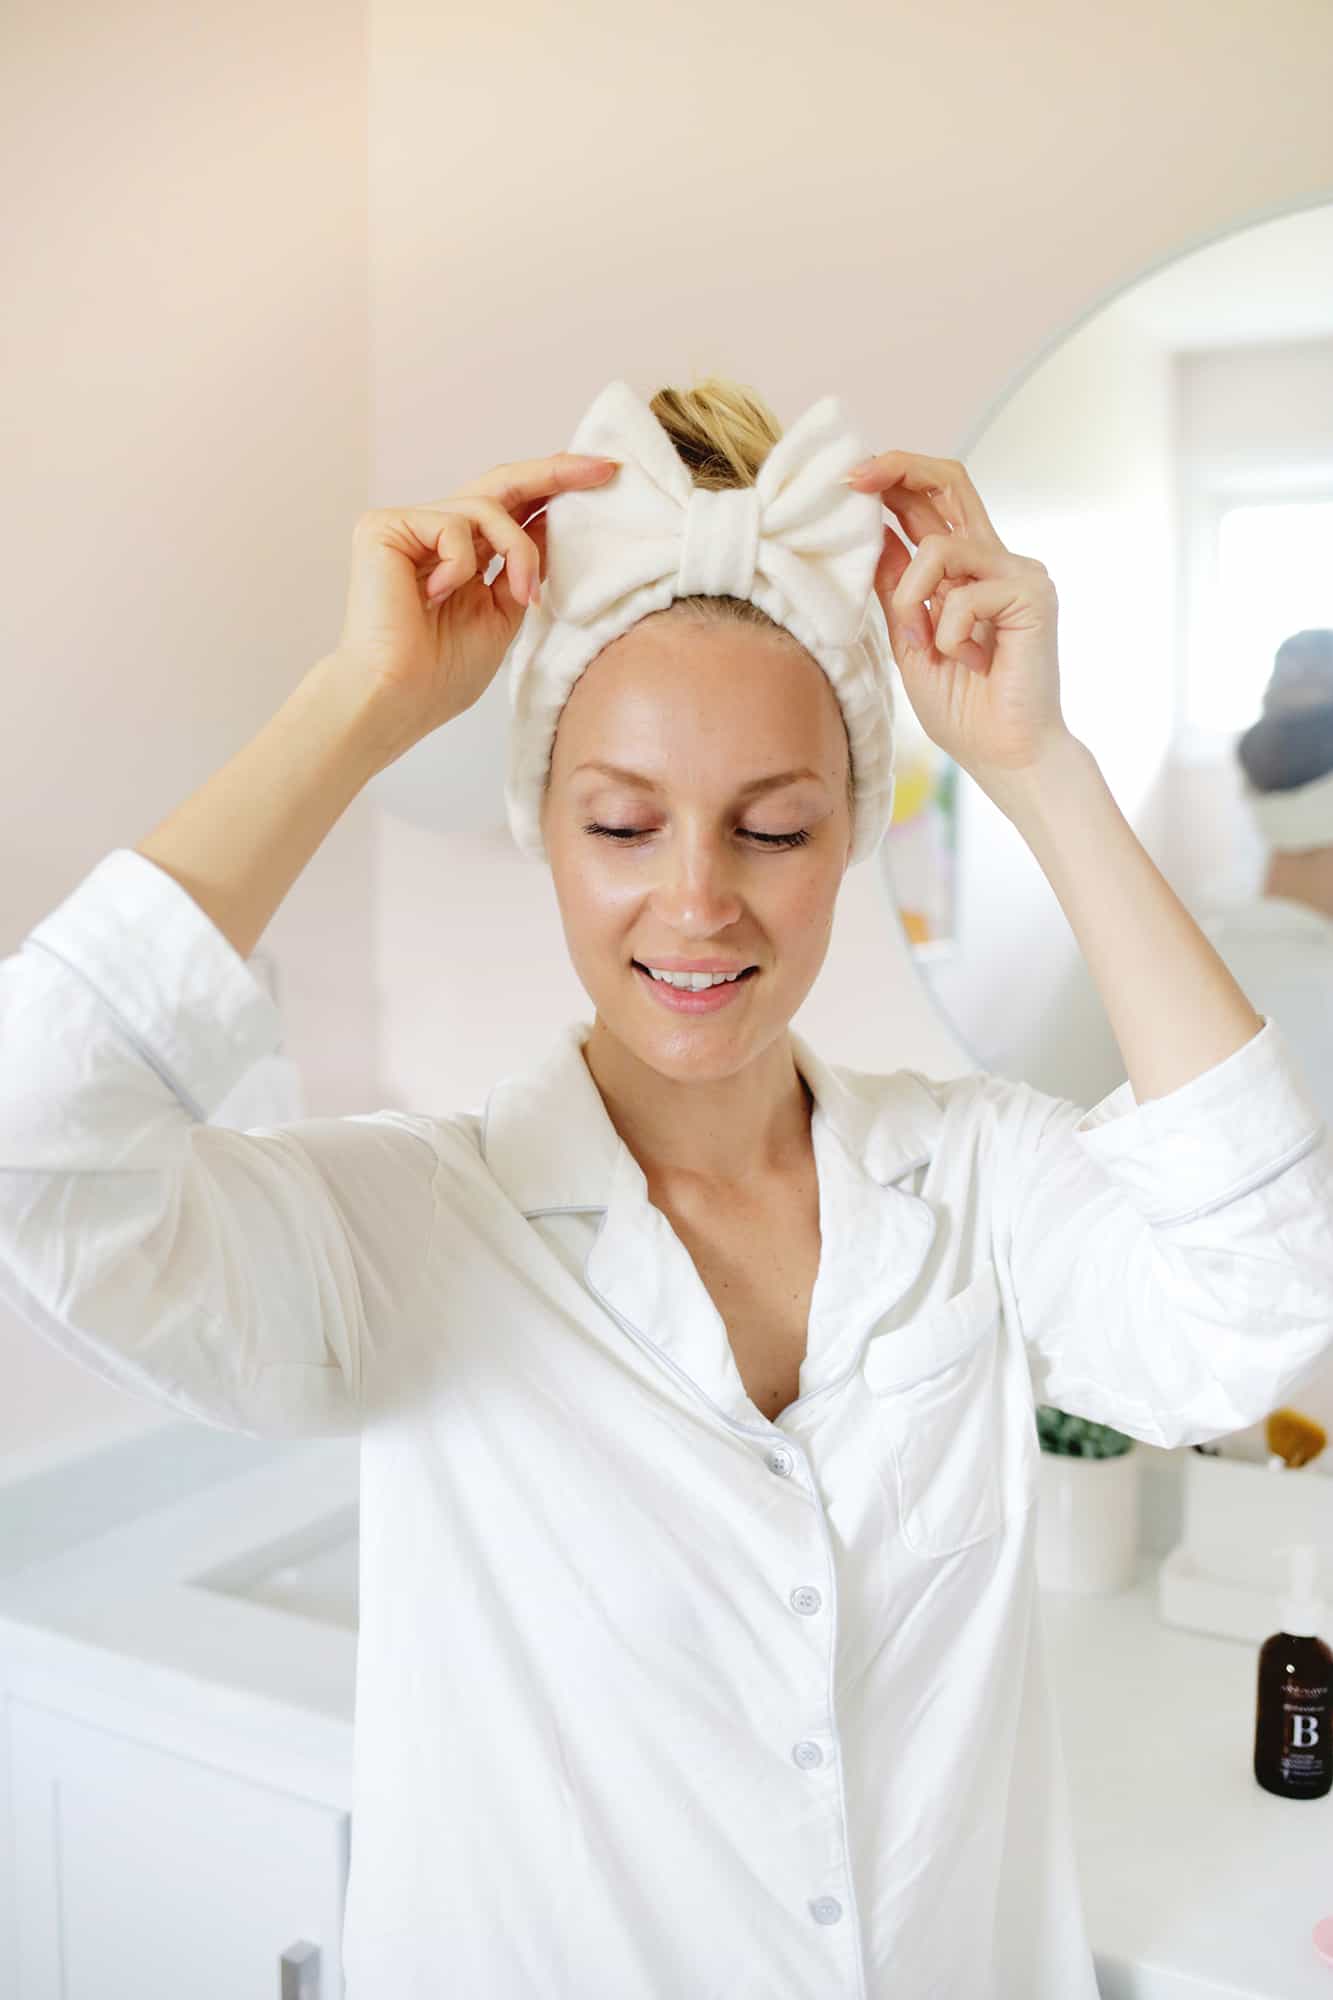
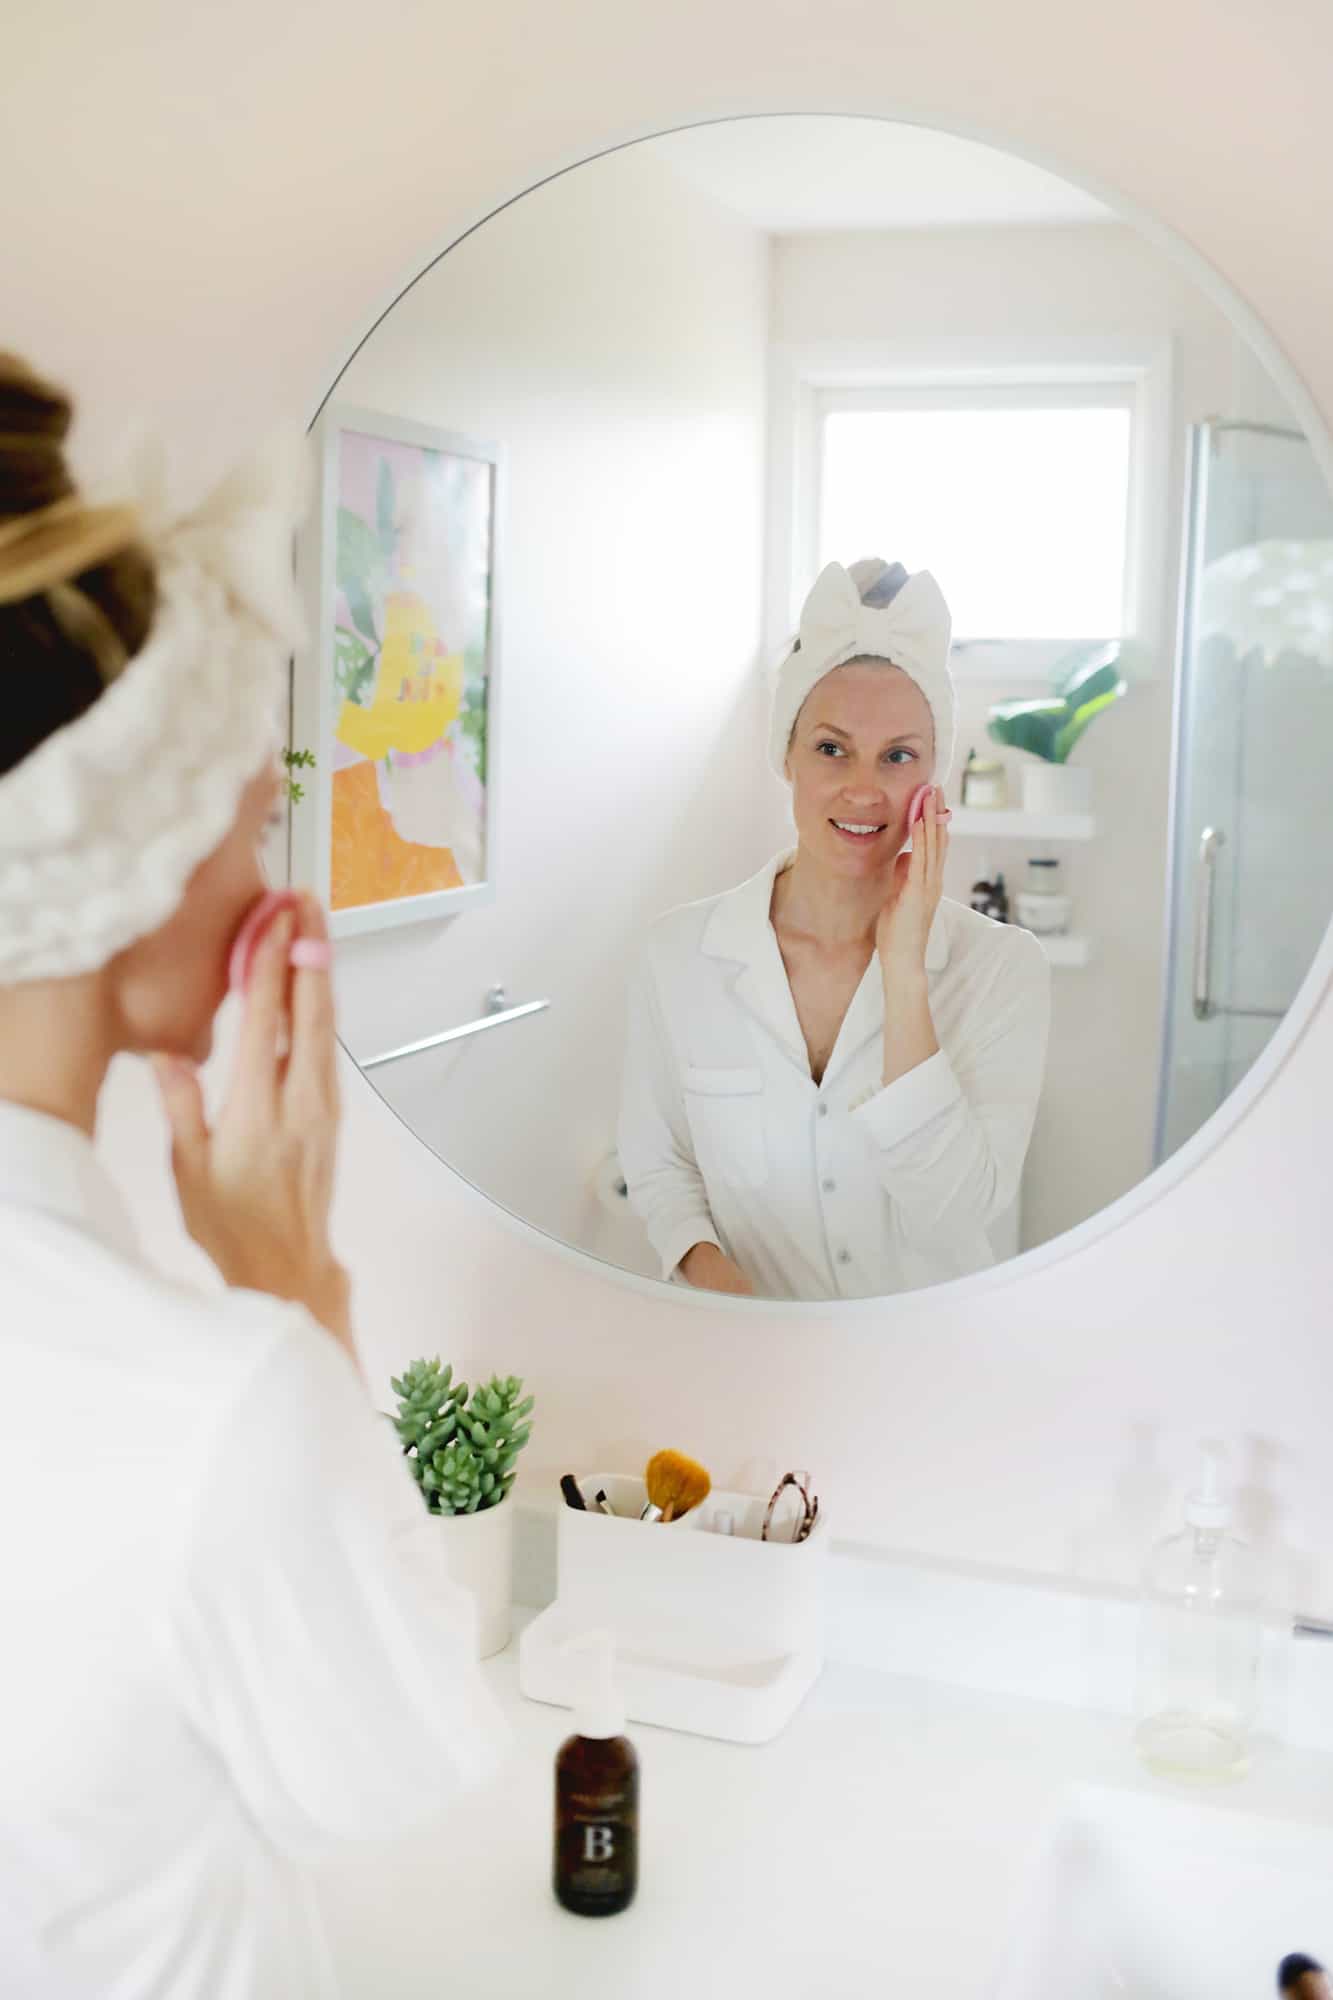 I’ve got to say that I’m pretty proud of myself here … it looks so profesh! I love that it helps keep shorter pieces and flyaways out of my face while I wash my hair (or you can use it while applying makeup as well), and I can throw it in the wash as needed with my washcloths and reusable makeup wipes.
These are also great if you are doing a beauty mask and want to keep your hair at bay (although if you do a lot of charcoal and darker masks you may want to make a darker colored one to hide any mask stains).
Overall, you just can’t help but feel cute and pampered when you pop one of these on—love it! xo. Laura
]]>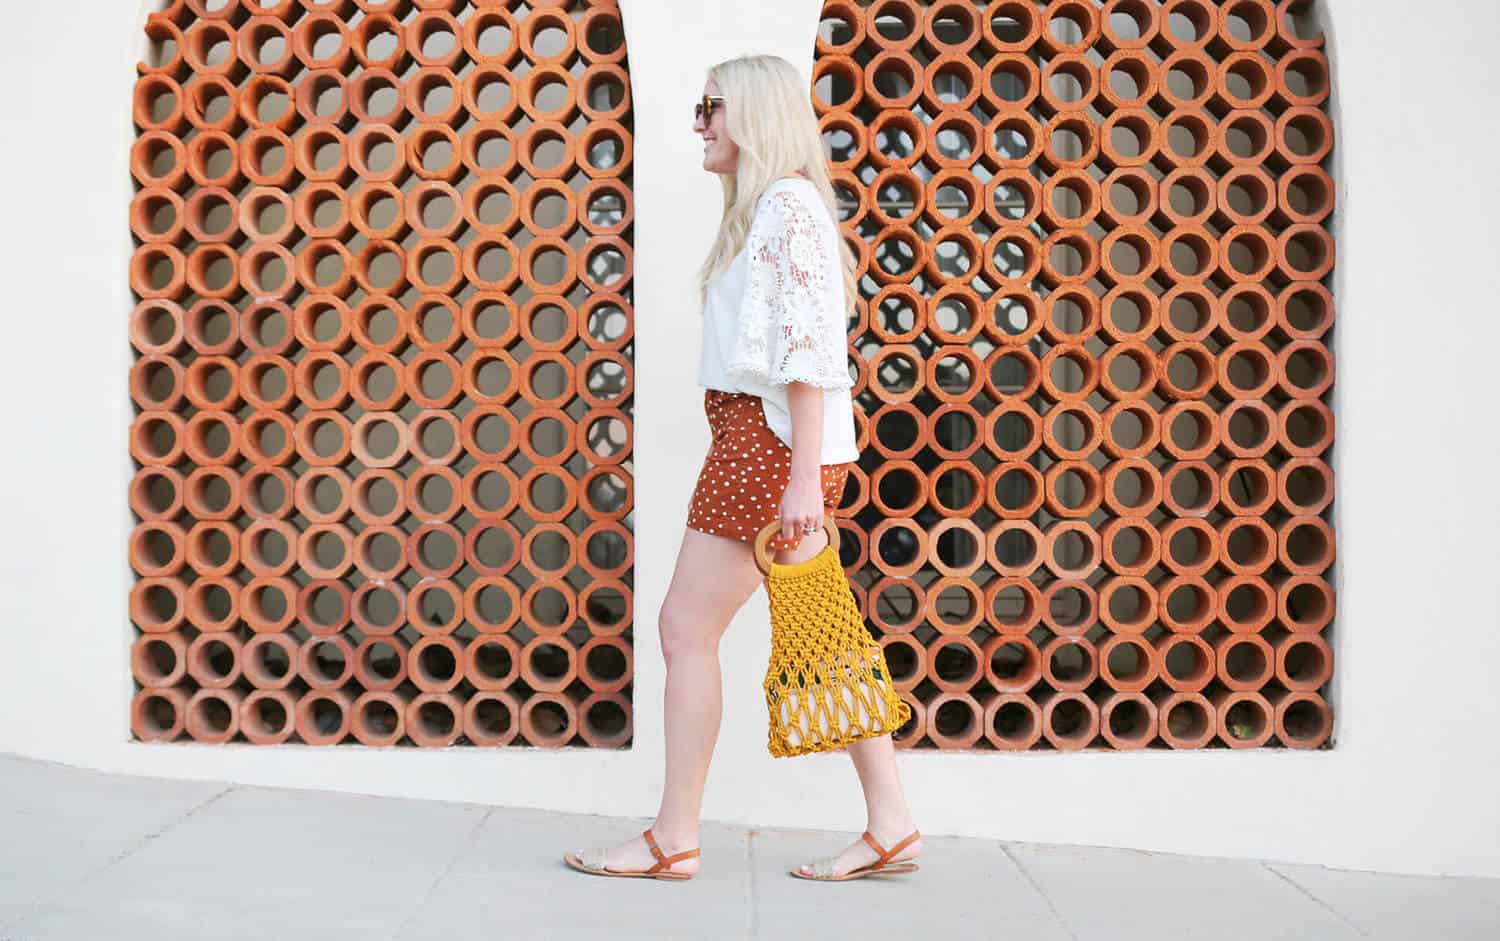
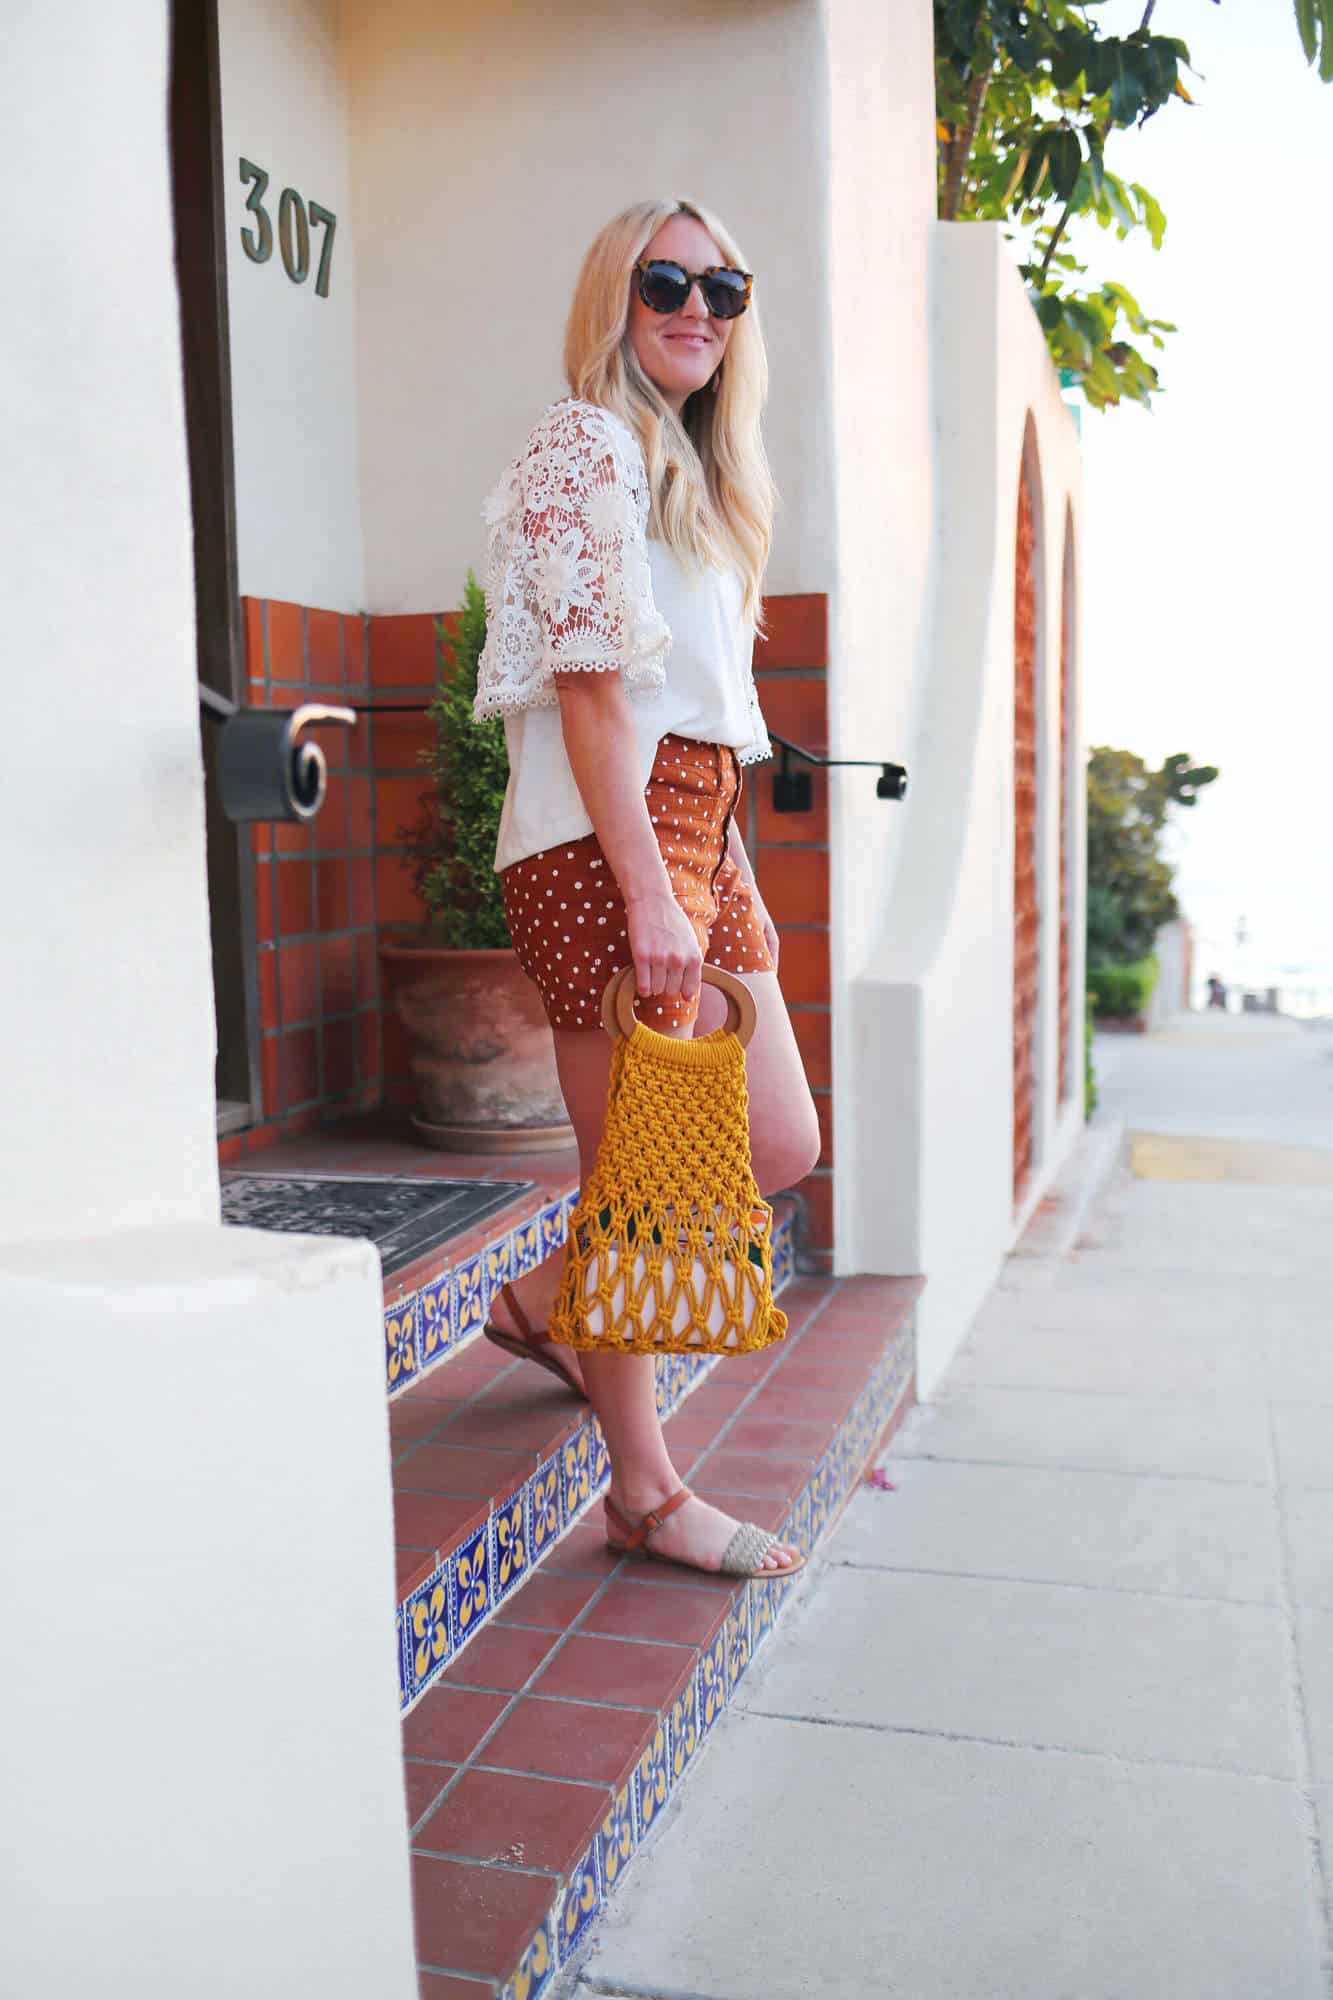
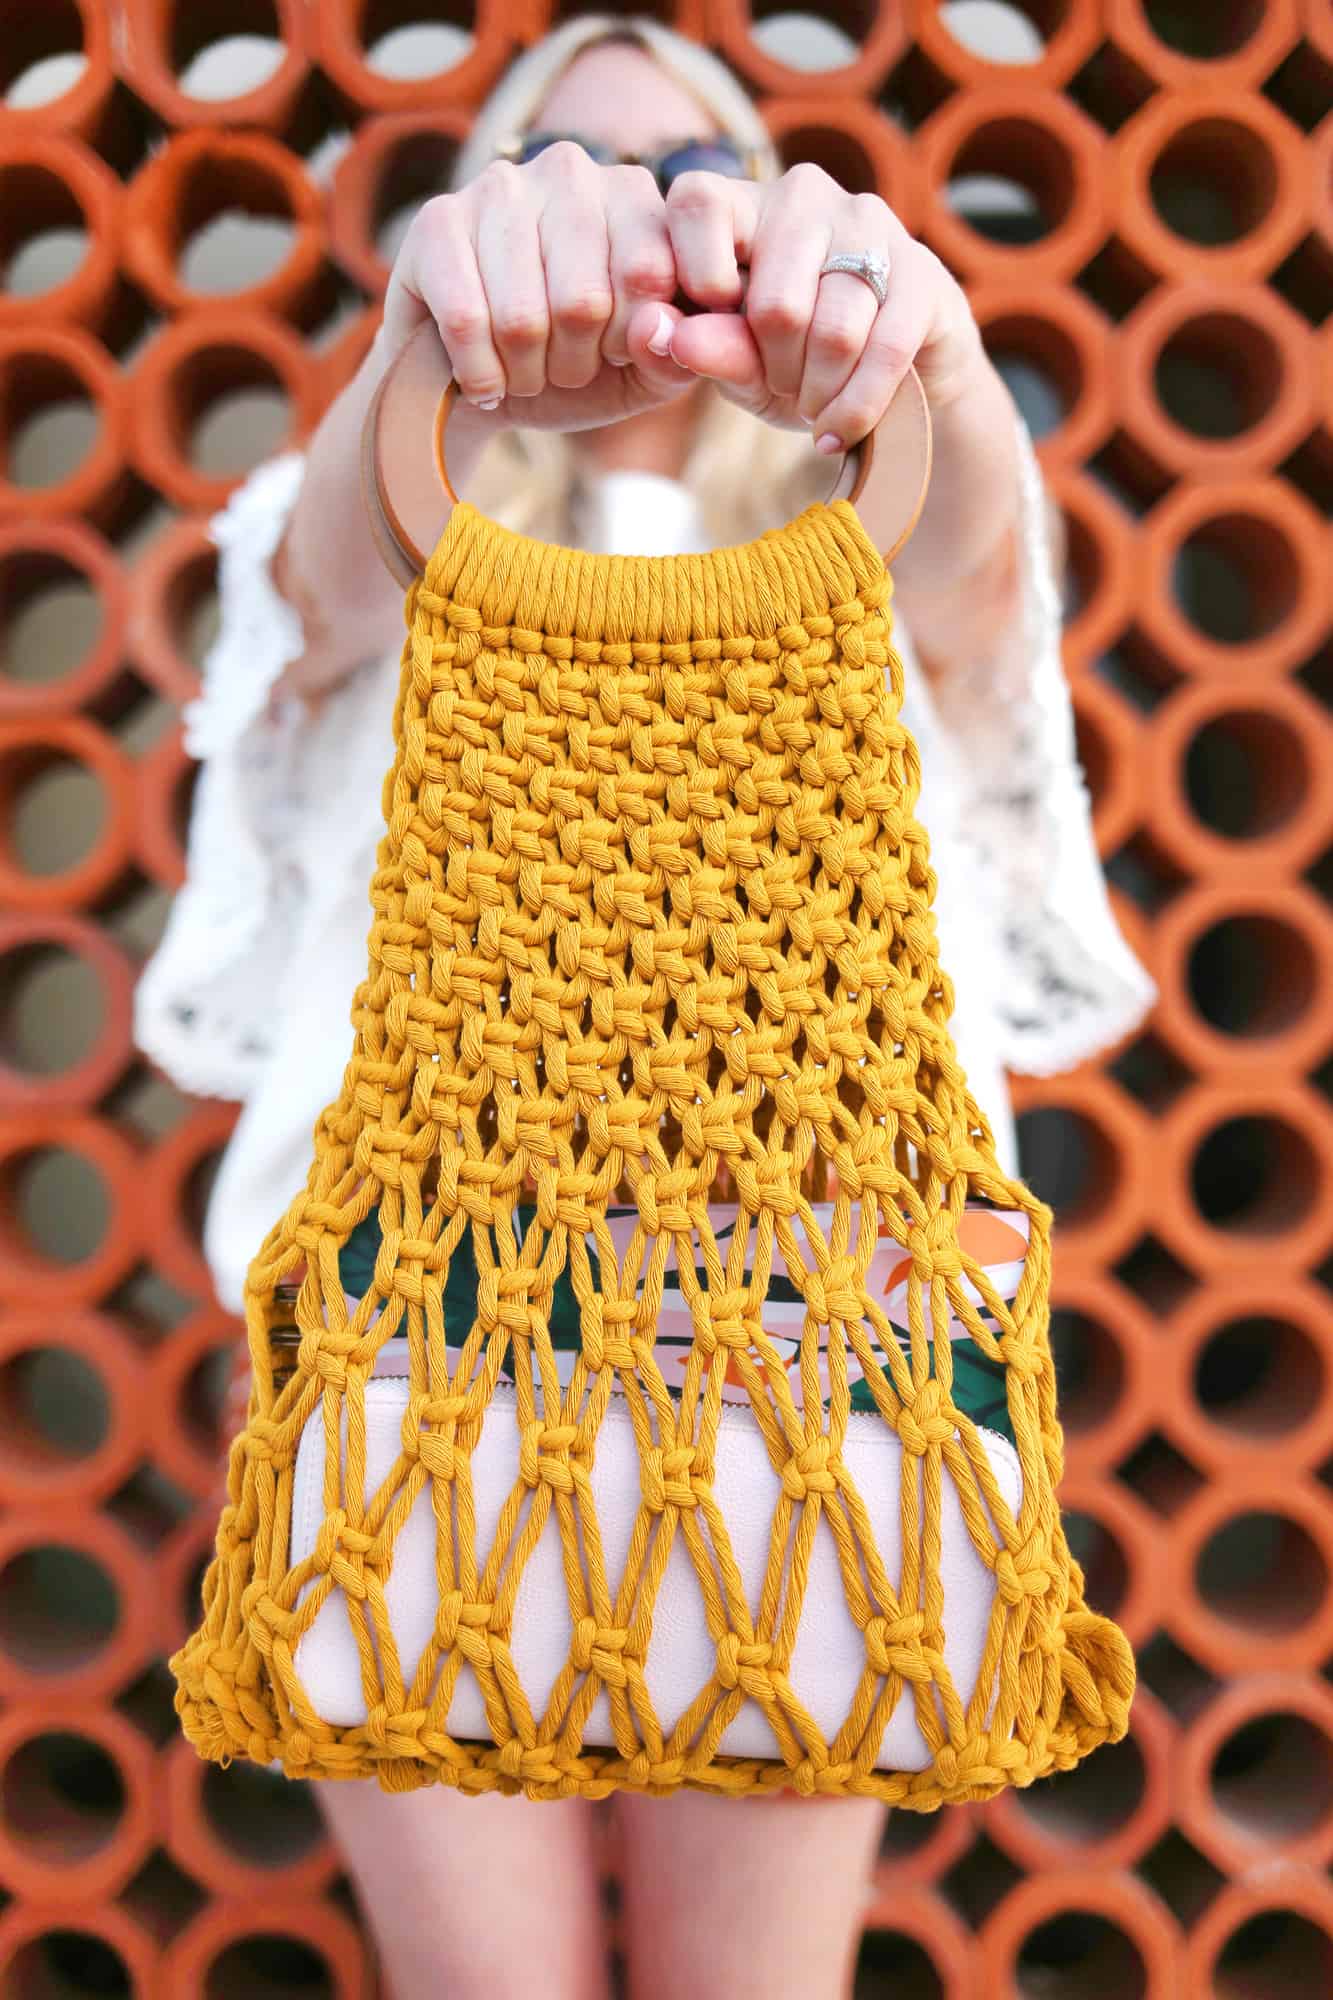
With the resurgence of macrame in recent years, there is an exciting range of dyed, cotton rope to be had. I found this beautiful mustard color and a coordinating set of stained wooden handles and realized I could use the most basic macrame knots to make a cute accessory that would hold the basics: my wallet, notebook (with pen attached inside the spiral binding b/c, duh), and phone. The best part is, this highly textured handbag can follow you from summer to fall in this beautiful golden tone.
Related: How To Macrame: A Step By Step Guide For Beginners
Check out our How to Make Friendship Bracelets tutorial!
 Supplies:
–one pair of wooden round shaped handles
–mustard 3mm cotton cord
-scissors
-yardstick or measuring tape
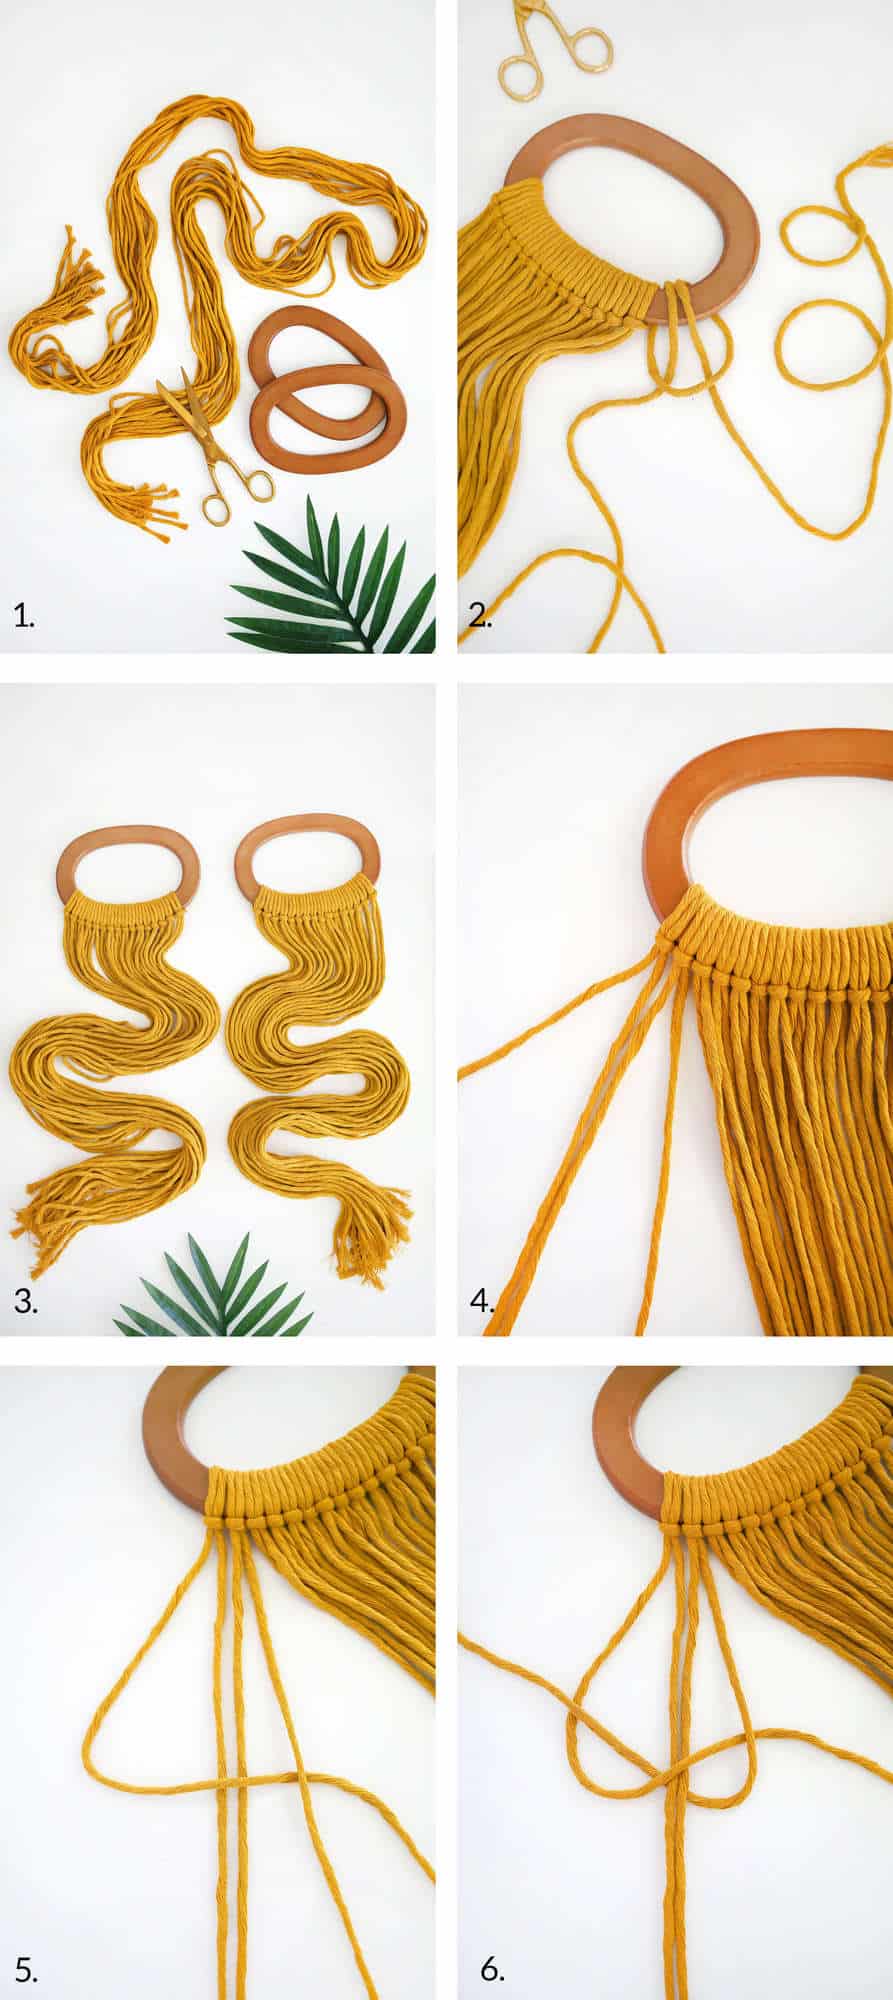 Step One: Cut thirty-two lengths of cotton cord that measure 11′ each.
Step Two: Tie sixteen strands to each handle using a lark’s head knot. To achieve a lark’s head knot, fold your strand in half and fold the center from the outer rounded part of one handle to the back of the handle. Then pull the two loose ends through the folded center as shown. This creates a lark’s knot.
Step Three: Repeat until you have tied sixteen strands per handle. Pay special attention that all of your knots are on the same side of your handle or else it will disrupt the visual pattern.
Step Four: Start your first row of square knots by using the first four strands of rope on the left side of one handle. You can move the rest of the strands off to the side to make this easier.
Step Five: Fold the first strand over the second and third strand and under the fourth strand to create a ‘4’ shape.
Step Six: Then fold the fourth strand under the second and third strands and up and over the bend in the first strand as shown. It almost looks like an upside down heart. Pull the outer two strands until they are snug. This is a half-knot.
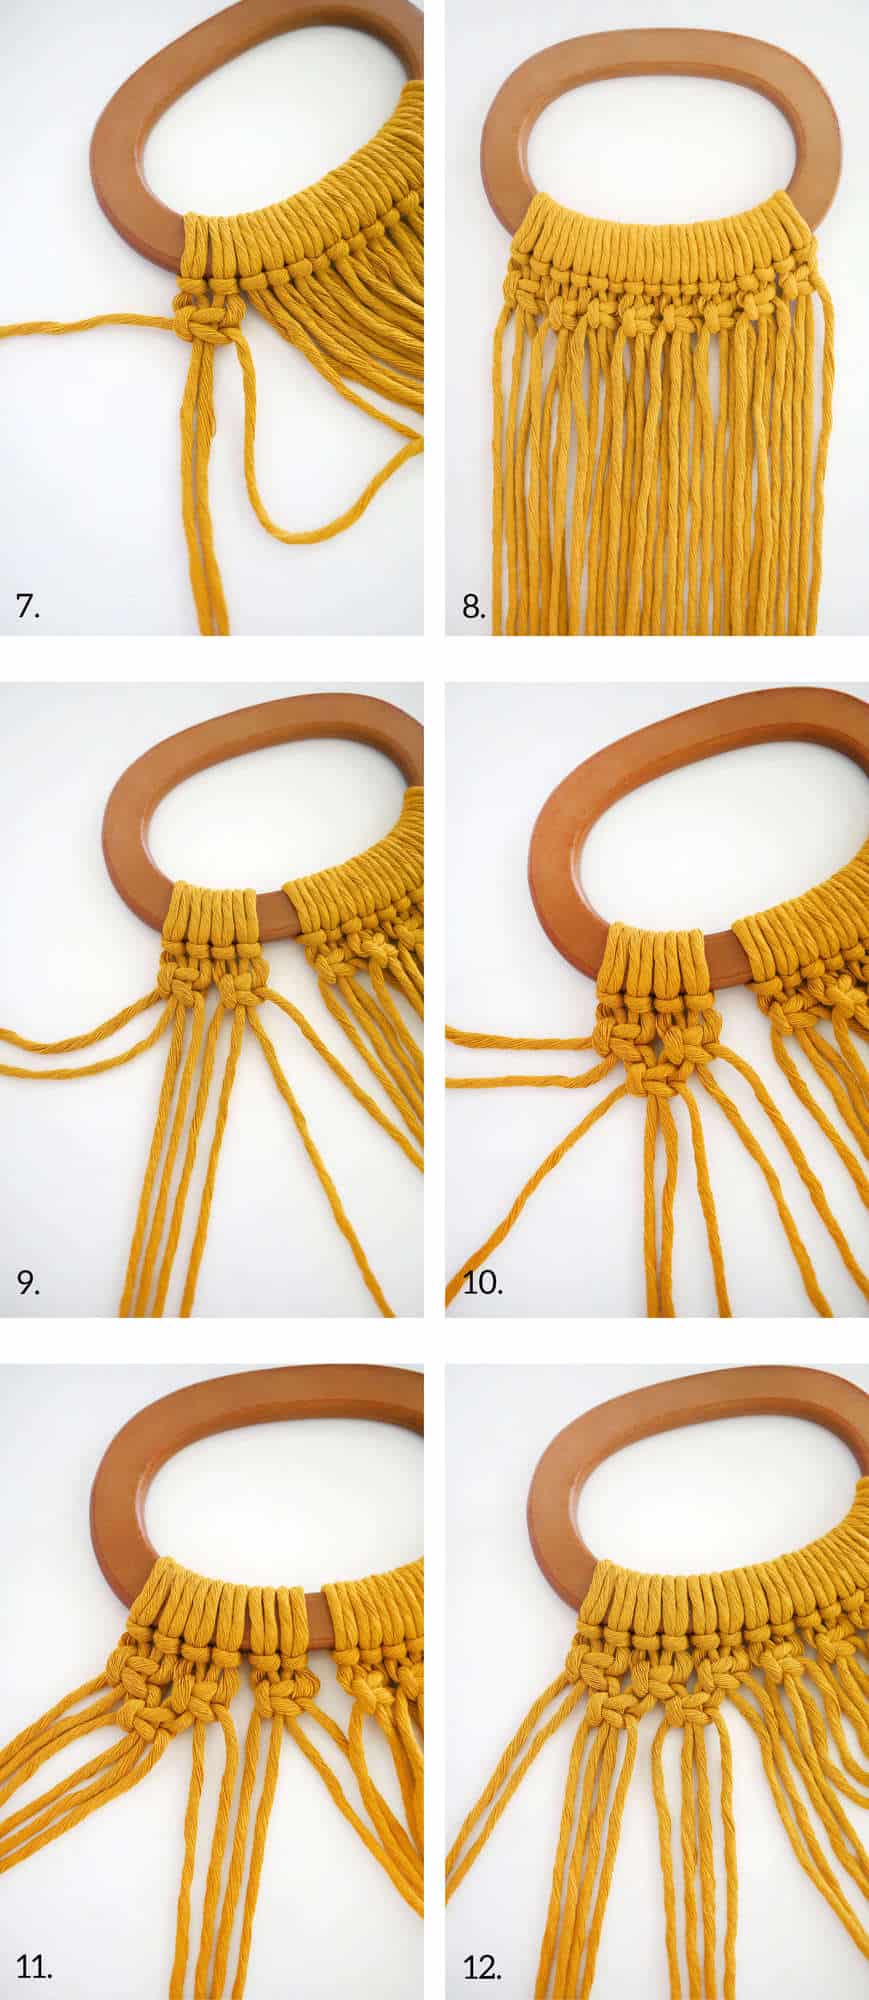 Step Seven: Then you’ll create another similar half knot but reverse the overlap order of the outer ropes. The outer rope on the right side will go over the center two ropes but under the outer rope on the left side. Then the outer rope on the left side will go behind the center two ropes and come out over the bend in the outer right rope. Check out steps two through four in this macrame stocking tutorial for further visual breakdown. This is a square knot.
Step Eight: Use the next four strands to create another square knot and keep adding square knots all the way across.
Step Nine: We’re going to create alternating square knots for the second row of knots. Use the first eight strands on the left side. Skip the first two strands on the left side and the last two strands on the right side so that you’re only working with the four strands in the middle.
Step Ten: Use those four strands to create a square knot.
Step Eleven: Use the two leftover strands on the right side and next two strands for your next square knot as shown.
Step Twelve: This is how it should look. Continue this second row of knots. Follow up with a third row of square knots, a fourth row of alternating knots, a fifth row of square knots, and a sixth row of alternating knots.
Note: In my pattern, I only tied five rows of knots but later realized a sixth row would create a smoother pattern before joining the two sides together.
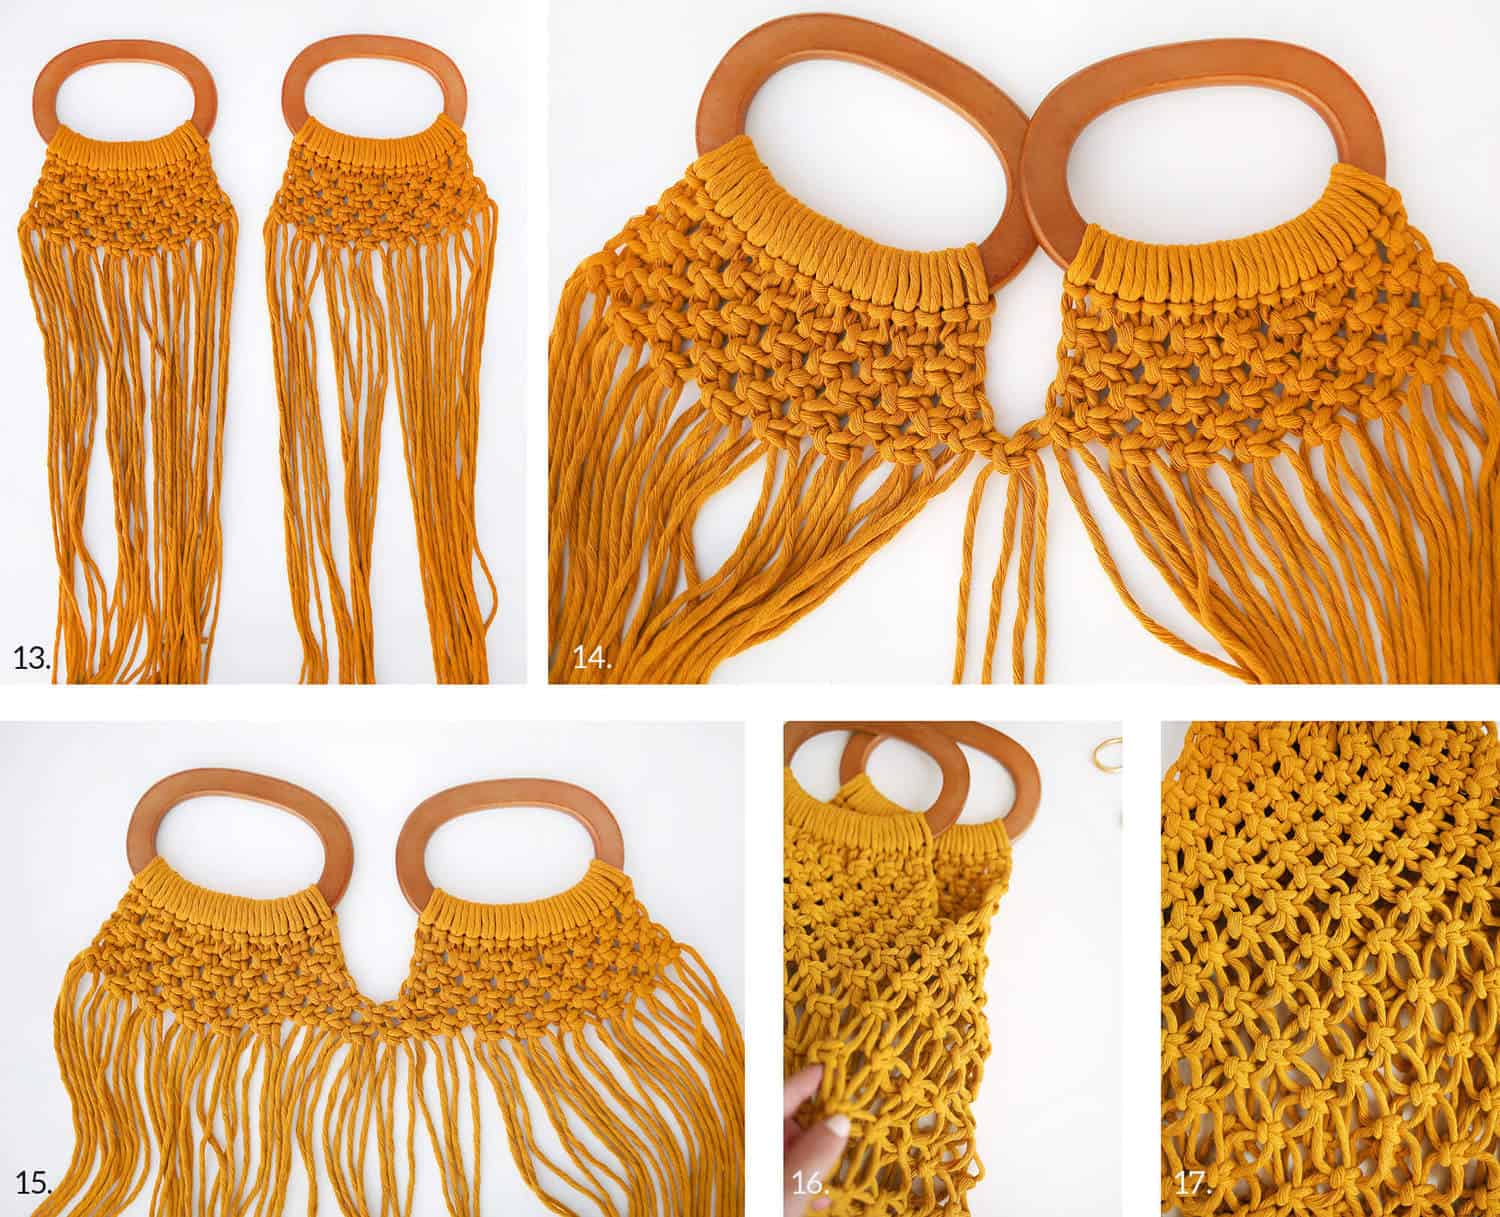 Step Thirteen: Repeat steps four through twelve on your second handle.
Step Fourteen: Place the two handles next to each other. My handles have a right side and a wrong side, so be sure your handles are both facing right side up. Create an alternating square knot between two strands from one side and two strands from the other side.
Step Fifteen: Continue tying square knots from the center to each edge to finish out that row, except for the last two or four strands on each end. Once you get to the tenth row, start leaving some space between rows. This will give your bag more roominess and stretch in the bottom half.
Step Sixteen: Once you’ve finished fifteen rows, fold your bag in half so that the wrong sides of the handles are facing each other. Attach the open sides of the bag by tying up the rest of the knots to finish off the rows.
Step Seventeen: You can see how the knots are closer together at the top and further from each other at the bottom.
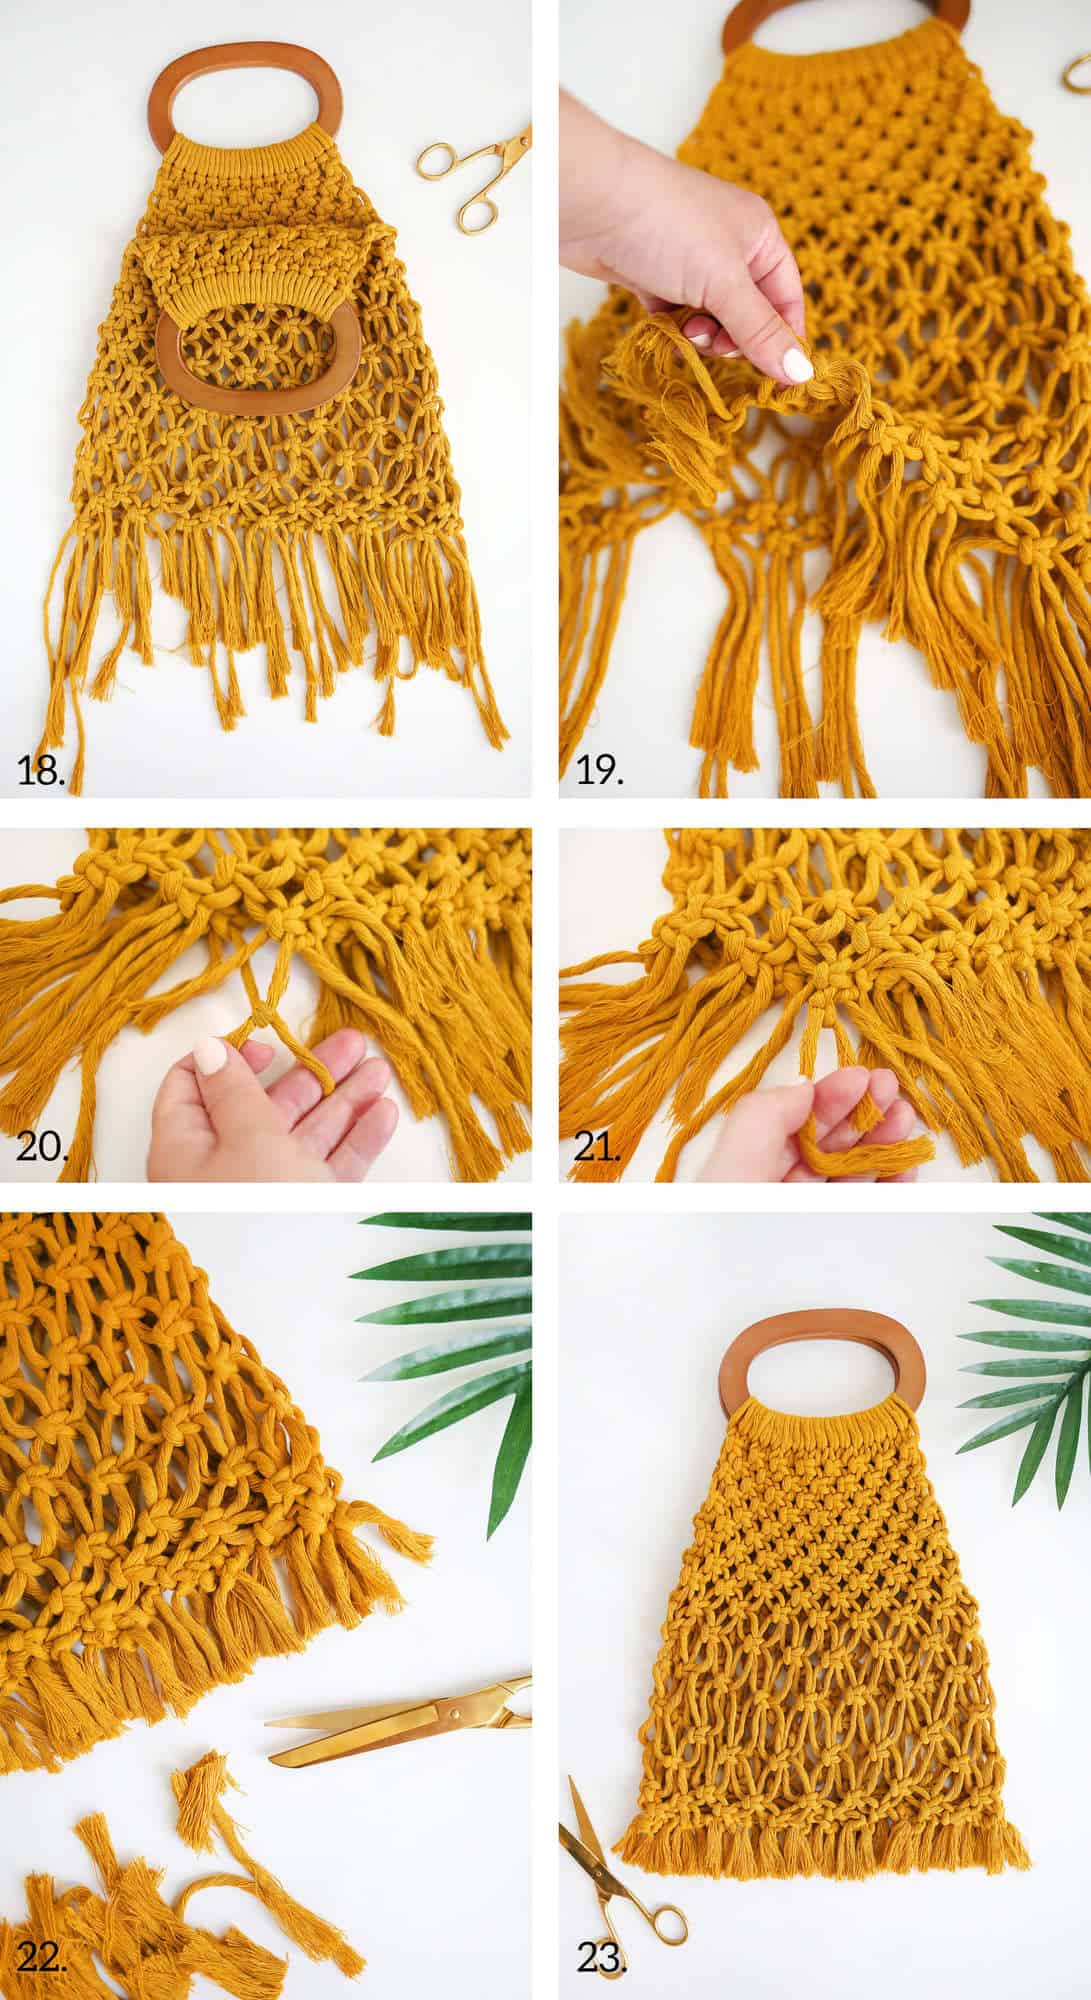 Step Eighteen: Now, this bag can be made with fringe on the bottom or tucked inside. If you want it tucked inside, like mine, this is the point where you turn your bag inside out with the right sides of the handles facing each other.
Step Nineteen: We’re going to tie the knots from the front side of the bag at the bottom, to the back side of the bag at the bottom.
Step Twenty: Take individual strands from one knot on the front side and an individual strand from a nearby knot on the back side and knot together once so that they are snug.
Step Twenty-One: Then tie a double knot. Follow along until all strands have been double-knotted to a strand on the opposite side.
Step Twenty-Two: Trim your strands so that they are even.
Step Twenty-Three: Brush your strands out so that they are full if you are going to keep them on the outside of your bag.
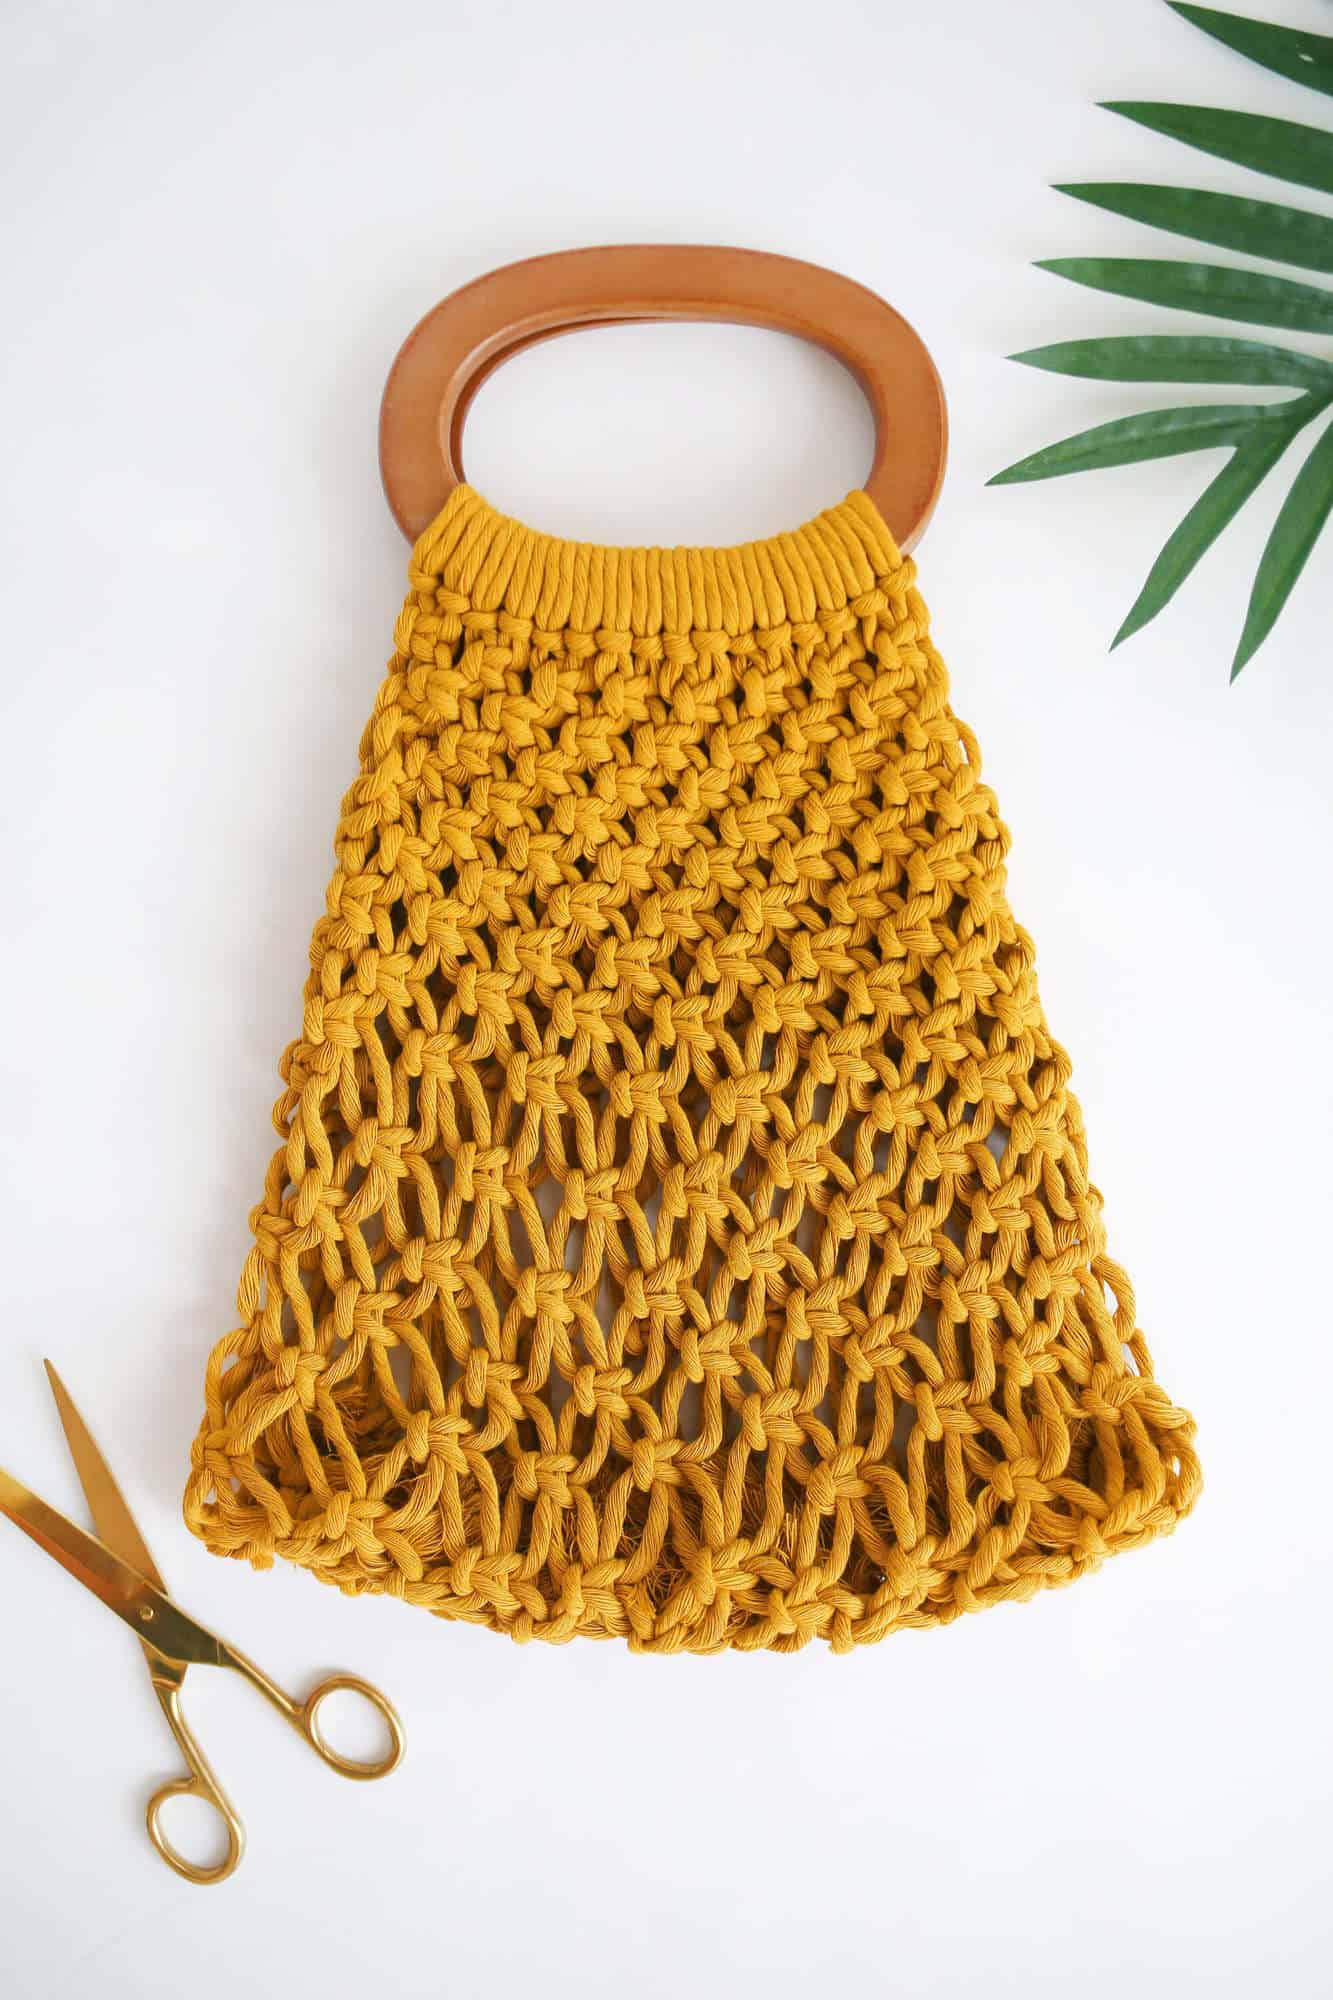 Or trim them down a bit further and turn your bag right side out as shown. I trimmed mine down even further after this photo once I decided I liked mine better without fringe after all. Ha! Decisions, decisions.
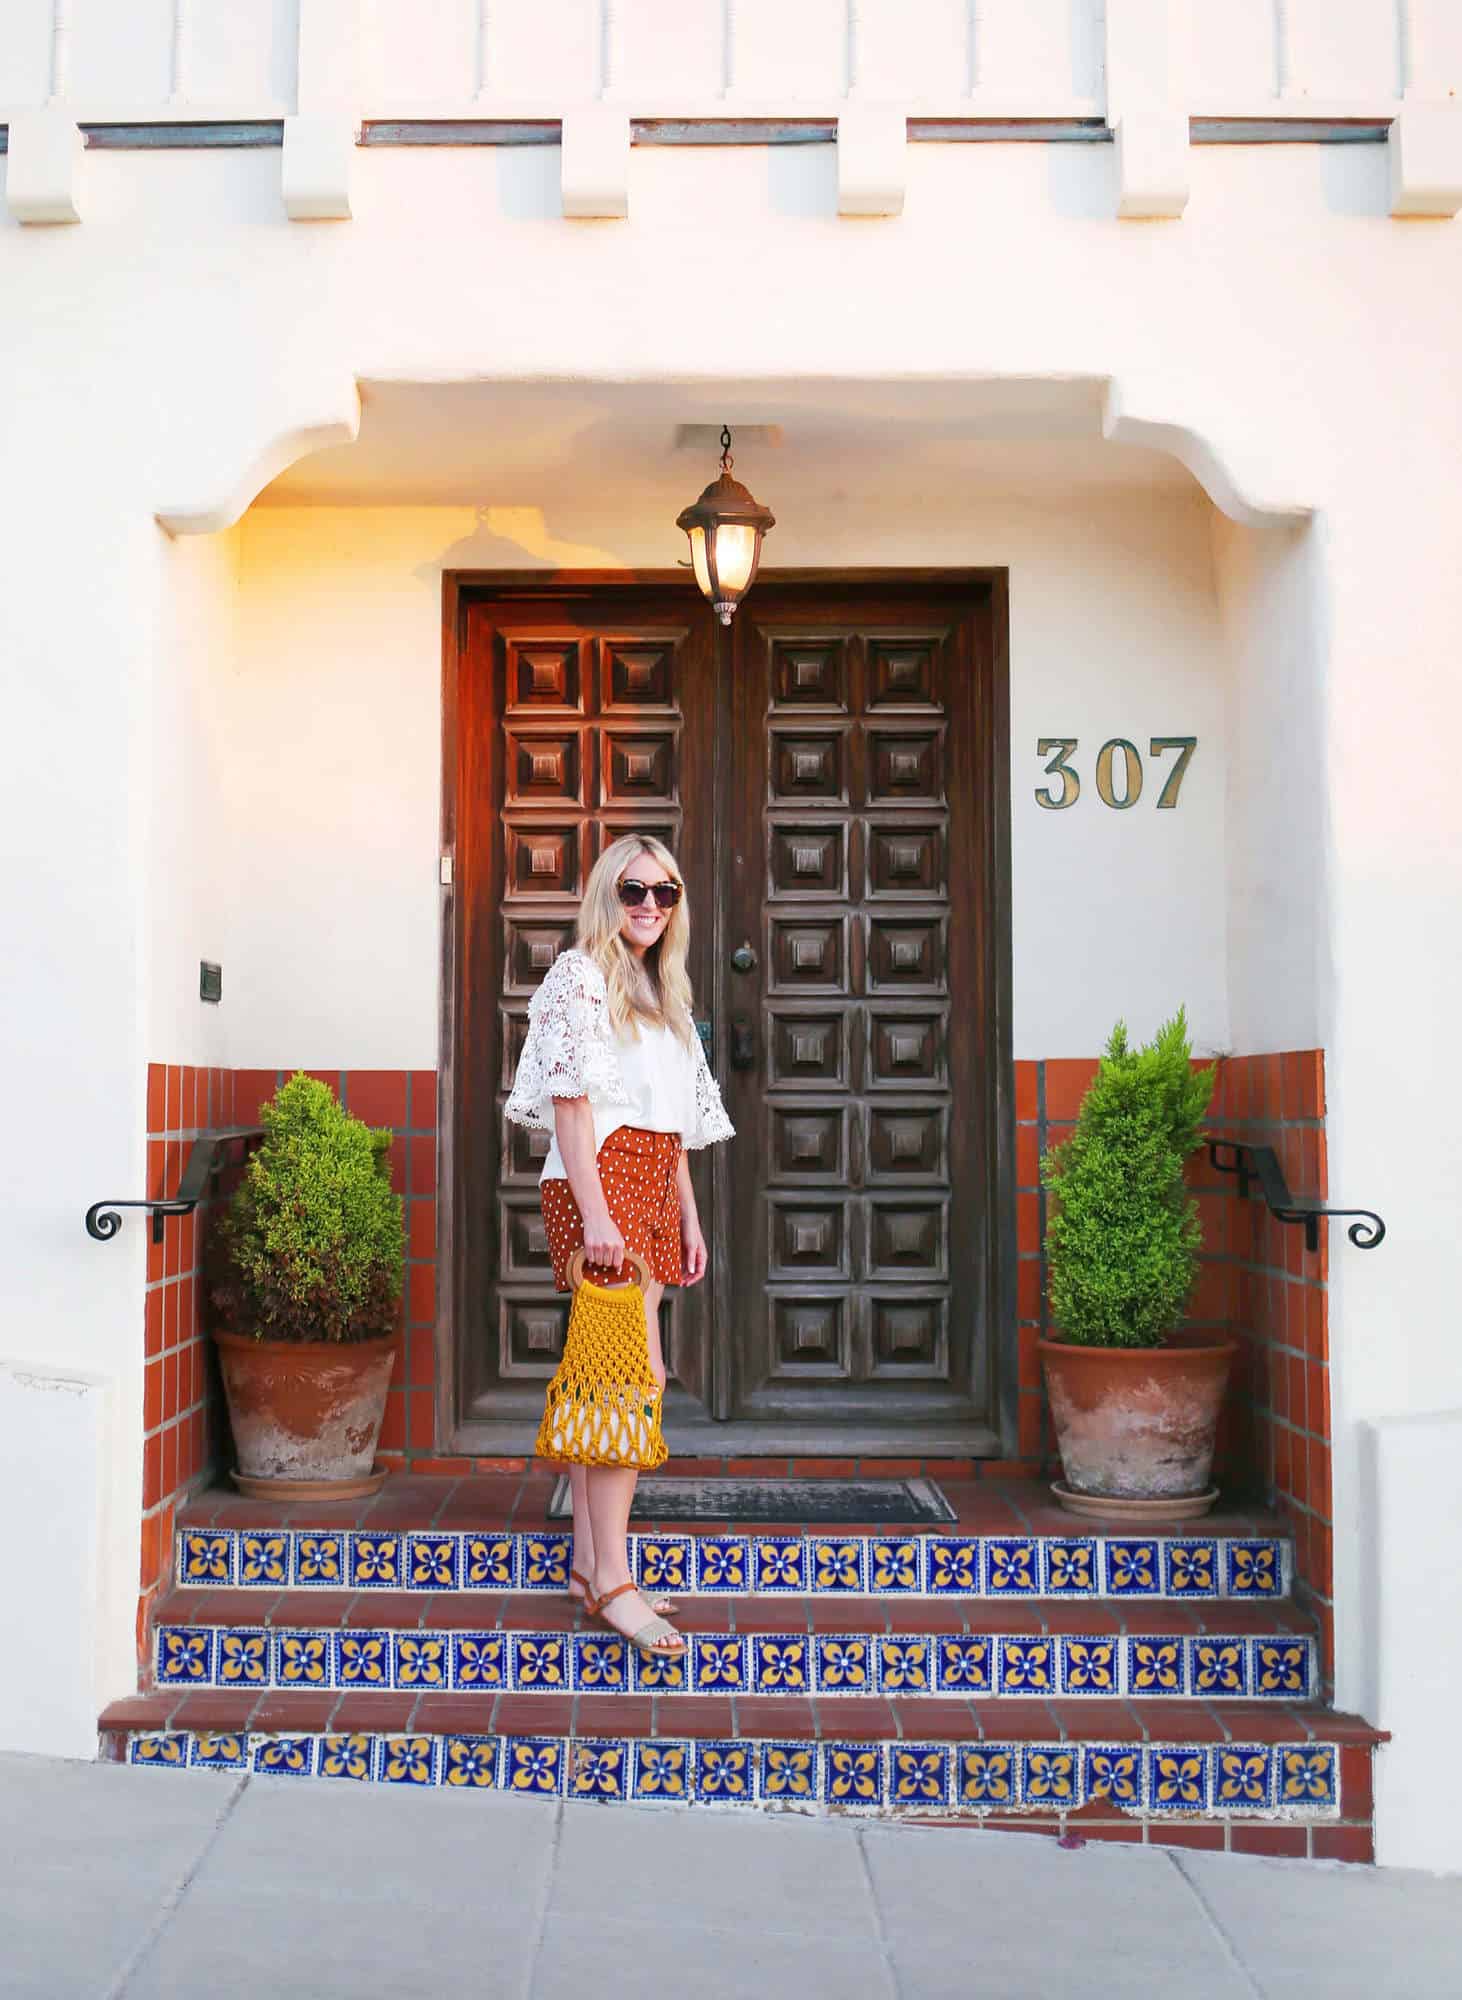 Worried about the random stash of lipsticks and pens that are usually pooling at the bottom of your most used bags? Toss in a cute zipper bag to carry smaller items and you’re golden! Enjoy. – Rachel
Check out our favorite bags and accessories on wishlist and shopping pages!
Credits//Author and photography: Rachel Denbow. Photos edited with A Color Story Desktop.
]]>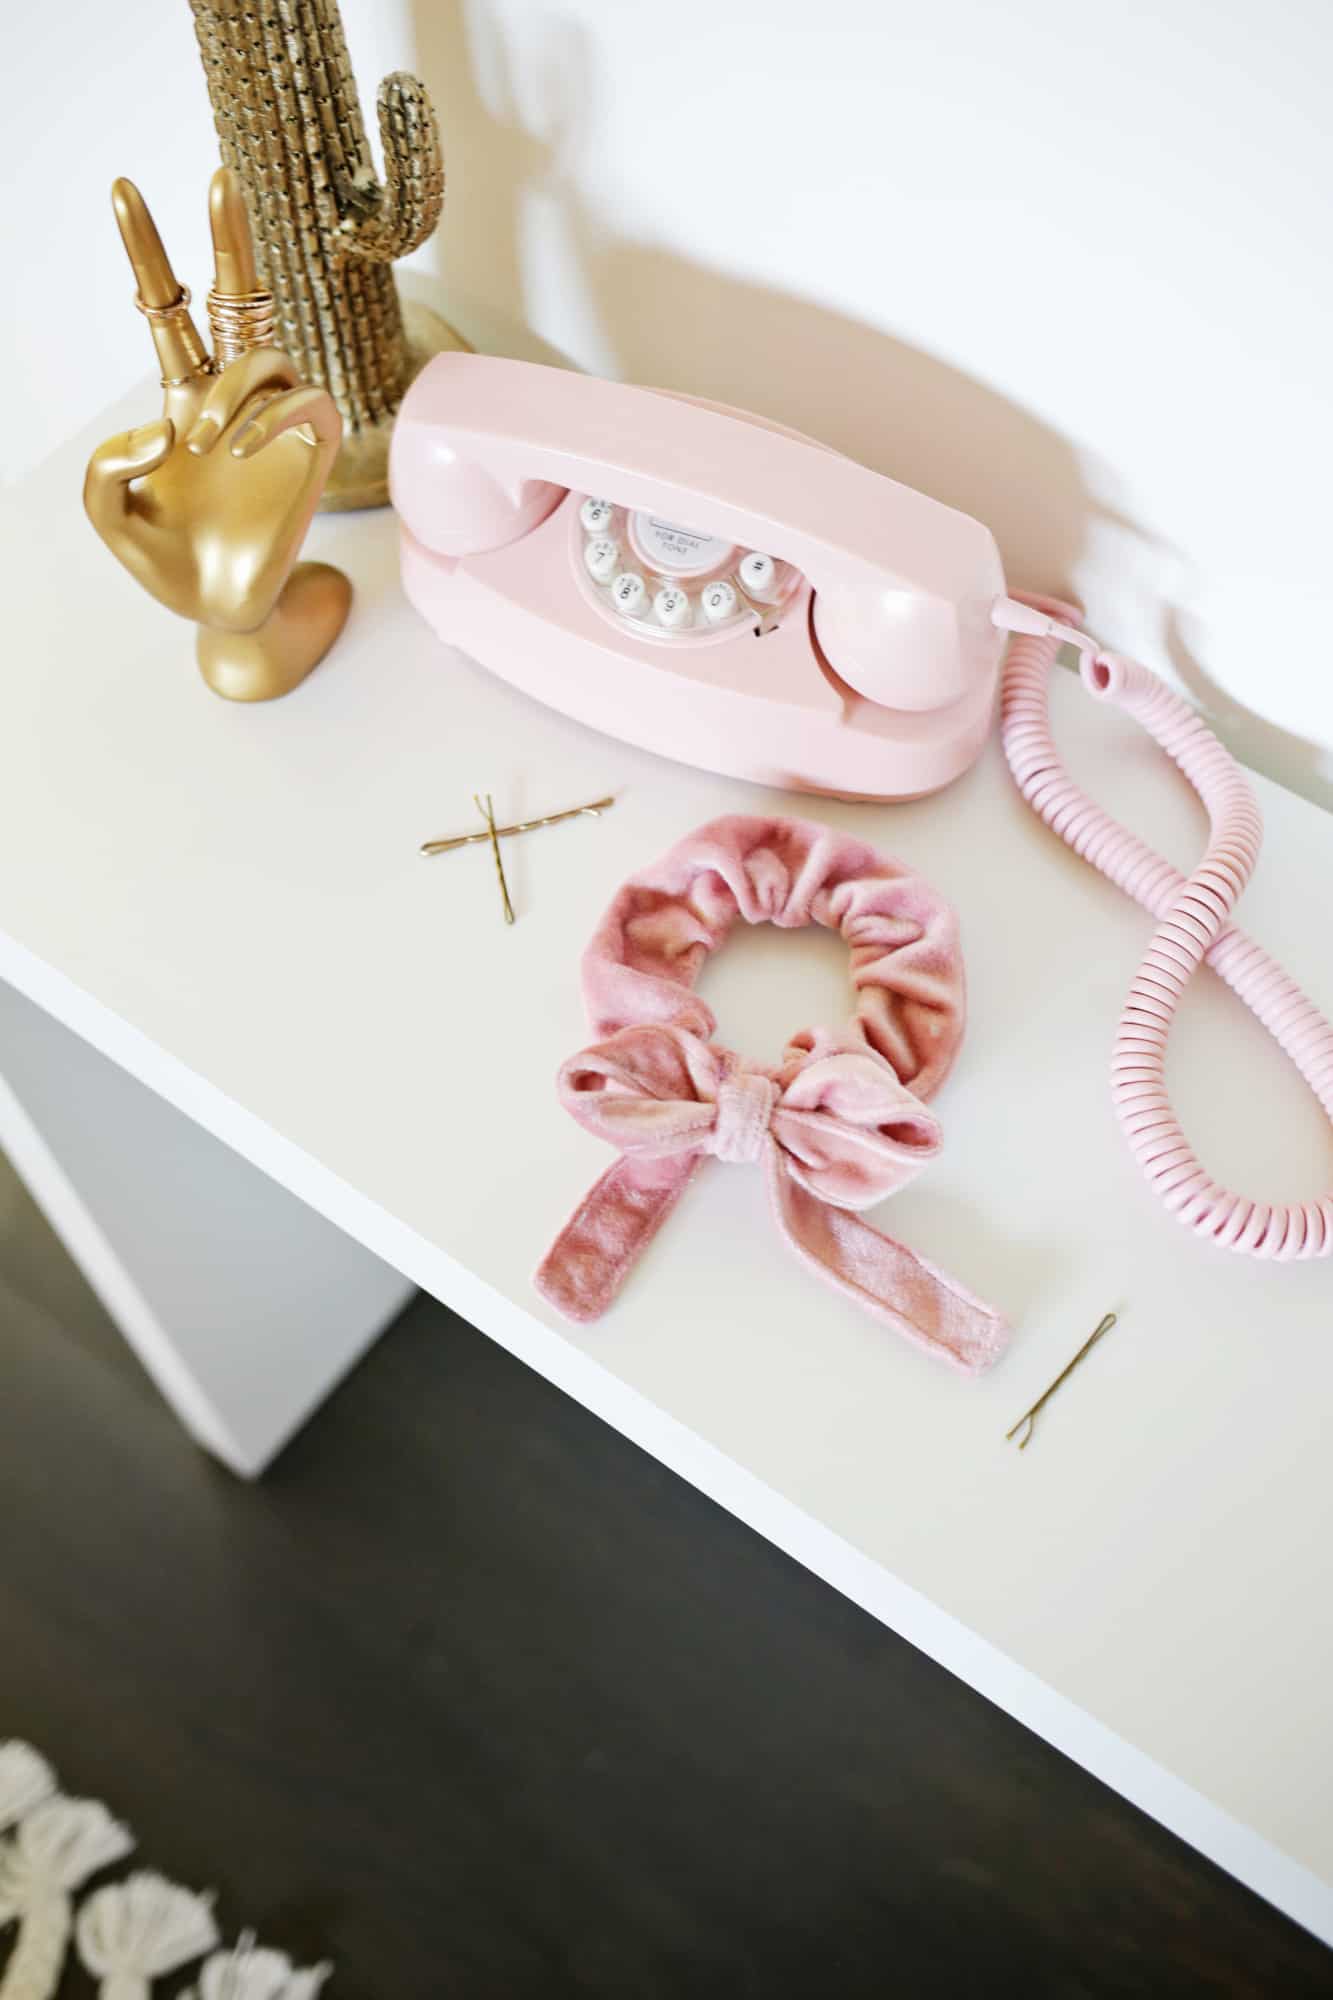 For some of you, scrunchies may be the new trend. But for others of us, it’s a pretty big blast from the past. Scrunchies did double duty in my day as you could either wear it in your hair, or wear it on your arm as a bracelet, just waiting for that big moment when you might actually need it for your hair.
It’s fun to see the trend come back in a new way and one of the things that I’ve loved seeing (which were maybe around in my day—I just don’t remember having one) are the bow scrunchies! I’ll show you how to make your own scrunchie.
Plus you can customize the fabric choice and also how wide a bow you want or how long you want the tails to be to suit your wardrobe and style …
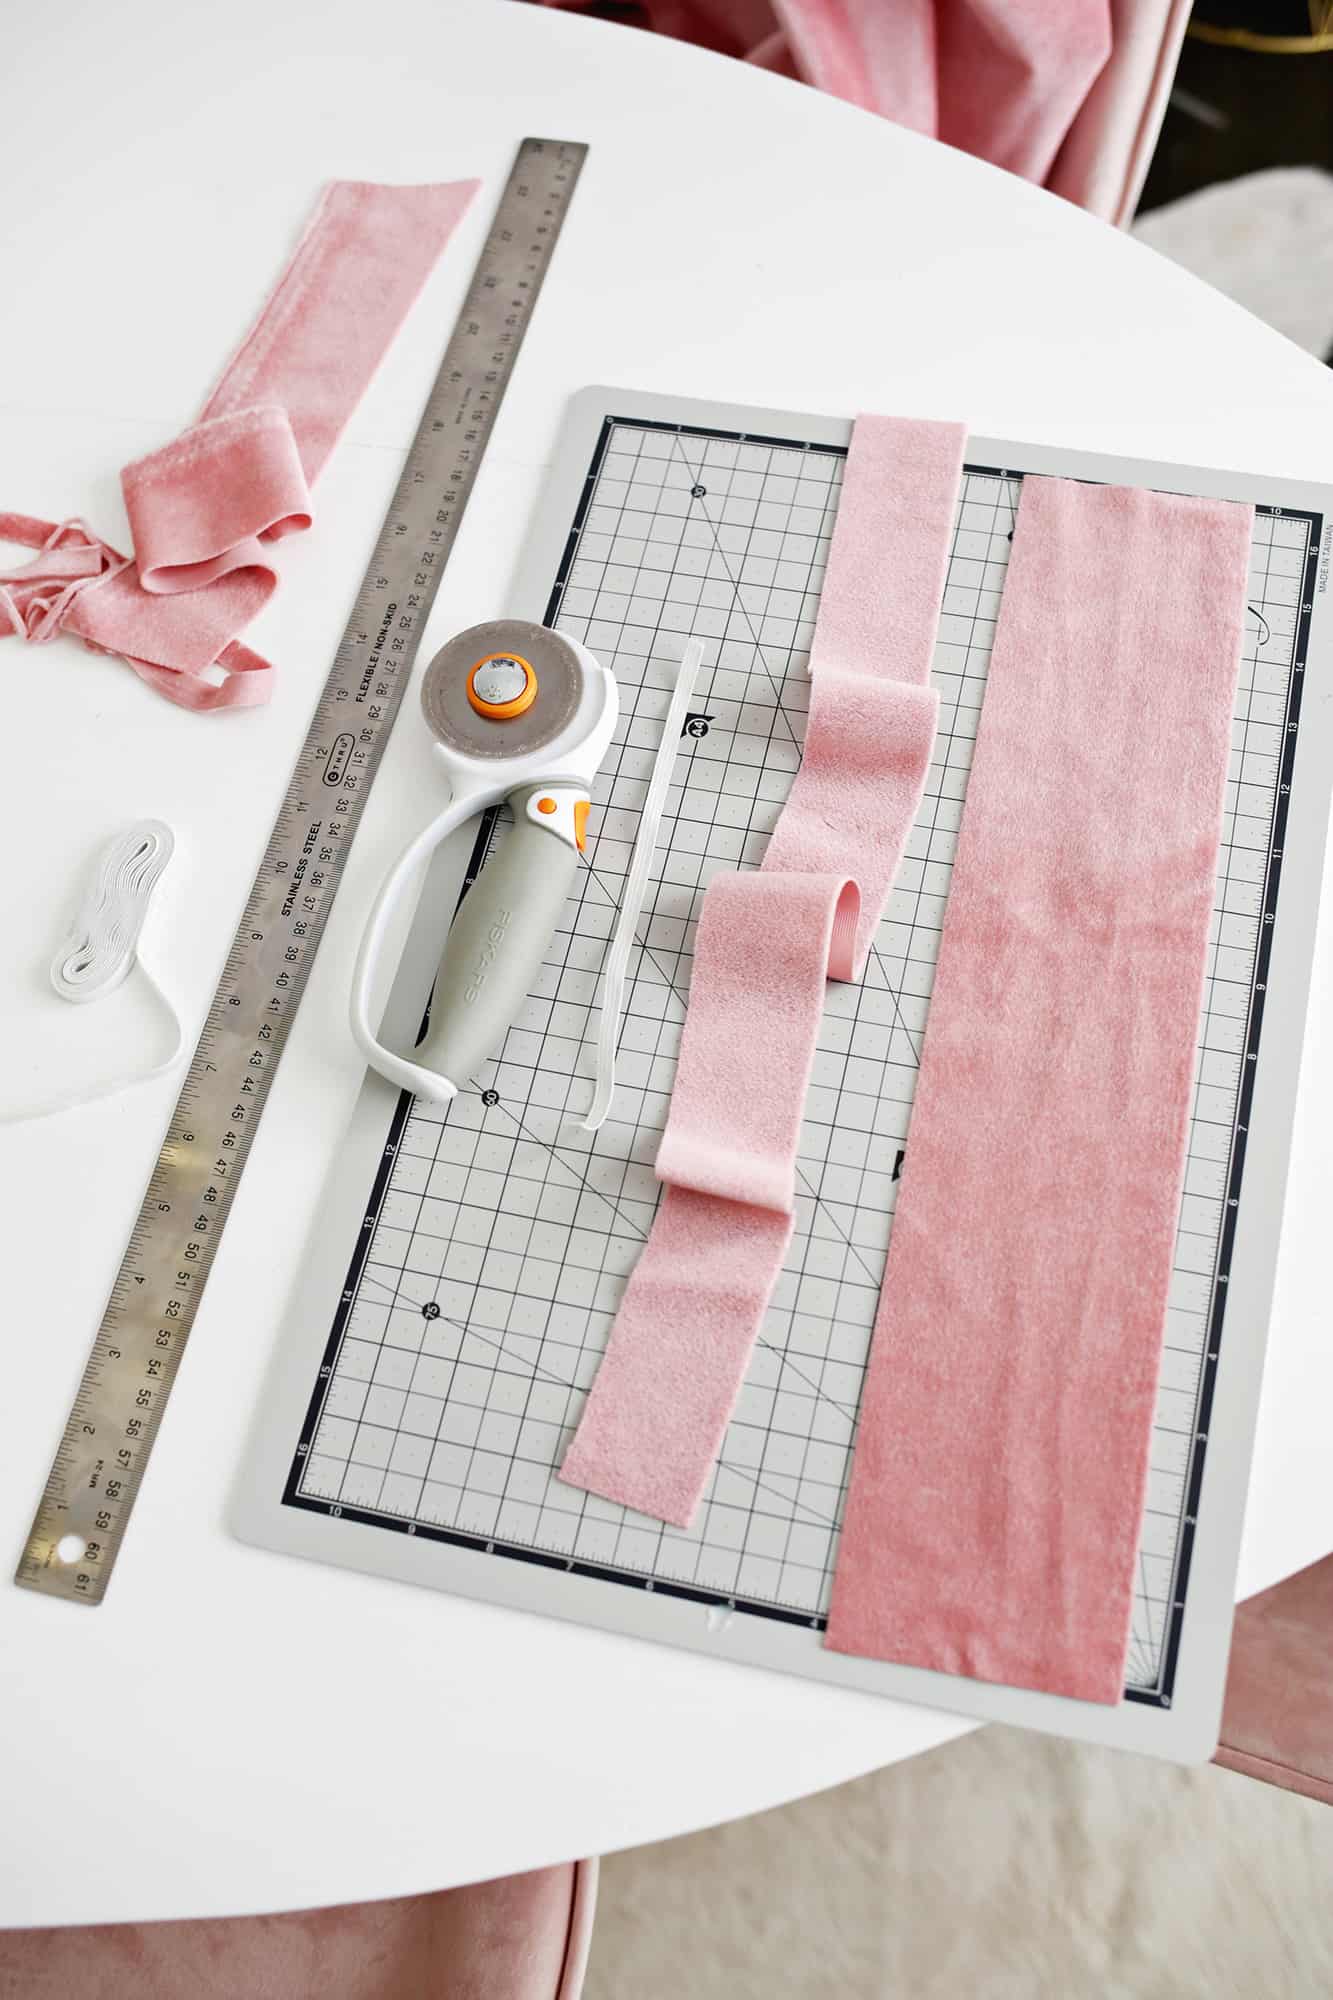 Supplies:
-small amount of non-stretch fabric (I used a non-stretch velvet)
-fabric scissors
-sewing machine
-straight pins
-1/4″ elastic
-safety pin
First, you’ll want to cut out a rectangle of velvet that is 3.5″ x 18″ for your scrunchie and another long strip that is 2.5″ x 25″ for your bow.
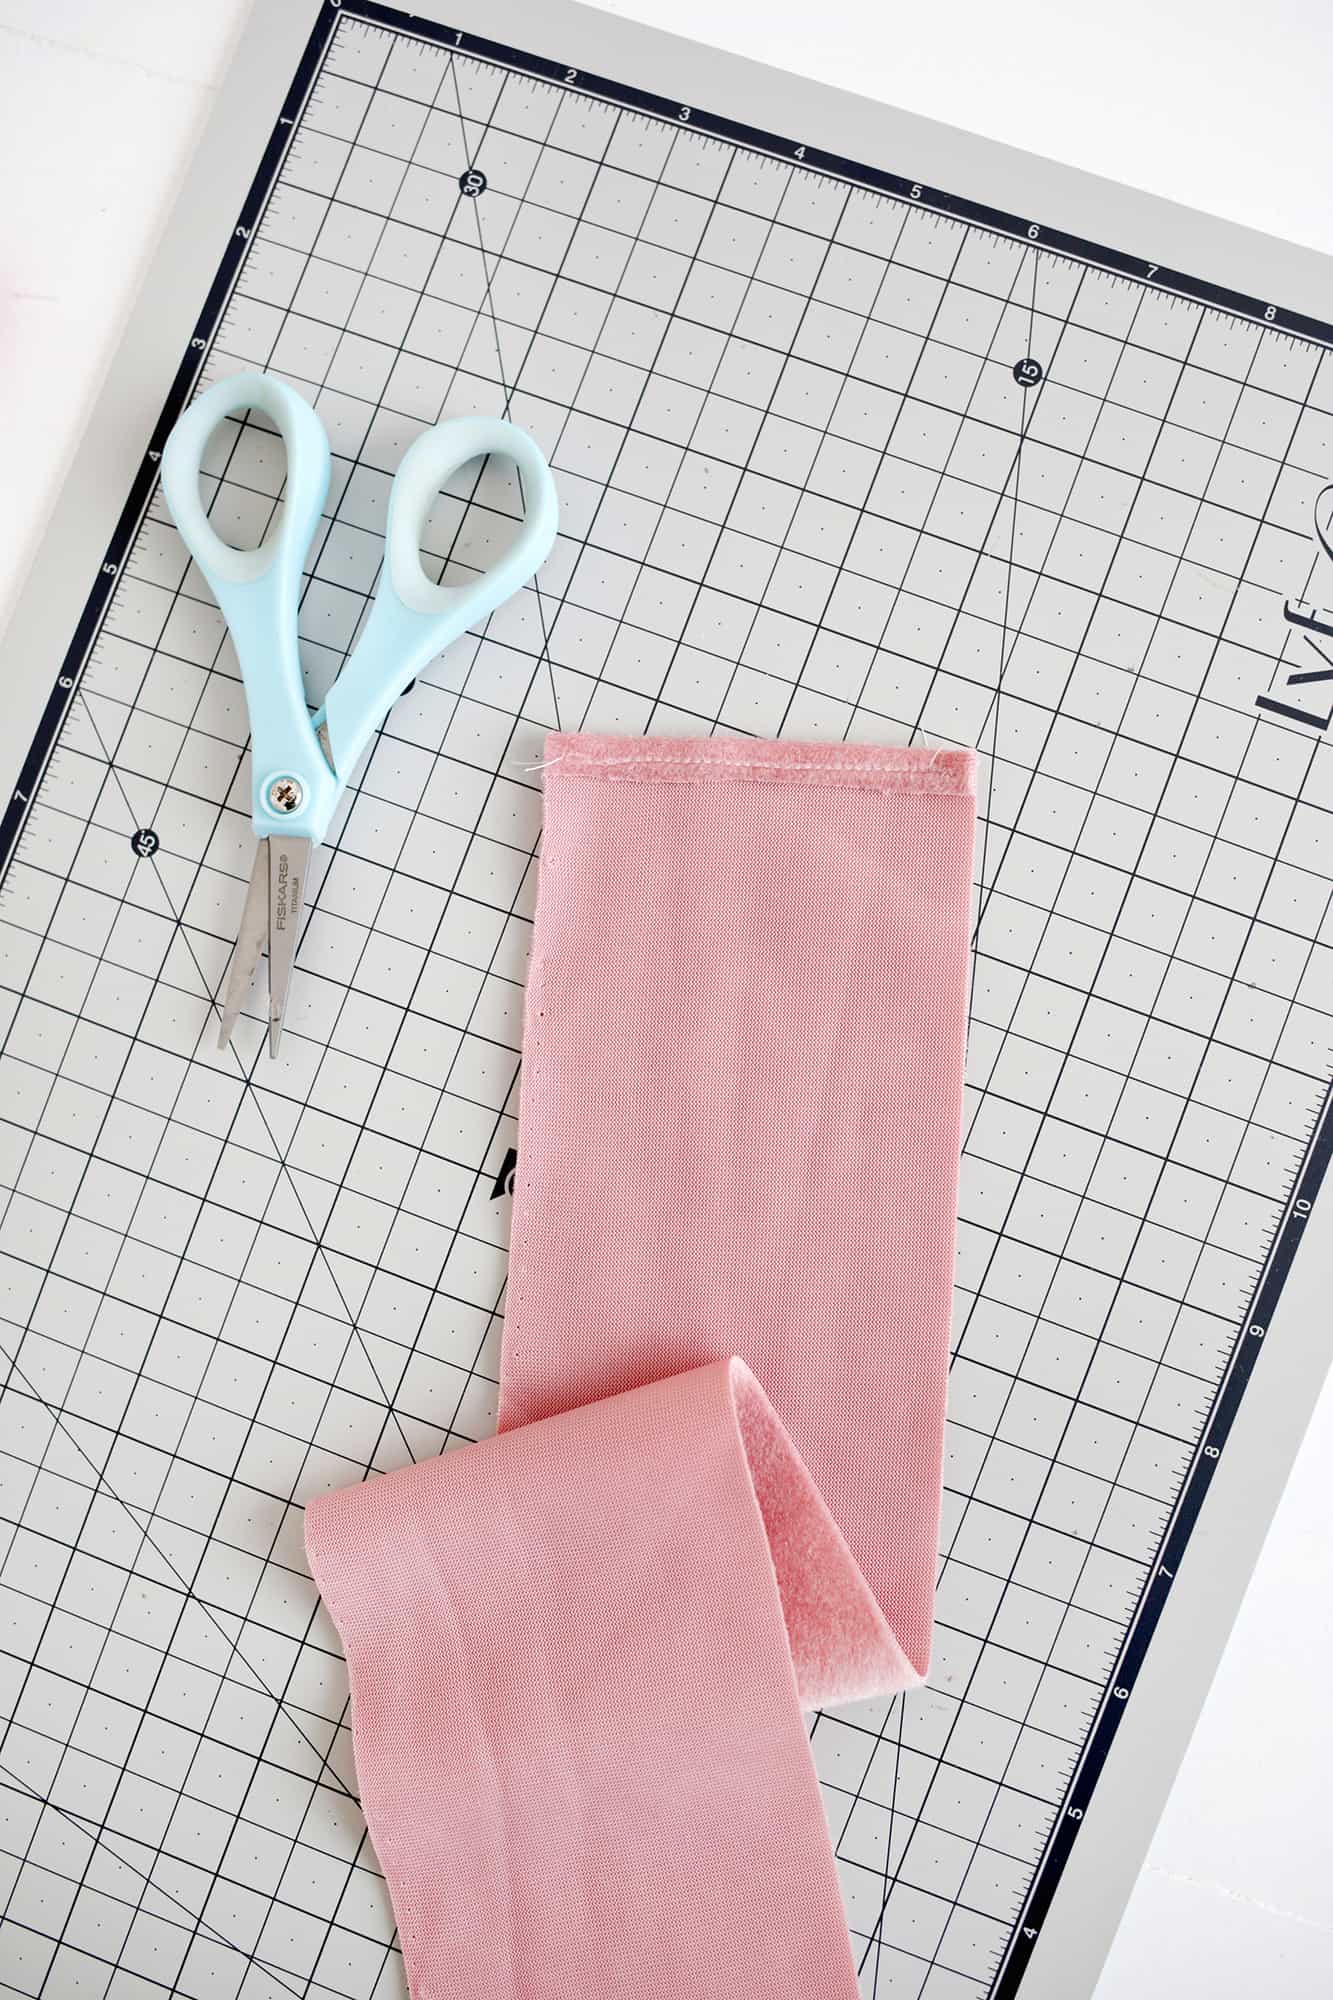 Fold over the top 1/4″ inch of your rectangle and sew flat to create a finished edge.
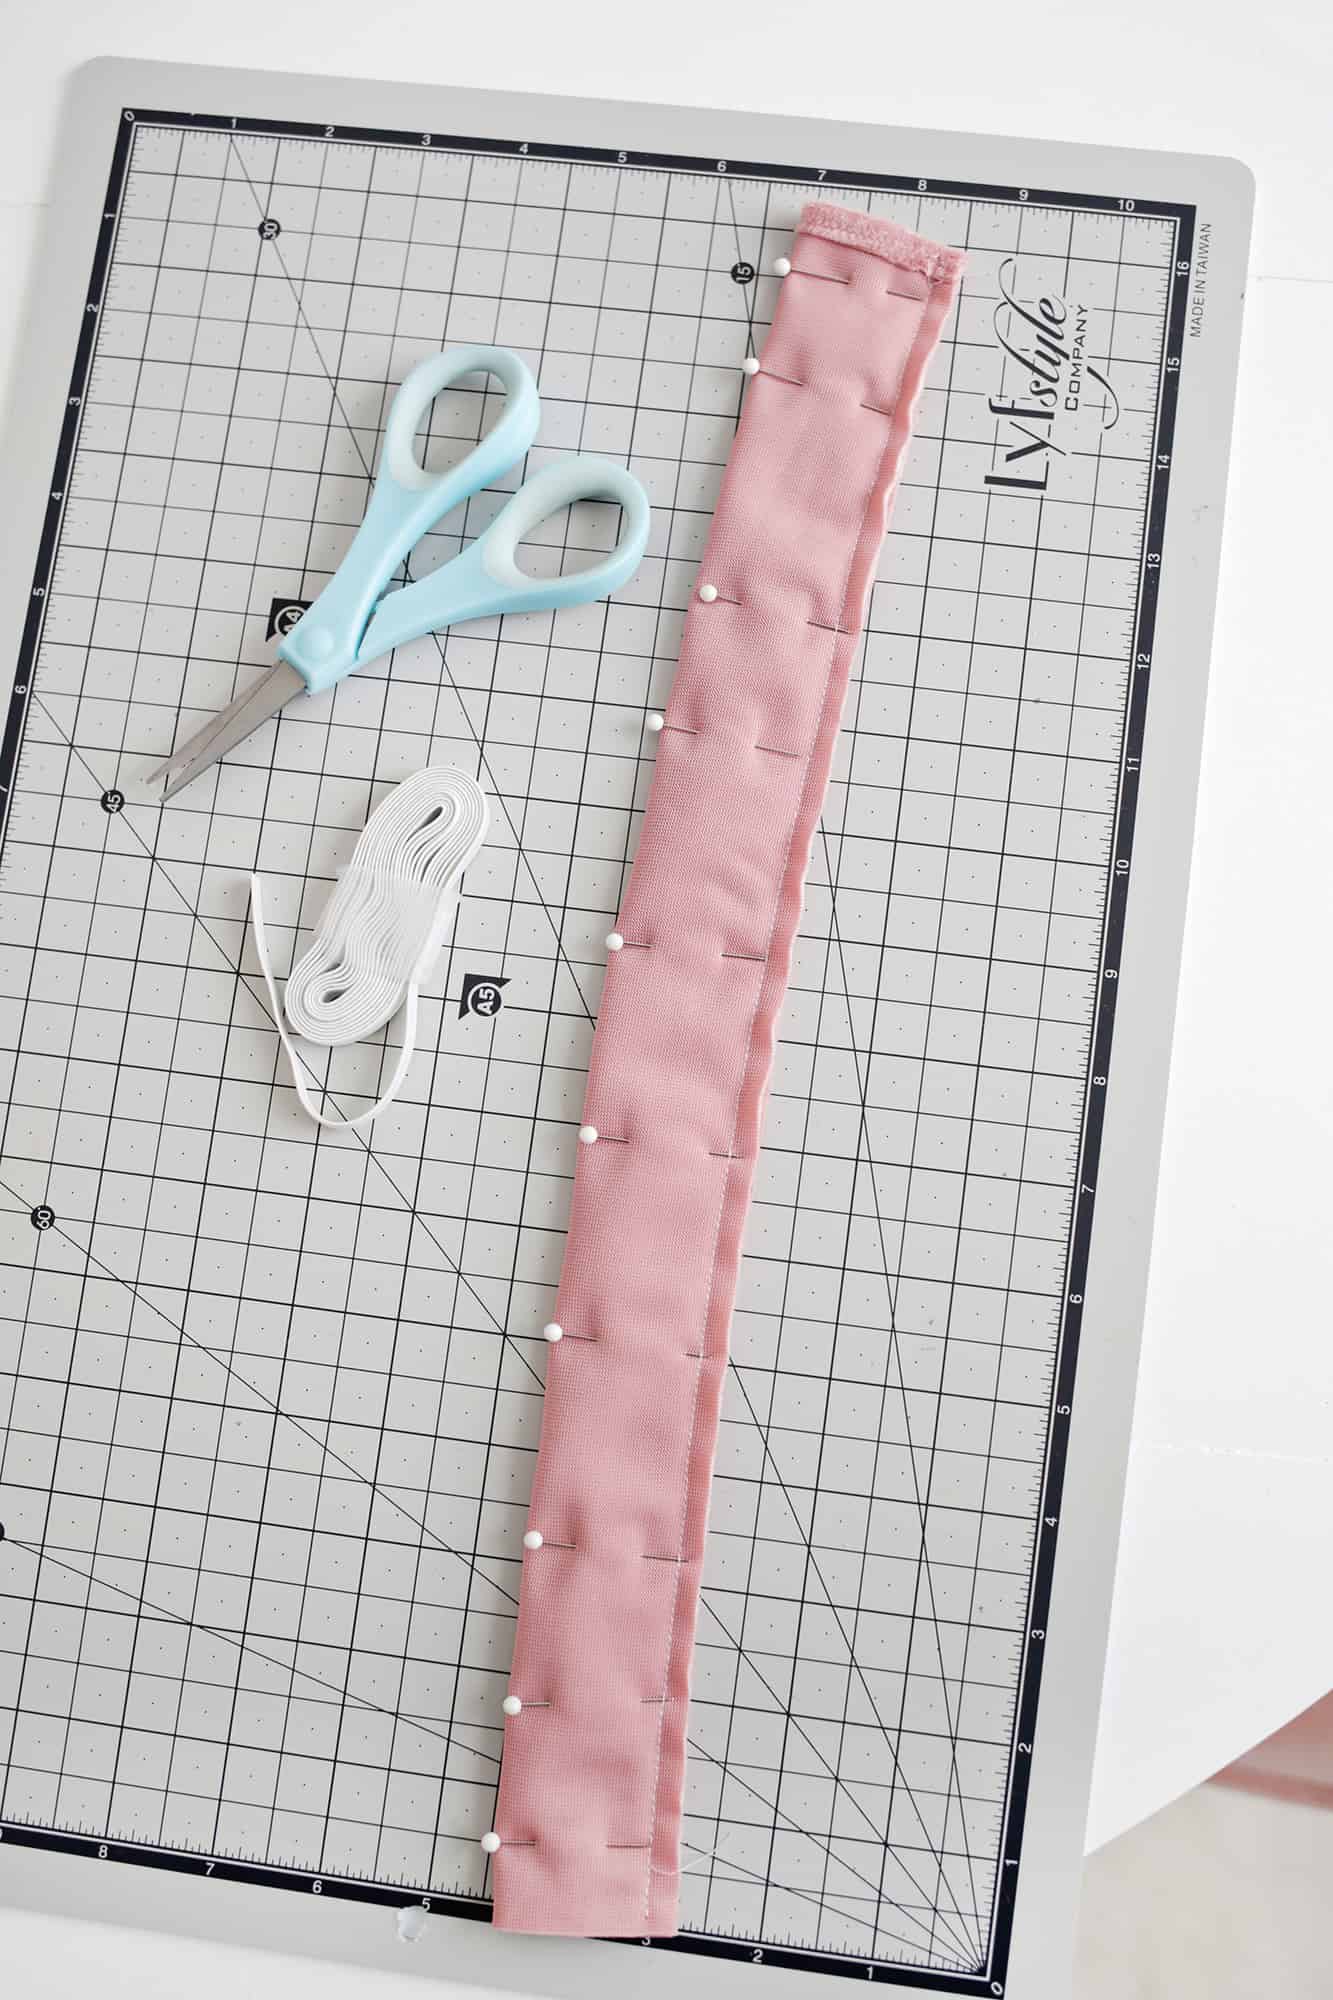 Fold your scrunchie rectangle in half lengthwise, right sides together, and pin the open side closed with pins. Sew down the open side with a 1/4″ seam allowance so that you create a tube.
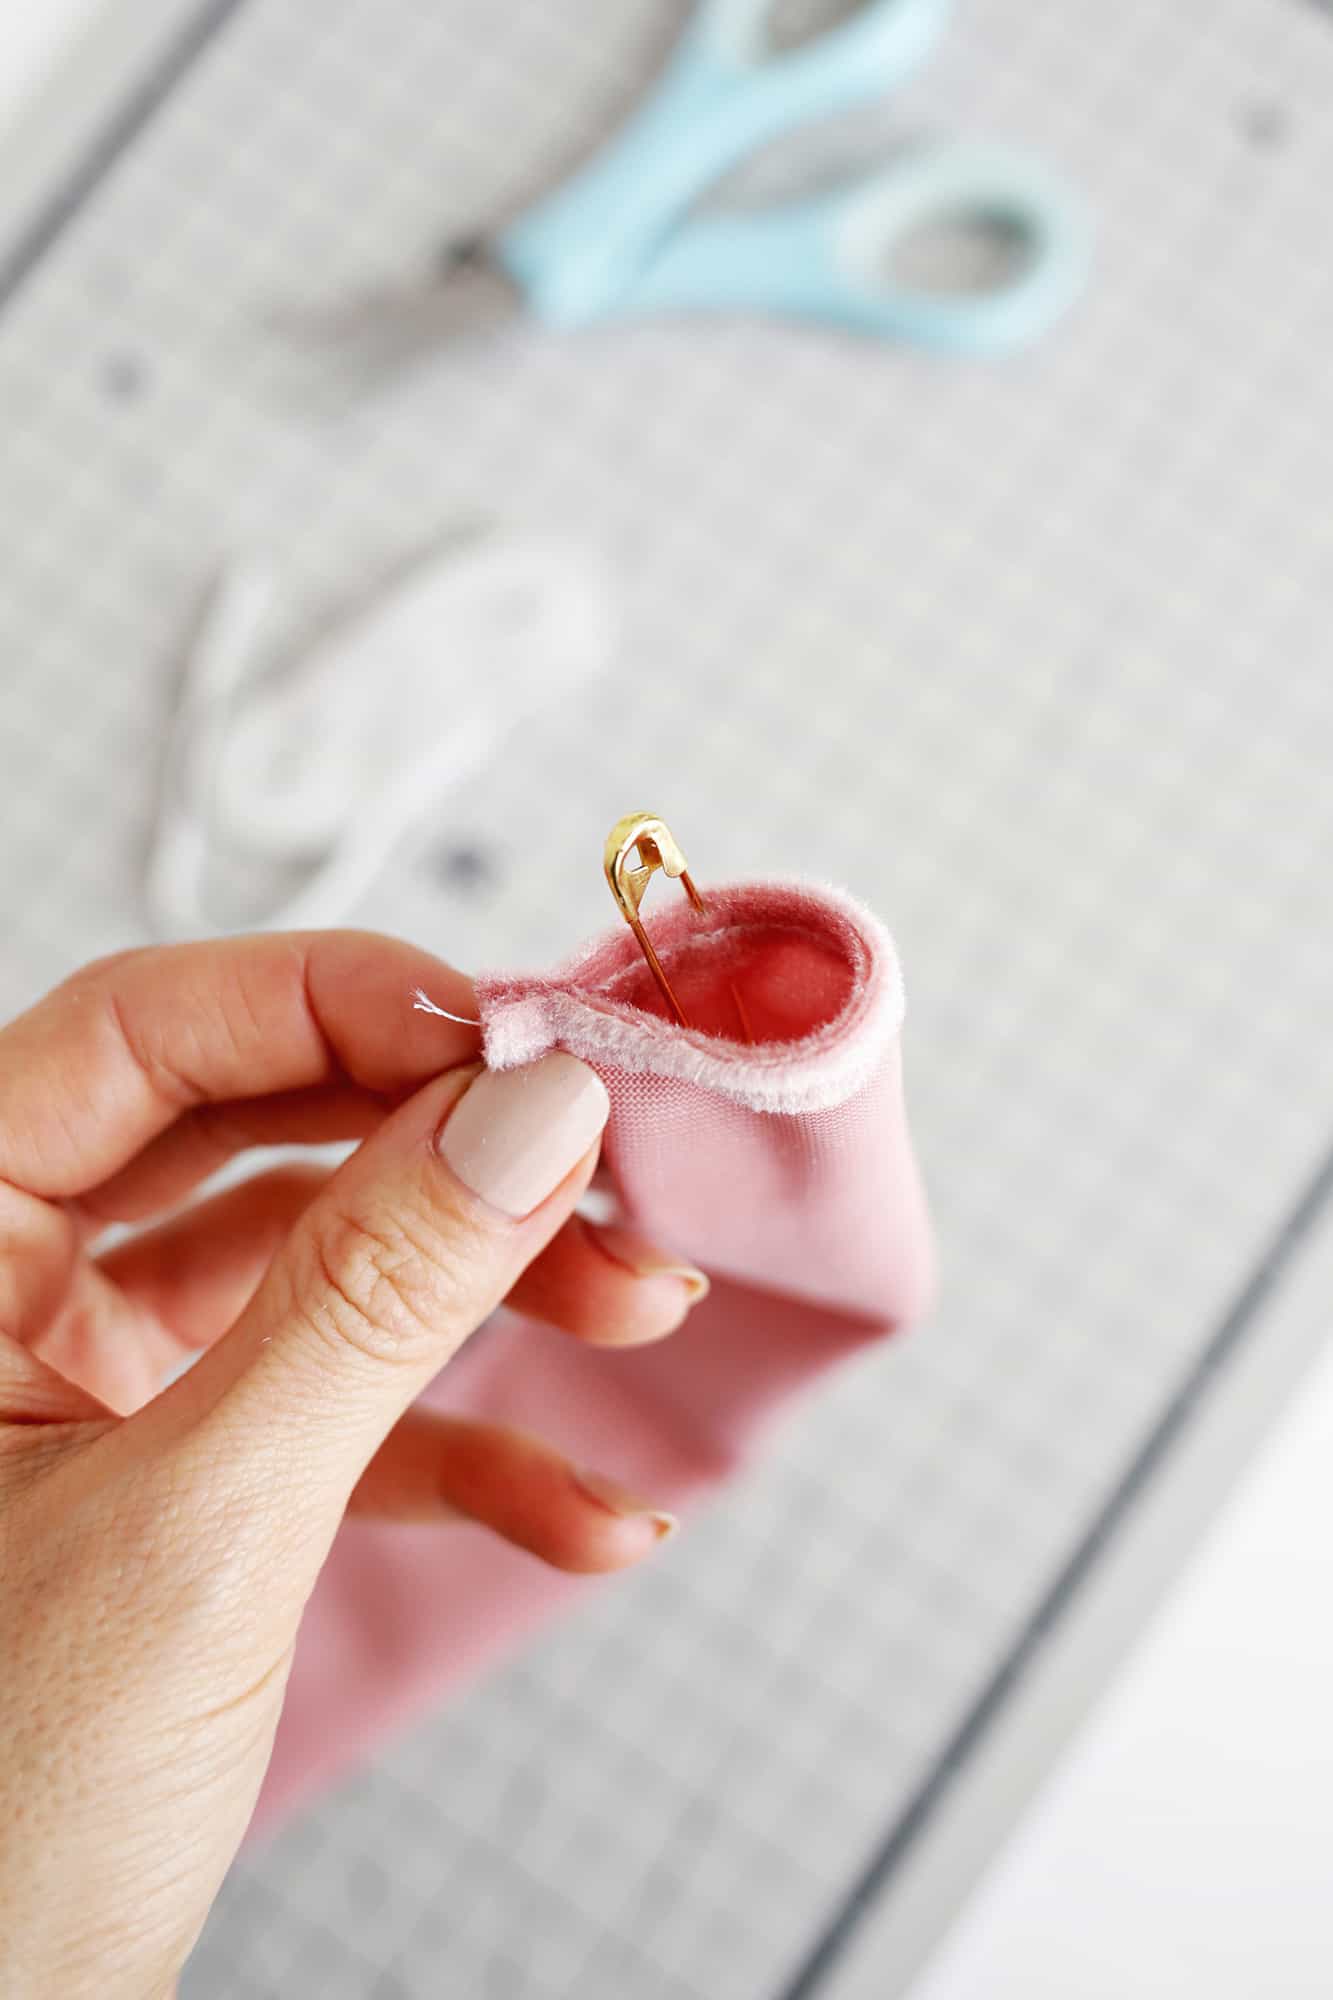
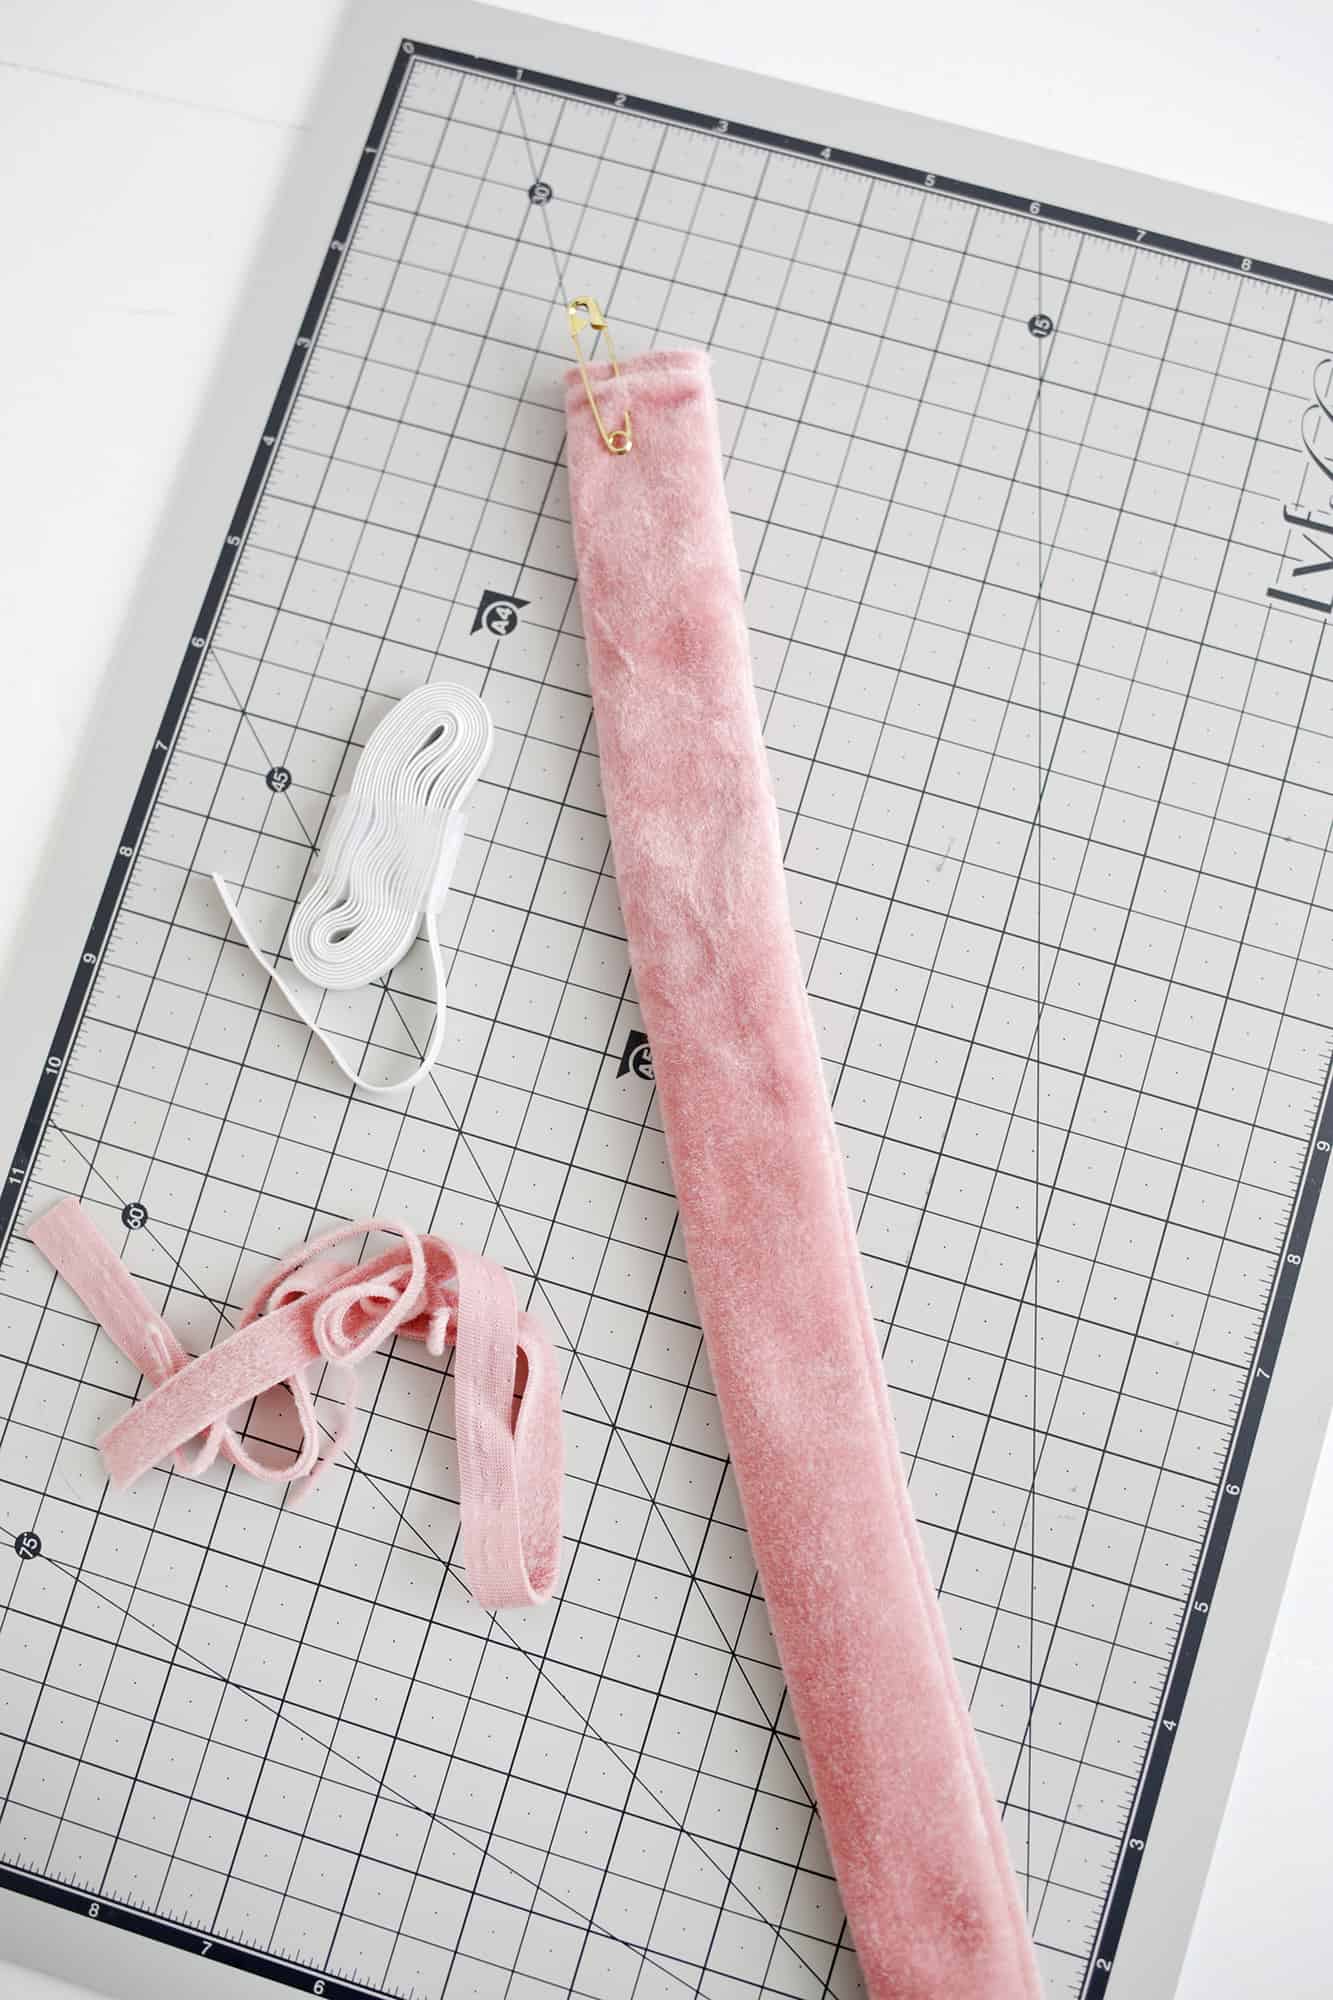 Turn the tube right side out by pinning a safety pin to one end and feeding the pin through the tube until it comes out the other end and your tube is right side out.
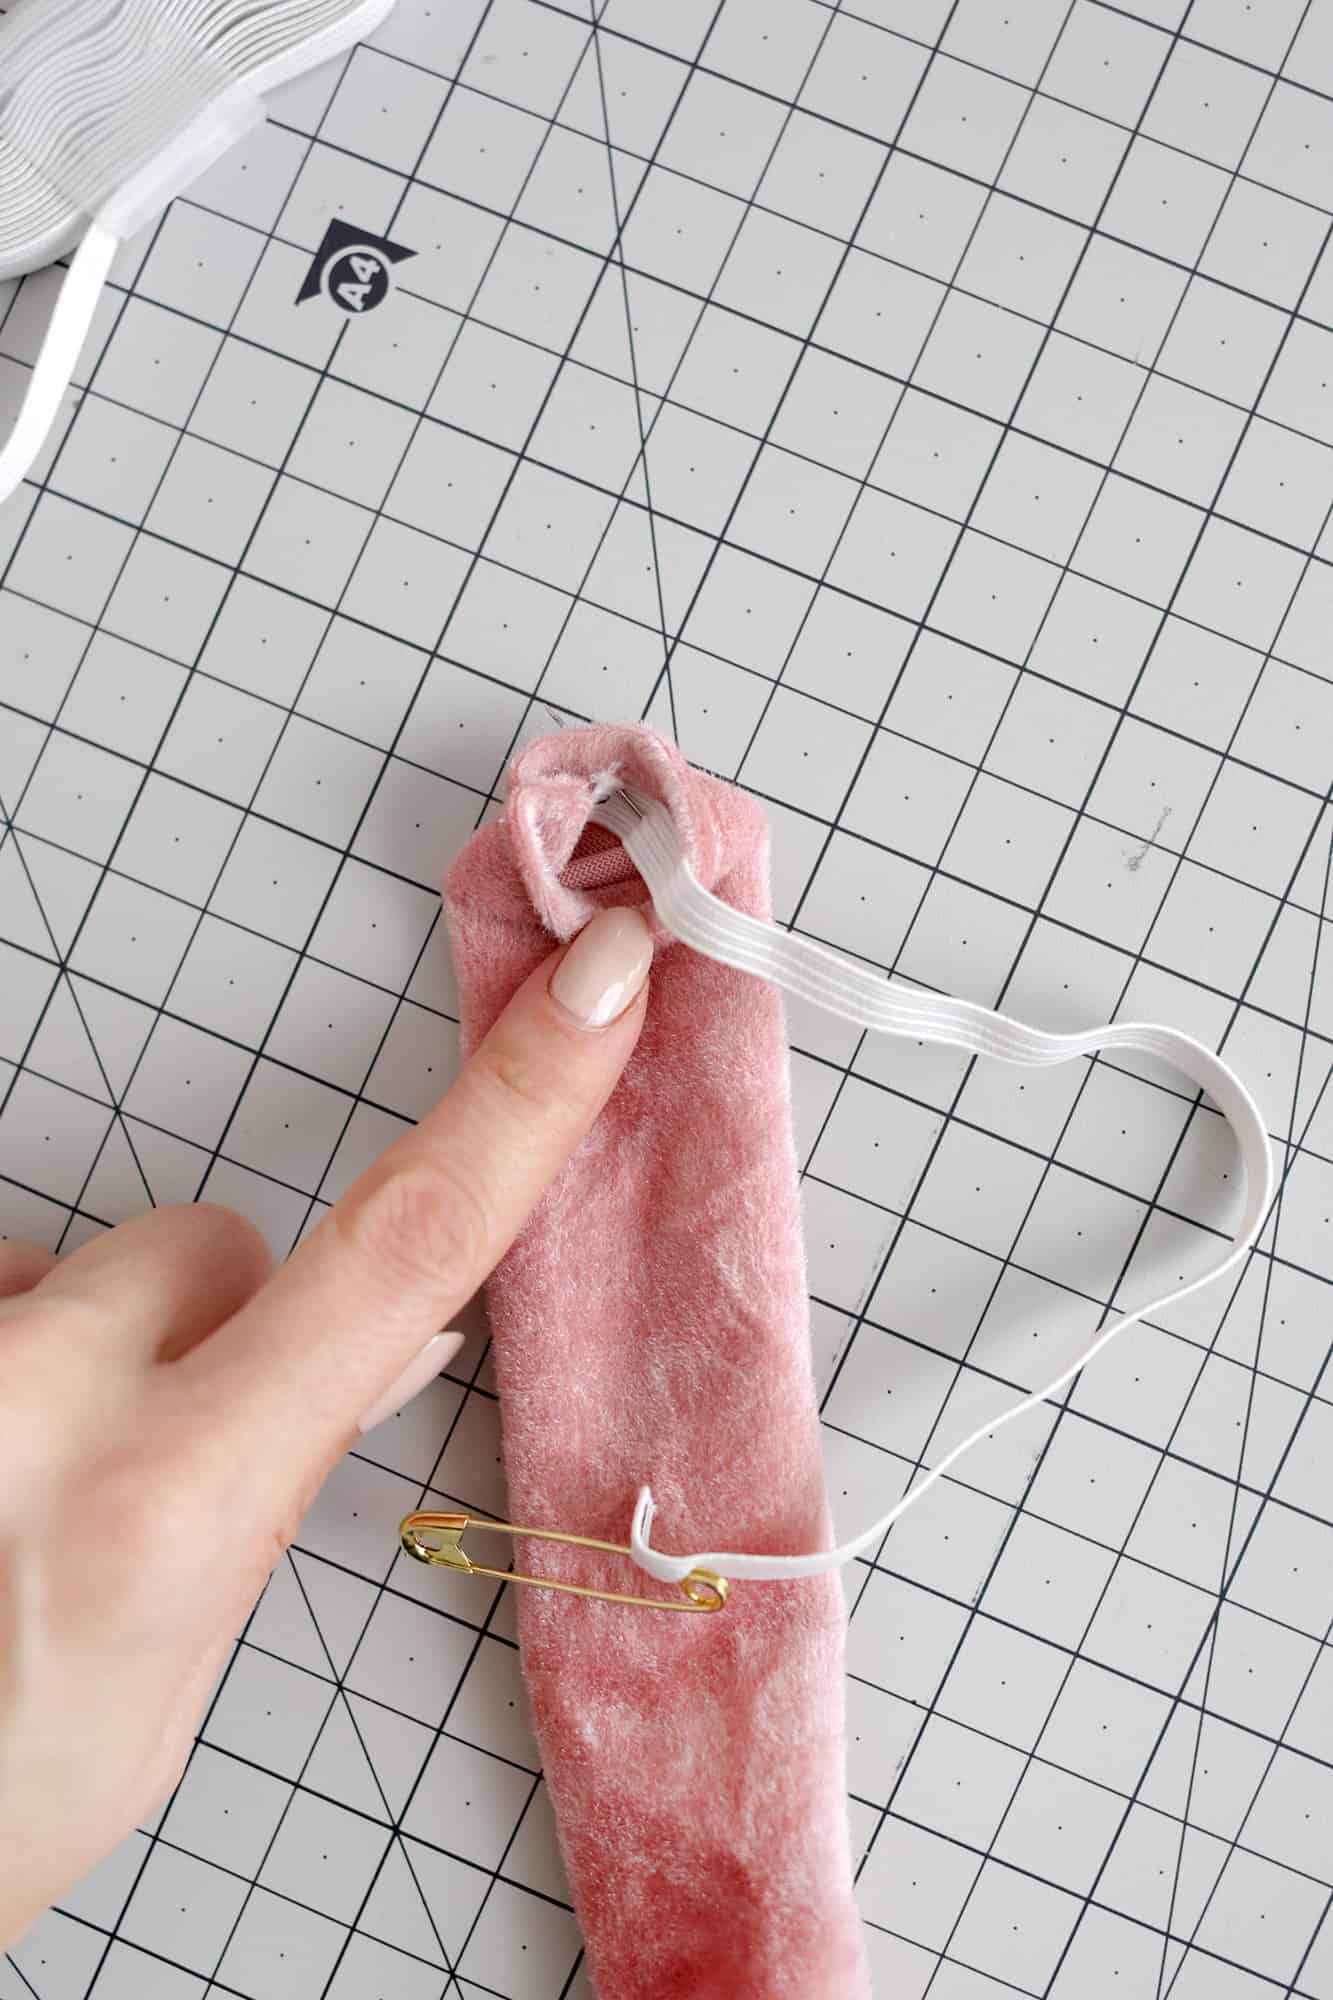 Cut a piece of elastic 8″ long. Use a safety pin at one end of the elastic to thread it through the tube and come out the other side (just feel around to make sure the elastic didn’t twist in the tube during the process).
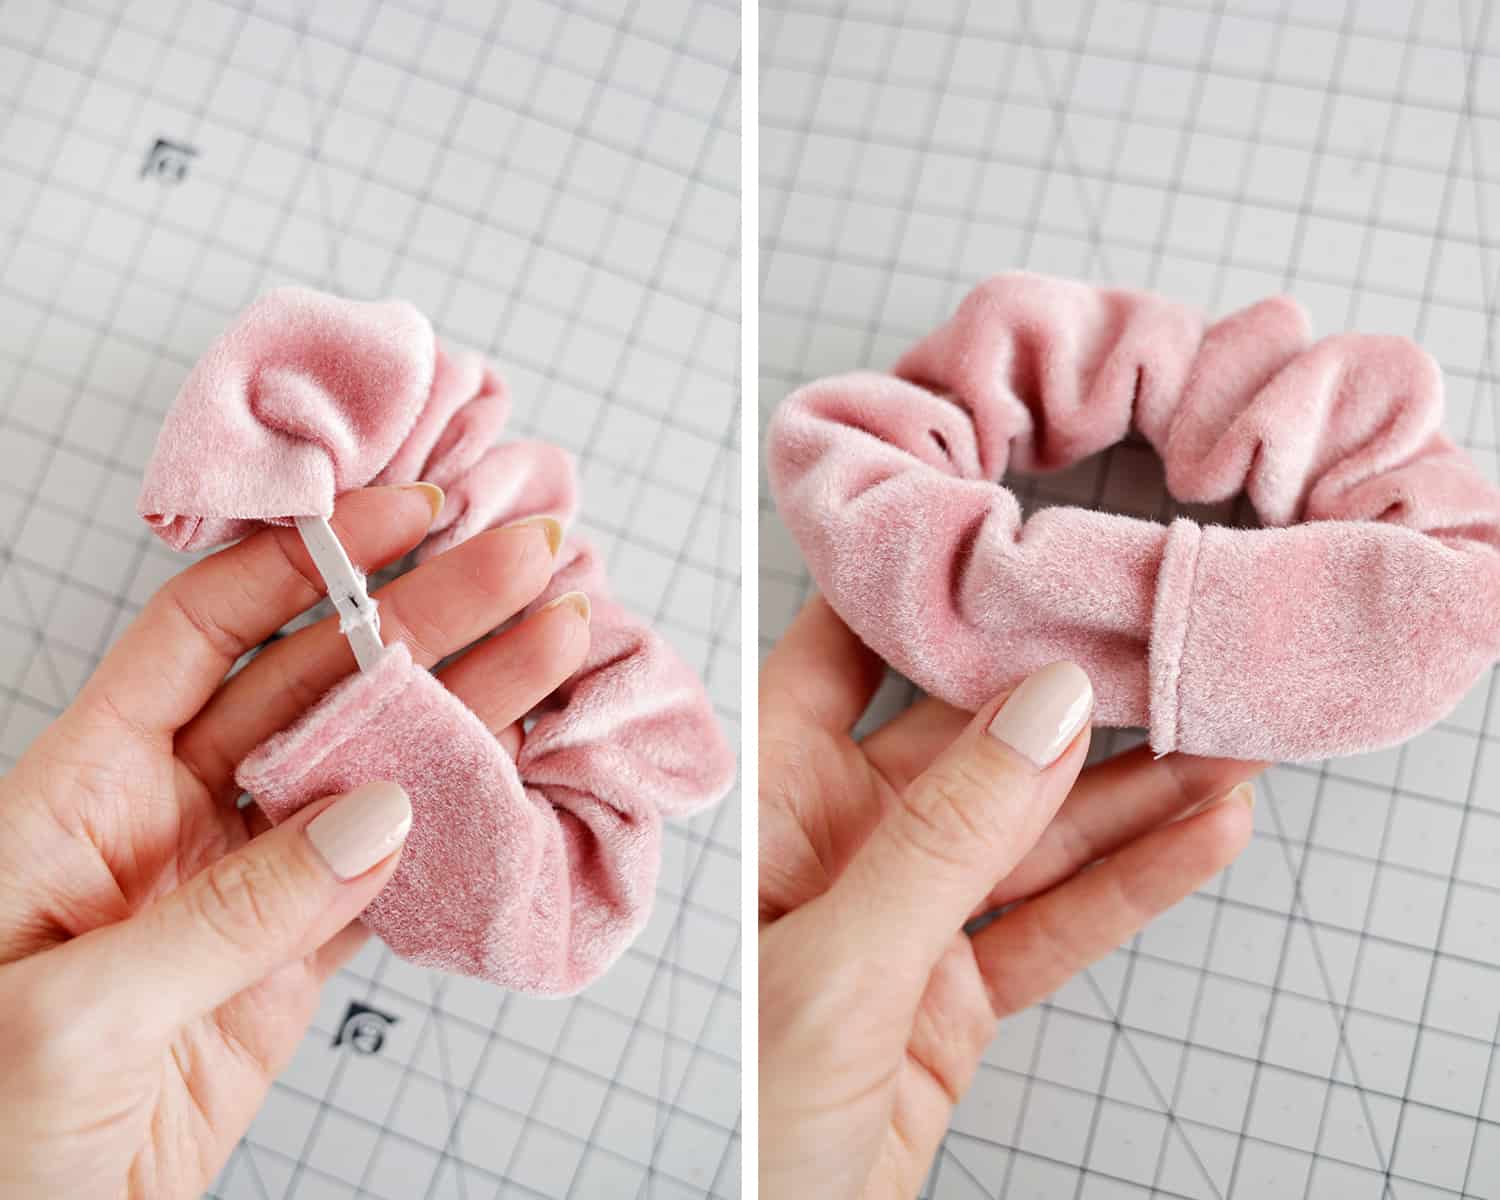 Sew the ends of your elastic together. Tuck your unfinished scrunchie edge into your finished edge and pin them flat together.
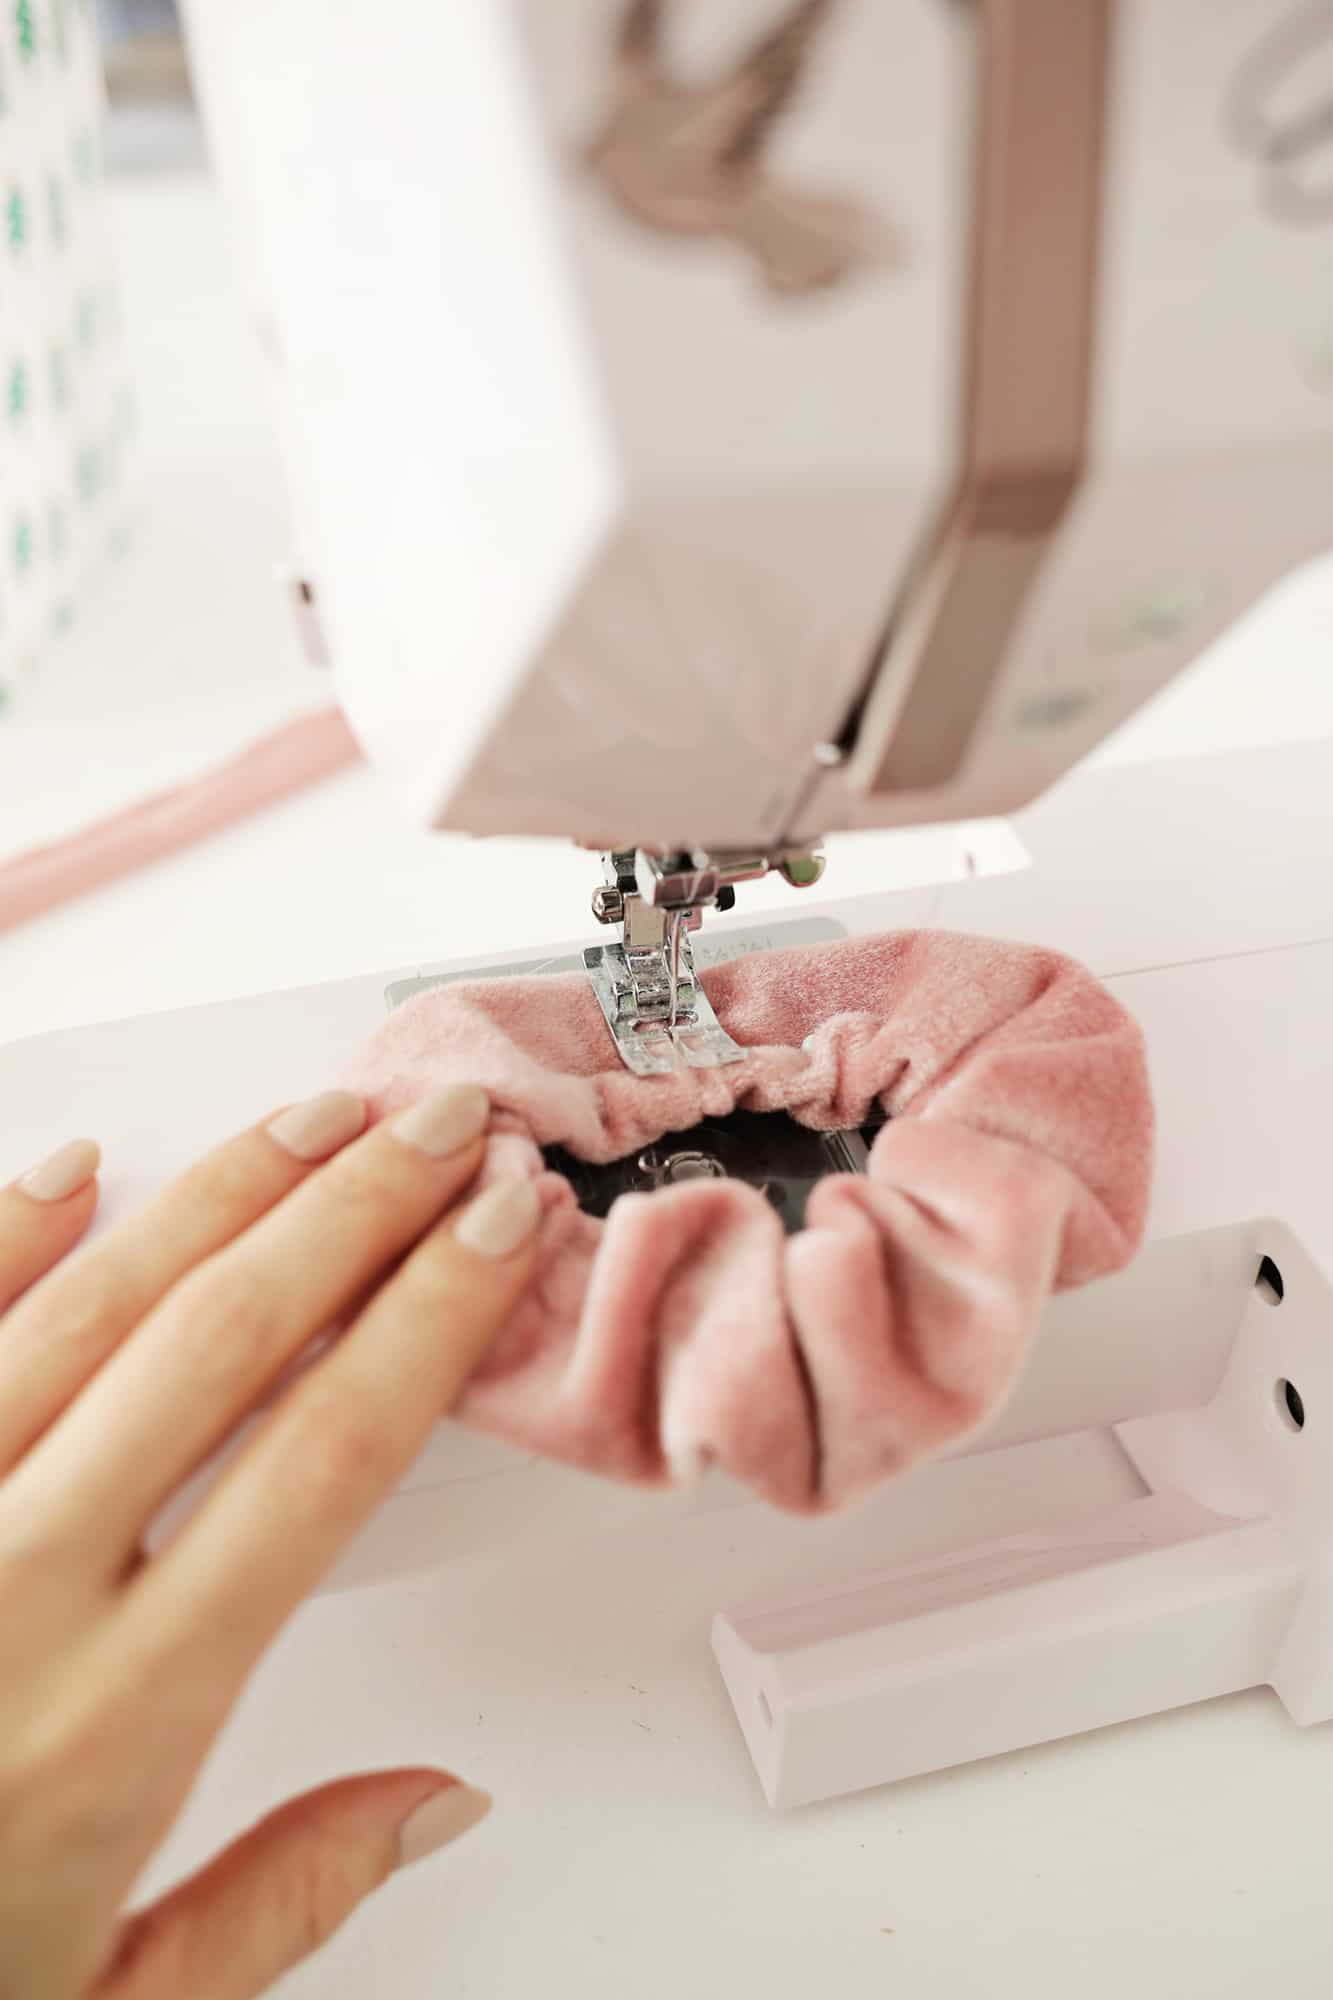 Sew down the finished edge line to secure both layers together with the elastic band between them. Don’t worry about that flat spot, as your bow will cover it!
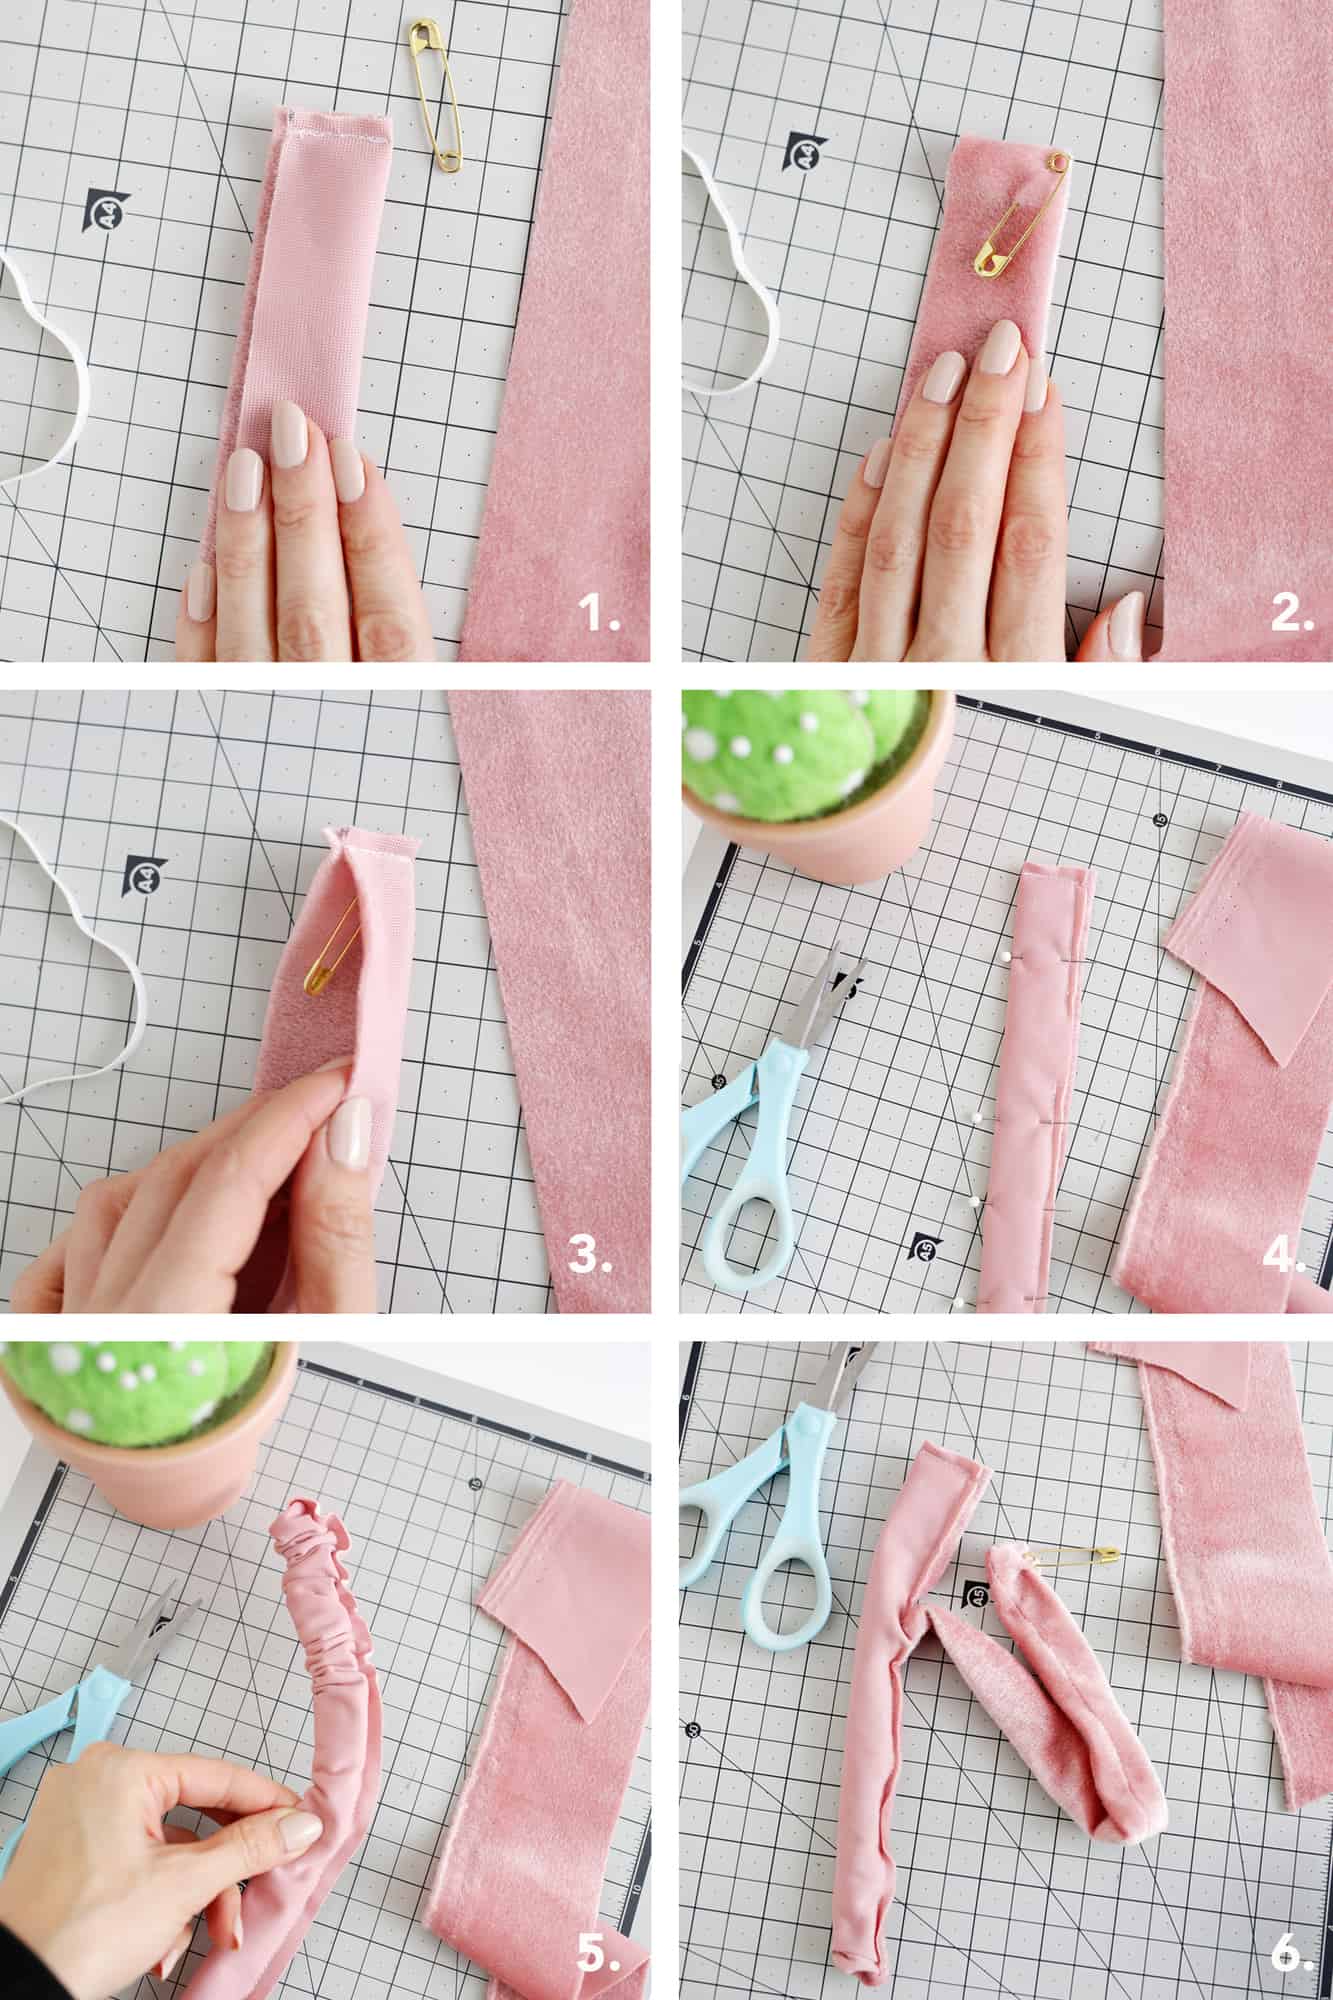 To make your bow, (1) fold your long strip in half lengthwise, right sides together, and pin in place. Sew along the top with a 1/4″ seam allowance.
(2) Open the top right side out again and attach a safety pin in the top inside corner before (3) turning it back to having both right sides touching again and the pin sandwiched between the layers.
(4) Sew down the side of your long strip but leave an opening of 2-3″ towards the bottom and then continue all the way down the side and along the bottom edge.
(5) Find your safety pin that you pinned in the top corner with your fingers and use that to pull the top corner towards the opening in the bottom corner, eventually (6) turning the whole strip right side out. Remove the safety pin.
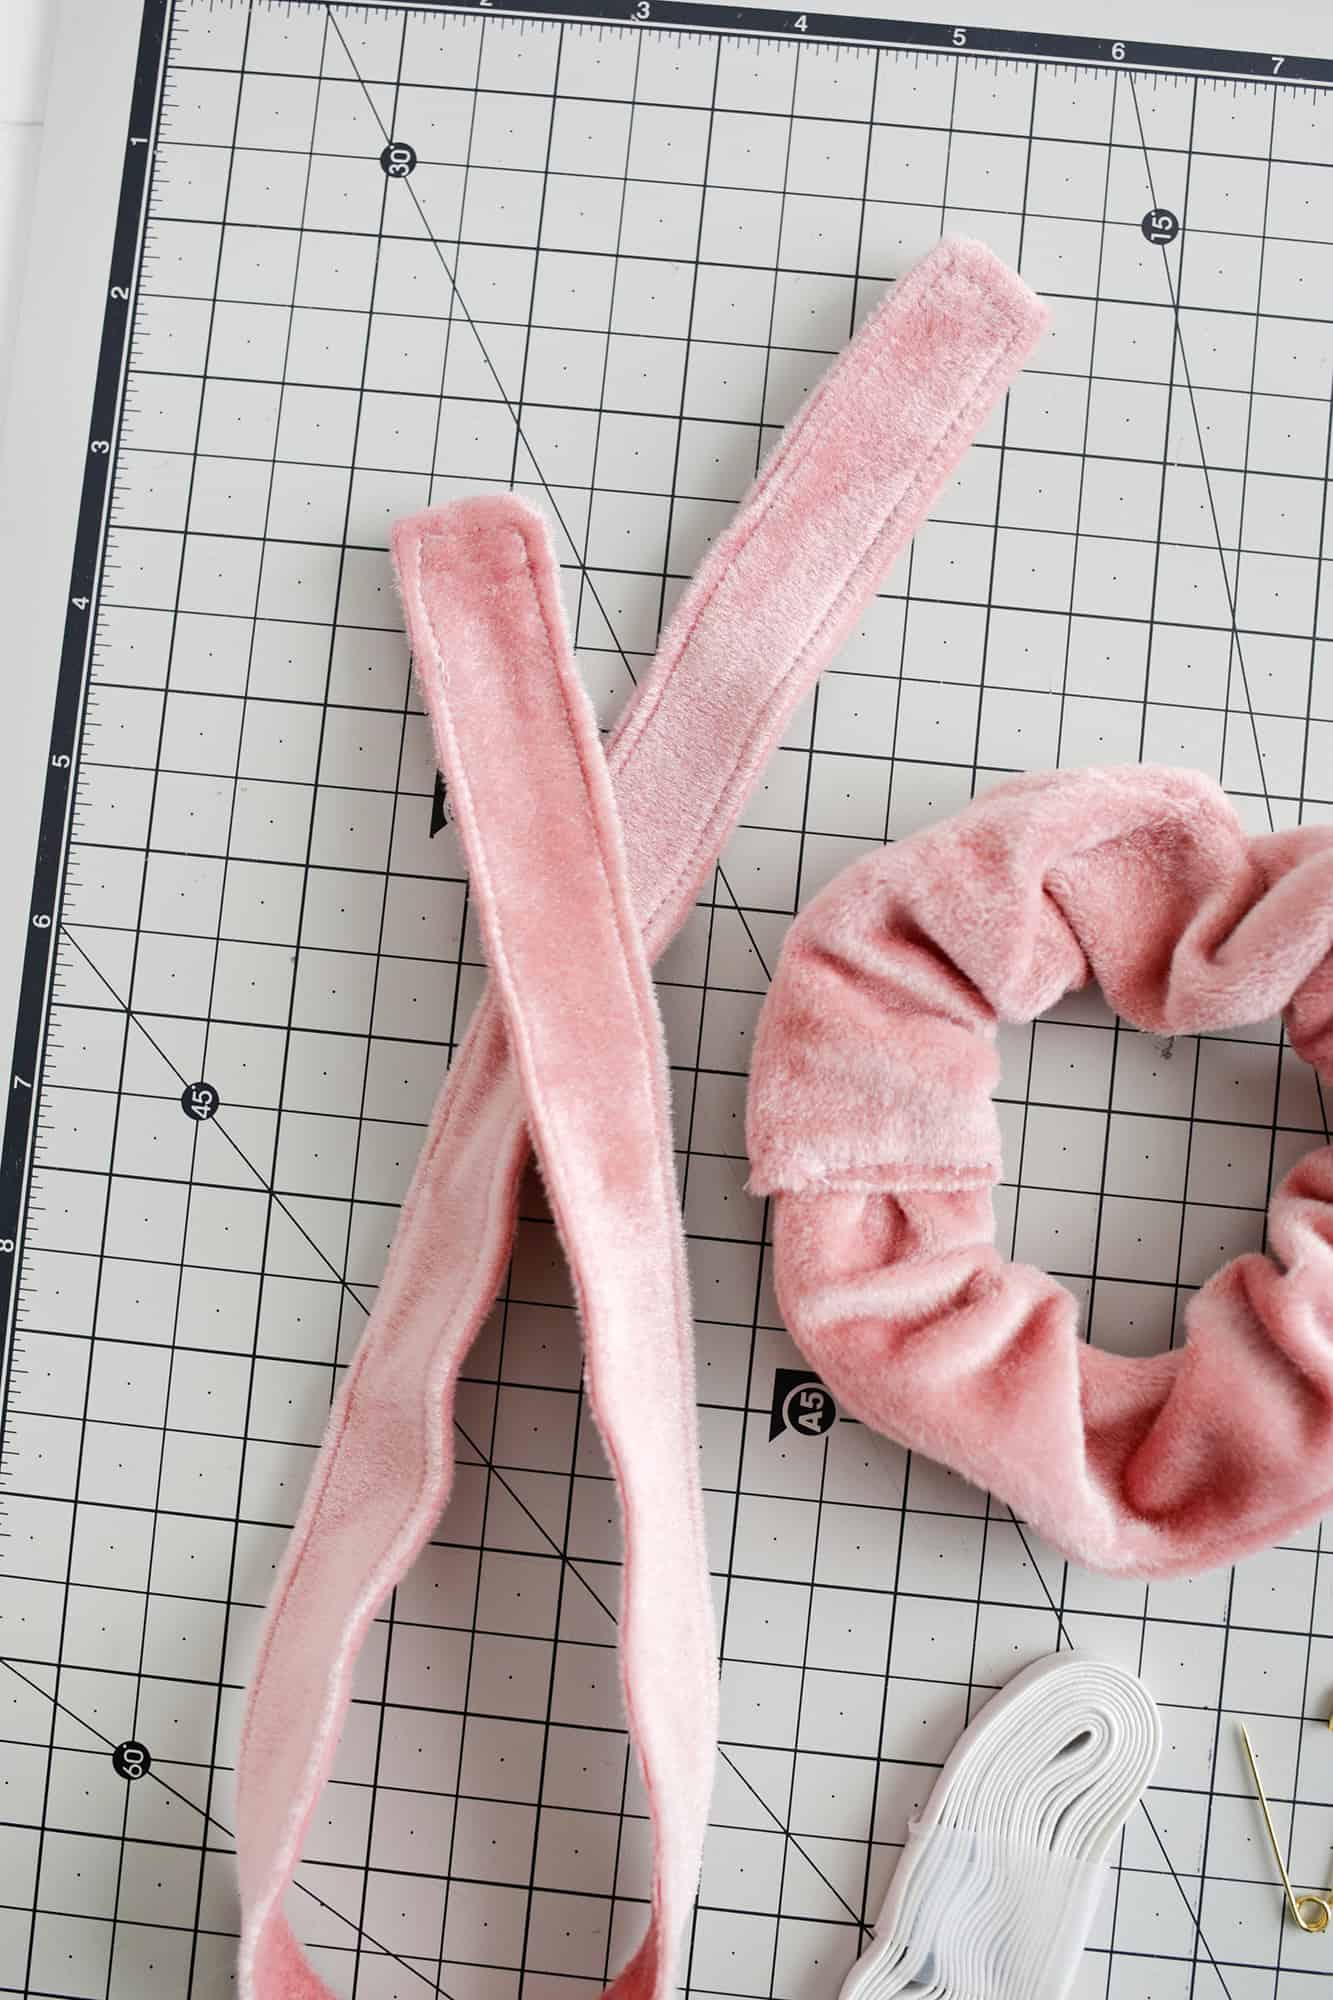 Top sew all the way around the edge of the strip with a 1/8″ seam allowance to close up your gap and give the bow a finished, and flattened, look.
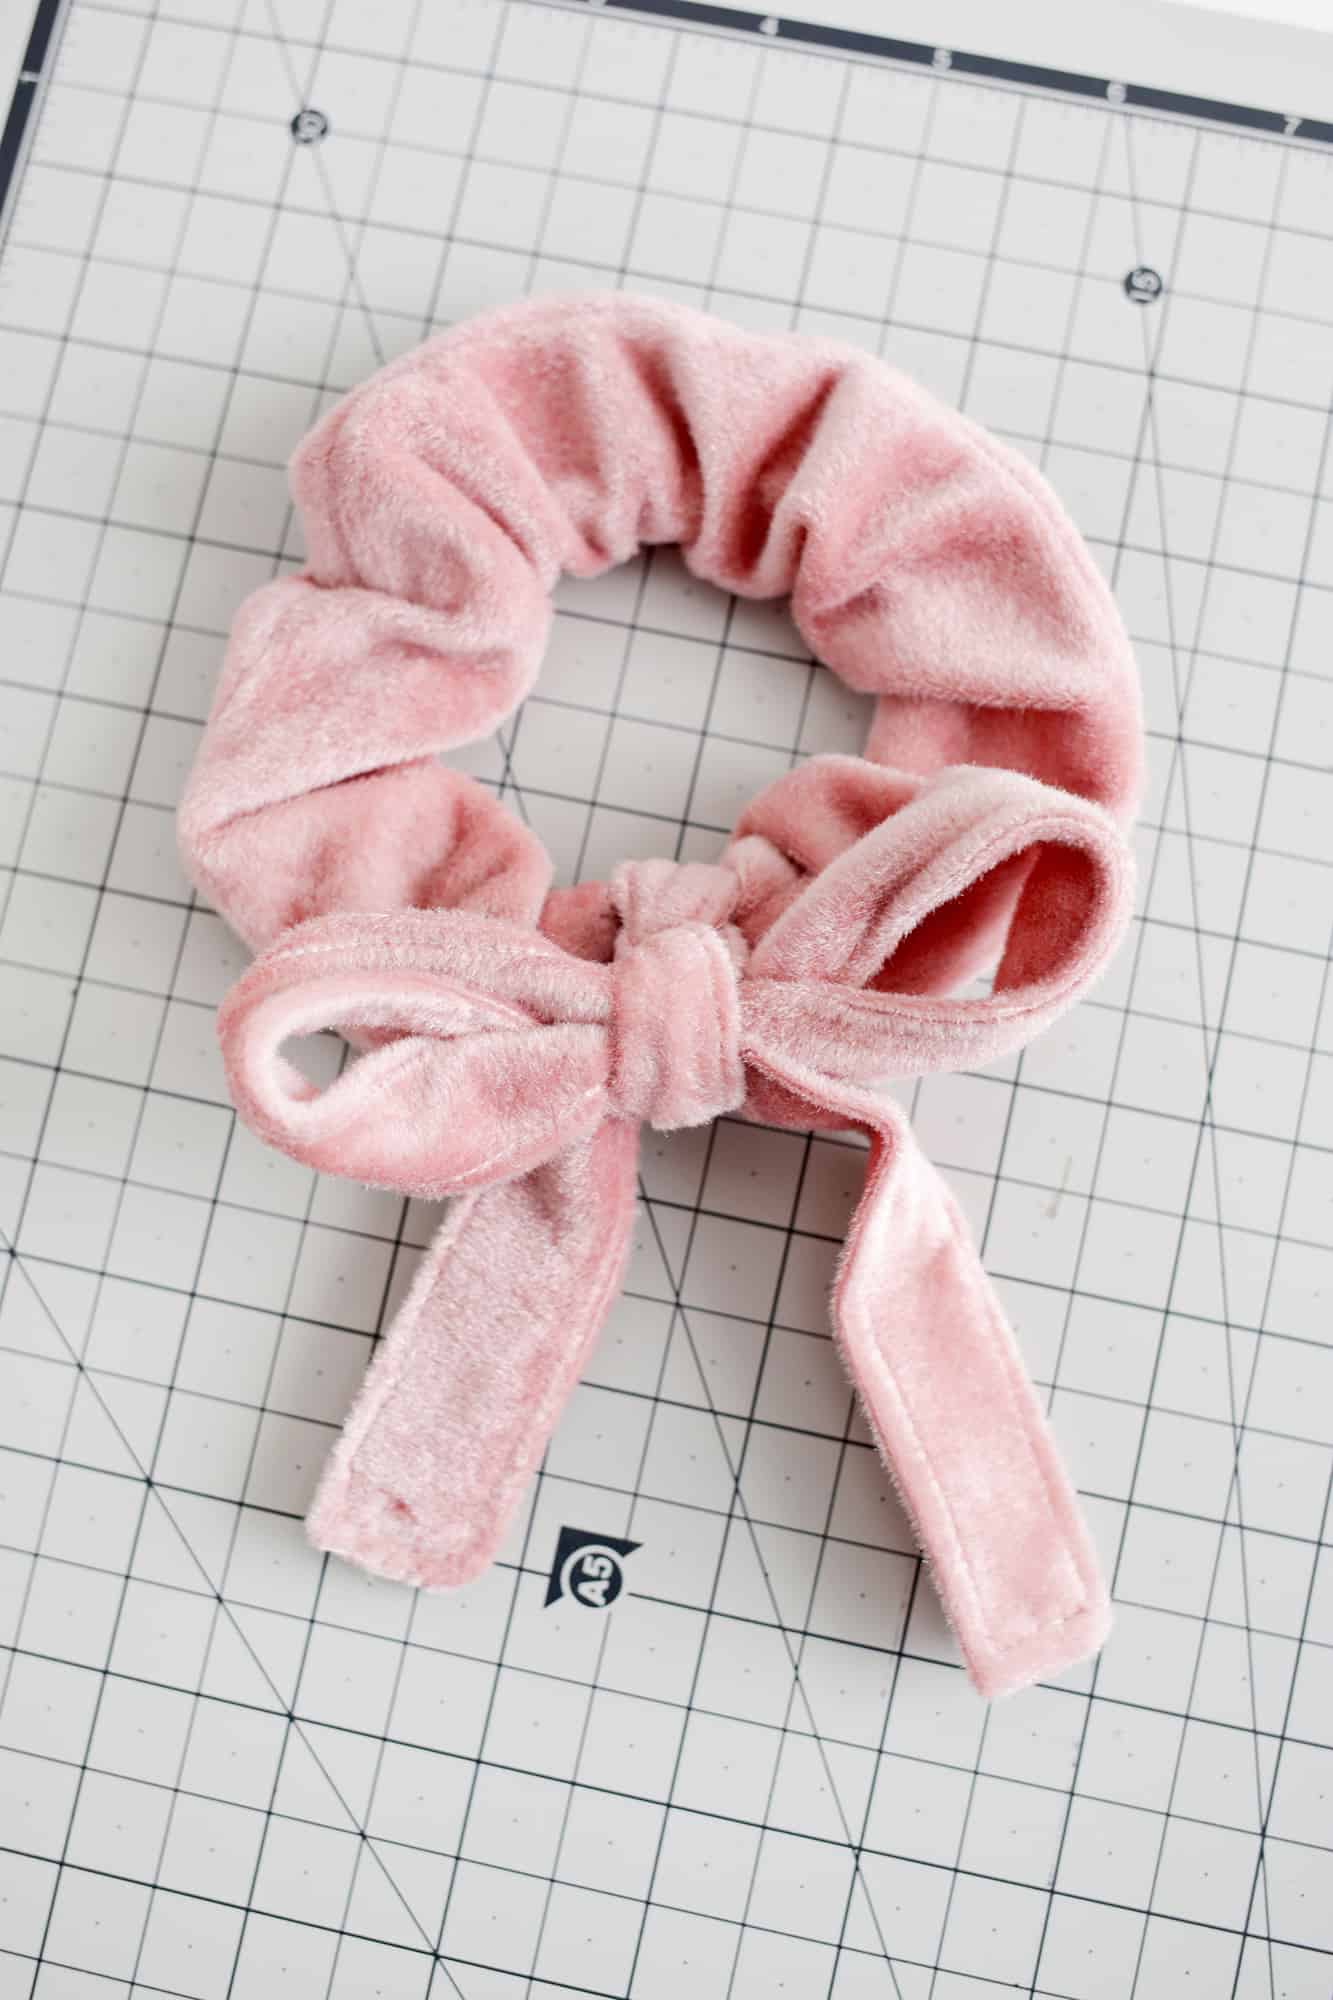 Tie your bow onto the flat spot on your scrunchie and that’s it! Your bow scrunchie is now ready to wear!
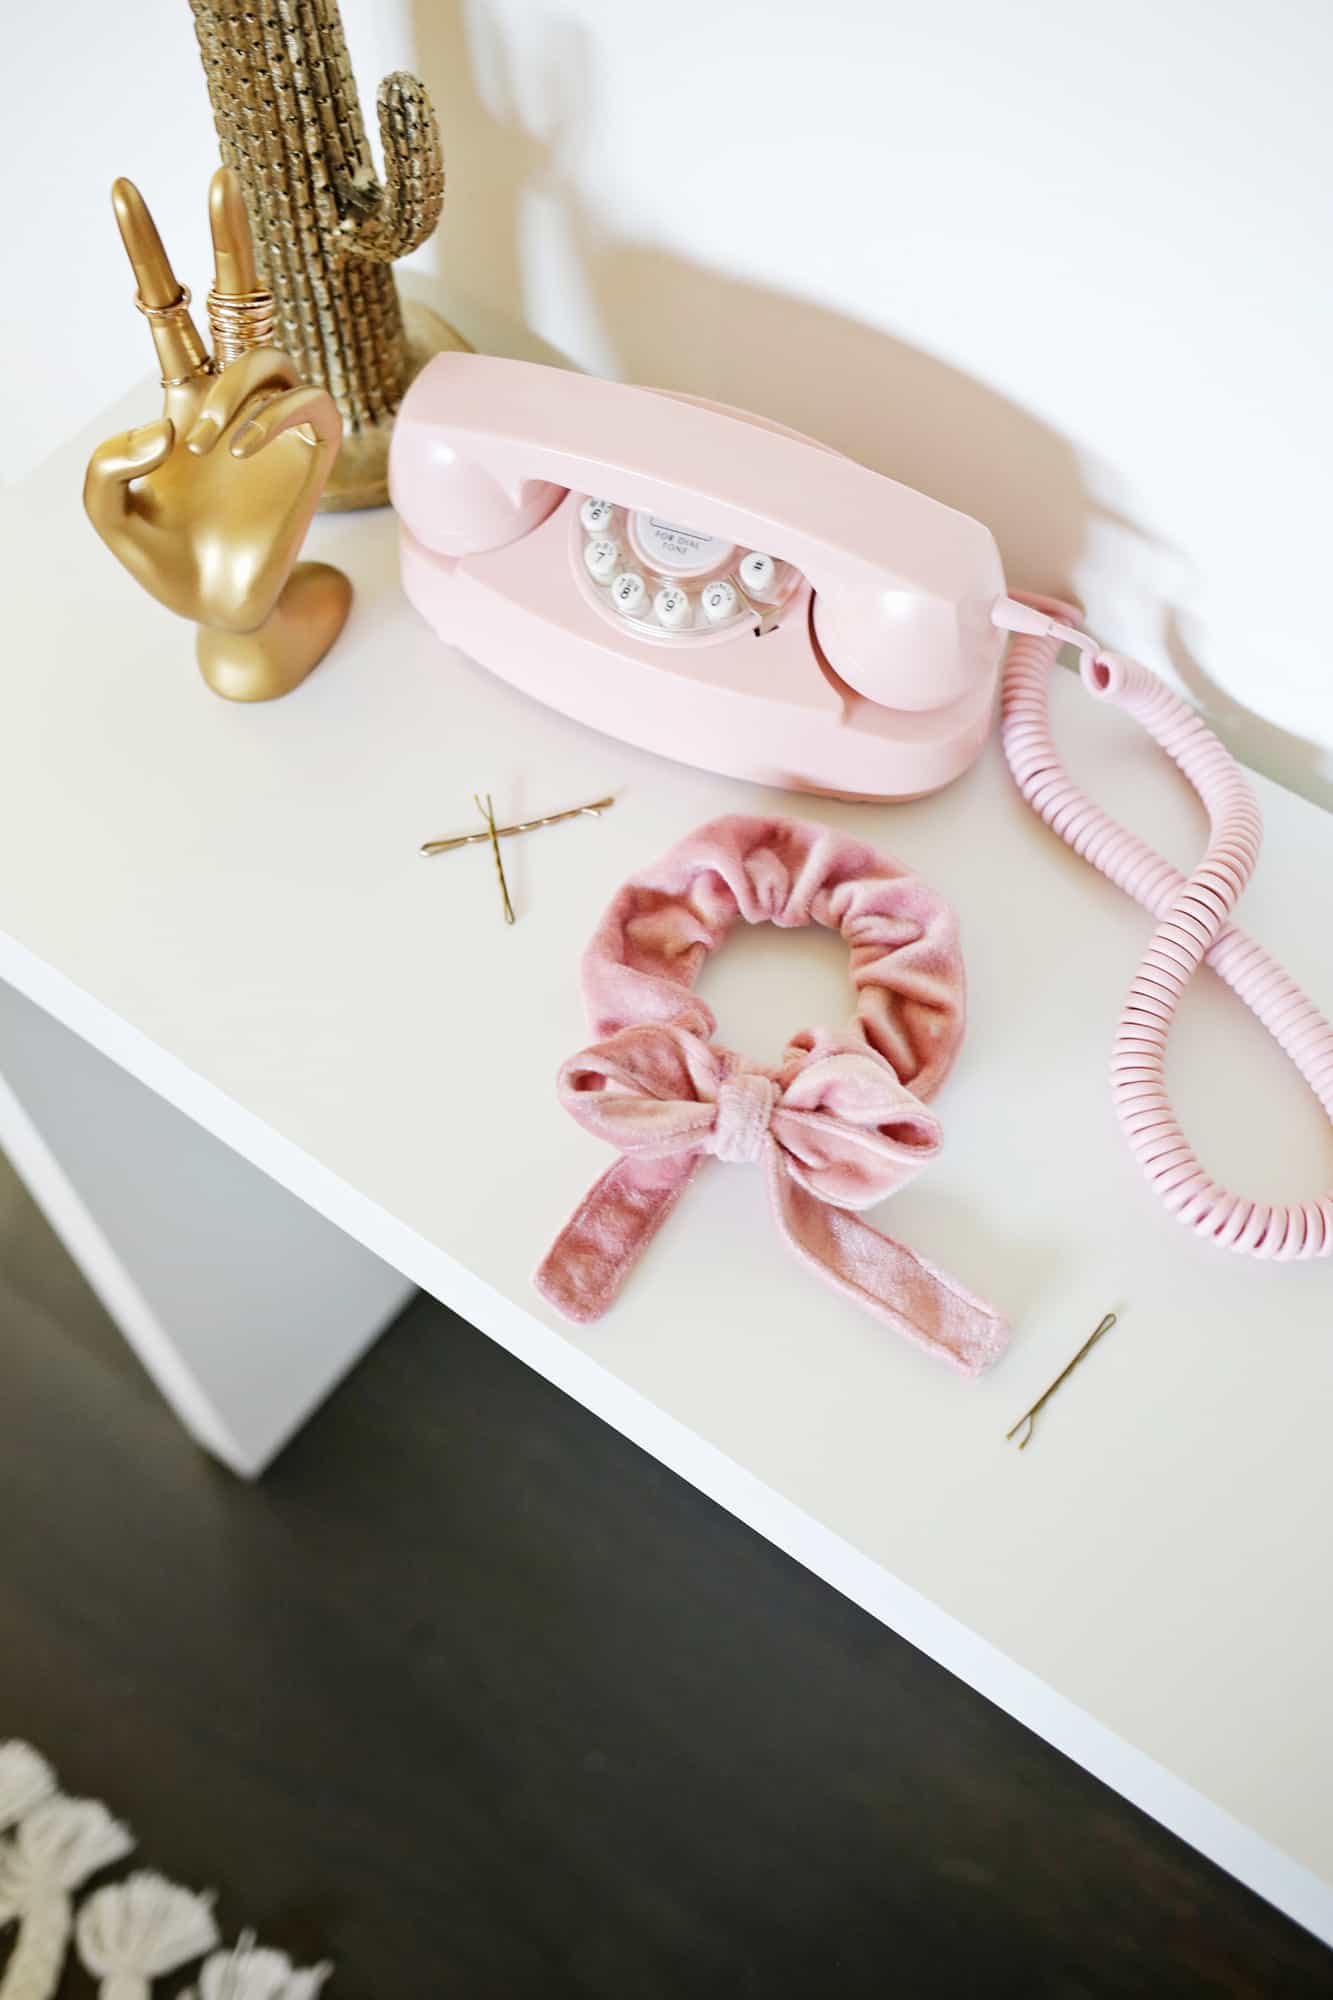 So sweet! There’s lots of ways to style a bow scrunchie, but you can see my favorite way to do it on our IGTV channel. Using different patterns and fabrics can also make your scrunchie more seasonal as well, so feel free to make new ones for summer vs. winter, etc.
Whether this is a new or a very old favorite of yours. Hope you enjoyed this easy tutorial for how to make a scrunchie. xo. Laura
DIY Bow Scrunchie
Ingredients
- small amount of non-stretch fabric
- fabric scissors
- sewing machine
- straight pins
- 1/4″ elastic
- saftey pin
Instructions
- First, you’ll want to cut out a rectangle of velvet that is 3.5″ x 18″ for your scrunchie and another long strip that is 2.5″ x 25″ for your bow. Fold over the top 1/4″ inch of your rectangle and sew flat to create a finished edge.
- Fold your scrunchie rectangle in half lengthwise, right sides together, and pin the open side closed with pins. Sew down the open side with a 1/4″ seam allowance so that you create a tube.
- Turn the tube right side out by pinning a safety pin to one end and feeding the pin through the tube until it comes out the other end and your tube is right side out.
- Cut a piece of elastic 8″ long. Use a safety pin at one end of the elastic to thread it through the tube and come out the other side (just feel around to make sure the elastic didn’t twist in the tube during the process).
- Sew the ends of your elastic together. Tuck your unfinished scrunchie edge into your finished edge and pin them flat together.
- Sew down the finished edge line to secure both layers together with the elastic band between them. Don’t worry about that flat spot, as your bow will cover it!
- To make your bow, (1) fold your long strip in half lengthwise, right sides together, and pin in place. Sew along the top with a 1/4″ seam allowance. (2) Open the top right side out again and attach a safety pin in the top inside corner before (3) turning it back to having both right sides touching again and the pin sandwiched between the layers. (4) Sew down the side of your long strip but leave an opening of 2-3″ towards the bottom and then continue all the way down the side and along the bottom edge. (5) Find your safety pin that you pinned in the top corner with your fingers and use that to pull the top corner towards the opening in the bottom corner, eventually (6) turning the whole strip right side out. Remove the safety pin.
- Top sew all the way around the edge of the strip with a 1/8″ seam allowance to close up your gap and give the bow a finished, and flattened, look.
- Tie your bow onto the flat spot on your scrunchie and you're finished.
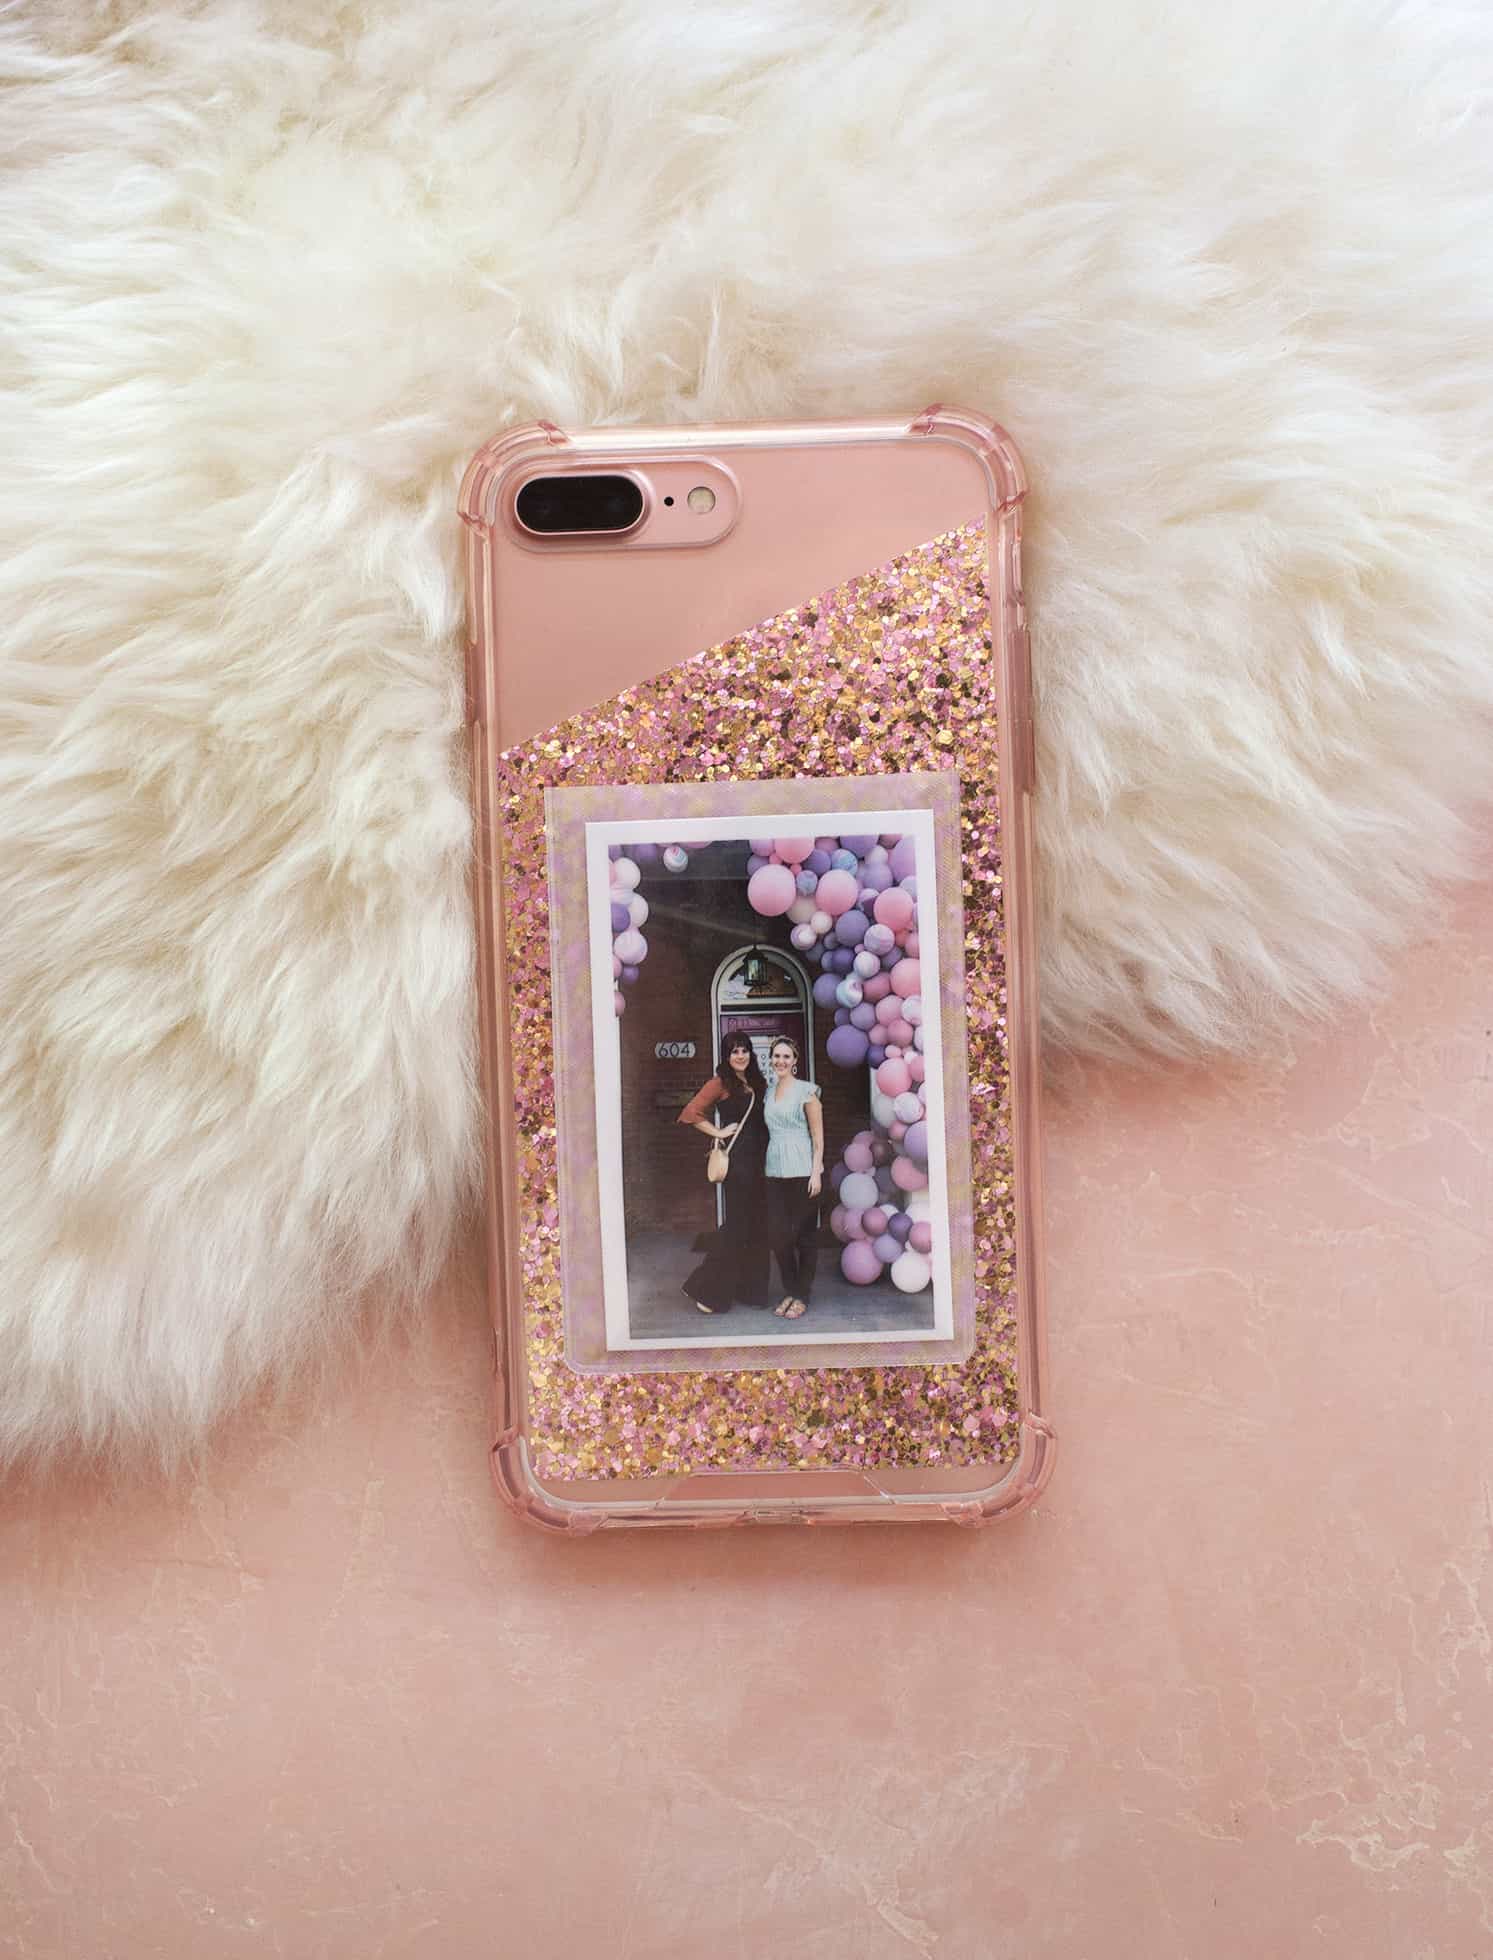 Hi, friends! Today, I’m sharing a super simple craft project for dressing up your mobile phone. Not only is this project really cute and we get to use my favorite craft supply (glitter!), but I also think this would be a perfect craft project to do with friends at a little get together or party. I’ll explain more as we go.
I’m working with Canon USA and I’m really excited to show you their new IVY Mini Photo Printer!!!!! You may have seen us using this on our IG account. It’s a compact (and cute) instant printer that can print directly from your phone (through an app) or social media. It prints colored prints that are 2×3 inches and have a peel and stick back. This little printer would be great to take to a party (like for a photo booth) or to give as a gift. I am pretty obsessed with mine already!
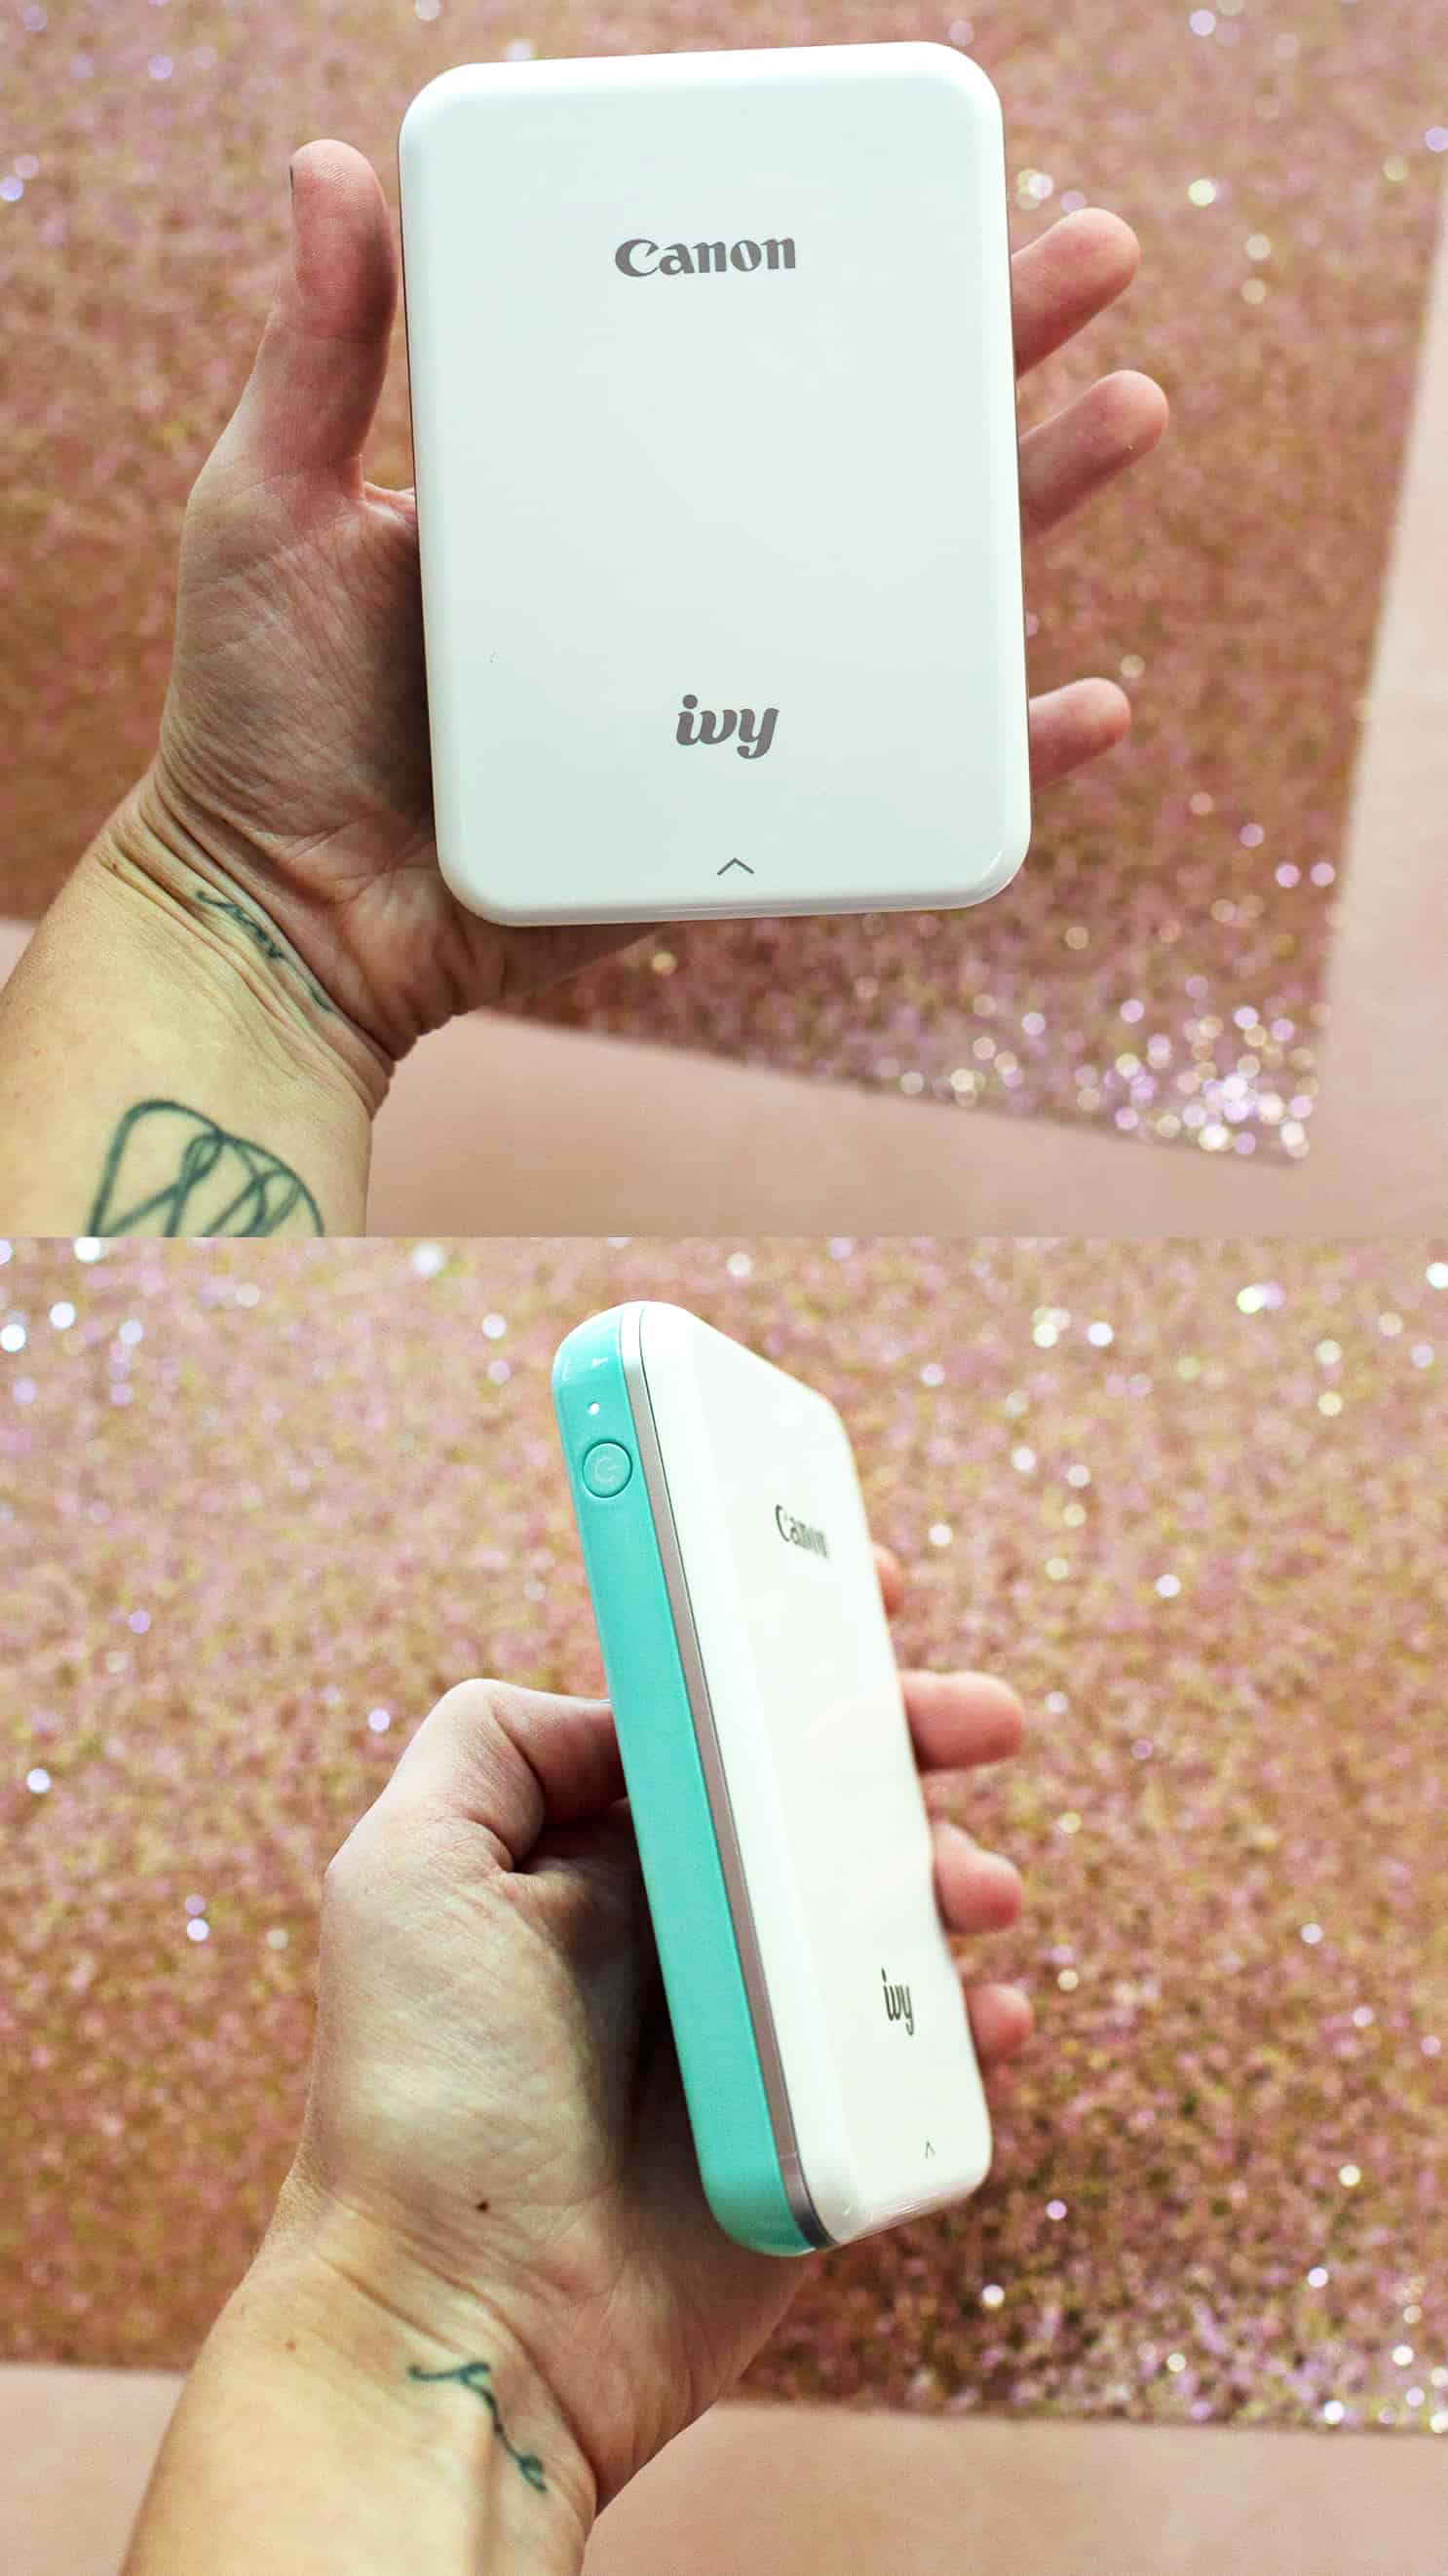 Here is my IVY, I chose the Mint Green color (it also comes in Rose Gold and Slate Gray). As you can see, it fits in the palm of my hand and I have pretty small hands.
OK, so before we dive into this DIY photo cell phone case project, I have a quick story for you. Recently, I went to a cupcake decorating workshop where we were supposed to learn to create succulent cupcakes. Although it was really fun and we had cupcakes to eat at the end (so I can’t complain!), I did think the course was advanced enough that the designated “instructor” had a hard time keeping everyone on track, and ultimately I didn’t really learn a lot. No biggie, as I said it was fun anyway. But if you’ve ever tried to host a craft night with friends before, or have an easy project for a shower or party you were hosting, you probably know this dilemma. Basically, you need a project everyone can be successful with (so it’s EASY), but you still want the project to be cute and fun and also those who want to go a bit deeper with the project are able to. So that’s why I think this would be a great one for the next craft night. Just tell everyone to bring a clear phone case that fits their phone and you could easily supply the rest. And you could easily print their photos at the party too with the IVY printer.
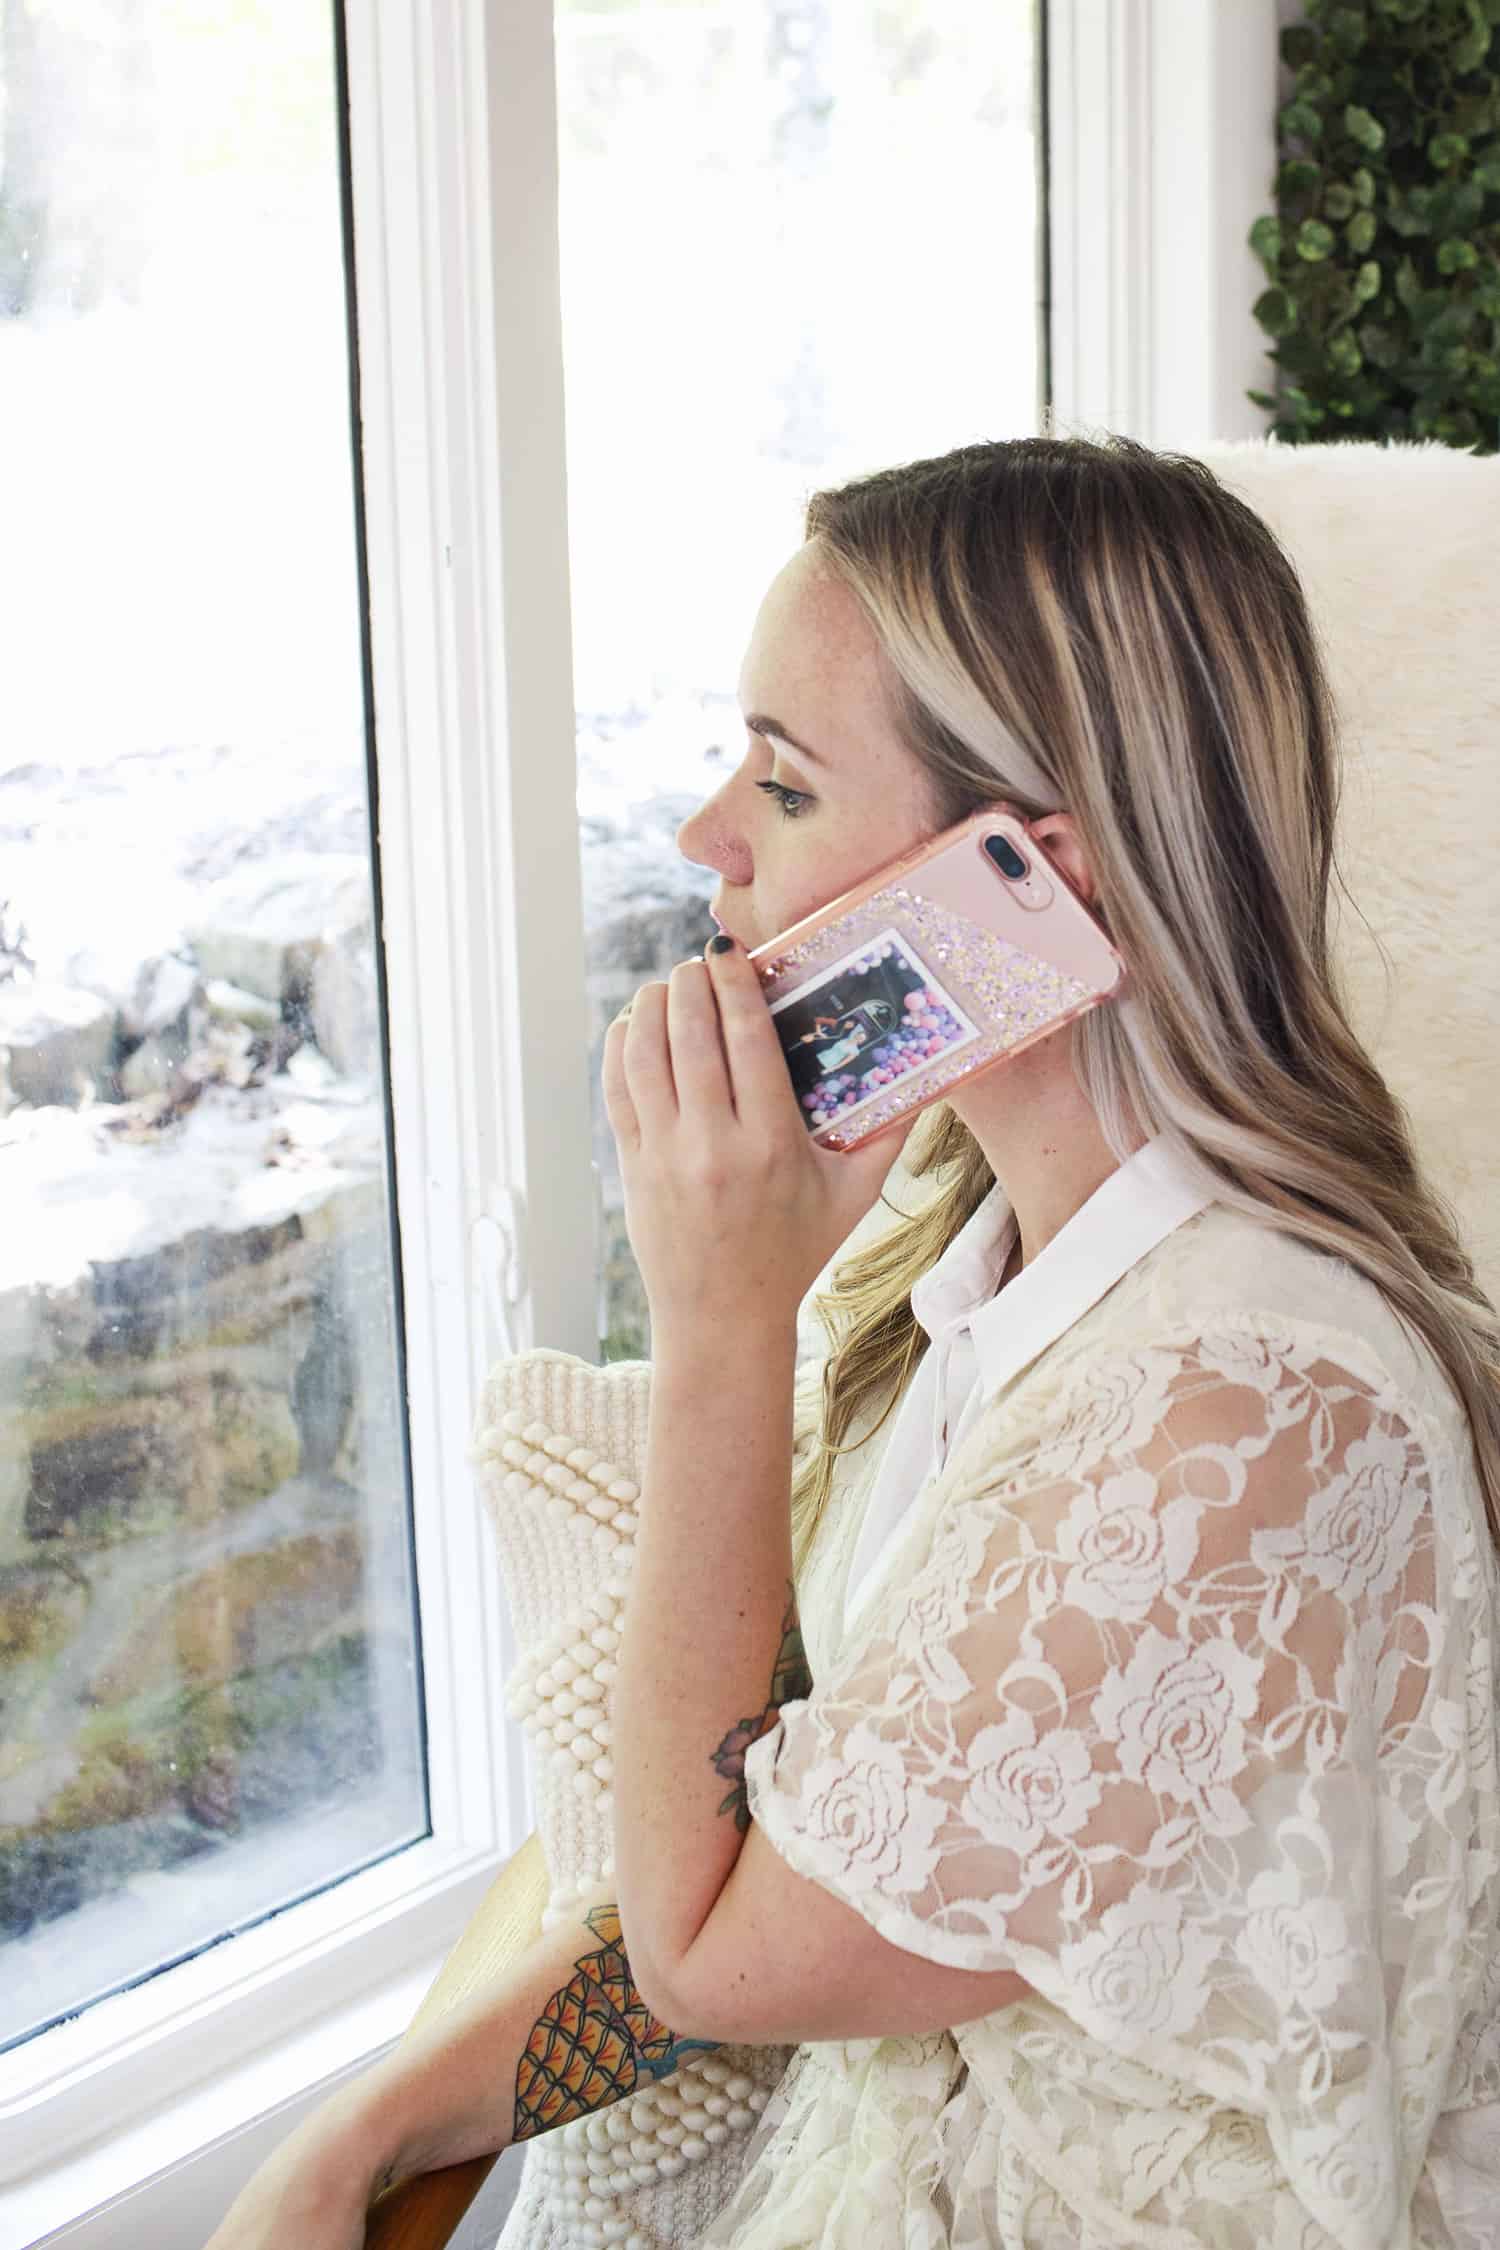
You can also just make this project for yourself. That’s what I did. I already had one person at the gym tell me how cute they thought my phone case was too. So, clearly, a win.
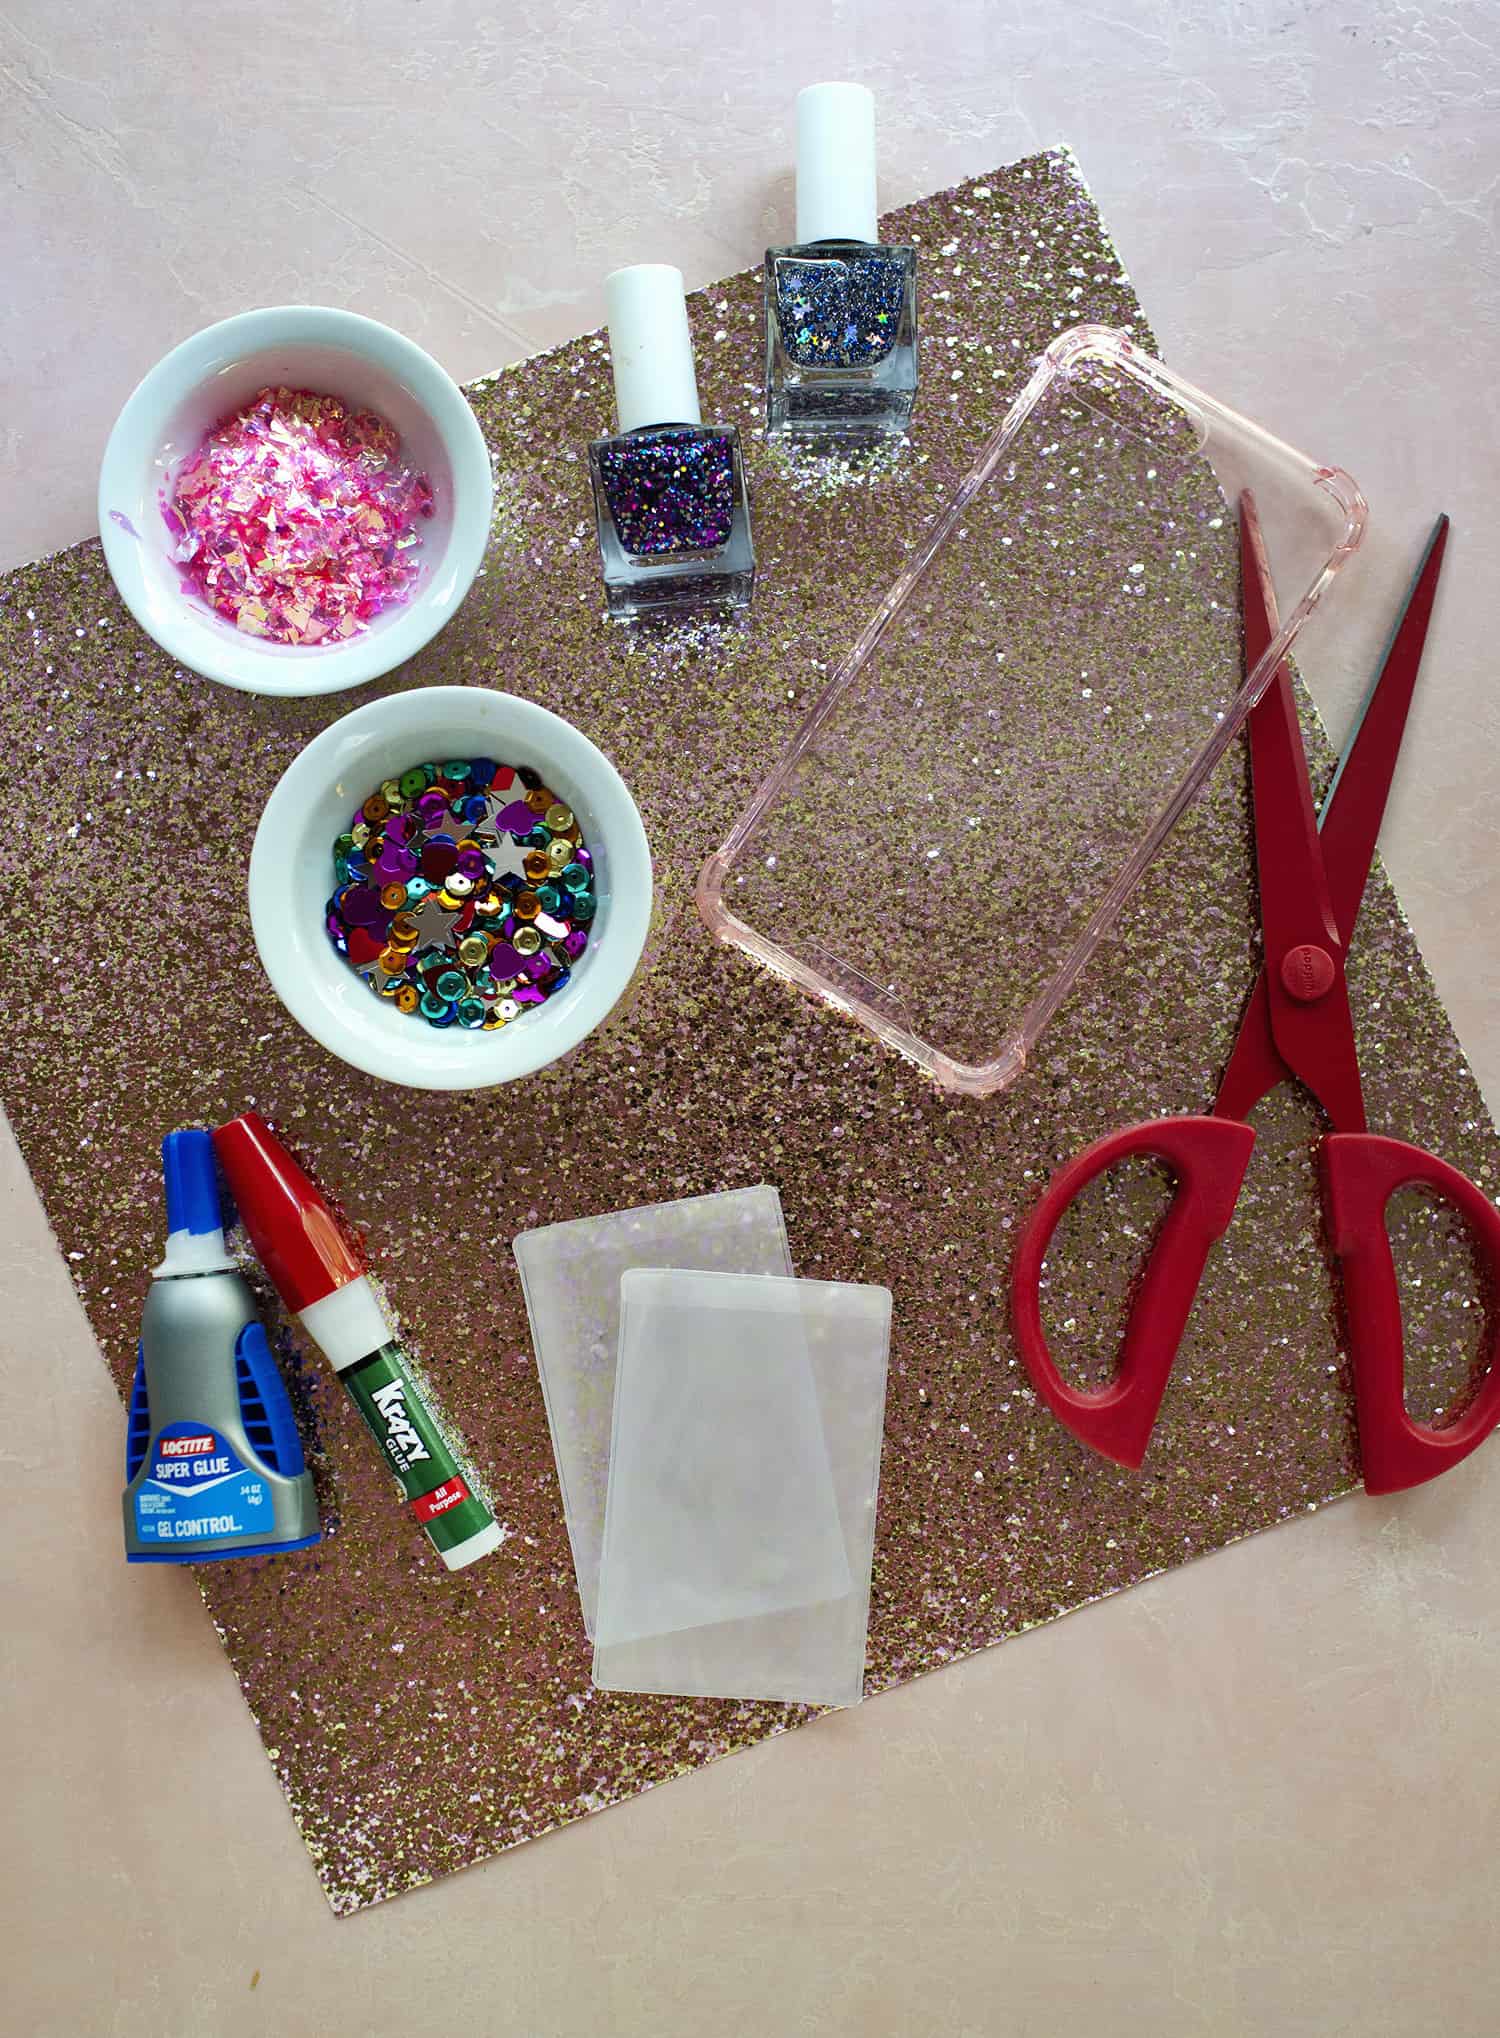 Supplies:
–clear cell phone case
–business card plastic sleeves
-glitter paper, glitter, or sequins
-craft paint or nail polish
-clear drying glue*
–IVY Mini Photo printer
*I tested both glue types in the above photo and I’ll share my favorite. But there are probably many brands that could work, as you just want something that dries totally clear and doesn’t streak.
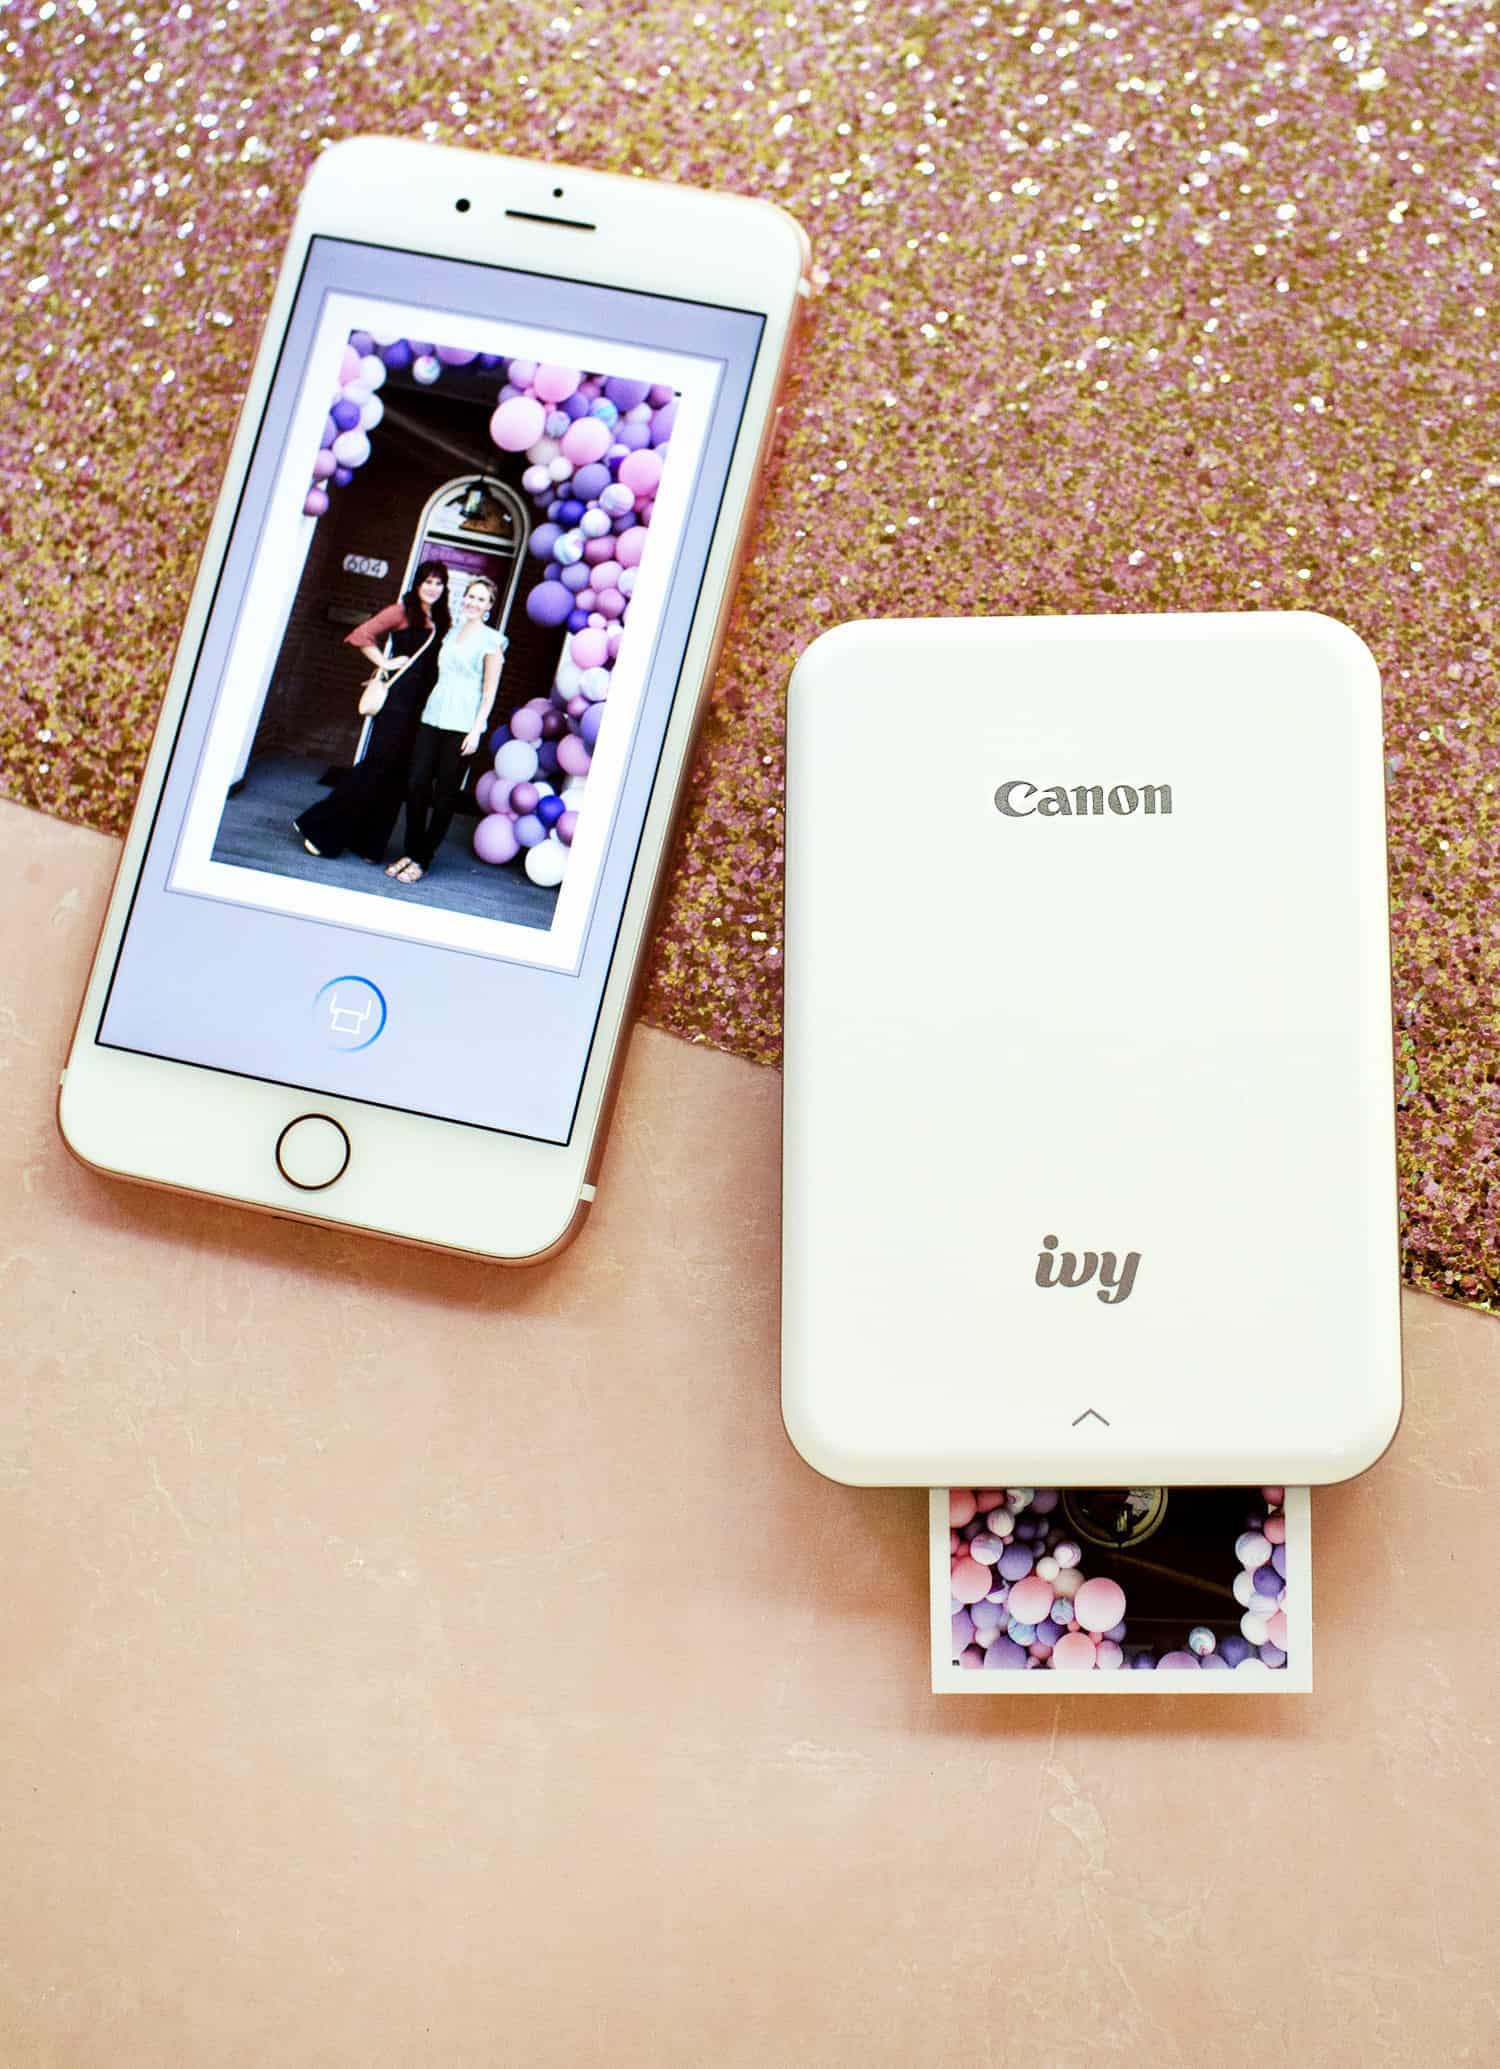 Step One: Print your photo. The IVY Mini Photo printer comes with instructions which are really easy to follow (I was so impressed!). You basically will need to charge the printer, download an app (Canon Mini Print), then follow the app prompts to print your first photo. Then you’re good to go to. The app allows you to print from any folder on your phone or from social media. There are also little frames and stickers you can add to your photos before printing. Here you can see I added a plain white frame to my photo before printing. But you can also just print your photos as is, too.
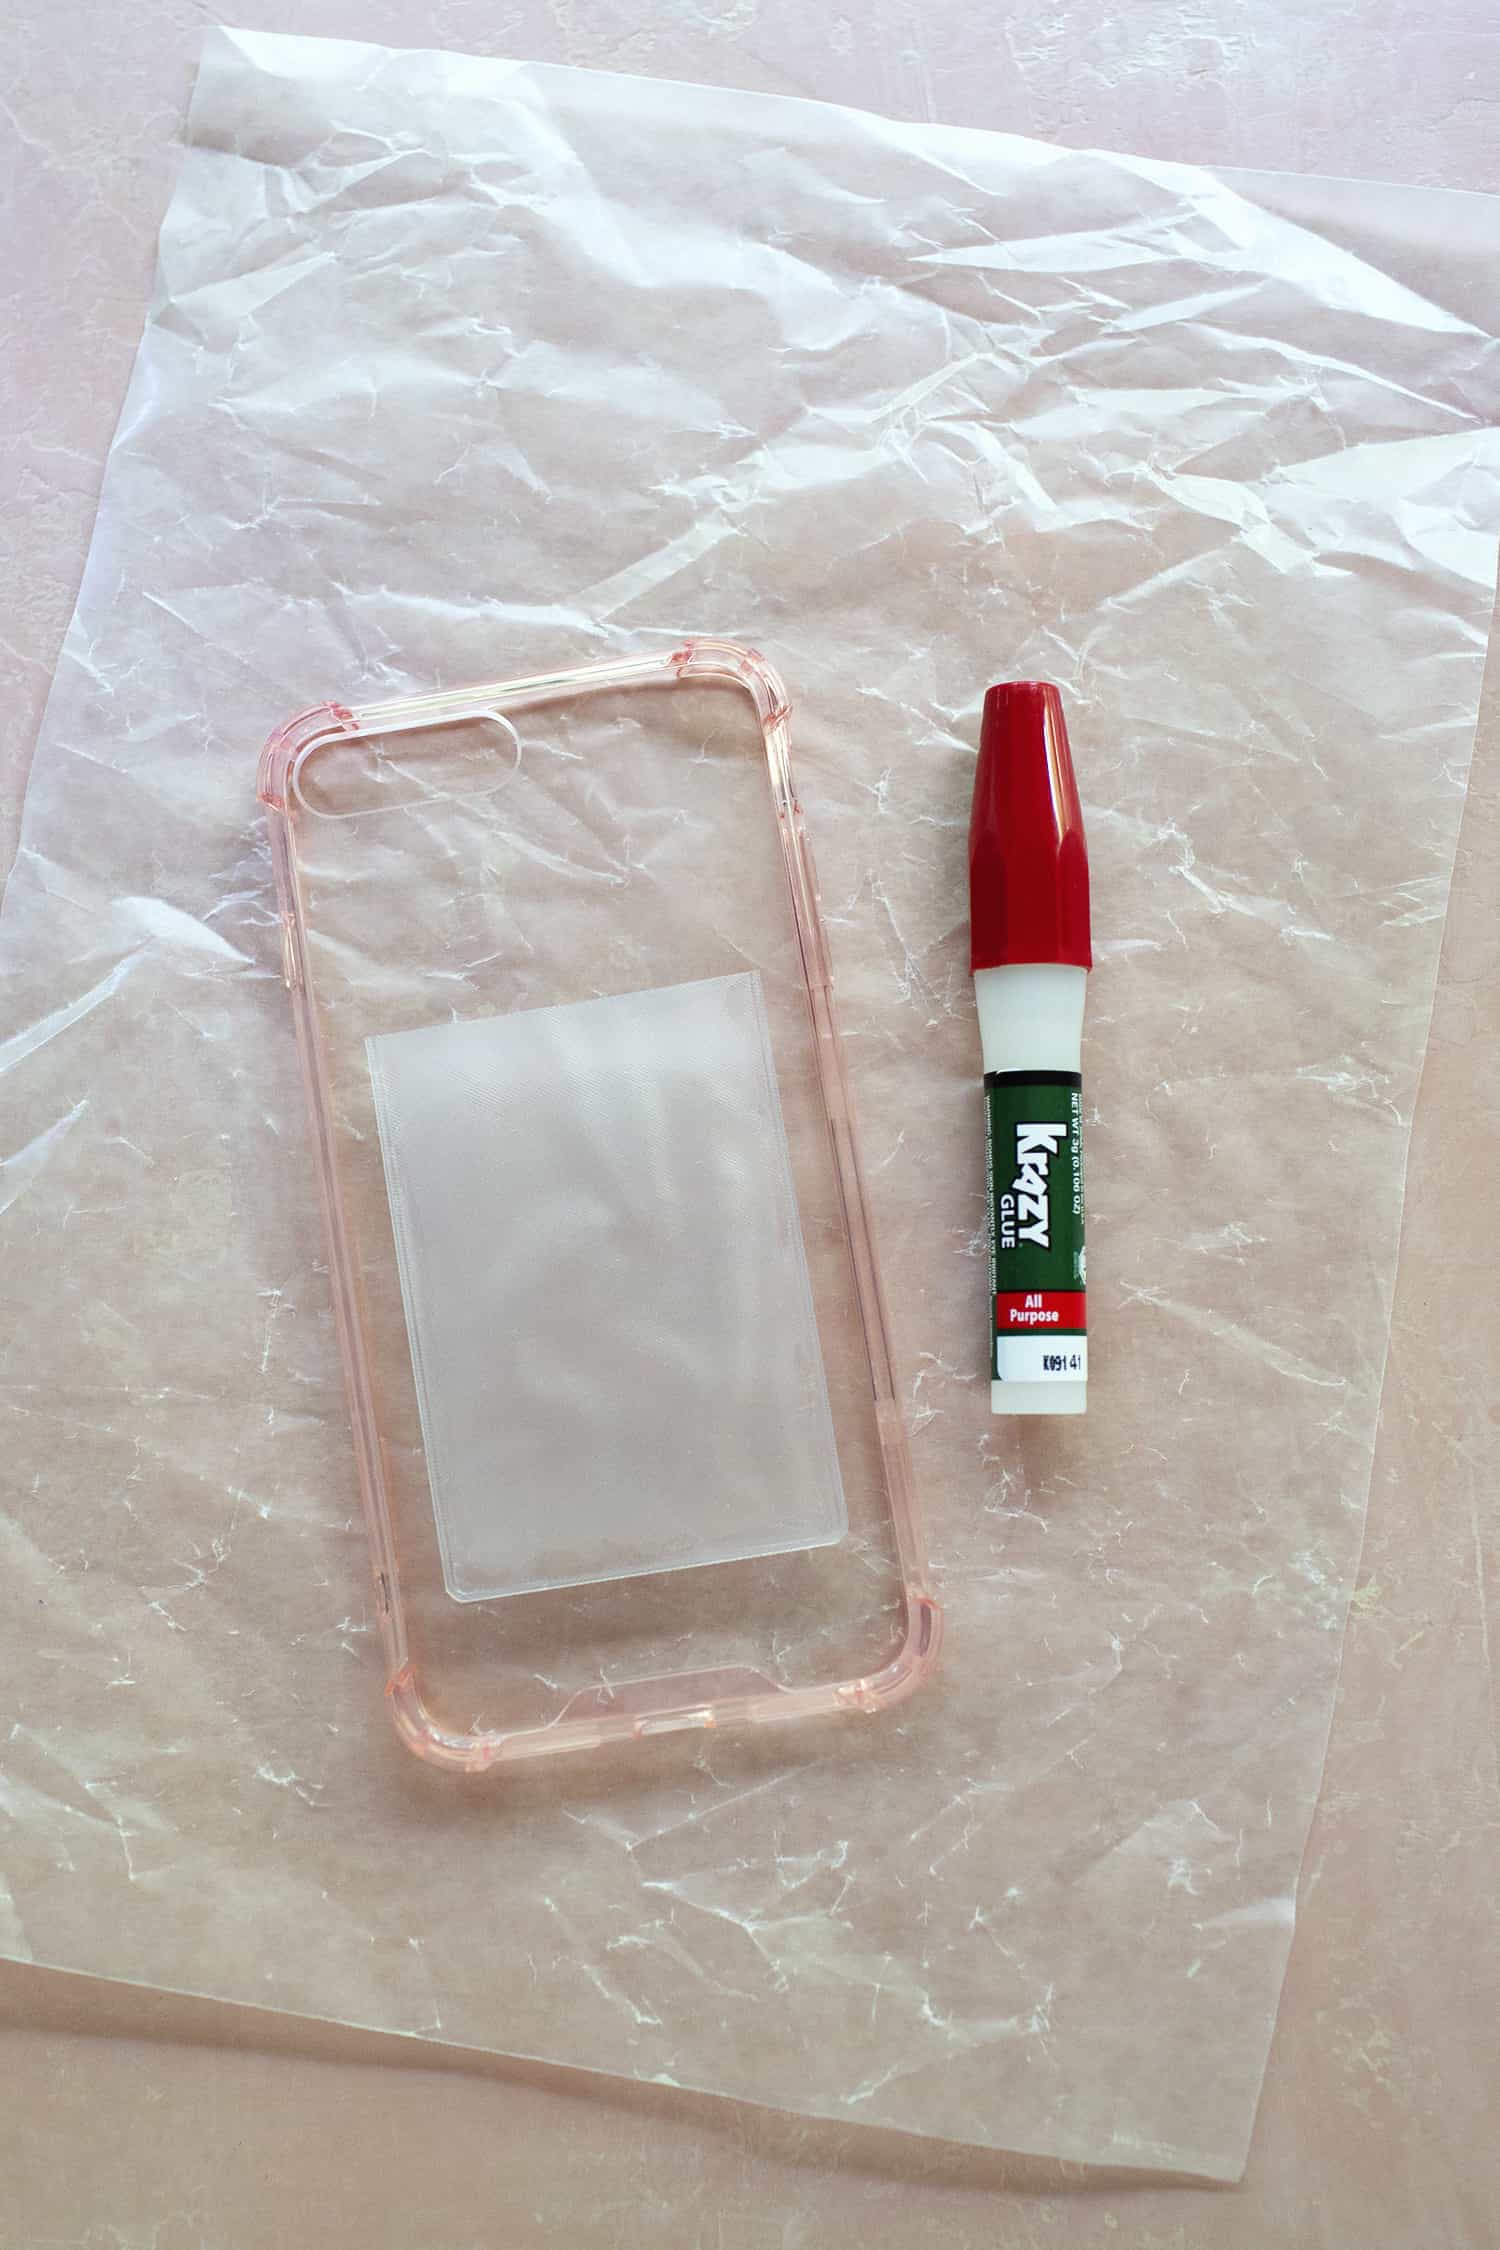
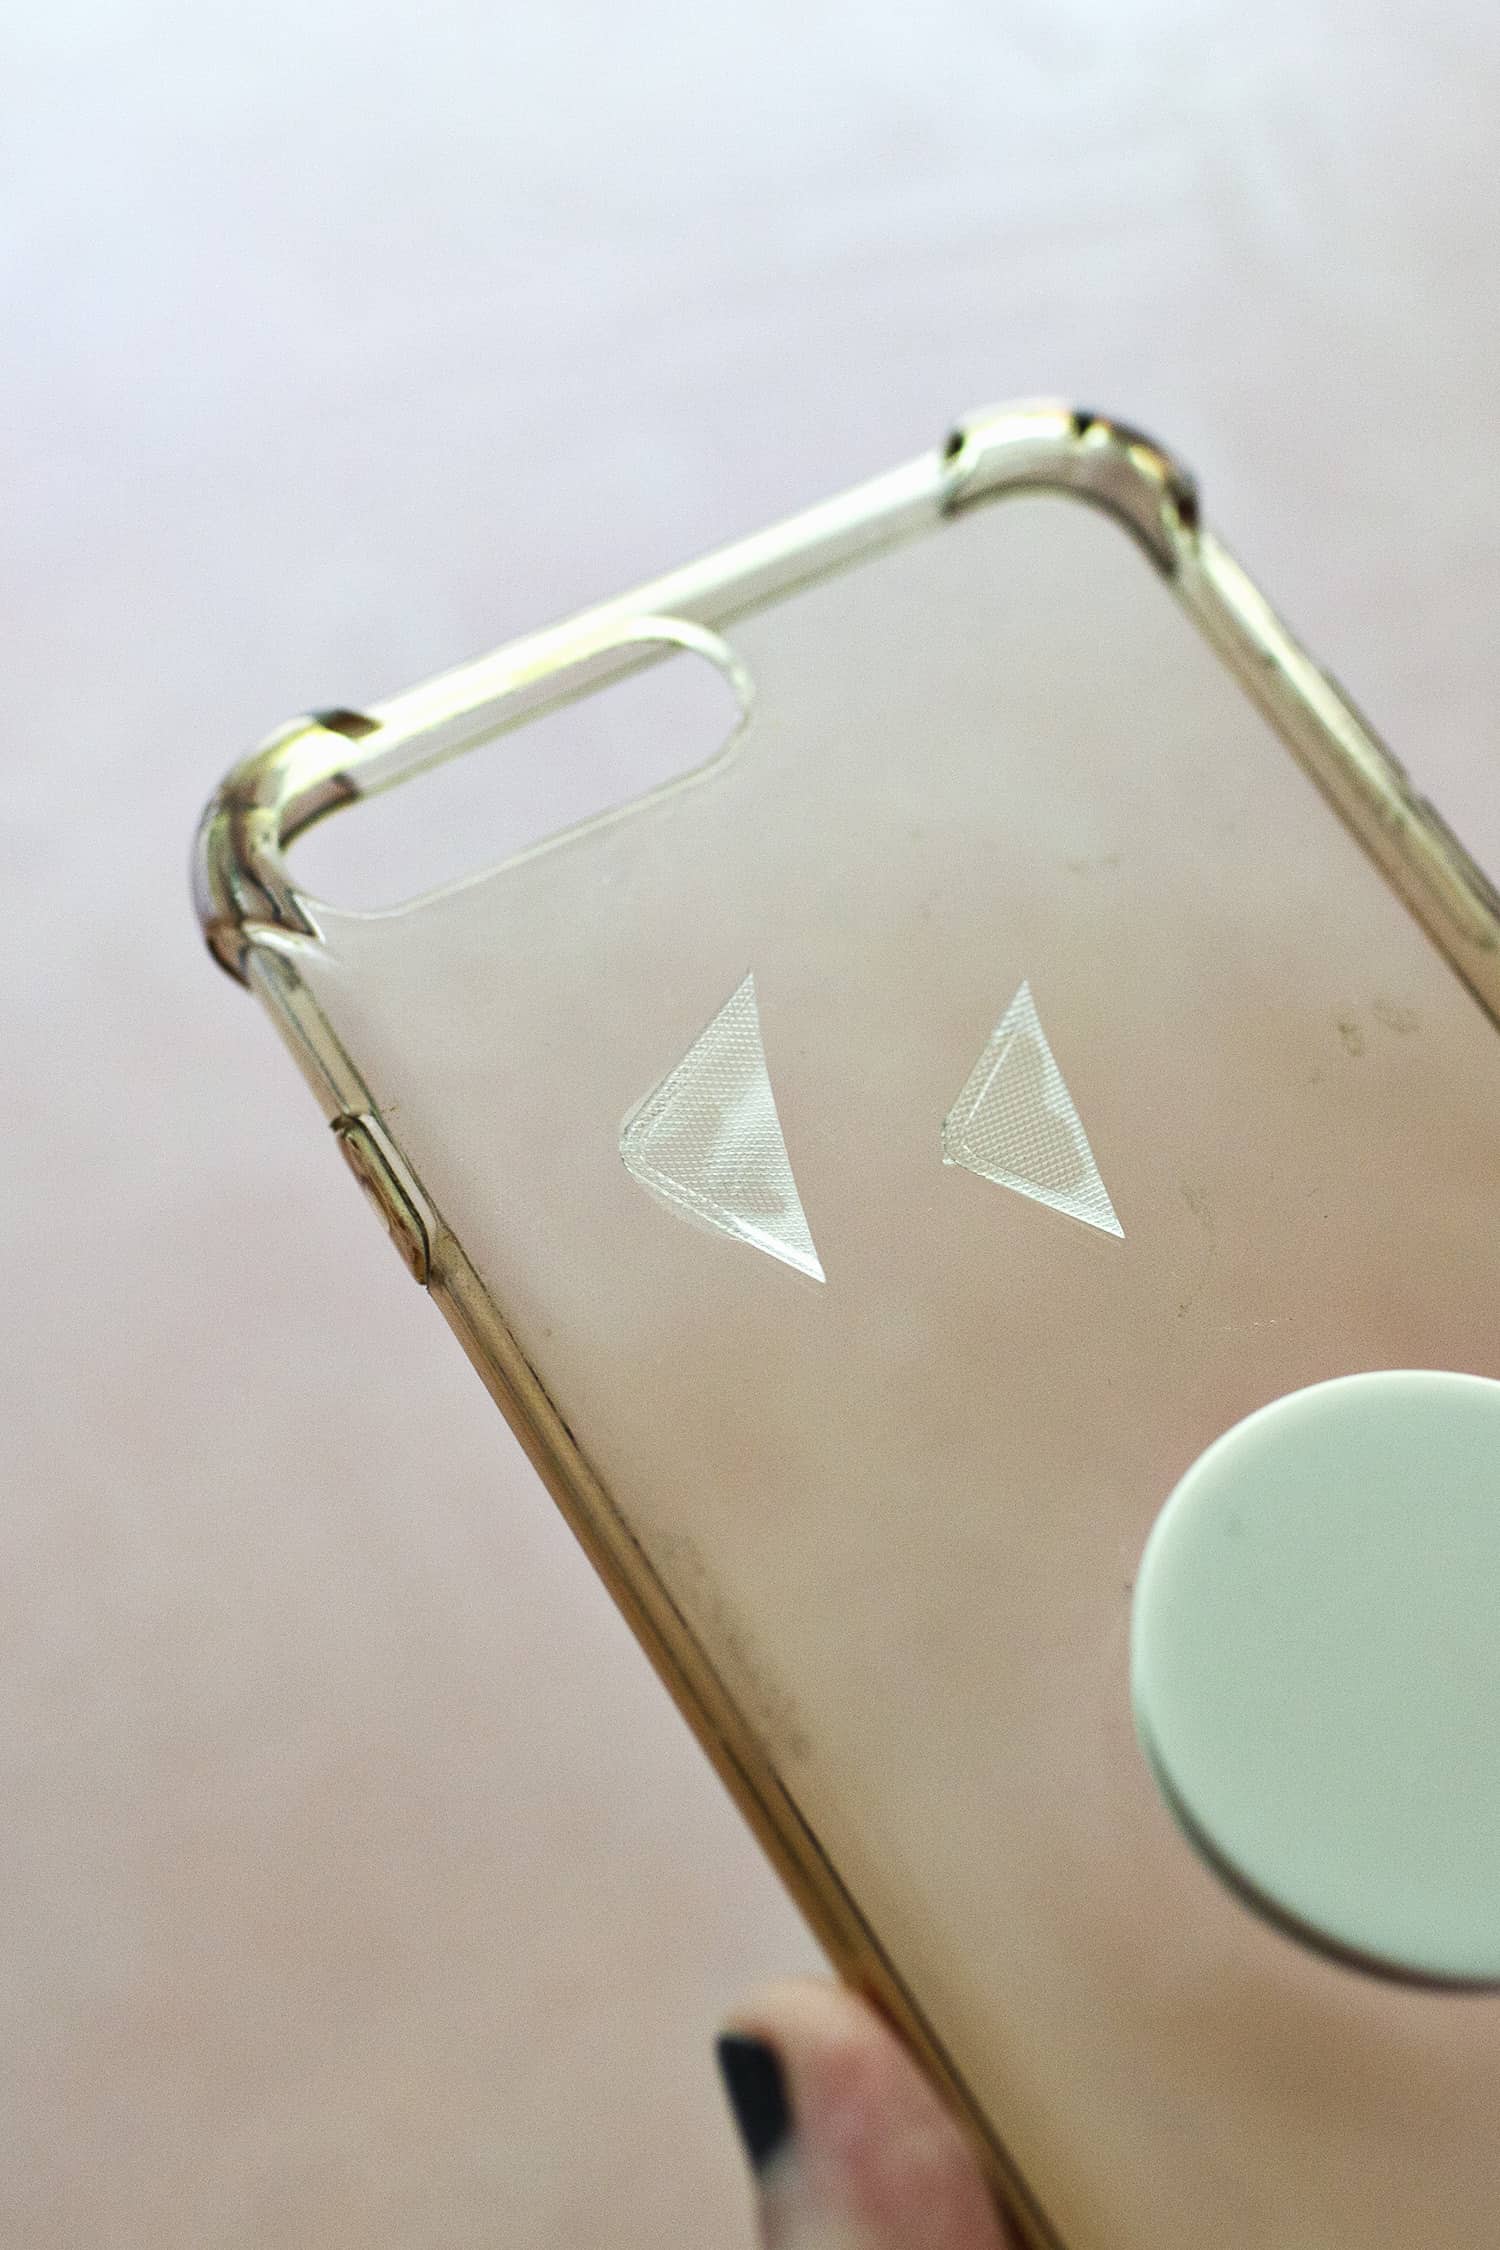 On my old (yellowing) cell phone case, I decided to test out the glues to see which one would be super strong but not visually noticeable at all. I liked the Krazy glue pen more (it’s the one on the right in the photo above).
Step Two: Adhere the plastic sleeve to the outside of the phone case. As I mentioned above, the IVY paper is a peel and stick back so you could just stick them onto your case if you wanted. But I know myself well enough to know I’ll want to swap my photo out now and again because I like to change things up. So the plastic pocket is a better fit.
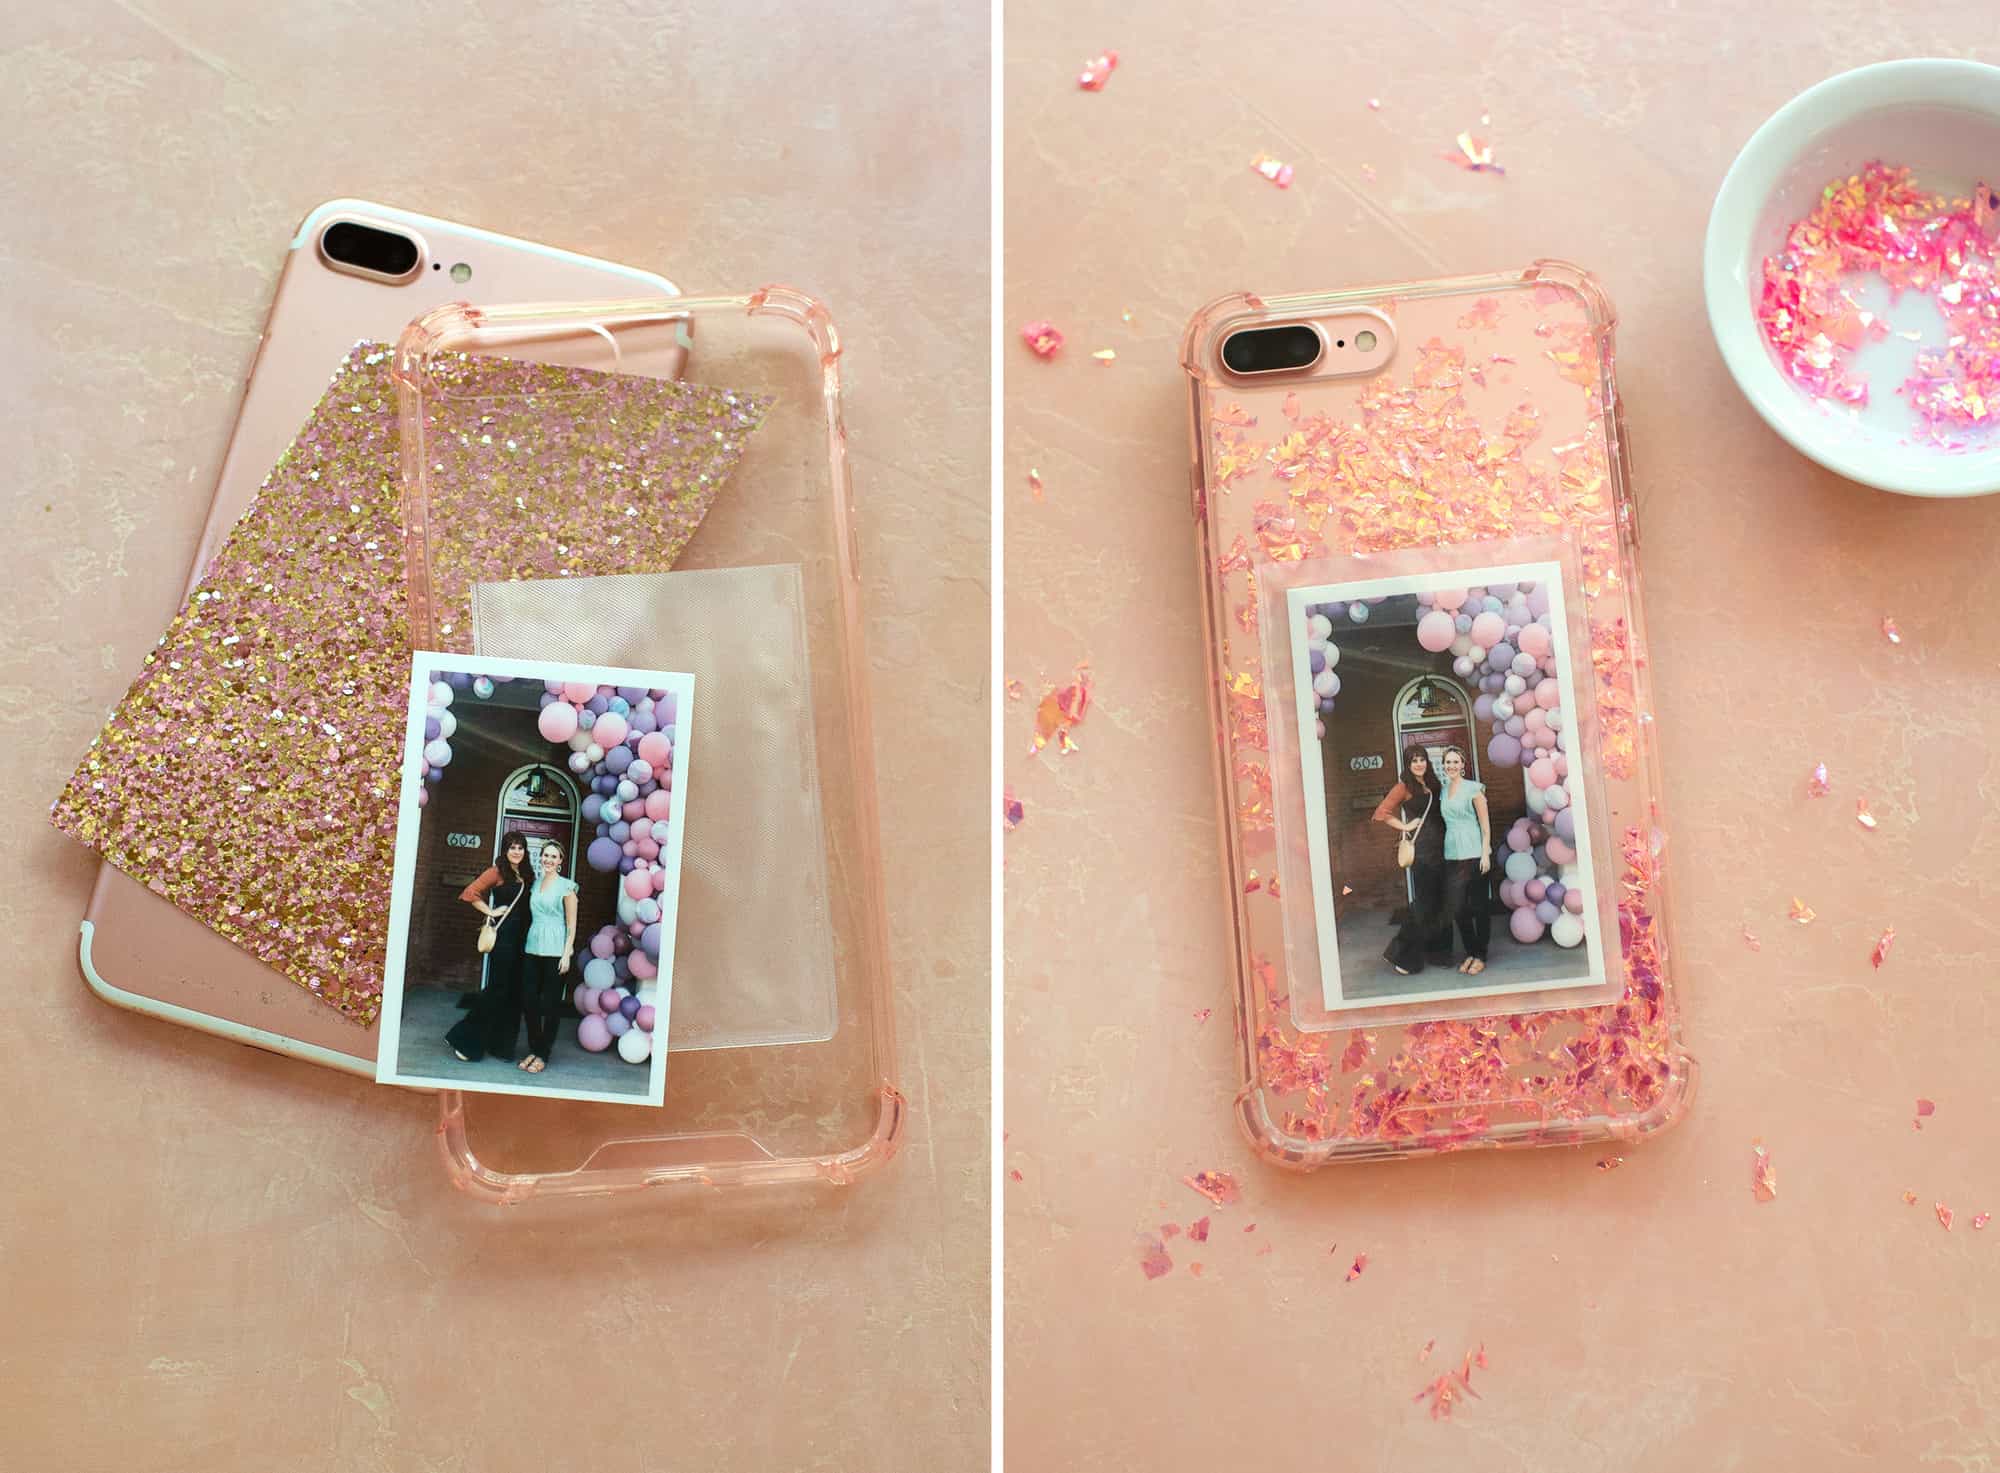 Step Three: Adorn the inside of your case and assemble. Here’s where you can get creative and use all sorts of materials if you like. You can glue glitter or sequins to the inside of the case, add glitter paper, other craft papers, or thin fabric. Or, you could paint the inside of your case with craft paints or nail polish. If you do glue or paint the inside of the case, make sure to allow it to fully dry before adding your phone.
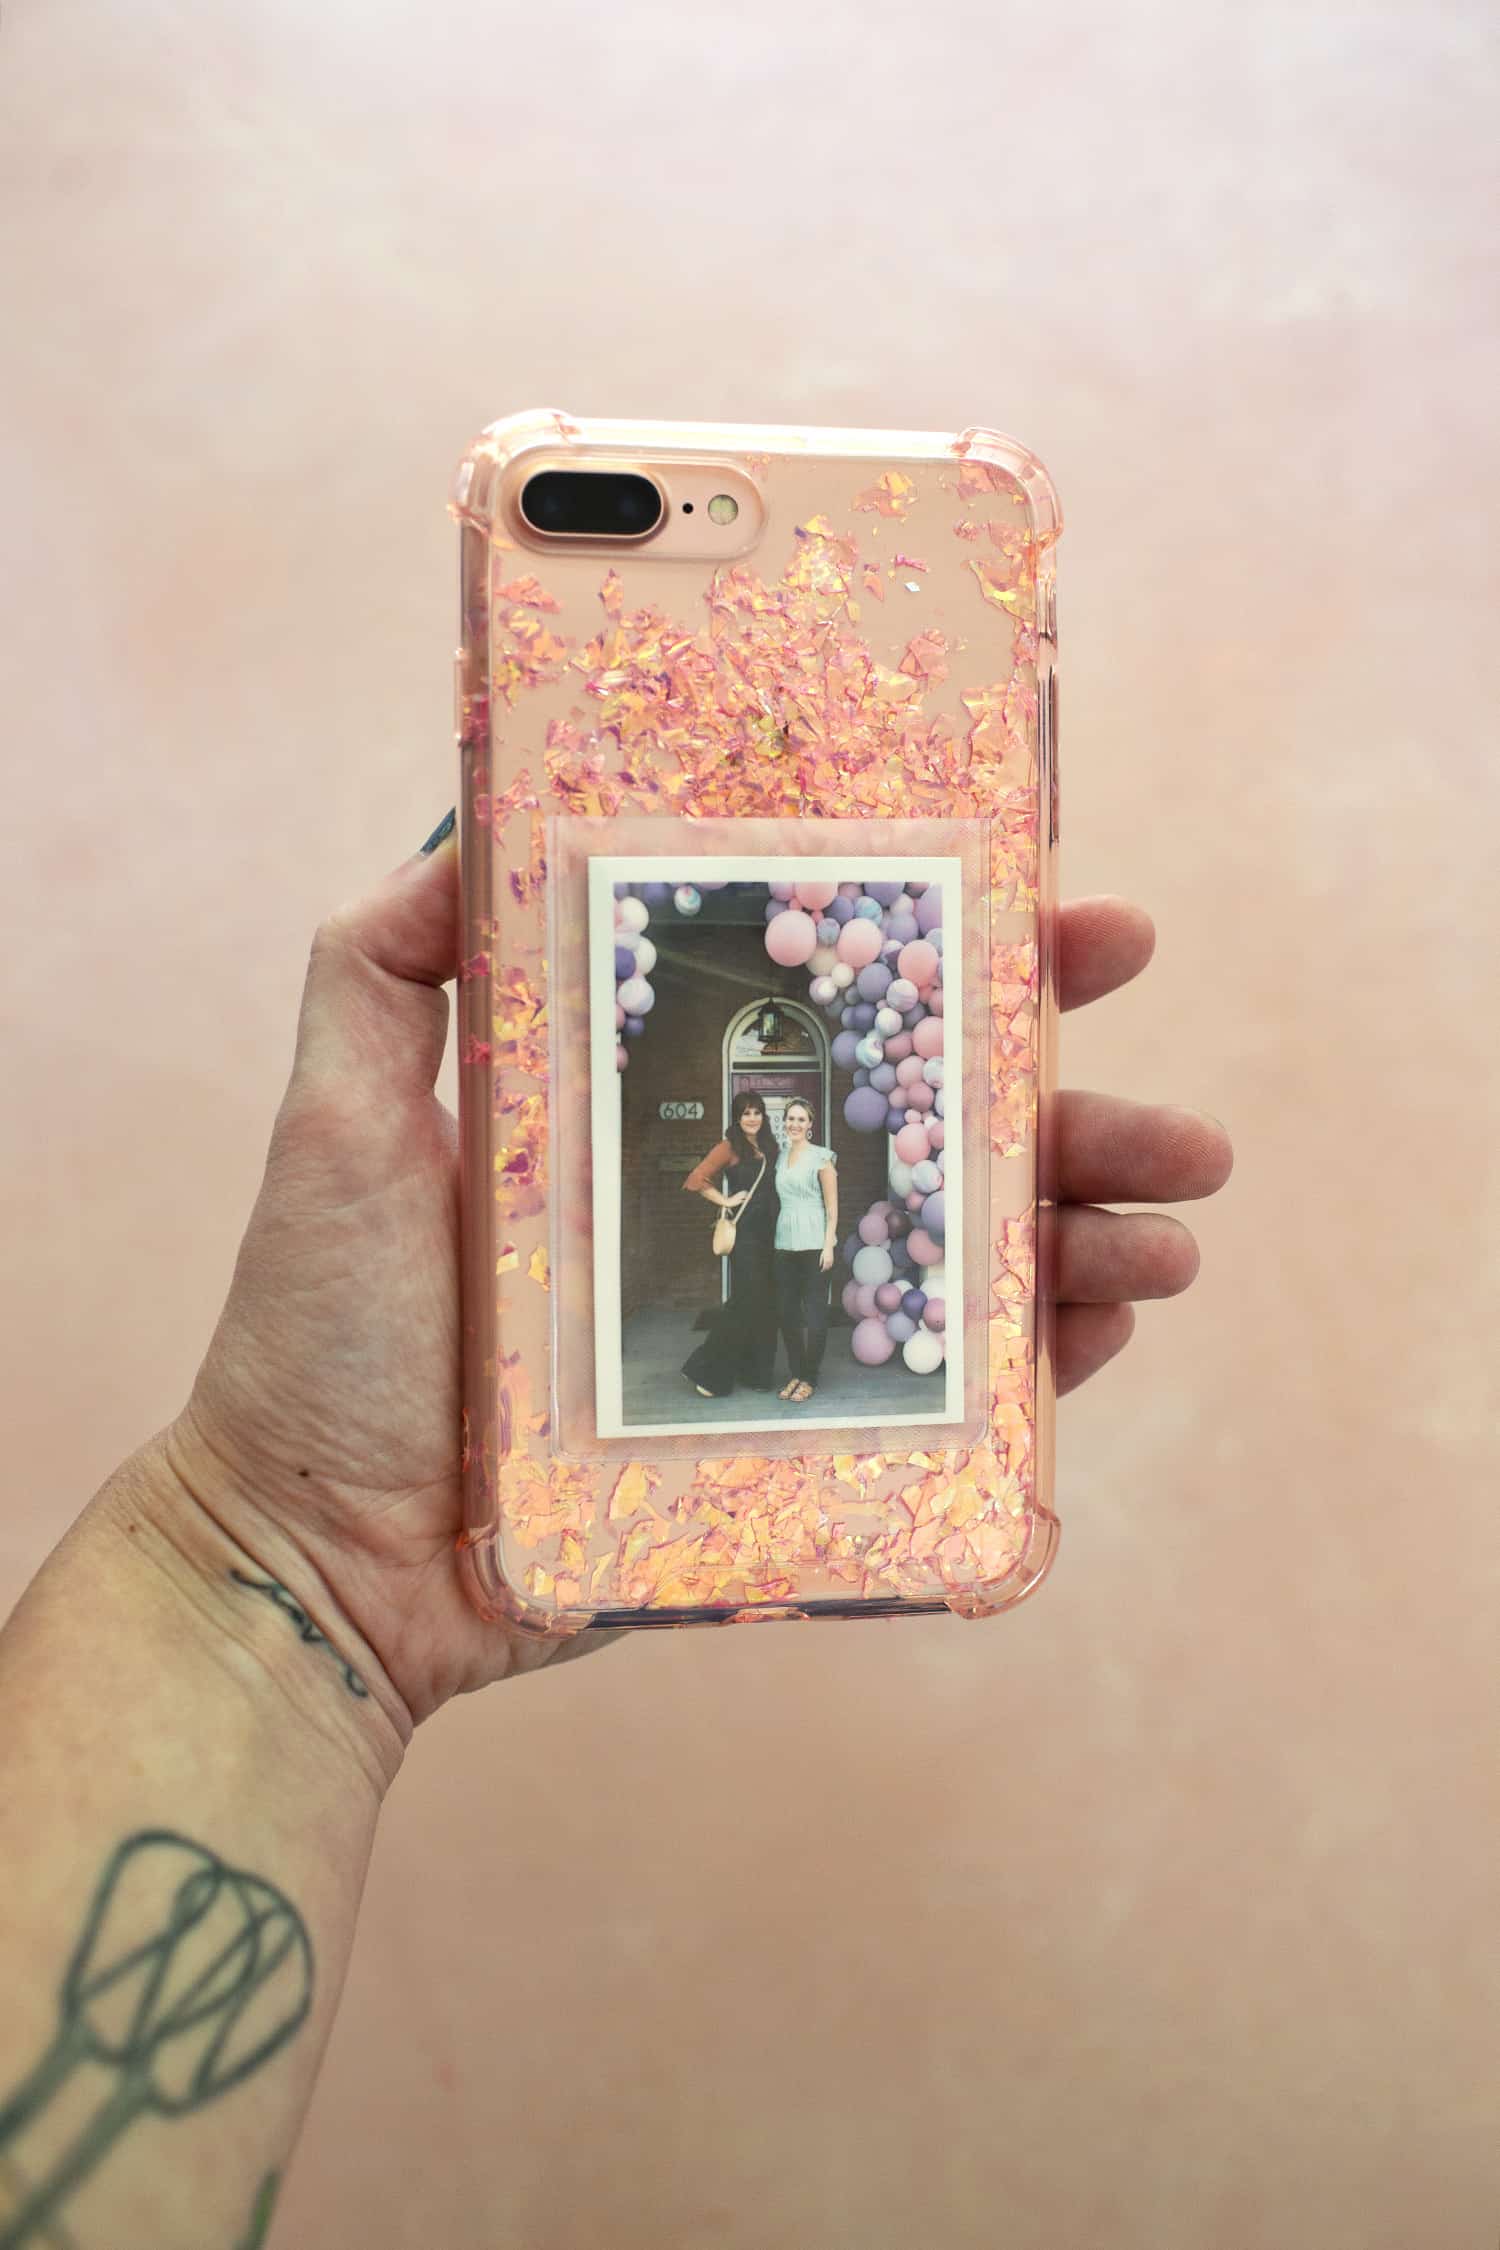 If anyone does use this project at their next craft night, PLEASE tag us so we can see! Thanks for letting me share. xo. Emma
P.S. Want more ways to dress your tech? Or would you like to see a more advanced photo printing project? Check our craft archives for lots more!
Credits // Author and Photography: Emma Chapman. Photos edited with A Color Story Desktop.
]]>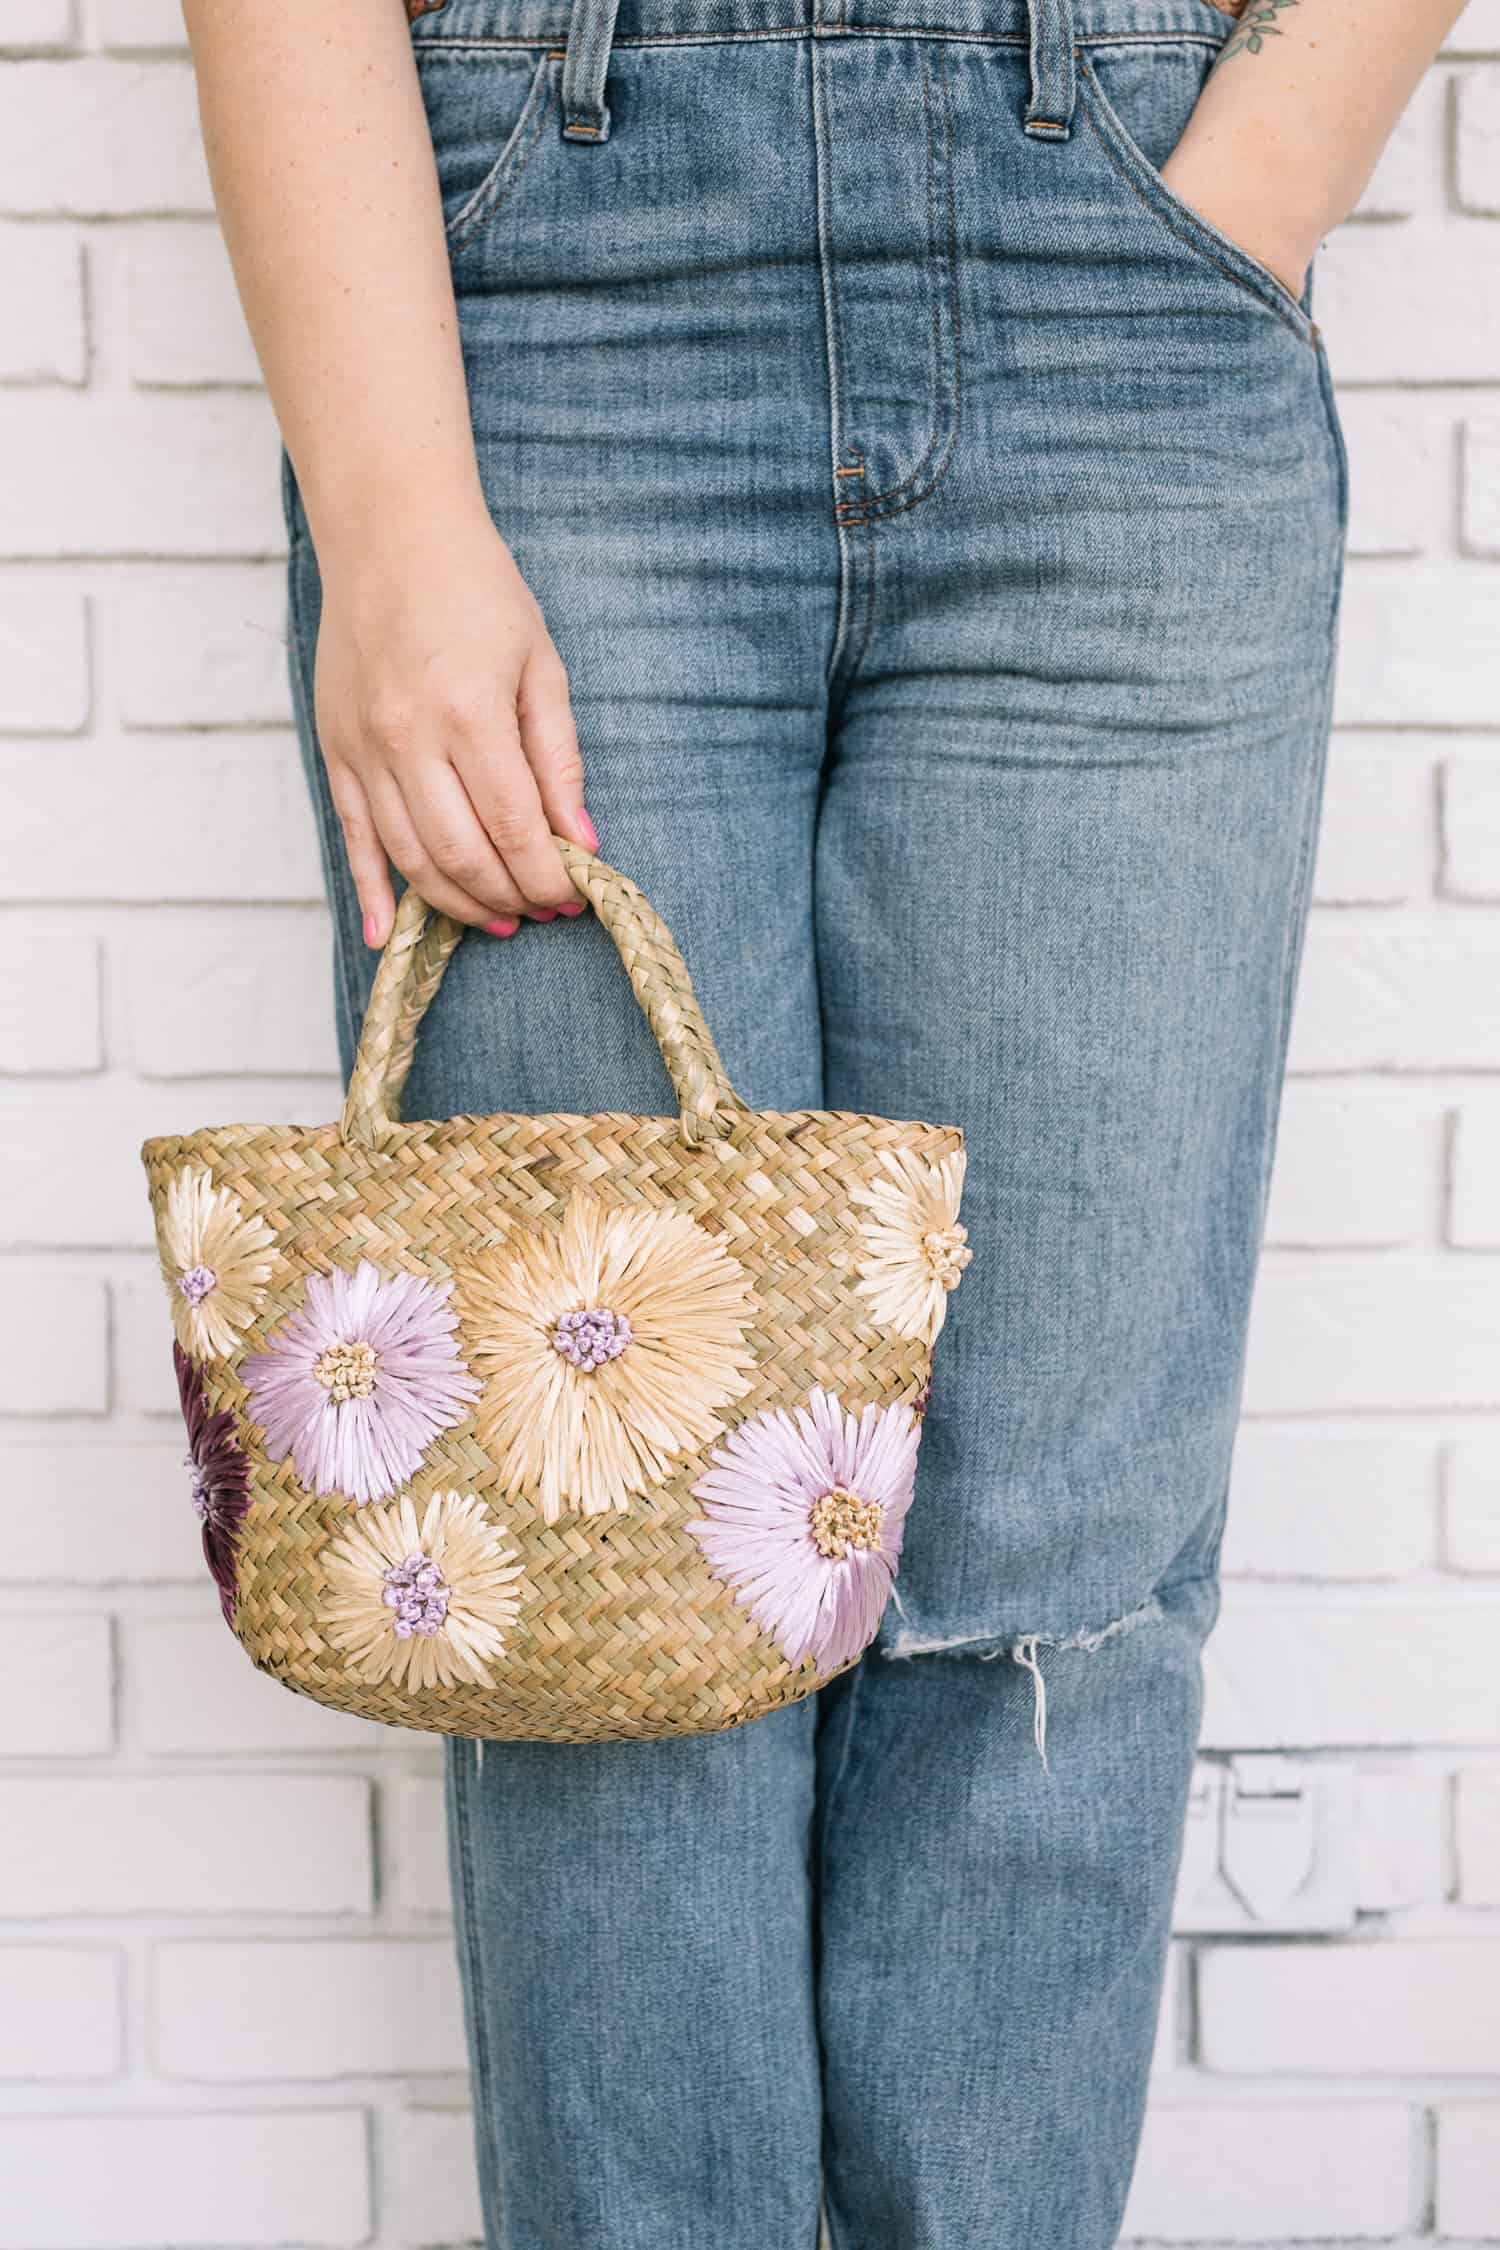 I made a stitched purse that looks more vintage than anything I have every DIYed. I am so proud of it! I made it for an IG video (see the video here!) which I have been doing more and more of lately. So I didn’t take full step-by-step photos, but it is so simple I can still teach you do it without the photos.
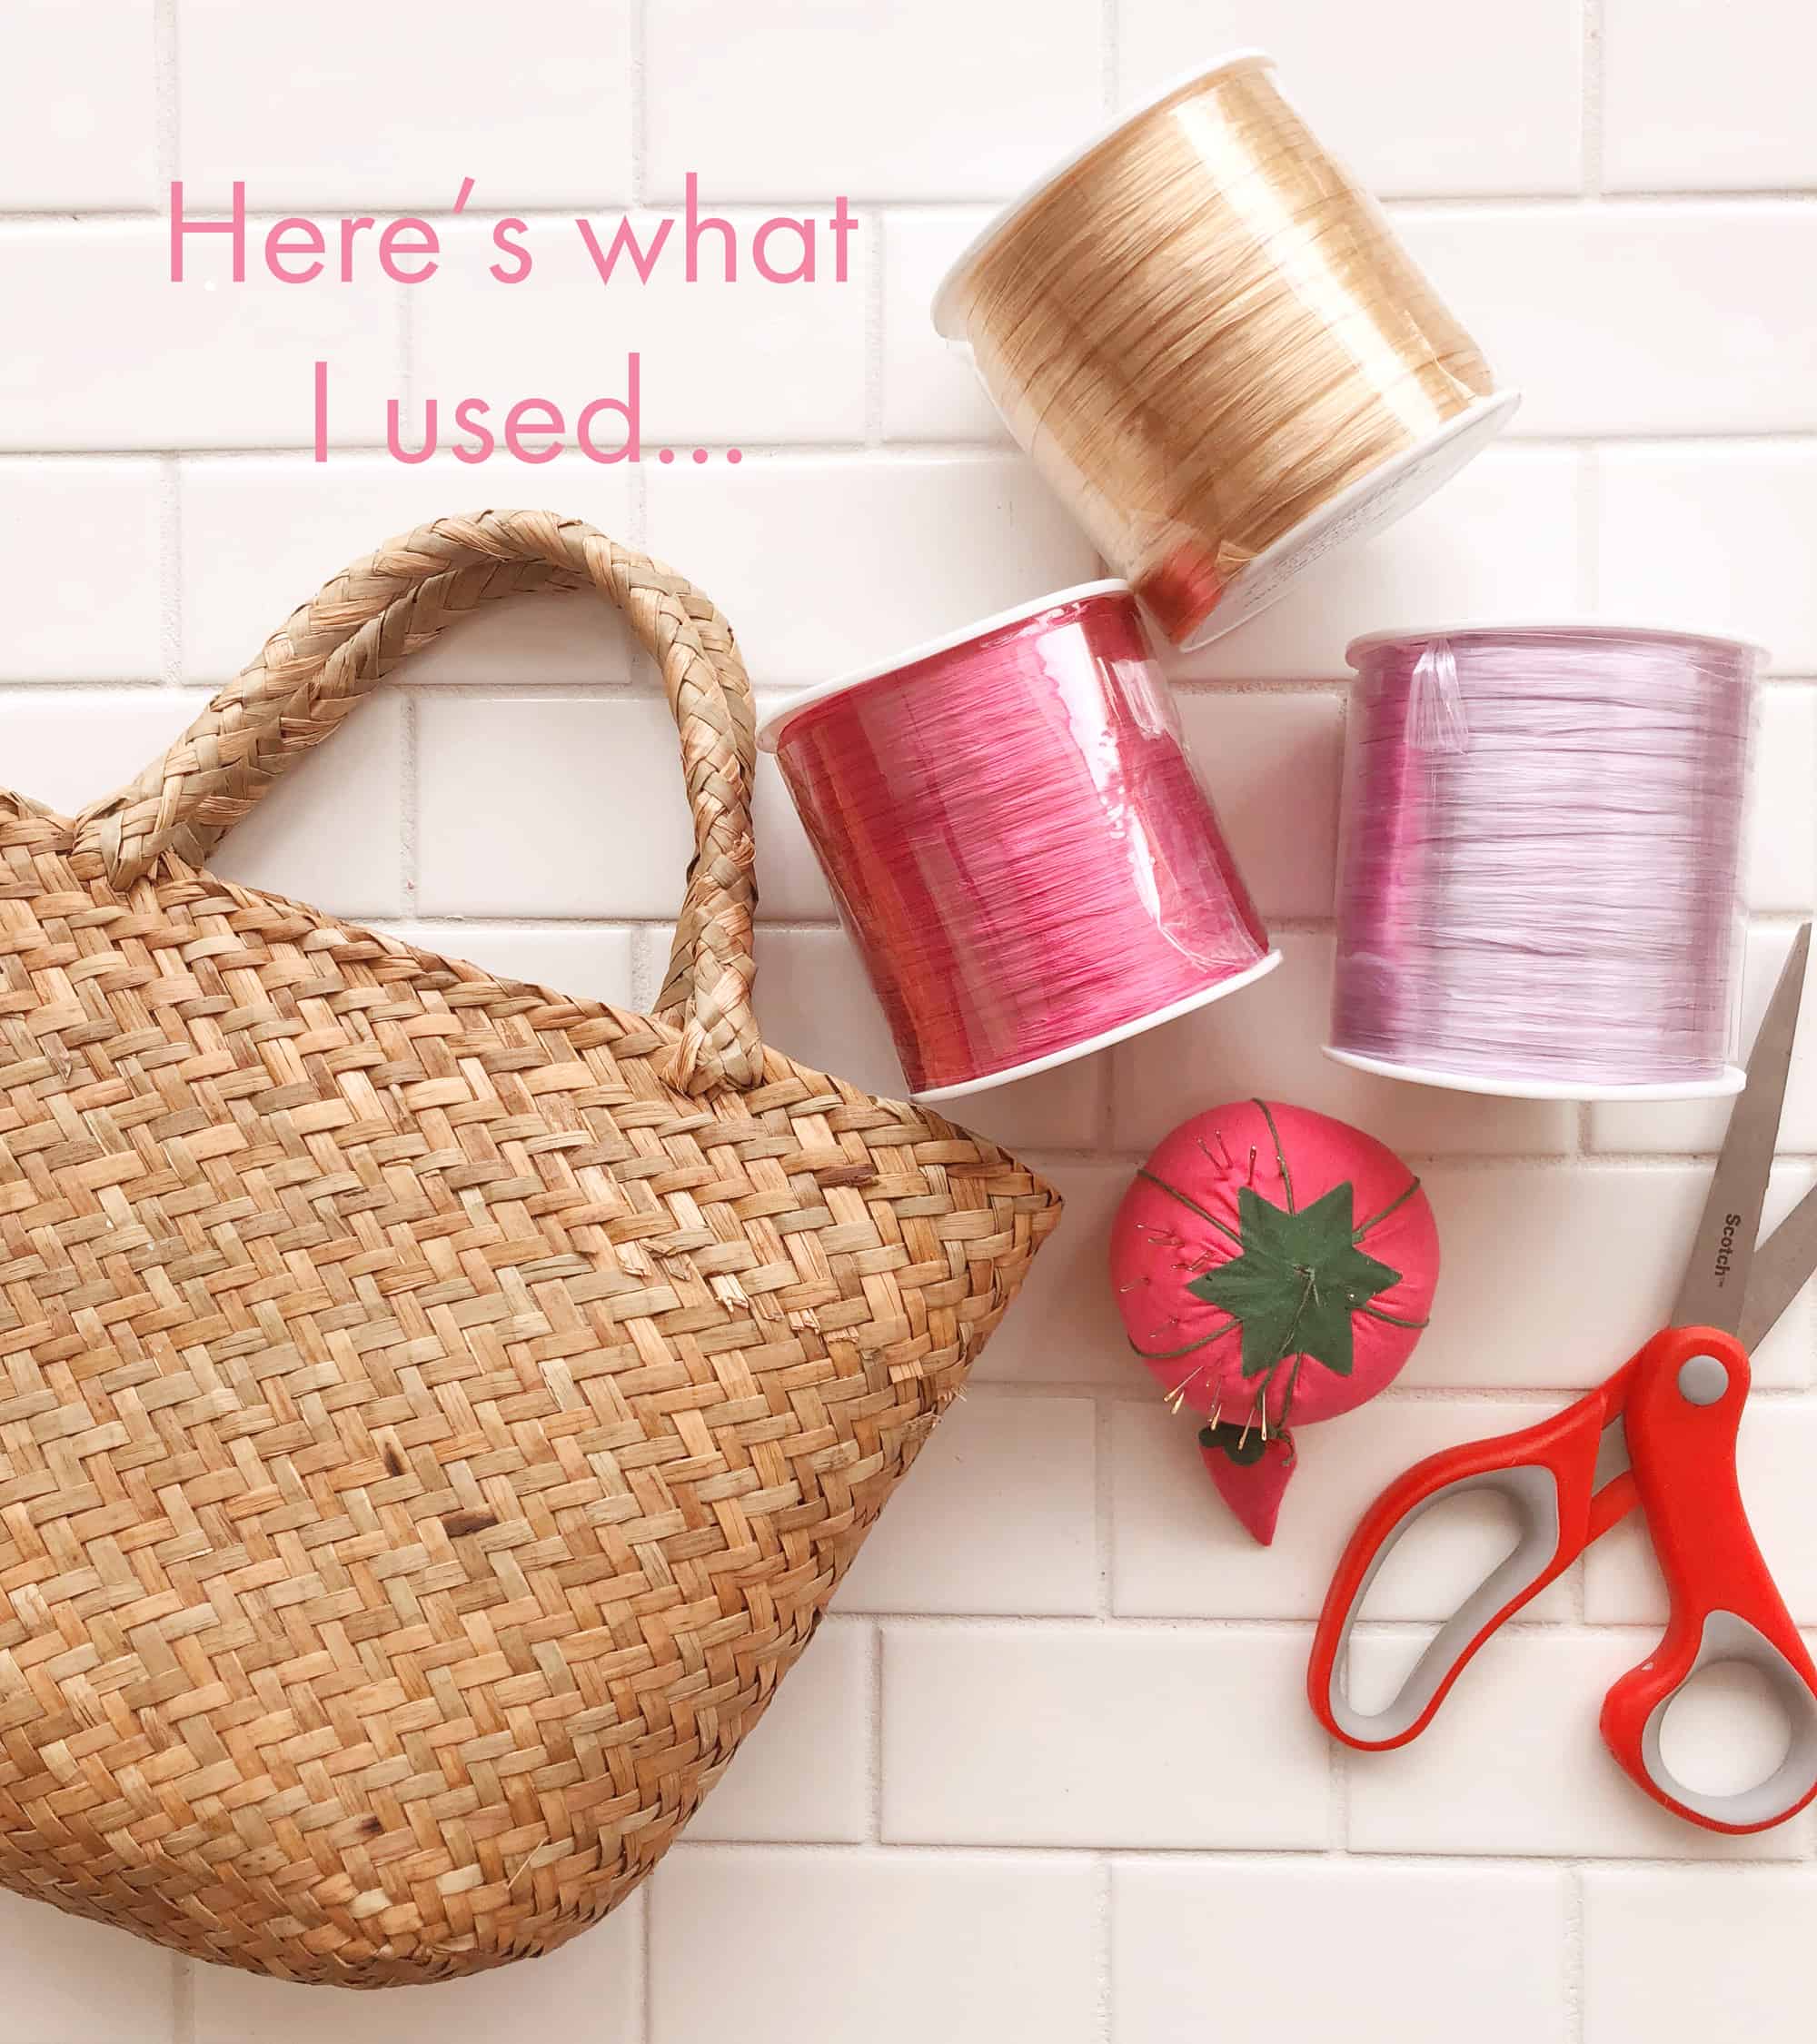 I used this bag (only $11). You can use any similar woven bag, but I will say that it needs to be unlined and a thin material that will be easy to stitch through. I used colored, pearlized raffia for the flowers.
I used a needle with a larger eye (a tapestry needle) and that is all you need besides a pair of scissors, of course.
It took me two days to stitch flowers all the way around my small bag. I listened to many episodes of Young House Love Has A Podcast and watched a lot of Westworld at night (I love a good craft you can do while watching television!), but I feel like only 48 hours is pretty quick considering.
To make the flowers, start with the “petals” and stitch one big circular burst, leaving a small circle inside each flower (where the center will go). I alternated between small, medium and large flowers to fill my bag all the way around.
To add the center, start a stitch from the back and tie knots close to the base (more knots equal bigger textures). I used between 2-3 knots for each little dot.
If you have any questions, I’d be happy to answer them! It’s super easy. If you’ve ever stitched before you can probably figure out my technique just by looking.
I am probably going to add a liner to mine because the messy stitching on the inside does bother me. But that is totally optional!
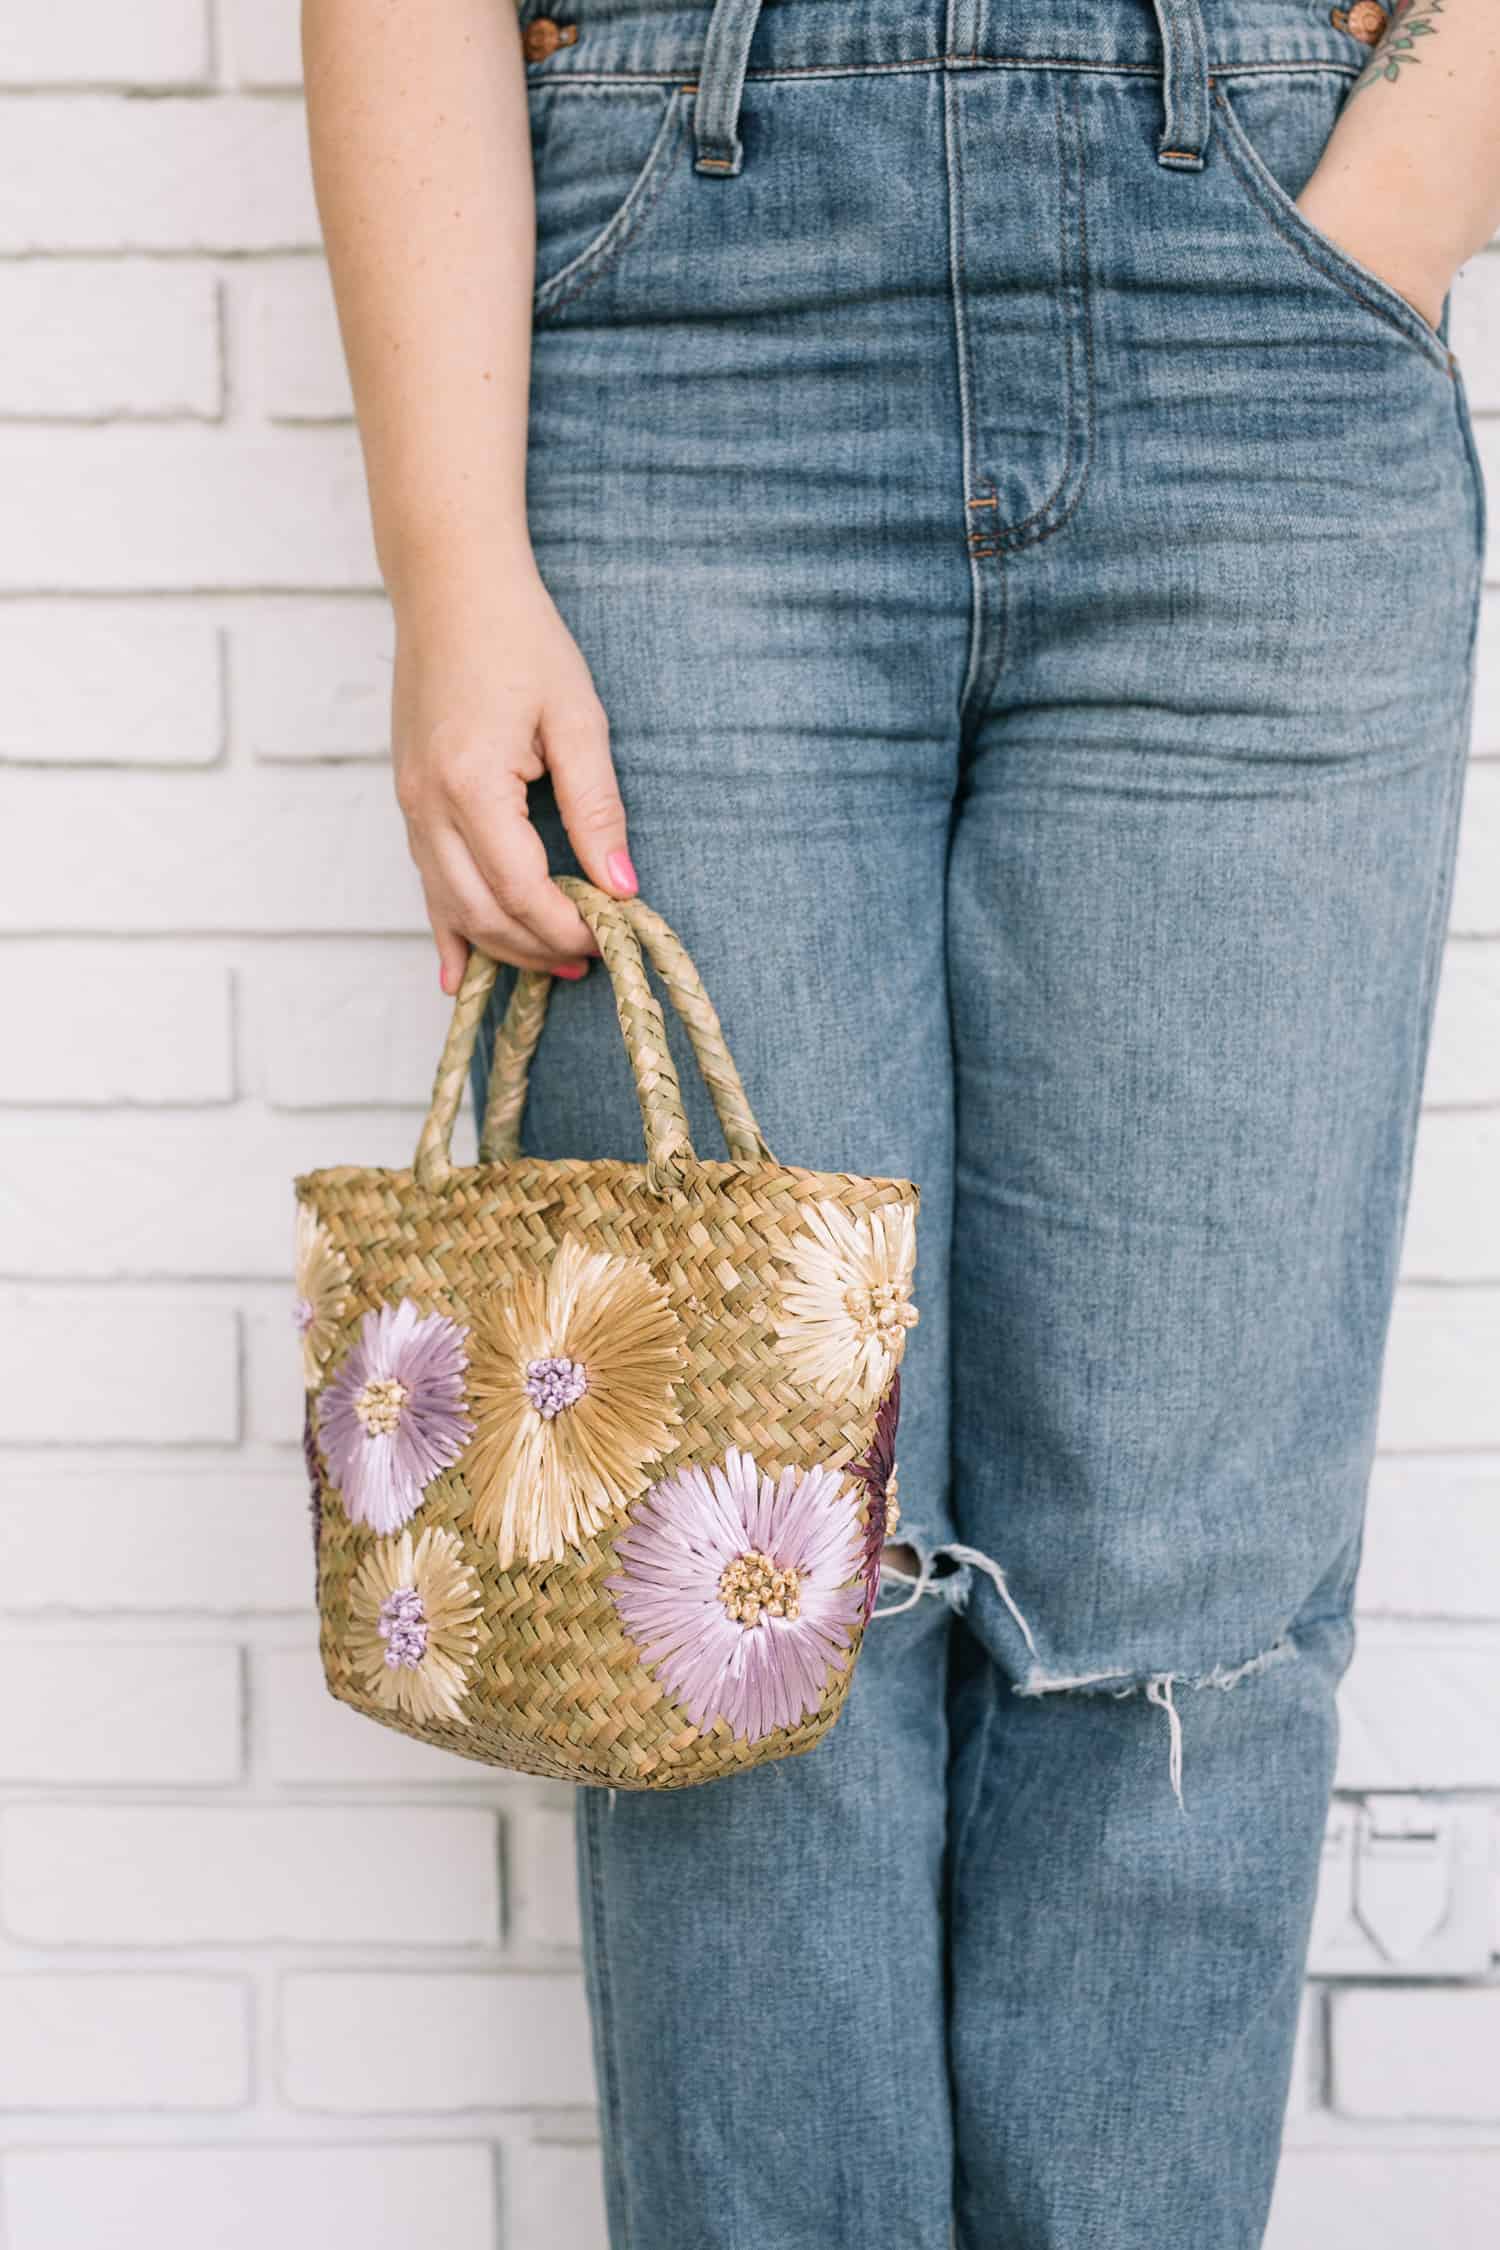
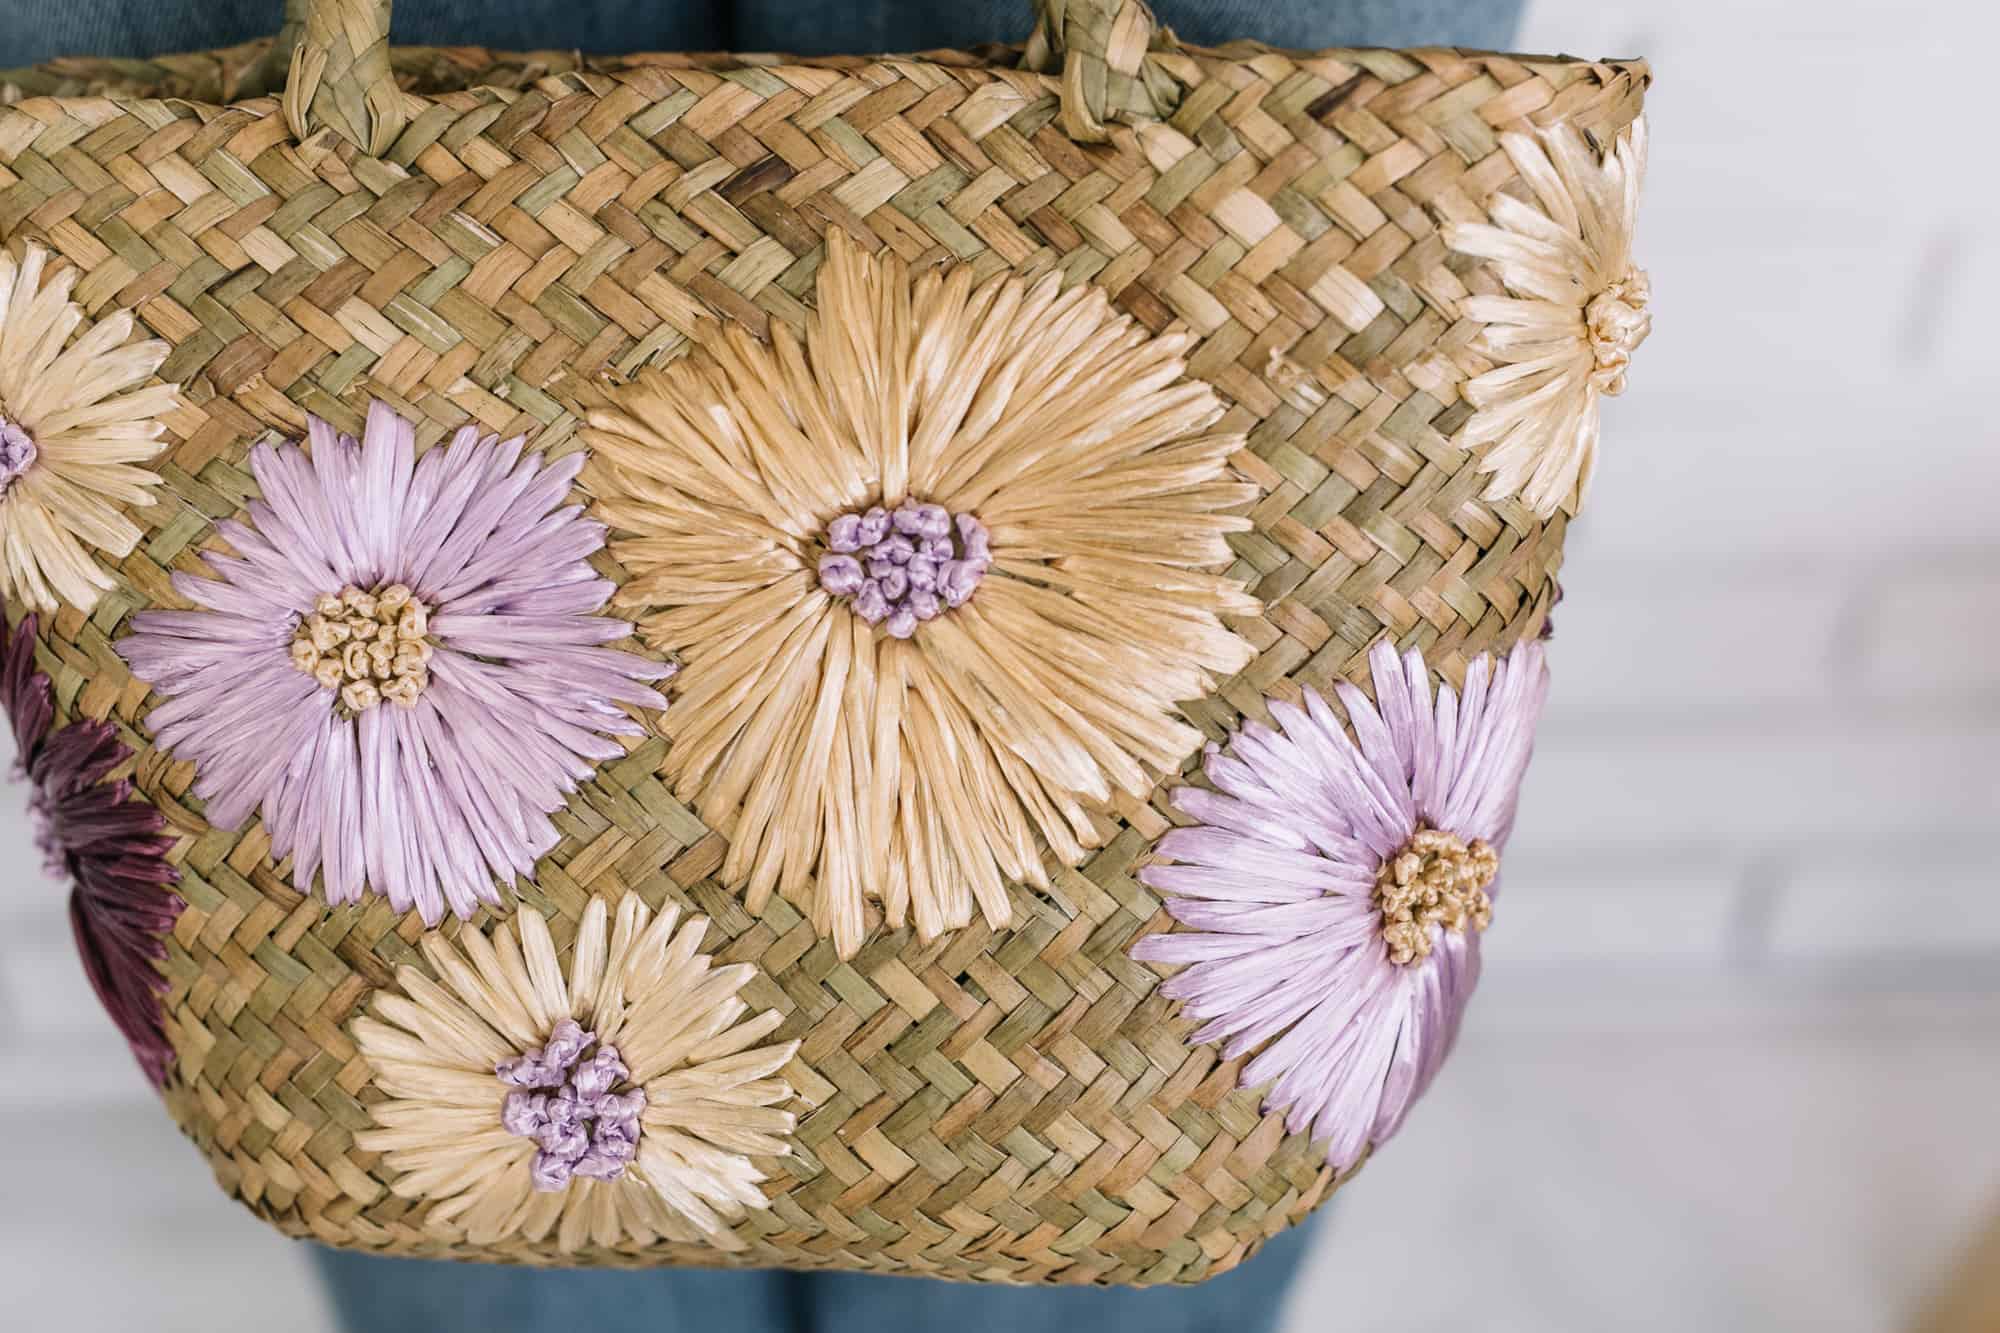
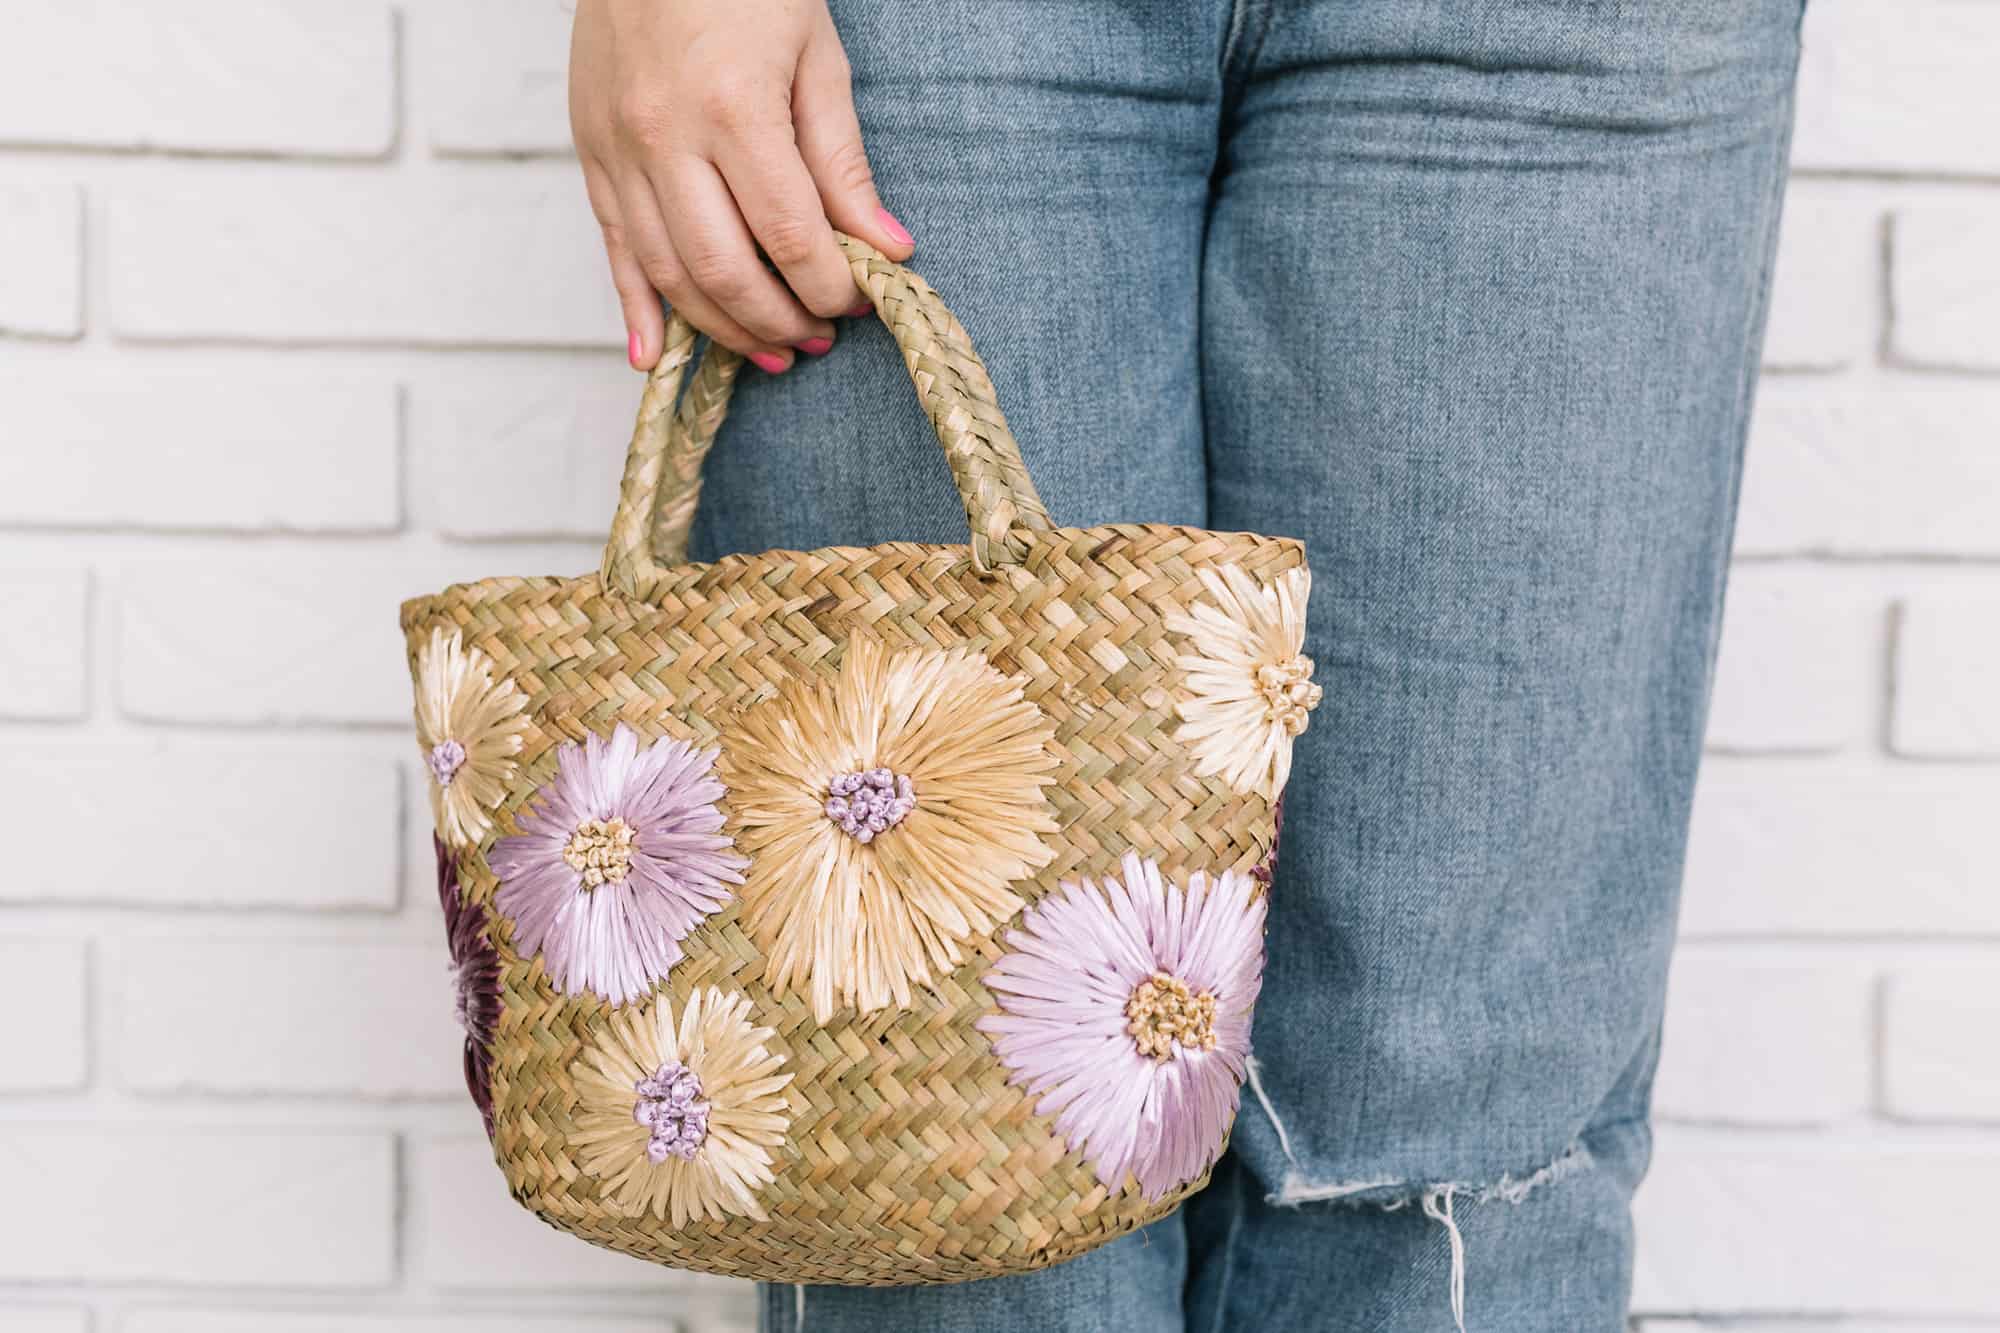 I’m so pleased with the final result! It feels very authentically vintage, in my opinion. I will keep this and use it for years to come! xx – Elsie
Credits//Author: Elsie Larson, Photography: Amber Ulmer. Photos edited with A Color Story Desktop.
]]>