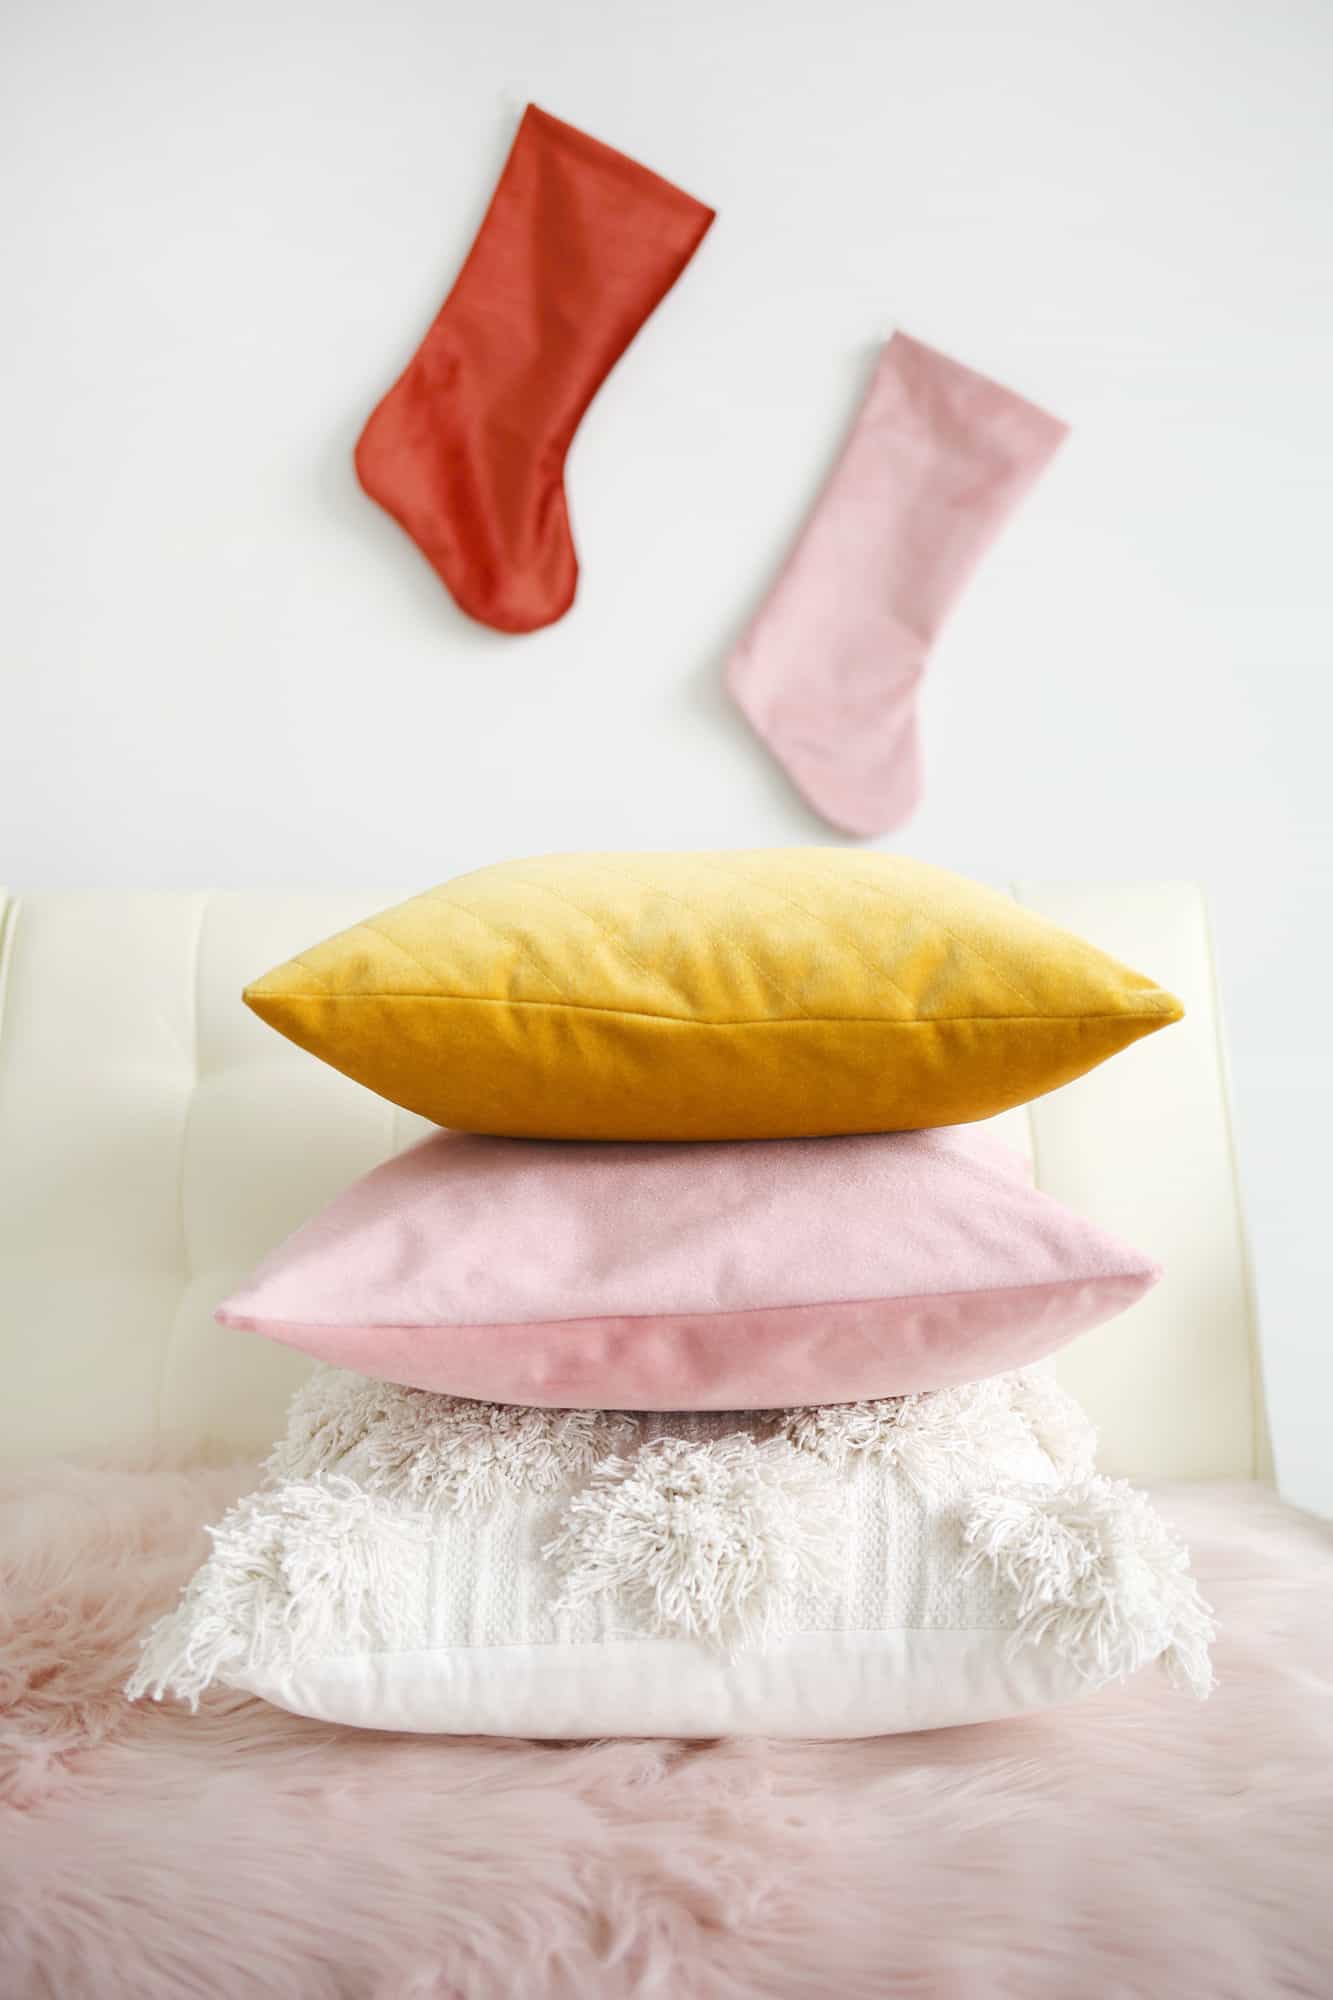
 Plus, adding new envelope pillow cover to your space is one of the quickest ways to give your couch or bed a mini makeover. You can slip it on and off with the seasons— but you might never want to put this velvet pillow away!
If you’ve got access to a sewing machine and can stitch a straight-ish line, you can fill your couch with a lush, quilted velvet pillow for a little more hygge this winter. Warning: you’ll want to take more naps.
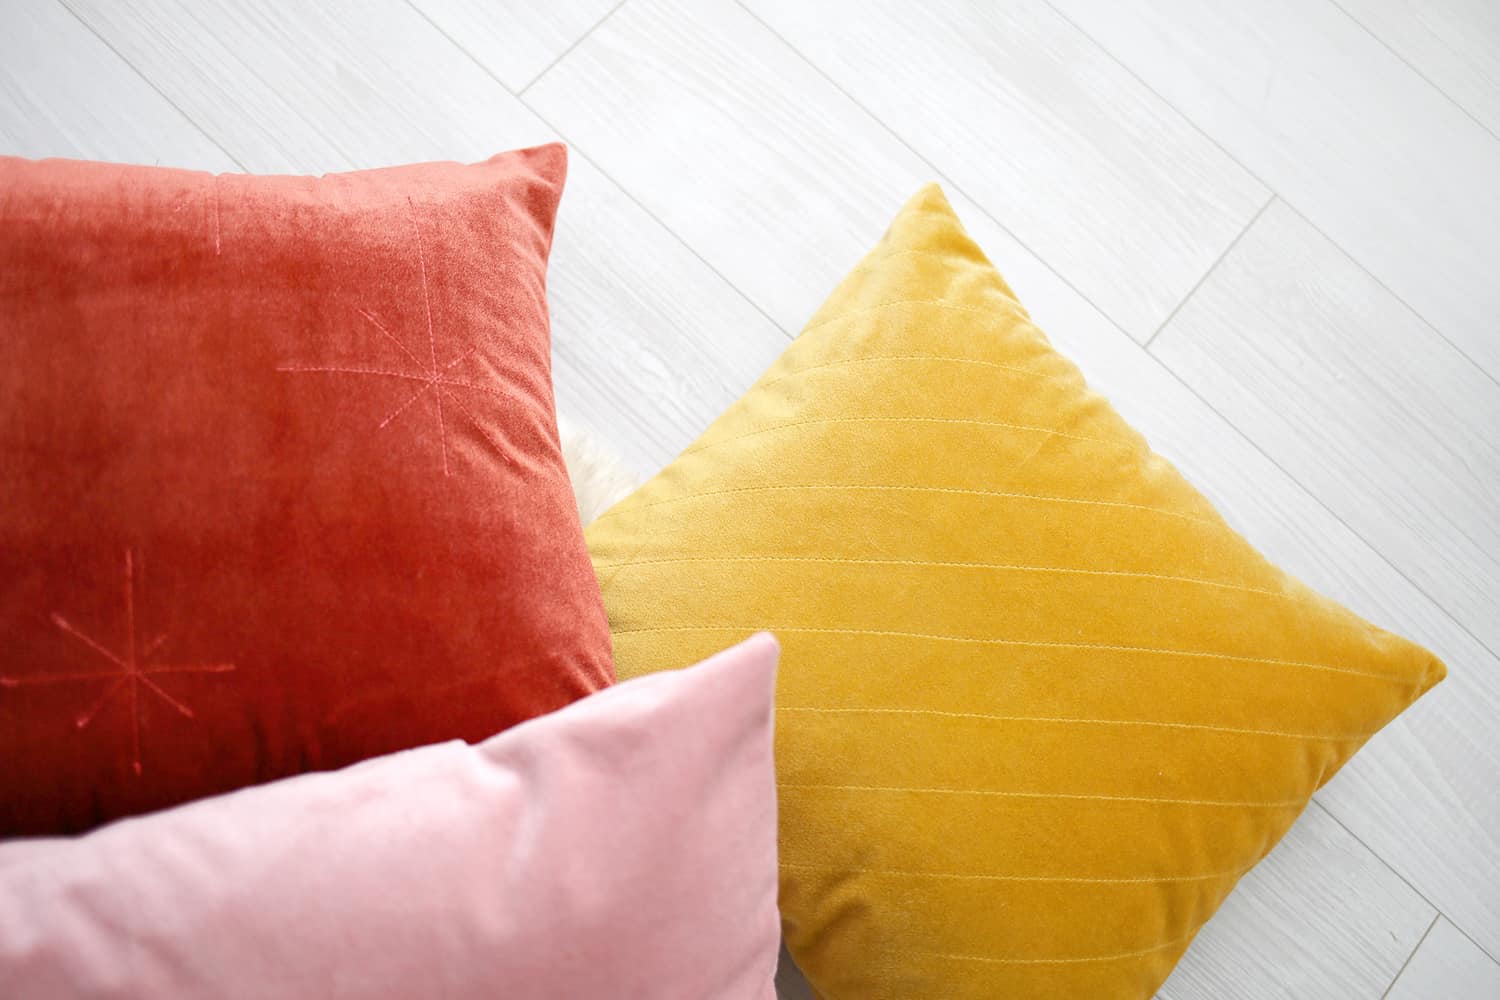 Adding simple stitch lines to the front piece of your pillow is an easy way to add a subtle pattern and add more interest to your pile.
I even added some mid-century looking star shapes to my brick red pillow to give it a subtle nod to the holidays. You can layer these up or mix and match with different woven cotton or knitted wool pillows for a visual feast at the end of your couch. 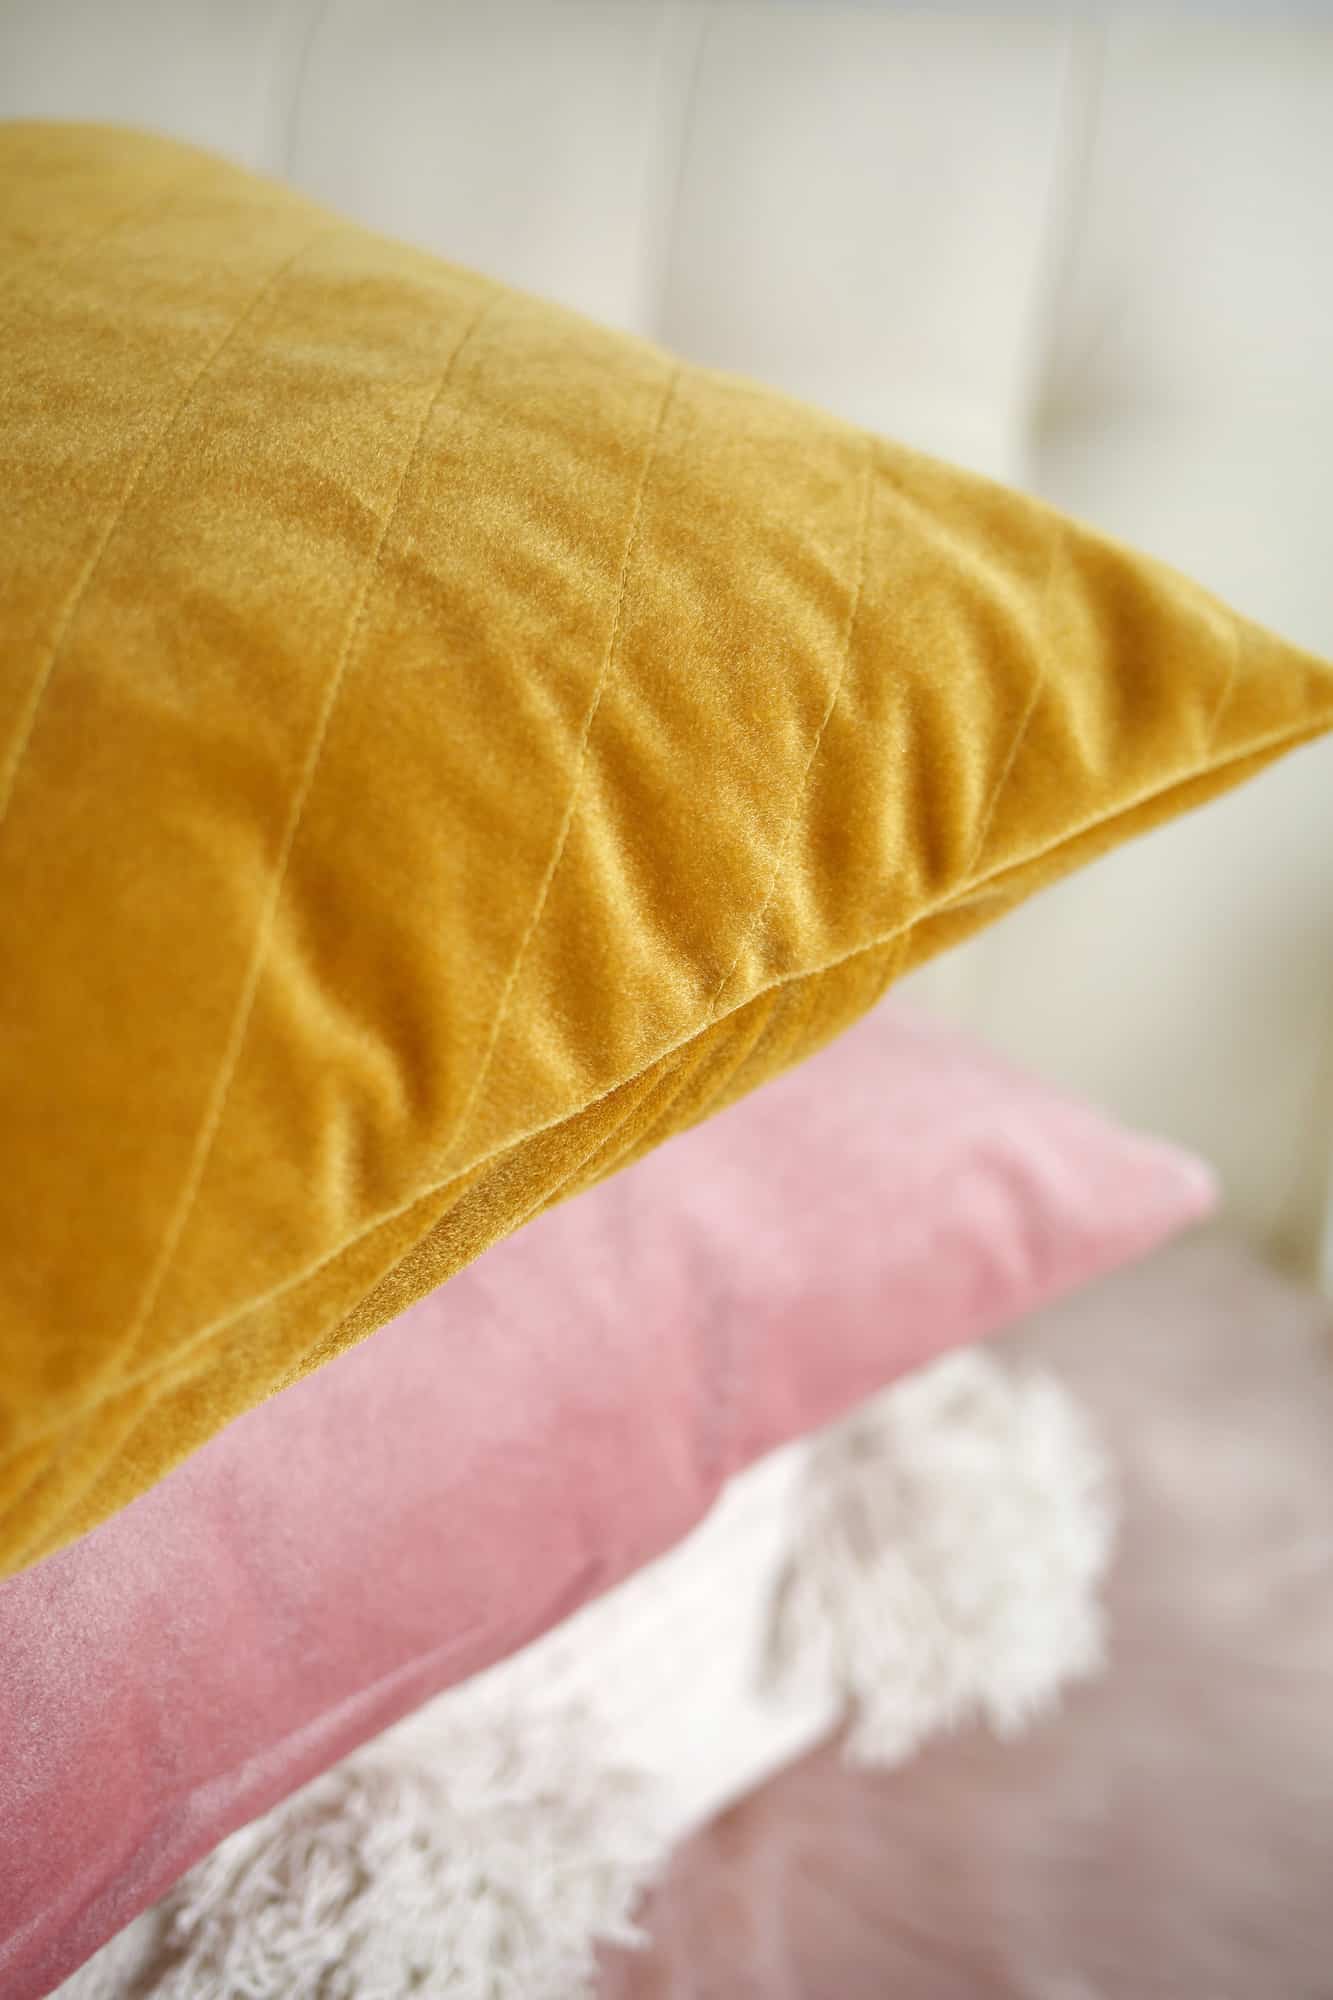
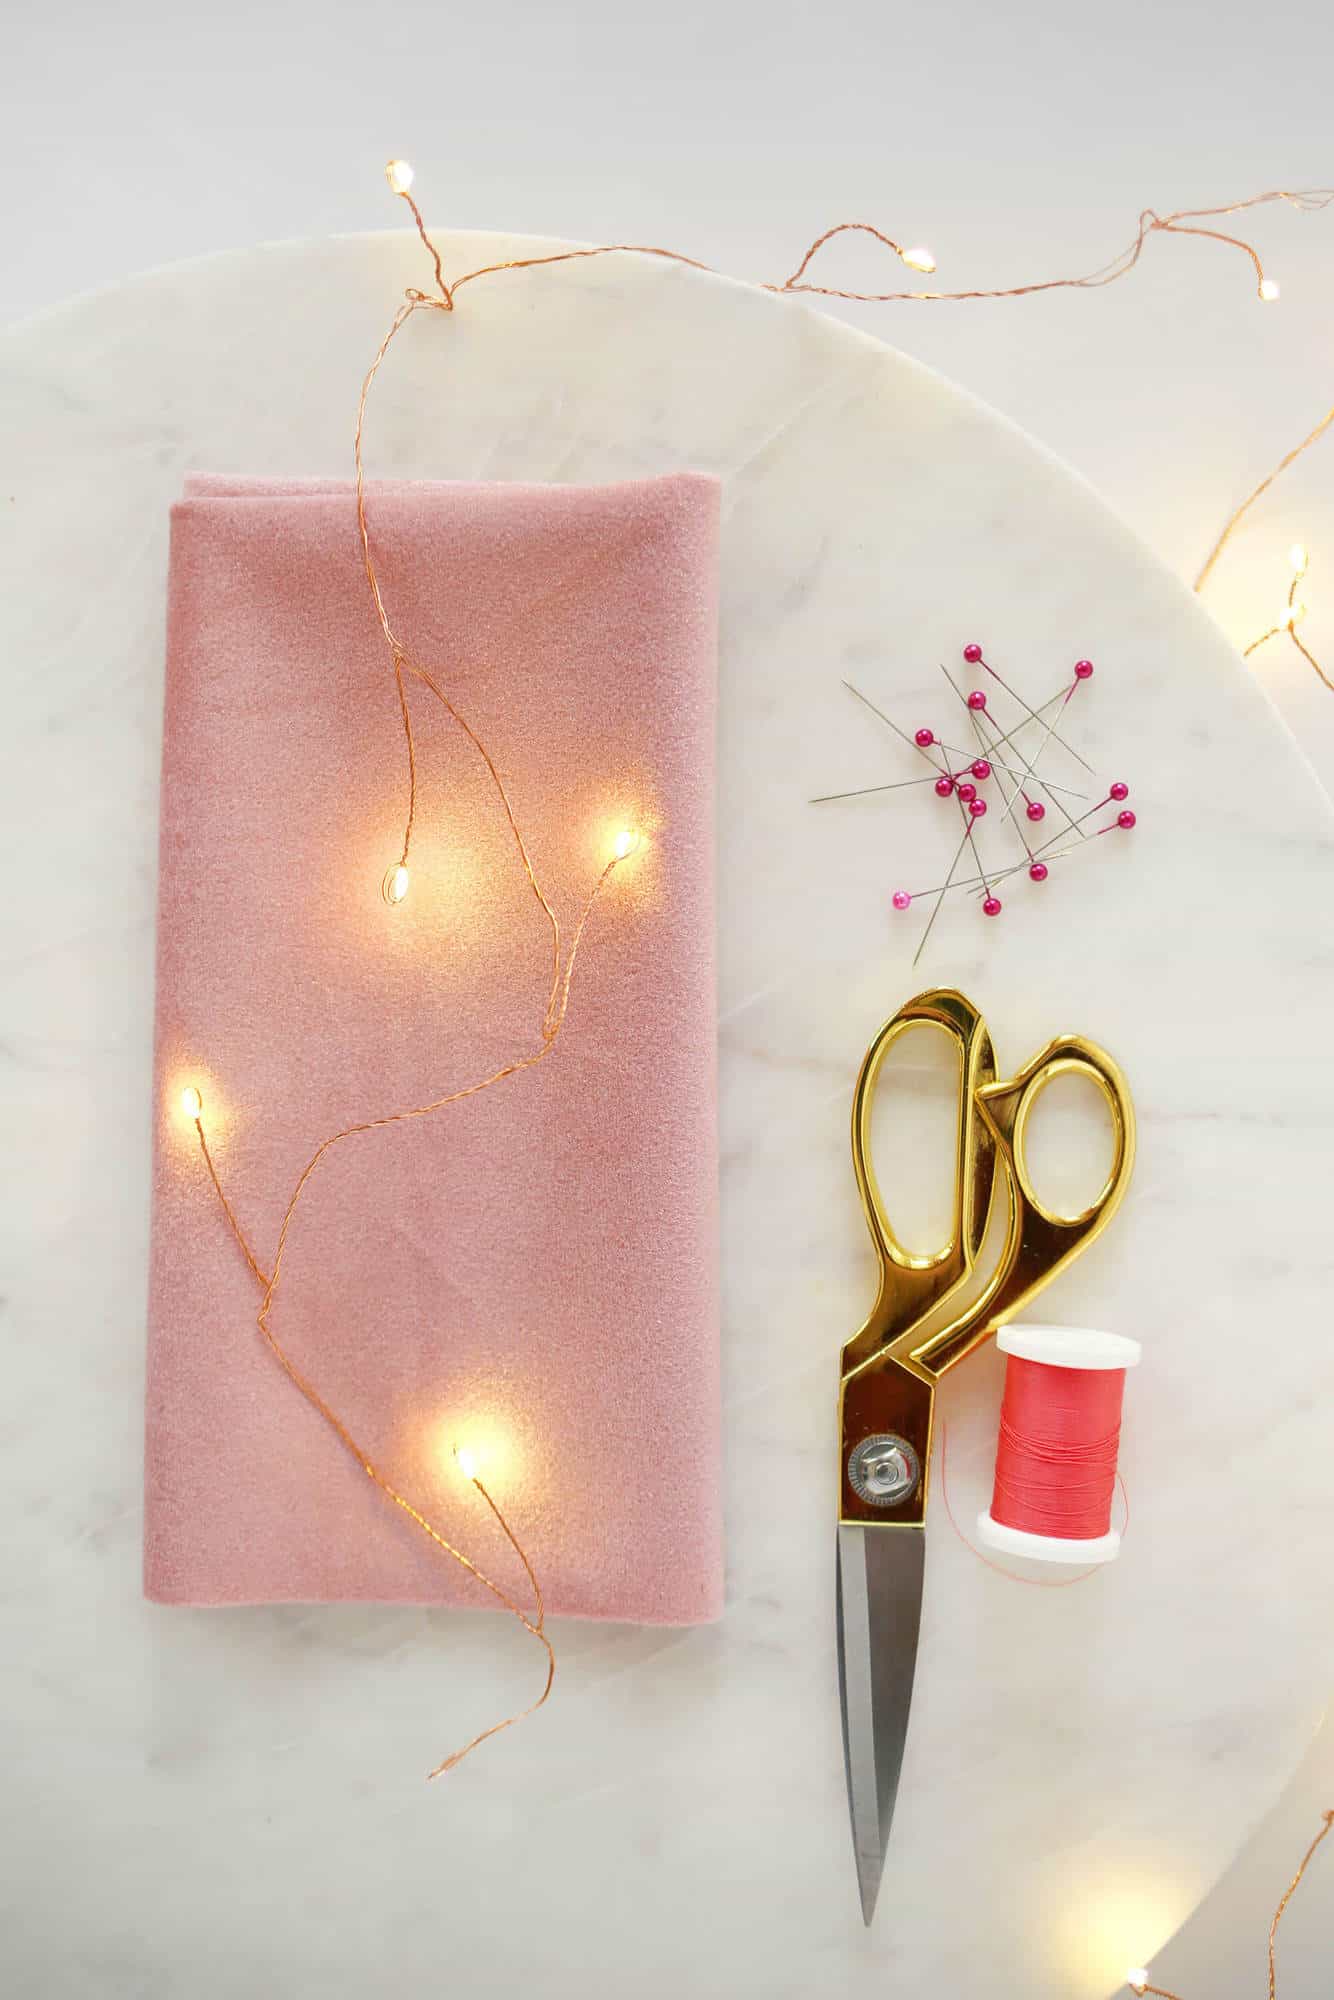 Supplies:
-2/3 yard of wide selvedge pink velvet fabric for 16″ pillows and 1/2 yard for 12″ pillows
–pillow insert of matching size (16″ pillow insert for 16″ pillow, etc.)
-sewing machine and coordinating thread
-fabric scissors
-straight pins
-chalk or marker
-acrylic ruler
–cutting mat (optional)
Since these are a bit larger, I’m going to share the process of making the gold version of the quilted lines pillow using a smaller sample. It’s a 6″ x 6″ size instead of 16″ x 16″.
No matter what size pillow you are wanting to create, cut the fabric to be the same size as the pillow insert. You don’t want to add an inch to make it fit or it will be loose and floppy. Ask me how I know this.
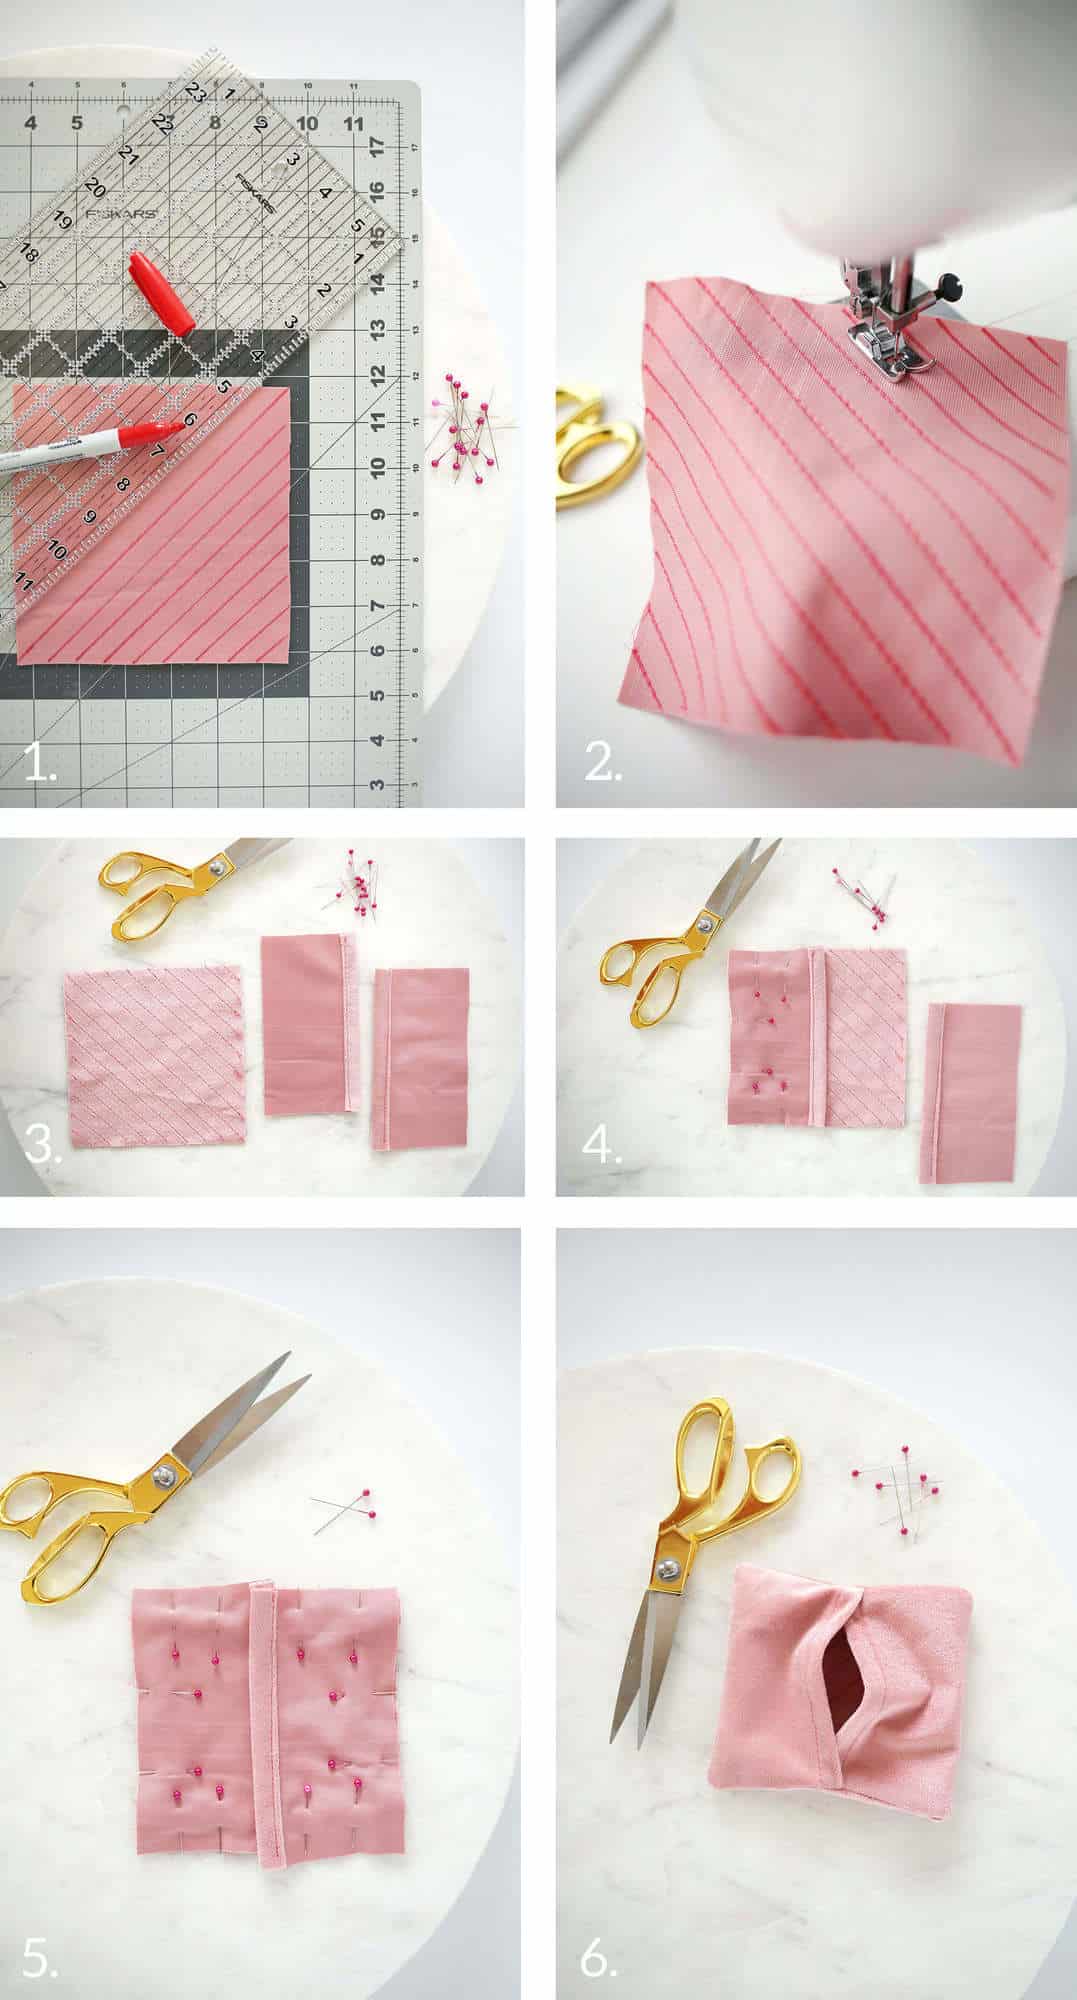 Step One: For a 16″ pillow, cut one piece of fabric that measures 16″ x 16″ for the front.
Then, cut another two pieces that measure 12″ x 16″ for the back pieces. You want your two back pieces to overlap by at least 5″. For diagonal stripes on your pillow, turn your 16″ square piece so that the velvet side is facing down.
Use your acrylic ruler and cutting mat to draw straight lines as far apart as you’d like them for your design. I suggest either 1/2″ or 1″ apart. Just keep it consistent and it’ll look great!
If you’d like a star design, use your acrylic ruler to draw a variety of star shapes on the back side. Just be sure you’re back stitching at the beginning and ending of a stitch line to keep your stitches from unraveling.
Step Two: Follow your stitch lines with your sewing machine and trim up your ends when you’re finished.
Step Three: For each of the two back sides, fold one of the long edges down once for a 1/2″ and then again 1/2″. Pin in place. Stitch along the folded edge. Make sure you’re folding onto the wrong side so that the right side of the fabric is showing after you’ve stitched together as shown.
Step Four: Place one of your back sides on top of the front piece so that the right sides are facing each other and three of the edges are lined up as shown. Pin in place along the three edges.
Step Five: Repeat with the second back side. Your hemmed edges should be overlapping a bit more than mine show in the example. Pin in place.
Stitch all the way around the perimeter of your pillow so that you’re stitching through both pieces as you go. Remove pins.
Step Six: Turn pillow right side out, poke out the corners, and insert your pillow form. Fluff and enjoy!
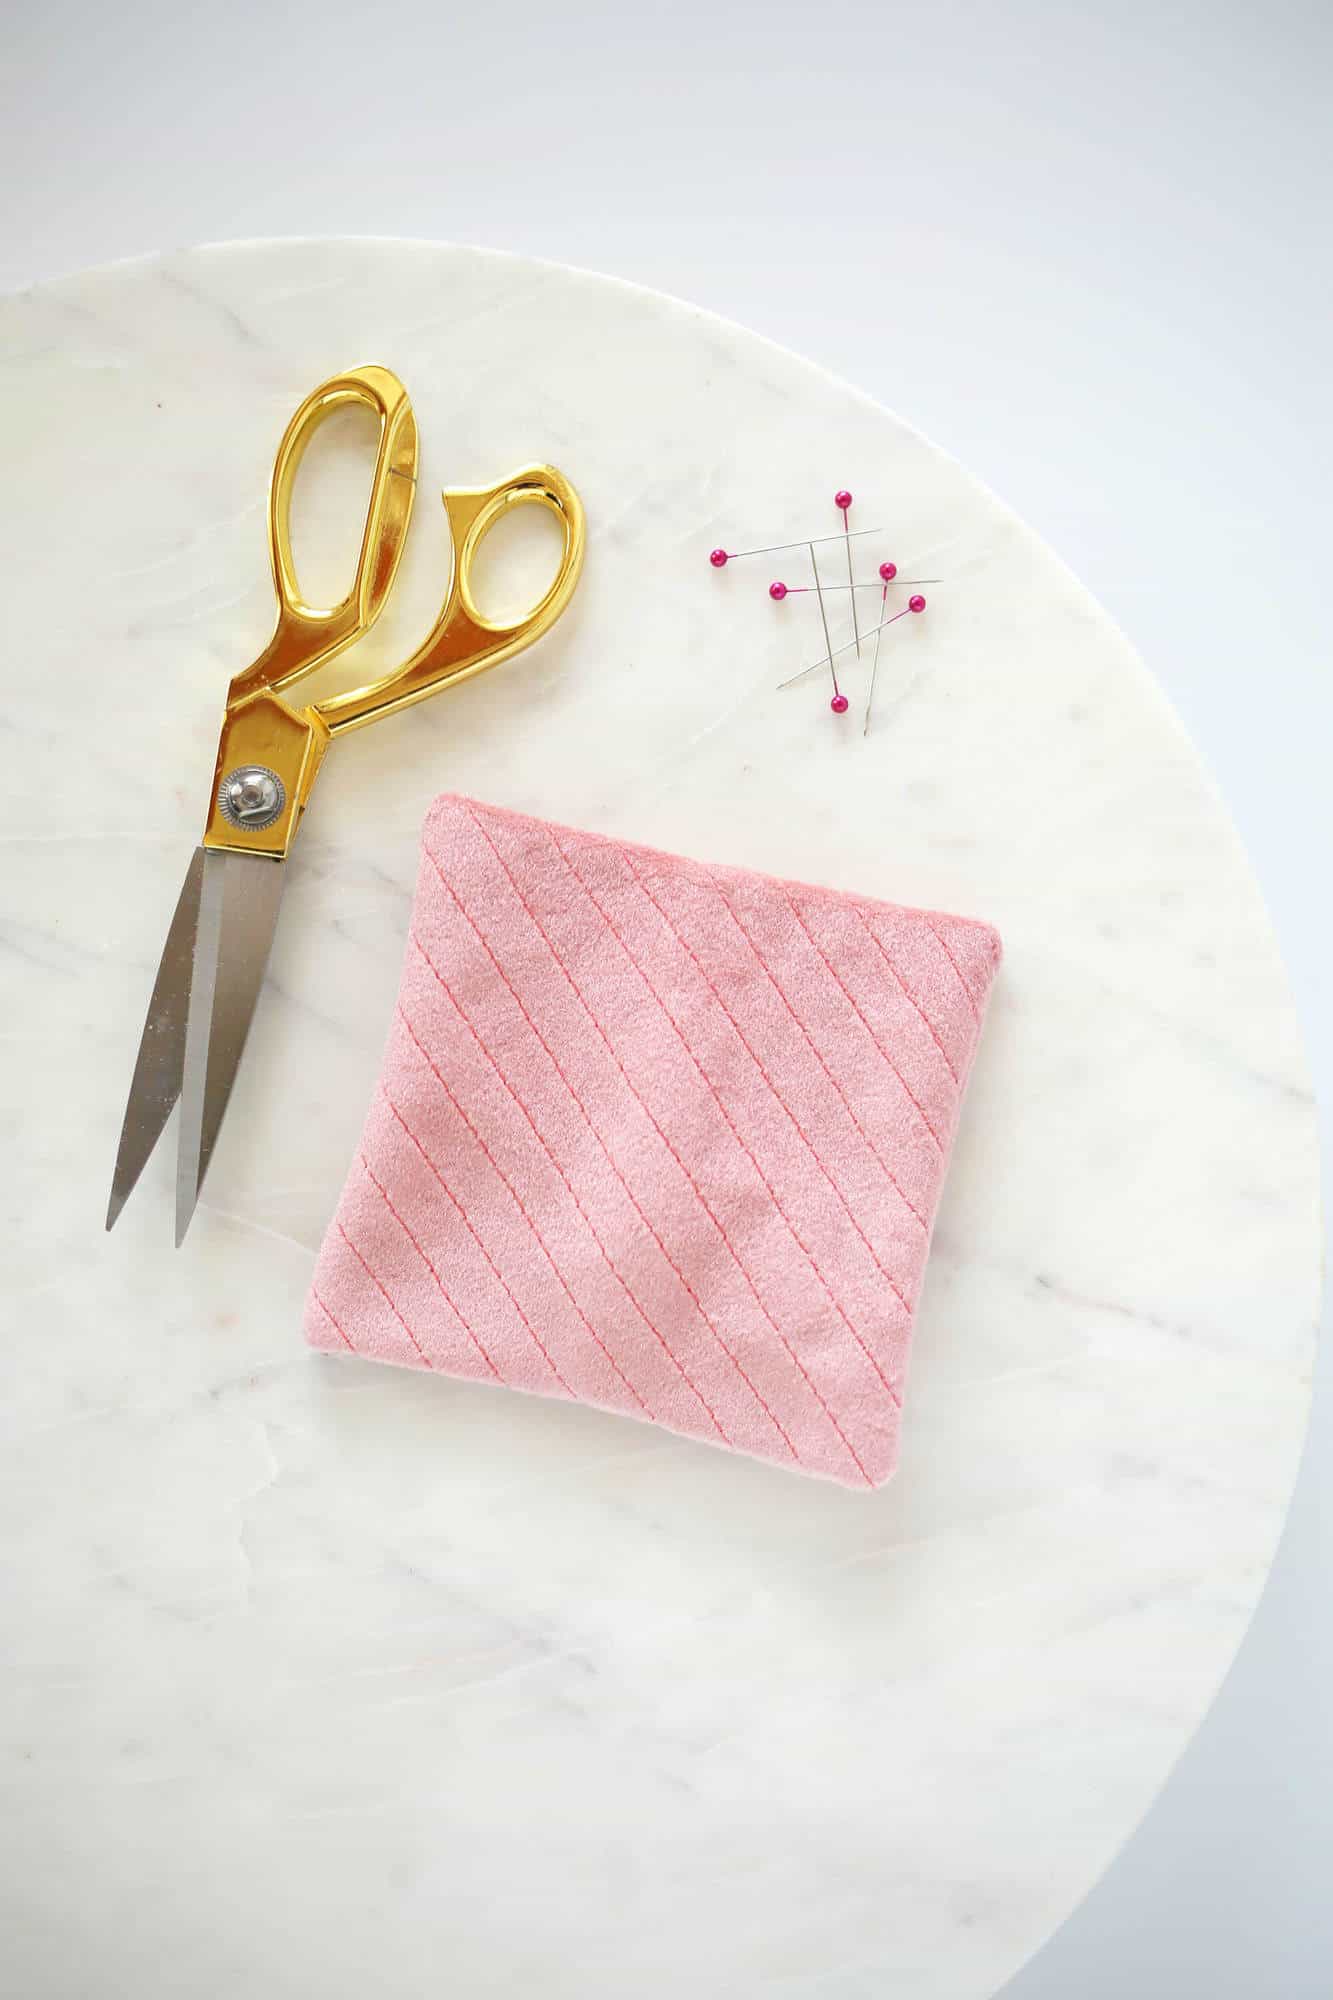 I love the way the light catches the velvet. It makes you want to grab a good book and cozy up for the evening!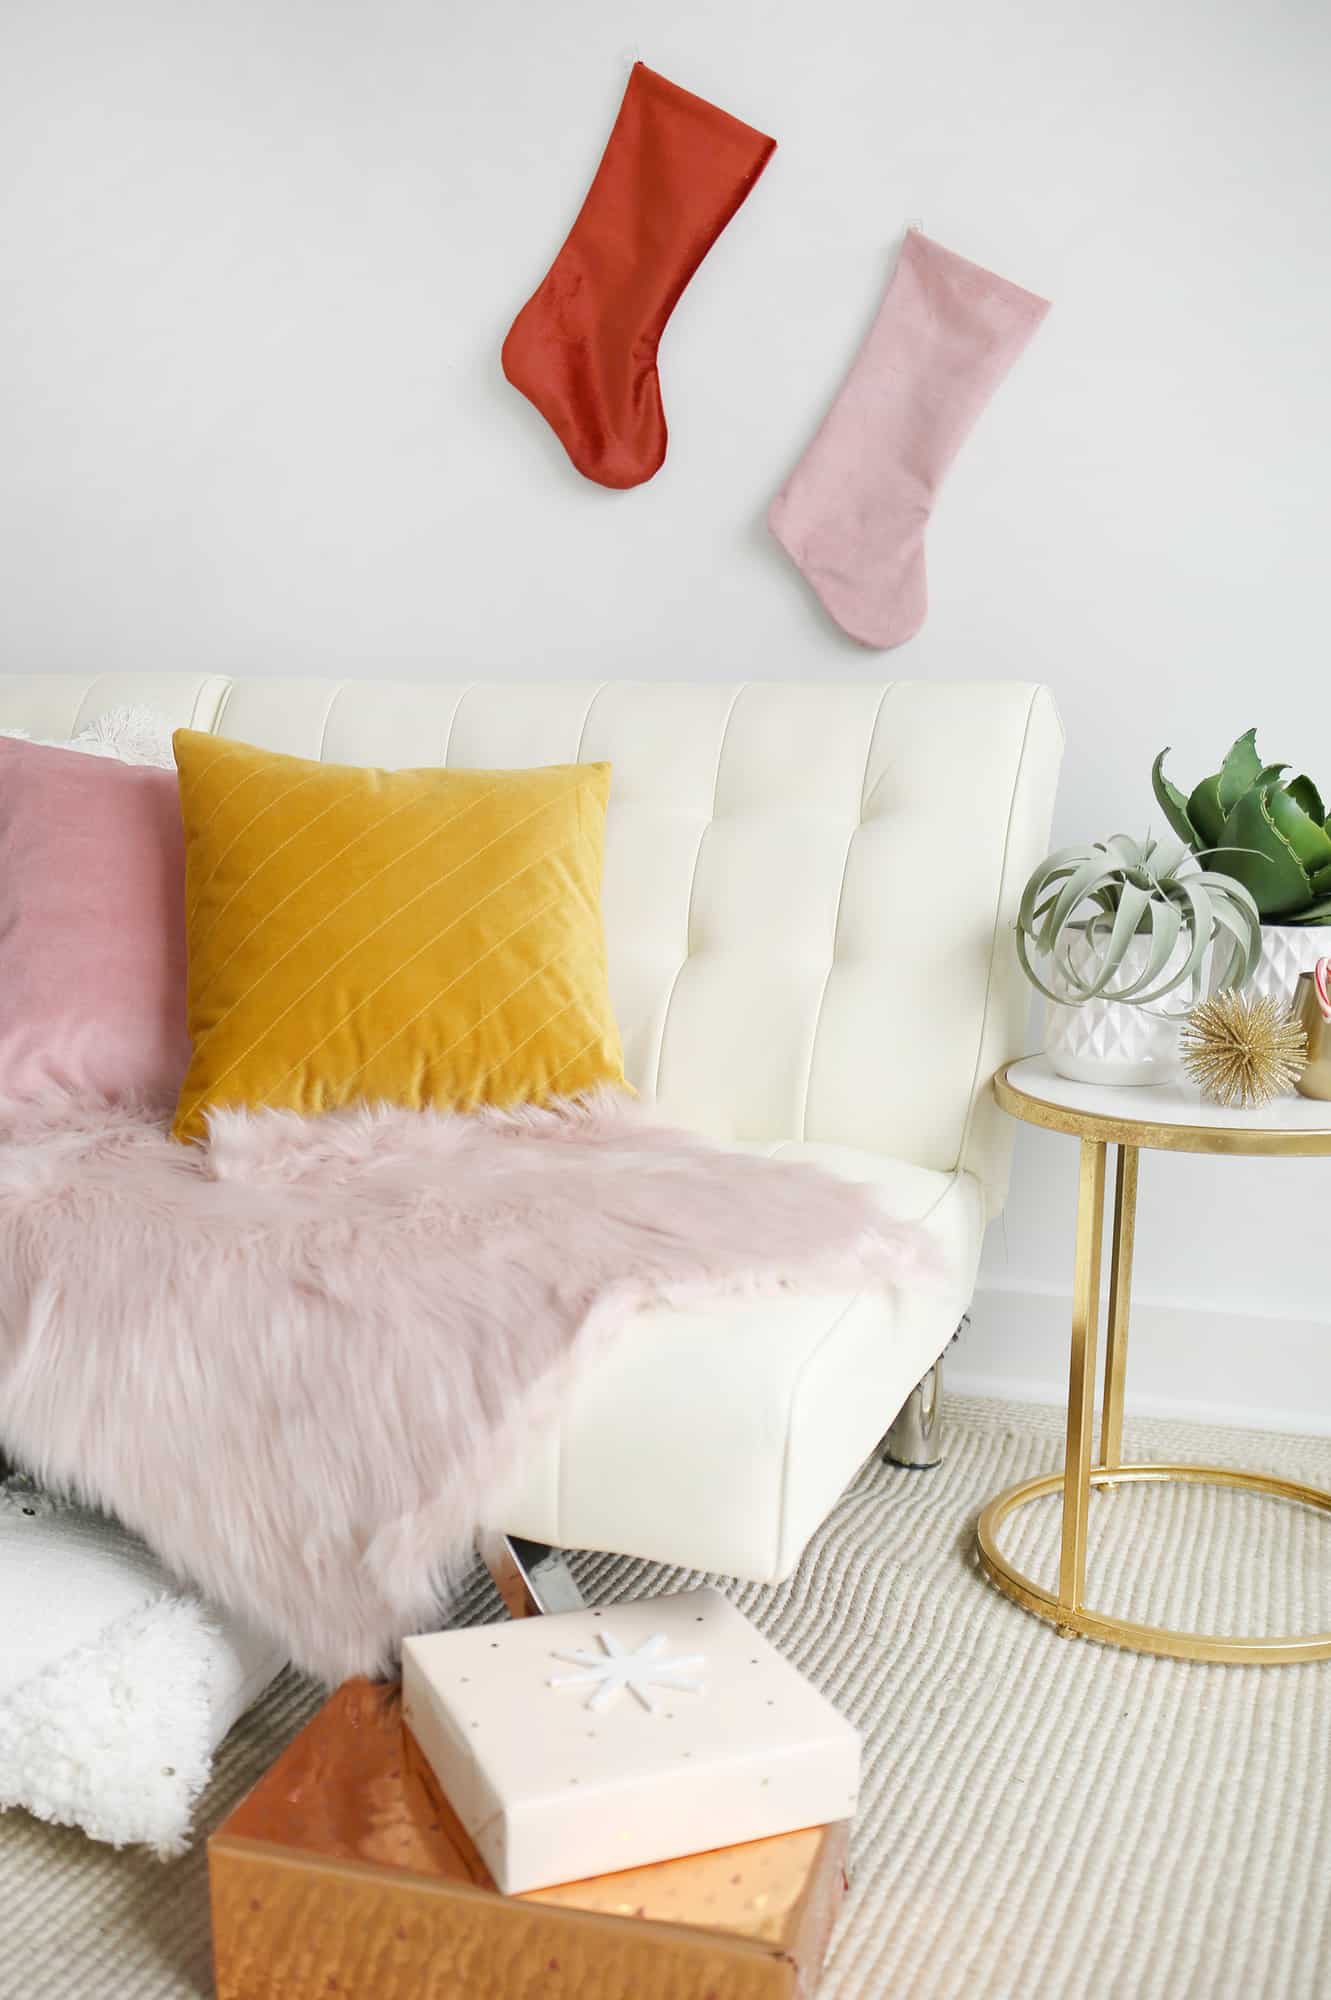
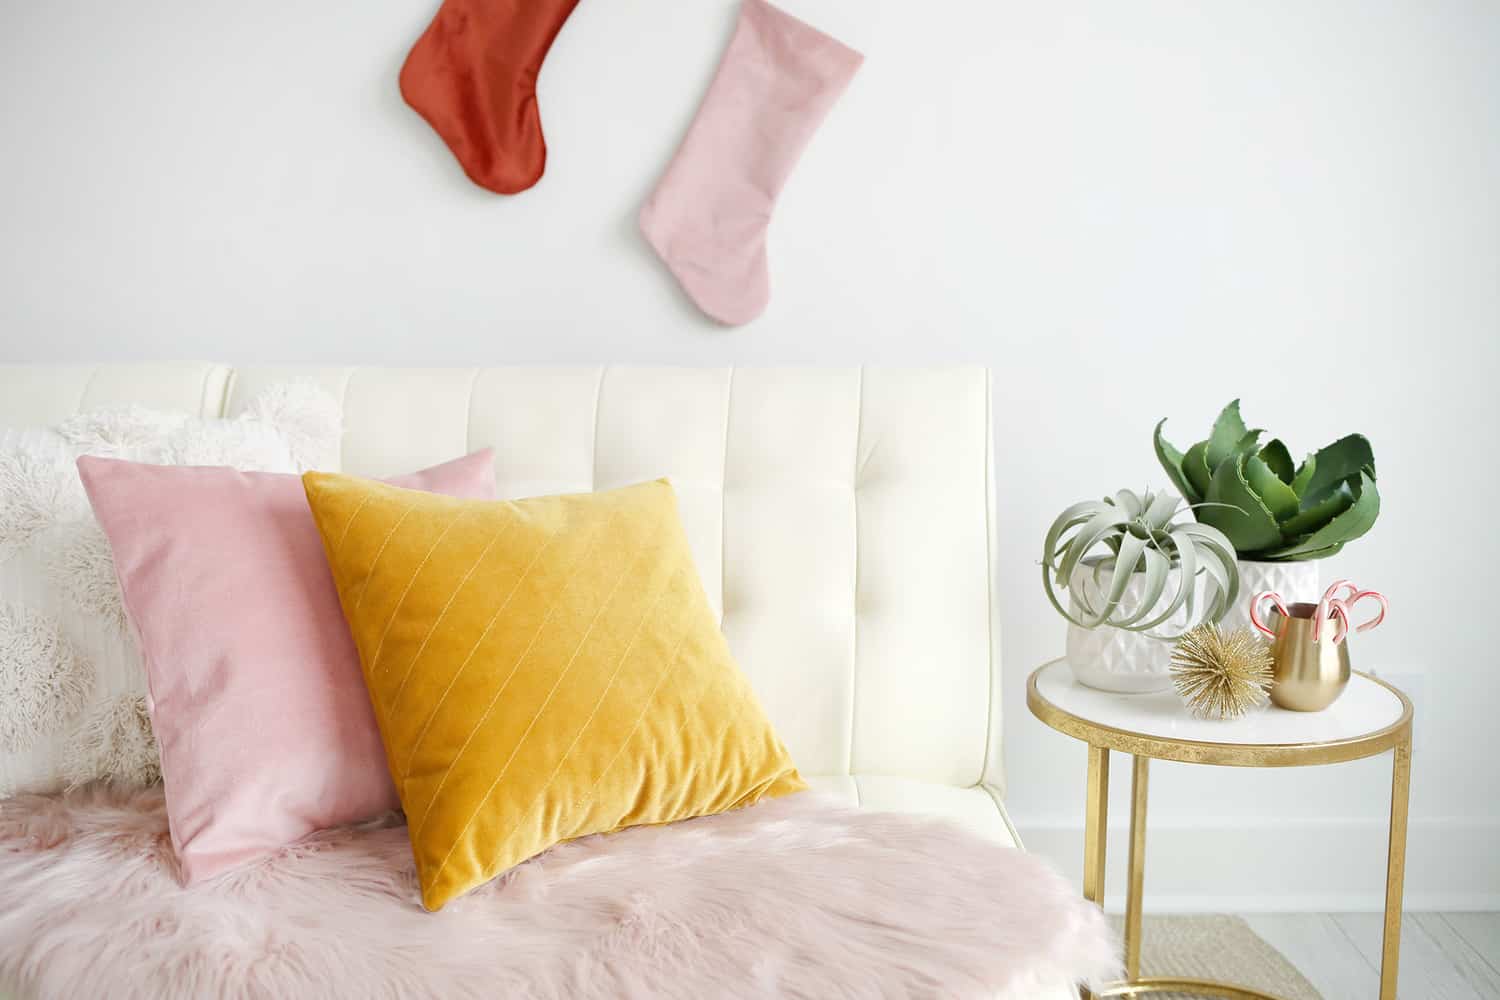 Are we still karate chopping our pillows? I think these didn’t have enough weight to them to stay chopped.
Find yourself a faux down insert for an even more high end effect and everyone will be asking where you bought your pillow! – Rachel
Looking for more cute pillow DIYS?
- Round Velvet Pillow DIY
- How to Sew a Zippered Throw Pillow
- Rainbow Roving Pillow DIY
- The Cutest Throw Pillow Roundup!

Quilted Velvet Pillow DIY
Equipment
- sewing machine
Ingredients
- 2/3 yard of wide selvedge pink velvet fabric for 16″ pillows and 1/2 yard for 12″ pillows
- pillow insert of matching size 16″ pillow insert for 16″ pillow, etc.
- sewing machine and coordinating thread
- fabric scissors
- straight pins
- chalk or marker
- acrylic ruler
- cutting mat optional
Instructions
- For a 16″ pillow, cut one piece of fabric that measures 16″ x 16″ for the front.Then, cut another two pieces that measure 12″ x 16″ for the back pieces. You want your two back pieces to overlap by at least 5″. For diagonal stripes on your pillow, turn your 16″ square piece so that the velvet side is facing down.Use your acrylic ruler and cutting mat to draw straight lines as far apart as you’d like them for your design. I suggest either 1/2″ or 1″ apart. Just keep it consistent and it’ll look great!If you’d like a star design, use your acrylic ruler to draw a variety of star shapes on the back side. Just be sure you’re back stitching at the beginning and ending of a stitch line to keep your stitches from unraveling.
- Follow your stitch lines with your sewing machine and trim up your ends when you’re finished.
- For each of the two back sides, fold one of the long edges down once for a 1/2″ and then again 1/2″. Pin in place. Stitch along the folded edge. Make sure you’re folding onto the wrong side so that the right side of the fabric is showing after you’ve stitched together as shown.
- Place one of your back sides on top of the front piece so that the right sides are facing each other and three of the edges are lined up as shown. Pin in place along the three edges.
- Repeat with the second back side. Your hemmed edges should be overlapping a bit more than mine show in the example. Pin in place.Stitch all the way around the perimeter of your pillow so that you’re stitching through both pieces as you go. Remove pins.
- Turn pillow right side out, poke out the corners, and insert your pillow form. Fluff and enjoy!
Notes
Credits//Author and Photography: Rachel Denbow.
]]>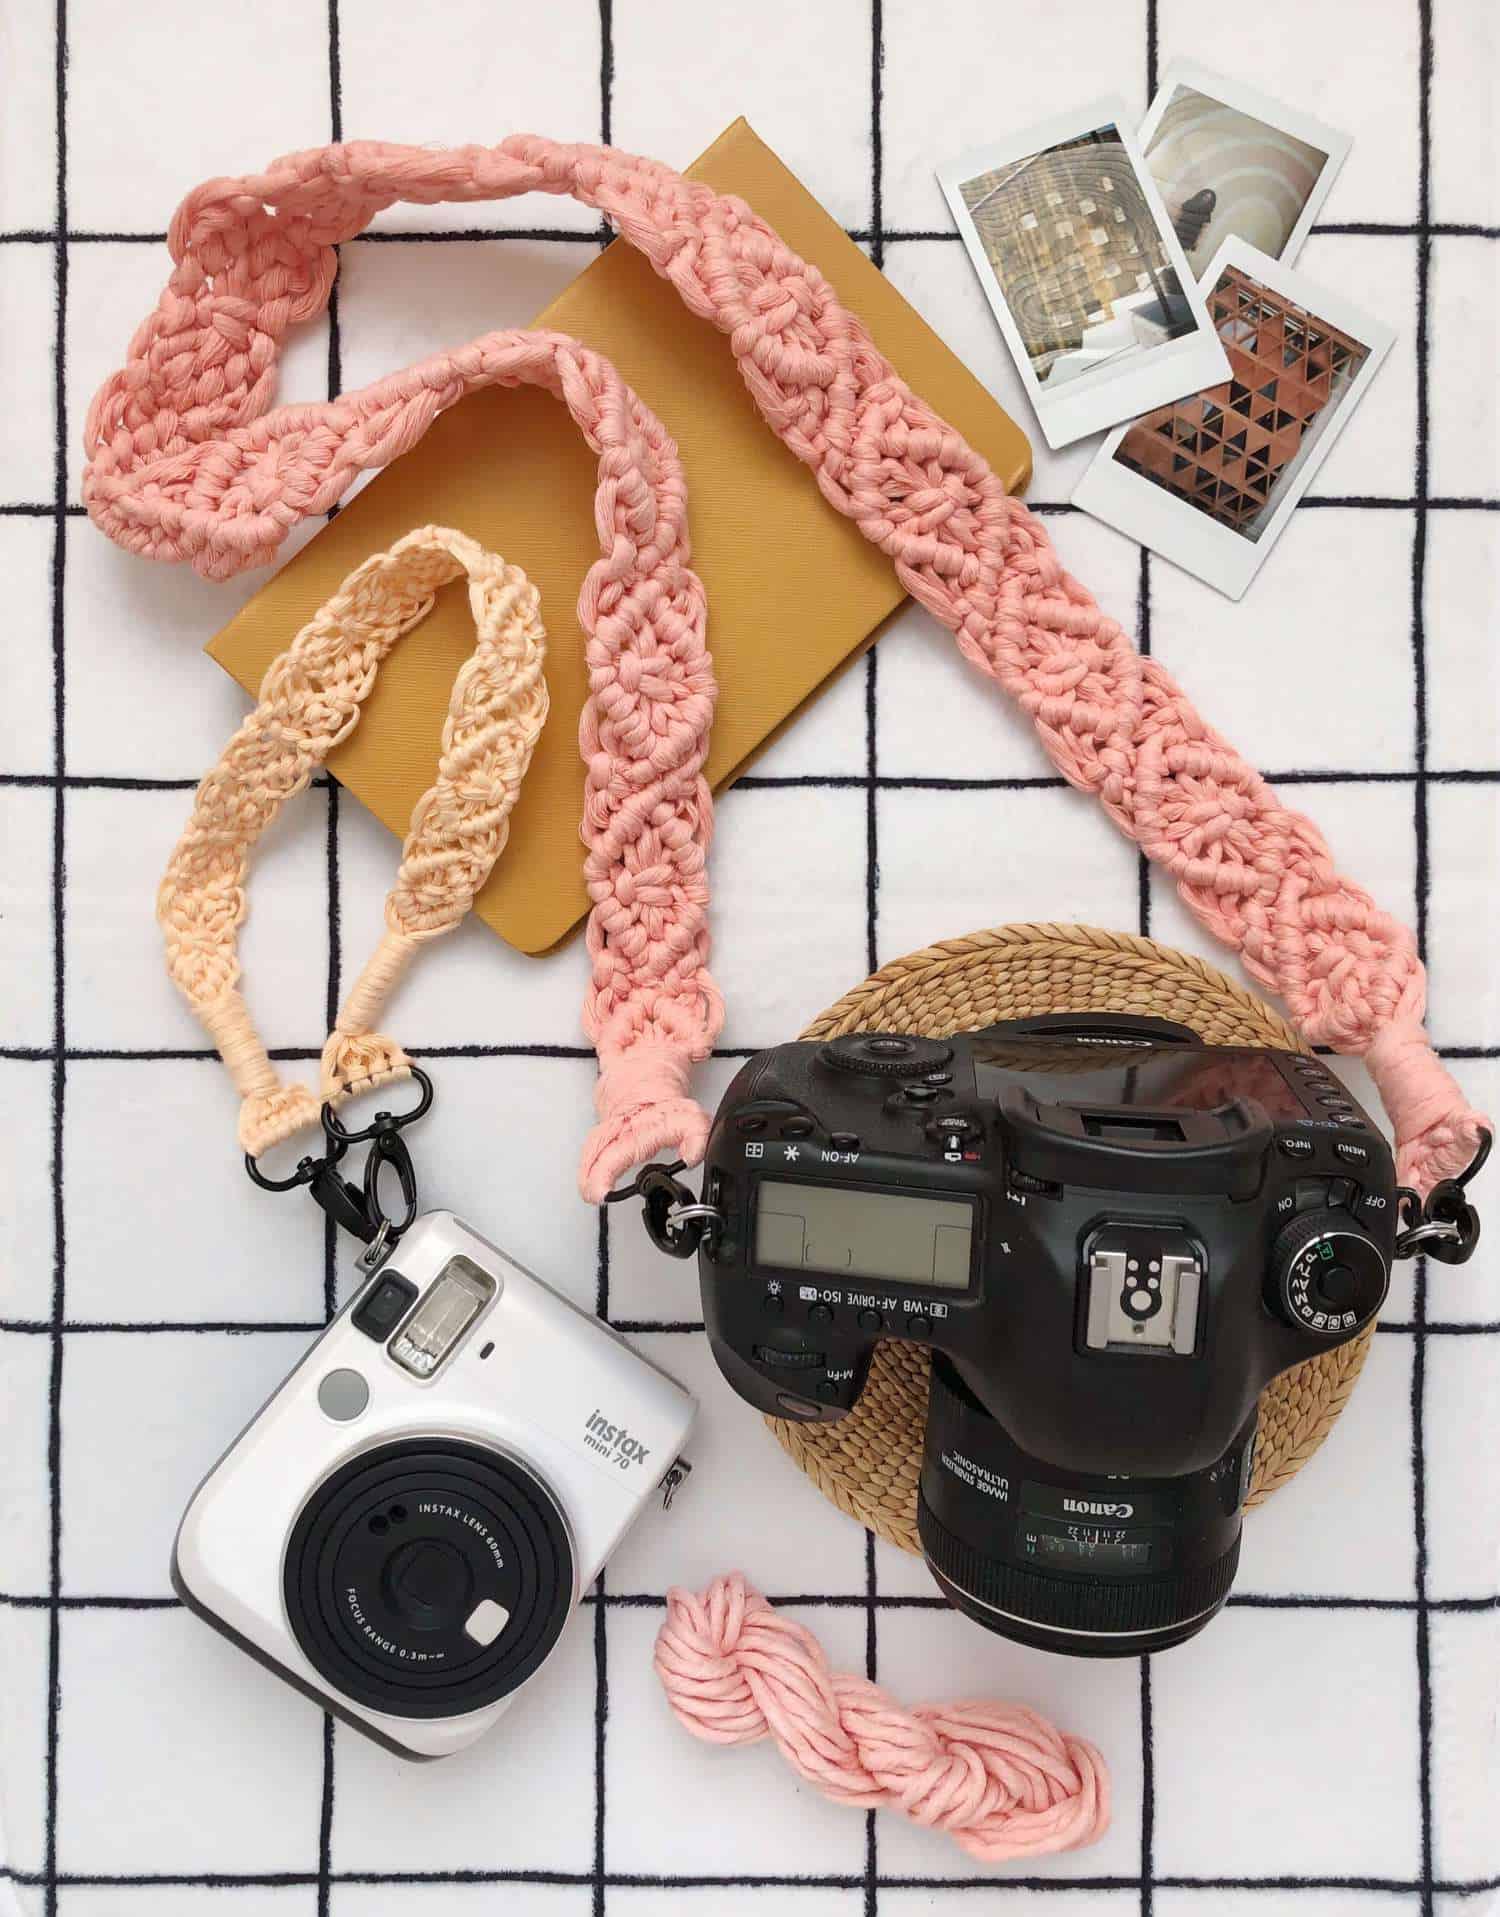 For those of us that still enjoy lugging around our trusty DSLR or Instax instant cameras, there’s a need for cute camera straps. Gone are the days of settling for factory grade black nylon straps.
This simple macrame camera strap tutorial will not only work as an accessory to anything in your capsule wardrobe, it’ll ensure you’re able to explore your own city hands free.
Don’t need a standard length camera strap? I’m also sharing a wristlet camera strap for those who like to travel light! There are so many great cotton yarns on the market, so it’s easier than ever to pick your favorite color.
You can also stick with natural cotton if you prefer something really neutral. The best part is that if these get dirty, you can just throw them in the washing machine on a gentle cycle and it’ll be as good as new.
Related: How To Macrame: A Step By Step Guide For Beginners
Check out our How to Make Friendship Bracelets tutorial!

 Supplies
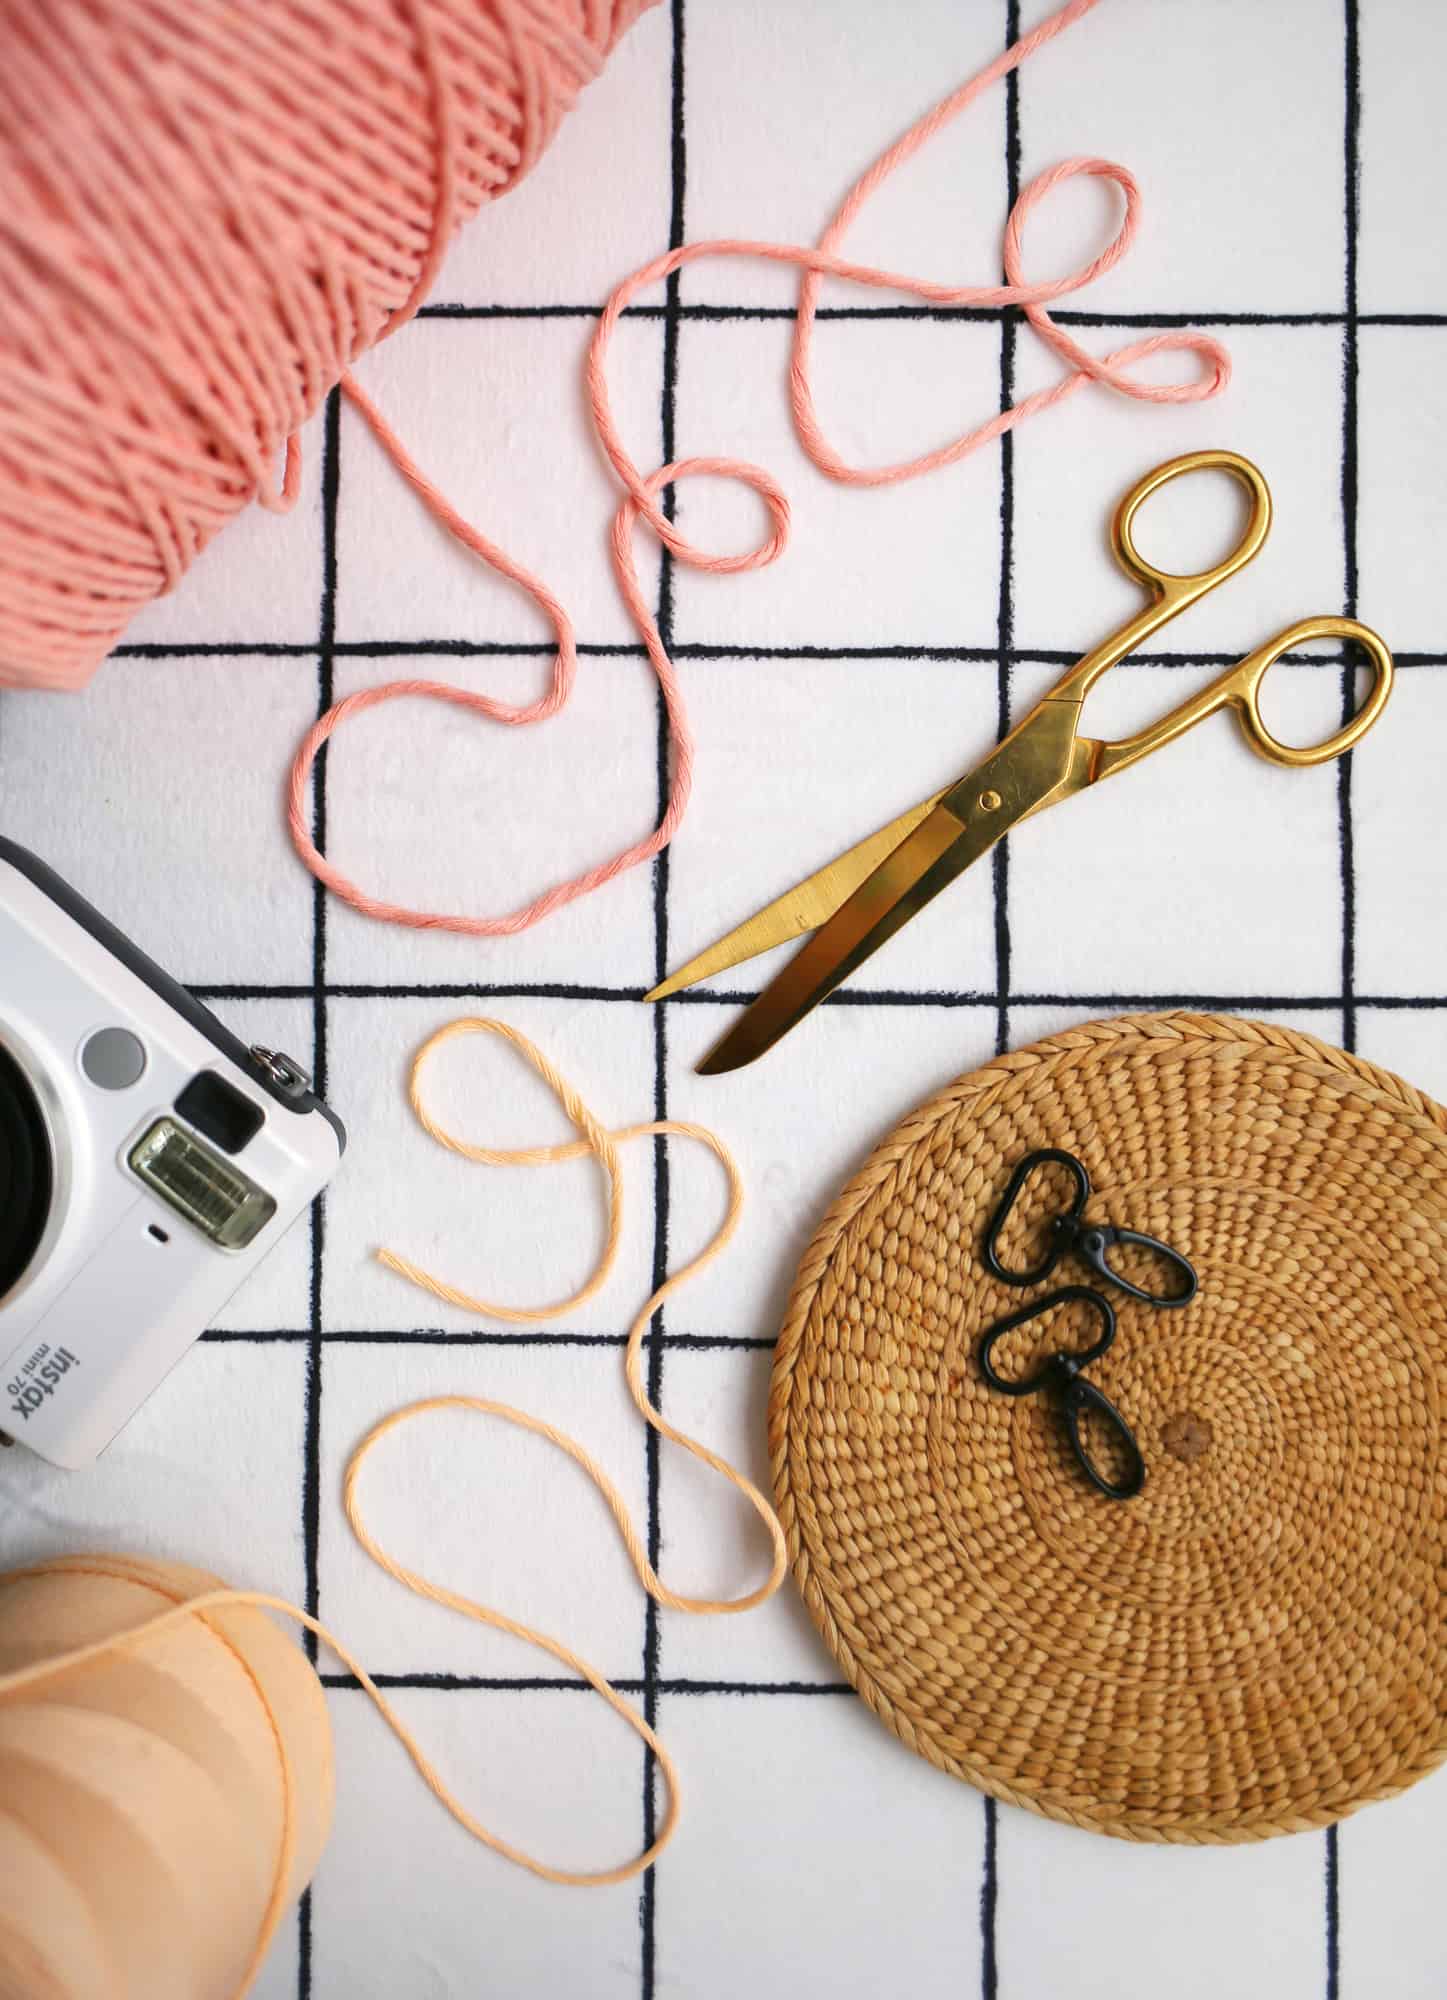
–two 1″ black swivel lobster claw clasps per strap
-102′ of 3mm soft cotton cord for a 40″ camera strap (shown in photo)
-116′ of 3mm soft cotton cord for a 48″camera strap
-40′ of 2mm combed cotton cord for a wristlet strap (shown in photo)
-scissors
–over the door hook to anchor the clasp to while tying knots
NOTE: I used an over the door clothes hook and metal hoop that I hooked my clasp to for maximum comfort. You can also use an S-hook. The instructions below teach how to construct any of the three different camera strap lengths even though I am only showing how to construct the wristlet. Note that 2mm cord and 3mm cord will give you different outcomes in both width and length, so be sure to use the correct cord weight shared in the links above.
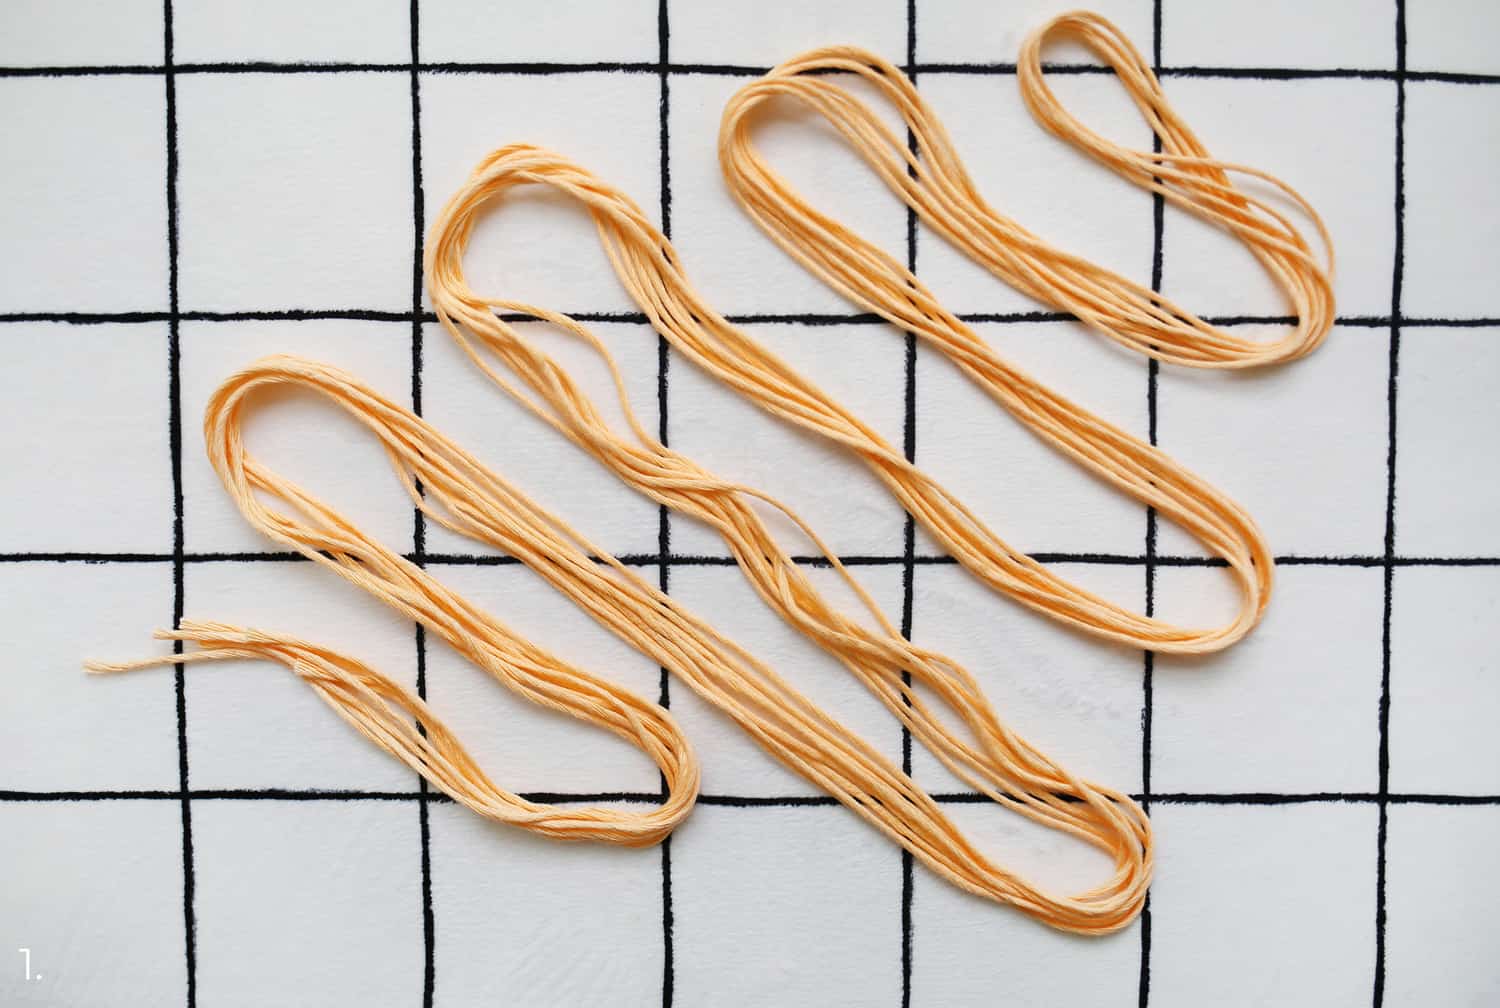 Step One: If you’re making the roughly 40″ camera strap, cut four 25′ strands of 3mm cotton cord and set the rest aside.
If you’re making the roughly 48″ camera strap, cut four 28.5″ strands of 3mm cotton cord and set the rest aside.
If you’re making the wristlet camera strap, cut four 9′ lengths of 2 mm cotton and set the rest aside.
Step Two: Hook your black lobster clasp to a hook, hoop, or S-ring. Fold one of your four strands in half so that you find the center. Loop the center over the bar of the clasp and then slide the ends through the loop to create a lark’s head knot.
Step Three: Repeat with the next three strands. Then split them apart so that four strands are on one side and four strands are on the other. I will refer to these as strands 1-8 from left to right.
Even if they move around, I’ll still refer to them in the order that they rest in each step. For example, if strand two finds itself on the opposite side after a knot, if will no longer be strand two but strand seven.
Step Four: Use strand four to tie two half hitches around strand five so that they rest about 2.5″ from the clasp.
Step Five: Use strand three to tie two half hitches as well.
Step Six: Repeat with strands two and then one. Now split the strands in half again so that the first four on left are the new strands 1-4 and the four on the right are strands 5-8.
Step Seven: Use strand six to tie two half hitches around strand five.
Step Eight: Repeat with strands seven and then eight. This makes the top half of your diamond pattern.
Step Nine: Use strands and seven and eight to tie a half knot over the middle strands (3-6). Don’t pull it too tightly.
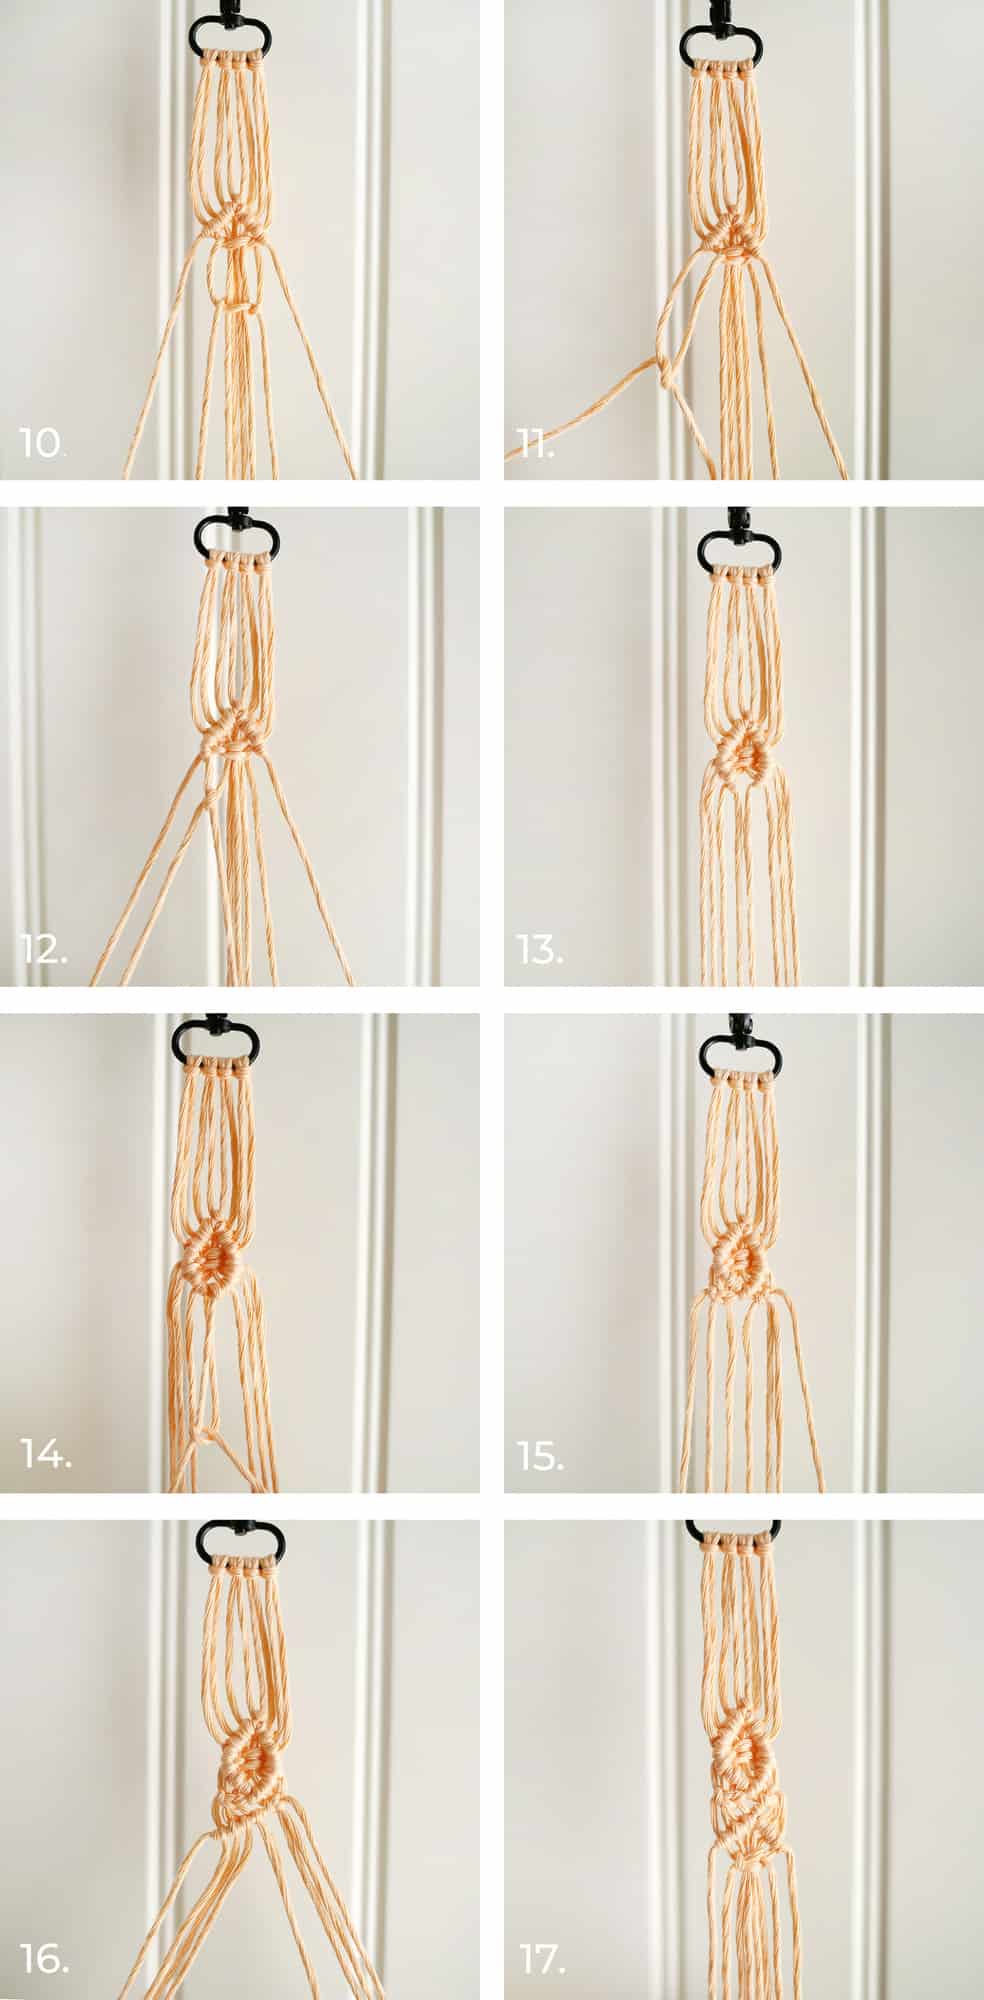 Step Ten: Take the new second strand and the new seventh strand and tie another half knot over strands three through six to form a square knot.
Step Eleven: Use the new strand two to tie two half hitches around strand one. This will start the bottom part of your diamond.
Step Twelve: Use strand three to tie two half hitch knots and then strand four.
Step Thirteen: Use strand seven to tie two half hitch knots around strand eight and then follow them using strands six and five.
Step Fourteen: Use the new strand four to tie two half hitch knots over strand five to close the bottom of your diamond.
Step Fifteen: Use strands one and four to tie two half knots to form a square knot over strands two and three. Repeat with strands five and eight over strands six and seven.
Step Sixteen: Start on your next diamond by using strand four to tie two half hitch knots over strand five, then repeat with strands three, two and one.
Step Seventeen: Finish the other top half of your diamond and then use the new strands two and seven to tie a square knot around strands three through six. Then finish up the bottom of your diamond, add square knots on either side of your diamond, and start a new diamond. Repeat until you are about three inches short of your desired length.
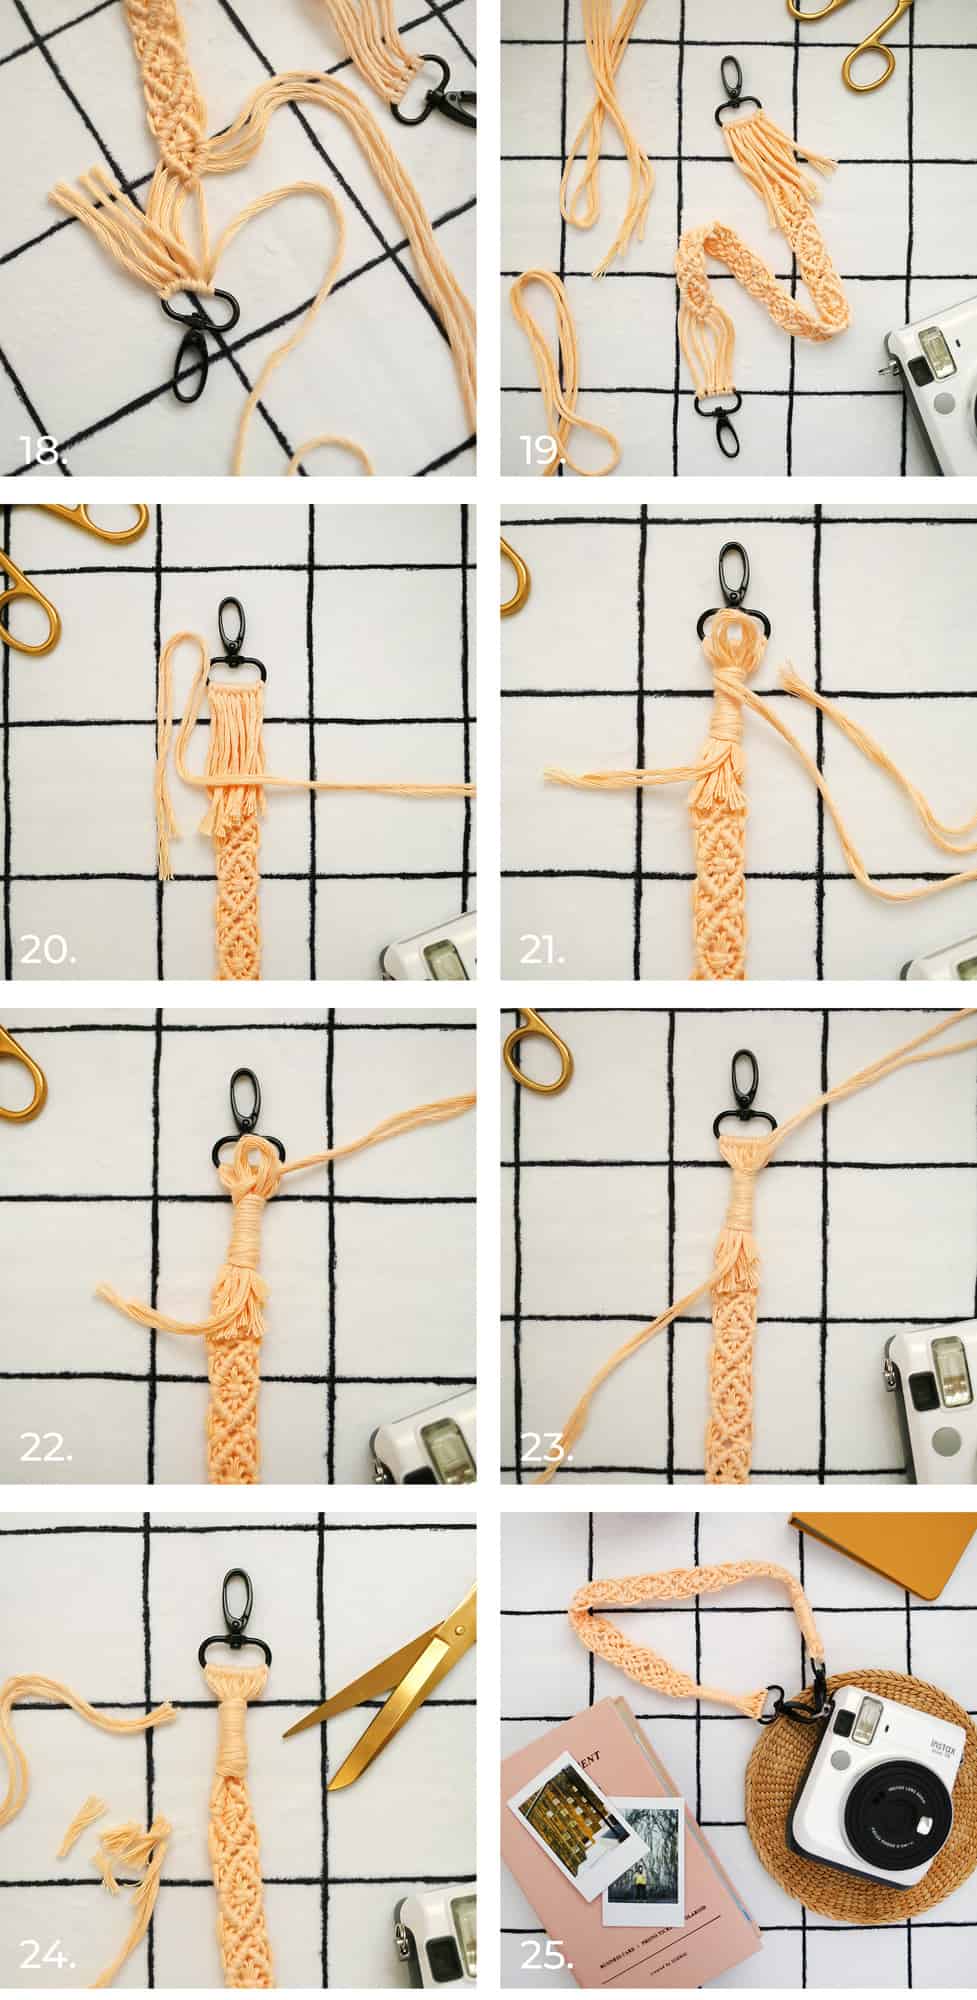 Step Eighteen: Trim your strands so that they are all about 6.5″ long. Tie each strand to the second lobster clasp with a lark’s head knot (also called a cow hitch). Only this time, you’ll have to tie it using only one strand. See details here. Be sure that the knot is about 3″ down from the last diamond and has about 3″ of a tail.
Step Nineteen: You’ll be doubling the amount of lark’s head knots on this lobster clasp, so squeeze them together tightly.
Step Twenty: Use the cord that you set aside at the beginning and cut two 2′ strands. Make an upside down U-shape with one end of the two strands so that the U is slightly above the lark’s head knots. Then fold the strands again near the tails of the lark’s head knots so that they reach over the strap.
Step Twenty-One: Use the long end of those two straps to trap the U-shape on top of the strap and continue wrapping around all of them to create a wrapped knot.
Step Twenty-Two: Once you’re almost to the lark’s head knots, place the long end of your wrapped knot strands through your loop.
Step Twenty-Three: Pull down on the other end of the loop so that the U shape, along with the long end, disappear under the wraps.
Step Twenty-Four: Trim off both ends of the wrapped knot and then gently trim off the excess from the tail ends. Spread your wrapped knot down to cover the cut ends.
Step Twenty-Five: Add another wrapped knot to the other end of your strap. It won’t be quite as thick because there are half as many strands to wrap around, but it won’t be too noticeable. Attach both lobster clasps to the same ring hook on your camera for the wristlet version.
If you’re making the 40″ or 48″ version, you’ll follow all of the same directions above but will attach one lobster clasp to each side of your camera.
NOTE: These camera straps are sturdy if made according to the directions. Always test out your camera strap holding your camera over your bed before taking it out. Always check that your lobster clasps are securely attached to your camera before picking it up.
I recommend the wristlet for smaller cameras, such as an Instax Mini. If you’re using a large DSLR with a heavy lens, it’s probably better to go with the larger strap for the sake of comfort. However, the larger strap also looks REAL cute when attached to a smaller camera.
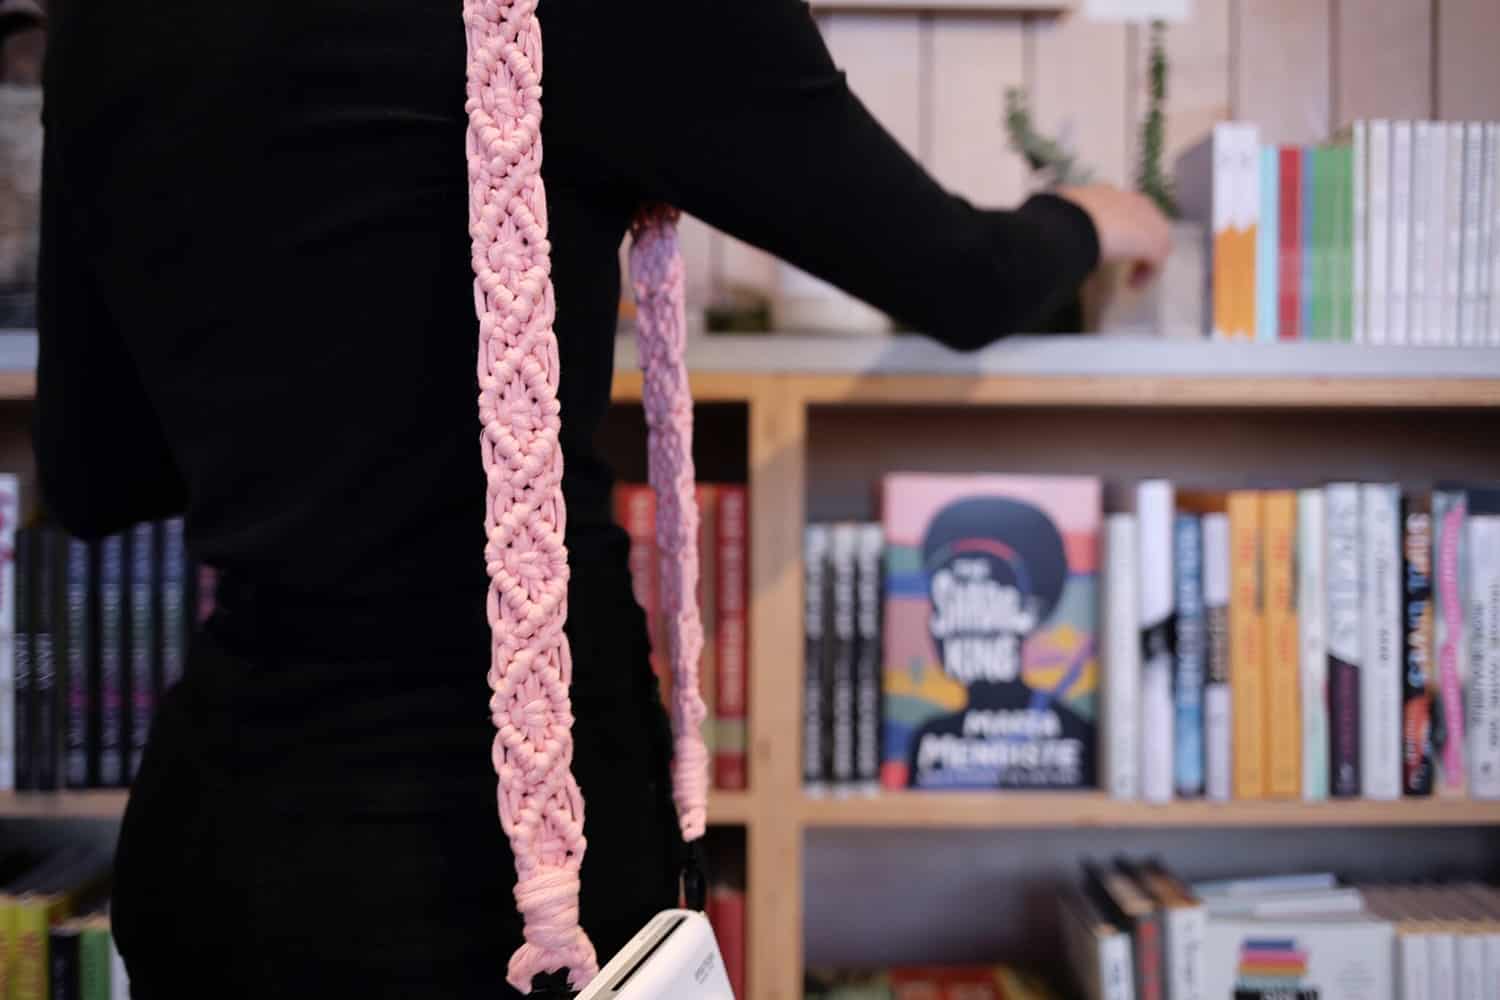
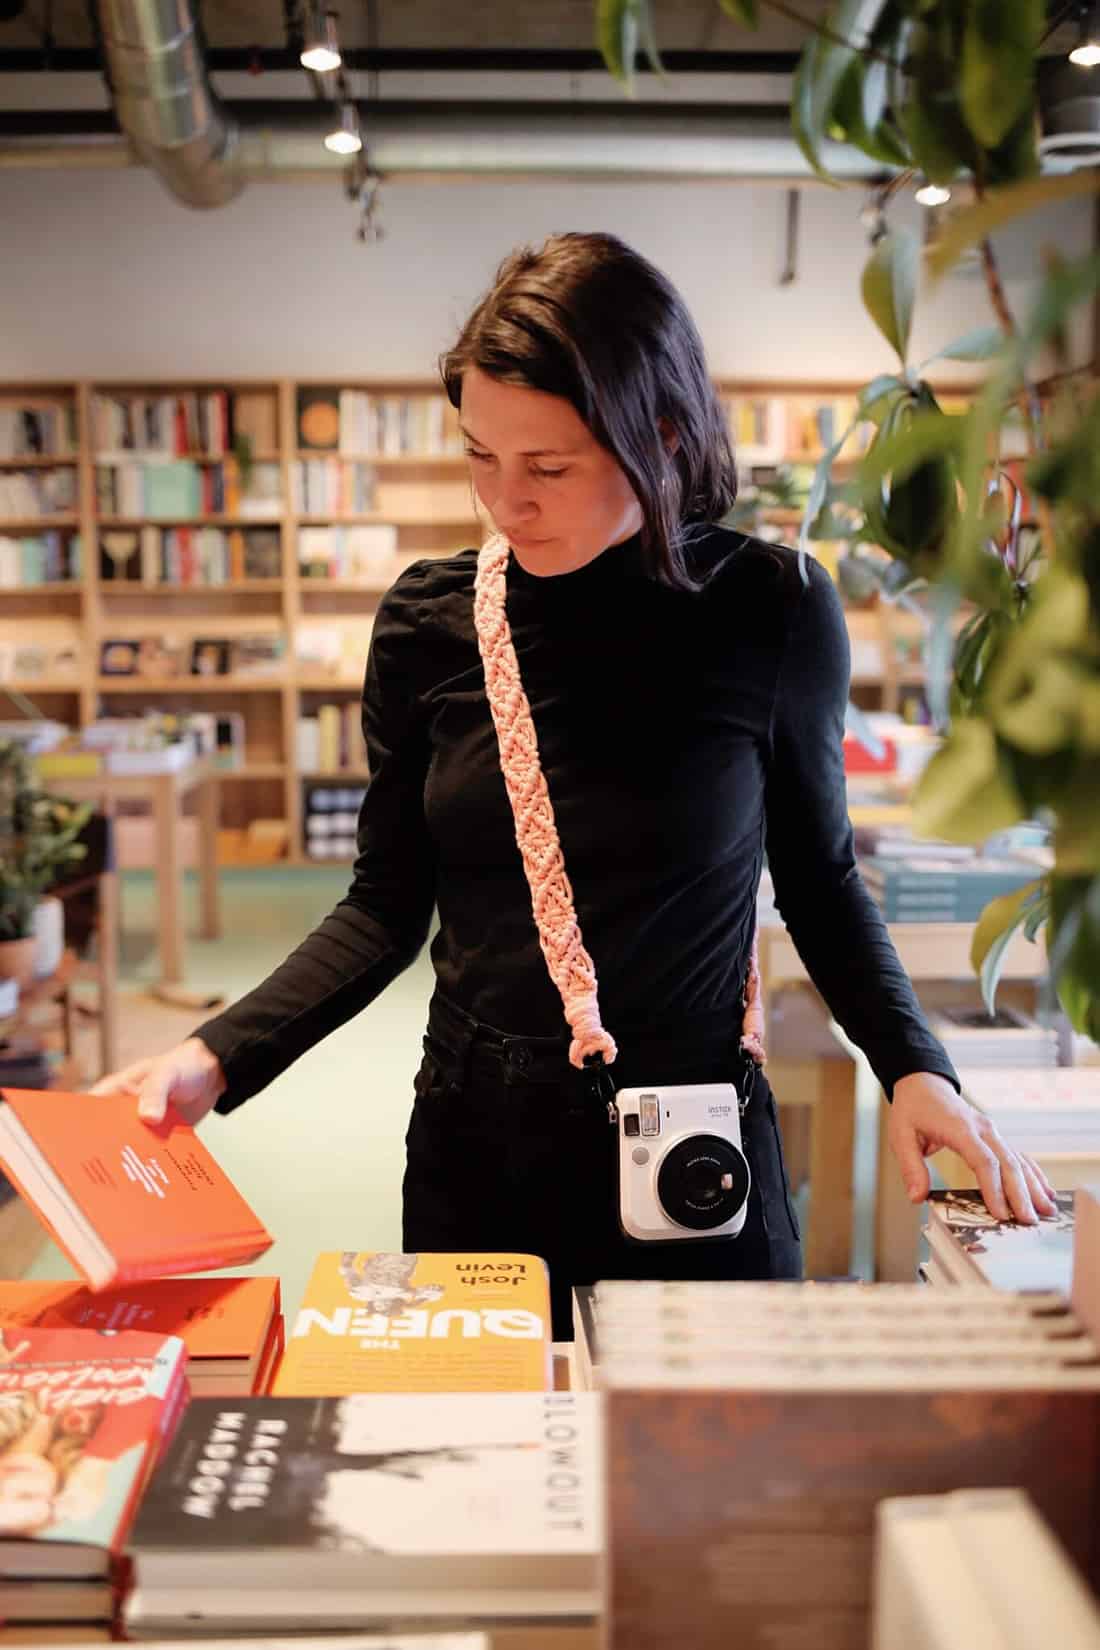
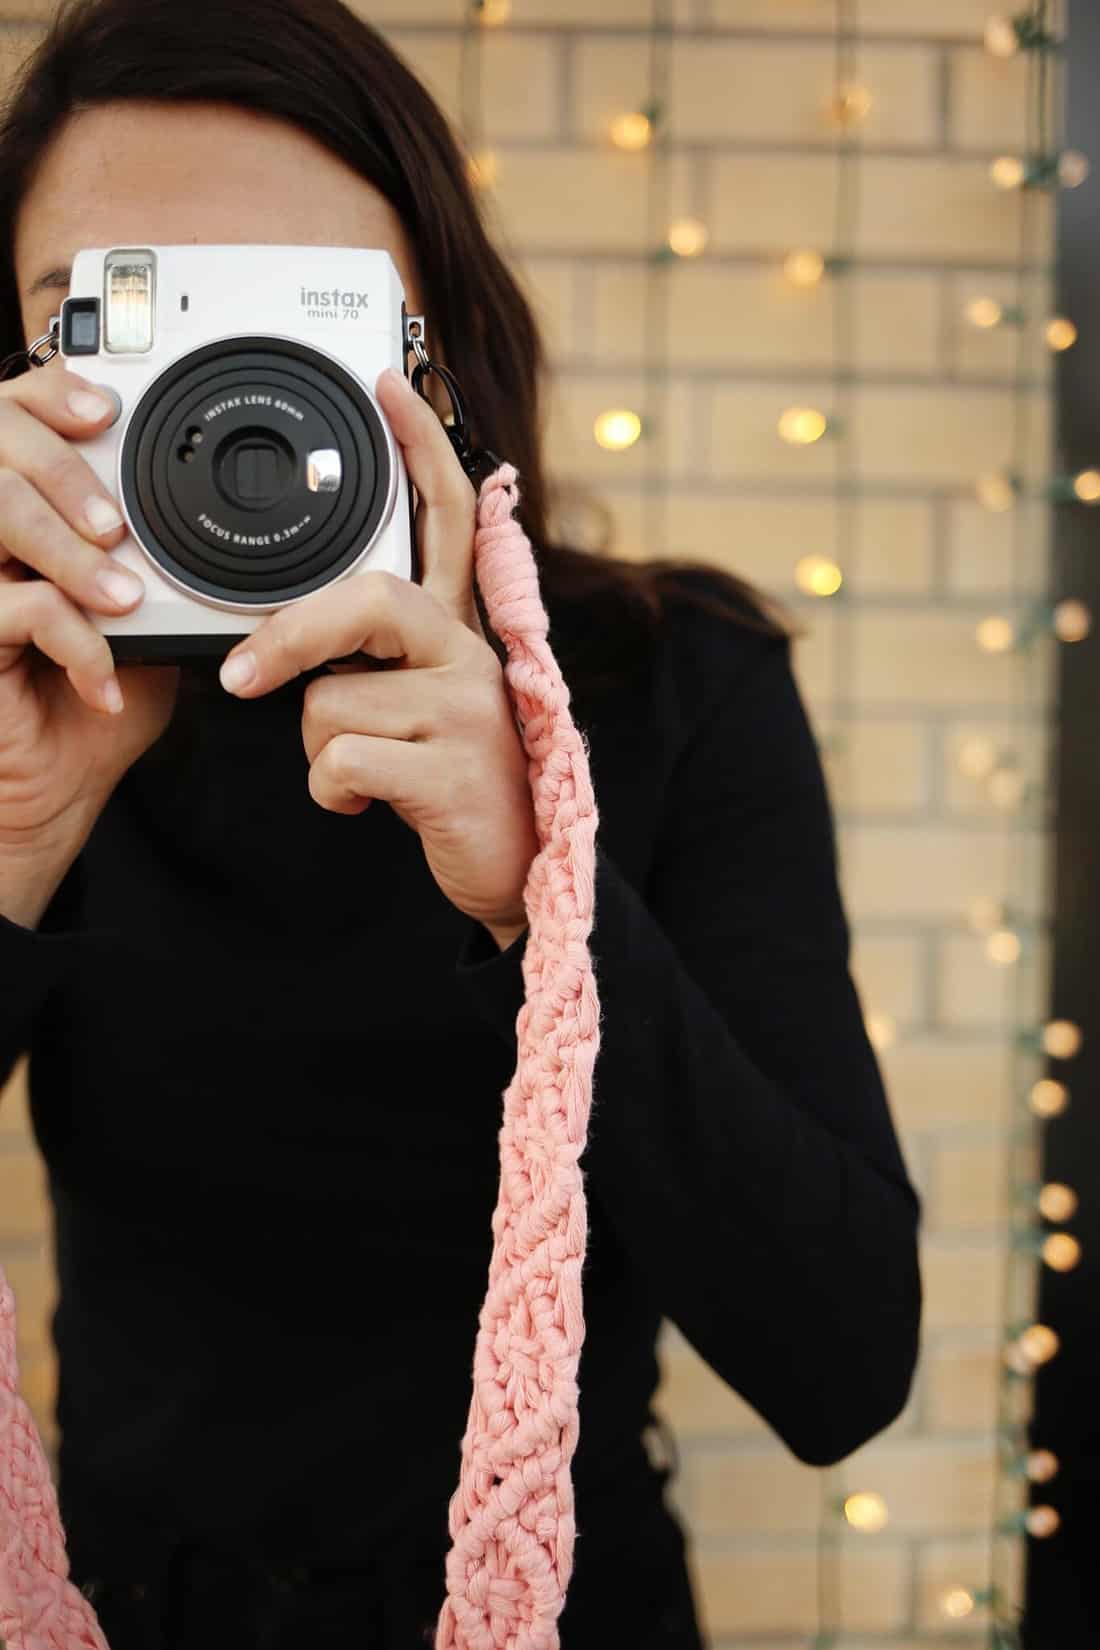 This project only took me a few hours to make after I figured out the details. It’s inspiring me to grab my DSLR instead of always relying on my smartphone for photos!
If you’re already pretty familiar with macrame, there are SO many knot patterns you can create to customize your strap even further. Enjoy! –Rachel
Interested in more simple macrame projects? Check out our macrame table runner, macrame room divider, macrame handbag, macrame Christmas stocking, and macrame bracelet.
]]>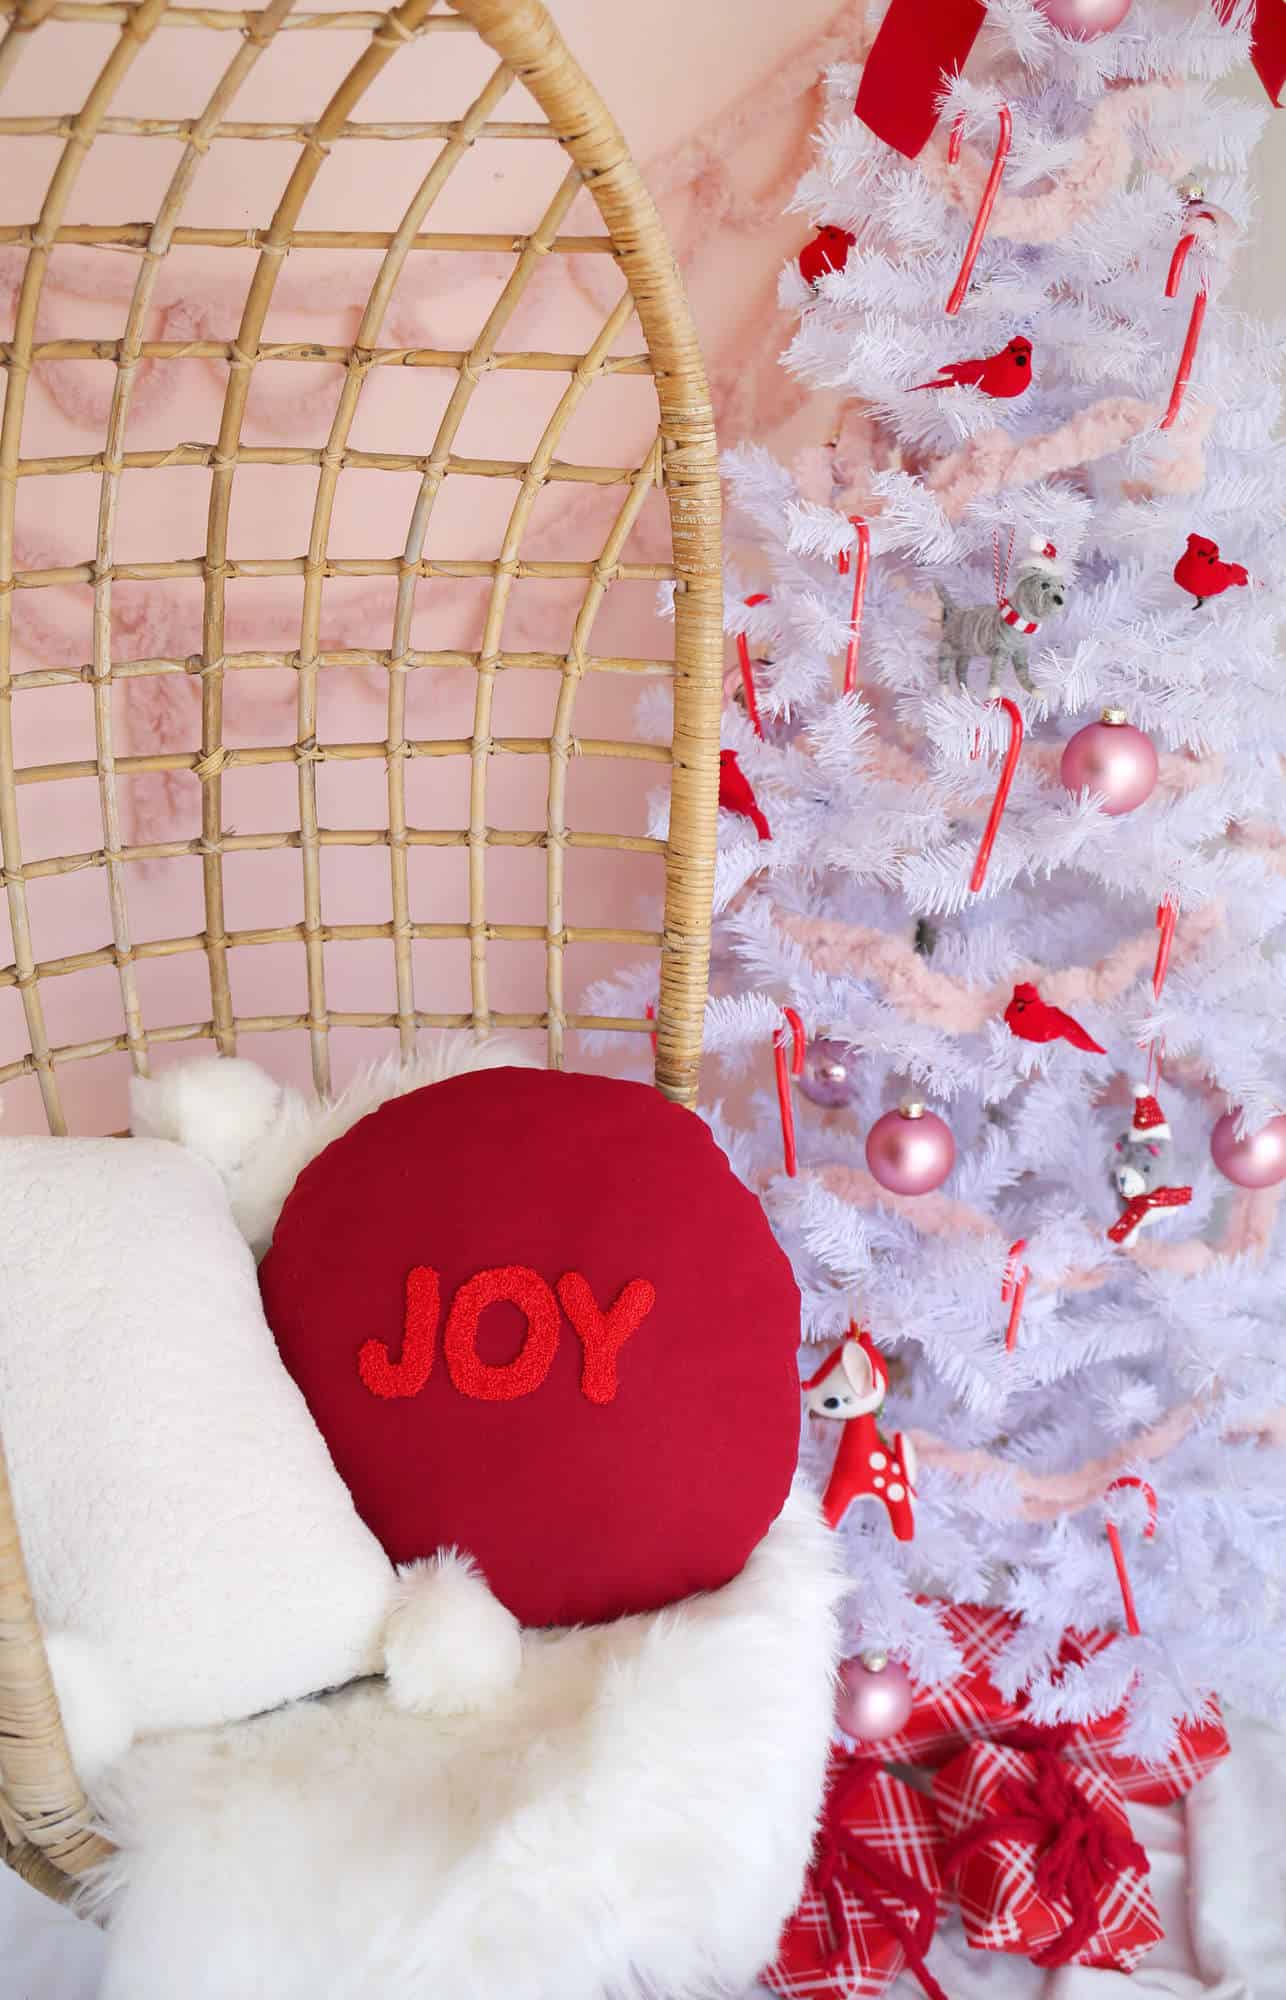 If you’ve been itching to try your hand at punch needling but need something less intimidating to start with than a WHOLE pillow, this is the project for you! We partnered with JOANN to share a tutorial on creating this fun and festive pillow! Punch needle embroidery is the same concept but with much thinner thread, so you can work on more delicate lines, create embroidery-like images, or just get a lot of texture in a small space. It’s perfect for customizing a throw pillow or two for the holidays and can easily be scaled down to make your own ornaments!
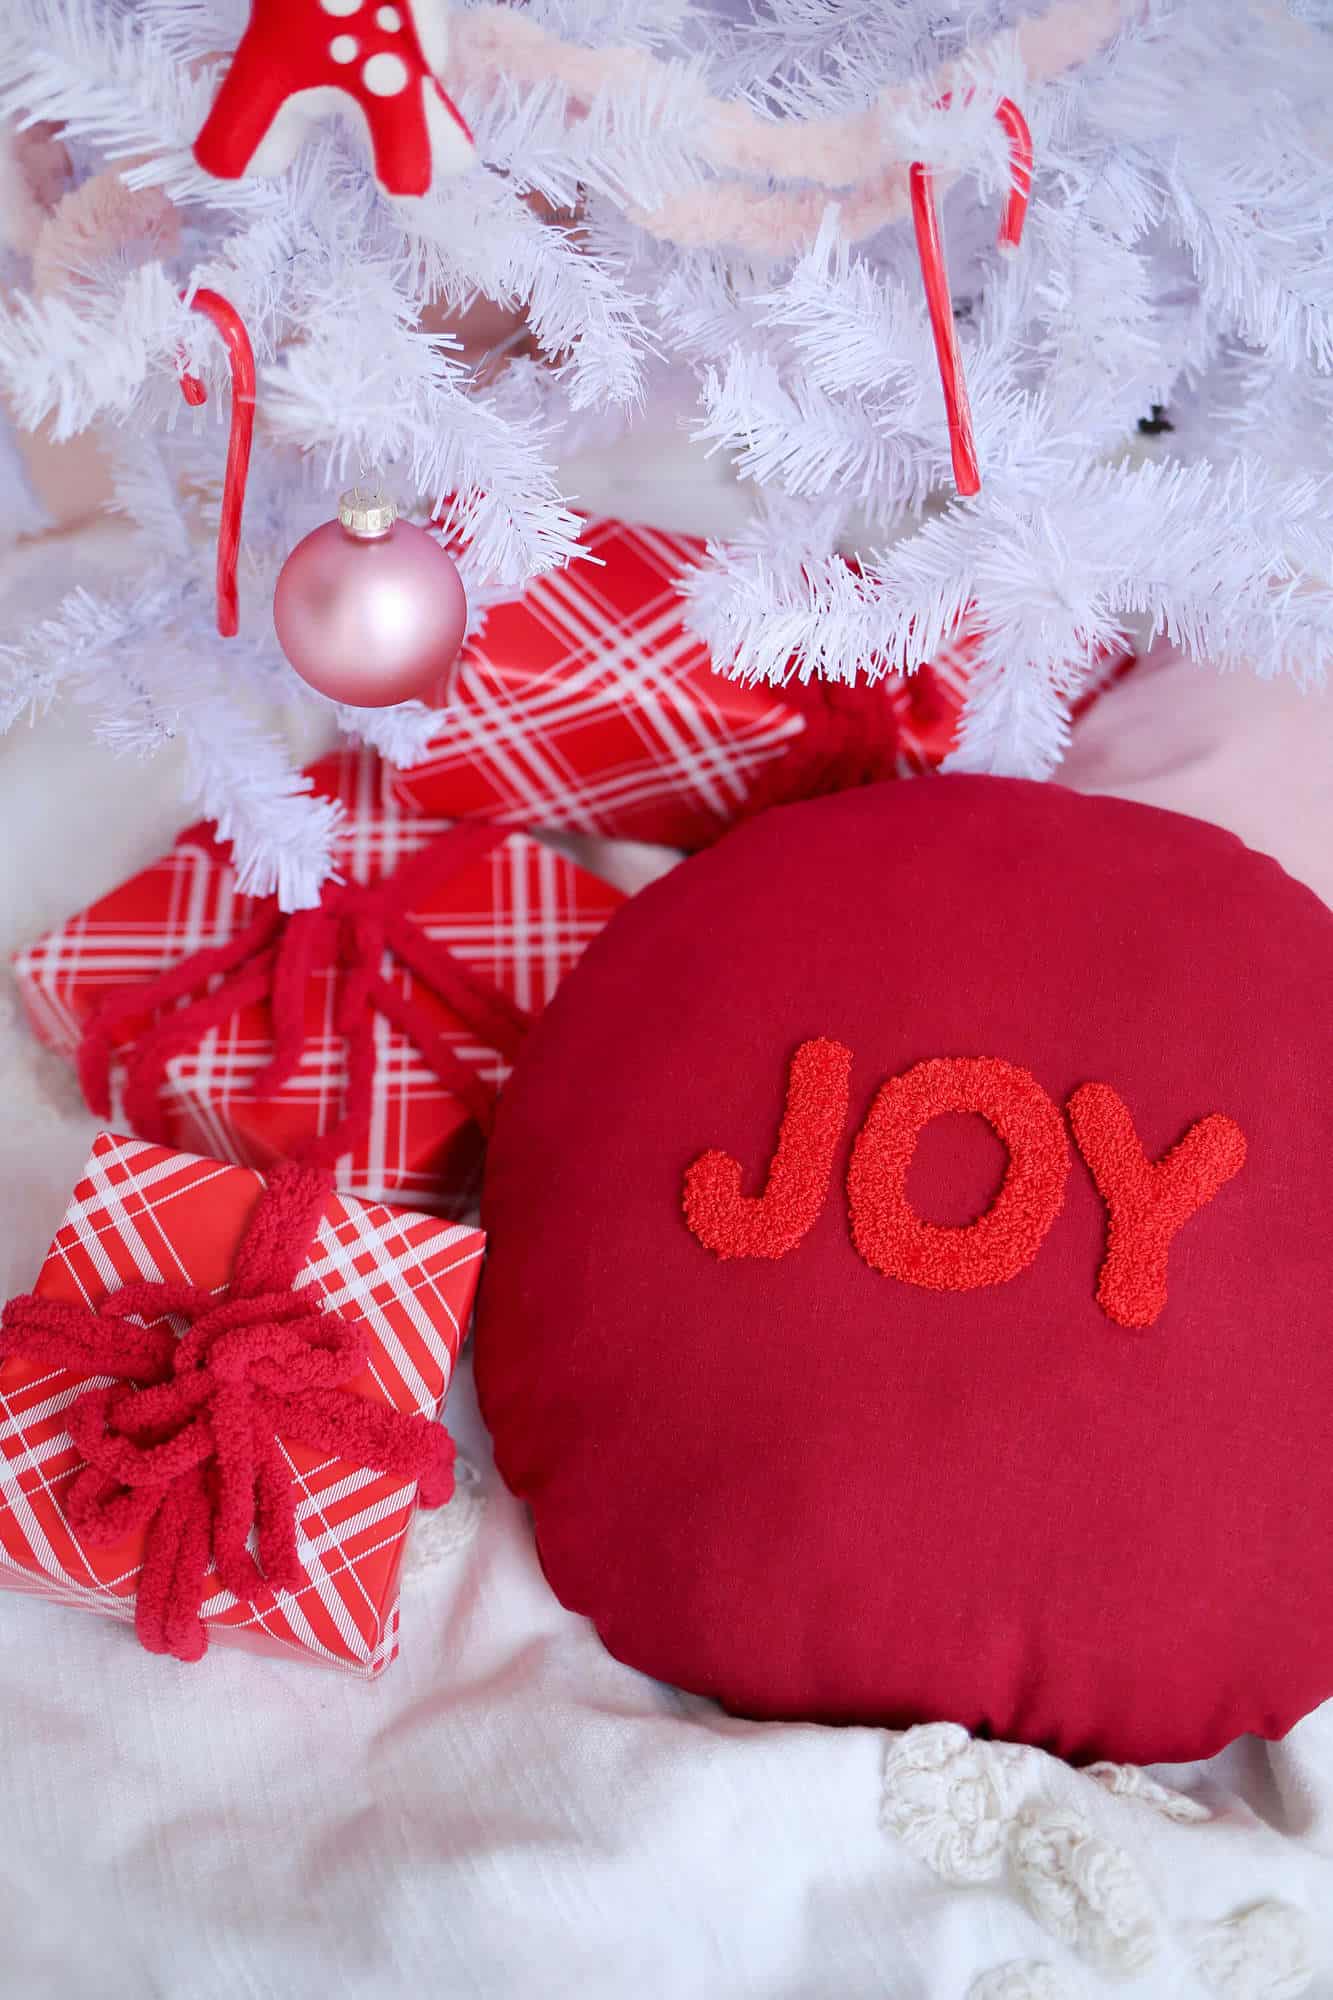
In this round holiday pillow project, I used my embroidery punch needle to spell out the word “joy.” It took much less time than I imagined it would and since I punched it out on a red linen backing, I didn’t have to fill the whole front of the pillow and got to catch up on laundry instead. Just kidding, I caught up on Grey’s Anatomy.
 Supplies
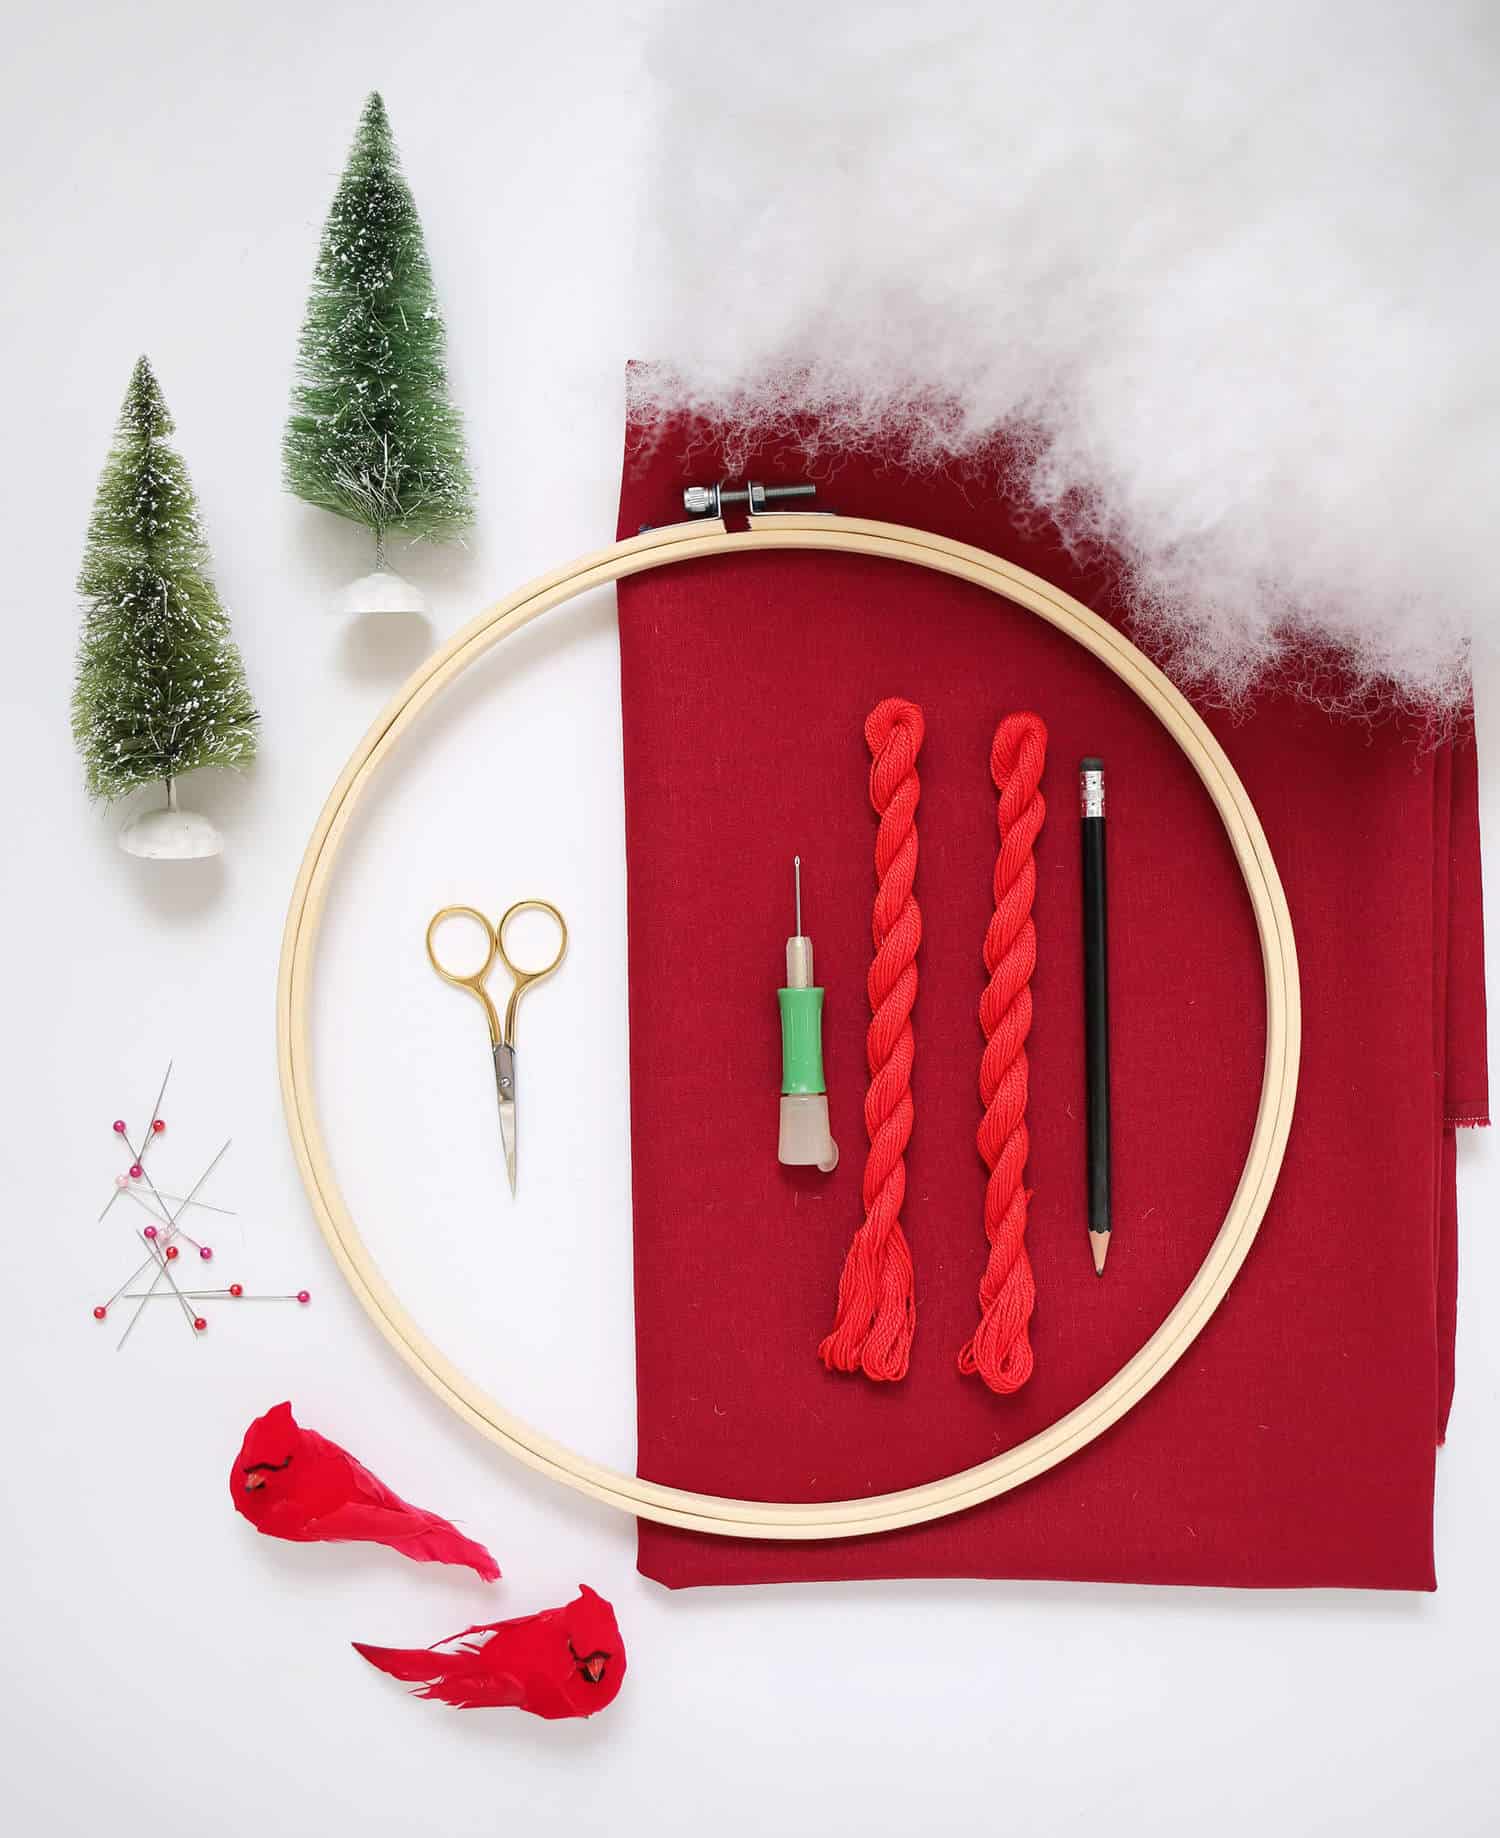
–1/2″ yard scooter red linen fabric
–14″ wooden quilting hoop
–Boye 2.2 embroidery punch needle
–three skeins of 6 ply red cotton embroidery floss
–poly-fil stuffing
–JOY Pillow Template
–straight pins
-scissors
–sewing machine (optional but I’ve linked to the one I’ve had for years and love)
-sharpie
-iron/ironing board
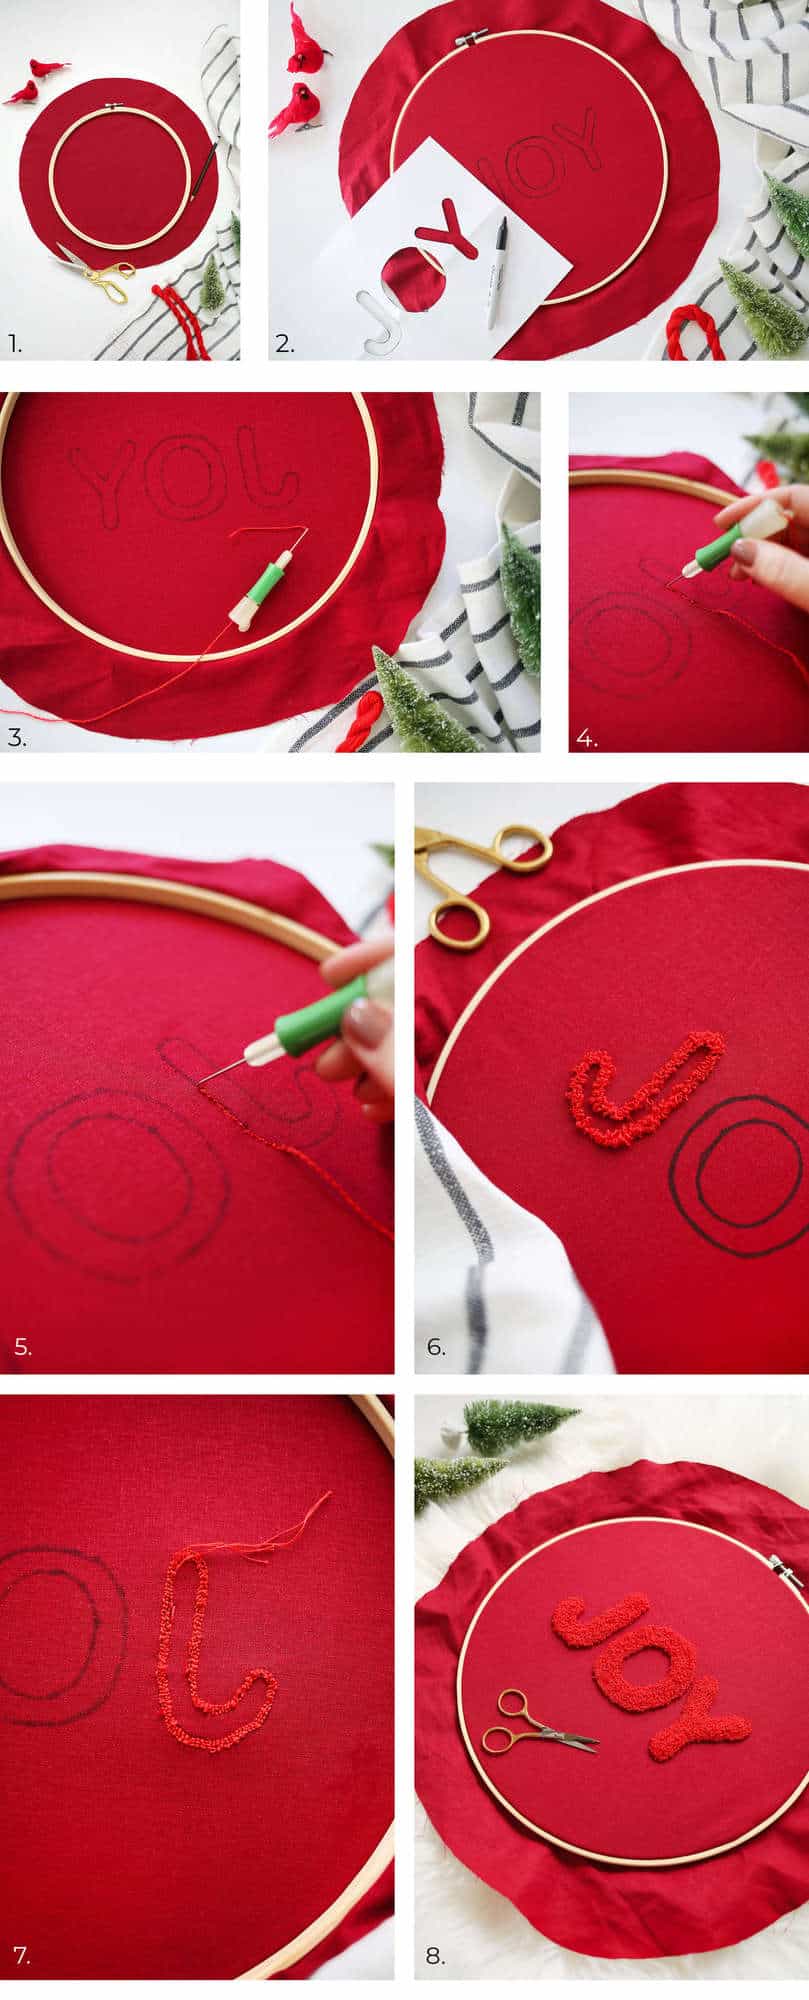 Step One: After pre-washing and ironing your linen fabric, use your embroidery hoop as a guide for cutting out two 16″ circles. The embroidery hoop is only 12″ wide but you can measure out 4″ from the edge and eyeball a wider diameter. Or you can follow these instructions.
Place one of the two circles in your hoop, center it within your hoop, and tighten the screw at the top. Pull your linen fabric taut in opposite directions to keep it centered within your hoop.
Step Two: Print out the provided JOY.pdf and carefully trim along the edges of each word to create a stencil. Center it within your hoop and carefully trace inside of your stencil with a black sharpie. You can pin your paper to the fabric as a precaution if you wish. The sharpie needs to be visible from the back of the fabric.
Step Three: Cut a 4′ length of 6 strand embroidery floss and split it into two bundles of 3 strands each. Six strands is too many for this size needle and less than 3 won’t stay put. Thread your embroidery punch needle according to manufacturer’s instructions. DON’T lose your needle threader. You’ll need(le) it. Hehe … For this type of project, you’ll want to adjust the length of your needle so that it’s only sticking out about 1/2″ from the handle. Not all needles are adjustable but this can help your loop height be more consistent.
Also, flip your hoop over. You’ll be punching from the back so that your loops stick out the front.
Step Four: Deep breath! Start just outside the sharpie line on one of your letters and leave about a 2″ tail hanging out from the needle end. Stitch forward, with the tail side of the needle where the thread is trailing out, on the back side. If the tail side of the needle is facing forward, it can pull your loops out more easily.
Step Five: When you’re punching through the fabric, you want your needle to punch through until your handle almost touches the fabric. When you pull it back out, keep the needle close to the fabric and move forward just a smidge. How much is a smidge? About the width of your needle. Since we’re using linen and not monk’s cloth or something with more obvious rows, just make sure you are keeping your stitches close to each other. You’ll get the hang of it pretty quickly and you can always fill in the gaps with more rows.
Punch until you run out of floss. Then reload your next length. Trim your tail ends down as you go so they don’t get in the way.
Step Six: Work your way around the outside of the sharpie so that it is covered up with loops on the other side. You’ll be moving your hoop as you work your way around the curves of each letter. You always want the needle to be facing in the right direction, so it’s best to rotate your hoop instead of rotating your needle. This is what three full outlines of the first letter looks like. If you like the outlined look, I suggest three rows but not less. This gives a nice thickness to each letter. If you want to fill them in, continue on.
Step Seven: This is the back of three row completions. You want to make sure your rows are as close together as possible to give it a full look on the front. If you see blank spots, just start a new length of thread and fill them in using more rows to keep things uniform. With this type of design, using only one color, it’s OK if you are moving all over the place with your stitches to fill things in. But if you were using different colors or making shorter loops, your rows would be more obvious and you’d want to keep things more uniform.
Step Eight: Continue punching rows from the outside in until all of your letters are filled in and fluffy!
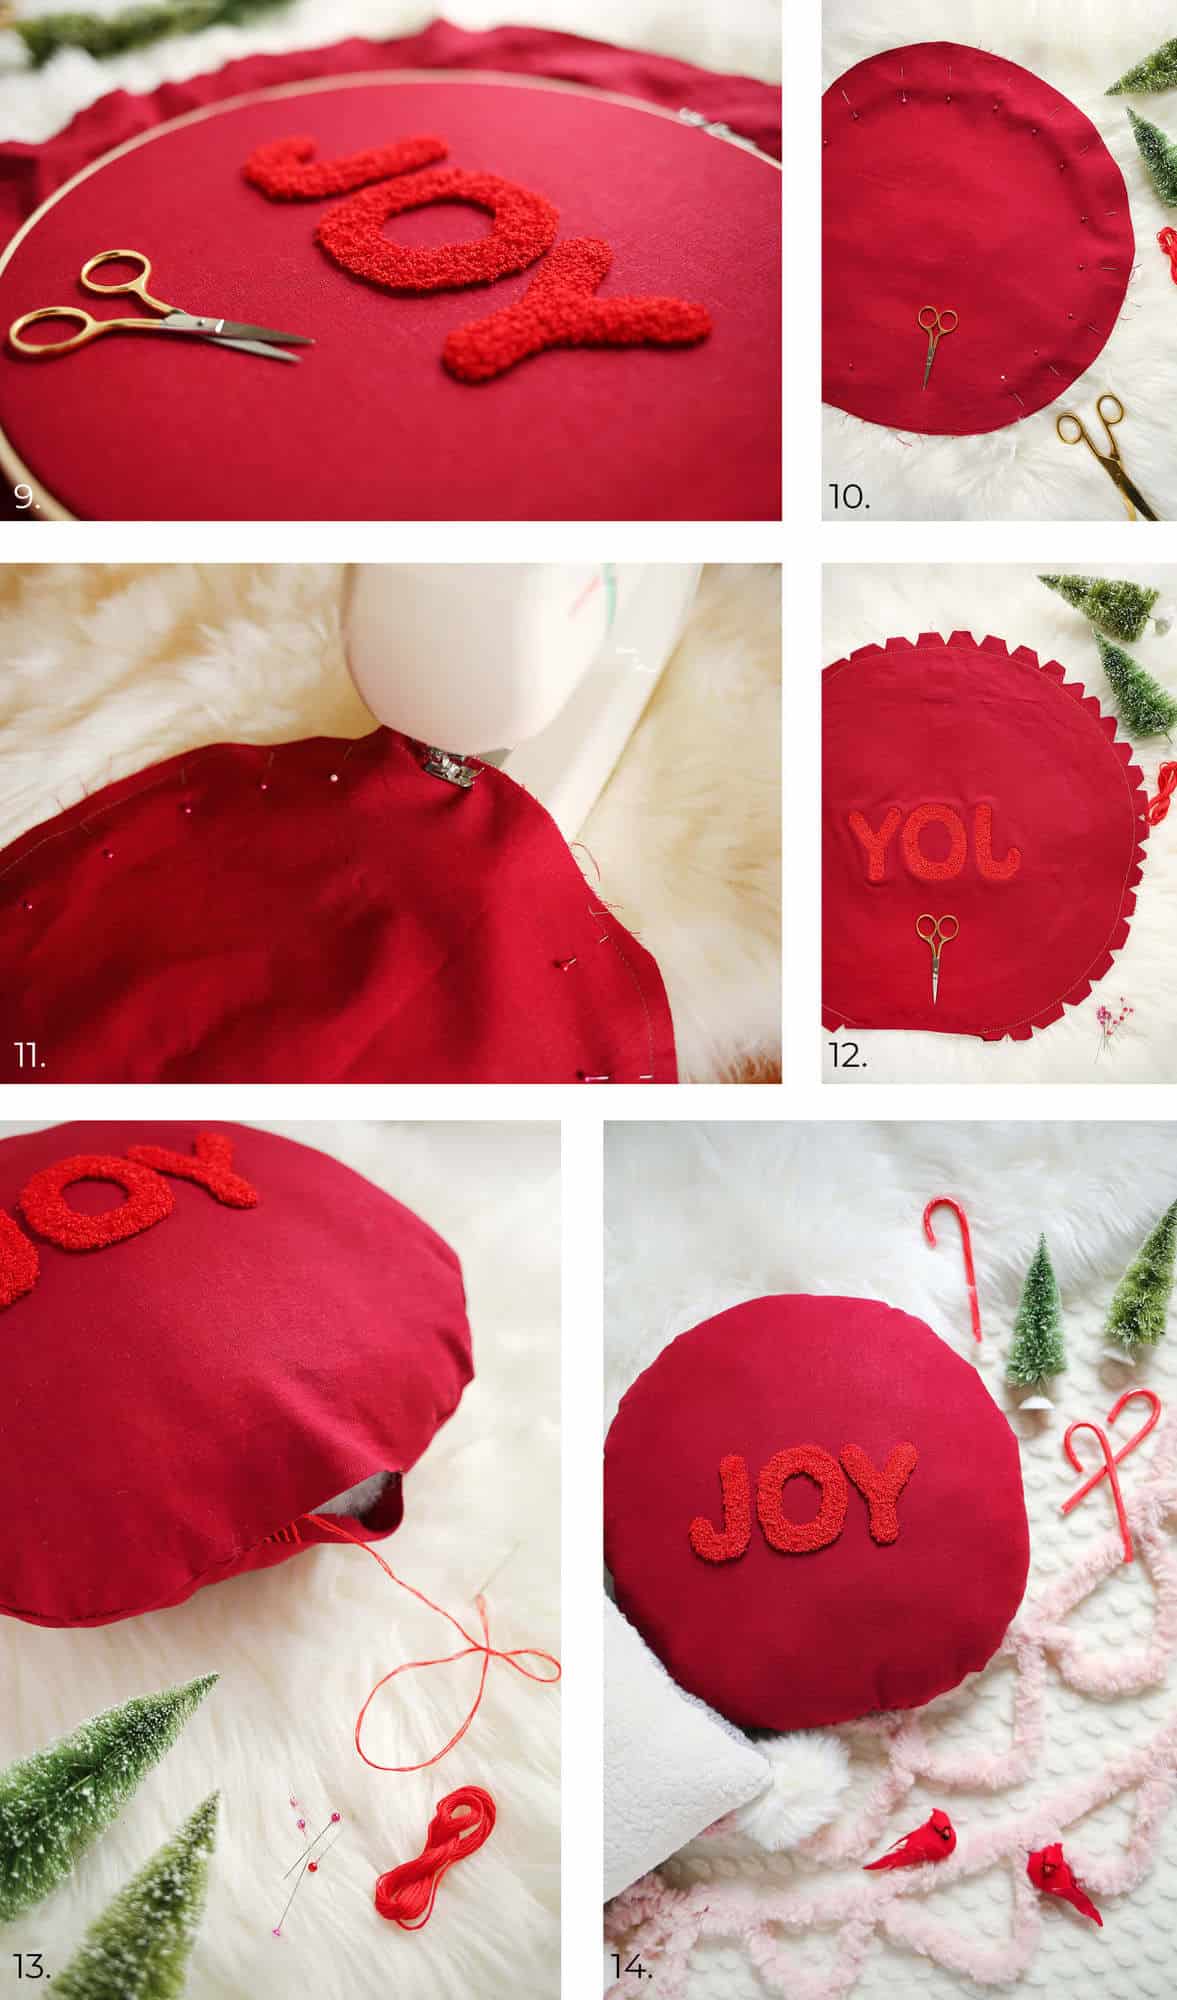 Step Nine: Take a close look at the front and trim any stray strands from tail ends or loops that somehow stand above the rest. If you’re doing a really long loop, you can trim all of them for a completely different, shag effect. For this project, your loops may not be long enough for that to be effective or necessary.
Carefully remove your fabric from your hoop.
Step Ten: Place your punched fabric on your work surface with the loops facing you. Then place the second piece of fabric on top so that outsides are flush with each other and pin the two pieces of fabric together using straight pins as shown. Leave an unpinned space a little wider than the width of your hand in order to turn your fabric right side out later on.
Step Eleven: Hand stitch or use a sewing machine to start stitching on one side of your hand width of space, all the way around the inside of the circle, and to the other side of your hand width of space. Make sure your stitches are even and about 1/4″ from the outside of your fabric. Remove your straight pins. Fold the flaps of your hand width opening back and iron in place.
Step Twelve: Cut small triangle shapes about 1″ apart all along your circle. Make sure the tops of your triangle don’t reach your seam, though! This will help the seam breathe a little when you turn it right side out. If you skip this step, your seam won’t be quite as smooth. Reach your hand through your opening and gently turn your pillow case right side out. Avoid pulling by the punch needle section. Flatten your case and iron along the seam.
Step Thirteen: Stuff your pillow thoroughly and evenly with poly-fil and then use a ladder stitch to close the opening.
Step Fourteen: Fluff your pillow into shape and find it a happy home.
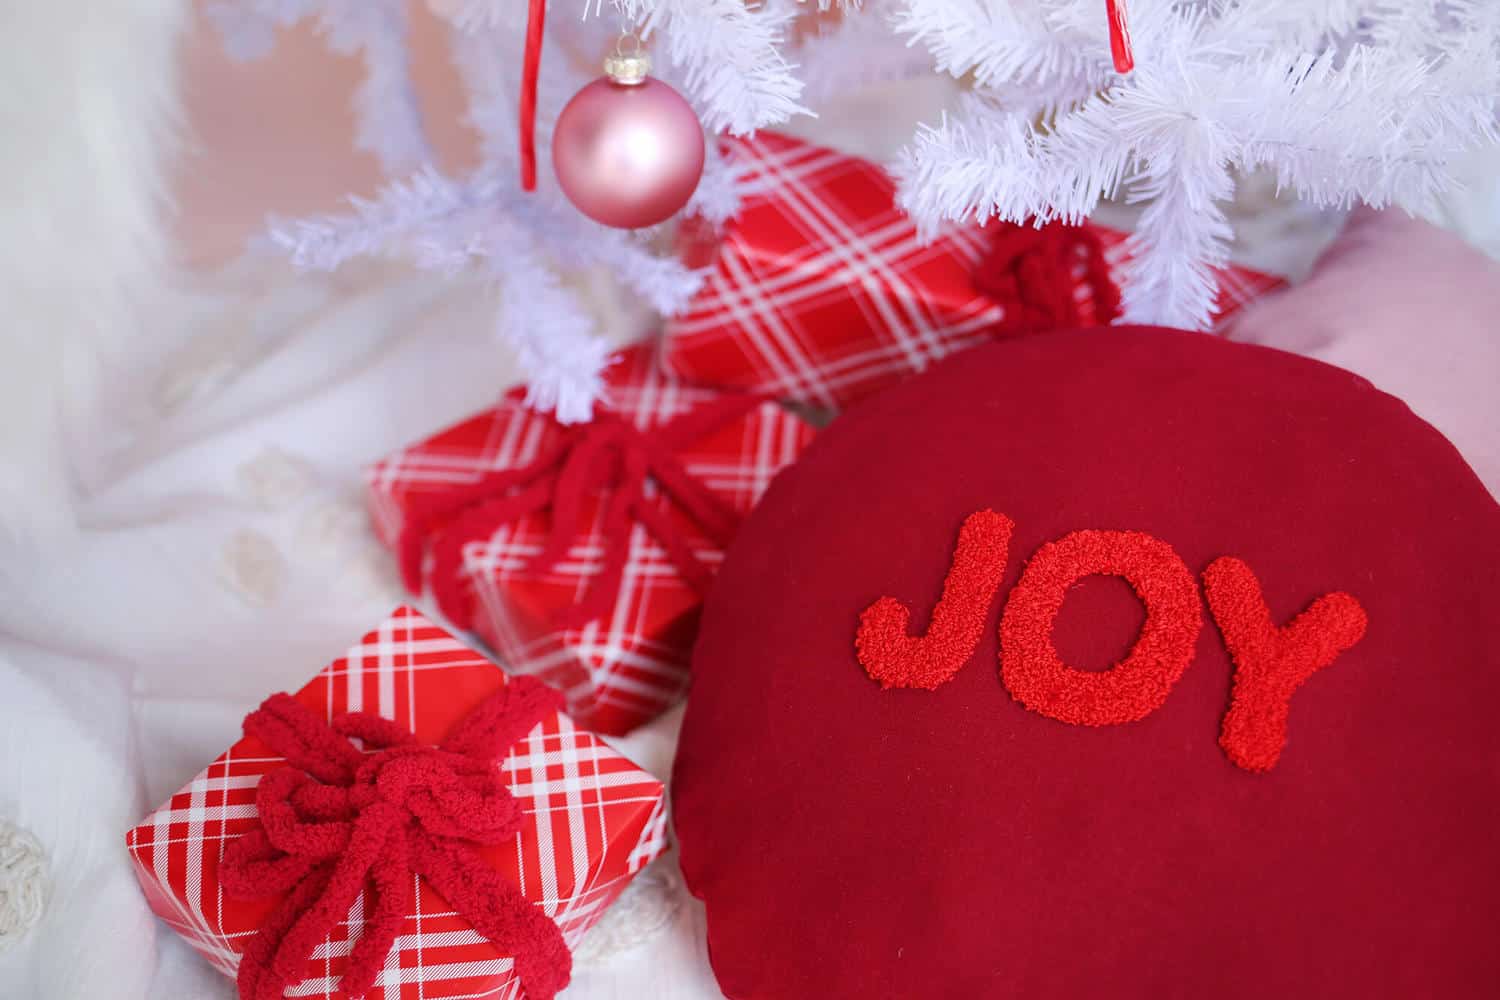
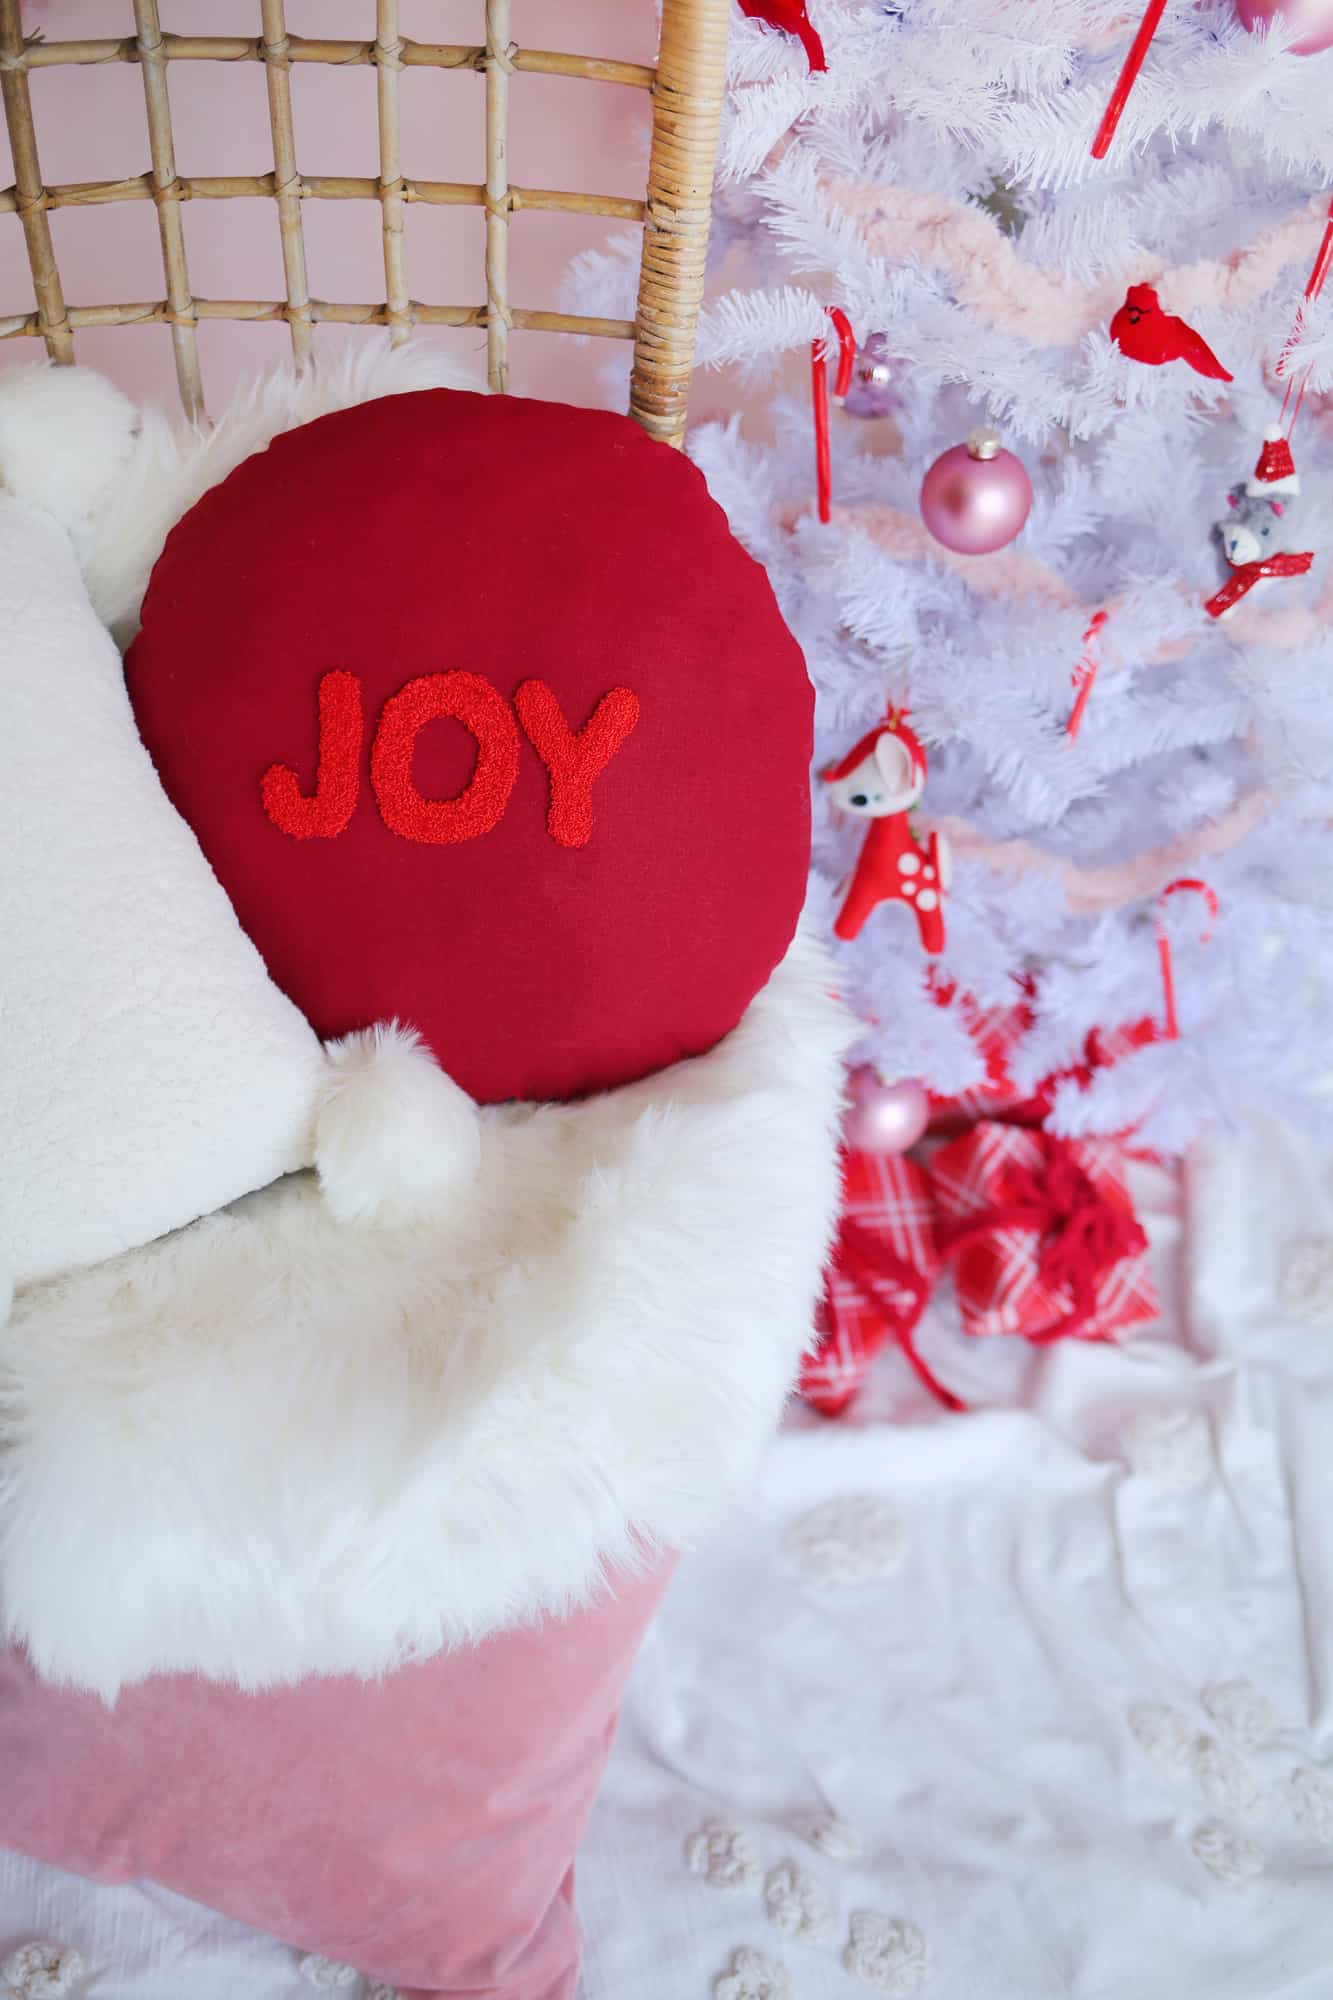
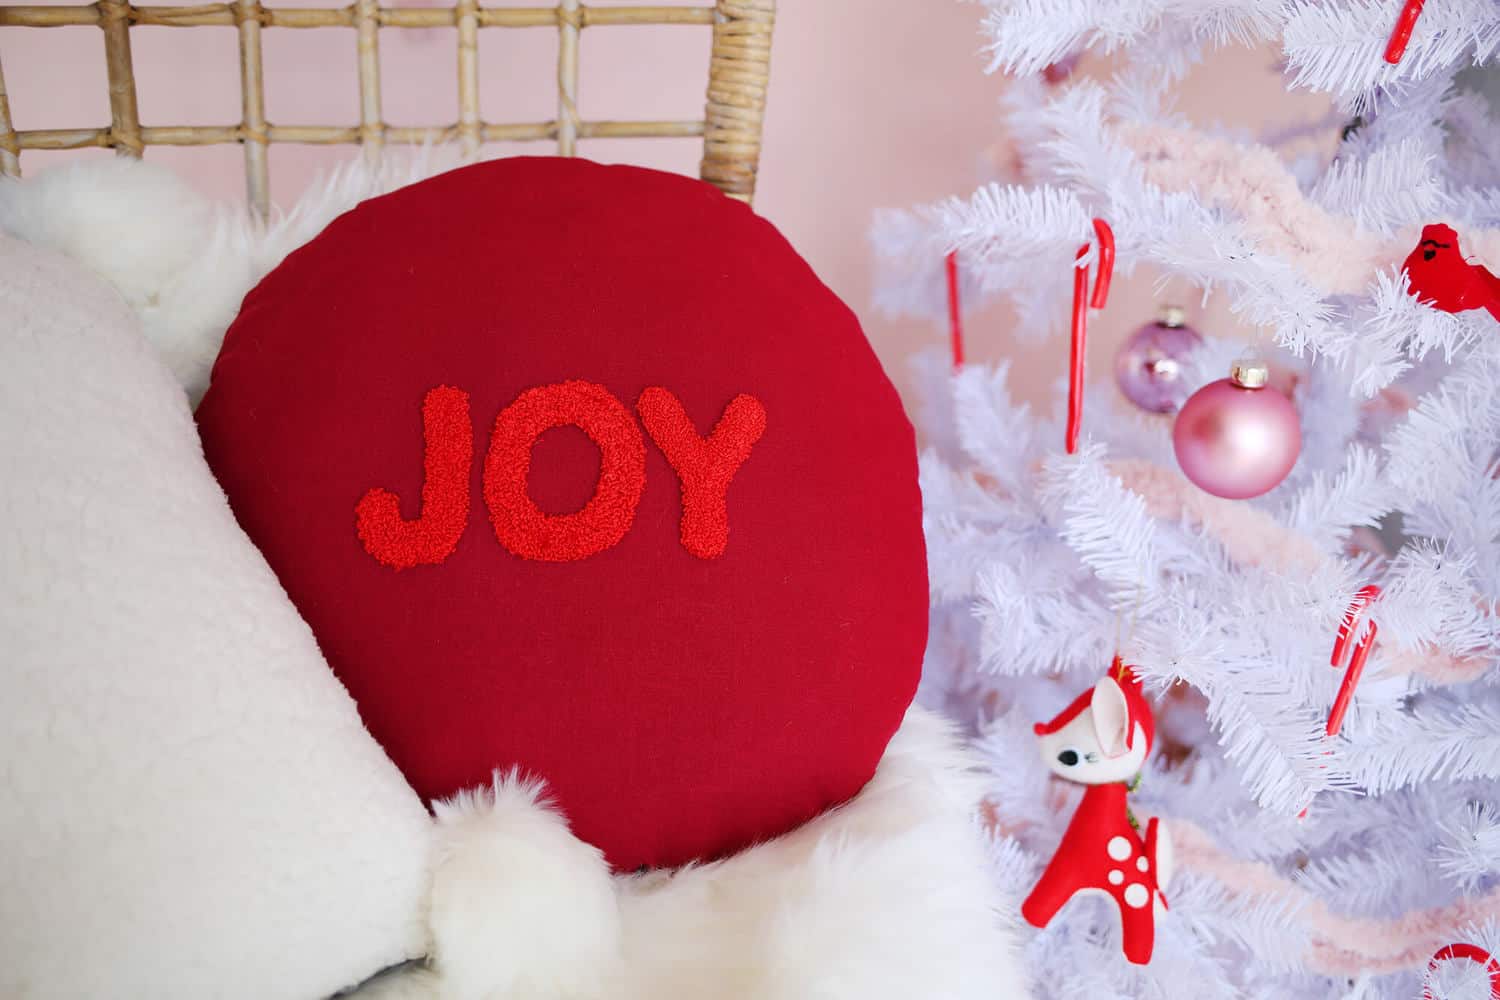 Now that I’m looking at it, it is giving me an ornament vibe! Who is going to take this tutorial one step further and whip up a matching set of “JOY” punch needled ornaments now? Just saying, it’d be real cute! –Rachel
PS- looking for more homemade gift ideas? Here’s a roundup of some of our favorites!
Credits // Author and Photography: Rachel Denbow. Photos edited with A Color Story Desktop.
]]>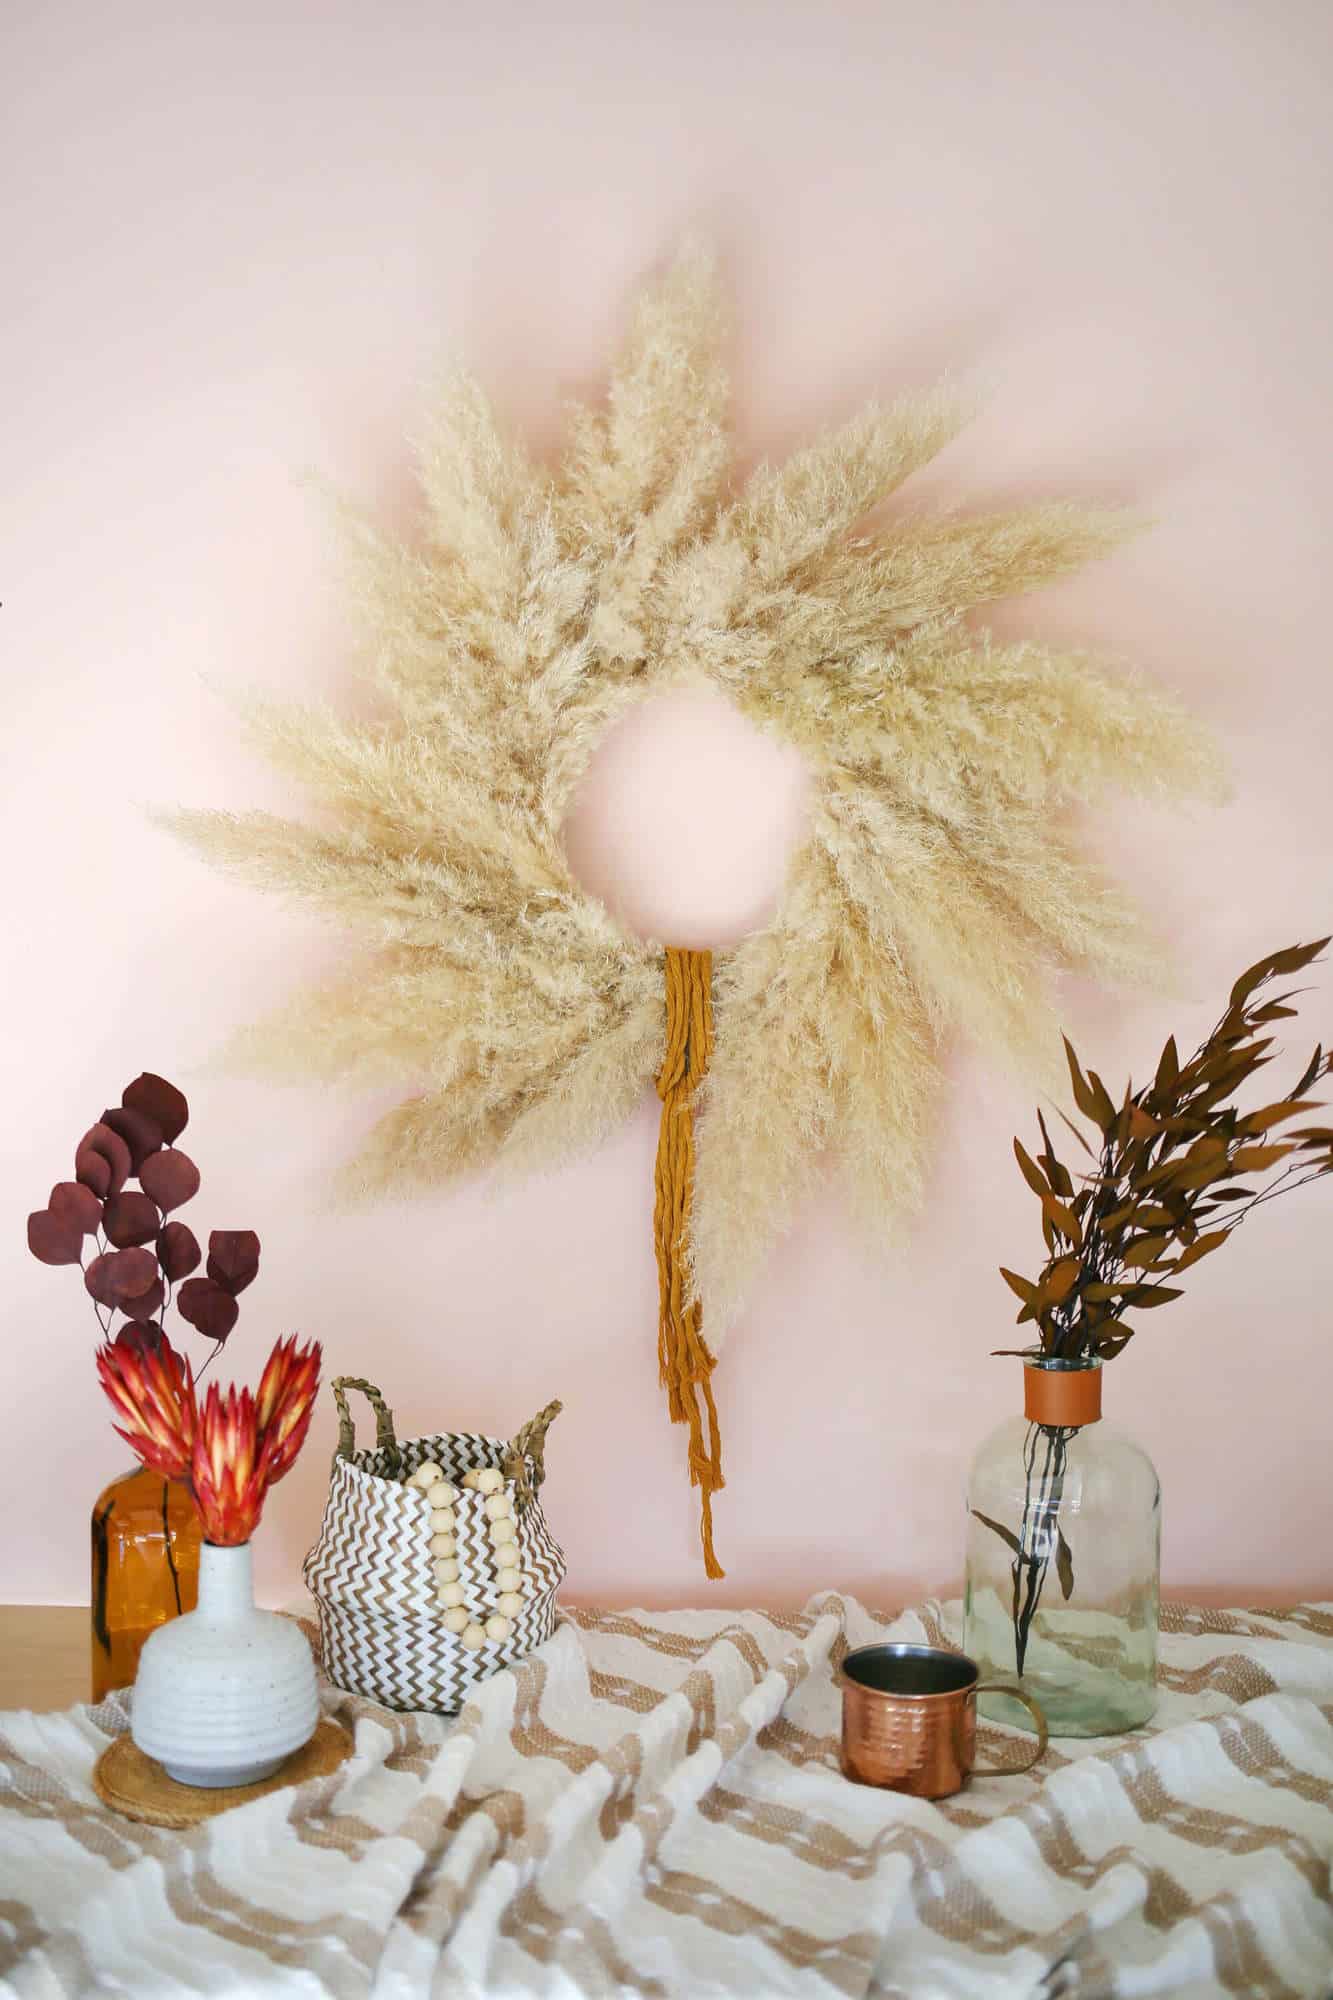 Have you jumped on board the dried grasses trend yet? I’m 100% here for it and couldn’t wait to make my own pampas grass wreath for this fall season.
It’s as easy as you’d imagine to put one together and there are just as many ways to customize your own according to your minimalist, maximalist, bohemian, or farmhouse needs.
I first got to work on a 12″ hoop before realizing my finished piece would fan out to a size no longer conducive to opening and closing a standard-sized front door. Ha!
So, use a 10″ hoop for a large wreath that will still work on a single door and a larger hoop if you’re wanting to use it on a wall and have a bit more space to fill.
I love the texture and simplicity of pampas grass and it’s perfect for the fall and harvest season home decor.
Looking for more wreath DIYs? Check out How to Make a Wreath (For Any Season)!
 Supplies
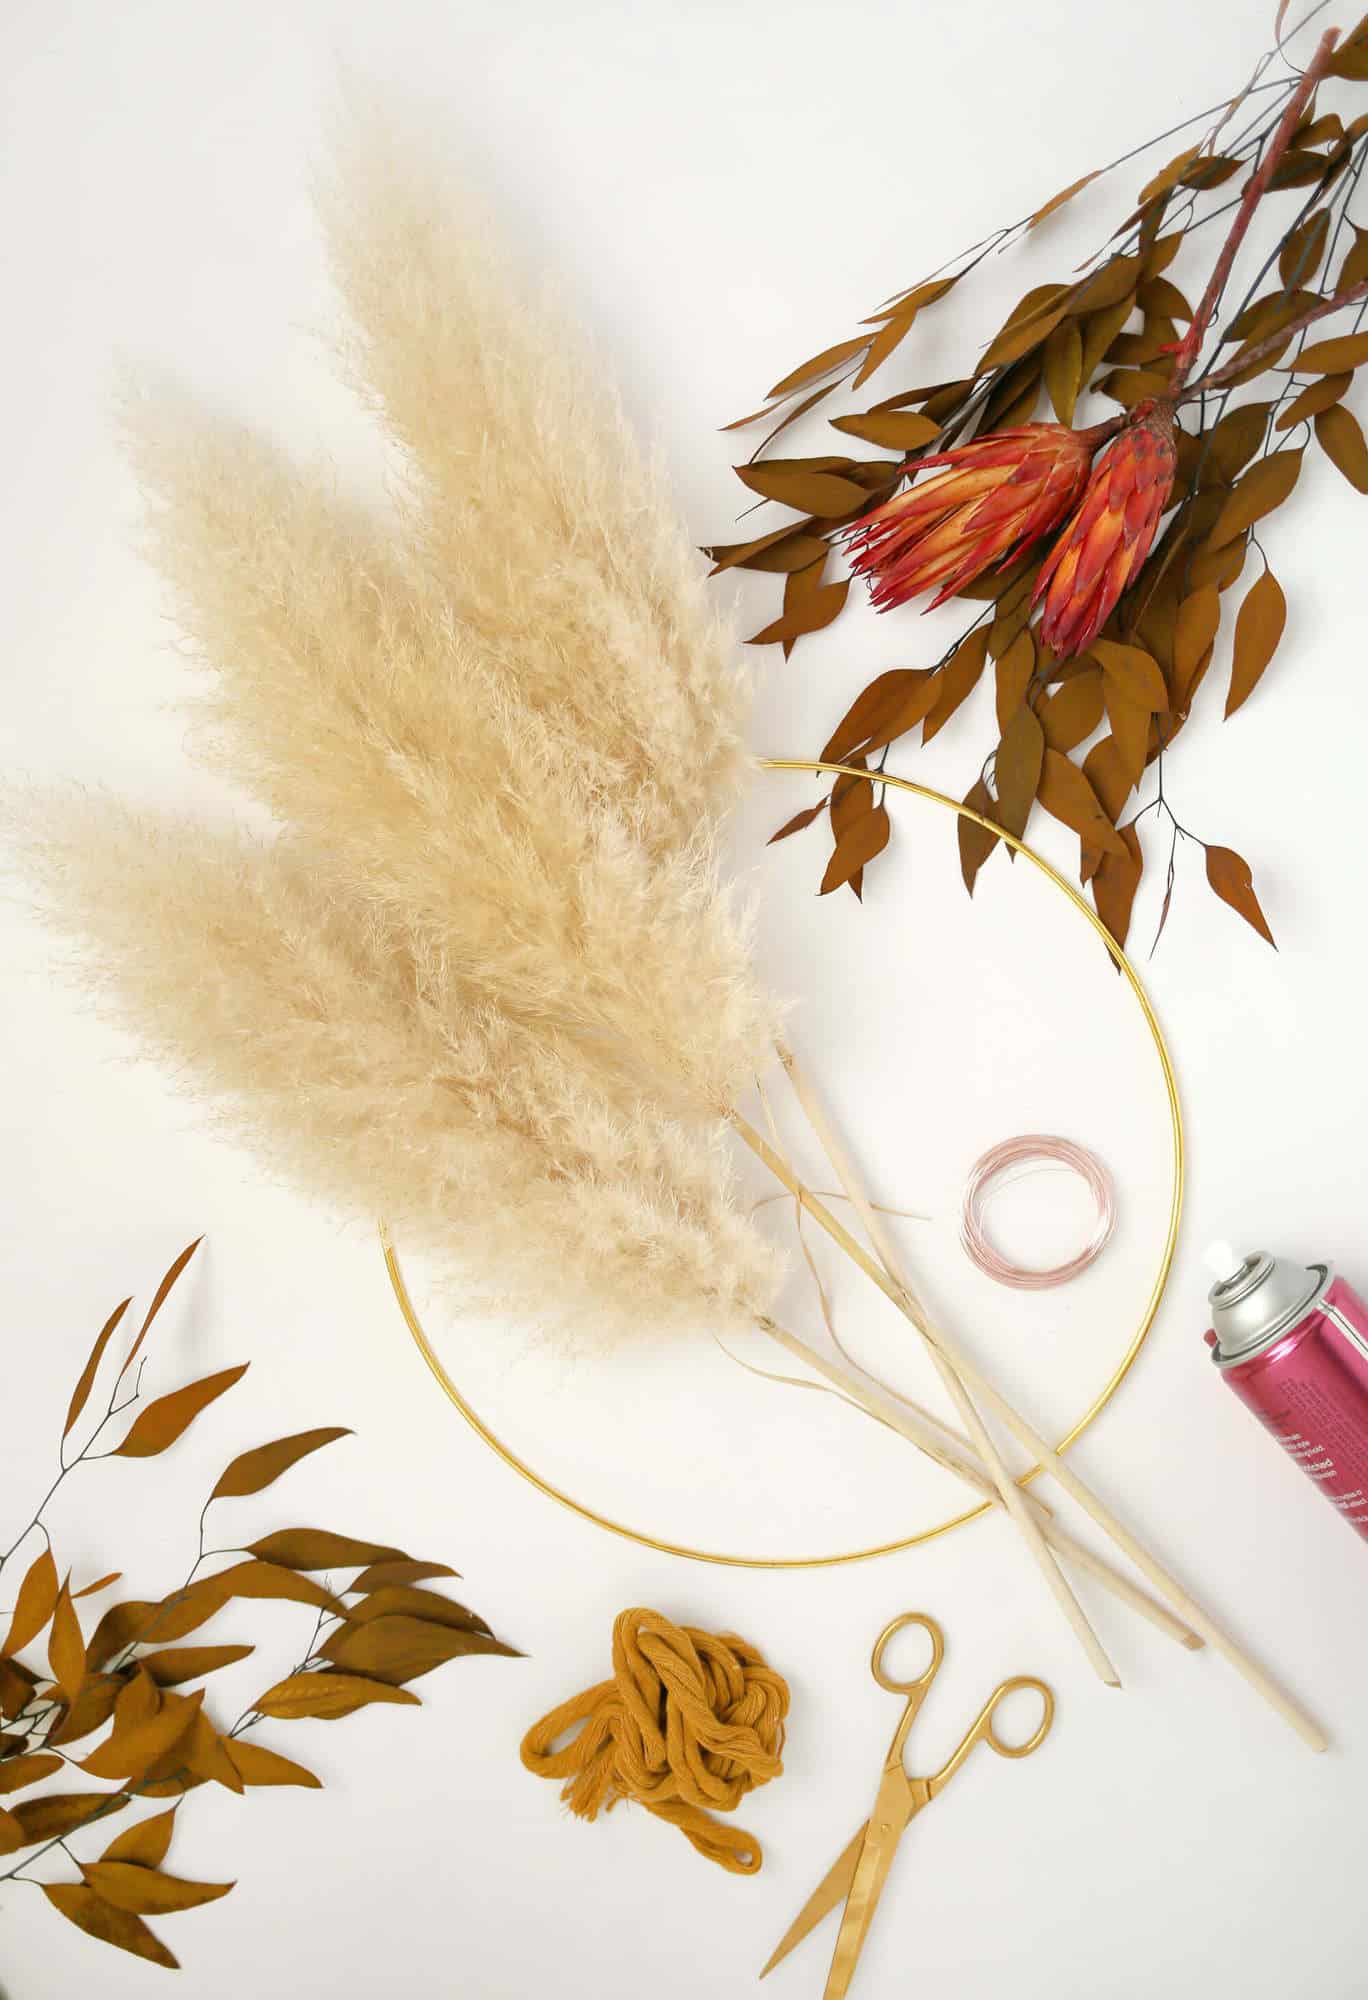
-15 or more pampas grass stalk heads of similar size (similar to these)
–10″ metal hoop
-floral wire or 24″ gauge wire
-wire cutters
-scissors
-aerosol hair spray (to keep it from shedding)
-silk or cotton ribbon
Note: There are many varieties of pampas grass available for purchase online. Some are fluffier than others so keep that in mind when ordering. The pampas grass I used was about 3″-4″ wide at the widest point and about 14″ of plume each.
If you’re lucky enough to know someone that has a pampas grass bush growing on their property, see if they’ll let you prune it. Win-win!
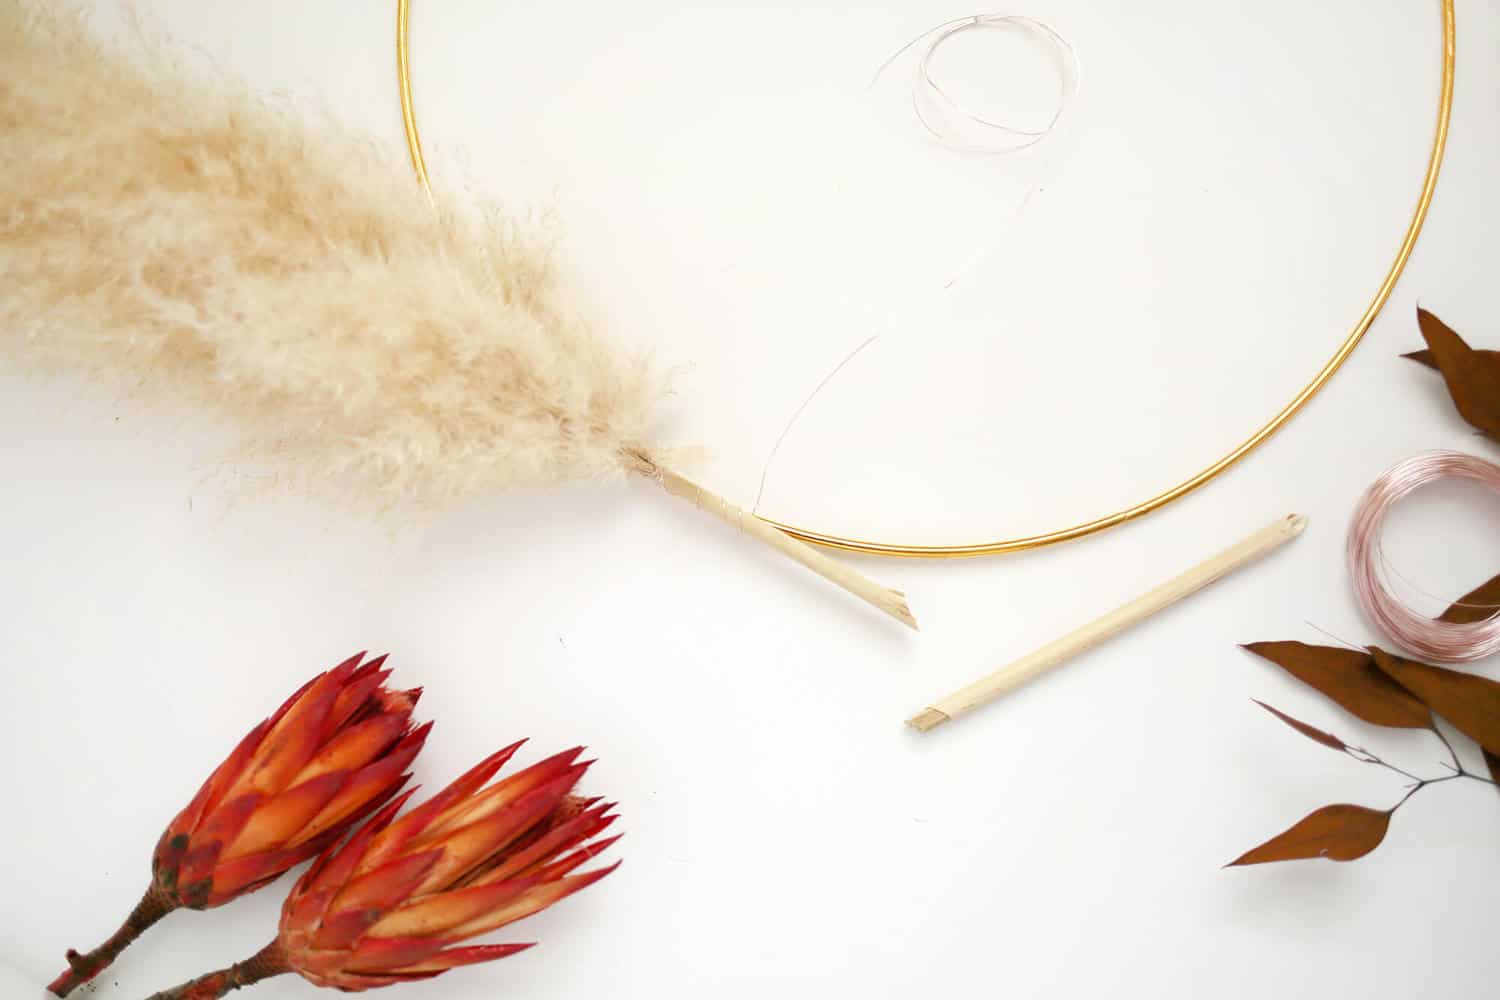 Step One: Before getting started on your wreath, you’ll want to generously spray your pampas grass plumes with aerosol hair spray to keep them from shedding bits of seed all over your floors. Do so in a well ventilated place and let them dry before handling them.
Next, trim your pampas grass stem so that you have a 3″-4″ stalk. Cut 2′ or so of wire and wrap it around the first stalk several times close to the bottom of the plume. Then wrap it around both the stalk and the hoop several times to secure it.
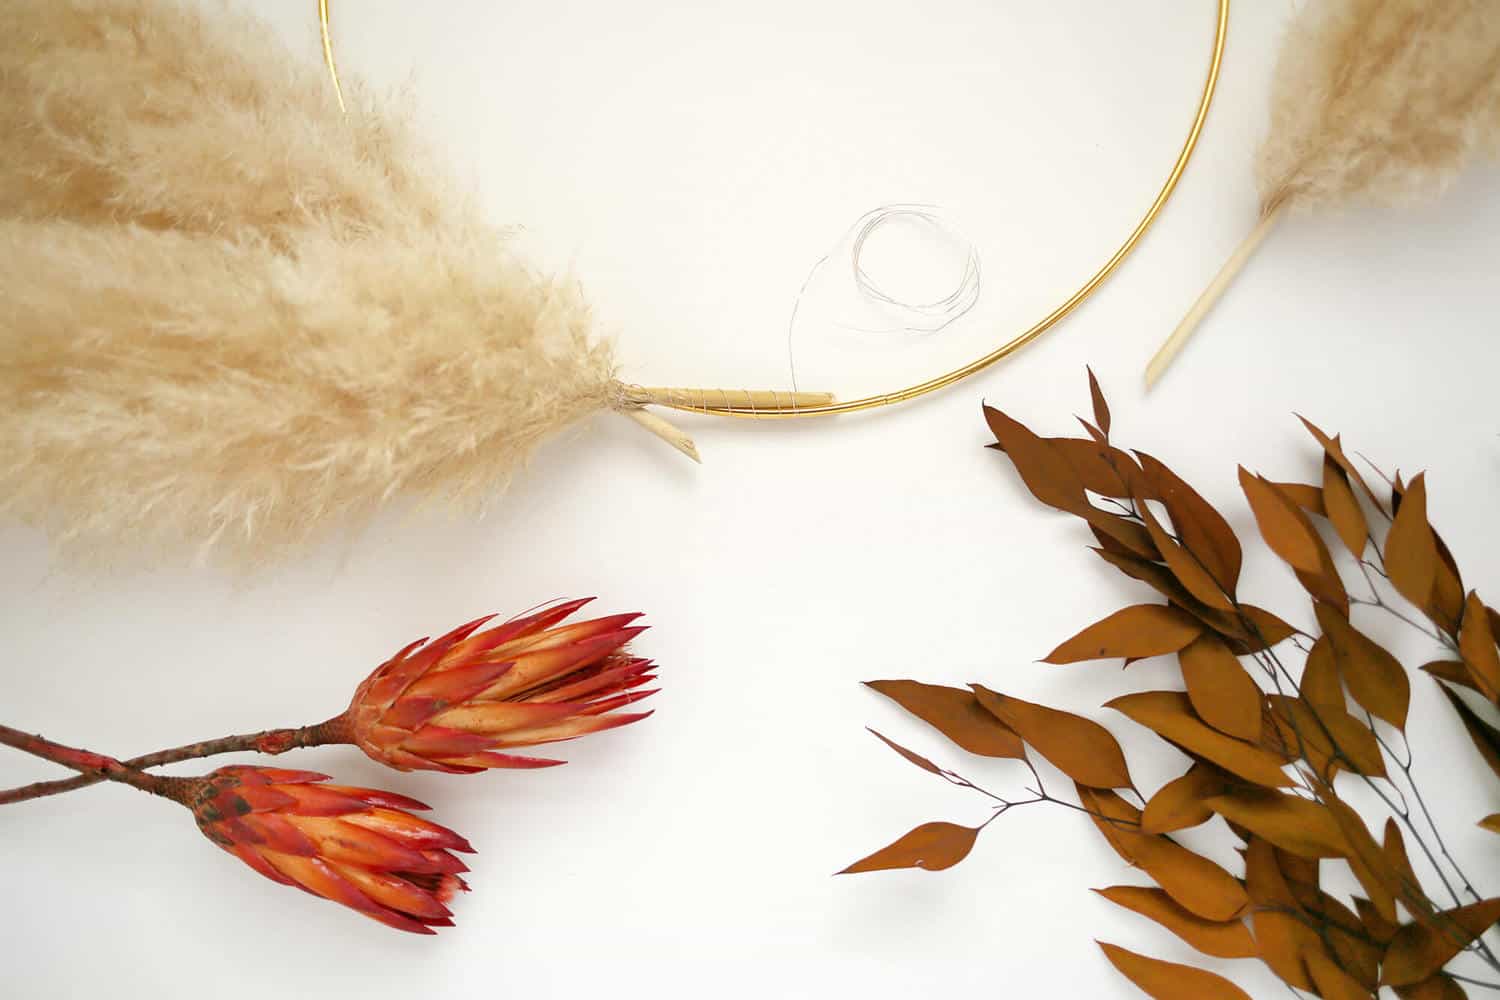 Step Two: Cut the second stalk and lay it over the first stalk. If you tuck the bottom of the second stalk just under the hoop, it will stay in place much better than just laying it on the top of the hoop. Wrap your wire a few times around the stalk and hoop together.
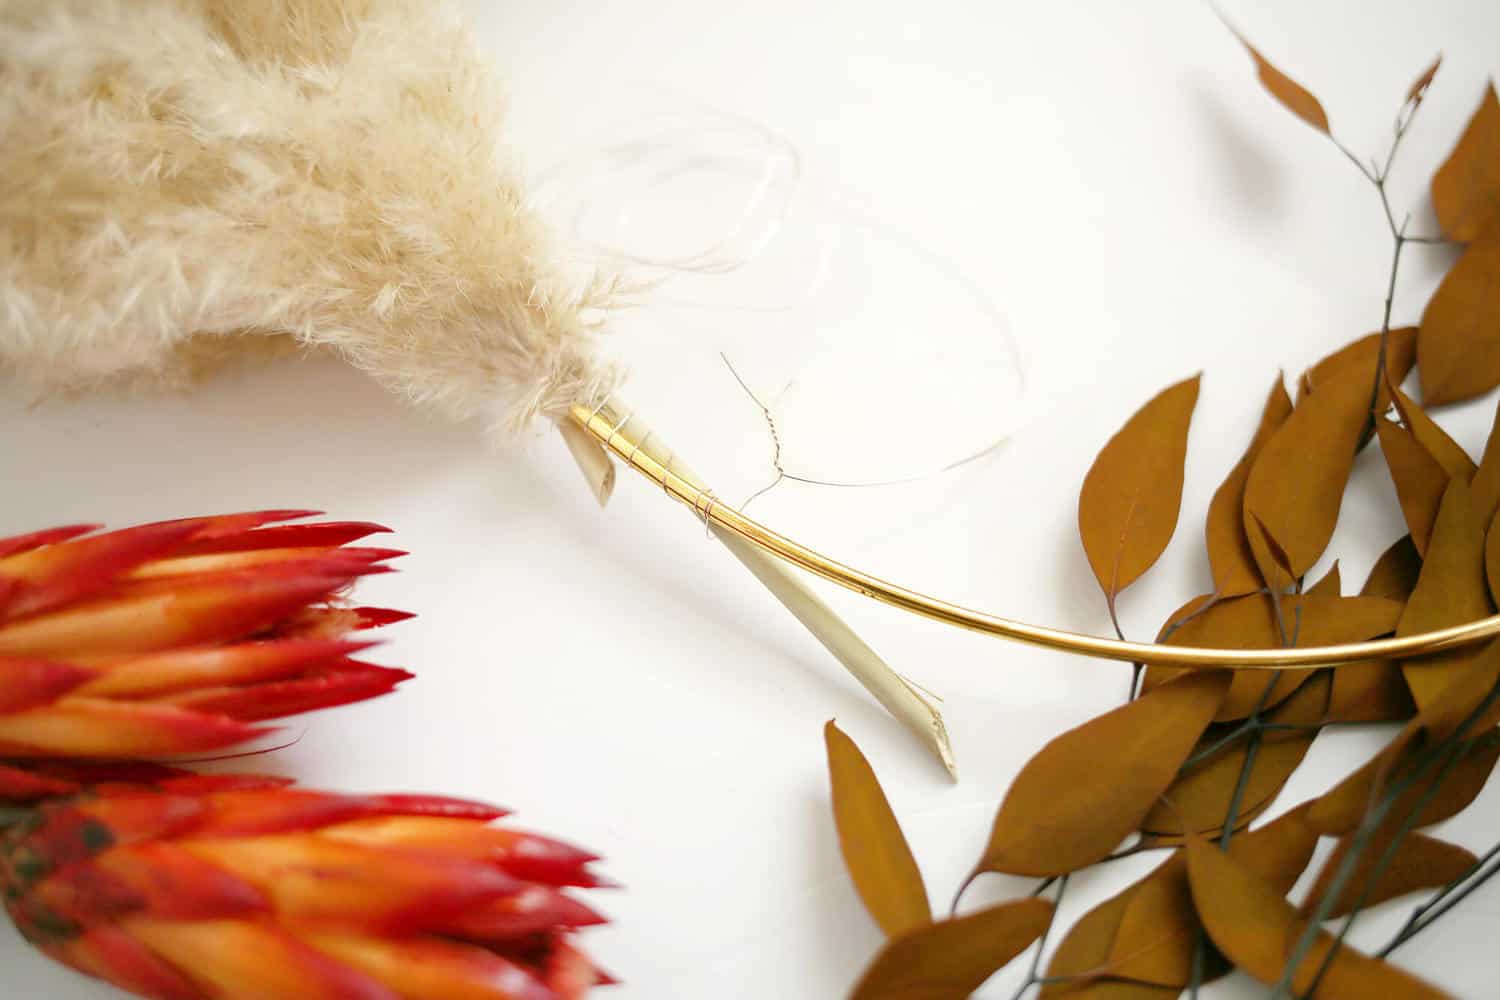 Step Three: Continue placing your next stalk over the previous stalk so that the stalks are covered up by the plumes. Once you run out of wire, cut another 2′ length (for ease of use) and twist it together with the end of your previous wire before continuing on.
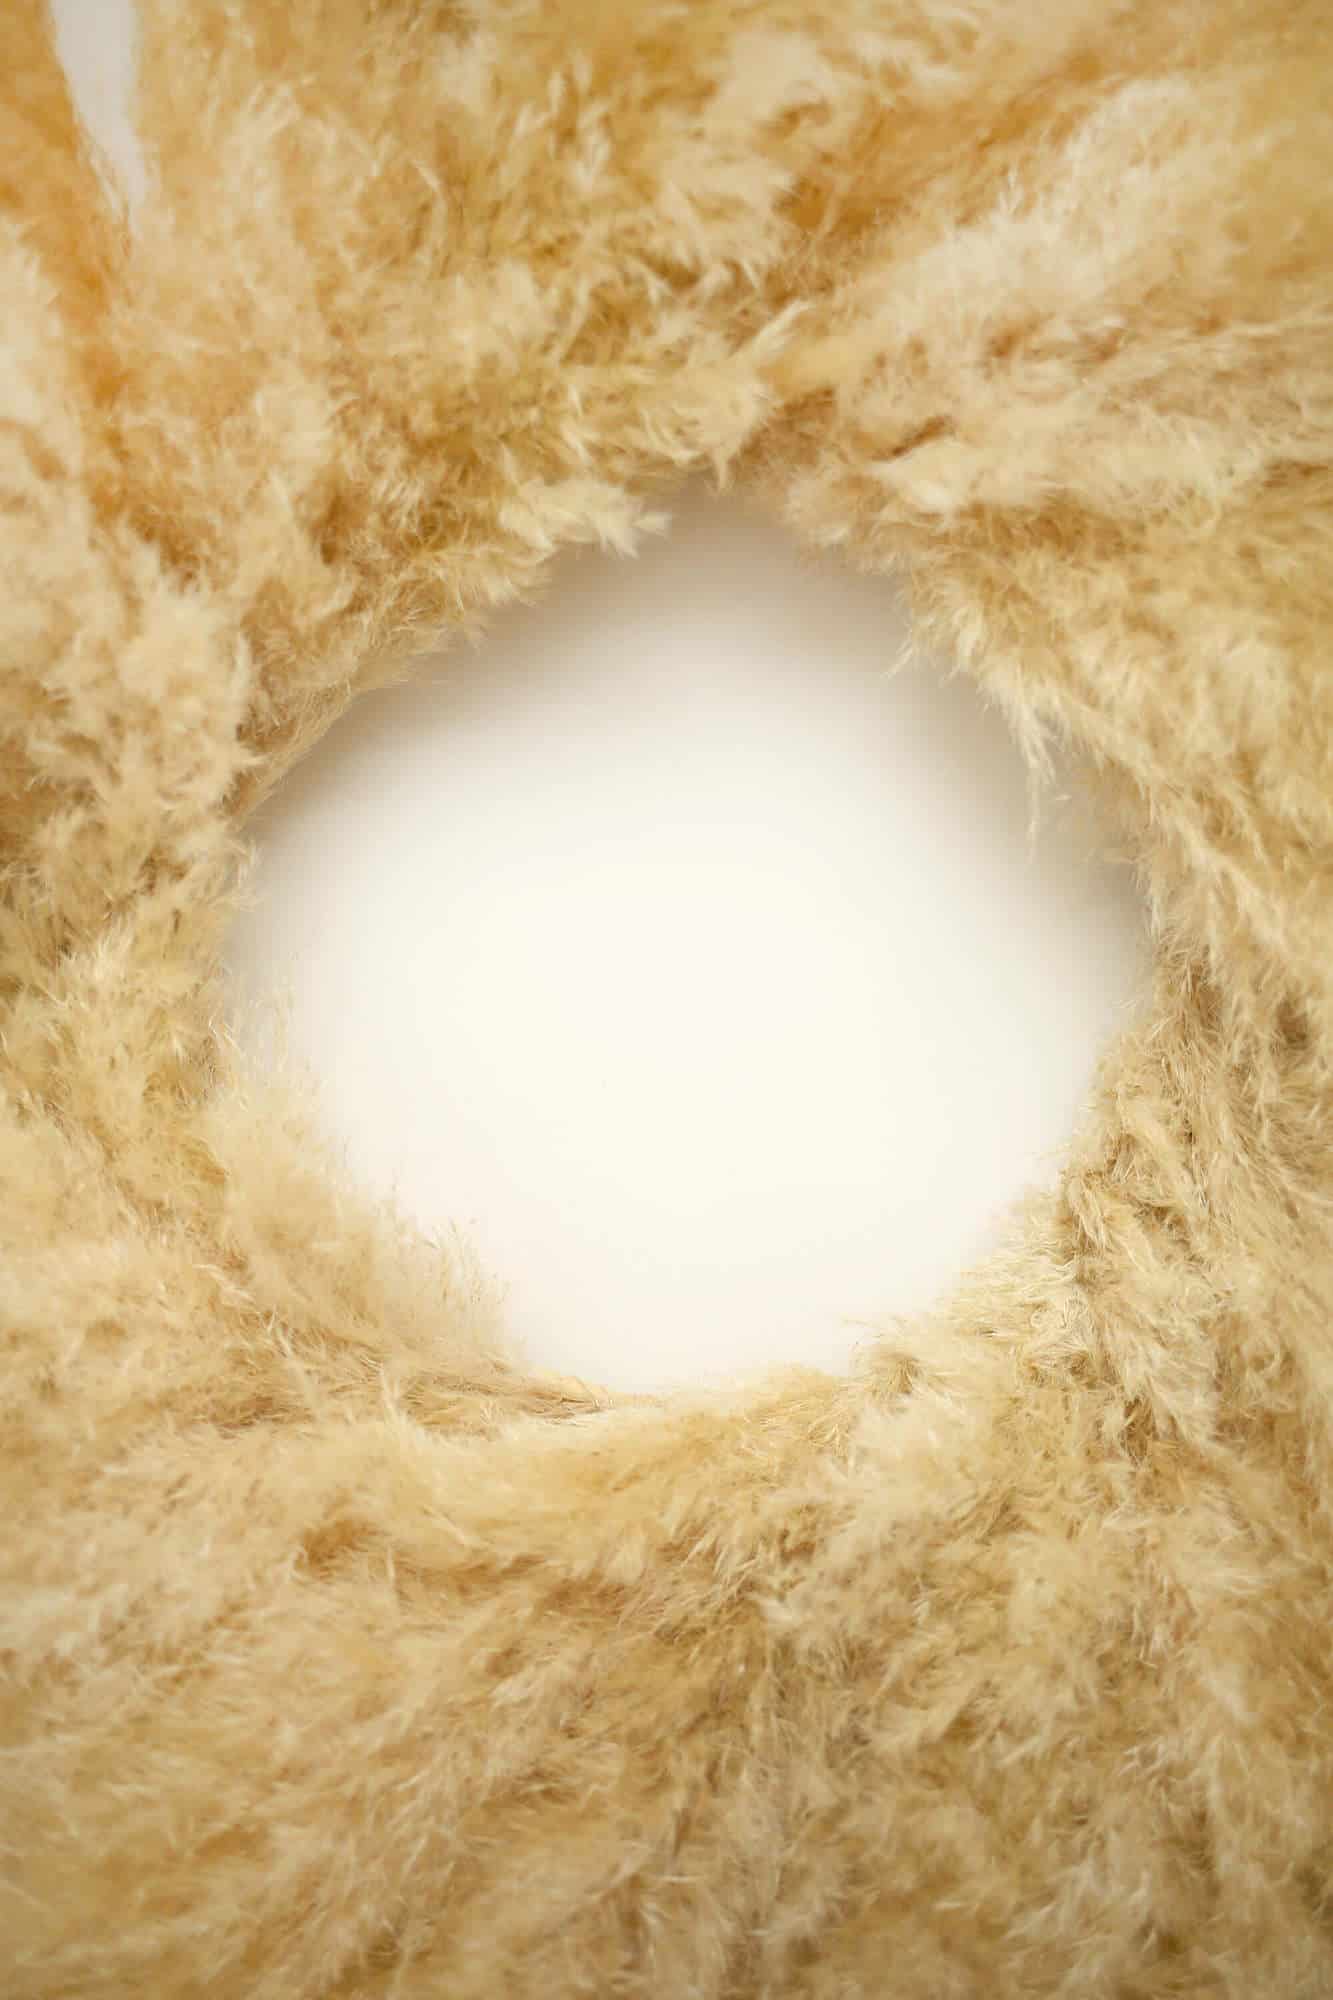 Step Four: Continue adding so that there is no gap left in the wreath. You may have to lift up the first plume to attach the last plume to the hoop.
Then, gently fluff the sprayed plumes on the areas around the inner part of the hoop to ensure they cover the stalks and wire. Attach a 4″ length of wire around the hoop and twist the ends together to make a loop. This will be your hanger.
You can announce it finished or you can add another layer of dried grasses, flowers, ribbons, etc., to add a little more flair or you can enjoy it in its simplicity.
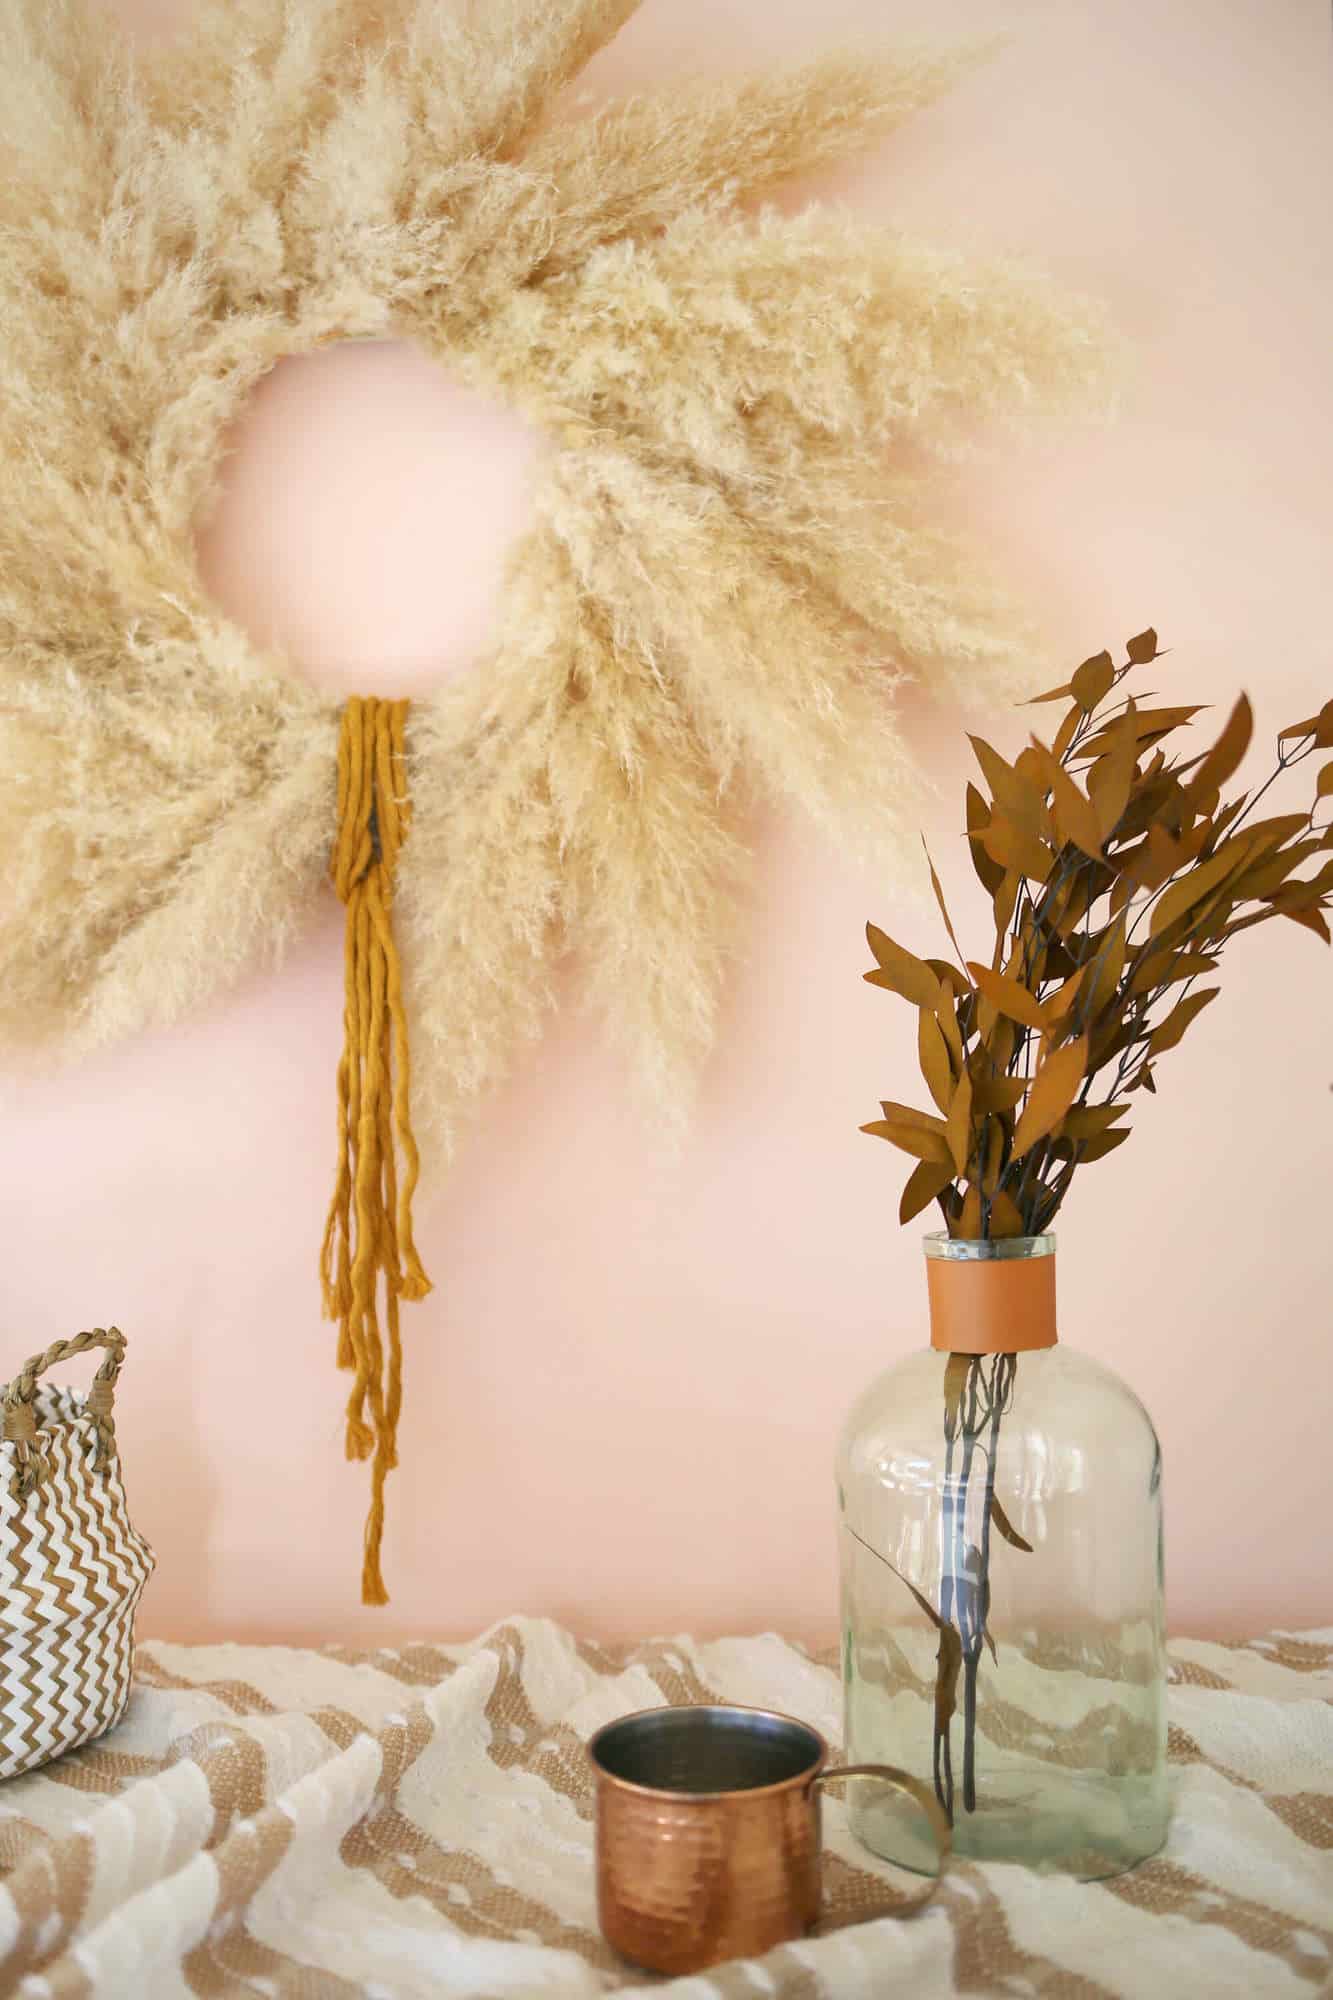
I added a folded length of ochre colored cotton cord to mine. The perfect shade of golden yellow, I think!
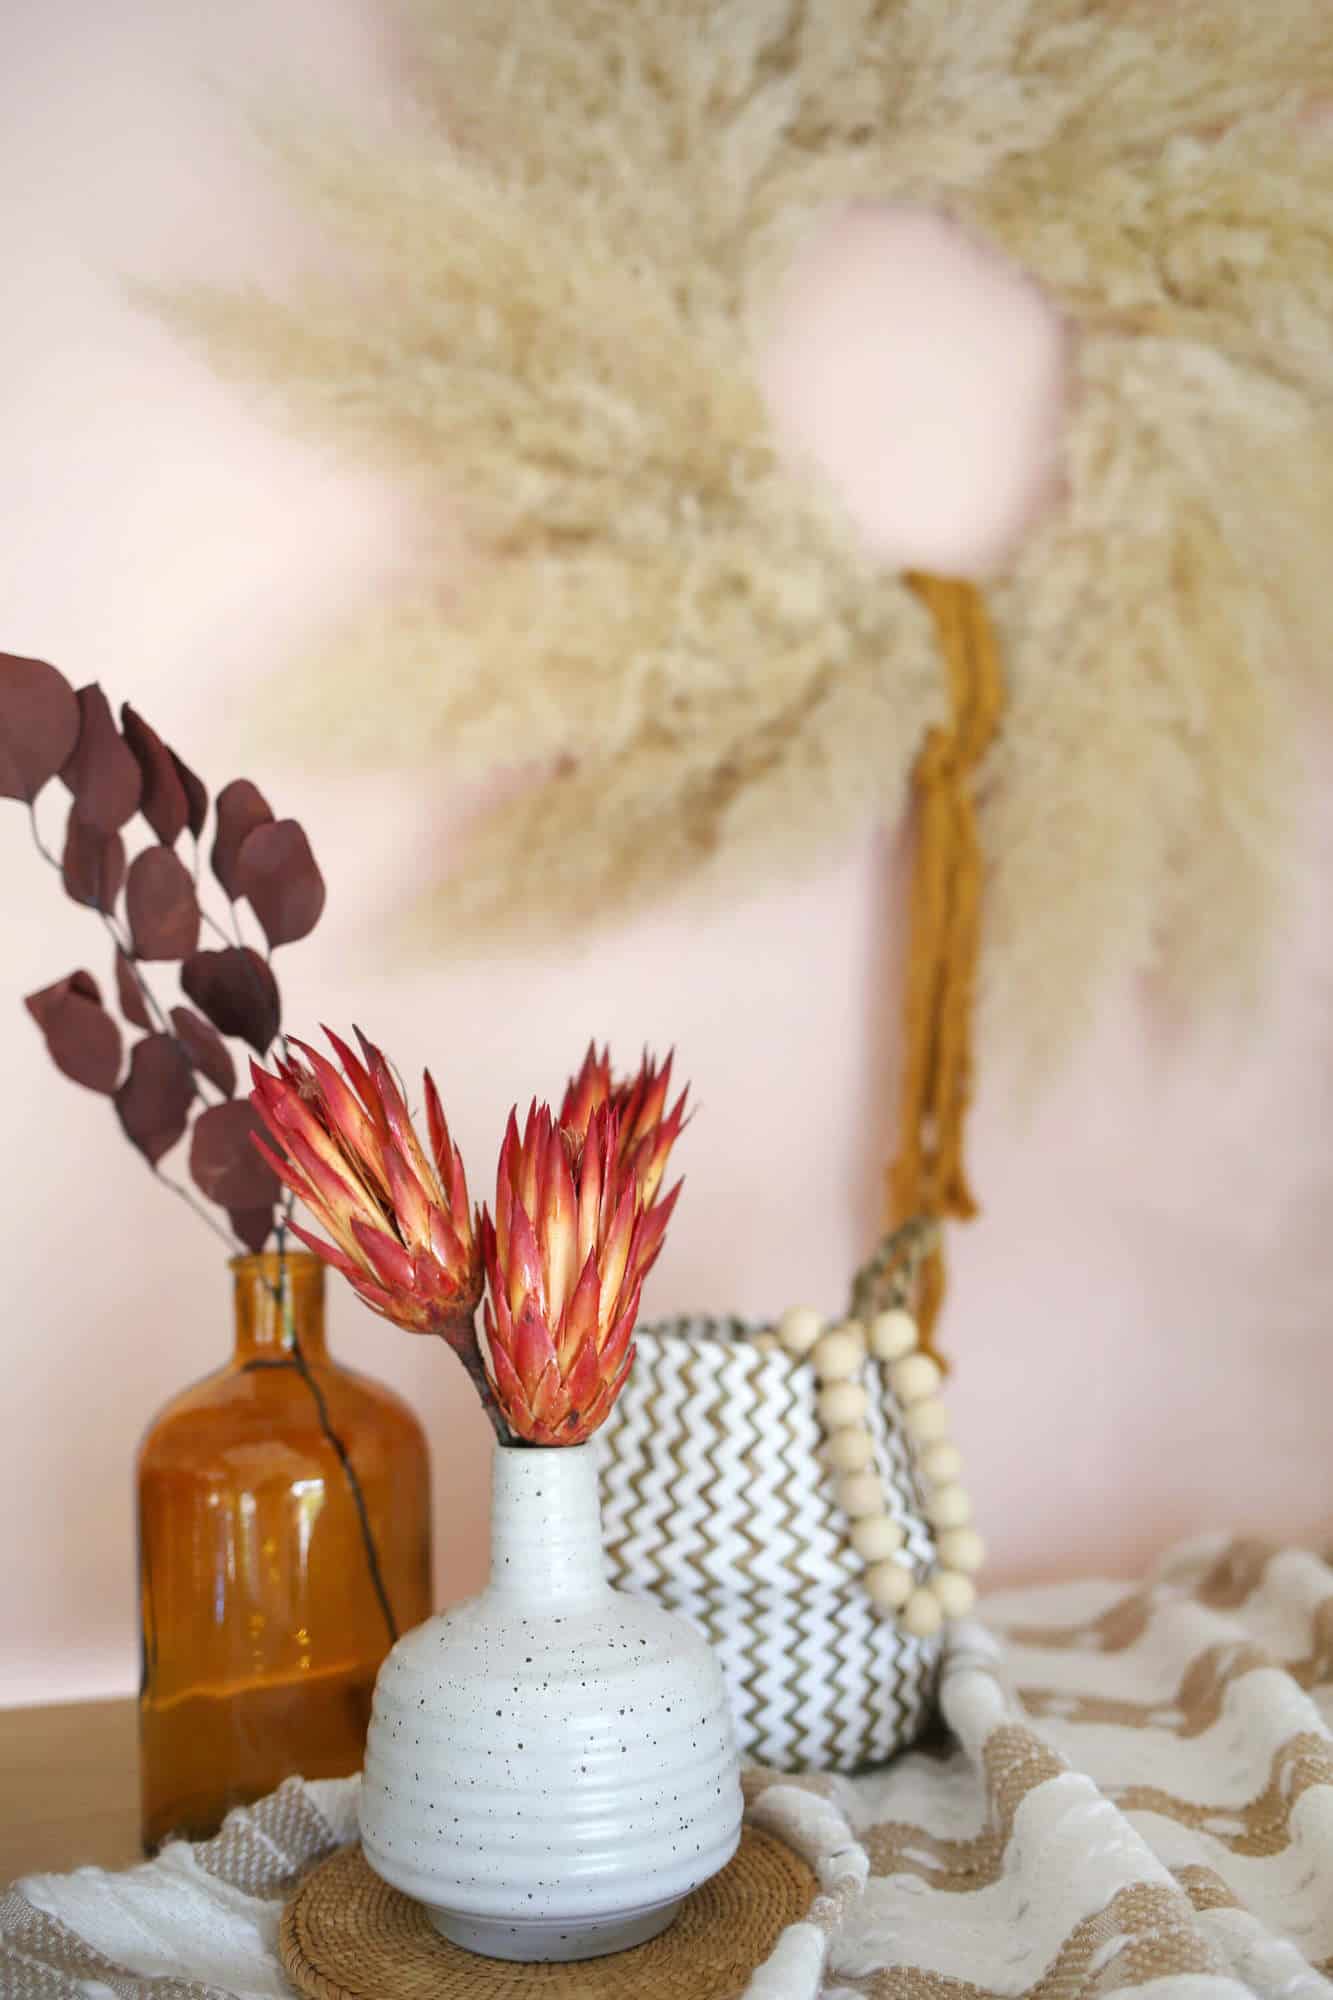 It’s a perfectly delicious wreath for the kitchen, dining room, or front door. It satisfies my attraction to natural, organic materials, but will save well for next year, too.
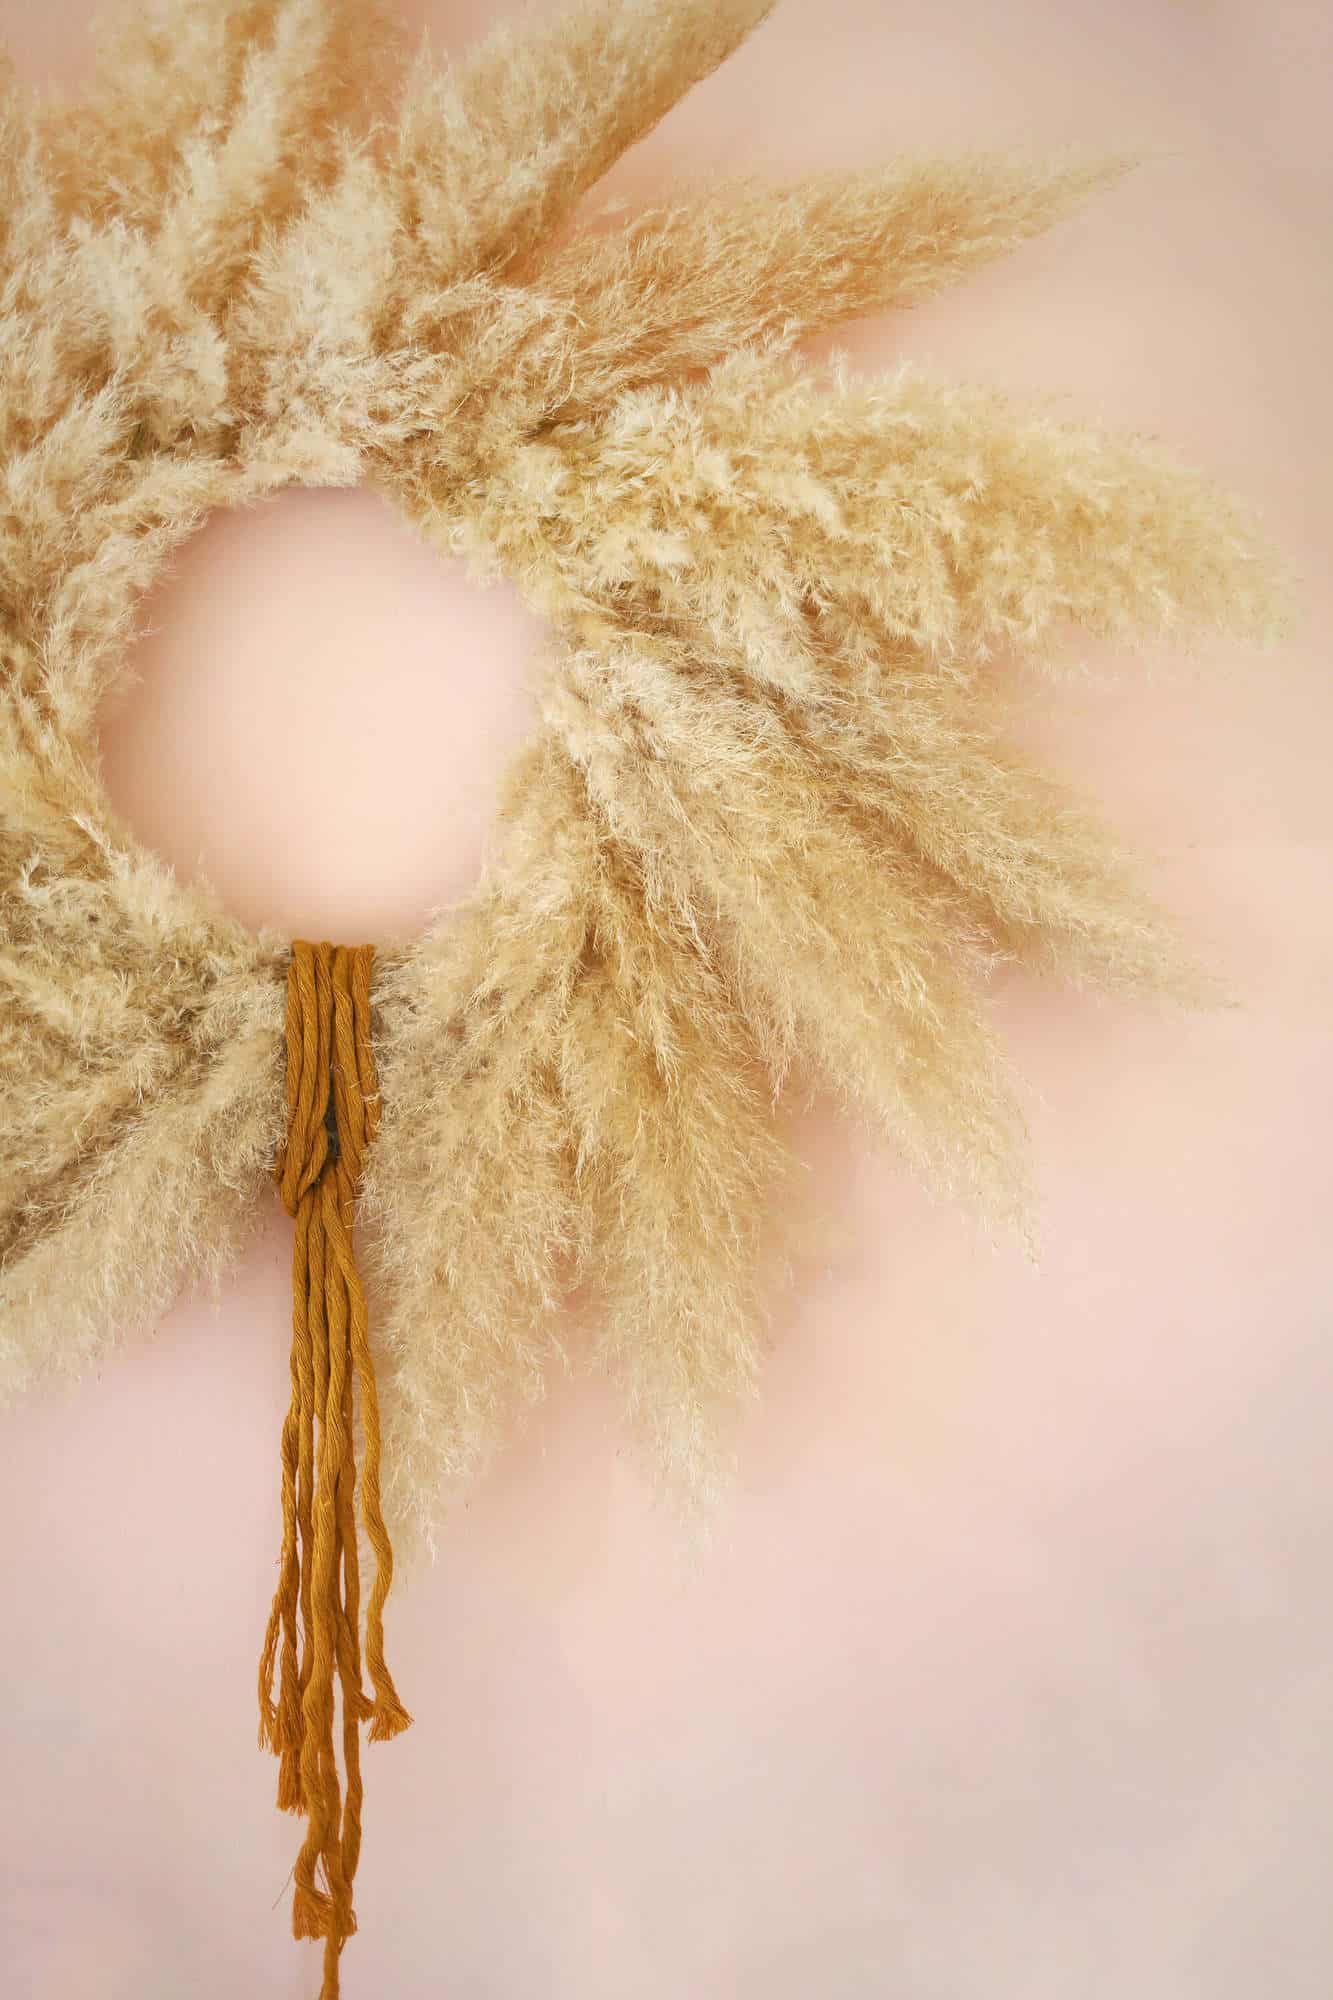
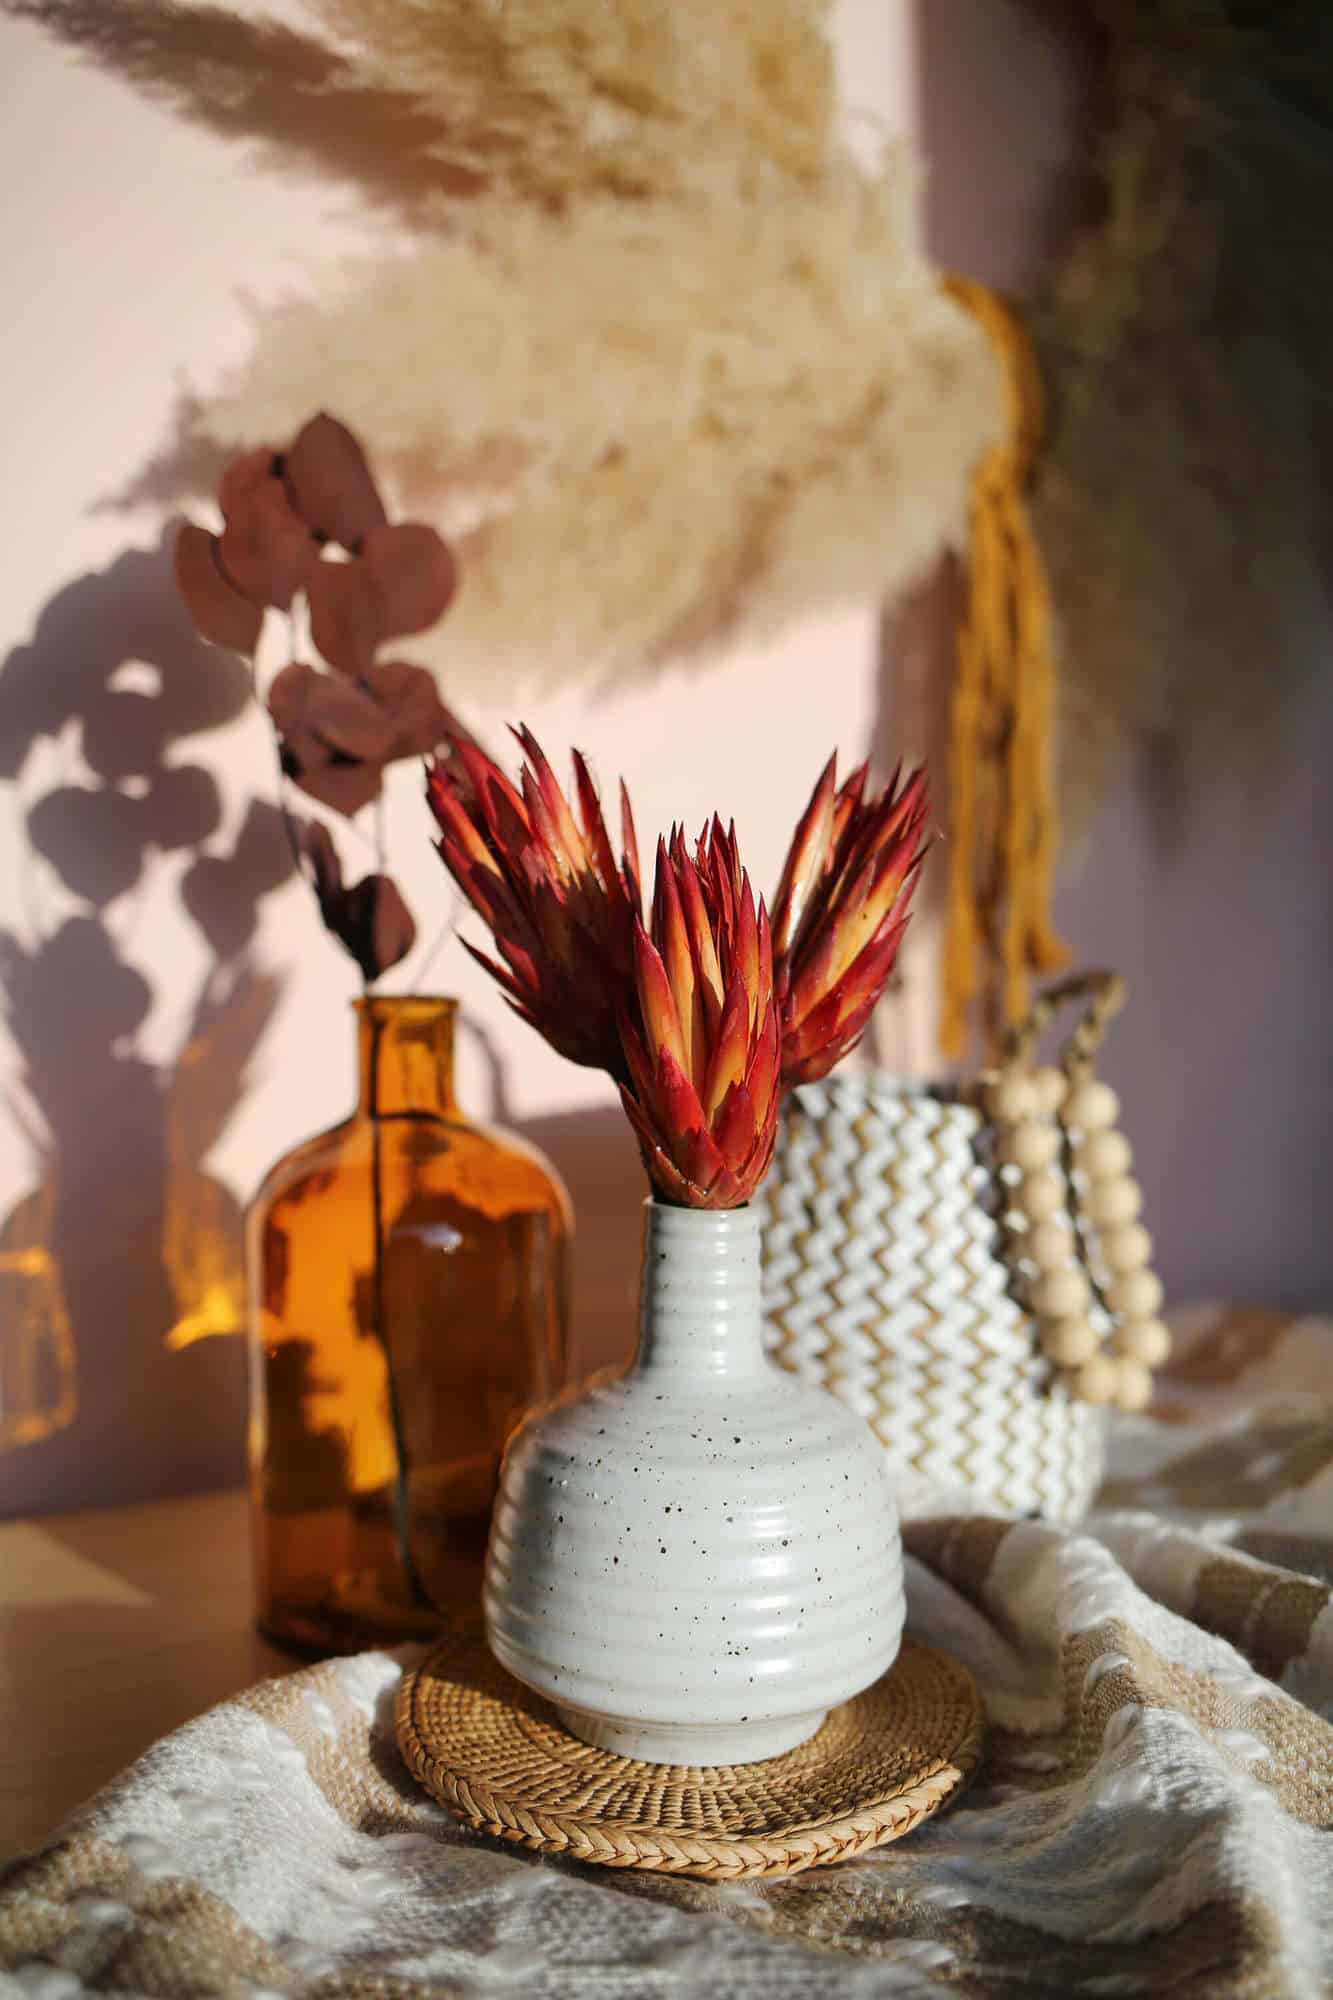 Umm … did you know that pink pampas grass is a thing? I used to think it was all just spray painted or dyed somehow, but it grows that way! Soft pink and orange and white pumpkins would be really pretty together, wouldn’t they? Enjoy! -Rachel
P.S. Check out 15 Easy Fall Decor DIYs (Budget-Friendly) for more ideas!
]]>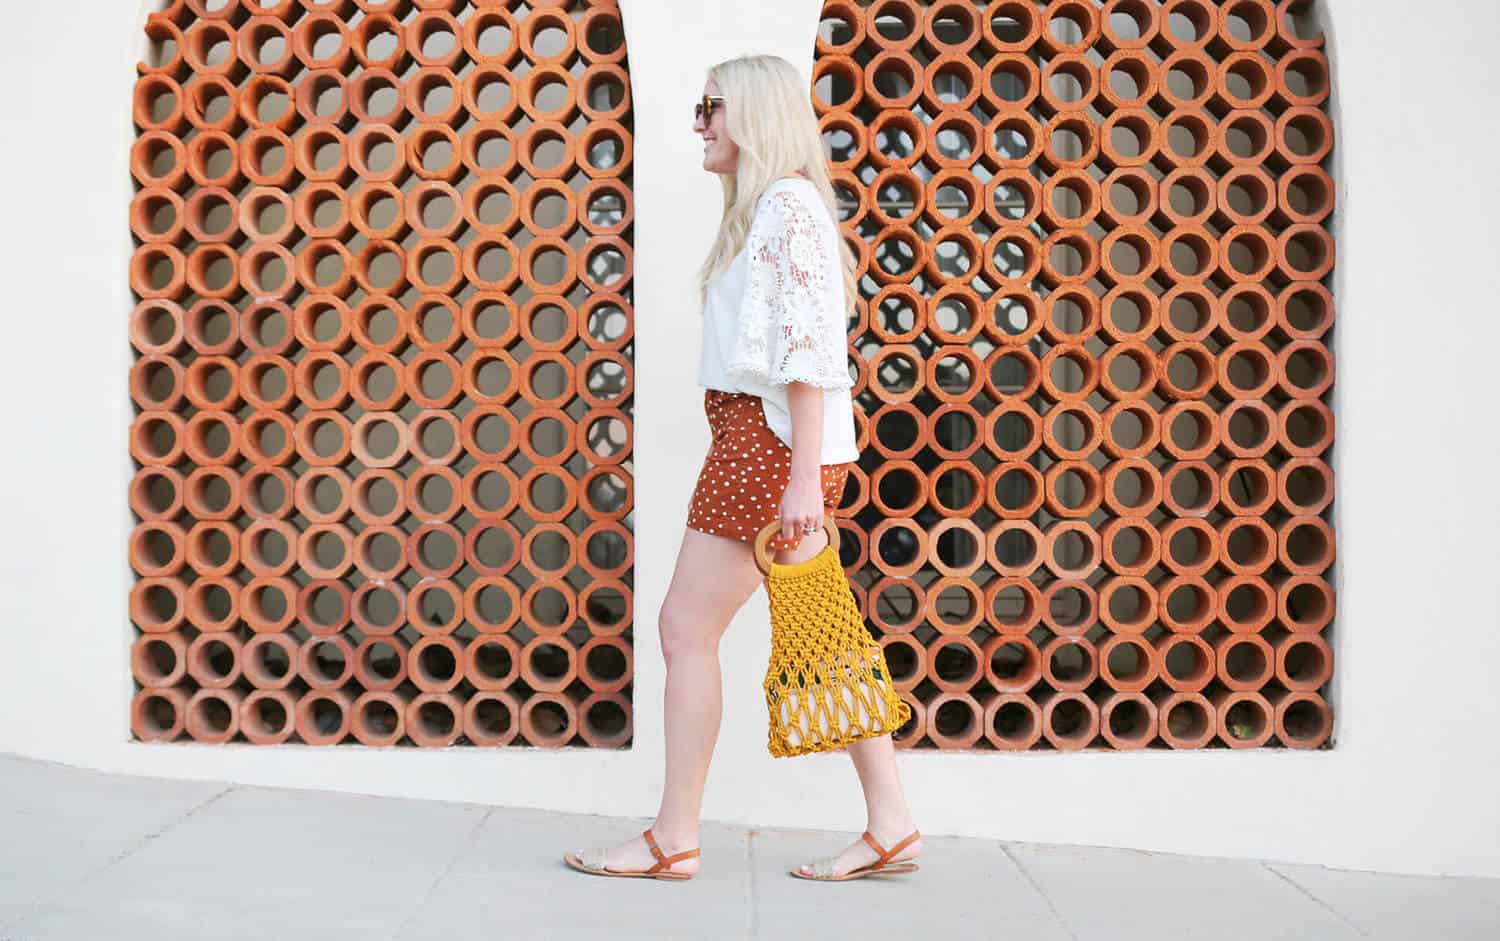
With the resurgence of macrame in recent years, there is an exciting range of dyed, cotton rope to be had. I found this beautiful mustard color and a coordinating set of stained wooden handles and realized I could use the most basic macrame knots to make a cute accessory that would hold the basics: my wallet, notebook (with pen attached inside the spiral binding b/c, duh), and phone. The best part is, this highly textured handbag can follow you from summer to fall in this beautiful golden tone.
Related: How To Macrame: A Step By Step Guide For Beginners
Check out our How to Make Friendship Bracelets tutorial!
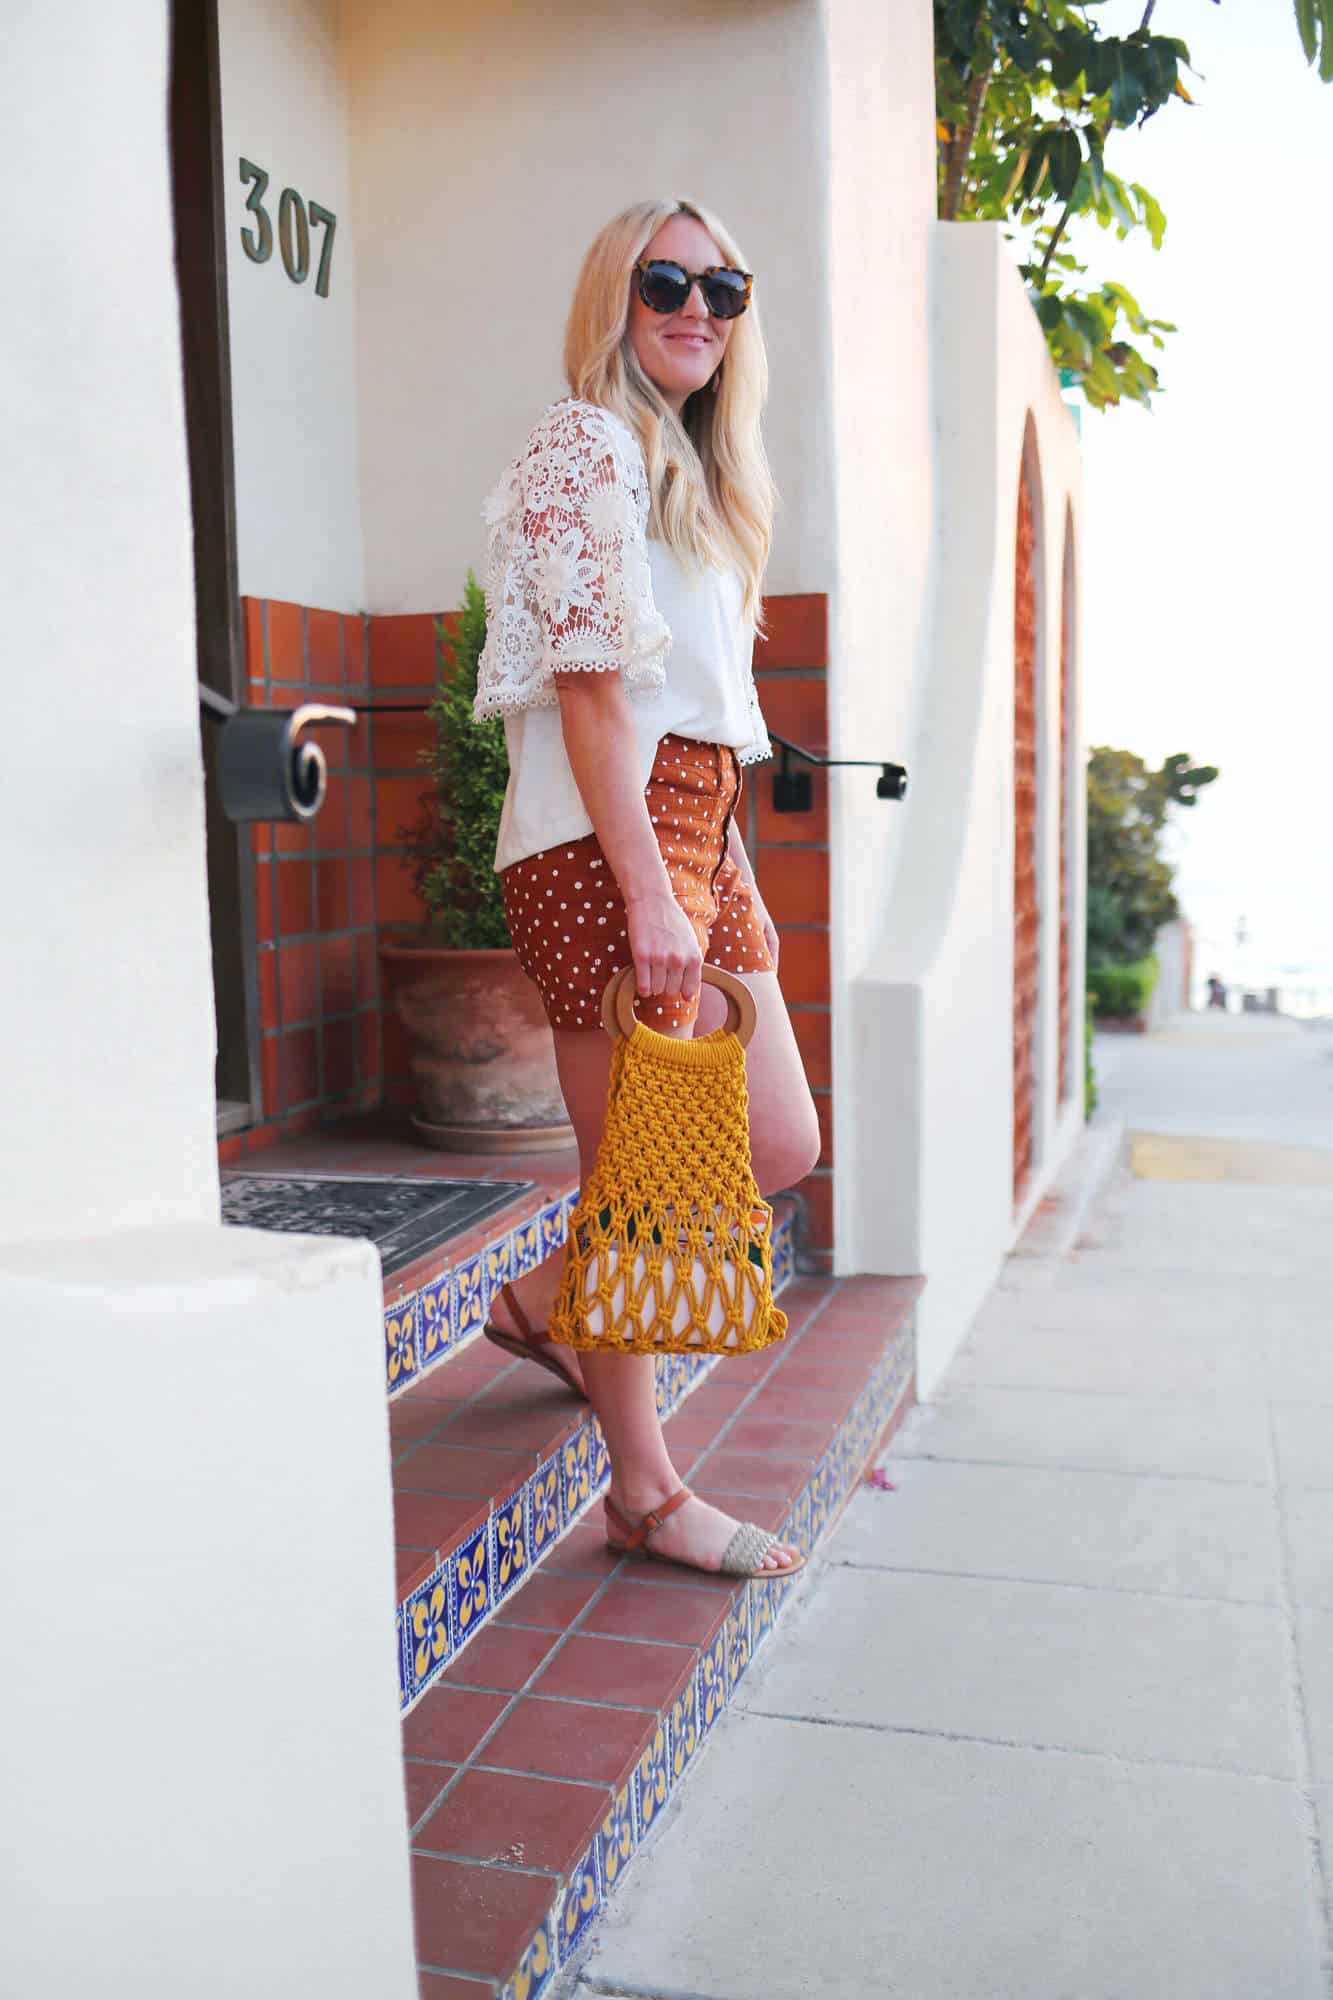
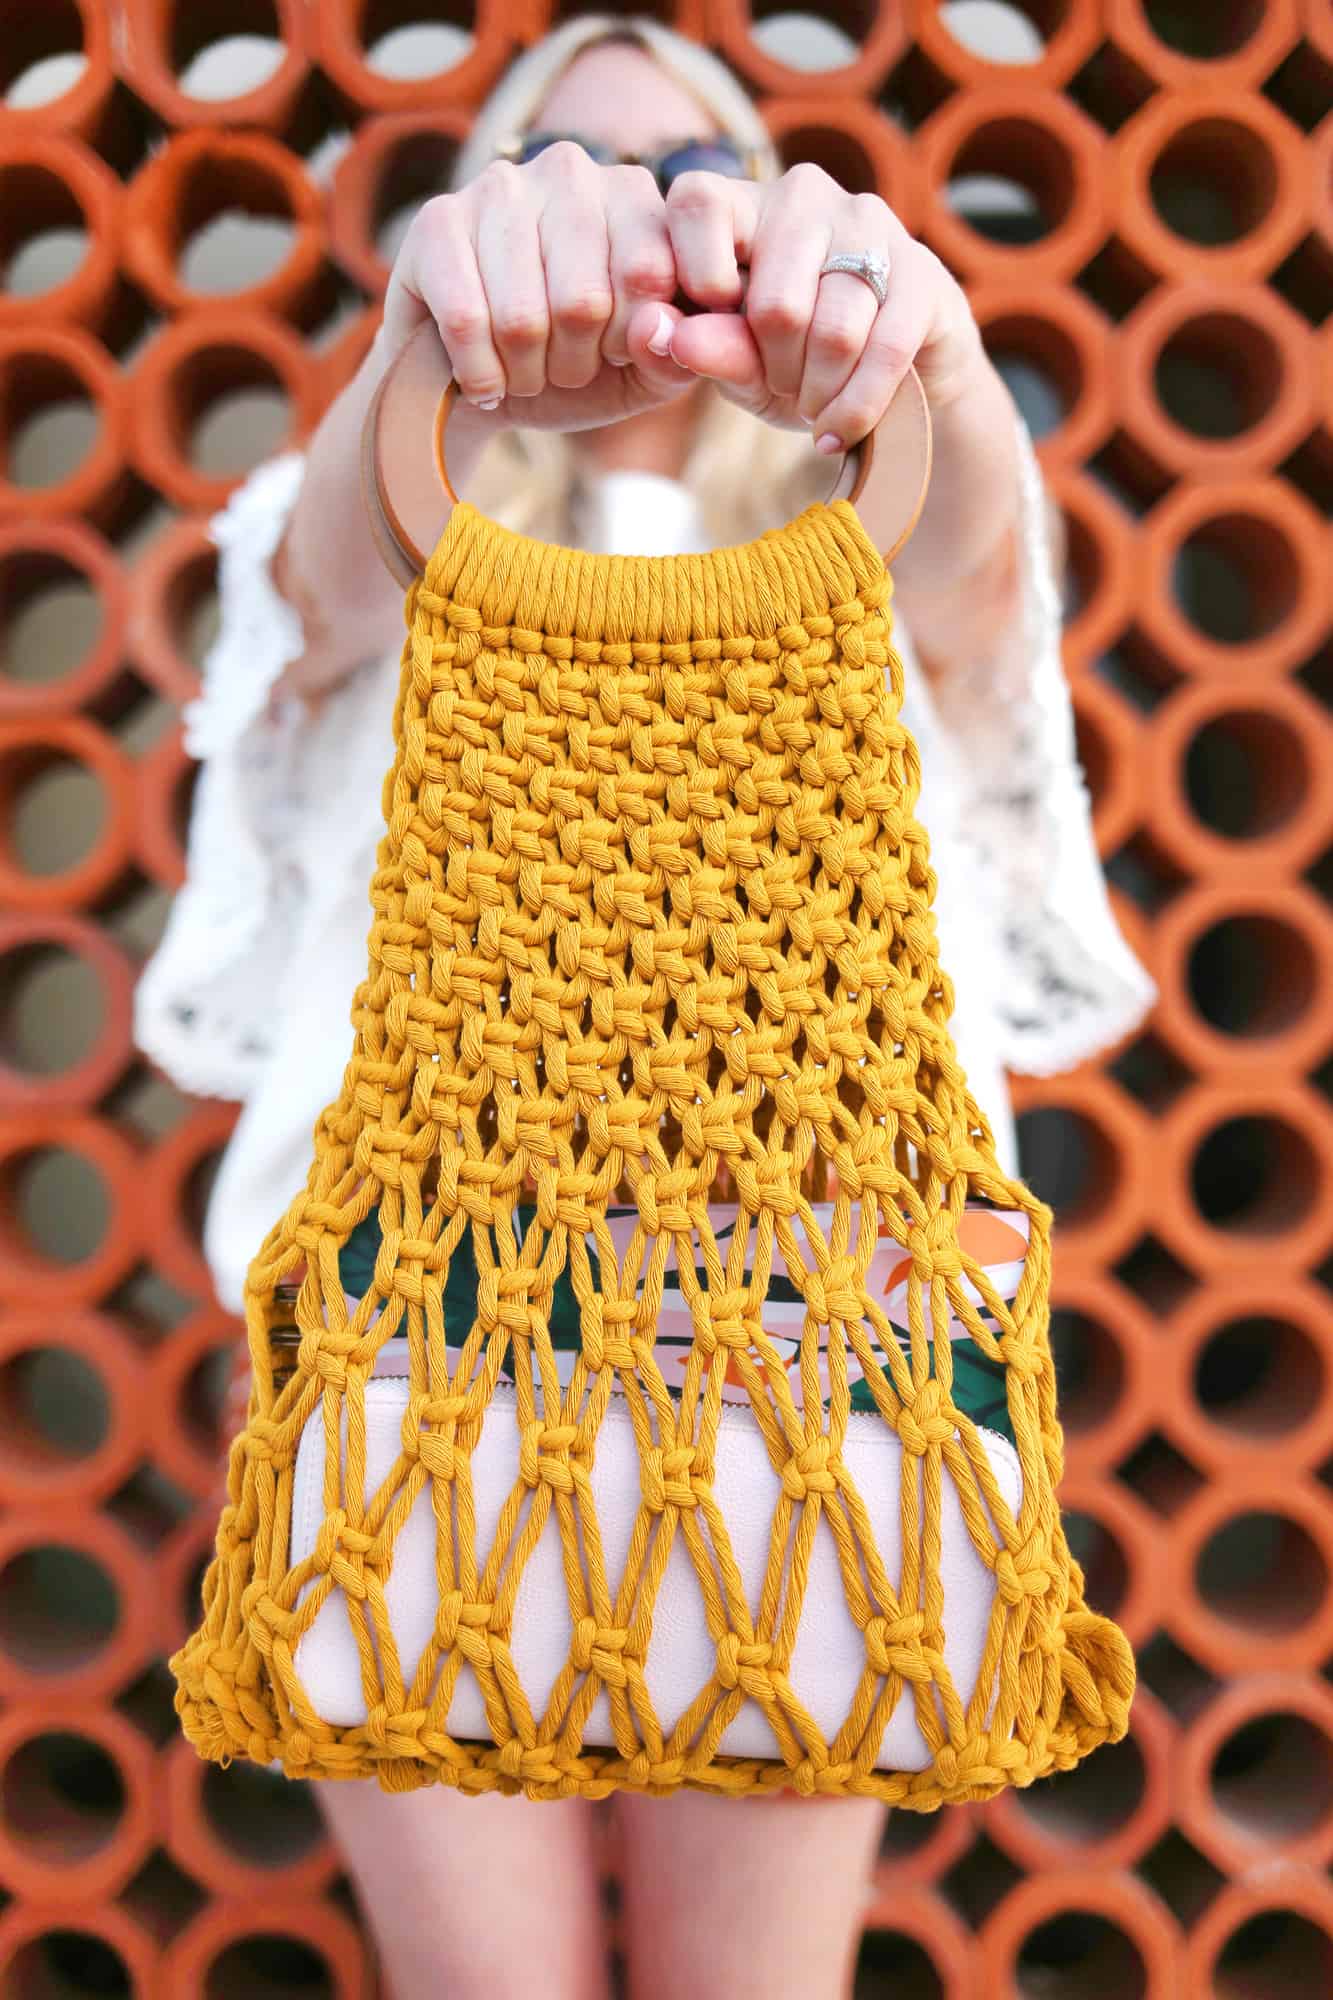 Supplies:
–one pair of wooden round shaped handles
–mustard 3mm cotton cord
-scissors
-yardstick or measuring tape
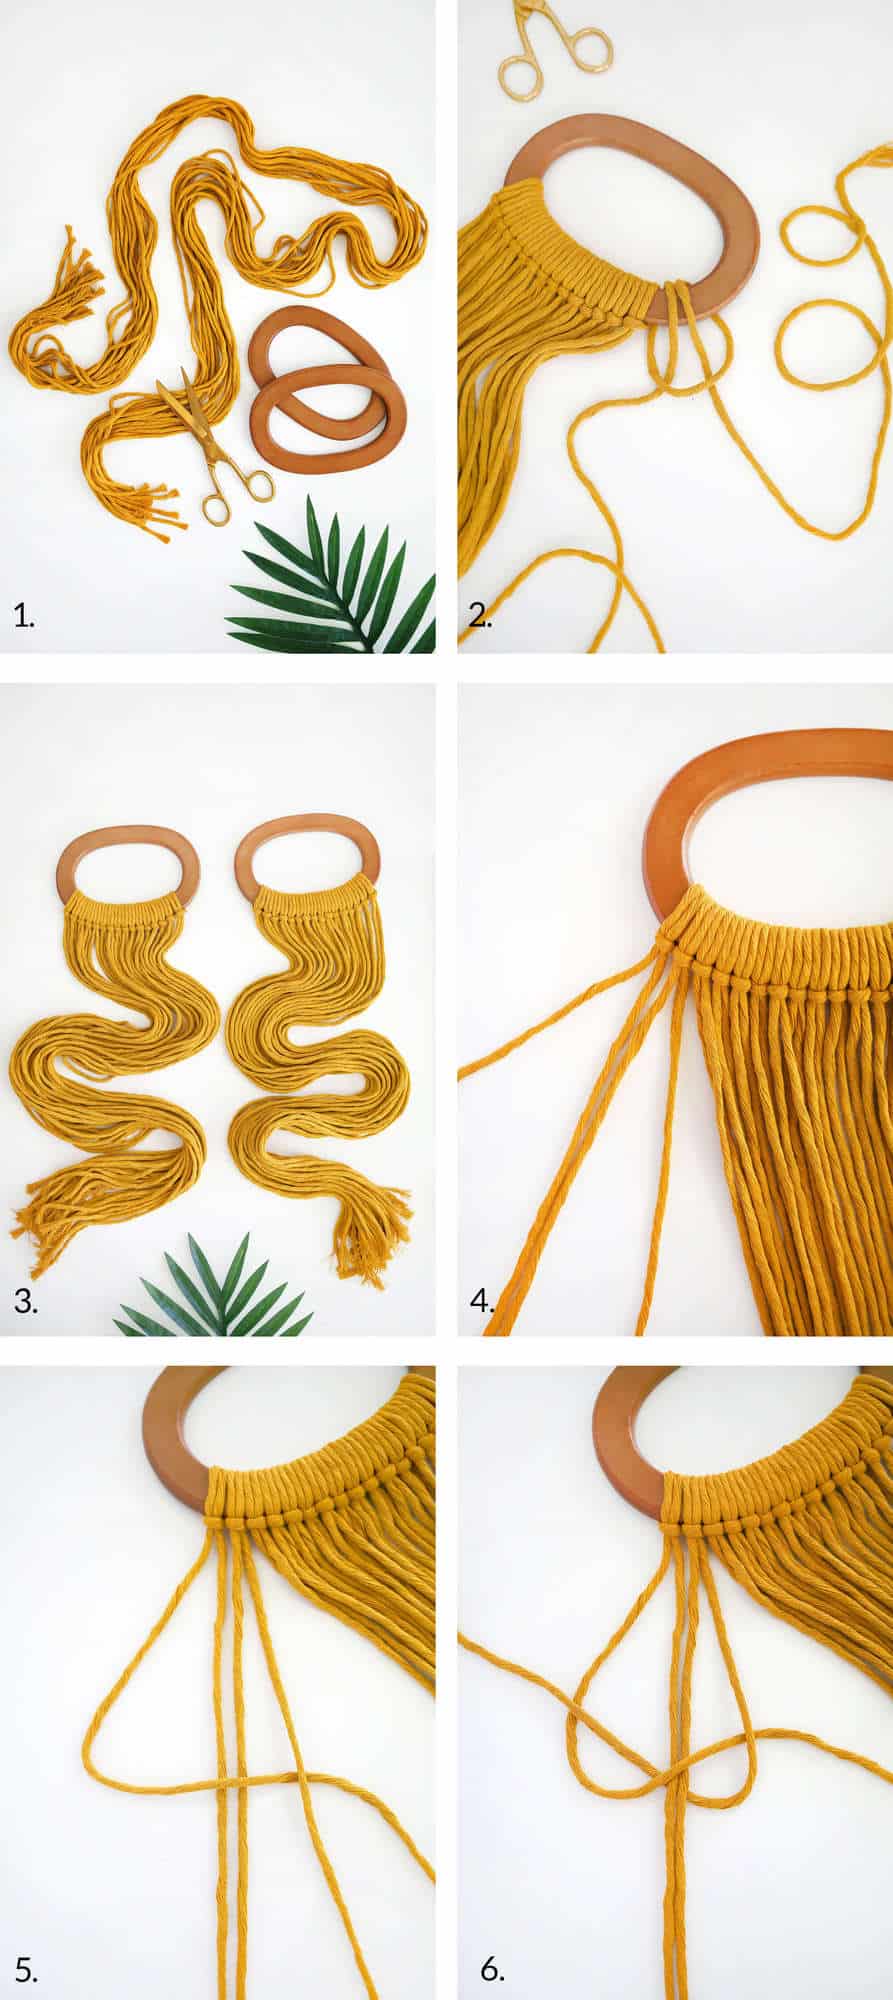 Step One: Cut thirty-two lengths of cotton cord that measure 11′ each.
Step Two: Tie sixteen strands to each handle using a lark’s head knot. To achieve a lark’s head knot, fold your strand in half and fold the center from the outer rounded part of one handle to the back of the handle. Then pull the two loose ends through the folded center as shown. This creates a lark’s knot.
Step Three: Repeat until you have tied sixteen strands per handle. Pay special attention that all of your knots are on the same side of your handle or else it will disrupt the visual pattern.
Step Four: Start your first row of square knots by using the first four strands of rope on the left side of one handle. You can move the rest of the strands off to the side to make this easier.
Step Five: Fold the first strand over the second and third strand and under the fourth strand to create a ‘4’ shape.
Step Six: Then fold the fourth strand under the second and third strands and up and over the bend in the first strand as shown. It almost looks like an upside down heart. Pull the outer two strands until they are snug. This is a half-knot.
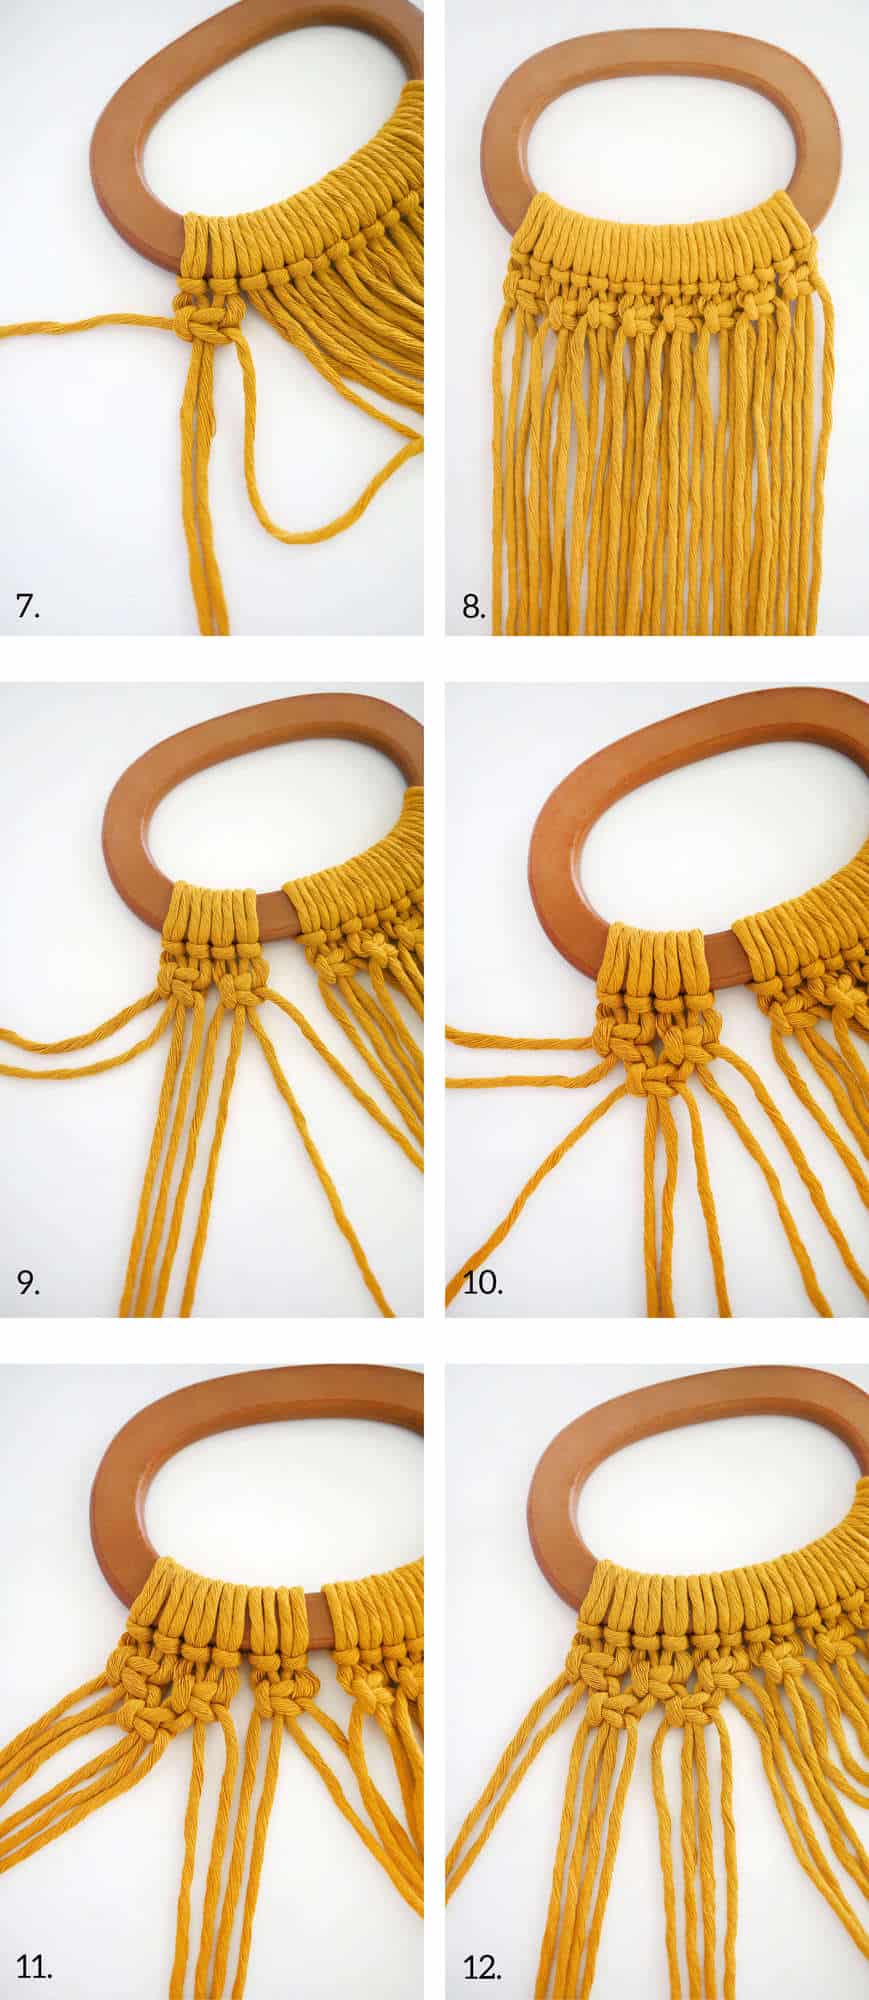 Step Seven: Then you’ll create another similar half knot but reverse the overlap order of the outer ropes. The outer rope on the right side will go over the center two ropes but under the outer rope on the left side. Then the outer rope on the left side will go behind the center two ropes and come out over the bend in the outer right rope. Check out steps two through four in this macrame stocking tutorial for further visual breakdown. This is a square knot.
Step Eight: Use the next four strands to create another square knot and keep adding square knots all the way across.
Step Nine: We’re going to create alternating square knots for the second row of knots. Use the first eight strands on the left side. Skip the first two strands on the left side and the last two strands on the right side so that you’re only working with the four strands in the middle.
Step Ten: Use those four strands to create a square knot.
Step Eleven: Use the two leftover strands on the right side and next two strands for your next square knot as shown.
Step Twelve: This is how it should look. Continue this second row of knots. Follow up with a third row of square knots, a fourth row of alternating knots, a fifth row of square knots, and a sixth row of alternating knots.
Note: In my pattern, I only tied five rows of knots but later realized a sixth row would create a smoother pattern before joining the two sides together.
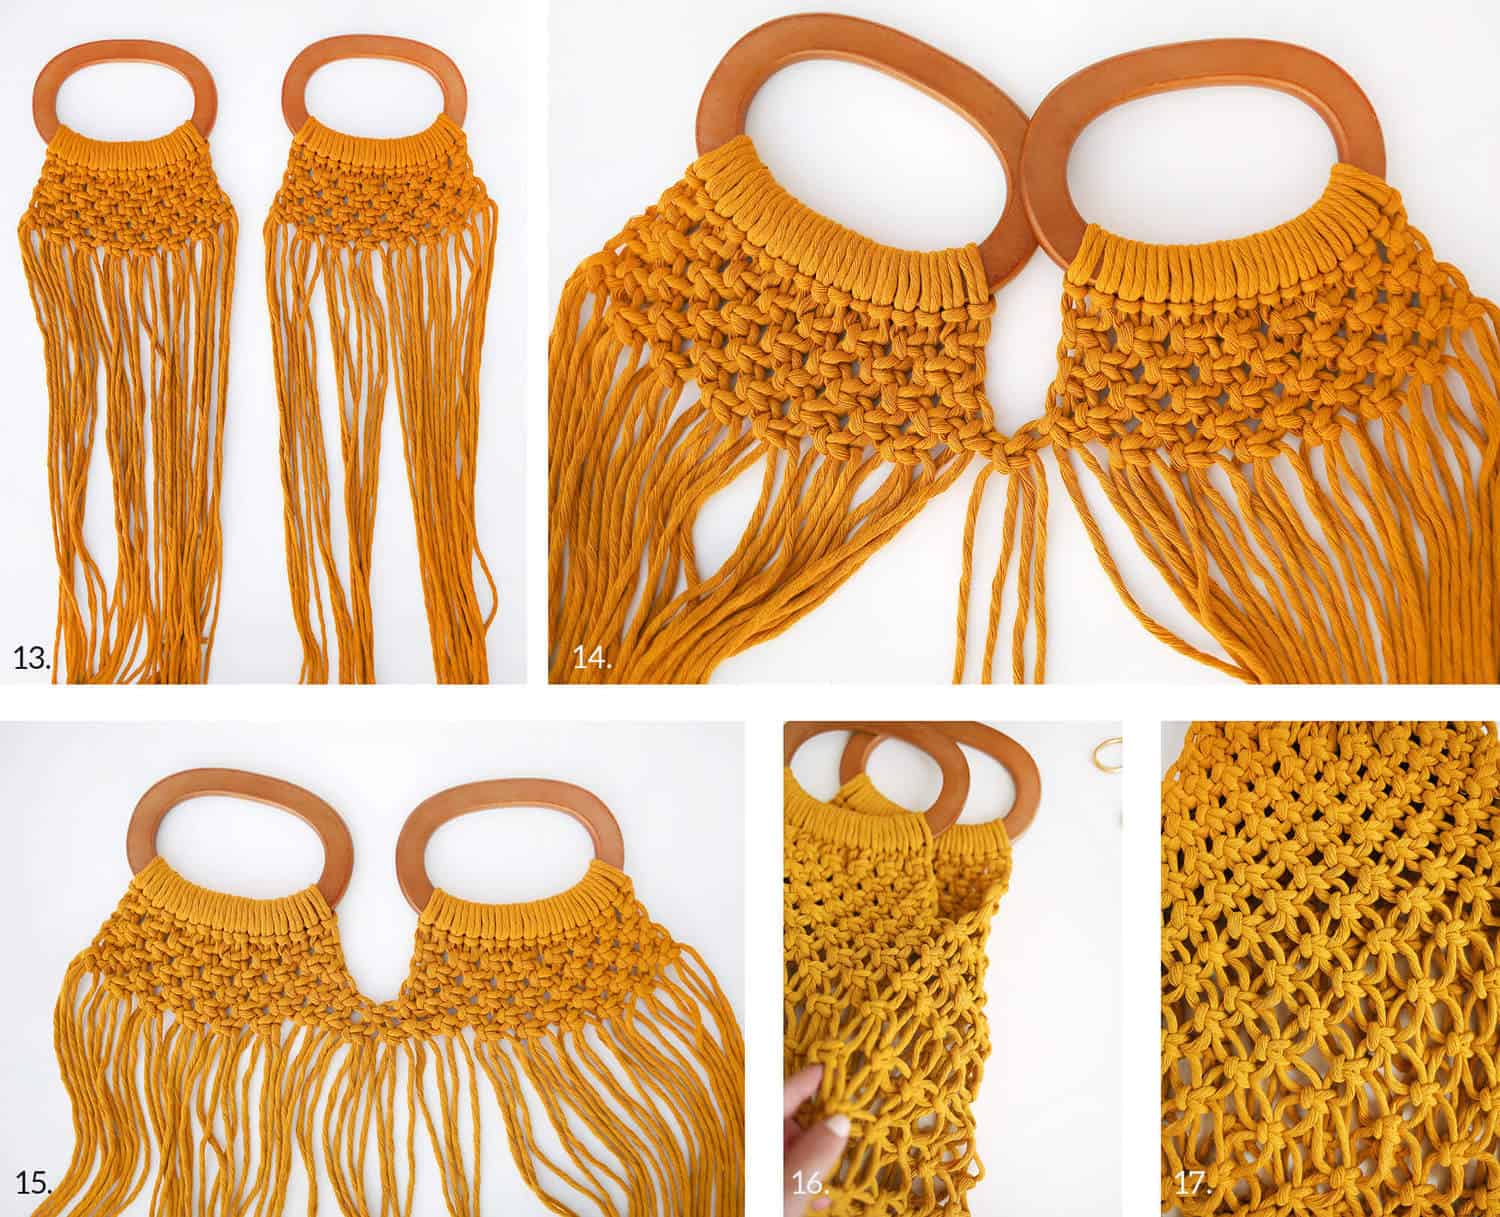 Step Thirteen: Repeat steps four through twelve on your second handle.
Step Fourteen: Place the two handles next to each other. My handles have a right side and a wrong side, so be sure your handles are both facing right side up. Create an alternating square knot between two strands from one side and two strands from the other side.
Step Fifteen: Continue tying square knots from the center to each edge to finish out that row, except for the last two or four strands on each end. Once you get to the tenth row, start leaving some space between rows. This will give your bag more roominess and stretch in the bottom half.
Step Sixteen: Once you’ve finished fifteen rows, fold your bag in half so that the wrong sides of the handles are facing each other. Attach the open sides of the bag by tying up the rest of the knots to finish off the rows.
Step Seventeen: You can see how the knots are closer together at the top and further from each other at the bottom.
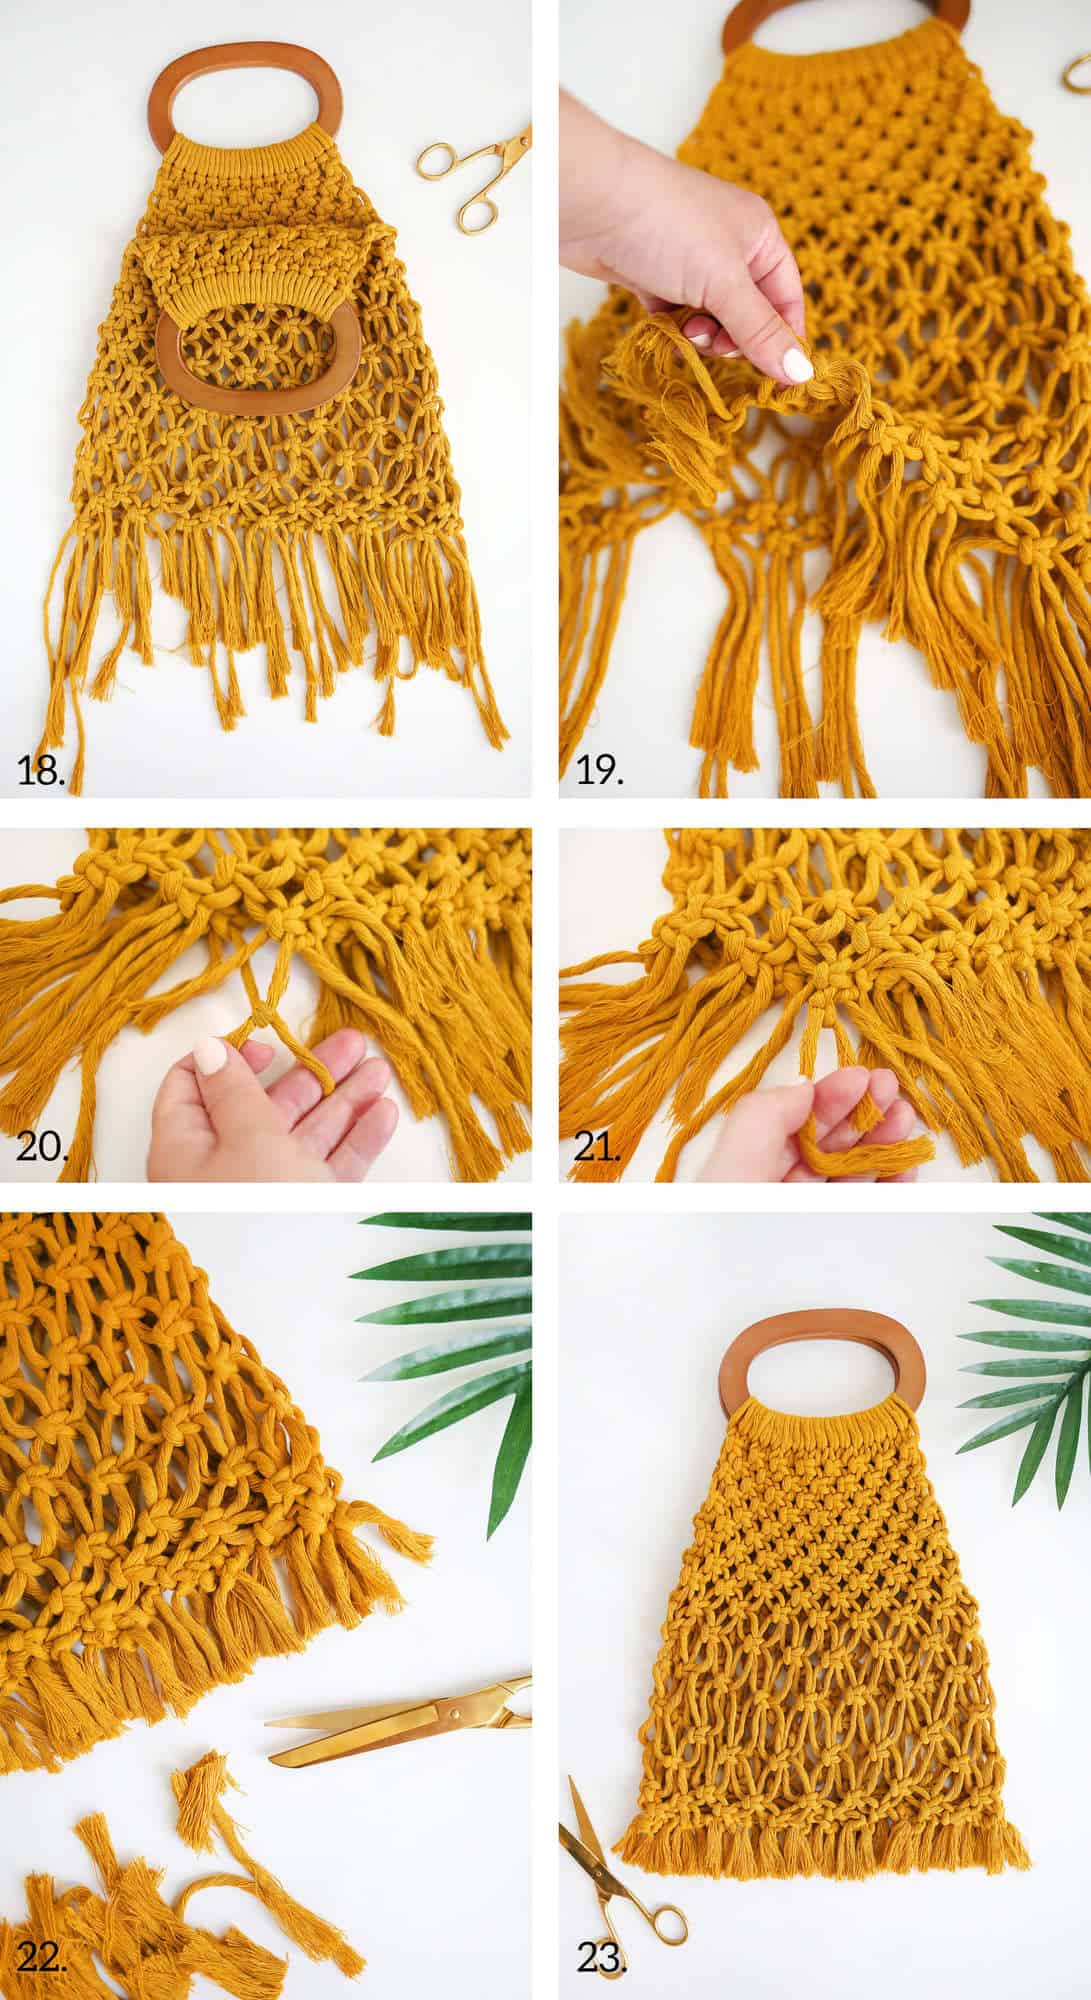 Step Eighteen: Now, this bag can be made with fringe on the bottom or tucked inside. If you want it tucked inside, like mine, this is the point where you turn your bag inside out with the right sides of the handles facing each other.
Step Nineteen: We’re going to tie the knots from the front side of the bag at the bottom, to the back side of the bag at the bottom.
Step Twenty: Take individual strands from one knot on the front side and an individual strand from a nearby knot on the back side and knot together once so that they are snug.
Step Twenty-One: Then tie a double knot. Follow along until all strands have been double-knotted to a strand on the opposite side.
Step Twenty-Two: Trim your strands so that they are even.
Step Twenty-Three: Brush your strands out so that they are full if you are going to keep them on the outside of your bag.
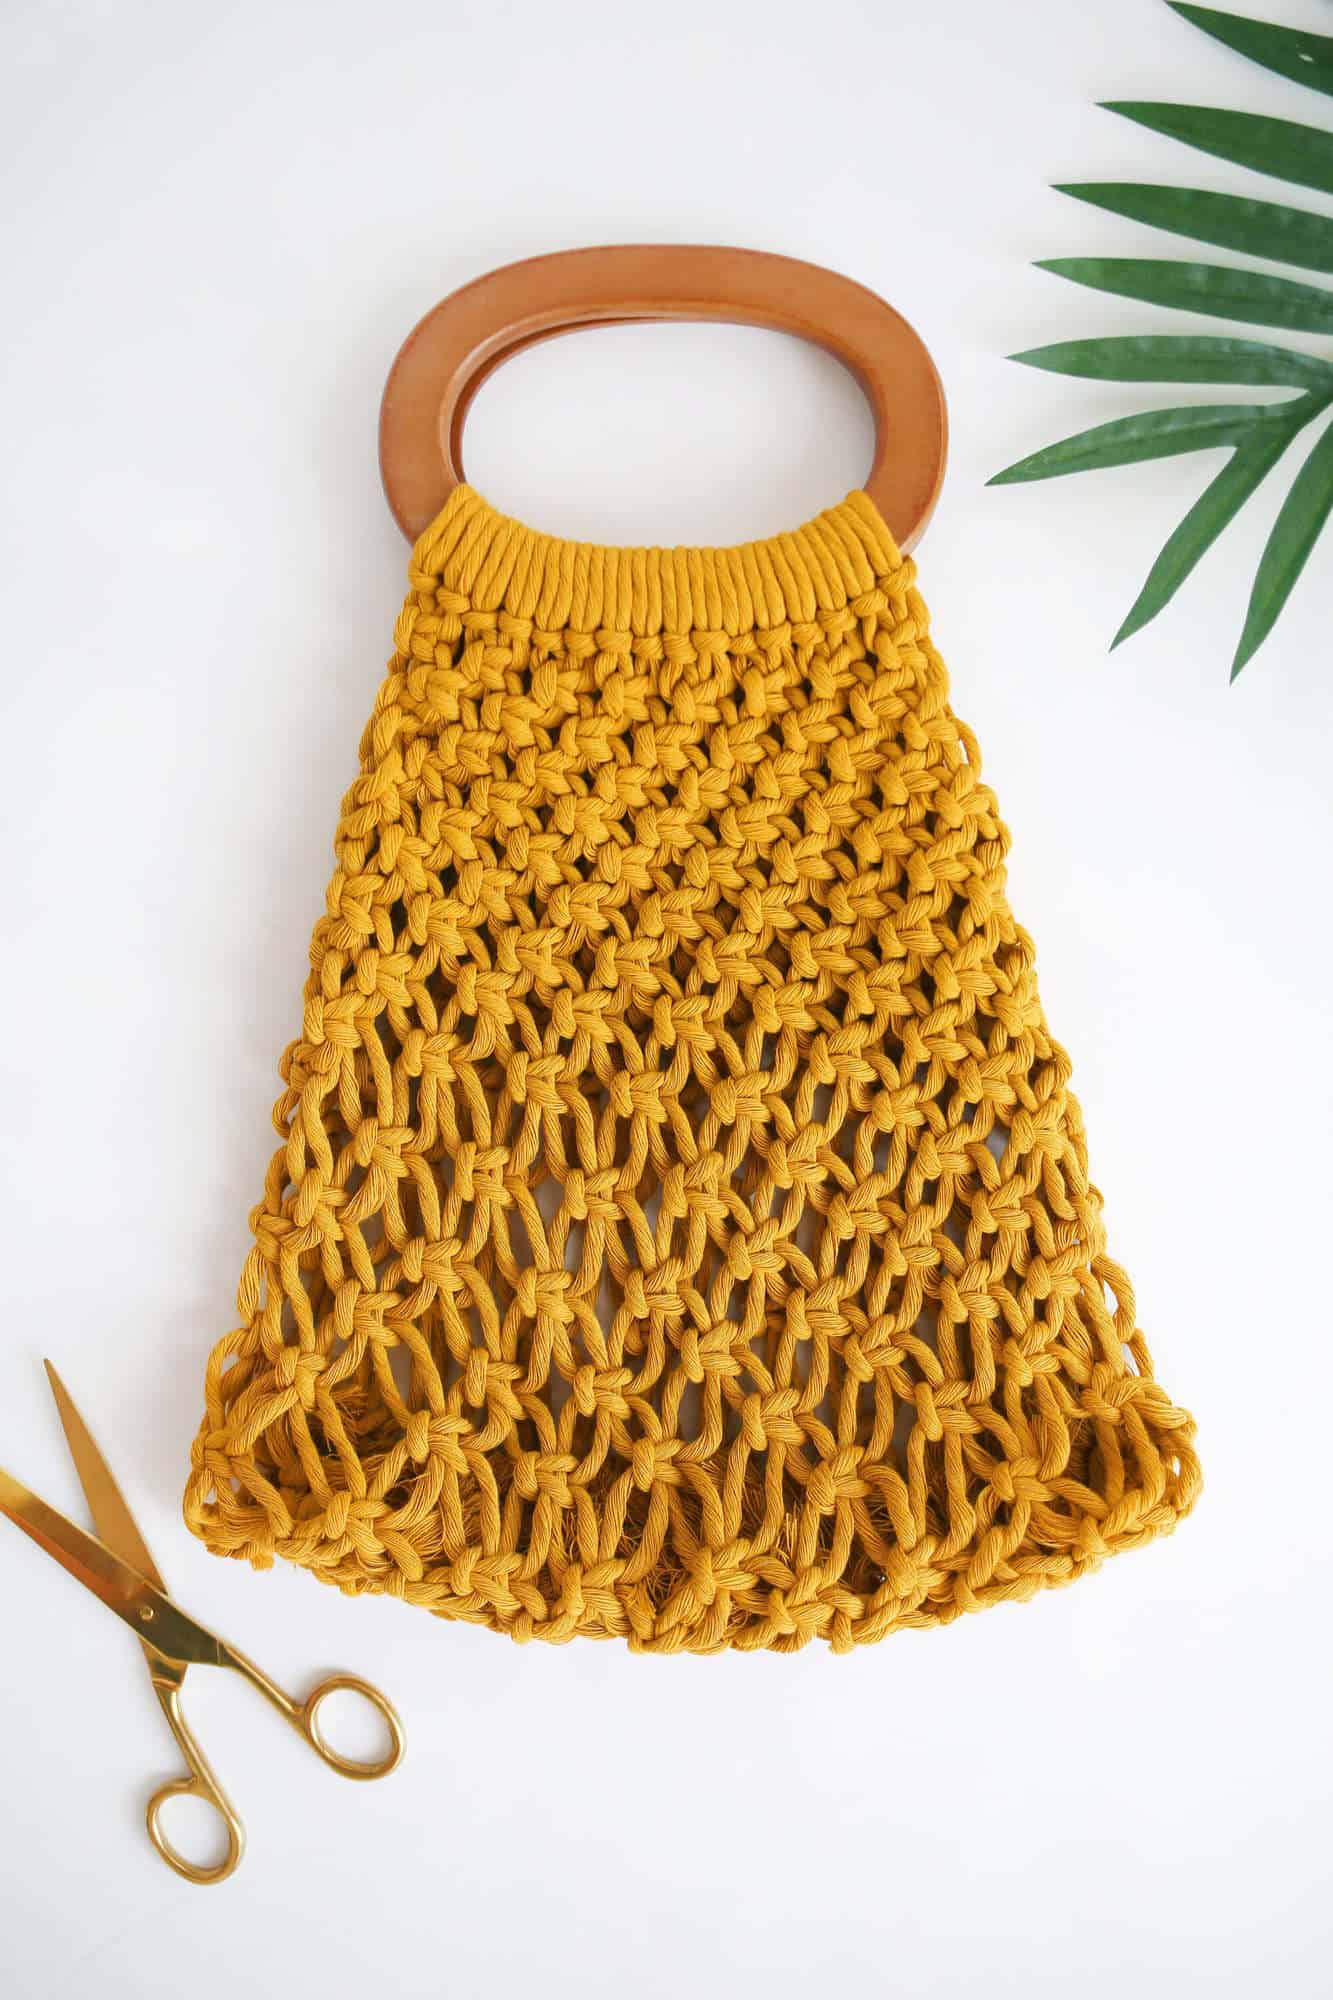 Or trim them down a bit further and turn your bag right side out as shown. I trimmed mine down even further after this photo once I decided I liked mine better without fringe after all. Ha! Decisions, decisions.
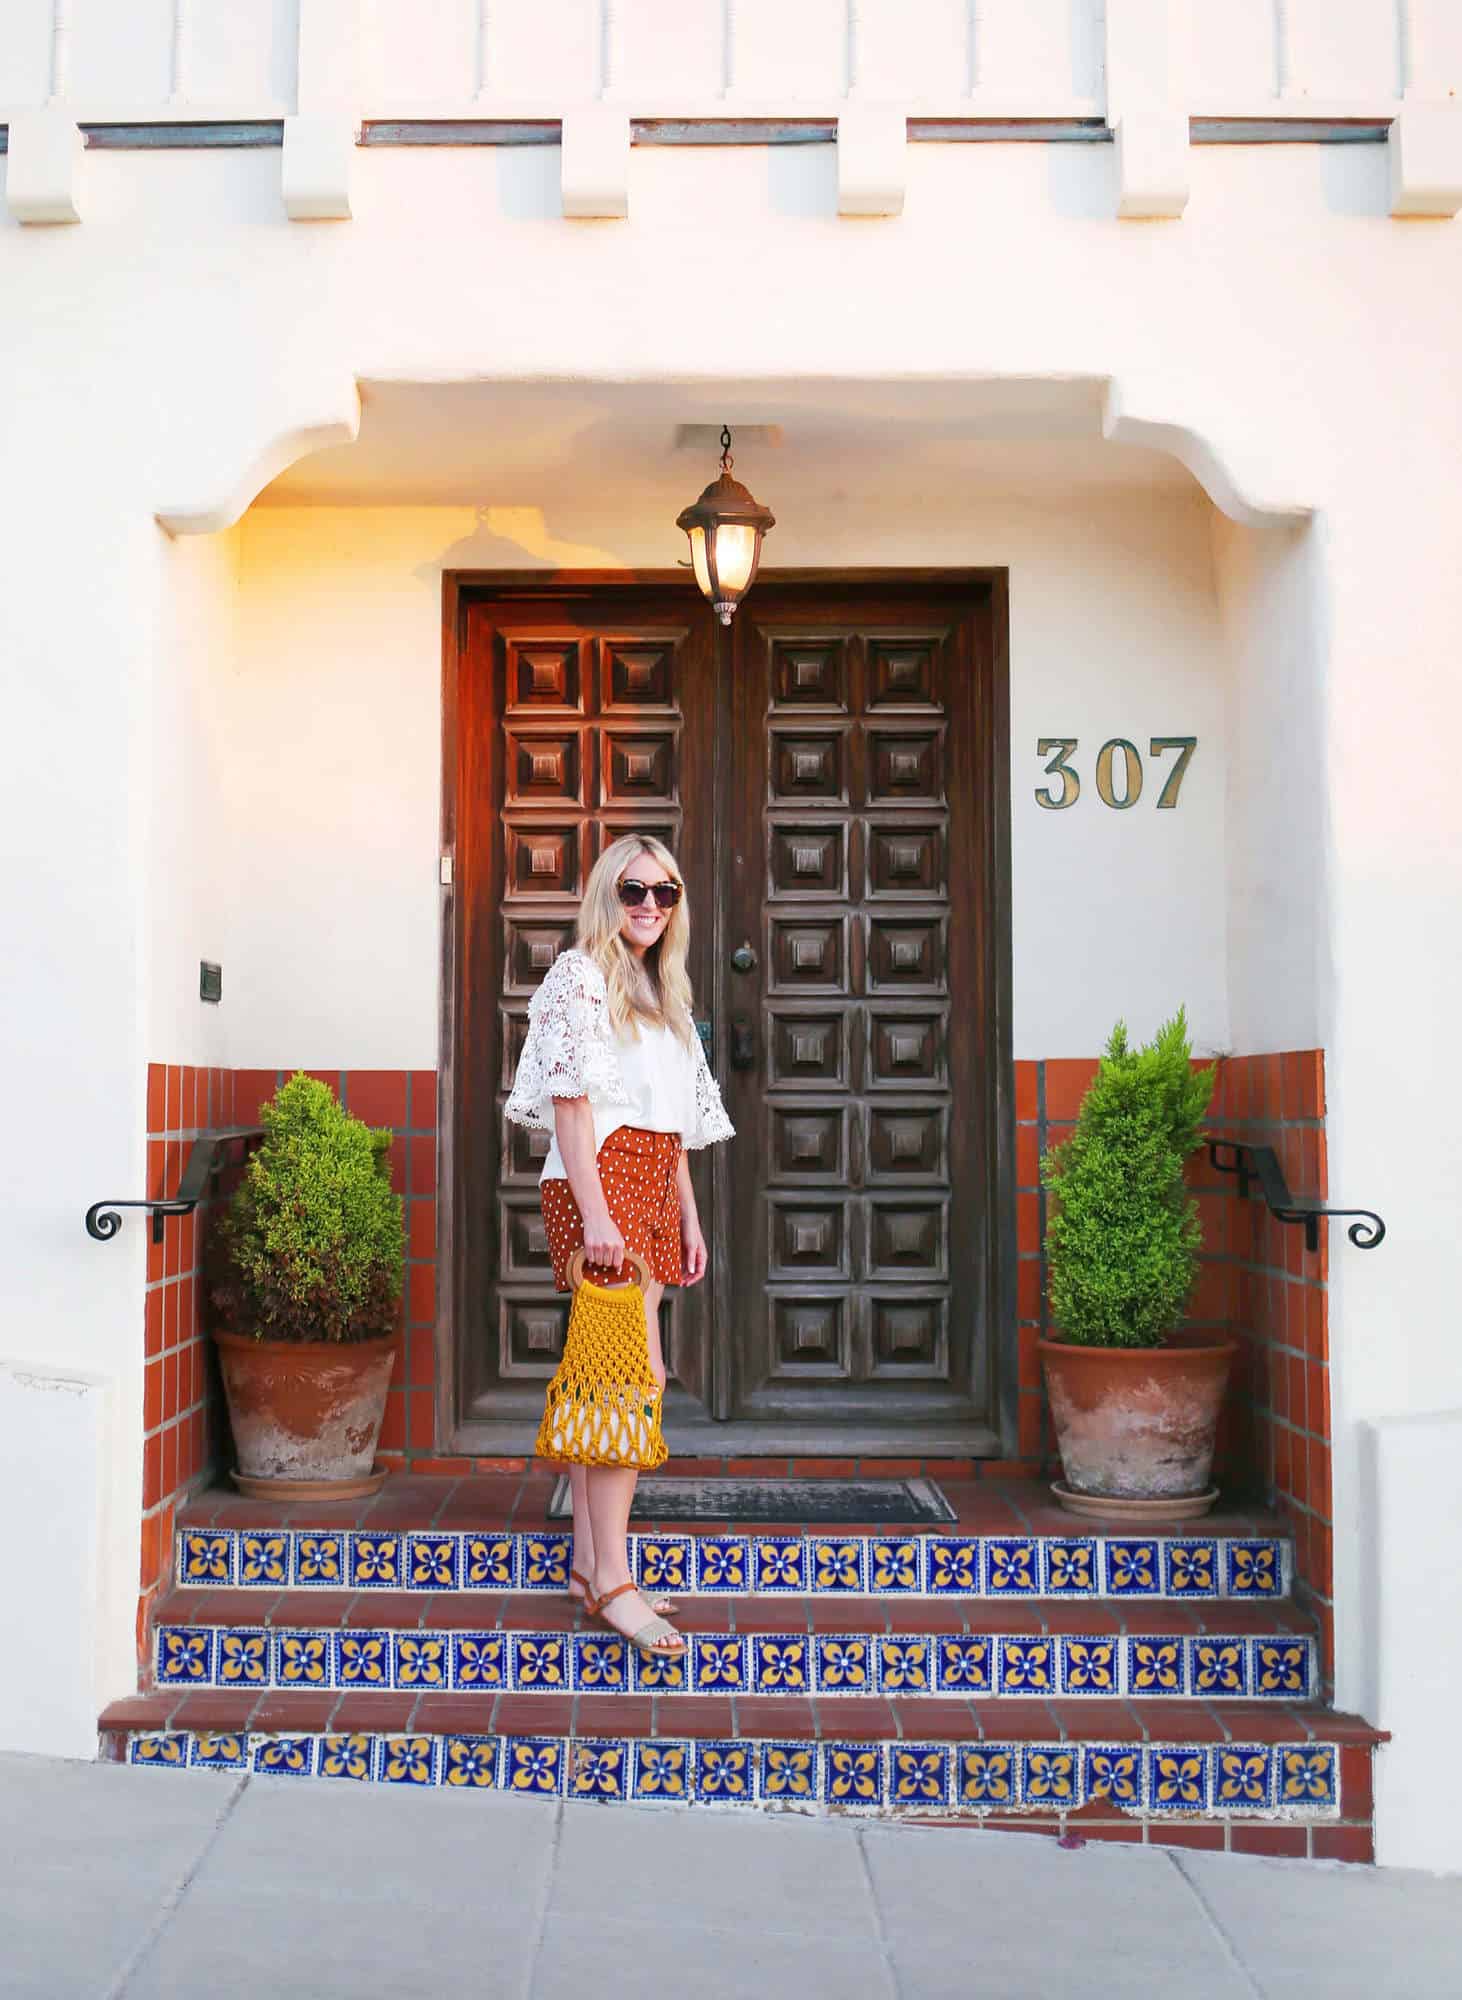 Worried about the random stash of lipsticks and pens that are usually pooling at the bottom of your most used bags? Toss in a cute zipper bag to carry smaller items and you’re golden! Enjoy. – Rachel
Check out our favorite bags and accessories on wishlist and shopping pages!
Credits//Author and photography: Rachel Denbow. Photos edited with A Color Story Desktop.
]]>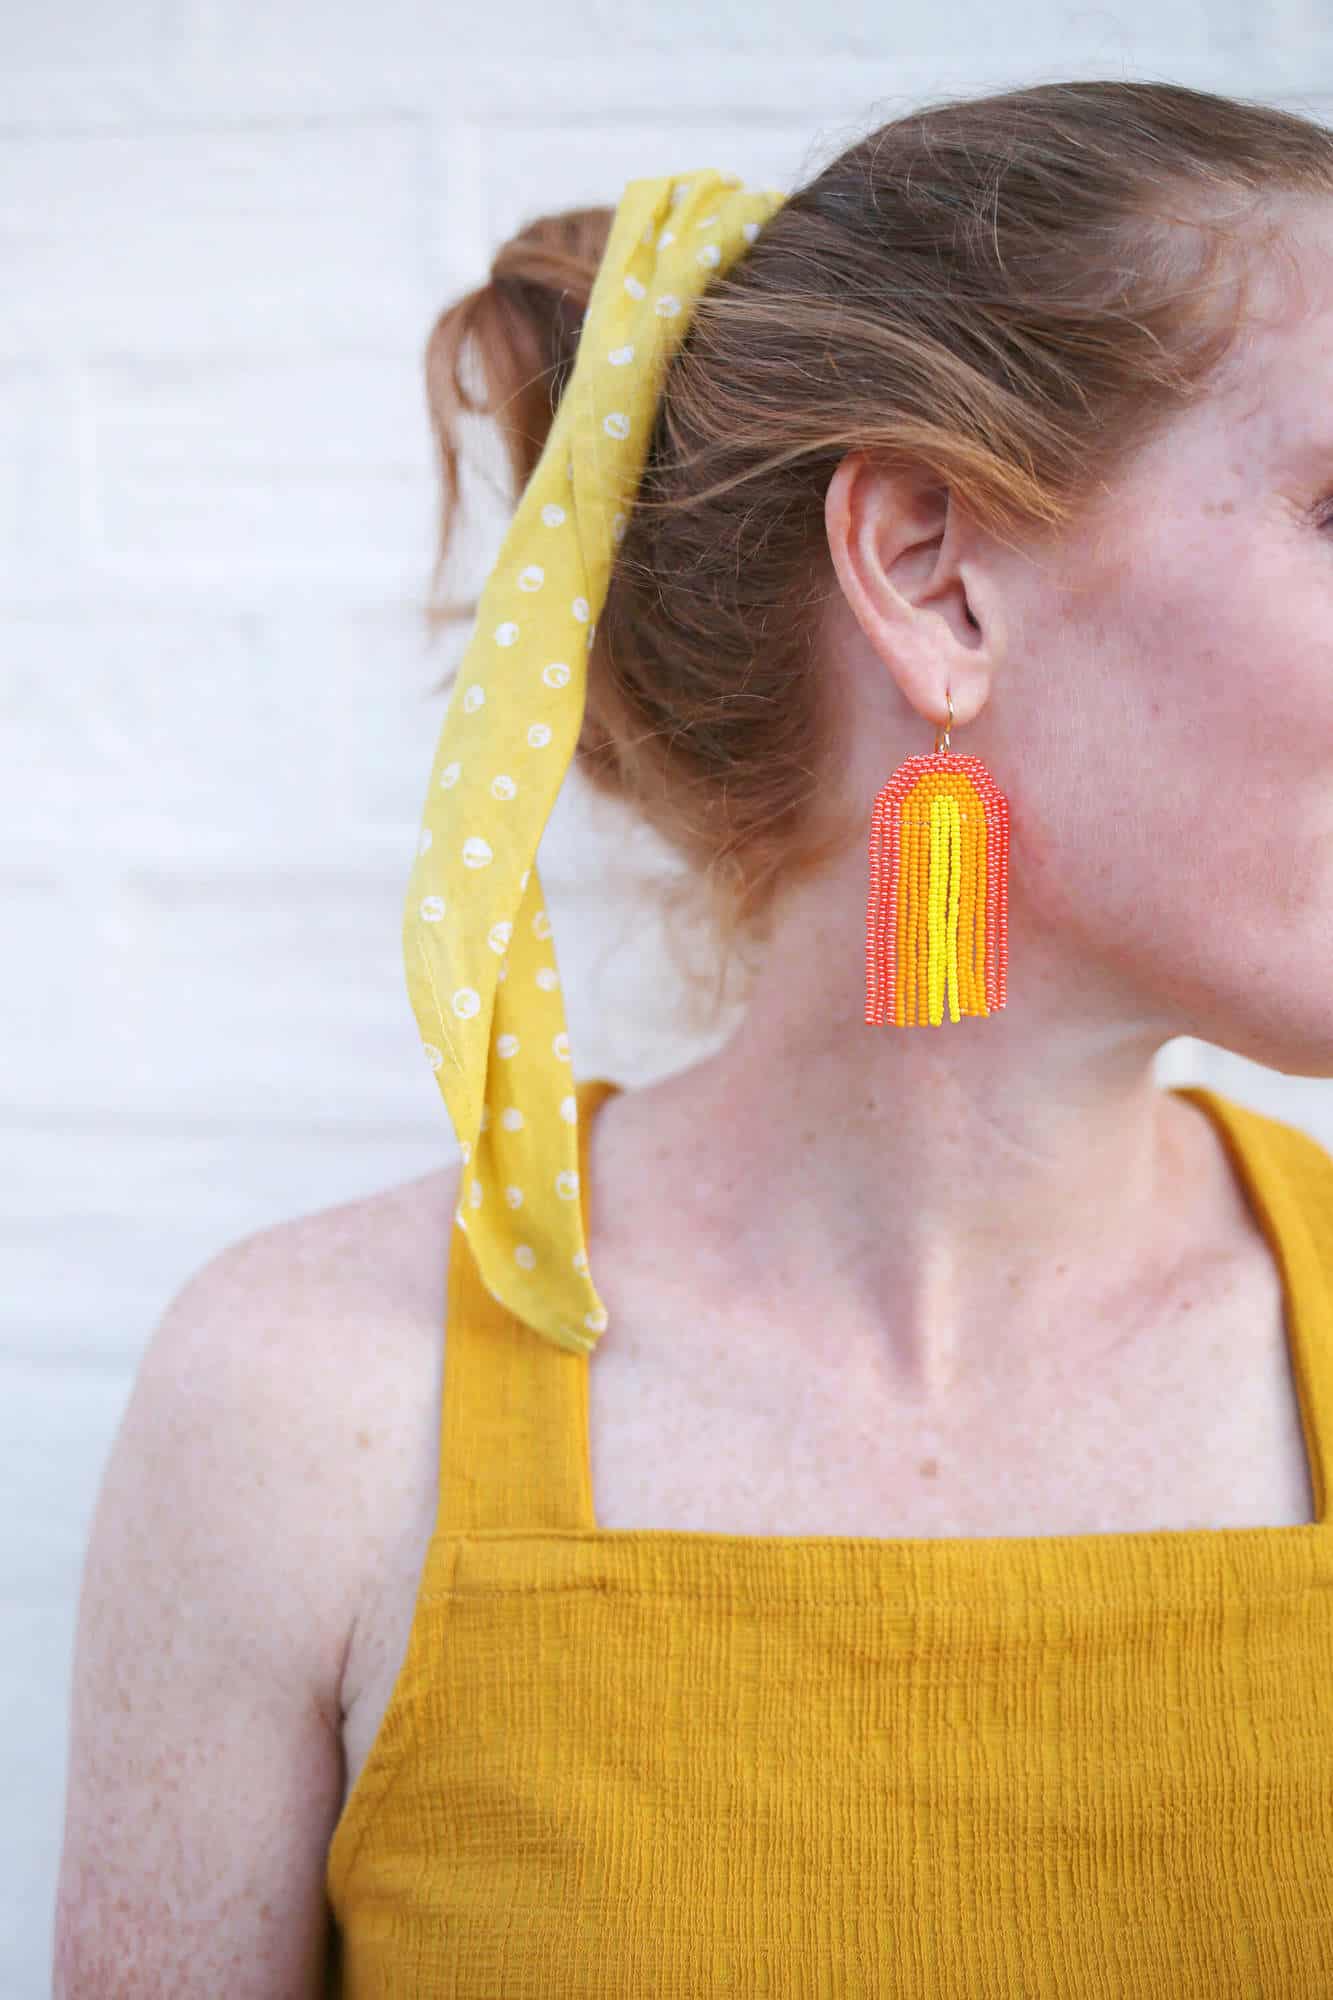 Who says life can’t be all sunshine and rainbows?! This statement pair of seed bead rainbow earrings will keep that endless summer vibe alive, even if the pumpkin spice release date is just around the corner.
Related: How to make Clay Bead Bracelets – Ideas
After learning to create triangular seed bead earrings, I realized I could adjust the pattern to create a simple rainbow shape. I am thrilled with how they turned out! I chose to use three colors, but you could easily tweak the pattern to create a more traditional rainbow design. Wear them with your favorite jumper or dress up a simple pair of cut-off jeans and cropped tee and watch those storm clouds disappear. The rainbow trend is still going strong and I couldn’t be happier!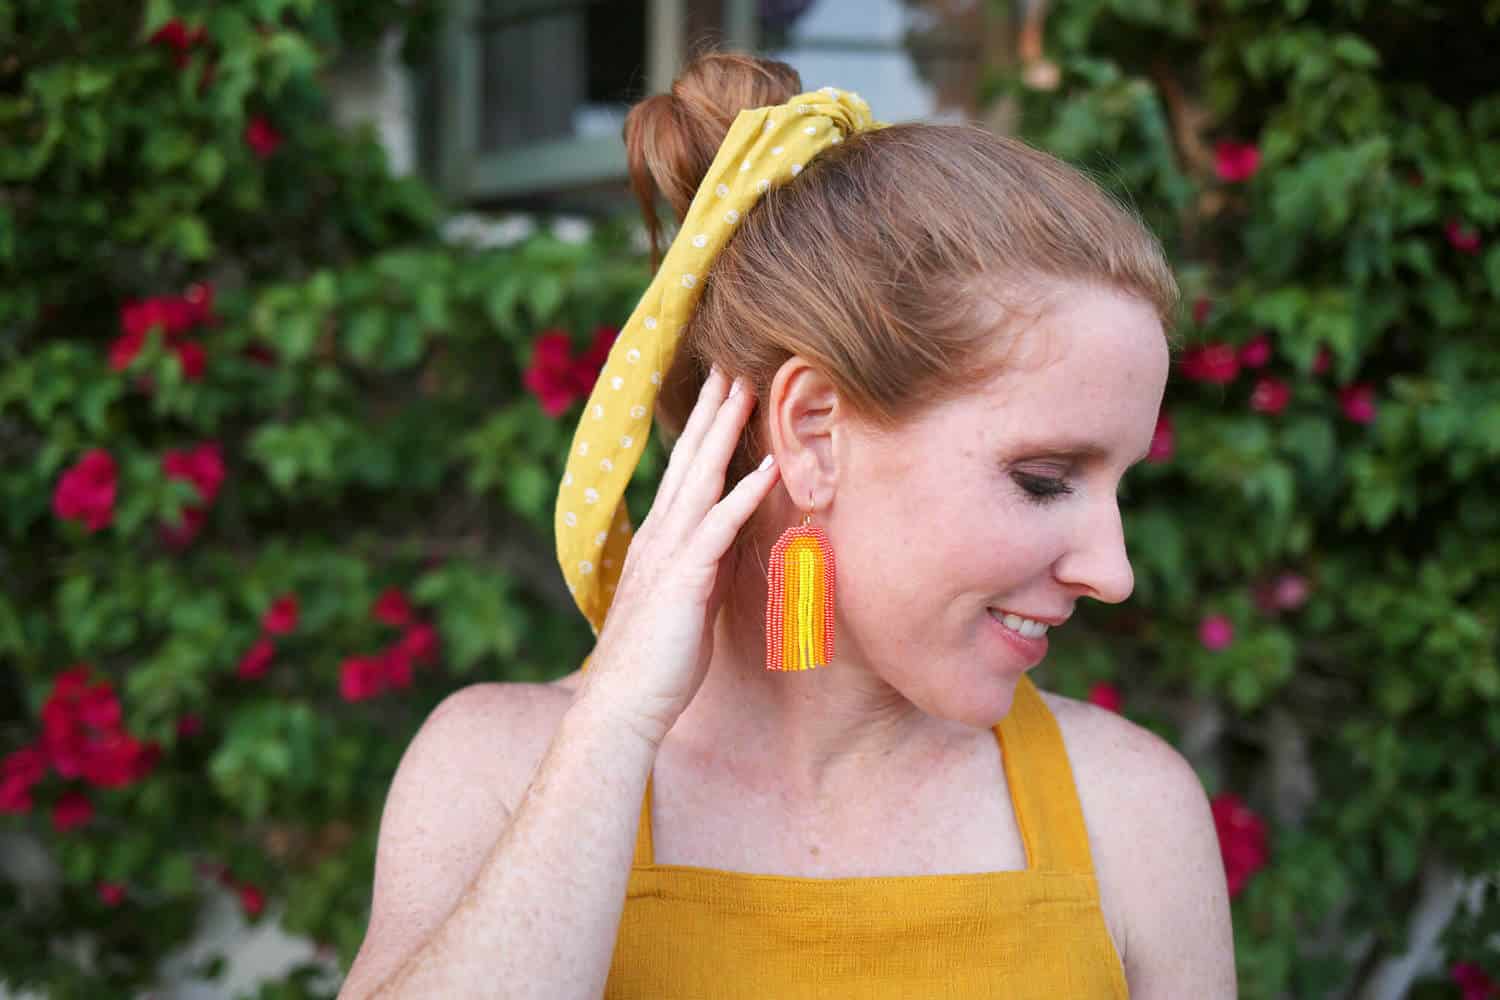
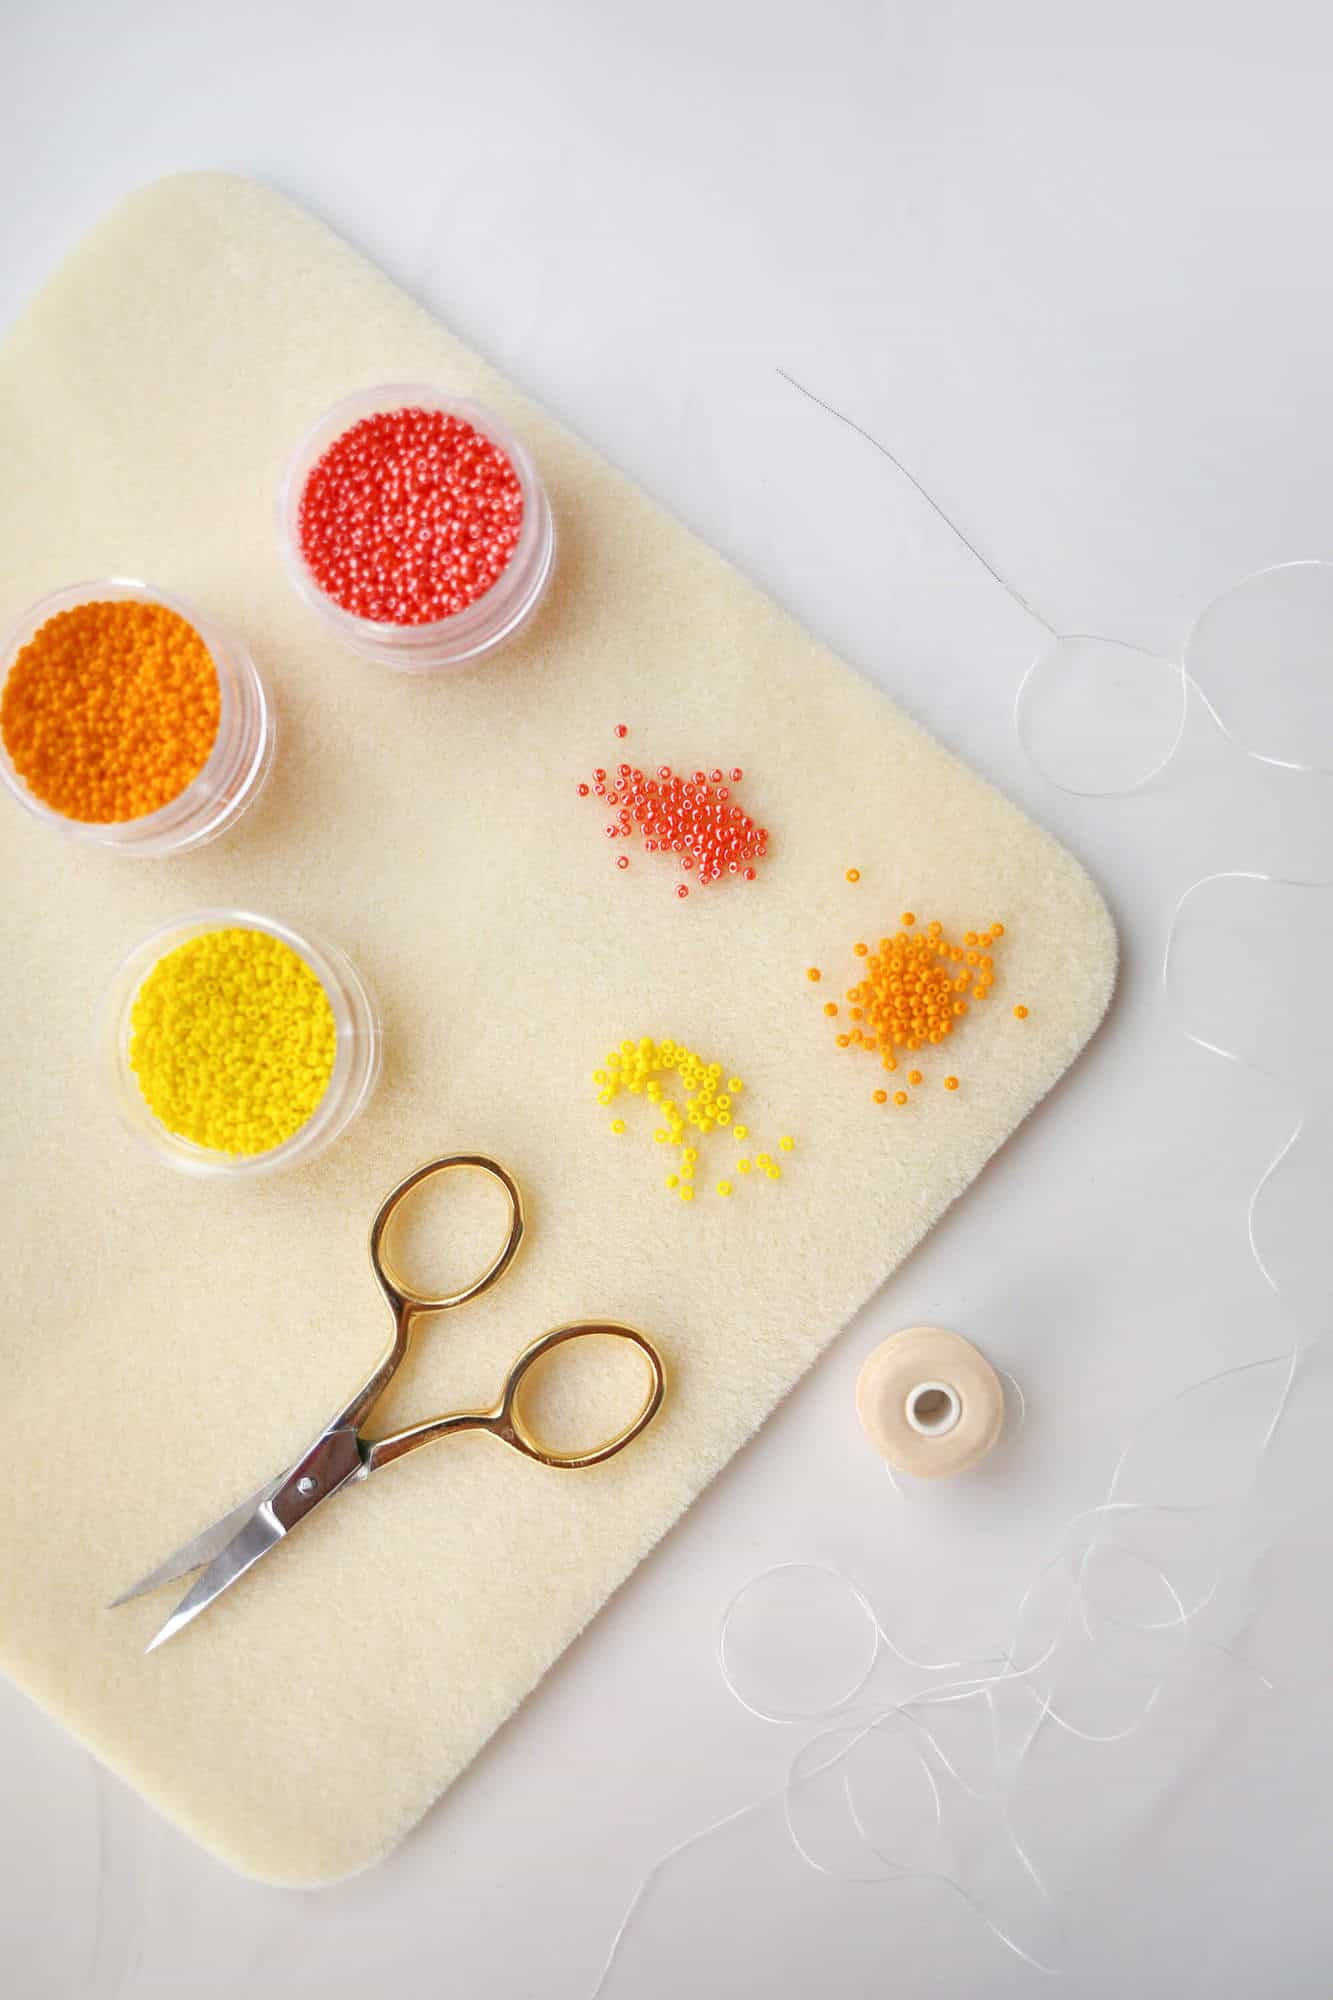 Supplies:
–Miyuki round seed beads, yellow (11/0)
-Miyuki round seed beads, light orange (11/0)
-Miyuki round seed beads, rose pink (11/0)
-collapsible eye needle (6.4 cm, 2.5in)
–Nymo nylon thread, size D in white (64 yards)
–bead mat
-20 mm earring connectors
-scissors
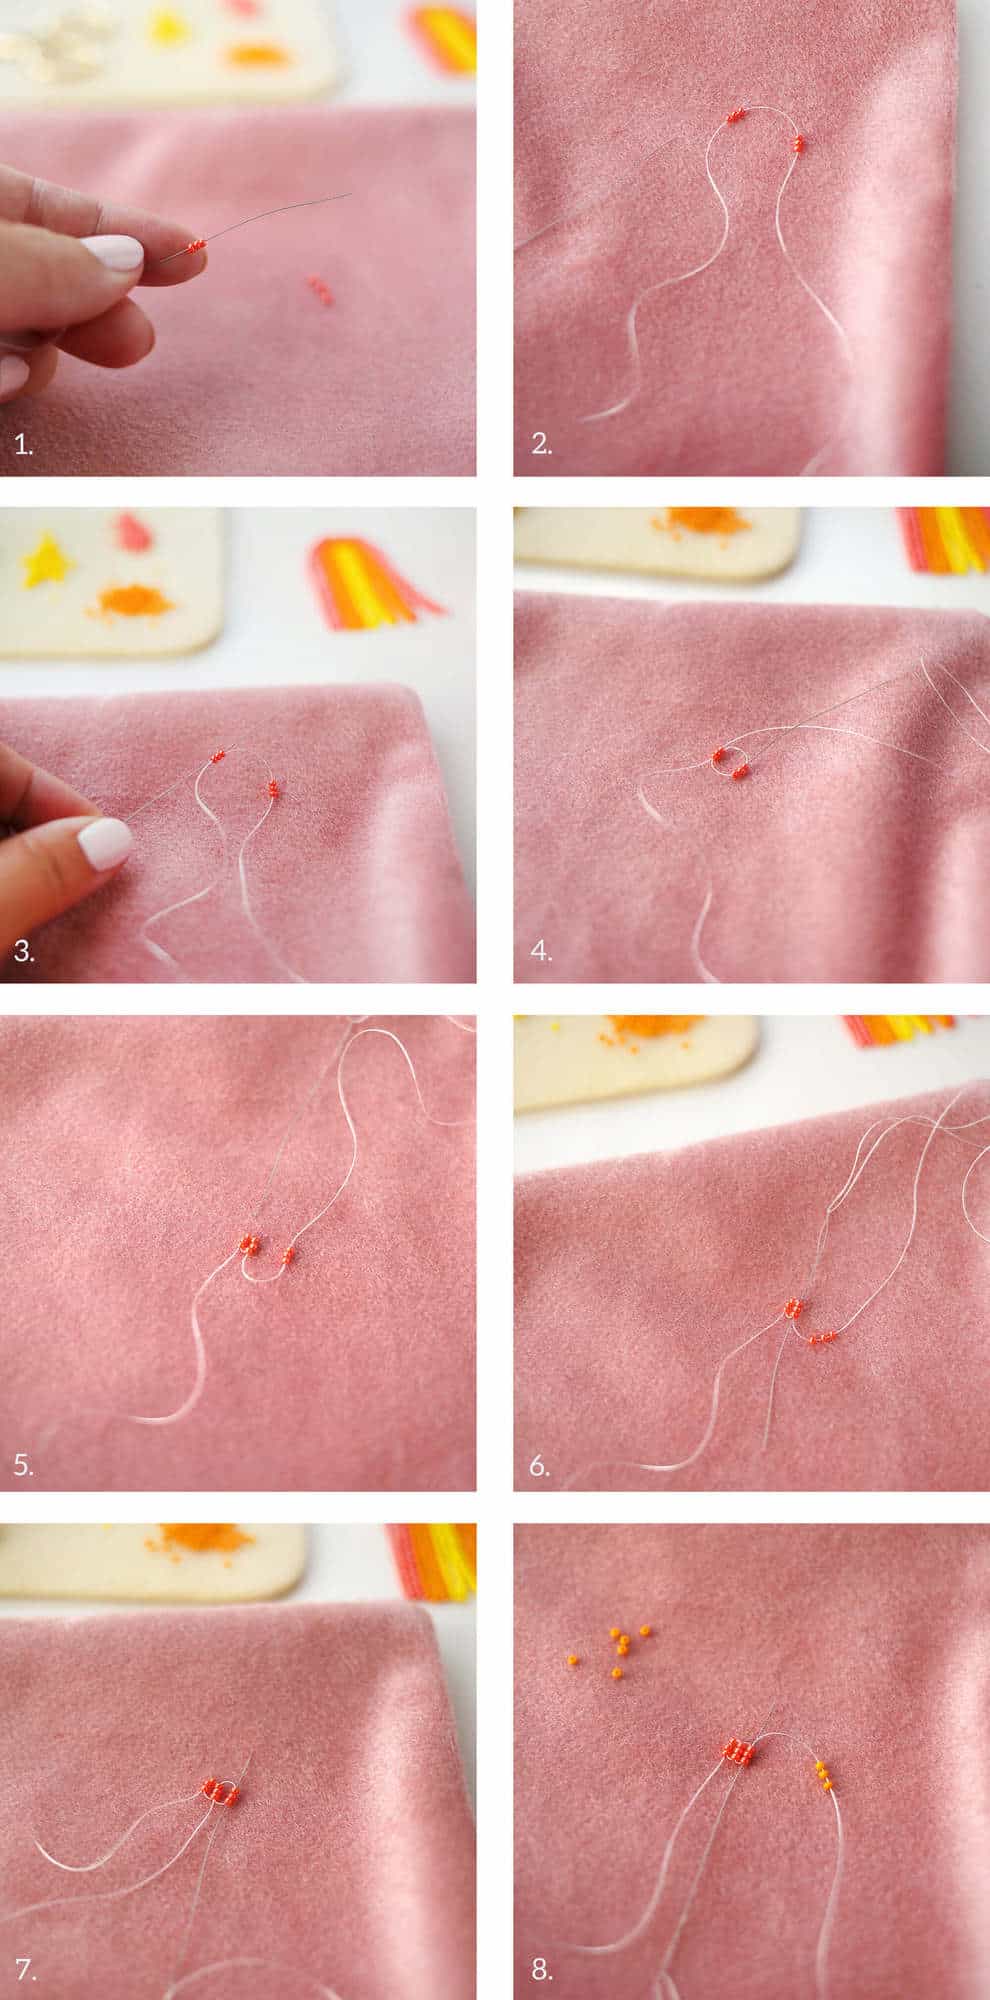 Step One: Start your first earring with 5′ of thread on your needle. Thread your first three beads in your outer rainbow color and pull them along your thread until you have a 4″ tail.
Step Two: Thread your next three beads in the same color to create the start of your ladder stitch. Keep a space between your first three and your second three.
Step Three: Thread your needle back up through the bottom of the first set of three beads.
Step Four: Then thread your needle back down through the second set of three beads. Pull taut so that the first and second set of beads are snugly side-by-side.
Step Five: Next, pick up three more beads in the same color.
Step Six: Stitch down through the second set of three beads.
Step Seven: Stitch back up through the third set of three beads and pull taut.
Step Eight: Pick up three beads in your next color and then stitch through the bottom of the third set of beads and pull taut.
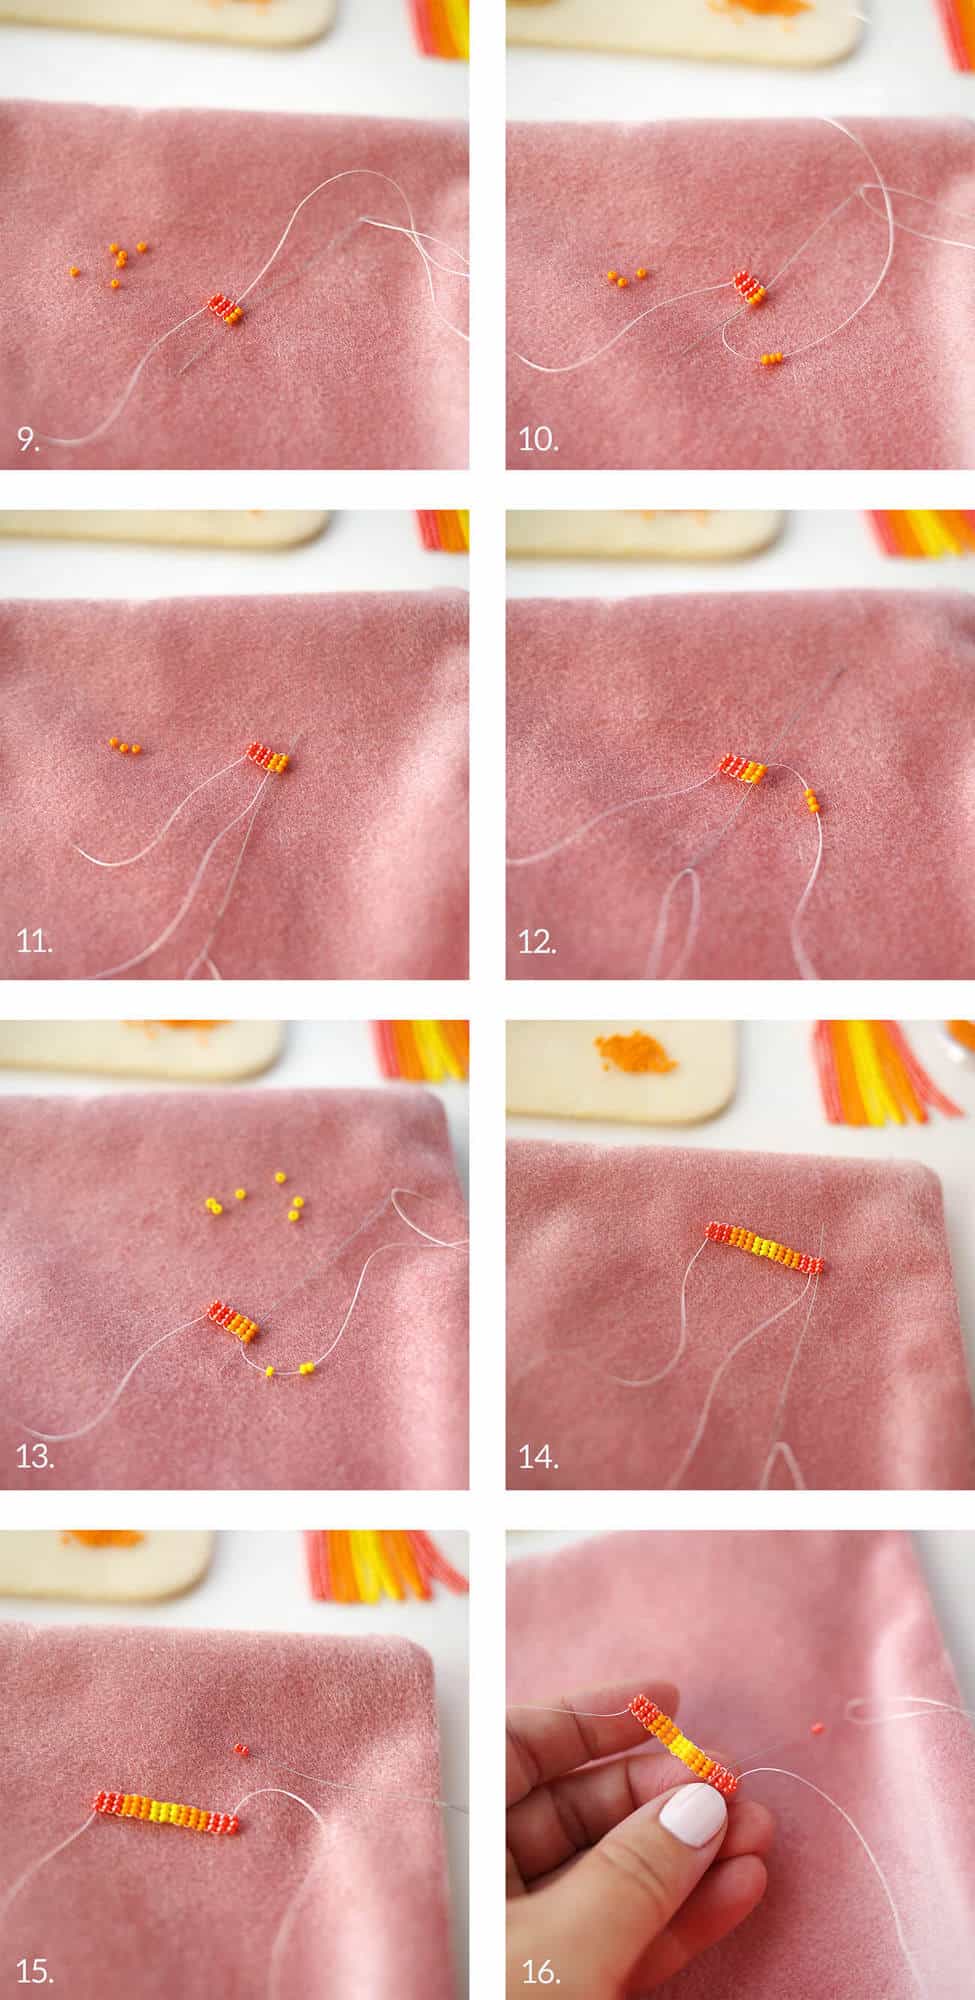 Step Nine: Stitch back down through the new color set of beads.
Step Ten: Pick up three more of the second color beads and stitch down through the previous set—the fourth row of beads.
Step Eleven: Then stitch back up through the fifth row of beads and pull taut.
Step Twelve: Pick up three more beads in the second color and stitch up through the fifth row of beads again. Then stitch back down the sixth row of beads.
Step Thirteen: Pick up three beads in the third color and stitch down from the top of the sixth row.
Step Fourteen: Continue the ladder stitch pattern so that you add in two more of the third color and then repeat three more of the second color and three more of the first color. You should end by stitching up through the top of the last three beads.
Step Fifteen: Now we’ll start the brick stitch. Pick up two beads in the outer color.
Step Sixteen: Then stitch your needle under the thread showing between the second and third bead from the edge in the previous row. It’s helpful to stitch from the back to the front.
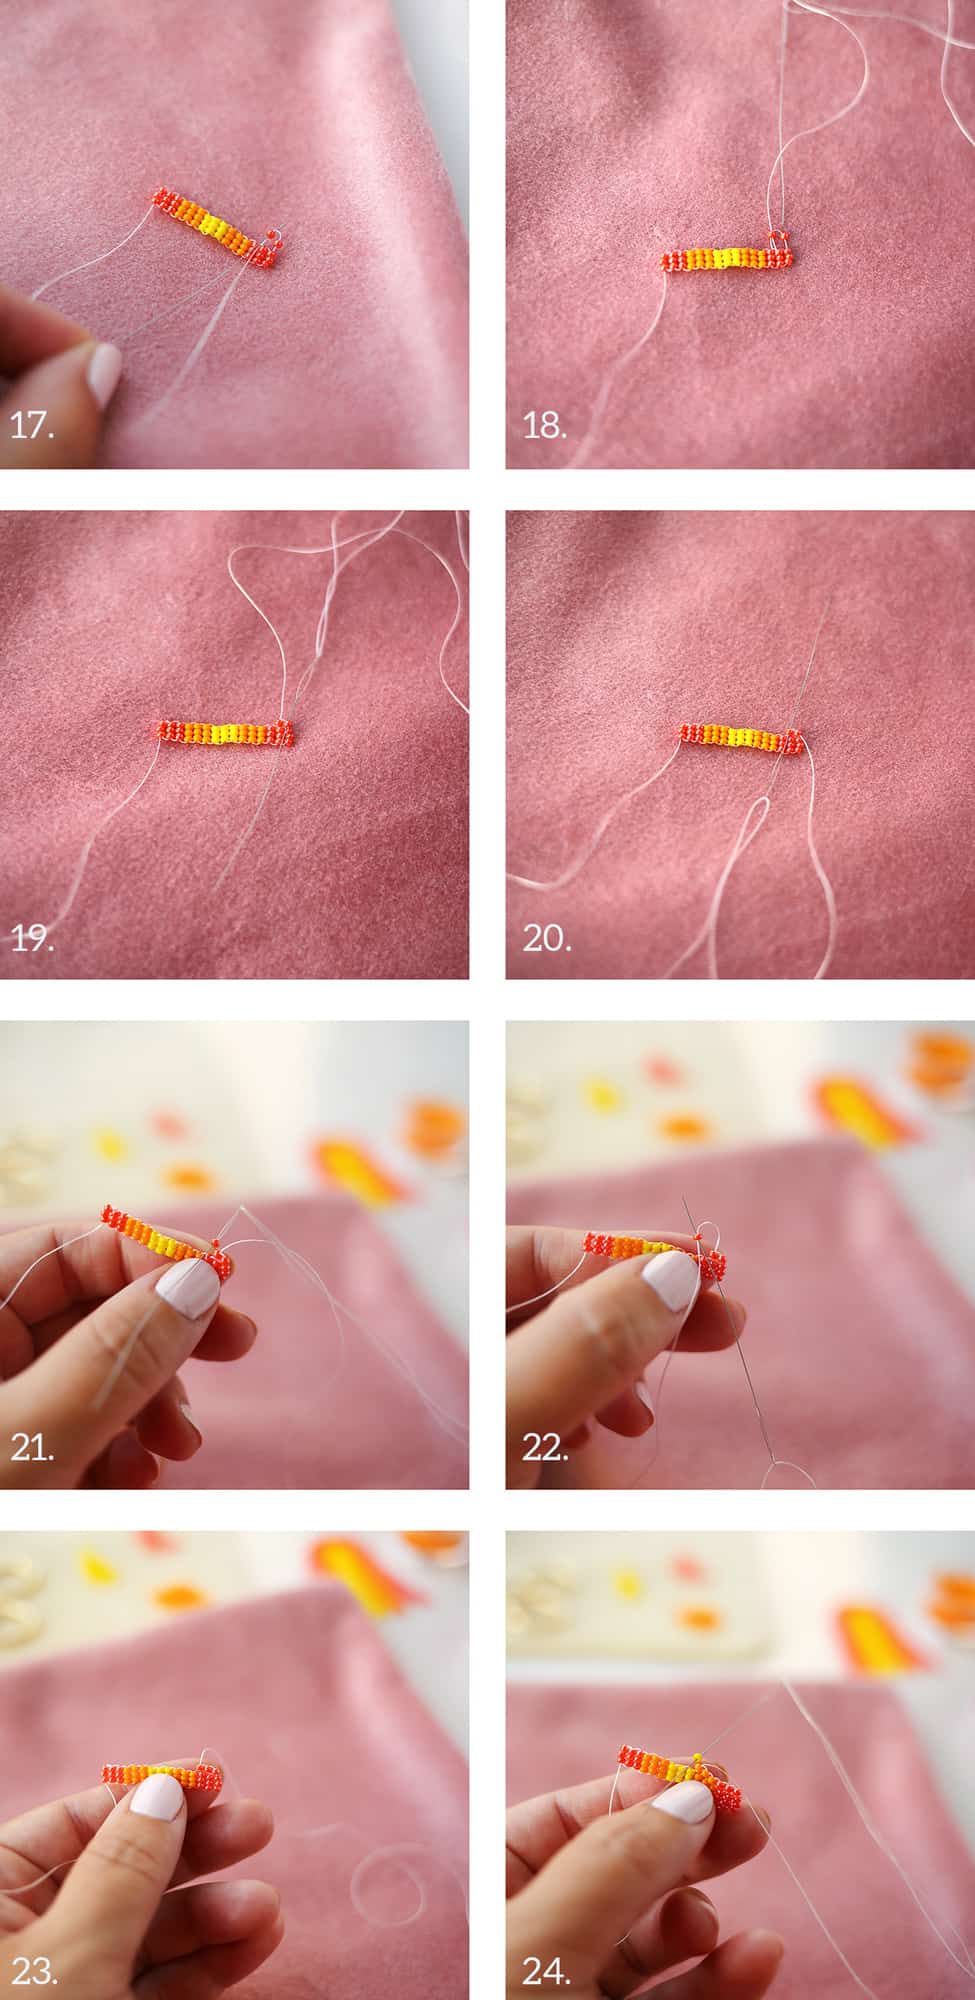 Step Seventeen: Pull until almost taut and then stitch back up through that second bead as shown. This will be the second bead in a new row.
Step Eighteen: Stitch back down the first bead in your new row.
Step Nineteen: Pull your needle through and then pull taut.
Step Twenty: Stitch back up through the second bead in your new row. Doubling back through these two will ensure they are well secured, but you won’t be doing this every two beads—only at the start of a new row.
Step Twenty-One: Pick up a third bead in that same color and stitch under the thread showing between the two beads underneath, the same as in step sixteen.
Step Twenty-Two: Stitch back up through that third bead in your new row.
Step Twenty-Three: Pull taut so that the beads in this row are sitting on top and in between the beads in the row below. Add three more beads in the second color.
Step Twenty-Four: Add in your first of two beads in the third color. This new row has decreased the number of beads in it so the middle color only gets two instead of three. Continue your pattern all the way across.
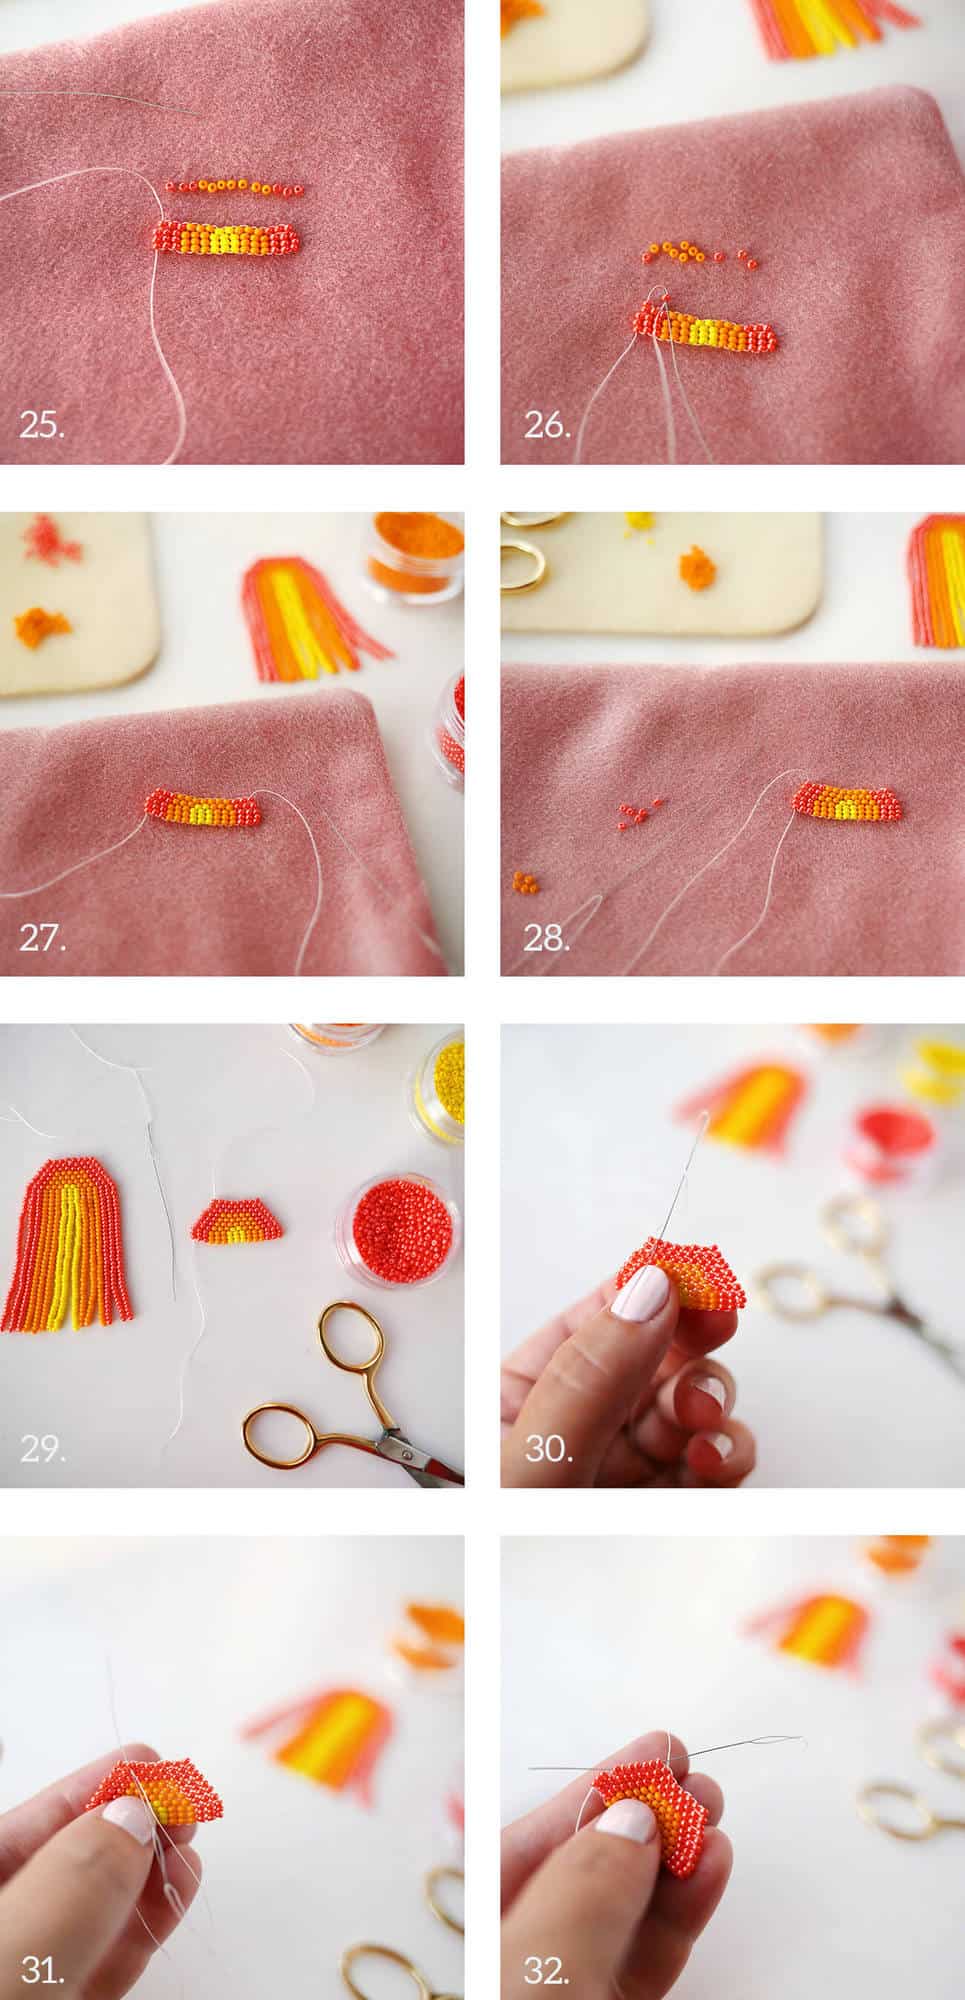 Step Twenty-Five: Lay out your second row of beads to brick stitch. You’ll need three in the first color, seven in the second color, and three in the first color. You won’t use any of the third color.
Step Twenty-Six: Pick up two beads in the first color and stitch under the thread between the second and third bead in the previous row. Then stitch back up through that second bead. This is the same thing you did at the start of your first row of brick stitch.
Step Twenty-Seven: Continue adding beads until you finish off this row.
Step Twenty-Eight: Your third row of brick stitch will include three beads in the first color, six beads in the second color, and three more beads in the first color.
Step Twenty-Nine: Add three more rows of beads all in the first color.
Step Thirty: Stitch back down through the second bead in that top row.
Step Thirty-One: Then stitch under the thread in between the second and third bead in the row underneath and then stitch back up through that second bead in the top row.
Step Thirty-Two: Stitch back down all the beads along the edge of the brick stitch rows. Remove your needle from this length of thread.
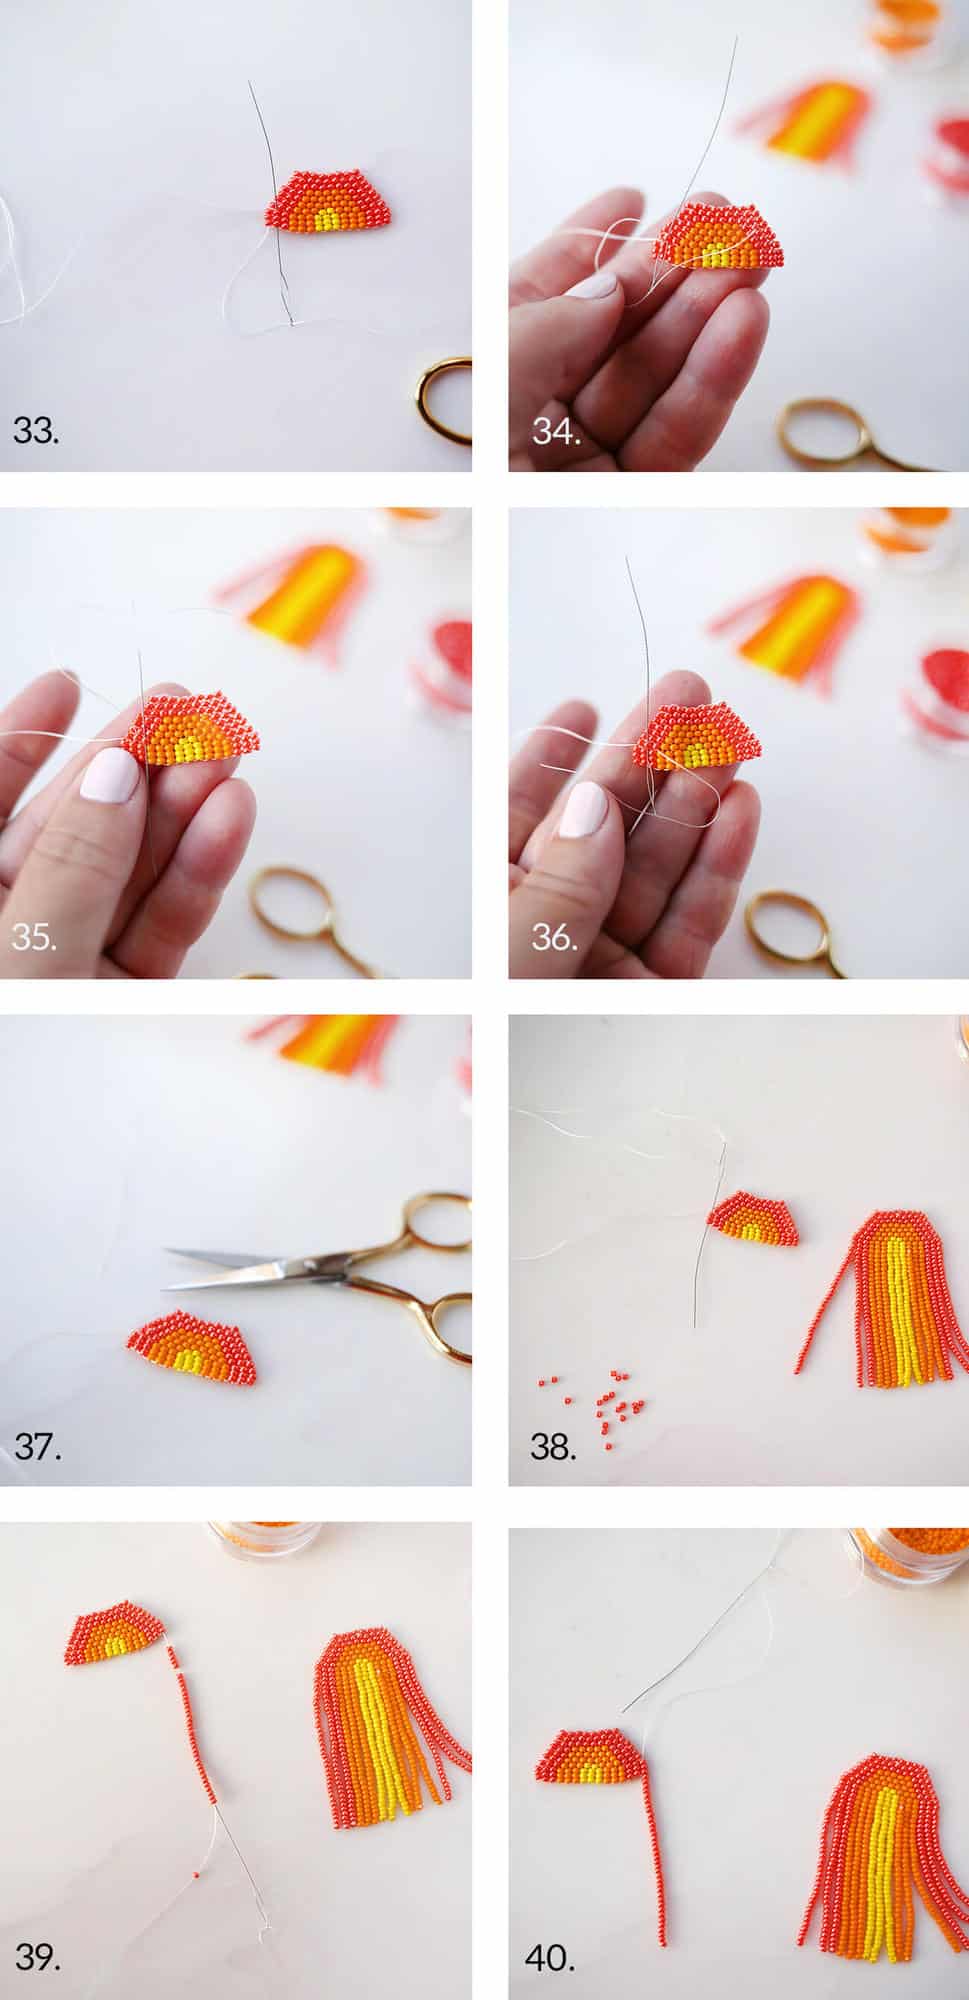 Step Thirty-Three: Thread the short tail of thread through your needle and stitch up the second set of three beads. Pull through.
Step Thirty-Four: Carefully stitch up through the second bead in that first row of brick stitch.
Step Thirty-Five: Then stitch down through the third bead in that first row of brick stitch—the one right next to it.
Step Thirty-Six: Stitch back up through the second bead in that first row of brick stitch.
Step Thirty-Seven: Pull taut and trim. This hides the yarn and ensures that this end won’t unravel.
Step Thirty-Eight: Rethread the long end and stitch down through the first stack of three beads. Pull through.
Step Thirty-Nine: I’ve flipped the earring in this photo. Pick up thirty-five beads in the first color. Leave the bottom bead alone and stitch back up through the next thirty-four beads.
Step Forty: Then stitch back up through the stack of three beads directly above. Pull taut but not so tight that there isn’t any wiggle room. Repeat steps thirty-nine and forty as you move across your earring so that the thirty-five added beads match the stack of three beads above it.
Once you get to the opposite side and finish your last row, circle back with your thread as in steps thirty-four through thirty-seven to make sure it doesn’t unravel. Add your earring hook by slipping it under the thread between the two center beads in the top row.
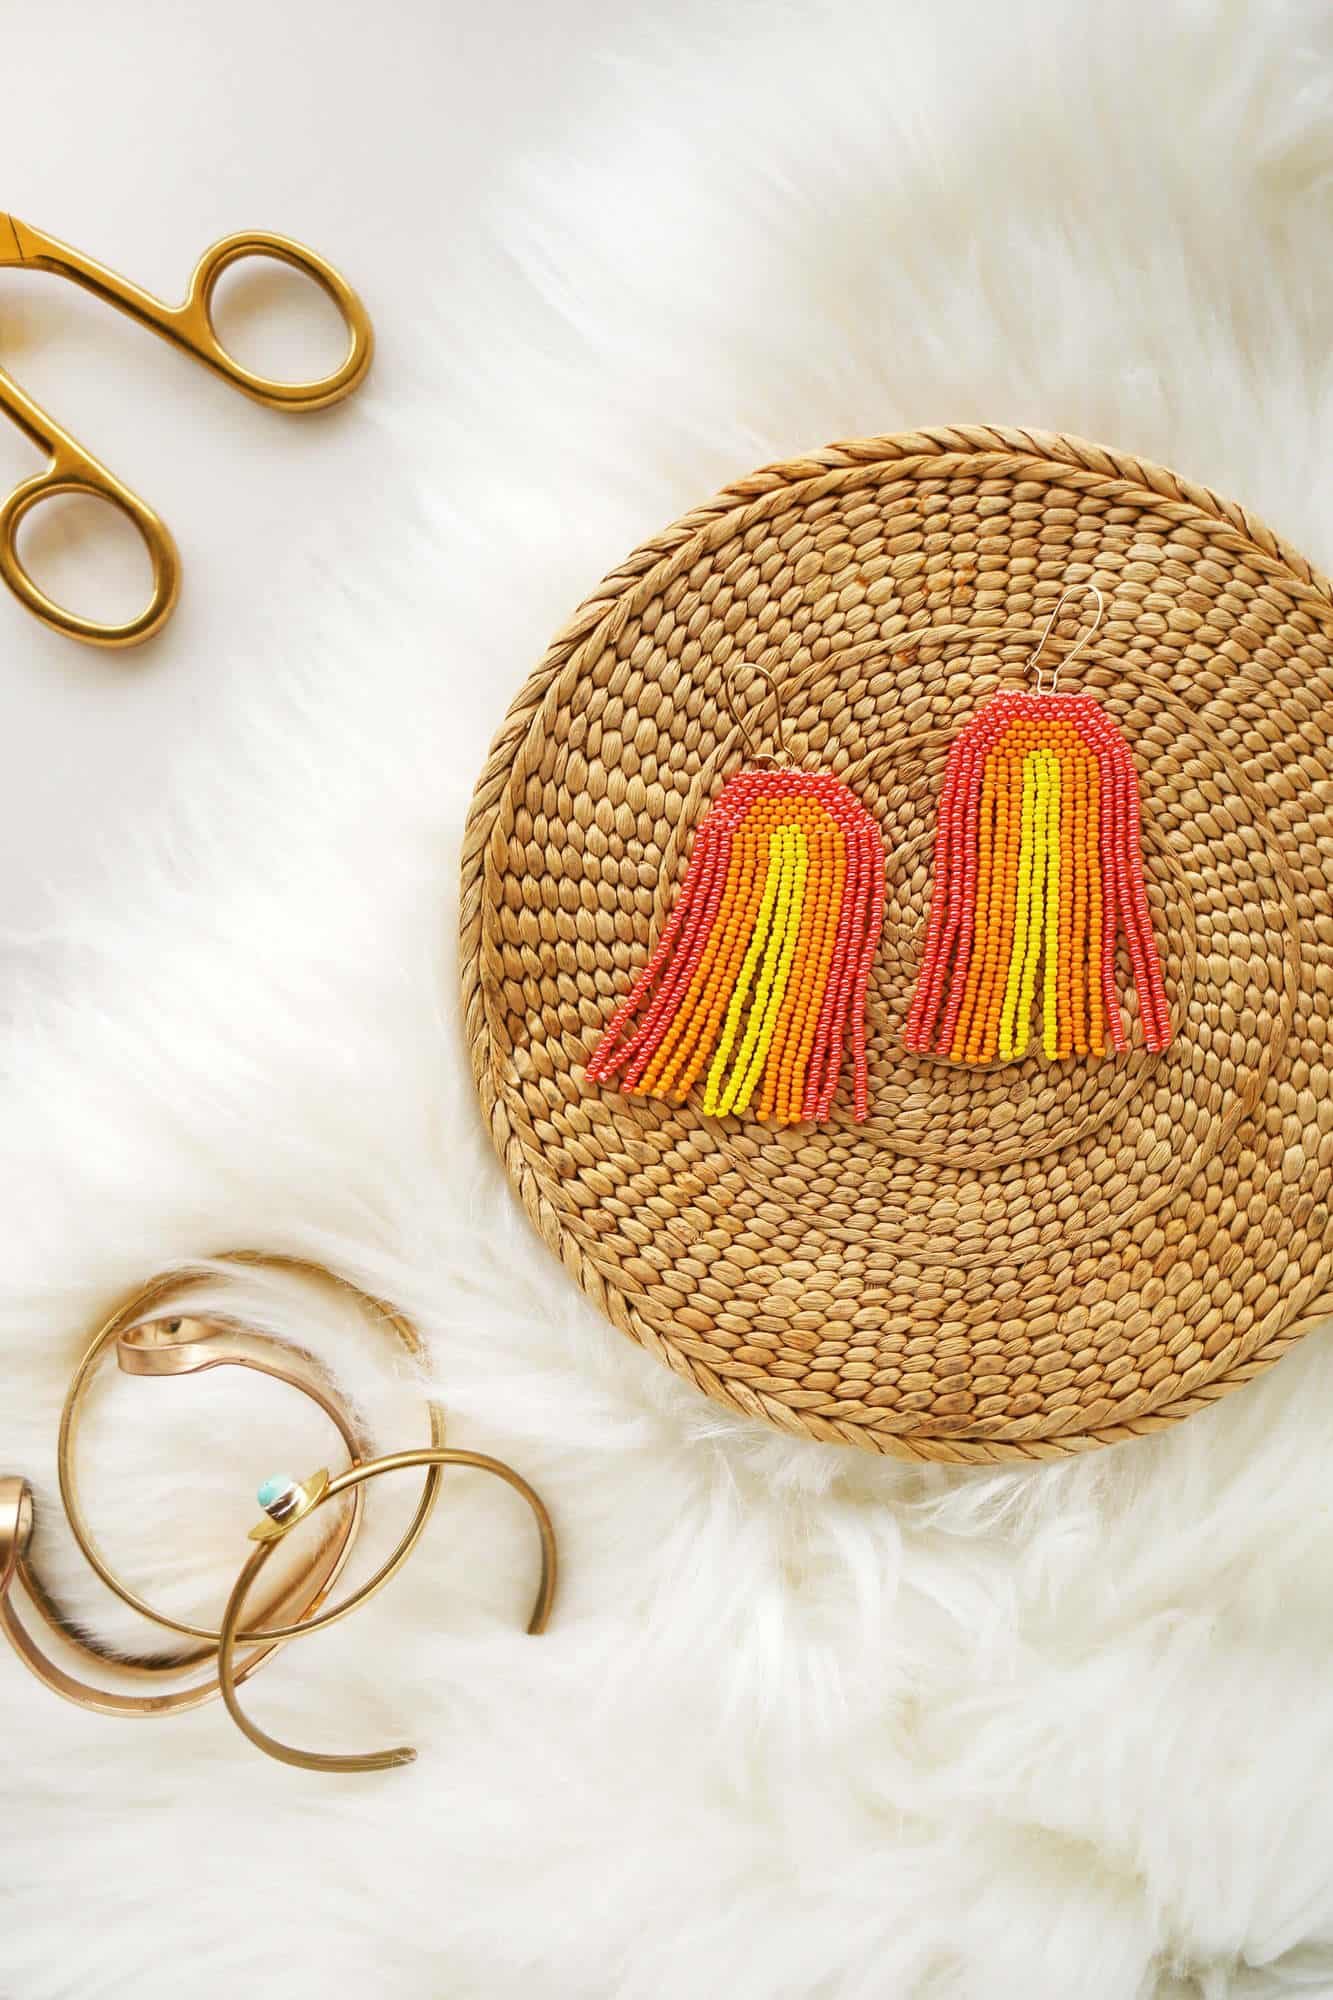 Your first earring will take a minute to finish but your second one will go much faster! Once you get the hang of the brick stitch, you’ll be designing your own earrings in your sleep.
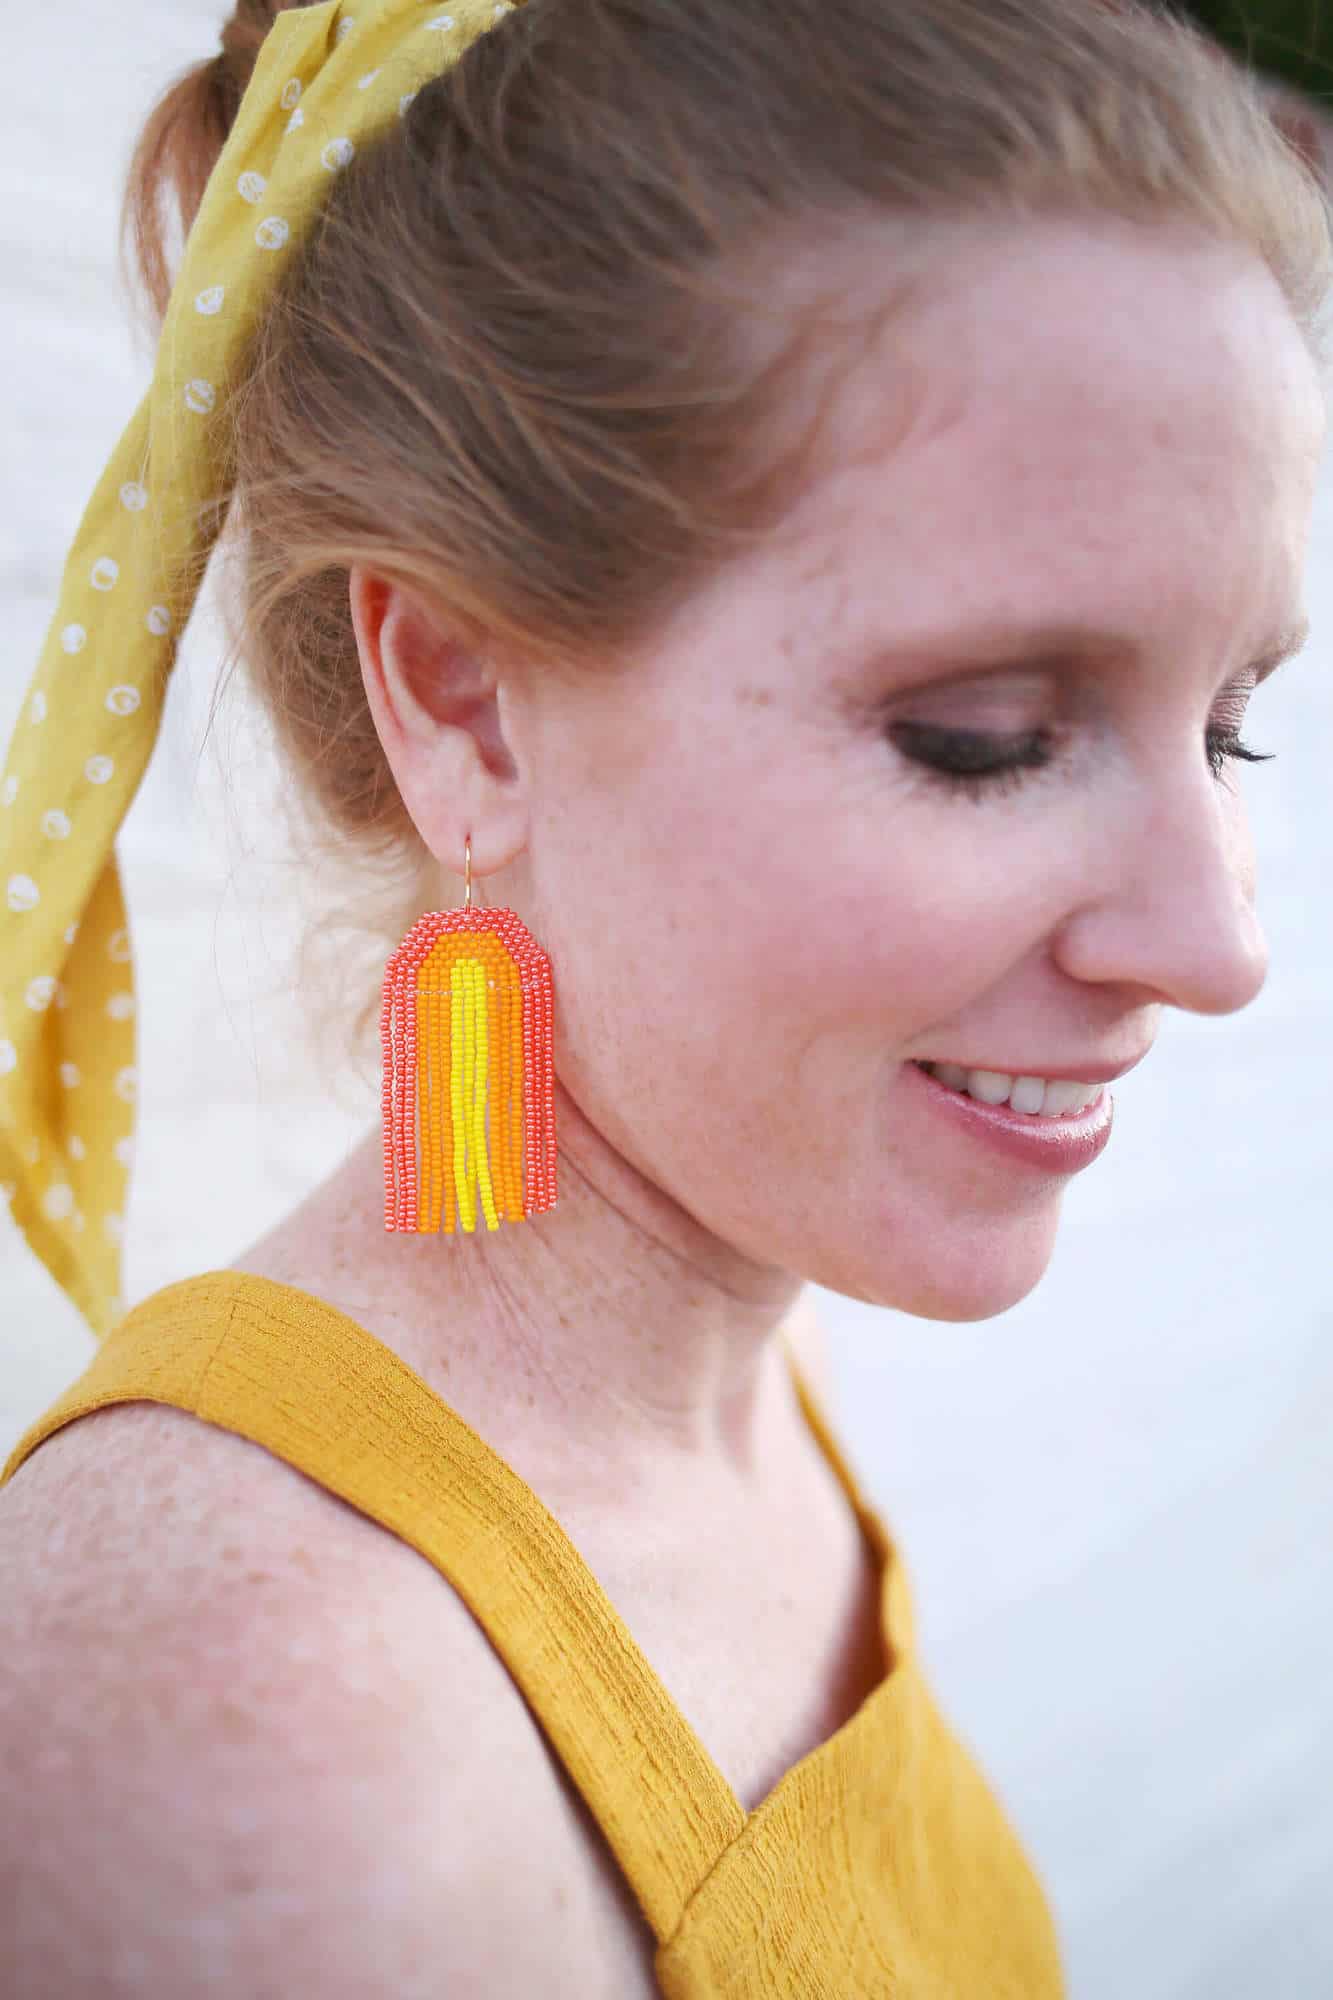
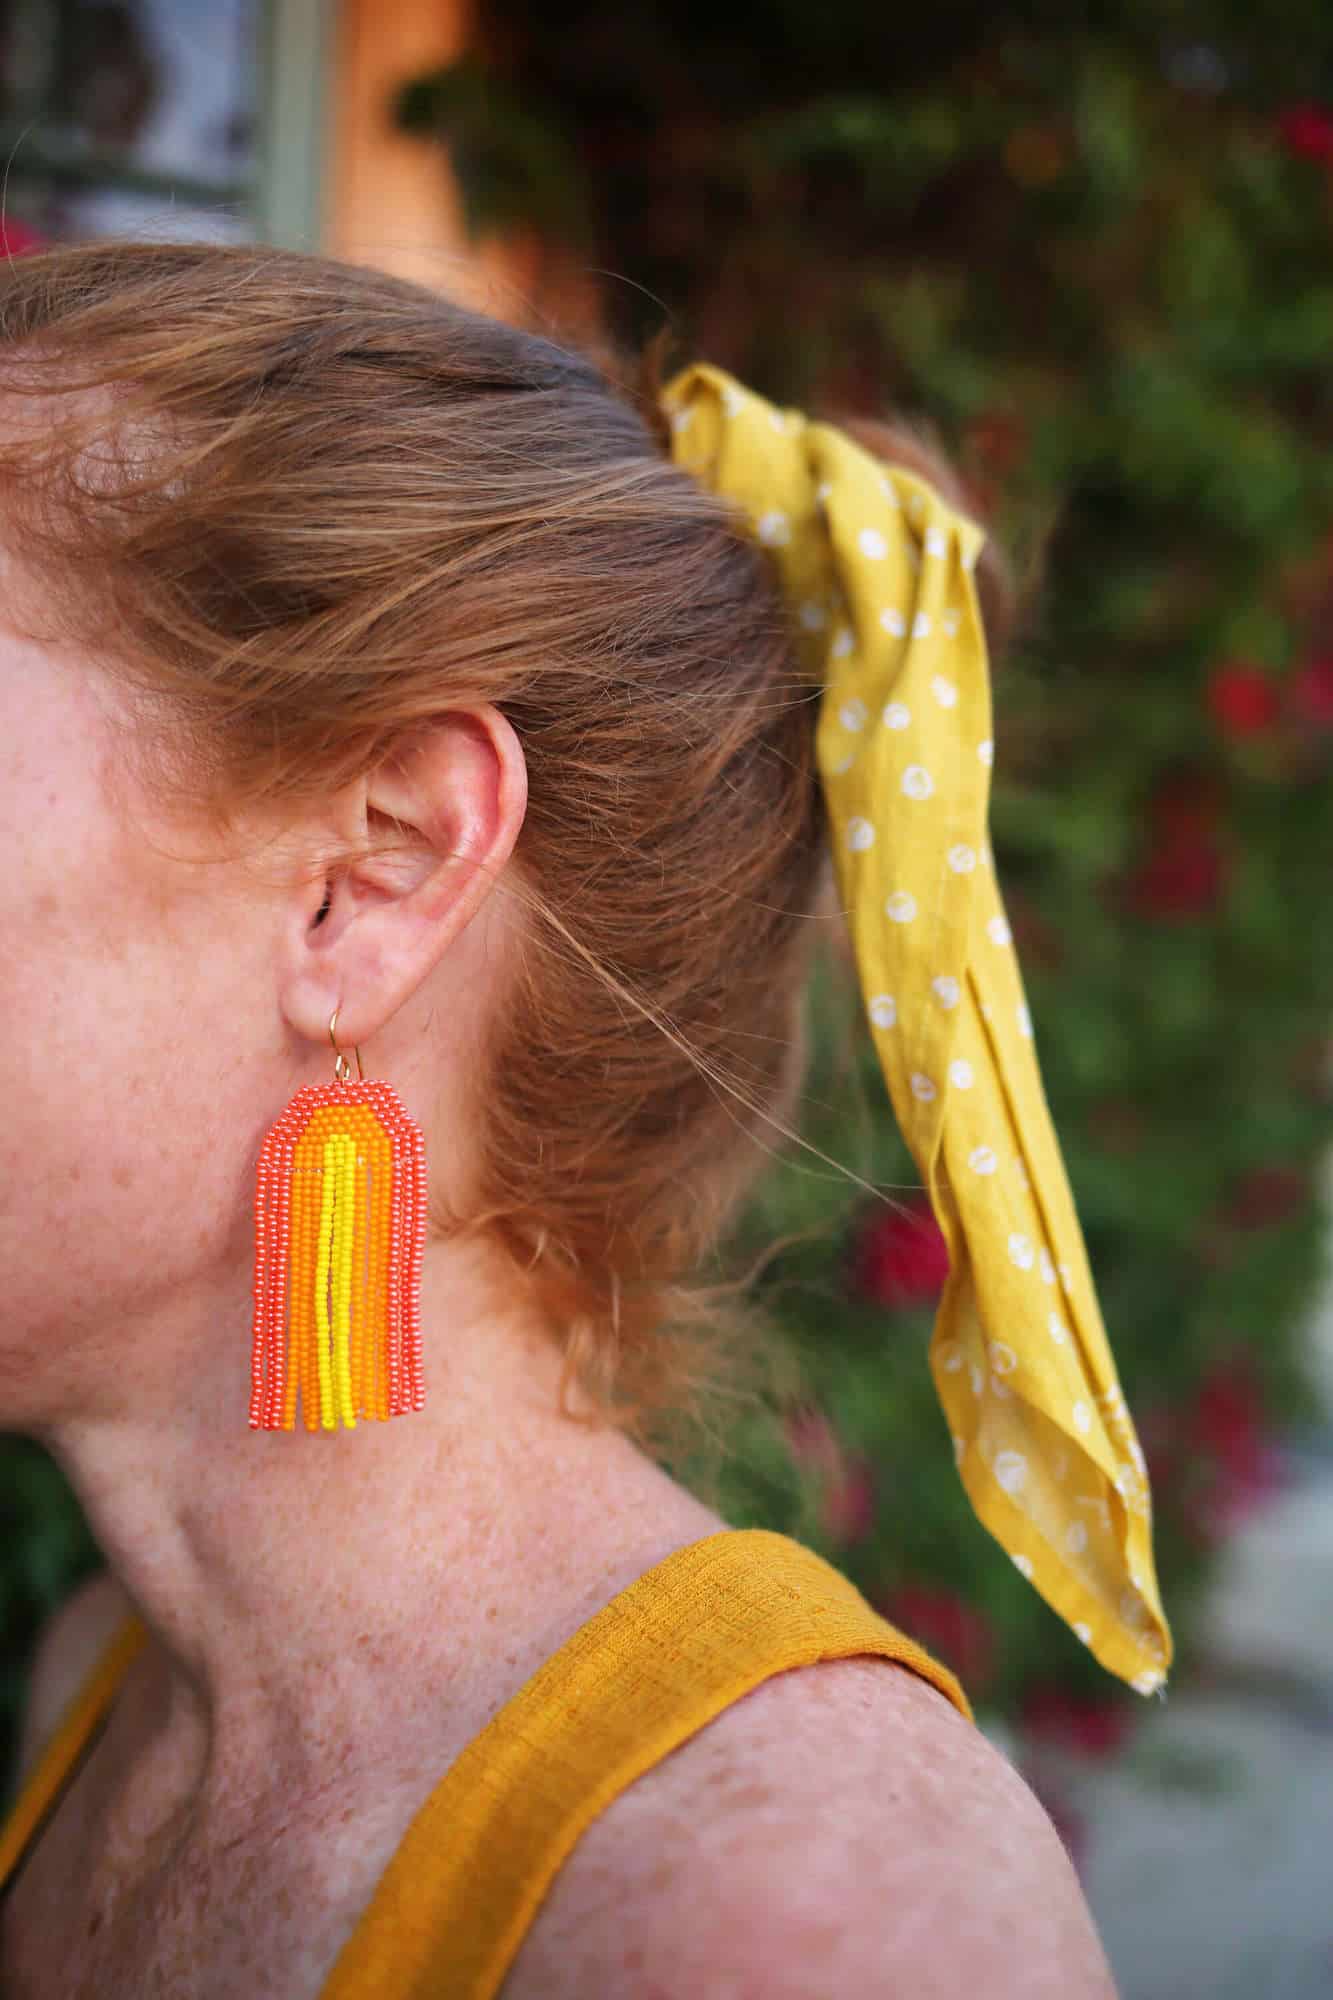 I love the late ’60s vibe these give off! These are the perfect earrings for one more summer adventure—or three, or four …- Rachel
Like these earrings? Check out our marbled clay statement earring DIY and daisy earring DIY!
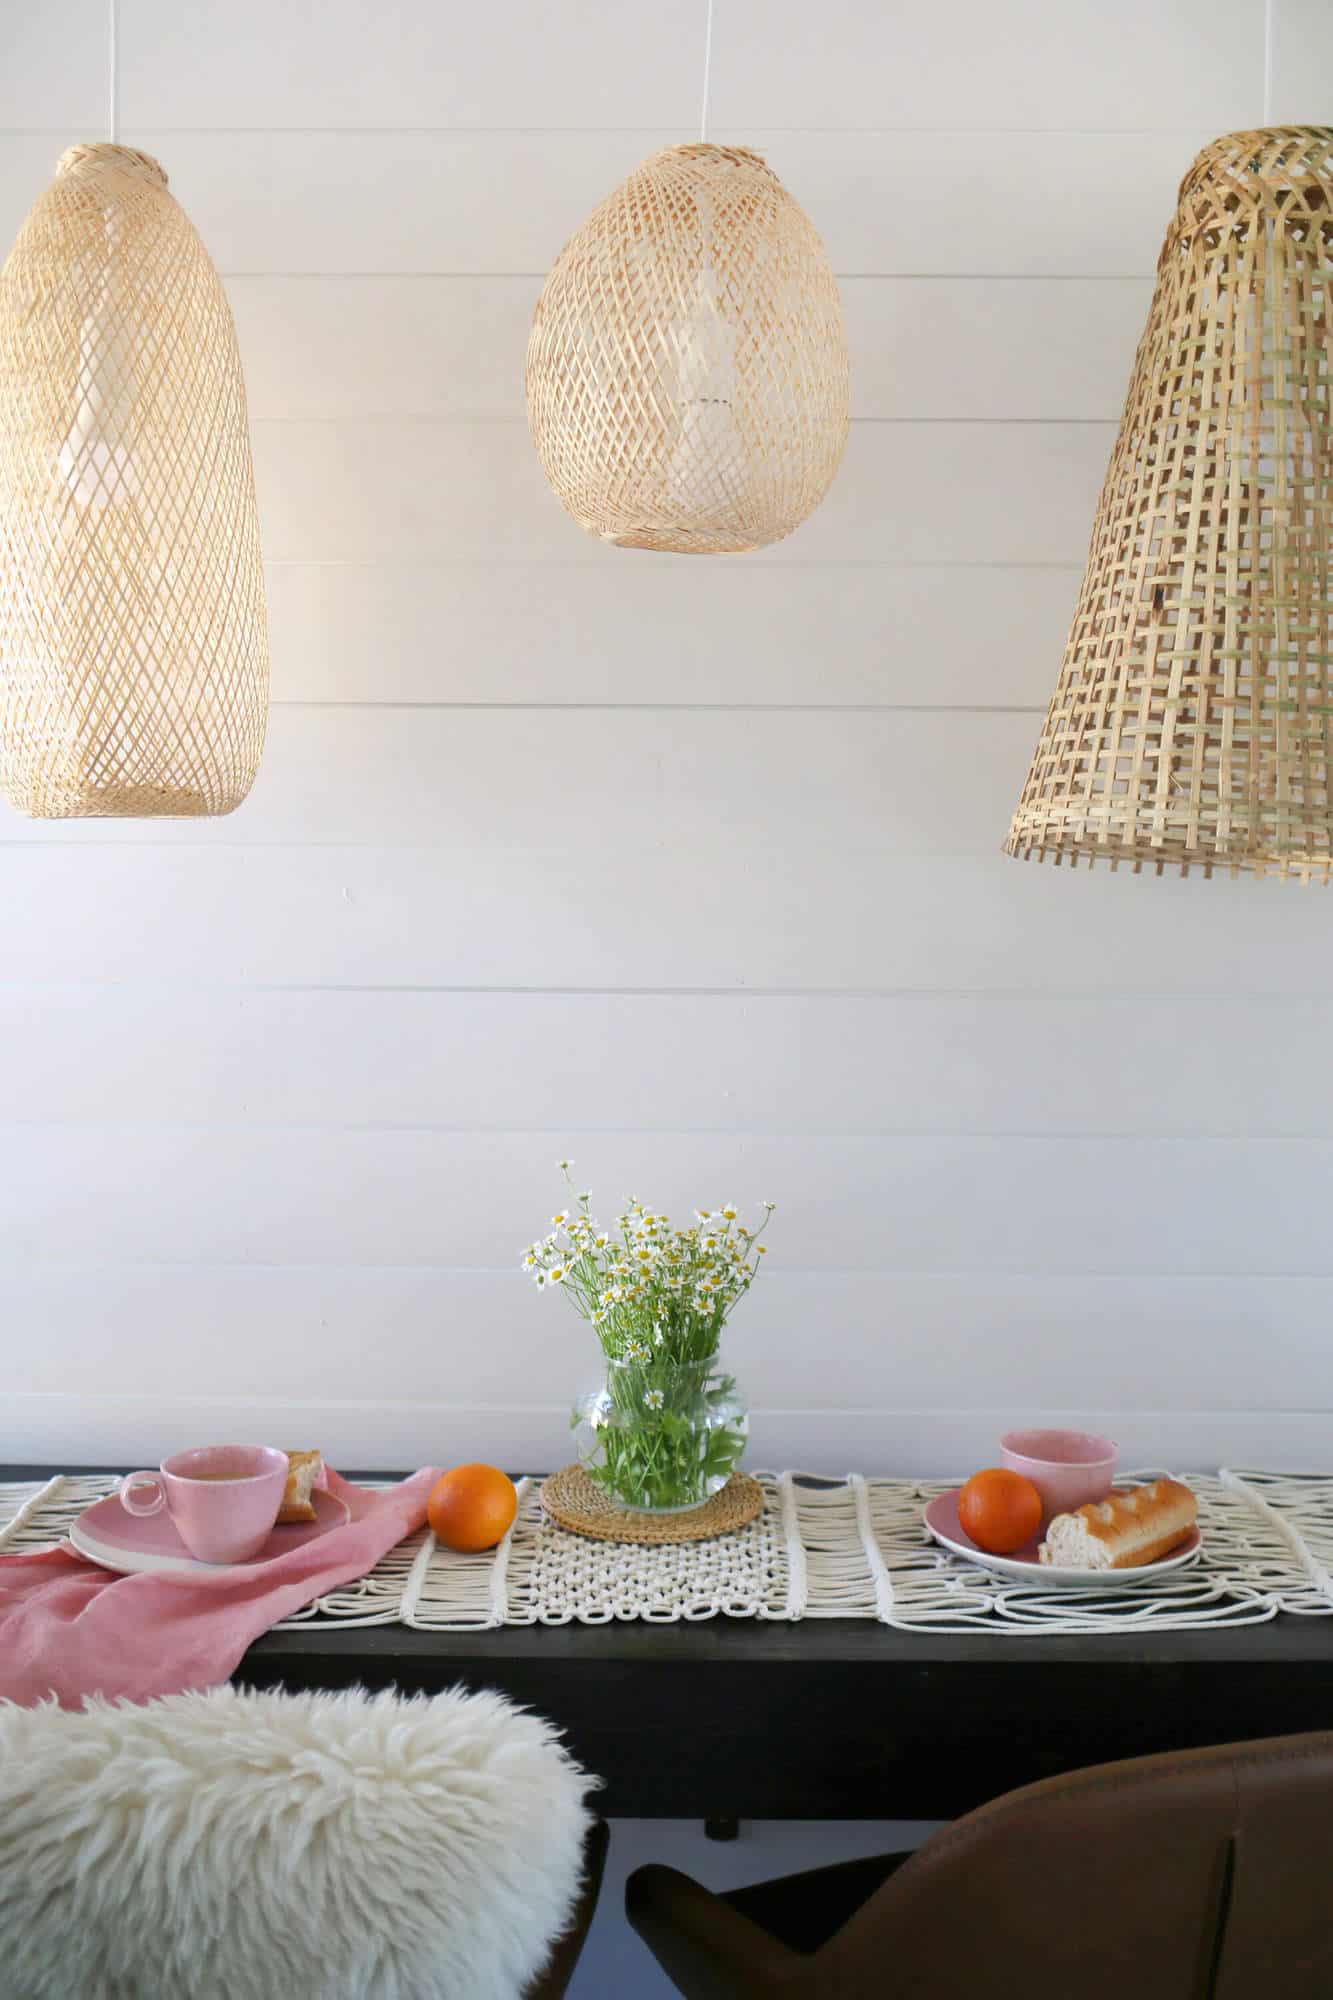
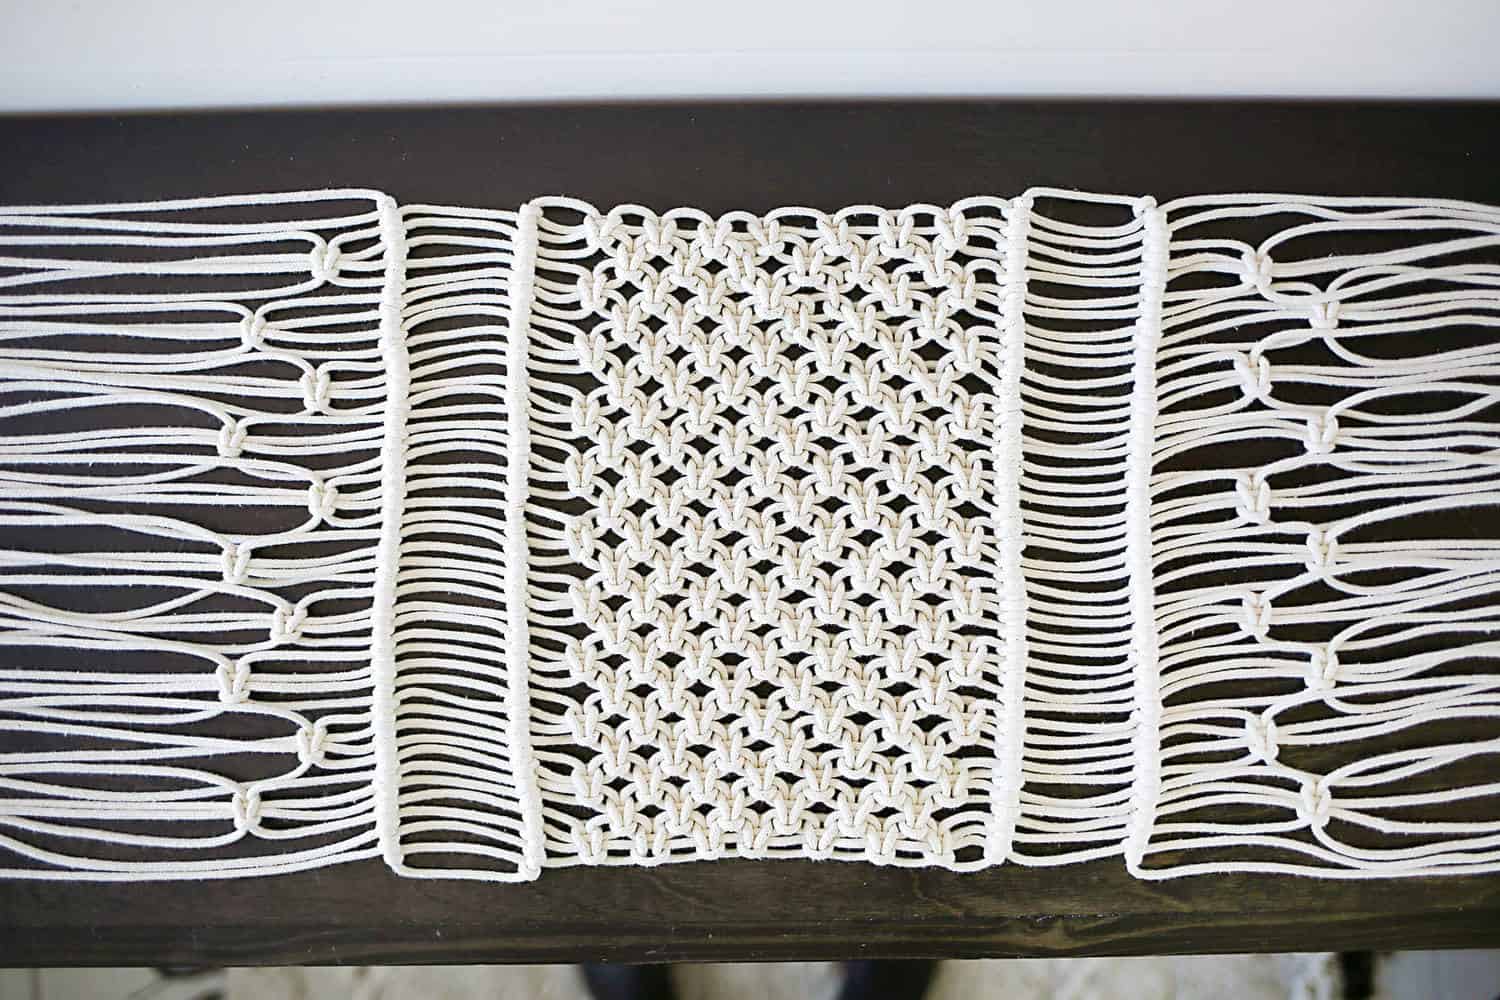
]]>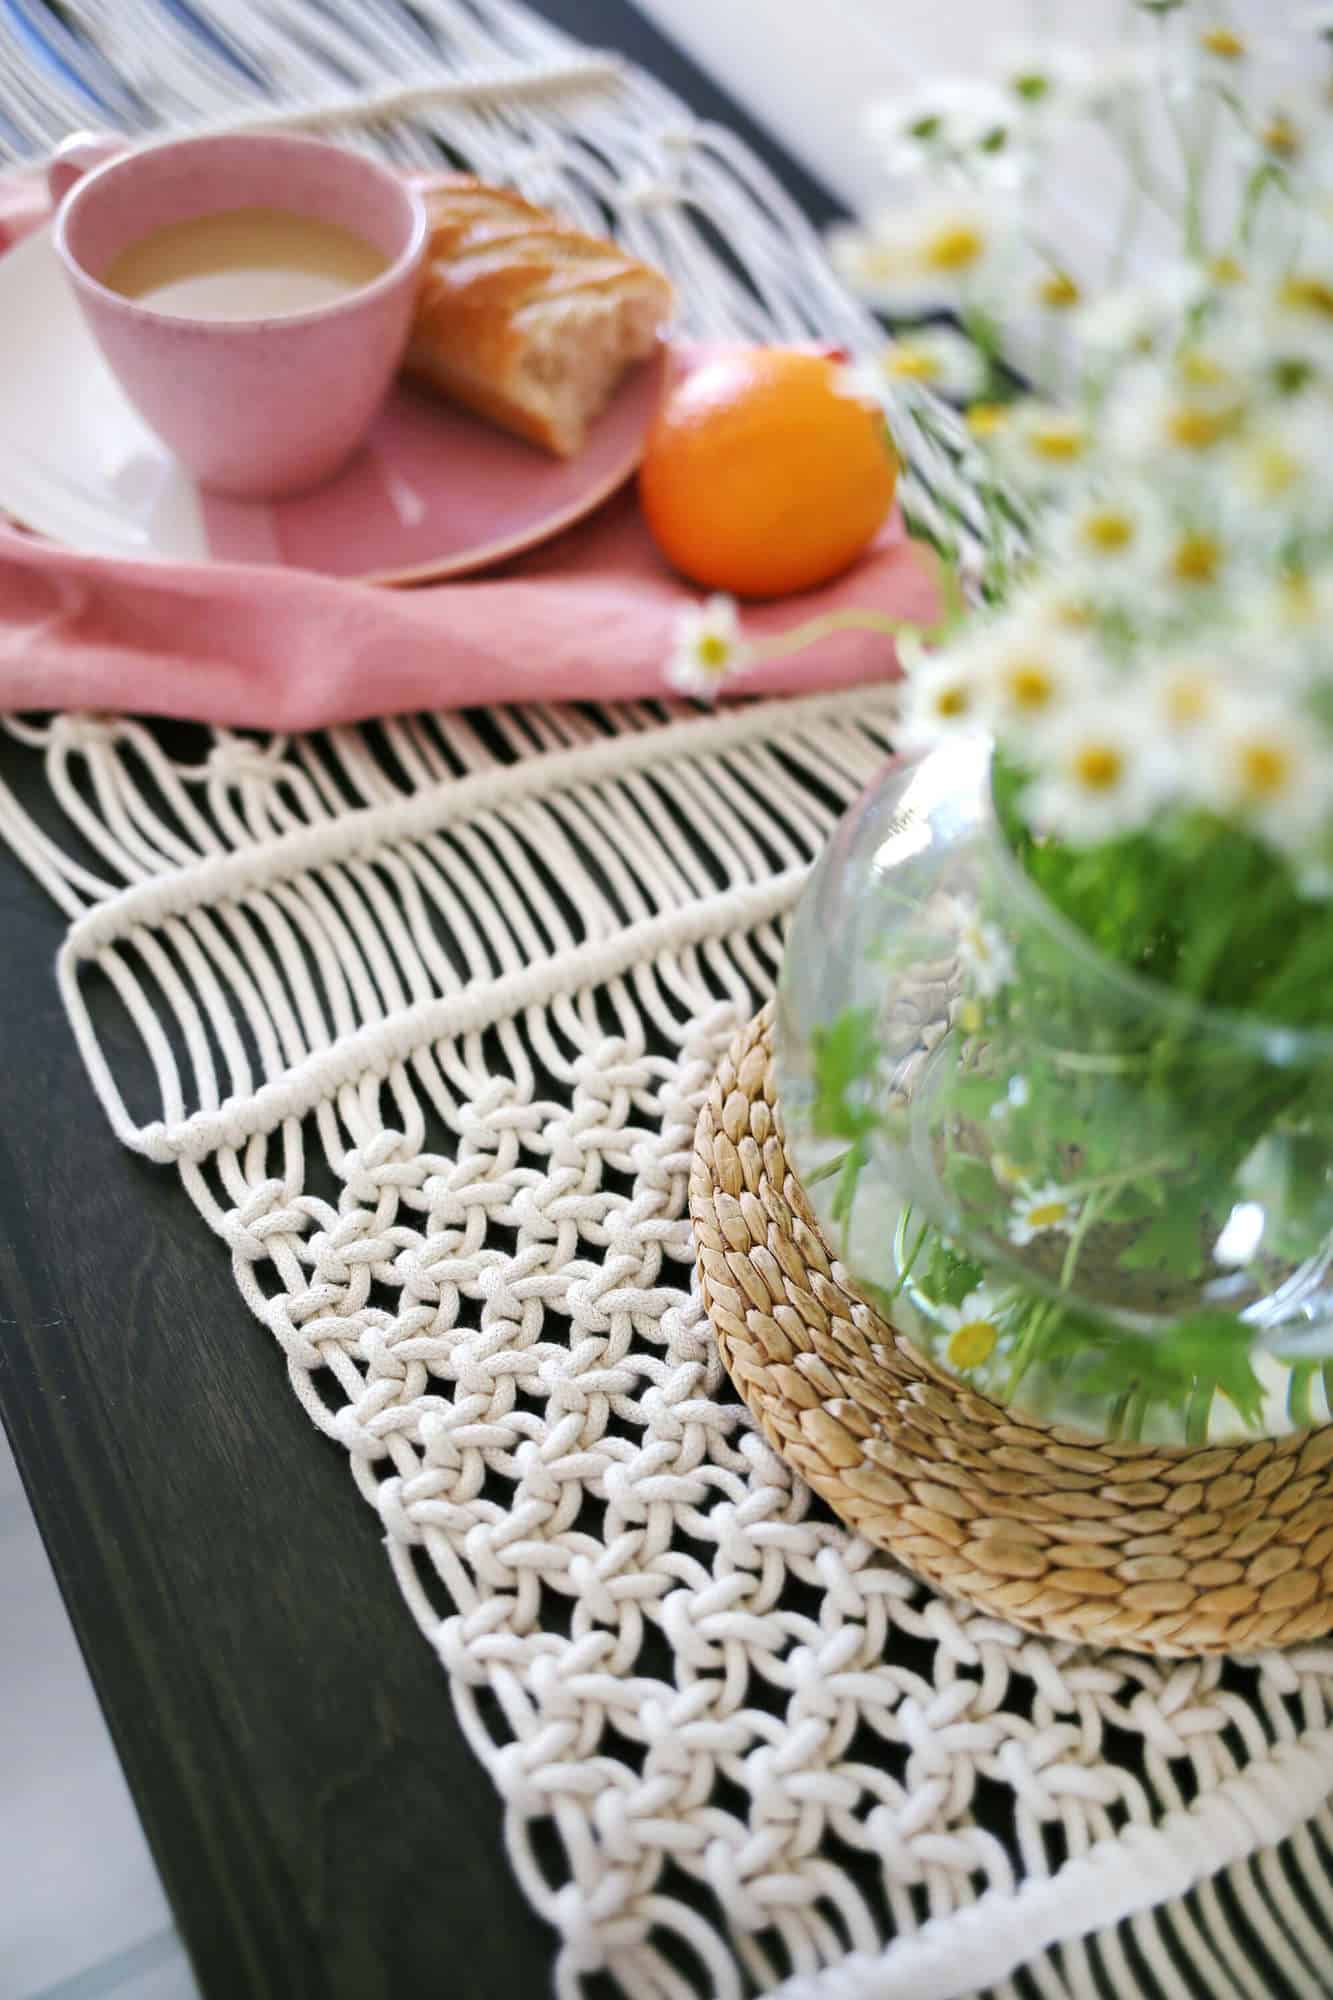 When I’m decorating any space, I think in terms of layers that coordinate and contrast. Whether it’s color, texture, or size, those three elements can make a room feel less basic. My fourth guideline is versatility! This macrame table runner checks all of the boxes and made this compact breakfast nook even more special with its simple but interesting design.
All you need to know are three simple knots and you’ve got a layer of charm that works in any season. Once you’re familiar with the knots shared here, you can customize your own table runner to fit the length of your own table or completely change it up and create a macrame wall hanging!
Related: How To Macrame: A Step By Step Guide For Beginners, Simple Macrame Handbag Tutorial, Macrame Camera Strap Tutorial, Macrame Christmas Stocking, Macrame Room Divider, Macrame Yarn Garland, Make Your Own Macrame Bracelet, Macrame Curtain, Macrame Plant Hanger
Check out our How to Make Friendship Bracelets tutorial!
 Supplies:
-12″ wooden dowel
–22 strands of 16′ cotton rope measuring 3mm
–over the door hooks
-2′ of cotton twine for dowel hanger
-scissors
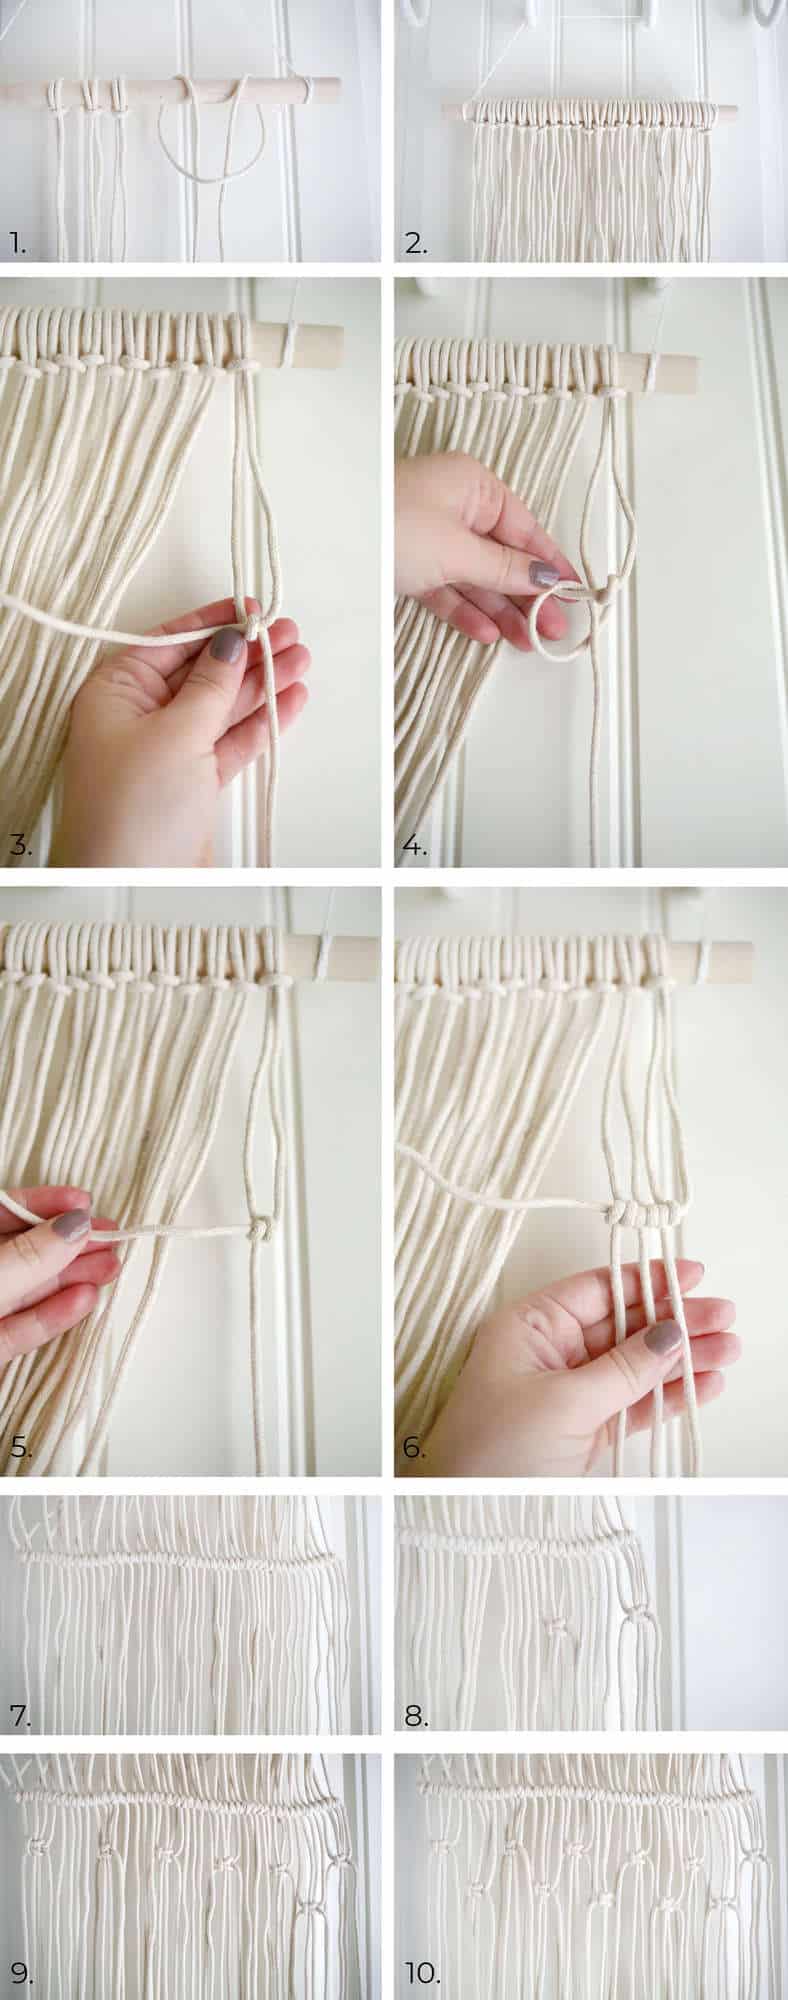 Step One: Tie cotton twine to each end of your dowel and hang it from your over the door hooks. Fold your first 16′ strand of rope in half and create a lark’s head knot over your dowel. See this post for even more detailed steps.
Step Two: Continue adding each 16′ strand of rope using a lark’s head knot until you have 22 total. This will give you 44 strands to work with.
Step Three: Pull the outer right rope across the front of all the other ropes (to the left) and drape the end on your door hook. This is going to be the base for the next row of knots called a half-hitch that will create a horizontal row. Use the second rope from the right side to tie a single knot around the rope you just draped across so that it’s about 6″ below the dowel.
Step Four: Use the same strand to tie a second knot over the base strand. This is called a half-hitch knot.
Step Five: Make sure they are even and consistent.
Step Six: Repeat with the second, third, and fourth rope from the outside and tie another half-hitch knot so that it’s snug, etc. You’ll start to see the pattern. This is a horizontal half-hitch.
Step Seven: Continue tying consecutive ropes in a single knot all the way across. You don’t want this to be so tight that it pulls the width in at the edges.
Step Eight: Starting from the right again, use the outer four strands and create a square knot about 1.5″ below your horizontal line of knots. To get more details on a square knot, check out this macrame stocking post.
Skip the next four strands (five through eight) and tie another square knot using strands nine through 12. Continue skipping four, tying four until you get all the way across.
Step Nine: Starting on the right side again, use the four strands you skipped (five through eight) and tie a square knot about 3″ below the dowel.
Step Ten: Keep tying the skipped sets of four strands in square knots until you finish that row.
 Step Eleven: Pull the outer two strands on the right side off to the side. Then use strands three through six to create another square knot about 11″ below the horizontal row of knots in step seven. Then use the next four strands to create another square knot about 1.5″ above the last square knot.
Step Twelve: Continue all the way across as shown.You won’t do anything with the last two strands.
Step Thirteen: Starting from the right side again, create another row of horizontal half-hitch knots by repeating steps three through seven.
Step Fourteen: Starting from the left side, use that same base strand of rope and create another horizontal half-hitch row of knots about 2.5″ below the last one. You’ll be working from the left to the right on this one.
Step Fifteen: Starting on the left side, create a row of square knots without skipping any strands that rests about 1″ below that horizontal line of knots. Then create a second row of square knots by skipping the first two strands on the left before tying another full row of square knots. This is called an alternating square knot. You don’t want much space in between these rows so you can pull them tightly together as you add each square knot.
Step Sixteen: Keep going until you have about 13 rows of alternating square knots total. This section is the center of your table runner so everything else from this point is going to mirror what you already wove above.
Step Seventeen: Add another horizontal half-hitch row of knots starting from the outer left side and working your way to the right.
Step Eighteen: Move down about 2.5″ and use the same base rope to create another horizontal half-hitch row of knots that move from the right to the left.
Step Nineteen: For this section, skip the outer two strands of rope on the right and then tie a square knot using strands three through six. Skip strands seven through 10 and use strands 11 through 14 to tie another square knot. Repeat so that you’re skipping every four strands. You’ll have six strands left on the left side.
Skip rows one and two on the left side and tie strands three through six into a square knot about 1.5″ below that last row of square knots. Then skip the next four strands and finish off the pattern for that second row of square knots. This will leave you with six extra strands on the right side.
Step Twenty: Measure down 11″ from the last row of horizontal knots and tie a square knot using the outer four strands on the right side. Then tie the next four into a square knot about 1.5″ above the last knot.
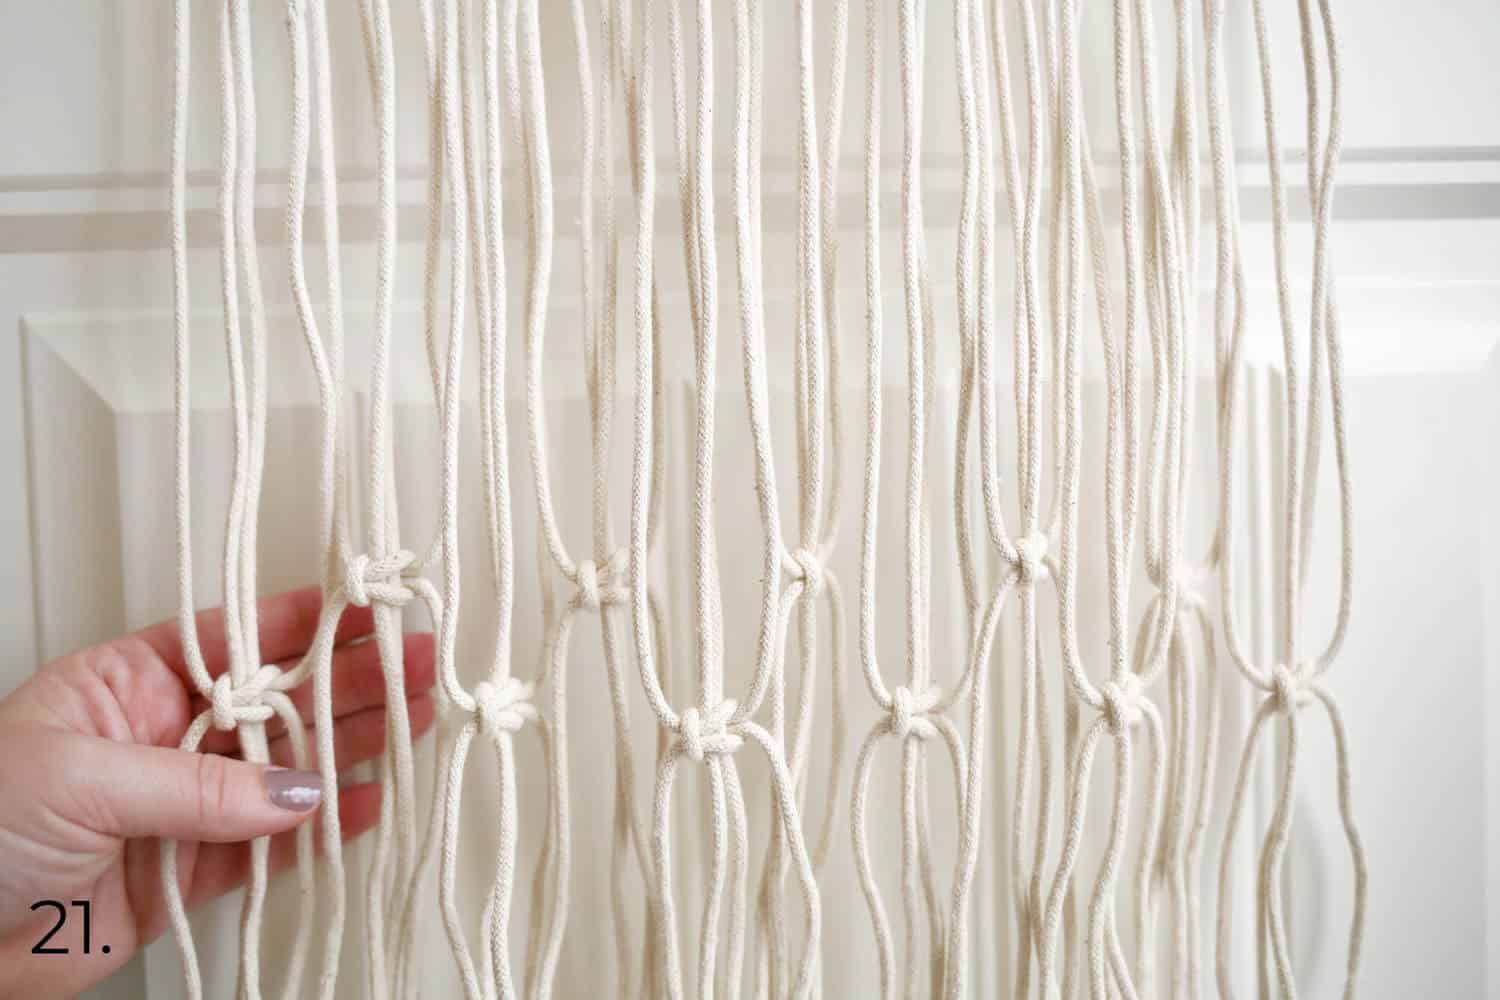 Step Twenty-One: Repeat all the way across.
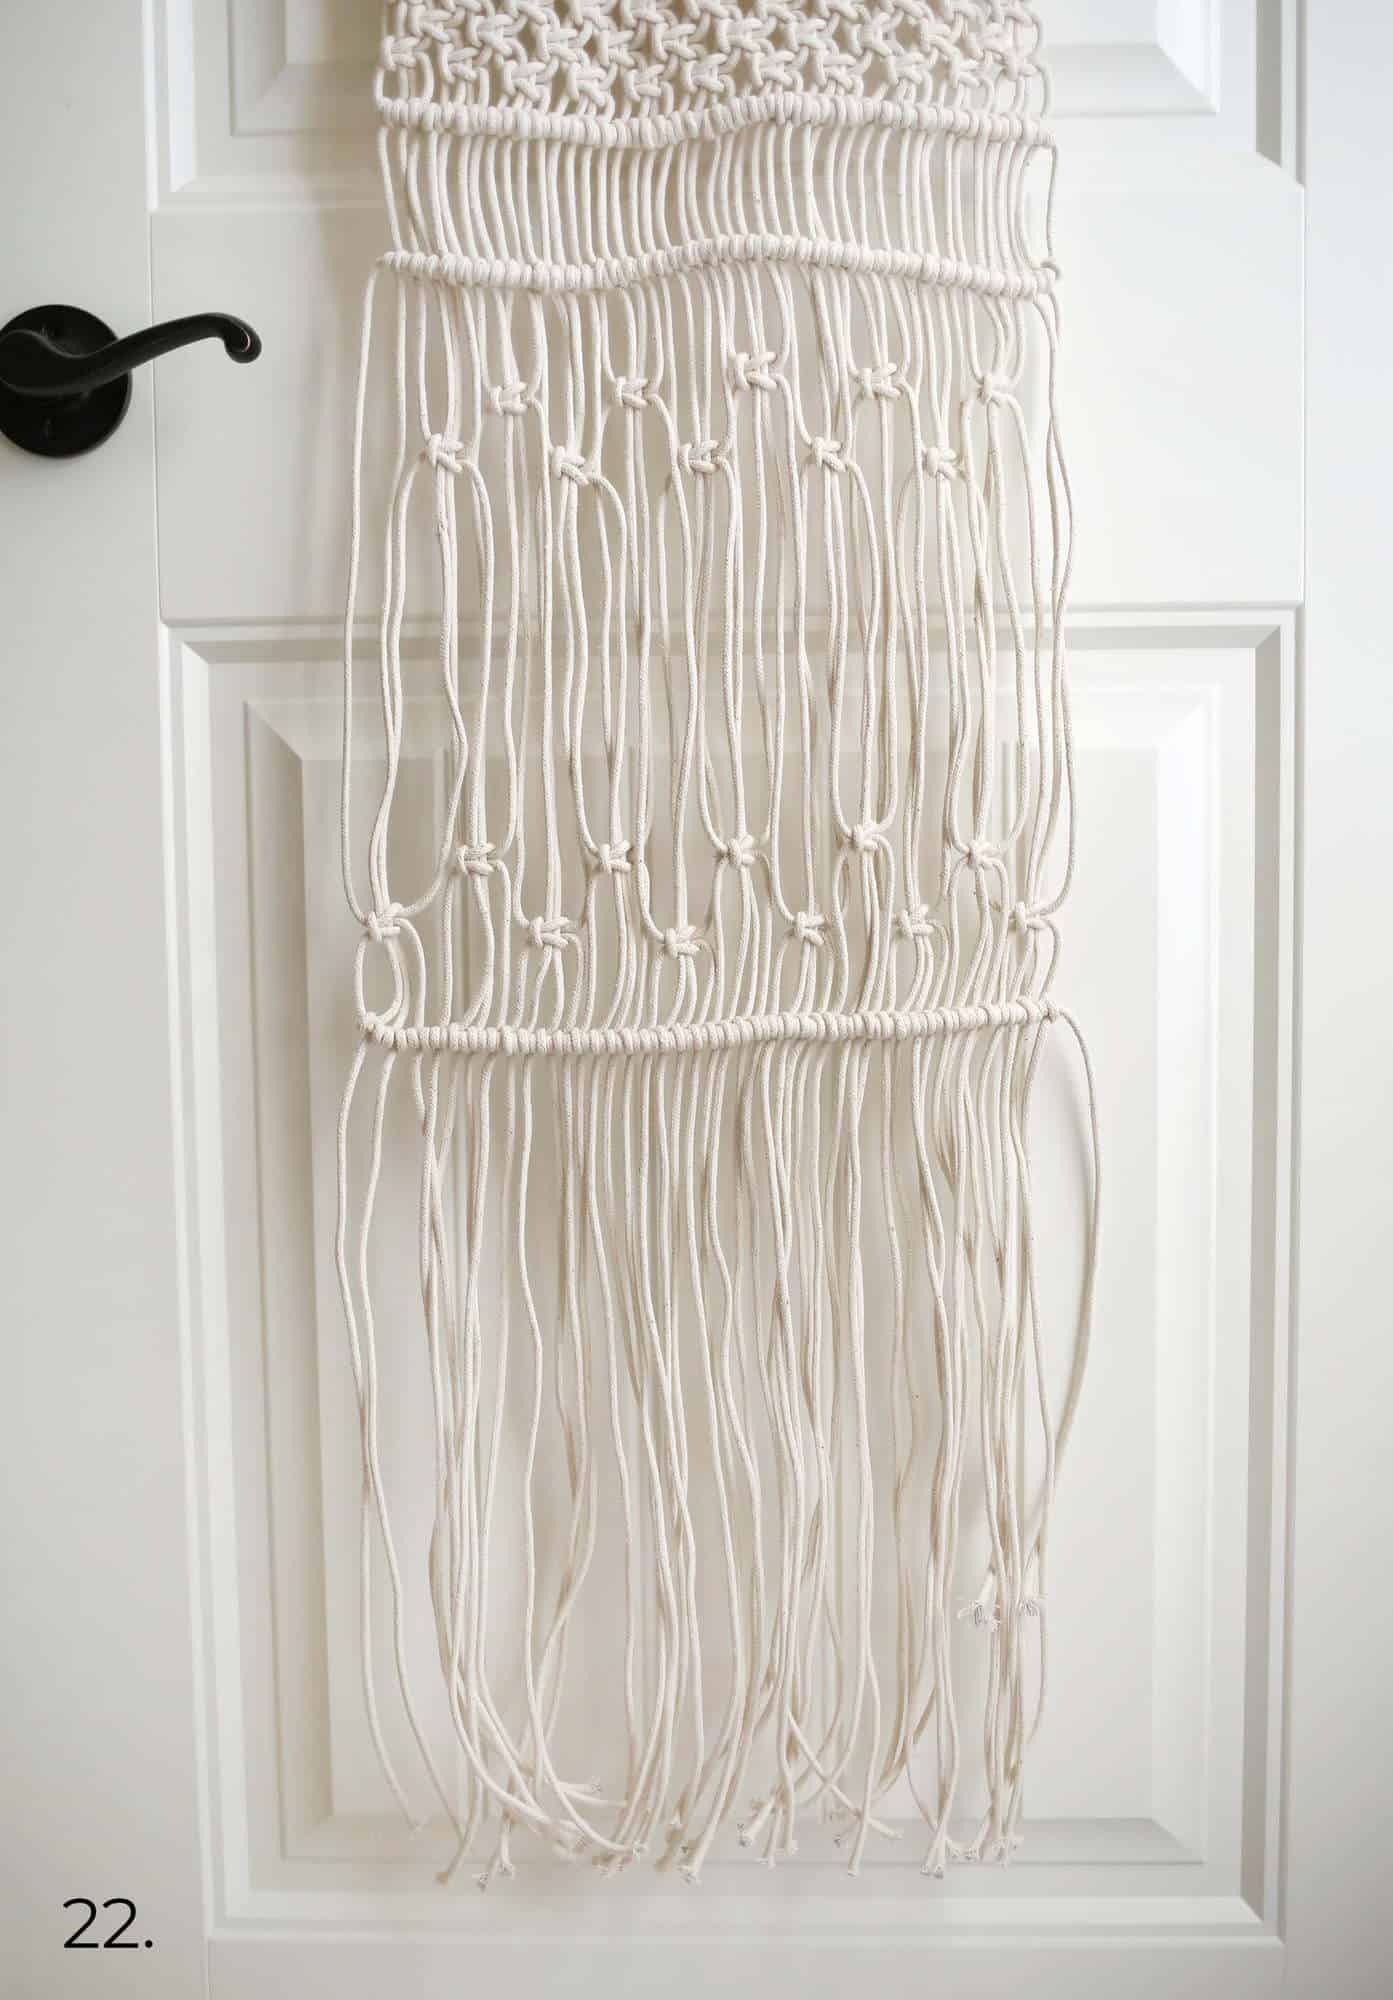 Step Twenty-Two: Finally, tie one last row of horizontal half-hitch knots about 1.5″ below the row of alternating square knots. Trim up the ends to be as long as you’d like, making note of how long they are on the opposite end. Remove the cotton twine from your dowel and slip all of the lark’s head knots off gently. Then cut the center of the lark’s head knot loop and trim up the ends.
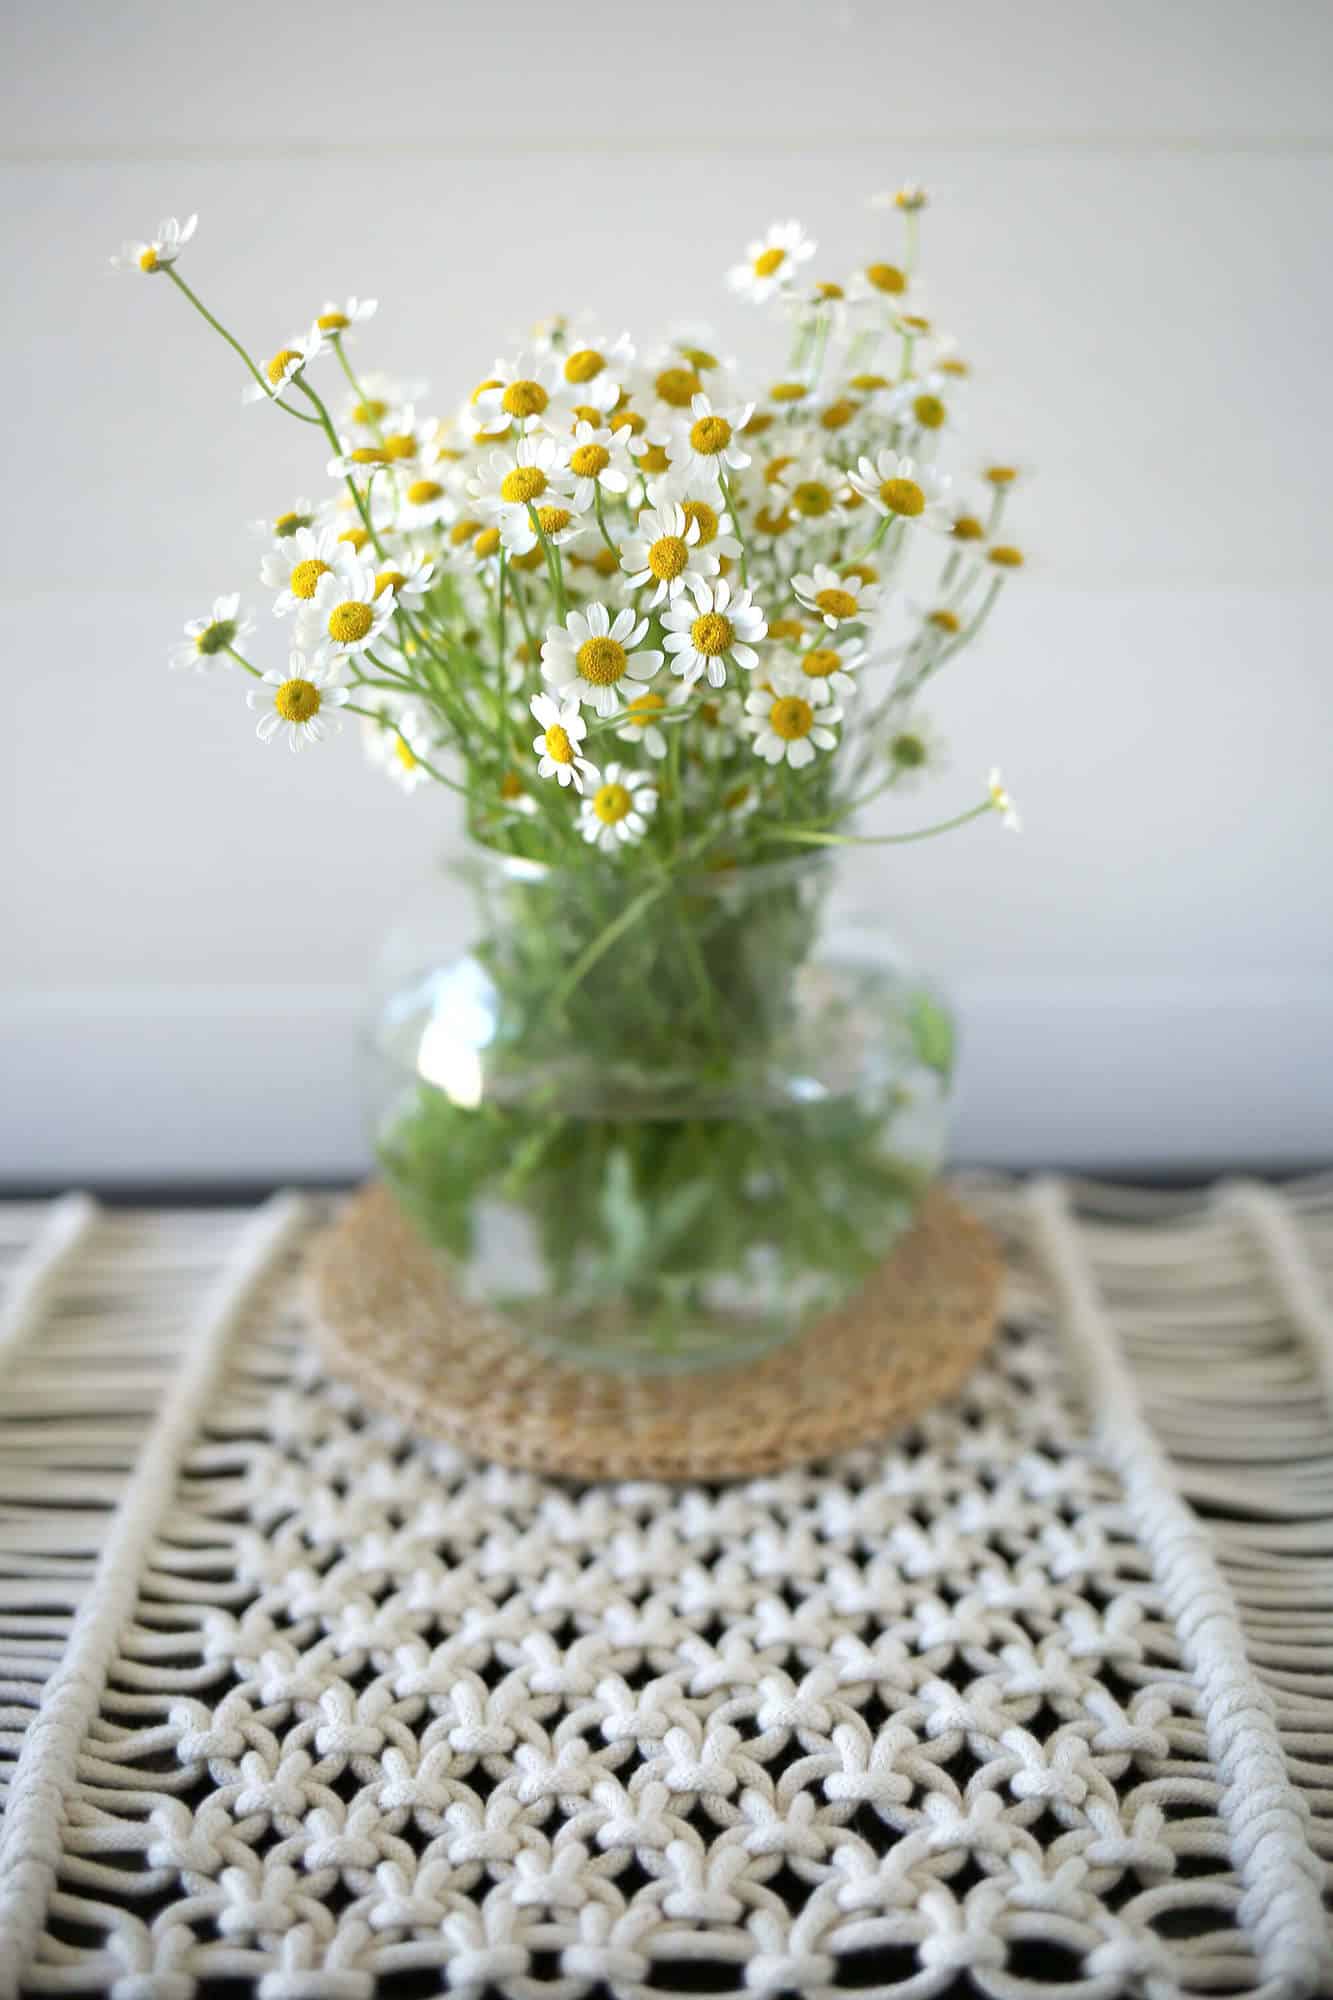 Now you’re ready to set a very charming table!
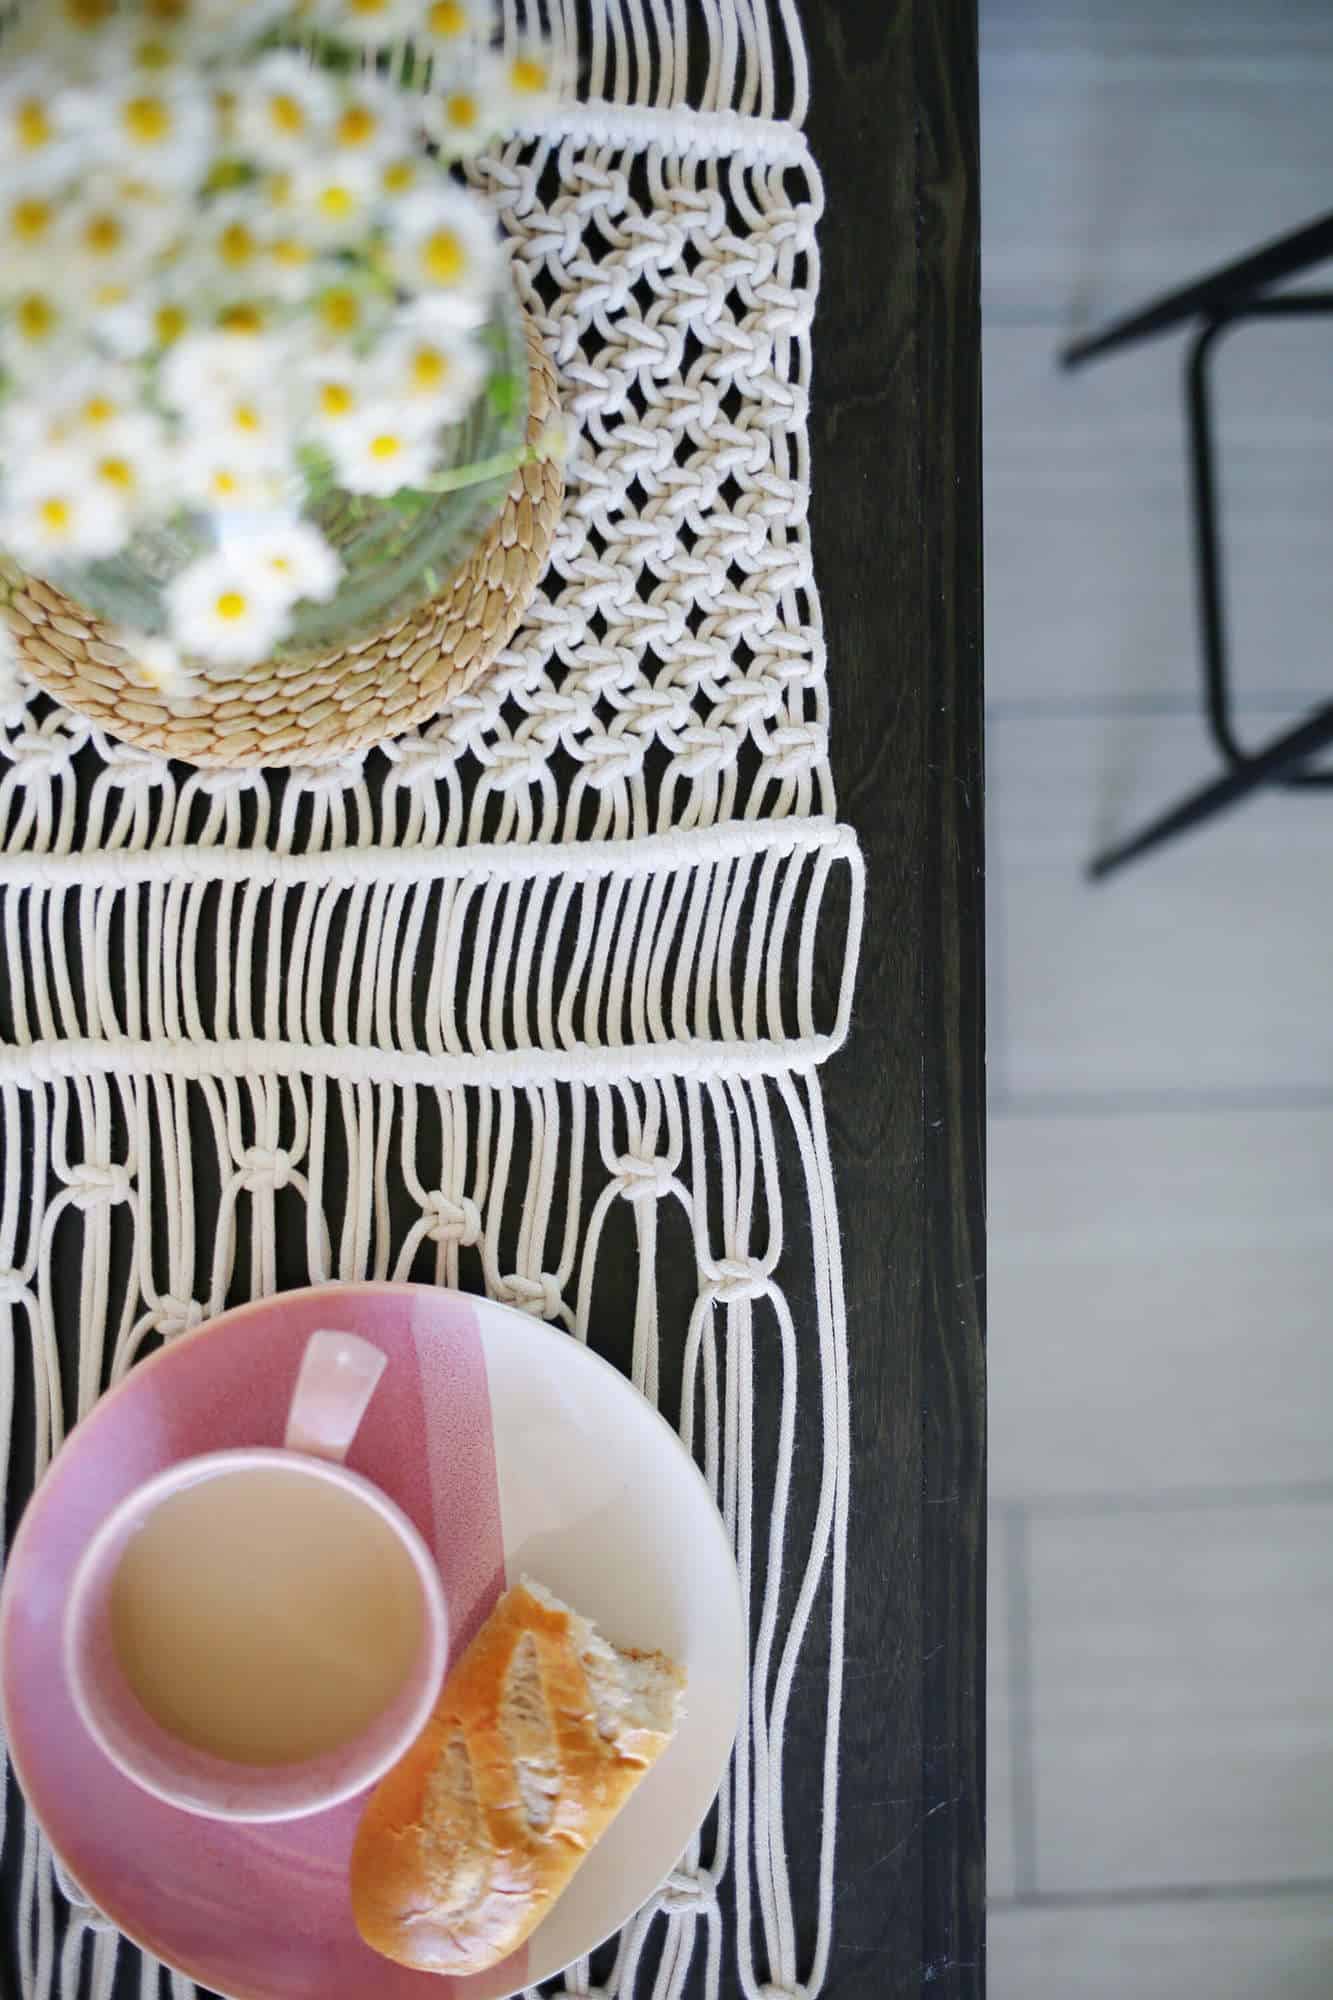
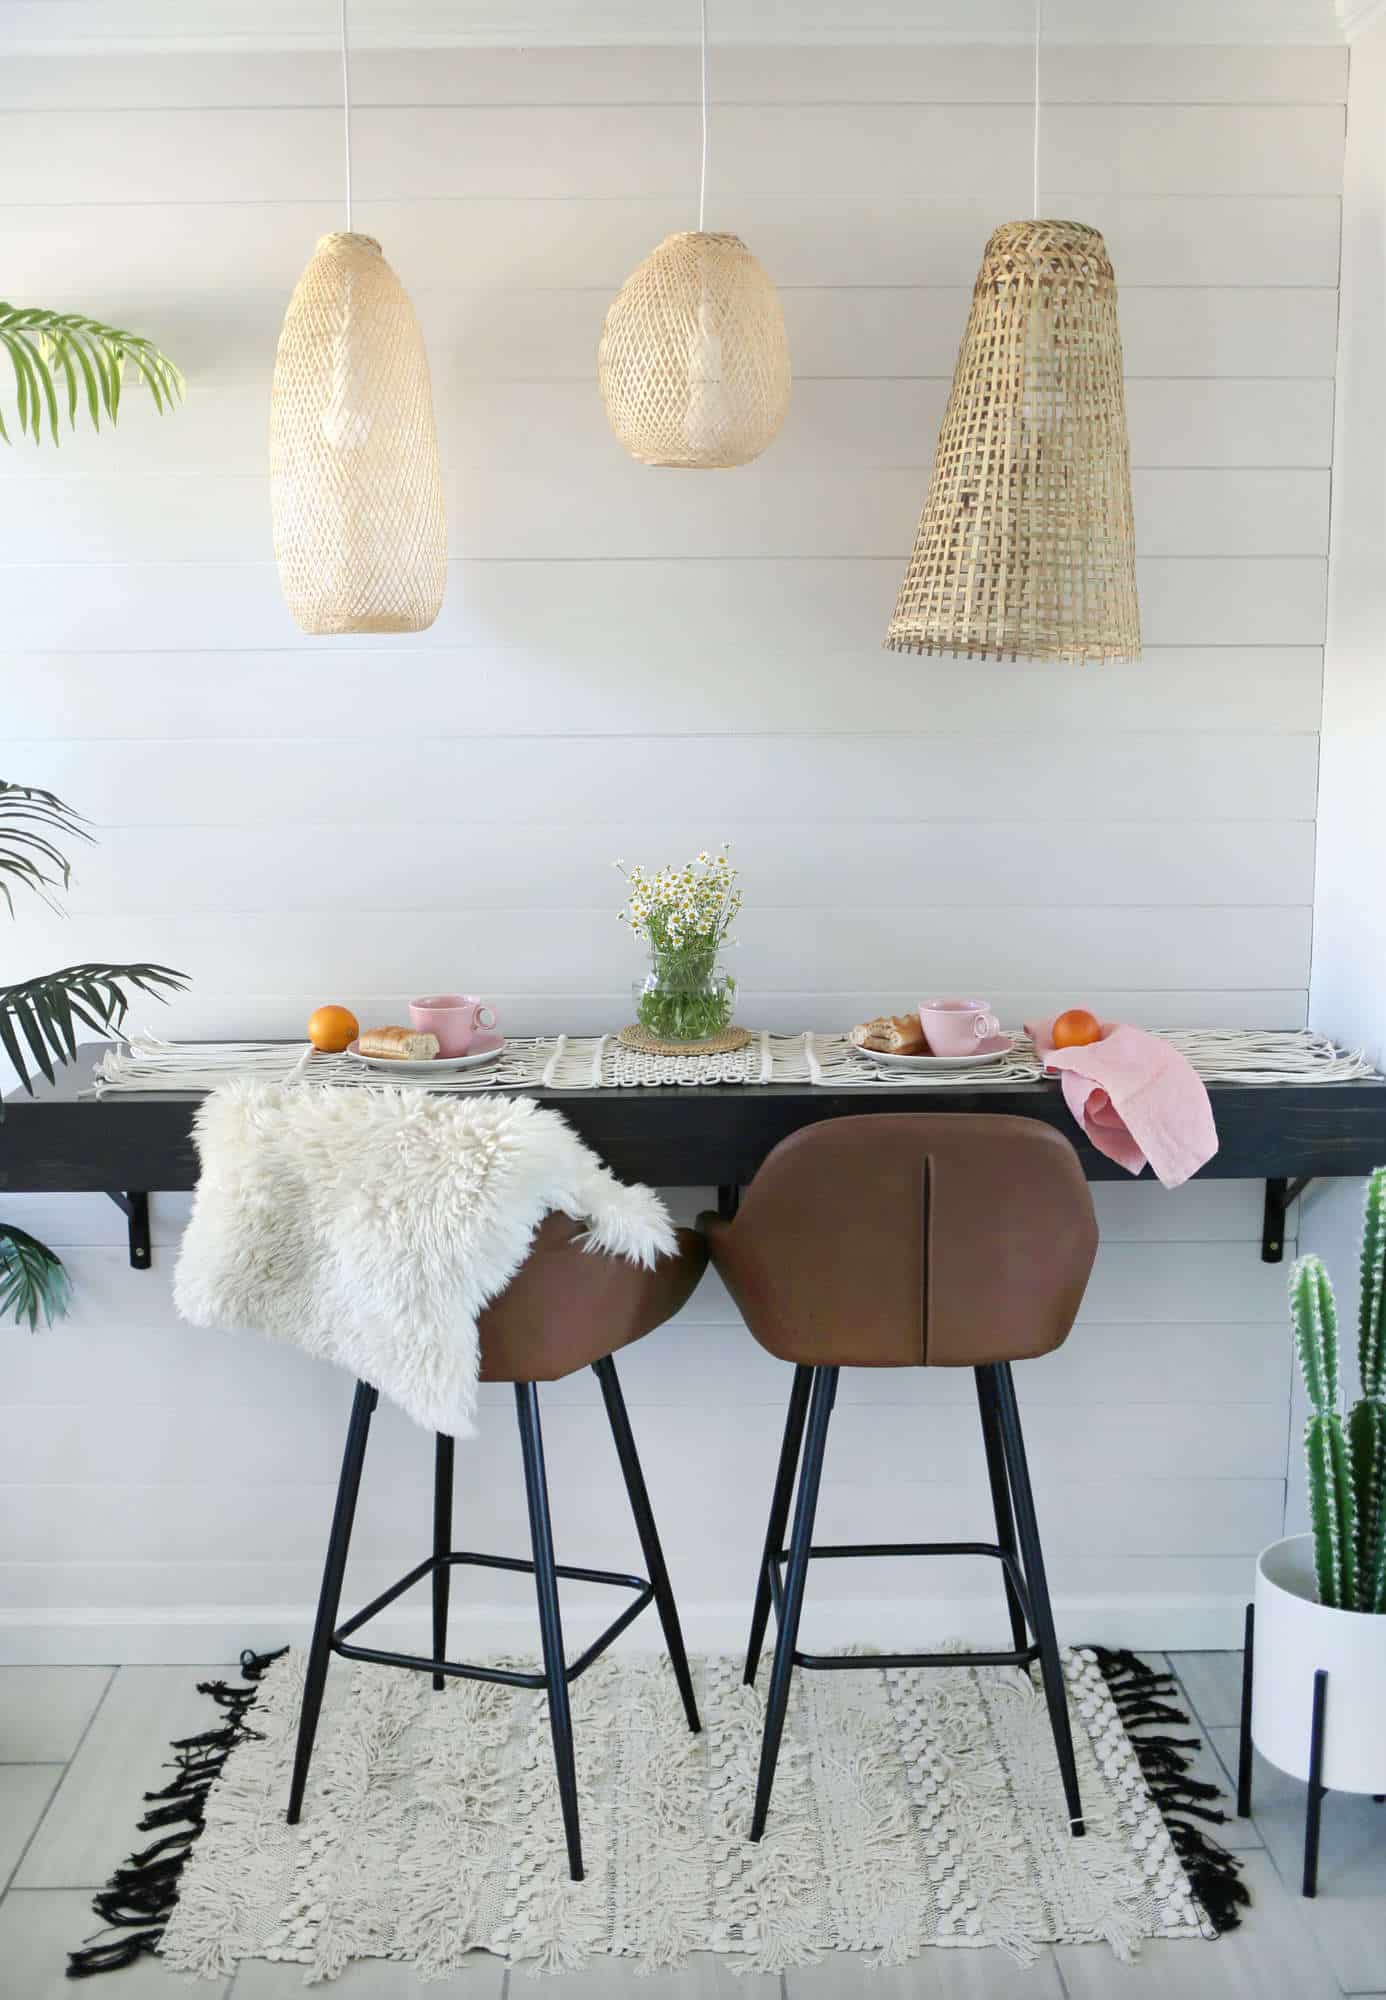 The center of your table runner is the ideal spot for a centerpiece, so layer on a trivet and find some fresh flowers to help anchor your eye. You can even use it as its own giant placemat on a breakfast bar to make sure your kitchen is looking its best! You can also use the three simple knots you learned, the lark’s head knot, the half-hitch knot, and the square knot to create a variety of textured wall hanging designs! – Rachel
Need something with a little more color? Try these beautiful 3mm and 5mm dyed ropes from Modern Macrame.
Love macrame? Check out our Simple Macrame Camera Strap Tutorial!
Credits//Author and Photography: Rachel Denbow. Photos edited with A Color Story Desktop.
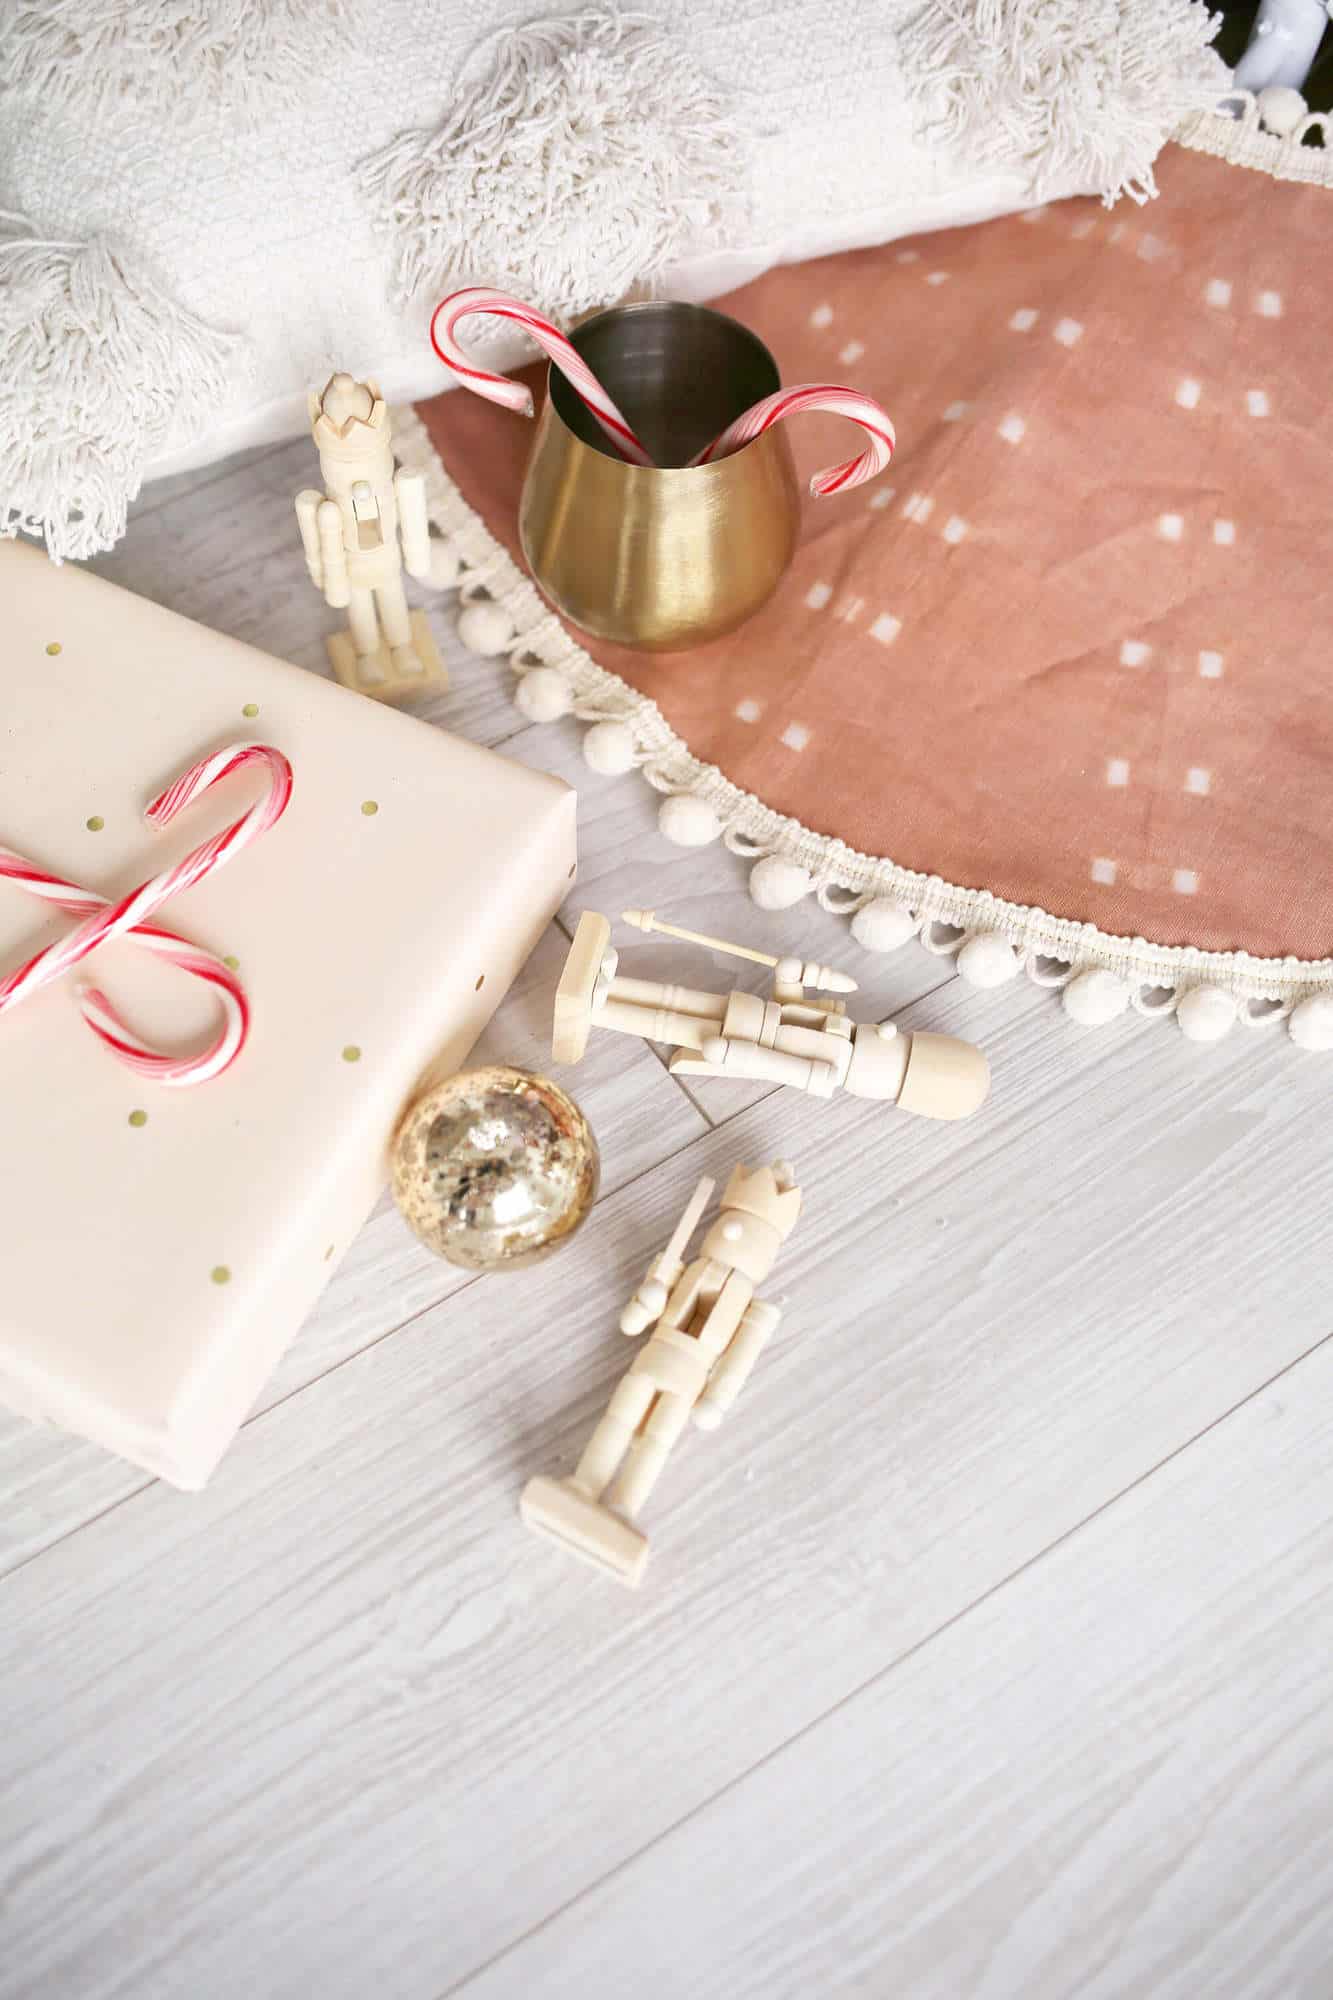
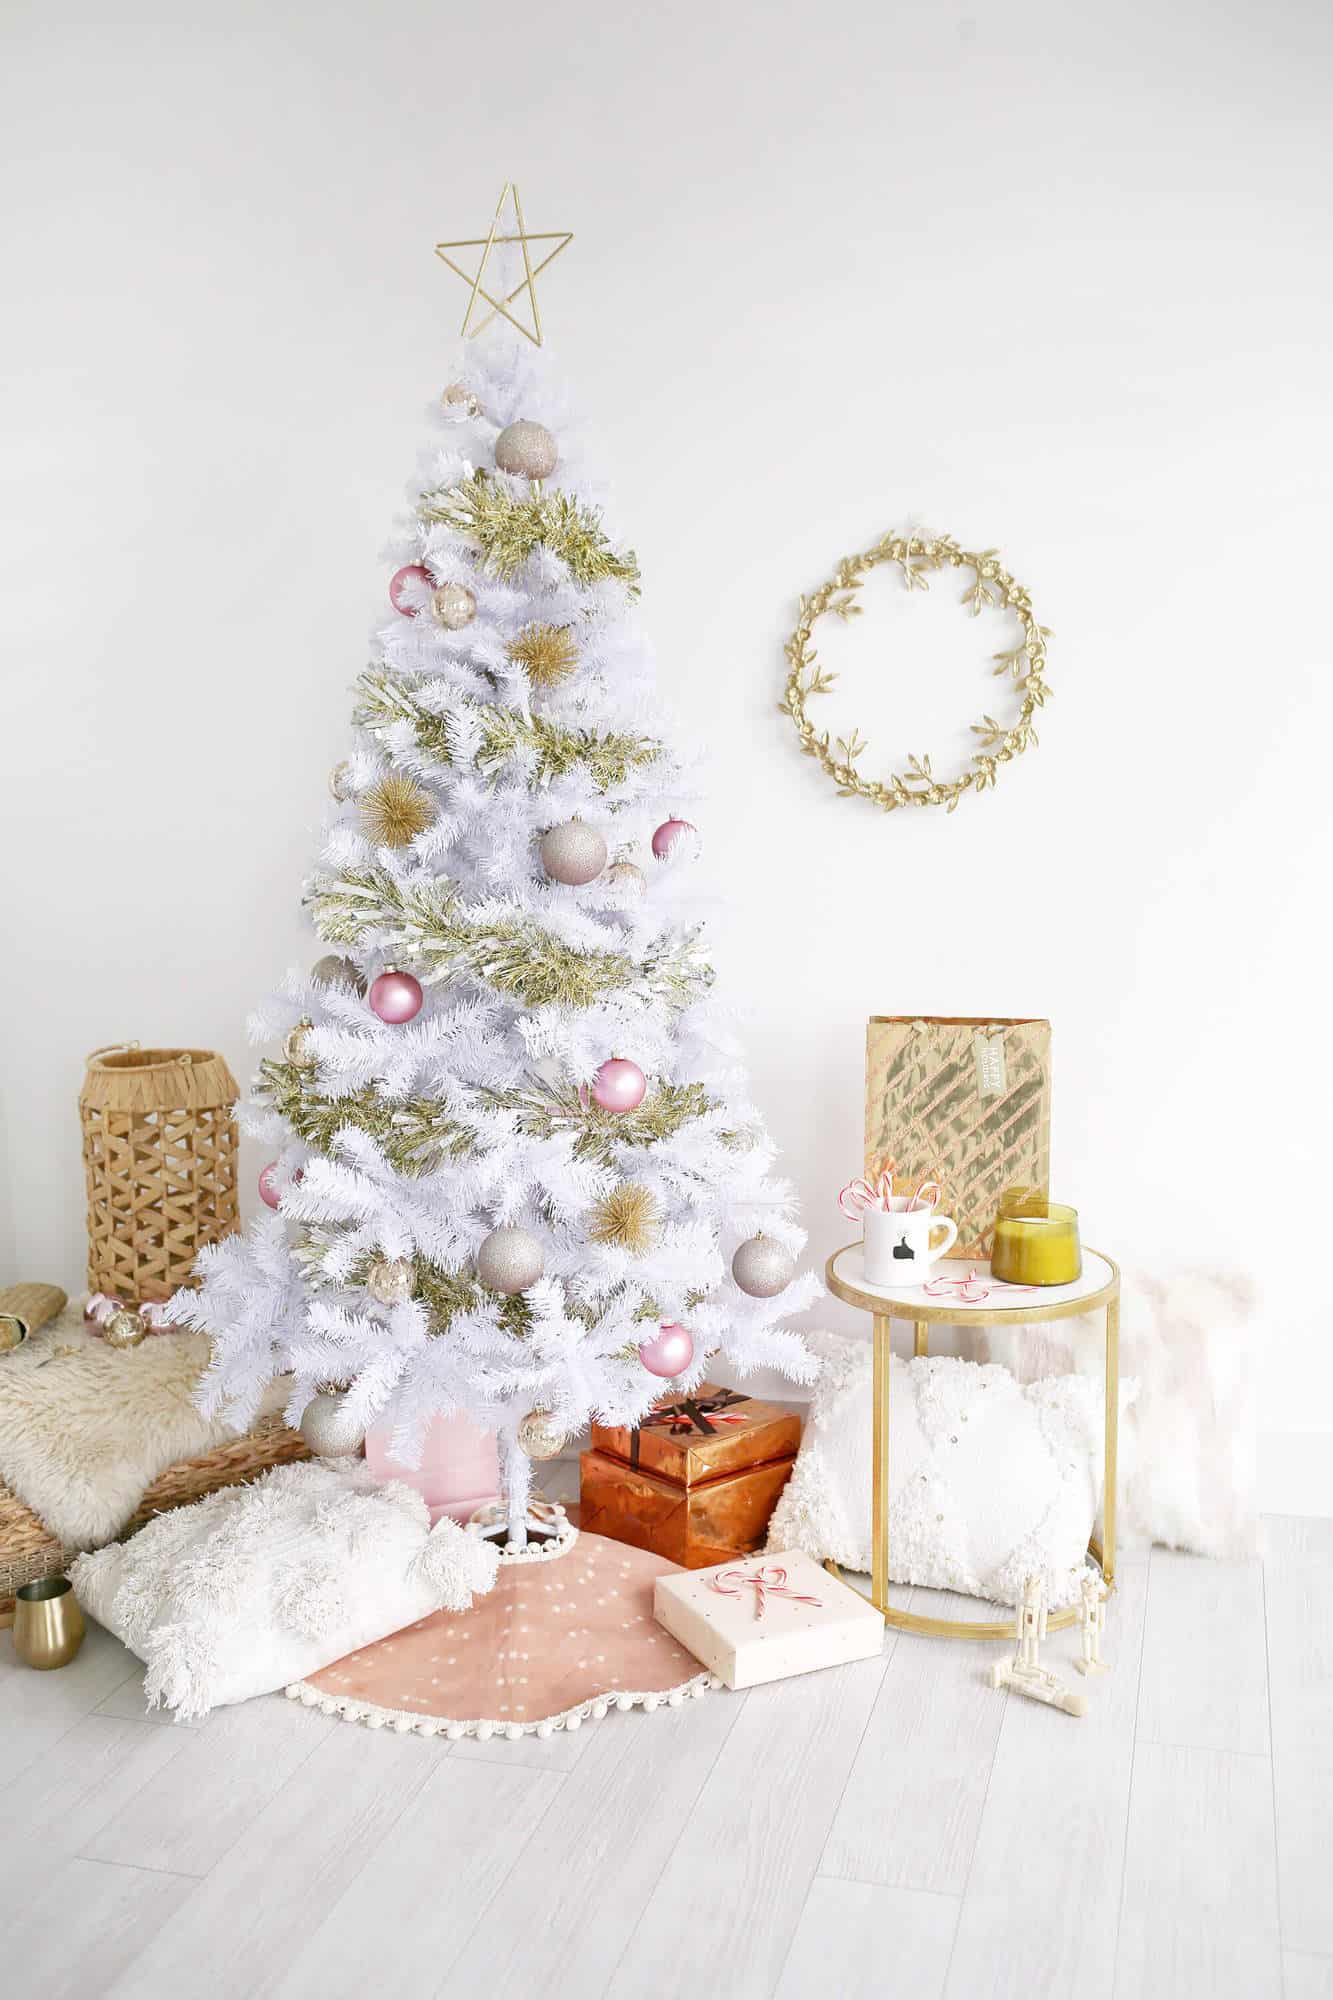
]]>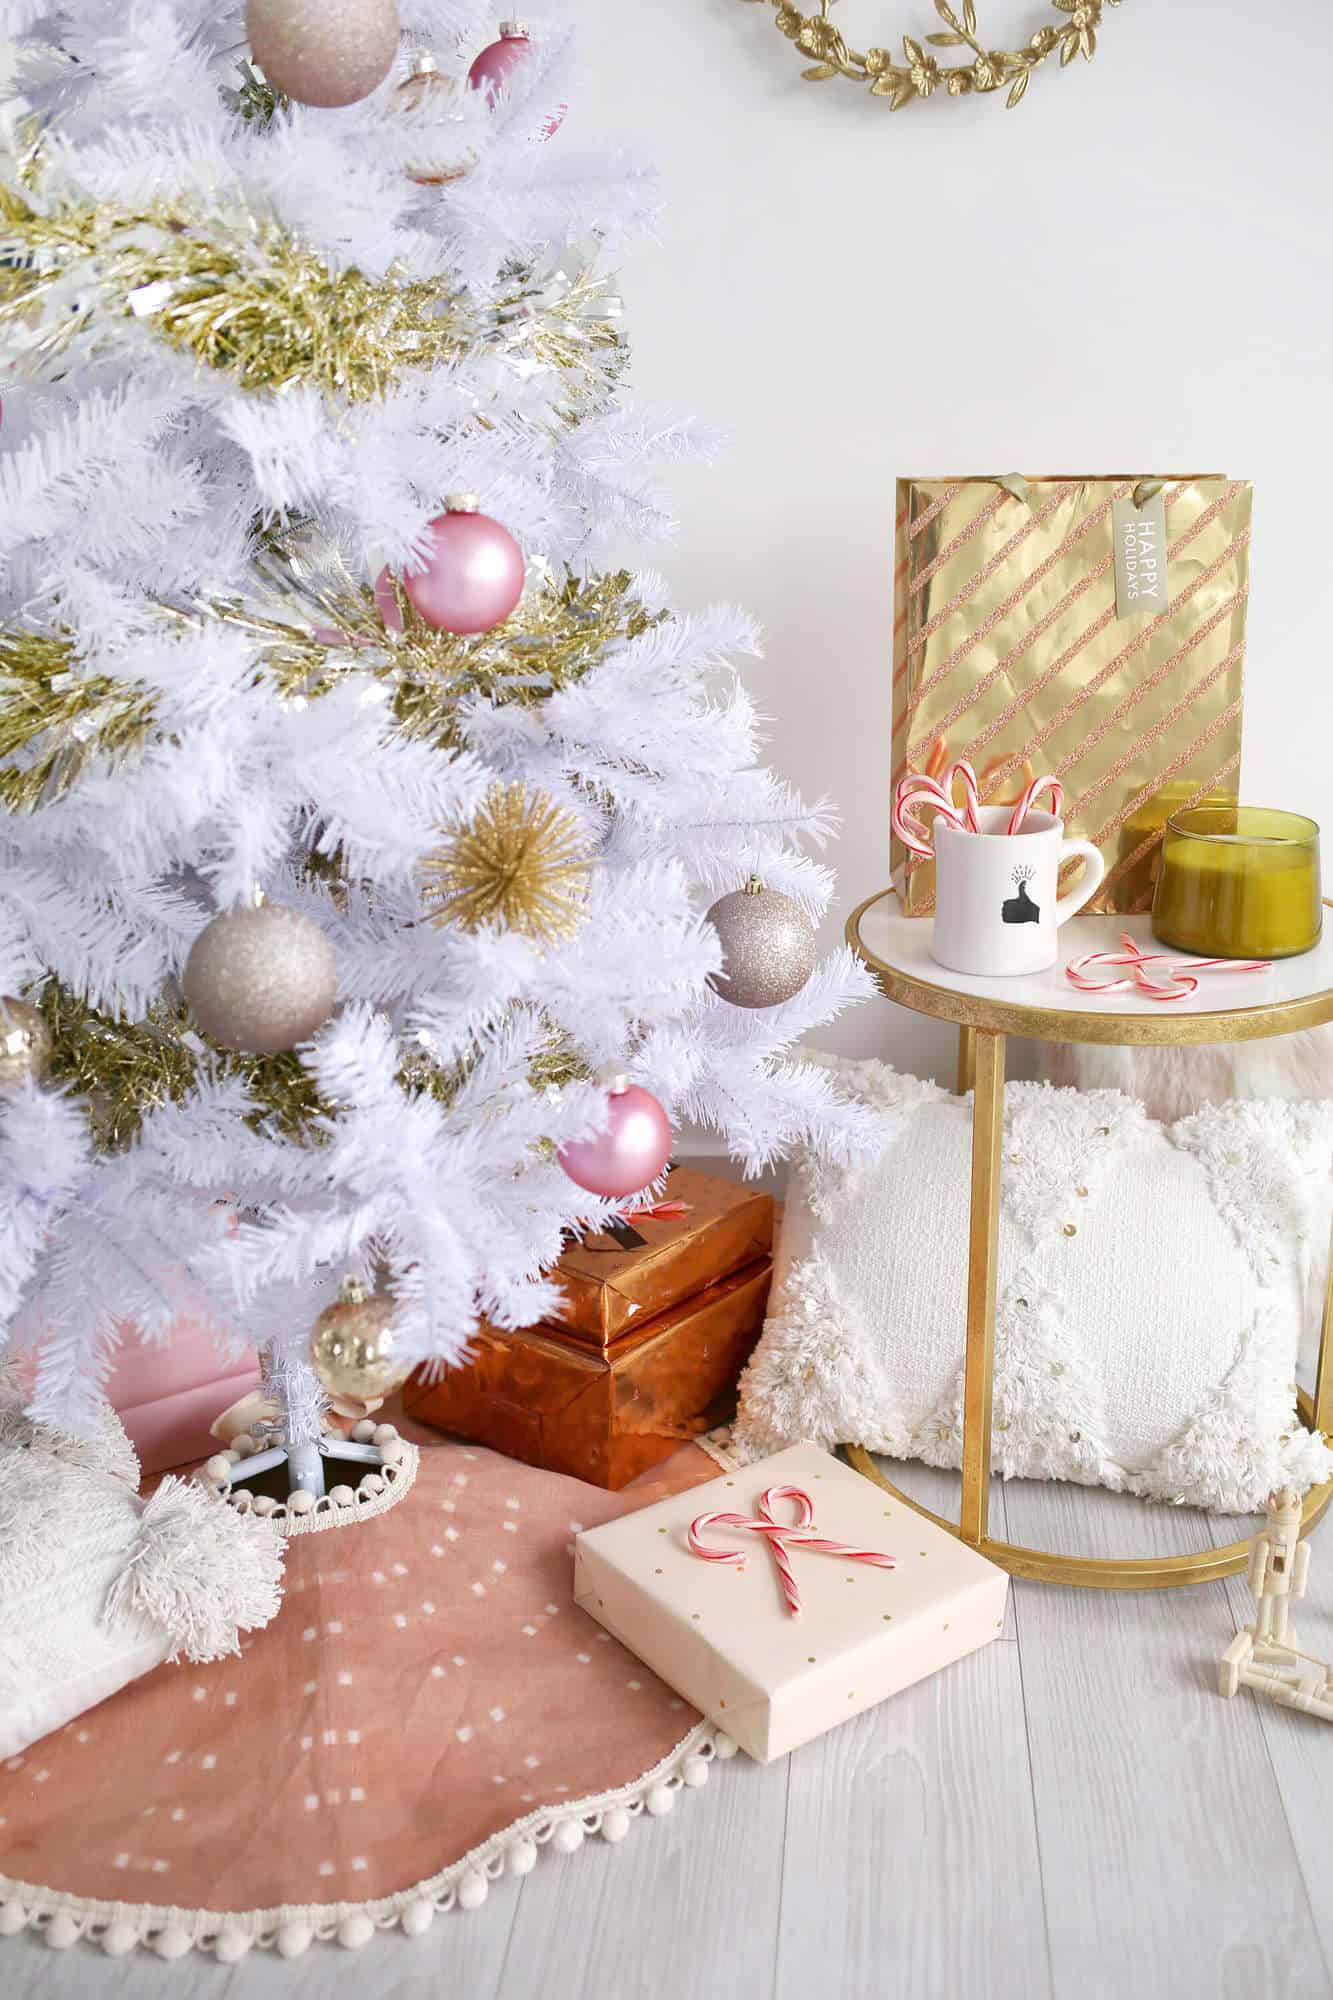 I love the patterns found in vintage indigo mud cloth textiles, but I’ll never be the girl with any dark blue in her Christmas decor. I decided to try out the same dyeing pattern using madder root on linen to create a tree skirt with a bit of a bohemian vibe. Madder root in different amounts can offer colors ranging from a blush pink to a brick red, so it’s a great natural dye to use if you enjoy a bit of pink or mauve. It works great for a pillowcase DIY too! It plays well with candy cane stripes and brass accents!
You can use this same resist pattern dye technique to create all kinds of holiday decor for your home. Create a bolster pillow, linen stockings, or cloth napkins!
Looking for more Christmas tree skirt ideas? Try these!
 Tree Skirt Supplies:
-one yard of wide bolt 100% linen
-one yard of wide bolt felt
-two yards of white pom pom trim (optional)
-fabric scissors
-straight pins
-sewing machine
-iron
Dyeing Supplies
–100 wooden clothespins
-2 tablespoons alum for mordanting
–20 quart stainless steel pot (can’t be used again for cooking)
-stainless steel ladle or wooden dowel (can’t be used again for cooking)
-1/2 ounce-3 ounces of madder root powder extract depending on your desired shade
-access to a stovetop
Preparing Your Fabric
To prepare your linen for dyeing, wash it with a mild detergent in hot water. This will remove any oils from processing in order for the dye to best attach to the fibers. Make sure you are using 100% linen and not a linen/poly blend.
Before you start cutting your fabric, fill your pot 3/4 full with hot water. Set it on the stove on medium-high heat. Add 2 tablespoons of alum and stir to dissolve. Add 1/2 ounce of madder root for blush pink, 1 1/2 ounces for mauve, and 3 ounces or more for a darker mauve-brick red. Stir to dissolve, cover and bring pot to a simmer. Do not let it boil or it will muddy your color.
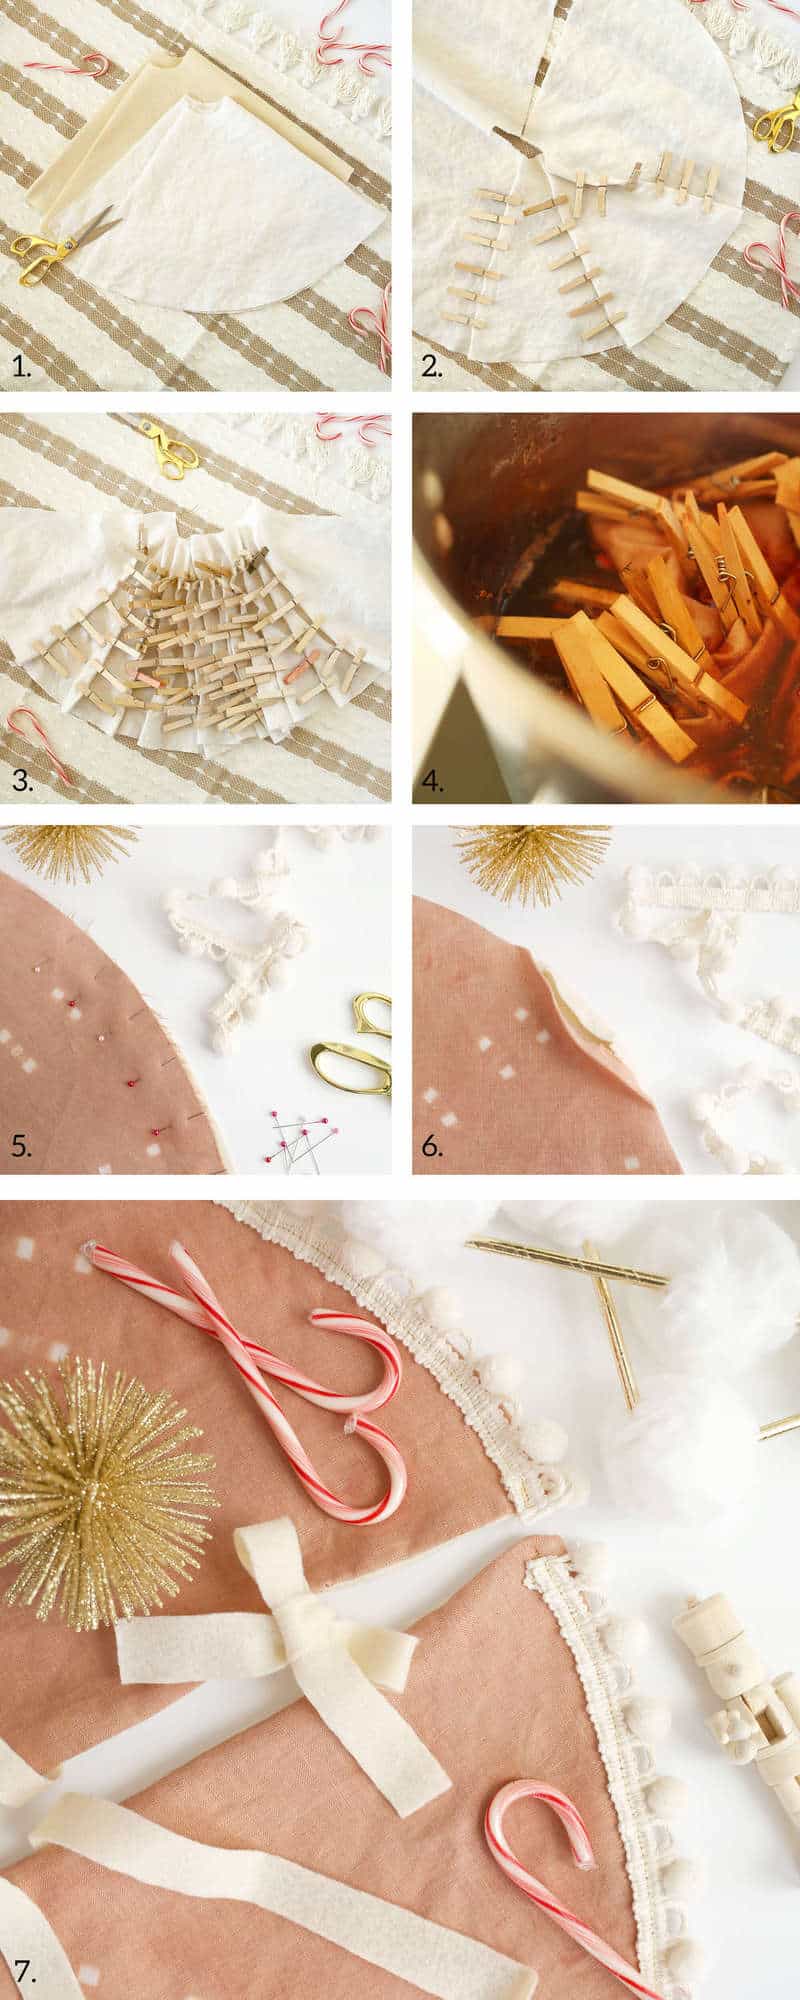 Step One: Cut your linen and your felt to measure 1″ wider than you want your tree skirt to be. I usually fold my fabric in half vertically and then in half horizontally, then make a compass using two pens and some yarn to draw perfect circles on top of your fabric.
Cut your circles out and then cut a smaller circle near the center for the tree stand opening. Finally, make a cut from the outside to the inner circle on both pieces of fabric.
Step Two: On the linen only, imagine it has lines on it like a cut pizza. Pinch up on each of those lines and attach six clothespins so that they’re evenly spaced.
Step Three: Continue all the way around. The more pizza slices you imagine, the more clothespins you’ll need and the more dense your pattern will be.
Step Four: Carefully add your fiber to the dye pot and gently stir so you don’t disturb the clothespins. Leave in dye pot until you’ve reached desired color. It will dry slightly lighter. Remove clothespins, rinse with cold water, and hang to dry or dry in dryer. Iron flat.
Step Five: Next, place your dyed fabric and your felt on top of each other. There aren’t really right sides on either of these fabrics, but usually you would want right sides facing each other. Pin together along the perimeter. Sew along the perimeter so that you leave 1/4″ from the stitch line to the edge. Leave an opening the width of your hand.
Step Six: Pull right side out and iron flat so that the opening is turned inside. Pin the opening together.
Step Seven: Pin your pom pom trim along the edge and stitch it to your tree skirt using a coordinating thread. Then add some along the smaller circle near the top to frame it nicely. Hand stitch leftover felt strips to the bottom of your tree skirt along the opening to use as ties to keep things in place.
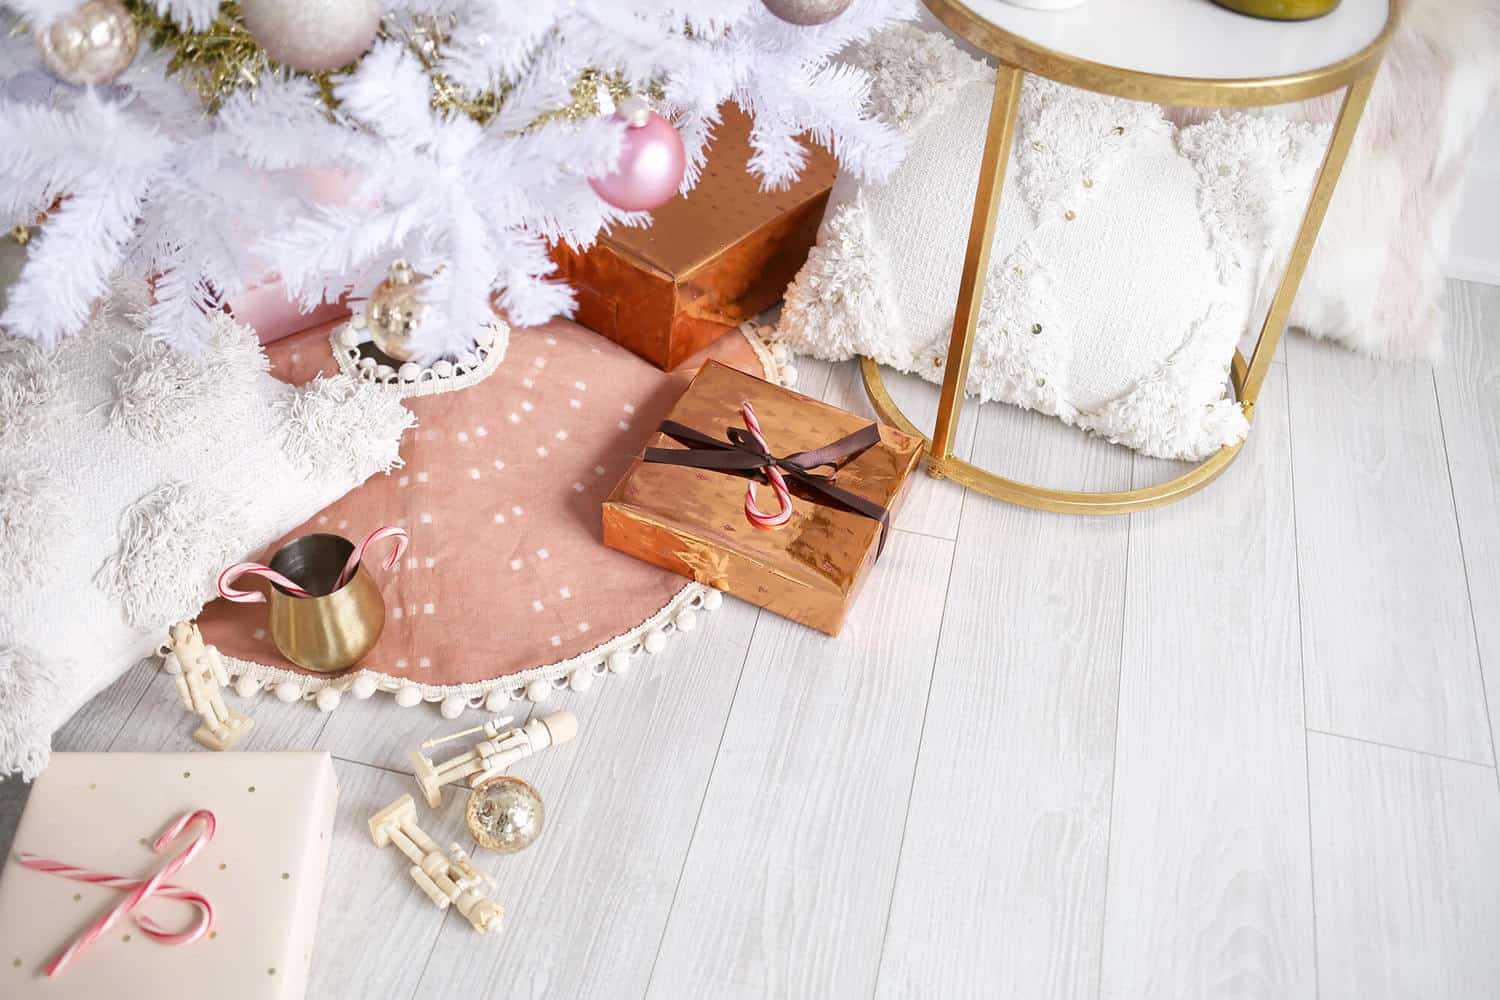 I love how it really pops against the white tree and the white floor of this room. Paired with so many gold and brass accents, it really warms the space up.
Interested in making a tree skirt without having to use a sewing machine? Check out these beautiful options. Ready to make your own Christmas tree collar? Try this one!
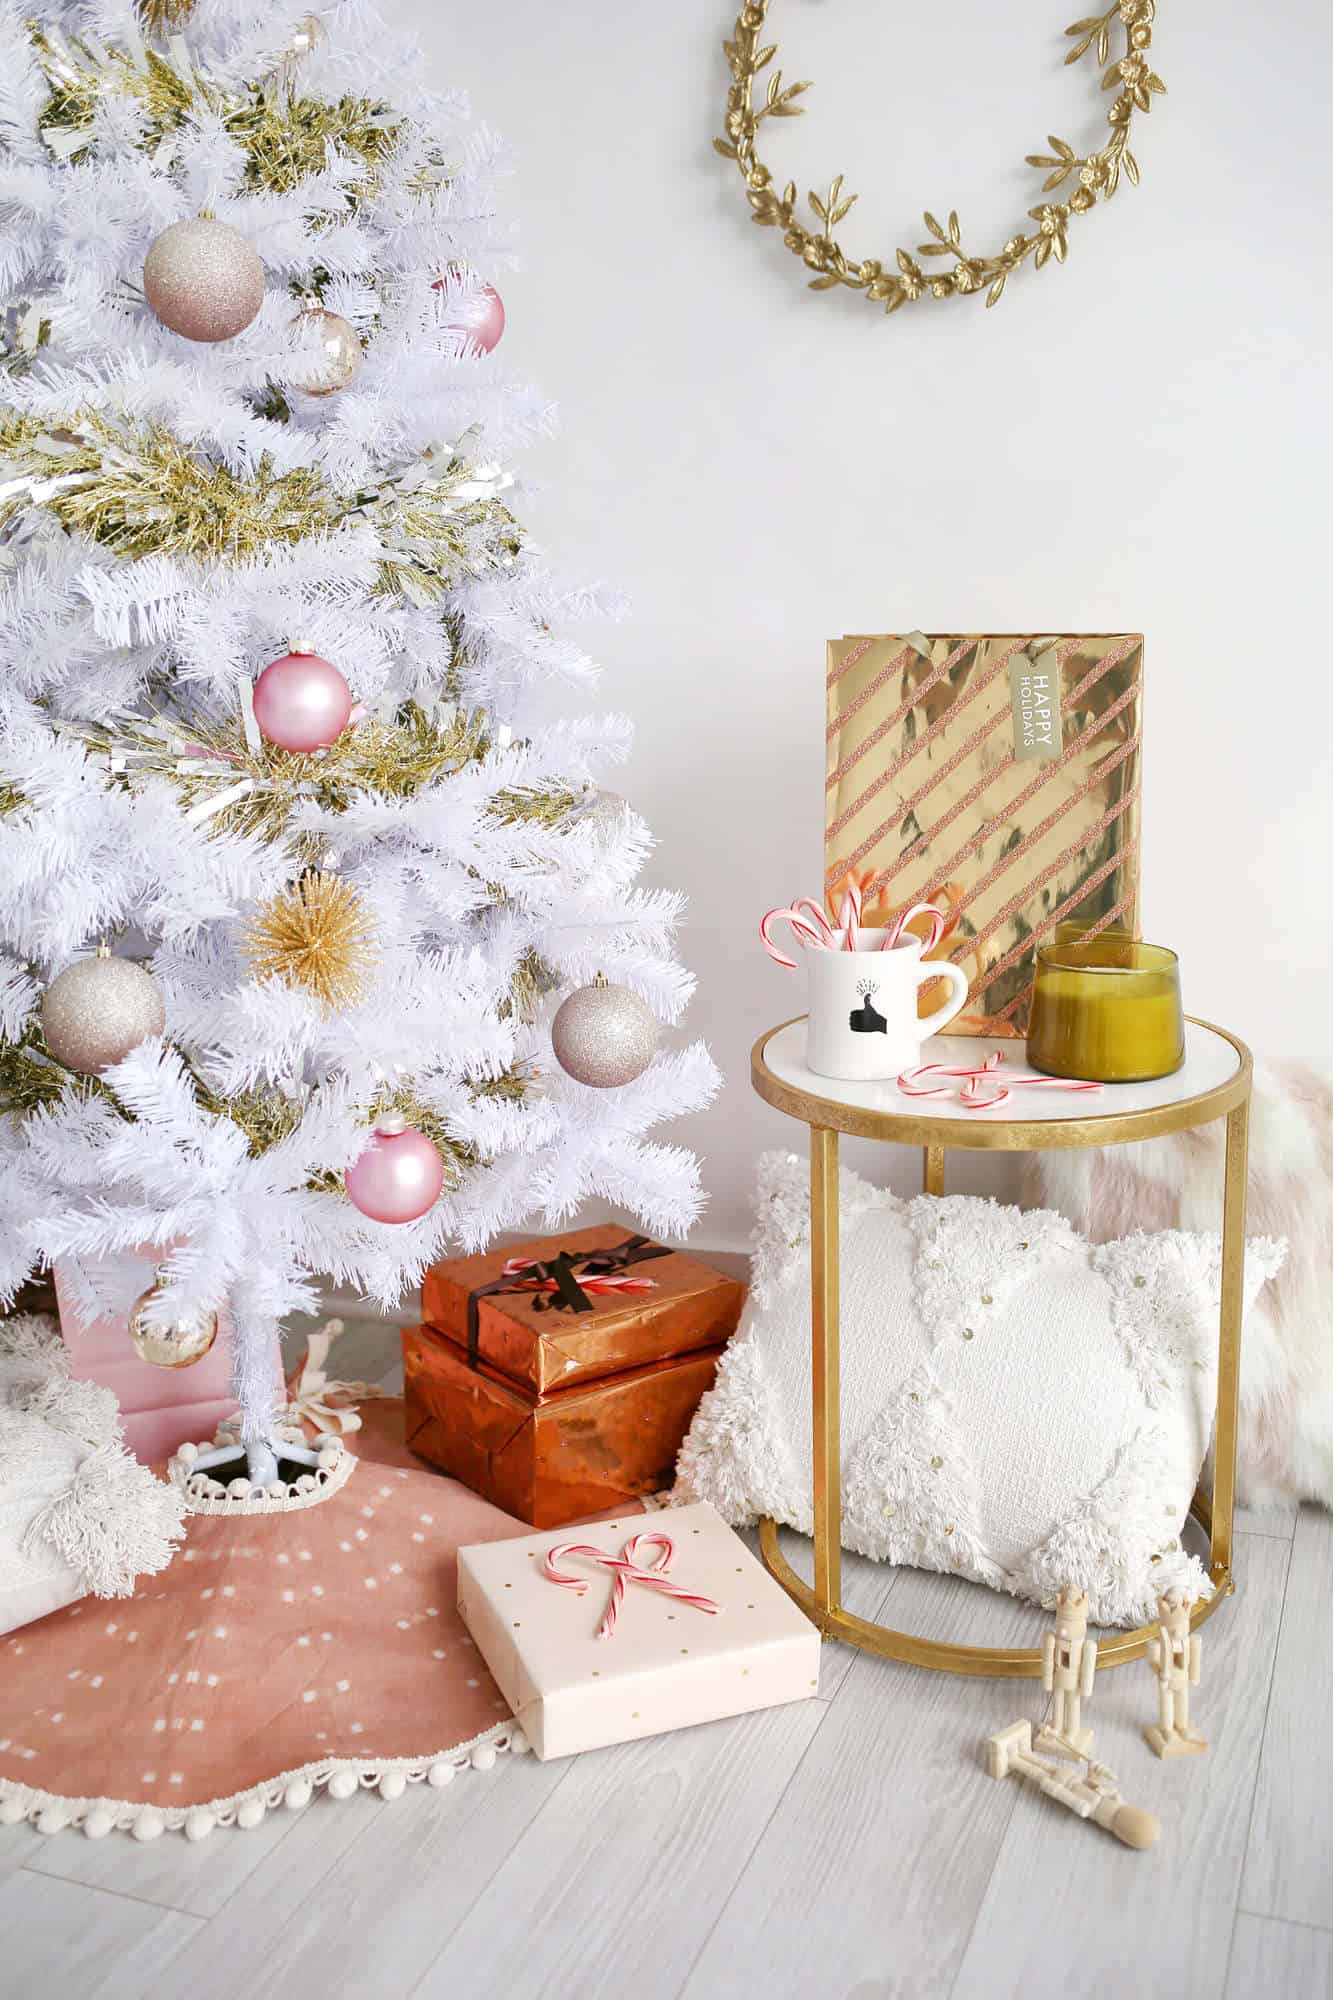 You can use these instructions to create whatever size tree skirt you need. This tree is only 5′ and not too wide so I kept my tree skirt a bit on the petite side to keep things in proportion. The felt backing on this piece could easily be used as the front if you decide you want something much simpler next year, but it really helps add some structure so the linen isn’t falling down in between the tree stand legs.
Not into the pom poms? Try a fringe trim instead or just leave it off completely. We love seeing what you make from our tutorials, so be sure to tag us when you share on Instagram! – Rachel
Credits//Author and Photography: Rachel Denbow. Photos edited with A Color Story Desktop.
]]>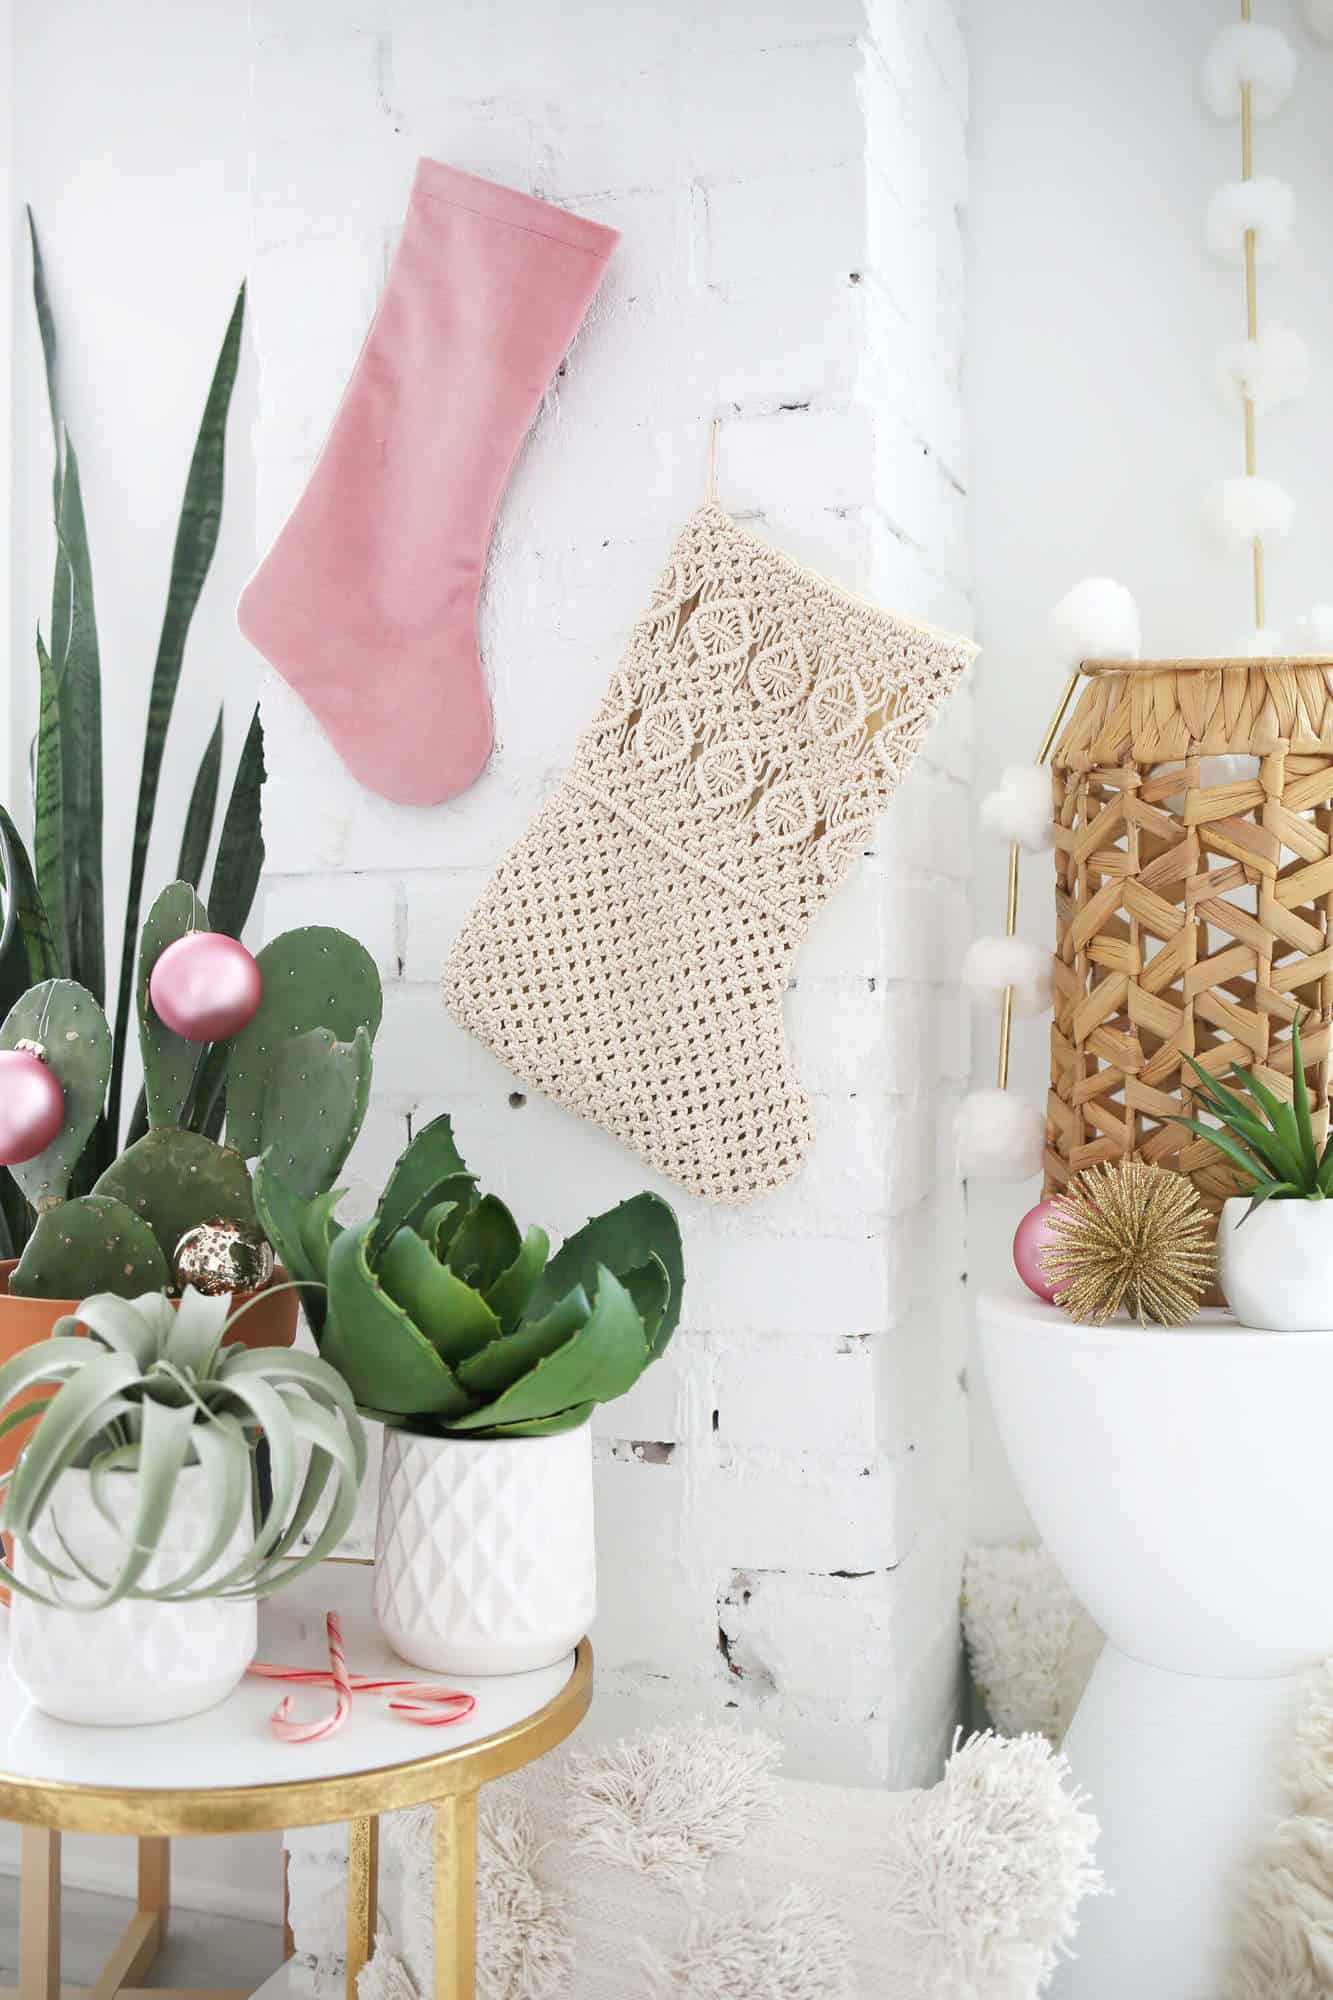 Raise your hand if you’ve been searching for a beautiful macrame Christmas stocking tutorial to no avail?! Well, after some careful thought, a few wild stabs in the dark, and plenty of patience, I’ve designed a Christmas stocking using simple knots that still offers plenty of structure so that it’s not just decorative!
You can make this macrame projects in a few hours using the thin rope I’ve used for a delicate look or size up on your rope and modify the design a bit on your own. Since it’s neutral, it would fit with any color scheme you’ve already got, but you could also easily dye your rope if you’re wanting something more colorful for your holiday decor.
This is one of those Christmas stockings you’ll want to keep for years to come, so be sure to save this tutorial in case you need to make another one next year!
Related: How To Macrame: A Step By Step Guide For Beginners, Simple Macrame Handbag Tutorial, Macrame Camera Strap Tutorial, Simple Macrame Table Runner, Macrame Room Divider, Macrame Yarn Garland, Make Your Own Macrame Bracelet, Macrame Curtain, Macrame Plant Hanger
 If you’re familiar with macrame basics already, you could easily customize the design with your own knot patterns using my instructions for the silhouette and backing.
 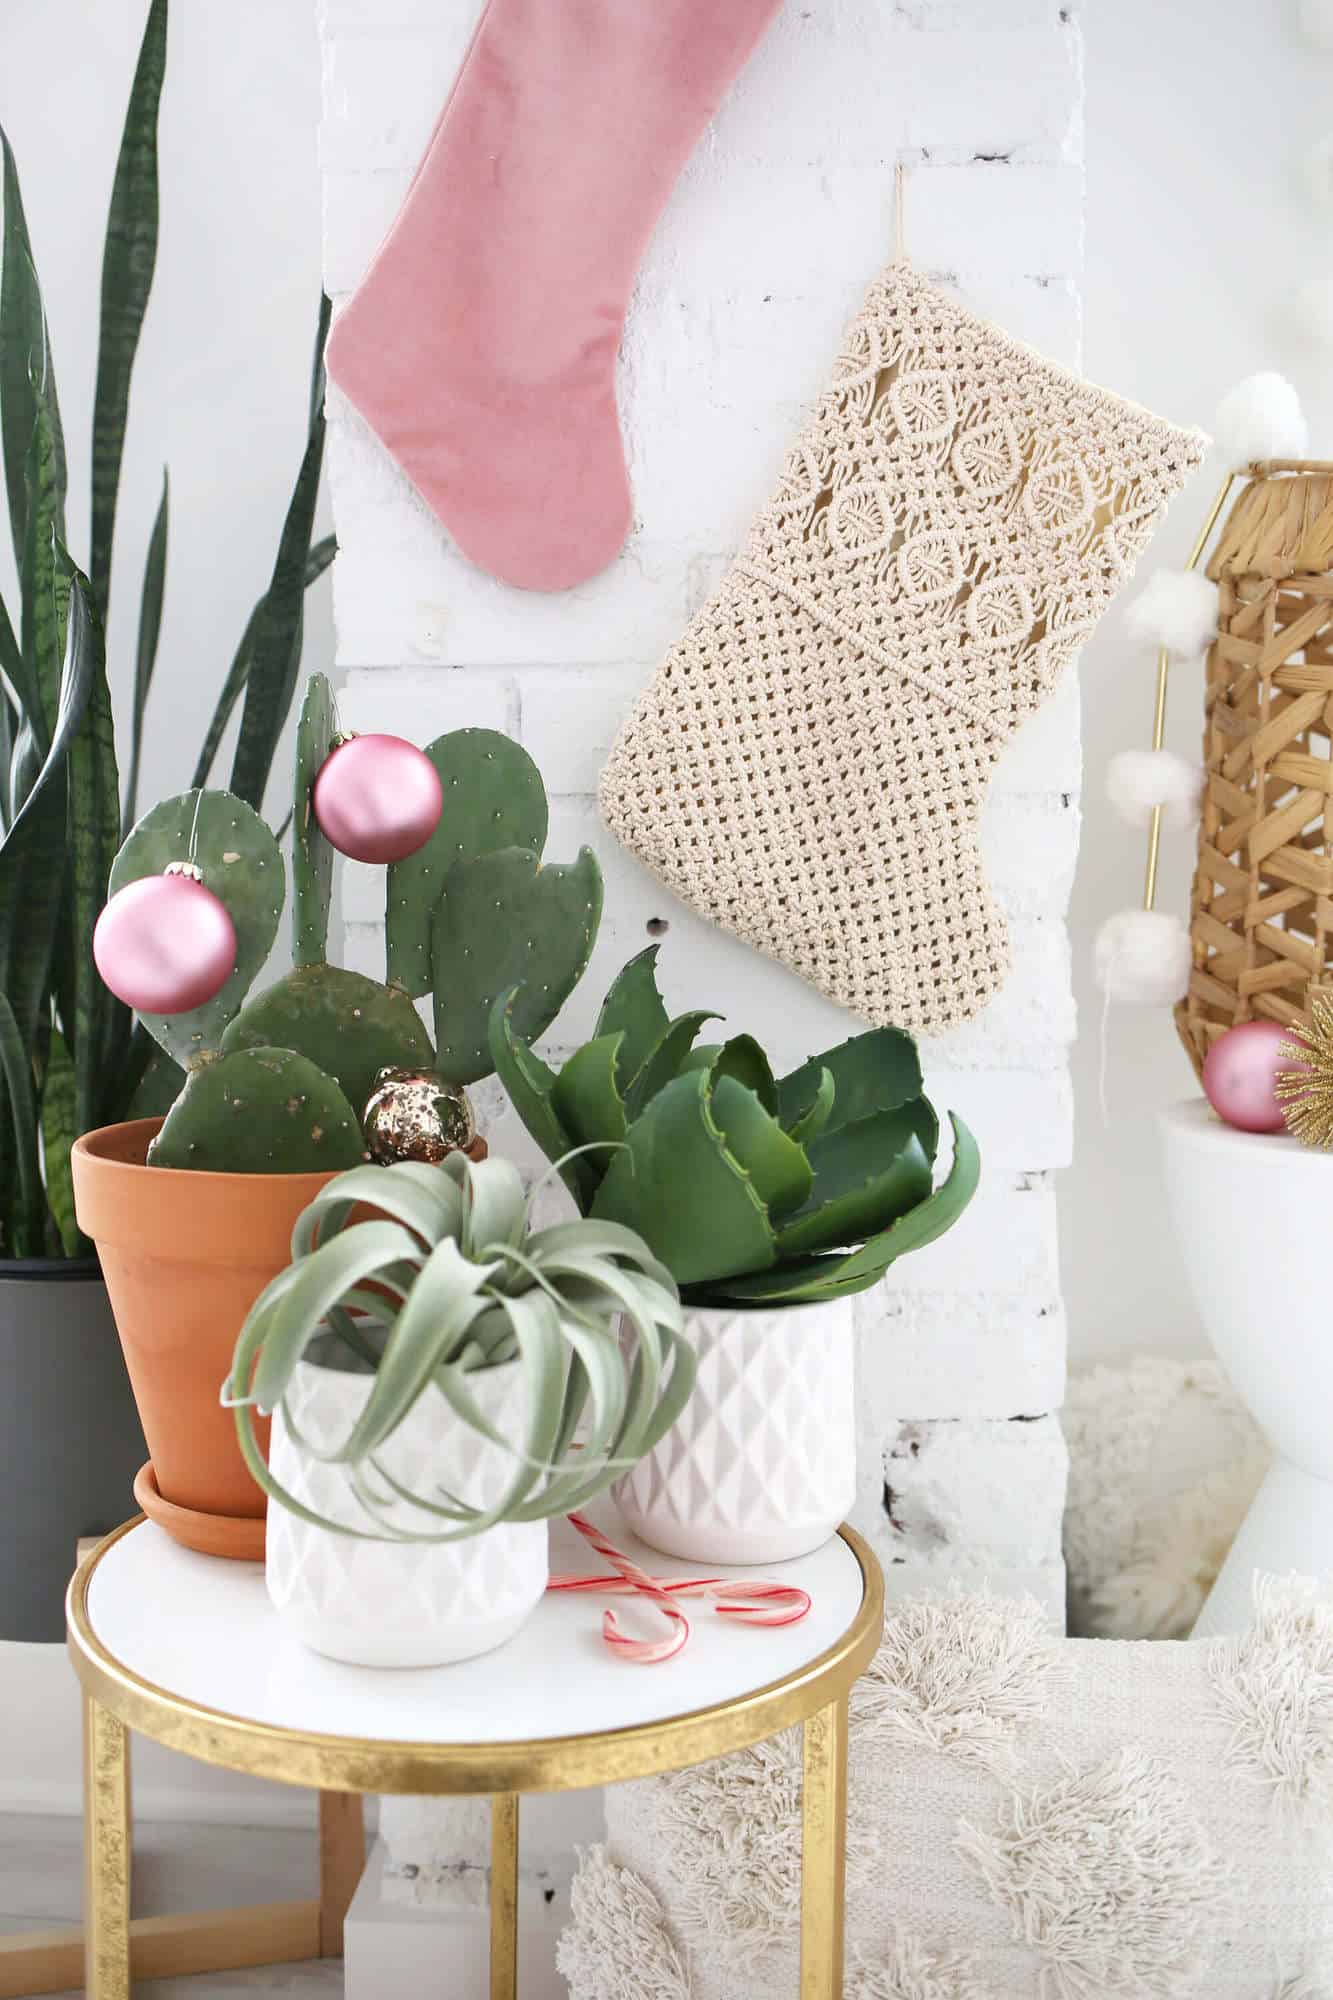 Supplies:
-500′ of 3mm cotton rope
-12″ wooden dowel
–3mm cotton macrame cord
-1/2 yard of off-white wool felt
–over the door hooks measuring at least 10″ from outer hook to outer hook or standing clothes rack similar to this one or this one
-sewing machine and thread (or you can hand stitch everything together)
–sharp tapestry needle
-scissors
-straight pins
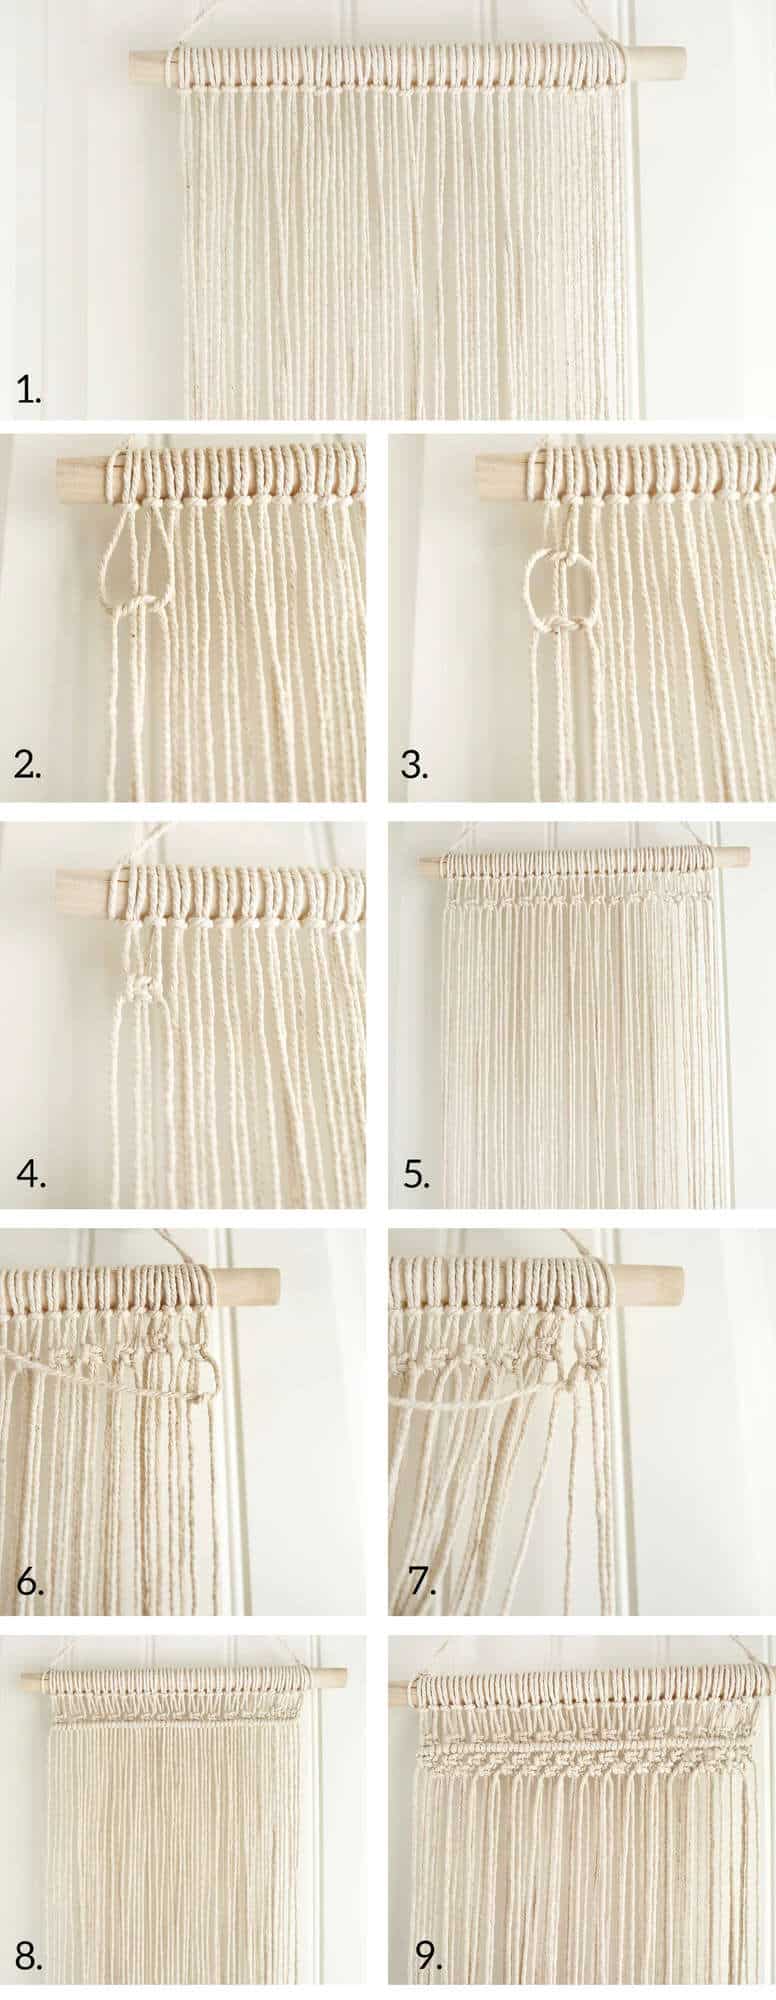 Step One: Cut 30 strands of rope measuring 15′ each. Attach each of your 30 strands of 15′ rope to your dowel using a lark’s head knot (see here). Do your best to attach these so that the ends are even and then space them out evenly along your wooden dowel so that you have about 1″ of free space left on each end of your dowel.
Using your additional piece of rope, tie one end in a double knot on one end of the dowel and the other end on the other end of your dowel to create a hanger. Adjust this to the height you desire so that it’s hanging at a comfortable height from your hooks to be able to work on.
Step Two: Using the first four strands on the left side of your dowel, tie a half knot. The two center ropes stay where they are and the two outer ropes pull away just a bit. Then create a bend in the outer left rope and move it towards and then under the outer right rope as shown.
Next, bend the outer right rope under the place where the outer left rope crossed it, behind the two center ropes, and back up through the bend from the outer left rope as shown. Leave about 1/2 of room between the knot and the dowel.
Step Three: Then you’ll create another similar half knot but reverse the overlap order of the outer ropes. The outer rope on the right side will go over the center two ropes but under the outer rope on the left side. Then the outer rope on the left side will go behind the center two ropes and come out over the bend in the outer right rope.
Step Four: Pull this second half knot snugly into the first half knot to create a square knot.
Step Five: Repeat steps two through four with the next group of four ropes, and so on, and so on, until you’ve completed 15 square knots total.
Step Six: Pull the outer right rope across the front of all the other ropes (to the left) and drape the end on a coat hook. This is going to be the base for the next row of single knots that will create a horizontal row. Use the second rope from the right side to tie a single knot around the rope you just draped across.
Step Seven: Then use the third rope from the outside and tie a single knot so that it’s snug against the other knot. Then repeat with the fourth rope from the outside and tie a single knot so that it’s snug, etc. You’ll start to see the pattern.
Step Eight: Continue tying consecutive ropes in a single knot all the way across. You don’t want this to be so tight that it pulls the width in at the edges.
Step Nine: Follow this with another 15 square knots snugly under your horizontal row. Then create a second row of square knots by skipping the first two outer rows of rope on the left side before continuing your pattern of square knots using four ropes each. This is called an alternating square knot. It will leave you with two extra ropes on the right side as well.
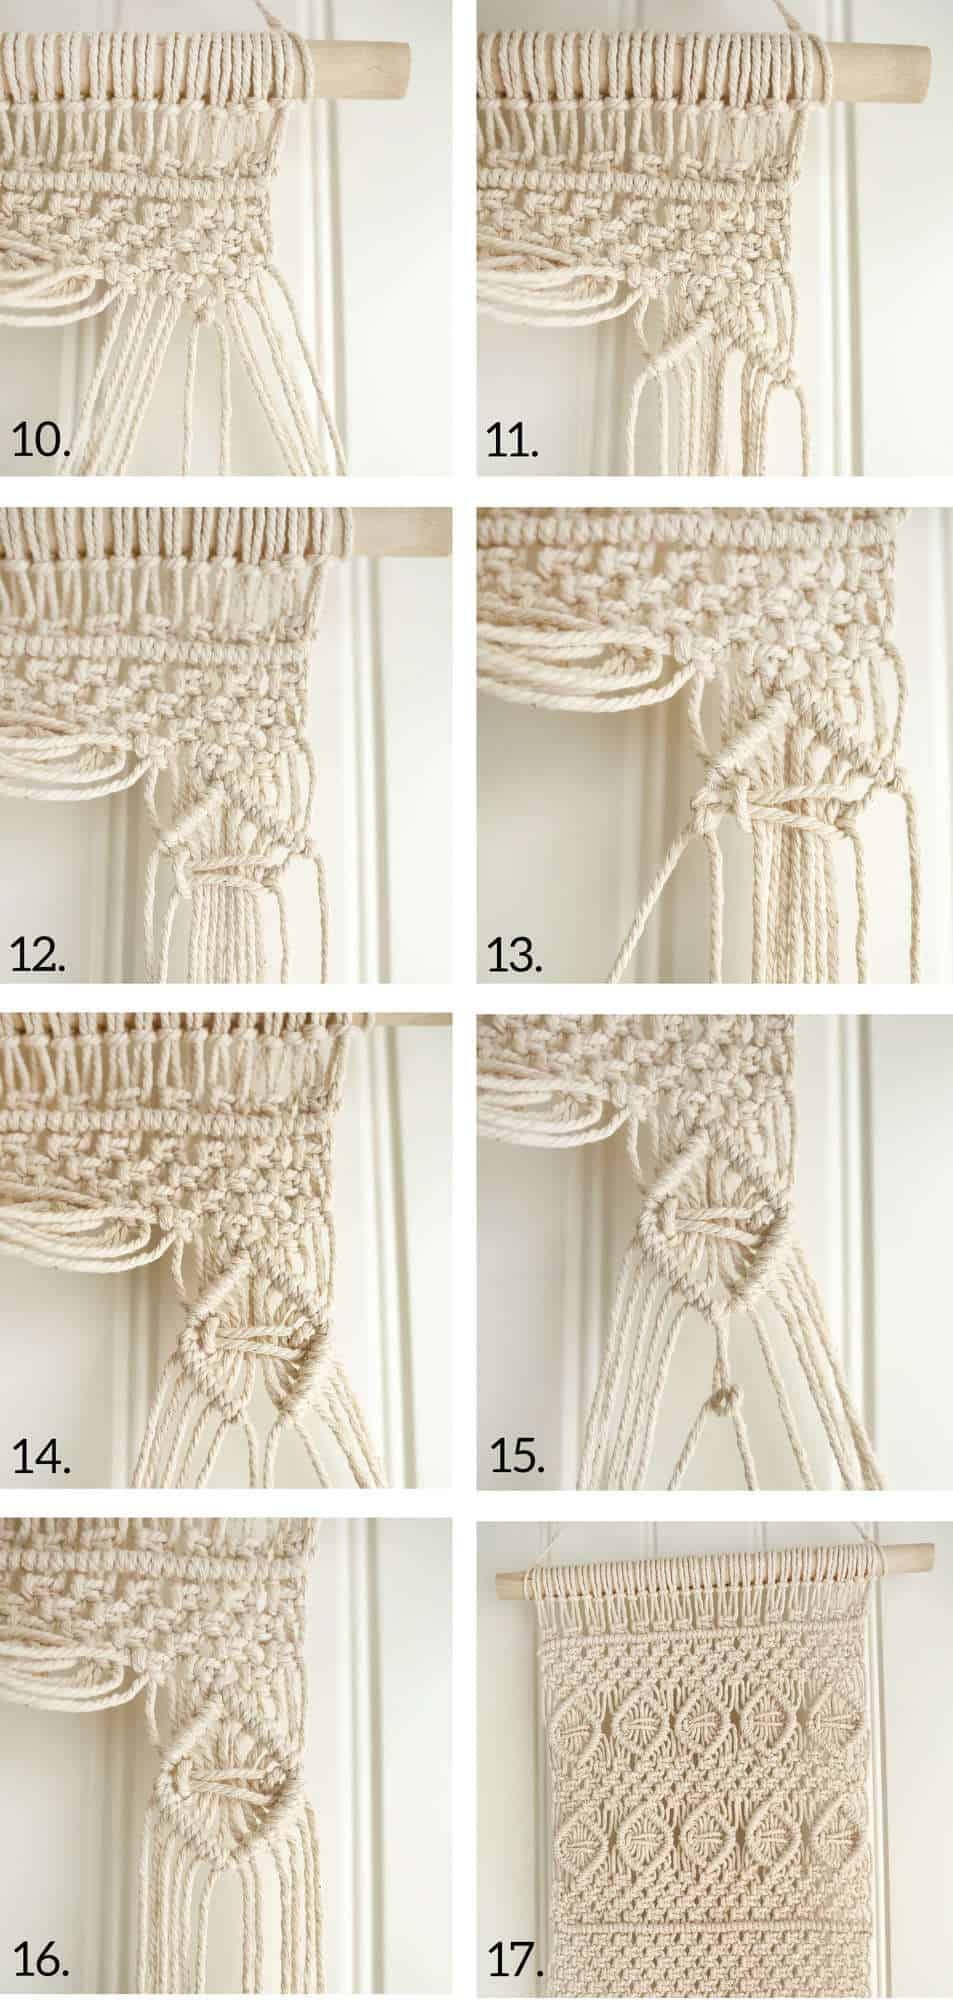 Step Ten: After four rows of square knots and alternating square knots, you’ll create your first diamond. I think it also kind of looks like a mid-century ornament! You’ll use 12 strands of rope on the right side of your piece. I like to pull all the other non-working ropes off to the side to keep things from getting too tangled.
Wrap the sixth rope from the left over the seventh row from the left using a double half hitch knot (two single knots). This will create the top point of your diamond.
Step Eleven: Wrap the fifth, fourth, third, second, and first ropes around the seventh rope using the same double half hitch knots to create the top right side of the diamond.
Then wrap the eighth, ninth, 10th, 11th, and 12th ropes around the sixth rope using the double half hitch knot to create the top left side of your diamond.
Step Twelve: Use the 11th rope and the second rope from the right side to tie a square knot around all of the ropes in between. Don’t pull too tightly—you just want them to rest against the edges so they all have room to breathe.
Step Thirteen: The 12th rope will be the rope you wrap the 11th rope around with a double half hitch. This will create the elbow of the diamond on the left side.
Step Fourteen: Then wrap the 10th, ninth, eighth, and seventh rope around the 12th to finish off the bottom left side fo the diamond. Next, you’ll wrap the second, third, fourth, fifth, and sixth around the first rope using the double half hitch to finish off your bottom right side of the diamond.
Step Fifteen: To create the bottom point, wrap the new sixth rope from the right side around the new seventh rope using a double half hitch.
Step Sixteen: This is how your finished diamond will look. You did it!
Step Seventeen: Now finish up the next four diamonds in this row. Next, I added four more rows of square knots and alternating square knots before another full row of diamonds. Then another section of four rows of square and alternating square knots as shown. Finally, I added another horizontal line as in steps six through eight.
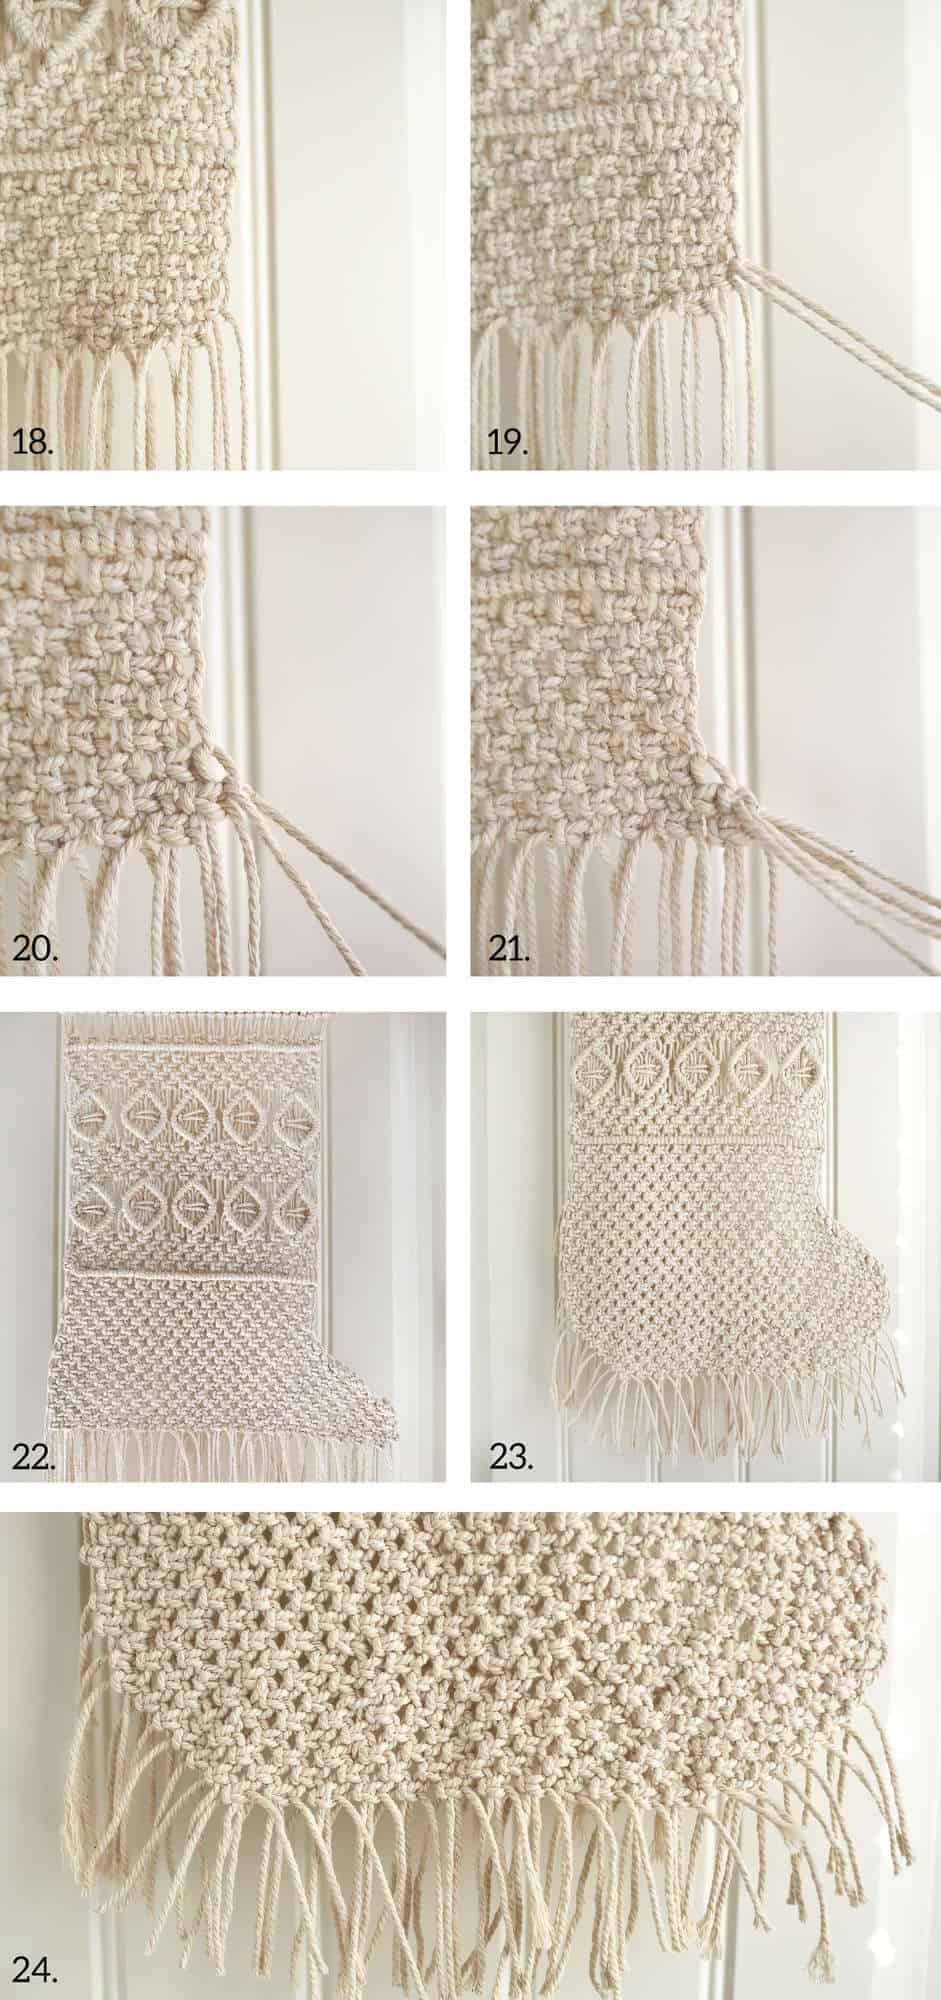 Step Eighteen: Tie eight more rows of square knots and alternating square knots. This is where we’ll increase the silhouette for the foot. You should have two extra ropes on the right side.
Step Nineteen: Slip a 4′ section of rope through the loop above the two extra ropes on the right side. Center it so that you’ve got two more strands of rope to use. Then use your four free ropes to tie another square knot in the eighth row.
Step Twenty: Tie a ninth row of square knots all the way across from the left to the right. This will still leave you with an additional two rope strands on the right side. So, add another 4′ section of rope through the loop above the two extra ropes on the right just like in step 19. This introduction of new strands will increase the width of your stocking to start the toe shape.
Step Twenty-One: Once you’ve finished your ninth row, add two strands of 4′ rope through the loop above the outer knot. This will widen your stocking even further for a more distinguished toe shape.
Step Twenty-Two: Continue steps 19 through 21 until you’ve finished a total of 14 rows of square and alternating square knots. Each even row should get an additional two strands of rope and each odd row should have only two strands of rope added. Rows 15 through 19 should be knotted without any additional strands added in.
Step Twenty-Three: The next section of rows will taper in at each side by two ropes on each outer edge. This means rows 20 through 25 will be decreasing on each end by two ropes.
Step Twenty-Four: Here’s a close up of the bottom section. You’ll have much shorter ropes to work with at this point! I suggest trimming them down to about 2″ for now. If they get too short, they may start unraveling.
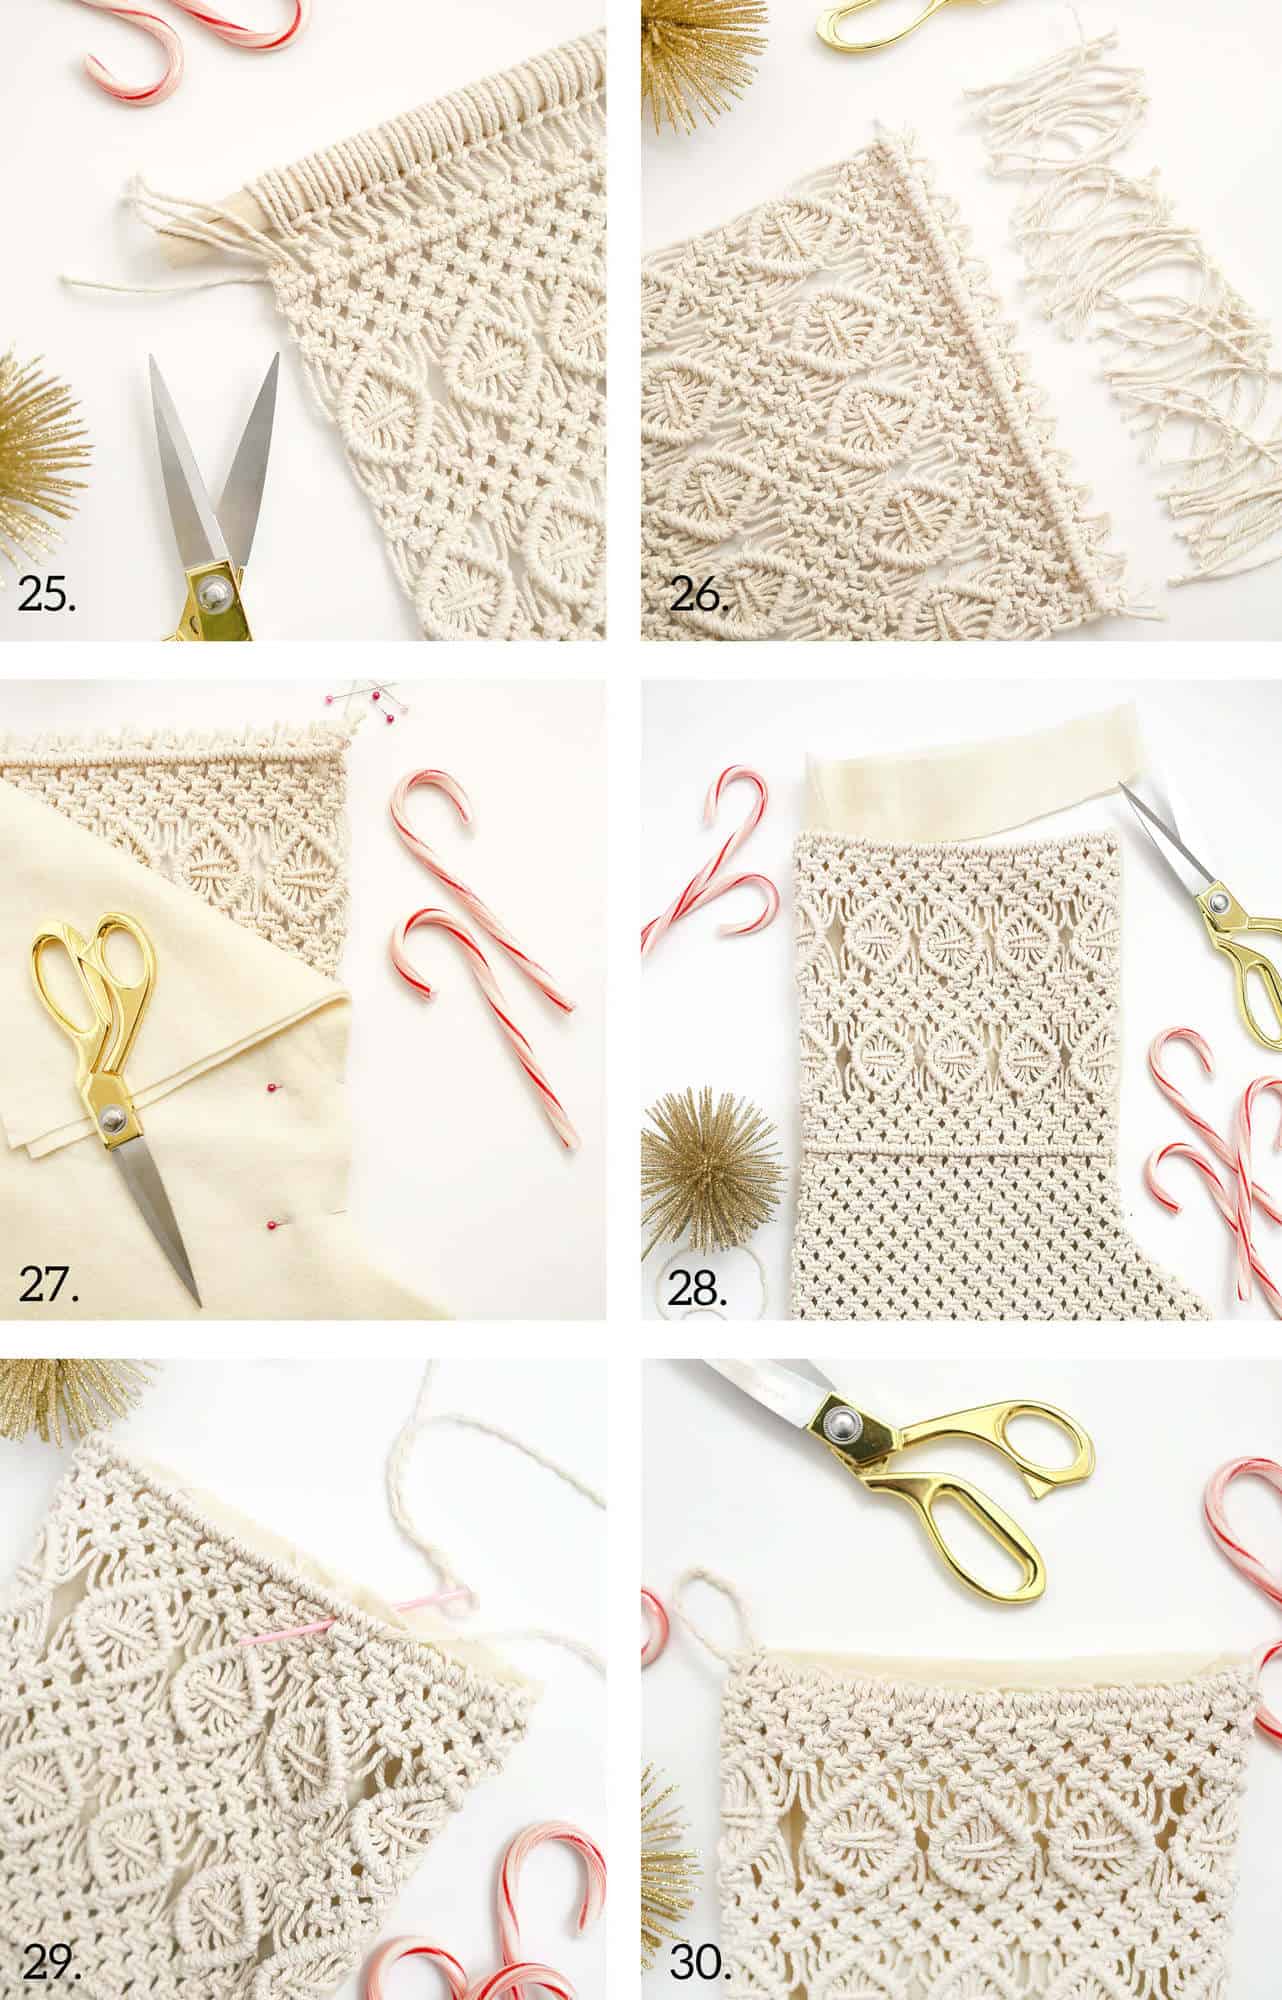 Step Twenty-Five: Let’s get this piece off of your dowel. Loosen the lark’s head knots and cut them off.
Step Twenty-Six: Trim your rope strands so that there is only about 1/2″ above the first row of square knots.
Step Twenty-Seven: Place your finished macrame piece on top of two pieces of wool felt. I chose this fiber because you don’t need to worry about unraveling or adding a hem on the back side. Plus, it feels extra cozy in your hands. Use the macrame piece as your template and cut out the same shape in the two pieces of wool with about 1/2″ of room around the perimeter.
Put both pieces of wool on top of the macrame piece and pin all three layers together with straight pins, except for across the top of the stocking. Hand or machine stitch through all three layers all the way from the top right corner, around the toes, around the heel, and back up to the top left corner. Be sure not to stitch the top side shut.
Step Twenty-Eight: Turn right side out so that the macrame layer is on the front. Tuck the square knots at the top inside so that they’re between the front of the macrame piece and the middle layer of wool. This will give you a nice clean line at the top. You’ll have a little extra wool felt on the top. Trim it down so that it’s flush with the top of your macrame piece.
Step Twenty-Nine: With a sharp tapestry needle and thread or leftover rope, stitch the middle piece of felt to the horizontal row of macrame. Be sure to tie a knot where you begin and end. You can use a blanket stitch or a whip stitch, which is where you stitch through both layers from back to front over and over.
Step Thirty: Add a three-inch loop on the left side so you can hang it anywhere you like!
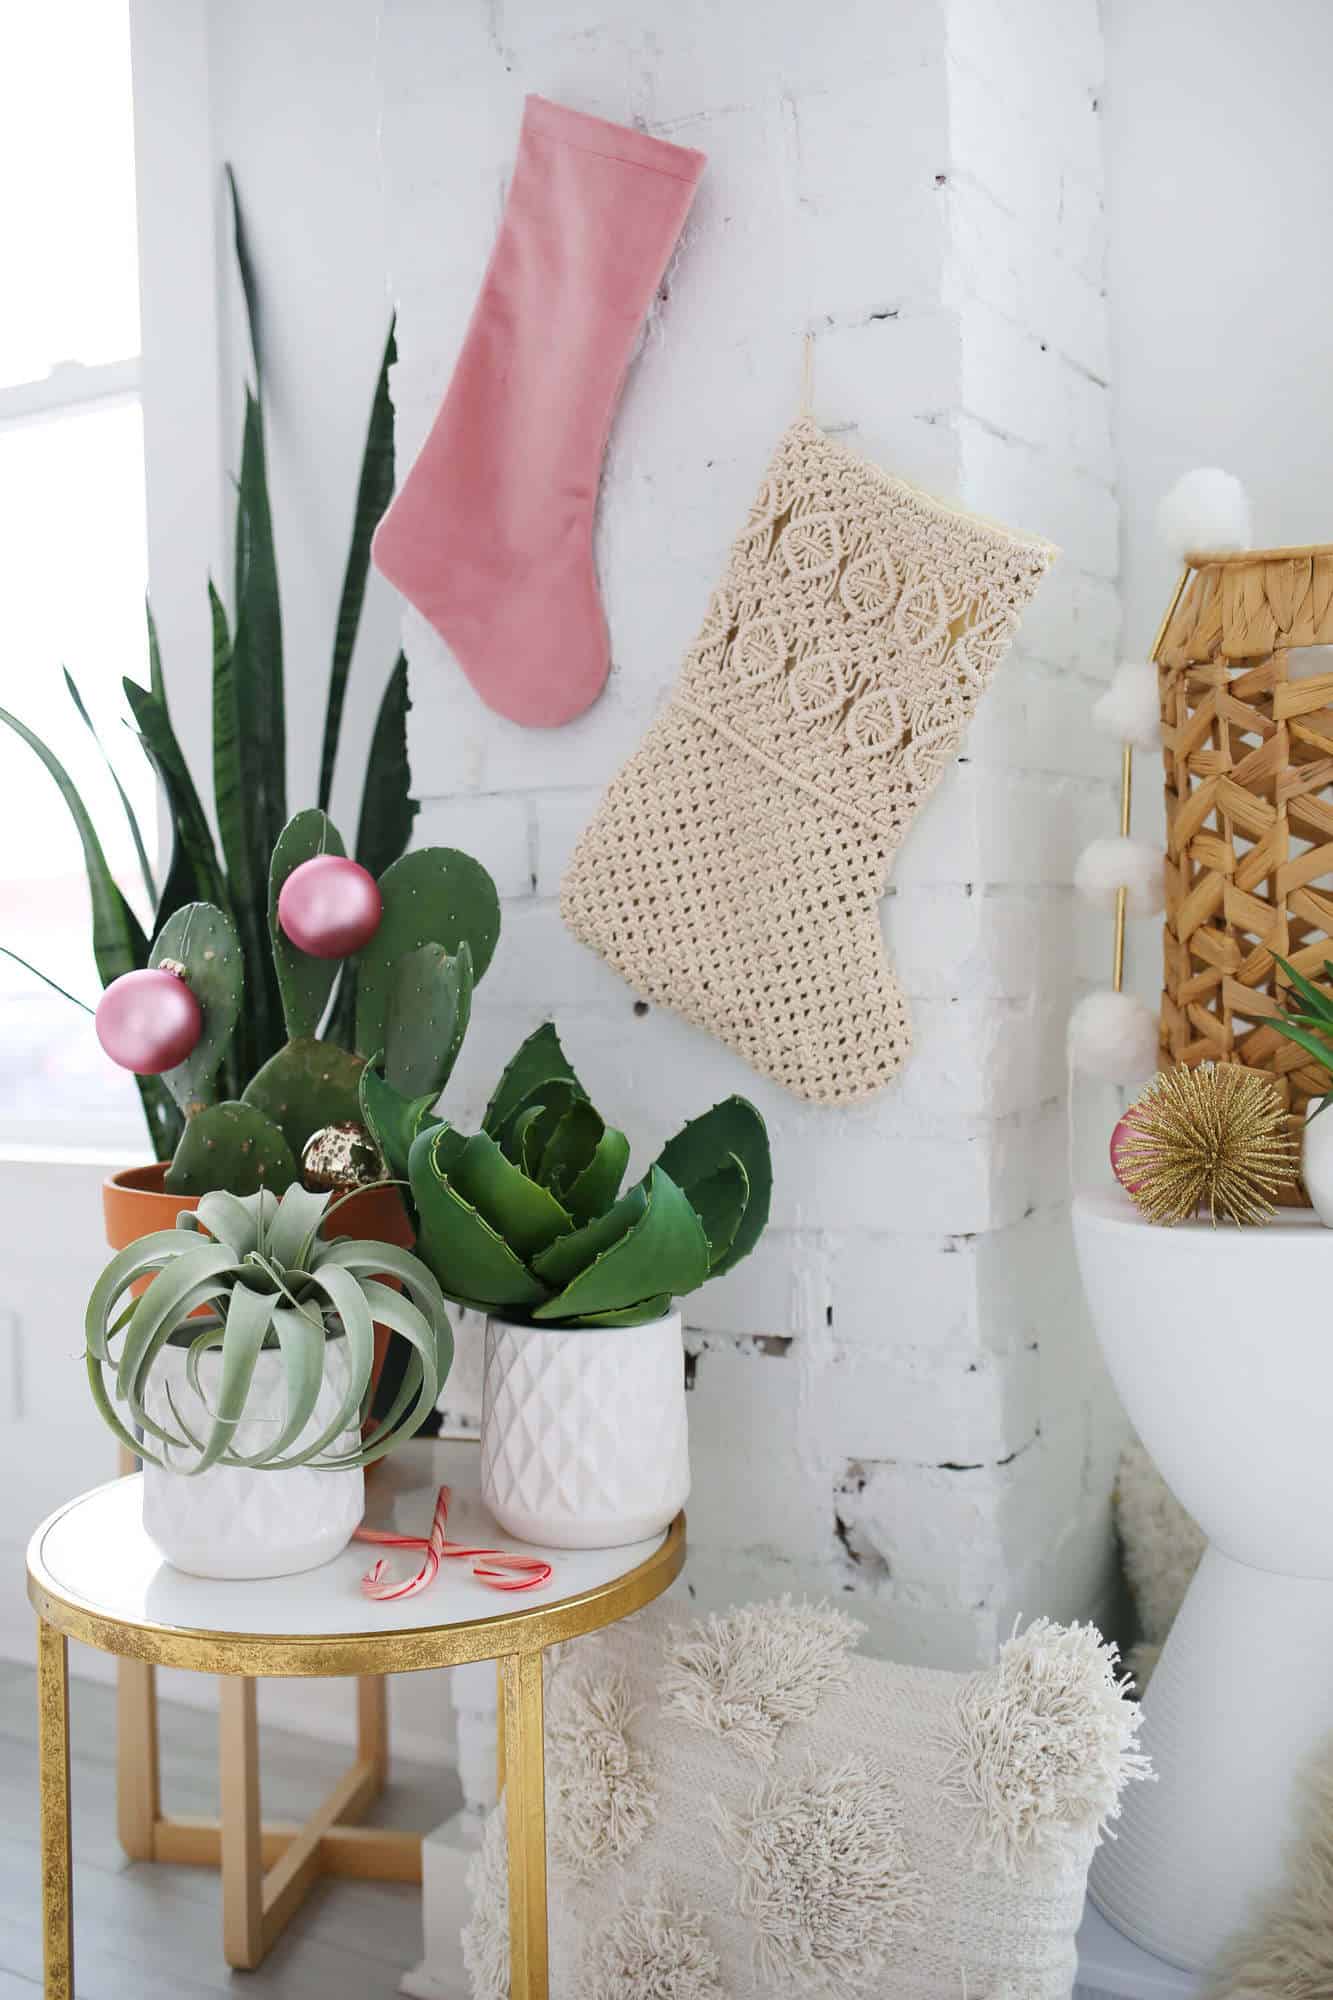 The wool felt pieces will create a sturdy pocket while the macrame design on the front will only reinforce it so that if you were really good this year, Santa can fill your stocking with something substantial! Since wool may shrink even more than it has, I suggest spot cleaning your stocking should it get candy cane or cookie crumbs on it.
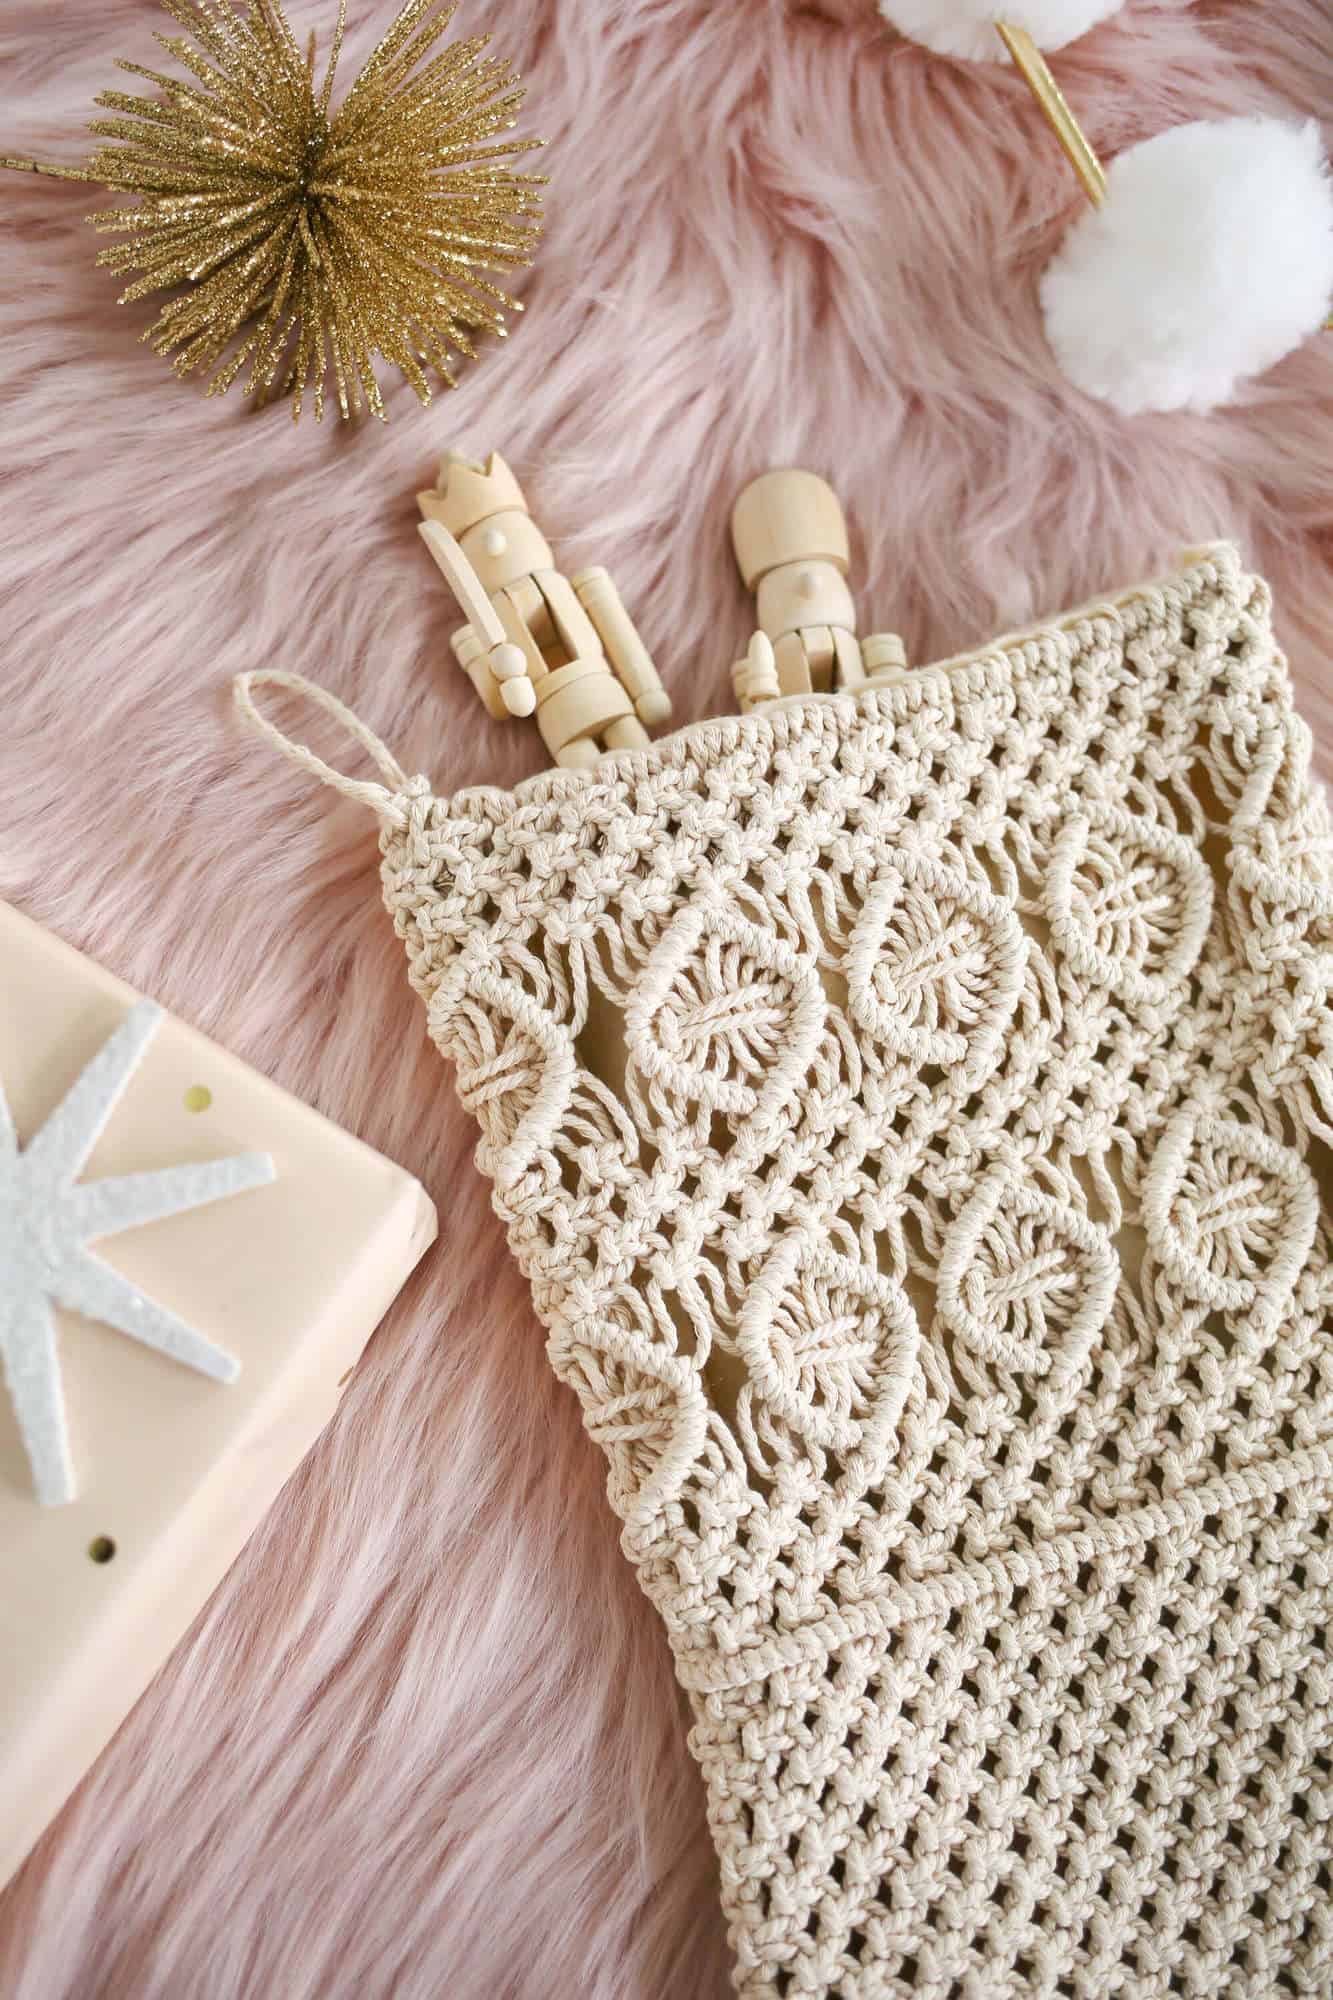 Wouldn’t miniature macrame stockings be sweet as a garland or ornaments? I can’t wait to see what you make for your own space this year! Looking for a woven stocking tutorial? This one from a few years back is still a favorite! – Rachel
Credits// Author and Photography: Rachel Denbow. Photos edited with A Color Story Desktop.
If you’re interested in learning more about macrame, one of my favorite books is Macrame at Home by Natalie Ranae. Her step-by-step knot section is one of the most helpful I’ve seen.
]]>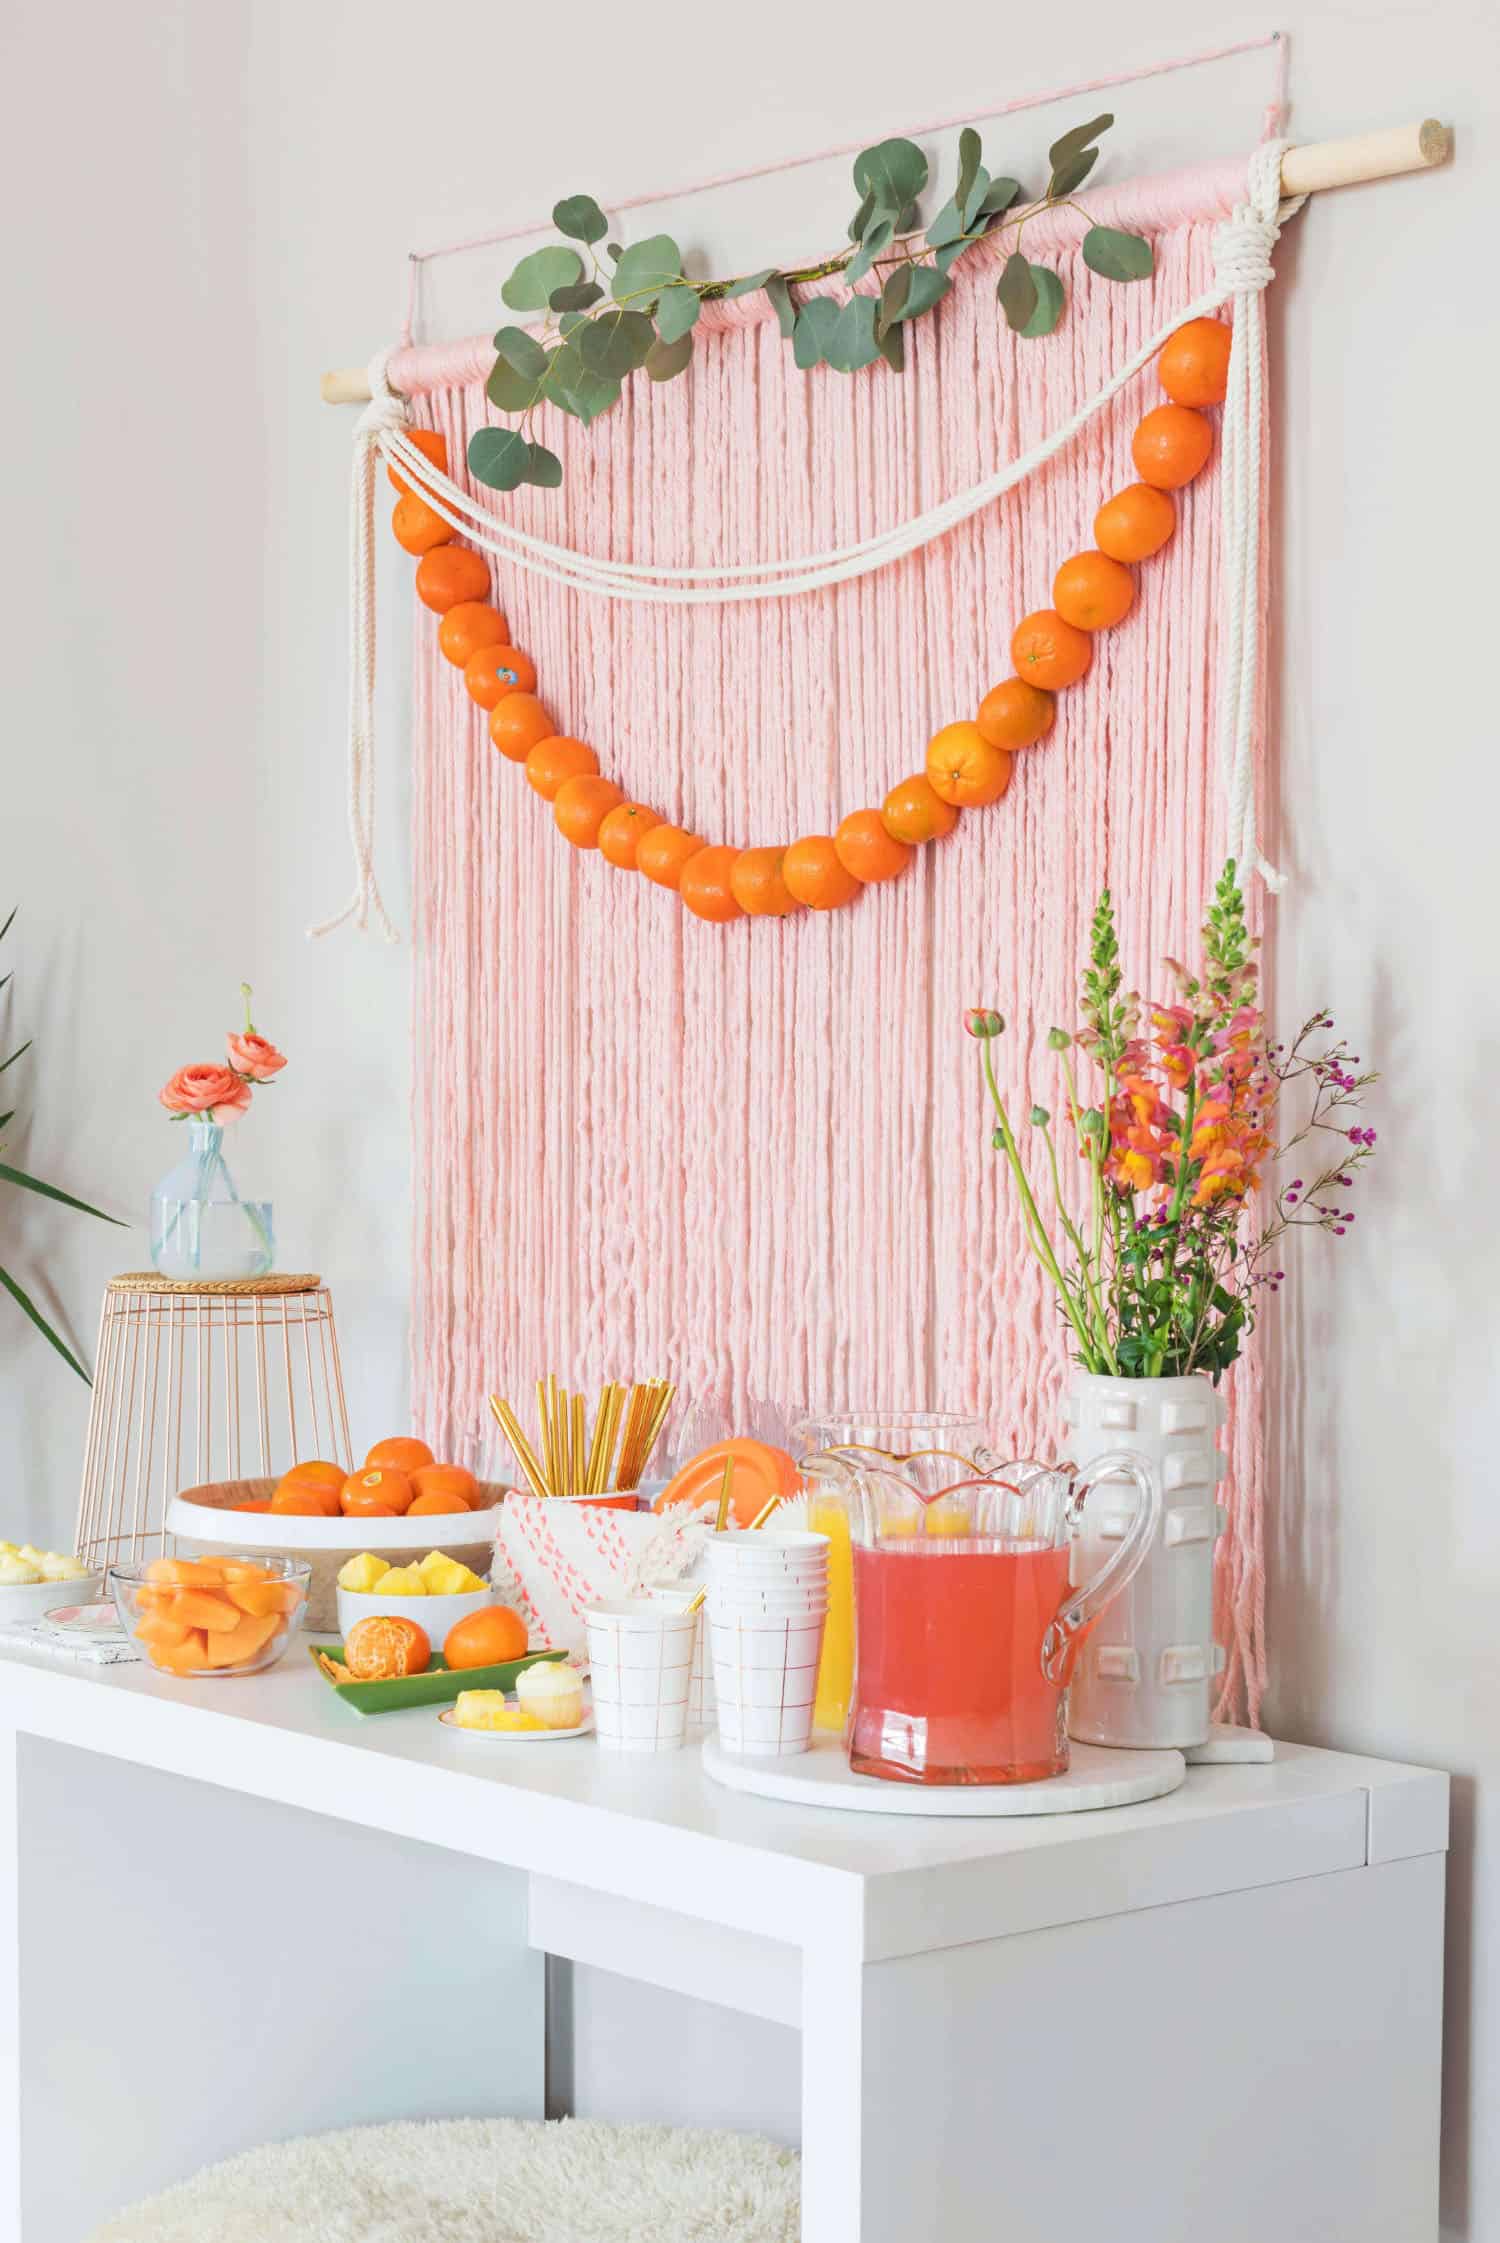
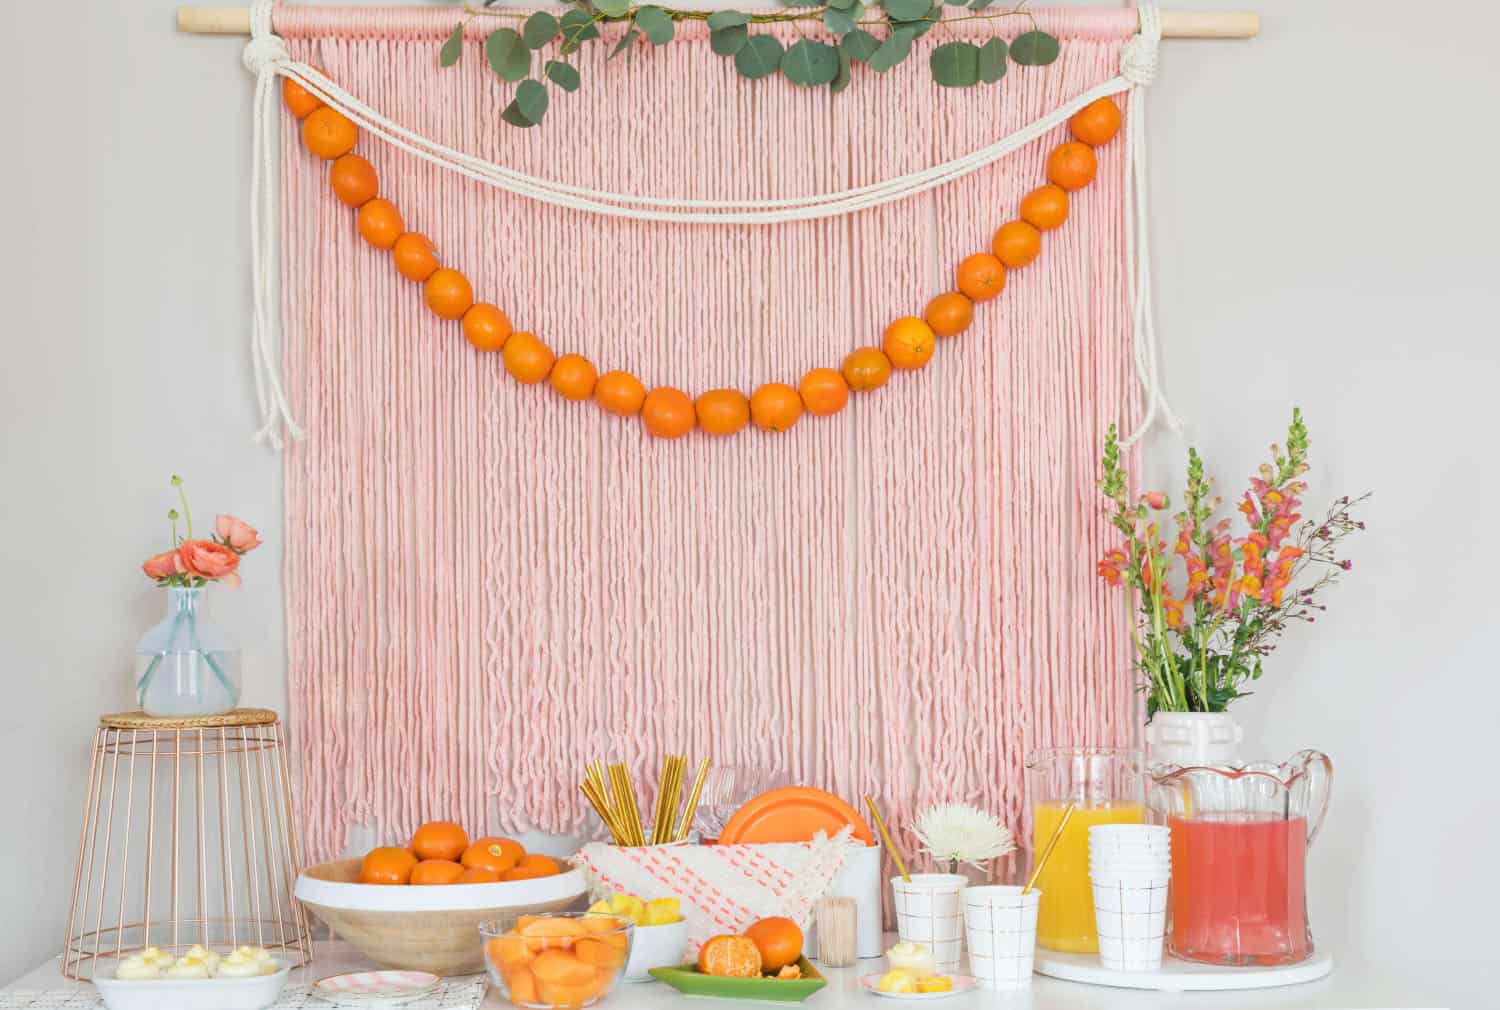 I’m a firm believer in decorating for special occasions! Three kids and a work-from-home job mean I have to decorate smarter, not harder—so my secret weapon is usually to focus in on one area for the most visual impact. I also love finding unexpected ways to decorate with food! We’ve partnered with Wonderful Halos to show you how to incorporate these delicious little seedless and easy to peel mandarins into your Easter brunch or any spring party to celebrate those you love. Not only do they have a beautiful color and a naturally sweet flavor but the party clean-up will be a breeze!
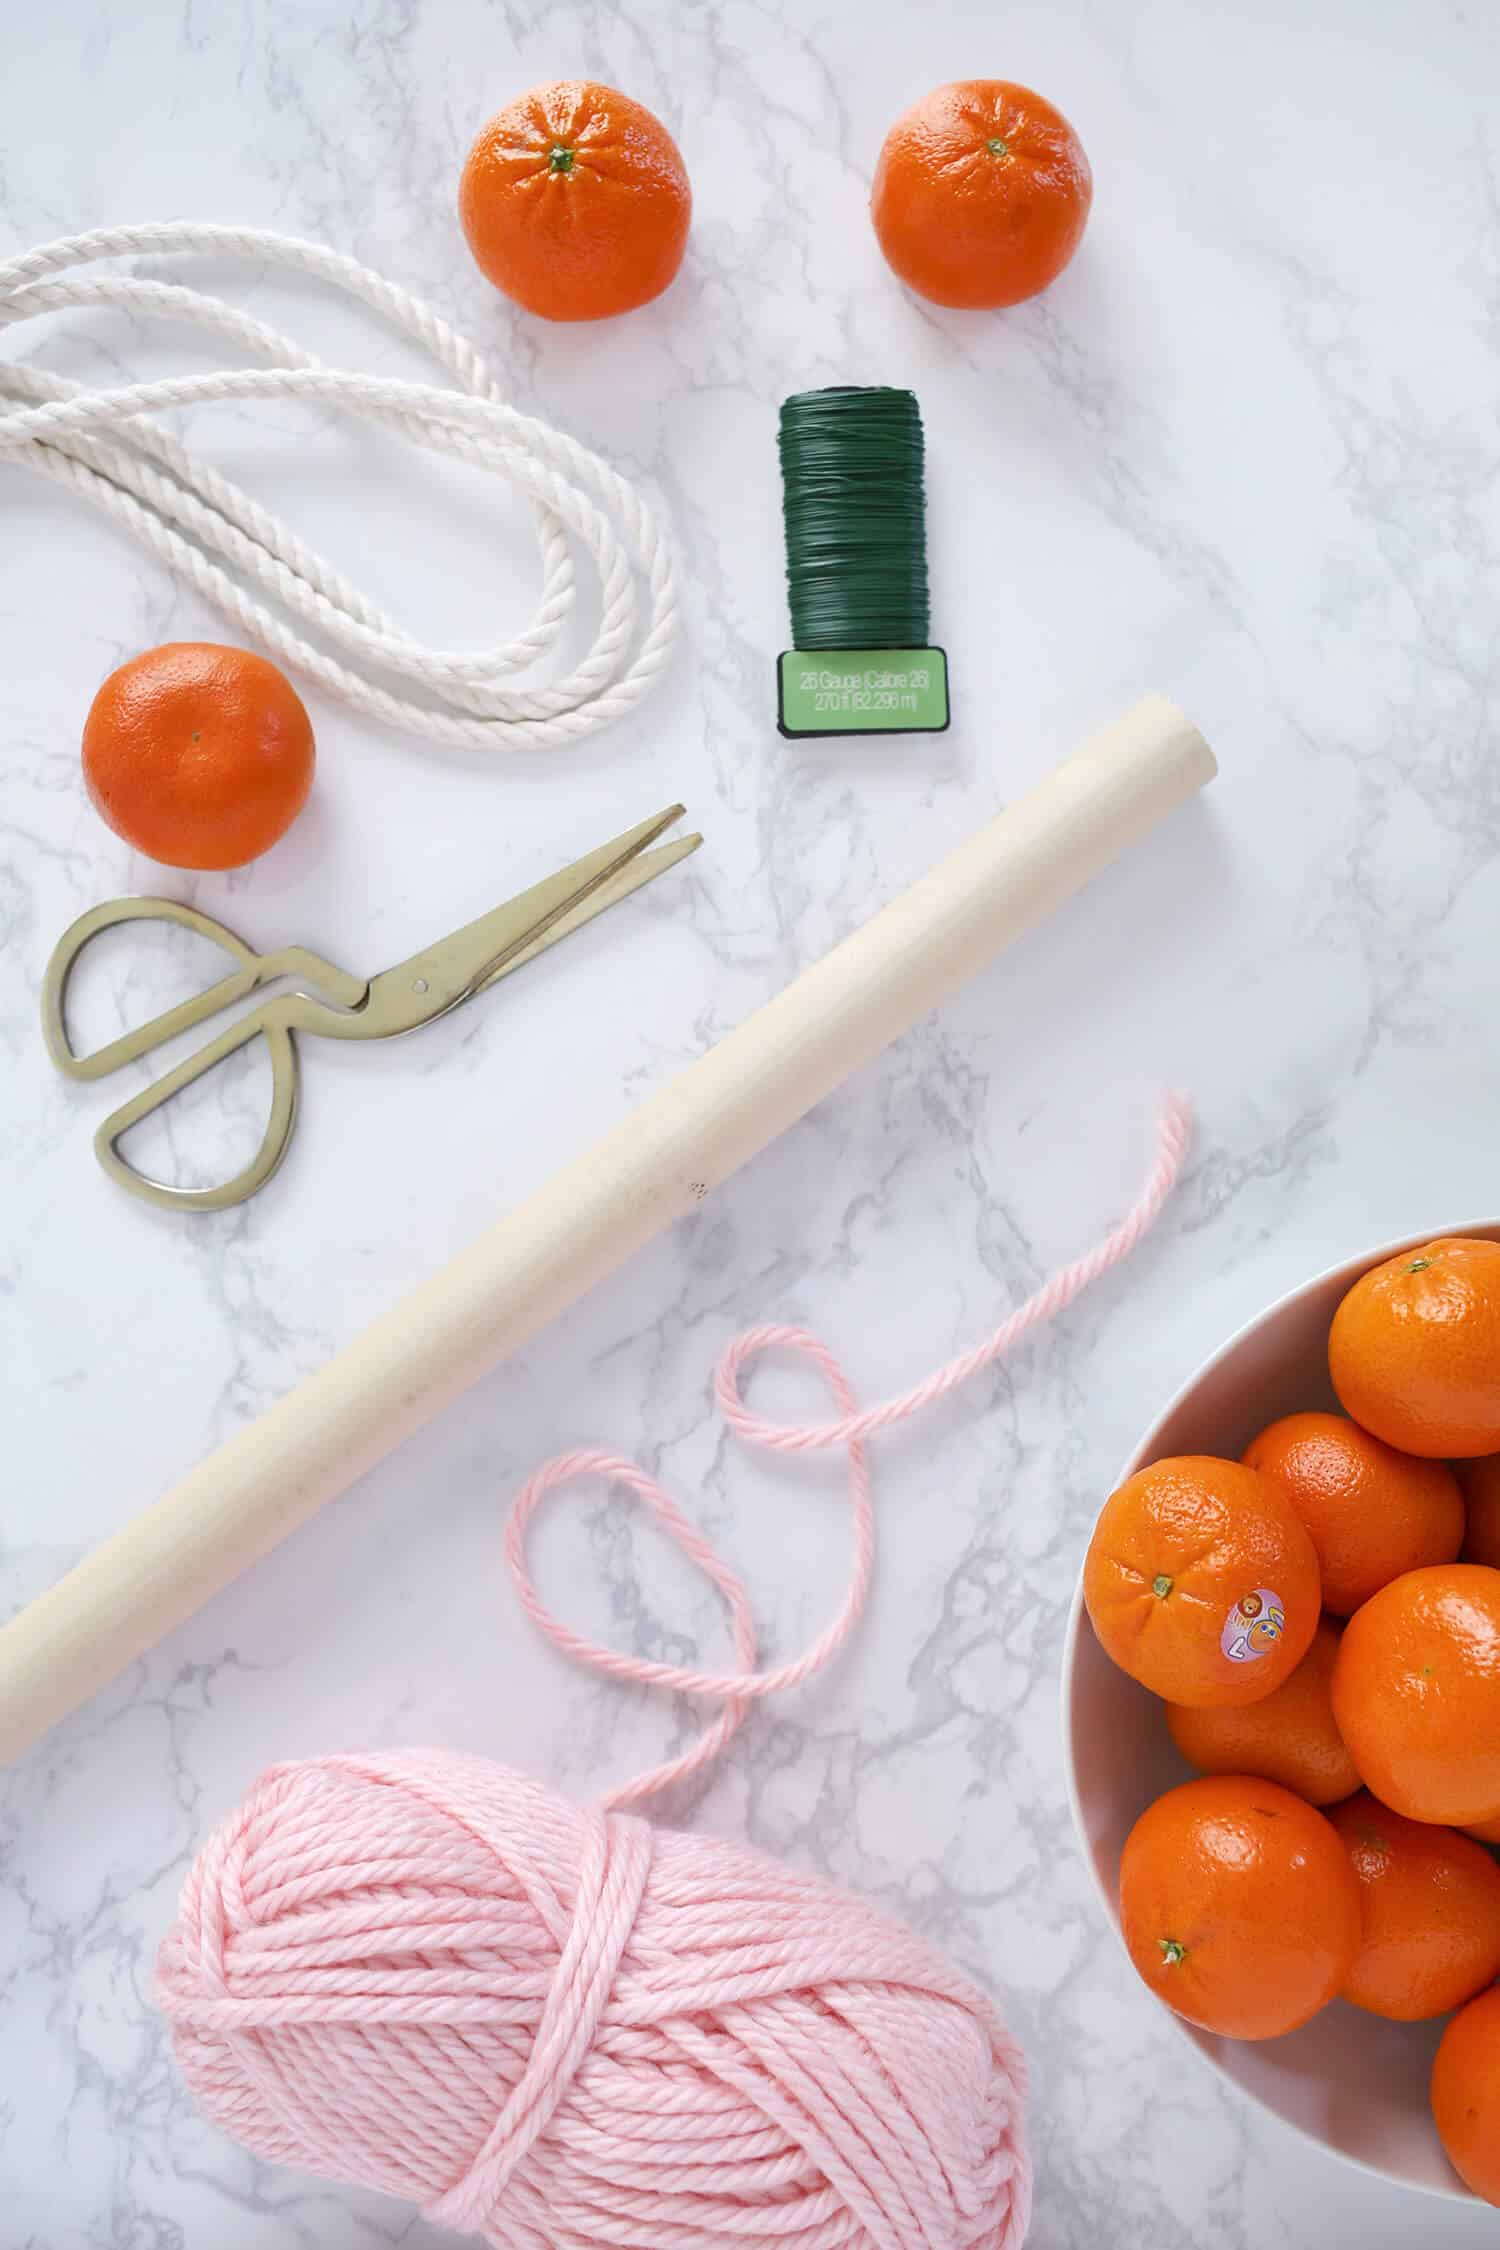 Supplies:
–1″ x 48″ wooden dowel
-one bag of Wonderful Halos
–two 100g skeins of chunky yarn
–26 gauge wire
-scissors
-6 stems of eucalyptus (or other leafy branches)
-21′ of 1/2″ macrame rope
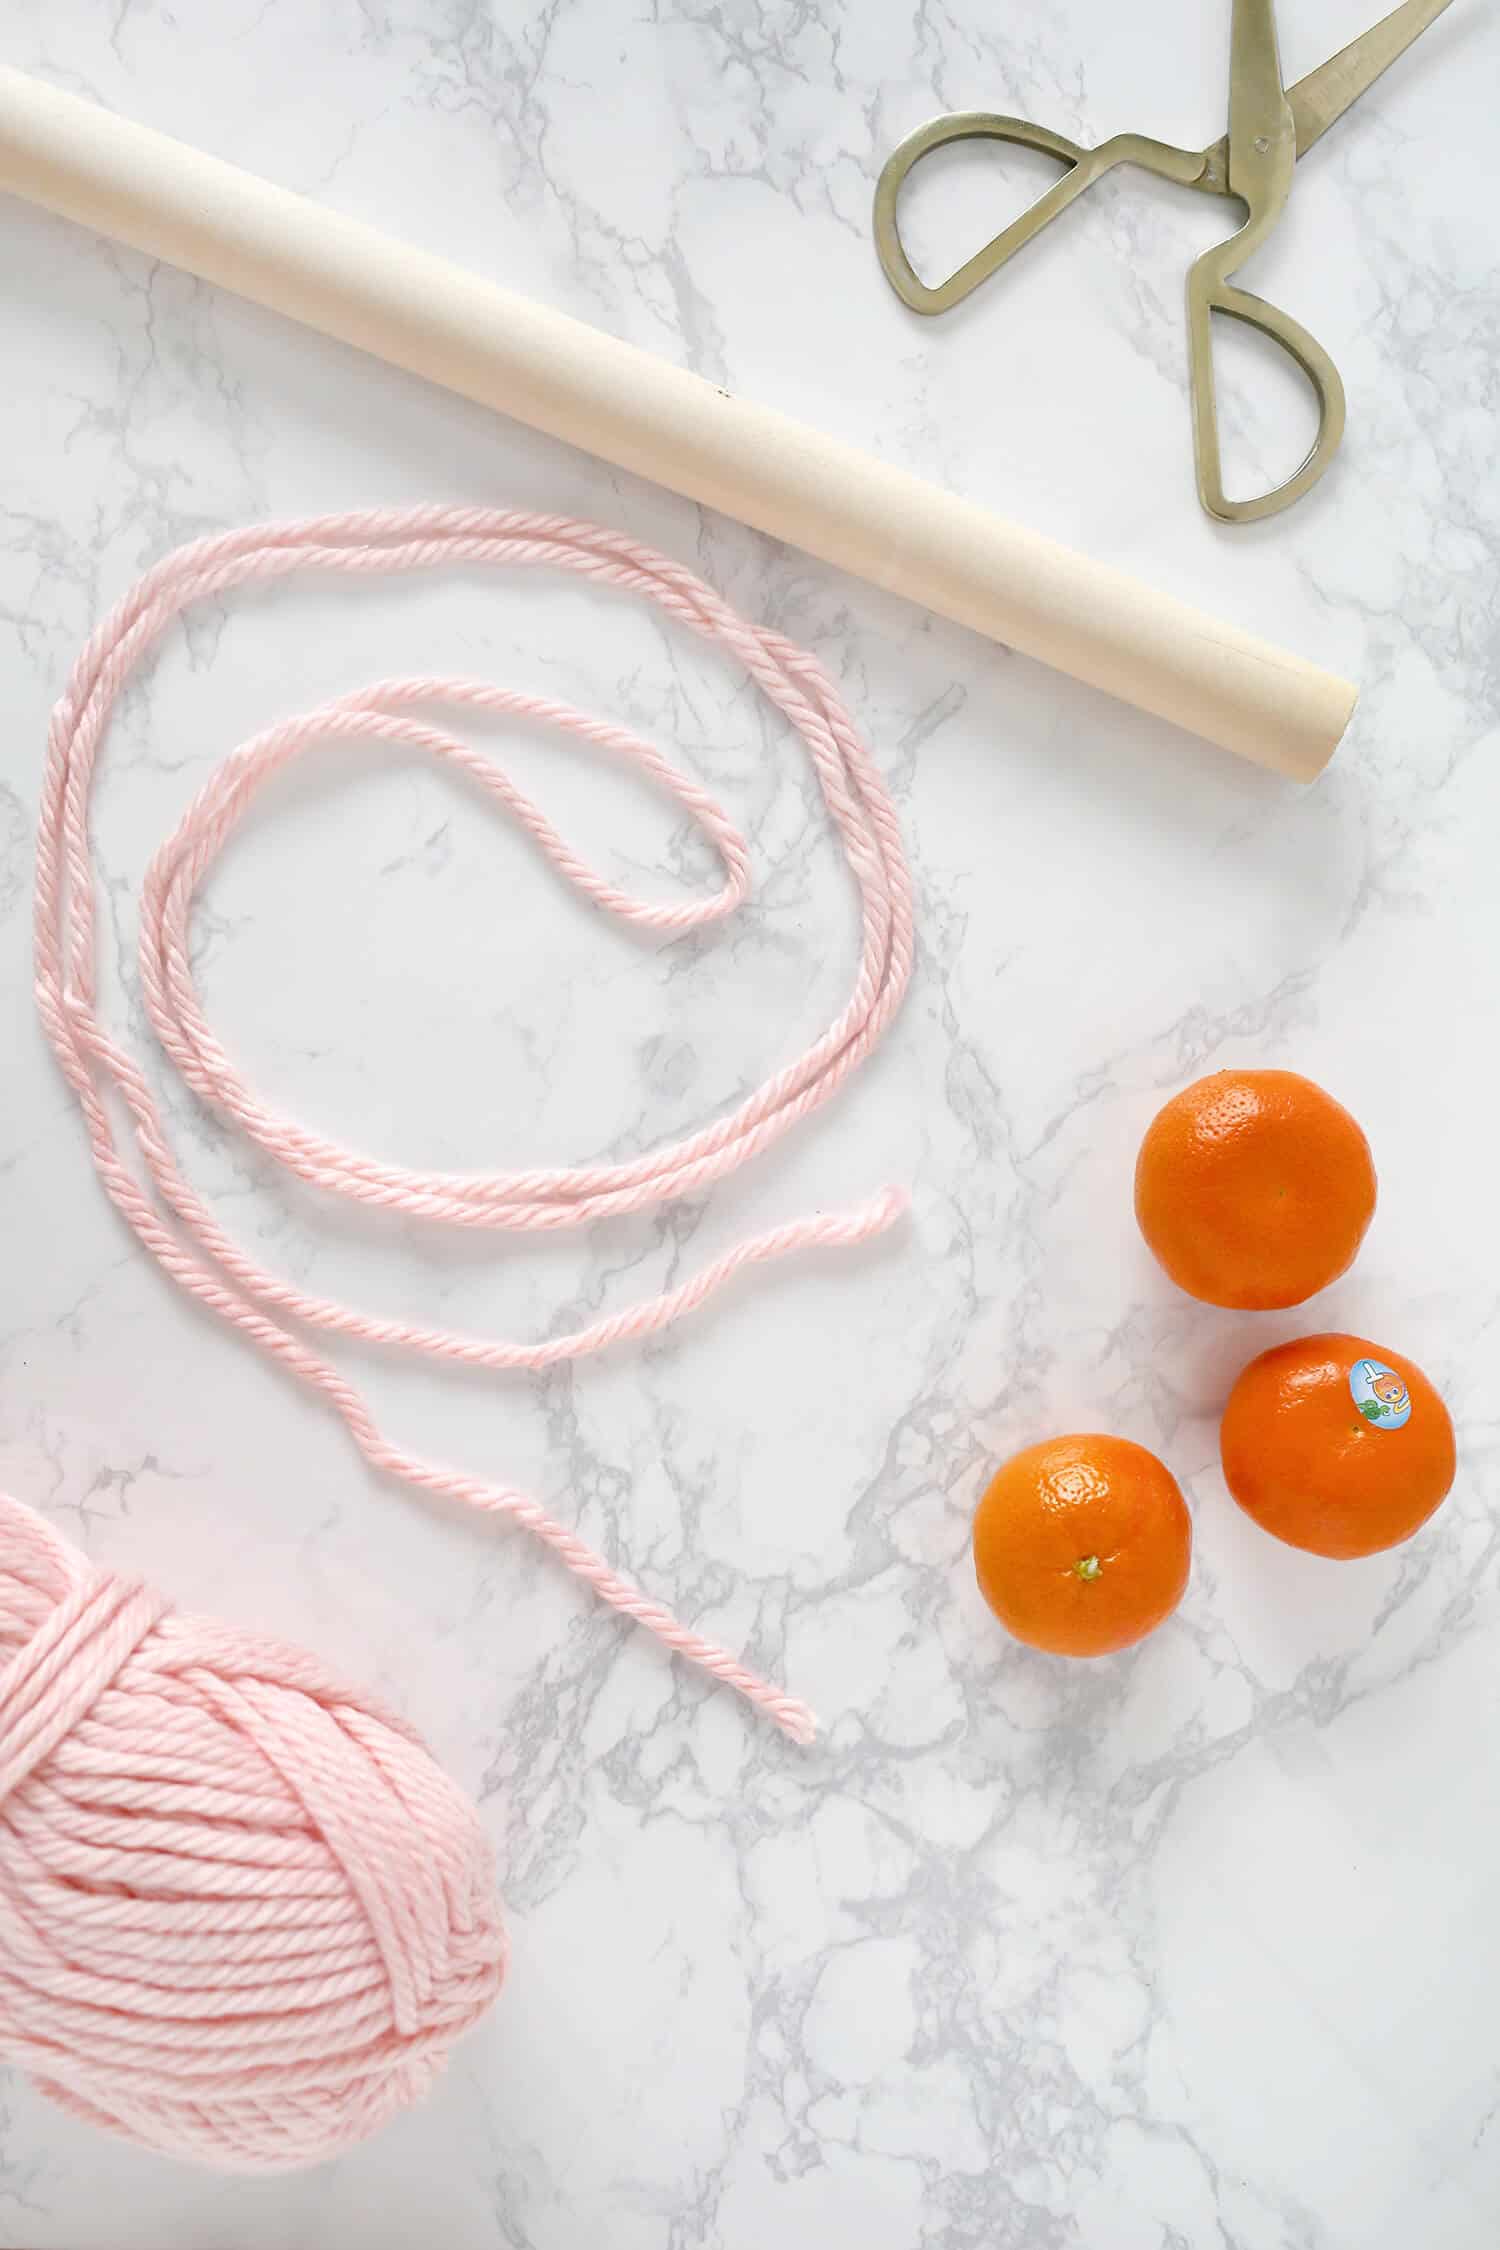 Measure how long you want your yarn strands to hang from your wooden dowel, add two inches, and then double that. Use this strand as your template to cut the rest of your strands. Another easy trick is to just make them as long as your wingspan if you’d like this part to go faster. Cut about 60 of these. You may need more but this is a good start.
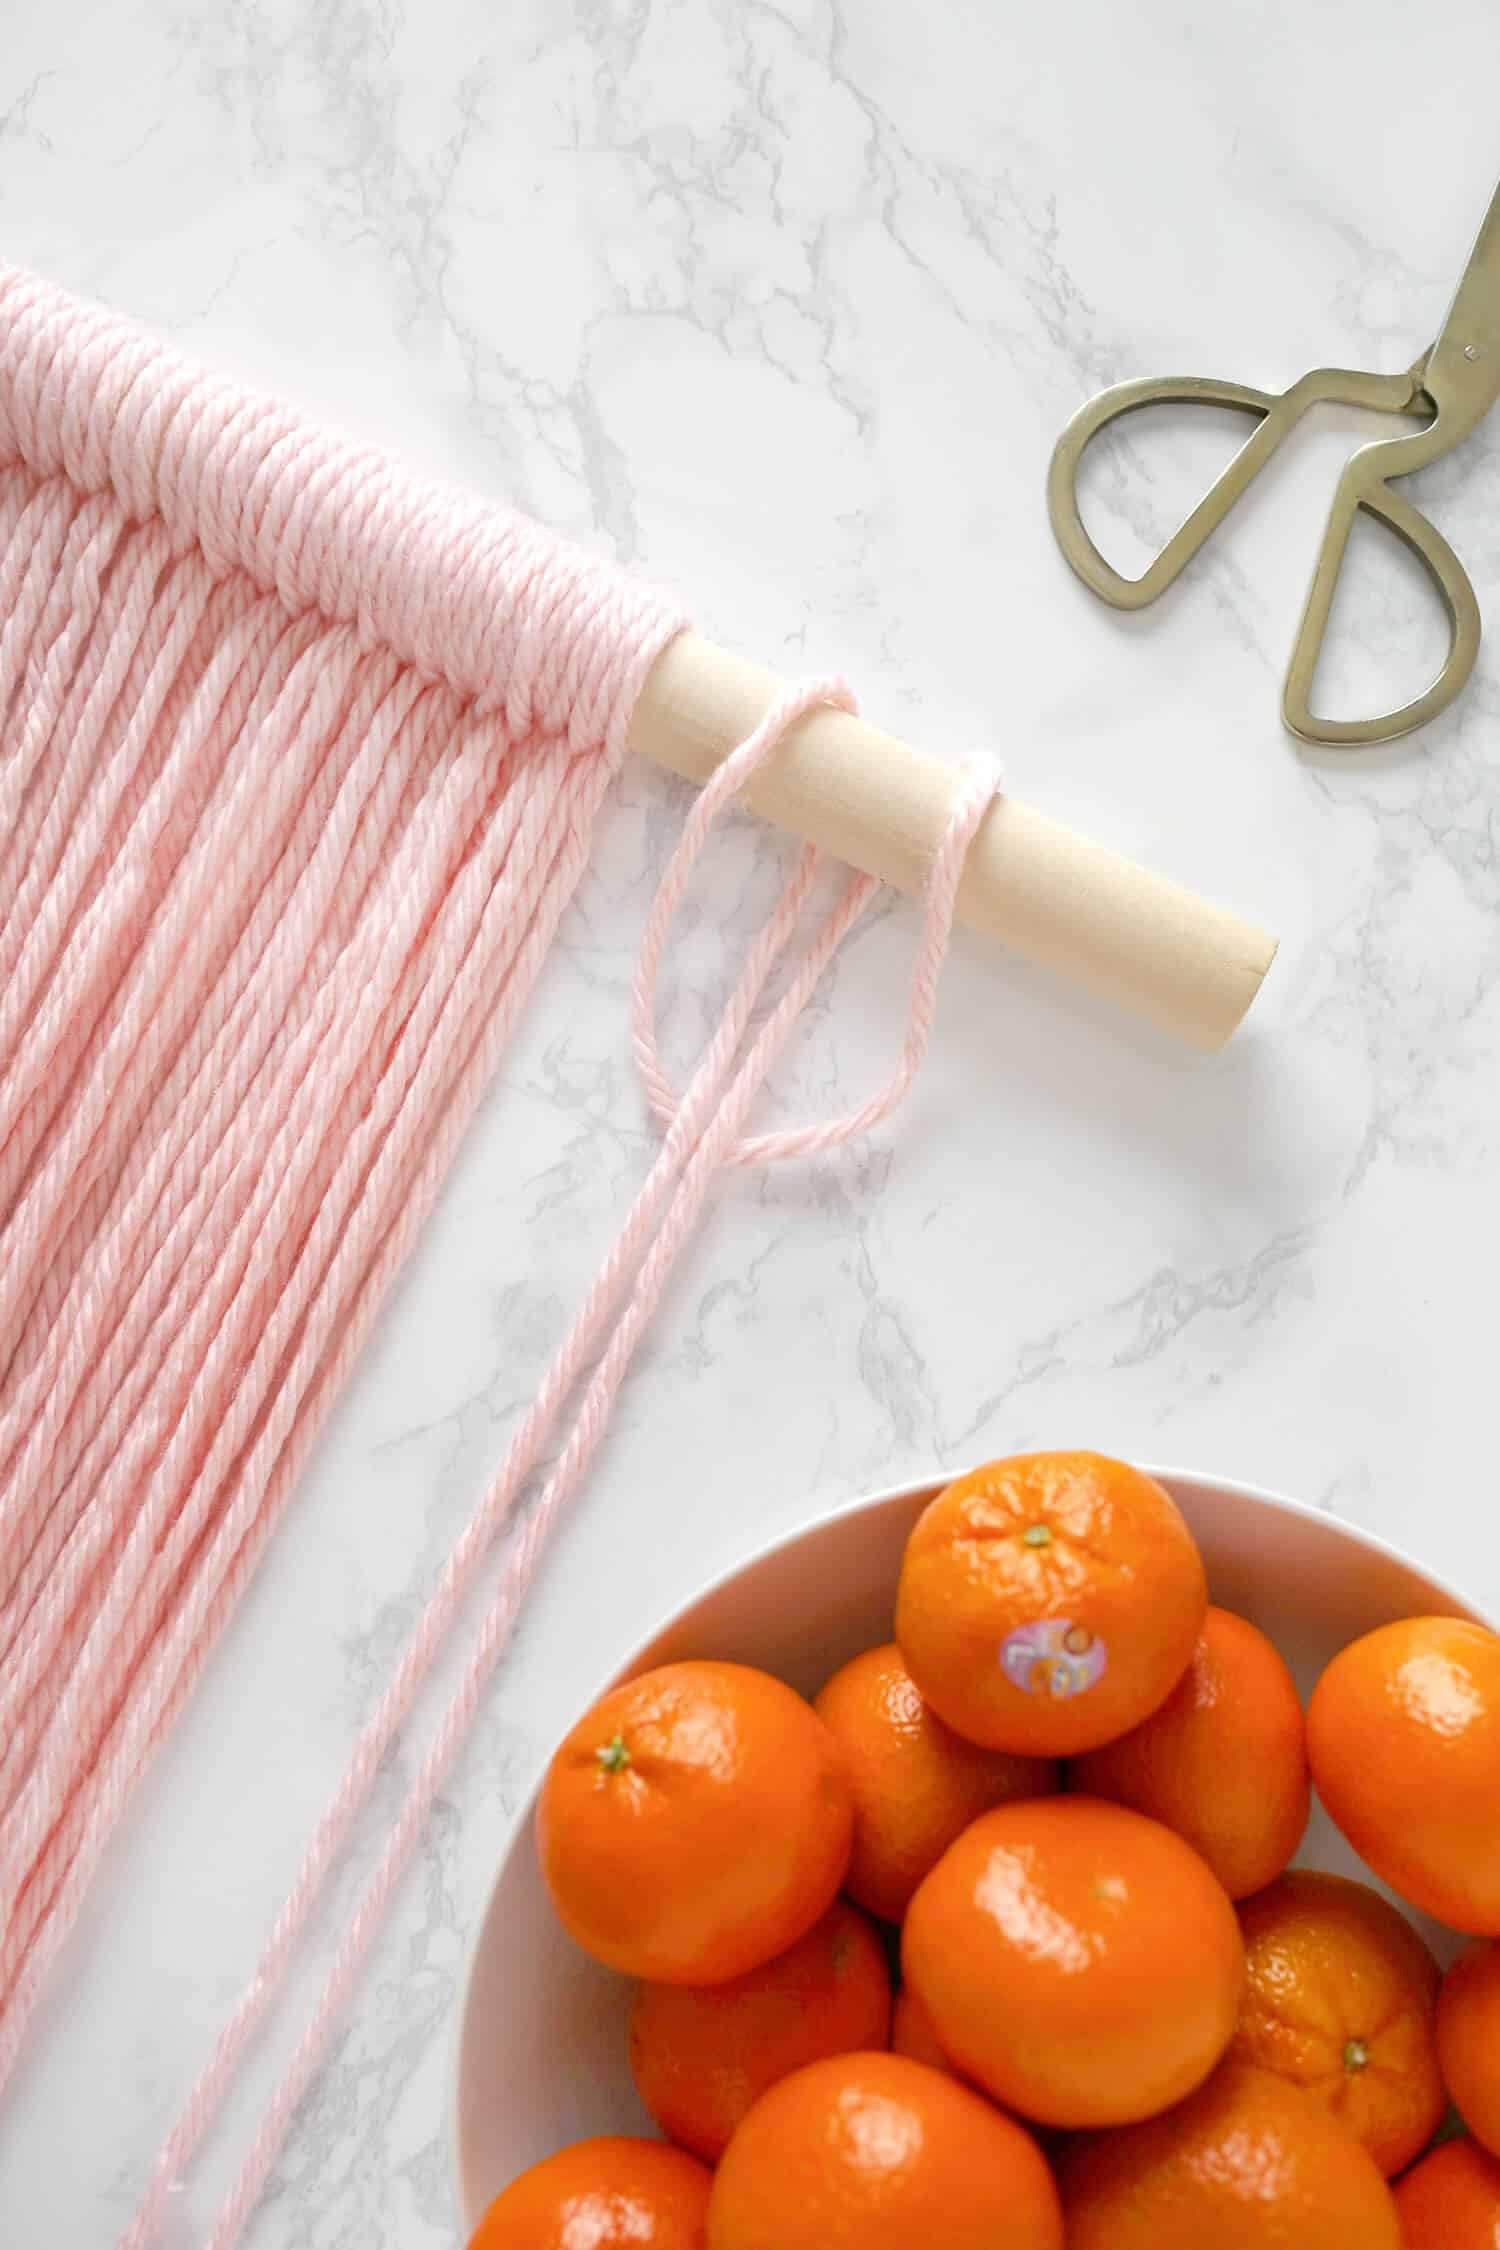 Lay your dowel on a surface and create a Lark’s Head knot with your first strand of yarn. You can do this by folding your strand in half and placing the loop under your dowel rod. Then wrap the loop over the dowel rod and pull the two ends through the loop. Tighten by pulling on the loose ends. Repeat this with the rest of your strands so that they are consistent. You shouldn’t be able to see much dowel rod in between your strands as you add them. Cut more strands if you need them.
 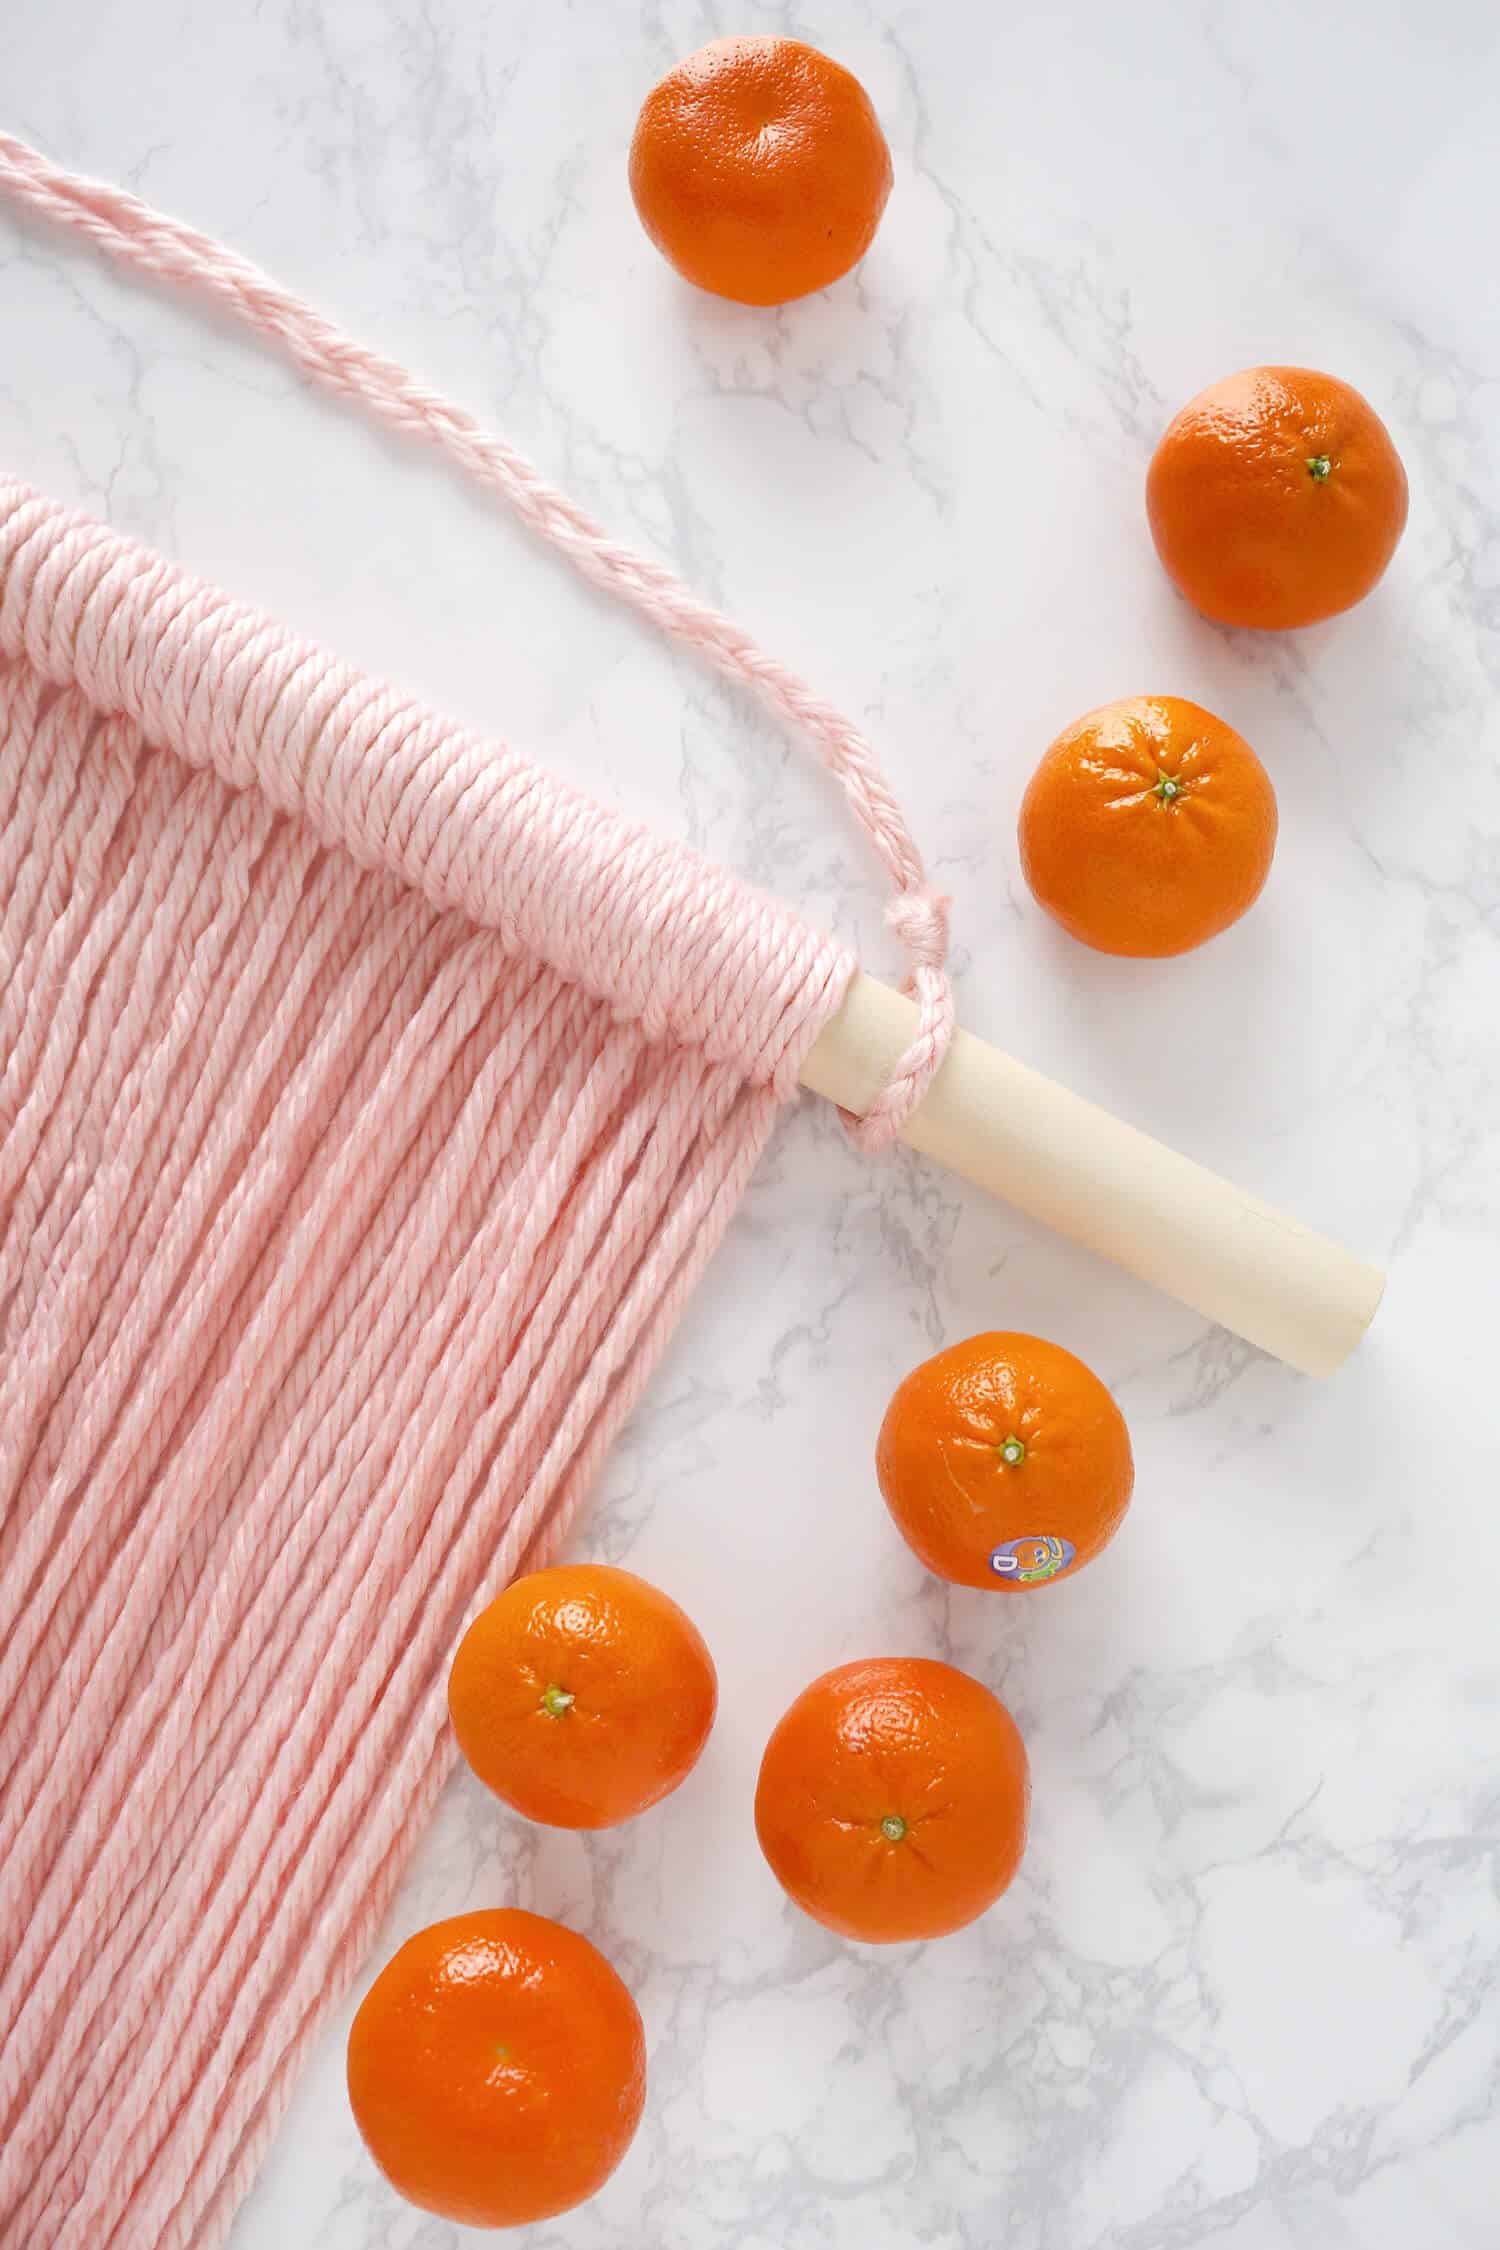 To make your hanger, cut three strands of yarn that measure 5′ long each. Braid these three strands together and then knot one end on either side of your dowel rod. Trim your ends.
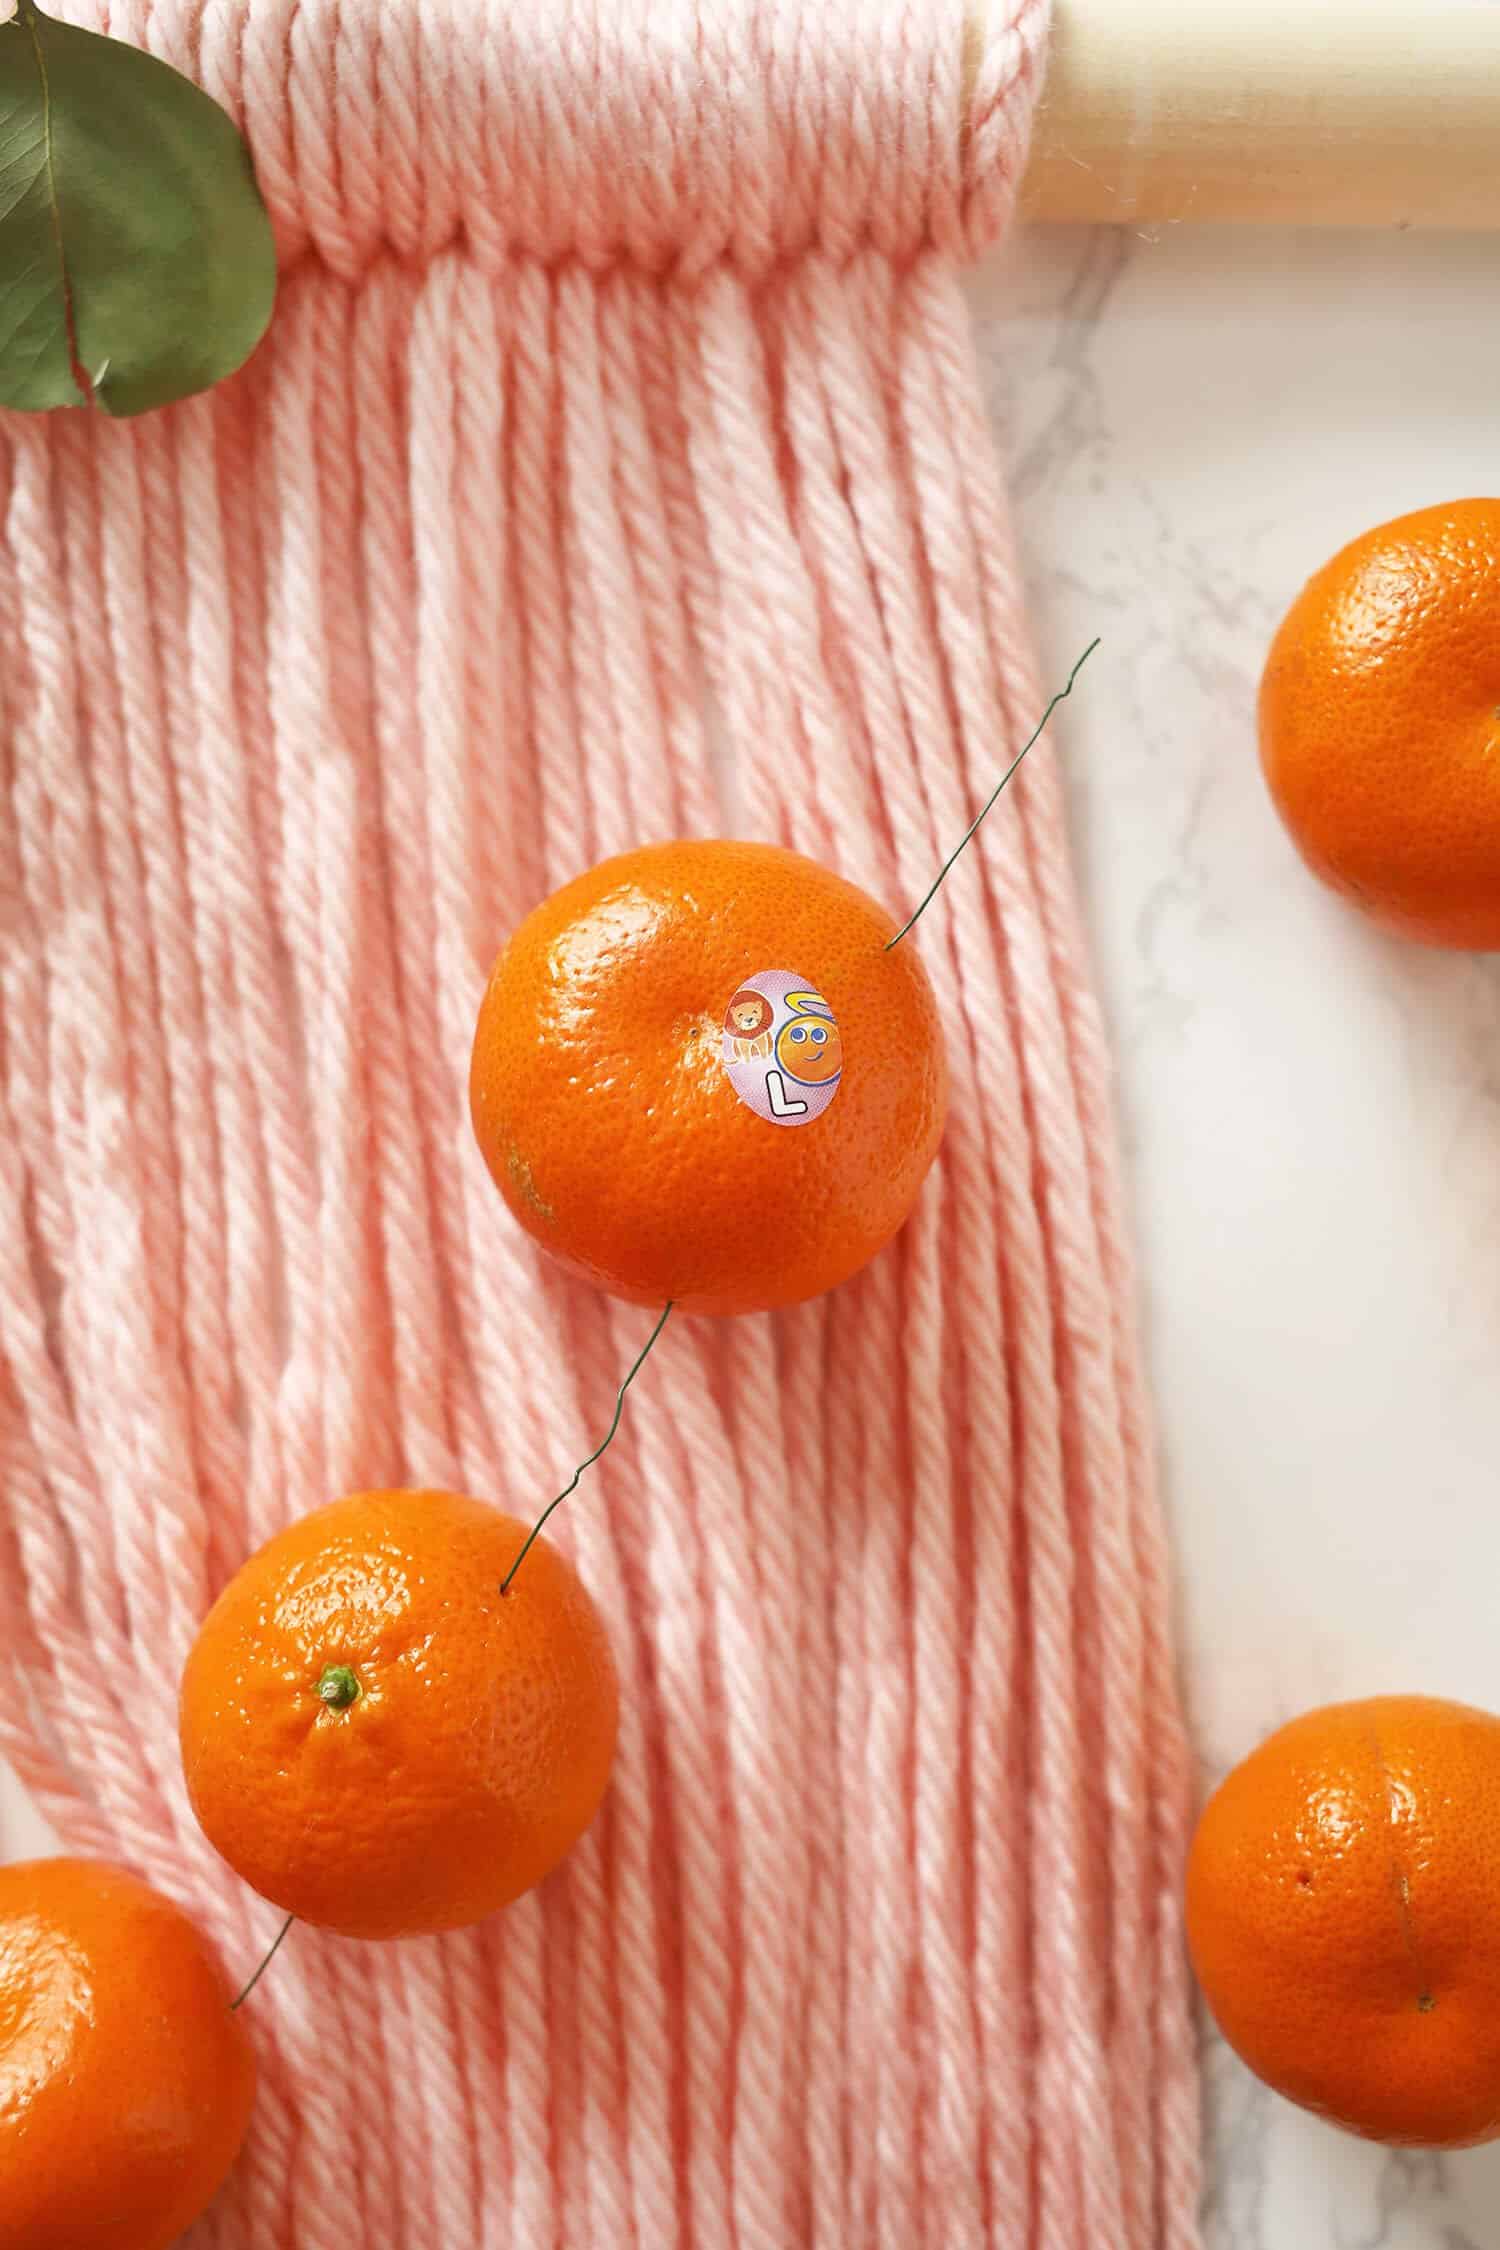 Cut a 6′ length of wire and straighten one end. Hold your Wonderful Halo so that you can pierce through the widest part of the fruit. It won’t always go straight through, but as long as it isn’t right under the peeling, it’ll hold. Gently slide each fruit down until you have about 22 on your wire. Since the wire is so thin, you shouldn’t have any problems with your fruit leaking juice everywhere.
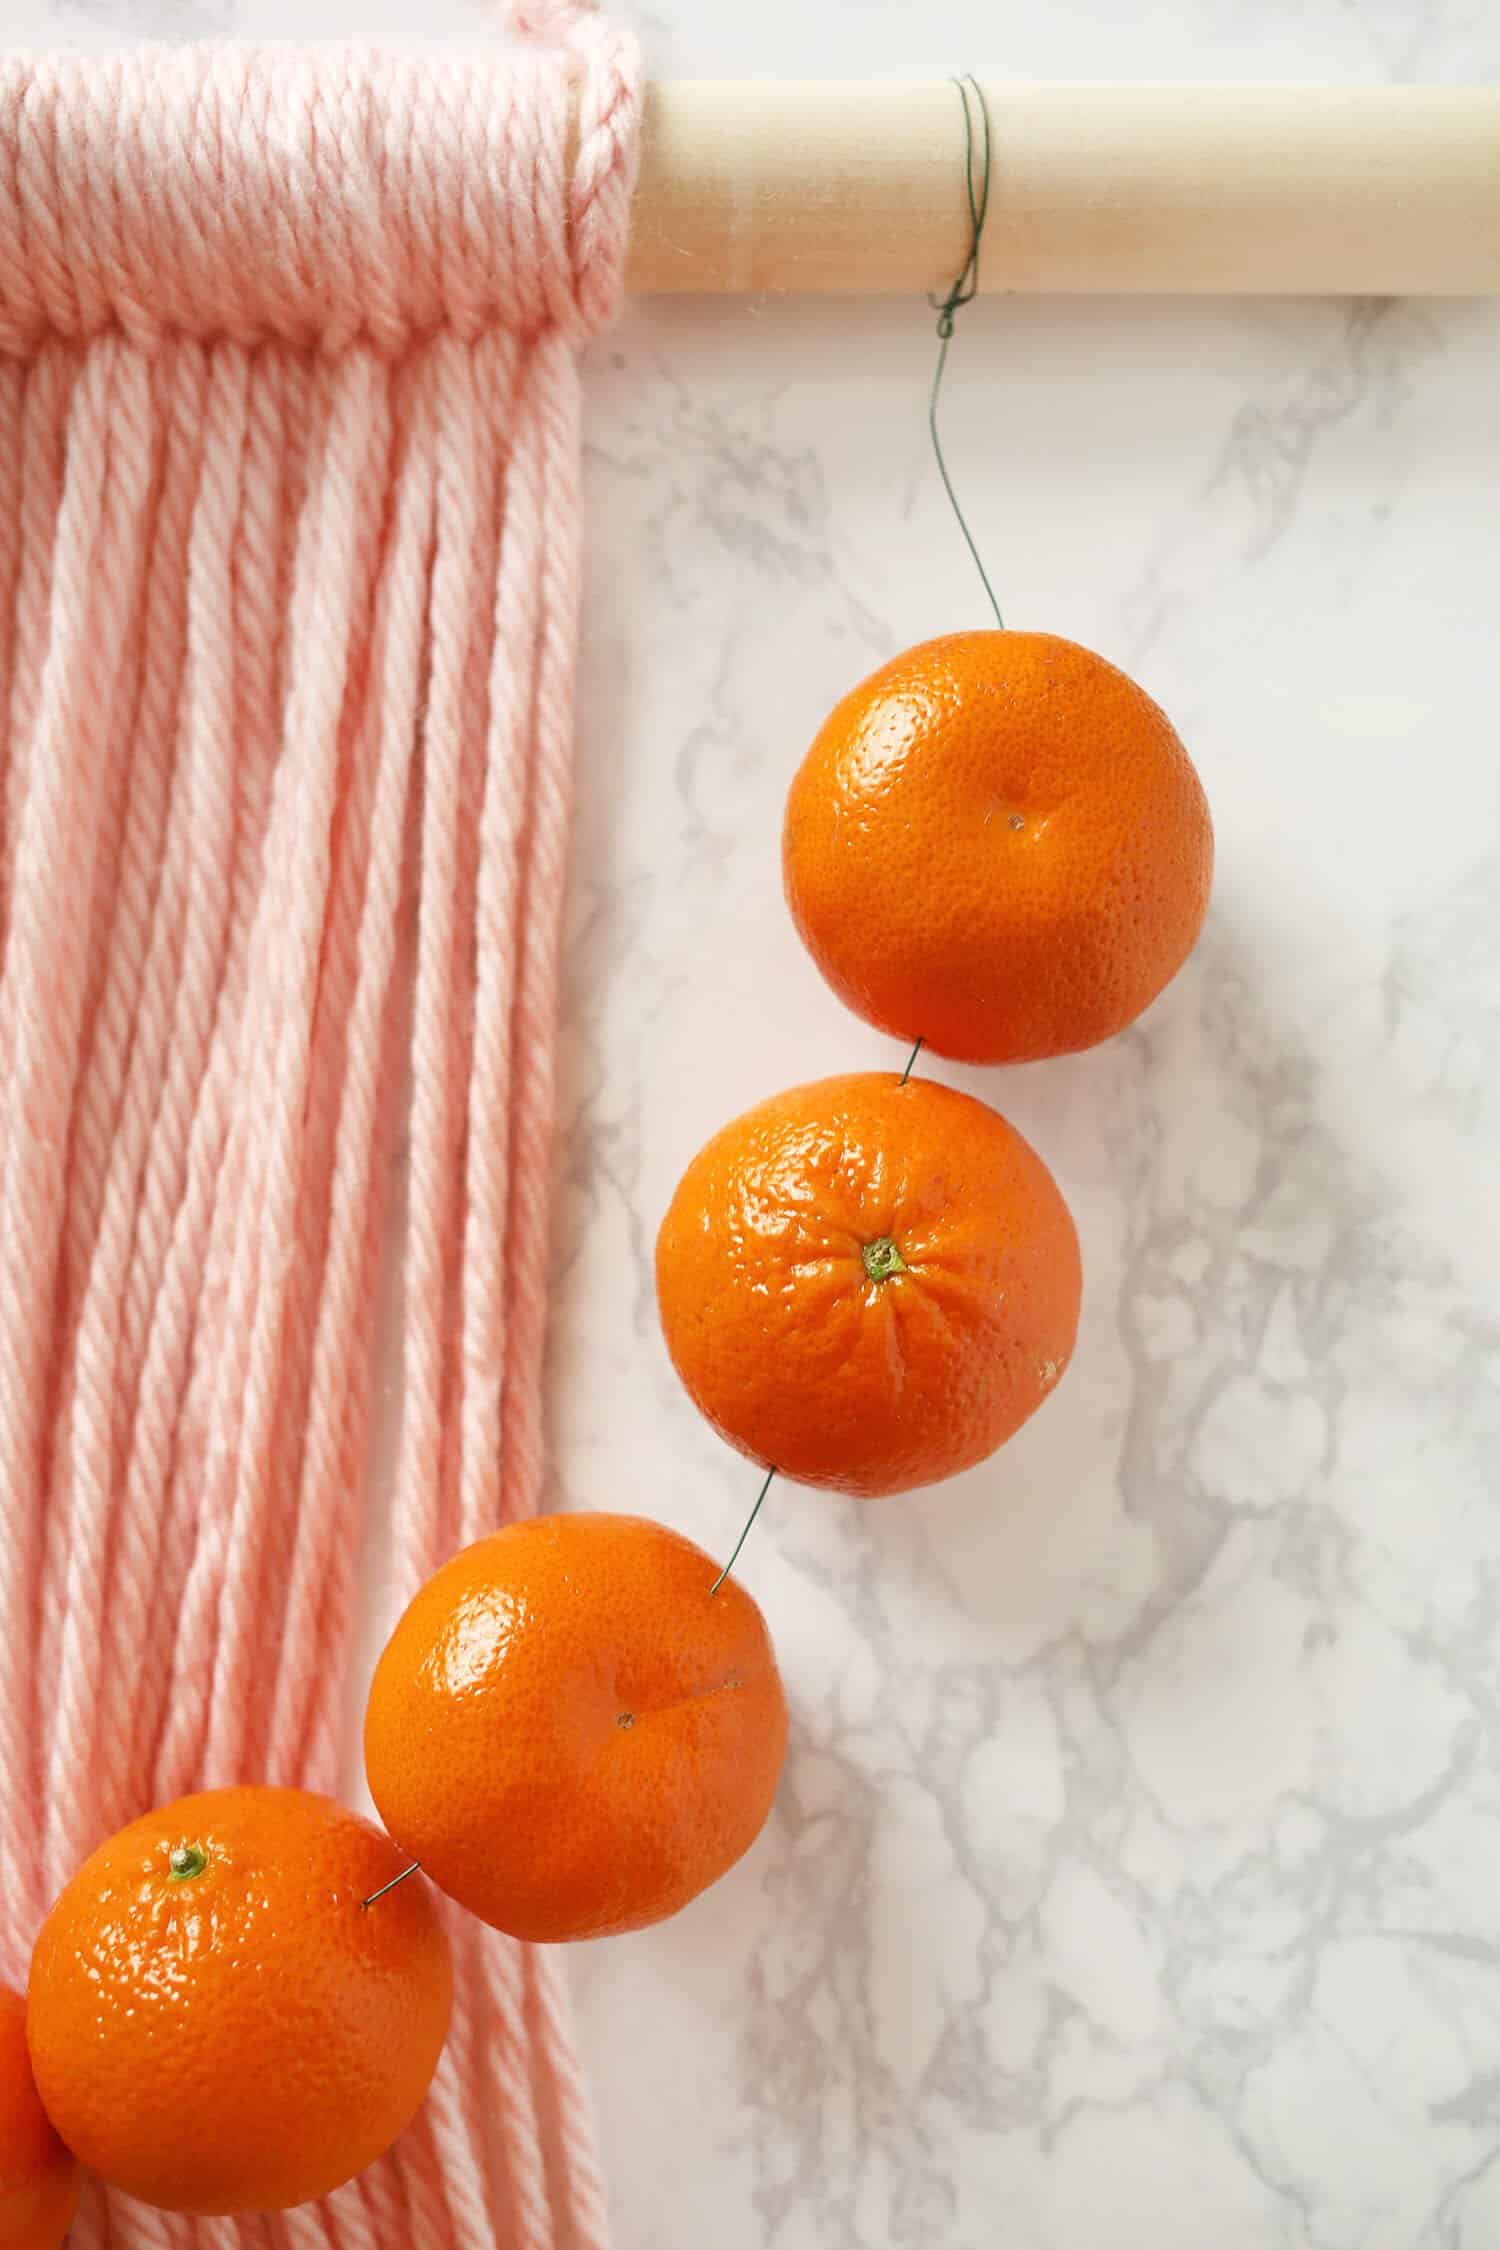 On a flat surface, tie both ends of your wire twice around your dowel and then twist your ends tightly. Slide the wire on the dowel until it’s next to your hanger.
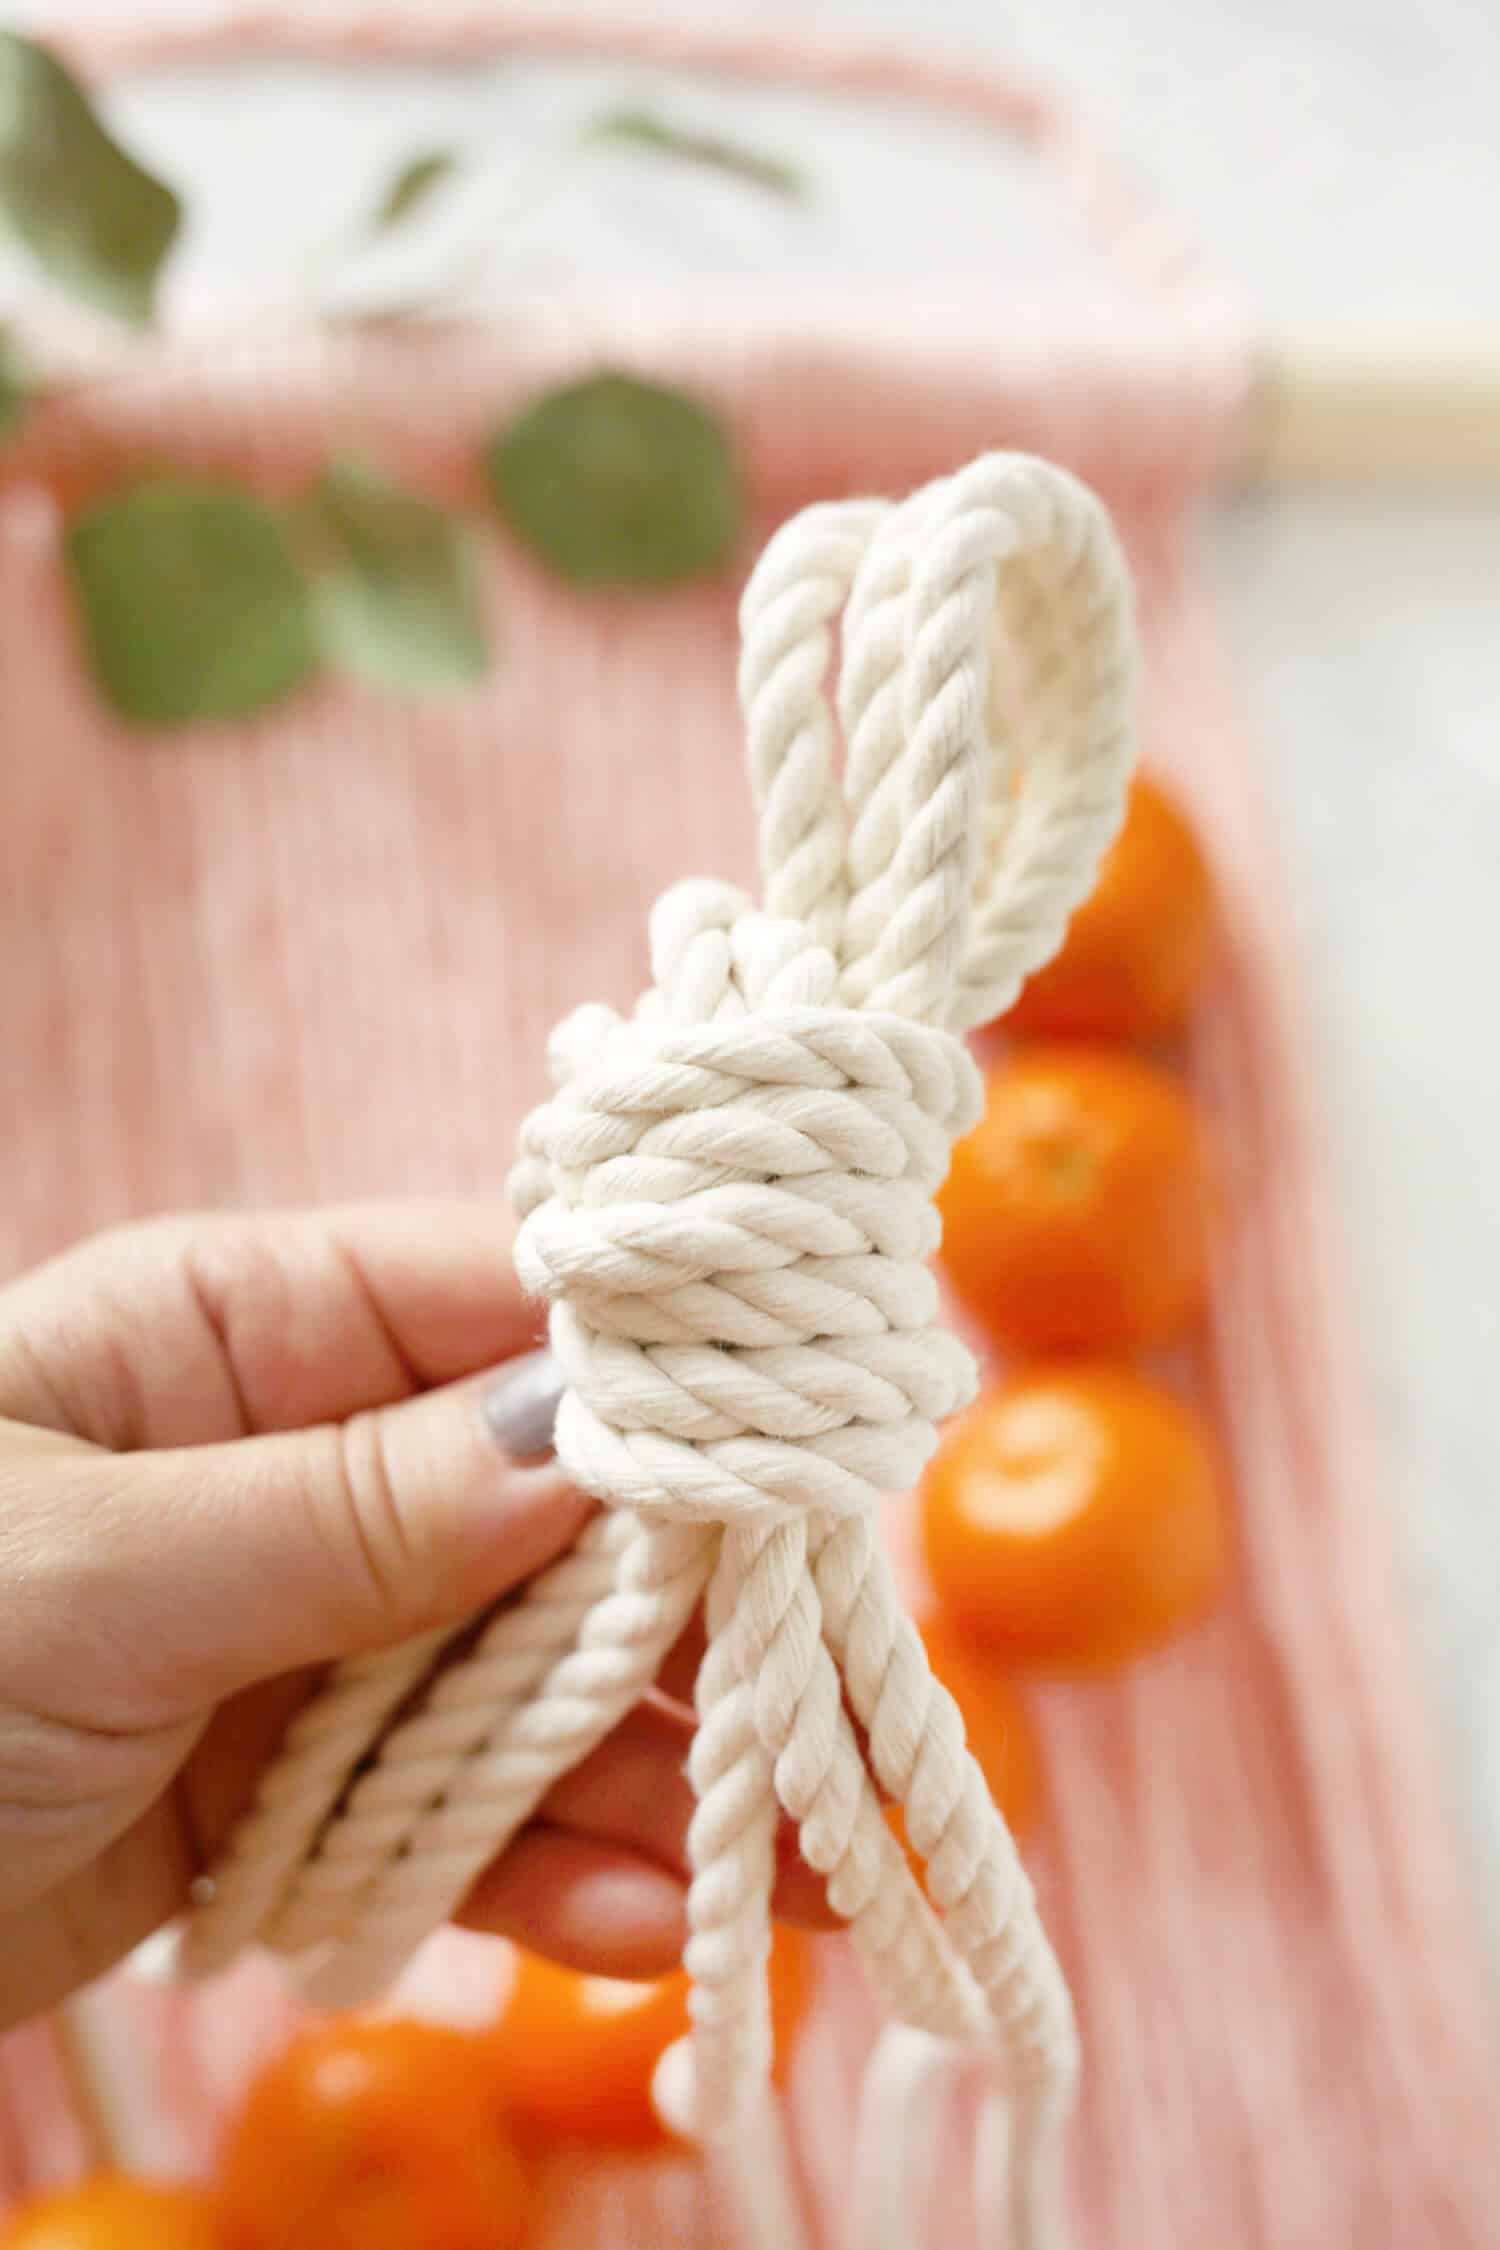 Cut three equal strands of rope. Holding all three strands, measure down about 2.5′ and tie a loop knot. Make sure your loop fits gently over your dowel rod.
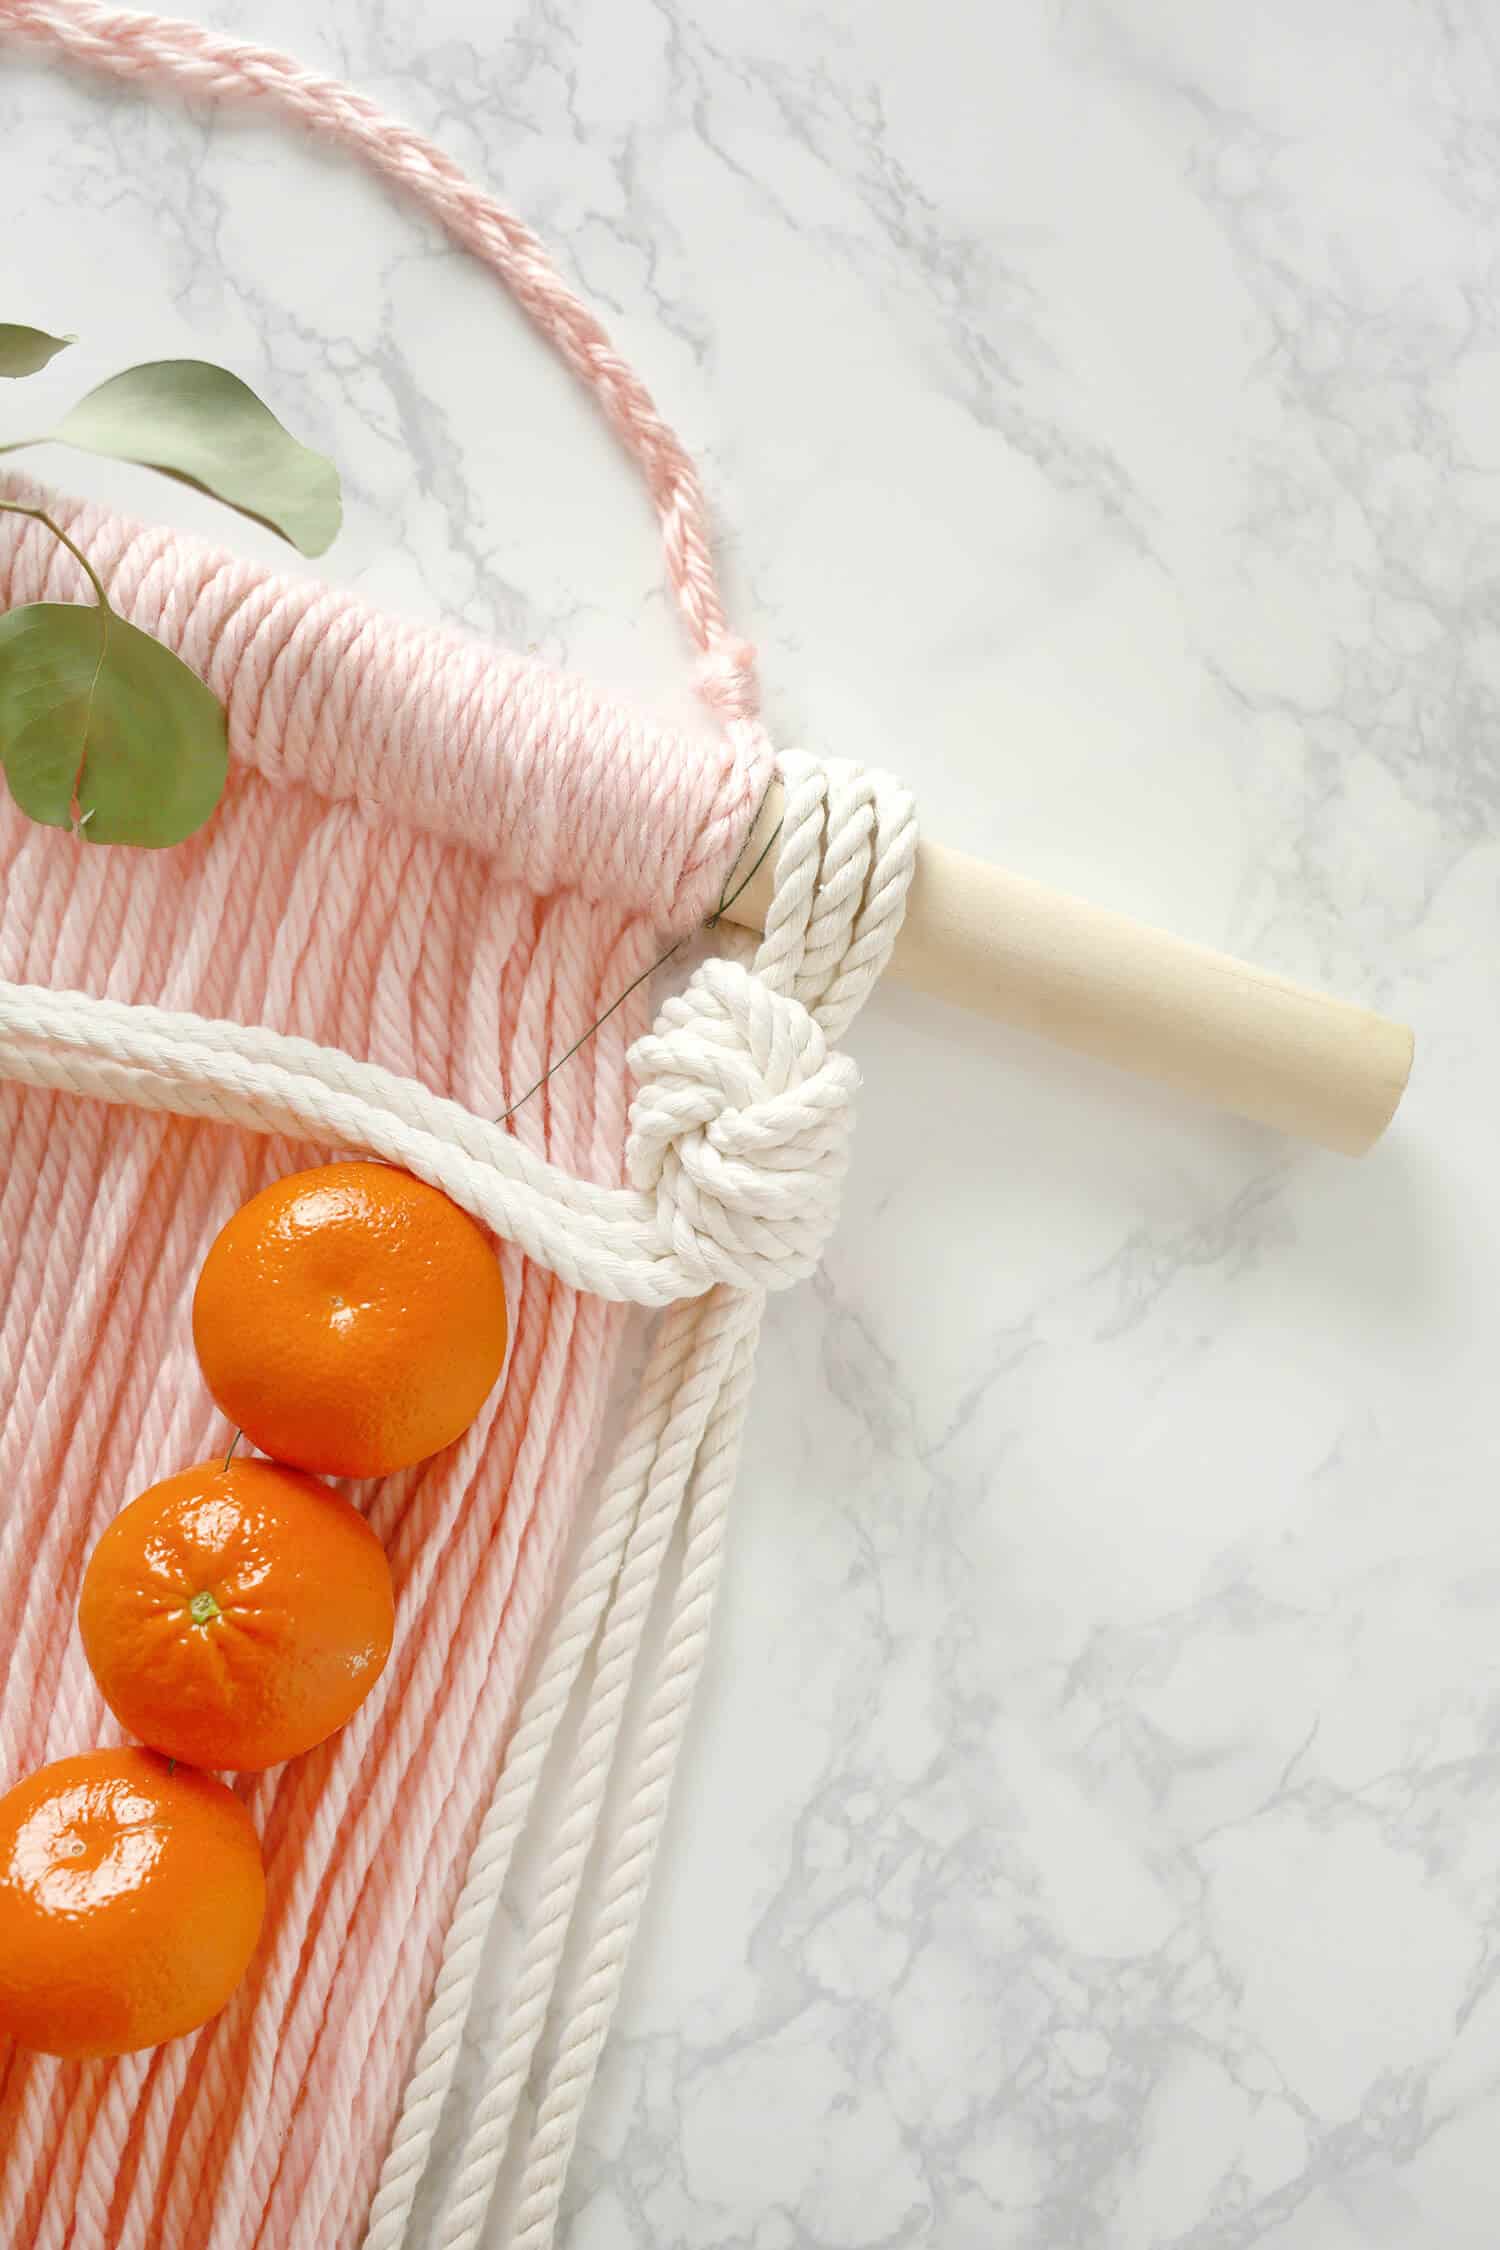 After you’ve secured one knotted end, drape your strands so that they are halfway between the dowel rod and your strand of Wonderful Halos. Tie another looped knot with your rope and add it to the other end of your dowel rod. Trim both sides of your rope if they’re uneven. Add some eucalyptus or other leafy branches to the center of your dowel with more wire and hang up your new party backdrop!
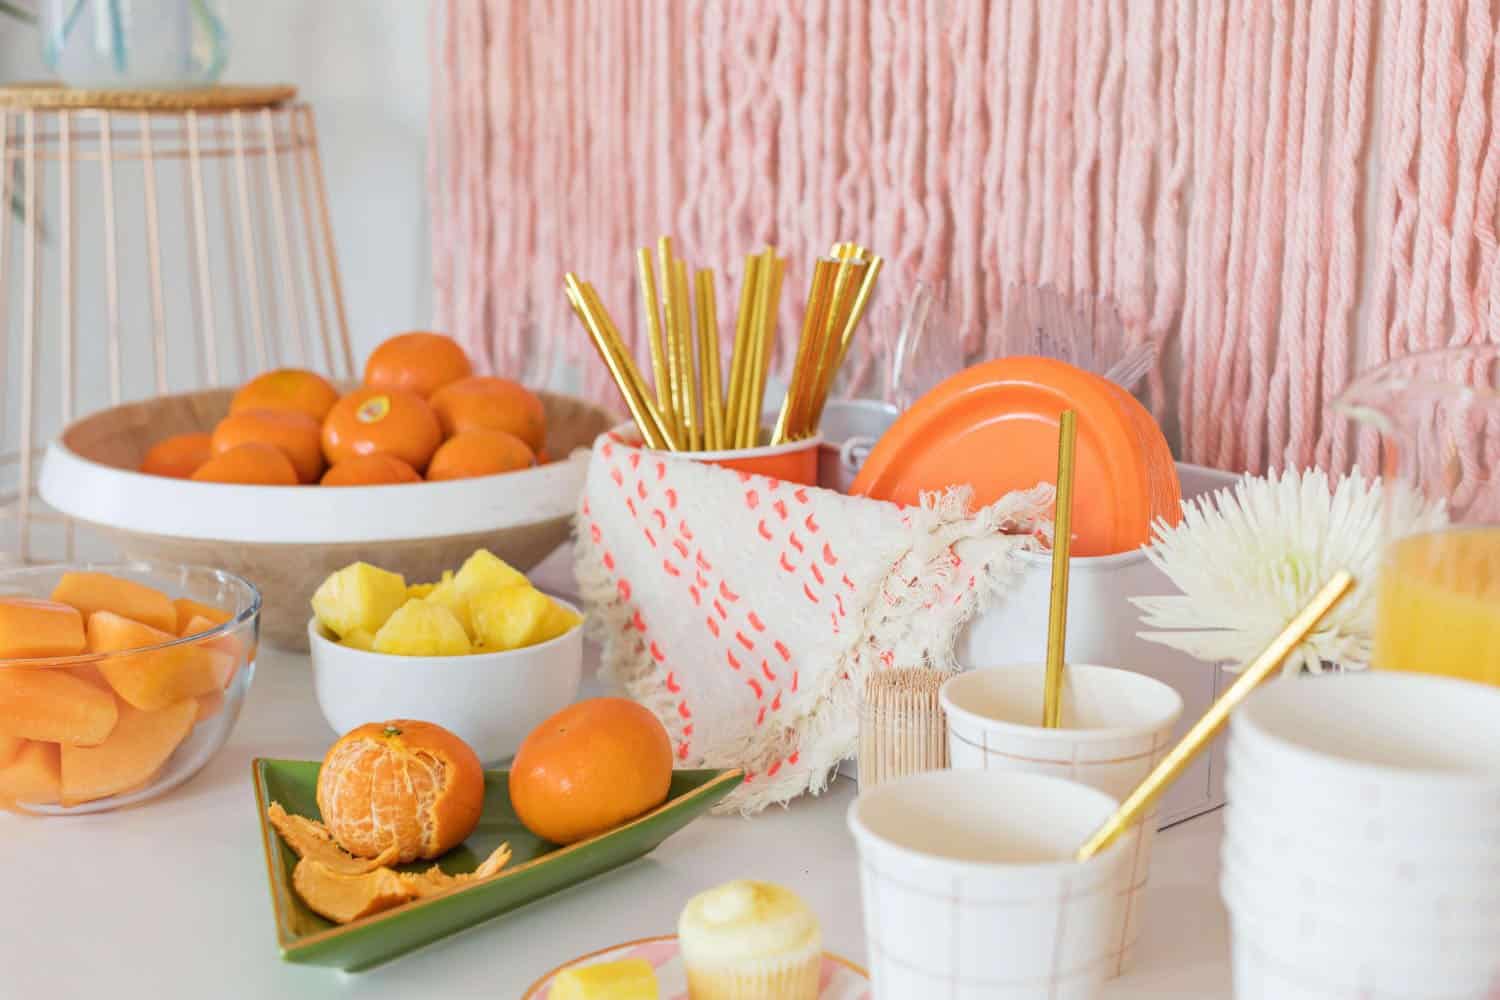
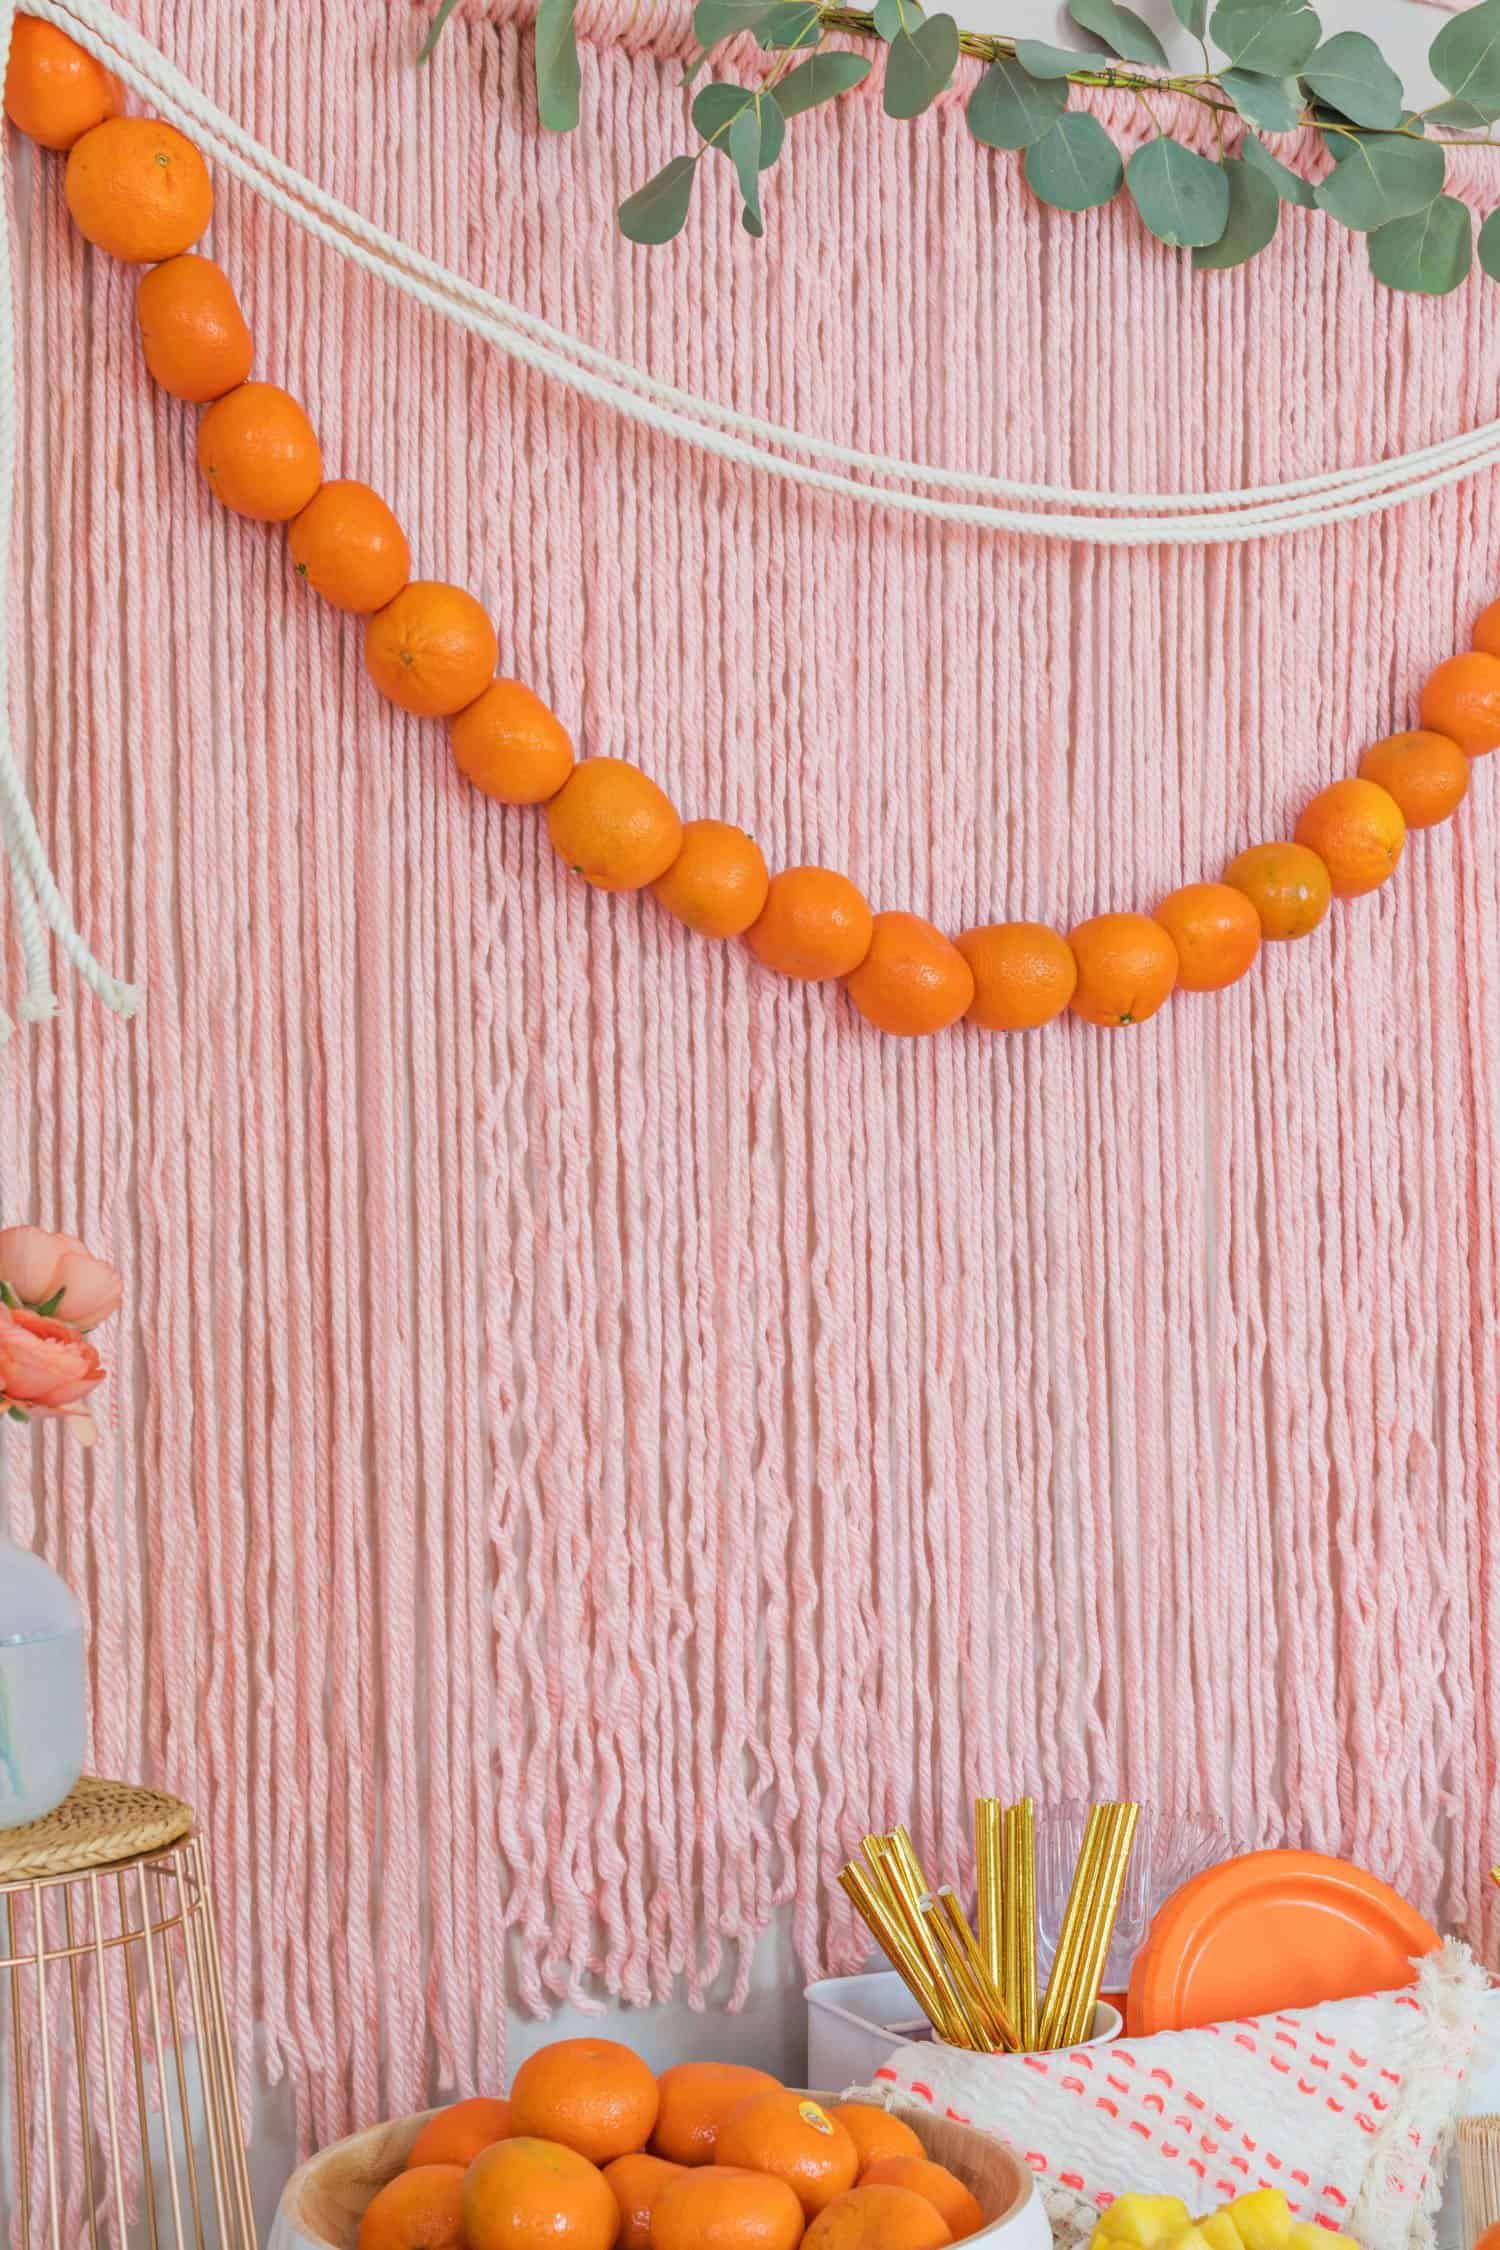
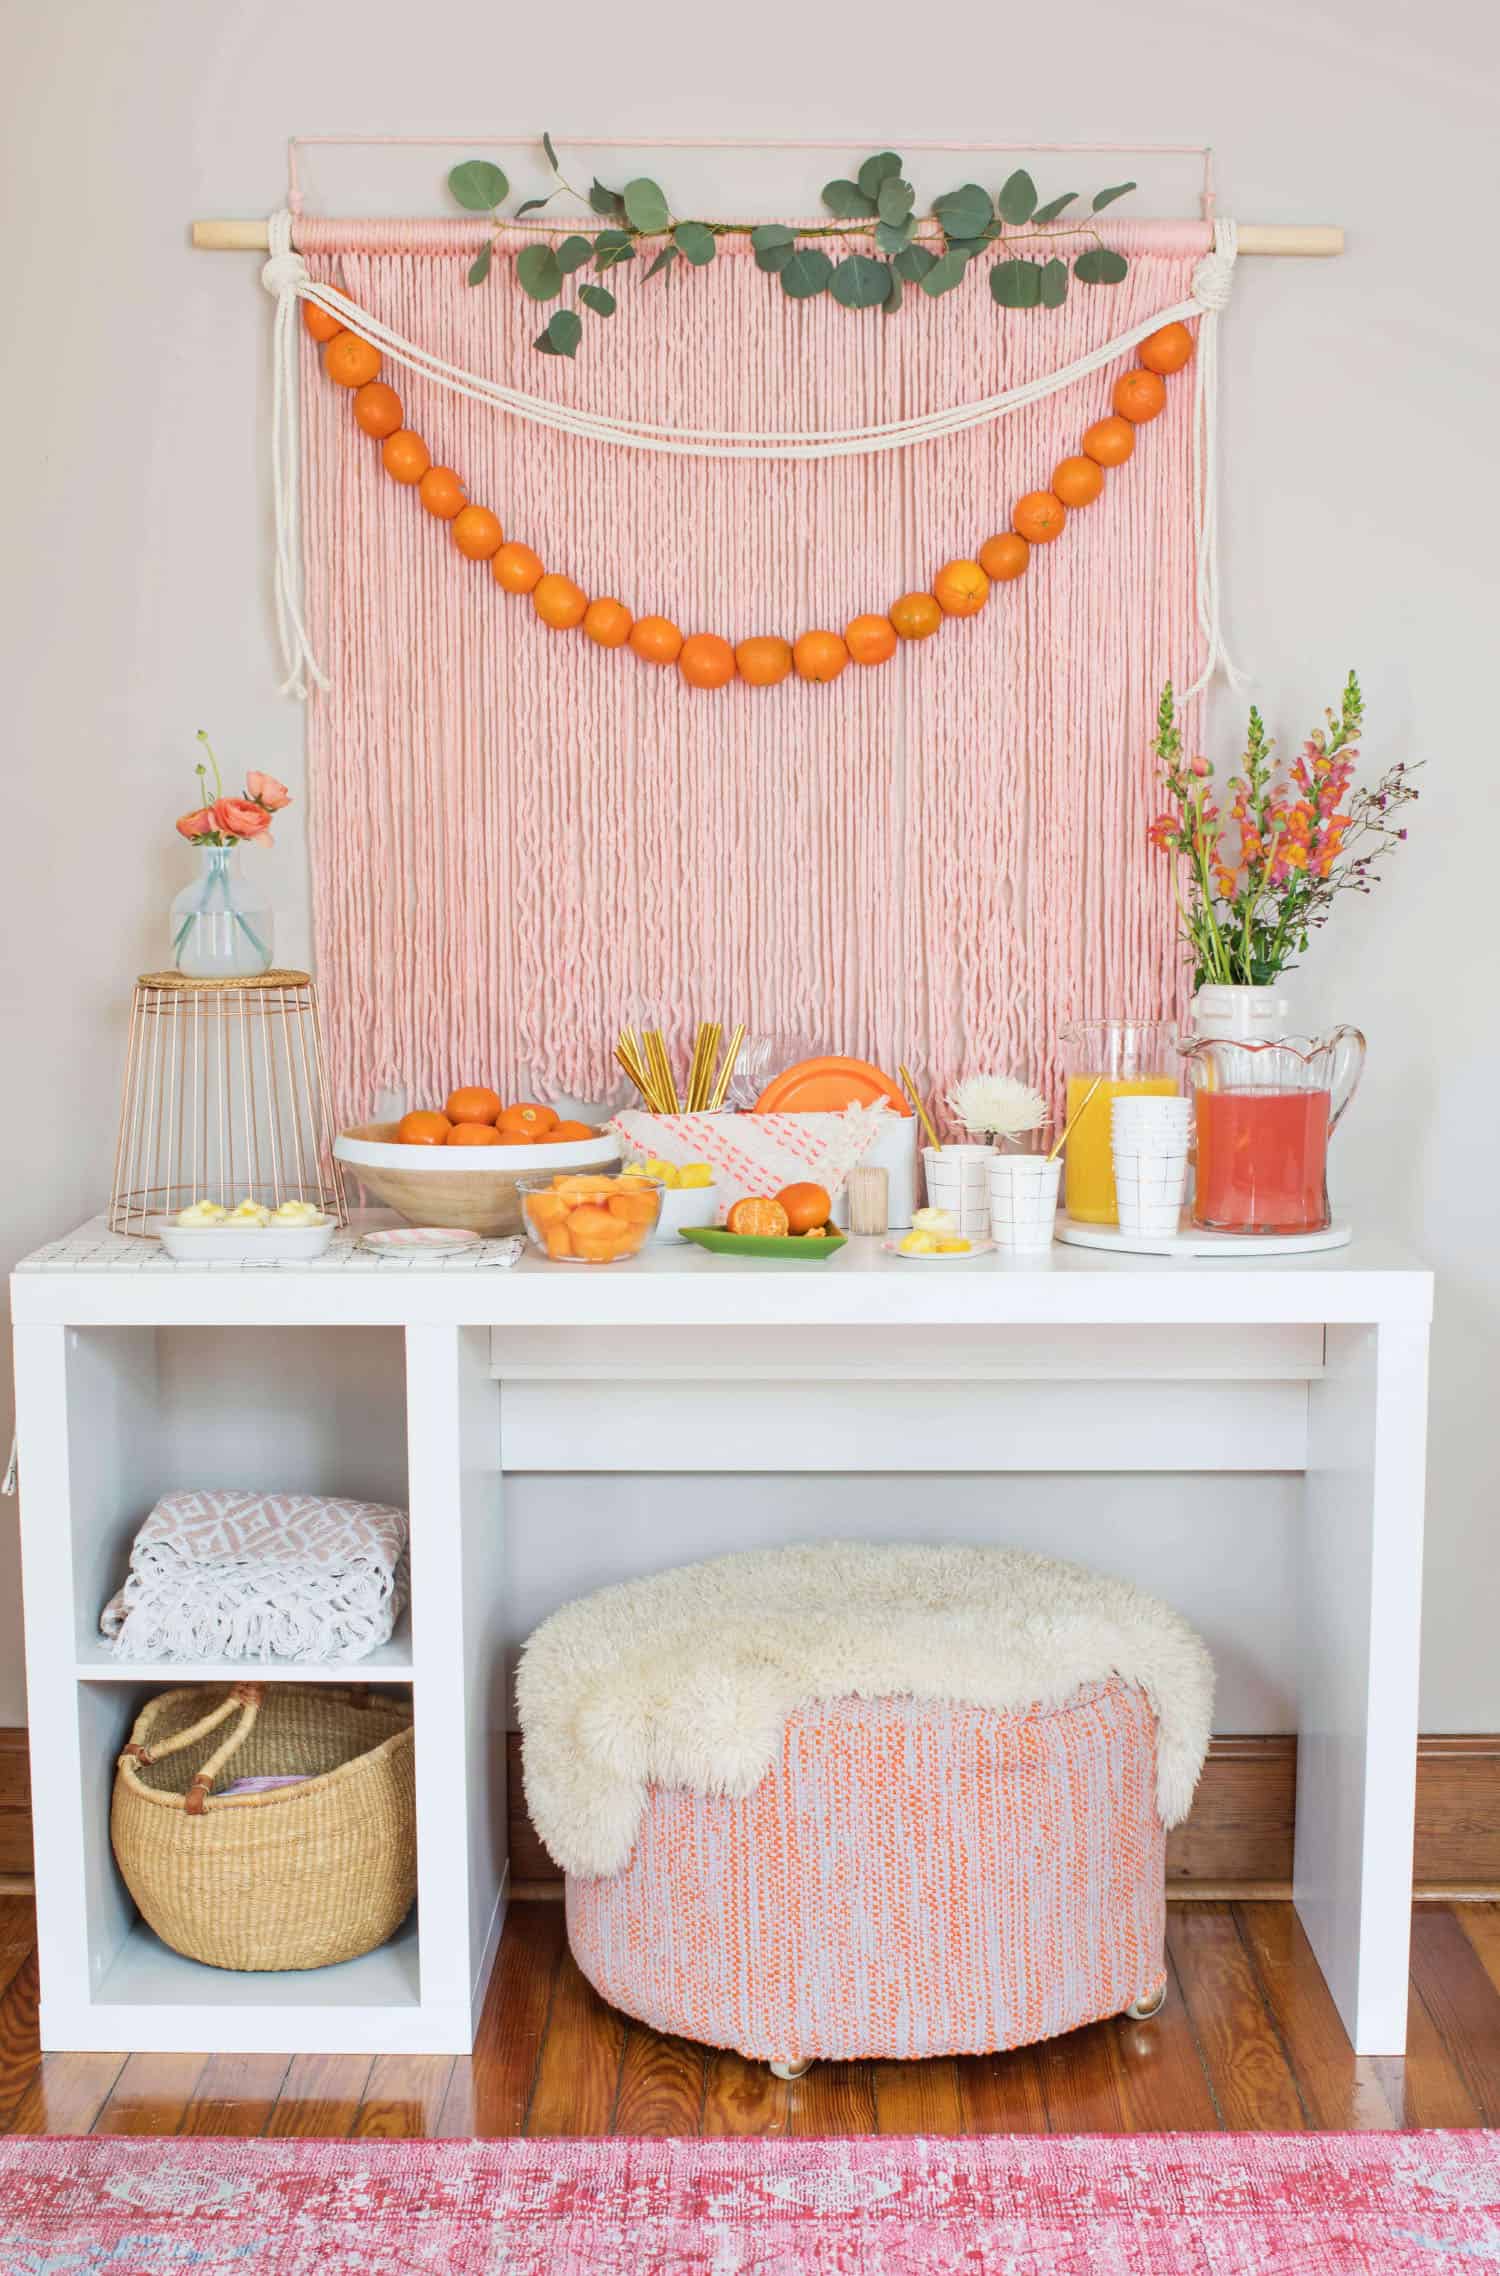
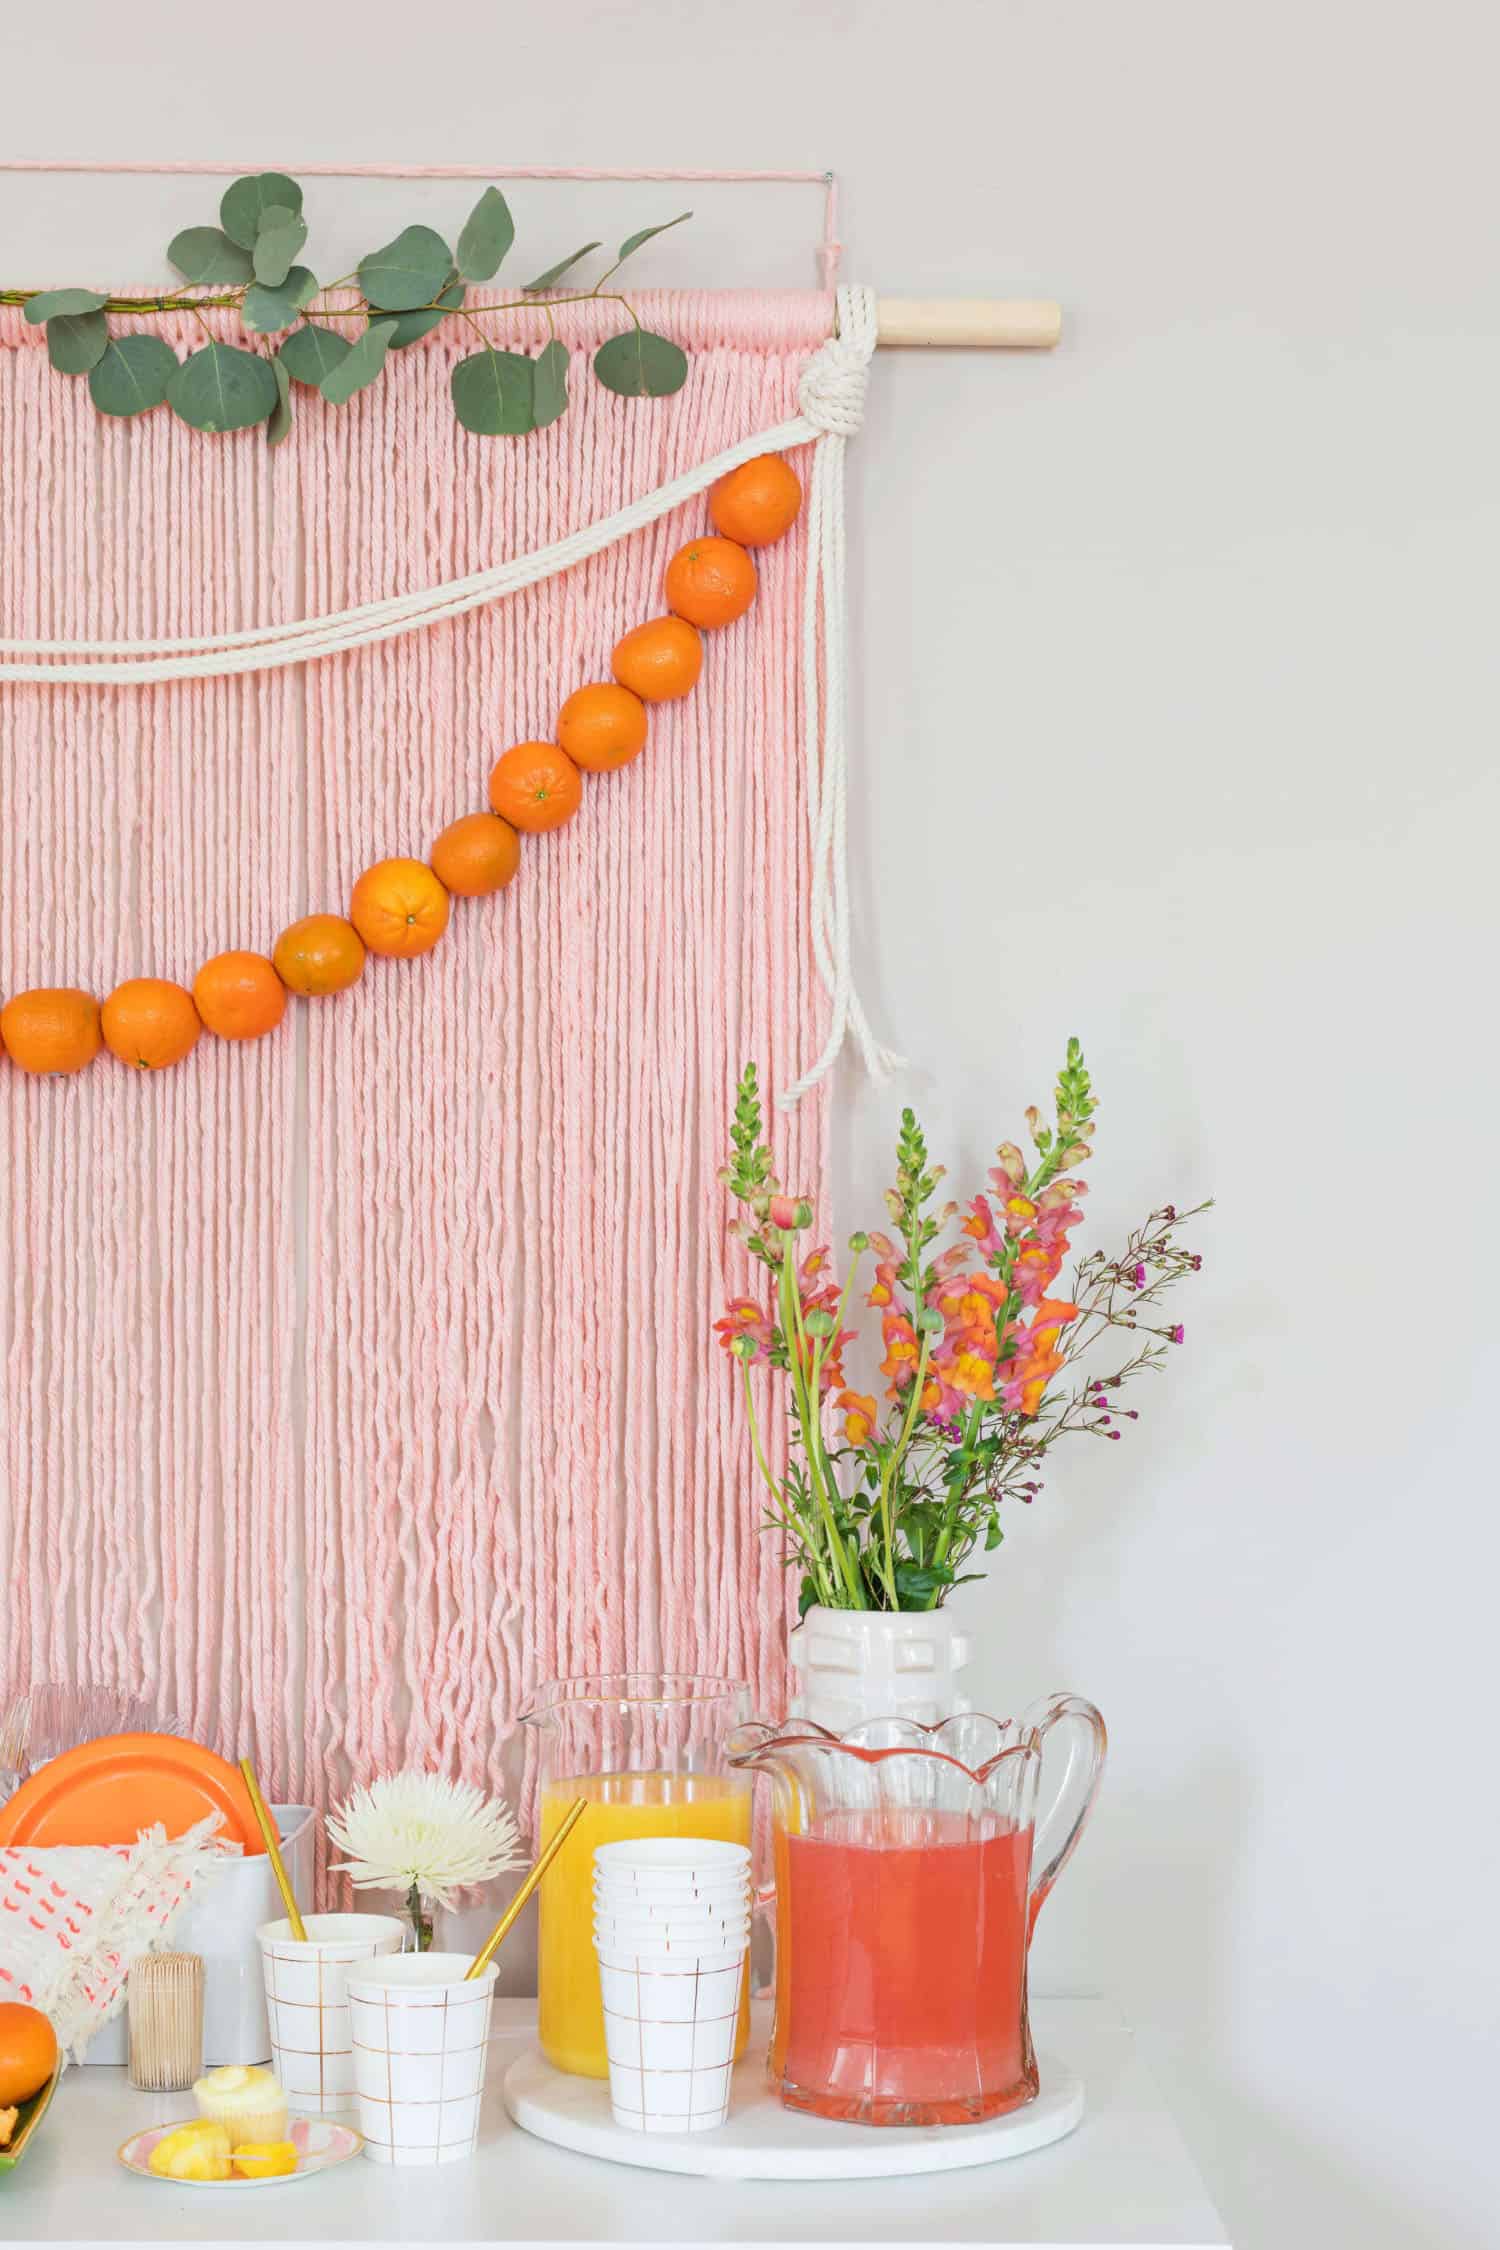
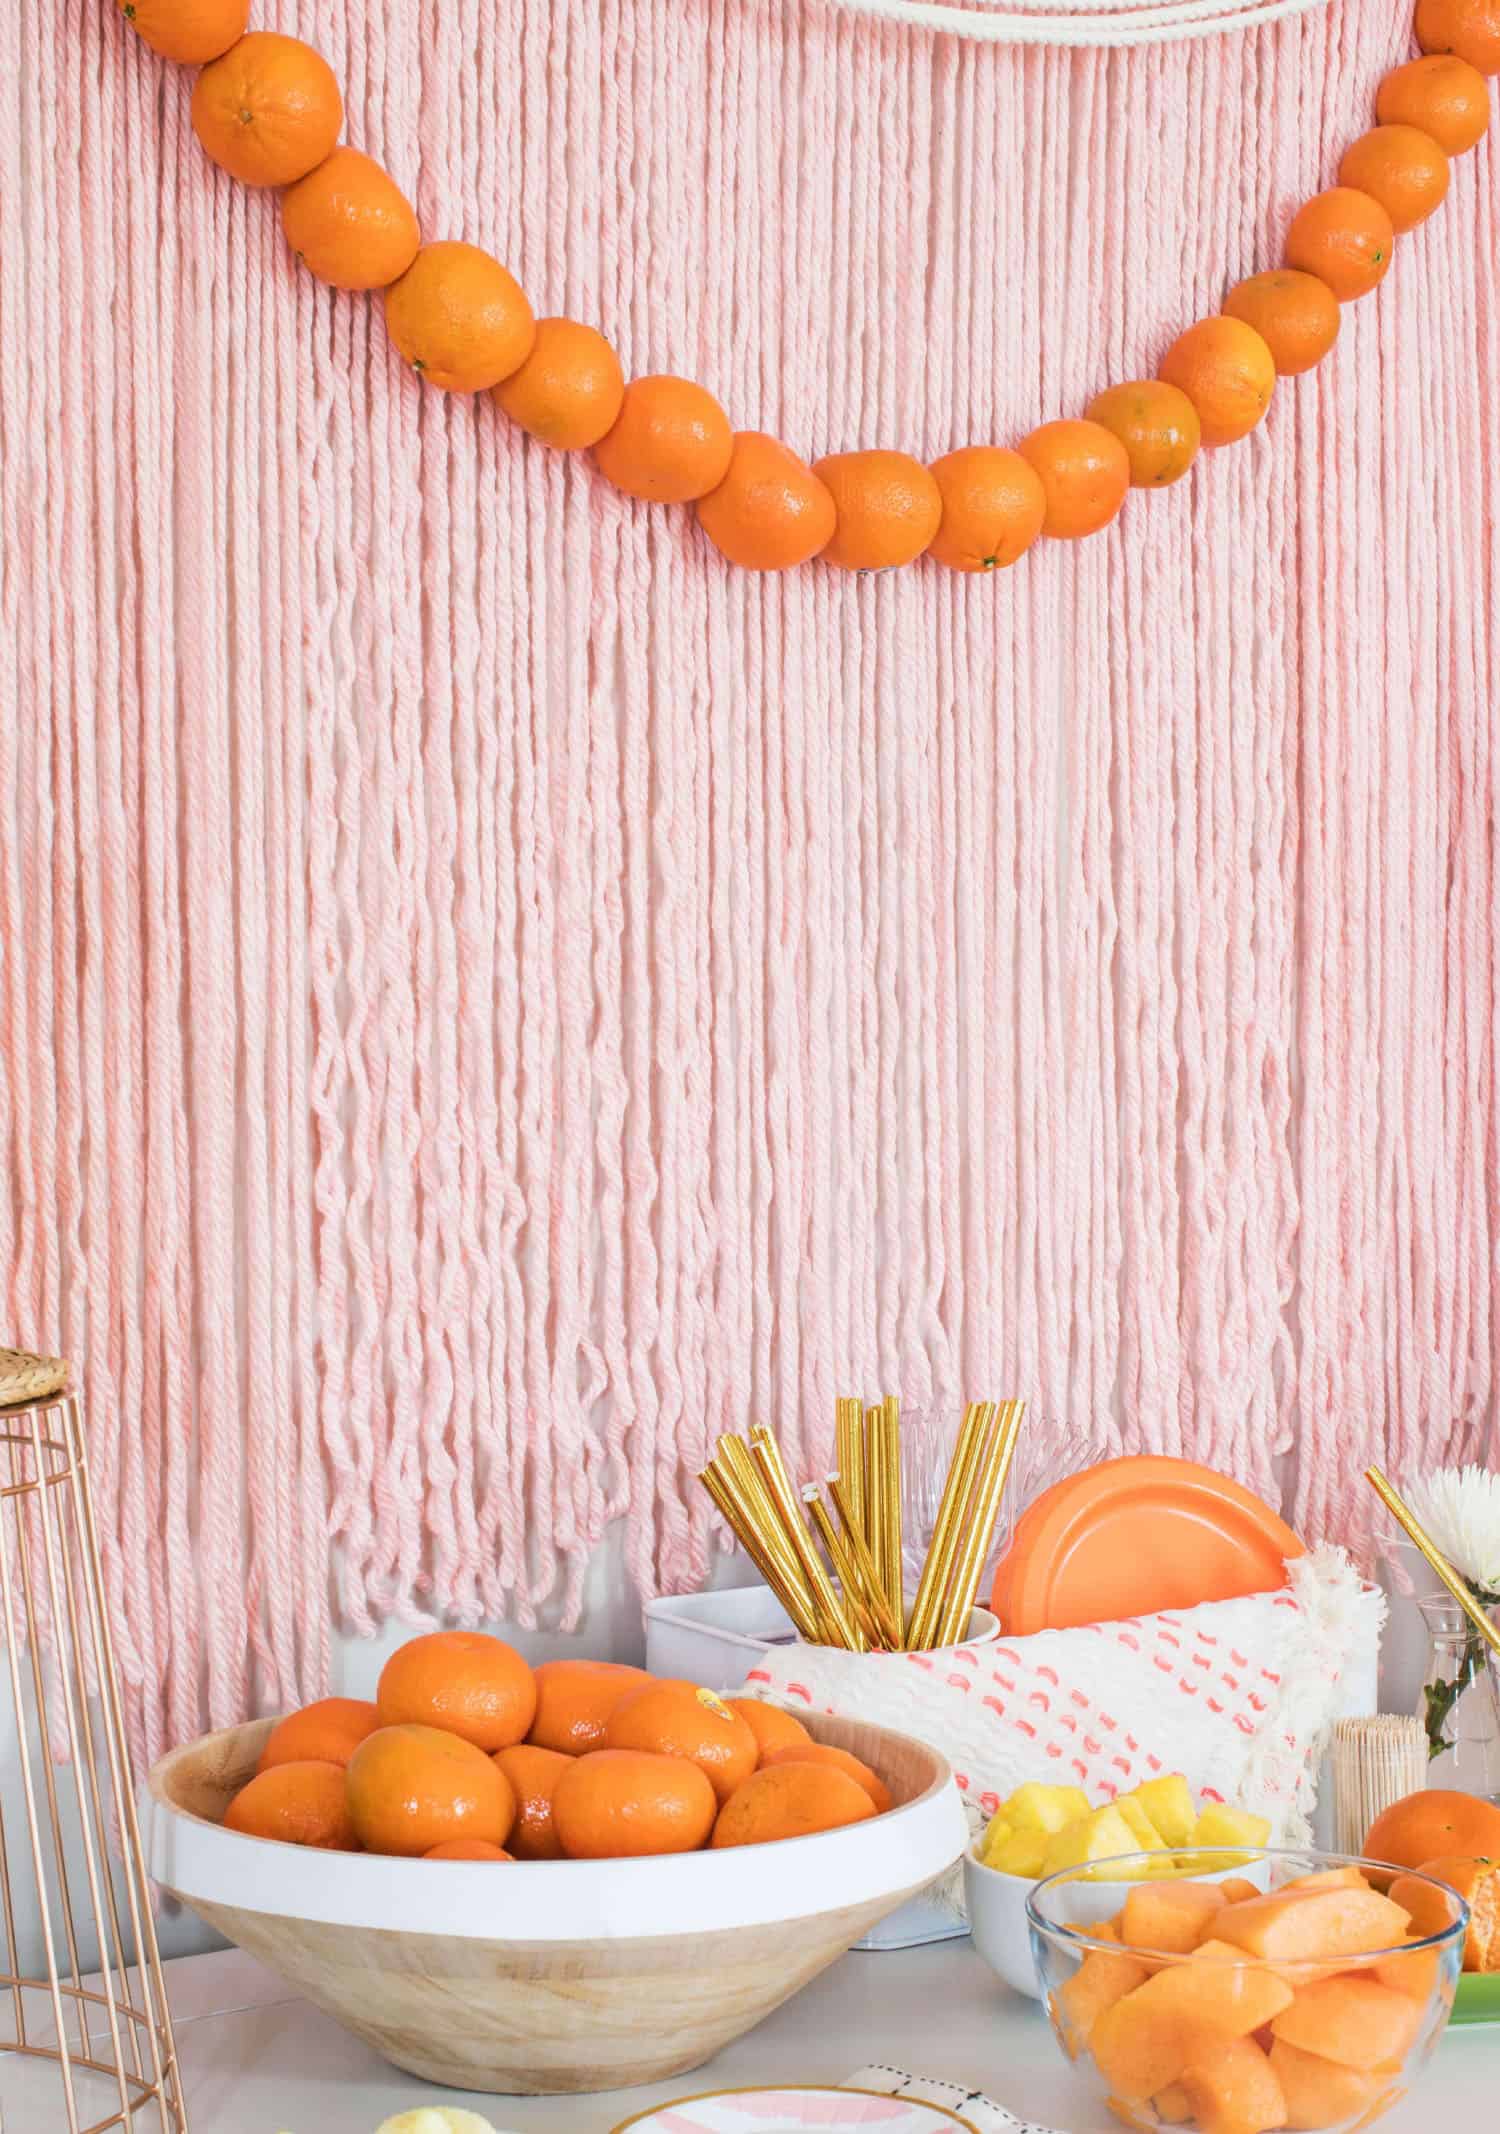 I love the colorful addition and texture these healthy and naturally sweet treats added to this backdrop. Once the party is over, the fruit garland can be snacked on and the wall hanging can be reused as everyday decor! Even if you’re not hosting any parties at your house, grab an extra bag of Wonderful Halos while they’re in season (until May) and make your next Sunday brunch a feel a little more special! – Rachel