This is one classic cocktail that is so easy to make you don’t even need a cocktail shaker for a Tom Collins.
Related: 40+ Cocktails to Make at Home, Classic Gimlet Cocktail, Mint Mojito, Gin & Tonic, Cosmopolitan, Hugo Spritz and Simple Syrup Recipe.

What is a Tom Collins?
If you’ve never had a Tom Collins before, it is essentially a spiked lemonade drink. It’s made with gin, lemon juice, simple syrup, and club soda or Sprite. I prefer the club soda version, but I won’t turn my nose up to the Sprite version. If you’re in the mood for a refreshing cocktail, this is a great one to try.
Want to try a variation? Try this:
- Vodka Collins – replace the gin with vodka, sometimes called a Joe Collins
- John Collins -replace the gin with bourbon
- Ron Collins – replace the gin with rum
R

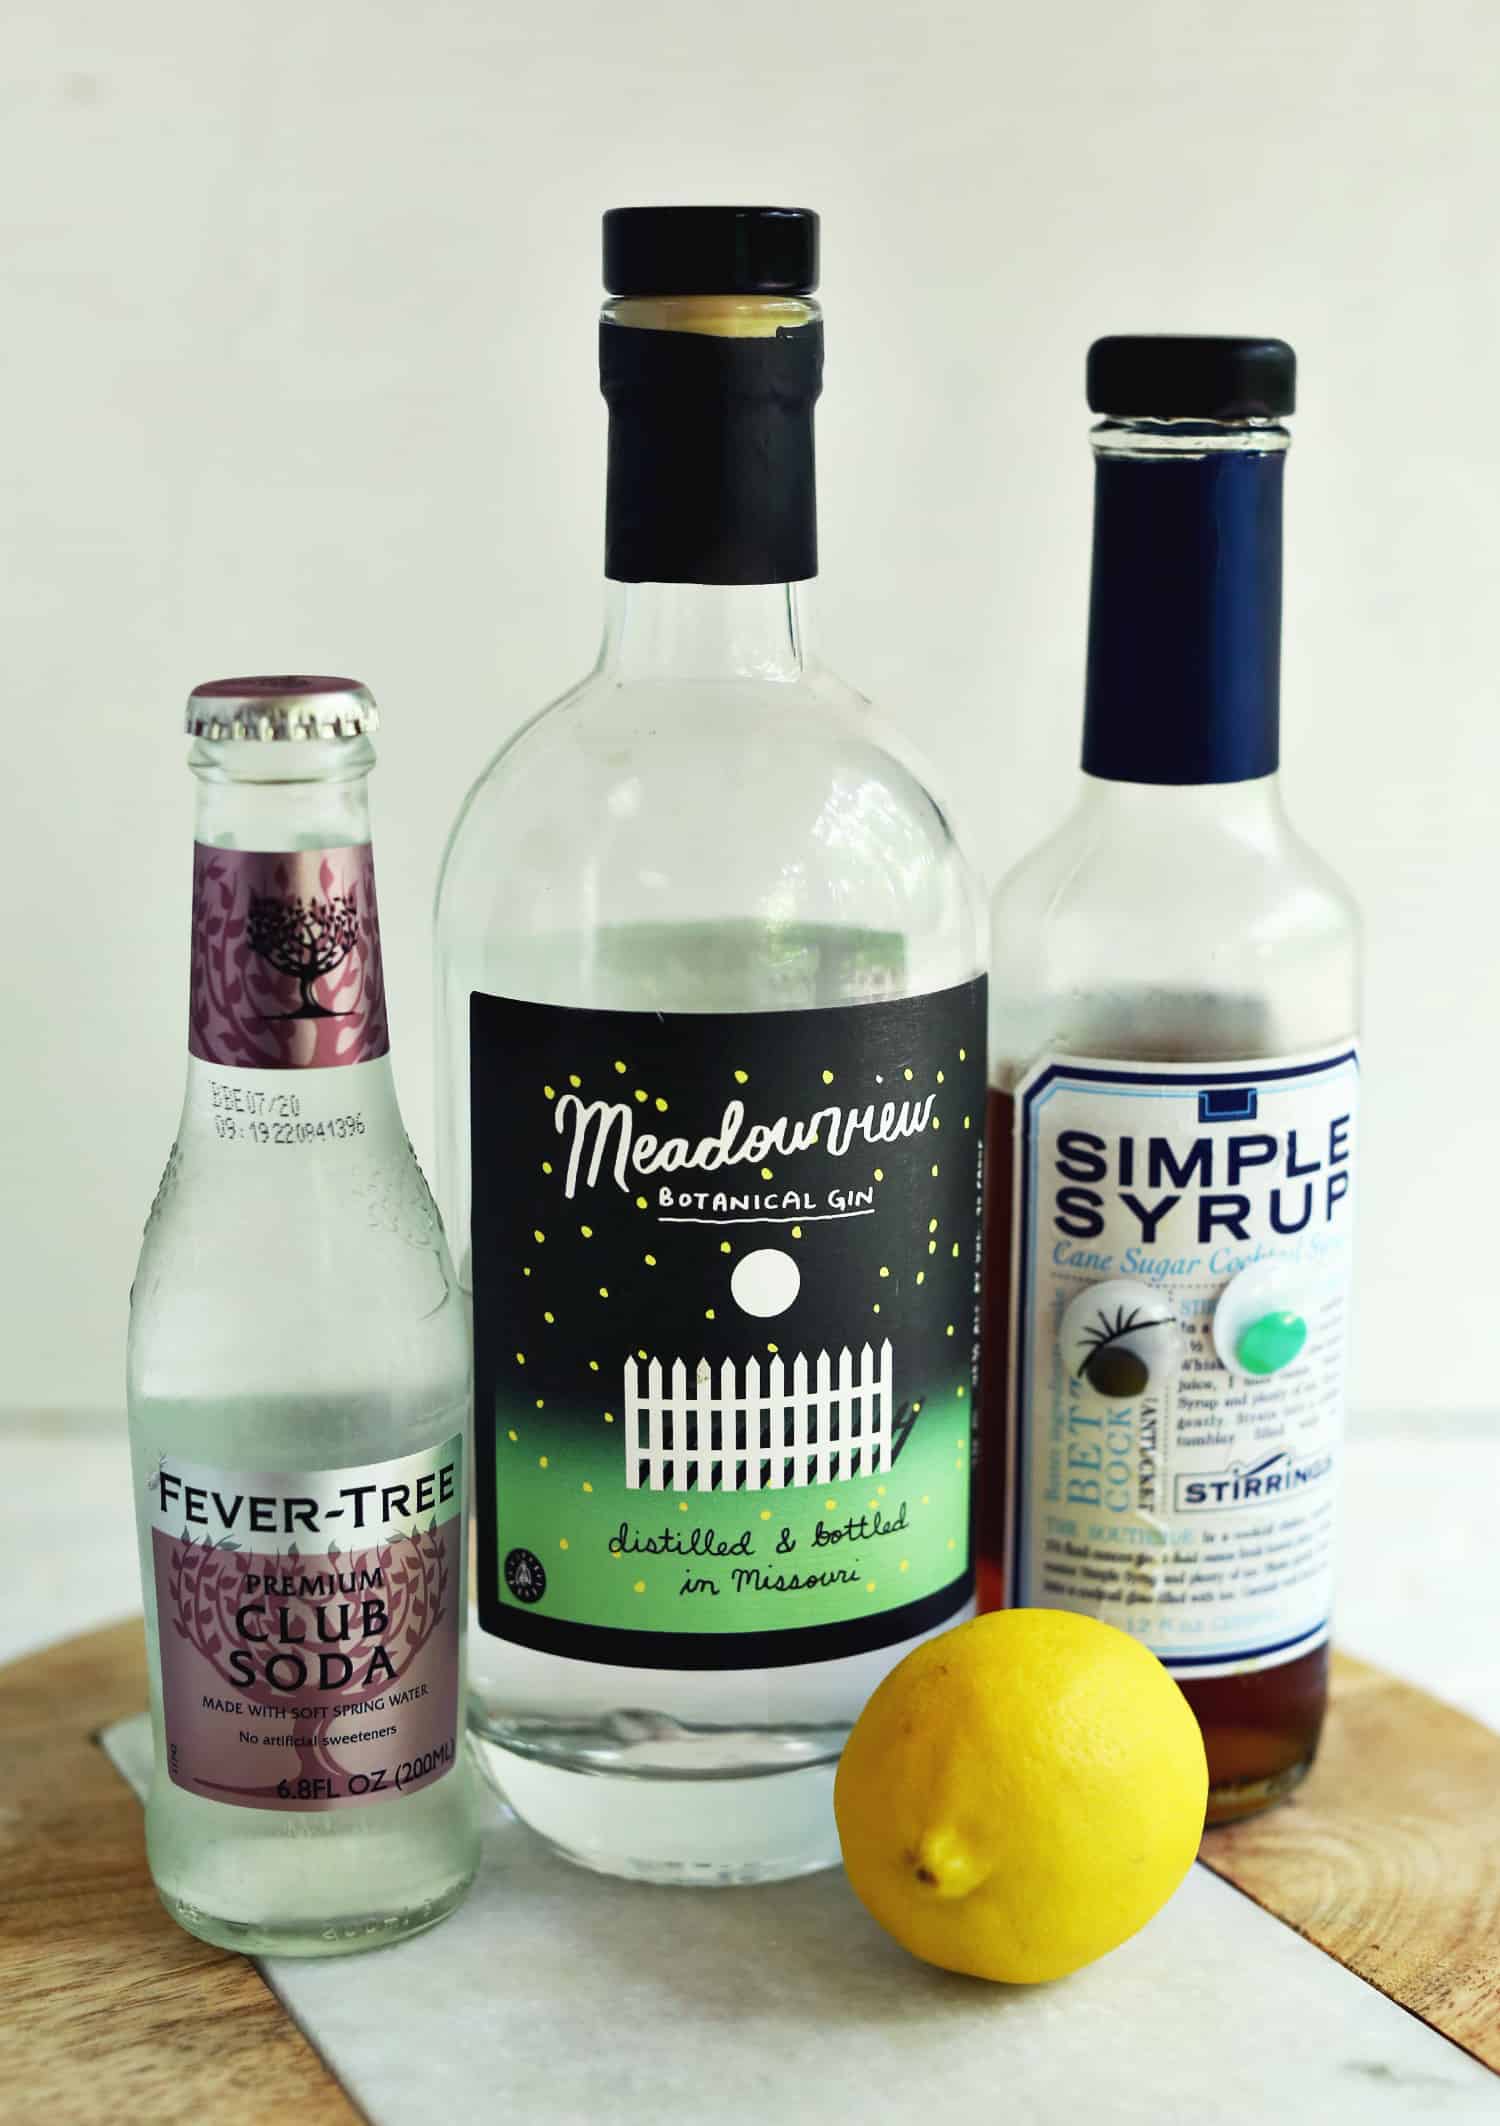
Tom Collins Ingredients
- Gin – any brand works, Old Tom Gin was traditionally used.
- Lemon Juice – fresh squeezed
- Simple Syrup – storebought or make your own simple syrup recipe.
- Club Soda – any brand like Topo Chico or Fever Tree, also sparkling water like LaCriox work too.
- Ice
- Lemon Slices For garnish
- Maraschino Cherry For garnish (we love using Luxardo brand)
How to Make a Tom Collins
Add gin, lemon juice and simple syrup to a Collins glass.
Add Ice, then top it off with club soda and stir until well mixed.
Garnish with slices of lemons and a marachino cherry.
Serve a Tom Collins cocktail in a Collins glass, also called a highball glass.
Substitutions and Notes
- Some recipes will use sugar cubes or granulated white sugar in place of simple syrup. While you can do this, simple syrup will mix best in a drink so it’s what we recommend here.
- Replace club soda with Sprite or 7Up for a sweeter cocktail.
- Place your glass is the freezer before mixing for an even more refreshing experience.

History of a Tom Collins Cocktail
Dating back to 1874 the Tom Collins recipe got its name when a group of friends began telling people in New York City bars that a man called “Tom Collins” was spreading lies. So many partons began searching for this mysterious Tom Collins that bartenders were inspired to name a drink after him.
The Tom Collins was first recorded by mixologist Jerry Thomas in 1882 in his book New and Improved Bartender’s Manual. Thomas is considered the father of modern mixology. The drink has been well known ever since.
More Gin Cocktails:

Tom Collins
Ingredients
- 2 ounces gin
- 1 ounce fresh lemon juice
- 1 ounce simple syrup
- 6-7 ounces club soda
- 1 lemon wedge for garish
- 1 maraschino cherries for garnish
Instructions
- Add gin, lemon juice and simple syrup to a Collins glass.
- Add Ice, then top it off with club soda and stir until well mixed.
- Garnish with slices of lemons and a marachino cherry.
Notes
- Replace to gin with vodka to make a “Vodka Collins” cocktail.
- Replace the gin with whiskey to create a “John Collins” cocktail.
- Replace club soda with Sprite or 7Up for a sweeter cocktail.
- Place your glass is the freezer before mixing for an even more refreshing experience.
Nutrition
The roots of the Mojito can be traced back to Havana, Cuba, during the late 16th century. Originally known as “El Draque,” the drink was crafted by Francis Drake and his ship crew. Ernest Hemingway was famously a fan, ordering them at the Havana bar La Bodeguita del Medio.
More refreshing cocktails: Paloma, Tom Collins, Caipirinha, Margarita, French 75, Ranch Water, Mint Julep.
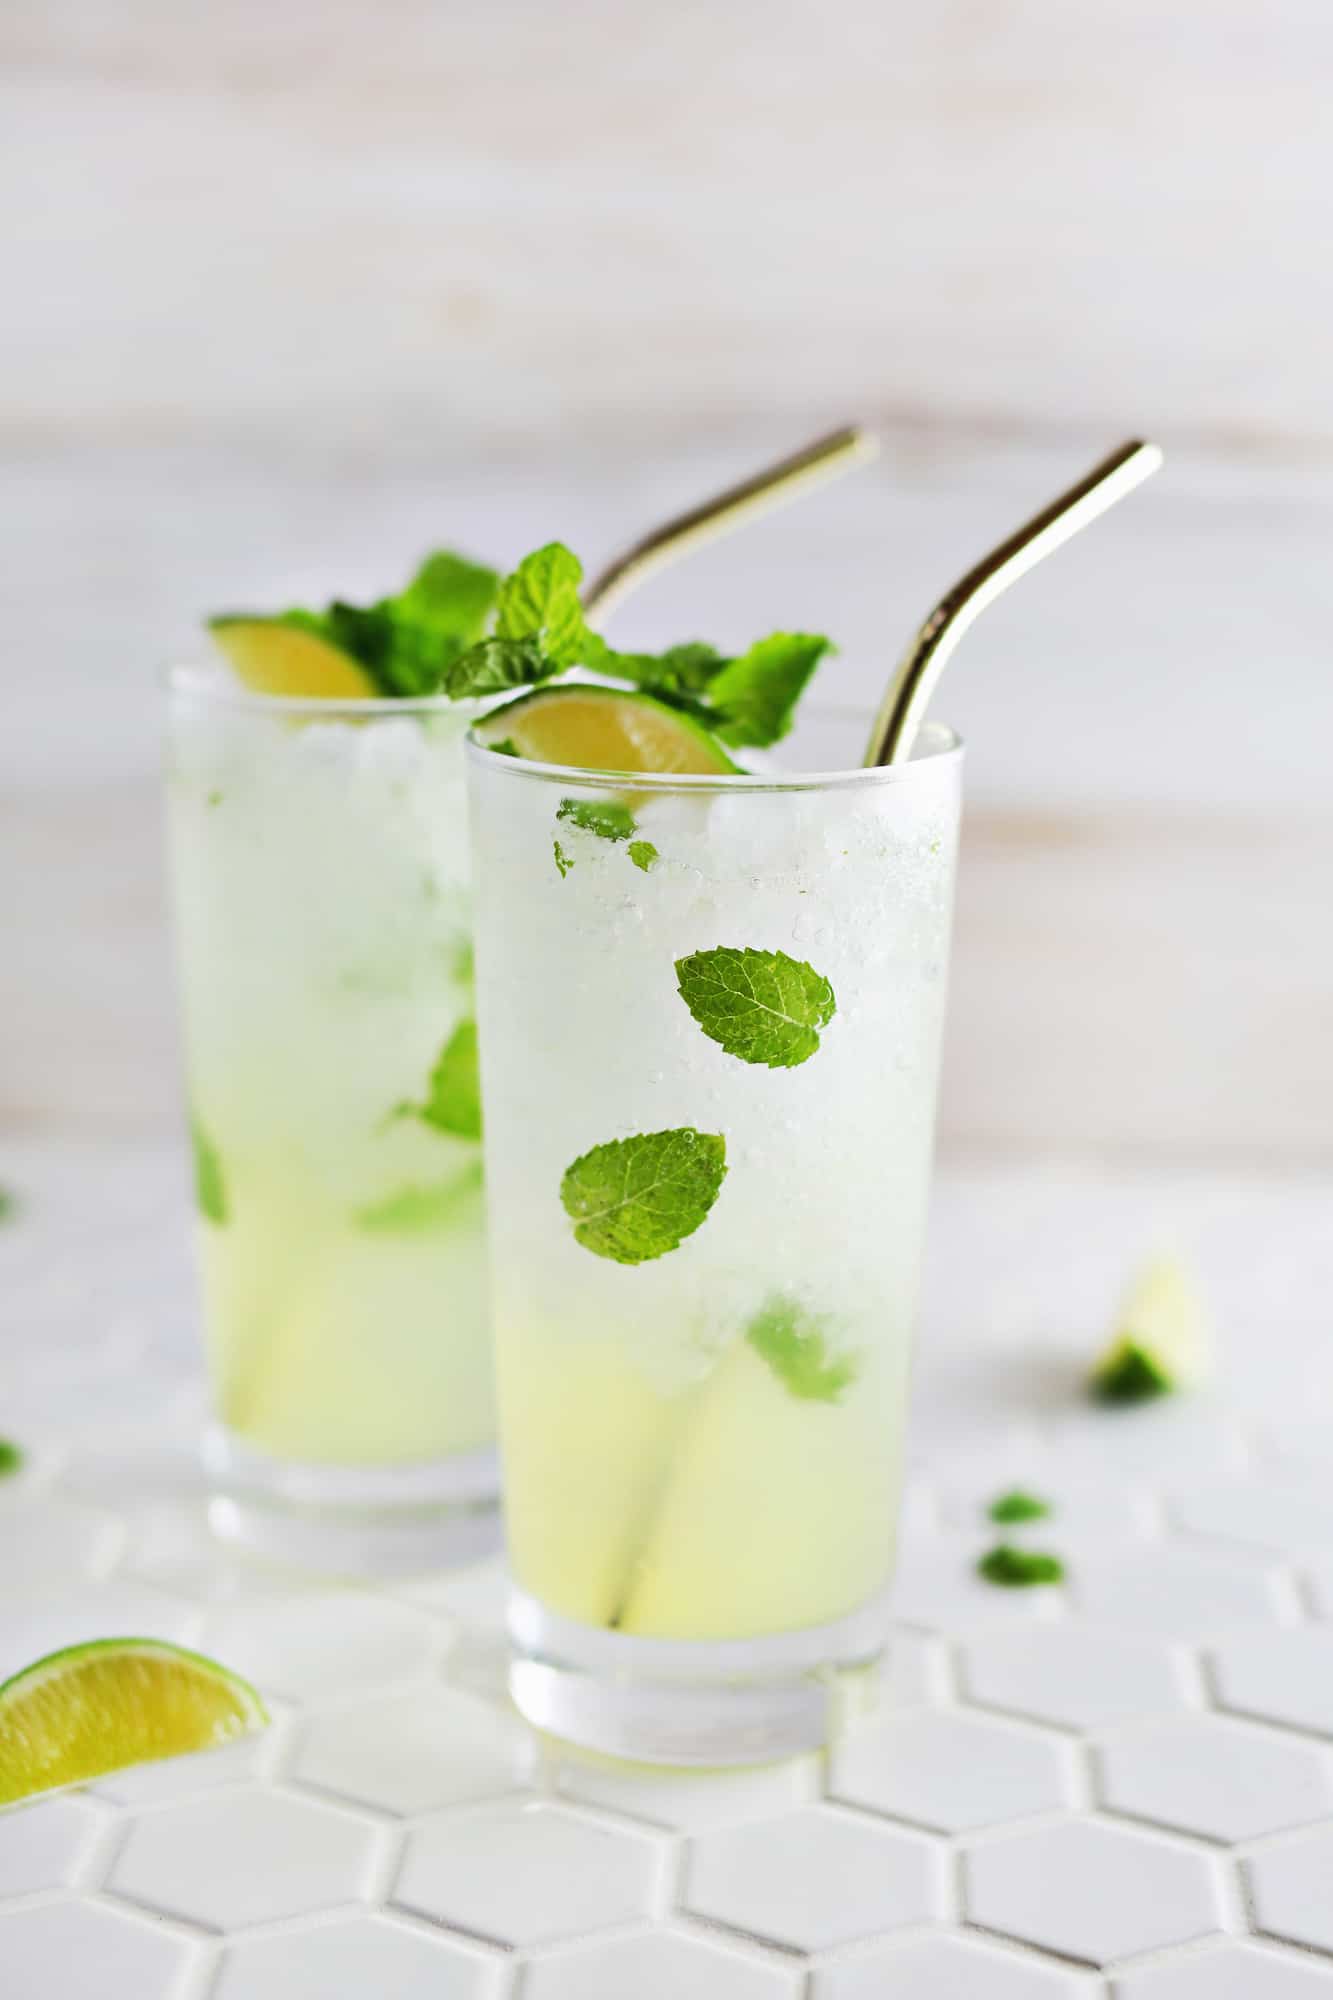
A mojito is a classic cocktail that is easy to make at home. It’s simple, sweet, and only requires 5 ingredients. This is the best at-home mojito recipe, and I know you’ll love it as much as I do.
Here’s a video on how to make a mojito in under one minute:
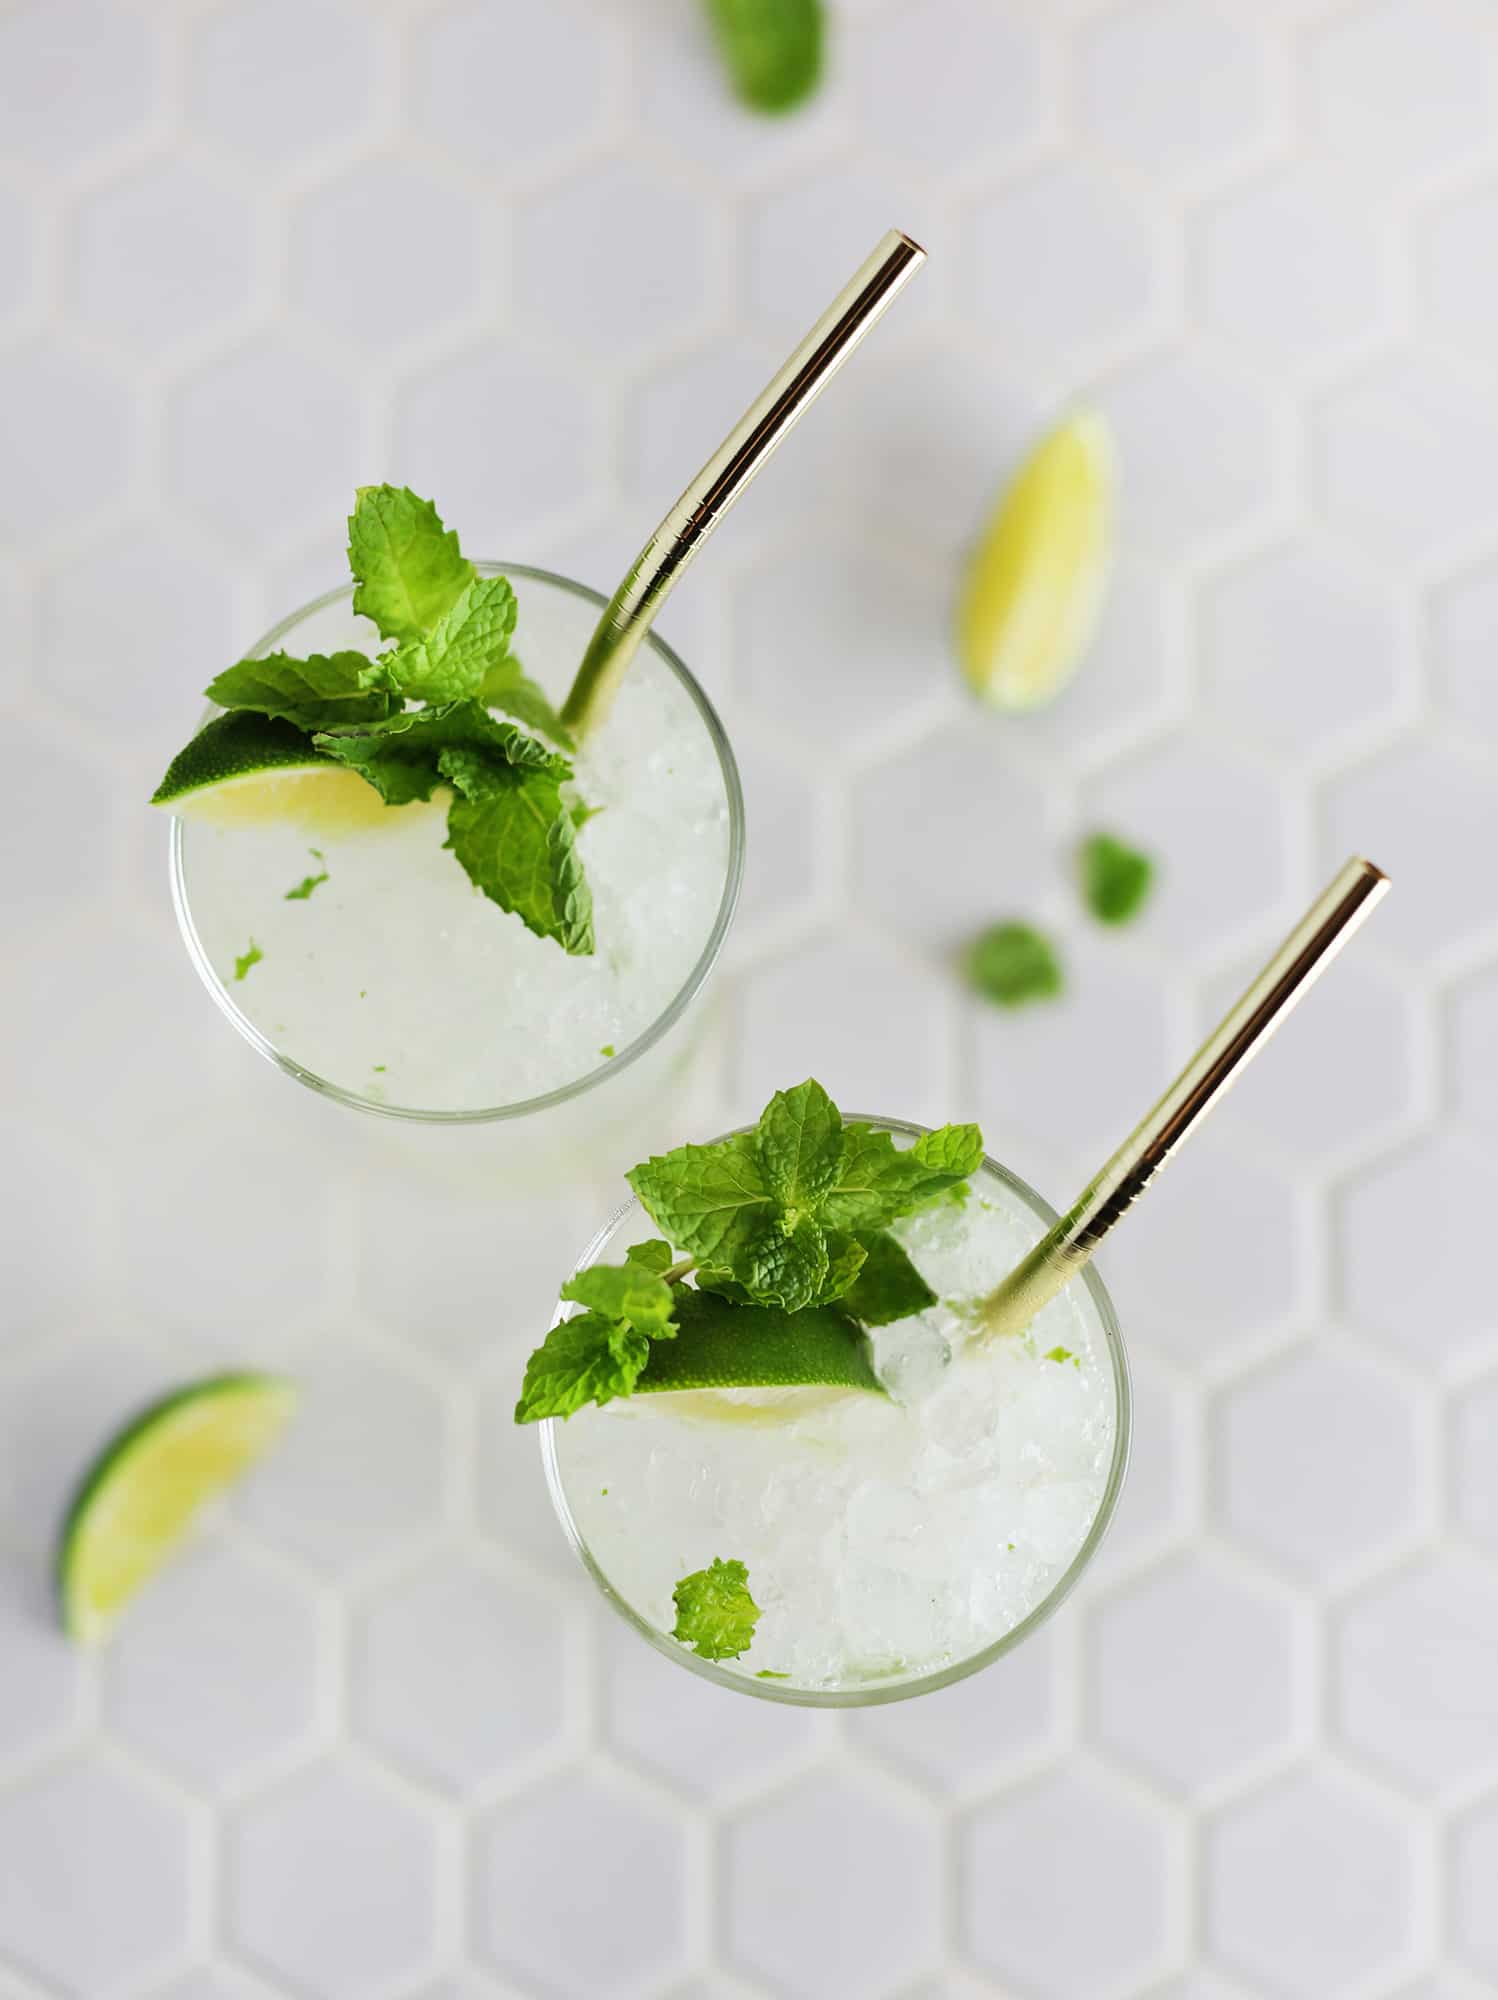
Best Mojito Ingredients:
- White Rum – This is the classic and most traditional choice. Pick a light rum such as Bacardi Silver Rum.
- Lime Juice – freshly squeezed by hand or use a press.
- Simple Syrup – You can make your own or buy a simple syrup. This will mix into the liquid drink better than granulated white sugar muddled in with the leaves, another option. And you can up the flavor with Mint Simple Syrup
- Club Soda -to top the drink with. You can use any sparkling (non-sweetened) water including ones flavored with lime.
- Fresh Mint Leaves – used for both muddling and garnish.
How to make a Mojito:
Prepare a glass by muddling (smashing lightly) the mint leaves at the bottom of the glass. This step releases fragrant minty oils. A few taps with a wood muddler (or the end of a wooden spoon) should do the job.
In a cocktail shaker, add the rum, lime juice, simple syrup, and mint leaves.
Add ice and shake the cocktail, then strain into a tall glass such as a Collins or Highball glass filled with ice.
Top off the drink with the club soda.
Garnish with a mint sprig.
Different Types of Rum:
- White Rum: White rum allows the flavors of the mint and lime to shine through. It provides a clean and smooth base for a refreshing Mojito. This is also what is most commonly and traditionally used. So, if you had a great mojito on vacation and are trying to recreate it, more than likely white rum was used.
- Aged Rum: For a richer and more complex profile, consider using an aged rum. The notes of caramel, vanilla, and spice complement the mint and lime, resulting in a sophisticated Mojito experience. A few of my favorites are Ron Zacapa and Appleton. If I make a mojito I use either white rum or aged rum.
- Dark Rum: If you prefer a more intense flavor, dark rum can add depth to your Mojito. It offers a distinct molasses-like sweetness. There are many dark rums but one I use sometimes is Goslings. Note the darker the color of the rum the more it will color your drink, making the mojito a caramel or brown color.
Mint Varieties:
Mint plays a crucial role in the Mojito, providing a refreshing and aromatic profile. While spearmint is the traditional choice for crafting this cocktail, there are other varieties worth exploring to add unique flavor dimensions.
Here are a few popular types of mint to consider:
- Spearmint: This is the most commonly used mint for Mojitos. It offers a cool, sweet, and slightly tangy flavor that pairs beautifully with the other ingredients.
- Peppermint: With a more intense and minty taste, peppermint can add an invigorating twist to your Mojito. This is also fun if you are making a mojito during the holiday (Christmas) season.
- Thai Mint: This mint has a vibrant green color with purple stems and leaves that are slightly elongated and pointed. Its aroma is reminiscent of anise and licorice, and has a bold flavor can be fun in a Mojito.
Mojito Variations:
More Rum Cocktails:
- Dark and Stormy Cocktail
- Best Pina Colada
- Blue Hawaiian
- Queen’s Park Swizzle
- How to Make a Daiquiri
- Rum Runner
- Rum & Coke
- Rum Punch
- Mai Tai
- Painkiller
- Jungle Bird
- Bahama Mama
- Fishbowl Cocktail
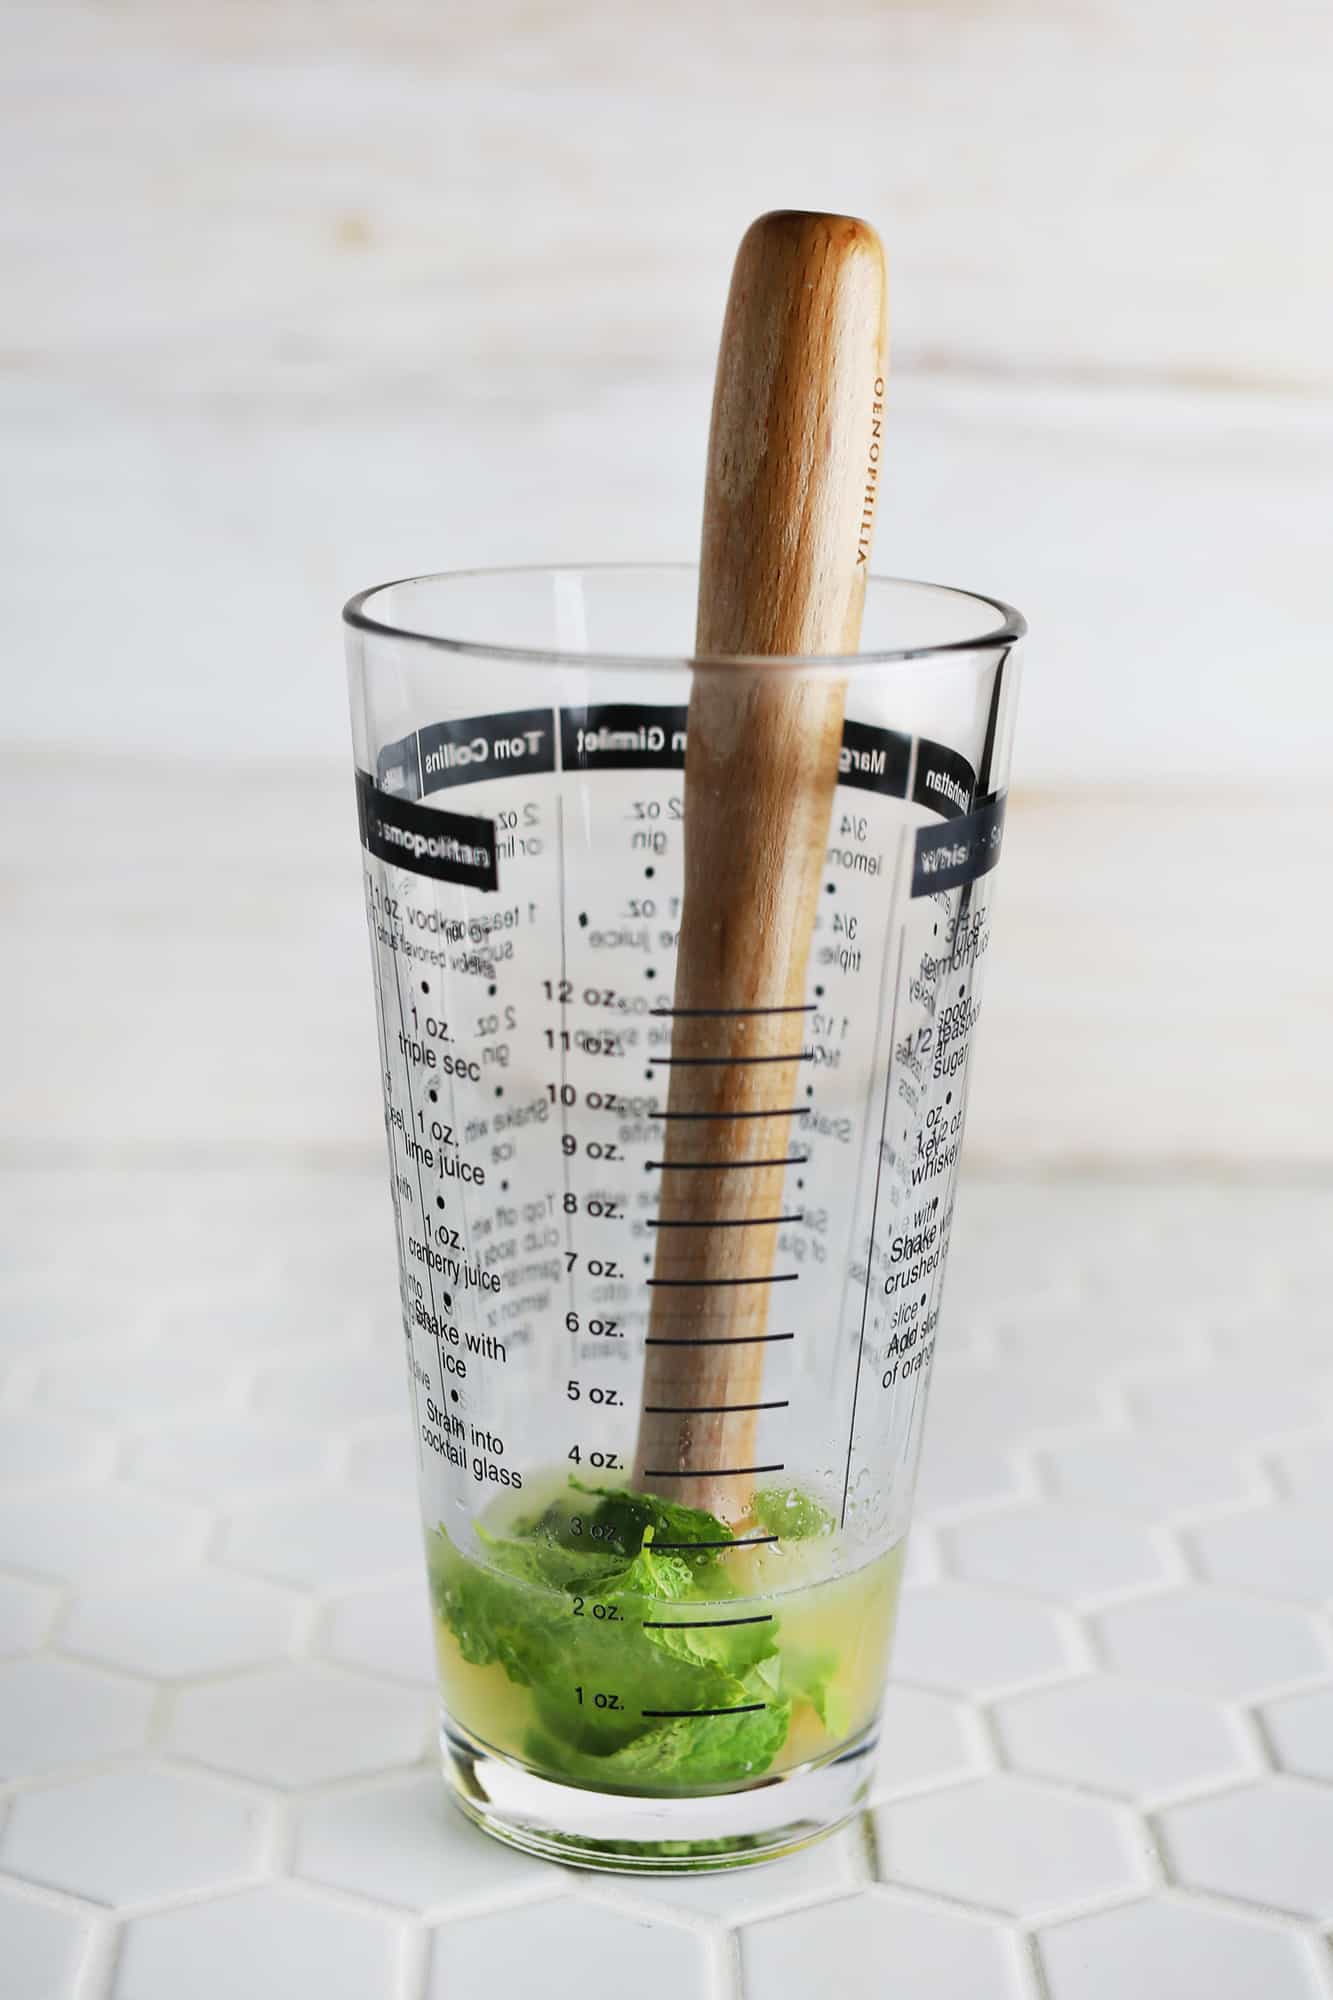 In the recipe below, you’ll see that muddling the mint leaves is an important step. If you don’t have a muddler, you can use a spoon or the end of a wooden spoon. Sometimes you will also see bartenders clap the mint between their hands. This is another technique to smash or muddle mint leaves.
The goal is to smash the mint leaves so they release their oils, as this enhances the flavor and aroma.
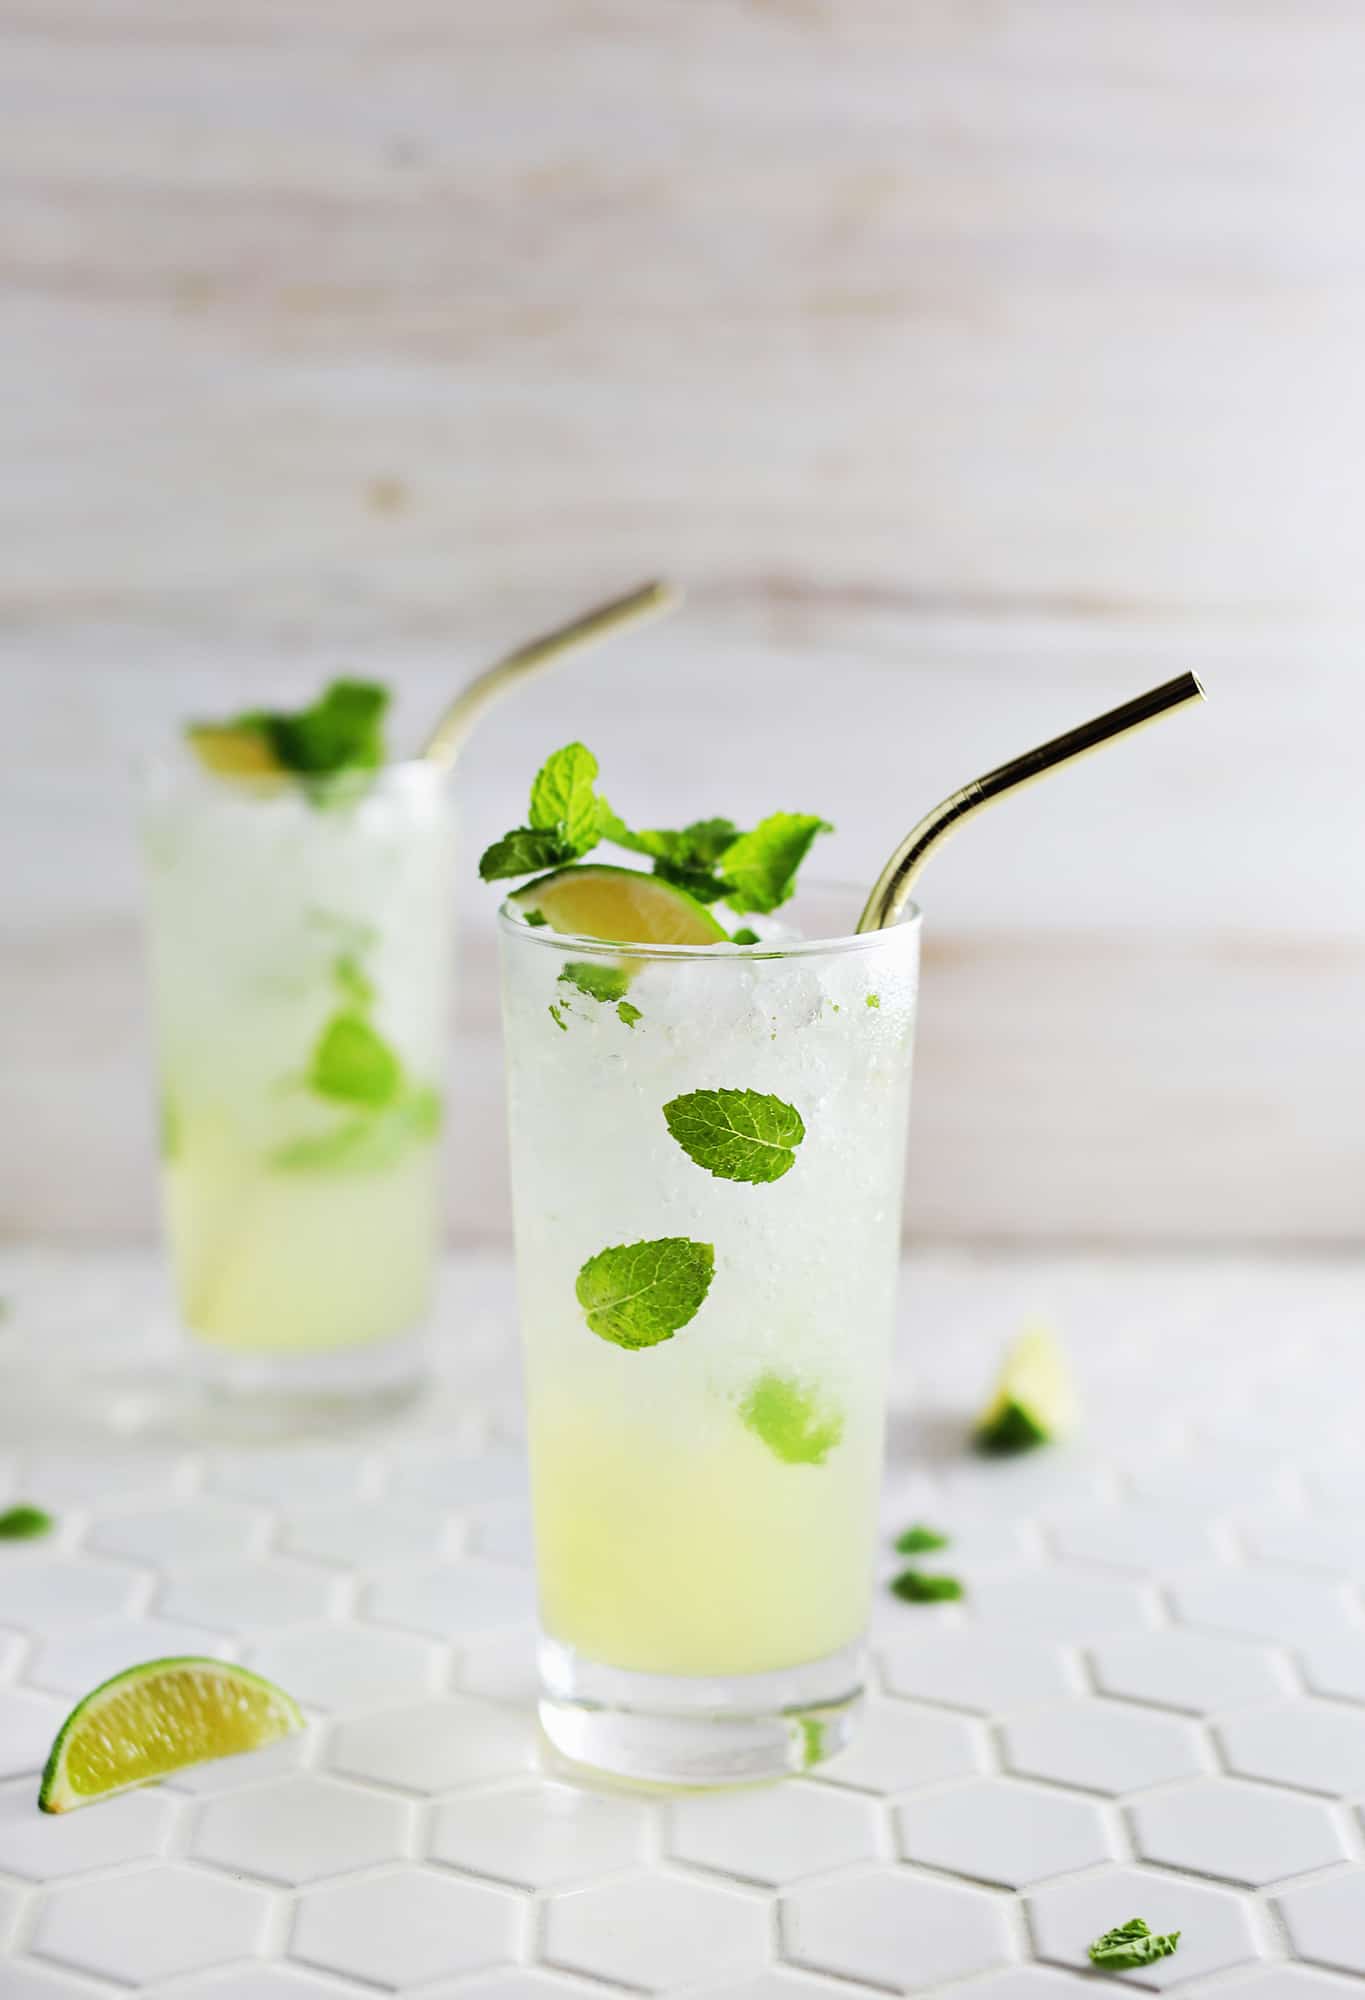 And, major bonus points if you use chipped or pebble ice. This really elevates any at-home drink. Sometimes, I will buy a bag from Sonic and keep it in my freezer—especially if I’m hosting a party. Cheers! xo. Emma

Best Mint Mojito Recipe
Ingredients
- 2 ½ ounces rum white
- 1 ounce lime juice fresh
- 1 ounce simple syrup see recipe notes
- 8 mint leaves fresh
- club soda or sparkling water
Instructions
- In a cocktail shaker, add the rum, lime juice, simple syrup, and mint leaves.
- Muddle (smash) the mint leaves well.
- Add ice and shake the cocktail, then strain into a tall glass such as a Collins or Highball glass.
- Add ice and top off with the club soda.
- Garnish with a mint sprig.
Notes
Nutrition
Personally, I like Jello poke cake best during the summer, as the cake gets refrigerated while the Jello sets so the cake is typically served cold. This is also a great cake recipe to turn into an easy flag cake if you need something for a 4th of July or Juneteenth celebration.
Related: If you love this poke cake, then you may also love Jello Salad, Ambrosia Salad, or Red Velvet Cake.
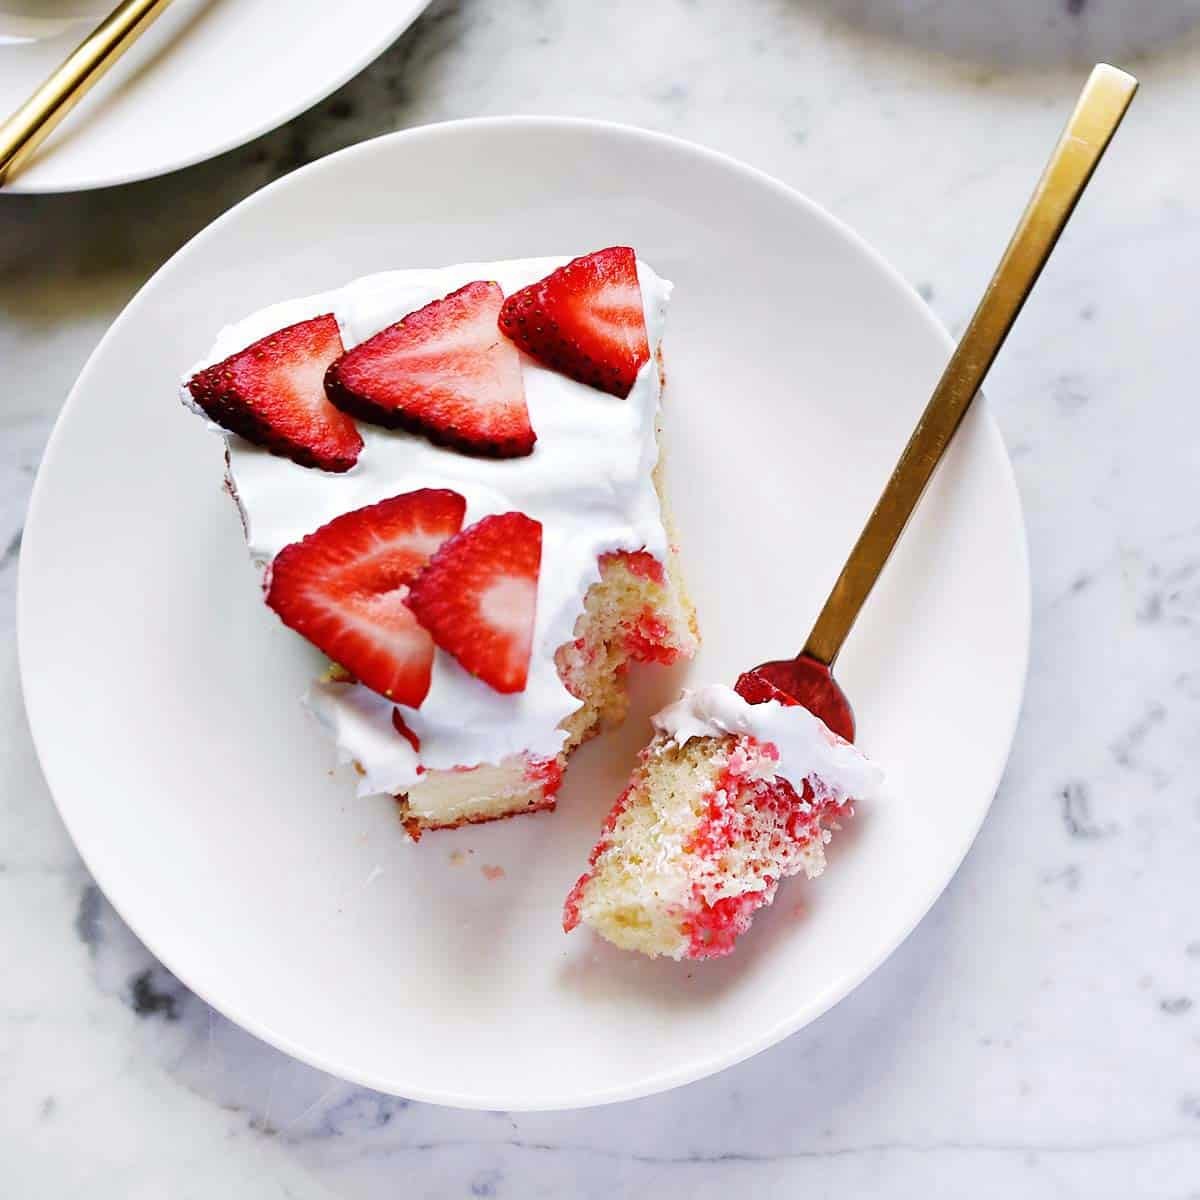
Ingredients
- White cake mix
- Jello mix
- Cool Whip
While these are the three main ingredients you will need, keep in mind the cake mix and Jello mix will require other ingredients. This may vary based on your cake mix brand, but this may include water, oil, eggs, or milk.
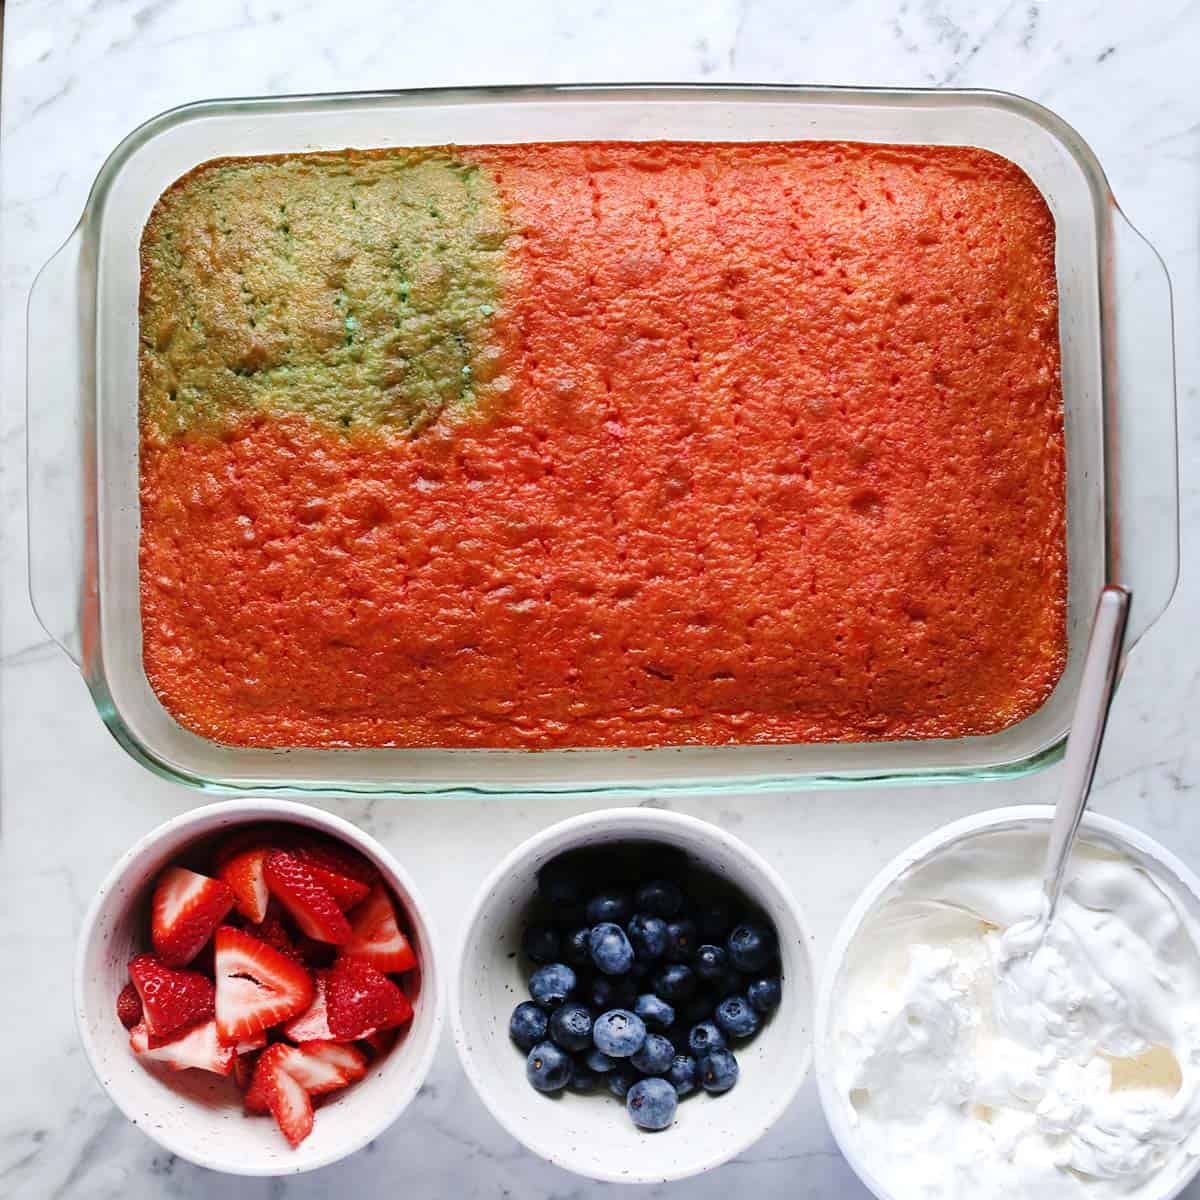
If you plan to turn your Jello poke cake into an easy flag cake, you will also need fresh strawberries and blueberries.
Directions
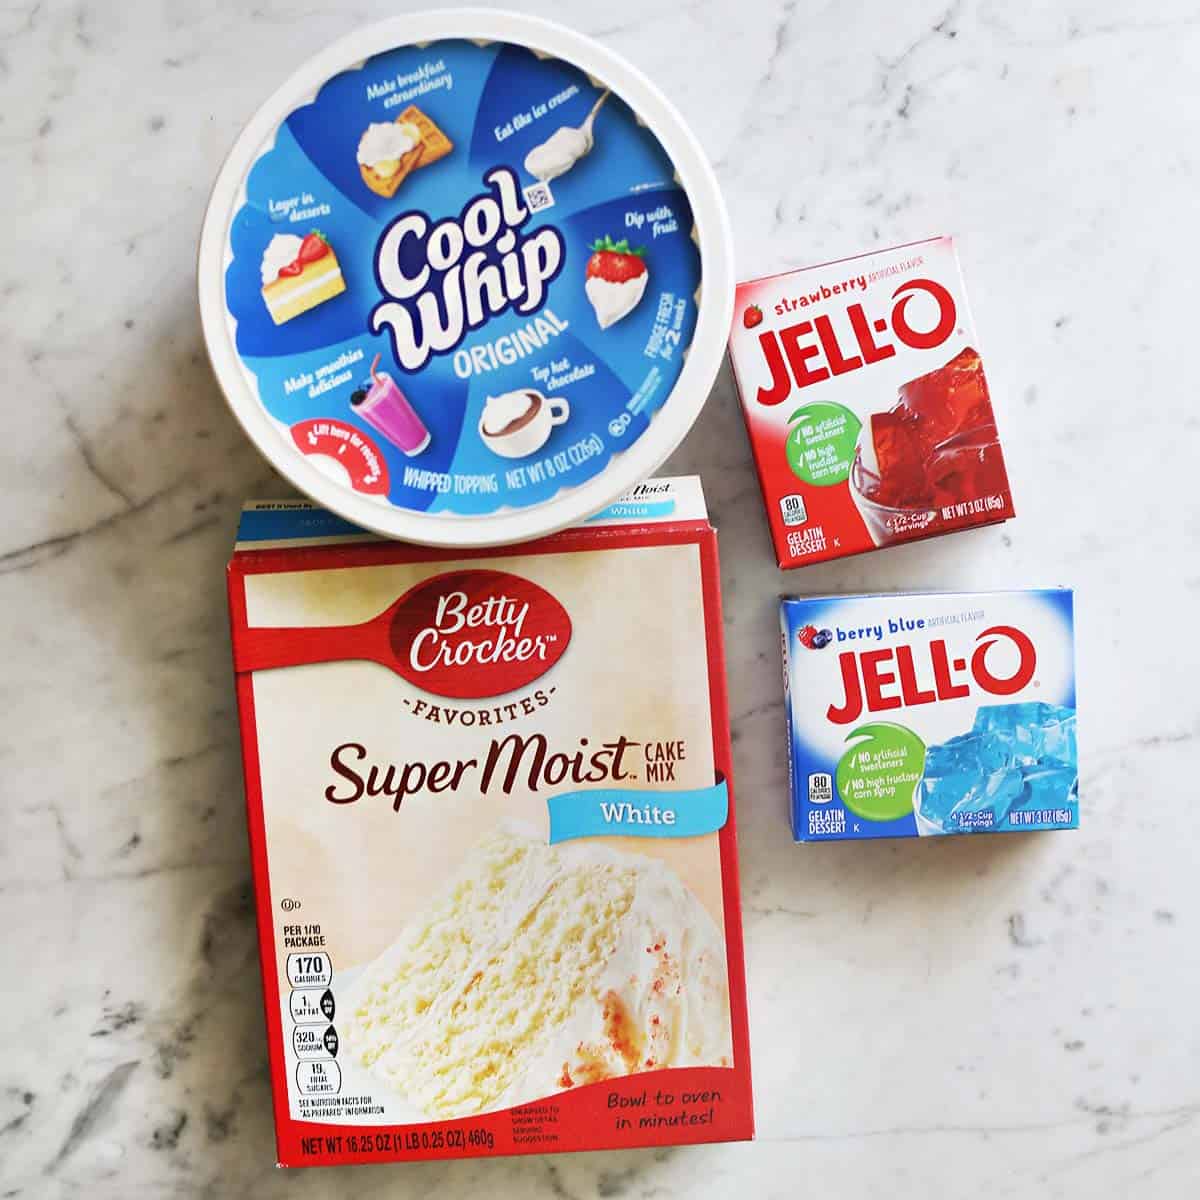
Prepare the cake mix according to the box directions to create a 9×13 cake. Once the cake is baked, remove it from the oven and let it cool in the pan for about 15 minutes.
While the cake is cooling, prepare the Jello mixture. In a heatproof bowl, dissolve the flavored gelatin in 1 cup of boiling water. Stir until the gelatin is completely dissolved. Add 1/2 cup of cold water to the gelatin mixture and stir well.
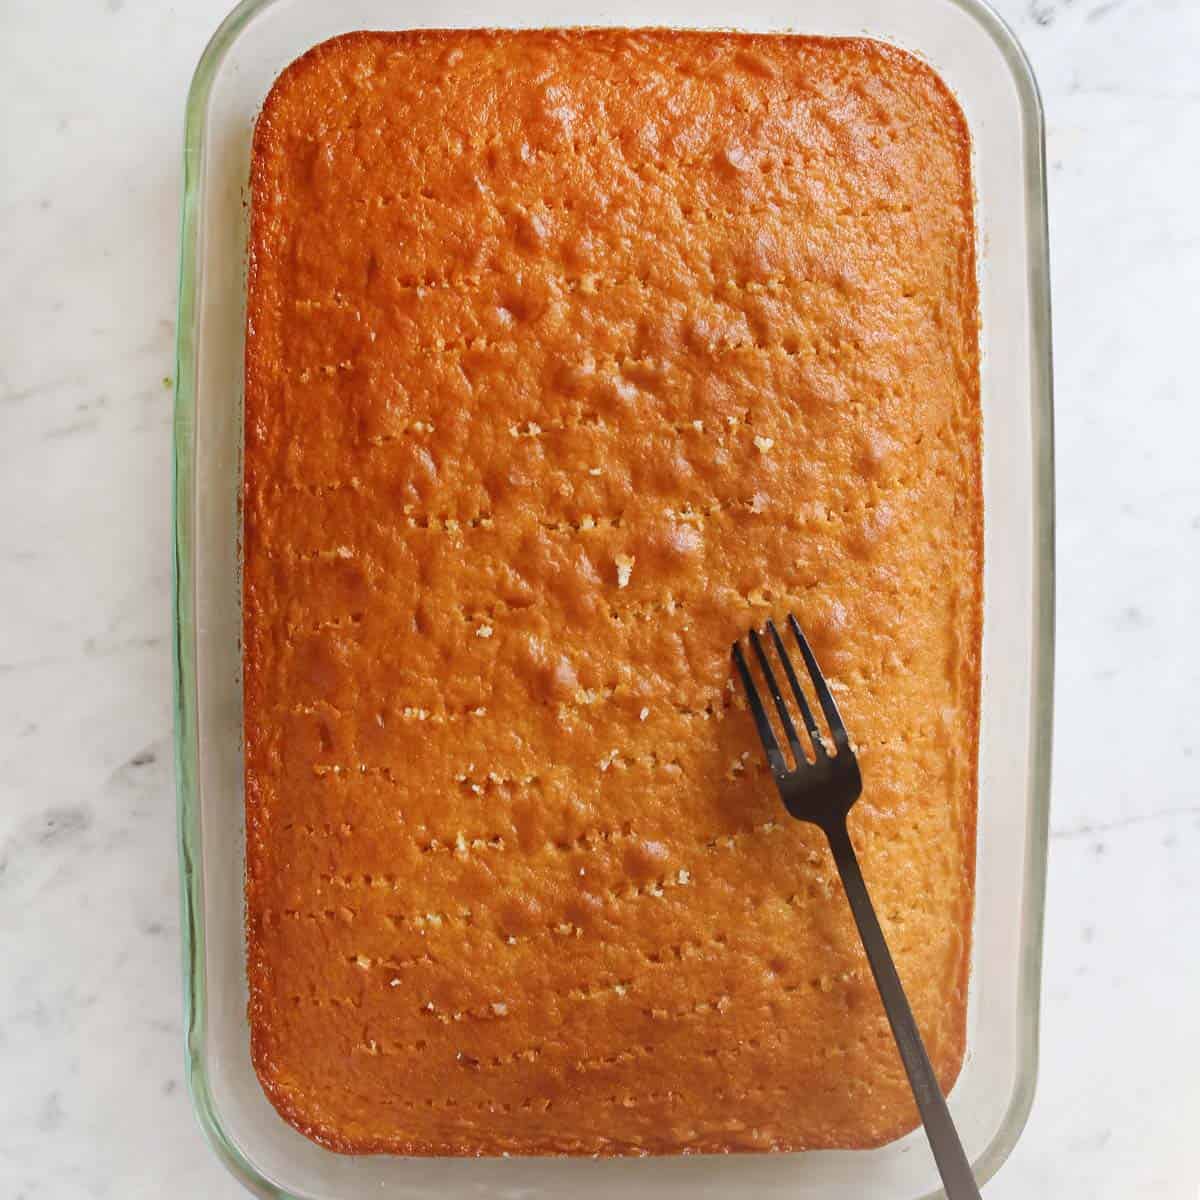
Use a fork to poke holes all over the cooled cake. Then, use a spoon or pastry brush to spoon the Jello mixture on top of the cake so it seeps into the holes.
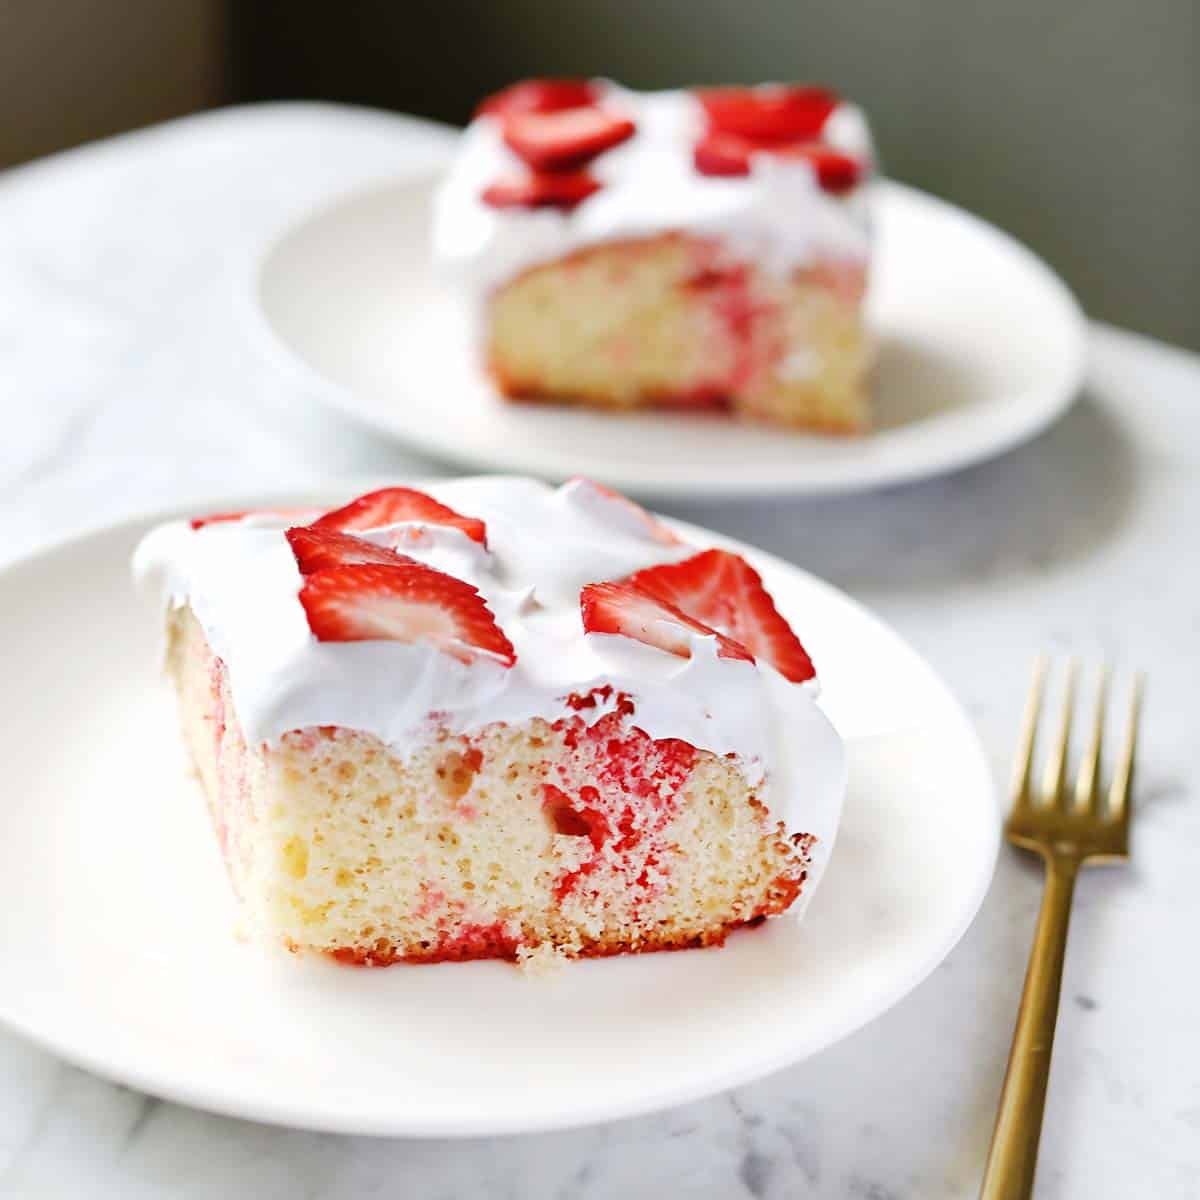
Refrigerate the cake for 3-4 hours, so the Jello has time to set. Then, top the cake with Cool Whip and serve!
Easy Flag Cake
If you want to turn your Jello Poke cake into a an easy flag cake, simply use both red and blue Jello mixes and distribute them over the cake, like an American flag. You won’t use all of the blue Jello mix, so feel free to simply mix up half instead of the entire box.
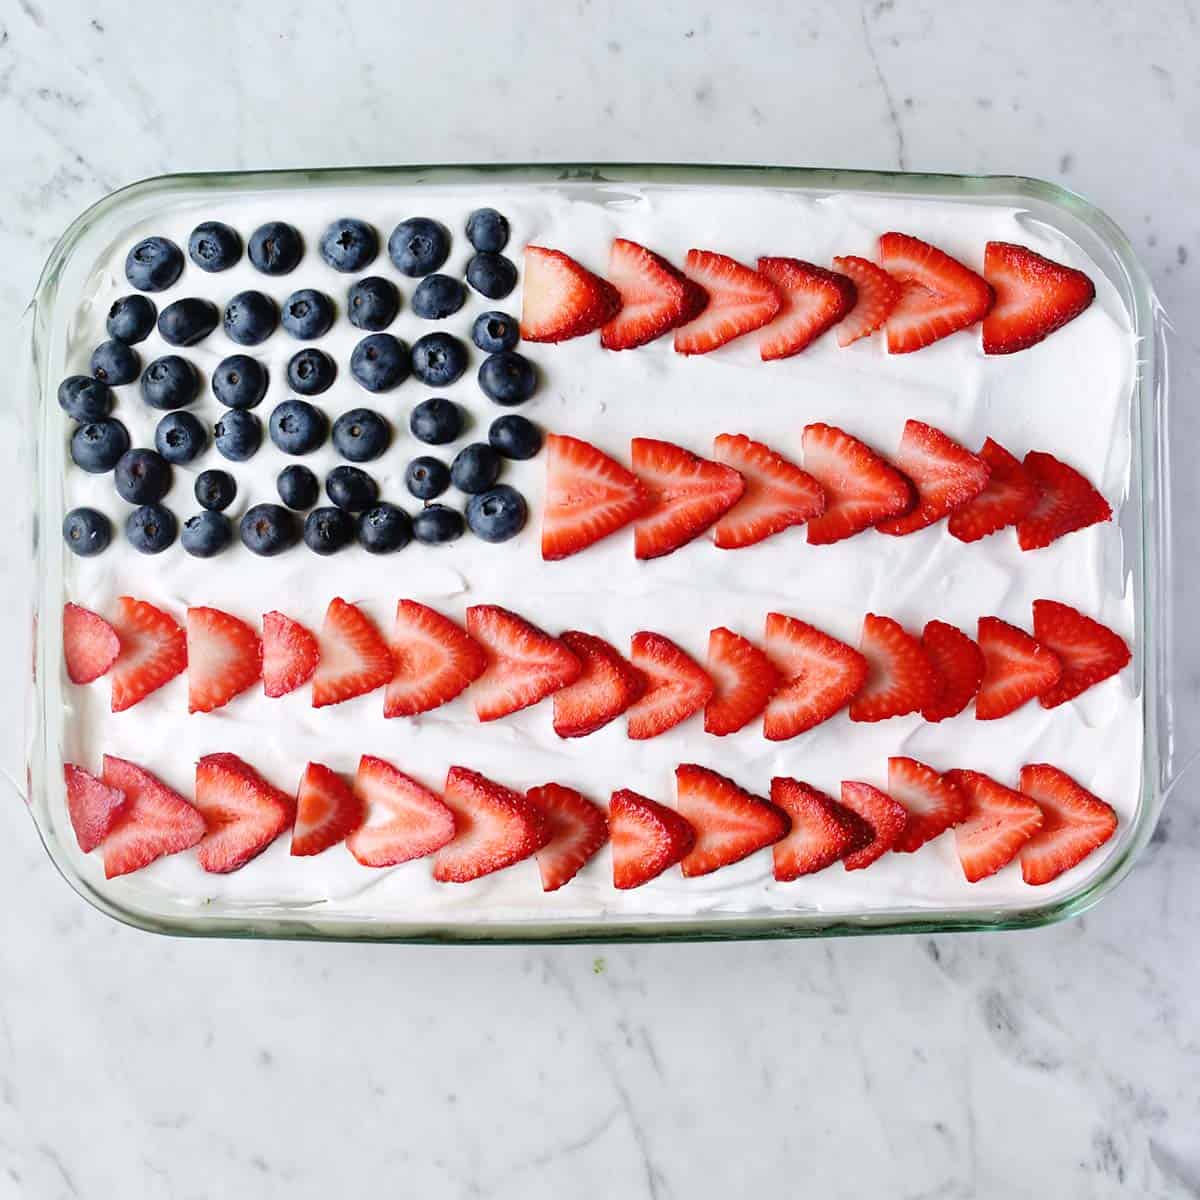
Once the cake has set and the Cool Whip has been added, top with lines of fresh blueberries and sliced strawberries like an American flag.
Tips & Variations
- You can use any cake mix flavor. Some flavors will go better with certain Jello flavors than others. But any cake mix can become a poke cake. You can also bake a cake from scratch or use a pre-made (not frosted) cake from a bakery.
- Use any flavor of Jello you like! I think lemon or lime would be really fun for summer, too.
- You can use other frosting beyond Cool Whip (whipped topping) like cream cheese frosting or buttercream.
- Fresh fruit is optional as a topping, but I think it makes this Jello poke cake recipe feel more festive and finished.
Making a Jello poke cake is a delightful way to elevate a simple cake into a visually stunning and delicious dessert. With its vibrant colors and fruity flavors, it’s bound to be a hit at any gathering.
The best part is you can customize it to your liking by choosing different flavors of cake and Jello. Happy baking!

Jello Poke Cake
Equipment
- 1 oven
Ingredients
- 1 box white cake mix
- 3 ounces box Jello mix
- 8 ounces whipped topping Cool Whip
Instructions
- Prepare the cake mix according to the box directions to create a 9×13 cake. Once the cake is baked, remove it from the oven and let it cool in the pan for about 15 minutes.
- While the cake is cooling, prepare the Jello mixture. In a heatproof bowl, dissolve the flavored gelatin in 1 cup of boiling water. Stir until the gelatin is completely dissolved.
- Add ½ cup of cold water to the gelatin mixture and stir well.
- Use a fork to poke holes all over the cooled cake.
- Then, use a spoon or pastry brush to spoon the Jello mixture on top of the cake so it seeps into the holes.
- Refrigerate the cake for 3-4 hours, so the Jello has time to set.
- Then top the cake with Cool Whip and fresh berries if using and serve!
Notes
- While these are the three main ingredients you will need, keep in mind the cake mix and Jello mix will require other ingredients. This may vary based on your cake mix brand, but this may include water, oil, eggs, or milk.
- If you plan to turn your Jello poke cake into an easy flag cake, you will also need fresh strawberries and blueberries.
- Jello poke cake can be stored covered in the refrigerator for 2-3 days after making.
Nutrition
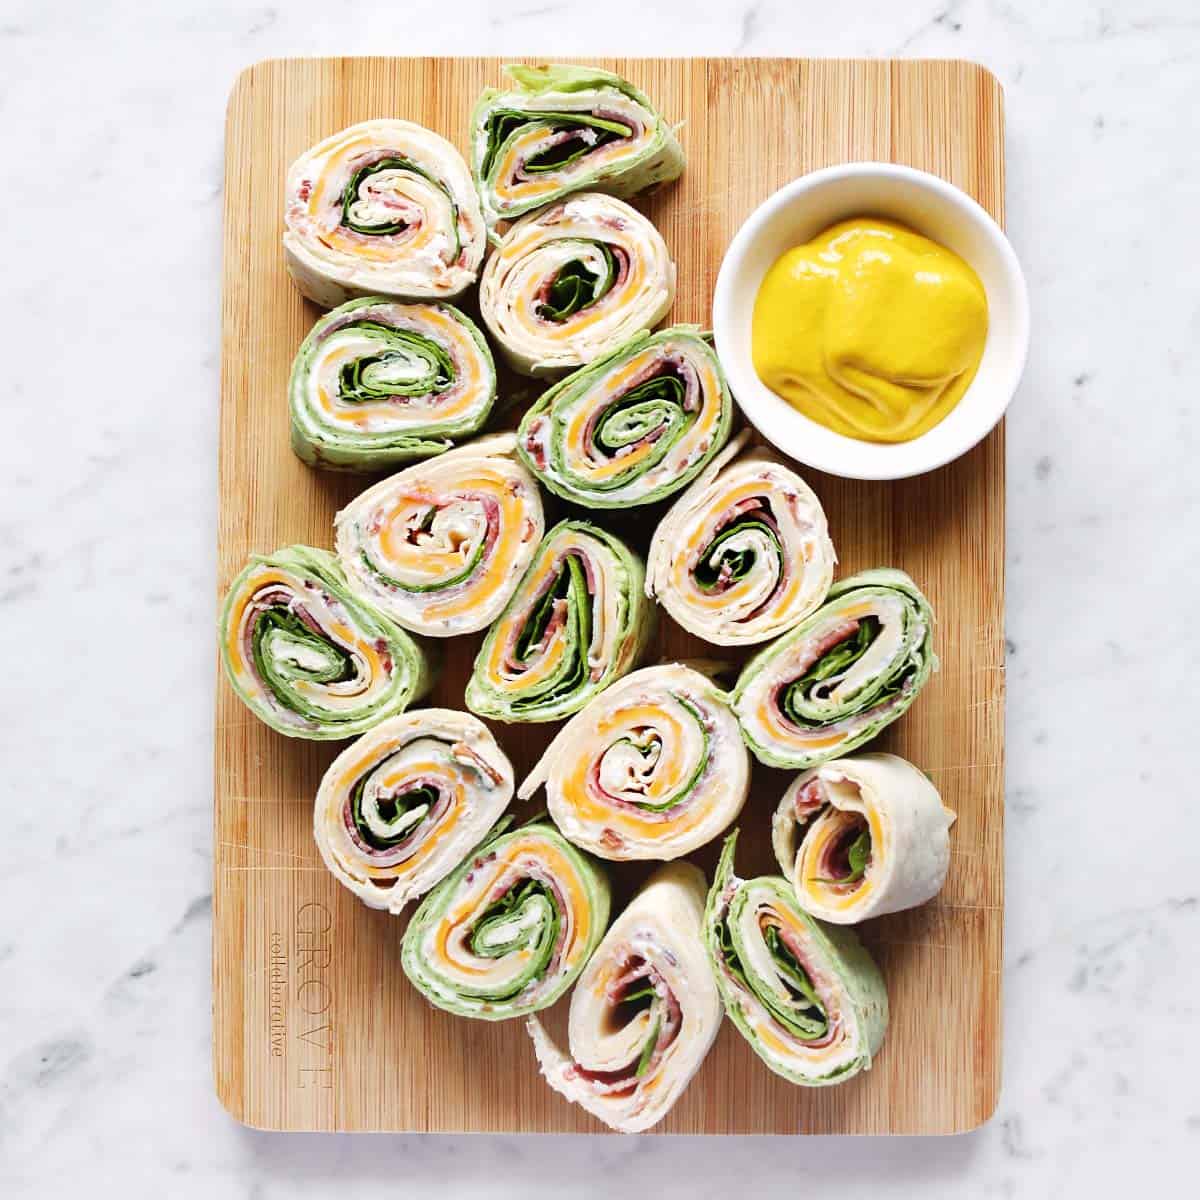
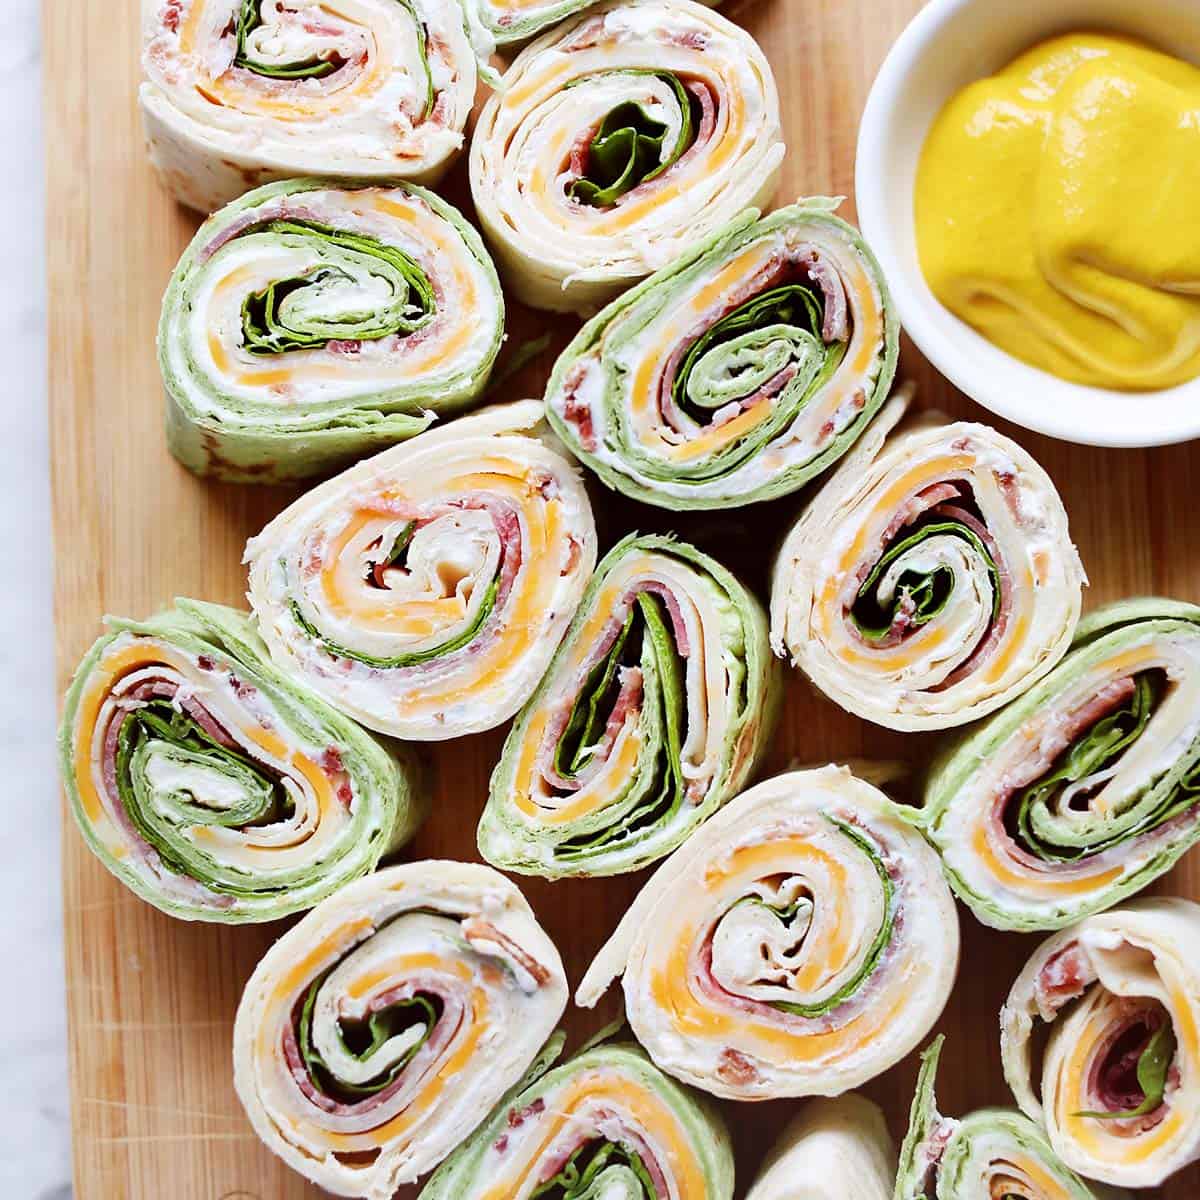
The secret to a great pinwheel sandwich is the cream cheese filling! This is the “glue” that keeps this rolled up sandwich looking great and it tastes amazing. I like to make the cream cheese filling with ranch and bacon bits, but there are many different options and variation to try.
Related: Looking for more easy appetizers? Try 30 Easy Finger Foods for a Party, 50 Easy BBQ Side Dishes or 75 Summer Dinner Ideas.
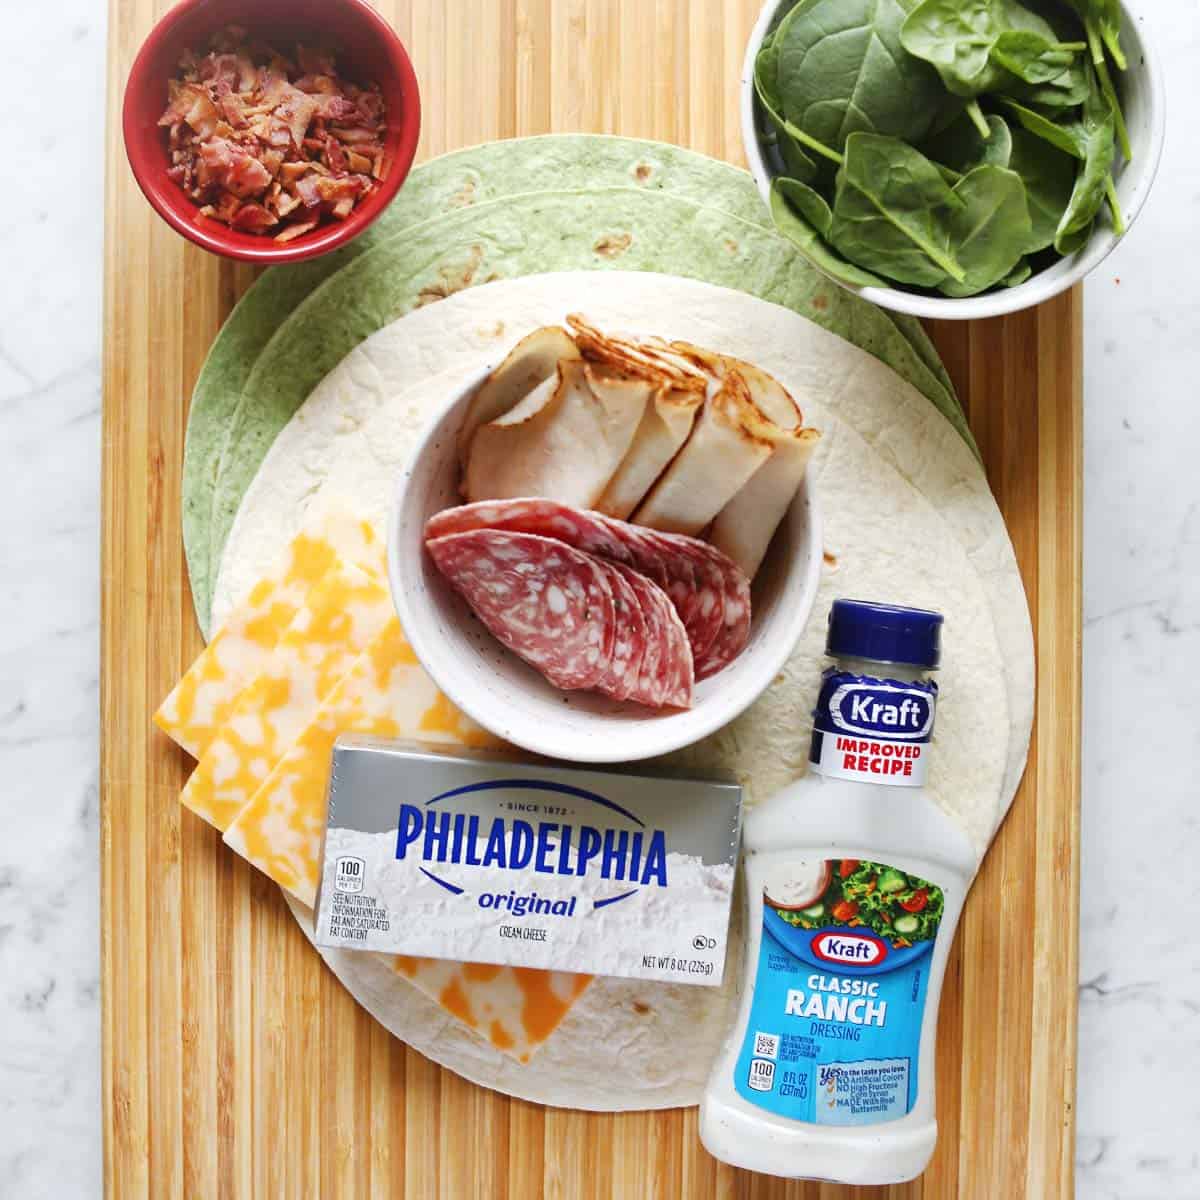
Basic Ingredients
- Flour tortillas
- Cream cheese
- Ranch dressing – store bought or homemade
- Bacon
- Sliced cheddar cheese – colby is great too
- Deli meat – I like smoked turkey, salami or ham
- Veggies like romaine lettuce, cucumber, avocado or spinach
How to Make Pinwheel Sandwiches
Combine the softened cream cheese with the ranch dressing and bacon (chopped).
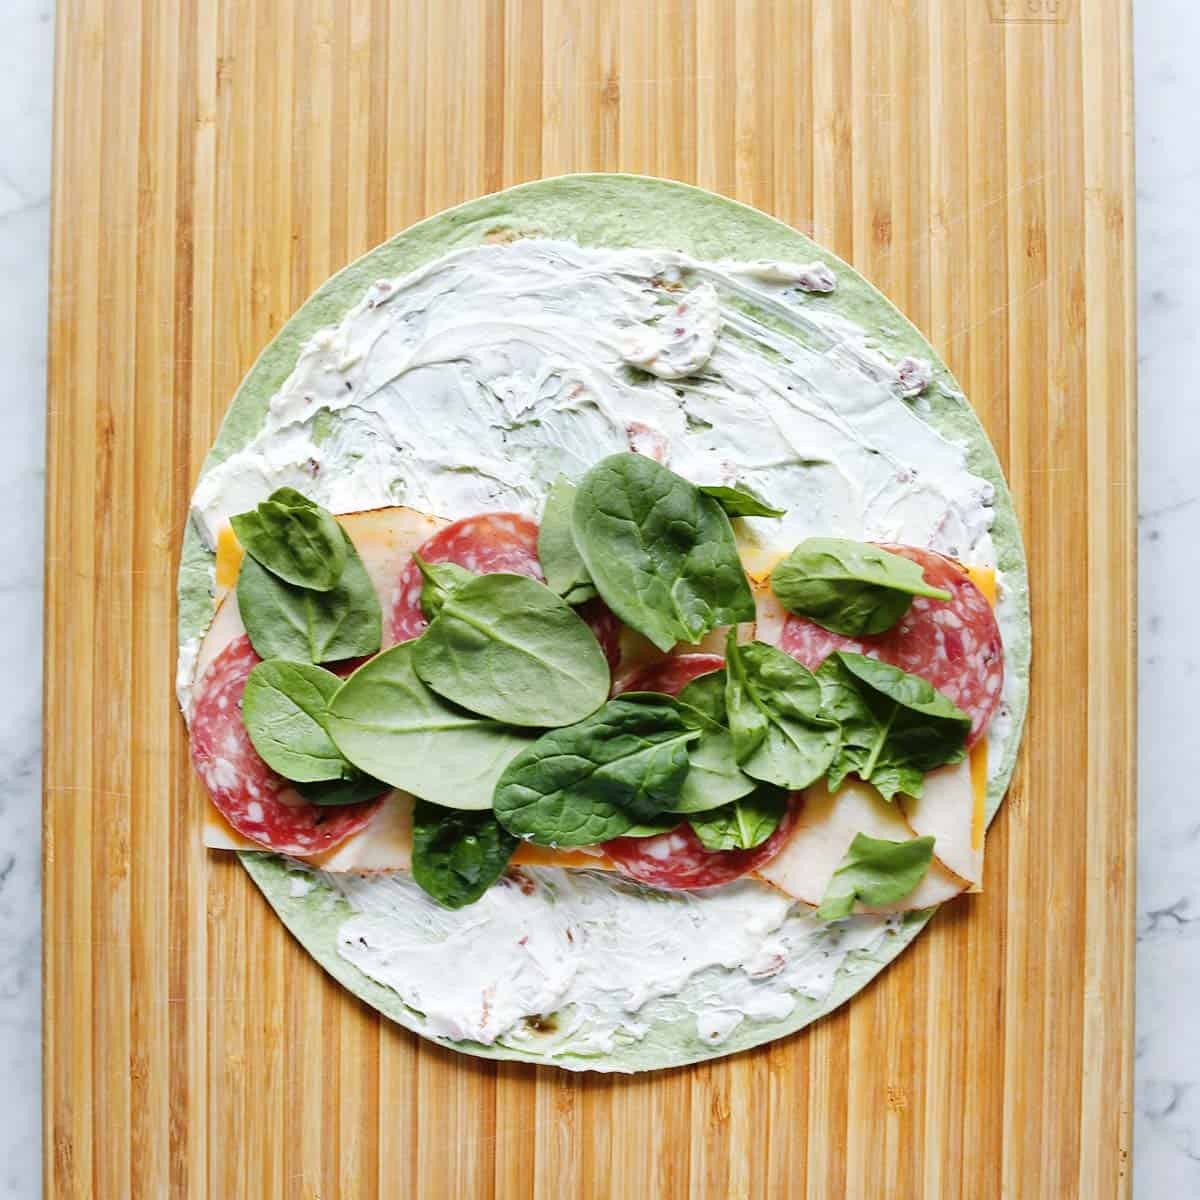
Lay out a tortilla shell. Spoon the cream cheese mixture on top and spread into a thin layer, coating the entire tortilla.
Layer on the sliced cheese, deli meat, and spinach. Place it toward the bottom 1/3 of the tortilla (not the center).
Roll up the tortilla and slice into pinwheels. The cream cheese holds these together pretty well, BUT if you have issue with them wanting to unroll, add a toothpick to the pinwheel. Use a sharp knife to cut the rolled tortilla into pinwheels.
Additional Filling Ideas
- For the cream cheese filling, you could omit the ranch dressing and add a packet of ranch seasoning instead. The bacon is also optional.
- If you don’t want to use a cream cheese filling, you could swap it for hummus for a similar effect.
- Any cheese that comes in slices (or that you can slice) will work. You could also try a crumbly cheese like feta.
- Any deli meat you prefer can work for pinwheel sandwiches: turkey, chicken, salami, pepperoni, or even bacon strips.
- You can add more or less vegetables: lettuce, spinach, sliced bell peppers, thinly sliced tomato, or fresh herbs like cilantro or basil.
- Pickled items will work as well: bread and butter pickles, olives, pickled carrots, etc.
More Appetizer Recipes
Other recipes to make for a party:
- The Best Fruit Salad
- Creamy Pasta Salad
- Deviled Eggs
- Ambrosia Salad
- Egg White Bites
- Homemade Chex Mix
Frequently Asked Questions
Can I make pinwheel sandwiches ahead of time?
Yes, pinwheel sandwiches can be made the day before and refrigerated until ready to serve. The one factor you’ll want to consider are any ingredients (like sliced tomatoes) that could create additional moisture during storage.
How do I store pinwheel sandwiches and how long do they last?
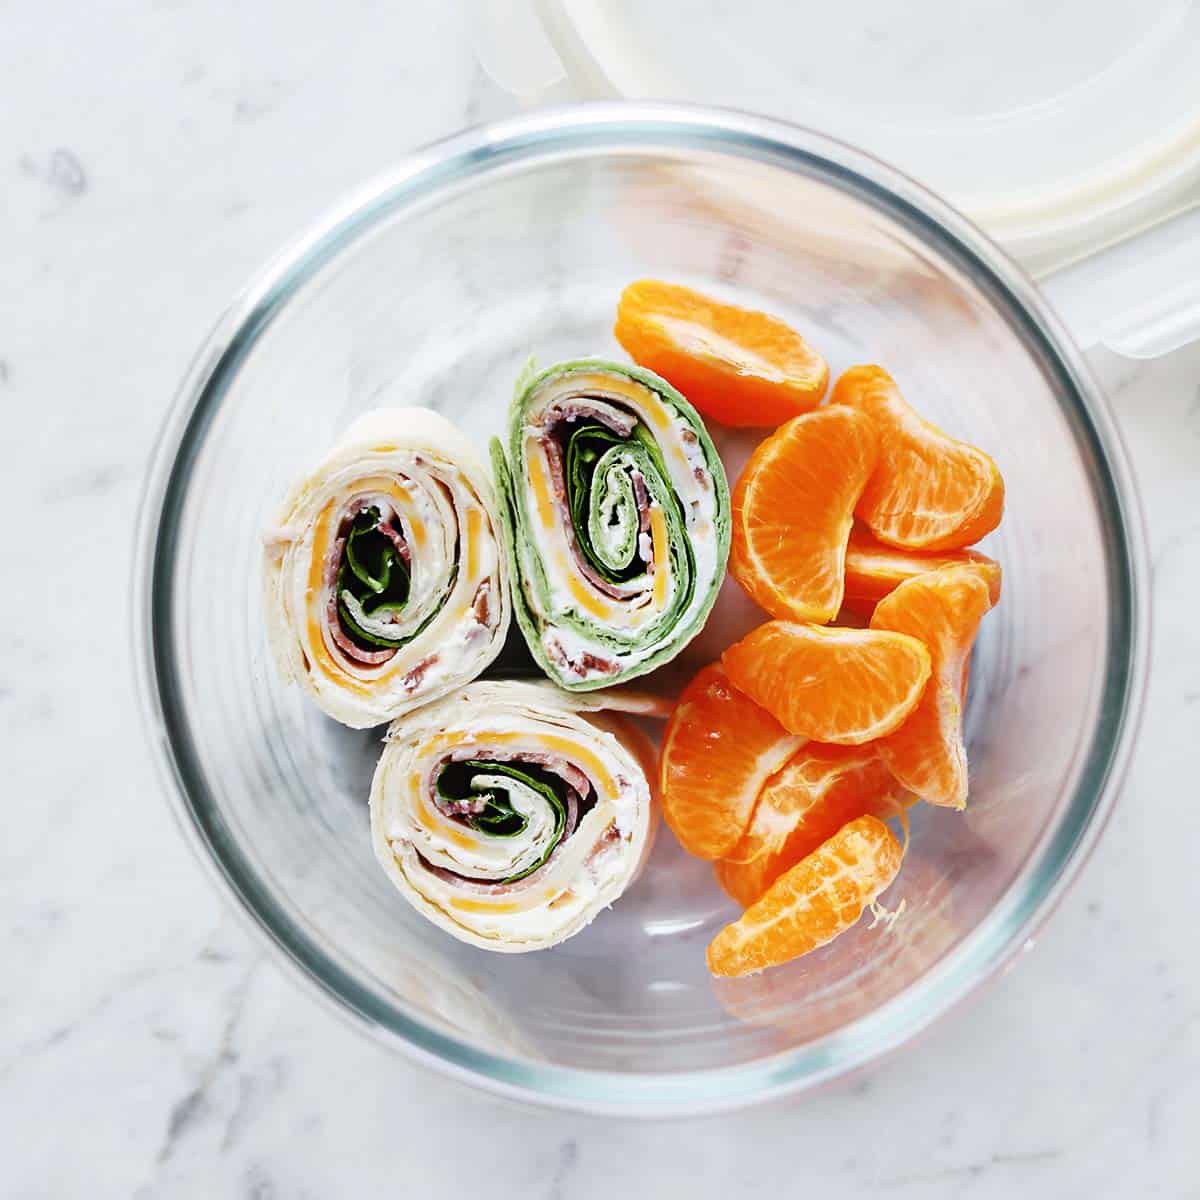
You can store pinwheel sandwiches in an airtight container in the refrigerator. This could be a ziplock bag or Tupperware-type container.
You could also store them on a serving tray or cutting board wrapped in plastic wrap. They can be stored this way for 2-3 days.

Pinwheel Sandwiches
Ingredients
- 4 tortillas soft
- 8 ounces cream cheese softened
- ¼ cup ranch dressing
- 3 strips bacon
- 8 slices cheese
- 8 slices deli turkey
- 16 slices salami
- 1 cup spinach leaves
Instructions
- Combine the softened cream cheese with the ranch dressing and bacon (chopped).
- Lay out a tortilla shell. Spoon the cream cheese mixture on top and spread into a thin layer, coating the entire tortilla.
- Layer on the sliced cheese, deli meat, and spinach. Place it toward the bottom 1/3 of the tortilla (not the center).
- Roll up the tortilla and slice into pinwheels.
- The cream cheese holds these together pretty well, BUT if you have issue with them wanting to unroll, add a toothpick to the pinwheel.
Notes
- For the cream cheese filling, you could omit the ranch dressing and add a packet of ranch seasoning instead. The bacon is also optional.
- If you don’t want to use a cream cheese filling, you could swap it for hummus for a similar effect.
- Any cheese that comes in slices (or that you can slice) will work. You could also try a crumbly cheese like feta.
- Any deli meat you prefer can work for pinwheel sandwiches: turkey, chicken, salami, pepperoni or even bacon strips.
- You can add more or less vegetables: lettuce, spinach, sliced bell peppers, thinly sliced tomato, or fresh herbs like cilantro or basil.
- Pickled items will work as well: bread and butter pickles, olives, pickled carrots, etc.
Nutrition
A lot of weeknight dinners we make at our house are pretty basic. We make some kind of protein (meat or plant-based) with rice or pasta. So, I like to have easy ways to change this up flavor-wise. And that’s where this orange chicken sauce recipe comes in.
Related: Check out Cashew Chicken Sauce, Sweet & Sour Sauce, Air Fryer Chicken or give our Easy Chicken Pot Pie a try!

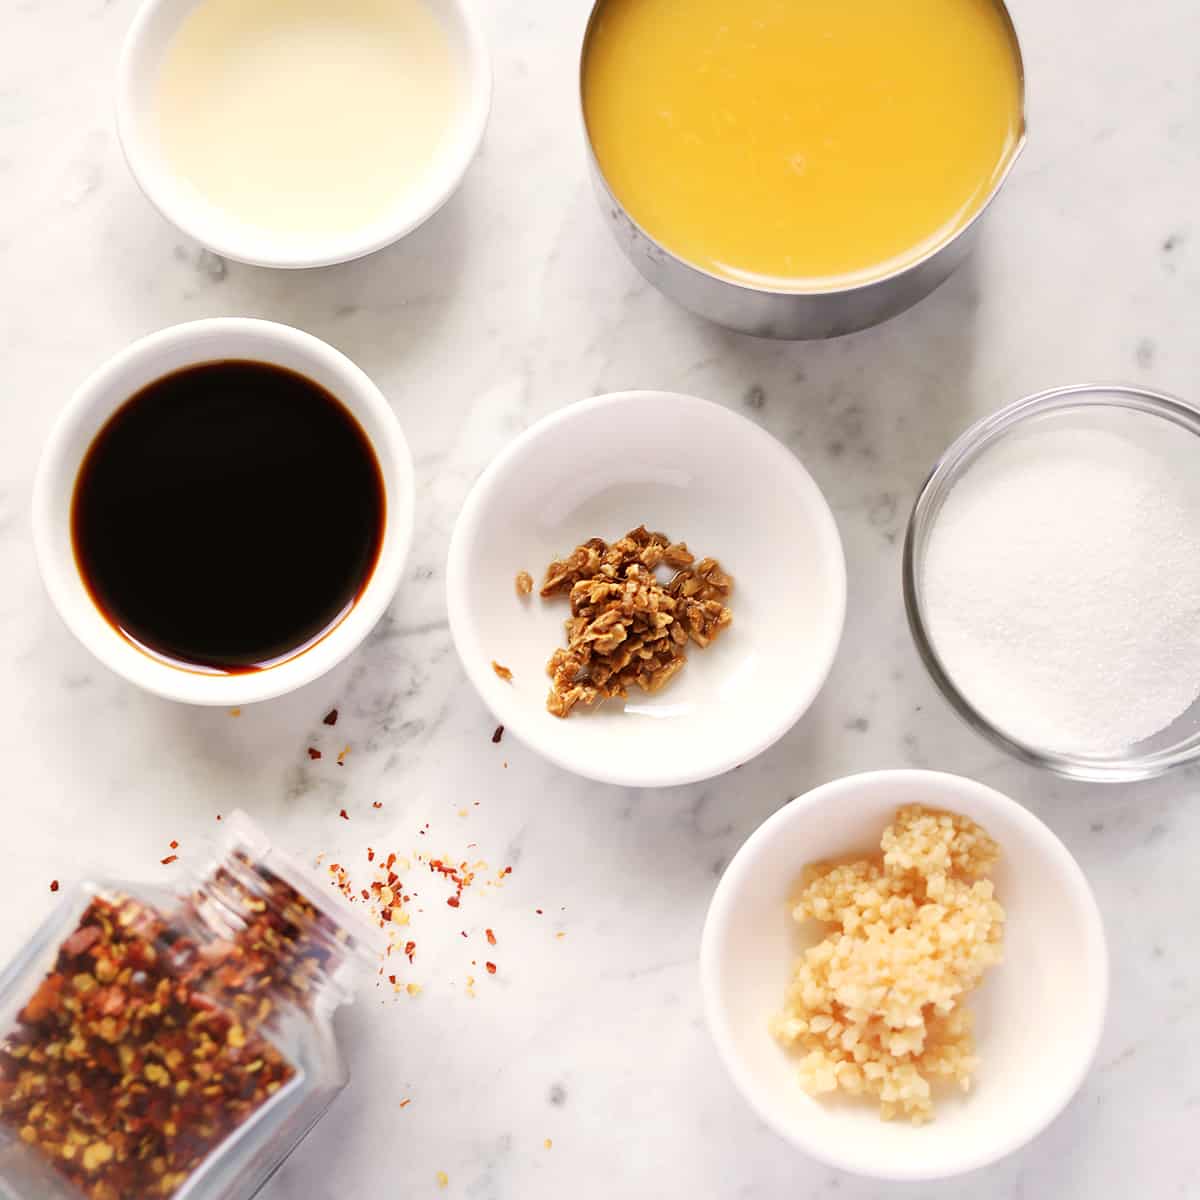
Orange Chicken Sauce Ingredients:
- Olive oil
- Ginger
- Garlic
- Orange Juice + Zest
- Granulated White Sugar
- Rice Vinegar
- Soy Sauce
- Cornstarch
- Red Pepper Flakes
Directions:
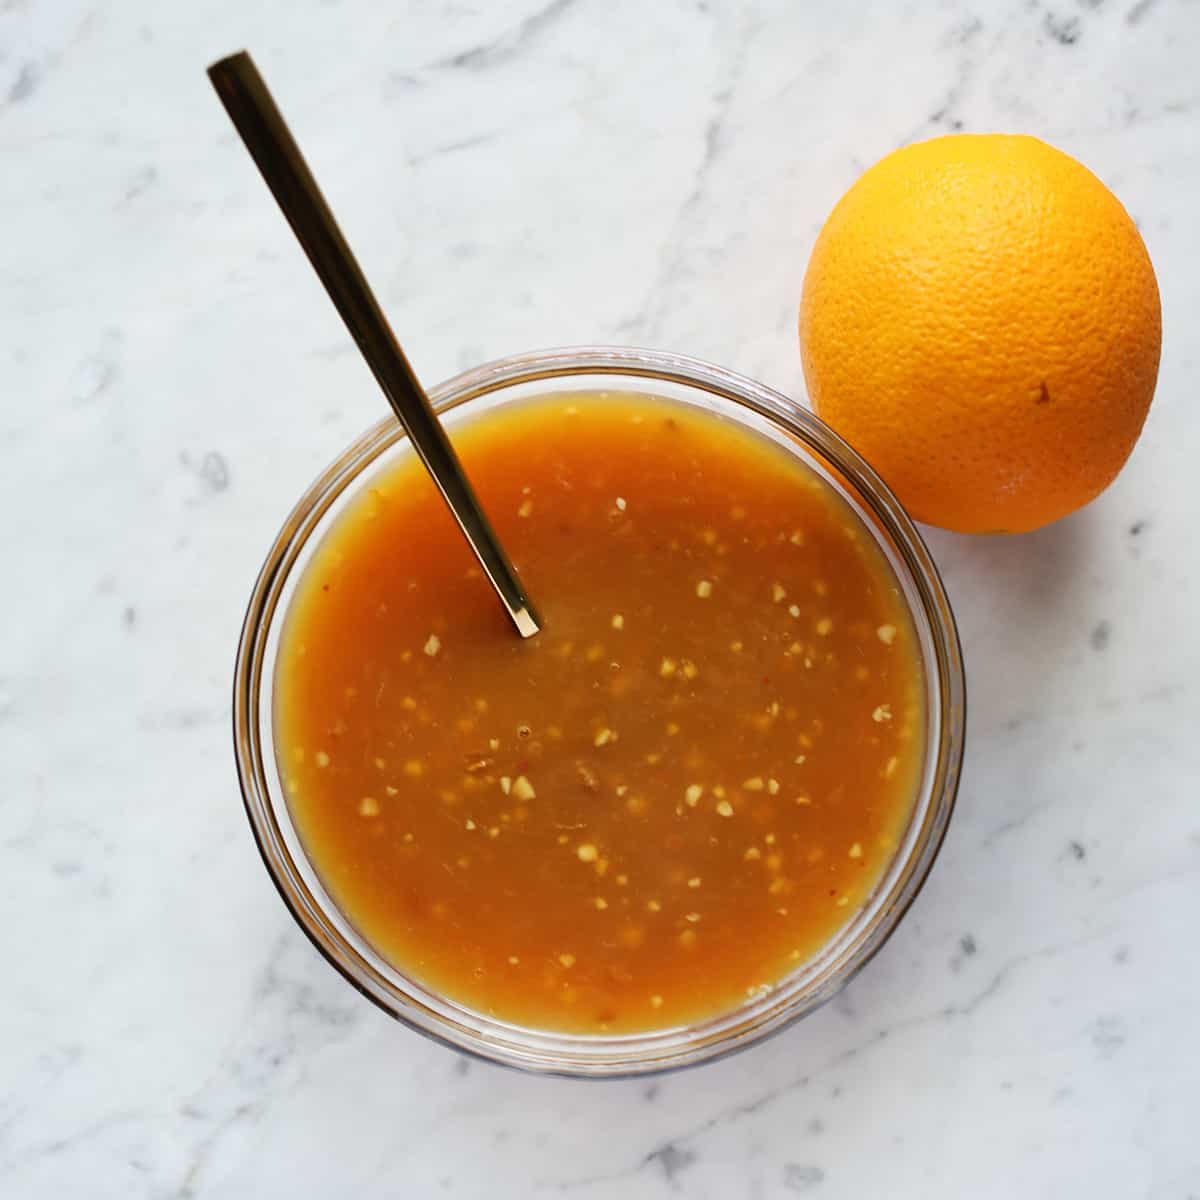
Cook the minced ginger and garlic in the olive oil over medium/high heat for a minute or two. Then, add the orange juice, zest, sugar, rice vinegar, and soy sauce. Whisk until the sugar dissolves. Stir in the red pepper flakes.
In a small bowl or glass, stir together the cornstarch with one tablespoon water. This creates a thick slurry mixture. Slowly pour this into the sauce, stirring as you do.
Continue to cook until the sauce thickens. Taste and add more soy sauce or red pepper flakes if needed.
Tips & Substitutions:
- You can substitute honey for the granulated white sugar if you like.
- If you don’t have rice vinegar, you can use white vinegar instead.
- Sauce is like gravy in that if it’s not thickening as much as you want after you’ve added the cornstarch, turn the heat up a little and continue to cook. Keep an eye on it though, as it can thicken quickly.
- You can store orange chicken sauce in an airtight container in the refrigerator for up to a week—just rewarm before using.
Serving Suggestions:
- You can use this Springfield-Style Cashew Cauliflower recipe and substitute this orange chicken sauce for a vegetarian-friendly option.
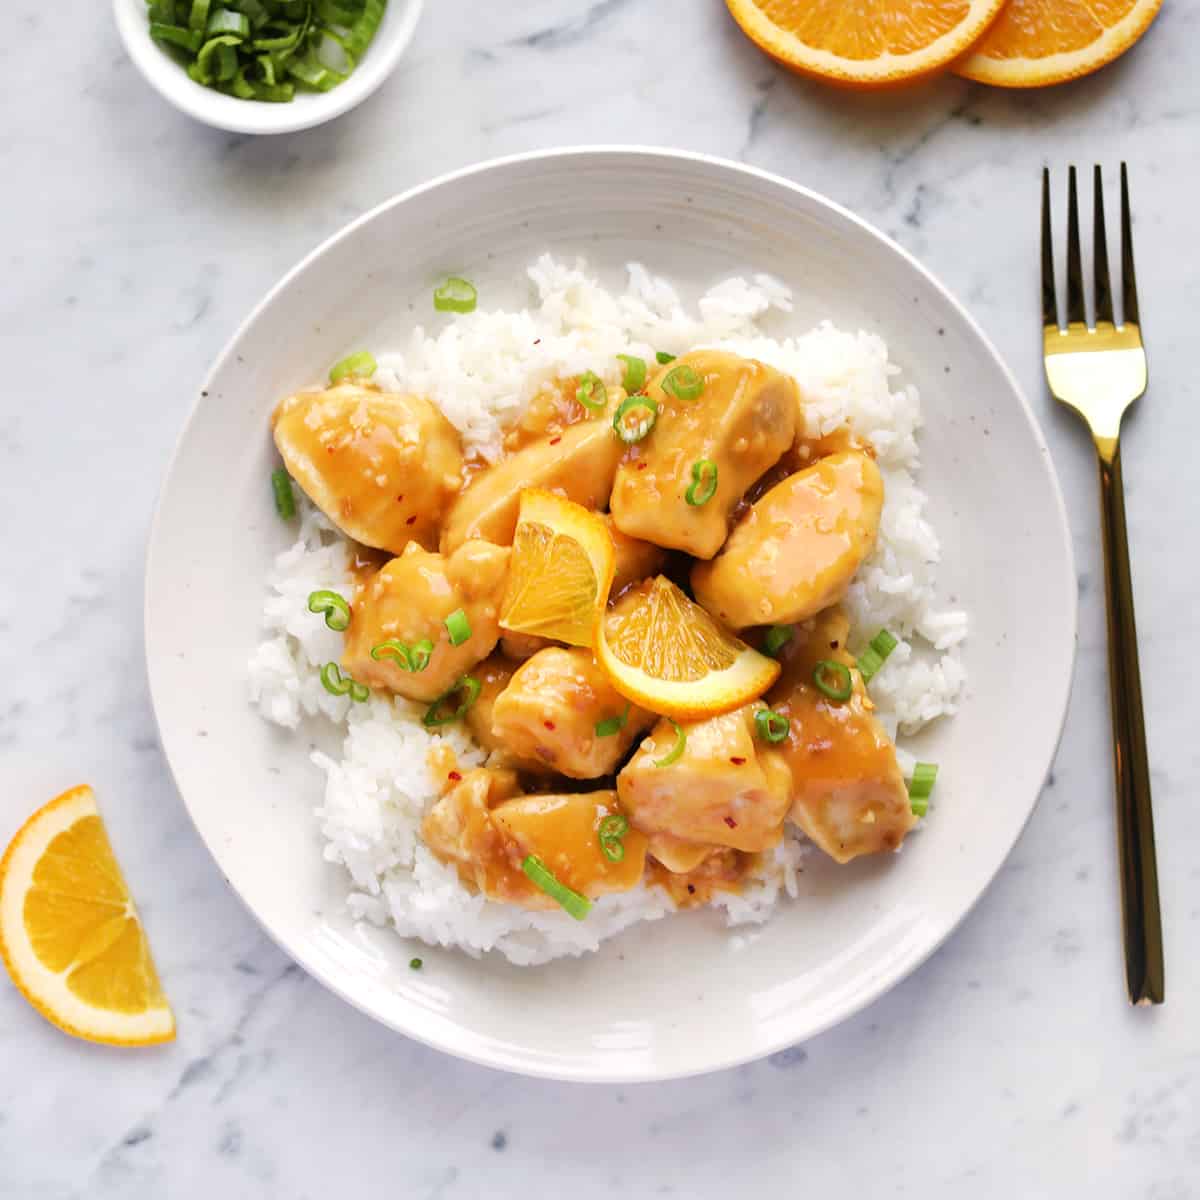
- When we make rice, I always use a rice cooker since it’s so easy, and then I can focus on making the chicken and sauce while the rice cooker does its thing.
- I like to add a few chopped green onions over this sauce just before serving.

Orange Chicken Sauce
Ingredients
- 1 teaspoon olive oil
- 1 tablespoon ginger minced
- 3 cloves garlic minced
- 1 cup orange juice and zest from orange
- 2 tablespoons granulated white sugar
- 2 tablespoons rice vinegar
- 2 tablespoons soy sauce
- ¼ teaspoon red pepper flakes
- 1 tablespoon cornstarch
Instructions
- In a sauce pan, cook the minced ginger and garlic in the olive oil over medium/high heat for a minute or two.
- Then, add the orange juice, zest, sugar, rice vinegar, and soy sauce.
- Whisk until the sugar dissolves.
- Stir in the red pepper flakes.
- In a small bowl or glass, stir together the cornstarch with one tablespoon water. This creates a thick slurry mixture.
- Slowly pour this into the sauce, stirring as you do.
- Continue to cook until the sauce thickens. Taste and add more soy sauce or red pepper flakes if needed.
Notes
- You can substitute honey for the granulated white sugar if you like.
- If you don’t have rice vinegar, you can use white vinegar instead.
- Sauce is like gravy in that if it’s not thickening as much as you want after you’ve added the cornstarch, turn the heat up a little and continue to cook. Keep an eye on it though, as it can thicken quickly.
- You can store orange chicken sauce in an airtight container in the refrigerator for up to a week, just rewarm before using.
Nutrition
Carbonara also manages to be one of those pasta dishes that feels both light but rich and filling at the same time. The main components are pancetta (or bacon), egg yolks and cheese.
Related: Pomodoro Sauce, Vodka Sauce, Alfredo Sauce, Pesto and Bruschetta.

Ingredients
- Pancetta, or thick cut bacon
- Parmesan
- Egg yolks
- Garlic
- Spaghetti noodles
- Salt and pepper
Pasta water is also a critical component of this recipe, but you will make it as you cook the noodles.

Directions
Cook the pasta according to the package directions for al dente. Before straining, reserve some of the pasta water.
In a large saucepan, cook the pancetta (or bacon) until fully cooked, but not too crispy. Then toss in the garlic and cook for another minute.
In a small bowl, add a few tablespoons of the (hot) pasta water to the egg yolk and stir to incorporate. Add a few more tablespoons at a time, stirring in between. The goal here is heat up the yolks gradually so they don’t curdle/cook once added to the pan.
Now add the pasta and yolk mixture to the pancetta pan. Reduce the heat to low and toss everything with tongs. Sprinkle in the cheese and continue to toss until the cheese begins to melt. Taste and add any salt or pepper as needed. Serve warm.

Tips & Substitutions
- Pancetta is the traditional option for carbonara sauce, but sometimes this ingredient is difficult to find at the grocery stores I frequent. If that’s the case for you as well, thick cut bacon will also work for this recipe.
- If you do notice the eggs curdling or cooking too fast, it’s OK! This will only change the texture, it doesn’t mean the dish is completely ruined. It will be more like fried rice than traditional carbonara but still tasty.
- I will often add a sprinkle of fresh herbs, like parsley, before serving just for a little added flavor and green, but this is optional and not necessarily traditional.

Serving Suggestions
I love this carbonara recipe alongside a big salad or vegetable side dish. Here are some ideas.
- Homemade Caesar Salad
- Roasted Asparagus
- Roasted Brussels Sprouts
- Roasted Green Beans
- Roasted Cauliflower
- Air Fryer Zucchini
- Air Fryer Green Beans
- Air Fryer Cauliflower
- Air Fryer Brussels Sprouts
- Air Fryer Asparagus

Carbonara Sauce
Ingredients
- 2 ounces pancetta
- ¼ cup Parmesan cheese
- 2 egg yolks
- 1 clove garlic
- 8 ounces spaghetti noodles
- ¼ cup pasta water
- salt and pepper
Instructions
- Cook the pasta according to the package directions for al dente. Before straining, reserve some of the pasta water.
- In a large saucepan, cook the pancetta (or bacon) until fully cooked, but not too crispy.
- Then toss in the garlic and cook for another minute.
- In a small bowl, add a few tablespoons of the (hot) pasta water to the egg yolk and stir to incorporate. Add a few more tablespoons at a time, stirring in between. The goal here is heat up the yolks gradually so they don’t curdle/cook once added to the pan.
- Now add the pasta and yolk mixture to the pancetta pan. Reduce the heat to low and toss everything with tongs.
- Sprinkle in the cheese and continue to toss until the cheese begins to melt.
- Taste and add any salt or pepper as needed. Serve warm.
Notes
Nutrition
This is a dessert that I had a lot growing up—for whatever reason, it stands out in my mind as something that was made at church get-togethers. It’s funny the little things we remember.
Eclair cake is a spin on the classic French pastry. Eclairs are made of a (baked) choux dough filled with pastry cream, and then topped with a flavored icing (often chocolate). The cake version is layers dough/crust and pastry cream all topped with a chocolate ganache.
This chocolate eclair cake is a no-bake version, so it’s not made with the classic choux dough. If you’re looking for an eclair cake that more closely resembles a classic eclair, try this recipe from Food52.
Related: No-Bake Chocolate Silk Pie, No-Bake Banana Cream Pie, and 30+ Easy No-Bake Desserts.
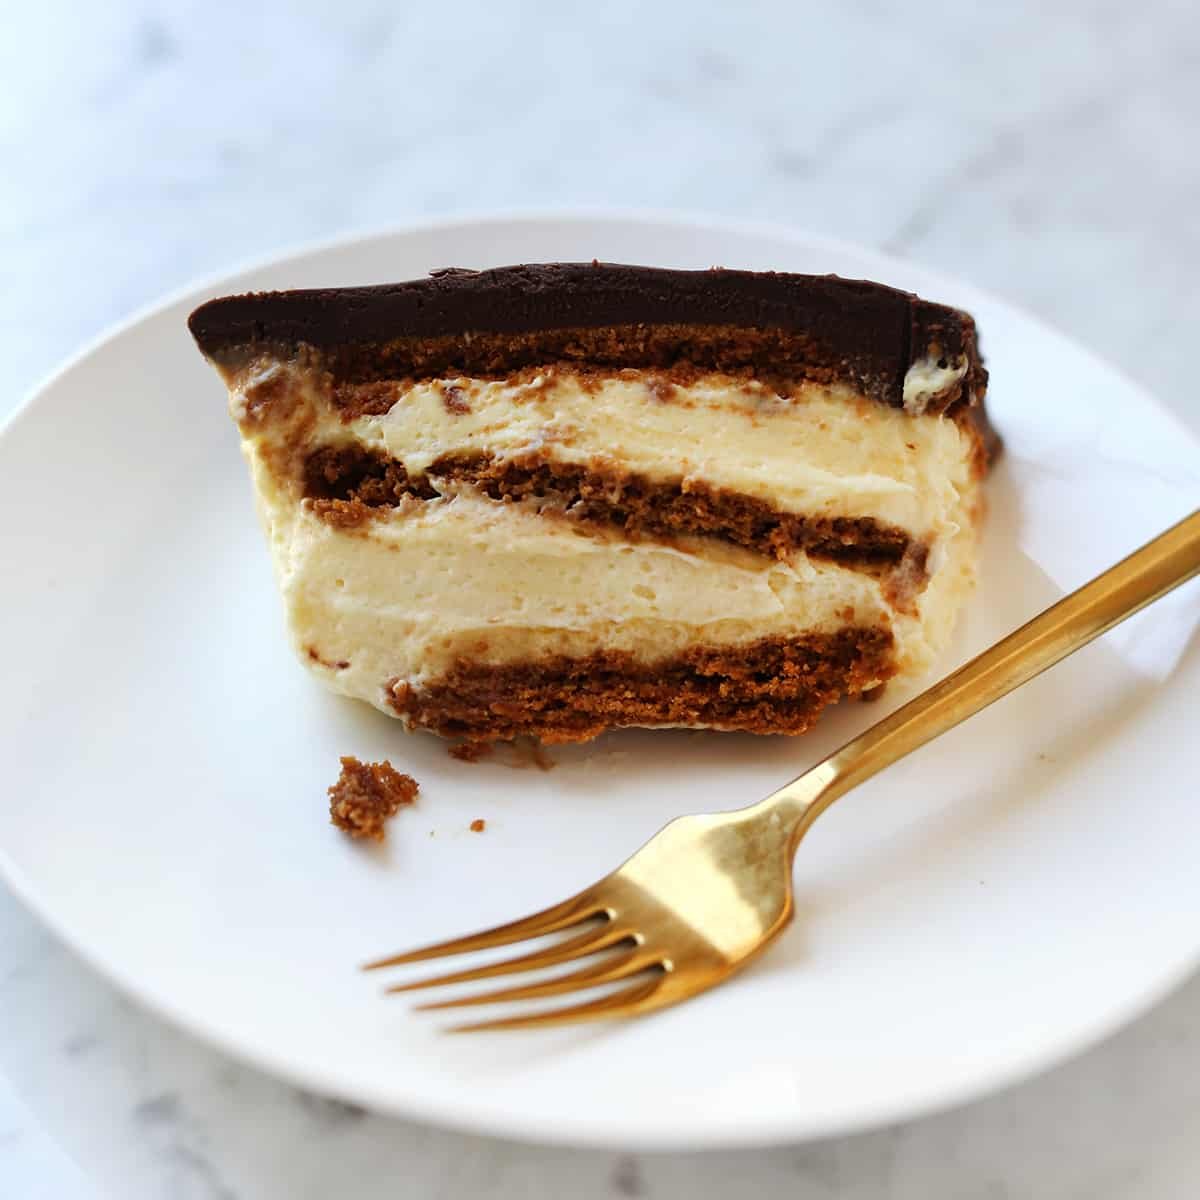
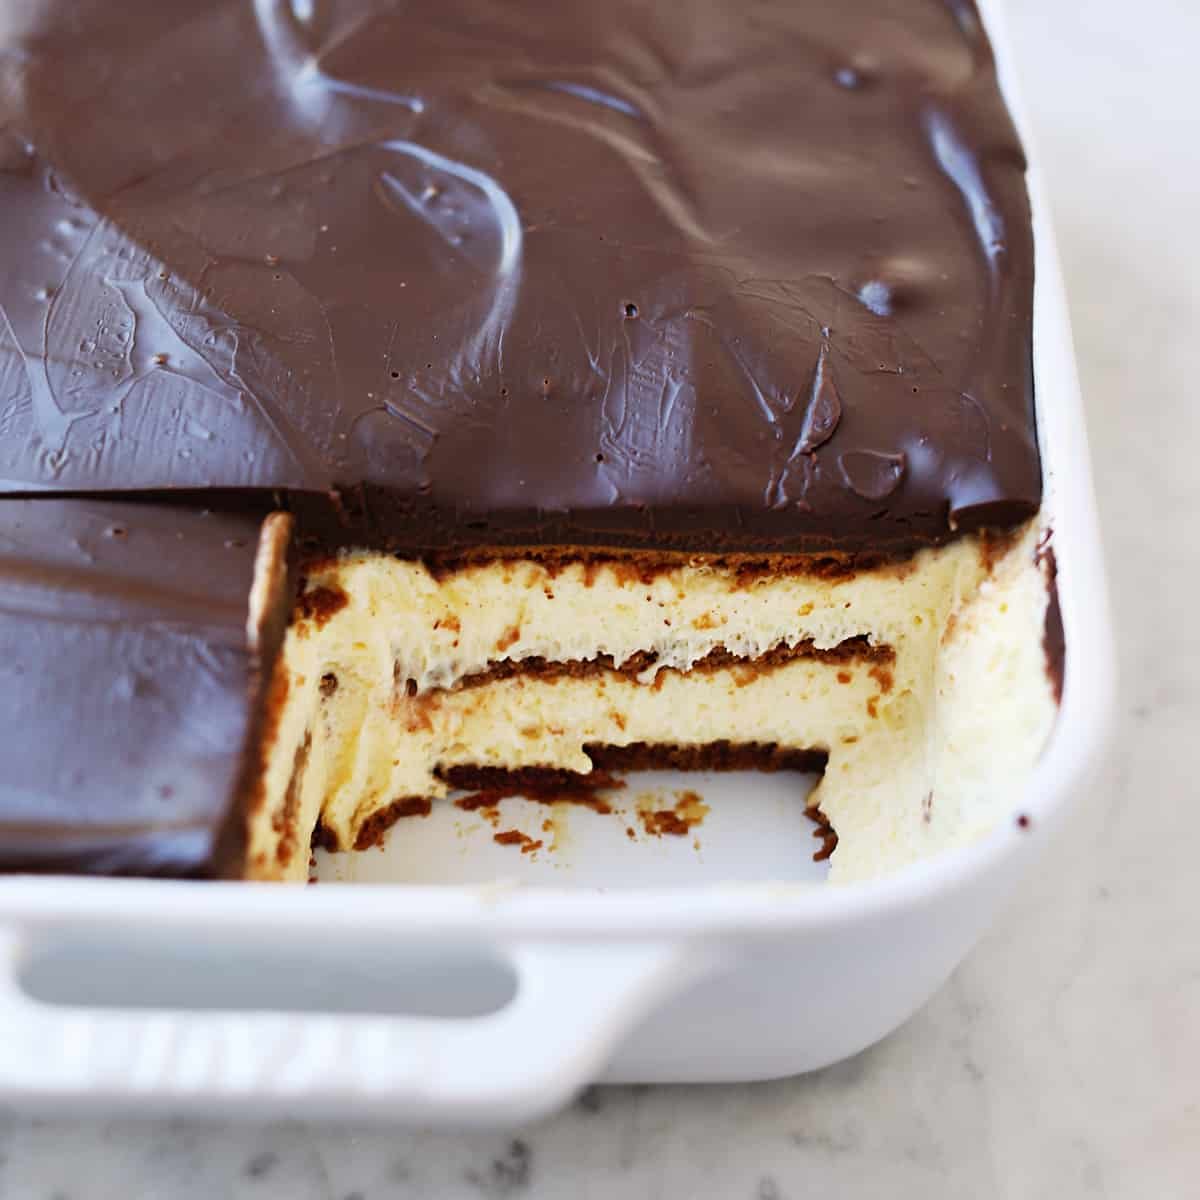
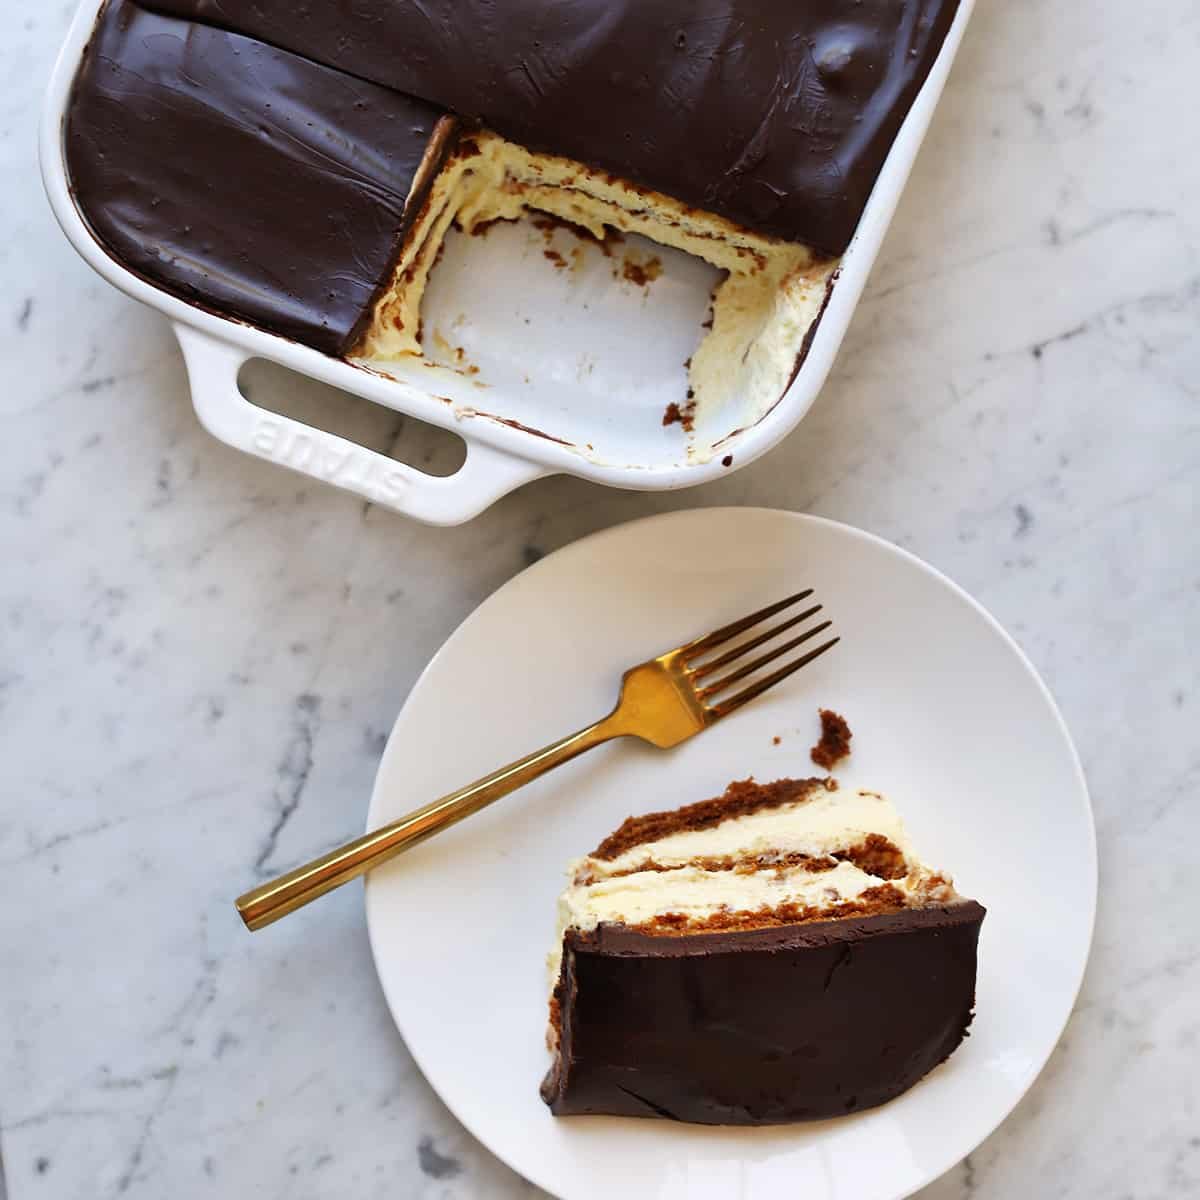
This eclair cake recipe is the easiest version I know—but it’s still very delicious. I recently made this for a group of friends and I’m happy to report this cake got rave reviews.
In addition to being easy to make, I also love that you can make this cake ahead. It’s best to make this at least eight hours before you plan to serve it, and up to 24 hours.
So, you can make this cake the morning before or even the night before a big dinner party.
What is Eclair Cake Made of?
- Crust – Graham crackers, vanilla wafers, or Biscoff cookies are my favorites to use.
- Pudding – I use both French vanilla and cheesecake-flavored puddings.
- Whipped cream – You can use Cool Whip or make your own whipped cream.
- Chocolate ganache – Chocolate chips and heavy cream OR you can use chocolate frosting
Although my version here is super simple, there are ways to make this recipe even easier as noted above in the ingredients list.
However, I think the version you will find below (in the printable recipe card) is the perfect mix and creates a truly delicious eclair cake while still being a no-bake dessert.
Other No-Bake Desserts You Will Love:
- No-Bake Peanut Butter Pie
- No-Bake S’mores Icebox Cake
- Chocolate No-Bake Cookies
- No-Bake Cherry Cheesecake
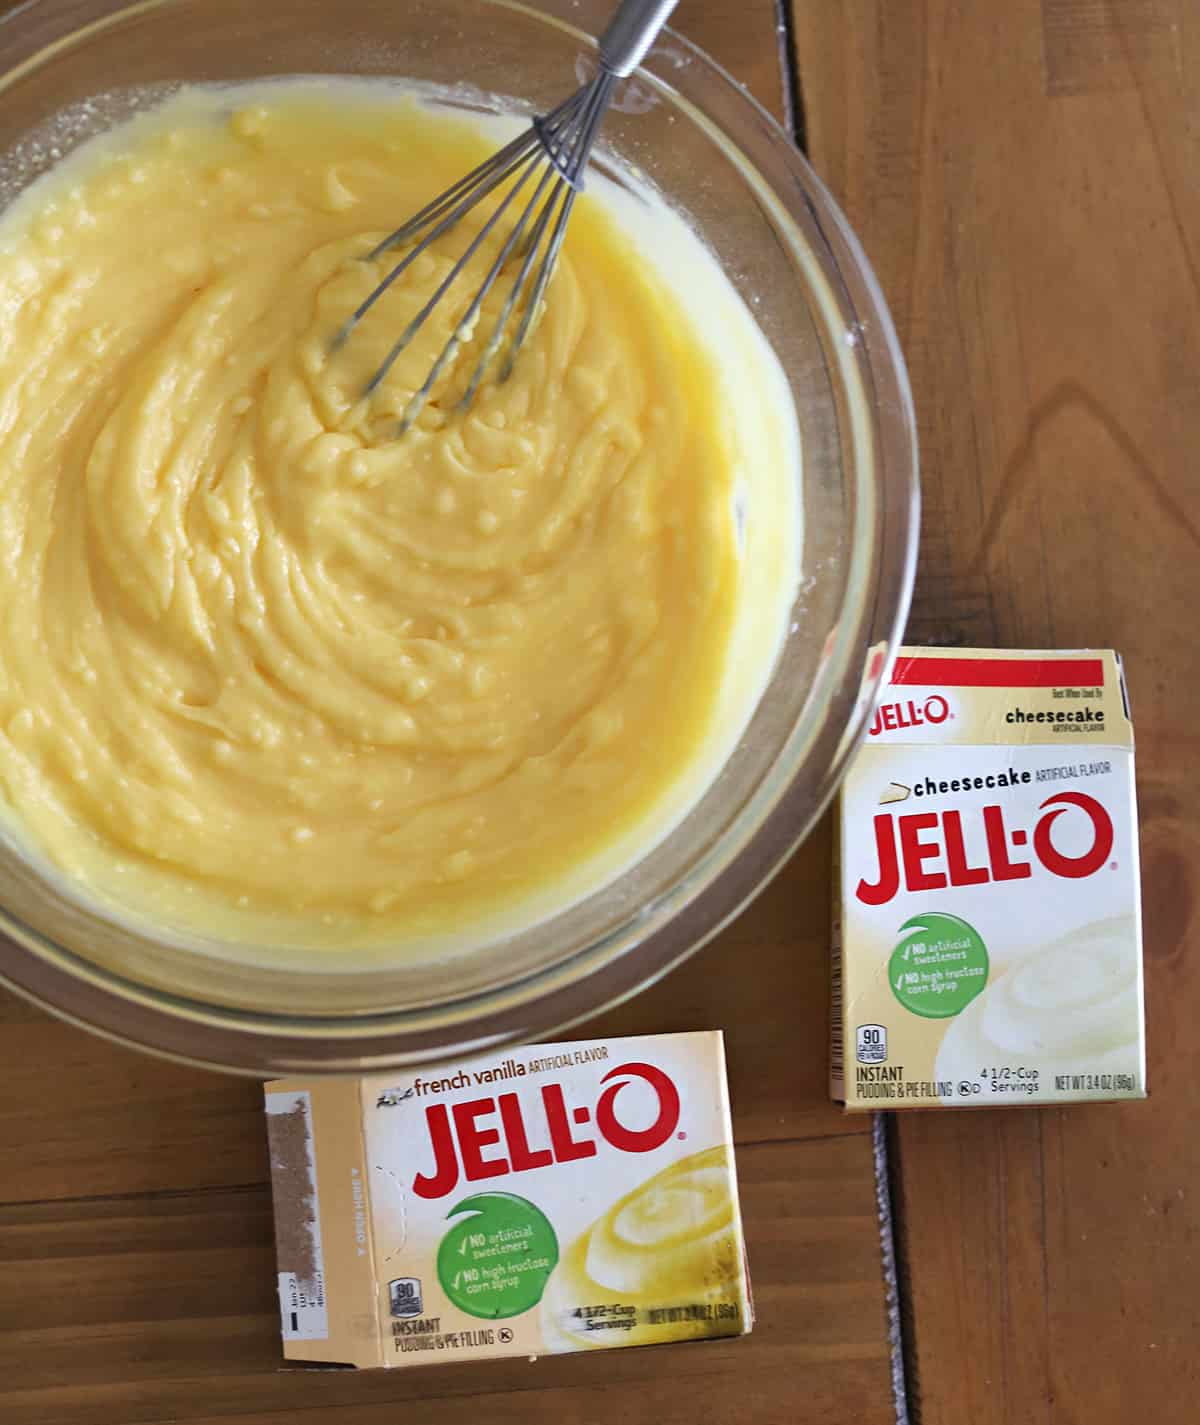
The filling is made of instant pudding and homemade whipped cream. I like to use one French vanilla and one cheesecake pudding mix. If you can’t find cheesecake pudding mix, you can simply use two vanilla instead.
If you are looking to flavor your eclair cake, this is an easy way to do it—simply substitute one or both of the instant pudding mixes for a flavor like banana or strawberry.
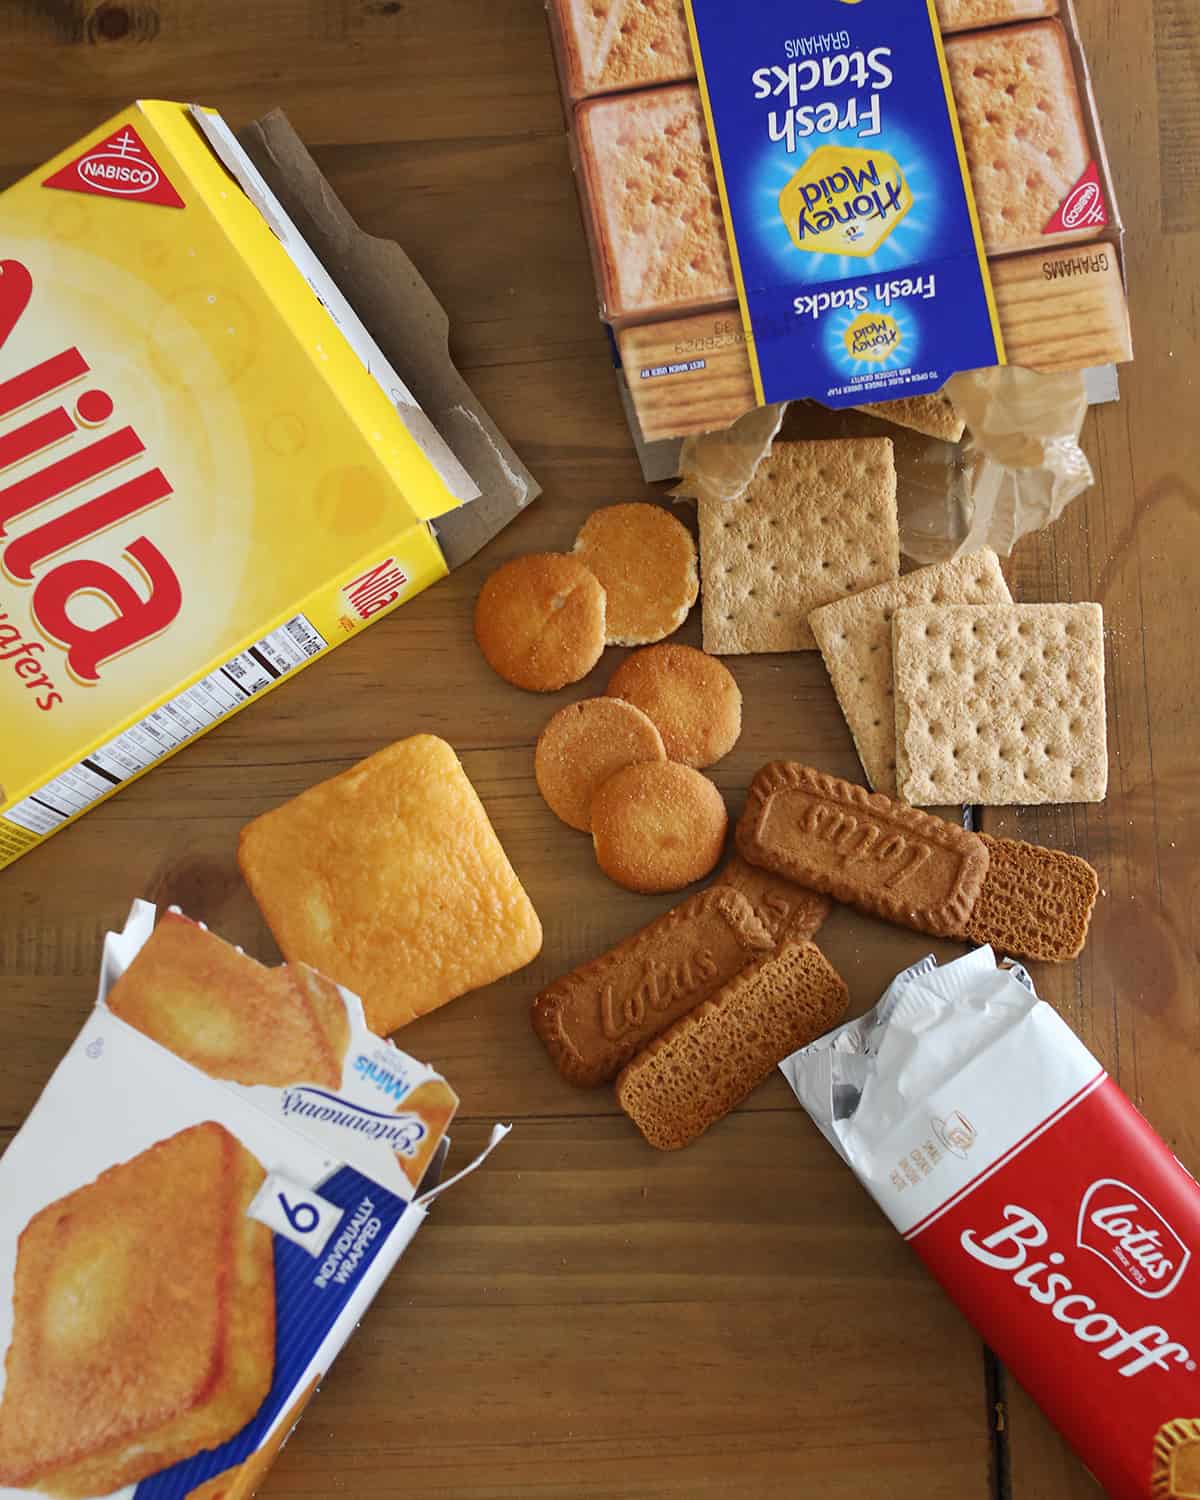
No-bake eclair cakes are most often made with graham crackers for the crust layers. This is a great option as they are already square or rectangle shaped, so they are easy to work with. But, two other options I like are vanilla wafers or Biscoff cookies.
If you are wanting to serve your eclair cake sooner than eight hours, or you want to make it and serve it immediately (or within an hour or two), be sure to use something for the crust layer that is soft in texture. A good option is pound cake cut into thin pieces.
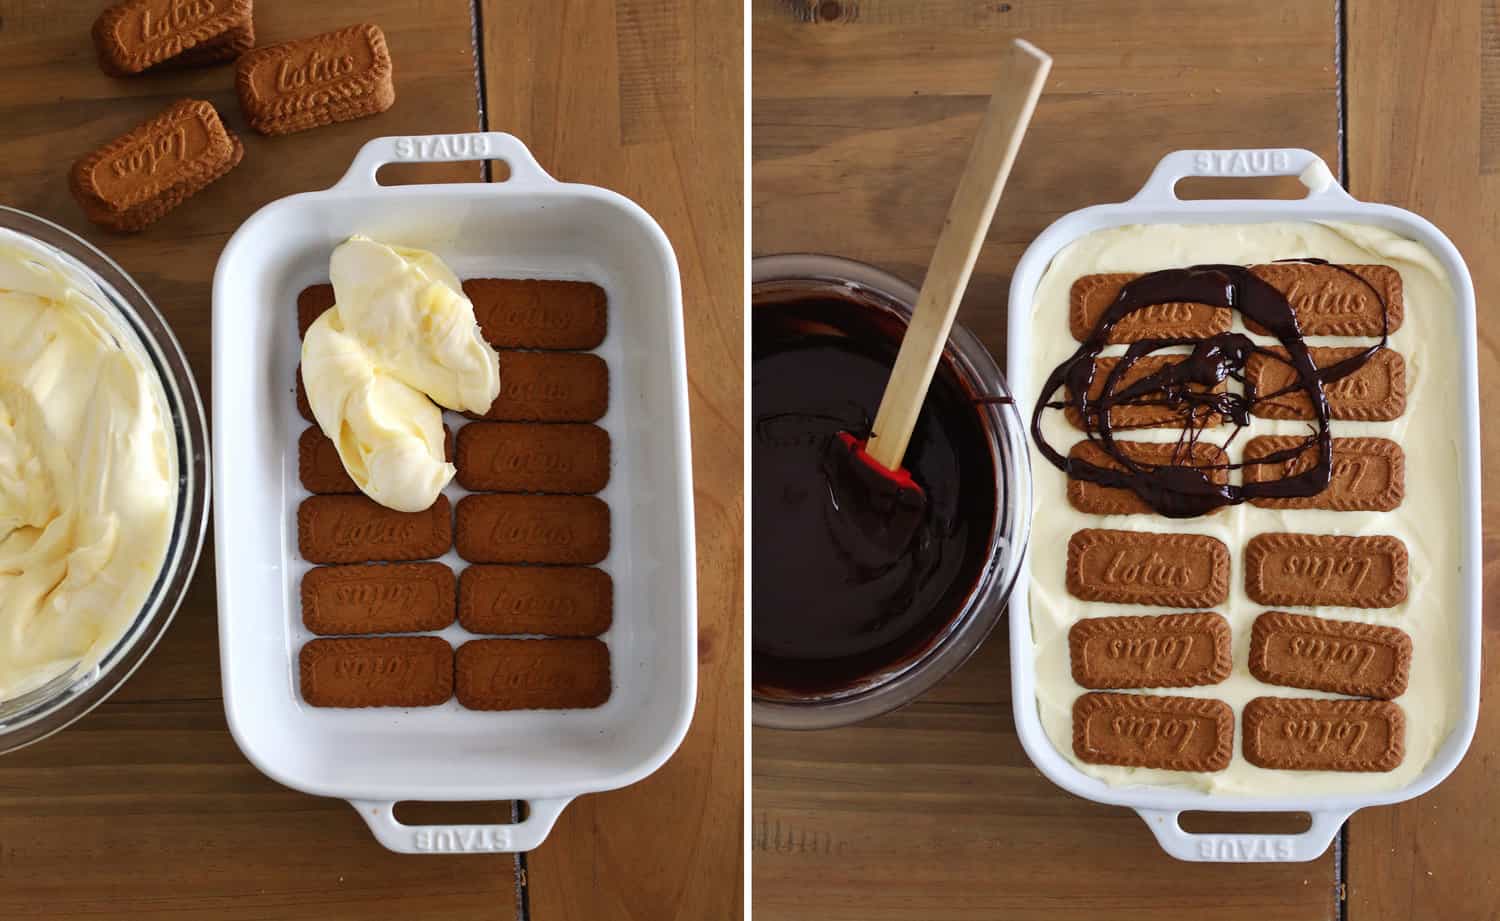
Once you have the filling made, you simply start the cake with a layer of the crust, then filling, crust, filling again, and then a top crust. Then, you pour the chocolate ganache over the top before refrigerating.
If you use a store-bought chocolate frosting instead of ganache, you will want to make sure the consistency is as spreadable as possible. You may need to microwave (in a microwave-safe bowl) for a few sections so it will easily spread over the top.
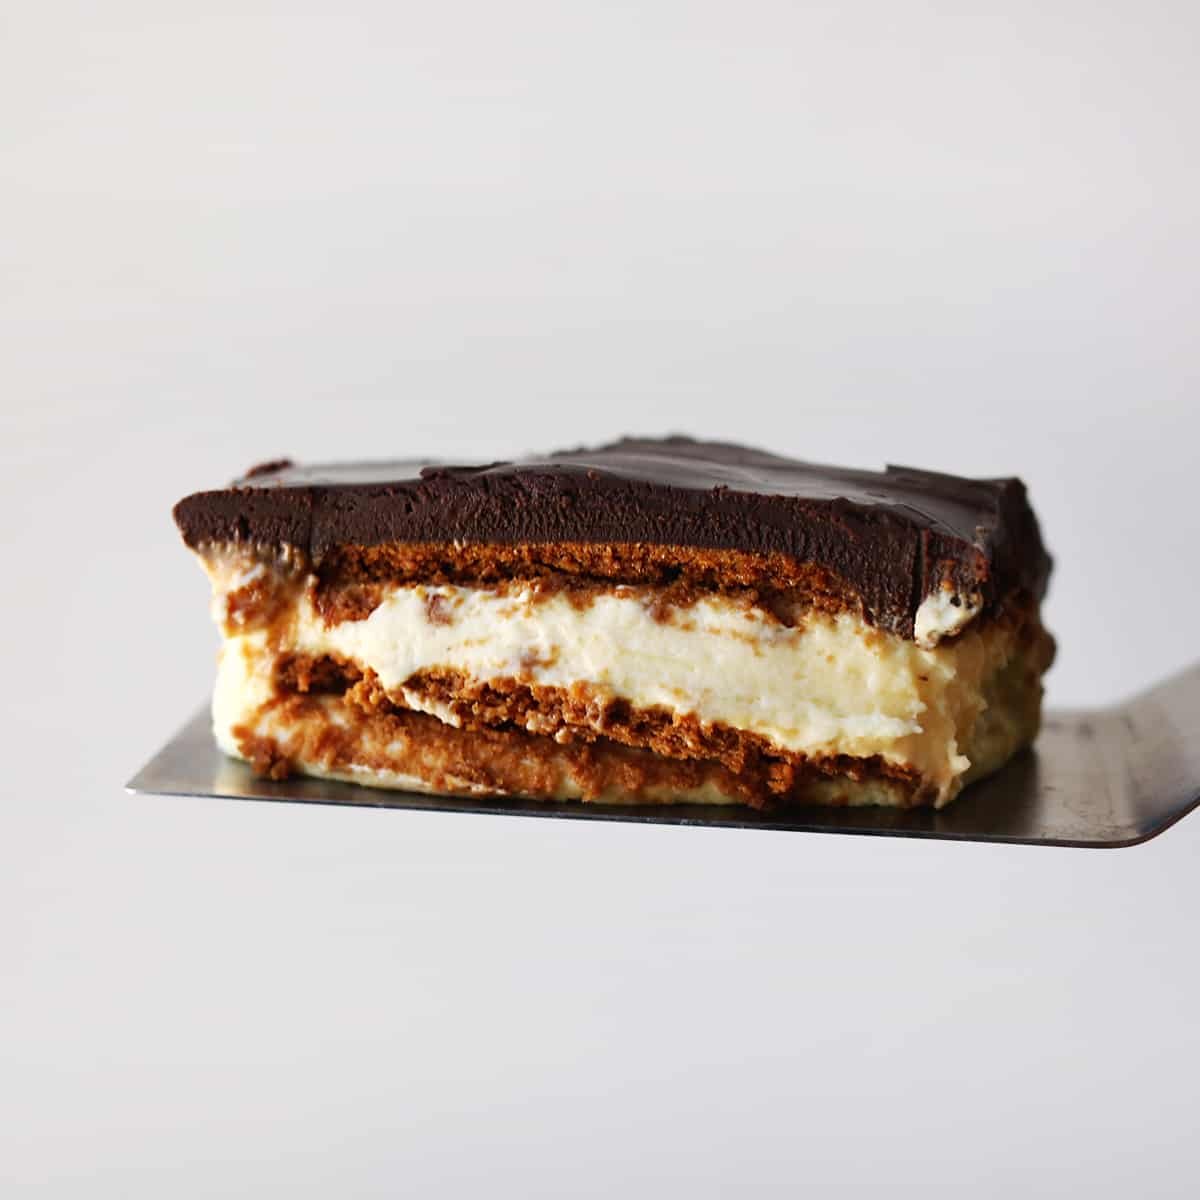
The hardest part about making this eclair cake recipe is serving it from the pan! Lol. This is such a soft, pudding like dessert it can be a little tricky to remove that first piece. But it’s worth it as this is such a crowd-pleasing dessert.
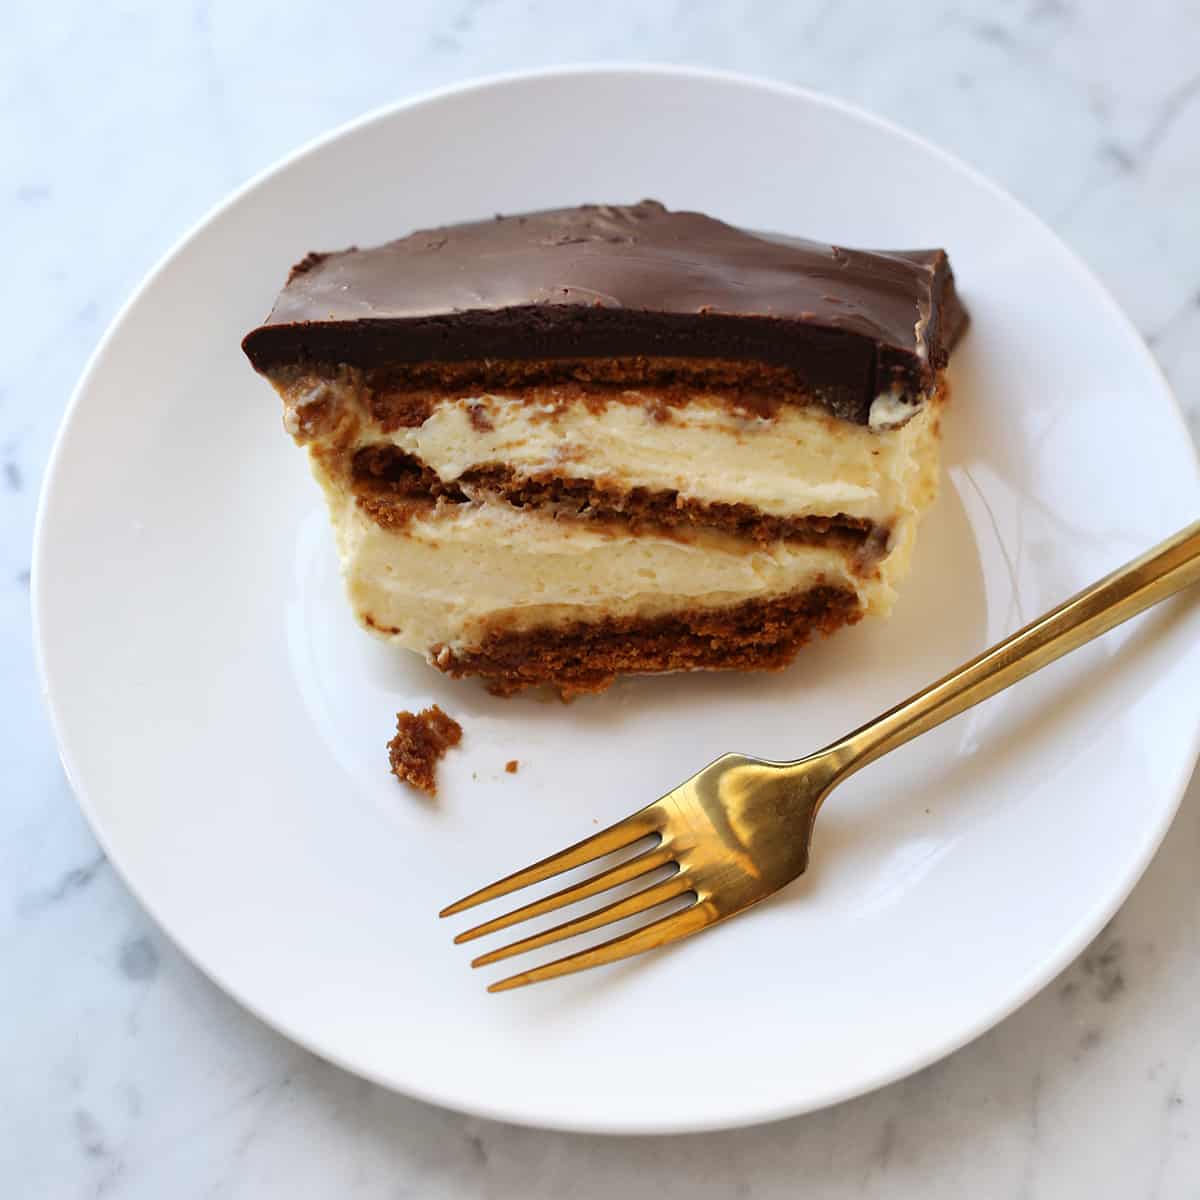
If you make this eclair cake, let us know what you think in the comments!
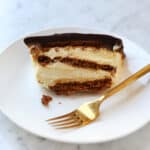
Elcair Cake – No-Bake
Ingredients
- 2 boxes instant pudding French vanilla and cheesecake flavors (3.4 ounce boxes)
- 3 cups milk
- 3 cups heavy whipping cream divided
- 1 box graham crackers, vanilla wafers, or other cookies see notes
- 1 ½ cups dark or semi sweet chocolate chips
Instructions
- In a mixing bowl, stir together the pudding mixes and 3 cups milk. This will make instant pudding.
- In the bowl of a stand mixer, whip 2 cups of heavy whipping cream for 2-4 minutes to make homemade whipped cream.
- Fold the whipped cream into the pudding mixture, until just combined.
- Line the bottom of the baking pan with graham crackers (or other cookie of choice).
- Add half the whipped pudding mixture, spread evenly.
- Add another layer of graham crackers or other cookies.
- Add the second half of the whipped pudding mixture, spread evenly.
- Add another layer of graham crackers or other cookies. Set aside while you make the ganache.
- In a microwave-safe bowl, combine 1 cup heavy whipping cream and the chocolate chips. Microwave in 30-second intervals, stirring in between, until just combined.
- Pour the chocolate ganache over the top layer of the eclair cake. Spread evenly.
- Cover with plastic wrap and refrigerate for at least 8 hours and up to 24 hours. Serve cold.
Notes
Nutrition
Related: Taco Seasoning, Italian Seasoning, Fajita Seasoning, Chili Seasoning.
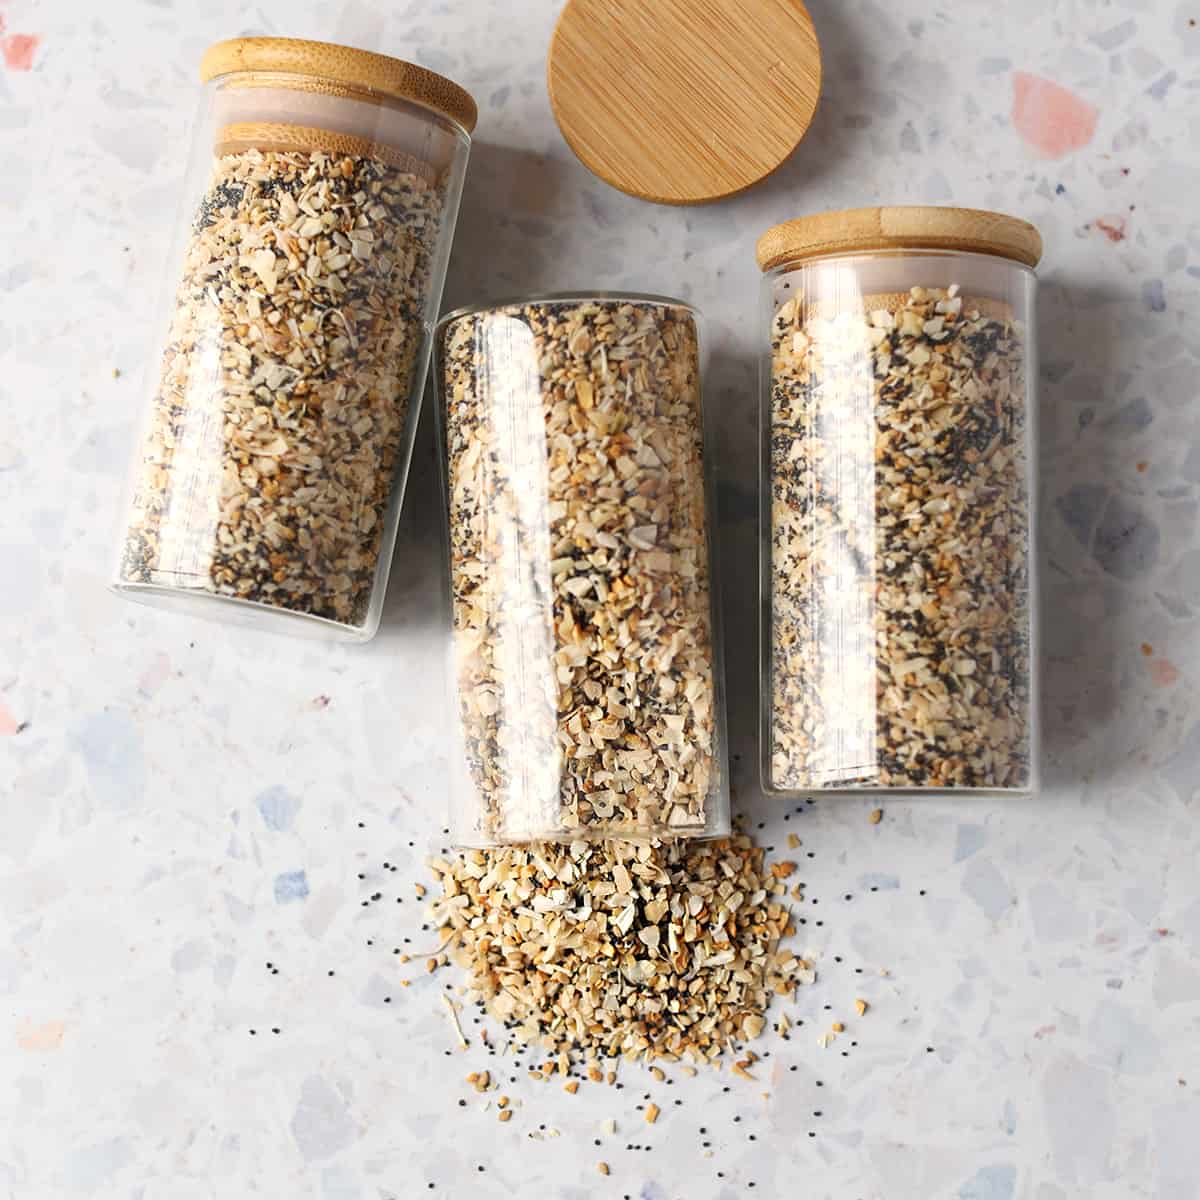
Uses for Everything Bagel Seasoning include: the tops of hamburger or hot dog buns, sheet pan breakfast sandwiches, avocado toast, pigs in a blanket, and of course …everything bagels.
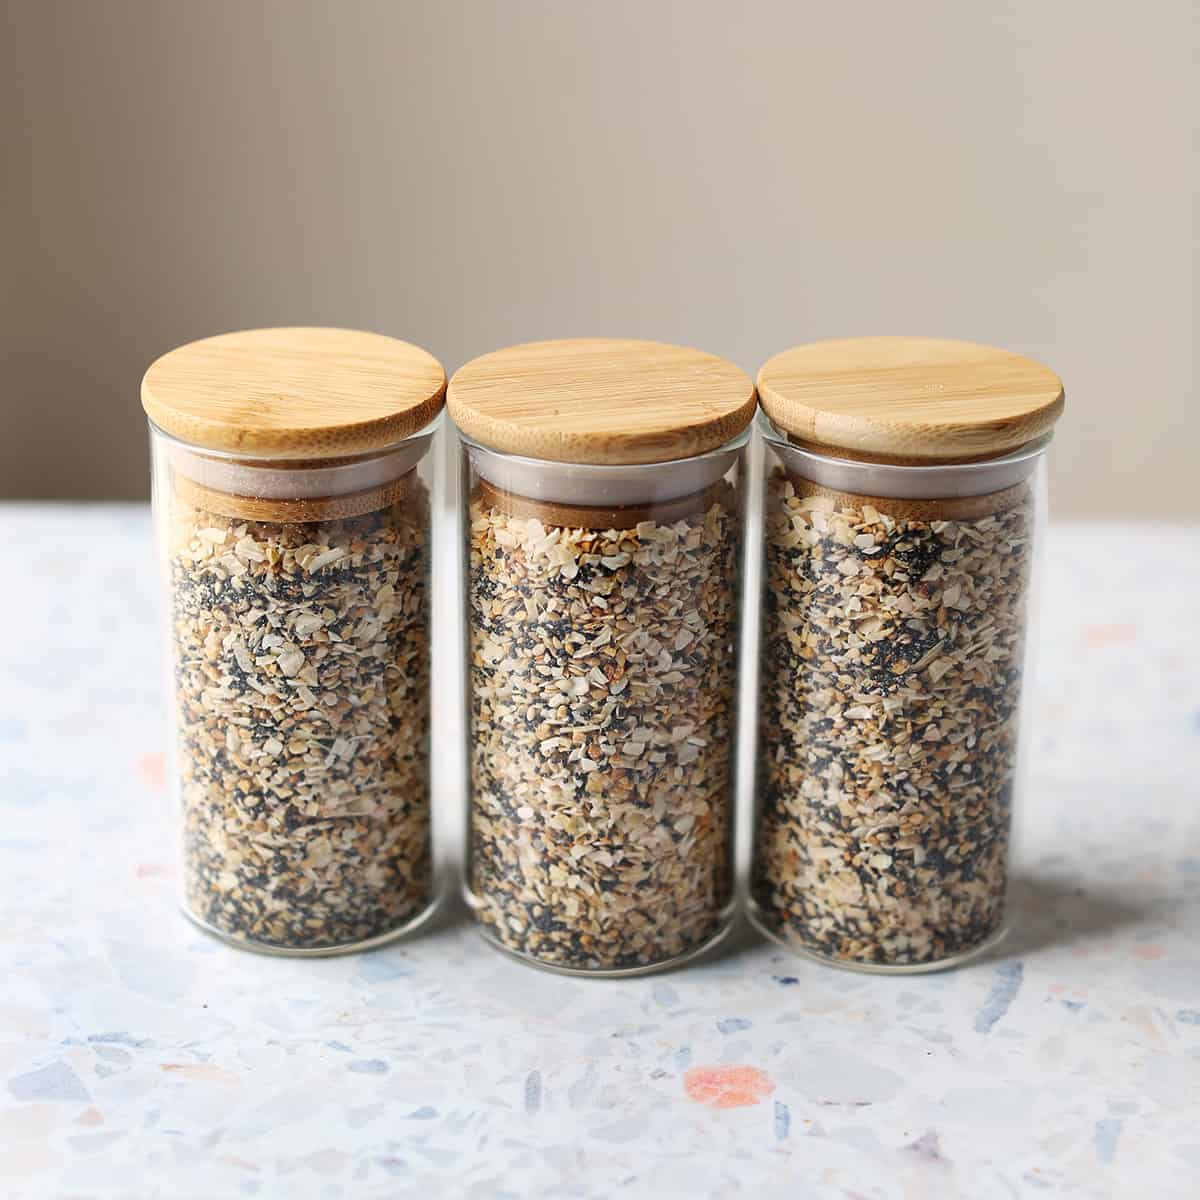
It’s easier to make a large amount of Everything Bagel Seasoning from standard size containers of the ingredients, so unless you can buy things from bins (and thus buy small amounts) you’ll likely end up with a good amount of this on your hands.
If you like, package a few up and share with your mom or friends who like to cook. This recipe would also make a fun homemade gift or part of a larger gift for a foodie friend.
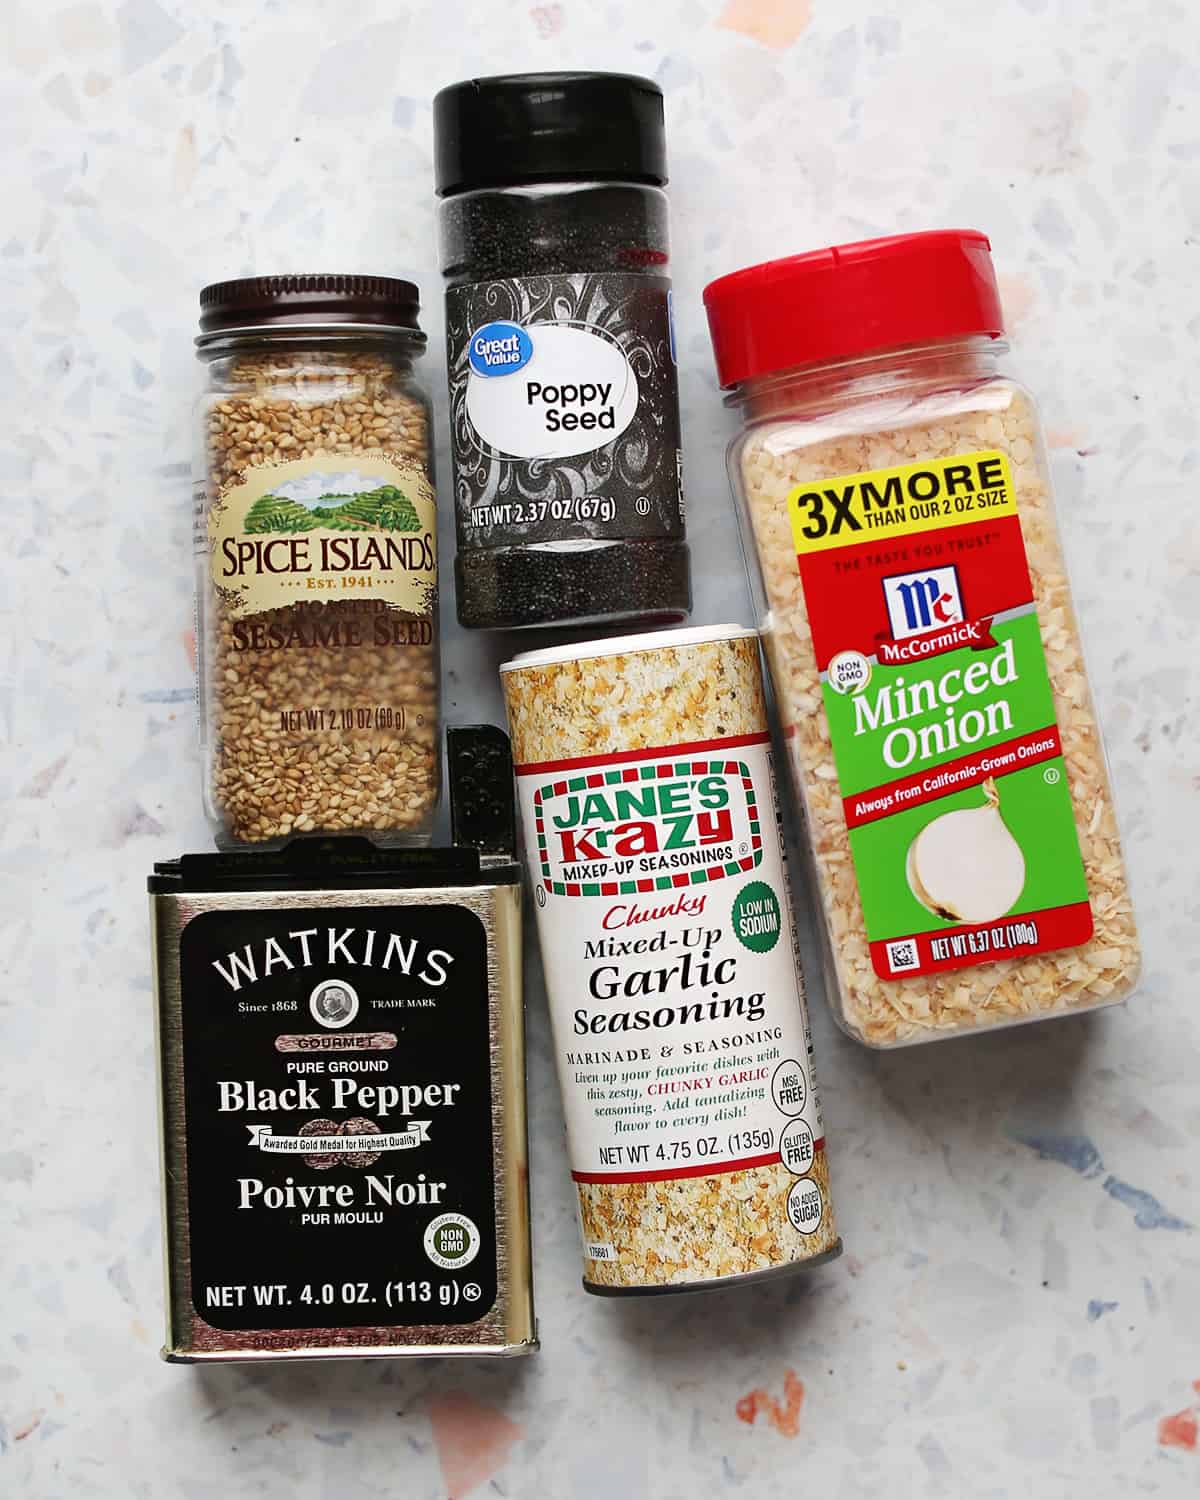
Everything Bagel Seasoning Ingredients
–Dried Onion
–Dried Garlic
–Poppy Seeds
–Sesame Seeds
–Flaky Sea Salt
–Black Pepper
If you make your own, you can also make substitutes or go heavy or light on ingredients you want.
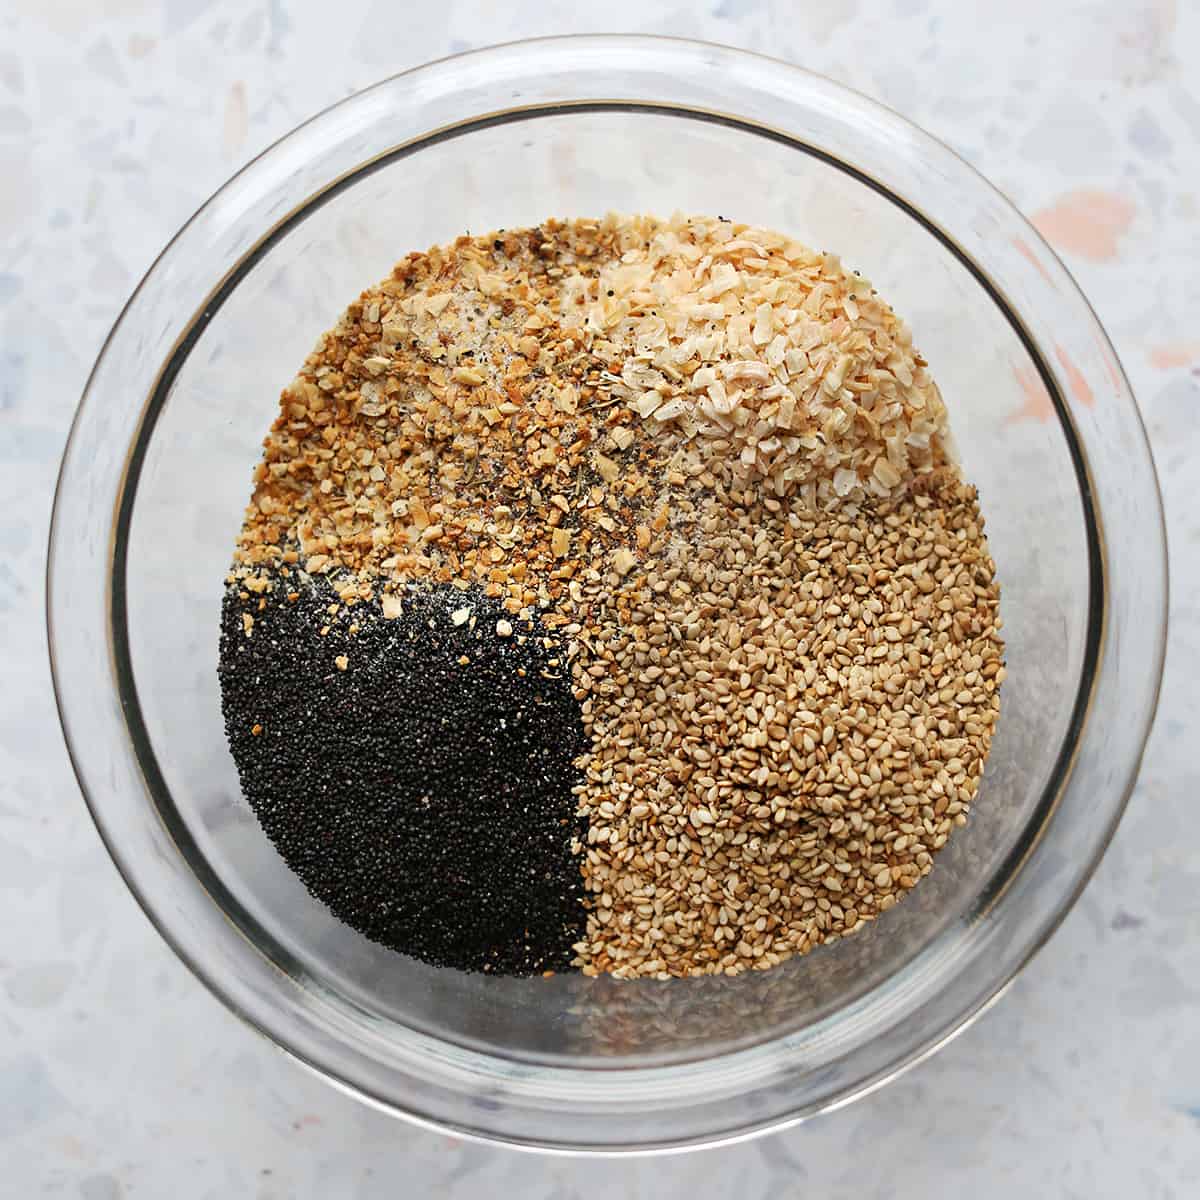
Instructions
Once you mix together all the ingredients, you can reuse and refill a larger container or add the seasoning to new glass containers (especially if you are gifting).
I made a little funnel from parchment paper (you can also buy one) to make it easy to fill my jars without making a too big a mess.
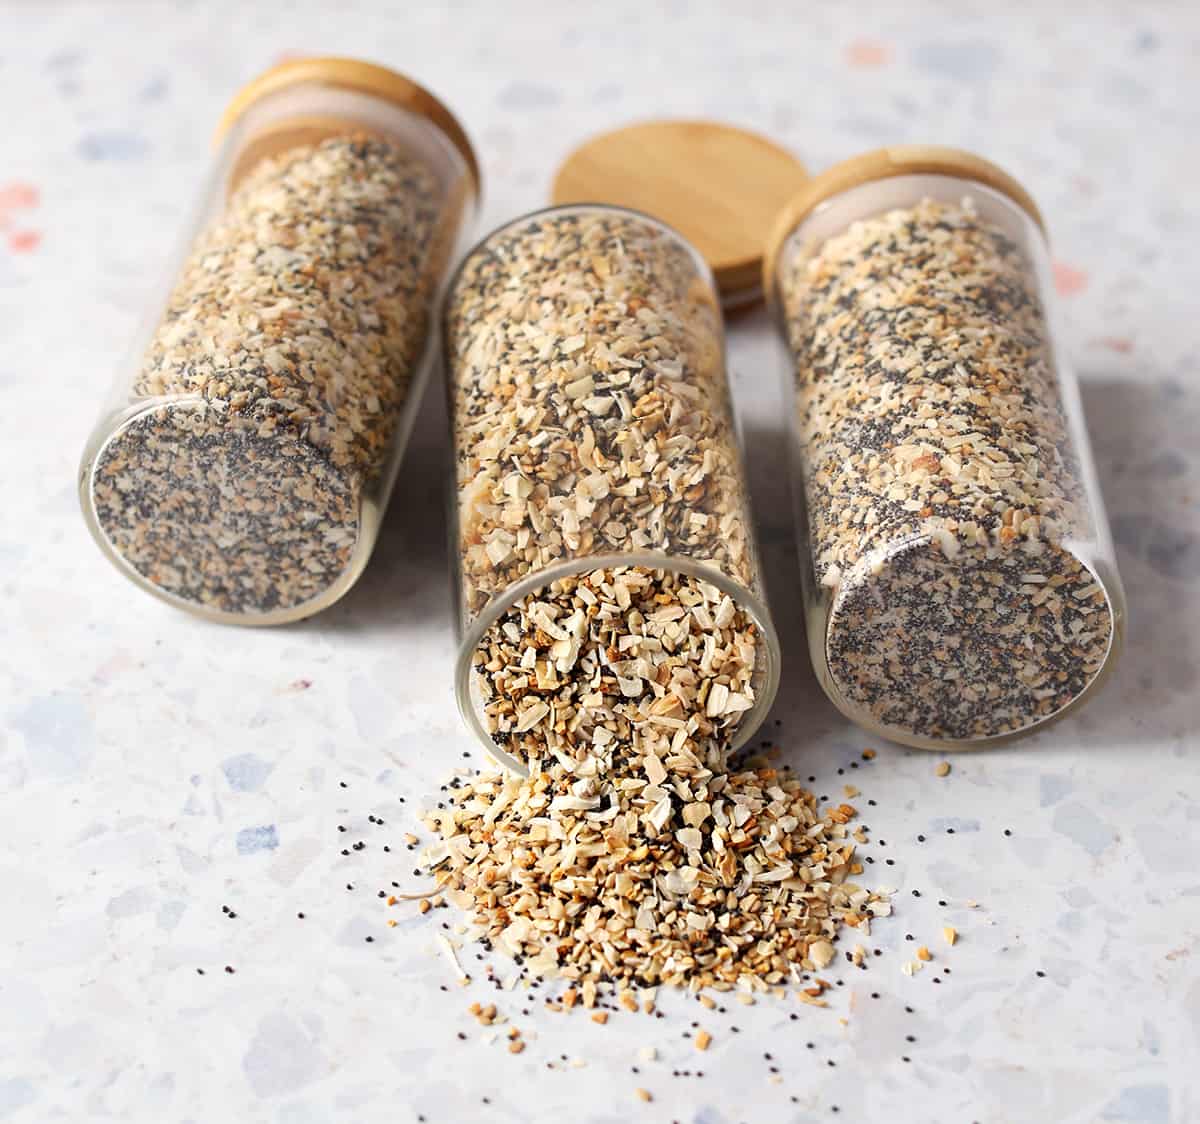
Here are the spice jars I used. And if you’d rather buy Everything Bagel Seasoning, here is an option from Amazon and one from Target. xo. Emma
Everything Bagel Seasoning
Ingredients
- 3 ounces dried onion
- 2 ounces dried garlic
- 2 ounces poppy seeds
- 2 ounces sesame seeds
- 2 tablespoons sea salt flaky
- ¼ teaspoon black pepper
Instructions
- Add all the ingredients to a small mixing bowl.
- Stir together until combined.
- Store in a container that can be sealed shut (with a lid or cap).
Notes
If you love the Taco Bell Chalupa, this is a copycat version you can make at home by combining a deep fried tortilla shell (similar to flatbread) with ground beef, sour cream, cheese, lettuce and tomato. We love to make this chalupa recipe at home. And it’s easy to customize with all sorts of different taco fillings such as chicken or vegetarian fillings.
Related: Homemade Arepas, Tostadas, Elotes and Margarita Cocktail.

Ingredients
- Chalupa shells – Fried of baked.
- Ground beef – seasoned with Taco seasoning
- Shredded cheese – we like to use cheddar or a Mexican blend.
- Sour cream – This optional ingredients adds a creamy flavor.
- Lettuce – shredded iceburg lettuce adds crunch to the recipe. This can be substituted for Greek yogurt if you like.
- Tomato – You may use chopped tomatoes or salsa.
You can add other toppings like salsa, pico de gallo or guacamole too!

What are Chalupas?
Chalupas are a traditional food originating from South-Central Mexico including the states of Hidalgo, Puebla, Guerrero and Oaxaca. They are made with flat fried dough and filled with meats, cheeses, salsa and shredded lettuce.
The Taco Bell version is Americanized and combines the shell of a chalupa with the fillings of a taco. There are many ways to customize the fillings in a chalupa.
How to make Chalupas
Cook the ground beef, seasoning with the taco seasoning, on medium high heat until cooked through. No pink should remain. Shred the cheese, lettuce and cut up the tomatoes.
Fry / heat your chalupa shell according to whichever method you prefer (three options below).
Fill the shell with the cooked beef, sour cream, cheese, lettuce and tomatoes. Serve warm.

Tips and Substitutions
- Ground beef can be substituted for any ground meat like turkey or chicken.
- I like to use store bought chalupa shells (which you can also buy online) but if you want to make your own try this whole wheat flatbread recipe and then use one of the methods below for frying the chalupas after they are baked.
- To make this chalupa recipe vegetarian you could use refried beans or black beans in place of the beef.
- Other great chalupa fillings include: carnitas, al pastor, or barbacoa.
- This recipe is best served the day it is made. If you want to make these ahead I recommend making / prepping the fillings and toppings and then heating the shells when you are ready to eat.

More Tex-Mex and Latin American Recipes
- Carne Asada
- Chilaquiles
- Quesadillas
- Torta
- Pozole
- Chicharron
- Avocado Salsa
- Mango Salsa
- Mole Sauce
- Queso
- Enchilada Sauce
- Chicken Verde Enchiladas
- Taco Dip
- Birria Tacos
- Birria Pizza
- Chimichangas
- Fajitas
- Flan

Best Way to Cook Chalupa Shells
There are three ways to warm / fry chalupa shells: oven, air fryer or stove top. You can see the results of these methods in the photo above (from right: oven, air fryer, and two stove top).
- Oven Method- Heat oven to 425°F. Brush both sides of the shell with a little oil and place on a baking sheet. Bake for 5-6 minutes, flipping halfway through. Then place in a taco holder or similar device to help keep it’s shape.
- Air Fryer Method- Air fry at 400°F for 3 minutes. Then place in a taco holder or similar device to help keep it’s shape.
- Stove Top Method- Add a few teaspoons of oil to a pan and heat over medium/high heat. Pan fry the shell for 1-2 minutes on both sides or until browned. Placed folded in half until ready to fill.
In my opinion the best way is to pan fry on the stove top. However, if you are cooking many at once then I would recommend the oven so they can all be warm at the same time as chalupas are best when served warm.


Chalupa
Ingredients
- 4 chalupa shells
- 1 pound ground beef
- 2 tablespoons taco seasoning
- ½ cup sour cream
- 1 cup cheese
- 2 cups lettuce
- 2 roma tomatoes
Instructions
- Cook the ground beef, seasoning with the taco seasoning, on medium high heat until cooked through. No pink should remain.
- Shred the cheese, lettuce and cut up the tomatoes.
- Fry / heat your chalupa shell according to whichever method you prefer (three options below).
- Fill the shell with the cooked beef, sour cream, cheese, lettuce and tomatoes. Serve warm.
Notes
Nutrition
I love the sweet and tart flavor of cherries and making your own homemade syrup from fresh cherries is the best! While store-bought cherry syrups are less work they sometimes can taste too much like medicine or too sweet to me. Homemade is worth with and super easy.
Related: If you love cherries make our Cherry Limeade, Shirley Temple or Cherry Bomb shot. You’ll also enjoy our Mint Simple Syrup or Honey Simple Syrup.

Ingredients
- Cherries Fresh cherries work best for this recipe, but frozen will work just fine too. Any variety of sweet and sour cherries such as Bing or Rainier cherries are a great choice.
- Granulated White Sugar You may also use brown sugar or honey if you like.
- Water filtered of distilled water is best.
We are looking for fresh cherries, like what you would find in the produce section. You may find them frozen as well. Do not use maraschino cherries (jarred) for this recipe.

How to make Cherry Syrup
Remove the stems and cut the cherries in half.
In a small to medium pot combine the sugar and water. Whisk until the sugar dissolves. Add the cherries to the mixture. Bring to boil. Then reduce the heat to a simmer (low) and continue to cook for 10 minutes.
Remove from heat and allow the mixture to cool. The cherries will continue to steep and release flavor.
Pour the mixture through a fine mesh sieve into a glass mixing cup with a spout. Use a spoon to fresh the cherries into the sieve, to get as much liquid out as you can.
Store in an airtight container in the refrigerator for up to two weeks. If you think you may want to use the cherry syrup longer you can freeze it in ice cubes to use as needed.

Tips, Notes and Substitutions
- If you are using frozen cherries thaw before following this recipe.
- You do not have to remove the pits. But, if you do remove the pits then you can use the leftovers like a compote on jam or ice cream. If you leave the pits in it will not effect your syrup but you’ll want to discard the remains after straining.
- This cherry syrup recipe is super simple and delicious as is. But if you want to slightly deepen or alter the flavor you could try adding: vanilla extract, fresh herbs like mint or rosemary, citrus rind like orange or lemon, or simply a big pinch of sea salt. Add these to the cooking process as strain out any solids along with the cherry fruit / pits.
- You could also swap some or all of the granulated white sugar for brown sugar for a different flavor. Or swap for demerara sugar for a slightly different texture to your syrup.

Uses for Cherry Syrup
- Roy Rogers Drink – swap the grenadine
- Shirley Temple– swap the grenadine
- Dirty Shirley Cocktail– swap the grenadine
- Add to a latte or mocha
- Add to your favorite tea or sparkling water
Frequently Asked Questions
Is cherry syrup the same as grenadine syrup?
No, grenadine syrup is made from pomegranate. But, they are similar and it can make a good substitute even though it doesn’t taste exactly the same.


Cherry Syrup
Ingredients
- 1 cup cherries
- ⅔ cup granulated white sugar
- ⅔ cup water
Instructions
- Remove the stems and cut the cherries in half.
- In a small to medium pot combine the sugar and water. Whisk until the sugar dissolves. Add the cherries to the mixture.
- Bring to boil. Then reduce the heat to a simmer (low) and continue to cook for 10 minutes.
- Remove from heat and allow the mixture to cool. The cherries will continue to steep and release flavor.
- Pour the mixture through a fine mesh sieve into a glass mixing cup with a spout. Use a spoon to fresh the cherries into the sieve, to get as much liquid out as you can.
- Store in an airtight container in the refrigerator for up to two weeks. If you think you may want to use the cherry syrup longer you can freeze it in ice cubes to use as needed.